clearcase客户端操作指导-080407
ClearCase7使用技巧总结
管理员使用
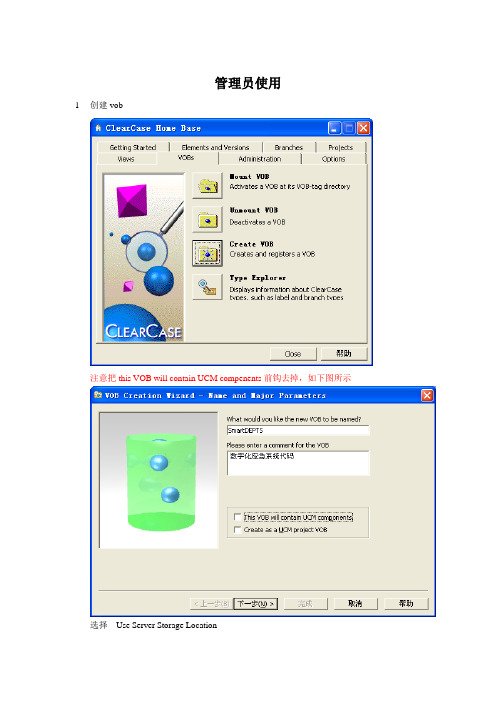
1创建vob
注意把this VOB will contain UCM compenents前钩去掉,如下图所示
选择Use Server Storage Location
点击列表中的location
选择none 如下图
点击完成
2删除vob
3批处理添加代码管理
Clearfsimport –recurse [源] [vob影射路径]
也可以cd 到[vob影射路径] 然后Clearfsimport –recurse [源] 。
“。
”代表当前路径
4其他
开发人员使用
1安装clearcase客户端和clearcase eclipse 插件
安装完毕后
2Create view
选择动态
给view 起名字选择view影射驱动盘
Finish .
3mount vob 你可以认为vob就是源码库的名字,本步骤就是连接到库,选择工程所在vob 点击mount
4载入工程
注意选择---你的影射盘----vob ----工程名
注意:不要copy projects into workspace 否则会无法使用clearcase管理代码。
然后就可以checkout checkin 了。
clearcase服务端安装说明-推荐下载

目录(?)[+]安装1. 1.1. ClearCase1.1.1. 初始化配置规划Storage:包括VOB storage 和View storage;使用开始\程序\Rational clearcase administrator\Serverstorage wizard 菜单指定驱动器,自动创建共享给everyone(共享状态下完全控制,安全状态下只读)的文件夹clearcase_storage,策划具体项目时使用Protectvob 命令继续设置其中元素的共享权限;也可以由Clearcase 系统管理员直接在服务器的资源管理器上创建共享文件夹作为clearcase_storag。
客户端只需要创建view storage,还可以修改共享的人为自己的域用户。
1.1.2. 安装Installation Manager 1.4.4安装文件位置:\\192.168.1.52\Rational部署资料\ClearCase期间选择下一步,可以根据需要修改软件安装的目录和位置,最后点击安装。
由于CC应用本身能够提供license server,因此这里不需要再安装License Server。
1.1.3. ClearCase服务器的安装ClearCase必需运行在域环境中,在安装之前,必需在域控制器上创建ccadmin用户、clearcase_albd用户以及ccuser用户组和clearcase用户组,将clearcase_albd加入到clearcase组,将ccadmin加入到ccuser组和本机的administrators组中,最后将ccsrv 加入到guofangkj域中,重启SCM-DB服务器后以ccadmin 帐号登录到guofangkj域。
安装介质位置:D:\Install\7.1.1\CZ9WAML.zip ,首先将其解压缩。
在开始菜单中执行上一步安装好的Installation Manager。
ClearCase Guide

ClearCase Guide本文档按照某一版软件的发放流程涉及到的ClearCase操作按顺序编写。
使用时可以参照该顺序操作。
一. 检查View的Config Spec是否为本次release的base如果不一致,则要修改该View的Config Spec。
以A305Z14为基础release A305D14为例:二. 创建代码branch和label1. Create branchbranch的命名格式如下:branch_[程序员名字简写]_[本次release版本号]cmd 命令行下输入:cleartool mkbrtype -nc branch_zyx_A305D14@\hwi_vobPS:A305D14为本次release version2. Create labellabel的命名格式如下:LABEL_[程序员名字简写]_FDS_[FDS号]PS:建议每个FDS对应一个label。
cmd 命令行下输入:cleartool mklbtype -nc LABEL_ZYX_FDS_A0212130@\hwi_vobPS:LABEL_ZYX_FDS_A0212130为label名。
3. 配置config_view.cfg文件当创建完branche后还要修改V:\hwi_vob\config_view.cfg文件。
config_view.cfg文件包括对label和branch的定义,将branch改为上面创建的名字。
Config_view.cfg文件位置见下图。
配置内容如下:三. checkout, checkin注意:多个label时,每个label单独分批checkout,checkin。
1. checkouta. 将config_view.cfg文件中的label改为将要checkout的label,查找该label(FDS)所涉及到的需要修改的文件,逐次将其checkout。
右击要checkout的文件,选择“Check Out…”,如下图:b. 单击“Checkout..”之后弹出如下对话框:注释格式:FDS号:FDS标题例如:A0210248: ETC2.7 - WCH - Rename hwi_adc_average_read API with lowercase letters (this is FDS title)A0210435: ETC2.7 - WCH - Change interface of ADC average readc. 添加注释之后,单击OK。
clearcase的简易使用指南

Do I Want to Branch?
• Yes if you...
– want to make major changes that’ll take a while before you release them (if ever) – expect to check-in intermediate changes before you finish everything
Merging Back to the Baseline
• Find and do the merges, verify, check-in.
– Go to a view that looks at your baseline branch, e.g. “/main”. – cleartool findmerge -fversion /main/CMI_3_branch/LATEST -merge -graphical – Resolve merge conflicts, if any. – Verify your merge results. – Check it all in.
Using a Task Branch
• A CMI_n branch could be useful.
Create and use CMI_3 branch config_spec:
element * CHECKEDOUT element * /main/CMI_3_branch/LATEST element * /main/LATEST -mkbranch CMI_3_branch element * /main/LATEST
default config_spec: element * CHECKEDOUT element * /main/LATEST specialized for CMI phase 2 config_spec: element * CHECKEDOUT element \rtpk10\services\mps\… /main/CMI_2 element \rtpk10\services\cmi\… /main/CMI_2 element \rtpk10\services\cmiscd\… /main/CMI_2 element * /main/LATEST
ClearCase常用命令及操作

Clearcase 常用命令及操作1、VOB常用命令11、显示VOB: cleartool lsvobC:\ >cleartool lsvob* \SmartNGoss_PVOB \\pmcserver1\Vob_Store1\Vobs\SmartNGoss_PVOB.vbsprivate(ucmvob)* \SmartNGoss_Vob \\pmcserver1\Vob_Store1\Vobs\SmartNGoss_Vob.vbs public2、停止活动VOB:cleartool umountC:\ >cleartool umount \SmartNGoss_VobUnmounting MVFS filesystem \SmartNGoss_Vob.3、注销VOB实体:cleartool unregisterC:\ >cleartool unregister -vob \\pmcserver1\Vob_Store1\Vobs\ SmartNGoss_Vob.vbs4、删除VOB标签:cleartool rmtagC:\ >cleartool rmtag -vob \SmartNGoss_VobRegistry password:注:由于该VOB在创建时设置为公有并加入密码,所以删除时也需输入密码5、注册VOB实体:cleartool registerC:\ >cleartool register -vob \\pmcserver1\Vob_Store1\Vobs\SmartNGoss_Vob.vbs6、创建VOB标签:cleartool mktagC:\ >cleartool mktag -vob -tag \Doc_Vob\\pmcserver1\Vob_Store1\Vobs\SmartNGoss_Vob.vbs7、激活VOB :cleartool mountC:\>cleartool mount \Doc_VobMounting MVFS filesystem \Doc_Vob.8、改变VOB的所有者:cleartool protectvobC:\>cleartool protectvob -chown weilm \\pmcserver1\Vob_Store1\VobsSmartNGoss_Vob.vbs9、显示VOB属性:cleartool describeC:\>cleartool describe vob:\Source_Vobversioned object base "\Source_Vob"created 18-十二月-03.11:21:37 by jiamx.NGBoss@PMCSERVER1VOB family feature level: 4VOB storage host:pathname "pmcserver1:F:\Vob_Store1\Vobs\Source_Vob.vbs"VOB storage global pathname "\\pmcserver1\Vob_Store1\Vobs\Source_Vob.vbs"database schema version: 54VOB ownership:owner DIGITALCHINA\jiamxgroup DIGITALCHINA\NGBossAttributes:FeatureLevel = 4Hyperlinks:AdminVOB -> vob:\SmartNGoss_PVOB1、查找并列出未打上某标签的文档:cleartool> find . -version 'version(main\LATEST) && (!lbtype(VSS_代码迁移版本_031211))' –print.\ctais后台oracle\ctais1.06(o)_031128\ctais后台升级脚本(1.05o8i_030910到1.06o8i_031128)\ctais后台1.05(o8i)_030910已发放补丁\030910(o8i)-北京04补丁\数据处理脚本\管理服务_减免税期初数据采集数据处理脚本\01_创建备份表ws_jms_qc_bf.sql@@\main\1.\ctais后台oracle\ctais1.06(o)_031128\ctais后台升级脚本(1.05o8i_030910到1.06o8i_031128)\ctais后台1.05(o8i)_030910已发放补丁\030910(o8i)-北京04补丁\数据处理脚本\管理服务_减免税期初数据采集数据处理脚本\减免税期初数据采集处理脚本说明.doc@@\main\12、在cleartool命令行模式下显示当前视图当前目录下的文件及文件夹列表cleartool> !dir驱动器M 中的卷是CCase卷的序列号是0234-5789M:\houyla_view_server_1\Code_lib\ctais后台oracle\ctais1.06(o)_031128\ctais后台升级脚本(1.05o8i_030910到1.06o8i_031128)\ctais后台1.05(o8i)_030910已发放补丁\030910(o8i)-北京04补丁\数据处理脚本\管理服务_减免税期初数据采集数据处理脚本的目录12/10/03 03:06p <DIR> .12/10/03 03:05p <DIR> ..11/24/03 11:08a 1,171 01_创建备份表ws_jms_qc_bf.sql11/24/03 11:08a 642 02_数据处理.sql11/24/03 11:08a 408 03_数据恢复.sql11/24/03 11:08a 117 04_删除备份表、数据.sql11/24/03 11:08a 19,968 减免税期初数据采集处理脚本说明.doc5 个文件22,306 字节2 个目录524,288,000 可用字节3、单独为某个文档打标签:cleartool> mklabel VSS_代码迁移版本_031211 减免税期初数据采集处理脚本说明.doc Created label "VSS_代码迁移版本_031211" on "减免税期初数据采集处理脚本说明.doc"version "\main\1".cleartool> mklabel VSS_代码迁移版本_031211 01_创建备份表ws_jms_qc_bf.sqlCreated label "VSS_代码迁移版本_031211" on "01_创建备份表ws_jms_qc_bf.sql" version "\main\1".4、显示某文档的版本树:cleartool> lsvtree -g 出口企业海关代码表主键重复处理说明.doc删除模块(comp)的命令组:1、显示当前VOB:C:\>cleartool lsvob\test_pvob \\Ccserver_2\V ob_store\V obs\test_pvob.vbs private (ucmvob)\test_vob \\Ccserver_2\V ob_store\V obs\test_vob.vbs private\Ctais_PVOB \\Ccserver_2\V ob_store\Vobs\Ctais_PVOB.vbs private (ucmvob)\Doc_lib \\Ccserver_2\V ob_store\V obs\Doc_lib.vbs public\Code_lib \\ccserver_2\V ob_store\V obs\Code_lib.vbs private\Ctais_test_PVOB \\Ccserver_2\V ob_store\V obs\Ctais_test_PVOB.vbs private ( ucmvob)* \Ctais_code \\Ccserver_2\Vob_store\V obs\Ctais_code.vbs public2、关闭当前活动的VOB:C:\>cleartool umount \Ctais_codeUnmounting MVFS filesystem \Ctais_code.3、显示当前View:C:\>cleartool lsviewtest_view \\Ccserver_2\View_store\test_view.vws* houyla_view_test \\Ccserver_2\View_store\houyla_view_test.vws4、进入视图的虚拟盘符:C:\>m:5、进入活动视图M:\>cd hou*6、显示VOB,激活将要删除的comp所在的PVOB:M:\houyla_view_test>cleartool lsvob\test_pvob \\Ccserver_2\V ob_store\V obs\test_pvob.vbs private (ucmvob)\test_vob \\Ccserver_2\V ob_store\V obs\test_vob.vbs private\Ctais_PVOB \\Ccserver_2\V ob_store\Vobs\Ctais_PVOB.vbs private (ucmvo b)\Doc_lib \\Ccserver_2\V ob_store\V obs\Doc_lib.vbs public\Code_lib \\ccserver_2\V ob_store\V obs\Code_lib.vbs private\Ctais_test_PVOB \\Ccserver_2\V ob_store\V obs\Ctais_test_PVOB.vbs private ( ucmvob)\Ctais_code \\Ccserver_2\V ob_store\V obs\Ctais_code.vbs publicM:\houyla_view_test>cleartool mount \Ctais_test_PVOBMounting MVFS filesystem \Ctais_test_PVOB.7、进入PVOB所在的目录:M:\houyla_view_test>cd ct*8、显示PVOB中所有的comp:M:\houyla_view_test\Ctais_test_PVOB>cleartool lscomp17-十二月-03.14:49:30 Ctais_code houyla root directory: "\Ctais_code"9、删除指定名称的compM:\houyla_view_test\Ctais_test_PVOB>cleartool rmcomp Ctais_codeRemove component "Ctais_code"? [no] yRemoved component "Ctais_code".删除视图:1、显示当前用户信息:C:\WINNT\system32>credsLogin name: DIGITALCHINA\clearcase_albdUSID: NT:S-1-5-21-1757981266-682003330-1801674531-28991Primary group: DIGITALCHINA\Domain Users (NT:S-1-5-21-1757981266-682003330-18016 74531-513)Groups: (7)Everyone (NT:S-1-1-0)BUILTIN\Administrators (NT:S-1-5-32-544)BUILTIN\Users (NT:S-1-5-32-545)NT AUTHORITY\INTERACTIVE (NT:S-1-5-4)NT AUTHORITY\Authenticated Users (NT:S-1-5-11)DIGITALCHINA\ccuser (NT:S-1-5-21-1757981266-682003330-1801674531-28989) DIGITALCHINA\clearcase (NT:S-1-5-21-1757981266-682003330-1801674531-28990)You have ClearCase administrative privileges.2、显示当前视图:C:\WINNT\system32>cleartool lsview* test_view \\Ccserver_2\View_store\test_view.vwshouyla_view_server_1 \\Ccserver_1\View_store\houyla_view_server_1.vwsjiangyia_view \\Jiangyia\View_Store\jiangyia_view.vwsjiangyia_test \\Jiangyia\View_Store\jiangyia_test.vwsjiangyia_test_int \\Jiangyia\View_Store\jiangyia_test_int.vws3、删除视图tag:C:\WINNT\system32>cleartool rmview -tag jiangyia_viewC:\WINNT\system32>cleartool rmview -tag jiangyia_testRemoving references from VOB "\test_pvob" ...Removed references to view "\\Jiangyia\View_Store\jiangyia_test.vws" from VOB "\test_pvob".cleartool: Warning: Unable to idle view "\\Jiangyia\View_Store\jiangyia_test.vws": Permission deniedcleartool: Error: View storage directory "\\Jiangyia\View_Store\jiangyia_test.vws" is in use. Make sure no process has this directory as the current directory.cleartool: Warning: Trouble removing view storage: "error detected by ClearCase subsystem".cleartool: Error: Unable to remove view "\\Jiangyia\View_Store\jiangyia_test.vws".C:\WINNT\system32>cleartool lsview* test_view \\Ccserver_2\View_store\test_view.vwshouyla_view_server_1 \\Ccserver_1\View_store\houyla_view_server_1.vwsjiangyia_test \\Jiangyia\View_Store\jiangyia_test.vwsjiangyia_test_int \\Jiangyia\View_Store\jiangyia_test_int.vwsC:\WINNT\system32>cleartool rmview -tag jiangyia_test_intRemoving references from VOB "\test_pvob" ...Removed references to view "\\Jiangyia\View_Store\jiangyia_test_int.vws" from VOB "\test_pvob".cleartool: Warning: Unable to idle view "\\Jiangyia\View_Store\jiangyia_test_int.vws": Permission deniedcleartool: Error: View storage directory "\\Jiangyia\View_Store\jiangyia_test_in t.vws" is in use. Make sure no process has this directory as the current direct ory.cleartool: Warning: Trouble removing view storage: "error detected by ClearCase subsystem".cleartool: Error: Unable to remove view "\\Jiangyia\View_Store\jiangyia_test_int .vws".C:\WINNT\system32>cleartool lsview* test_view \\Ccserver_2\View_store\test_view.vwshouyla_view_server_1 \\Ccserver_1\View_store\houyla_view_server_1.vws jiangyia_test \\Jiangyia\View_Store\jiangyia_test.vwsjiangyia_test_int \\Jiangyia\View_Store\jiangyia_test_int.vwsC:\WINNT\system32>cleartool lsview -lTag: test_viewGlobal path: \\Ccserver_2\View_store\test_view.vwsServer host: Ccserver_2Region: Ctais_winActive: YESView tag uuid:54d25265.2ecf418a.bb0b.5d:9a:2f:20:0b:f7View on host: Ccserver_2View server access path: D:\View_store\test_view.vwsView uuid: 54d25265.2ecf418a.bb0b.5d:9a:2f:20:0b:f7View owner: DIGITALCHINA\houylaTag: houyla_view_server_1Global path: \\Ccserver_1\View_store\houyla_view_server_1.vwsServer host: Ccserver_1Region: Ctais_winActive: NOView tag uuid:91d09fb3.5b7e44a6.b61f.78:6c:f6:7c:ec:62View on host: Ccserver_1View server access path: D:\View_store\houyla_view_server_1.vwsView uuid: 91d09fb3.5b7e44a6.b61f.78:6c:f6:7c:ec:62View owner: DIGITALCHINA\houylaTag: jiangyia_testGlobal path: \\Jiangyia\View_Store\jiangyia_test.vwsServer host: JiangyiaRegion: Ctais_winActive: NOView tag uuid:eb689d82.6fe04303.8cad.6d:a1:36:26:d6:27View on host: JiangyiaView server access path: D:\View_Store\jiangyia_test.vwsView uuid: eb689d82.6fe04303.8cad.6d:a1:36:26:d6:27View attributes: ucmviewView owner: DIGITALCHINA\jiangyiaTag: jiangyia_test_intGlobal path: \\Jiangyia\View_Store\jiangyia_test_int.vwsServer host: JiangyiaRegion: Ctais_winActive: NOView tag uuid:d8fd7f46.d4334bf9.94b5.18:b5:c1:65:53:beView on host: JiangyiaView server access path: D:\View_Store\jiangyia_test_int.vwsView uuid: d8fd7f46.d4334bf9.94b5.18:b5:c1:65:53:beView attributes: ucmviewView owner: DIGITALCHINA\jiangyiaC:\WINNT\system32>cleartool unregister -view -uuid d8fd7f46.d4334bf9.94b5.18:b5: c1:65:53:beC:\WINNT\system32>cleartool lsview* test_view \\Ccserver_2\View_store\test_view.vwshouyla_view_server_1 \\Ccserver_1\View_store\houyla_view_server_1.vws jiangyia_test \\Jiangyia\View_Store\jiangyia_test.vwsjiangyia_test_int \\Jiangyia\View_Store\jiangyia_test_int.vwsC:\WINNT\system32>cleartool rmtag -view jiangyia_test_intC:\WINNT\system32>cleartool lsview* test_view \\Ccserver_2\View_store\test_view.vwshouyla_view_server_1 \\Ccserver_1\View_store\houyla_view_server_1.vws jiangyia_test \\Jiangyia\View_Store\jiangyia_test.vwsC:\WINNT\system32>cleartool lsview -lTag: test_viewGlobal path: \\Ccserver_2\View_store\test_view.vwsServer host: Ccserver_2Region: Ctais_winActive: YESView tag uuid:54d25265.2ecf418a.bb0b.5d:9a:2f:20:0b:f7View on host: Ccserver_2View server access path: D:\View_store\test_view.vwsView uuid: 54d25265.2ecf418a.bb0b.5d:9a:2f:20:0b:f7View owner: DIGITALCHINA\houylaTag: houyla_view_server_1Global path: \\Ccserver_1\View_store\houyla_view_server_1.vwsServer host: Ccserver_1Region: Ctais_winActive: NOView tag uuid:91d09fb3.5b7e44a6.b61f.78:6c:f6:7c:ec:62View on host: Ccserver_1View server access path: D:\View_store\houyla_view_server_1.vwsView uuid: 91d09fb3.5b7e44a6.b61f.78:6c:f6:7c:ec:62View owner: DIGITALCHINA\houylaTag: jiangyia_testGlobal path: \\Jiangyia\View_Store\jiangyia_test.vwsServer host: JiangyiaRegion: Ctais_winActive: NOView tag uuid:eb689d82.6fe04303.8cad.6d:a1:36:26:d6:27View on host: JiangyiaView server access path: D:\View_Store\jiangyia_test.vwsView uuid: eb689d82.6fe04303.8cad.6d:a1:36:26:d6:27View attributes: ucmviewView owner: DIGITALCHINA\jiangyiaC:\WINNT\system32>cleartool unregister -uuid eb689d82.6fe04303.8cad.6d:a1:36:26: d6:27cleartool: Error: Required command argument is missing.Usage: unregister -vob {-uuid uuid | vob-storage-dir-pname}unregister -view {-uuid uuid | view-storage-dir-pname}C:\WINNT\system32>cleartool unregister -view -uuid eb689d82.6fe04303.8cad.6d:a1: 36:26:d6:27C:\WINNT\system32>cleartool rmtag -view jiangyia_testC:\WINNT\system32>cleartool lsview -lTag: test_viewGlobal path: \\Ccserver_2\View_store\test_view.vwsServer host: Ccserver_2Region: Ctais_winActive: YESView tag uuid:54d25265.2ecf418a.bb0b.5d:9a:2f:20:0b:f7View on host: Ccserver_2View server access path: D:\View_store\test_view.vwsView uuid: 54d25265.2ecf418a.bb0b.5d:9a:2f:20:0b:f7View owner: DIGITALCHINA\houylaTag: houyla_view_server_1Global path: \\Ccserver_1\View_store\houyla_view_server_1.vwsServer host: Ccserver_1Region: Ctais_winActive: NOView tag uuid:91d09fb3.5b7e44a6.b61f.78:6c:f6:7c:ec:62View on host: Ccserver_1View server access path: D:\View_store\houyla_view_server_1.vwsView uuid: 91d09fb3.5b7e44a6.b61f.78:6c:f6:7c:ec:62View owner: DIGITALCHINA\houylaC:\WINNT\system32>cleartool unregister -view -uuid 91d09fb3.5b7e44a6.b61f.78:6c:f6:7c:ec:62C:\WINNT\system32>cleartool lsview* test_view \\Ccserver_2\View_store\test_view.vwshouyla_view_server_1 \\Ccserver_1\View_store\houyla_view_server_1.vwsC:\WINNT\system32>cleartool rmtag -view houyla_view_server_1C:\WINNT\system32>cleartool lsview* test_view \\Ccserver_2\View_store\test_view.vws查找命令:查找并列出该VOB里在最新版本中没打上某标签的文件列表:M:\ccadmin_view\Mobile>cleartool find . -version "version(\main\LATEST) && ! lbtype(20040106_import)" -print列出该VOB里的标签:M:\ccadmin_view\HeNanBoss>cleartool lstype -kind lbtype查找并删除该vob中扩展名为“.SCC”的文档cleartool> find . -name "*.scc" -print -exec "cleartool rmelem %CLEARCASE_PN%"权限修复:1、修复/指定文件夹权限C:\>fix_prot -root -chown ccadmin -chgrp boss \\ccserver_8\VOB_Store\VOBs\Mobile.vbs2、递归修复/指定库权限C:\>fix_prot -root -r -chown ccadmin -chgrp boss \\ccserver_8\VOB_Store\VOBs\Mobile.vbs3、最后确定库权限C:\>cleartool protectvob -chown ccadmin -chgrp boss \\ccserver_8\VOB_Store\VOBs\Mobile.vbs在库文档损坏或是对库文档所在文件夹的权限进行修改之后,需要对库文档权限进行修复,其步骤如上所示。
Clearcase trigger(触发器)指南

ClearCase Trigger指南1) 前言与简介1.前言我在深入了解ClearCase的过程中,发现Trigger是一个很有用的助手,但是我在学习的过程中也走过弯路,常常觉得如果有一个简要的文档给以指导会避免许多无谓的烦恼,所以完成本文,希望能够给ClearCase的初学者以帮助。
提醒:本文中所有的Trigger只是示例,不能直接应用到实际的配置管理系统中,如果直接应用可能产生不明后果;同时本文的所有示例都是基于ClearCase 2003.06.15 for Windows,其他版本与平台的ClearCase可能会有所不同。
本文草稿完成于2006年3月底,在草稿中提到了我对Deliver过程的初步了解,在之后的修改过程中,IBM于2006年6月23日发布了IBM Rational Software Development Platform –Team Version 7.0,新的ClearCase随机文档IBM Rational ClearCase Guide to Developing Software with UCM, 7.0中对Deliver过程进行了描述,基于新的文档本文进行了修订。
2.ClearCase Trigger简介在学习ClearCase的过程中,Rational ClearCase CCIUG讨论组给了我很大的帮助,刚接触ClearCase时,我提出了许多流程控制的问题,在ClearCase讨论组中许多人回答到这些问题用Trigger解决比较合适;由此带来了新的问题:Trigger 是什么?在其他的软件中也有Trigger这个概念,例如:Oracle数据库;在ClearCase中Trigger与其他软件中的Trigger有什么不同吗,它能够起到什么作用呢?顾名思义,Trigger就是触发器,符合条件时会触发一系列动作,在这里我们可以看一下Rational给出的标准解释(IBM Rational ClearCase Book cc_intro.pdf Page 63):A monitor that specifies one or more standard programs or built-in actions to be executed whenever a certain ClearCase operation is performed.翻译过来大意为:监控某一指定的ClearCase操作时,当符合条件时,会触发一系列的动作,执行的这些动作可以是ClearCase内置命令或可执行的标准程序。
ClearCase使用培训(测试与开发人员)

软件技术处
使用版本扩展命名法
使用标准命名法,将看到当前试图选择 的元素版本
使用扩展版本命名法,将能看到试图中 的任意版本
软件技术处
使用版本树浏览器
版本树浏览器使用一个层次图来显示一 个元素的进化情况
标有“眼睛”的图标显示当前试图选择 的版本
软件技术处
元素的属性
元素的属性可以通过 自己的属性页查看
IDE开发工具
软件技术处
ClearCase命令行工具
软件技术处
ClearCase学习途径
在线帮助 pdf手册 Clearcase新闻组
软件技术处
三、使用初步
版本对象库(VOB) 元素(element) 版本(Version)、版本树( Version Tree) 视图(View) 视图配置规则(Config Spec) 使用模式(Checkout – Edit –Checkin ) 分支 (Branch) 归并 (Merge) 标签 (Label)
0 1
2
3
3
7
软件技术处
版本、版本树
控制任何文件的版本
可对目录和子目录进行 版本控制
完美的分支和归并功能 采用版本树结构 文本比较
丰富的注释和版本报告 信息
\main
0
LABELS
BETA_01 1 RLS1.0 2
RLS2.0 3
\enhance
0
4
\special
0
1
5
ClearCase
使用培训(研发、测试人员)
软件技术处
培训内容
ClearCase简介 ClearCase界面 使用初步 版本化工作 文件的版本 目录的版本 ClearCase程序组工具简介 使用技巧及注意事项
ClearCase基本操作
应用ClearCase人员的一些基本操作以下归纳的操作都是ClearCase最基本的操作,每个操作人员都应该熟练的掌握,以提高工作效率。
下面给出了图形界面和命令行模式两种方式下的操作方法。
Add To Source Control此操作的目的是将文件系统中的元素放入版本控制库,作为版本控制元素来管理。
图形界面下,操作是右键点击要添加的元素,选择add to source contronl即可;命令行命令为mkelem。
✧在命令行模式下,执行mkelem命令时,必须保证要添加为版本控制元素的文件或目录的上一级目录已经被checkout出来。
并且默认状态下,执行了mkelem命令后所添加的元素保持checkout状态。
如:某文件test.txt在目录1下面1\test.txt,则在对test.txt文件进行mkelem操作时,必须保证目录1已经被checkout出来了。
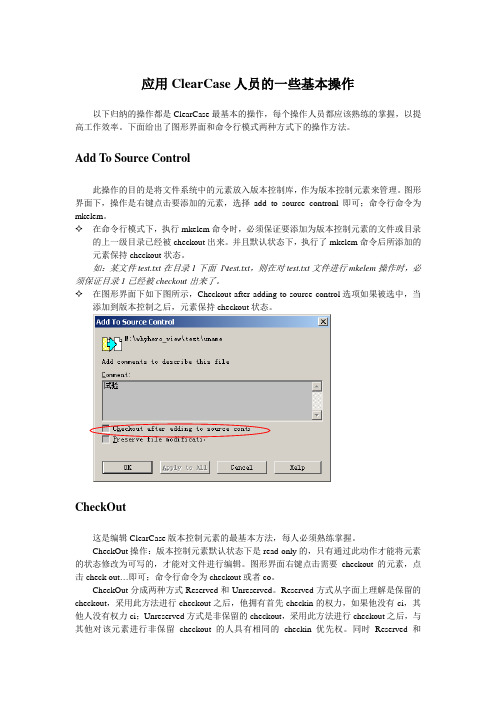
✧在图形界面下如下图所示,Checkout after adding to source control选项如果被选中,当添加到版本控制之后,元素保持checkout状态。
CheckOut这是编辑ClearCase版本控制元素的最基本方法,每人必须熟练掌握。
CheckOut操作:版本控制元素默认状态下是read-only的,只有通过此动作才能将元素的状态修改为可写的,才能对文件进行编辑。
图形界面右键点击需要checkout的元素,点击check out…即可;命令行命令为checkout或者co。
CheckOut分成两种方式Reserved和Unreserved。
Reserved方式从字面上理解是保留的checkout,采用此方法进行checkout之后,他拥有首先checkin的权力,如果他没有ci,其他人没有权力ci;Unreserved方式是非保留的checkout,采用此方法进行checkout之后,与其他对该元素进行非保留checkout的人具有相同的checkin优先权。
ClearCase基本操作详解
ClearCase基本操作详解对于开发⼈员⽽⾔,对ClearCase的常⽤操作⽆⾮增、删、改⽽已。
但在不同情况下,这些操作也会变得复杂,下⾯我们就来看看如何通过⼀些技巧,使复杂的过程操作起来能够很简单。
h2. ⼀、增增加⼀个⽂件到ClearCase;1)右键单击该⽂件,选择"Add to Source Control"add to source.jpg2)选择⼀个activity名字,或者新建⼀个activity,选择"ok"select activity.jpg增加同⼀级⽬录下的⽂件到ClearCase;1)选择add to source control;add01.jpg2)选择apply to all;add02.jpgadd03.jpg增加⼀个包括⼦⽂件夹的⽂件夹到ClearCase;增加多个⽬录下的多个⽂件到ClearCase;使⽤windows资源管理器增加⽂件到ClearCase;1)右键单击该⽂件,选择"ClearCase",然后选择"Add to Source Control"explorer_add.jpg2)选择⼀个activity名字,或者新建⼀个activity,选择"ok"select activity.jpg使⽤ClearCase客户端增加⽂件到ClearCase;使⽤windows搜索功能增加⽂件到ClearCase;1)选择要增加的⽬录,通过Windows Search,找到要增加的⽂件;searchadd01.jpg2)右键选择Add to source control;searchadd02.jpg使⽤Visual Studio增加⽂件到ClearCase;1)安装:运⾏ <clear case>\bin\Integrations\CCVS7Addin\Setup\setup.exe2)在VS中新建⼯程,⼯程⽬录必须在VOB\View之中vs01.jpg3)右键选择add to source controlvs02.jpg4)确定vs03.jpg*使⽤Eclipse增加⽂件到ClearCase;*1)安装:\\cn-sh-d0403220\App选择"Find and Install"eclipse01.JPG2)选择"Search for new features to install"eclipse02.JPG3)点击"New Local Site..."eclipse03.JPG4)选择插件所在⽬录eclipse04.JPG5)确定eclipse05.JPG6)插件安装完成eclipse06.JPG7)新建⼯程,且⼯程⽬录必须是View的路径,这⾥的已将⼯程默认路径设置成View的路径eclipse07.JPG8)选择"clearcase"菜单,选择"Connect to rational ClearCase"eclipse08.JPG9)确定eclipse09.JPG10)现在⼯程将被"Add to Source Control",选择确定。
Clearcase入门
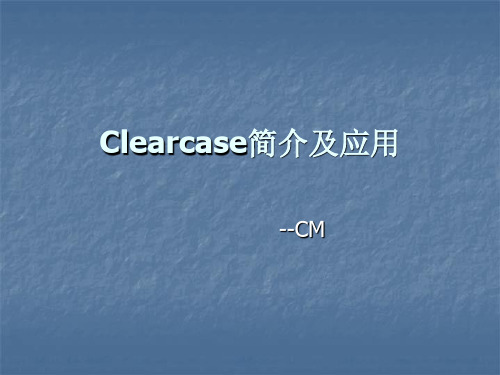
鼠标左键双击图标“branch type”(图 一),打开VOB test的branch types。右击鼠标,选择“create”弹出 “create”(图 二),为你的branch起名并添加注释。点 击ok创建
图一
图二
5) Merge manager 的应用 右键点击需要Merge的View,选择Merge manager,如下 图:
2)Check In与Check Out 选定所需elment,使用工具栏上的 checkin,checkout,undocheckout按钮。
相关概念: checkin checkout
undocheckout
Checkout 的element会显示一个绿色小钩
3)查看版本树
右键点击element,选择Version Tree,将显示该文件 元素的版本树。下图中眼睛所指向的版本2是当前View 所选中的文件版本。
ClearCase Explorer界面
2)创建Snapshot View 在Toolbox中选择“Create View”(如下图):
根据向导提示,选择默认选项,直至出现下 面的界面,选择Snapshot,并继续向导
相关知识: 两种View的区别
在“Choose Elements to Load”窗口中 ,选 择所需的VOB,并点击OK结束View的创 建
更改视图config spec,通过右键点击视图,选择菜单
“Properties of View”
:
弹出如下窗口,选择“Edit”按钮可以编辑。
相关知识:
config spec更改方法
4)创建自己的branch 选择“开始->程序->Rational ClearCase->Type Explorer”, 出现“Select VOB”窗口 ,选择需要的VOB
clearcase安装手册
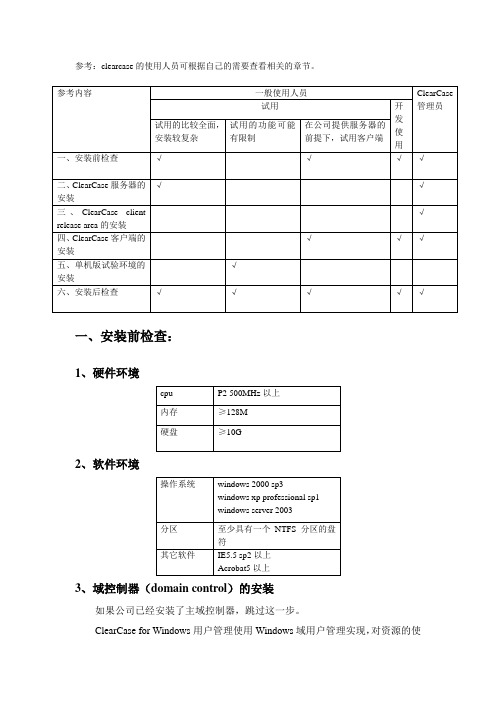
参考:clearcase的使用人员可根据自己的需要查看相关的章节。
一、安装前检查:1、硬件环境2、软件环境3、域控制器(domain control)的安装如果公司已经安装了主域控制器,跳过这一步。
ClearCase for Windows用户管理使用Windows域用户管理实现,对资源的使用权限控制使用了Windows的资源的使用权限管理实现,因此,非单机的ClearCase必须要在域中安装,vob服务器和客户端都必须是域中的机器。
作为域控制器的机器要求操作系统是windows2000 server sp3或sp4。
安装前确定域名*.com。
选择“开始”|“运行”,输入dcpromo,点击确定按钮,开始安装,安装过程中以下步骤需进行选择:在“新的域名”一步,输入新域的DNS全名,如;在“数据库和日志文件位置”一步,选择数据库和日志文件的存放位置;在“共享的系统卷”一步,选择sysvol文件夹的存放位置;其余页面均使用向导提示的默认配置即可。
系统管理员在主域控制器安装成功后,需要在主域控制器上建立使用ClearCase的所有用户的用户帐号和用户分组。
4、从管理员处已经获取信息所在域名称:;加入域的用户(你的)账号、口令,同邮件账号口令;dns服务器地址:192.168.2.8;主域控制器IP:192.168.2.8;clearcase vob server:CVIC-CCS1clearcase registry server:CVIC-CCS1clearcase license server:CVIC- CCS1region:rationalclearcase_albd口令:rational5、网络设置以本机管理员的身份进入你的本机,修改网络设置。
方法:选择桌面>网上邻居,右键菜单选择属性,在网络和拨号连接窗口,选择本地连接,右键菜单选择属性,在本地连接属性对话框中,双击Internet协议(TCP/IP),修改首选dns 服务器,设置为dns服务器地址,;选择“高级”-〉wins, 将主域控制器IP加入到wins地址中,选中“启用LMHOSTS查询”,选择“启用TCP/IP上的NetBIOS”; 选择“DNS”,选择“在DNS中注册此连接的地址”;设置完成后,点击“确定”退出,点击“关闭”关闭本地连接属性对话框,重新启动计算机。
ClearCase使用指南

ClearCase使用指南
(Bolik@)
1、打开Rational ClearCase Explore (类似资源管理器)
2、在UCM选择页上点击Join Project(加入项目),出现项目选择界面,选择要加入的项目然后进入下一步
2.1、如果出现如下消息框,那是因为你曾经加入过该项目,并且对该项目进行了修改
点击OK后会出现如下界面,请选择(Advanced Options)
在如下窗体中建议选择(Reuse an existing development stream:选择一个已经存在的工作流),然后在以前修改的基础上工作,如果创建一个新的工作流的话,那么你就在该项目上同时进行着很多修改,会有很多视图,建议一直使用一个视图工作(一个工作流)
3、进入视图创建页,选择开发视图和集成试图请选择类行为动态视图(Dynamic),进入下一步
3.1、如果出现如下窗体那是因为有些机器没有连上,请忽略掉它
4、进入开发视图配置页,选择连接映射磁盘盘符时如果选择{none}则不会映射磁盘,这时的视图映射应该存放在M盘,这样可以避免因加入多个项目而映射出一大堆硬盘的烦恼
4.1请选择(Advanced Options)选项,然后选择视图存放位置,请选择(Use server storage location),并在其中选择本机的存储路径(前缀为自己的计算机名)该选项仅在第一次使用时需要指定,以后只要不修改存储路径就不用再次修改,完成开发视图配置,然后在以相同方法完成集成视图参数配置
5、参数配置完成出现如下界面,选择OK,当出现成功对话框时表明加入项目成功。
6、在视图下工作。
Clearcase安装配置操作手册

Clearcase安装配置操作手册裸奔的蚂蚁西安软件测评中心二〇〇七年三月1前言ClearCase是一种配置管理工具,由Rational公司开发,是开发小组用来跟踪、管理软件开发过程各个工件的配置管理系统, ClearCase可以协助开发组织更好地管理软件开发进程。
ClearCase可以和Rational公司的其他软件紧密结合,例如UCM、ClearQuest等等。
ClearCase包括两套:ClearCase LT和ClearCase (MultiSite)。
前者可以用于在同一个局域网的开发小组,适合于中小型开发组织;ClearCase (MultiSite)则适应于分布于不同地理位置、不同局域网的开发小组,适合于大型的开发组织。
工具特点ClearCase的核心功能是版本控制,它是对软件开发进程中一个文件或一个目录发展过程进行追踪的手段。
在软件开发环境中,ClearCase可以对每一种对象类型(包括源代码、二进制文件、目录内容、可执行文件、文档、测试包、编译器、库文件等)实现版本控制,同时还提供了先进的版本分支和归并功能用于支持并行开发。
*支持广泛的文件类型ClearCase不仅可以对软件组件的版本进行维护和控制,也可以对一个非文本文件、目录的版本进行维护。
用户可以定义自己的元件类型,也可以使用ClearCase中的预定义类型。
在存储时,ClearCase可以利用增量算法将文本文件存储在一个特殊结构的文件容器中,或采用标准的压缩技术控制任何操作系统文件。
(这比以往的存储形式节省了50%-70%的存储空间。
)*在版本树中观察元件发展的过程在ClearCase中,文件版本的组织体现在版本树结构中。
每一个文件都可以通过checkout-edit-checkin的命令形成多个版本,还可以包含多层分支和子分支。
*对目录和子目录进行版本控制ClearCase可以对目录和子目录进行版本控制,允许开发者对其数据的组织发展过程进行追踪。
ClearCase操作命令

ClearCase操作命令目录⏹ClearCase基本命令: (2)1.最基本的操作 (2)2.最有用的命令 (2)3.查看被自己co的文件 (3)4.新增目录和文件 (3)5.放弃co某个文件 (2)6.Check out (2)7.Check in (2)8.主线、分支文件合并 (3)9.标签相关 (4)⏹ClearCase高级命令 (5)1.将整个目录导入clearcase (5)2.加锁 (5)3.解锁 (5)4.转换格式 (5)5.查看VOB的基本信息和UUID (5)6.删除视图 (5)7.删除lost+found (5)8.查询某一天的修改记录 (5)9.更改VOB的Owner: (5)10.更改VOB的Group: (5)11.增加Additional Group: (5)12.删除Additional Group: (6)13.更改group、owner、mod (6)14.创建VOB (6)15.Mount vob (6)16.创建视图 (6)17.设置当前视图 (6)18.设置当前的activity (6)⏹参考: (7)ClearCase基本命令:1. 最基本的操作cleartool co -nc xxx.cppcleartool ci -nc xxx.cpp2. 最有用的命令cleartool man xxxcleartool help xxx3. 放弃co某个文件cleartool unco -keep file.cpp //保留当前所改动的文件cleartool unco -rm file.cpp4. Check out//Check out一个文件cleartool checkout [-reserve][-unreserve] filename//Check out前目录cleartool checkout .//Check out当前目录下所有文件cleartool Checkout –nc *.*//Check out当前目录下所有的文件和目录中的文件cleartool find . $file -exec …cleartool checkout -nc $CLEARCASE_PN‟ //查看当前目录以下被checkout的文件或目录cleartool lsco -cview -r5. Check in//Check in 一个文件cleartool checkin filename//Check in 当前目录cleartool checkin .//Check in 当前目录下所有文件.cleartool Checkin –nc *.*//Check in当前目录下所有的文件和目录中的文件cleartool find . $file -exec …cleartool checkin -nc –ide $CLEARCASE_PN‟//Check in 所有被 checkedout的文件cleartool lsco -cview -recurse -short .|xargs cleartool ci -nc6. 主线、分支文件合并//查找需要合并的文件cleartool findmerge . -fversion /main/xxxx_path -print//比较文件不同cleartool diff file.cpp file.cpp@@/main/xxxx_path/LATEST//查看最新版本cleartool lsvtree file.cpp//合并cleartool merge -to file.cpp file.cpp@@/main/xxxx_path/LATEST file.cpp@@/main/LA TEST7. 查看信息cleartool ls //查看当前目录中文件是否是clearcase文件cleartool lsco -cview -me –all //查看当前vob中被自己checkout的文件cleartool lsco -cview -me –avobs //查看所有vob中被自己checkout的文件cleartool lsh -last 2 //查看当前目录中每个文件最后2次操作的历史cleartool lsh -last 2 -all //查看当前vob最后2次操作的历史cleartool lsh -last –avobs //查看当所有vob中最后1次操作的历史8. 新增目录和文件cleartool mkdir -c comment new_dircleartool mkelem -c comment new_file.cpp9. 标签相关//新建标签cleartool mklbtype -nc TEST_LABEL//给文件打标签cleartool mklabel -r TEST_LABEL file.cpp//删除标签cleartool rmtype lbtype:TEST_LABEL//给所有打上TEST_LABEL标签的文件打上TEST_LABEL2标签cleartool mklabel -replace -version /main/TEST_LABEL TEST_LABEL2 *//查找打上TEST_LABEL标签的所有文件cleartool find . -version "lbtype(TEST_LABEL)" -print//查找打上TEST_LABEL和TEST_LABEL2标签的文件cleartool find . -element 'lbtype_sub(TEST_LABEL) && lbtype_sub(TEST_LABEL2)' -print// label the last version of branch branch_namecleartool find . -version 'version(/main/brach_name/LATEST)' -print -exec 'cleartool mk label -nc LABEL_NAME $CLEARCASE_PN'//use this command to check whether all the files are labeld:cleartool find . -version 'version(/main/brach_name/LATEST) &&! lbtype(LABEL_NAM E)' -printClearCase高级命令1. 将整个目录导入clearcaseclearfsimport -r…源路径‟ …目标路径‟2. 加锁find . -name '*.*' -exec 'cleartool lock nuser userame1,username2 "%CLEARCASE_PN%"'3. 解锁find . -name '*.*' -exec 'cleartool unlock "%CLEARCASE_PN%"' 4. 转换格式chtype -f compressed_file “fileName”5. 查看VOB的基本信息和UUIDdes -l vob:.6. 删除视图rmview -uuid "UUID"7. 删除lost+foundfind . -name '*.*' -exec 'cleartool rmelem -f "%CLEARCASE_PN%"' 8. 查询某一天的修改记录cleartool lshis -r -since 07-dec9. 更改VOB的Owner:cleartool protectvob –chown root /vob/vob.vbs10. 更改VOB的Group:cleartool protectvob –chgrp alluser /vob/vob.vbs11. 增加Additional Group:cleartool protectvob –add_group group1 /vob/vob.vbs12. 删除Additional Group:cleartool protectvob –delete_group group1 /vob/vob.vbs13. 更改group、owner、modprotect -r -chgrp groupname–chown username -chmod 770 .14. 创建VOBcleartool mkvob -tag /vobtags/test_code -c "Test" "D:\Data\Tets.vbs"15. Mount vobcleartool mount /vobtags/vob16. 创建视图cleartool mkview –tag test /ccvob/views/test.vws17. 设置当前视图cleartool setview test18. 设置当前的activitycleartool setactivity activityname参考:1. When you come to work, the first thing you need to do is: Create a View Command:cleartool mkview -tag <view_tag> <view_storage_path>example:cleartool mkview -tag alex_test /net/nj2/Other Command:cleartool lsview //list all the views reside in the hostscleartool lsview | grep name //list specified view by namecleartool rmview -tag <view_tag> //remove an exist view2. After you create a vew, you need to Set the View to enter it. Then you are able to s ee the vob content only when you set the view.cleartool setview <view_tag>Example:cleartool setview alex_testOther Commandscleartool pwv see which view you are currently inexit quit from current view3. When you are in a view, you need to set the config spec correctly to pick up the rig ht version of element.cleartool catcs //view your config speccleartool edcs //edit your config spec by vi editorOther Commandscleartool catcs > filename //Copy your config spec to a filecleartool setcs filename //Set your config spec from a fileWhat doew config spec say ? For example:element* CHECKEDOUTelement* .../ISGcq00123456/LASTESTelement* BLUETOOTH_00.07.00element* AP_SIPC.01.32.00element* AP_IB2.00.38_ARMelement* /main/LATESTCommandelement <file path> <version path>file path: hello.c, *, /vob/su_java/...version path: Label or Branch4. Now you may have a task to do. You have a CR assigned, and you know the baseli ne version.Set config spec to the baseline version.Create branch type associated with the CR.cleartool mkbrtype ISGcq00123456Make branch on the baseline versioncleartool mkbranch ISGcq00123456 hello.c@@/main/2Result: hello.c@@/main/ISGcq00123456/0 is created and checked out(a copy of he llo.c in the dir was created and you can edited it. If there is not hello.c in the dir, the clearcas e would submit a error).Add a rule to pick up this branch in the config spec, just below the CHECKEDOUT rul e.element* .../ISGcq00123456/LATESTAccessional:Branch type shall have naming convention designed by every project.Don't want check out:cleartool mkbranch -nco ISGcq00123456 hello.c@@/main/2Remove a branch from an element:cleartool rmbranch hello.c@@/main/ISGcq00123456.Make sure no checked out version on this branchRename a branch namecleartool rename brtype:old_name brtype:new_nameIt will apply to all the created branch.Remove a branch type as well as all the related element branchcleartool rmtype -rmall brtype:ISGcq001234565. After making your CR branch on the file to be changed, check out the version if it h asn't been checked out(checkout后会产生一个自己的私有文件,你可以自己修改,别人看不到,只有这个文件被checkin后才会放到vobs里).cleartool co -nc hello.c@@/main/ISGcq00123456/0Then, you are able to edit this file. After you finish the change, check in the file to vob.cleartool ci -nc hello.cThe result is, the element will increase one version on the branch:hello.c@@/main/ISGcq00123456/1AccessionalA checked out version is only in your view. Other engineer can not see it. If you remov e that view, you will lost the checked out version.You can undo checkout by:cleartool unco hello.cIf a checked version has no change, it can't be checked in. You will get an error mess age like "The file is identical"An unreserved checked out will not block other people check out the same version. N ormally, we just use reserved checkout.You can only check out a file on the branch which has mastership role.6. If your task is to create a new file, you need to do below steps:Make branch on the directory that you will add the file tocleartool mkbranch ISGcq00123456 /vob/su_jave/code/srcThe directory will be automatically checked out. Then make element in this dir.cleartool mkelem -nco hello.cCreate a foldercleartool mkelem -eltype directory testDont check it out, because you need to make the CR branch on this file.cleartool mkbranch ISGcq00123456 hello.cCheck in this directory. Otherwise, other people can not see your new file.cleartool ci -nc /vob/su_java/code/srcAccessionalWe usually only check in the file, but forget to check in the directory. This will cause th e file you created can't be stored in the VOB and can't be seen by other people.Go to the top project folder, use below command to list all checked out files and direct ories in the current dir and sub dir in your view. It will help you check in all elements.cleartool lsco -cview -r7. Now, your task is ongoing. In coding and testing, you may need to merge your file t o other version. below example gives the merge steps:Example: Merge file from hello.c@@/main/branchfrom/5 to hello.c@@/main/branchto /2cleartool co -nc hello.c@@/main/branchto/2cleartool merge -to hello.c hello.c@@/main/branchfrom/5Usually you may also need to compare two versionscleartool diff hello.c hello.c hello.c@@/main/branchfrom/5 hello.c@@/main/branchto/ 2Compare this version from the previous versioncleartool diff -pre hello.c@@/main/branchto/2AccessionalUse this command to list all versions of an elementcleartool lsvt hello.cinclude the merge infocleartool lsvt -merge hello.cRemove a merge arrow:cleartool rmmerge hello.c@@/main/branchfrom/5 hello.c@@/main/branchto/2Dont do actual merge, just draw a merge linecleartool merge -ndata hello.c@@/main/branchfrom/5 hello.c@@/main/branchto/2 In what cases we need merge:Integrate with the code developed by someone else.If baseline version has been incresed, need upermage.Merge for release.8. If you want to remove an un-use version, use the commandcleartool rmver hello.c@@/main/branchto/2Then the version 2 will be removed, but next time the version will increase from 1 to 3.If you want to remove a file, you can use remove name command:cleartool rmname hello.cBe sure to make branch and check out the current directory before rmove it, just like t he steps of make element.If you want to rename a file, you can usecleartool mv old_name new_nameIf you want to create an element link, you can usecleartool ln source_file file_link(checkout current folder like above)9. Now you may have completed the task of coding, testing, inspection, and prepare t o release it. You need to check your developed version is complied with below rules: Must make branch from the baseline version.Must have up merged your branch if the baseline version is not the LATEST version.All the files and directories have no checkou.10. How to label the versionMake the label type:cleartool mklbtype BLUETOOTH_00.07.00Make label on a version:cleartool mklabel BLUETOOTH_00.07.00 hello.c@@/main/branchto/2Move a label from the old version to a new version:cleartool mklabel -replace BLUETOOTH_00.07.00 hello.c@@/main/branchto/3Remove label on a version:cleartool rmlabel BLUETOOTH_00.07.00 hello.c@@/main/branchto/3Remove the label typecleartool rmtype lbtype:BLUETOOTH_00.07.0011. How to search the reuqired versionFind all files with the version(.../ISGcq00373766/LATEST) and with no label SAMB A_AP_DSL_BLUETOOTH_00.00.07:cleartool find /vob/directory -version 'version(.../ISGcq00373766/LATEST) && !versio n(SAMBA_AP_DSL_BLUETOOTH_00.00.07)' -printFind all files with the version SAMBA_AP_DSL_BLUETOOTH_00.00.07, and then se arch STRING in all found files:cleartool find .-version 'version(SAMBA_AP_DSL_BLUETOOTH_00.00.07)' -exec 'gre p STRING $CLEARCASE_PN'说明:本文是作者根据网上收集的资料整理而来,方便大家使用。
Clearcase安装指南
Clearcase安装指南Clearcase 安装软件放到了网上家园,安装时,请首先进入\\nethome\shares\clearcase_client。
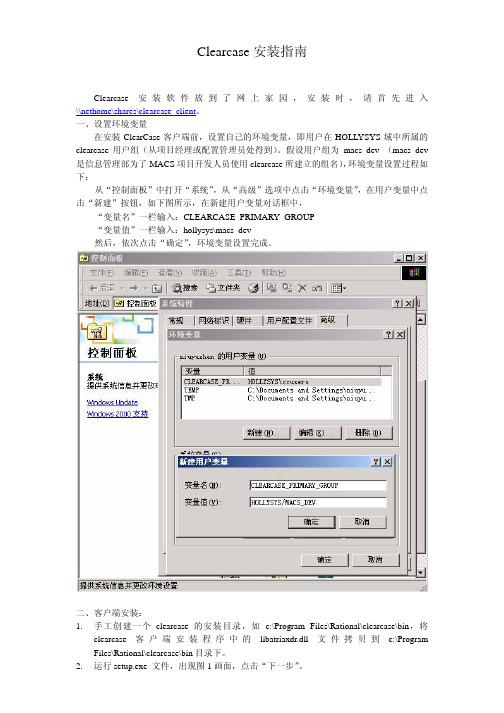
一、设置环境变量在安装ClearCase客户端前,设置自己的环境变量,即用户在HOLLYSYS域中所属的clearcase用户组(从项目经理或配置管理员处得到)。
假设用户组为 macs_dev (macs_dev 是信息管理部为了MACS项目开发人员使用clearcase所建立的组名),环境变量设置过程如下:从“控制面板”中打开“系统”,从“高级”选项中点击“环境变量”,在用户变量中点击“新建”按钮,如下图所示,在新建用户变量对话框中,“变量名”一栏输入:CLEARCASE_PRIMARY_GROUP“变量值”一栏输入:hollysys\macs_dev然后,依次点击“确定”,环境变量设置完成。
二、客户端安装:1.手工创建一个clearcase的安装目录,如c:\Program Files\Rational\clearcase\bin,将clearcase客户端安装程序中的libatriaxdr.dll文件拷贝到c:\Program Files\Rational\clearcase\bin目录下。
2.运行setup.exe 文件,出现图1画面,点击“下一步”。
3.出现图2画面,选中“Rational Clearcase LT Client”, 点击“下一步”。
4.出现图3,点击“确定”。
5.出现图4,选中复选框“Yes, I accept the agreement.”,然后点击“下一步”。
6.出现图5,选择“Typical”典型安装,并给出安装路径(一定是手工创建的那个目录并且指到Rational就可以啦),然后点“下一步”。
图57.出现图6,在输入框中输入“cc”,点击“下一步”,开始安装。
图68.当出现图7时,选中“Restart”,点击“完成”。
使用clearcase管理工作文档

使用Clear Case管理工作文档1开始使用Clear Case1开始使用Clear Case (1)1.1进入ClearCase Explorer (2)1.2创建自己的view (2)2把工作文档加入ClearCase管理 (7)2.1文档已经存在的情况 (7)2.2把新建的文档放入ClearCase下管理 (9)2.3把目录加入ClearCase配置管理 (9)3在ClearCase Explorer下工作的基本操作 (10)3.1check out/check in 操作 (10)3.2update操作 (13)3.3删除文件、重命名等基本操作 (15)4进一步使用ClearCase (16)4.1修改Load Rules (16)4.2对比文件的不同版本 (18)4.2.1 对比当前版本和上一版本 (18)4.2.2 对比文档的任意两个版本 (19)4.3选取文件的特定版本 (20)4.3.1 修改配置规则(Config Spec) (22)5实行不规范操作后的补救方法 (23)6clearfsimport命令的使用 (24)1.1 进入ClearCase Explorer从开始菜单->程序->Rational ClearCase->ClearCase Explorer,或从桌面的快捷方式进入ClearCase Explorer。
如下图所示:1.2 创建自己的view1)选择快捷图标栏中的“Toolbox”->“Base ClearCase”(在上图的左下角),如图所示2)在左侧的快捷图标栏中选择“Create View”3)弹出View创建向导对话框,如下所示不做任何改动,直接点击“下一步”4)如果客户端安装了MVFS(支持动态视图Dynamic View),则会出现如下界面,选择“Snapshot”快照视图。
5)选择快照视图的位置使用缺省目录名,或改变“Where would you like it”下的文本框中列出的目录,注意:如要改变,必须保证最右侧目录的上级目录存在,即,如上图所示“D:\ClearCase_Views”必须存在,该目录用于保存从Server端传来的数据;最右侧目录的命名遵循“姓名缩写_内容简写”的格式,如“hyc_worklog”。
使用ClearCase进行代码版本管理快速指南

使用ClearCase进行代码版本管理快速指南使用ClearCase进行代码版本管理快速指南开发经理1、创建新的ClearCase项目(在Rational Project Explorer中),并将需要修改和访问的构件(Component)加入项目的配置中。
2、加入项目(在Rational Explorer中选择Join Project工具快捷方式),作为第一次加入项目的人员,同时需要创建一个开发流(其他人员都是重用该开发流)。
加入项目的结果,是创建两个视图,一个是开发视图(默认为Snapshot视图),一个是集成视图(默认为Dynamic视图)。
3、在集成视图中,在构件目录下建立目录结构,通常包括src、testsrc、lib、dist、build、bin、res等目录。
将本构件的源代码(Java)文件导入src目录中。
导入程序的命令格式为:clearfsimport -nsetevent -recurse 源程序路径目的路径例如:clearfsimport -nsetevent -recurse d:\src\* M:\zhangyong_NC3.1_int \NC_CIT\UAP\DDC 4、创建本项目集成流(Integration Stream)的基线(在Project Explorer中右键点击项目集成流,选择Make Baseline),并将其设置为推荐基线(在Project Explorer中右键点击项目集成流,选择Recommend Baseline)。
5、将开发流的构件基线更改为集成流最新创建的基线(右键点击开发视图->Properties ofView->Configuration->选中构件->Change->选中最新基线->Rebase)。
开发人员1、加入项目(在Rational Explorer中选择Join Project工具快捷方式),选择重用开发流(Advanced Option)。
Clearcase操作命令

ClearCase常用命令1.将整个目录导入clearcaseclearfsimport -r‘源路径’ ‘目标路径’2.加锁find . -name '*.*' -exec 'cleartool lock nuser userame1,username2 "%CLEARCASE_PN%"'3.解锁find . -name '*.*' -exec 'cleartool unlock "%CLEARCASE_PN%"'4.转换格式chtype -f compressed_file “fileName”5.查看VOB的基本信息和UUIDdes -l vob:.6.删除视图rmview -uuid "UUID"7.删除lost+foundfind . -name '*.*' -exec 'cleartool rmelem -f "%CLEARCASE_PN%"'8.查询某一天的修改记录cleartool lshis -r -since 07-dec9.最基本的操作cleartool co -nc filenamecleartool ci -nc filename10.查看自己总共co了多少文件cleartool lscheckout -cview -me -avobs11.make目录和文件cleartool mkdir -c comment newdirectorycleartool mkelem -c comment newfilename12.主线、分支文件合并//查找需要合并的文件cleartool findmerge . -fversion /main/TEST_Path -print//比较文件不同cleartool diff filename filename@@/main/TEST_Path/LATEST//查看最新版本cleartool lsvtree filename//合并cleartool merge -to filename filename @@/main/TEST_path/LATEST filename @@/main/LATEST13.标签相关cleartool mklbtype -nc TEST_LABELcleartool mklabel -r TEST_LABEL filenamecleartool rmtype lbtype:TEST_LABEL//给所有打上TEST_LABEL标签的文件打上TEST_LABEL标签cleartool mklabel -replace -version /main/TEST_LABEL TEST_LABEL *//查找打上TEST_LABEL标签的所有文件cleartool find . -version "lbtype(TEST_LABEL)" -print//查找打上TEST_LABEL和TEST_LABEL1标签的文件cleartool find . -element 'lbtype_sub(TEST_LABEL) && lbtype_sub(TEST_LABEL1)' -print14.察看某目录下的文件ls15.man/help命令cleartool man xxxcleartool help xxx16.放弃co某个文件cleartool unco -keep filenamecleartool unco -rm filename17.更改VOB的Owner:cleartool protectvob –chown root /vob/vob.vbs18. 更改VOB的Group:cleartool protectvob –chgrp alluser /vob/vob.vbs19.增加Additional Group:cleartool protectvob –add_group group1 /vob/vob.vbs20.删除Additional Group:cleartool protectvob –delete_group group1 /vob/vob.vbs21. 更改group、owner、modprotect -r -chgrp groupname–chown username -chmod 770 .22.创建VOBcleartool mkvob -tag /vobtags/test_code -c "Test" "D:\Data\Tets.vbs"23. Mount vobCleartool mount /vobtags/vob24. 创建视图cleartool mkview –tag test /ccvob/views/test.vws25. 设置当前视图cleartool setview test26.设置当前的activitycleartool setactivity activityname27. Check outCheck out一个文件Cleartool checkout [-reserve][-unreserve] filenameCheck out前目录Cleartool checkout .Check out当前目录下所有文件Cleartool Checkout –nc *.*Check out当前目录下所有的文件和目录中的文件cleartool find . $file -exec ‘cleartool checkout -nc $CLEARCASE_PN’28. Check inCheck in 一个文件Cleartool checkin filenameCheck in 当前目录Cleartool checkin .Check in 当前目录下所有文件.Cleartool Checkin –nc *.*Check in当前目录下所有的文件和目录中的文件cleartool find . $file -exec ‘cleartool checkin -nc –ide $CLEARCASE_PN’cl earcase下的一些常用命令1.最基本的操作cleartool co -nc xxx.cppcleartool ci -nc xxx.cpp2.查看自己总共co了多少文件cleartool lscheckout -cview -me -avobs3.最有用的命令cleartool man xxxcleartool help xxx4.新增目录和文件cleartool mkdir -c comment new_dircleartool mkelem -c comment new_file.cpp5.放弃co某个文件cleartool unco -keep file.cpp //保留当前所改动的文件cleartool unco -rm file.cpp6.主线、分支文件合并//查找需要合并的文件cleartool findmerge . -fversion /main/xxxx_path -print//比较文件不同cleartool diff file.cpp file.cpp@@/main/xxxx_path/LATEST//查看最新版本cleartool lsvtree file.cpp//合并cleartool merge -to file.cpp file.cpp@@/main/xxxx_path/LATEST file.cpp@@/main/LATEST 7.标签相关//新建标签cleartool mklbtype -nc TEST_LABEL//给文件打标签cleartool mklabel -r TEST_LABEL file.cpp//删除标签cleartool rmtype lbtype:TEST_LABEL//给所有打上TEST_LABEL标签的文件打上TEST_LABEL2标签cleartool mklabel -replace -version /main/TEST_LABEL TEST_LABEL2 * //查找打上TEST_LABEL标签的所有文件cleartool find . -version "lbtype(TEST_LABEL)" -print//查找打上TEST_LABEL和TEST_LABEL2标签的文件cleartool find . -element 'lbtype_sub(TEST_LABEL) && lbtype_sub(TEST_LABEL2)' -print8.将整个目录导入clearcaseclearfsimport -recurse /xxx/xxx/xxx/src /view/zhuj/home/vobs/cc_account/xxx/xxx/xxx/src目录(包括此目录下的所有目录和文件)被导入/view/zhuj/home/vobs/cc_account中(/view/zhuj/home/vobs/cc_account/src)clearcase命令收集1.最基本的操作cleartool co -nc xxx.cppcleartool ci -nc xxx.cpp2.查看自己总共co了多少文件cleartool lscheckout -cview -me -avobs3.最有用的命令cleartool man xxxcleartool help xxx4.新增目录和文件cleartool mkdir -c comment new_dircleartool mkelem -c comment new_file.cpp5.放弃co某个文件cleartool unco -keep file.cpp //保留当前所改动的文件cleartool unco -rm file.cpp6.主线、分支文件合并//查找需要合并的文件cleartool findmerge . -fversion /main/xxxx_path -print//比较文件不同cleartool diff file.cpp file.cpp@@/main/xxxx_path/LATEST//查看最新版本cleartool lsvtree file.cpp//合并cleartool merge -to file.cpp file.cpp@@/main/xxxx_path/LATEST file.cpp@@/main/LATEST7.标签相关//新建标签cleartool mklbtype -nc TEST_LABEL//给文件打标签cleartool mklabel -r TEST_LABEL file.cpp//删除标签cleartool rmtype lbtype:TEST_LABEL//给所有打上TEST_LABEL标签的文件打上TEST_LABEL2标签cleartool mklabel -replace -version /main/TEST_LABEL TEST_LABEL2 * //查找打上TEST_LABEL标签的所有文件cleartool find . -version "lbtype(TEST_LABEL)" -print//查找打上TEST_LABEL和TEST_LABEL2标签的文件cleartool find . -element 'lbtype_sub(TEST_LABEL) && lbtype_sub(TEST_LABEL2)' -print8.将整个目录导入clearcaseclearfsimport -recurse /xxx/xxx/xxx/src /view/zhuj/home/vobs/cc_account/xxx/xxx/xxx/src目录(包括此目录下的所有目录和文件)被导入/view/zhuj/home/vobs/cc_account中(/view/zhuj/home/vobs/cc_account/src)以上来自:__________________________________________________________ clearcase常用命令集锦1.将整个目录导入clearcaseclearfsimport -r‘源路径’ ‘目标路径’2.加锁find . -name '*.*' -exec 'cleartool lock nuser userame1,username2 "%CLEARCASE_PN%"'3.解锁find . -name '*.*' -exec 'cleartool unlock "%CLEARCASE_PN%"'4.转换格式chtype -f compressed_file “fileName”5.查看VOB的基本信息和UUIDdes -l vob:.6.删除视图rmview -uuid "UUID"7.删除lost+foundfind . -name '*.*' -exec 'cleartool rmelem -f "%CLEARCASE_PN%"'8.查询某一天的修改记录cleartool lshis -r -since 07-dec9.最基本的操作cleartool co -nc filenamecleartool ci -nc filename10.查看自己总共co了多少文件cleartool lscheckout -cview –me -vobs11.make目录和文件cleartool mkdir -c comment newdirectorycleartool mkelem -c comment newfilename12.主线、分支文件合并//查找需要合并的文件cleartool findmerge . -fversion /main/TEST_Path -print//比较文件不同cleartool diff filename[url=mailto:file.cpp@@/main/xxxx_path/LATEST]filename@@/main/TEST_Path/LATE //查看最新版本cleartool lsvtree filename//合并cleartool merge -to filename [url=mailto:file.cpp@@/main/xxxx_path/LATEST]filename@@/main/TEST_path/LATEST[url=mailto:file.cpp@@/main/LATEST]filename @@/main/LATEST13.标签相关cleartool mklbtype -nc TEST_LABELcleartool mklabel -r TEST_LABEL filenamecleartool rmtype lbtype:TEST_LABEL//给所有打上TEST_LABEL标签的文件打上TEST_LABEL标签cleartool mklabel -replace -version /main/TEST_LABEL TEST_LABEL *//查找打上TEST_LABEL标签的所有文件cleartool find . -version "lbtype(TEST_LABEL)" -print//查找打上TEST_LABEL和TEST_LABEL1标签的文件cleartool find . -element 'lbtype_sub(TEST_LABEL) && lbtype_sub(TEST_LABEL1)' -print14.察看某目录下的文件ls15.man/help命令cleartool man xxxcleartool help xxx16.放弃co某个文件cleartool unco -keep filenamecleartool unco -rm filename17.更改VOB的Owner:cleartool protectvob –chown root /vob/vob.vbs18. 更改VOB的Group:cleartool protectvob –chgrp alluser /vob/vob.vbs19.增加Additional Group:cleartool protectvob –add_group group1 /vob/vob.vbs20.删除Additional Group:cleartool protectvob –delete_group group1 /vob/vob.vbs21. 更改group、owner、modprotect -r -chgrp groupname–chown username -chmod 770 .22.创建VOBcleartool mkvob -tag /vobtags/test_code -c "Test" "D:\Data\Tets.vbs"23. Mount vobCleartool mount /vobtags/vob24. 创建视图cleartool mkview –tag test /ccvob/views/test.vws25. 设置当前视图cleartool setview test26.设置当前的activitycleartool setactivity activityname27. Check outCheck out一个文件Cleartool checkout [-reserve][-unreserve] filenameCheck out前目录Cleartool checkout .Check out当前目录下所有文件Cleartool Checkout –nc *.*Check out当前目录下所有的文件和目录中的文件cleartool find . $file -exec ‘cleartool checkout -nc $CLEARCASE_PN’28. Check inCheck in 一个文件Cleartool checkin filenameCheck in 当前目录Cleartool checkin .Check in 当前目录下所有文件.Cleartool Checkin –nc *.*Check in当前目录下所有的文件和目录中的文件cleartool find . $file -exec ‘cleartool checkin -nc –ide $CLEARCASE_PN’。
ClearCase使用手册

ClearCase使用手册(V1.0)目录前言 (4)1配置管理工具介绍 (5)1.1 V ISUAL S OURCE S AFE(VSS) (5)1.2 C ONCURRENT V ERSION S YSTEM(CVS) (5)1.3 C LEAR C ASE (6)1.4 配置管理工具对比 (6)2CLEARCASE介绍 (7)2.1 C LEAR C ASE基本概念 (7)2.2 C LEAR C ASE特点 (8)2.2.1基本组成形式 (8)2.2.2开发模式 (8)2.2.3ClearCase特点 (9)3环境准备 (9)3.1 C LEARCASE系统客户端配置方案 (9)3.1.1客户端支持的操作系统包括 (9)3.1.2客户端环境要求 (9)3.2 C LEARCASE的服务器 (10)3.2.1网络要求 (10)3.2.2操作系统要求 (10)3.2.3硬件要求 (10)3.3 C LEARCASE安装前检查 (10)3.3.1ClearCase部署准备工作 (10)3.3.2Clercase安装前检查 (11)4服务器使用手册 (12)4.1 安装C LERCASE (12)4.1.1环境检查 (12)4.1.2安装ClearCase (12)4.2 UCM使用 (24)4.2.1VOB建立 (24)4.2.2COMP建立 (28)4.2.3Project建立 (30)4.2.4Stream建立 (33)4.2.5View建立 (35)4.2.6Security设置 (38)4.2.7数据初始化 (39)4.2.7.1 VSS数据初始化 (39)4.2.7.2 CVS数据初始化 (41)4.2.7.3 File数据初始化 (44)4.2.7.4 ClearCase数据初始化 (44)4.2.8常用命令 (45)5客户端使用手册 (46)5.1 安装C LEAR C ASE (46)5.1.1安装前准备 (46)5.1.2客户端安装 (49)5.1.3安装完毕检查 (53)5.2 参加P ROJECT (54)5.3 日常变更操作 (58)5.4 提交开发任务 (61)5.5 版本同步 (64)5.6 使用技巧 (68)6日常操作 (69)6.1 C LEAR C ASE备份 (69)6.1.1VOB备份 (69)6.1.2VIEW备份 (70)6.1.3注册项备份 (70)6.2 C LEAR C ASE恢复 (70)7项目实例 (77)前言本手册是公司内部使用IBM Rational配置管理工具ClearCase的统一变更管理流程UCM 的用户使用手册。
- 1、下载文档前请自行甄别文档内容的完整性,平台不提供额外的编辑、内容补充、找答案等附加服务。
- 2、"仅部分预览"的文档,不可在线预览部分如存在完整性等问题,可反馈申请退款(可完整预览的文档不适用该条件!)。
- 3、如文档侵犯您的权益,请联系客服反馈,我们会尽快为您处理(人工客服工作时间:9:00-18:30)。
ClearCase客户端操作指导(仅供内部使用)手册编号:版本:V1.0编写者:于绒北京瑞斯康达科技发展股份有限公司Beijing Raisecom Science Co., Ltd北京瑞斯康达科技发展股份有限公司目录CLEARCASE 使用指导 ....................................................................................................................... - 1 -1一些基本概念 ........................................................................................................................... - 1 -1.1VOB的概念 (1)1.2VIEW的概念 (2)1.3VIEW的C ONFIG S PEC (4)1.4C HECK I N 和C HECK O UT (4)1.5H IJACK (5)2使用CLEARCASE的基本流程 ........................................................................................... - 5 -2.1首先安装CLEARCASE C LIENT 端软件 (6)2.1.1安装须知 ................................................................................................................... - 6 -2.1.2安装图示 ................................................................................................................. - 13 -2.2创建一个视图 (16)2.3元素受控,CHECH IN,CHECH OUT,V ERSION T REE 等等 (19)2.4VIEW C ONFIG S PEC 和工作空间 (27)2.5标签和分支 (28)2.5.1标签(label)......................................................................................................... - 30 -2.5.2分支(branch)..................................................................................................... - 31 -2.6分支和归并 . (34)2.7版本提交测试及发布注意事项 (37)IClearcase 使用指导1 一些基本概念开始时,需要提到一些基本概念。
这些基本概念是进一步阅读的基础,但也并不意味着要完全理解,有个大体的印象就可以了。
在第二部分开发人员使用CLEARCASE 的工作流程中会进一步体现这些概念。
读者在阅读第二部分的时候,应该自己动手去试验,争取大部分图片都能在你的试验当中能够显示类似的图片来。
1.1VOB 的概念VOB 的全称是Version Object Base,版本对象库,是CLEARCASE 特有,特定的数据库系统,当中存放的内容具有版本的概念,保存和记录开发者的历史记录,可以让开发者回溯到任意时期,任意版本的开发阶段。
VOB 库中除了用于存放这些需要版本历史记录的元素之外,还需要一些用来更好的组织,描述那些具有版本历史纪录的元素,附加于元素之上的其他内容,提供给元素更多的特性,用来支持并行开发,权限控制。
如果开发者对关系型数据库有所了解的话,可以作一个类比。
比如关系型数据库除了存放最为重要的用户业务数据记录之外,也需要一些存放一些SQL 程序,触发器等等。
图1举例说明了VOB 库的逻辑概念:该VOB 库中包含了四个文件元素,每个文件有个main 的主干分支,该分支上有代表元素不同版本的数字。
该图来自于CLEARCASE 的帮助手册,在CLEARCASE 当中,元素(Element)是具有版本纪录的对象,包括了文件(file)和目录(directory) ,目录的版本就是目录下的文件增加和删除等的变化,目录下文件内容的改变不会影响目录的版本。
Figure 1: VOB 和VOB 中的元素- 1 -1.2VIEW 的概念VOB 一般是配置管理人员按照项目的配置管理计划在VOB 服务器上创建,根据项目的大小,决定所创建的VOB 的大小,在大的项目中,一个子系统模块对应一个VOB。
开发人员也许并不关心这些内容,而是更关注于:我如何将我的文件和代码放入到VOB 中实现版本控制呢?我怎么样才能够观察,处理VOB 库中的内容?如果熟悉某些关系型的数据库系统,比如Oracle 等,Oracle 提供了除了SQL 语句之外,也提供了视图(VIEW)来帮助使用者观察数据库中的数据记录。
读者也非常熟悉相机,通过调节相机的镜头(VIEW)来观察景物。
类似的,CLEARCASE 中通过VIEW 来观察、操作VOB 中的内容。
图2形象的说明了VIEW 工作时的逻辑含义:Figure 2: VIEW 和VOB 的关系- 2 -VIEW 通过某些规则来获取VOB 中元素中的某个版本,并组织成操作系统中的目录结构。
在CLEARCASE 中通过MVFS(Multi-Version File System)在Windows 的操作系统中会为VIEW 创建一个虚拟的盘符,公司采用Windows 操作系统平台,创建的视图为动态视图。
从VIEW 的盘符下,我们可以观察元素的某个选定的版本,并可以将原来不在VOB 中的文件“受控(Add toSource Control)”到VOB 中,所以VIEW 是开发人员的工作空间。
在图2 中,只是说明了从VOB选择元素特定版本的一种关系,在VIEW 中,还可以存在视图私有文件,也就是我们还没有将这些元素受控到VOB 中,VOB 中还不存在这样的元素,只存放在视图的存储池(View Storage)。
在此提一下,客户端安装好CLEARCASE 之后,在程序菜单中,就会有一个创建视图的向导。
视图一般创建在用户的计算机上的一个共享目录下(View Storage Directory),因为CLEARCASE 的用户权限直接来自于Windows 操作系统的域用户。
CLEARCASE 本身的进程需要一个自动在域中创建的用户身份来运行,同时也为了其他的开发者(一般会是一个组)来访问你的视图。
所以该目录的共享权限至- 3 -少要包括这些用户的权限,如何设定这个共享目录的权限是配置管理员的工作。
1.3VIEW 的Config Spec视图的Config Spec 是视图的一个属性,但是将它单独拿出来说,是因为它的重要性。
ConfigSpec 是一个“高级”的“滤镜”,说是滤镜是因为它可以帮我们选择VOB 中元素的某个指定的版本来供我们观察和操作。
说是“高级”,是因为滤镜的规格,可以由一些简单的语句编写组成,非常灵活,功能强大。
缺省的规格是:Element * CHECKEDOUTElement * /main/LATEST注释:第一句中CHECHEDOUT 用来表示当VOB 中的元素某个版本被Check Out,取得该版本上修改权,视图应该首先选择这个版本。
如果第一句得不到元素的某个版本,那就执行下一句,该语句选择元素的main 分支上的最新版本。
在复杂项目的开发中,这些缺省的规则是不够用的,我们要在这里两个语句中间增加其他的内容。
更具体的精彩内容,CLEARCASE 的帮助手册cc_ref1.pdf文档中有详细的说明。
后面还会提到一些基本的。
1.4Check In 和Check Out前面提到:VOB 库中存放具有版本历史记录的元素,比如拿文件元素来说,文件将具有多个版本。
这些版本当然是由开发人员来产生。
在ClearCase 中(包括其他版本管理工具),如果我们要修改其中的元素,首先要做Check Out 的操作,意味着取得文件的修改权;当修改完成了,通过Check In 的操作,将你的修改保存到ClearCase 的VOB 库中,并形成一个新的版本。
让我们用一个图来作为第一部分“一些基本概念”的结束语吧:Figure 3: VOB、VIEW 和VIEW Config Spec 的关系- 4 -- 5 -1.5 Hijack劫持:在ClearCase Exporer 中为何文件前有 的标记?带有这种标记的文件即是Hijacked (劫持)文件。
它是因为在使用静态View 时,如在非checkout 文件的状态下修改了文件,之后如updata 或checkout 时系统就会提示。
1. 在本地修改你需要改的文件,调试,review ,保存。
(不checkout )2. 更新view 或者文件对应的目录。
(update )3. 你修改的文件都会变成状态。
4. 进行checkout ,再checkin 或者undo 。
2 使用CLEARCASE 的基本流程有了前面的三个重要的基本概念的介绍,具体该如何一步步的做?将是大家希望得到的答案。
建议阅读者将本部分的内容作为一个试验手册,练习手册来对待,而不是像阅读小说一样的快速,配置管理员应提供一个试验VOB ,做为你的练习场地。
(有待申请)2.1首先安装CLEARCASE Client 端软件2.1.1 安装须知安装ClearCase前,确认:域帐号:姓名全拼密码:raisecom1!域控制器名称:soft1服务器计算机名:ccserver域服务器IP:192.168.9.101)加入soft1域;设置默认DNS为域服务器的IP;网上邻居->属性->本地链接->属性->常规->Internet协议(TCP/IP),首选DNS 改为域服务器的IP,备用DNS可设置为原首选DNS。
这里一定要记得,不能将首选DNS重新改为别的地址,否则无法正常使用ClearCase。
- 6 -- 7 -我的电脑—>属性->计算机名->更改:选择“域”选项->输入域控制器名称,计算机名为本人登录域的域帐户;- 8 -如果在此操作以前此机器没有加入过任何域,那么“隶属于”选项默认选择在“工作组”上,那么只需要选择“域”选项输入域控制器名即可;如果在此操作以前此机器加入过与ClearCase无关的任何域,那么“隶属于”选项默认选择在“域”上,必须现退出目前的域之后在加入到与ClearCase有关的域。
