美蛋入手:Linksys EA6200 双频路由器翻新版开箱
EX6200 WiFi Range Extender 安装指南 如何安装高功率双频Gigabit端口
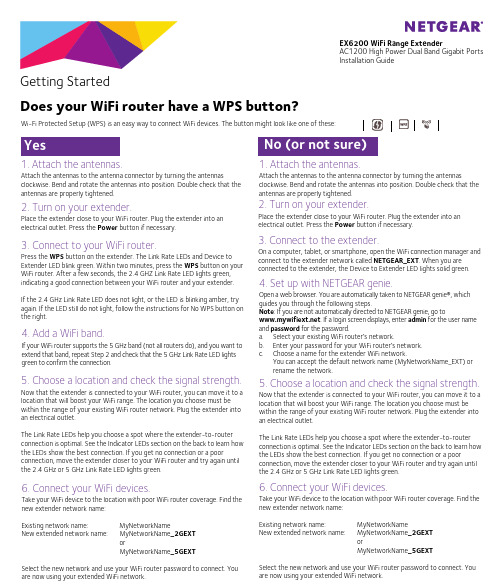
Getting Started3. Connect to your WiFi router.Press the WPS button on the extender. The Link Rate LEDs and Device to Extender LED blink green. Within two minutes, press the WPS button on your WiFi router. After a few seconds, the 2.4 GHZ Link Rate LED lights green, indicating a good connection between your WiFi router and your extender.If the 2.4 GHz Link Rate LED does not light, or the LED is blinking amber, try again. If the LED still do not light, follow the instructions for No WPS button on the right.4. Add a WiFi band.If your WiFi router supports the 5 GHz band (not all routers do), and you want to extend that band, repeat Step 2 and check that the 5 GHz Link Rate LED lights green to confirm the connection.6. Connect your WiFi devices.Take your WiFi device to the location with poor WiFi router coverage. Find the new extender network name:Existing network name:MyNetworkNameNew extended network name:MyNetworkName _2GEXT orMyNetworkName _5GEXTSelect the new network and use your WiFi router password to connect. You are now using your extended WiFi network.5. Choose a location and check the signal strength.Now that the extender is connected to your WiFi router, you can move it to a location that will boost your WiFi range. The location you choose must be within the range of your existing WiFi router network. Plug the extender into an electrical outlet.The Link Rate LEDs help you choose a spot where the extender-to-router connection is optimal. See the Indicator LEDs section on the back to learn how the LEDs show the best connection. If you get no connection or a poorconnection, move the extender closer to your WiFi router and try again until the 2.4 GHz or 5 GHz Link Rate LED lights green.3. Connect to the extender.On a computer, tablet, or smartphone, open the WiFi connection manager and connect to the extender network called NETGEAR_EXT . When you are connected to the extender, the Device to Extender LED lights solid green.4. Set up with NETGEAR genie.Open a web browser. You are automatically taken to NETGEAR genie®, which guides you through the following steps.Note : If you are not automatically directed to NETGEAR genie, go to . If a login screen displays, enter admin for the user name and password for the password.a.Select your existing WiFi router’s network.b.Enter your password for your WiFi router’s network.c.Choose a name for the extender WiFi network.You can accept the default network name (MyNetworkName_EXT) or rename the network.6. Connect your WiFi devices.Take your WiFi device to the location with poor WiFi router coverage. Find the new extender network name:Existing network name:MyNetworkNameNew extended network name:MyNetworkName _2GEXT orMyNetworkName _5GEXTSelect the new network and use your WiFi router password to connect. You are now using your extended WiFi network.Does your WiFi router have a WPS button?2. Turn on your extender.Place the extender close to your WiFi router. Plug the extender into an electrical outlet. Press the Power button if necessary.Wi-Fi Protected Setup (WPS) is an easy way to connect WiFi devices. The button might look like one of these:5. Choose a location and check the signal strength.Now that the extender is connected to your WiFi router, you can move it to a location that will boost your WiFi range. The location you choose must be within the range of your existing WiFi router network. Plug the extender into an electrical outlet.The Link Rate LEDs help you choose a spot where the extender-to-router connection is optimal. See the Indicator LEDs section on the back to learn how the LEDs show the best connection. If you get no connection or a poorconnection, move the extender closer to your WiFi router and try again until the 2.4 GHz or 5 GHz Link Rate LED lights green.2. Turn on your extender.Place the extender close to your WiFi router. Plug the extender into an electrical outlet. Press the Power button if necessary.1. Attach the antennas.Attach the antennas to the antenna connector by turning the antennasclockwise. Bend and rotate the antennas into position. Double check that the antennas are properly tightened.1. Attach the antennas.Attach the antennas to the antenna connector by turning the antennasclockwise. Bend and rotate the antennas into position. Double check that the antennas are properly tightened.WPS buttonLAN portsReset button Power button Power inputHardwareSupportAfter installing your extender, locate the serial number on the label and use it to register your product at https:// . You must register your product before you can use NETGEAR telephone support. NETGEAR recommends registering your product through the NETGEAR website. For product updates and web support, visit .You can get the user manual online at or through a link in the product’s user GEAR recommends that you use only the official NETGEAR support resources.For the current EU Declaration of Conformity, visit: /app/answers/detail/a_id/11621/. For regulatory compliance information, visit /about/regulatory/. See the regulatory compliance document before connecting the power supply.NETGEAR, the NETGEAR logo, and Connect with Innovation are trademarks and/or registered trademarks of NETGEAR, Inc. and/or its subsidiaries in the United States and/or other countries. Information is subject to change without notice. Other brand and product names are registered trademarks or trademarks of their respective holders. © NETGEAR, Inc. All rights reserved.NETGEAR, Inc. 350 East Plumeria Drive, San Jose, CA 95134 USA January 2014Indicator LEDs2.4 GHz Link Rate LEDSolid green . Best connectionSolid amber . Good connection Solid red . Poor connection Off . No connection5 GHz Link Rate LEDSolid green . Best connection Solid amber . Good connection Solid red . Poor connection Off . No connectionDevice to Extender LEDSolid green . The extender and device are connected.LAN LEDsSolid green . The LAN port has detected an Ethernet link with the extender.USB LEDSolid green . A USB device is connected tothe extender.。
Netgear A6200 USB WiFi Adapter安装指南说明书
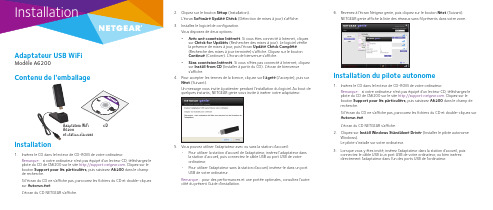
InstallationAdaptateur USB WiFiModèle A6200Contenu de l'emballage2. Cliquez sur le bouton Setup (Installation).L'écran Software Update Check (Détection de mises à jour) s'affiche. 3. Installez le logiciel de configuration.Vous disposez de deux options :•Avec une connexion Internet . Si vous êtes connecté à Internet, cliquez sur Check for Updates (Rechercher des mises à jour). Le logiciel vérifie la présence de mises à jour, puis l'écran Update Check Complete (Recherche des mises à jour terminée) s'affiche. Cliquez sur le bouton Continue (Continuer). L'écran de bienvenue s'affiche.•Sans connexion Internet . Si vous n'êtes pas connecté à Internet, cliquez sur Install from CD (Installer à partir du CD). L'écran de bienvenue s'affiche.4. Pour accepter les termes de la licence, cliquez sur I agree (J'accepte), puis surNext (Suivant).Un message vous invite à patienter pendant l'installation du logiciel. Au bout de quelques instants, NETGEAR genie vous invite à insérer votre adaptateur.5. Vous pouvez utiliser l'adaptateur avec ou sans la station d'accueil :• Pour utiliser la station d'accueil de l'adaptateur, insérez l'adaptateur dansla station d'accueil, puis connectez le câble USB au port USB de votre ordinateur.•Pour utiliser l'adaptateur sans la station d'accueil, insérez-le dans un port USB de votre ordinateur.Remarque : pour des performances et une portée optimales, consultez l'autrecôté du présent Guide d'installation.Adaptateur WiFi A6200et station d'accueil6. Revenez à l'écran Netgear genie, puis cliquez sur le bouton Next (Suivant).NETGEAR genie affiche la liste des réseaux sans fil présents dans votre zone.Installation du pilote autonome1. Insérez le CD dans le lecteur de CD-ROM de votre ordinateur.Remarque : si votre ordinateur n'est pas équipé d'un lecteur CD, téléchargez le pilote du CD de l'A6200 sur le site . Cliquez sur le bouton Support pour les particuliers , puis saisissez A6200 dans le champ de recherche.Si l'écran du CD ne s'affiche pas, parcourez les fichiers du CD et double-cliquez sur Autorun.exe .L'écran du CD NETGEAR s'affiche.2. Cliquez sur Install Windows Standalone Driver (Installer le pilote autonomeWindows).Le pilote s'installe sur votre ordinateur.3. Lorsque vous y êtes invité, insérez l'adaptateur dans la station d'accueil, puisconnectez le câble USB à un port USB de votre ordinateur, ou bien insérez directement l'adaptateur dans l'un des ports USB de l'ordinateur.CD Installation1. Insérez le CD dans le lecteur de CD-ROM de votre ordinateur.Remarque : si votre ordinateur n'est pas équipé d'un lecteur CD, téléchargez le pilote du CD de l'A6200 sur le site . Cliquez sur le bouton Support pour les particuliers , puis saisissez A6200 dans le champ de recherche.Si l'écran du CD ne s'affiche pas, parcourez les fichiers du CD et double-cliquez sur Autorun.exe .L'écran du CD NETGEAR s'affiche.Septembre 2014NETGEAR, Inc.350 East Plumeria Drive San Jose, CA 95134, Etats-UnisNETGEAR, le logo NETGEAR et Connect with Innovation sont des marques commerciales et/ou des marques déposées de NETGEAR, Inc. et/ou des filiales de NETGEAR aux Etats-Unis et/ou dans d'autrespays. Les informations sont sujettes à changement sans préavis. © NETGEAR, Inc. Tous droits réservés.Connexion à un réseau sans filVous pouvez vous connecter à un réseau sans fil à partir de NETGEAR genie. Vous pouvez également utiliser la fonctionnalité WPS (Wi-Fi Protected Setup) si votre routeur sans fil est compatible.¾Pour vous connecter au réseau avec Netgear genie :1. Connectez l'adaptateur à un autre port USB de votre ordinateur.2. Cliquez sur l'icône NETGEAR genie qui s'affiche dans la barre des tâchesWindows ou sur le bureau.L'écran d'accueil de NETGEAR genie s'affiche.3. Cliquez sur le bouton Join a Network (Se connecter à un réseau).4. Sélectionnez le réseau sans fil.5. Cliquez sur le bouton Connect (Se connecter).6. Si le réseau est sécurisé, saisissez le mot de passe ou la clé réseau.L'adaptateur se connecte au réseau (l'opération peut prendre plusieurs minutes). Vos paramètres sont enregistrés dans un profil. ¾Pour vous connecter au réseau via WPS :1. Appuyez sur le bouton WPS situé sur l'adaptateur et maintenez-le enfoncépendant deux secondes.2. Dans un délai de deux minutes, appuyez sur le bouton WPS situé sur votrerouteur ou passerelle sans fil.L'adaptateur se connecte au réseau (l'opération peut prendre plusieurs minutes). Vos paramètres sont enregistrés dans un profil.Vérification de l'état de la connexionLorsque vous installez votre adaptateur, l'icône NETGEAR genie s'affiche dans la zone de notification Windows et sur le bureau. Double-cliquez sur cette icône pour ouvrir NETGEAR genie et apporter des modifications ou établir une connexion vers un autre réseau sans fil. La couleur de l'icône indique le niveau de puissance de votreconnexion sans fil :Blanc. Connexion forte Jaune. Connexion faible Rouge . Aucune connexionSi vous retirez l'adaptateur, NETGEAR genie n'est pas disponible et l'icône ne s'affiche pas. Elle s'affiche à nouveau lorsque vous réinsérez l'adaptateur.Augmentation de la portée et amélioration des performancesPour augmenter la portée et améliorer les performances de l'adaptateur, vous pouvez faire pivoter la partie supérieure de manière à la positionnerhorizontalement :Cette position perpendiculaire à l'adaptateur permet de déployer les antennes internes et d'améliorer les performances Wi-Fi.AssistanceNous vous remercions pour l'achat de ce produit NETGEAR.Après l'installation de votre appareil, notez le numéro de série inscrit sur l'étiquette. Il vous sera nécessaire pour enregistrer votre produit à l'adresse https:// .Vous devez enregistrer votre produit avant de pouvoir utiliser l'assistance téléphonique de NETGEAR. NETGEAR vous recommande d'enregistrer votre produit sur le site Web de NETGEAR.Pour obtenir des mises à jour de produits et accéder au support Web, rendez-vous à l'adresse . NETGEAR vous recommande d'utiliser uniquement les ressources d'assistance officielles de NETGEAR.Vous pouvez télécharger le manuel de l'utilisateur en ligne à l'adresse ou via un lien dans l'interface utilisateur du produit.Pour consulter la déclaration de conformité UE complète, rendez-vous à l'adresse /app/answers/detail/a_id/11621/.Pour obtenir les informations relatives à la conformité légale, rendez-vous sur : /about/regulatory/.Avant de brancher l'alimentation, reportez-vous au document de conformité légale.Pour une utilisation en intérieur uniquement. En vente dans tous les Etats membres del’UE, les Etats de l’AELE et la Suisse.Bouton WPS。
洋垃圾DIR-868L复活记
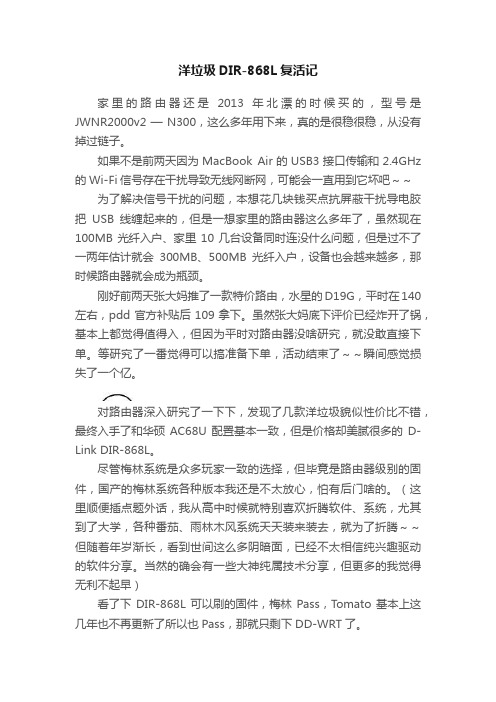
洋垃圾DIR-868L复活记家里的路由器还是2013年北漂的时候买的,型号是JWNR2000v2 — N300,这么多年用下来,真的是很稳很稳,从没有掉过链子。
如果不是前两天因为MacBook Air的USB3接口传输和2.4GHz 的Wi-Fi信号存在干扰导致无线网断网,可能会一直用到它坏吧~~为了解决信号干扰的问题,本想花几块钱买点抗屏蔽干扰导电胶把USB线缠起来的,但是一想家里的路由器这么多年了,虽然现在100MB光纤入户、家里10几台设备同时连没什么问题,但是过不了一两年估计就会300MB、500MB光纤入户,设备也会越来越多,那时候路由器就会成为瓶颈。
刚好前两天张大妈推了一款特价路由,水星的D19G,平时在140左右,pdd官方补贴后109拿下。
虽然张大妈底下评价已经炸开了锅,基本上都觉得值得入,但因为平时对路由器没啥研究,就没敢直接下单。
等研究了一番觉得可以搞准备下单,活动结束了~~瞬间感觉损失了一个亿。
对路由器深入研究了一下下,发现了几款洋垃圾貌似性价比不错,最终入手了和华硕AC68U配置基本一致,但是价格却美腻很多的D-Link DIR-868L。
尽管梅林系统是众多玩家一致的选择,但毕竟是路由器级别的固件,国产的梅林系统各种版本我还是不太放心,怕有后门啥的。
(这里顺便插点题外话,我从高中时候就特别喜欢折腾软件、系统,尤其到了大学,各种番茄、雨林木风系统天天装来装去,就为了折腾~~但随着年岁渐长,看到世间这么多阴暗面,已经不太相信纯兴趣驱动的软件分享。
当然的确会有一些大神纯属技术分享,但更多的我觉得无利不起早)看了下DIR-868L可以刷的固件,梅林Pass,Tomato基本上这几年也不再更新了所以也Pass,那就只剩下DD-WRT了。
刷这个DD-WRT可真是一波三折,所以把正确的过程记录一下备忘:用老版本的factory-to-ddwrt.bin这是最最最重要的一点,我就是用了最新的版本,刷了直接挂掉!factory-to-ddwrt.bin的问题,其实官方也说了,在If flashing from the stock firmware to dd-wrt doesn't work, download a factory-to-ddwrt.bin firmware between 01-20-2015-r25974 .. 05-28-2015-r27096. Afterwards try to upgrade to the latest dd-wrt build.常进入界面!DD-WRT官方指导的坑爹处这是D-Link DIR-868L刷DD-WRT官方的文档(/wiki/index.php/D-Link_DIR-868L),我只能说真的很坑爹!尤其是第4条:WTF!路由器地址因为刷了DD-WRT后变成了192.168.1.1(官方固件的地址是192.168.0.1),指导说明竟然教你把电脑IP手动改成192.168.1.1 进入路由器真是坑爹的姿势!事实上,只要刷了factory-to-ddwrt.bin正常后,不用手动设置,你会自动被分配地址,只要访问192.168.1.1 即可进入路由器。
网件r6200安装指南说明书
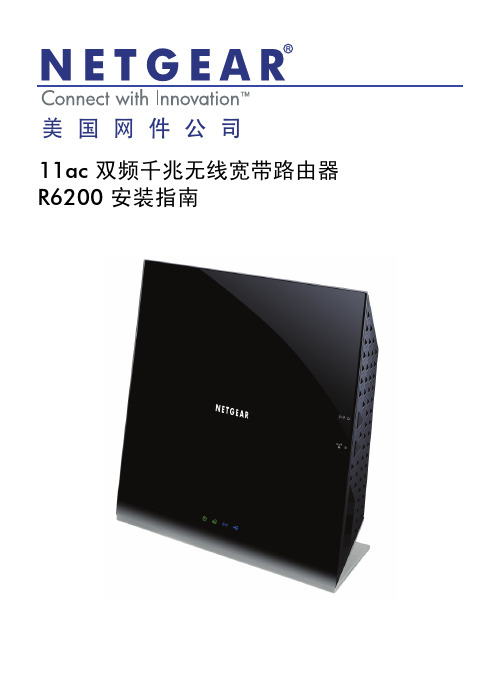
美国网件公司11ac 双频千兆无线宽带路由器R6200 安装指南包装内容注意:•某些国家销售的R6200包装中附有一张资源CD 。
•路由器使用前,请撕开其表面的塑料薄膜。
网线R6200电源适配器目录路由器安装 . . . . . . . . . . . . . . . . . . . . . . . . . . . . . . . . . . . . . . . . .4第一步将R6200接入网络 . . . . . . . . . . . . . . . . . . . . . . . . .4第二步登录路由器管理界面 . . . . . . . . . . . . . . . . . . . . . . . .5第三步将路由器连上因特网 . . . . . . . . . . . . . . . . . . . . . . . .6第四步预设无线密码 . . . . . . . . . . . . . . . . . . . . . . . . . . . . .11第五步计算机成功连接无线网络 . . . . . . . . . . . . . . . . . . . .12 ReadySHARE®︱易共享 •USB存储功能 . . . . . . . . . . . . . . . .13 NETGEAR Genie™ 精灵 . . . . . . . . . . . . . . . . . . . . . . . . . . . . .15路由器安装本节将介绍路由器的安装使用方法。
只需5步即可完成全部设置,让您享受上网冲浪的乐趣。
第一步将R6200接入网络1. ADSL/ Cable Modem接入,连接方式如下:使用一条网线将Modem连接到路由器的因特网端口(黄色标识),2. 若宽带网线到户,没有Modem,连接方式如下:使用一条网线将计算机连接到路由器的局域网端口,运营商提供的宽带线或宽带接口,直接连接到路由器的因特网端口(黄色标识)。
Linksys新54M无线路由器WRT54G2配置详解
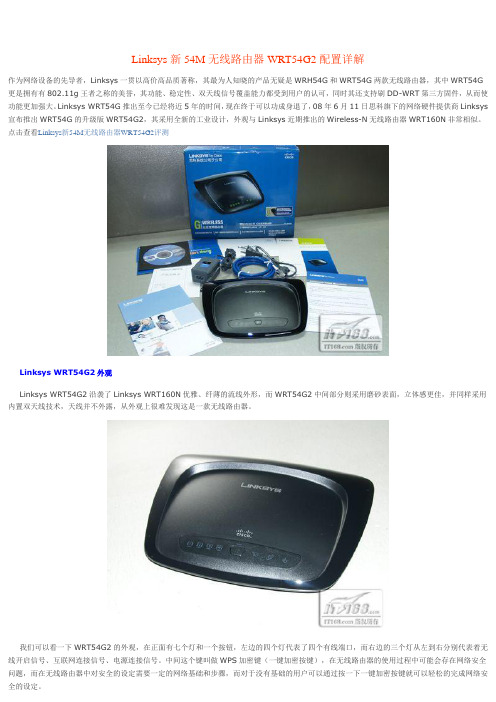
Linksys新54M无线路由器WRT54G2配置详解作为网络设备的先导者,Linksys一贯以高价高品质著称,其最为人知晓的产品无疑是WRH54G和WRT54G两款无线路由器,其中WRT54G 更是拥有有802.11g王者之称的美誉,其功能、稳定性、双天线信号覆盖能力都受到用户的认可,同时其还支持刷DD-WRT第三方固件,从而使功能更加强大。
Linksys WRT54G推出至今已经将近5年的时间,现在终于可以功成身退了,08年6月11日思科旗下的网络硬件提供商Linksys 宣布推出WRT54G的升级版WRT54G2,其采用全新的工业设计,外观与Linksys近期推出的Wireless-N无线路由器WRT160N非常相似。
点击查看Linksys新54M无线路由器WRT54G2评测Linksys WRT54G2外观Linksys WRT54G2沿袭了Linksys WRT160N优雅、纤薄的流线外形,而WRT54G2中间部分则采用磨砂表面,立体感更佳,并同样采用内置双天线技术,天线并不外露,从外观上很难发现这是一款无线路由器。
我们可以看一下WRT54G2的外观,在正面有七个灯和一个按钮,左边的四个灯代表了四个有线端口,而右边的三个灯从左到右分别代表着无线开启信号、互联网连接信号、电源连接信号。
中间这个键叫做WPS加密键(一键加密按键),在无线路由器的使用过程中可能会存在网络安全问题,而在无线路由器中对安全的设定需要一定的网络基础和步骤,而对于没有基础的用户可以通过按一下一键加密按键就可以轻松的完成网络安全的设定。
这款54M无线路由还提供给了四个10M/100M自适应LAN口和1个10M/100M自适应WAN口,在端口下面非别有不同颜色的标签标示,消费者可以在进行无线上网的时候,也可以进行有线网络连接。
WRT54G2的电源上设计也有所改观,在电源插头和变压器采用了分体连接的设计,节省了在接线板上的空间,而且电源插头采用了双口插头,更适合于中国用户的使用。
NETGEAR WAX214双频WiFi6 AX1800点访问设备说明书
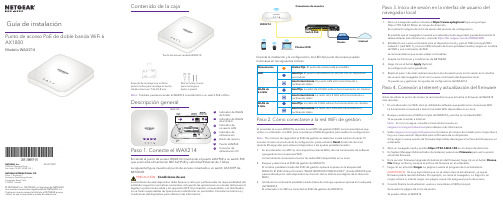
NETGEAR, Inc.350 East Plumeria Drive, San Jose, CA 95134 (EE. UU.)© NETGEAR, Inc., NETGEAR y el logotipo de NETGEAR son marcas comerciales registradas de NETGEAR, Inc. Cualquier marca comercial distinta a NETGEAR que se utilice, se usa únicamente a modo de referencia.JULIO 2021NETGEAR INTERNATIONAL LTD Floor 1, Building 3,University Technology Centre Curraheen Road, Cork, T12EF21, IrlandaPunto de acceso PoE de doble banda WiFi 6 AX1800Guía de instalaciónEncienda el punto de acceso WAX214 conectando el puerto LAN/PoE a un switch PoE que suministre alimentación 802.3af (PoE) y velocidad Ethernet de 1 Gbps. La siguiente figura muestra el punto de acceso conectado a un switch GS310TP de NETGEAR.Soporte de montaje con orificios para tornillos para montaje en techo sólido o barra en T de 23,8 mm.Dos tornillos y tacos para montaje en techo o paredAl encender el nuevo WAX214, se activa la red WiFi de gestión (SSID). Le recomendamos que utilice un ordenador con WiFi para conectarse al SSID de gestión para realizar la configuración. Nota: Por motivos de seguridad, el SSID de gestión se desactiva si está inactivo durante 15 minutos. Si esto ocurre durante la configuración, pulse el botón Reset (botón de reinicio) durante 20 segundos para dolver el dispositivo a los ajustes predeterminados.1. En el ordenador con WiFi (u otro dispositivo cliente WiFi), abra la herramienta de softwareque gestiona las conexiones WiFi.La herramienta comenzará a buscar las redes WiFi disponibles en su zona.2. Busque y seleccione el SSID de gestión del WAX214.El nombre predeterminado del SSID de gestión aparece impreso en la etiqueta delWAX214. El SSID utiliza el formato "WAX214XXXXXX-CONFIG-ONLY", donde XXXXXX está personalizado para cada dispositivo (en función de los últimos seis dígitos de la dirección MAC).3. Introduzca la contraseña predeterminada (clave de red) que aparece impresa en la etiquetadel WAX214.El ordenador con WiFi se conectará al SSID de gestión del WAX214.Paso 2. Cómo conectarse a la red WiFi de gestión51. Abra un navegador web e introduzca https:// (que es igual quehttps://192.168.0.100) en el campo de dirección.Se mostrará la página de inicio de sesión del proceso de configuración.Es posible que el navegador muestre una advertencia de seguridad; puede descartarla. Si desea obtener más información, consulte https:///es/000062980/.2. Establezca una nueva contraseña para el dispositivo local y, para el SSID principal (WiFinetwork 1 [red WiFi 1], el único SSID activado de forma predeterminada), asigne un nombre de SSID y una contraseña de WiFi.Le recomendamos que anote ambas contraseñas.3. Acepte los Términos y condiciones de NETGEAR.4. Haga clic en el botón Apply (Aplicar).La configuración se ha guardado.5. Repita el paso 1 de estas indicaciones de inicio de sesión para iniciar sesión en la interfazde usuario del navegador local con la nueva contraseña del dispositivo local.Ya puede ver y gestionar los ajustes de configuración del WAX214.Paso 3. Inicio de sesión en la interfaz de usuario del navegador localAntes de utilizar el punto de acceso, le recomendamos que actualice al firmware de WAX214 más reciente.1. En el ordenador con WiFi, abra la utilidad de software que gestiona las conexiones WiFi.La herramienta comenzará a buscar las redes WiFi disponibles en su zona.2. Busque y seleccione el SSID principal del WAX214 y escriba la contraseña WiFi.Ya se puede conectar a Internet.Nota: Si no lo consigue, consulte el manual del usuario en /support/download para obtener más información.3. Visite /support/download e introduzca el número de modelo para comprobar sihay una nueva versión disponible para el firmware de su dispositivo.Si hay alguna nueva versión de firmware disponible, descargue el archivo de firmware en el ordenador.4. Abra un navegador web y escriba https://192.168.0.100 en el campo de dirección.5. En System Manager (Administrador del sistema), seleccione Firmware para ver la versiónactual del firmware.6. En la sección Firmware Upgrade (Actualización del firmware), haga clic en el botón ChooseFile (Elegir archivo) y busque el archivo de firmware en el ordenador.7. Haga clic en el botón Cargar . La página muestra el progreso de la actualización.ADVERTENCIA: Es muy importante que no se interrumpa la actualización, ya que el firmware podría resultar dañado. Por ejemplo, no cierre el navegador, no haga clic en ningún enlace ni intente cargar una página nueva. No apague el punto de acceso.8. Cuando finalice la actualización, vuelva a conectarse al SSID principal.Se muestra la página de inicio de sesión.Ya puede utilizar el WAX214.Paso 4. Conexión a Internet y actualización del firmwareinstalador seguir las normativas nacionales, incluyendo las operaciones en canales de frecuencia legales, la potencia de salida y los requisitos DFS. El proveedor, el revendedor o el distribuidor no se harán responsables de operaciones inalámbricas no permitidas. Consulte los términos y condiciones del dispositivo para obtener más información.Condiciones de usoDurante la instalación y la configuración, los LED del punto de acceso pueden iluminarse en los siguientes colores:Visite /support para obtener todas las respuestas a sus preguntas y acceder a las descargas más recientes.También podrá echar un vistazo a los útiles consejos de nuestra comunidad de NETGEAR en .Asistencia técnica y comunidadPara consultar la declaración de conformidad de la UE, visite https:///about/regulatory/.Consulte el documento de cumplimiento normativo antes de conectar la fuente de alimentación.No utilice este dispositivo en exteriores. La fuente PoE está diseñada únicamente para la conexión entre edificios.Aplicable solo a dispositivos de 6 GHz: Utilice este dispositivo solo en interiores. El funcionamiento de dispositivos de 6 GHz está prohibido en plataformas petrolíferas, coches, trenes, barcos y aeronaves, excepto que el funcionamiento de este dispositivo esté permitido en aviones grandes volando por encima de los 3000 metros. Elfuncionamiento de transmisores en la banda de 5,925-7,125 GHz está prohibido para el control o las comunicaciones con sistemas de aeronaves no tripuladas.Reglamentario y legal1. Marque la pared en la que desea insertar los tacosy tornillos proporcionados, que deben estar a 98,5 mm de distancia, e insértelos.Deje sobresalir de la pared cada tornillo unos6 mm para que pueda introducirlos en los orificios de la parte inferior del punto de acceso.La parte inferior del punto de acceso incluye dos orificios que permiten montarlo con dos tornillos insertados en una pared., de forma que el cable quepa en el espacio estrecho entre el punto de acceso y la superficie en la que se monte o coloque.Montaje en una pared sólida1. Deslice el soporte de 23,8 mm entre las guías de la parte inferior del punto deacceso hasta que encaje en su sitio.2. Sujete el punto de acceso boca abajo.Nota: Si alcanza la parte posterior de la barra en T, sujétela con una mano y el punto de acceso con la otra.3. Alinee la parte rectangular que sobresale del soporte con la barra en T.4. Enganche el soporte a uno de los lados de la barra en T.5. Enganche el soporte al otro lado de la barra en T hasta que encaje en esta.Montaje en una barra en T1. Con los tacos y tornillos proporcionados, fije el soporte de 23,8 mm con orificiospara los tornillos en el techo.La parte rectangular que sobresale del soporte debe estar orientada hacia el 2. Sujete el punto de acceso boca abajo con la parte delantera orientada hacia elsoporte.soporte.3. Deslice el punto de acceso en el soporte hasta que encaje en su sitio.Nota: Para desbloquear el punto de acceso, empuje la pestaña de bloqueo hacia el techo y deslice hacia fuera el punto de acceso del soporte.Montaje en un techo sólido。
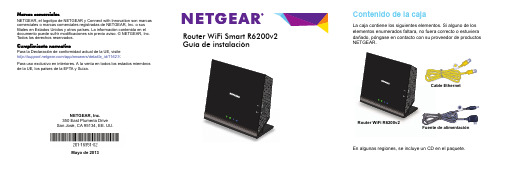
NETGEAR R6200v2 WiFi Smart Router 使用指南说明书
NETGEAR recomienda utilizar sólo los recursos de soporte oficiales NETGEAR.
Marcas comerciales
NETGEAR, el logotipo de NETGEAR y Connect with Innovation son marcas comerciales o marcas comerciales registradas de NETGEAR, Inc. o sus filiales en Estados Unidos y otros países. La información contenida en el documento puede sufrir modificaciones sin previo aviso. © NETGEAR, Inc. Todos los derechos reservados.
a. Conecte la fuente de alimentación al router y enchufe la fuente de alimentación a una toma de corriente.
b. Espere hasta que el indicador Wi-Fi
del panel frontal
Conectarse a la red inalámbrica . . . . . . . . . . . . . . . . . . . . . . . . . . . 8 Acceso al router para hacer cambios . . . . . . . . . . . . . . . . . . . . . . . 9 Acceso a ReadySHARE . . . . . . . . . . . . . . . . . . . . . . . . . . . . . . . . 10 Función de impresión de ReadySHARE . . . . . . . . . . . . . . . . . . . . 11 App NETGEAR genie . . . . . . . . . . . . . . . . . . . . . . . . . . . . . . . . . . 12 Otras características . . . . . . . . . . . . . . . . . . . . . . . . . . . . . . . . . . . 12
NETGEAR WAX214 WiFi 6 PoE Dual Band AX1800 点Access
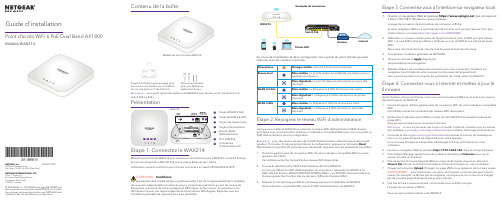
NETGEAR, Inc. 350 East Plumeria DriveSan Jose, CA 95134, USA (Etats-Unis)© NETGEAR, Inc., NETGEAR et le logo NETGEAR sont des marques commerciales de NETGEAR, Inc. Toutes les marques commerciales autres que NETGEAR sont utilisées à des fins de référence uniquement.JUILLET 2021NETGEAR INTERNATIONAL LTD Floor 1, Building 3,University Technology Centre Curraheen Road, Cork, T12EF21, IrlandePoint d’accès WiFi 6 PoE Dual Band AX1800Guide d’installationMettez le point d’accès WAX214 sous tension en connectant le port LAN/PoE à un switch PoE qui fournit une alimentation 802.3af PoE et une vitesse Ethernet de 1 Gbit/s.L’illustration suivante montre le point d'accès connecté à un switch NETGEAR GS310TP .Support de fixation avec perçage pour les vis pour une fixation sur un plafond dur ou une barre en T de 23,8 mm.Deux vis et chevilles pour une fixation au plafond ou au murRemarque : vous avez l'option de mettre votre WAX214 sous tension en le connectant à un Lorsque vous mettez le WAX214 sous tension, le réseau WiFi d’administration (SSID) devientactif. Nous vous recommandons d’utiliser un ordinateur compatible WiFi pour vous connecter au SSID d’administration pour la configuration.Remarque : pour des raisons de sécurité, le SSID d’administration s’éteint lorsqu’il reste inactif pendant 15 minutes. Si cela se produit durant la configuration, appuyez sur le bouton Reset(Réinitialisation) pendant 20 secondes pour réinitialiser l’appareil avec les paramètres par défaut.1. Ouvrez le gestionnaire de connexions WiFi de votre ordinateur compatible WiFi (ou autreappareil client WiFi).Cet utilitaire recherche l'ensemble des réseaux WiFi disponibles.2. Trouvez et sélectionnez le SSID d’administration de votre WAX214.Le nom par défaut du SSID d’administration est imprimé sur l’étiquette du WAX214. Le SSID utilise le format « WAX214XXXXXX-CONFIG-ONLY », où XXXXXX est personnalisé sur chaque appareil (en fonction des six derniers chiffres de l’adresse MAC).3. Saisissez le mot de passe par défaut (clé réseau) imprimé sur l'étiquette du WAX214.Votre ordinateur compatible WiFi rejoint le SSID d’administration du WAX214.Étape 2. Rejoignez le réseau WiFi d’administration51. Ouvrez un navigateur Web et saisissez https:// (qui correspondà https://192.168.0.100) dans le champ d’adresse.La page de connexion de la procédure de connexion s’affiche.Si votre navigateur affiche un avertissement de sécurité, vous pouvez l'ignorer. Pour plus d'informations, consultez https:///000062980/.2. Définissez un nouveau mot de passe de l’appareil local et, pour le SSID principal (réseauWiFi 1, le seul SSID activé par défaut.), attribuez un nom de SSID et une phrase de passe WiFi.Nous vous recommandons de noter le mot de passe et la phrase de passe.3. Acceptez les conditions générales de NETGEAR.4. Cliquez sur le bouton Apply (Appliquer).Les paramètres sont enregistrés.5. Répétez l’étape 1 de ces étapes de connexion pour vous connecter à l’interface surnavigateur local à l’aide de votre nouveau mot de passe de l’appareil local.Vous pouvez à présent voir et gérer les paramètres de configuration du WAX214.Étape 3. Connectez-vous à l’interface sur navigateur localAvant d’utiliser votre point d’accès, nous vous recommandons d’effectuer la mise à jour avec le dernier firmware du WAX214.1. Ouvrez le logiciel utilitaire gestionnaire de connexions WiFi de votre ordinateur compatibleWiFi.Cet utilitaire recherche l'ensemble des réseaux WiFi disponibles.2. Recherchez et sélectionnez le SSID principal de votre WAX214 et saisissez la phrase depasse WiFi.Vous pouvez à présent vous connecter à Internet.Remarque : si vous ne parvenez pas à vous connecter à Internet, reportez-vous au manuel de l'utilisateur sur /support/download pour obtenir davantage d’informations 3. Consultez le site /support/download et saisissez le numéro de modèle pourvoir si un nouveau firmware est disponible pour votre appareil.Si un nouveau firmware est disponible, téléchargez le fichier du firmware sur votre ordinateur.4. Lancez un navigateur Web et saisissez https://192.168.0.100 dans le champ d’adresse. 5. Dans System Manager (gestionnaire du système), sélectionnez Firmware pour voir laversion actuelle du firmware.6. Dans la section Firmware Upgrade (Mise à niveau du firmware), cliquez sur le boutonChoose File (Choisir un fichier) et accédez au fichier du firmware sur votre ordinateur.7. Cliquez sur le bouton Upload (Charger). La page affiche la progression de la mise à niveau.AVERTISSEMENT : pour éviter toute corruption du firmware, n’interrompez pas la mise à niveau. Par exemple, ne fermez pas le navigateur, ne cliquez pas sur un lien et ne chargez pas de nouvelle page. N'éteignez pas le point d'accès.8. Une fois la mise à niveau terminée, reconnectez-vous au SSID principal.La page de connexion s'affiche.Vous pouvez à présent utiliser votre WAX214.Étape 4. Connectez-vous à Internet et mettez à jour le firmwarede suivre les réglementations locales du pays, y compris les opérations au sein de canaux de fréquences, puissance de sortie et exigences DFS légaux. Le fournisseur, le revendeur ou le distributeur ne sont pas responsables des fonctionnement Wifi illégaux. Reportez-vous aux Conditions générales de l'appareil pour plus de détails.ConditionsAu cours de l’installation et de la configuration, les voyants du point d’accès peuvent s’allumer avec les couleurs suivantes :Visitez /support pour obtenir des réponses à vos questions et accéder aux derniers téléchargements.Vous pouvez également consulter notre communauté NETGEAR pour obtenir de bons conseils sur .Support et communautéPour les informations à propos de la conformité réglementaire, y compris la Déclaration de conformité pour l’UE, rendez-vous sur https:///about/regulatory/.Avant de brancher l’alimentation, reportez-vous au document de conformité légale.N’utilisez pas ce périphérique à l’extérieur. La source PoE est destinée à une connexion à l’intérieur d’un bâtiment uniquement.Applicable aux appareils 6 GHz uniquement : utilisez cet appareil en intérieur uniquement. L'utilisation de périphériques 6 GHz est interdite sur les plateformes pétrolières, les voitures, les trains, les bateaux et les aéronefs, à une exception : l'utilisation de ce périphérique est autorisée sur les grands avions volant à plus de 10 000 pieds d’élévation. L'utilisation d'émetteurs sur la bande 5,925 - 7,125 GHz est interdite pour le contrôle de systèmes d'aéronef sans pilote ou la communication avec ces systèmes.Règlementation et aspects juridiques1. Marquez le mur à l’endroit où vous voulez insérerles chevilles et vis fournies, avec un écart de98,5 mm entre elles, et insérez les chevilles et les vis.Laissez une partie saillante d'environ 6 mm pour chaque vis par rapport au mur de sorte à pouvoir insérer les vis dans les trous en bas du point d’accès.La partie inférieure du point d’accès comporte deux orifices qui vous permettent de le fixer à l’aide de deux vis insérées dans un mur.plat de telle façon que ce dernier puisse passer dans l’espace étroit entre le point d’accès et la surface surlaquelle il est fixé ou placé.Fixation sur un mur solide1. Faites glisser le support de 23,8 mm entre les guides de la partie inférieure dupoint d’accès jusqu’à ce qu’il s’enclenche.2. Tenez le point d’accès à l’envers.Remarque : si vous pouvez atteindre l’arrière de la barre en T, tenez la barre en T d’une main et le point d’accès de l’autre.3. Alignez la partie saillante rectangulaire du support avec la barre en T.4. Accrochez le support à un côté de la barre en T.5. Accrochez le support à l’autre côté de la barre en T jusqu’à ce qu’il s’enclenche surla barre en T.Fixation sur une barre en T1. A l’aide des chevilles et des vis fournies, fixez le support de 23,8 mm avec lesorifices des vis sur le plafond.La partie saillante rectangulaire doit être orientée vers le plafond.2. Tenez le point d’accès à l’envers avec la partie avant du point d’accès tournée versle support.3. Faites glisser le point d’accès dans le support jusqu’à ce qu’il s’enclenche.Remarque : pour déverrouiller le point d’accès, poussez sur la languette de verrouillage en direction du plafond et faites glisser le point d’accès pour le retirer du support.Fixation sur un plafond dur。
LINKSYS WRT54GC-CN路由器 说明书
14
图 5-2: 路由器登录屏幕
14
图 5-3: 设置选项卡 - 基本设置
14
图 5-4: 静态 IP 连接类型
15
图 5-5: PPPoE 连接类型
15
图 5-6: PPTP 连接类型
16
图 5-7: 静态 DHCP 客户端列表
17
图 5-8: DHCP 客户端表
17
图 5-9:
第 1 章:简介
3
本指南的内容
迷你型 Wireless-G 宽带路由器
第 2 章 : 规划您的无线网络
网络拓扑
无线局域网 (WLAN) 与常规局域网 (LAN) 非常类似,不同之处在于 WLAN 中每台计算机都使用无线设 备连接到网络上。 WLAN 中的计算机共享相同频率通道和 SSID, SSID 是由属于同一无线网络的无线 设备共享的标识名称。
• 附录 C:升级固件 本附录指导您如何在路由器上的固件需要升级时执行升级操作。
• 附录 D:Windows 帮助 本附录介绍如何使用 Windows 帮助,以获得有关网络 (如安装 TCP/IP 协议)的指导。
• 附录 E:查找以太网适配器的 MAC 地址和 IP 地址 本附录介绍了如何查找计算机以太网适配器的 MAC 地址,以便可以使用路由器的 MAC 筛选和 / 或 MAC 地址克隆功能。
但是,这些优势意味着什么呢?
网络是用于共享计算机资源的实用工具。您既可以从不同的计算机访问一个打印机,也可以访问位 于其他计算机硬盘驱动器中的数据。网络甚至可以用于多人视频游戏。因此,网络不仅适用于家庭 和办公室,而且还可以进行娱乐。
有线网络上的 PC 可以创建 LAN,即局域网。它们使用以太网电缆连接起来,这就是网络被称为 “有线”的原因。
Linksys N600 PRO Wi-Fi Range Extender 说明书
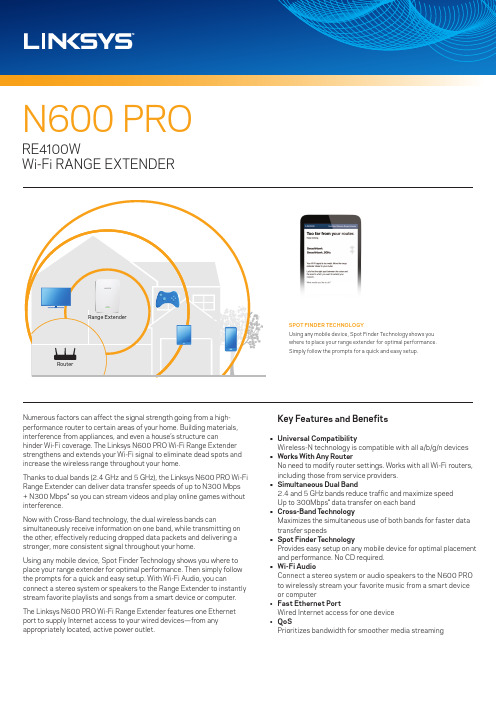
Numerous factors can affect the signal strength going from a high-performance router to certain areas of your home. Building materials, interference from appliances, and even a house’s structure can hinder Wi-Fi coverage. The Linksys N600 PRO Wi-Fi Range Extender strengthens and extends your Wi-Fi signal to eliminate dead spots and increase the wireless range throughout your home.Thanks to dual bands (2.4 GHz and 5 GHz), the Linksys N600 PRO Wi-Fi Range Extender can deliver data transfer speeds of up to N300 Mbps + N300 Mbps* so you can stream videos and play online games without interference. Now with Cross-Band technology, the dual wireless bands can simultaneously receive information on one band, while transmitting on the other, effectively reducing dropped data packets and delivering a stronger, more consistent signal throughout your home. Using any mobile device, Spot Finder T echnology shows you where to place your range extender for optimal performance. Then simply follow the prompts for a quick and easy setup. With Wi-Fi Audio, you can connect a stereo system or speakers to the Range Extender to instantly stream favorite playlists and songs from a smart device or computer.The Linksys N600 PRO Wi-Fi Range Extender features one Ethernet port to supply Internet access to your wired devices—from any appropriately located, active power outlet. Key Features and Benefits • Universal Compatibility Wireless-N technology is compatible with all a/b/g/n devices • Works With Any Router No need to modify router settings. Works with all Wi-Fi routers, including those from service providers.• Simultaneous Dual Band 2.4 and 5 GHz bands reduce traffic and maximize speed Up to 300Mbps* data transfer on each band • Cross-Band T echnology Maximizes the simultaneous use of both bands for faster data transfer speeds • Spot Finder T echnology Provides easy setup on any mobile device for optimal placement and performance. No CD required.• Wi-Fi Audio Connect a stereo system or audio speakers to the N600 PRO to wirelessly stream your favorite music from a smart device or computer • Fast Ethernet Port Wired Internet access for one device • QoS Prioritizes bandwidth for smoother media streamingRange ExtenderSPOT FINDER TECHNOLOGYUsing any mobile device, Spot Finder Technology shows youwhere to place your range extender for optimal performance.Simply follow the prompts for a quick and easy setup.DescriptionN600 PRO Wi-Fi RANGE EXTENDERPart NumberRE4100W-MEUPC 745883683222EAN 4260184665488PACKAGE CONTENTS• Linksys N600 PRO Wi-Fi Range Extender, RE4100W• Quick Installation GuideMINIMUM SYSTEM REQUIREMENTS• AC power outlets• P C: Wi-Fi enabled running Windows® XP SP3, Windows 7,or Windows 8Mac: Wi-Fi enabled running Mac® OS X Leopard v10.5.8 orlater, Snow Leopard v10.6.1 or later, Lion v10.7, or MountainLion v10.8• Wireless: Existing a/b/g/n wireless router or access pointWireless Operating Spectrum:Simultaneous Dual-Band2.4 GHz and 5 GHzWireless Security:Wi-Fi Protected Setup™ buttonWPA®/WPA2® encryptionSPI firewallWEP encryptionWi-Fi RANGE EXTENDERPorts:1 Fast EthernetAntenna Type:InternalAntenna Gain:Antenna 1: 2.4GHz - 1.00dB,Antenna 2: 2.4GHz - 1.00dBAntenna 1: 5GHz - 2.00dBAntenna 2: 5GHz - 2.00dBEIRP output power:2.4GHz: 18.99 dBm5GHz: 18.93 dBmOperating Frequencies:2.4GHz: 2412-2472 MHz5GHz: 5150-5250 MHzElectrical Rating:100-240V~ 2.0A, 50/60HzProduct Weight (kg): 0.15Product Depth (cm): 3.3Product Width (cm): 9.19Product Height (cm): 15.5Unit Weight (cm): 0.49Unit Depth (cm): 8.8Unit Width (cm): 15.8Unit Height (cm): 21Case Pack Quantity (*PL): 4Case Pack Weight (kg) (*PL): 2.52Case Pack Length (cm) (*PL): 29.57Case Pack Width (cm) (*PL): 34.62Case Pack Height (cm) (*PL): 25.4Linksys Pte. Ltd. c/o Belkin BVTupolevlaan 1, 1119 NW Schiphol-Rijk, The NetherlandsMade in T aiwanBelkin, Linksys and many product names and logos are trademarks of the Belkin group of companies. Third-party trademarks mentioned are the property of their respective owners. Wi-Fi and Wi-Fi Protected Setup are either trademarks or registered trademarks of the Wi-Fi Alliance. The Wi-Fi CERTIFIED Logo and the Wi-Fi Protected Setup Identifier Mark are either trademarks or registered trademarks of the Wi-Fi Alliance. Mac, Mac OS, and the Mac logo are trademarks of Apple Inc., registered in the U.S. and other countries. Windows is either a registered trademark or trademark of Microsoft Corporation in the United States and/or other countries. 14PB032 Specifications are subject to change without notice. An active, customer-purchased Internet Service Provider broadband account is required for connection to the Internet.*Maximum performance derived from IEEE Standard 802.11 specification. Actual performance can vary, including lower wireless network capacity, data throughput rate, range, andcoverage. Performance depends on many factors, conditions, and variables, including distance from the access point, volume of network traffic, building materials and construction,operating system used, mix of wireless products used, interference, and other adverse conditions.†Range specifications are based on performance test results under normal use case conditions. Actual ranges will increase or decrease depending on wireless obstructions, operatingenvironments and building material. Wireless coverage claims are used only as reference and are not guaranteed as each wireless network is unique.Secure push-button setup works with devices that support Wi-Fi Protected Setup like Linksys Wireless-AC routers and others.May require a software/firmware update available for download at /supportWarranty2-Y ear Limited WarrantySpeakers connect directly to the range extender to enable wireless sound that can becontrolled from anywhere in and around your home, using a smartphone, tablet, or laptop.STREAM MUSIC WIRELESSLY FROM ANYWHERE IN YOUR HOME.Audio Jack。
A6200 WiFi Adapter 安装指南说明书

Installation Guide 802.11ac A6200 WiFi AdapterPackage ContentsResourceCDA6200WiFiAdapter InstallationEstimated completion time: 10 minutes.1. Insert the Resource CD in your computer’s CD drive. If the CD main screendoes not display, browse the files on the CD and double-click Autorun.exe.2. Click Setup.The Software Update Check screen displays.3. If you are connected to the Internet, click Check for Updates. If not, then clickInstall from CD.4. Click I agree to accept the license agreement and then click Next.A message displays asking you towait while software is installed. Thismight take a few minutes. Then youare prompted to insert your adapter.5. You can use the adapter with orwithout the cradle:• To use the adapter with thecradle, place the wireless adapterat least 4 feet (1 meter) away fromyour router. NETGEARrecommends this method.•To use the adapter without thecradle, insert the adapter into aUSB port on your computer.6.Click Next.NETGEAR Genie displays a list of wireless networks in your area.July 2012©2012 by NETGEAR, Inc. All rights reserved. NETGEAR, the NETGEAR logo, and Connect with Innovation are trademarks or registered trademarks of NETGEAR, Inc. and/or its subsidiaries in the United States and/or other countries. Information is subject to change without notice. Other brand and product names are trademarks orregistered trademarks of their respective holders.This symbol was placed in accordance with the European Union Directive 2002/96 on the WasteElectrical and Electronic Equipment (the WEEE Directive). If disposed of within the European Union,this product should be treated and recycled in accordance with the laws of your jurisdictionimplementing the WEEE Directive.Join a Wireless NetworkYou can join a wireless network from this NETGEAR Genie screen, or you can useWi-Fi Protected Setup (WPS) if your wireless network supports it.• NETGEAR Genie: Click your wireless network to select it from the list, and thenclick Connect. If the network is secure, enter its password or network key.• WPS: Press and hold the WPS button on the side of the adapter for 2 seconds.Within 2 minutes, press the WPS button on your wireless router or gateway.The adapter joins the network, which can take a few minutes. Your settings aresaved in a profile.NETGEAR Genie IconWhen you install your adapter, the NETGEAR Genie icon displays in the Windowssystem tray and on the desktop. You can double-click this icon to open NETGEARGenie to make changes or connect to a different wireless network. The color of theicon indicates the strength of your wireless connection from 0 (zero) to 5 bars.White: 3 to 5 barsYellow: 1 or 2 barsRed: 0 (zero) bars, indicating no connectionIf you remove your adapter, NETGEAR Genie is not available, so the icon does notdisplay. if you insert the adapter again, the icon returns.Technical SupportThank you for selecting NETGEAR products.After installing your device, locate the serial number on the label of your product,and use it to register your product at /register.Registration is required to use our telephone support service. Also go to http:// for product updates, additional documentation, and support.For complete DoC, go to the NETGEAR EU Declarations of Conformity website at:/app/answers/detail/a_id/11621/For indoor use only in all EU countries and Switzerland.WARNING:Do not stack equipment, or place equipment in tight spaces, in drawers,or on carpets. Make sure your equipment is surrounded by at least 2 inches of airspace.Get the user manual at or through a link inthe product user interface.。
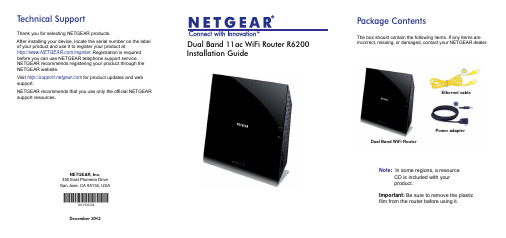
NETGEAR R6200双频11ac WiFi路由器安装指南说明书
4
Wireless Network Settings
Record the default preset wireless settings that are printed on the label here for easy reference.
WiFi network name (SSID): Network key (password): If you change the default settings, record them here for easy reference, and then store this booklet in a safe place: WiFi network name (SSID): Network key (password): To retrieve or update your wireless password, type in a web browser and log in using the default user name (admin) and password (password). Select Wireless Settings to locate your wireless password.
b. If the modem has a battery backup, remove its batteries.
1
DSL or cable
c. If your modem was already connected to another
Internet
router, disconnect the cable
2
3. Power on the router. Modem
a
LinksysEA7500v2怎么样
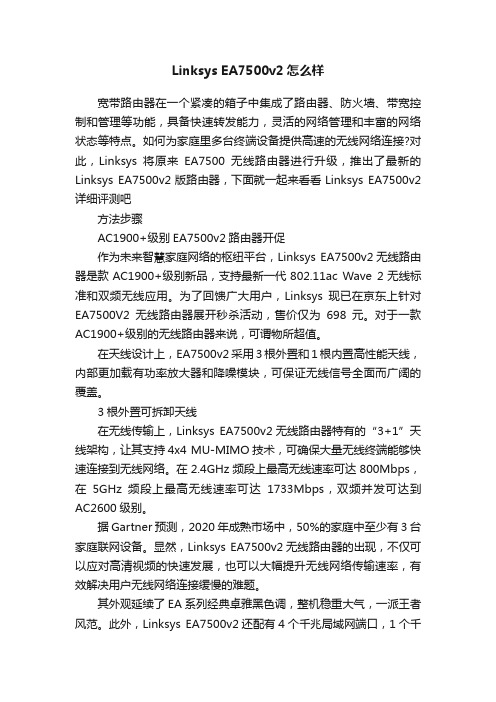
Linksys EA7500v2怎么样宽带路由器在一个紧凑的箱子中集成了路由器、防火墙、带宽控制和管理等功能,具备快速转发能力,灵活的网络管理和丰富的网络状态等特点。
如何为家庭里多台终端设备提供高速的无线网络连接?对此,Linksys将原来EA7500无线路由器进行升级,推出了最新的Linksys EA7500v2版路由器,下面就一起来看看Linksys EA7500v2详细评测吧方法步骤AC1900+级别EA7500v2路由器开促作为未来智慧家庭网络的枢纽平台,Linksys EA7500v2无线路由器是款AC1900+级别新品,支持最新一代802.11ac Wave 2无线标准和双频无线应用。
为了回馈广大用户,Linksys现已在京东上针对EA7500V2无线路由器展开秒杀活动,售价仅为698元。
对于一款AC1900+级别的无线路由器来说,可谓物所超值。
在天线设计上,EA7500v2采用3根外置和1根内置高性能天线,内部更加载有功率放大器和降噪模块,可保证无线信号全面而广阔的覆盖。
3根外置可拆卸天线在无线传输上,Linksys EA7500v2无线路由器特有的“3+1”天线架构,让其支持4x4 MU-MIMO技术,可确保大量无线终端能够快速连接到无线网络。
在2.4GHz频段上最高无线速率可达800Mbps,在5GHz频段上最高无线速率可达1733Mbps,双频并发可达到AC2600级别。
据Gartner预测,2020年成熟市场中,50%的家庭中至少有3台家庭联网设备。
显然,Linksys EA7500v2无线路由器的出现,不仅可以应对高清视频的快速发展,也可以大幅提升无线网络传输速率,有效解决用户无线网络连接缓慢的难题。
其外观延续了EA系列经典卓雅黑色调,整机稳重大气,一派王者风范。
此外,Linksys EA7500v2还配有4个千兆局域网端口,1个千兆广域网有线端口,可确保网友获得高速的有线传输。
NETGEAR Insight Managed WiFi 6E AXE7800 三带成品数据表说明书
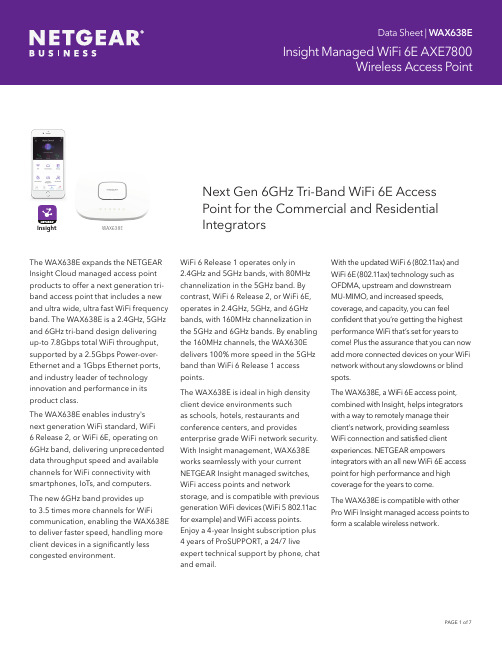
The WAX638E expands the NETGEAR Insight Cloud managed access point products to offer a next generation tri-band access point that includes a new and ultra wide, ultra fast WiFi frequency band. The WAX638E is a 2.4GHz, 5GHz and 6GHz tri-band design delivering up-to 7.8Gbps total WiFi throughput, supported by a 2.5Gbps Power-over-Ethernet and a 1Gbps Ethernet ports, and industry leader of technology innovation and performance in its product class.The WAX638E enables industry'snext generation WiFi standard, WiFi6 Release 2, or WiFi 6E, operating on6GHz band, delivering unprecedented data throughput speed and available channels for WiFi connectivity with smartphones, IoTs, and computers.The new 6GHz band provides upto 3.5 times more channels for WiFi communication, enabling the WAX638E to deliver faster speed, handling more client devices in a significantly less congested environment. Next Gen 6GHz Tri-Band WiFi 6E Access Point for the Commercial and ResidentialIntegratorsWAX638EInsightWiFi 6 Release 1 operates only in2.4GHz and 5GHz bands, with 80MHz channelization in the 5GHz band. By contrast, WiFi 6 Release 2, or WiFi 6E, operates in 2.4GHz, 5GHz, and 6GHz bands, with 160MHz channelization in the 5GHz and 6GHz bands. By enabling the 160MHz channels, the WAX630E delivers 100% more speed in the 5GHz band than WiFi 6 Release 1 access points.The WAX638E is ideal in high density client device environments suchas schools, hotels, restaurants and conference centers, and provides enterprise grade WiFi network security. With Insight management, WAX638E works seamlessly with your current NETGEAR Insight managed switches, WiFi access points and network storage, and is compatible with previous generation WiFi devices (WiFi 5 802.11ac for example) and WiFi access points. Enjoy a 4-year Insight subscription plus 4 years of ProSUPPORT, a 24/7 live expert technical support by phone, chat and email.With the updated WiFi 6 (802.11ax) and WiFi 6E (802.11ax) technology such as OFDMA, upstream and downstreamMU-MIMO, and increased speeds, coverage, and capacity, you can feel confident that you’re getting the highest performance WiFi that’s set for years to come! Plus the assurance that you can now add more connected devices on your WiFi network without any slowdowns or blind spots.The WAX638E, a WiFi 6E access point, combined with Insight, helps integrators with a way to remotely manage their client's network, providing seamless WiFi connection and satisfied client experiences. NETGEAR empowers integrators with an all new WiFi 6E access point for high performance and high coverage for the years to come.The WAX638E is compatible with other Pro WiFi Insight managed access points to form a scalable wireless network.Supercharged performance and unbeatable security for WiFi integration projects• Business class WiFi based on nextgeneration 802.11ax WiFi 6 technology on 6.0GHz, 5.0GHz and 2.4GHz bands. (Backward compatible to 802.11b/g/n/a/ac)• Support 160MHz channelization in both5GHz and 6GHz to deliver 200% throughputcompared to previous generation• Tri-band, 2.4GHz, 5.0GHz, 6.0GHz, 8 streams of data for an aggregate throughput of up to 7.8Gbps • Instant WiFi Mesh forming wireless backhaul with other Pro WiFi Insight managed access points to form a WiFimesh network• 100% more throughput in 4-stream 5.0GHz band compared to previous generation • 4 times more client device supported• Enterprise security and Enhanced Open security, such as WPA3, WPA2 Enterprise, WPA3 Enterprise, 8x SSID, Dynamic VLAN and VLAN• Basic Service Set Coloring (BSS Coloring) enabling significant improvement in radio frequency channel effeciency and reduction of interference• Orthogonal Frequency Division Multiple Access (OFDMA) allowing simultaneous services to multiple devices in the same channel thus improving bandwidthefficiency and reducing latency• 2.5GbE port, backward compatible with 100/1000Mbps Ethernet, supported by NETGEAR MS510TXUP and other multi- gig Ethernet switches• One additional 1GbE port for networkredundancy or link aggregation to enhance reliability or throughput• Target Wake Time (TWT) allows more efficient power usage resulting inlonger battery life in WiFi 6 client devices • Beamforming+; Advanced 6th generation WiFi technology such as up and downstream MU-MIMO • One 802.3bt 2.5Gbps PoE port. Remote management and monitoring from NETGEAR Insight app or Cloud portal for unrivaled managementexperience of your wireless network.• App managed. Faster installation through NETGEAR Insight app or Cloud portal. No additional hardware needed.• Market leading 5-year warranty with24/7 chat support for peace of mindRadio Patterns for WAX638E Radio Pattern for 2.4GHzRadio Pattern for 5GHzRadio Patterns for WAX638EExample ApplicationWAX638E Deployment ScenarioLaptop PC, Tablet and SmartphoneConnects toInsight Managed or other NETGEAR GigE orMultiGig switchConnects to desktop PCCable/DSL modemPrinter and Surveillance CameraPoE++ LAN port on the access pointWAX638ERadio Pattern for 6GHzProduct Comparison WAX628WAX638EWiFi Standards 5.0GHz: 802.11a/n/ac/ax2.4GHz: 802.11b/g/n/ax6.0GHz: 802.11ax5.0GHz: 802.11a/n/ac/ax2.4GHz: 802.11b/g/n/axWireless Mode (Transmit x Receive) 4x4 in 5.0GHz2x2 in 2.4GHz2x2 in 6.0GHz4x4 in 5.0GHz2x2 in 2.4GHzChannelization5GHz: 20/40/80 /160MHz2.4GHz: 20/40MHz 5GHz: 20/40/80/160MHz 6GHz: 20/40/80/160MHz2.4GHz: 20/40MHzOFDM/OFDMA OFDM and OFDMA OFDM and OFDMA BSS Coloring Yes YesMulti-User MIMO Bi-dir MU-MIMO Bi-dir MU-MIMO T arget Wake Time (TWT) Yes Yes Maximum Theoretical Throughput AX5400 5.4Gbps AXE7800 7.8GbpsMaximum Theoretical Throughput per Band 5.0GHz: 4800Mbps2.4GHz: 600Mbps6.0GHz: 2400Mbps5.0GHz: 4800Mbps2.4GHz: 600MbpsAntenna Gain Internal 2.5/3.0 dBi(2.4GHz/5GHz)Internal 4.4/6.3/3.1 dBi(2.4GHz/5GHz/6GHz)Power over Ethernet (PoE)802.3at/af802.3bt/at Coverage 3,000 sq.ft. (275m2)3,000 sq.ft. (275m2) PoE Power Consumption21.2W27.64W Centralized Management Insight App Insight App Secure Socket Layer (SSL) Yes Yes Wireless Distribution System (WDS)Repeater Yes Yes Bridge Point-to-point/Multi-point Yes Yes Simultaneous Bridge and Wireless Client Association Yes Yes SecurityWiFi Protected Access (WPA/WPA2 WPA3), 802.11i Yes YesMAC address filtering with access control Yes Yes 802.1x RADIUS support with EAP TLS, TTLS, PEAP Yes Yes Neighbor AP detection Yes Yes Block SSID Broadcast Yes Yes VLAN Support Yes Yes Guest Network/Captive Portal Yes Yes Bandwidth management Yes YesLink Layer Discovery Protocol Yes Yes Bandsteering Yes Yes Instant WiFi MeshWireless backhaul to form Mesh Network Yes Yes Product ComparisonTechnical SpecificationsStandards WAX628WAX638EIEEE 802.11ax WiFi 6 standard Yes YesWMM Wireless Multimedia Prioritization Yes YesWDS Wireless Distribution System Yes YesPower over Ethernet (PoE) IEEE 802.3af Yes, approximately 60% of full throughputperformanceNoPower over Ethernet (PoE) IEEE 802.3at Yes Yes, max throughput will reduce by 50% on 2.4GHz Power over Ethernet (PoE) IEEE 802.3bt Yes YesOFDM/OFDMA Yes YesPhysical SpecificationsDimensions W x D x H 241.2 x 239.6 x 51.4 mm(9.5 x 9.4 x 2.0 in)266.6 x 268.3 x 55.5 mm(10.49 x 10.56 x 2.18 in)Weight819g (1.80lb)1050 g (2.31 lb) Environmental SpecificationsOperating temperature 0° to 40°C (32° to 104°F)0° to 40°C (32° to 104°F) Physical InterfacesInterface One 100/1000/2.5GBASE-T Gigabit Ethernet(RJ-45) ports with Auto Uplink™ (Auto MDI-X)supporting IEEE 802.3af or 802.3at P ower overEthernet (P oE)One 100/1000GBASE-T Gigabit Ethernet(RJ-45) portOne 100/1000/2.5G (IEEE 802.3at or 802.3bt doesn'tsupport IEEE 802.3af) One 100/1000M EthernetPower adapter (not included)12V DC, 2.5A; plug is localized to country of sale12V DC, 3.5A; plug is localized to country of saleLEDFive (5): Power and cloud connection;T wo (2) LAN ports: 2.4GHz status, 5.0GHz statusOne (1): Power and cloud connection;T wo (2): LAN ports;Three (3): Radio (2.4GHz, 5GHz, 6GHz )SecurityWiFi Protected Access® (WPA, WPA2, WPA3)Yes Yes WPA2 and WPA3 Enterprise Yes Yes Wireless access control to identify authorized wirelessnetwork devices Yes Yes MAC address authentication Yes Yes Network ManagementNETGEAR Insight App App management for setup, monitoring and management Advanced WirelessWireless Distribution System (WDS)Bridge mode: Point-to-point wireless Bridge mode: Point-to-multipoint wirelessRepeater mode Adjustable Transmit Power Control (TPC)Device detectionTechnical SpecificationsPackage Contents WAX638EW AX638E Insight managed wireless access pointWall/ceiling mount kitInstallation guideWarranty and SupportHardware Limited Warranty 5 yearsNext-Business-Day (NBD) Replacement 5 yearsT echnical support (online, phone)90 days free from date of purchase*ProSUPPORT OnCall 24x7 Service Packs (This NETGEAR product comes with 4 years of Insight remote management subscription and 4 years of our ProSupport OnCall 24x7 Service Pack.**) PMB0312-10000S, 1 year PMB0332-10000S, 3 years PMB0352-10000S, 5 yearsOrdering InformationWAX638E-100EUS Europe and Asia Pacific WAX638E-111NAS US。
LinksysEA9500AC5400M路由器评测
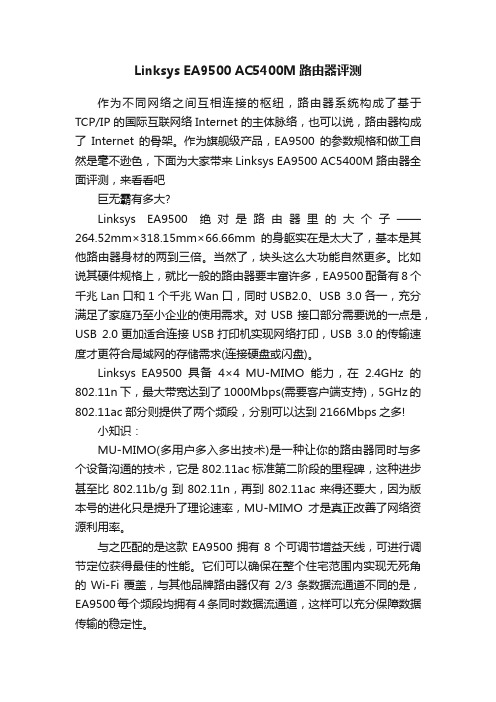
Linksys EA9500 AC5400M路由器评测作为不同网络之间互相连接的枢纽,路由器系统构成了基于TCP/IP 的国际互联网络Internet 的主体脉络,也可以说,路由器构成了Internet的骨架。
作为旗舰级产品,EA9500的参数规格和做工自然是毫不逊色,下面为大家带来Linksys EA9500 AC5400M路由器全面评测,来看看吧巨无霸有多大?Linksys EA9500绝对是路由器里的大个子——264.52mm×318.15mm×66.66mm的身躯实在是太大了,基本是其他路由器身材的两到三倍。
当然了,块头这么大功能自然更多。
比如说其硬件规格上,就比一般的路由器要丰富许多,EA9500配备有8个千兆Lan口和1个千兆Wan口,同时USB2.0、USB 3.0各一,充分满足了家庭乃至小企业的使用需求。
对USB接口部分需要说的一点是,USB 2.0更加适合连接USB打印机实现网络打印,USB 3.0的传输速度才更符合局域网的存储需求(连接硬盘或闪盘)。
Linksys EA9500具备4×4 MU-MIMO能力,在2.4GHz的802.11n下,最大带宽达到了1000Mbps(需要客户端支持),5GHz的802.11ac部分则提供了两个频段,分别可以达到2166Mbps之多!小知识:MU-MIMO(多用户多入多出技术)是一种让你的路由器同时与多个设备沟通的技术,它是802.11ac标准第二阶段的里程碑,这种进步甚至比802.11b/g到802.11n,再到802.11ac来得还要大,因为版本号的进化只是提升了理论速率,MU-MIMO才是真正改善了网络资源利用率。
与之匹配的是这款EA9500拥有8个可调节增益天线,可进行调节定位获得最佳的性能。
它们可以确保在整个住宅范围内实现无死角的Wi-Fi覆盖,与其他品牌路由器仅有2/3条数据流通道不同的是,EA9500每个频段均拥有4条同时数据流通道,这样可以充分保障数据传输的稳定性。
Linksys RE9000 三带无线扩展器用户指南说明书

Model # RE9000ContentsProduct Overview (3)Front (3)Side (4)Back (5)How to Install the Range Extender (6)Setting up as a wireless range extender (6)Setting up as wired range extender (access point) (15)How to Access the Settings Interface (17)Using Range Extender Settings (19)WPS (20)Access Control (22)Troubleshooting (23)You cannot get your range extender connected (23)You cannot access your range extender (23)You have intermittent connection problems (25)Specifications (26)RE9000 (26)Environmental (26)Product OverviewYour Linksys RE9000 is a tri-band range extender with band steering. That means it will direct connected devices to the extended Wi-Fi band that will provide the best performance. The range extender will balance connected devices between one 5 GHz band and the 2.4 GHz band. (The second 5 GHz band is dedicated to the connection with your main router.) Band steering is available on all three bands when you set up your RE9000 as an access point.FrontThe light on the front of the range extender gives you information about power, updating and readiness.Power Light Status/ descriptionBlinking Green •Starting up.•Updating firmware.Solid Green •Good signal from router.Solid Orange •Weak signal from router.Fix: Unplug the extender, and move it closer to the router.Blinking Orange •Ready for setup / Not connected to router / Other errorFix:1. Make sure your router has an Internet connection and Wi-Fi is turned on.2. If the router is in order, unplug the extender, move it closer to the router, plug itback in, wait one minute, reconnect to your network.WPS™ button—Use Wi-Fi Protected Setup to automatically and securely add compatible wireless devices to your network.Ethernet ports (1)—Connect wired devices to these ports with ethernet cables.Power Light Status/ descriptionOff•No link over ethernet cable or no data activity.Solid Green•Established link over ethernet cable.Blinking Green•Sending/Receiving data.Reset button (2)—Press and hold until the light on the front of the range extender blinks to reset extender to factory default settings.Power port (3)—Connect the included AC power adapter.How to Install the Range ExtenderThere are two ways to use your Linksys range extender: as a wireless range extender or as a wired range extender (access point). Wireless range extenders repeat existing Wi-Fi signals. Wired range extenders (access points) create new Wi-Fi hotspots when connected to a router or access point with an ethernet cable. Both scenarios require a router with a working internet connection.Before starting setup, decide whether you want to use your RE9000 as a wireless range extender or as a wired range extender (access point). Instructions for both setups are in this user guide. Setting up as a wireless range extenderWi-Fi Protected Setup (WPS)Does your router have a WPS button?WPS is a simple way to connect Wi-Fi devices. Routers that support WPS have a button that might look like one of these symbols:If your router has a WPS button, continue with WPS below.If not, or if you are not sure, continue with browser-based setup on page 10.Note—The WPS button will not work if you have disabled WPS on your router, or if you have chosen WEP as your network security type. In either case, continue with browser-based setup on page 10.1.Plug the range extender into an electrical outlet close to your router. You can move therange extender to an ideal location later in step 5. After the range extender is plugged in, the light on the top will blink green for up to a minute.2.Wait for the light on the front of your range extender to blink orange before going tostep 3. This can take up to a minute.3.Extend your network.Press the WPS button on your router. Within the next two minutes press the WPS button on the side of your range extender.The WPS button will light up and the light on the top of your range extender will blink green.Watch the light on the top of your range extender to verify whether the connection was successful.If it turns solid green, the connection was successful. Move to step 4.If it starts to blink orange , the connection failed. You may try again by repeatingstep 3 or try browser-based setup.4.Move your range extender to an ideal spot.Unplug your range extender and plug it back in midway between your router and the area without Wi-Fi. Using your mobile device or laptop, be sure you have at least two bars(around 50%) of your router’s Wi-Fi signal at that location. If you don’t have two bars, move the range extender closer to the router.5.Check the light on the top of the extender for connection quality.It can take up to a minute for the ranger extender to boot up after moving it. During this period, you will see the blinking green light once again.o Solid green Ready to use.o Solid orange Weak connection to the router. Find an outlet closer to yourrouter.o Blinking orange Not connected to the router. Find an outlet closer to yourrouter.6.Connect your Wi-Fi devices to the extended network you just created.If you have setup your range extender with a Linksys Max-Stream Router, you don’t have to do anything. Max-Stream routers support seamless roaming, and your extended Wi-Fi network shares the same network name and password. Connected devices will select the main or extended network as you move around the coverage area.Note—Your Linksys RE9000 is a tri-band range extender with band steering. That means it will direct connected devices to the extended Wi-Fi band that will provide the bestperformance. This range extender will balance connected devices between one 5 GHz band and the 2.4 GHz band. (The second 5 GHz band is dedicated to the connection with your main router.) Band Steering is available on all 3 bands when you set up RE9000 as an access point.If you do not have a router with seamless roaming, select the extended network on your device's Wi-Fi manager. Extended networks are identified by "_Ext" added to the end of your main network name(s). Password(s) will be the same as those for your mainnetwork(s).Note—To learn more about seamless roaming and see a list of supported devices visit /seamless-roaming.Your range extender is now set up. Enjoy your extended Wi-Fi coverage.Browser-based setupUse this setup method if you don’t have a WPS button on your router, or if you don’t want to use WPS to set up your RE9000.1.Plug in the range extenderPlug in the range extender midway between your router and the area without Wi-Fi. Using your mobile device or laptop, be sure you have at least two bars (around 50%) of yourrouter’s Wi-Fi signal at that location. If you don’t have two bars, move the range extender closer to the router. You can move the range extender to an ideal location later using the setup software.2.Wait for the light on top of your range extender to blink orange.This can take up to a minute3.Connect to range extender setup network.On a computer, phone or tablet, connect to the Wi-Fi network: Linksys Extender Setup.unch setup.Enter (or try http://192.168.1.1) in a browser to complete setup. Follow the on-screen instructions:o Welcome to setup.o How do you want to use your range extender?o Choose your wireless network.o Enter your password for your wireless network.o Your extended wireless network.o Spot finder resultso Secure your range extender.o Register your product.o You are almost done.o Your extender is set up.Note—If you are not connected to your range extender’s setup network you will get apage alerting you that you haven’t connected to the extender. The page will ask whether you are trying to set up a new range extender or access settings on a range extender you already set up.Sometimes you will get a "404 Not Found" error page. If that happens, clear your browser cache and try again.5.Connect your Wi-Fi devices to the extended network you just created.If you have set up your range extender with a Linksys Max-Stream router, you don’t have to do anything. Max-Stream routers support seamless roaming, and your extended Wi-Fi network shares the same network name and password. Connected devices will select the main or extended network as you move around the coverage area.If you do not have a router with seamless roaming, select the extended network on yourdevice's Wi-Fi manager. Extended networks are identified by "_Ext" added to the endof your main network name(s). Passwords will be the same as those for your mainnetwork(s).Setting up as wired range extender (access point)Browser-based setup1.Prepare for setupBe sure your router has a working internet connection and you have an ethernet cable long enough to connect the router to the range extender.Note—Do not connect any devices other than your router to the range extender untilsetup is complete.2.Plug the range extender into a wall outlet.3.Wait for the blinking light on the top of the range extender to change from green toorange.e an ethernet cable to connect the range extender to the LAN port of your router.5.Connect to the Linksys Extender Setup network.On a computer, phone, or tablet, connect to the Wi-Fi network Linksys Extender Setup.unch setup.Enter (or try http://192.168.1.1) in a browser to complete setup. Be sure to choose “As a wired range extender (access point)” when asked how you want to use your range extender. Follow the on-screen instructions to create a network name and password for your access point.7.Connect your Wi-Fi devices to the extended network you just created.Select the extended network on your device's Wi-Fi manager. Extended networks are identified by "_Ext" added to the end of your main network name(s).Note—If your router’s MAC filtering feature is on you must enter the MAC address of the extender into the list of the router’s allowed addresses. That will allow the extender, and devices connected to extended networks, to connect to the main network.For speed and reliability, the RE9000 uses one of its 5 GHz bands as a dedicatedconnection to your router. The MAC address of the extender’s 5GHz band can be found on the Status > Upstream Network Statistics screen in your extender’s settings. Look for “Seen by Upstream AP.” The MAC address of the extender’s ethernet port is identified as Extender Mac Address on the Status > Device Info screen.Once the extender can access the router, all devices connected to the extender have access as well.How to Access the Settings InterfaceTo change or view range extender settings, first connect to an extended network, e.g.,MyWiFi_Ext. In a browser, go to and enter admin password.Your range extender's default admin password is "admin". We highly recommend that you change this after WPS setup. You will be asked to change it if you do browser-based setup.To change your admin password, click the Management tab of the settings interface and enter a new password under Extender Access.If you have not changed the range extender’s default name, you can also access the settings interface when connected to your main router.Enter into a browser http://RE90000 (Windows) or http://RE9000.local or (Mac OS X or iOS).If you changed your range extender’s name, you can access the settings interface by entering the new name in a browser. For example: if you named your extender MyExtender, enterhttp://MyExtender (Windows) or http://MyExtender.local (Mac OS X or iOS).You can also enter your range extender’s IP address in a browser. Find the IP address on your router’s administrative interface.Note—If you are not connected to your extended network you will get a page alerting you that you haven’t connected to the extender. The page will ask whether you are trying to set up a new range extender or access settings on a range extender you already set up.Sometimes you will get a "404 Not Found" error page. If that happens, clear your browser cache and try again.Using Range Extender SettingsClick Help on the right side of the screen for additional information on the screen’s options. Changes to settings will not be effective until you click Save at the bottom of the screen. You also can click Cancel to clear any changes.WPSWPS makes it easy to connect your extender to your network, and connect other devices to your network through the extender.Connecting the range extender to an existing access point or wireless router (see p. 6)Connecting devices to your network through the range extenderRepeat the instructions for each client device that supports WPS.1.Connecting with the WPS Buttona.Press the WPS button on the client device.b.Click the WPS button on the extender’s WPS screen, OR press and hold the WPSbutton on the side of the extender for one second. When the connection is complete,the light on the top of the range extender will be solid green for 20 seconds. If the lightblinks orange for two minutes, the connection failed. Go back to the previous step andtry again.c.If using the extender’s WPS screen, be sure to click OK within two minutes or you willhave to start over.2.Connecting with the client device’s PINa)Enter the PIN from the client device in the field on the extender’s WPSscreen.b)Click Register on the extender’s WPS screen. When the connection iscomplete, the light on the top of the range extender will be solid green for 20 seconds.c)Click OK on the extender’s WPS screen within two minutes or you will have tostart over.3.Connecting with the extender’s PINa)On the client device, enter the PIN listed on the extender’s WPS screen. (It isalso listed on the product label on the back of the extender.)b)Click OK on the client device’s WPS screen within two minutes.Access ControlAll devices connected to your range extender can access your Wi-Fi network if the extender can access the router. Use the Access Control feature to restrict certain devices. On the Wireless > Access Control screen you can specify the MAC addresses of devices to allow or deny.TroubleshootingYour range extender works on 2.4GHz and 5 GHz networks.You cannot get your range extender connectedCheck the position of your router and extender.•For first-time setup, you may need to place the extender closer to the router. After you’ve set up your extender, you can unplug it and move it to the final location.•To reduce signal obstructions, try alternate locations for the router and extender.•Avoid placing the router and extender near metal objects, masonry walls, and reflective surfaces such as glass or mirrors.•Avoid placing the router and extender near other electronics that may cause signal interference.If you’re using Wi-Fi Protected Setup to connect, wait until the WPS button light changes from solid orange to off before trying to make the connection again.You cannot access your range extenderTo access your range extender, you must be connected to your extended network. If you currently have wireless internet access, the problem may be that you have accidentally connected to a different wireless network.To fix the problem on Windows computers*:1.On your Windows desktop, click on the wireless icon in the system tray. A list of availablenetworks will appear.2.Click your extended network name. Click Connect. In the example below, the computer wasconnected to another wireless network named wraith_5GHz. Your extended network name, Damaged_Beez2.4_Ext in this example, is shown selected.3.If you are prompted to enter a network security key, type your password (security key) intothe network security key field. Click OK.4.Your computer will connect to the extended network, and you should be able to access therange extender’s settings interface.*Depending on your version of Windows, there could be some differences in wording or icons in these steps.To fix the problem on Mac computers, do the following:1.In the menu bar across the top of the screen, click the Wi-Fi icon. A list of wireless networkswill appear.2.In the example below, the computer was connected to another wireless network namedwraith_5GHz. Your extended network name, Damaged_Beez2.4_Ext in this example, is shown selected.3.Click the extended network name of your range extender (Damaged_Beez2.4_Ext in theexample).4.Type your wireless network password (Security Key) into the Password field. Click OK.You have intermittent connection problemsPlug in the range extender midway between your router and the area without Wi-Fi. Be sure you have at least 50% of your router’s Wi-Fi signal at that point on the device you used for setup. If you have two bars or lower, move closer to your router.To check the signal strength for individual devices connected to the extended network, go to the Status > Wireless Clients Table.SpecificationsRE9000Description Tri-Band Wireless-AC Range Extender Standards IEEE 802.11ac/a/b/g/nPorts 4 x Gigabit EthernetButtons Reset, Wi-Fi Protected Setup™Lights Power/Status, Wi-Fi Protected Setup,Ethernet (link, activity)Wireless Security WEP, WPA-Personal and WPA2-Personal EnvironmentalDimensions 170 mm x 136 mm x 45 mm(6.7 in x 5.35 in x 1.77 in)Weight .36 kg(.79 lb)Power External AC/DC power supply: 100-240V,2A, 50/60 HzCertification FCC , ICES 003, Wi-Fi (IEEE 802.11a/b/g/n),WPA2™, WMM®, Wi-Fi Protected Setup™ Operating Temp. 32 to 104°F (0 to 40°C)Storage Temp. -4 to 140°F (-20 to 60°C)Operating Humidity 10 to 80% non-condensingStorage Humidity 5 to 90% non-condensing Specifications are subject to change without notice.Visit /support/RE9000 for award-winning 24/7 technical support. BELKIN, LINKSYS and many product names and logos are trademarks of the Belkin group of companies. Third-party trademarks mentioned are the property of their respective owners. Licenses and notices for third party software used in this product may be viewed here: /en-us/license. Please contact /en-us/gplcodecenter for questions or GPL source code requests.© 2017 Belkin International, Inc. and/or its affiliates. All rights reserved.LNKPG-00506 Rev. A00。
美国网件 X6S AC3000 三频 WiFi 扩展器 EX8000 使用说明书
Do More Nighthawk X6SModel EX8000Use the Extender in Access Point Mode You can set up your extender as a WiFi access point. Tri-band WiFi is available when your extender is in access point mode.The following instructions assume that you did not previously set up your extender.¾1. The Power LED lights green.If the Power LED does not light, press the Power button.2. Connect a computer or mobile device to the extender using a WiFi orEthernet connection:• WiFi. On your WiFi-enabled computer or mobile device, open the WiFi connection manager and locate and connect to the extendernetwork called NETGEAR_EXT.When your WiFi-enabled computer or mobile device is connectedto the extender, the Client LED lights solid white.• Ethernet. Use an Ethernet cable to connect the Ethernet port on the extender to an Ethernet port on your computer.Note: If you want to use an Ethernet connection, you must dothis before you connect your extender to your modem router orrouter.3. Launch a web browser and visit .The NETGEAR installation assistant displays.4. Use an Ethernet cable to connect your router to an Ethernet port onthe extender.Note: Do not connect your extender directly to your DSL or cablemodem. The extender does not function as a router. If your network includes a DHCP server, you can connect the extender to a switch or hub that is connected to the DHCP server.5. Return to the NETGEAR installation assistant and follow the promptsto finish setting up your extender as an access point.Connect to the Extender NetworkAfter you complete the setup process, you can connect all your devices to the new extender network using a WiFi, wired, or WPS connection. WiFi connectionNote: If you enabled the One WiFi Name feature, your extender uses the the same WiFi network name and password as your router.¾To connect to the extender WiFi network:1. On your WiFi-enabled computer or mobile device, open the WiFiconnection manager that manages your WiFi connections.The WiFi connection manager scans for WiFi networks in your area. 2. Find and select your extender’s WiFi network name (SSID) and enteryour extender’s WiFi password.This is the SSID and password that you set up during the installation process. If you enabled the One WiFi Name feature, use your router’s SSID and password.Wired ConnectionYou can connect a wired device to an Ethernet port on your extender usingFor help with the WPS button on your WPS-enabled device, check the instructions or online help that came with that device. Some older equipment cannot use WPS.¾To connect to the extender using a WPS connection:1. Press the WPS button on the extender.The WPS LED blinks white.2. Within two minutes, press the WPS button on yor WPS-enabled device.When the extender connects to your WPS-enabled device, the WPS LED lights solid white.Log In to Access Extender SettingsAfter installation, you can log in to the extender to view or change the extender’s settings.¾To log in to the extender:1. Launch a web browser from a computer or mobile device that isconnected to your extender network.2. Log in to your extender:• If you did not enable the One WiFi Name feature, enter in the address field of the browser.• If you enabled the One WiFi Name feature, enter one of the following URLs:-Windows-based computer. http://mywifiext-Mac computers and iOS devices. http://mywifiext.local-Android devices. http://<extender’s IP address> (for example, http://192.168.1.3)To find your extender’s IP address, do the following:a. Log in to your router.b. Find the page in your router web interface that lists thedevices connected to your router.c. Find your extender in the list and note your extender’s IPaddress.d. Enter your extender’s IP address in the address field ofyour web browser.A login page displays.3. Enter your admin email address and password and click the LOG INbutton.The Status page displays.Change the Extender WiFi SettingsIf you enabled the One WiFi Name feature, you cannot change the WiFi network settings from the extender web interface. You must log in to your router to change your WiFi network settings.If you did not enable the One WiFi Name feature, you can change your extender’s WiFi settings from the extender web interface.¾To change your extender’s WiFi settings:1. Launch a web browser from a computer or mobile device that isconnected to your extender network.2. Log in to your extender:• If you did not enable the One WiFi Name feature, enter in the address field of the browser.• If you enabled the One WiFi Name feature, enter one of the following URLs:-Windows-based computer. http://mywifiext-Mac computers and iOS devices. http://mywifiext.local-Android devices. http://<extender’s IP address> (forexample, http://192.168.1.3)A login page displays.If you do not see the login page, see Log In to Access ExtenderSettings on page 6 for more information.3. Enter your admin email address and password and click the LOG INbutton.The Status page displays.4. Select Settings > Wireless.The Wireless page displays.5. To change the WiFi network name (SSID), enter a new name in theNetwork Name (SSID) field.6. To change the WiFi password, enter a new password in theWiFi Password field.7. Click the SAVE button.Your settings are saved.Enable or Disable One WiFi NameThe One WiFi Name feature enables your extender to use the same WiFi network settings as your router.¾To enable or disable the One WiFi Name feature:1. Launch a web browser from a computer or mobile device that isconnected to your extender network.2. Log in to your extender:• If you did not enable the One WiFi Name feature, enter in the address field of the browser.• If you enabled the One WiFi Name feature, enter one of the following URLs:-Windows-based computer. http://mywifiext-Mac computers and iOS devices. http://mywifiext.local-Android devices. http://<extender’s IP address> (for example, http://192.168.1.3)A login page displays.If you do not see the login page, see Log In to Access ExtenderSettings on page 6 for more information.3. Enter your admin email address and password and click the LOG INbutton.The Status page displays.4. Select Settings > Wireless.The Wireless page displays.5. To enable the One WiFi Name feature, select the Yes radio button.If this is the first time you are enabling the One WiFi Name feature, you must run the Smart Setup. Go to the Status page and click the SMART SETUP button to run the Smart Setup.6. To disable the One WiFi Name feature, select the No radio button.If you disable this feature, you can set a new SSID and password for the extender’s 2.4 GHz and 5 GHz networks in the Network Name (SSID) and WiFi Password fields on this page.7. Click the SAVE button.Your settings are saved.Frequently Asked QuestionsYou can find more information about your product in the user manual, which is available at .The web browser setup guide keeps asking me for my network password (passphrase) or security key, and I am sure that I entered the correct password. What can I do?The extender is probably placed at the borderline of the range coveredby the router or access point. To improve your signal strength, move your extender closer to your router and make sure that the Link Status LED lights solid white or amber.• Solid white. Best connection• Solid amber. Good connection• Solid red. Poor connection• Off. No connectionIf you are using WEP security, make sure that you are typing the network password in the correct field.I am connected to NETGEAR_EXT and launched a browser and I can’t I see the web browser setup guide. What can I do?Try these troubleshooting steps:• Make sure that your computer is set up to use DHCP (most are).• Make sure that the Client LED is white and that you are using a valid IP address.• Relaunch the web browser and enter in the address field. Enter your admin email address and password and click the LOG IN button.• If you are installing the extender as an access point, make sure that you are connecting your computer or WiFi device to the extenderthrough a WiFi connection instead of an Ethernet connection.How do I restore the extender to its factory default settings?1. Use a sharp object such as a pen or paper clip to press and hold theReset button on the extender for at least five seconds until the Link Status LED, Maximum Throughput LED, 2.4 GHz LED, and 5 GHz LED blink white.2. Release the Reset button and wait for the extender to reboot.The extender resets and returns to the factory default settings.I forgot my login email address and password. What can I do?On the login page, click the Username & Password Help link and answer the security questions that you set up during the initial setup.If you forgot the answers to your security questions, do the following to set up your login credentials again:1. Restore the extender to its factory default settings.2. Launch a web browser from a computer or mobile device that isconnected to your extender network.3. Log in to your extender:• If you did not enable the One WiFi Name feature, enter in the address field of the browser.• If you enabled the One WiFi Name feature, enter one of the following URLs:-Windows-based computer. http://mywifiext-Mac computers and iOS devices. http://mywifiext.local-Android devices. http://<extender’s IP address> (forexample, http://192.168.1.3)A login page displays.If you do not see the login page, see Log In to Access ExtenderSettings on page 6 for more information.4. Click the NEW EXTENDER SETUP button.When prompted, complete the fields on the page to set up your login credentials again.My router security is WEP, and I entered the wrong passwordor security key on the extender. I cannot access the extender anymore. What can I do?The extender cannot check to see if the WEP password is correct. If you entered the wrong password, your WiFi-enabled computer or mobile device is not able to get the IP address from the extender. You must reset the extender to its factory default settings to get the IP address back. Can I set up the extender in extender mode if I connect it to the router or access point with an Ethernet cable?No. The extender is designed to connect wirelessly to the router or access point if it is in extender mode. If the extender is in access point mode, you can connect it to the router or access point with an Ethernet connection. For more information about access point mode, see Use the Extender in Access Point Mode on page 2.I enabled a WiFi MAC filter, WiFi access control, or access control list (ACL) on my router. What should I do when installing the extender?When the WiFi device connects through the extender to your router, the MAC address of the WiFi device shown on the router is translated to another MAC address. If your router’s MAC filter, WiFi access control, or ACL is enabled, the WiFi device connects to the extender but cannot get an IP address from the extender and cannot access the Internet.To allow the WiFi device to receive an IP address from the extender and access the Internet, you must provide the translated MAC address to the router.¾To add a translated MAC address to your router:1. Log in to your router and disable the MAC filter, WiFi access control,or ACL.For more information about how to disable your router’s MAC filter, WiFi access control, or ACL, see your router’s documentation.2. Power on the extender and connect all of your WiFi devices to theextender.3. Make sure that the Link Status LED remains lit.4. Log in to your extender:a. Launch a web browser from a computer or mobile device that isconnected to your extender network.b. Log in to your extender:• If you did not enable the One WiFi Name feature, enter in the address field of the browser.• If you enabled the One WiFi Name feature, enter one of the following URLs:-Windows-based computer. http://mywifiext-Mac computers and iOS devices. http://mywifiext.local-Android devices. http://<extender’s IP address> (forexample, http://192.168.1.3)A login page displays.If you do not see the login page, see Log In to Access ExtenderSettings on page 6 for more information.c. Enter your admin email address and password and click theLOG IN button.5. Select Settings > Connected Devices.The Connected Devices page displays the MAC addresses and virtual MAC addresses for computers and WiFi devices that are connected to the extender network.6. On the router, add the extender’s virtual MAC addresses and all of thevirtual MAC addresses of the devices connected to the extender to your router’s MAC filter table.7. Enable the router’s MAC filter, WiFi access control, or ACL.July 2017NETGEAR, Inc.350 East Plumeria DriveSan Jose, CA 95134, USA NETGEAR INT LTD Building 3 University Technology CentreCurraheen Road Cork IrelandSupportThank you for purchasing this NETGEAR product. You can visit /support to register your product, get help, access the latest downloads and user manuals, and join our community. We recommend that you use only official NETGEAR support resources.Trademarks© NETGEAR, Inc., NETGEAR and the NETGEAR Logo are trademarks of NETGEAR, Inc. Any non-NETGEAR trademarks are used for reference purposes only.ComplianceSi ce produit est vendu au Canada, vous pouvez accéder à ce document en français canadien à /other/.(If this product is sold in Canada, you can access this document in Canadian French at /other/.)For the current EU Declaration of Conformity, visit /11621.For regulatory compliance information, visit /about/regulatory/.See the regulatory compliance document before connecting the power supply.。
无线路由刷机失败修复办法与方案
无线路由刷机失败修复办法与方案一、刷机变砖的原因:在我们了解使用命令和刷机变砖操作告别之前,需要了解刷机变砖的原因。
当我们向无线路由器执行刷机操作时和我们平时安装操作系统有类似之处。
而变砖的最主要原因就是固件程序不匹配,说白了就是操作系统版本不对。
就笔者经验来说刷机变砖主要由两点造成的,第一是固件程序选择不适合无线路由器,例如用B厂商对应的固件给A厂商的无线路由器刷机升级;第二则是固件程序版本选择错误,由于DD-WRT自身的版本有很多种,包括完全版,VOIP 版,精简版和MEGA版等,不同版本之间功能上存在差异,对设备硬件的要求也是不同的。
特别是FLASH容量这个参数很重要,有些用户用8M容量的固件向FLASH容量只有4M产品上进行刷机,最终结果必然是设备变砖。
对于原因一来说我们只需要在下载时核对DD-WRT的文件名即可判断他是针对哪个厂商产品发布的,从而避免刷错变砖问题的发生;而对于原因二来说判断起来相对比较困难,我们并不知道自己的设备FLASH容量是多少,那么选择时是用完全版还是精简版呢?本文介绍的方法就是针对用户在原因二中产生的疑惑进行解决的,通过一条命令了解自己设备的FLASH容量,从而因地制宜的选择大容量固件或者小容量固件程序。
二、用命令和刷机变砖告别:在前文中我们已经了解到出现问题主要是因为FLASH容量过小而使用的固件程序容量过大,从而造成刷机后FLASH被写满而无法顺利启动最终变砖。
下面笔者介绍一条指令,通过此命令可以让普通用户对自己的无线路由器FLASH容量有一个清晰的了解,从而避免错刷问题的发生。
第一步:假设我们的无线路由器管理地址为192.168.1.1,那么我们在一台连接该路由器的主机上通过命令提示窗口中的telnet 192.168.1.1命令连接无线路由器。
小提示:如果发现使用telnet 192.168.1.1命令连接后出现超时的错误提示时,很可能是无线路由器的telnet服务没有开启,我们需要进入DD-WRT管理界面开启telnet 服务。
网易路由器 Wi-Fi USB 适配器 A6200 安装指南说明书
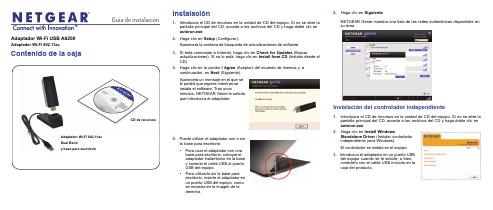
®Guía de instalación Adaptador Wi-Fi USB A6200Adaptador Wi-Fi 802.11acContenido de la cajaCD de recursosAdaptador Wi-Fi 802.11acDual Bandy base para escritorio Instalación1. Introduzca el CD de recursos en la unidad de CD del equipo. Si no se abre lapantalla principal del CD, acceda a los archivos del CD y haga doble clic enautorun.exe.2. Haga clic en Setup (Configurar).Aparecerá la ventana de búsqueda de actualizaciones de software.3. Si está conectado a Internet, haga clic en Check for Updates (Buscaractualizaciones). Si no lo está, haga clic en Install from CD (Instalar desde elCD).4. Haga clic en la opción I Agree (Aceptar) del acuerdo de licencia y, acontinuación, en Next (Siguiente).Aparecerá un mensaje en el que sele pedirá que espere mientras seinstala el software. Tras unosminutos, NETGEAR Genie le solicitaque introduzca el adaptador.5. Puede utilizar el adaptador con o sinla base para escritorio:• Para usar el adaptador con unabase para escritorio, coloque eladaptador inalámbrico en la basey conecte el cable USB al puertoUSB del equipo.• Para utilizarlo sin la base paraescritorio, inserte el adaptador enun puerto USB del equipo, comose muestra en la imagen de laderecha.6. Haga clic en Siguiente.NETGEAR Genie muestra una lista de las redes inalámbricas disponibles ensu área.Instalación del controlador independiente1.Introduzca el CD de recursos en la unidad de CD del equipo. Si no se abre lapantalla principal del CD, acceda a los archivos del CD y haga doble clic enautorun.exe.2. Haga clic en Install WindowsStandalone Driver (Instalar controladorindependiente para Windows).El controlador se instala en el equipo.3. Introduzca el adaptador en un puerto USBdel equipo cuando se le solicite, o bien,conéctelo con el cable USB incluido en lacaja del producto.Septiembre de 2012Este símbolo aparece conforme a la directiva 2002/96 de la UE sobre residuos de aparatoseléctricos y electrónicos (directiva RAEE). Si tuviera que desechar este producto dentro de la Unión Europea, deberá tratarlo y reciclarlo de conformidad con lo dispuesto en las leyes locales pertinentes, en aplicación de la directiva RAEE.NETGEAR, el logotipo de NETGEAR y Connect with Innovation son marcas comerciales o marcas comerciales registradas de NETGEAR, Inc. o sus filiales en Estados Unidos y otros países. La información contenida en el documento puede sufrir modificaciones sin previo aviso. El resto de marcas y nombres de productos son marcas comerciales o marcas comerciales registradas por sus respectivos titulares. ©NETGEAR, Inc. Todos los derechos reservados.Para uso exclusivo en interiores en todos los países de la UE y Suiza.Para consultar la declaración de conformidad de la UE completa, visite /app/answers/detail/a_id/11621/.Condiciones : con el fin de mejorar el diseño interno, el funcionamiento y la fiabilidad, NETGEAR se reserva el derecho de realizar modificaciones del producto descrito en el presente documento sin previo aviso. NETGEAR no asume responsabilidad alguna derivada del uso o la aplicación del producto o del circuito descritos en el presente documento.Conexión a una red inalámbricaPuede conectarse a una red inalámbrica desde NETGEAR Genie o bien, usar el botón WPS (Wi-Fi Protected Setup) si el router inalámbrico lo admite.• Opción 1: NETGEAR Genie . Haga clic en su red inalámbrica (SSID) paraseleccionarla y, a continuación, haga clic en Connect (Conectar). Si la red está protegida, introduzca la contraseña o clave de red. • Opción 2: WPS . Mantenga pulsado el botón WPS del lateral del adaptadordurante 2 segundos.Antes de que transcurran 2 minutos, pulse el botón WPS del router o la puerta de enlace inalámbricos.El adaptador se conectará a la red. Este proceso puede tardar varios minutos.La configuración se guarda en un perfil.Botón WPSComprobación del estado de la conexiónTras instalar el adaptador, el icono de NETGEAR Genie aparece en la barra de sistema de Windows y en el escritorio. Haga doble clic en él para abrir NETGEAR Genie y realizar cambios o conectarse a una red inalámbrica diferente. El color del icono indica la intensidad de la conexión inalámbrica:Blanco: 3-5 barras (intensidad alta)Amarillo: 1-2 barras (intensidad baja)Rojo: 0 (cero) barras (sin conexión)Si extrae el adaptador, NETGEAR Genie no estará disponible, por lo que el icono tampoco se mostrará. Cuando vuelva a conectar el adaptador, el icono apareceráde nuevo.Ampliación del alcance y del rendimientoPara aumentar el alcance y el rendimiento, puede gira la parte superior del adaptador de modo que quede perpendicular al mismo:En esta posición, las antenas internas se extienden desde el adaptador y aumenta el rendimiento Wi-Fi.Servicio técnicoUna vez instalado el dispositivo, busque el número de serie en la etiqueta del producto y regístrelo en https:// .De lo contrario, no podrá hacer uso del servicio telefónico de asistencia deNETGEAR. NETGEAR recomienda registrar el producto a través del sitio web de NETGEAR. Podrá encontrar actualizaciones del producto y asistencia técnica en .Encontrará el manual del usuario en línea en o a través de un vínculo en la interfaz de usuario.。
- 1、下载文档前请自行甄别文档内容的完整性,平台不提供额外的编辑、内容补充、找答案等附加服务。
- 2、"仅部分预览"的文档,不可在线预览部分如存在完整性等问题,可反馈申请退款(可完整预览的文档不适用该条件!)。
- 3、如文档侵犯您的权益,请联系客服反馈,我们会尽快为您处理(人工客服工作时间:9:00-18:30)。
Linksys EA6200翻新新低价,千兆级高性价比~Linksys是民用路由器高端品牌,先前由业界大佬Cisco 思科持有,而Linksys EA6200属于其中高端产品。
当前,思科已与Belkin贝尔金达成协议,将家庭网络业务部门转让给后者,包括相关技术,员工及Linksys品牌,后续产品如EA6900再无思科血统。
Linksys EA6200算是当前民用802.11.ac路由中的中高端配置,内置四天线,支持5GHZ 867MGbps和
2.4GHZ 300Mbps的双频高速传输;有线接口千兆,更适合组建家庭网络,更附有USB
3.0接口可外接移动硬盘共享,打印分享和存储内容。
出于当地法律规定,美版5G频段信道比港版更多。
由于先前使用的360出的路由器360P1,信号什么的和远程控制体验都还不错,就是看视频老卡,不知是不是国产路由器的原因,就想买个Linksys的路由器感受下,毕竟是外国货,民用路由器高端品牌,看到美国新蛋网出的EA6200官方翻新版才27.99美元,加上运费单个到手大概250元左右一个,价格十分划算,国外的官方翻新版还是比较放心的,不会像国内那样瞎搞!话不多说,到官网上撸了两个路由器,下面是新蛋网的订单截图,两个一共55.98美元,转运公司用的是转运帮,由于路由器比较重,两个重量达到1.95千克,运费花了我154元(好心疼,没想到路由器那么重)
新蛋网订单截图
转运帮转运截图(电子产品走转运帮还是不错的,体验蛮好的)
海外飘了几十天,路由器到手,深圳那边邮政快递过来。
在地上有点不庄重,我拿到桌上来开箱。
包装非常简单
开箱,Linksys EA6200字眼映入眼帘,有点小激动。
送的关盘,适配器,双绞线。
路由器拿出来
撕开的它的塑料膜,电子产品这一刻是最美的。
下面配置路由器,拿到路由器,注意官翻版的路由器最好重置一下路由器,默认密码是admin,这边Linksys EA6200
进入了配置界面,全是英文,我英语一般,还能看懂,进行上网拨号配置,这边不做详细说明,不会的百度。
用这个路由器,注意是体验的它的无线,双频路由器,2.4G和5G两个界面的配置。
已经配置好
屁股后面来一张
优点:
比较稳定,目前用了一周从未关机是一点问题都没有,手机连上5G的信号看视频明显缓冲时间变(前提是你的手机得支持5G,不然你搜索不到5G的信号的)
缺点:
就是发热比较大。
