linksys交换机简要配置手册中文版(v1.1)
linksys 设置
Linksys设置Linksys是一家知名的网络设备制造商,提供了一系列的路由器和交换机产品。
在本文档中,我们将详细介绍如何设置Linksys路由器。
硬件准备在开始设置Linksys路由器之前,我们需要准备以下硬件:1.Linksys路由器2.电源适配器3.电脑或者智能手机4.网线确保所有硬件都已准备好,并按照以下步骤进行设置。
步骤一:连接路由器1.将Linksys路由器的电源适配器插入电源插座,并连接到路由器的电源端口。
2.使用一个网线连接路由器的WAN(广域网络)端口与您的宽带调制解调器(例如:光纤调制解调器,DSL调制解调器)相连。
3.使用另一根网线将您的电脑或智能手机的网络接口与路由器的任意一个LAN(局域网)端口连接。
步骤二:访问路由器设置页面1.打开您的浏览器,并在地址栏中输入路由器的默认网关IP地址。
通常情况下,Linksys路由器的默认网关地址是192.168.1.1。
如果不确定路由器的默认网关地址,可以在路由器的用户手册中查找。
2.按下回车键后,您将被重定向到Linksys路由器的登录页面。
步骤三:登录到路由器1.在登录页面中,输入您的用户名和密码。
默认情况下,Linksys路由器的用户名为空,密码为admin(注意区分大小写)。
如果您曾经更改过这些登录凭据,请输入相应的用户名和密码。
2.点击登录按钮,您将被登录到Linksys路由器的设置界面。
步骤四:配置无线网络1.在路由器设置界面中,找到Wireless(无线)选项,并点击进入无线设置页面。
2.在无线设置页面中,您可以更改无线网络的名称(也被称为SSID)和密码。
确保选择一个安全的密码,以防止未经授权的访问您的网络。
3.选择适当的加密协议,如WPA2-Personal,以确保您的无线网络的安全性。
4.保存您的无线网络设置,并将设置应用到路由器上。
步骤五:配置网络连接1.在路由器设置界面中,找到Internet(互联网)选项,并点击进入互联网设置页面。
LINKSYS SR224G交换机 说明书
FCC STATEMENT Every 10/100/1000 Gigabit Switch has been tested and complies with the limits for a Class B digital device, pursuant to Part 15 of the FCC Rules. These limits are designed to provide reasonable protection against harmful interference in a residential installation. This equipment generates, uses, and can radiate radio frequency energy and, if not installed and used according to the instructions, may cause harmful interference to radio communications. However, there is no guarantee that interference will not occur in a particular installation. If this equipment does cause harmful interference to radio or television reception, which is found by turning the equipment off and on, the user is encouraged to try to correct the interference by one or more of the following measures:
LINKSYS无线路由简单配置(全程图解)
LINKSYS Wireless-G 2.4G Broadband Router
1.复位键:复位键(Reset)有两种方式可以对路由器的出厂默认设置进行复位。
可以按住复位键5 秒(如下图)
2.按下图连接网络硬件(下图是使用ADSL连接方式):
3.如图使用网线连接计算机:
4.将交流电源适配器连接到路由器的电源端口,将另一端连接到电源插座上。
只使用专门为路由器配备的电源适配器(如图)
5.如欲接入到另一台路由器的基于网页的工具,打开IE 或是网景浏览器,在“地址”栏输入另一台路由器的默认IP 地址192.168.1.1 。
之后按回车键。
认密码为admin)。
之后,单击“确定”键。
无线--基本无线设置
备注:修改完必须保存配置
8.无线加密
无线—无线安全
备注:修改完必须保存配置
9.配置保存后,使用无线你会发现又一个命名为BYD的无线信号。
思科linksys无线路由器设置详解

1 、登录路由器。
地址:在IE地址栏内输入192.168.1.1 用户名/密码:admin
2、设置PPPOE拨号模式。
红框处下拉,选择PPPOE模式
USERNAME:宽带用户名。
PASSWORD:宽带密码。
3、设置完后,点击保存设置
4、无线的基本设置页面
SSID处可以更改为你想要的名称。
其他地方可以不改。
5、无线的安全设置
大家可以根据自己的需要选择加密的方式,上图选的是WPA模式。
(选的时候注意了,有些加密模式网卡并不支持)6、端口映射
start-end port:起始端口(填入你需要开启的端口号,可以选择一个范围内的端口) protocol:协议(你开启端口的协议类型,根据软件选择TCP或UDP) to ip address:目标IP地址(需要端口映射的主机的IP) 7、DMZ
实在不会端口映射,就使用DMZ吧。
(虽然不太安全) 8、查看路由的状态
设置好后,在上面红框内能显示出路由器当前状态。
(由于是测试,上图状态是空的,正常连接的情况下,ip address、subnet mask等栏内都是有数字类的显
示的)基本设置就以上方法了。
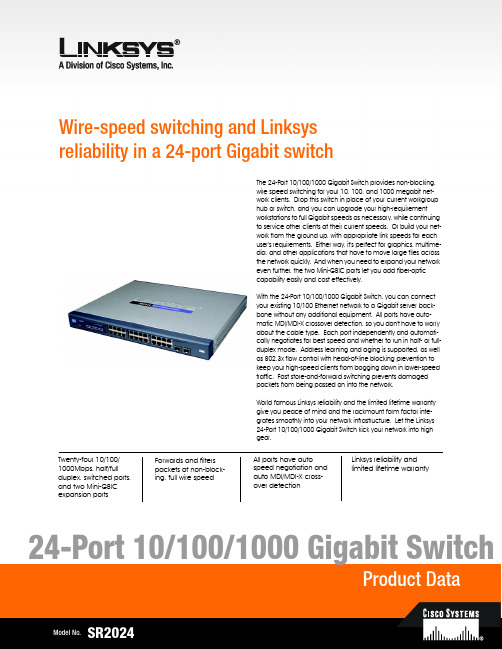
Linksys SR2024 24-Port Gigabit 交换机用户说明书
Wire-speed switching and Linksys reliability in a 24-port Gigabit switchTwenty-four 10/100/1000Mbps, half/full duplex, switched ports, and two Mini-GBIC expansion portsLinksys reliability and limited lifetime warrantyForwards and filters packets at non-block-ing, full wire speedAll ports have autospeed negotiation and auto MDI/MDI-X cross-over detectionThe 24-Port 10/100/1000 Gigabit Switch provides non-blocking, wire speed switching for your 10, 100, and 1000 megabit net-work clients. Drop this switch in place of your current workgroup hub or switch, and you can upgrade your high-requirement workstations to full Gigabit speeds as necessary, while continuing to service other clients at their current speeds. Or build your net-work from the ground up, with appropriate link speeds for each user's requirements. Either way, it's perfect for graphics, multime-dia, and other applications that have to move large files across the network quickly. And when you need to expand your network even further, the two Mini-GBIC ports let you add fiber-optic capability easily and cost effectively.With the 24-Port 10/100/1000 Gigabit Switch, you can connect your existing 10/100 Ethernet network to a Gigabit server back-bone without any additional equipment. All ports have auto-matic MDI/MDI-X crossover detection, so you don't have to worry about the cable type. Each port independently and automati-cally negotiates for best speed and whether to run in half- or full-duplex mode. Address learning and aging is supported, as well as 802.3x flow control with head-of-line blocking prevention to keep your high-speed clients from bogging down in lower-speed traffic. Fast store-and-forward switching prevents damaged packets from being passed on into the network.World famous Linksys reliability and the limited lifetime warranty give you peace of mind and the rackmount form factor inte-grates smoothly into your network infrastructure. Let the Linksys 24-Port 10/100/1000 Gigabit Switch kick your network into high gear.Features•24 RJ-45 ports for 10BASE-T/ 100BASE-TX/1000BASE-TX con-nections•Supports half duplex and full duplex modes auto-negotia-tion for all ports.•Auto MDI/MDI-X support on all ports for easy cable detec-tion•Efficient MAC Address learn-ing engine supports up to 8K MAC Addresses •Provides store-and-forward forwarding scheme.•Standard width and mounting kit (included) make it easy to be installed into a rack •Two mini-GBIC ports for easy expansion to other mini-GBIC equipped switchesLinksysA Division of Cisco Systems, Inc.18582 Teller AvenueIrvine, CA 92612 USAE-mail:************************************Web:Linksys products are available in more than 50 countries, supported by 12 Linksys Regional Offices throughout the world. For a complete list of local Linksys Sales and Technical Support contacts, visit our Worldwide Web Site at .Package Contents•One 24-Port 10/100/1000 Gigabit Switch •One AC Power Cord•One User Guide with Registration Card •One Set of Rack Mounting brackets24-Port 10/100/1000 Gigabit SwitchSpecificationsModel Number SR2024Standards IEEE 802.3, 802.3u, 802.3x, 802.3abPorts24 RJ-45 10/100/1000 + 2 Mini-GBIC portsCabling Type Category 5e or betterLEDs System, 1 through 24EnvironmentalDimensions432 mm x 45 mm x 349 mm(W x D x H)(17.01" x 1.75" x 13.74")Unit Weight7.98 lb. (3.62 kg)Power Input110-120VAC, 100WCertifications FCC Class B, CEOperating Temp.32ºF to 122ºF (0ºC to 50ºC)Storage Temp.-40ºF to 158ºF (-40ºC to 70ºC)Operating Humidity20% to 95%, Non-CondensingStorage Humidity5% to 95%, Non-CondensingSpecifications are subject to change without notice. Linksys and EtherFast are registered trademarks of Cisco Systems, Inc. Other brands and product names are trademarks or registered trademarks of their respective holders. Copyright © 2003 Cisco Systems, Inc. All rights reserved.SR2024-DS-80508A-KO。
linksys路由器配置文档

Linksys路由器配置文档注:如果安装地无网络,那么请先在办公室进行配置和调试,已达到测试路由器是否能联通网络1、首先把电脑跟linksys路由器进行联通,修改本地电脑IP跟路由器默认登录IP设置相配2、登录路由器设置界面,用户名:admin 密码:admin 进入后就可以看到一下界面注:连接电脑网线端口插1-4端口,internet(wan1)为网络信号接入端口,wan2端口为网络信号接入备用端口2、点击设置界面横条上的step按钮注:如果网络信号接入线插在wan1端口,请配置wan1端口的网络接入方式,如为wan2请配置wan2端口的网络接入方式,通常普遍的是PPOE宽带拨号方式,输入宽带帐号和密码即可4、配置VPN(点击设置界面横条上VPN按钮)5、然后点击”Add New Tunnel”6选择第一个点击”Add New”7、然后就可以开始配置VPN通道8、如果拨号方式选择为wan1,那么这里的设置也相对应选择wan1,然后在“Tunel Name”填入已经编写好的部门编号11、配置VPN识别参数12、最后点击保存设置并退出,然后重启路由器以上为门店linksys设备的设置接下来为杭州机电总部的设置流程:1、门店地址在总部的添加1、打开一个空IE,在地址栏上输入:122.224.110.133上图为输入该IP后弹出的窗口,用户和密码均为:hillstone 点击登陆2、登陆进去后,在左边点击对象→地址簿如图:3、在点击地址簿后,点击右边地址薄栏上的新建如图4、点击新建弹出了地址薄基本配子:在名称栏上输入需配子分店的路由IP/24(为了方便认知,名称也可随意设置)如图5、点击成员列表右下芳的添加,弹出如下图:类型选择IP地址,成员必须的需键通道分店路由的IP地址,支持通配符掩码为24不变,然后点击确定,完成该店地址薄的添加2、总部VPN的设置1、点击总部路由左边VPN→IPSec VPN 如图:2、在点击IKE VPN下边栏上的新建如图3、1)下面为VPN新建步骤1,如图:2)下面为VPN新建步骤2,如图:3、下面为防火墙→策略的添加1、点击总部路由左边防火墙→策略如图3、将源安全域改为:trust 和目的安全域改为:untrust,点右边的搜索,如图4、点击搜索右边的新建进去设置如图根据以上配置后,点确定5、将源安全域改为:untrust 和目的安全域改为:trust,点右边的搜索,如图6、点击搜索右边的新建进去设置如图根据以上配置后,点击确定最后把设置好的分机那到店里进行网络测试。
LINKSYS交换机配置

(Switching) (Config)#spanning-tree
(Switching) (Config)#exit
(Switching) #copy system:running-config nvram:startup-config
8、 启用广播包抑制
(Switching) (Vlan)#vlan name XXX yyyy //设置vlan名称
(Switching) (Interface 0/x)#vlan pvid xxx //设置pvid
(Switching) (Interface 0/7)#vlan tagging xxx //设置以Tag方式通过的vlan
(Switching) (Config)#exit
(Switching) #copy system:running-config nvram:startup-config
删除系统默认的public(ro)、private(rw)字符串,指定读写字符串(rw)为: wzNAdxl
7、 Spanning-tree配置
(Switching) (Interface 0/20)#description 7-201
(Switching) (Config)#exit
(Switching) #copy system:running-config nvram:startup-config
分为用户端口描述和级联端口描述。
(Sபைடு நூலகம்itching) (Interface 0/x)#no auto-negotiate //取消自动协商
(Switching) (Interface 0/x)#speed 10 half-duplex //限速为10M
Linksys路由器快速设置指南
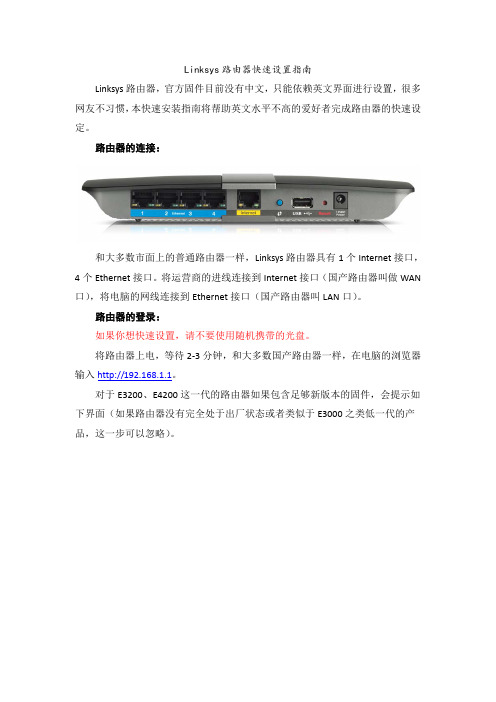
Linksys路由器快速设置指南Linksys路由器,官方固件目前没有中文,只能依赖英文界面进行设置,很多网友不习惯,本快速安装指南将帮助英文水平不高的爱好者完成路由器的快速设定。
路由器的连接:和大多数市面上的普通路由器一样,Linksys路由器具有1个Internet接口,4个Ethernet接口。
将运营商的进线连接到Internet接口(国产路由器叫做WAN 口),将电脑的网线连接到Ethernet接口(国产路由器叫LAN口)。
路由器的登录:如果你想快速设置,请不要使用随机携带的光盘。
将路由器上电,等待2‐3分钟,和大多数国产路由器一样,在电脑的浏览器输入http://192.168.1.1。
对于E3200、E4200这一代的路由器如果包含足够新版本的固件,会提示如下界面(如果路由器没有完全处于出厂状态或者类似于E3000之类低一代的产品,这一步可以忽略)。
点击Continue with open and unsecured netwok,会出现如下界面:勾选I understand that my network is currently open and not secure.前的复选框,点击Continue按钮。
会提示你输入用户名和密码:这个初始用户名为空,密码为:admin如果无法登录,或者提示密码不正确,请进行路由器30‐30‐30复位操作。
路由器的复位:如果你感觉到你的路由器不正常,或者配置有问题想恢复出厂设置、或者忘记了登录密码,都可以进行复位操作。
复位操作将初始路由器的所有配置,原先保存在路由器里面的设置将全部清理。
将路由器断电关机,静候30秒之后,用尖物(镊子、笔等)顶住路由器的RESET按钮(E3000、E4200在电源边,E3200等盘形的路由器在路由器的底部)。
顶住RESET按钮开机,上电30秒之后,断电关机,这个步骤中,尖物千万不能放松。
断电30秒之后,正常开机,机器就已经复位恢复出厂设置了。
Linksys智能WiFi无线路由器说明书

/us/wireless-routers/c/smart-wi-fi-wireless-routers/#fullstoryMonitor and control your home Wi-Fi. Anytime. Anywhere – Download the Linksys Smart WiFi appDownload the Linksys App to your phone for easy set up. Follow the App instructions to complete set up.Manage your home WiFi from any mobile deviceDEVICE LIST See Who’s Online View which devices are connected to your home Wi-FiGUEST ACCESSShare Y our Wi-Fi Permit up to 50 guestsWi-Fi accessDEVICE PRIORITIZATIONPlay FavoritesAssign connection hierarchyfor all devicesPARENTAL CONTROLSSet Boundaries Manage your kids’ accessand usageADVANCED SETTINGSConnect BetterAccess advanced features to get more out of your routerWIRELESSConnect and Share Safely Password retrieval, connectand share home Wi-FiDASHBOARD Wi-Fi at Y our Fingertips Get real-time info about yourWi-Fi networkMANAGE NETWORKSSimplify Network Access Manage your network,all in one placeStarHub – Typical Fibre Set UpFibre T erminationPoint (FTP)Wireless RouterPower Sockets Optical Network T erminal (ONT)LAN Cable Cat 5eor Cat 6/RJ45StarHub Installation GuideEA8100 RouterMAX-STREAMDECT phone*Please note that if you have your own CCTV/Security/PABX installation/Gaming/ other port forwarding setup in your home premises (current router), please refer to your specific vendor/provider for further assistance when you are replacing your current router with a NEW router.Internet LED: Fixed WhiteONTPower SocketRouterMonitor and control your home Wi-Fi. Anytime. Anywhere – Download the Linksys Smart WiFi appDownload the Linksys App to your phone for easy set up. Follow the App instructions to complete set up.Quick and Easy SetupSet up your home Wi-Fi using a Linksys Smart Wi-Fi Router Download the free our Mobile Device to Manage Y our Home Wi-FiManaging your home Wi-Fi with Linksys Smart Wi-Fi is fast and easy:11: When connected tothe internet, the router will be able to detect available updates for you to apply on your device.Under the Firmware Update section, check the box to enable the Automatic firmware update option. Once done, click Apply to save the changes.In order to optimize your antennas’ maximum signal, the following positions are recommended:For multi-storey environments:• two (2) of the antennas should be pointing straight up and the other two (any two) should be adjusteddepending where you need the coverage and where you want the signal to radiate.For Additional information and how to videos visit the links below./fi/support-article?articleNum=142491https:///watch?v=tXlS9eObXuATroubleshooting1. How can I reset the Linksys EA8100 to factory defaults?ways to reset the Linksys EA8100 to factory defaults:Press and hold the Reset button on the back panel of the Linksys EA8100 for about – Log in to your Linksys Smart Wi-Fi Account. Under Router Settings, click Troubleshooting > Diagnostics . Click 2. I have reset the Linksys EA8100 and now I can’t launch the setup page. What should I do?Y ou need more help?Alternatively, you may call Linksys at:6701-69718820-02607 Rev.A00ou can try the following troubleshooting suggestions:Access your Linksys Smart Wi-Fi account locally by opening your web browser and typing in . Input the admin password which is ‘admin’If your computer has a static IP Address, make sure it has valid DNS numbers. If not, set the computer Remote Assistance –Should you need more helpIMPORTANT NOTICE: In activating Agent Assist, the Linksys Support Agent (“Agent”) will have access to Customer’s Smart Wi-Fi account settings but not to computer settings or any information stored on the computer, and the Customer’s Wi-Fi network name and password will be visible to the Agent. We therefore strongly encourage Customer to change his/her Wi-Fi password immediately after the Agent Assist session.。
思科和linksys产品交换机文档

产品特色: 产品特色: 1、丰富的产品种类,全系列的二层智能交换机和非网管交换机,支持256个Vlan和4096个vlan id 、丰富的产品种类,全系列的二层智能交换机和非网管交换机,支持 个 和 个 8口、16口、24口和 口;100m接入、1000M上联或者全 口和48口 接入、 上联或者全1000M口。 口 口 口和 接入 上联或者全 口 2、全系列无阻塞线速转发 、 全系列产品都提供高速交换矩阵, 全系列产品都提供高速交换矩阵,提供无阻塞的线速转发 3、易于管理和配置 、 基于WEB页面的管理界面为主,同时具有 页面的管理界面为主, 基于 页面的管理界面为主 同时具有console口,可以同时通过 口 可以同时通过console和WEB进行管理 和 进行管理 4、部分产品可堆叠(使用千兆的双绞线堆叠)以提高管理性 、部分产品可堆叠(使用千兆的双绞线堆叠) 百兆机型,使用G0/1和G0/2口,千兆 口机型使用 口机型使用G0/12和G0/24口作为堆叠口,千兆 口机型使用 口作为堆叠口, 口机型使用G0/24和 百兆机型,使用 和 口 千兆24口机型使用 和 口作为堆叠口 千兆48口机型使用 和 G0/48口作为堆叠口。 口作为堆叠口。 口作为堆叠口 支持STP,RSTP,MST生成树协议 支持 , , 生成树协议 5、相对较低廉的价格 、 系列而言, 的产品价格显得格外的平易近人: 相对于昂贵的思科 CATALYST系列而言,LINKSYS的产品价格显得格外的平易近人 系列而言 的产品价格显得格外的平易近人 口全千兆, 口可以替换为mini GBIC接口光模块 参考价格:¥ :¥9200;)-数据来源于 )-数据来源于 (LINKSYS SRW2048 48口全千兆,最后 口可以替换为 口全千兆 最后4口可以替换为 接口光模块 参考价格:¥ )- 中关村在线
linksys设置方法

自动设置使用说明:首先把无线中继通上电,这时上面的灯是一红一蓝。
然后按下侧面的“Auto configuration”按钮,它的红灯就会闪动,这是在搜寻无线信号,稍稍过了几秒,就变成蓝色了,说明已经连接上。
这里有个特别要注意的,因为无线网卡之前已经直接无线连上了路由器,所以,启动WRE54G之后要断开无线网卡的连接,重新连接一次,这样才有效。
无线网卡在重新连接的时候,WRE54G的灯又会闪动一阵子。
确定连接好后,有数据的时候,WRE54G上面的蓝会闪动哦!上面的是自动设置的说明,自动动设置优点就是简单方便,但它只是选最强信号的进行中继,如果你想中继自己指定的信号,就要用手工设置了.也就是说要进入WRE54G的设置页面进行设置,首先把你的无线网卡(或用有线网卡)IP地址设置为192.168.1.88,子网掩码是255.255.255.0,然后通过IE浏览器访问WRE54G的默认IP192.168.1.240,用户名空,密码是admin进入之后,重点是:设置与所中继的信号相同的SSID及信道,若信号加了密,还要设置相同的加密方式及加密码,这样就大功告成下面以TP-LINK路由为例来演示设置方法一,链接到linksysXXXXX("XXXXX"为MAC地址的后六位)。
因为WRE54G并没有内置DHCP服务器,所以前提是需要自己设置无线的IP,IP地址设置为192.168.1.88,子网掩码是255.255.255.0。
二、链接到linksysXXXXX后,打开IE浏览器,在地址栏输入192.168.1.240并按回车键进入WRE54G的WEB管理界面。
用户名不用填,密码是admin三、进入WEB设置界面后,把SSID改为你要放大的热点名,并且选择好相关的信道(就是你要放大的那个热点的信道),(保存一下){{如果要放大的信号是加了密的,则需要在"Wireless Security"一栏选"Enable",然后点"Edit Security Setting"进去选择加密方式及密码,确定后回来下面这个页面}},接着单击“保存”。
Linksys无线路由器轻松配置
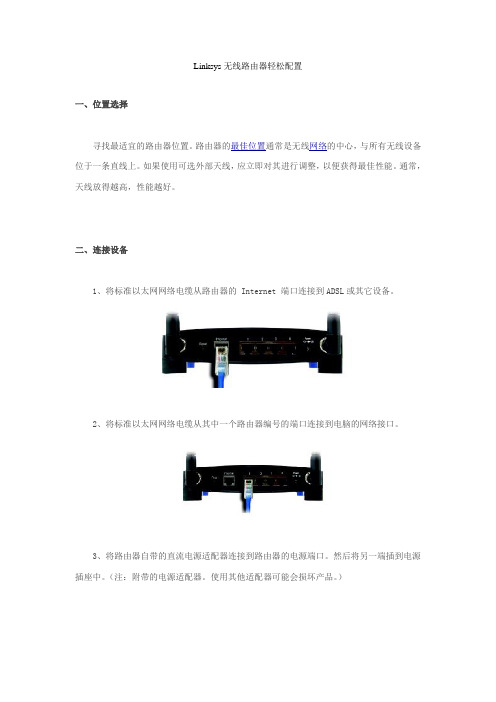
Linksys无线路由器轻松配置一、位置选择寻找最适宜的路由器位置。
路由器的最佳位置通常是无线网络的中心,与所有无线设备位于一条直线上。
如果使用可选外部天线,应立即对其进行调整,以便获得最佳性能。
通常,天线放得越高,性能越好。
二、连接设备1、将标准以太网网络电缆从路由器的 Internet 端口连接到ADSL或其它设备。
2、将标准以太网网络电缆从其中一个路由器编号的端口连接到电脑的网络接口。
3、将路由器自带的直流电源适配器连接到路由器的电源端口。
然后将另一端插到电源插座中。
(注:附带的电源适配器。
使用其他适配器可能会损坏产品。
)4、现在已完成硬件安装三、设置路由器路由器支持基于 Web 的实用程序。
路由器的默省IP 地址为 192.168.1.1。
所以首先把自己的电脑指定一个IP地址和路由器的IP地址在一个网段(如:IP地址:192.168.1.100 掩码255.255.255.0)。
1、要访问基于 Web 的实用程序,请启动 Internet Explorer或其它的浏览器。
2、在地址栏输入路由器的地址192.168.1.1,然后按下 Enter。
3、在出现的口令请求页面。
将用户名字段留空。
使用默省口令admin。
然后单击确定按钮。
4、在出现的第一个屏幕显示“setup”选项卡。
使用该选项卡可以更改路由器的常规设置。
5、在Internet 连接类型,从下拉菜单中选择 ISP 提供的 Internet 连接类型。
一般使用ADSL的用户都选择PPPOE来上网。
6、如果是通过ADSL线路连接到 Internet,则必须启用 PPPoE。
然后在用户名和口令分别输入申请宽带的用户名和口令如果想让路由器连接后一直保持不断开,就选择“keep alive..” 选项。
四、DHCP服务器设置DHCP 服务器出厂默认设置为启用 DHCP。
此功能可以实现让电脑自动获取地址,并可通过路由器上因特网,所以一旦配置好了路由器,自己用的电脑不用指定地址,改为自动获取就可以上网了。
Linksys AC1200智能Wi-Fi路由器用户手册说明书
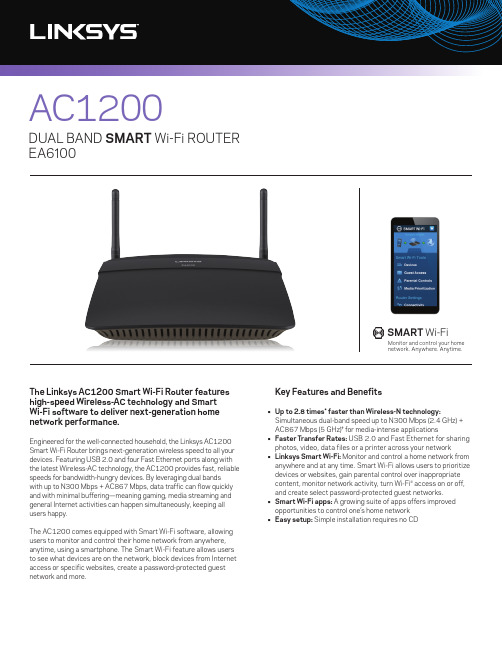
The Linksys AC1200 Smart Wi-Fi Router features high-speed Wireless-AC technology and SmartWi-Fi software to deliver next-generation home network performance.Engineered for the well-connected household, the Linksys AC1200 Smart Wi-Fi Router brings next-generation wireless speed to all your devices. Featuring USB 2.0 and four Fast Ethernet ports along with the latest Wireless-AC technology, the AC1200 provides fast, reliable speeds for bandwidth-hungry devices. By leveraging dual bands with up to N300 Mbps + AC867 Mbps, data traffic can flow quickly and with minimal buffering—meaning gaming, media streaming and general Internet activities can happen simultaneously, keeping all users happy.The AC1200 comes equipped with Smart Wi-Fi software, allowing users to monitor and control their home network from anywhere, anytime, using a smartphone. The Smart Wi-Fi feature allows users to see what devices are on the network, block devices from Internet access or specific websites, create a password-protected guest network and more.Key Features and Benefits• Up to 2.8 times* faster than Wireless-N technology: Simultaneous dual-band speed up to N300 Mbps (2.4 GHz) + AC867 Mbps (5 GHz)† for media-intense applications• Faster Transfer Rates: USB 2.0 and Fast Ethernet for sharing photos, video, data files or a printer across your network• Linksys Smart Wi-Fi: Monitor and control a home network from anywhere and at any time. Smart Wi-Fi allows users to prioritize devices or websites, gain parental control over inappropriate content, monitor network activity, turn Wi-Fi access on or off, and create select password-protected guest networks.• Smart Wi-Fi apps: A growing suite of apps offers improved opportunities to control one’s home network• Easy setup: Simple installation requires no CDAC1200DUAL BAND SMART Wi-Fi ROUTEREA6100Monitor and control your homenetwork. Anywhere. Anytime.SMART Wi-FiDUAL BAND SMART Wi-Fi ROUTER EA6100AC1200DescriptionAC1200 Dual Band Smart Wi-Fi RouterPart Number EA6100-MEUPC745883654499Warranty 2-Y ear LimitedPACKAGE CONTENTS• Linksys Smart Wi-Fi Router AC1200, EA6100• Quick Start Guide• CD-ROM with Documentation • Ethernet Cable • Power AdapterMINIMUM SYSTEM REQUIREMENTSFor Router Setup and Linksys Smart Wi-Fi access: Internet Explorer 8, Safari 5 (for Mac ), Firefox 8 or Google Chrome™For Printer Sharing and User Documentation:PC: Wi-Fi enabled with CD or DVD drive, Windows XP SP3, Windows Vista SP1 or later, Windows 7, or Windows 8Mac: Wi-Fi enabled with CD or DVD drive, Mac OS X Leopard v10.5.8 or later, Snow Leopard v10.6.1 or later, Lion v10.7, or Mountain Lion v10.8User Documentation is also available at: /support Specifications are subject to change without notice.An active, customer-purchased Internet Service Provider broadband account is required for connection of this router and other connected computers and devices to the Internet.Some devices may require additional wireless adapters or an Ethernet cable to connect to this router.Specifications:Wireless Standards with Link RateIEEE 802.11ac (draft 2.0) (up to 867 Mbps for 5 GHz†)IEEE 802.11n (up to 300 Mbps for 2.4 GHz/up to 300 Mbps for 5 GHz†) IEEE 802.11g (up to 54 Mbps†) IEEE 802.11a (up to 54 Mbps†) IEEE 802.11b (up to 11 Mbps†)Wireless Operating Spectrum:Simultaneous Dual-Band 2.4 GHz and 5 GHzNext-Generation Wireless-ACT echnology For Powerful NetworkingWi-Fi Radio Specifications:Frequency Band:2.4GHz and 5GHz (simultaneous dual-band)Peak antenna gain:2.4GHz: 2.91 dBi 5GHz: 2.72 dBi Antenna type:External dipoleTransmitted Power (EIRP power):2.4GHz: 19.98 dBm (max.)5GHz: 22.96 dBm (max.)Power Supply Specifications:Input: 100-240V~ 50/60Hz Output12V/1.5AWireless Security:Wi-Fi Protected Setup™ button WPA / WPA2 encryption WEP encryption RADIUSVPN Support:PPTP pass-through IPSec pass-through L2TP pass-through* Up to 2.8x faster physical data rate when compared to 802.11n Wi-Fi routers using two antennas to transmit and receive data. Actual speeds will vary depending on a number of factors. In order to achieve the best performance, router must be used with a compatible AC867 wireless device.†The standard transmission rates—300 Mbps or 867 Mbps (for 5 GHz), 300 Mbps (for 2.4 GHz), 54 Mbps, and 11 Mbps—are the physical data rates. Actual data throughput will be lower and may depend on the mix of wireless products used and external factors.© 2014 Belkin International, Inc. and/or its affiliates. All rights reserved.LinksysTupolevlaan 1, 1119 NW Schiphol-Rijk, The Netherlands Made in China© 2014 Belkin International, Inc. and/or its affiliates. All rights reserved. Belkin, Linksys and many product names and logos are trademarks of the Belkin group of companies. Third-party trademarks mentioned are the property of their respective owners. Windows, Windows Vista, Internet Explorer, and the Windows logo are either registered trademarks or trademarks of Microsoft Corporation in the United States and/or other countries. Mac, Mac OS, Safari, and the Mac logo are trademarks of Apple Inc., registered in the U.S. and other countries. Google Chrome is a trademark of Google Inc. Wi-Fi and Wi-Fi Protected Setup are either trademarks or registered trademarks of the Wi-Fi Alliance. The Wi-Fi CERTIFIED Logo is a certification mark of the Wi-Fi Alliance. 14PB005Internet USBEthernet Wi-Fi Protected Setup ™ buttonEAN4260184664764Media Specifications:DLNA Media Server Ports:1x Internet4x Fast Ethernet 1x USB 2.0Weights & DimensionsPower Product Weight (kg): 0.3Product Depth (cm): 19.9Product Width (cm): 17.5 Product Height (cm): 2.9 Unit Weight (kg): 0.79 Unit Depth (cm): 31.19Unit Width (cm): 23.80 Unit Height (cm): 6.71Case Pack Quantity (*PL): 16Case Pack Weight (kg) (*PL): 13.99Case Pack Length (cm) (*PL): 56.01 Case Pack Width (cm) (*PL): 34.01Case Pack Height (cm) (*PL): 49.81。
linksys_wrt54g路由器基本设置
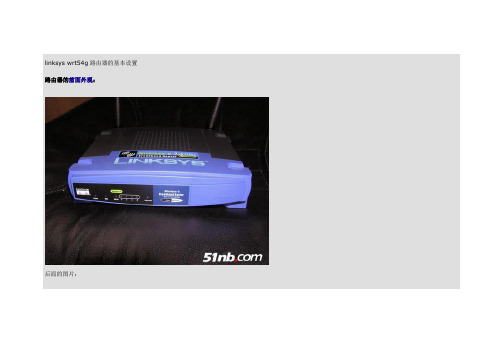
linksys wrt54g路由器的基本设置路由器的前面外观:
后面的图片:
这里可看出路由的版本:
linksys中国官方的网站地址:
linksys wrt54g v1.1的中文使用手册下载地址:
http://218.247.139.114/ugcn/WRT54G-CN%20v1.1-ug.pdf
linksys wrt54g v1.1最新固件升级下载地址:
ftp:///pub/network/WRT54GV3.0_3.03.6_US_code.zip
从上面地址下载升级固件接压后,需要在路由升级页面内升级固件。
ftp:///pub/network/WRT54GV3.0_3.03.6_US_code.exe
从上面地址下载的升级固件,不需要进入路由管理页面,只要运行后按要求填入路由的IP地址、进入路由管理的密码,就可以进行升级。
首先要进入路由的页面,在浏览器输入路由的IP地址,linksys wrt54g出厂默认的IP是192.168.1.1,用户名为空,密码为admin 我因为把ADSL猫的IP设成192.168.1.1,所以这里显示的是192.168.1.3
完成上述步骤后,进入路由的基本设置页面,这里Internet Connection Type(宽带连接类型)有动态IP(以前用长宽就是选择这种)、静态IP、PPPoE (现在用ADSL就选择这种)、PPTP(用于欧洲的一项服务)、L2TP、Telstra Cable五种,完成本页面设置,就可以进入网络了,呵呵。
linksys无线路由器安装配置步骤

无线路由器安装配置步骤选择无线设备第一步是确保您具有所需的设备。
无线设备安装准备清单:1)宽带 Internet 连接.2)无线路由器.3)具有内置无线网络支持或无线网络适配器的计算机.无线路由器路由器将通过 Internet 连接传入的信号转换为无线广播,有点像无线电话基站。
无线网络适配器无线网络适配器以无线方式连接计算机与无线路由器。
如果是新的计算机,其中可能已有内置的无线功能。
如果是这样,则不需要无线网络适配器。
如果需要为台式机购买适配器,那么请购买 USB 无线网络适配器。
如果使用膝上型电脑,那么请购买基于 PC 卡的网络适配器。
应确保网络中的每台计算机上都有一个适配器连接无线路由器首先,找到电缆调制解调器或 DSL 调制解调器,并拔出以将其关闭。
接着,将无线路由器连接到调制解调器。
调制解调器应该可以立即连接到Internet。
稍后,等一切都连接好之后,计算机将以无线方式连接到路由器,而路由器将通过调制解调器向 Internet 发送通信。
接下来,将路由器连接到调制解调器:注意:以下说明适用于 Linksys 无线路由器为例。
如果您的计算机目前已直接连接到调制解调器:从计算机后部拔出网线,然后将其插入路由器后部标签为 Internet、WAN 或 WLAN 的端口。
如果计算机目前没有连接到 Internet:将路由器附带网线的一端插入调制解调器,将另一端插入无线路由器上的 Internet、WAN 或 WLAN 端口。
如果计算机目前已连接到路由器:将当前连接到路由器上 Internet、WAN 或 WLAN 端口的网线拔出,再将此端插入无线路由器上的 Internet、WAN 或 WLAN 端口。
然后,拔出任何其他网线,并将其插入无线路由器上的可用端口。
不再需要原来的路由器,因为它已被新的无线路由器取代。
接着,插入电缆或 DSL 调制解调器并将其打开。
稍等几分钟,使其有时间连接到Internet,然后插入并打开无线路由器。
Linksys路由器设置指南说明书
Linksys Router SetupOverviewFollow these steps for Router Firewall Setup for SnapAV IP product with a Linksys router. Some of the screens may look different; however the steps will be the same. If you have questions about your specific Linksys device, please contact technical support.Before BeginningComplete the initial setup of the SnapAV IP product by following the instructions in the products owner’smanual.The following information from the SnapAV IP product setup is needed to complete the setup of the router: ∙Static IP Address∙TCP and UDP Ports for access to the device∙Any TCP and UDP ports for services such as Email, FTP, etc.Example: For a WirePath DVR, the default ports for remote access are 67 and 68 on both TCP and UDP protocolsa nd port 80 on TCP protocol. Other ports may also be needed, i.e. 587 for Email setup, 21 for FTP, etc…Note: WRT54G series or older routers do not support DCHP reservation. A static IP must be assigned to the SnapAV IP product and skip to Step 4.Linksys Router SetupSetting Up the RouterNote: The following steps contain a placeholder [SnapAV IP product] for the product being installed. In the routerthis should be replaced with a name that will identify the product without the brackets. Example: DVR-1, WB400-1…1.Before logging into the router, connect the SnapAV IP product to the Network and turn it on.2.Login to router using the default gateway listed in the router user manual. Most Linksys devices use thedefault gateway http://192.168.0.1 or http://192.168.1.1 the user name is usually admin and the password is usually password.3.Click on the Setup tab to access the DHCP Server Setting. Click on the DHCP reservation button.4.Under the DHCP reservation - Select the checkbox next to the SnapAV IP product in the list. It may show asan unknown device so you should match the MAC address to that listed in the Advanced Network screen in the SnapAV IP product . Now click on the “Add Clients” button to save the changes you’ve just made.Linksys Router Setup 5.The client’s name and other details such as the IP address and its MAC address should then appear on the“Clients Already Reserved” section. Click on the “Save Settings” button to finalize the changes.6.In the router setup, select the Applications & Gaming Tab7.Now you will see the screen below. In the first open field in the list, enter the port number you wish to forwardin the “External Port” and “Internal Port” field. Select t he protocol for either TCP, UDP, or BOTH. Enter the last set octet of the IP address assigned to the device into the “To IP Address” field, and check the “Enabled”box.8.Repeat step 7 for all ports that need to be forwarded. After making the last entry, be sure to click the “Save”or “Apply” button at the bottom of the screen before travelling to another page of the router setup.9.The router has now been configured to allow remote access to the SnapAV IP product. Be sure to save allchanges and reboot both the router and the SnapAV device when when you are finished to be sure all changes take effect.Linksys Router Setup Contacting Technical Support Phone: (866) 838-5052Email: **********************。
思科S系列100系列交换机说明书

价格实惠、简单易用、面向中小型企业网络的交换机无需任何配置即可工作。
想要时刻保持企业优势,就必须保证办公环境运行通畅。
如今,这意味着必须拥有可靠性极高的网络来连接计算机、打印机、复印机以及其它办公设备。
但是如果你的企业与大多数中小型企业类似的话,那么一般来说,企业是没有一位专门的IT 员工来设置企业网络的。
有了思科100系列交换机,现在你便可以拥有高性能、企业级的办公网络了。
这些设备开盒即用,非常方便。
思科100系列交换机操作简便,可为中小型企业提供强劲的网络性能以及可靠性。
这些交换机不负用户对思科产品的厚望,可提供用户期待的全部特性、可扩展性以及投资保护。
这些设备无需安装软件、无需任何配置。
只需插入插头、连接自己的计算机以及其它商用设备即可运行。
思科100系列交换机作为思科中小型企业网络解决方案的一部分,思科 100系列交换机(图1)是非网管型交换机产品系列。
该系列产品可提供线速高速以太网以及千兆以太网接口,以便为你的中小型企业办公环境联网。
这些交换机具有桌面型和机架型型两种款式,旨在满足所有办公环境需要以及优化功率效率。
这些产品耗电量更低,但是却能够提供强劲、可靠的联网性能,以满足用户的商用需求。
此外,这些设备还支持服务质量(QoS )等先进特性。
所有这些内容均包含在一台交换机当中,用户在短短几分钟之内即可自行完成交换机的安装。
作为一款企业级低价格网络解决方案思科100系列交换机为中小型企业带来了久经考验的可靠性与与思科网络解决方案的高投资回报率。
特性与优势思科100系列交换机为中小型企业网络提供了一款易于使用的解决方案。
该系列产品可提供下列特性:● 易于使用:思科100系列交换机开盒即用,无需安装软件、无需配置。
每一个交换机端口均可独立设置,以实现最佳速度,而且还能够自动决定以半双工或全双工方式运行。
作为一款基于标准的思科解决方案,思科100系列交换机还具有即装即用的特点,可对所有用户网络设备提供原生支持,其中包括:在同一个网络中支持每秒10兆位(Mbps)、100兆位(Mbps )以及最高每秒1 千兆位(1000 Mbps )的诸多设备。
- 1、下载文档前请自行甄别文档内容的完整性,平台不提供额外的编辑、内容补充、找答案等附加服务。
- 2、"仅部分预览"的文档,不可在线预览部分如存在完整性等问题,可反馈申请退款(可完整预览的文档不适用该条件!)。
- 3、如文档侵犯您的权益,请联系客服反馈,我们会尽快为您处理(人工客服工作时间:9:00-18:30)。
添加新管理员 system 点击 Add to ListUpdate 确认
第 8 页 共 13 页
设置完毕以后需要在下方工具条上选择保存配置
注意需要点击最下面的
北京能通万维网络科技有限公司内部文档
Save Settings Cancel Changes
修改 admin 密码,需要先创建一个用户例如 system 然后保存。
Interface Ingress Rate Limit Status
Port 20000
LAG
Egress Shaping Rate on Selected Port
Committed Information Rate(CIR)
50000
Committed Burst Size(CbS)
Update
Save settings 保持配置。
4. 把端口加入相应的vlan或trunk
设置端口作为 trunk 端口 点击 主菜单上的 VLAN Management 子选项 Port Setting 出现如下配置 默认情况下 端口都属于 access 接口,用户接入电脑用户,属于 vlan1 本例选择端口 1 作为 trunk 口作为 vlan 聚合端口以及上连链路
User Name:
admin
Password: Confirm Password:
(Alphanumeric)
第 3 页 共 13 页
北京能通万维网络科技有限公司内部文档
选项介绍 进入登录以后出现如下主界面 注界面为英文版,中文注解是本手册注解添加,实际使用中没有中文选项。
24-port 10/100 + 4-Port Gigabit Switch
SRW224G4
Setup 设置
Port Management
7. 系统管理设置管理员
系统管理员认证可以使用多种方式认证 本地认证、radius 认证等 点选主菜单 admin 子菜单 User Authentication
User Name:
system
Password:
(Alphanumeric)
Confirm Password:
Add to ListUpdate
<<Previous 1 2 3 Next>>
第 5 页 共 13 页
Port e1 e2 e3
Mode Trunk Access Access
Join VLAN Join VLAN Join VLAN Join VLAN
北京能通万维网络科技有限公司内部文档
VLANs
LAG
1U
1U
1U
点击 e2 选项中的 Join VLAN 会弹出小窗口 内容如下 注:ie 浏览器屏蔽弹出窗口选项需 要关闭
北京能通万维网络科技有限公司内部文档
out Rate Limit (64-1000000 Kbps) 出流量 (既用户的下载流量) 本例使用 希望设置端口 2 限速 OUT 50M 限速一般有 20%冗余所以使用以下公式计算 50M×1000=500000 KB IN 20M×1000=200000 KB 点选主菜单 QOS 子菜单 Bandwidth 选项
VLAN ID (2-4094): VLAN Name:
VLAN Range
VLAN Range:
2 myvlan2
AddUpdate
-
Add Range
VLAN Table
VLAN ID 1 2
VLAN NAME
Status
Default
myvlan2
Static
DeleteCancel
Total existing VLANs: 1
端口管理
VLAN Management
Vlan 管理
Statistics 统计
ACL 访问 列表
Security 安全
QoS 服务 质量
Spanning Tree 生成树
Multicast 组播
SNMP 网络 管理
Admin 系统管
理
LogOut 退出
Summary 概要 | Network Settings 网络设置 | Time 时间
2. 输入帐户密码登录
系统默认使用账户 admin 密码为空 web 页面登录 http://192.168.1.254 最好使用 ie6 浏览器,如果使用 ie7 可能或出现如下提示
点击 location 即可出现登录界面
输入帐户 admin 密码为空 可以登录。注:ie7 仍然会出现跳转选项,点击 location 即可登 陆。
Port Setting
<<Previous 1 2 3 4 Next>>
Port
Mode
e1 Trunk
Acceptable Frame Type
Admit All
e2 Access
Admit All
e3 Access
Admit All
设置完毕以后需要在下方工具条上选择保存配置
注意需要点击最下面的
3. 设置vlan以及trunk
点击 VLAN Management 进入 vlan 管理选项
Vlan 管理
Create VLAN |Port Setting 端口设置 |Ports to VLAN 端口 VLAN |VLAN to Ports VLAN 和端口对应 |
GVRP vlan 裁剪
Create VLAN Single VLAN
第 7 页 共 13 页
Management VLAN
2
IP Address Mode
Static
北京能通万维网络科技有限公司内部文档
Host Name
SRW24F4G
IP Address
192.168.10.
Subnet Mask
255.255.255
Default Gateway DNS Server
设置完毕以后需要在下方工具条上选择保存配置
注意需要点击最下面的
Save Settings Cancel Changes
6. 设置管理vlan 以及管理IP
选择主菜单 SETUP 子菜单 Network Settings 目标修改管理 IP 地址为 192.168.10.254 管理 vlan 为 vlan 2 管理 vlan 网关为 192.168.10.1 配置如下
第 4 页 共 13 页
Save Settings Cancel Changes
北京能通万维网络科技有限公司内部文档
本选项可以单独添加 lan 也可以添加一段 vlan 举例 添加 vte 会添加 vlan 到表单选项中, 注意需要点击最下面的
Save Settings Cancel Changes
Join VLAN to Port e2
2
1U
Select Add
VLAN
Tagging
Tagged
Untagged
选择 vlan 2 点选中间 add 选项 添加 vlan 最后选择 save & close 保存配置。 回到主界面,
e2
Access
Join VLAN
2U
Vlan 已经变为 2u 既 vlan 2
192.168.10
设置完毕以后需要在下方工具条上选择保存配置
注意需要点击最下面的
Save Settings Cancel Changes 注意:因为本操作时使用 web 登录,选择 save settings 后 ie 浏览器会出现不响应,是因为 IP 地址已经改变,需要更改本机地址,重新登陆,并且使用 管理 vlan 所在的端口进行登录。
设置完毕以后需要在下方工具条上选择保存配置
注意需要点击最下面的
Save Settings Cancel Changes
5. 设置端口QOS
设置带宽控制 带宽控制可以对端口的出入浏览做控制范围是 in Rate Limit (62-1000000 Kbps) 入流量(既用户的上传流量)
第 6 页 共 13 页
第 2 页 共 13 页
北京能通万维网络科技有限公司内部文档
1. 设置IP地址登录WEB页面
Linksys 系列交换机可以使用串口登录,也可以使用 web 登录出厂设置已经配置有 web 因串口的使用方式异于 cisco 系列交换机,使用不是很方便,建议用户使用 web 方式配置。 在本地计算机上配置如下地址 192.168.1.100/24 linksys 交换机默认使用管理地址 192.168.1.254/24
Port
Ingress Rate Limit
Egress Shaping Rates
Status
Rate Limit
Status
CIR
CbS
e1
e2
Enable
20000
Enable
50000
Vlan 已经变为 Ingress Rate Limit 20000KB 入流量(既用户的上传流量)
Egress Shaping Rates 50000 KB 出流量 (既用户的下载流量)
北京能通万维网络科技有限公司内部文档
福建移动 LINKSYS 交换机 简明配置手册
能通公司内部资料(保密) (V1.1 版)
第 1 页 共 13 页
北京能通万维网络科技有限公司内部文档
1. 设置IP地址登录WEB页面 ......................................................................................................3 2. 输入帐户密码登录...................................................................................................................3 3. 设置vlan以及trunk ...................................................................................................................4 4. 把端口加入相应的vlan或trunk ...............................................................................................5 5. 设置端口QOS...........................................................................................................................6 6. 设置管理vlan 以及管理IP ......................................................................................................7 7. 系统管理设置管理员...............................................................................................................8 8. 使用终端或者telnet登录管理..................................................................................................9 9. 配置选项介绍.........................................................................................................................11 10. 系统管理选项.....................................................................................................................12
