2018-2019-garmin佳明etrex20说明书-推荐word版 (5页)
GPS校准说明要点

目录1、Etrex 20GPS基本操作 ........................... - 2 -1.1、eTrex 20按键说明 ......................... - 2 -1.2、参数的设置................................ - 3 -1.3、采样点的导航.............................. - 4 -1.4、航点的存储................................ - 5 -1.5、GPS野外使用注意问题....................... - 6 -2、GPS校准说明 ................................... - 6 -2.1、校正条件.................................. - 7 -2.2、校正目的.................................. - 7 -2.3、校正步骤.................................. - 7 -3、化探采样点导入GPS ............................ - 11 -4、航迹航点的导入导出............................ - 13 -4.1、MapSource软件的设置 ..................... - 13 -4.2、使用MapSource导出数据................... - 15 -4.3、使用MapSource导入数据................... - 17 -5、实际点位图的制作.............................. - 18 -一、Etrex 20GPS基本操作(一)、eTrex 20按键说明图1 eTrex 20按键分布图①电源/背光键(light):• 长按可开关机。
garmin佳明双星eTrex 20
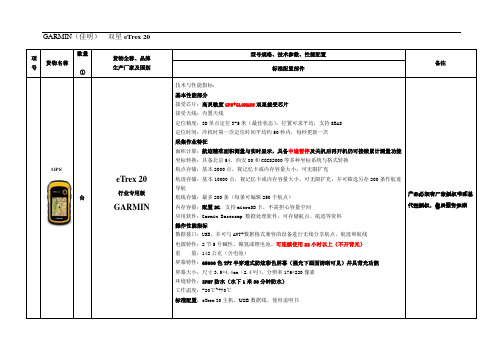
GARMIN(佳明)双星eTrex 20项号货物名称数量①货物全称、品牌生产厂家及国别型号规格、技术参数、性能配置备注标准配置部件GPS台eTrex 20行业专用版GARMIN技术与性能指标:基本性能部分接受芯片:高灵敏度GPS+GLONASS双星接受芯片接受天线:内置天线定位精度:3D单点定位3-5米(最佳状态),位置可求平均,支持SBAS定位时间:冷机时第一次定位时间平均约50秒内,每秒更新一次采集作业特征面积计算:航迹精准面积测量与实时显示,具备中途暂停及关机后再开机仍可接续累计测量功能坐标转换:具备北京54、西安80和CGCS2000等多种坐标系统与格式转换航点存储:基本2000点,视记忆卡或内存容量大小,可无限扩充航迹存储:基本10000点,视记忆卡或内存容量大小,可无限扩充,并可筛选另存200条作航迹导航航线存储:最多200条(每条可编辑250个航点)内存容量:配置2G,支持microSD卡,不需担心容量空间应用软件:Garmin Basecamp 数据处理软件,可存储航点、航迹等资料操作性能指标数据接口:USB、并可与ANT+数据格式兼容的设备进行无线分享航点、航迹和航线电源特性:2节5号碱性、镍氢或锂电池、可连续使用22小时以上(不开背光)重量:142公克(含电池)屏幕特性:65000色TFT半穿透式防炫彩色屏幕(强光下画面清晰可见)并具背光功能屏幕大小:尺寸3.5*4.4cm(2.4吋),分辨率176*220像素环境特性:IPX7防水(水下1米30分钟防水)工作温度:-20℃~+70℃标准配置:eTrex 20主机、USB数据线、使用说明书产品必须有厂家授权书和总代理授权,售后服务承诺。
手持GPS说明书

eTrex 操作手册目录一、介绍部分1. eTrex的超强功能…………………()2.eTrex 性能简介…………………………………()二、 eTrex 的基本操作1.机体外部设计……………………………()2.基本按键操作……………………………三、功能画页简介1.卫星状况画页……………………………………()2.航及导航画页…………………………………………() 3.罗盘导航画页…………………………………………() 4.菜单画页…………………………………………()四、坐标系统的转换及校正……………………………()1.坐标格式设置……………………………()2.坐标参数计算……………………………()3.参数输入……………………………()五、定位.导航功能设定………………………………………()1.如何设定航点……………………………()2.如何编辑航线……………………………()3.如何导航……………………………()六、求面积操作……………………………………………()七、性能指标………………………………………………()八、选配件……………………………………………………()九、产品售后服务……………………………………………()一十、装箱单…………………………………………1、eTrex的超强功能● 真正并行12通道,可瞬间完成定位功能,在各种恶劣环境中尤显其卓越性能。
● 全中文界面、人形图案、形象生动、妙趣横生。
● 可自由转换坐标,包含WGS-84、BJ-54、西安-80及自定义坐标、各种球面、平面显示格式。
● 可用来计算不规则地形的面积,方便快捷。
● 内存大、存点多、航迹、航线多种导航方式。
● 单手操作、简单易懂、使用更加便利、舒适● 外形精巧、彩色封壳、鲜明活泼● 只用两节电池、功耗低、重量轻、小巧精致、迷你设计。
● 制作标记、外出更轻松,给出日出。
日落时间。
使你工作、计划井井有条。
2、eTrex 性能简介美国GARMIN公司一直投入大量的人力、物力,倾注于高水平GPS接收体制的研究。
GARMIN eTrex 说明书
工程机械(轮胎吊,推土机等)控制 精细农业 正如人们所说:GPS的应用, 仅受人们的想象力制约。 GPS问世以来, 已充分显示了其在导航, 定位领域的霸主地位。 许多领域也由于GPS的出
GPS 的广泛应用 GPS 应用于导航
主要是为船舶,汽车,飞机等运动物体进行定位导航。 : 例如 船舶远洋导航和进港引水 飞机航路引导和进场降落 汽车自主导航 地面车辆跟踪和城镇智能交通管理 智能运输系统 (ITS) 车辆监控调度系统 紧急救生 个人旅游及野外探险 个人通讯终端 (与手机, PDA, 电子地图等集成一体)
2
eTrex
小博士
3
PDF 文件以 "FinePrint pdfFactory Pro" 试用版创建
eTrex
小 博 士 GIS 应用
eTrex
小 博 士
理两个测站载波相位观测量的差分方法。 即是将基准站采集的载波相位发 给用户接收机, 进行求差解算坐标。 载波相位差分可使定位精度达到厘米级。 大量应用于需要高精度位置 的领域。
小博士1PDF 文件以"FinePrint pdfFactory Pro" 试用版创建
eTrex
小 博 士
eTrex
小 博 士
定位系统。 经过近10年我国测绘等部门的使用表明, GPS以全天候、 高精 度、 自动化、 高效益等显著的特点, 赢得了广大测绘工作者的信赖, 并成 功地应用于大地测量、 工程测量、 航空摄影测量、 运载工具导航和管制、 地 壳运动监测、 工程变形监测、 资源勘察、 地球动力学等多种学科, 从而给 测绘领域带来一场深刻的技术革命。 随着全球定位系统的不断改进, 软件的不断完善, 硬、 应用领域正在 不断地开拓, 目前已遍及国民经济各种部门, 并开始逐步深入人们的日常 生活。
GARMIN佳明eTrex20中文使用手册

知识产权声明
本机功能及内容仅提供本产品购买人使用,不得私自转载、转 印、复制、更改内容、扫描储存提供给他人,或用作其他用 途。本机所标示的商品文字或图片仅为说明辅助的用途,并非 作为商标使用,原商品商标的知识产权仍为原权利人所有。
eTrex 20 中文使用手册
1
注意事项
注意事项
全球卫星定位系统(Global Positioning System,GPS),由美 国国防部研发及管理,并负责该系统的正常运作及定位精度
4. eTrex 20符合美国 FCC 法规第15条中,关于Class B级数码 设备的条件,使用时仍可能会有温和的无线通讯辐射。使 用者需自行调整使用位置,避免被其他设备干扰,导致信 号接收与运作不正常;另外,也需注意本接收机是否会影
2
eTrex 20 中文使用手册
注意事项
响到其他通讯设备的正常工作。上述的干扰状态并不在本 产品所保证事项内。
第三章 航点标定与管理.............................................19
3.1 自建航点说明 ....................................................................19 3.2 使用现场标定功能 ............................................................20 3.3 手动输入法 ........................................................................21 3.4 投影航点法 ........................................................................22 3.5 电子地图法 ........................................................................23 3.6 航点管理 ............................................................................23
Garmin eTrex Legend 使用手册

eTrex Legend 传 奇 使用航线导航 面积计算器 4. 航迹页面 ............................................ 56 设置航迹记录方式 存储航迹 5. 设置页面 ............................................ 58 设置时间格式和时区 设置度量单位和坐标 设置对比度和背景光 设置航向表示的基准 设置数据接口 设置系统工作模式 6. 工具页面 ............................................ 64 查询日月运行情况 查询日历及添加注释 查询打猎/捕鱼时段 实时面积计算 第四章:附录 附录 A:技术指标 ........................................... 71 附录 B:时差表 ............................................. 72 附录 C:配件 ............................................... 73 附录 D:数据接口 .......................................... 74 附录 E:简单故障维修 ...................................... 75 附录 F:坐标系统参数计算 ................................. 76 附录 G:注意事项 ........................................... 78
差分GPS分为两大类:伪距差分和载波相位差分。
1.伪距差分原理
这是应用最广的一种差分。 在基准站上, 观测所有卫星, 根据基准站 已知坐标和各卫星的坐标, 求出每颗卫星每一时刻到基准站的真实距离。 再与测得的伪距比较, 得出伪距改正数, 将其传输至用户接收机, 提高定 位精度。 这种差分, 能得到米级定位精度, 如沿海广泛使用的 “信标差分”
【精编范文】garmin,etrex,20使用手册word版本(13页)

【精编范⽂】garmin,etrex,20使⽤⼿册word版本(13页)本⽂部分内容来⾃⽹络整理,本司不为其真实性负责,如有异议或侵权请及时联系,本司将⽴即删除!== 本⽂为word格式,下载后可⽅便编辑和修改! ==garmin,etrex,20使⽤⼿册篇⼀:Garmin⼿持GPS常见问题解答Garmin⼿持GPS常见问题解答⼀采集数据和真实坐标偏差漂移问题(该章节档适⽤于Garmin Oregon450,Garmin Oregon550,Garmin Dakota 20,Garmin map62s,Garmin map78s等新款机型)1、使⽤带图机器采集的数据和真实坐标偏差解决国家测绘局规定对于⼤⽐例尺地图需要经过加密偏移,因此带详细导航地图机器在采集真实坐标时,需进⾏⼀些设置(如果不进⾏纠偏会和真实坐标相差⼏百⽶)。
在主菜单状态下打开:“设置—〉地图—〉地图信息选择地图—〉关闭 CN China NT201X第⼀个详图界⾯,剩下的⼏个不⽤关闭通过以上设置,就可以达到解决偏移的问题。
(该章节⽂档适⽤机型vista hcx峰彩,map60csx炫彩)2、使⽤带卡机器及Map60cs地图升级后采点时出现漂移问题的解决办法⽬前⼿持机中提供地图升级的产品为Map60cs及带卡机器,最新地图版本为201X年详图。
国家测绘局规定对于⼤⽐例尺地图需要经过加密偏移,相应的软件也要做相应的处理。
因此升级后的Map60cs⾯临如下问题:定点时所求得坐标有偏移,为了避免此问题,需要在机器中,打开“主菜单—〉设置—〉地图—〉信息(倒数第⼆项注i处)”,将最后⾯⼀项“测试(SCM),China Country Map,04 201X”前⾯的框去掉,此时所得点位坐标是正确的,但是与底图有⼀点偏移。
如果将其选中,此时在导航时是正确的,即当前位置与地图吻合,但是坐标有误差,即漂移。
因此在定位求坐标时需要将其去掉,导航时选中。
【最新文档】garmin佳明etrex20说明书-范文word版 (5页)
本文部分内容来自网络整理,本司不为其真实性负责,如有异议或侵权请及时联系,本司将立即删除!== 本文为word格式,下载后可方便编辑和修改! ==garmin佳明etrex20说明书篇一:GARMIN etrex简易操作陕西测绘仪器计量监督鉴定中心MARMIN etrex手持机简易操作流程1. 安装蓄电池,开机;2. 按“翻页”键进入接收机主界面,选择“设置”项,在“设置”界面中选择“校准”项,按需要依次对罗盘和高度计进行校准(注:对高度计的校准需要在已知点上操作),完成校准后按“翻页”退出;3. 继续在“设置”界面中选择“单位设置”(部分机型此处显示“单位”,进入可继续按确认键进行设置),按客户需求依次对单位格式(默认为:度分秒或者dddmmss.ss)、坐标系统(默认为:WSG 84)、距离/速度(默认为:公制)、高度/垂直速度(默认为:米/秒)、深度(默认为:米)、气压(默认为:毫巴)等进行设置,按“翻页”退出;4. 继续在“设置”界面中选择“系统”,GPS项选择“正常”、广域增强系统选择“关闭”(因为中国区域没有WGS84下的参考站)、标准气压选择“打开”、高度计选择“自动校准”等,按“翻页”退出;5. 继续在“设置”界面中选择“高度计设置”,自动校准选择“打开”、气压计模式选择“可变高度”等,按“翻页”退出;6. 继续在“设置”界面中选择“地图”,若需要单点定位而非导航使用,则需要在“信息”一栏中“去选”该地区的地图,按“翻页”退出(注:部分机型无此项);7. 继续按“翻页”,可进入坐标页面读取测点的大地坐标,部分机型则需要“翻页”至“存点”项来读取坐标。
注:不同仪器的操作键面可能有所差异,但设置项类似。
201X 12 05 lule5212篇二:garmin佳明双星eTrex 20GARMIN(佳明)双星eTrex 20篇三:garmin eTrex Legend GPS 使用说明书中文版eTrex Legend(中文)——传奇使用手册GPS新概念——真正的数字化生活中文输入功能完善超大内存面积计算人性化界面目录第一章:序言部分第二章:速查部分1.性能简介2.按键及功能介绍 3.电池的安装4.显示屏背景光及对比度设置 5.主页页面转换 6.地图页面基本情况 7.导航页面基本情况8.旅行计算机页面基本情况 9.主菜单页面基本情况10.把当前位置标志为航路点 11.改变航路点符号12.引导返回到您的起始点第三章:手册部分13.概述14.如何选择“关闭GPS” 15.导航方式——概述 16.地图页面概述17.地图页面选项概述 18.使用移动光标概述 19.停止导航 20.数据区概述21.设置地图概述。
garmin catalyst 详细操作手册说明书

GARMIN CATALYST™Driving Performance Optimizer 详细的操作手册© 2020 Garmin Ltd. 或其子公司保留所有权利。
根据版权法,未经 Garmin 的书面同意,不得复制此手册的全部或部分内容。
Garmin 保留更改或改善其产品并对此手册的内容进行更改的权利,但没有义务向任何人或任何组织通知此类变更或改善。
有关本产品的使用的最新更新和补充信息,请访问。
Garmin和 Garmin 徽标是 Garmin Ltd. 或其分公司在美国和其他国家/地区注册的商标。
Garmin Catalyst™和 Garmin Express™是 Garmin Ltd. 或其子公司的商标。
未经 Garmin 明确许可,不得使用这些商标。
Apple和 Mac是 Apple Inc. 在美国和其他国家/地区的注册商标。
Bluetooth字标和徽标归 Bluetooth SIG, Inc. 所有,Garmin 使用这些名称前已获得许可。
microSD是 SD-3C 的商标。
Wi‑Fi是 Wi-Fi Alliance 的注册商标。
Windows是 Microsoft Corporation 在美国和其他国家/地区的注册商标。
目录使用入门 (1)安装 (1)在车辆中安装磁性底座 (1)将底座连接至车辆电源 (2)裸线 USB 电缆 (2)摄像头安装注意事项 (3)将偏振滤波器安装到摄像头上 (4)从摄像头上取下偏振滤波器 (5)在挡风玻璃上安装远程摄像头 (5)正在连接摄像头电缆 (7)将设备连接至磁性底座 (8)在仪表板上安装旋入式球形固定装置 (9)设备概述 (10)使用触摸屏 (11)主页屏幕 (12)状态栏图标 (13)将练习数据同步至您的 Garmin 账户 (13)查看路线信息 (13)查看天气预报 (13)Catalyst 应用程序 (14)开始驾驶练习 (14)暂停驾驶练习 (15)驾驶练习音频设置 (15)语音提示和指导设置 (15)比赛计时器 (16)添加路线 (16)添加路线配置 (17)添加驾驶员配置文件 (17)编辑驾驶员配置文件 (17)更改测量单位 (17)添加或编辑汽车配置文件 (17)选择汽车或驾驶员配置文件 (17)查看驾驶练习 (18)练习摘要 (18)查看练习视频 (19)保存练习视频 (19)比较练习 (19)删除练习 (19)查看机会 (19)机会 (20)将机会信息添加到比赛教练 (21)查看跑圈 (21)跑圈 (22)查看跑圈速度数据 (22)查看加速和减速数据 (23)比较跑圈 (23)设置 (23)正在连接至无线网络 (23)启用Bluetooth无线技术 (23)配对无线耳机或汽车立体声音响 (23)显示设置 (23)声音和通知设置 (23)声音和通知音量 (24)设置文本语言 (24)日期和时间设置 (24)设备设置 (24)重置数据和设置 (24)设备信息 (24)查看电子标签的法规和合规信息 (24)规格 (24)给设备充电 (25)设备维护 (25)Garmin支持中心 (25)使用 Wi‑Fi 网络更新软件 (25)使用 Garmin Express™ 更新软件 (26)安装 Garmin Express (27)更新摄像头软件 (27)设备保养 (27)清洁外壳 (27)清洁触摸屏 (27)清洁相机镜头 (27)防窃 (28)重新启动设备 (28)取下设备、固定架和吸盘 (28)从吸盘上取下固定架 (28)从挡风玻璃上取下吸盘 (28)取下带粘膜的摄像头底座 (28)常见问题解答 (28)吸盘吸不住挡风玻璃 (28)车辆行驶中底座无法固定我的设备 (28)我的设备无法获取卫星信号 (28)设备在我的车辆中无法充电 (29)我的电池电量短时间内会耗完 (29)我的摄像头在工作时发热 (29)我的录像画面模糊 (29)附录 (29)数据管理 (29)存储卡 (29)正在更换存储卡 (30)格式化存储卡 (30)从存储卡中删除视频 (30)将设备连接至计算机。
Garmin eTrex GPS receiver用户手册说明书
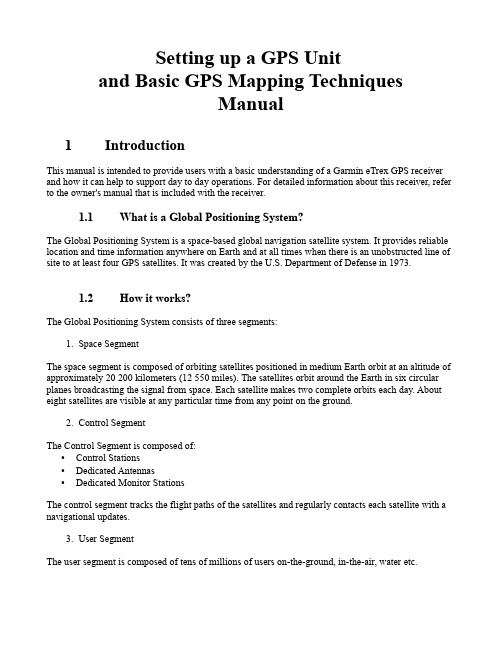
Setting up a GPS Unitand Basic GPS Mapping TechniquesManual1 IntroductionThis manual is intended to provide users with a basic understanding of a Garmin eTrex GPS receiver and how it can help to support day to day operations. For detailed information about this receiver, refer to the owner's manual that is included with the receiver.1.1 What is a Global Positioning System?The Global Positioning System is a space-based global navigation satellite system. It provides reliable location and time information anywhere on Earth and at all times when there is an unobstructed line of site to at least four GPS satellites. It was created by the U.S. Department of Defense in 1973.1.2 How it works?The Global Positioning System consists of three segments:1.Space SegmentThe space segment is composed of orbiting satellites positioned in medium Earth orbit at an altitude of approximately 20 200 kilometers (12 550 miles). The satellites orbit around the Earth in six circular planes broadcasting the signal from space. Each satellite makes two complete orbits each day. About eight satellites are visible at any particular time from any point on the ground.2.Control SegmentThe Control Segment is composed of:•Control Stations•Dedicated Antennas•Dedicated Monitor StationsThe control segment tracks the flight paths of the satellites and regularly contacts each satellite with a navigational updates.er SegmentThe user segment is composed of tens of millions of users on-the-ground, in-the-air, water etc.GPS Segments2 Setting up a Garmin e-Trex GPS unitThese are the basic steps on how to set up a Garmin eTrex GPS unit. These steps are specifically addressed for achieving best results when collecting track logs and waypoints for OpenStreetMap. For a full description of the settings please consult the Owners Manual or check the site:2.1 Getting Started2.1.1 Installing batteries and a microSD cardThe eTrex operates on two AA batteries which are not included.To install the batteries:➢Remove the battery compartment cover from the back of the unit➢Insert the batteries, observing the proper polarityThe SD card should be included in the Garmin eTrex folder bundle. It should be installed in the slot on the left side of the batteries.To install a microSD card:➢Remove the battery compartment cover from the back of the unit➢Locate the card slot at the upper-left edge of the battery tray, and slide the card into the slot2.1.2 Transferring data to and from the GPS unitTo transfer data to and from the device:➢Lift the weather cover from the USB unit on the back of the unit➢Connect the USB cable to the USB port on your computer and the USB port on the back of the unit➢Transfer the dataInstalling the batteries and a microSD card2.1.3 Key FunctionsKey Functions2.1.4 Initializing the GPS ReceiverWhen the satellite is turned on for the first time, the receiver must collect satellite data and establish its location. To receive the satellite signals you must:➢Be outdoors and have a clear view of the sky➢GPS is now searching for the satellite signals➢The Locating Satellites is replaced by Acquiring Satellites message➢Once the connection is established the Location and Coordinates appear in the Acquiring Satellites WindowAcquiring Satellites Window2.2 Loading a MapOpenStreetMap data is free to use however you like. Important! The changes need to be released under the OSM license. OSM data can be transformed into map files compatible with Garmin GPS devices. CloudMade () is one of the companies that produces free Garmin maps for a large number of countries.Download a map:➢To find maps of the area, load and browse the maps. The Garmin maps are in .img format.➢Once the area of interest is found, download the appropriate file to the computer.➢Unzip the file, this will extract the file called gmapsupp.imgLoad the map onto the Garmin device by putting the device into USB Mass Storage mode, and copying over the file:➢Press Menu twice or Page key until arriving to Main Menu➢Select the Setup icon, press Enter, then select the Interface icon, and press Enter➢Connect the GPS to the Computer via USB cable, highlight the USB Mass Storage button and press Enter, the device shows up on a system as a drive➢If it doesn't exist create a folder called Garmin on the device➢Copy the downloaded gmapsupp.img file to the Garmin folder; if the file already exists you might want to archive the existing file➢Disconnect the GPS or press the Power button to restart the unit - the map should be available2.3 Map SetupMap SetupSet up a map on the Map Page:➢Press Quit/Page key until arriving at the Map Page➢Press Menu/Find key, select Setup Map and press Enter/Rocker keyUse the Rocker key and move it left and right between different Map setups. Setup:General Setup➢Use the Rocker key (left and right) to move from icon to icon on the top menu and select the General Setup➢Move the Rocker key down to highlight Orientation, press Enter, select North Up and press Enter again➢Then highlight Lock On Road, press Enter, select Off and press Enter again.Turning Lock On Road ON would automatically align the tracklog with the nearest road present on the map loaded into the GPS unit. By turning the Lock On Road OFF will record new data even in the presence of existing roads.Tracks Setup➢Use the Rocker to move back to the Icon Menu on top➢Select Track Setup➢Move the Rocker down to highlight Track Points and press Enter➢Use the Numeric Keypad to enter 10000 and press Enter10000 is the maximum number of track points that can be recorded in the GPS units internal memory. The limit of the track points recorded to the microSD card is only limited by the size of the card.2.4 Track Log SetupThese steps make sure that the Garmin eTrex is recording track logs with a sample rate once per second and recording the track logs to the data card. Setting the frequency of the track log recording to the highest possible (one second) will ensure the most complete track recording.Track Log SetupFirst make sure the Track Log is being recorded:➢Press Menu twice or Page key until arriving to Main Menu➢Select Tracks icon and press Enter➢If Track Log is set to Off, move the Rocker to highlight On, and press EnterNext, configure the Track Log recording:➢Highlight the Setup button, and press Enter to open the Tracklog Setup Page➢Highlight Wrap When Full, and press Enter so that it is Checked➢Highlight Record Method, press Enter, select Time, and press Enter➢Highlight Interval, use the Numeric Keypad to set interval to 00 hrs 00 min 01 sec, and select OK➢Highlight Color, press Enter, select your choice, and press EnterFinally. Configure the Data Card:➢Highlight the Data Card Setup button, and press Enter to enter the Data Card Setup Page ➢Highlight Log Track To Data Card, and press Enter so that it is CheckedSystem Setup➢Press Menu twice or Page key until you arrive to the Main Menu➢Select the Setup icon, and press Enter, then select the System icon, and press Enter➢Highlight GPS, press Enter, select Normal, and press Enter again➢Highlight WASS/EGNOS, press Enter, select Enabled, and press Enter again➢Highlight Battery Type, press Enter, select depending on your battery type (most rechargeable batteries are usually NiMH, while the normal ones are Alkaline)2.6 Units SetupUnits SetupTo set up Measuring Units:➢Press Menu twice or Page key until you arrive to the Main Menu➢Select Setup icon, press Enter, then select the Units icon, and press Enter➢Highlight Position Format, press Enter, select hddd.ddddd°, and press Enter➢Select Map Datum, press Enter, select WGS 84, and press Enter➢Select Distance/Speed, press Enter, select Metric, and press Enter➢Select Elevation, press Enter, select Meters (m/min), and press Enter➢Select Depth, press Enter, select Meters, and press Enter➢Select Temperature, press Enter, select Celsius, and press EnterTime Setup➢Press Menu twice or Page key until you arrive to the Main Menu➢Select Setup icon, press Enter, then select the Time icon, and press Enter➢Highlight Time Format, press Enter, and select 24 Hour➢Highlight Time Zone, press Enter, and select a city in your time zone. If no obvious choice is listed, select Other, and press Enter➢Highlight UTC Offset, press enter, and use the Numeric Keypad to manually set your timezones offset. When finished, select OK.2.8 Welcome screen setupWelcome Setup➢Press Menu twice or Page key until you arrive to the Main Menu➢Select Setup icon, and press Enter, then select Welcome icon, and press Enter➢Use the Alphanumeric Keypad to enter a message3 Basic GPS mapping techniquesThe basic mapping techniques described are specifically addressed for achieving the best results when collecting points of interest, ways and areas, using a hand-held GPS units, such as the Garmin eTrex device.3.1 Collect satellite data and establish locationThe steps to initialize the GPS receiver are already described above (Initializing the GSP receiver). Before you set out to map, you need to initialize the GPS receiver, meaning, the receiver must collect satellite data and establish its location. To receive the satellite signals:➢Be outdoors and have a clear view of the sky!➢Turn the GPS device on by pressing the Power button ➢GPS is now searching for the satellite signals ➢The Locating Satellites is replaced by Acquiring Satellites message ➢Once the connection is established the Location and Coordinates appear in the Acquiring Satellites WindowYou are ready to map!Collecting satellite data and establishing location3.2 Collecting Points of InterestPoints of Interest (POI) are points/locations which are of special interest and usually the reason for conducting a mapping exercise. They are either physical points or events, placed somewhere in space and time. Some examples of Points of Interest are hospitals, schools, water points, toilets, shops, religious institutions, and even events, such as, demonstrations, clashes, rallies, etc. By mapping we determine the exact location of Points of Interest in space and time.There are many different ways to collect Points of Interest. This step explains how to collect these points , also known as waypoints, using a hand-held GPS unit.To collect a point:➢Stand in front of an object you wish to collect➢Press Enter key and hold it for one second until you arrive to Mark Waypoint screen➢Write down on a piece of paper (or into Waypoint Log Sheet) the number and the name of the point you are collecting (You can move up to the waypoint number field by using the Rocker key, and press Enter. Alphanumeric and Numeric Keypads appear. You can use these keypads to type in the name of the location you are mapping but for the sake of saving time it is better to use a sheet of paper and a pencil)➢OK should be highlighted, press Enter to save the locationCollecting Points of InterestExample of a GPS Waypoint Log Sheet:Waypoint Log Sheet3.3 Collecting WaysWays are lines connecting different locations. Ways can be highways, roads, paths, railway lines, bus lines, ship lines, bicycle routs, hiking trails etc.Before you start collecting ways, you need to set the Track Log as described above in the Track Log Setup. Once the device is set to record track, all you need to do is walk along the way you wish to map, and the device does the rest. For maximum efficiency try walking in the middle of the way you are collecting, but DO NOT PUT YOURSELF IN DANGER!Collecting ways3.4 Collecting AreasAn area is an enclosed space usually of the same attribute/land use. Areas can be forests, lakes, seas, parks, fields, buildings, parking lots, squares, playgrounds, etc.There is a couple of ways to collect an area with a GPS unit but the fastest and the easiest are:Collect a point in the middle:➢Collect a point in the middle of an area you want to map, estimate the dimensions and draw an approximate sketch of an area on a piece of paperThis method is good for smaller areas like playgrounds but it's not very precise.Collect points on the perimeter of the area:➢Walk around the perimeter of an area and collect points at the edges of an area➢Write the waypoints of the edges of an area on a piece of paperCollecting a point in the middle of an area and sketching out an area:Collecting a point in the middle and sketching out an area Collecting points on the perimeter of the area:Walking the perimeter of an area and collecting points at the edges。
Garmin 汽车导航设备用户手册说明书
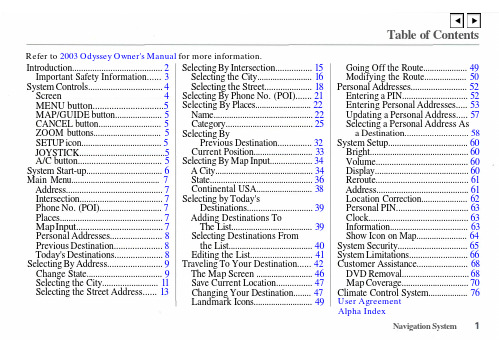
Table of ContentsIntroduction (2)Important Safety Information (3)System Controls (4)Screen 4 MENU button (5)MAP/GUIDE button (5)CANCEL button (5)ZOOM buttons (5)SETUP icon (5)JOYSTICK (5)A/C button (5)System Start-up (6)Main Menu (7)Address (7)Intersection (7)Phone No. (POI) (7)Places (7)Map Input (7)Personal Addresses (8)Previous Destination (8)Today's Destinations (8)Selecting By Address (9)Change State (9)Selecting the City (11)Selecting the Street Address...... 13Selecting By Intersection. (15)Selecting the City (16)Selecting the Street (18)Selecting By Phone No. (POI) (21)Selecting By Places (22)Name (22)Category (25)Selecting ByPrevious Destination (32)Current Position (33)Selecting By Map Input (34)A City (34)State (36)Continental USA (38)Selecting by Today'sDestinations (39)Adding Destinations ToThe List (39)Selecting Destinations Fromthe List (40)Editing the List (41)Traveling To Your Destination (42)The Map Screen (46)Save Current Location (47)Changing Your Destination (47)Landmark Icons (49)Going Off the Route (49)Modifying the Route (50)Personal Addresses (52)Entering a PIN (52)Entering Personal Addresses (53)Updating a Personal Address (57)Selecting a Personal Address Asa Destination (58)System Setup (60)Bright (60)Volume (60)Display (60)Reroute (61)Address (61)Location Correction (62)Personal PIN (63)Clock (63)Information (63)Show Icon on Map (64)System Security (65)System Limitations (66)Customer Assistance (68)DVD Removal (68)Map Coverage (70)Climate Control System (76)Navigation SystemRefer to 2003 Odyssey Owner's Manual for more information.User AgreementAlpha Indexv wIntroductionYour Honda Navigation System is a highly-sophisticated location system that uses satellites and a map database to show you where you are and to help guide you to a desired destination.The Navigation System receives signals from the Global Positioning System, a network of 24 satellites in orbit around the earth. By receiving signals from several of these satellites, the Navigation System can determine the latitude and longitude of your vehicle.In addition, a gyroscopic sensor and a speed sensor in your vehicle keep track of the direction and speed of travel at all times.The Navigation System applies thislocation, direction, and speedinformation to the maps and calcu-lates a route to the destination youenter. As you drive to thatdestination, the System providesguidance.The Navigation System is easy to use.The locations of many places ofbusiness and entertainment arealready entered in the system. Youcan select any of them as a desti-nation by pressing only one or two ofthe controls.If a desired destination is not in thesystem's database, you can enter itsaddress and the system will directyou to it. This destination can besaved for reuse at a later date.As you drive, the Navigation Systemprovides visual and audio drivinginstructions so you do not have totake your eyes off the road. Theseinstructions are provided in advanceof the actual driving maneuver soyou have time to slow down andchange lanes if necessary.Read this manual thoroughly so youare familiar with all the NavigationSystem's features. Afterwards, keepthis manual in the glove box of yourvehicle so you can refer to at anytime.Navigation SystemIntroduction Important Safety InformationThe Navigation System can distract your attention from the road if you focus on the screen or operate the system's controls while driving. You should always enter information into the system before you begin driving. Then, as you drive, you can listen to the audio instructions or glance at the screen.Operating the NavigationSystem controls while you aredriving can take your attentionaway from the road, causing acrash in which you could beseriously injured or killed.Enter information into thesystem only when your vehicleis stopped.The Navigation System is designedto provide route information to helpyou reach your destination. However,this route guidance may sometimesconflict with road conditions such asstreet closures, road construction,and detours.Additionally, the system itself hascertain limitations (see page 66 ).Therefore, you must verify the audioand visual route informationprovided by the system by carefullyobserving the roadway, signs andsignals, etc. If you are unsure,proceed with caution. Always useyour own good judgment, and obeytraffic laws while driving.Navigation System。
2018-2019-飞歌,导航,尾线定义word版本 (9页)

本文部分内容来自网络整理,本司不为其真实性负责,如有异议或侵权请及时联系,本司将立即删除!== 本文为word格式,下载后可方便编辑和修改! ==飞歌,导航,尾线定义篇一:飞歌导航各个系列的比较飞歌导航各个系列的比较广州飞歌汽车影音导航分为6500祥韵版,7000系列,7500 4S店专供产品,8000黄金版。
下面一一为大家剖析:7000系列已经停产,现还有部分库存!希望选购7000系列机型的车主需从速,但愿还有您需要的机型!另外还有部分8000一代的机器,夏普屏幕,韩国DVS机芯,三星双核处理器,硬件和7000系列一样优秀,带有九段EQ调节,数字音频传输!7500机器没有飞歌字样,专供4S店,硬件和6500系列一样,厂家不允许此产品流通到渠道,但市场上串货或者为追求利润背着厂家销售的现象时有发生!广州飞歌汽车音响有限公司,专业从事汽车音响、导航系统的研发、制造与销售。
公司拥有强大的自主研发队伍和出色的制造能力,依靠先进的音视频及芯片核心技术高速发展为国内车载影音导航行业的主流品牌,目前在台湾、新加坡、澳大利亚、美国均设有独资的海外分公司,并在全球各地建立了客户服务中心。
中国汽车用品在线作为飞歌家族店/飞歌品牌授权专营店,主要经营DVD+GPS导航系列产品,确保所销售产品质量可靠,价格优惠。
飞歌DVD导航产品现在分为5个系列,分别是黄金版8000系列、普通版7000系列、祥韵版6500系列、飞歌经典版FA系列、飞歌7500系列,除7000系列外,导航软件采用的是全新凯立德C-CAR实景地图,每个系列可以说是各有千秋,每个车主都可以根据自己的喜好来选择。
飞歌7000系列,采用全新数字高清晰液晶显示屏,彩图形化操作;GPS导航地址查询迅速;全面支持多种影音媒体播放格式;内置FM/AM收音调谐器;支持ipod接入、蓝牙免提;此外可连接倒车雷达,更直观地了解倒车情况(可选配)。
飞歌8000黄金版系列,相对普通版而言在音质提升方面还是比较显外的,采用国内首创基于DSP(数字信号微处理器芯片)设计的车载音频信号数字处理系统,独具一格的九段(EQ)均衡效果器,音质更为圆润。
手持GPS操作说明eTrexH_manual
Garmin®、eTrex®、TracBack®、MapSource®、BlueChart®、 AutoLocate™ 均經商標註冊登記,未經台灣國際航電股份有限公司 (Garmin Corporation)正式授權許可,任何人(及單位)均不得私 自使用。
附錄 A 介面說明………..……50 附錄 B 產品保證書…….….…51
3
第一章 基本原理介紹
1-1 定位原理簡介
全球衛星定位系統(Global Positioning System,GPS)是由美國 政府所發展,整個系統約分成下列三個部份:
1.太空衛星部份:由 24 顆繞極衛星所組成,分成六個軌道,運行 於約 20200 公里的高空,繞行地球一周約12小 時。每個衛星均持續著發射載有衛星軌道資料及 時間的無線電波,提供地球上的各種接收機來應 用。
2
目
特別聲明…………….…...…..1 注意事項……………..……...2 目 錄……………..…….…..3
第一章 基本原理介紹 1-1 定位原理簡介……….…4 1-2 使用環境限制……….…5 1-3 導航之基本原理……..…5 1-4 其他相關應用……….…6
第二章 功能說明 2-1 功能簡介……………7 2-2 規 格……………8 2-3 台灣地區使用須知...…10 2-4 按鍵說明…………...…12
第六章 航線功能(ROUTES) 6-1 航線編輯……..….……36 6-2 航線導航………...……38 6-3 停止航線導航……...…39 6-4 航線清除………..….…39
佳明表盘详解
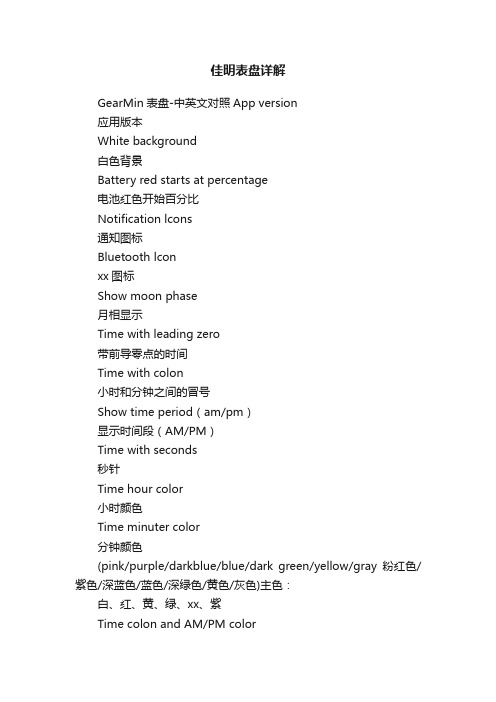
佳明表盘详解GearMin表盘-中英文对照App version应用版本White background白色背景Battery red starts at percentage电池红色开始百分比Notification lcons通知图标Bluetooth lconxx图标Show moon phase月相显示Time with leading zero带前导零点的时间Time with colon小时和分钟之间的冒号Show time period(am/pm)显示时间段(AM/PM)Time with seconds秒针Time hour color小时颜色Time minuter color分钟颜色(pink/purple/darkblue/blue/dark green/yellow/gray粉红色/紫色/深蓝色/蓝色/深绿色/黄色/灰色)主色:白、红、黄、绿、xx、紫Time colon and AM/PM color冒号和AM/PM颜色Date format日期格式Timezone1 offset时间偏移量Current location当前位置Timezone1 locationTimeZONE1定位Week offset周距Week starts onxx开始Notification extra field(rounded watch only)通知额外字段(仅为圆形表)(next sunrise/sunset time remaing-距下一次[日出/日落]剩余时间;current location-当前位置;timezone3location时区3位置;utc time 世界时间;day of the year今年的第几天;heart rate-心率;elevation-海拔;steps步数goal目标;calories burned燃烧卡路里;distance traveled-行进距离;total steps;total step goals;total calories burned总步数;总步数目标;消耗的总卡路里;average steps 平均步数average step goals 平均步数目标;average distance traveled平均行进距离;active minutes(moderate-vigorous)活动分钟(中度-剧烈))D1 data fieldD1数据场(date-日期sunrise-日出sunset-日落seconds秒;seconds with data日期和秒)(R1)data field 1(R1)数据字xx1Activity field 1活动字段1Move bar style进度轴(classic move bar经典移动棒)Select Graph type选择图形类型(activity monitor活动监视器、heart rate心率temperature温度pressure压力elevation海拔)Zoom graph data(graph sensor history only) 缩放图形数据(图形传感器历史记录)Graph background color图形背景颜色Graph shaded color图形阴影颜色Graph shaded data(activity monitor)图形阴影数据(活动监视器)Graph data-steps图形数据连线是否显示Select color选择颜色Graph data-step goal步目标线是否显示Select color选择颜色Graph data-calories图表数据卡路里Select color选择颜色Graph data-distance图形数据距离Select color选择颜色Graph data-floors climbed图层数据爬楼Select color选择颜色Graph data-floors climbed goal 图层数据爬升目标Select color选择颜色Graph data-floors descended 图形数据楼层下降Select color选择颜色Graph plot line width图线宽度Graph plot line color图形绘图线颜色(dev option)text vertical offset (DEV选项)文本垂直偏移ActiFace表盘-中英文对照Append moon phase to date追加月亮相位Graph description :maximums/totals/averages图形描述:最大值/总数/平均值Line graph data:distance/steps线图数据:距离/步长Color graph style:curve/bars彩色图形风格:曲线/条Upper custom field:sunset-sunrise/goal percentage/calories上层自定义场:日落日出/目标百分比/卡路里Custom field1:second time24/distance/calories自定义字段1:第二时间24/距离/卡路里Color graph line彩色图线Second time daylight saving offset二次夏令时。
garmin eTrex Legend GPS 使用说明书 中文版
eTrex Legend(中文)——传奇使用手册GPS新概念——真正的数字化生活中文输入功能完善超大内存面积计算人性化界面不得用于商业用途目录第一章:序言部分第二章:速查部分1.性能简介2.按键及功能介绍3.电池的安装4.显示屏背景光及对比度设置5.主页页面转换6.地图页面基本情况7.导航页面基本情况8.旅行计算机页面基本情况9.主菜单页面基本情况10.把当前位置标志为航路点11.改变航路点符号12.引导返回到您的起始点第三章:手册部分13.概述14.如何选择“关闭GPS”15.导航方式——概述16.地图页面概述17.地图页面选项概述18.使用移动光标概述19.停止导航20.数据区概述21.设置地图概述22.设置地图操作步骤23.导航页面概述24.设置导航页面操作步骤25.旅行计算机页面概述26.使用主菜单27.存点航路点页面概述28.创建航路点29.设计航路点不得用于商业用途30.查找菜单概述31.查找航路点概述32.查找操作步骤34.查找兴趣点概述37.创建和使用航线概述38.编辑航线39.编辑航路点40/41。
航线使用概述42.航线页面的数据区43.使用航迹概述44.航迹使用操作步骤45.设置页面概述46.单位页面概述47.显示页面概述48.接口页面概述49.系统页面概述50.工具概述51.日历概述52.打猎/捕鱼概述53.面积计算第四章:附录附录A:技术指标附录B:时差表附录C:配件附录D:数据接口附录E:简单故障维修不得用于商业用途第一章序言说明书介绍感谢您购买eTrex Legend(传奇)GPS接收机——我们不停努力的结果,为了可以使您的新型GPS接收机发挥最大的用途,并且了解所有的操作细节,您可以花些时间阅读一下本手册。
手册由四部分组成:一、序言部分二、速查部分介绍了一些Legend的细节、主要操作页面和基本导航方式三手册部分提供了使用Etrex Legend 的所有细节。
四、附录部分包括一些有关附件,说明书,维修向导,主题索引等方面的信息。
Amazfit智能运动手表使用手册说明书

Amazfit智能运动手表使用手册目 录外观和操作说明手表佩戴及充电方式运动功能介绍手表功能使用手表日常保养 010*******外观和操作说明以下使用说明内容基于WOS2.0系统,请升级到最新版本使用。
手表锁屏与操作状态手表在不进行操作一段时间后自动进入低功耗锁屏状态,并显示表盘界面。
可以通过按键短按来解锁手表,解锁后如果不进行操作,会再次自动进入低功耗锁屏状态。
系统状态符号说明系统状态符号会出现在解锁后的表盘上,每种符号会代表手表处于不同的状态。
触摸屏手势操作按键短按解锁手表返回表盘锁屏长按秒手表开机长按秒弹出手表重启、关机界面长按秒手表关机4610点击屏幕使用该功能、进入下一项或选中当前项左右滑动屏幕横向切换界面上下滑动屏幕上下滚动界面长按屏幕在表盘界面下长按激活表盘选择功能快捷设置菜单在表盘界面下滑,可以在该界面进行一些常用功能的开关和模式切换,以及进入更多设置界面。
语音控制功能说明见“语音助手”部分。
电池状态充电状态充满状态低电量保护状态当手表电量在5%及以下时会进入低电量保护模式,此时需要将手表充电超过5%之后才可以解除保护模式。
与手机连接断开当手表与手机距离过远断开了蓝牙连接或手机关闭了蓝牙广播,。
已开启勿扰模式已开启飞行模式已连接蓝牙耳机此时会增加系统功耗。
音乐播放中如果音乐播放已经结束,。
手表佩戴及充电方式日常佩戴建议将手表以适中的松紧度佩戴在离手腕两指距离的位置上,以确保光学心率监测器正常监测数据。
运动中佩戴进行跑步或者其他运动时,建议将手表以贴合、舒服且不会滑动的松紧度佩戴。
不要过于拉紧,也不要让手表自由晃动。
充电将手表与充电底座进行连接。
将另外一头的USB插头插入USB电源适配器,此时手表上会显示充电状态,安装时注意底座上充电触点的方向和手表上金属触点的方向一致,压紧后手表不会松脱出底座。
充电要求:建议使用电脑端USB充电或者品牌手机充电头进行充电,手机充电头额定输入电压必须是DC 5.0v,且输入电流大于500mA以上;运动功能介绍开启运动解锁后在表盘状态向右滑动可以快速打开运动列表。
Garmin GPS 产品说明书

Marking a waypoint is simply capturing your current location and storing it in the unit’s memory. The unit must be turned on and tracking satellites to mark a waypoint.To mark a waypoint:1. Press the Thumb Stick In and hold it until the Shortcuts Menu is displayed.2. Highlight Mark Waypoint and press the Thumb Stick In todisplay the Mark Waypoint Page shown below.Mark Waypoint PageName FieldSymbol Field3. Highlight the Name field and press the Thumb Stick In. Enter a new name. When finished, highlight OK then press the Thumb Stick In.4. Highlight the Symbol field and press the Thumb Stick In. Choose a symbol then press the Thumb Stick In to accept the selection.5. Highlight the OK button at the bottom of the page and press the Thumb Stick In to save the waypoint.As you move, notice that a breadcrumb trail of your path is left on the map. This trail is called a Track Log. You can use the track log to retrace your steps back to a certain location.To view your breadcrumb trail (track log):1. Use the Page button to display the Map Page.2. Walk away from your original location for at least three minutes.3. The default zoom level is 80 miles. Press the Zoom button to zoom in to view the breadcrumb trail (track log) in detail.You can send any location that you have available in your Find ‘N Go menu. These may be waypoints, contacts, cities, exits, or any other data that is loaded in the unit. Below are the steps to send a waypoint.To send a location (waypoint) using Find ‘N Go:1. Press the Thumb Stick In and hold it until the Shortcuts Menu is displayed, or press the Page button until the Main Menu is displayed.2. Highlight Find ‘N Go and press the Thumb Stick In. Highlight Way-points and press the Thumb Stick In. Select Nearest or By Name andpress the Thumb Stick In.3. Highlight the waypoint that you want to send and press the Thumb Stick In to display the Waypoint Review page.4. Highlight the Option Menu button and press the Thumb Stick In.5. Select Send Location and press the Thumb Stick In.The location is sent to all Rinos on the same channel and squelch code as you. They can then choose to Goto that location, view the location on the map (Map ), or save the location (OK ).The Rino’s most unique feature is Peer-to-Peer positioning, send-ing the location of one Rino unit to other Rino units. Peer-to-Peer positioning allows you to track the movement of other Rino users and even navigate to their location. To send your location:Press and release either the Call or Talk button. Your Rino 110 automatically sends out its location. Other Rino users monitoring the same channel and squelch code receive this information.Using Find ‘N Go, you can search for a waypoint and then create a straight-line route to it from your current location.To find and go to a waypoint:1. Press and hold the Thumb Stick In to access the Shortcuts Menu.2. Highlight Find ‘N Go and press In.3. Highlight Waypoints and press the Thumb Stick In. Select Nearest from the pop-up menu4. Use the Thumb Stick to select the desired waypoint from the list and then press In to display the Information Page for that waypoint.5. Highlight Goto and press In to create a straight-line route to the waypoint from your current location.If you have not heard from a contact in a while and would like to know that contact’s current location, you may “poll” the contact’s location. This will update that contact’s location in your Rino 110.To poll a location:1. Press the Thumb Stick In and hold it until the Shortcuts Menu is displayed, or press the Page button until the Main Menu is displayed.2. Highlight Find ‘N Go and press the Thumb Stick In. HighlightContacts and press the Thumb Stick In.3. Highlight the contact that you want to poll and press the Thumb Stick In to display the Contact Review page.4. Highlight the Option Menu button and press the Thumb Stick In.5. Select Poll Location and press the Thumb Stick In.If you have further questions or just want to learn more about the operation of Rino 110, refer to the Owner’s Manual , which provides detailed information about all of your Rino 110’s features.Quick Start Guide110Step-by-Step Instructions(Turn this page and begin with Step 1)Part Number 190-00251-01 Rev. CYou can navigate to a waypoint, city, exit, or a contact’s location. Using optional detailed maps, you can also navigate to points of interest, addresses, and intersections.To begin navigation using Find ‘N Go:1. Press the Thumb Stick In to display the Shortcuts Menu.2. Highlight Find ‘N Go and press the Thumb Stick In.3. Highlight Waypoints and press the Thumb Stick In. Select the desired option (by Nearest or by Name ), and press the Thumb Stick In.4. Highlight the desired waypoint and press the Thumb Stick In.5. With the Waypoint Page displayed, highlight the Goto button at the bottom of the page and press the Thumb Stick In to begin navigation. The Navigation Page automatically opens to guide you to your destination. See below for more information.Navigation PageThe two main components of the Navigation Page are the compass ring and the pointer. As you move, the compass ring rotates showing your current direction of travel at the top of the display. The pointer points toward your destination. When the pointer is aligned withthe vertical line at the top of the compass ring, you are on a direct course toward your destina-tion. The unit has to be moving to navigate. If you are standing still or moving very slowly, the navigation data may not be accurate.The first time you receive a signal from another Rino user, the New Contact page is displayed. From the New Contact page you can show the user’s location on your Map, Goto that position, select OKto add them to your contact list, or press the Page/Quit button to disregard the contact.Every time you receive signals fromcontacts, your map is updated showing their new position. A Track Log of their move-ment is created and shown on your map.Navigation Page New Contact PagePolling a contact’s locationPower button:• Press and hold to turn the unit On/Off• Press to adjust contrast and backlightingCall button:• Press to send out Call Tone • Sends position when released (if enabled)Talk button:• Press and hold to talk • Sends position when released (if enabled)Page/Quit button:• Press to cycle through main pages• Used to quit or escape menu itemsVolume (V) button:• Press to open volume control windowMicrophone:• Hold unit 3–4 inches away when talkingZoom/Map (Z) button:• From the Map Page, press to open Zoom control window • From any other page, press to display Map PageSpeakerThumb Stick• Press In to enter highlighted options and to confirm messages• Move Up, Down, Right or Left to move through lists, highlight fields, on-screen buttons, icons, enter data, or move the map panning arrow • Press In and hold to display Shortcuts Menu.Send Location1The Rino 110 operates on three “AA” Alkaline batteries (not included) located in the back of the unit. Rechargeable batteries may also be used. The unit is factory set to use Alkaline batteries. See the Rino 110 Owner’s Manual for setting battery type. Stored data is not lost when the batteries are removed.To install batteries:1. Remove the battery cover on the back of the unit. Turn theD-ring 1/4 turn counter-clockwise and pull the cover off.2. Insert batteries observing the polarity reference molded intothe unit housing. Orient the negative (-) battery terminaltoward the spring.3. Reinstall the battery cover by inserting the bottom hinge clipand closing the cover. Turn the D-ring 1/4 turn clockwise.Notes on battery use:• When replacing batteries, use only new or fully recharged batteries. Rechargeable batteries may typically display lesscapacity than Alkaline batteries.• Do not mix different types of batteries together.• Remove the batteries from the unit if you do not plan to use it for several months. Follow the battery manufacturer’s instruc-tions for proper care and disposal of used batteries.• Extensive use of backlighting, WAAS, and/or FRS or GMRS will significantly reduce battery life.2All of the information you need to operate the Rino 110 can befound on five default main pages (or display screens). Simply pressand release the Page key to cycle through the Radio Page, MapPage, Navigation Page, Trip Computer, and Main Menu Page. Youcan also access the Main Pages by pressing the on-screen Main PageMenu button .Trip ComputerMain Menu Navigation PageWhile these five Main Pages provide you with different types ofinformation, they all share common features like Option Menus anda Main Page Menu. Access the Option Menu and Main Page Menuby using the Thumb Stick to highlight the on-screen button. Thenpress the Thumb Stick In.3Before the Rino 110 can be used for navigation, the GPS receivermust be initialized. Initialization allows the Rino 110 to receiveand store satellite information and begin using the satellites fornavigation. The initialization is automatic and should only take afew minutes.To initialize the unit (acquire satellites):1. Take the Rino 110 outside where it has an unobstructed viewof the sky and turn it on.2. The unit begins to search forsatellite signals. “Tracking Satel-lites” is displayed while the unit isinitializing.The first time you use your Rino110, initialization should take nomore than five minutes.3. When the GPS is initialized and ready for navigation, themessage “3D Accuracy” is displayed on the Radio Page.If for some reason the unit is not able to gather the necessary satel-lite information, refer to the Rino 110 Owner’s Manual.4 Entering DataUse the Thumb Stick like a joystick that youcontrol with your thumb. Move the ThumbStick Up, Down, Right, or Left. Press theThumb Stick In to select an item on thescreen, much like pressing the Enter buttonon a computer keyboard.Sometimes you will need to spell out things using the Thumb Stickand an on-screen keyboard. To enter characters with the on-screenkeyboard, press the Thumb Stick Up, Down, Left, or Right tohighlight the desired character (letter, number, or a space). Press theThumb Stick In to select that highlighted character. Choose Backto delete the character to theleft of the cursor. When youare finished entering charac-ters, highlight OK and pressthe Thumb Stick In.5Select a channel and squelch code to transmit on. Be sure to tell theother members of your group what channel and squelch code youare using so they can communicate with you.To select a channel:1. Highlight the Channel field and pressthe Thumb Stick In.2. Select an available channel andpress the Thumb Stick In to acceptthe selection.To select a squelch code:1. Select the Code field and press theThumb Stick In.2. Select one of the thirty-eight (38)available codes. Press the ThumbStick In to accept the selection.6The My ID (name) and symbol (icon) identify you to otherRino users.To change the unit ID/name:1. Highlight the My ID field and pressthe Thumb Stick In to activate thefield and display the keyboard.2. Highlight Clear, then press theThumb Stick In to clear thedefault ID.3. Enter an ID, or name, up to ten(10) characters long.4. When you have entered your newID, highlight OK and then pressthe Thumb Stick In.To change the user symbol:1. Highlight the face symbol to the right of the My ID field. Pressthe Thumb Stick In to show a list of available face symbols.2. Highlight the desired symbol from the list of selections.3. Press the Thumb Stick In to select that symbol.7The Rino 110 can transmit to and receive messages from other FRSradio users on the same channel and squelch code. To use all of thefeatures of the Rino, communicate with other Rino units.To transmit on your Rino 110:1. Press and hold the Talk button and speak in a normal voiceinto the microphone area on the front of the Rino 110 from adistance of about 3–4 inches.2. When you are finished talking, release the Talk button. Yourlocation is updated on all receiving Rinos.3. If you want to call another user or update your location onanother Rino, press and release the Call or Talk button.8If you need to adjust the volume, press the V (Volume) button onthe front of the unit to display an adjustment slider. To change thevolume, press the Thumb Stick Up or Down to raise or lower theslider. When you have the proper level set, press the V button orpress the Thumb Stick In.If lighting conditions make it hard for you to see the display screen,you can adjust the contrast or turn on the backlight.To turn on the backlight and adjust the screencontrast:1. With the unit on, briefly press and release the Power buttonto display the Backlight and Contrast adjustment.2. Press thePower button or press Up or Down on the ThumbStick to turn the Backlight on or off. A light bulb symbol ap-pears on the top Status Bar when the backlight is on.The backlight remains on until the set timeout period iscompleted or the Power button is pressed again. The unit isfactory set to timeout 15 seconds after the last button press.3. Move the Thumb Stick to Left (Lighter) or Right (Darker) toadjust the contrast.4. Press the Thumb Stick In to close the Backlight and Contrastwindow.Example of an on-screen keyboardTracking Satellite SignalsSelecting the channelMy ID field Symbol fieldMain Page Menu buttonOption Menu button。
AMAZFIT智能手表使用手册
AMAZFIT 智能手表使用手册目 录手表操作和手表状态手表佩戴及充电方式手表功能使用手表日常保养01030417手表操作说明和手表状态1. 按键说明2. 触摸屏手势操作3. 灭屏模式HOME键手表绑定后默认设置是灭屏模式,该模式在待机状态下为黑屏,不显示时间,在抬腕动作产生后才会显示表盘。
消息通知产生时,手表会亮屏显示消息内容。
灭屏模式的开启会增加手表的待机时间。
在手表中的 系统设置 > 使用偏好 > 锁屏模式 中可以更改成微光模式。
4. 微光模式微光模式在待机状态下为屏幕只显示时间(指针表盘显示指针,数字表盘显示数字时间),在抬腕动作产生后才会显示手表状态待机中解锁后其他按键功能解锁手表表盘界面呼起语音开机按键功能短按按键短按按键长按2秒点击屏幕功能项左右滑动屏幕上下滑动屏幕表盘界面长按屏幕使用该功能、进入下一项或选中当前项横向切换界面上下滚动界面激活表盘选择功能完整表盘。
消息通知产生时,手表会亮屏显示消息内容。
微光模式的开启会降低手表待机时间。
在手表的 系统设置 > 使用偏好 > 锁屏模式 中可更改成灭屏模式。
开启锁屏秒针后,黑屏模式下会在抬腕后的表盘上显示秒针或秒,微光模式下会在待机状态下以及抬腕后都显示秒针或秒。
锁屏秒针是默认关闭的,开启后会减少手表的待机时间。
5. 锁屏秒针模式系统状态符号会出现在解锁后的表盘上,每种符号会代表手表处于不同的状态。
6. 系统状态符号[充电中][充满][低电量保护模式] [与手机断连][勿扰][飞行模式]充电状态。
充满状态。
低电量保护状态。
当手表电量在5%及以下时会进入低电量保护模式,此时需要将手表充电超过5%之后才可以解除保护模式。
与手机连接断开。
当手表与手机距离过远断开了蓝牙连接或手机关闭了蓝牙广播,以及手表开启了飞行模式,手表表盘界面都会显示这个符号。
已开启勿扰模式。
开启该模式后,手表收到消息、来电等提醒后都不会自动显示和震动。
- 1、下载文档前请自行甄别文档内容的完整性,平台不提供额外的编辑、内容补充、找答案等附加服务。
- 2、"仅部分预览"的文档,不可在线预览部分如存在完整性等问题,可反馈申请退款(可完整预览的文档不适用该条件!)。
- 3、如文档侵犯您的权益,请联系客服反馈,我们会尽快为您处理(人工客服工作时间:9:00-18:30)。
本文部分内容来自网络整理,本司不为其真实性负责,如有异议或侵权请及时联系,本司将立即删除!
== 本文为word格式,下载后可方便编辑和修改! ==
garmin佳明etrex20说明书
篇一:GARMIN etrex简易操作
陕西测绘仪器计量监督鉴定中心
MARMIN etrex手持机简易操作流程
1. 安装蓄电池,开机;
2. 按“翻页”键进入接收机主界面,选择“设置”项,在“设置”界面中选择“校准”项,按需要依次对罗盘和高度计进行校准(注:对高度计的校准需要在已知点上操作),完成校准后按“翻页”退出;
3. 继续在“设置”界面中选择“单位设置”(部分机型此处显示“单位”,进入可继续按确认键进行设置),按客户需求依次对单位格式(默认为:度分秒或者dddmmss.ss)、坐标系统(默认为:WSG 84)、距离/速度(默认为:公制)、高度/垂直速度(默认为:米/秒)、深度(默认为:米)、气压(默认为:毫巴)等进行设置,按“翻页”退出;
4. 继续在“设置”界面中选择“系统”,GPS项选择“正常”、广域增强系统选择“关闭”(因为中国区域没有WGS84下的参考站)、标准气压选择“打开”、高度计选择“自动校准”等,按“翻页”退出;
5. 继续在“设置”界面中选择“高度计设置”,自动校准选择“打开”、气压计模式选择“可变高度”等,按“翻页”退出;
6. 继续在“设置”界面中选择“地图”,若需要单点定位而非导航使用,则需要在“信息”一栏中“去选”该地区的地图,按“翻页”退出(注:部分机型无此项);
7. 继续按“翻页”,可进入坐标页面读取测点的大地坐标,部分机型则需要“翻页”至“存点”项来读取坐标。
注:不同仪器的操作键面可能有所差异,但设置项类似。
201X 12 05 lule5212
篇二:garmin佳明双星eTrex 20
GARMIN(佳明)双星eTrex 20
篇三:garmin eTrex Legend GPS 使用说明书中文版
eTrex Legend(中文)——传奇
使用手册
GPS新概念——真正的数字化生活
中文输入
功能完善
超大内存
面积计算
人性化界面
目录
第一章:序言部分第二章:速查部分
1.性能简介
2.按键及功能介绍 3.电池的安装
4.显示屏背景光及对比度设置 5.主页页面转换 6.地图页面基本情况 7.导航页面基本情况
8.旅行计算机页面基本情况 9.主菜单页面基本情况
10.把当前位置标志为航路点 11.改变航路点符号
12.引导返回到您的起始点
第三章:手册部分
13.概述
14.如何选择“关闭GPS” 15.导航方式——概述 16.地图页面概述
17.地图页面选项概述 18.使用移动光标概述 19.停止导航 20.数据区概述21.设置地图概述。