Synst星士达网络收音机使用说明
收音机使用方法
收音机使用方法收音机是一种非常常见的电子设备,它可以接收无线电信号并将其转换成声音。
在日常生活中,我们经常会用到收音机来收听广播节目或者音乐。
下面我将为大家介绍一下收音机的使用方法。
首先,当我们拿到一台新的收音机时,我们需要先了解它的基本结构和功能。
一般来说,收音机的正面会有一个频率调节旋钮,用来调节收音机接收的无线电信号的频率。
在旋钮的旁边通常会有一个音量调节旋钮,用来调节收音机的音量大小。
此外,收音机上还会有一个开关按钮,用来控制收音机的开关机状态。
接下来,我们需要找到一个合适的位置放置收音机。
通常来说,我们应该将收音机放置在离窗户或者高楼较近的位置,这样可以获得更好的信号接收效果。
另外,在使用收音机的时候,我们还需要避免将它放置在大型金属物体附近,因为这样会影响收音机的信号接收效果。
当我们准备好收音机的位置之后,我们就可以开始调节频率来收听广播了。
首先,我们需要打开收音机的开关,然后轻轻转动频率调节旋钮,直到我们听到广播信号为止。
在调节频率的过程中,我们需要耐心等待,因为有时候信号可能会有些杂音,我们需要找到一个清晰的信号才能开始收听广播。
一旦我们成功调节到了清晰的广播信号,我们就可以开始调节音量,享受收音机带来的音乐或者节目了。
在调节音量的过程中,我们需要注意不要调节得太大声,以免影响到他人。
另外,当我们使用耳机来收听广播时,我们也需要注意适当调节音量,以免对听力造成伤害。
最后,当我们使用完收音机之后,我们需要记得关闭收音机的开关,以免浪费电池或者电能。
另外,我们还需要注意定期清洁收音机的外壳和旋钮,以保持收音机的良好使用状态。
总的来说,收音机的使用方法并不复杂,只需要我们掌握一些基本的操作技巧就可以了。
希望通过本文的介绍,大家能够更好地使用收音机,享受到更多的音乐和广播节目。
收音机的使用技巧和方法

收音机的使用技巧和方法一、收听环境。
1,地理环境。
没有一个合适的收听环境,收音机就很难发挥出正常功能。
首先看你的地理环境,这点在你收听调频广播时,很重要。
2,用什么收音机与附件。
你应该根据他人的接收状态来确定你是否适合收听或者买什么设备、是否加天线和是否使用天线放大器。
最好买调频立体声收音机。
千万不要认为有CD 、VCD等音响设备,就忽略了立体声收音机。
同样的歌曲,经过音乐电台专家的编辑和造势诱导,使您的情绪达到一定境界,然后再去收听,肯定是有另一翻独到的享受。
一付小耳机把您搞的如醉如痴,把您悄悄带到美妙的音乐天堂,让人羡慕呀!如果您那里不容易收听到,我建议您认真向专家征求意见,购买合适的收音机和天线放大器,架设合适的天线。
在解决问题的过程中,您会增长很多知识,产生很多乐趣。
即使没有达到良好的收听境界,也让人感到此举不亏,乐在其中。
而且产生了继续努力的愿望。
大有不到长城非好汉的英雄气概!学会妥协与协调。
在电磁干扰如此严重的今天,人们必须把自己的收听目的与现实做一些妥协,人在大自然面前是渺小的。
如果人们把自己的收目标置于客观规律之上,那肯定是失败的。
所以人们在选定收听目标时,除了按照电波传递规律外,必须很现实地考虑受干扰程度。
并依此作为选择波段和电台的原则。
如果您不计现实收听条件,执意去收听一些电台,违背了事物的客观规律,您使用再好的收音机也没有用。
在设备没有发生根本性革命以前,人们必须得随和一点,及时改变自己的收听兴趣。
否则尽是一场徒劳。
退一步海阔天空,转换节目兴趣后,会有另一翻新天地。
您除了遵循电波传递规律,还要考虑干扰的程度和原因,才能确定接收的波段与电台。
有时还要在接收时间上进行协调。
而不是为接收什么电台,而买什么收音机。
这样去做,往往让您失望。
3,了解收听环境并设法改善收听环境。
使用调频波段,对电磁干扰的敏感度很小。
中波和短波就很敏感。
而且因污染源的不同而有明显差异。
譬如如果日光灯的起辉器中如果没有旁路电容,则形成强烈的干扰,严重时形成直径100米的居民区的干扰源。
(整理)收音机调试步骤及调试方法

收音机调试步骤及调试方法一.AM、IF中频调试1、仪器接线图扫频仪频标点频率为:450KHZ、455KHZ 、460KHZ或460KHZ、465KHZ 、470KHZ。
扫频仪1、检波输出2、3正负电源4、RF信号输入5、检波输入(INPUT)6频标点信号输入(PUISE INPUT)7、水平信号输入(HOR、INPUT)2:测试点及信号的连接:A:正负电源测试点(如电路板中的CD4两端或AC输入端)正负电源测试点从线路中的正负供电端的测试点输入。
B:RF射频信号输入(如CD2003的○4脚输入)。
RF射频信号由扫频仪输出后接到衰减器输入端,经衰减器衰减后输出端接到测试架上的RF输入端,在测试架上再串联一个10PF的瓷片电容后,从电路中的变频输出端加入RF信号将AM的振荡信号短路(即PVC的振荡联短路),或将AM天线RF输入端与高频地短路,(如CD2003○16与PVC地脚短路。
)C:检波输出端(如CD2003○11脚为检波输出端)从IC检波输出端串一个103或104的瓷片电容接到测试架上的OUT输出端。
再连接到显示器前面的INPUT端口上以观察波形。
3.调试方法及调试标准将收音机的电源开关打开并将波段开关切换到AM波段状态,调整中频中周磁帽使波形幅度达到最大(一般为原色或黄色的中周),并且以水平线Y轴为基准点,看波形的左右两半边的弧度应基本对称,以确保基增益达到最大、选择性达到最佳。
如图标准:波形左右两边的弧度基本等等幅相对称,455KHZ频率在波形顶端为最理想,偏差不超过±5KHZ。
如果中频无须调试的,则经标准样机的波形幅度为参考,观察每台机的波形幅度不应小于标准样机的幅度的3-5DB,一般在显示器上相差为一个方格。
二、FM IF中频调试1、器接线图①扫频仪频率分别为10.6MHZ,10.7MHZ,10.8MHZ至少三个频率点。
1、检波输出2、3正负电源4、RF信号输入5、检波输入(INPUT)6频标点信号输入(PUISE INPUT)7、水平信号输入(HOR、INPUT)②测试点及信号连接;A:正负电源测试点(如电路板中的CD4两端或AC输入端)正负电源测试点从线路中的正负供电端的测试点输入。
Super_Star_-_IP_产品说明书-24E1
第三章 室外单元.........................................................................................................................10 3.1 ODU 特性介绍 .................................................................................................................10 3.2 ODU 内部功能模块 .........................................................................................................10 3.3 ODU 频率分配计划 .........................................................................................................11 3.3.1 7GHz ODU 的波道分配............................................................................................12 3.3.2 8GHz ODU 的波道分配............................................................................................14 3.3.3 13GHz ODU 的波道分配..........................................................................................15 3.3.4 15GHz ODU 的波道分配..........................................................................................16 3.3.5 18GHz ODU 的波道分配..........................................................................................18 3.3.6 23GHz ODU 的波道分配..........................................................................................19
SCOTT钟控收音机说明书
产品销往欧洲十个国家,在产品的外盒上有注明,说明书也有七国语言.产品主要功能:1,时钟。
2,收音机。
3,投影钟。
4,闹钟。
5,无线音箱(需自配FM发射器)功能介绍:1.FM/AM两波段收音,手动调台,本机接收能力强。
2.荧光色大字体LED显示,1.3"蓝色LED时钟显示,非常醒目。
3.可显示年月日;星期显示功能。
4.机器独有的自动时间设定系统,每次断电无需重新调节!断电记忆功能。
可以在恢复供电后自动设置到正确的年月日时间;5。
独有的不同时段闹钟功能,可以设置周一到周五和周六到周日分开不同时间闹钟!可设置3种闹铃模式:每天,周一至周五,周末。
A,B闹钟可设置不同的闹铃时间。
6.定时自动开机闹醒功能,2组闹钟,闹醒方式有2种:收音机/蜂鸣(可根据自己喜好选择)7,可旋转180度的LCD放映灯可将时间投影到墙上或天花板上;8.独有的智能时钟设置系统;可设置不同时区(中国区设为16)。
通过简单设置时区,即可自动调整日期9.小睡赖床功能。
SNOOZE功能可以让你在闹铃响后再小睡一会儿,例如闹钟响后,按一下SNOOZE增加10分钟,10分钟后再响闹铃。
可设置不同的小睡时间。
10.内置电池可长时间记忆时钟;11.LED低电压指示器配置:主机,说明书.包装:彩盒包装,如图.产品尺寸规格:长/宽/高 22*10.5*9cm产品外盒规格:长/宽/高 25*11.5*13.5cm产品外箱规格:长/宽/高 28.5*26*24.6cmAC电源供电:AC 230V ( 50 Hz )SCOTT CPX88钟控收音机的说明书!操作说明书。
1.设定机器主时间:A:设日历举例说明:插上电后将机器设为当前时间和日历,如2008年7月20日,11时05分机器插电后,会处于初始状态,由于有时钟数据保存功能,插电后机器会自动显示日历和时间。
如果你需要改变日历,可同时按下机器顶部的“MONTH/DATE”键与“SET —”与“SET+”这二个键当中的一个,机器的日历显示窗口即会飞速“向前”或者“向后”计数,等到了你需要的日历,你松开按键,日历数据就能正常显示了。
收音扩音机 快速启动指南说明书

T 收音扩音机快速启动指南安全说明 (2)连接 (5)基本操作 (13)2Zh产品中有害物质的名称及含量本表格依据 SJ/T 11364 的规定编制。
○:表示该有害物质在该部件所有均质材料中的含量均在 GB/T 26572 规定的限量要求以下。
×:表示该有害物质至少在该部件的某一均质材料中的含量超出 GB/T 26572规定的限量要求。
保护环境如果需要废弃设备(及电池)时,请与本地相关机构联系,获取正确的废弃方法。
请勿将设备(及电池)随意丢弃或作为生活垃圾处理。
z (电源)键打开本机的电源或将其设置为待机模式。
有关详情,请参见CD-ROM 上的使用说明书。
要查看使用说明书,请单击当CD-ROM 插入PC 时自动显示的屏幕中的“ 中文”,或在显示型号选择屏幕的情况下单击相应型号,然后单击下一屏幕中的“ 中文”。
之后,请遵照屏幕说明进行操作。
如果未自动显示相应屏幕,请打开CD-ROM 中的“index.html” 文件。
警告:切勿试图在音频播放机中播放此CD-ROM。
部件名称有害物质铅(Pb)汞(Hg)镉(Cd)六价铬(Cr(VI))多溴联苯(PBB)多溴二苯醚(PBDE)电路板×○○○○○外壳箱体×○○○○○前部面板显示器×○○○○○此标识适用于在中华人民共和国销售的电子信息产品。
标识中间的数字为环保使用期限的年数。
1标明附件中所规定的技术指标和使用范围,说明所有控制、调整及开关等使用方法;–使用频率:2.4 - 2.4835 GHz –等效全向辐射功率(EIRP):天线增益< 10dBi 时:≤ 100 mW 或≤ 20 dBm –最大功率谱密度:天线增益< 10dBi 时:≤ 20 dBm / MHz(EIRP) (Bluetooth)–载频容限:20 ppm–帯外发射功率( 在2.4-2.4835GHz 頻段以外)≤ -80 dBm / Hz (EIRP)–杂散发射( 辐射) 功率( 对应载波±2.5 倍信道带宽以外):≤ -36 dBm / 100 kHz (30 - 1000 MHz)≤ -33 dBm / 100 kHz (2.4 - 2.4835 GHz)≤ -40 dBm / 1 MHz (3.4 - 3.53 GHz)≤ -40 dBm / 1 MHz (5.725 - 5.85 GHz)≤ -30 dBm / 1 MHz ( 其它1 - 12.75 GHz)2不得擅自更改发射频率、加大发射功率(包括额外加装射频功率放大器),不得擅自外接天线或改用其它发射天线;3使用时不得对各种合法的无线电通信业务产生有害干扰;一旦发现有干扰现象时,应立即停止使用,并采取措施消除干扰后方可继续使用;4使用微功率无线电设备,必须忍受各种无线电业务的干扰或工业、科学及医疗应用设备的辐射干扰;5不得在飞机和机场附近使用。
Dakota Alert WR-3000 无线收音器说明书

卫星电台使用说明

卫星电台使用说明嘿,朋友,听说你对卫星电台有兴趣?那就对了!谁不想随时随地把自己当个主持人,享受点“飞上天”的感觉呢?不过,说实话,卫星电台有点高大上,搞不好你一开始就晕头转向,搞不清楚怎么弄。
别担心!今天我就给你说说,怎么把这件事搞得轻松愉快,让你用得像吃饭一样简单。
卫星电台不是什么神秘的高科技设备。
它就是通过卫星传输信号,把声音从地球某个地方传到你家,或者说,随时给你提供全球的广播内容。
你只要通过接收器(就是那个小巧的天线或者卫星接收装置)就能收听到各种各样的频道,啥都有,从新闻、音乐到脱口秀,应有尽有。
就像是打开了一个世界的大宝盒,突然一堆东西砸到你面前,咋整呢?别怕,慢慢来,跟着我一步步来。
打开卫星接收器,看那个天线。
天线,顾名思义,得指向卫星,才能接收到信号嘛。
听起来是不是有点像古代的“瞄准星辰”?其实也差不多。
记得,天线别朝错方向,否则你就只能听见“嘶嘶”声,啥都没有。
调一调,天线对准卫星,你就能开始接收到清晰的信号了。
信号好了,接下来就是选择频道的问题了。
说到频道,你可得挑好听的。
毕竟这个世界上,广播的种类多得让人眼花缭乱。
你可以选择自己喜欢的音乐频道,沉浸在那美妙的旋律里,享受一下惬意的时光;也可以选择新闻频道,了解一下全球的热点新闻,跟得上时代的步伐。
你知道,现在的广播频道就像菜市场的摊位,各种口味都有,挑个你最喜欢的,听得开心才是最重要的!有时候呢,你还可以挑个电台,听听他们的脱口秀节目,或者是访谈类的内容,放松一下大脑,笑一笑。
人活一辈子,笑点必须要有,不然都不好意思说自己活过!这些节目里头,主持人和嘉宾聊的各种内容,能让你大开眼界。
别小看这些电台节目,它们可比电视里的娱乐节目更接地气,生活中的种种事儿,随便聊两句都能引发大波讨论。
哈哈,如果你有一天也想做个电台主持人,那就从这些节目里偷点儿“学问”呗。
不过,刚接触卫星电台的时候,很多人会问:“那我要怎么调整音量啊,或者换个频道啊?是不是特别复杂?”别担心,这个其实超级简单。
收音机使用方法

收音机使用方法
收音机是一种非常常见的电子产品,它可以接收广播电台的信号,让我们在不
同的场合中享受音乐、新闻和其他节目。
使用收音机并不复杂,但是对于一些新手来说,可能会有一些困惑。
下面我将为大家介绍一下收音机的使用方法。
首先,确保收音机的电源已经打开。
大多数收音机都使用电池或者是插电两种
方式供电,所以在使用之前需要确保电源充足。
如果是使用电池供电的收音机,建议定期更换电池,以免影响正常使用。
接下来,调整天线。
天线的调整对于收音机的接收效果至关重要,一般来说,
如果是室内使用,可以将天线伸展开来,然后朝向信号源的方向调整,如果是室外使用,可以选择一个开阔的地方,这样信号接收会更好。
然后,选择频道。
大多数收音机都有调频和调幅两种方式,通过旋钮或者按钮
来选择不同的频道。
在选择频道的时候,可以根据自己的喜好和需求来调整,比如选择音乐台、新闻台或者其他节目。
接着,调整音量。
音量的调节一般在收音机的侧面或者顶部,通过旋钮来实现。
在调节音量的时候,需要注意不要调得太大声,以免影响他人,也要注意不要调得太小声,以免影响自己的收听效果。
最后,收音机使用完毕后,及时关闭电源,以免浪费电量,同时也可以延长收
音机的使用寿命。
总的来说,收音机的使用方法并不复杂,只需要按照上述步骤依次进行操作即可。
希望以上介绍对大家有所帮助,让大家在使用收音机的时候更加得心应手。
网络收音机TGS-01中文说明书
简介
感谢您购买便携式网络收音机!您可以通过它收听全球12,000多个网络电 台,娱乐、新闻、音乐等各类广播应有尽有!相信会给您的生活增添许多乐 趣,带来更多精彩。
本网络收音机是通过使互联网连接到vTuner的服务器上来收听电台的, vTuner在该领域处于世界领先地位。一旦确定选择本网络收音机里的某一个电 台,该电台将会直接与网络收音机建立连接,并开始播放。使用该收音机收听 网络电台,需要预先连接有效的无线局域网络接入设备(AP)。在开始设置之 前,请确保无线局域网络接入点设备(如:无线路由器)已开启,并已与因特 网正常连接。如果需要,请参考无线接入设备的使用指南或联系Internet网络 接入运营商。
规格说明 WiFi:
1. 无线局域网: Wireless 802.11b/g. 支持WEP / WPA的加密方式。 2. 能收听到全世界的12, 000多个网上电台。 3. 支持RealAudio、MP3、WMA、等音频格式。
7
4. 可设置12个预设电台。
5. 可设置电台为书签。
FM: 1. 频率范围87.5~108MHz。 2. 支持 RDS功能。 3. 可设置30个预设电台。 电池: 1. 内置1500mAh的锂聚合物电池,在开启省电模式的状态下能连续收听超过15 个小时。 2. 充电时间:5-6小时。 3. 最大充电电流: 500mA。 4. 循环寿命: 大于300次。 整机: 1. 内置喇叭: 2W。 2. 3.5-mm 立体声耳机插孔。 3. 尺寸: 72.9mm*125.1mm*23.2mm (H*W*D)。 4. 重量: 162.7g。
4
播放预设电台..................................................... 29 添加喜爱的电台................................................... 29 播放喜爱的电台................................................... 33 FM 收音机操作.................................................... 33 FM切换.......................................................... 33 Seek 模式........................................................ 34 Preset 模式....................................................... 35 频道列表(Channel List).......................................... 35 自动搜索模式(Auto Program).................................... 36 Tune 模式........................................................ 37 清除电台列表(Clear All List)...................................... 37 RDS Function..................................................... 38 电池电量,充电及显示............................................. 40 FAQ............................................................. 41 安全警告......................................................... 44 FCC 声明......................................................... 45 FM 菜单结构图.................................................... 47 WiFi菜单结构图................................................... 48
收音机使用方法

收音机使用方法收音机是一种非常方便的电子设备,它可以让我们随时随地收听到各种广播节目,包括音乐、新闻、故事等。
下面,我将向大家介绍一下收音机的使用方法,希望能帮助大家更好地使用这一设备。
首先,当我们拿到一台新的收音机时,需要先了解一下它的各个部件。
通常,收音机的主要部件包括电源开关、音量调节按钮、频道选择按钮、天线等。
在使用收音机之前,我们需要确保电源开关处于关闭状态,然后插上电源线或安装好电池,接下来就可以打开电源开关,开始使用收音机了。
接着,我们需要调节收音机的天线,以便更好地接收广播信号。
通常情况下,我们可以将天线伸直,并尽量朝向广播信号源的方向,这样可以提高接收效果。
当天线调节好后,我们可以通过频道选择按钮来选择我们想要收听的广播频道,通常这些频道会以数字来表示,我们只需要按下相应的数字键,就可以自动调到相应的频道。
在收听广播时,我们可以通过音量调节按钮来调节音量大小,以便让声音达到我们所需的大小。
此外,如果我们想要收听调频广播,我们可以通过频率调节按钮来调节频率,以找到我们想要收听的频道。
另外,当我们使用收音机时,需要注意一些使用技巧。
比如,在收听AM频道时,我们可能会遇到一些电磁干扰,这时可以尝试调整收音机的位置或者让天线朝向不同的方向,以减少干扰。
此外,如果我们想要收听远距离的广播信号,我们可以使用外接天线来增强信号接收效果。
最后,当我们使用完收音机后,记得要关闭电源开关,以节省电力。
如果是使用电池供电的收音机,当电池电量低时,记得及时更换电池,以免影响收音机的正常使用。
总的来说,收音机是一种非常实用的电子设备,只要我们掌握了正确的使用方法,就能够轻松地享受到各种广播节目。
希望通过本文的介绍,大家能够更加熟练地使用收音机,让它成为我们生活中不可或缺的一部分。
祝大家收音愉快!。
Pioneer AVH-4200NEX 双层DVD播音收音机说明书

Application operation screenAV operation screenPhone menu screenAV operation keyThe AV operation screen appears.12 Displays the source list.Recalls equalizer curves.Refer to Using the equalizer on page 50 Selecting a sourceSource on the AV source selectionTouching an item on the list allows you to narrow down the options and proceed to the next operation.Appears when all characters are not displayed on the display area.If you touch the key, the rest are scrolled for display.Appears when items cannot be displayed on a single page.Drag the slider bar or the list to view any hidden items. Operating the time bar6Displays the characters that are entered.Moves the cursor to the right or left for a number of charac-ters equivalent to the number of touches.Enters the characters in the text box.Deletes the input text to the left of the cursor one letter at a time. Touching and holding the key deletes the letters to the left of the cursor in rapid succession.*6Switches to the preset dial screen.Refer to Using the preset dial lists on page 15 Switches to the phone book list.Refer to Calling a number in the phone book on page 15Recalls the preset channel stored to a key from memory.Stores the current broadcast frequency to a key.iTunes® tagging indicator andiTunes® tagging song status indicatorHOLDPerforms manual tuning.Performs seek tuning or non stop seek tuning.Releasing the key in a few seconds, skips to the nearest station from the current frequency.HOLDSkips files forwardor backward.*2Switches between playback and pause.Audio source screen 2Sets a repeat play range.: Repeats the current disc.: Repeats the current track.Video source screen 1Performs fast reverse orfast forward.Touch again to change play back thespeed.Stops playback.Sets a repeat play range.: Repeats all files.: Repeats the current chapter.: Repeats the current title.*6Resumes playback (Bookmark). This function is available for DVD-Video. You can memorize one point as a Bookmark for a disc (up to five discs).Skips files forwardor backward. Switches between playback and pause.*4Switches the current music information display.Sets a repeat play range.or : Repeats all files.: Repeats the current folder.or : Repeats the current file.Sets a repeat play range.: Repeats the current file.: Repeats the current folder. or: Repeats all files.Touch again to change the playback speed.Performs fast reverse or fast forward.*4Switches between Sets a repeat play range.: Repeats all files.: Repeats the current folder.Plays files in random order.Touch again to change the playback speed.Performs fast reverse or fast forward.*4Switches betweenAudio source screen 1Switches between playback and pause.Skips files forward or backward.Audio source screen 2Sets a repeat play range.: Repeats all in the selected list.: Repeats the current song or video.Video source screenPerforms fast reverse orfast forward.Apple Music Radio screenSwitches between playbackand pause.Skips tracks forward.Displays the pop-up menu forApple Music Radio.Displays the current source.Displays the menu screen.Press the button twice to hide the App control side bar.123 Touch to mute. Touch again to unmute.Sets whether to switch the sound mix function on or off. Left tab:The audio mix function is enabled (mix on) and the App volume is displayed.Right tab:The audio mix function is disabled (mix off).21Touch to mute. Touch again to unmute.21Touch to mute. Touch again to unmute.Skips tracks forward.Switches between playback Gives a “Thumbs Up” to the playing track.Adds information for the track currently playing to bookmarks.*2Skips files forward or backward.Plays files in random order. Playback screen 2Sets a repeat play range.Switches between playbackand pause.Selects a file from the list.Performs manual tuning.Selects a channel directly.*2Skips broadcasting channels.HOLDDisplays the preset channels.Select an item on the list("1" to "6") to switch to the preset channel.Skips files forward or backward.132Continues playing the current scanning song or channel.Skips to the previous/next song during TuneScan™ or to the previous/next channel during category scan.Cancels scan play.Using TuneMix™A High Speed HDMI® Cable (sold separately) is required forconnection.Refer to Using an HDMI input on page 64You can set the screen size for the video image.Refer to Changing the wide screen mode on page 55 CAUTIONFor safety reasons, video images cannot be viewed while yourSwitches between the video inputand the sound input.A Mini-jack AV cable (CD-RM10) (sold separately) is required for connection.Refer to External video component on page 63You can set the screen size for the video image.CAUTIONFor safety reasons, video images cannot be viewed while your vehicle is in motion. To view video images, stop in a safe place and apply the parking brake.Starting procedure (for AVSelects a track.Turns on or off the MIXTRAXoriginal visual display. Switches between playback and Sets to the original BPM (Beats Per Minute).Specifies the playback portion.: Plays back a middle portion.Displays the Parking Assist screen. Displays the Climate screen.Vehicle Information screen Climate screenParking Assist screenDisplaying the setting screen for iDatalinkFunctions and displays vary depending on the connected type of iDatalink adapter and the vehicle model.Display the “System” setting screen.。
smart收音机使用说明页
smart收音机使用说明页
描述
1.开/关按钮
按住按钮打开或关闭设备
2.音量+按钮
3.音量–按钮
按下按钮增大音量
按下按钮降低音量
4.调音+按钮
5.Tuning–按钮
按下按钮手动调谐至所需频率按住按钮可自动搜索电台6.模式按钮
按下按钮设置模式:FM/USB/存储卡
7.预设+按钮
下一步按钮(USB)
8.Preset–按钮
上一个按钮(USB)
FM:按此按钮可预设电台
按住按钮可观看电台列表
USB:按下按钮选择曲目
9.播放/暂停按钮程序按钮
按下按钮播放或暂停曲目
按下按钮确认存储位置
10.数字按钮
按其中一个按钮选择预设电台
11.电池仓
打开电池仓
将电池(3.7V锂离子)插入电池仓
关闭电池仓
12.天线
延长天线以获得最佳的无线电接收效果
使用方法
手动预设:
按编程按钮进入编程模式
调到您想要的电台
按程序按钮确认所选电台
按预设+/-按钮选择存储位置
按程序按钮确认选择的存储位置
自动预设:
按住程序按钮直到显示屏上的频率开始运行。
收音机接收详细说明说明书

調諧至一個無線電台自動調諧1.按主機上的 TUNER 幾次以選擇"AM"或"FM"。
2.按 TUNING MODE ,使顯示螢幕上的"AUTO"指示燈亮起。
3.按 TUNING 開始自動調諧。
找到一個電台後搜尋即自動停止。
調諧至某個無線電台時,顯示幕上的"TUNED "指示燈亮起。
調到一個 FM 無線電台時,"FM STEREO"指示燈亮起。
"TUNED "指示燈熄滅時,無聲音輸出。
FM 無線電台的訊號微弱時:無線電波信號可能較弱,這取決於其構建結構與周圍環境情況。
在此種情況下,請按照下一節"手動調諧"說明的程序,手動選擇所需的電台。
手動調諧1.按主機上的 TUNER 幾次以選擇"AM"或"FM"。
AM/FM 接收詳情2.按 TUNING MODE,使顯示螢幕上的"AUTO"指示燈熄滅。
3.按 TUNING 選擇所需的無線電台。
每按一下按鈕,頻率改變 1 個步長。
按住按鈕時頻率會持續改變,鬆開後停止。
調台時注意顯示幕。
若要返回自動調諧:按主機上的 TUNING MODE。
本機自動調諧至一個無線電台。
這時通常應顯示"AUTO"。
直接調諧頻率用於直接輸入您要收聽的無線電台的頻率。
1.按遙控器上的 TUNER 幾次以選擇"AM"或"FM"。
2.按 D.TUN。
3.使用數字按鈕,在 8 秒內輸入無線電台的頻率。
例如,要輸入 87.5 (FM),請按 8、7、5 或 8、7、5、0。
如果輸入的數字錯誤,請按 D.TUN 並輸入正確值。
預設一個 AM/FM 無線電台可以記錄最多 40 個您最喜歡的 AM/FM 無線電台。
提前記錄無線電台讓您能夠直接調到喜歡的電台。
Sylvania SCR1229BT 蓝牙自动设置时钟收音机 USB 充电说明手册说明书

MODEL NO. SCR1229BTBLUETOOTH AUTOSET CLOCK RADIO WITH USB CHARGINGINSTRUCTION MANUALPLEASE READ BEFORE OPERATING THIS EQUIPMENT Sylvania Inc. used under licenseSYLVANIA is a registeredtrademark of OSRAM .This symbol, located on back or bottom of the unit, is intended to alert the user to the presence of uninsulated “dangerous voltage” within the product’s enclosure that may be of sufficient magnitude to constitute a risk of electric shock to persons.This symbol, located on back or bottom of the unit, is intended to alert the user to the presence of important operating and maintenance (servicing) instructions inthe literature accompanying the appliance.Discs. This laser Compact Disc Player is equipped with safety switches to avoid exposure when the CD door is open and the safety interlocks are defeated. Invisible laser radiation is present when the CD Player’s lidis open and the system’s interlock has failed or been defeated. It is very important that you avoid direct exposure to the laser beam at all times. Please do not attempt to defeat or bypass the safety switches. CAUTION: TO PREVENT ELECTRIC SHOCK, MATCH WIDE BLADE OF PLUG TO WIDE SLOT, FULLY INSERT.To reduce the risk of electric shock, do not remove cover (or back). There are no user-serviceable parts inside. Please refer any servicing to qualified service personnel.WARNING:Any Changes or modifications to this unit not expressly approved by the party responsible for compliance could void the user’s authority to operate the equipment.This device complies with part 15 of the FCC Rules. Operation is subject to the following two conditions: (1) This device may not cause harmful interference, and (2) this device must accept any interference received, including interference that may cause undesired operation.NOTE: This equipment has been tested and found to comply with the limits for a Class B digital device, pursuant to Part 15 of the FCC Rules. These limits are designed to provide reasonable protection against harmful interference in a residential installation. This equipment generates, uses, and can radiate radio frequency energy and, if not installed and used in accordance with the instructions, may cause harmful interference to radio communications. However, there is no guarantee that interference will not occur in a particular installation. If this equipment does cause harmful interference to radio or television reception, which can be determined by turning the equipment off and on, the user is encouraged to try to correct the interference by one or more of the following measures:•Reorient or relocate the receiving antenna.•Increase the separation between the equipment and receiver.•Connect the equipment into an outlet on a circuit different from that to which the receiver is connected.•Consult the dealer or an experienced radio/TV technician for help.Warnings and PrecautionsTO PREVENT FIRE OR SHOCK HAZARDS, DO NOT EXPOSE THIS UNIT TORAIN OR MOISTURE.Do not mix old and new batteries.Do not mix alkaline, standard (carbon-zinc), or rechargeable (ni-cad, ni-mh, etc) batteries.This equipment complies with FCC radiation exposure limits set forth for an uncontrolled environment. This equipment should be installed and operated with minimum distance 20cm between the radiator & your body.21.Read Instructions - All the safety andoperating instruction should be read before the product is operated.2.Retain Instructions - The safety andoperating instruction should be retained forfuture reference.3.Heed Warnings - All warning on the productand in the operating instructions should beadhered to.4.Follow instructions - All operating and useinstructions should be followed.5.Cleaning - Unplug this product from thewall outlet before cleaning. Do not use liquidcleaners or aerosol cleaners. Clean only with a dry cloth.6.Attachments - Do not use attachments notrecommended by the product manufacturer asthey may cause hazards.7.Water and Moisture - Do not use this productnear water - for example, near a bath tub, wash bowl, kitchen sink, or laundry tub; in a wetbasement, or near a swimming pool, and thelike. The apparatus shall not be exposed todripping or splashing and that no objects filled with liquids, such as vases, shall be placed onapparatus.8.Accessories - Do not place this product onan unstable cart, stand tripod, bracket, ortable. The product may fall, causing seriousinjury to a child or adult, and serious damageto the product. Use only with a cart, stand,tripod, bracket, or table recommended by themanufacturer, or sold with the product. Anymounting of the product should follow themanufacturer’s instructions, and should usea mounting accessory recommended by themanufacturer.9. A product and cart combination should bemoved with care. Quick stops, excessive force, and uneven surfaces may cause the applianceand cart combination to overturn.See figu re:10.Ventilation - Slots and openings in the cabinetare provided for ventilation and to ensurereliable operation of the product and to protect it from overheating, and these openings mustnot be blocked or covered. The openingsshould never be blocked by placing theproduct on a bed, sofa, rug, or other similarsurface. This product should not be placed in a built-in installation such as a bookcase or rack unless proper ventilation is provided or themanufacturer’s instruction have been adheredto.11.Power Sources - This product should beoperated only from the type of power sourceindicated on the marking label. If you are notsure of the type of power supply to your home, consult your product dealer or local powercompany. For products intended to operatefrom battery power, or other sources, refer tothe operating instruction.12.Grounding or Polarization - This productmay be equipped with a polarized alternating-current line plug (a plug having one bladewider than the other). This plug will fit intothe power outlet only one way. This is a safetyfeature. If you are unable to insert the plugfully into the outlet, try reversing the plug. Ifthe plug should still fail to fit, contact yourelectrician to replace your obsolete outlet. Donot defeat the safety purpose of the polarizesplug.Alternate Warnings - This product isequipped with a three-wire grounding-typeplug, a plug having a third (grounding) pin.This plug will only fit into a grounding-typepower outlet. This is a safety feature. If youare unable to insert the plug into the outlet,contact your electrician to replace yourobsolete outlet. Do not defeat the safetypurpose of the grounding-type plug.13.Power-Cord Protection - Power supply cordsshould be routed so that they are not likely tobe walked on or pinched by items placed uponor against them, paying particular attention tocords at plugs, convenience receptacles, andpoint where they exit from the product.14.Protective Attachment Plug - The productis equipped with an attachment plug havingoverload protection. This is a safety feature.See Instruction Manual for replacement orresetting of protective device. If replacementof the plug is required, be sure the servicetechnician has used a replacement plugspecified by the manufacturer that has thesame overload protection as the original plug.15.Outdoor Antenna Grounding - If anoutside antenna is connected to the receiver,be sure the antenna system is groundedso as to provide some protection againstvoltage surges and built-up static charges.Article 810 of the National Electrical Code,ANSI/NFPA 70, provides information withregard to proper grounding of the mast andsupporting structure, grounding of the mastand supporting structure, grounding of thelead-in wire to an antenna-discharge unit, sizeof grounding conductors, location of antenna-discharge unit, connection to groundingelectrodes, and requirements for the groundingelectrode.16.Lightning - For added protection for thisproduct during a lightning storm, or when itis left unattended and unused for long periodsof time, unplug it from the wall outlet anddisconnect the antenna or cable system. Thiswill prevent damage to the product due tolightning and power-line surges.17.Power Lines - An outside antenna systemshould not be located in the vicinity ofoverhead power lines or other electric light orpower circuits, or where it can fall into suchpower lines or circuits. When installing anoutside antenna system, extreme care shouldbe taken to keep from touching such powerlines or circuits as contact with them might befatal.18.Overloading - Do not overload wall outlets,extension cords, or integral conveniencereceptacles as this can result in a risk of fire orelectric shock.19.Object and Liquid Entry - Never pushobjects of any kind into this product throughopenings as they may touch dangerous voltagepoints or short-out parts that could result in afire or electric shock. Never spill liquid of anykind on the product.20.Servicing - Do not attempt to service thisproduct yourself as opening or removingcovers may expose you to dangerous voltageor other hazards. Refer all servicing toqualified service personnel.21.Damage Requiring Service- Unplugthis product from the wall outlet and referservicing to qualified service personnel underthe following conditions:a)When the power-supply cord or plug isdamaged,b)If liquid has been spilled, or objects havefallen into the product,c)If the product has been exposed to rain orwater,d)If the product does not operate normallyby following the operating instructions.Adjust only those controls that are coveredby the operating instructions as an improperadjustment of other controls may result indamage and will often require extensive workby a qualified technician to restore the productto its normal operation.e)If the product has been dropped ordamaged in any way, andf)When the product exhibits a distinct changein performance - this indicates a need forservice.22.Replacement Parts - When replacement partsare required, be sure the service technicianhas used replacement parts specified by themanufacturer or have the same characteristicsas the original part. Unauthorized substitutionsmay result in fire, electric shock, or otherhazards.23.Safety Check - Upon completion of anyservice or repairs to this product, ask theservice technician to perform safety checksto determine that the product is in properoperating condition.24.Wall or Ceiling Mounting - The productshould be mounted to a wall or ceiling only asrecommended by the manufacturer.25.Heat - The product should be situated awayfrom heat sources such as radiators, heatregisters, stoves, or other products (includingamplifiers) that produce heat. Battery shall notbe exposed to excessive heat such as sunshine,fire, or the like.26.Main plug is used as disconnect device andit should remain readily operable duringintended use. In order to disconnect theapparatus from the mains completely, themains plug should be disconnected from themains socket outlet completely.27.Excessive sound pressure from earphones andheadphones can cause hearing loss. Important Safety Instructions678321161710111213141519LOCATION OF CONTROLSPOWER SOURCEDC Power To power the unit, plug the DC Power adaptorinto a standard wall outletBattery BackupRequires 1 x CR2032 Button Cell Battery (Included)The battery backup is intended for short poweroutages only. The unit’s primary functions cannotrun on the battery backup alone. This unit uses athe time. Replace the battery if the low battery indicatorlights up.1.POWER / SOURCE BUTTON2.VOLUME - DOWN / ALARM ONE BUTTON3.DST (DAY LIGHT SAVING) / AUTO SCAN BUTTON4.VOLUME + UP / ALARM TWO BUTTON5.SKIP / TUNE BACKWARD BUTTON6.NIGHT LIGHT ON/OFF /TIME ZONE BUTTON7. SKIP / TUNE FORWARD BUTTON8.PLAY / CLOCK /PRESET BUTTON9. SLEEP /DIMMER /SNOOZE BUTTON10.PM INDICATOR11.ALARM ONE INDICATOR (BUZZER / RADIO)12.DST (DAY LIGHT SAVING) INDICATOR13.BLUETOOTH MODE INDICATOR14.ALARM TWO INDICATOR (BUZZER / RADIO)15.LOW BACKUP BATTERY INDICATOR16.BACKUP BATTERY COMPARTMENTB CHARGING PORT18.DC IN JACK19.FM ANTENNA20. AUX JACKSetting The Alarm1.Press and hold the ALARM ONE BUTTON at standby mode.2.ALARM ONE INDICATOR and the digits of time will flash.3.Press the HOUR BUTTON or MINUTE BUTTON to increase the hourand minute.4.Tap ALARM ONE BUTTON again to set the weekly alarm schedule.5.Tap HOUR BUTTON or MINUTE BUTTON to select the desiredalarm schedule.• 1 – 7 means alarm will sound from Monday to Sunday.• 1 – 5 means alarm will sound from Monday to Friday only.• 6 – 7 means alarm will sound from Saturday to Sunday only.6.Tap ALARM ONE BUTTON repeatedly to select the wake up option.•Wake to Buzzer- Buzzer LED medicator will light.•Wake to radio – Radio LED indicator will light.•Disable the Alarm – both Buzzer and Radio indicator will turn off.7.The setting will be stored after 5 seconds.8.Press and hold the ALARM TWO BUTTON at standby mode.9.ALARM TWO INDICATOR and the digits of time will flash.10.Repeat steps 3 to 7 to set the ALARM TWO.Setting The Alarm ExampleMonday to Friday wake up at 7:00am by alarm1.Press and hold the ALARM ONE BUTTON at standby mode.2.ALARM ONE INDICATOR and the digits of time will flash.3.Press the HOUR BUTTON or MINUTE BUTTON set to 7:00am.4.Tap ALARM ONE BUTTON again to set the weekly alarm schedule.5.Tap HOUR BUTTON or MINUTE BUTTON to select 1-5.6.Tap ALARM ONE BUTTON once to select wake by alarm.Saturday and Sunday wake up at 9:00am by radio1.Press and hold the ALARM TWO BUTTON at standby mode.2.ALARM TWO INDICATOR and the digits of time will flash.3.Press the HOUR BUTTON or MINUTE BUTTON set to 9:00am.4.Tap ALARM TWO BUTTON again to set the weekly alarm schedule.5.Tap HOUR BUTTON or MINUTE BUTTON to select 6-7.6.Tap ALARM TWO BUTTON twice to select wake by radio.Note: Repeat steps 1 to 6 to set the 1-7(Monday to SundayTo view and change the wake up option:1.Tap ALARM ONE BUTTON at standby mode. The LED display willshow the alarm time and wake up option momentarily (5 seconds).2.Tap ALARM ONE BUTTON repeatedly within 5 seconds to selectthe wake up option or disable the alarm.3.The current setting will be store after 5 seconds.4.Repeat above steps to view and change the wake up option of ALARM TWO1. Make sure the unit is plugged into the wall2. Using the appropriate USB charging cable (not included), connect one end to the device and the other to the USB Charger on the unit.Refer to the user’s manual for your specific device for manufacturers required charging amperage as well as determining the appropriate cable for your device before charging.Note: This device uses a USB charging port with a 1000mA maximum charging capacity, making it unsuitable for charging iPads.3. The device will now charge.Power Output........................................ 500 mW RMS MonoUSB Charging....................................... DC 5V, 1AAC Power.............................................. AC100V - 240V 5V 1A ~ 50/60Hz Battery Size (For Backup Only)............. CR2032 x 1pcRadio Frequency................................... FM: 87.5 - 108MHz BT Operation Distance ......................... ≥ 32 Feet in open areaImpeadance of Speakers ...................... 0.5 W / 8 ꭥ. In very rare instances, such as an electrostatic discharge on a dry cold winterday, an erroneous display or prolonged abnormal behavior during normal use,you should unplug it from the AC power source and then remove the backup batteries from the battery compartment at the rear of the unit for at least one minute and it will reset to factory default setting.LIMITED PRODUCT WARRANTYThis quality product is warranted to be free from manufacturer’s defects in material and workman-ship, provided that the unit is used under the normal operating conditions intended by the manufacturer. Should you have any problem with this product, please and it is highly recommended to visit our website at before you take any other steps as we have additional copies of instruction manuals, operating manuals and trouble shooting tips on our website which gives you the answer on most of the questions you could have in operating the unit.TERMS OF WARRANTYC.I. Service Dept. warrants this product to be free from defects in materials and workmanship for 90 days on parts and 90 days on labor. If you originally purchased your product more than 90 days ago, a repair fee may apply. Nothing within this warranty shall imply that C.I. will be responsible or liable for any damage to any items placed in this product, whether due to any defect of the product, or its use, whether proper or improper.EXCLUSIONS Save as herein provided, C.I. Service Dept. (Canada) or C.I. Service Dept. (USA), there are no other warranties, conditions, representations or guarantees, express or implied, made or intended by C.I. or its authorized distributors and all other warranties, conditions, representations or guarantees, including any warranties, conditions, representations or guarantees under any Sale of Goods Act or like legislation or statue is hereby expressly excluded. Save as herein provided, C.I. Service Dept. (Canada) or C.I. Service Dept. (USA), shall not be responsible for any damages to persons or property, including the unit itself, howsoever caused or any consequential damages arising from the malfunction of the unit and by the purchase of the unit, the purchaser does hereby agree to indemnify and save harmless C.I. from any claim for damages to persons or property caused by the unit.TO OBTAIN REPAIRS UNDER THE TERMS OF THIS WARRANTY1. The original purchaser must present a copy of the original bill of sale and the service warranty card.2. Any alterations, abuse, misuse, battery corrosion or accidental damage voids the warranty.3. The warranty does not cover cabinets and accessories.4. No warranty or insurance contained or set out shall apply when damage or repair is caused by power failure; damage in transit or when moving the unit; improper power supply; use for commercial or industrial purposes; service calls resulting in customer education, etc.5. The defective product should be mailed to:CanadaU.S.AC.I. Service Dept. Cur �s Interna �onal Ltd315 A �well Drive Toronto, ON M9W 5C1 c/o Lotus International Company 6880 Commerce Blvd.Canton MI 48187U.S.A.For service assistance and product information, please call: 1-800-968-9853. If mailing the product, the freight must be prepaid and a money order for $7.00 should be included to cover the cost of insurance and the return of the product.6. C.I. reserves the right to repair or replace the parts which have become defective. To begin the warranty repair process , please note that you MUST obtain a return authorization number prior to returning your product for warranty based support.This can be placed under the 1-800-968-9853 contact line.Model No. Date Purchased Serial No.。
收音机使用
调频、调幅、短波、长波什么是调频(FM)、调幅(AM)、短波(SW)、长波(LW)?在一般的收音机或收录音机上都有AM及FM波段,相信大家已经熟悉,这两个波段是用来供您收听国内广播的,若收音机上还有SW波段时,那么除了国内短波电台之外,您还可以收听到世界各国的广播电台节目。
为了让您对收音机的使用有更进一步的认识,以下就什么是AM、FM、SW、LW作一简单的说明。
事实上AM及FM指的是无线电学上的二种不同调制方式。
AM: Amplitude Modulation称为调幅,而FM: Frequency Modulation称为调频。
只是一般中波广播(MW: Medium Wave)采用了调幅(AM)的方式,在不知不觉中,MW及AM之间就划上了等号。
实际上MW只是诸多利用AM调制方式的一种广播,像在高频(3-30MHz)中的国际短波广播所使用的调制方式也是AM,甚至比调频广播更高频率的航空导航通讯(116-136MHz)也是采用AM的方式,只是我们日常所说的AM波段指的就是中波广播(MW)。
那FM呢?它也同MW的命运相类似。
我们习惯上用FM来指一般的调频广播(76-108MHz,在我国为87.5-108MHz、日本为76-90MHz),事实上FM也是一种调制方式,即使在短波范围的27-30MHz之间,做为业余电台、太空、人造卫星通讯应用的波段,也有采用调频(FM)方式的。
而SW呢?其实可以说是对短波的一种简单称呼,正确的说法应该是高频(HF:High Frequency)比较贴切。
而短波这名称是怎么来的呢?以波长而言,中波(MW)介于200-600米(公尺)之间,而HF的波长却是在10~100米(公尺)之间,与上述的波长相比较,HF的波长的确是短了些,因此就把HF称做短波(SW: Short Wave)。
同样的,比中波MW更低频率的150KHz-284KHz之间的这一段频谱也是作为广播用的,以波长而言,它大约在1000~2000米(公尺)之间,和MW的200-600米相比较显然"长"多了,因此就把这段频谱的广播称做长波(LW: Long Wave)。
收音机说明书中英版

操作说明书一)插上电源适配器,并连接到收音机二)旋动功能开关,再旋TIME 或MINUTE 钮,分别可以设置时钟或闹钟时间三)功能开关旋到CLK 档位,按RADIO 键,开机并收听上次关机时电台四)按SOURCE 键,转换FM/DAB 功能五)在收音模式,长按UP/DOWN 键,向上或向下自动搜索电台并停台;短按UP/DOWN 键,向上或向下微调六)旋转hour/tuning,向上或向下微调电台频率,旋动minute/vol,可调节音量七)按info 键,查看电台相关信息八)按Menu 键,进入系统设置,配合UP/DOWN 键进行选择,按SEL 键确认九)按RAEPEAT/SELSET 键,确认存储搜到的电台十)按SLEEP 键,选择睡眠时间,对应图标显示十一)按SCAN 键,全频段自动搜台并存储签10 个电台十二)短按Preset,配合UP/DOWN,可以呼出预存电台十三)存台:长按UP/DOWN 搜索电台,停台后再长按Preset 键,配合UP/DOWN,找到存储位,按REPEAT/SELSET 即可十四)闹铃响起,按AL ON/OFF 可关闭铃声十五)按RADIO 键,显示“standby”并关机Operation Manual1. Plug in power and connect the radio.2. Turn the “function” switch, then “time” or “Minute” to set clock or alarm time.3. Turn the “function” switch to CLK, then press “Radio” button to turn on the radio and listen to the station shut down last time.4. Press “Source” button to change between FM/DAB.5. In Radio mode, long press “UP/DOWN”button to search backward or forward and stop automatically; short press “UP/DOWN” to fine tune backward and forward.6. Rotate “Hour/Tuning” button to fine tune radio frequency forward or backward; Turn “MINUTE/VOL” to adjust volume.7. Press “INFO” to check relevant information about the station.8. Press “MENU” and enter System Settings, then press “UP/DOWN” button to choose and confirm with “SEL”9. Press “REPEAT/SELSET” to confirm storing the stations searched .10. Press “SLEEP” to choose sleep time according to the icons displayed11. Press ”SCAN” for full-band auto scan and to store 10 stations12. A short press on “PRESET” with UP/DOWN can call out the stored stations13. Long press “UP/DOWN”for auto scan and again a long pr ess on ”PRESET” when search stops, then find the storage position with “UP/DOWN” and confirm with “REPEAT/SELSET” button.14. Turn off the alarm with “AL ON/OFF” when it rings.15. Press “Radio” button, then radio shuts down with icon ”Standby”.。
Synst星士达网络收音机使用说明
Synst星士达网络收音机使用说明一、产品概述Synst星士达网络收音机是一款高品质的便携式收音机,采用先进的网络接入技术,可以实时收听全球各地的广播电台。
其独特的设计和卓越的音质使其成为了广大音乐爱好者和新闻追随者的首选。
本文将为您介绍Synst星士达网络收音机的使用方法及注意事项。
二、开箱及组装1. 打开包装,取出Synst星士达网络收音机及配件。
2. 将电源适配器插入收音机的电源接口。
3. 连接一根适配器线束至网络接口,另一端连接到您的家庭网络或无线路由器。
三、基本操作指南1. 开机与关机长按收音机的电源按钮,即可开机或关闭收音机。
2. 调节音量通过扭转收音机右侧的音量旋钮,可调节音量大小。
3. 选择频道收音机主界面提供了频道选择按钮,您可以通过点击频道按钮进行选择。
按一下频道按钮,可循环切换到下一个可用频道,确保您留意频道信息的显示。
4. 播放与暂停在选择完频道之后,只需点击主界面的播放按钮,即可开始播放。
再次点击该按钮可以暂停播放。
5. 搜索功能Synst星士达网络收音机提供了搜索功能,方便用户查找感兴趣的频道。
在主界面点击搜索按钮,输入频道名称或特定关键词,即可搜索相关频道。
6. 收藏频道当您发现喜欢的频道时,您可以将其收藏以便更快地访问。
在播放中的频道界面,点击收藏按钮即可将该频道加入您的收藏夹。
7. 定时功能Synst星士达网络收音机还配备了定时功能,让您可以设置收音机在指定时间自动开启或关闭。
在主界面点击定时按钮,按照提示进行设定即可。
四、网络连接注意事项1. 使用WiFi连接时,请确保您输入正确的WiFi密码,并保持网络信号稳定。
2. 如需使用以太网接入,需要将网线正确连接到收音机和路由器之间的网络接口上。
3. 如果发现网络连接不稳定,建议调整收音机与路由器之间的距离,或联系网络供应商解决网络问题。
五、充电与续航1. Synst星士达网络收音机采用可充电电池供电,充电时间约为2-3小时。
SAMSUNG DSB-9401F数码电视收音机说明书
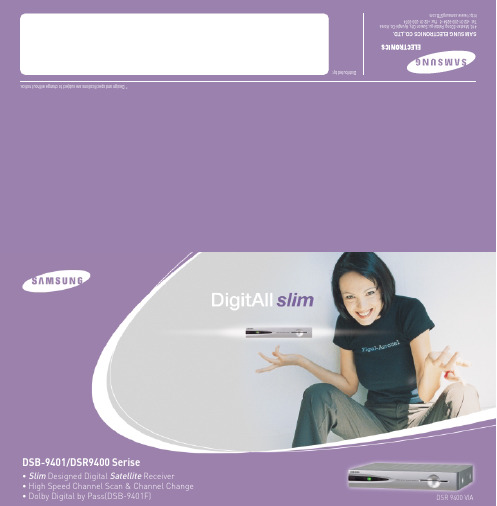
Good as it’s Digital.Even better as it’s Slim.DSB-9401FDigital Satellite Receiver1. AC MAINS2. S/PDIF3. VCR SCART4. TV SCART5. LNBSlim Design & Digital Look :233x176x38mm425•••••31• DSB-9401F :Free To AirRear Panel >>DSR 9400 Series1. AC MAINS2. S/PDIF3. VCR SCART4. TV SCART5. LNBSlim Design & Digital Look :233x176x38mm425•••••31• DSR 9400 VIA :Viaccess Embedded • DSR 9400 T :Cryptoworks Embedded • DSR 9400 G :Nagravision EmbeddedRear Panel >>Software Features >>The Samsung Set-Top Box supports multi-languages for Subtitle and Audio Sound. The Set-Top box conveniently sets your language preferences automatically among the multi-language choices.Multi-Languages support in Subtitle and Audio Sound4000 channels make this dwarf of a receiver look bigger than it actually is.It would not have made any sense to provide so much channel memory in a receiver that could only handle antenna input.Max. 4000 TV & Radio Channels CapacityIn the SAMSUNG Set-Top Box, it is possible to select channels through the following ways selected by the User: Favorite List, Alphabetical, Provider Name, and Transponder• Favorite List:Channel lists by user's favorite channels.(It supports 9 favorite lists.)• Alphabetical List:Channel Lists by Alphabetical Order (A - Z)• Provider Name:Channel Lists by Program Provider Name.• Transponder:Channel List by Frequency.Channel Sorting: Favorite List, Provider Name,Alphabetical, TransponderH i g h S p e e d C h a n n e l - S c a n !Scanning: only a few minutes for Hotbird and Astra at the same time.Dolby and the double -D symbolare trademarks of Dolby Laboratories.• MPEG2/DVB Compliant• SCPC/MCPC program receivable • Multi-language supported OSD(English, German, Franch, Italian, Russian, Spanish, Arabic, etc.)• Quick scan and channel chage• Easy Auto Scan for over 32 Satellites at the same time • Max 4000 TV and Radio Channel Program Capacity • Software download via Satellites (Hotbird, Astra, Sirius)• Full 7 days Electronic program Guide(EPG) on Screen Display • Subtitle with multi-languages• Teletext OSD and VBI supported with multi-languages• Channel Sorting: Favorite lists, Provider name, Alphabet ical, Transponders • PiP in channel sorting & EPG • Parental Lock• Digital Audio Output (S/PDIF) • DD o l b y D i g i t a l by Pass(DSB-9401F) Key Features >>Available CA >>Technical Specifications >>Power SupplyMax. 25W11WAudio Decoeder Network Interface (Broadcasting - Digital)Current: Max. 350mA, Overload Protection Frequency: 22°4KHz Amplitude: 0.6°0.2vVideo DecorderMemoryPhysical SpecificationEPG is the function where the user can easily look up program lists 7 daysbefore and after the present. The EPG of a SAMSUNG Set-Top Boxprovides easier and more convenient program list service, because it uses 8 direct buttons(Hot keys) of the remote control.Hot Key Function• Green Key:View lists by going back 1 day at a time up until 1week ago.• Yellow Key: View lists by going forward 1 day at a time until next week.1 - View lists by 90 minute blocks. 2 - View lists by 60 minute blocks.3 - View lists by 30 minute blocks. 4 - View lists by 15 minute blocks.Advanced Electronic Program Guide (EPG)User can download and upgrade the software for this set-top box through Astra, Sirius, and Hotbird satellites when new software is released.Software Download via Satellite (Hotbird, Astra, Sirius)Users can select the video tracks when several are transmitted from the broadcasting station. This convenience allows users to enjoy the visuals they want to see through fluid camera selection.Video Track Selection FunctionSoftware Features >>。
- 1、下载文档前请自行甄别文档内容的完整性,平台不提供额外的编辑、内容补充、找答案等附加服务。
- 2、"仅部分预览"的文档,不可在线预览部分如存在完整性等问题,可反馈申请退款(可完整预览的文档不适用该条件!)。
- 3、如文档侵犯您的权益,请联系客服反馈,我们会尽快为您处理(人工客服工作时间:9:00-18:30)。
Synst星士达网络收音机--IR808SF使用说明快速操作入门:星士达Synst 网络收音机IR-808SF 网络收音机的操作:如果您的(或与他人共用的)宽带有路由器且打开电脑不用再输入宽带帐号也不用点击专门的链接就能直接打开上网浏览器上网,那么这样的网络使用网络收音机就完全没问题的,接上直接就能用。
开关机:在关机状态下,接好收音机电源适配器(变压器),按收音机的“POWER”1.5秒进入完全开机状态。
在完全开机状态下,按收音机的“POWER”或遥控的“Standby”1.5秒就会进入待机状态(即:时间版面);在待机/时间版面状态下,按收音机的“POWER”或遥控器的“Standby”1.5秒会重新进入完全开机状态功能菜单。
提示:待机状态后显示屏会自动关闭灯光的,如果想在待机状态时看收音机里的时间,触动网络收音机或者遥控除了“POWER”以外其它任何按键显示屏都会亮。
在待机状态(时间版面),按1.5秒收音机的“POWER”或遥控器的“Standby”重新进入到完全开机状态功能菜单,如果不做选择电台等的其它操作,会在5秒后自动连接播放最近播放的那个电台。
收音机当进入待机状态后显示屏会自动关闭灯光的,如果想在待机状态时看收音机里的时间,触动除了网络收音机“POWER”或者遥控“Standby”以外的其它任何按键显示屏都会亮。
请特别注意:因为待机/时间版面状态和完全开机状态收音机都会与网络有连接(待机/时间版面状态会与网络时钟对时),网络收音机有点类似我们所用的电脑,所以切记不要在待机/时间版面状态和完全开机状态(尤其在播放过程中)的情况下直接关闭收音机电源适配器(也就是收音机变压器)插座的电源当作关机,否则有可能会导致不能正常开机(当然,如果只是偶然的家里突然停电不会有什么影响的,请放心)。
当很长时间不听收音机时,请完全关闭收音机,在完全开机或待机/时间版面状态下,长按收音机的“POWER”5秒钟就会进入完全关机状态(备注:完全关机后触动网络收音机除了“POWER”以外的其它任何按键显示屏都不会亮)。
完全关机后,最好把插有收音机变压器的您家里的电源插座也关闭电源,既节约电源(虽然完全关机后变压器几乎不用电),同时也有利于变压器可以更加长久使用。
(备注:按遥控器的“Standby”键只能从完全开机状态进入待机/时间状态或者从待机/时间状态进入完全开机状态,而不能通过遥控器的“Standby”键从完全开机、待机/时间版面状态进入完全关机状态或从完全关机状态进入完全开机、待机/时间版面状态)网络收音机的连接:1.>如果是从上网的路由器连接网线到网络收音机这种通过网线连接的方式,那么就完全不需要对网络收音机做任何设置。
只要从路由器接网线到收音机的网线接口,再接上电源,开机,选择您想听的电台,网络收音机就会完全自动连接。
就可以开始享受广播了。
整个过程:从路由器的网线接口连接网线到网络收音机;再通过连接电源适配器(也就是所配的变压器)接上电源,按一下“POWER”键开机后过十多秒会自动到达“功能菜单”,在“广播电台”按一下圆旋钮进入--->在“我的电台”按一下圆旋钮进入--->在“我的最爱”或者“新闻频道”或者“音乐频道”......按一下圆旋钮进入--->通过旋转圆旋钮选择您想听的电台后按一下圆旋钮“确认”--->收音机就会自动进行连接--->收听,享受广播。
如果您想换其它电台,按一下“STOP/ESCAPE”就会退出到上一层菜单,再重新选择您想听的电台;也可以通过按一下“MENU”键到“功能菜单”,再按照上面的步骤重新进行选择、收听电台。
另外:也可以通过按一下“MENU”键,然后在“广播电台”按一下“圆旋钮”进入“广播电台”,再进入“最佳电台”或者“网络电台列表”里面选择您想听的全球各国各地的电台。
(备注:其中有些电台不是24小时广播的,所以有时可能连接不了。
)建议第一次使用的用户先用网线连接,因为如果您第一次使用网络收音机就用无线进行连接,当您的无线网络是设有密码的话,会需要还未完全熟悉操作的您花多一点点时间输入无线网络的密码。
备注:如果您使用的网络很特殊,请参阅后面的:“详细深入的各种选项和功能操作说明”2.>如果您家里是用无线网络(现在有的MODEN---俗称的猫本身带有无线路由---也就是WiFi功能的。
另外也可以通过无线路由器实现无线网络也就是常说的WiFi功能),也只要在使用无线时输入一次您无线网络的密码(以后每次开机是不用再输入的,如果您的无线网络没有设置密码,连第一次使用无线网络都不用做任何设置),网络收音机就能完全自动连接。
不用对网络收音机做其它任何设置(在您未熟悉各项操作前,请先不要改动设置、也不要恢复出厂设置----因为虽然工厂有严格的检测,但在发快递前我都会再通电试一下机确保没任何问题,通电试机时我一般会加入一些较多国内听众喜欢收听的电台到网络收音机中“我的电台”里,让网友收到收音机就能听到想听的电台,如果恢复了出厂设置,我个人加入进去到“我的电台”里的电台就有可能会被删----当然到时我也可以提供我有的电台的流媒体地址给您再加入进去)。
如果您用无线网络,从开机到连接无线网络并输入您无线网络密码的操作过程(要使用无线网络时,请不要接网线到网络收音机,否则不能进行无线网络搜索,因为网络收音机会自动选择网线或无线网络,并以网线优先):连接电源适配器(也就是所配的变压器)接上电源,按一下“POWER”键开机后过十多秒会自动到达中文菜单,按一下“MENU”键--->通过旋转圆旋钮选择“设置”,在“设置”按一下圆旋钮进入--->在“网络设置”按一下圆旋钮进入--->通过旋转圆旋钮找到“无线网络设置”,按一下圆旋钮进入--->在“添加AP”按一下圆旋钮进入--->在“自动扫描”按一下圆旋钮确认进去,会发现您的无线网络(如果您那里有包括其他人的多个无线网络,也会全部扫描到,请通过旋转圆旋钮选择您自己的无线网络),通过按一下圆旋钮确认您的网络,如果您的无线没有设置密码,那么网络收音机就已经会自动连接上您的网络了,如果您的无线网络设置了密码,请通过旋转圆旋钮选择字母、数字、标点输入无线网络的密码,按一下FORWARD到前面一个字符(备注:按一下BACKWARD可以退回一个字符),全部密码字符输入完成并核对正确后,按一下圆旋钮确认,网络收音机就能自动连通无线网络。
密码设定一次后,下次开机时是不用再重新设置的,会自动进行连接。
(备注:如果用来连接上网的路由器与网络收音机之间是通过网线连接,就不用对无线网络进行这种设置)。
输入了您的无线网络密码后,然后就可以选择收听您想听的电台:按一下“MENU”键会自动到达“功能菜单”,在“广播电台”按一下圆旋钮进入--->在“我的电台”按一下圆旋钮进入--->在“我的最爱”或者“新闻频道”或者“音乐频道”......按一下圆旋钮进入--->通过旋转圆旋钮选择您想听的电台后按一下圆旋钮“确认”--->收音机就会自动进行连接--->收听,享受广播。
如果您想换其它电台,按一下“STOP/ESCAPE”键就会退出到上一层菜单,再重新选择您想听的电台;也可以通过按“MENU”到“功能菜单”,再按照上面的步骤重新进行选择、收听电台。
备注1.>:如果您从网络收音机“添加AP”后又改变了您的无线路由器的无线网络设置或者在网络收音机输入无线密码时输入了错误的密码却仍然按了“确认”,请先在网络收音机里“删除AP”,再重新进行“添加AP”备注2.>:如果您使用的网络很特殊,请参阅后面的:“详细深入的各种选项和功能操作说明”备注3.>:在您未熟悉各项操作前,请先不要改动网络收音机的设置或者恢复出厂设置----恢复出厂设置后我个人加在“我的电台”里的电台将可能会被删除,要重新添加个人设置的“我的电台”;并且是英文版面及GMT格林威治标准时间。
当然,可以按照后面的操作说明重新设置为中文菜单、您习惯的日期格式以及中国时间。
网络收音机前面一.>主要操作键:“POWER”键是开关键。
在关机状态下,接好收音机电源适配器(变压器),按收音机的“POWER”1.5秒进入完全开机状态。
在完全开机状态下,按收音机的“POWER”或遥控的“Standby”1.5秒就会进入待机状态(即:时间版面);在待机/时间版面状态下,按收音机的“POWER”或遥控器的“Standby”1.5秒会重新进入完全开机状态功能菜单。
提示:待机状态后显示屏会自动关闭灯光的,如果想在待机状态时看收音机里的时间,触动网络收音机或者遥控除了“POWER”以外其它任何按键显示屏都会亮。
在待机状态(时间版面),按1.5秒收音机的“POWER”或遥控器的“Standby”重新进入到完全开机状态功能菜单,如果不做选择电台等的其它操作,会在5秒后自动连接播放最近播放的那个电台。
请特别注意:因为待机/时间版面状态和完全开机状态收音机都会与网络有连接(待机/时间版面状态会与网络时钟对时),网络收音机有点类似我们所用的电脑,所以切记不要在待机/时间版面状态和完全开机状态(尤其在播放过程中)的情况下直接关闭收音机电源适配器(也就是收音机变压器)插座的电源当作关机,否则有可能会导致不能正常开机(当然,如果只是偶然的家里突然停电不会有什么影响的,请放心)。
当很长时间不听收音机时,请完全关闭收音机,在完全开机或待机/时间版面状态下,长按收音机的“POWER”5秒钟就会进入完全关机状态(备注:完全关机后触动网络收音机除了“POWER”以外的其它任何按键显示屏都不会亮)。
完全关机后,最好把插有收音机变压器的您家里的电源插座也关闭电源,既节约电源(虽然完全关机后变压器几乎不用电),同时也有利于变压器可以更加长久使用。
(备注:按遥控器的“Standby”键只能从完全开机状态进入待机/时间状态或者从待机/时间状态进入完全开机状态,而不能通过遥控器的“Standby”键从完全开机、待机/时间版面状态进入完全关机状态或从完全关机状态进入完全开机、待机/时间版面状态)。
****另外特别要注意:在待机/时间版面状态或播放SD的音乐时,功耗非常小,但网络收音机仍会与网络进行对时间的,也就是会有少量的数据与互联网络连通(当然这个时候网络收音机几乎是不占网络带宽的),如果您家的宽带不是包月而是每月包多少个小时的上网套餐,建议您在不听网络收音机时完全关掉电源或者在待机和播放SD卡音乐时把连接网络收音机的网线拨出,以免消耗您包时上网套餐的上网时间。
当然,如果您的宽带是包月的就不用考虑这个问题。
在开机或待机状态下,长按5秒钟收音机的“POWER”键就会完全关机,完全关机后触动网络收音机除了“POWER”以外的其它任何按键显示屏都不会亮,如果您的网络收音机与路由器是通过网线连接的话,路由器相应接口的灯也是熄的。
