新闻滚动效果代码
javascript:新闻上下滚动特效

javascript:新闻上下滚动特效 1<html>2<head>3<title>1</title>4<style type='text/css'>5#box{6 float:left;7 border:solid 1px green;8 overflow:hidden;9 height:26px;10 border-width:1px 0px;11 }12#ul_news{13 border:solid 0px green;14 margin:0px;15 list-style-type:none;16 width:150px;17 position:relative;18 }19#ul_news li{20 padding:3px;21 border-width:0px;22 border-bottom:dashed 1px #cccccc;23 font-size:14px;24 }25</style>26</head>27<body onclick='fun2();'>28<div id='box'>29<ul id='ul_news'>30<li>hello world</li>31<li><font color='green'>java web</font></li>32<li><font color='red'><strong>zend framework</strong></font></li>33</ul>34</div>35<script language='javascript'>36var obj=document.getElementById('ul_news');37function fun(){38if(obj.offsetTop==-26){39var obj2=obj.firstChild.cloneNode(true);40 obj.removeChild(obj.firstChild);41 obj.appendChild(obj2);42 obj.style.top='-1px';43 }else{44if(obj.offsetTop-4<-26)45 obj.style.top='-26px';46else47 obj.style.top=(obj.offsetTop-4)+'px';48 }49 }50function fun2(){51 window.setInterval("fun();",200);52 }53</script>5455</body>56</html>。
c# 滚动新闻
我们在浏览网站的时候,总能看到关于最新的网站信息滚动列出,通常这是用脚本代码编写而成的,很繁琐!这里介绍用web控件实现其功能!该控件已经在主流的浏览器上测试过,运行良好!实现这个功能的前提是要设计一个主从详细显示的数据库,为方便操作,我在系统给的NorthWind数据库中加入了两个表,这两个表结构很简单的!表一News Table:create table tbl_News(newsId int primary key identity(1,1) Not null,newTitle varchar(50) Not null,dateCreated datetime)表二News Detail Tablecreate table tbl_NewsDetail(dtlId int primary key identity(1,1) Not Null,newsId int foreign key references tbl_news,newsDetail varchar(8000))关于代码的详细说明:1、我建立的控件"Scrolling_News.ascx"放在文件夹“userControll”中,这只是为了便于有效管理!在该控件中,我放置了一个table控件,相应的HTML源码如下:<TABLE id="tblScrolling" cellSpacing="1" cellPadding="1" width="100%" border="0" runat="server"><TR id="rowScrolling" runat="server"></TR></TABLE>这个控件主要是查找新闻主表,按照创建日期进行排序,给出当前新闻的宏观展示。
JQ实现新闻滚动条效果(跑马灯)
JQ实现新闻滚动条效果(跑马灯)先看效果:HTML代码<div class="outer" id="outer"><h3>最新公告</h3><div class="inner" id="inner"><ul><li><a href="#" title="">星期⼀不上班</a></li><li><a href="#" title="">星期⼆不上班</a></li><li><a href="#" title="">星期三不上班</a></li><li><a href="#" title="">星期四不上班</a></li><li><a href="#" title="">星期五不上班</a></li><li><a href="#" title="">星期六发⼯资</a></li><li><a href="#" title="">星期天发奖⾦</a></li></ul></div></div>View CodeCss代码.outer{width:200px;border:1px solid #AAAAAA;margin:10px;}.inner{width:200px; height:85px;line-height:20px;overflow:hidden; background:#FFFFFF;}h3{height:26px;background:#3B5998;color:white;line-height:26px;text-indent:6px;margin:0px;}.inner li{height:21px;}.inner ul{margin:0px;list-style:decimal;}.inner li a{text-decoration:none;color:#3B5998;}View Codejq代码⽅式⼀原理:slideUp()--clone()--append()--remove()--传递参数-闭包1 $(function (){2 show(); //⾸次触发3var target=$("#inner");4var Timer;5 Timer=setInterval(show,7100); //七秒之后再调⽤ setInterval67 })89function show(){10var obj= $("ul li");11var len=obj.length;12for(var i=0;i<len;i++){13 setTimeout((function(para){14return function (){15 obj.eq(para).slideUp("slow",function (){ //隐藏16var li=$(this).clone(); //先克隆17 $(this).parent().append(li.show()); //显⽰的附加在后⾯18 $(this).remove(); //再移除这个节点19 });20 }21 })(i),1000*i)22 }2324 }View Code缺陷:⽆法应⽤到我们的hover中滴呀jq代码⽅式⼆原理,不需要传递参数,也就不⽤闭包,⽽且⽀持hover,不错是⾸选;1var target=$("#inner");2var Timer;3 target.hover(function (){4 clearInterval(Timer);5 },function (){6 Timer=setInterval(function (){7 show2(target);8 },3000)9 }).trigger("mouseleave");10 })1112function show2(obj){13var ul=obj.find("ul:first");14var liHeight=ul.find("li:first").height();//获取⾏⾼;15 ul.animate({"marginTop":-liHeight+"px"},700,function (){ //整个ul向上移动⼀个li⾼度16 ul.css({marginTop:0}).find("li:first").appendTo(ul);//直接移动到的最后⼀位;1718 })19 }View Code总结:完美。
滚动字幕版代码
这个是我们老师做的,代码是对的,但放到有写机子上无法运行滚动字幕版窗体1Dim intSpeed As IntegerConst strPrompt1 As String = "开往北京方向的66次列车马上就要开车了"Const strPrompt2 As String = "神舟飞船,载誉归来!!!" Const strPrompt3 As String = "东方明珠,开盘价20元/股" Const strPrompt4 As String = "宝剑锋从磨砺出,梅花香自苦寒来"Const strPrompt5 As String = "欲穷千里目,更上一层楼" Const strPrompt6 As String = "No Pay, no Gain"Const strPrompt7 As String = "书山有路勤为径,学海无涯苦作舟"Const strPrompt8 As String = "团结起来,共同战胜“非典”!"Dim blnDirection As Boolean 'False 表示从右往左移动 True 表示从左往右移动Dim blnAutoShift As Boolean 'True 表示左右摆动, False表示从左往右或从右往左Dim blnShiftDirection As Boolean ' True 表示向左摆动, False表示向右摆动Dim blnShiftMode As Boolean ' True表示摆动方式一, False 表示摆动方式二Dim blnStopMode As Boolean ' True表示暂停摆动,False 表示继续摆动Private Sub BKColor_Click()Dim intColor1 As LongSelect Case BKColor.ListIndexCase 0intColor1 = vbBlackCase 1intColor1 = vbGreenCase 2intColor1 = vbBlueCase 3intColor1 = vbCyanCase 4intColor1 = vbRedCase 5intColor1 = vbYellowCase 6intColor1 = vbMagenta Case 7intColor1 = vbWhite End SelectBKColor.Text = BKColor.Text Form2.BackColor = intColor1End SubPrivate Sub Check1_Click()If Check1.Value = 1 ThenFrame1.Visible = TrueElseFrame1.Visible = FalseEnd IfEnd SubPrivate Sub Check2_Click()If Check2.Value = 1 ThenFrame2.Visible = TrueElseFrame2.Visible = False End IfEnd SubPrivate Sub Check3_Click()If Check3.Value = 1 Then Frame4.Visible = True ElseFrame4.Visible = False End IfEnd SubPrivate Sub Check4_Click()If Check4.Value = 1 Then Timer3.Enabled = True ElseTimer3.Enabled = False End IfEnd SubPrivate Sub Check5_Click()If Check5.Value = 1 Thenbel1.FontSize = 72bel1.Top = (Form2.ScaleHeight - bel1.Height) / 1Form2.WindowState = 2Timer1.Enabled = TrueElsebel1.Top = (Form2.ScaleHeight - bel1.Height) / 1Form2.WindowState = 0bel1.FontSize = 24End IfEnd SubPrivate Sub Command1_Click()If Command1.Caption = "暂停" ThenCommand1.Caption = "继续"Timer1.Enabled = FalseblnStopMode = TrueElseCommand1.Caption = "暂停"Timer1.Enabled = TrueblnStopMode = FalseEnd IfEnd SubPrivate Sub Command10_Click()bel1.Caption = strPrompt7bel1.Left = (Form1.ScaleWidth - bel1.Width) / 2End SubPrivate Sub Command11_Click()bel1.Caption = strPrompt8bel1.Left = (Form1.ScaleWidth - bel1.Width) / 2End SubPrivate Sub Command12_Click()Me.HideEnd SubPrivate Sub Command2_Click()Unload MeEnd SubPrivate Sub Command3_Click()bel1.Caption = strPrompt1bel1.Left = (Form1.ScaleWidth - bel1.Width) / 2End SubPrivate Sub Command4_Click()bel1.Caption = strPrompt4bel1.Left = (Form1.ScaleWidth - bel1.Width) / 2End SubPrivate Sub Command5_Click()bel1.Left = (Form1.ScaleWidth - bel1.Width) / 2End SubPrivate Sub Command6_Click()bel1.Caption = strPrompt2bel1.Left = (Form1.ScaleWidth - bel1.Width) / 2End SubPrivate Sub Command7_Click()Form_LoadEnd SubPrivate Sub Command8_Click()bel1.Caption = strPrompt5bel1.Left = (Form1.ScaleWidth - bel1.Width) / 2End SubPrivate Sub Command9_Click()bel1.Left = (Form1.ScaleWidth - bel1.Width) / 2End SubPrivate Sub FGColor_Click()Dim intColor1 As LongSelect Case FGColor.ListIndexCase 0intColor1 = vbBlackCase 1intColor1 = vbGreenCase 2intColor1 = vbBlueCase 3intColor1 = vbCyanCase 4intColor1 = vbRedCase 5intColor1 = vbYellowCase 6intColor1 = vbMagentaCase 7intColor1 = vbWhiteEnd Selectbel1.ForeColor = intColor1End SubPrivate Sub Form_DblClick()Check5.Value = 0Check5_ClickEnd SubPrivate Sub Form_Load()Form2.ShowintSpeed = 20Option2_ClickBKColor.ListIndex = 1FGColor.ListIndex = 6bel1.Left = (Form2.ScaleWidth - bel1.Width) / 2bel1.Caption = strPrompt5blnDirection = True ' 表示从右往左移动blnAutoShift = False ' 表示单一方向移动blnShiftDirection = True '一开始向左摆动blnShiftMode = True '一开始选择摆动方式一blnStopMode = False '一开始工作于可以摆动的状态 Check4.Value = 0 '一开始颜色手动控制End SubPrivate Sub Form_MouseUp(Button As Integer, Shift As Integer, X As Single, Y As Single)If Button = 2 ThenPopupMenu mnuPopupMenuEnd IfEnd SubPrivate Sub Form_Unload(Cancel As Integer)Unload Form2End SubPrivate Sub Frame1_DragDrop(Source As Control, X As Single, Y As Single)End SubPrivate Sub Frame2_DragDrop(Source As Control, X As Single, Y As Single)End SubPrivate Sub Frame4_DragDrop(Source As Control, X As Single, Y As Single)End SubPrivate Sub Frame5_DragDrop(Source As Control, X As Single, Y As Single)End SubPrivate Sub HScroll1_Change()intSpeed = HScroll1.ValueEnd SubPrivate Sub HScroll1_Scroll()HScroll1_ChangeEnd SubPrivate Sub mnuExit_Click()End SubPrivate Sub mnuFileExit_Click()Command2_ClickEnd SubPrivate Sub mnuFontSize12_Click() bel1.FontSize = 12 End SubPrivate Sub mnuFontSize128_Click() bel1.FontSize = 128 End SubPrivate Sub mnuFontSize24_Click() bel1.FontSize = 24End SubPrivate Sub mnuFontSize36_Click() bel1.FontSize = 36 End SubPrivate Sub mnuFontSize48_Click() bel1.FontSize = 48 End SubPrivate Sub mnuFontSize64_Click() bel1.FontSize = 64 End SubPrivate Sub mnuFontSize72_Click() bel1.FontSize = 72 End SubPrivate Sub mnuFontSize96_Click() bel1.FontSize = 96 End SubPrivate Sub Option1_Click()bel1.FontSize = 48End SubPrivate Sub Option10_Click()blnAutoShift = True ' 进行左右摆动blnShiftMode = False ' 左右摆动方式二Timer1.Enabled = FalseTimer2.Enabled = TrueEnd SubPrivate Sub Option2_Click()bel1.FontSize = 24End SubPrivate Sub Option3_Click()On Error GoTo lbel1.FontName = "宋体"Exit Subl:MsgBox "对不起,本机无此字体。
网页图片滚动新闻代码
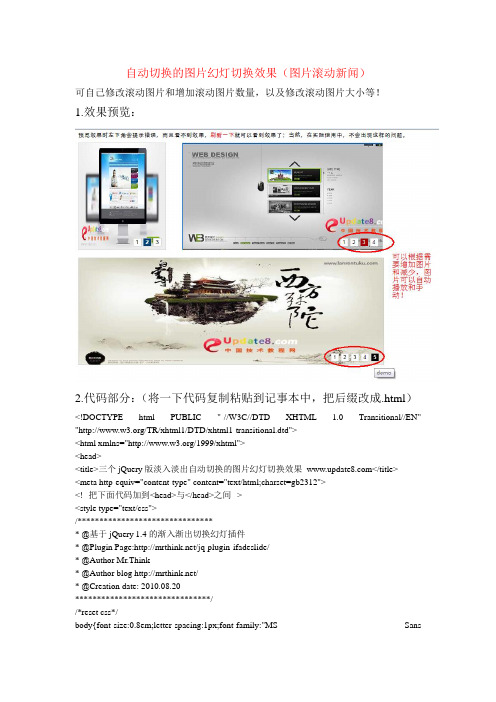
自动切换的图片幻灯切换效果(图片滚动新闻)可自己修改滚动图片和增加滚动图片数量,以及修改滚动图片大小等!1.效果预览:2.代码部分:(将一下代码复制粘贴到记事本中,把后缀改成.html)<!DOCTYPE html PUBLIC "-//W3C//DTD XHTML 1.0 Transitional//EN" "/TR/xhtml1/DTD/xhtml1-transitional.dtd"><html xmlns="/1999/xhtml"><head><title>三个jQuery版淡入淡出自动切换的图片幻灯切换效果_</title><meta http-equiv="content-type" content="text/html;charset=gb2312"><!--把下面代码加到<head>与</head>之间--><style type="text/css">/******************************** @基于jQuery 1.4的渐入渐出切换幻灯插件* @Plugin Page:/jq-plugin-ifadeslide/* @Author Mr.Think* @Author blog /* @Creation date: 2010.08.20*******************************//*reset css*/body{font-size:0.8em;letter-spacing:1px;font-family:"MS SansSerif",Geneva,sans-serif;line-height:1.8em;}div,h2,p,ul,li{margin:0;padding:0;}h1{font-size:1em;font-weight:normal;}h1 a{background:#047;padding:2px 3px;color:#fff;text-decoration:none;}h1 a:hover{background:#a40000;color:#fff;text-decoration:underline;}h3{color:#888;font-weight:bold;font-size:1em;margin:1em auto;position:relative;}h5a{background:#000;color:#fff;text-decoration:none;font-size:12px;font-weight:normal;letter-spaci ng:3px;position:absolute;right:7px;top:7px;padding:1px 12px;}.box{width:700px;height:250px;}/*demo css*//*SAMPLE-A*/#slide{position:relative;width:200px;height:250px;overflow:hidden;border:1px solid #ccc;float:left;}#slide img{width:200px;height:250px;}#slide .ico{position:absolute;right:8px;bottom:6px;}#slide .ico li{background:#fff;float:left;display:block;width:15px;height:15px;line-height:15px;border:1px solid#cecece;font-family:Arial,Helvetica,sans-serif;text-align:center;margin:2px;padding:1px;cursor:po inter;}#slide .ico li.high{background:#047;color:#fff;font-weight:bolder;}/*SAMPLE-B*/#slide_b{position:relative;width:460px;height:250px;overflow:hidden;border:1px solid #ccc;float:right ;}#slide_b img{width:500px;height:250px;}#slide_b .ico_b{position:absolute;right:8px;bottom:6px;}#slide_b .ico_b li{background:#fff;float:left;display:block;width:15px;height:15px;line-height:15px;border:1px solid#cecece;font-family:Arial,Helvetica,sans-serif;text-align:center;margin:2px;padding:1px;cursor:po inter;}#slide_b .ico_b li.high_b{background:#a40000;color:#fff;font-weight:bolder;}/*SAMPLE-C*/#slide_c{position:relative;width:700px;height:250px;overflow:hidden;border:1px solid #ccc;margin-top:20px;}#slide_c img{width:700px;height:250px;}#slide_c .ico_c{position:absolute;right:8px;bottom:6px;}#slide_c .ico_c li{background:#fff;float:left;display:block;width:15px;height:15px;line-height:15px;border:1px solid#cecece;font-family:Arial,Helvetica,sans-serif;text-align:center;margin:2px;padding:1px;cursor:po inter;}#slide_c .ico_c li.high{background:#000;color:#fff;font-weight:bolder;}</style><script src="/images/jquery-1.4.min.js"></script><!--<script src="/images/jquery.iFadeSldie.js">//开发版文件</script>--><script src="/js_img/4-14/images/jquery.iFadeSldie.pack.js">//压缩版文件</script><script language="javascript">/******************************** @基于jQuery淡入淡出可自动切换的幻灯插件* @jQuery V esion:1.4.2* @Plugin Page:/jq-plugin-ifadeslide/* @Author Mr.Think* @Author blog /* @Creation date: 2010.08.20*******************************///调用插件并传入插件参数//此处传入的参数将覆盖jquery.iFadeSlide.js的参数,为空即使用插件文件中默认参数$(function(){//SAMPLE-A调用---未传入任何参数,调用默认参数$('div#slide').iFadeSlide();//SAMPLE-B调用---传入新的参数,将覆盖原有参数,未传入的使用默认值$('div#slide_b').iFadeSlide({field: $('div#slide_b a'),icocon:$('div.ico_b'),hoverCls: 'high_b',curIndex: 2, //索引值0起始,故此处设置为第3项高亮interval: 2000});//SAMPLE-C调用---传入新的参数,将覆盖原有参数,未传入的使用默认值$('div#slide_c').iFadeSlide({field: $('div#slide_c img'),icocon: $('div.ico_c'),outTime:100,inTime: 200});});</script></head><body>预览效果时左下角会提示错误,而且看不到效果,<font color=red>刷新一下</font>就可以看到效果了;当然,在实际使用中,不会出现这样的问题。
python滚动字幕
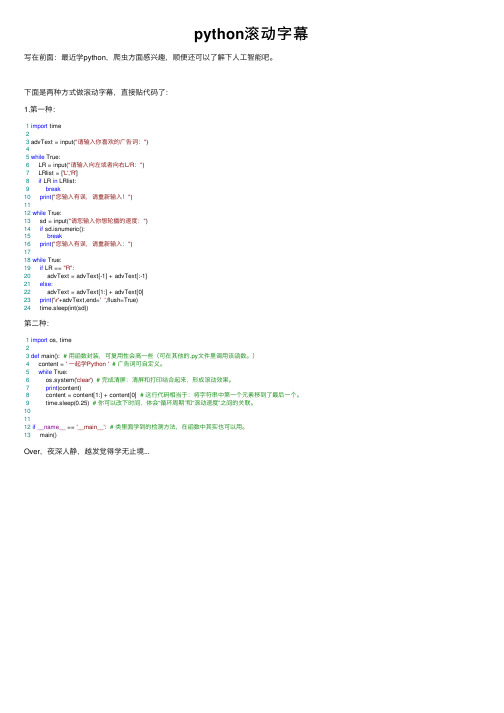
python滚动字幕写在前⾯:最近学python,爬⾍⽅⾯感兴趣,顺便还可以了解下⼈⼯智能吧。
下⾯是两种⽅式做滚动字幕,直接贴代码了:1.第⼀种:1import time23 advText = input("请输⼊你喜欢的⼴告词:")45while True:6 LR = input("请输⼊向左或者向右L/R:")7 LRlist = ['L','R']8if LR in LRlist:9break10print("您输⼊有误,请重新输⼊!")1112while True:13 sd = input("请您输⼊你想轮播的速度:")14if sd.isnumeric():15break16print("您输⼊有误,请重新输⼊:")1718while True:19if LR == "R":20 advText = advText[-1] + advText[:-1]21else:22 advText = advText[1:] + advText[0]23print('\r'+advText,end='',flush=True)24 time.sleep(int(sd))第⼆种:1import os, time23def main(): # ⽤函数封装,可复⽤性会⾼⼀些(可在其他的.py⽂件⾥调⽤该函数。
)4 content = ' ⼀起学Python '# ⼴告词可⾃定义。
5while True:6 os.system('clear') # 完成清屏:清屏和打印结合起来,形成滚动效果。
7print(content)8 content = content[1:] + content[0] # 这⾏代码相当于:将字符串中第⼀个元素移到了最后⼀个。
jQuery实现列表自动滚动循环滚动展示新闻
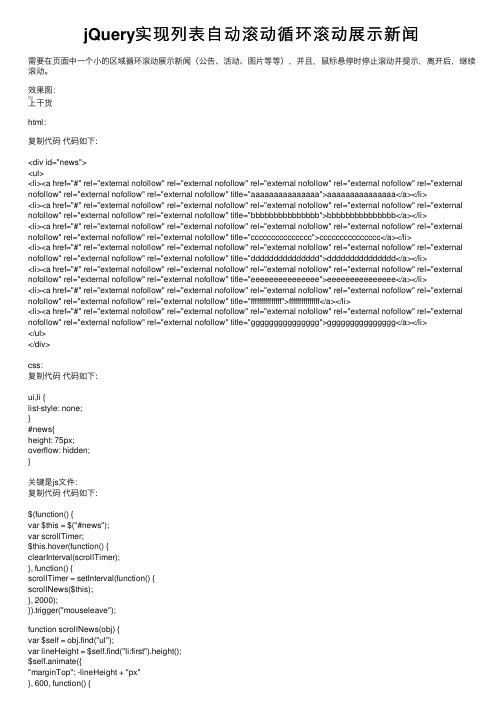
jQuery实现列表⾃动滚动循环滚动展⽰新闻需要在页⾯中⼀个⼩的区域循环滚动展⽰新闻(公告、活动、图⽚等等),并且,⿏标悬停时停⽌滚动并提⽰,离开后,继续滚动。
效果图:上⼲货html:复制代码代码如下:<div id="news"><ul><li><a href="#" rel="external nofollow" rel="external nofollow" rel="external nofollow" rel="external nofollow" rel="external nofollow" rel="external nofollow" rel="external nofollow" title="aaaaaaaaaaaaaaa">aaaaaaaaaaaaaaa</a></li><li><a href="#" rel="external nofollow" rel="external nofollow" rel="external nofollow" rel="external nofollow" rel="external nofollow" rel="external nofollow" rel="external nofollow" title="bbbbbbbbbbbbbbb">bbbbbbbbbbbbbbb</a></li><li><a href="#" rel="external nofollow" rel="external nofollow" rel="external nofollow" rel="external nofollow" rel="external nofollow" rel="external nofollow" rel="external nofollow" title="ccccccccccccccc">ccccccccccccccc</a></li><li><a href="#" rel="external nofollow" rel="external nofollow" rel="external nofollow" rel="external nofollow" rel="external nofollow" rel="external nofollow" rel="external nofollow" title="ddddddddddddddd">ddddddddddddddd</a></li><li><a href="#" rel="external nofollow" rel="external nofollow" rel="external nofollow" rel="external nofollow" rel="external nofollow" rel="external nofollow" rel="external nofollow" title="eeeeeeeeeeeeeee">eeeeeeeeeeeeeee</a></li><li><a href="#" rel="external nofollow" rel="external nofollow" rel="external nofollow" rel="external nofollow" rel="external nofollow" rel="external nofollow" rel="external nofollow" title="fffffffffffffff">fffffffffffffff</a></li><li><a href="#" rel="external nofollow" rel="external nofollow" rel="external nofollow" rel="external nofollow" rel="external nofollow" rel="external nofollow" rel="external nofollow" title="ggggggggggggggg">ggggggggggggggg</a></li></ul></div>css:复制代码代码如下:ui,li {list-style: none;}#news{height: 75px;overflow: hidden;}关键是js⽂件:复制代码代码如下:$(function() {var $this = $("#news");var scrollTimer;$this.hover(function() {clearInterval(scrollTimer);}, function() {scrollTimer = setInterval(function() {scrollNews($this);}, 2000);}).trigger("mouseleave");function scrollNews(obj) {var $self = obj.find("ul");var lineHeight = $self.find("li:first").height();$self.animate({"marginTop": -lineHeight + "px"}, 600, function() {$self.css({marginTop: 0}).find("li:first").appendTo($self);})}})主要就是对hover、setInterval、clearInterval、animate这些⽅法以及marginTop属性(marginLeft、top、left等等)的理解和运⽤,需要注意的是,如果不加.trigger("mouseleave"),在⽹页初始化的时候列表不会滚动,还有appendTo能直接移动元素,就这些了。
visual basic滚动字幕代码-概述说明以及解释
visual basic滚动字幕代码-概述说明以及解释1.引言1.1 概述Visual Basic是一种广泛应用于开发Windows应用程序的编程语言。
它是一种使用事件驱动的编程语言,它允许开发者通过编写代码和操作界面元素来创建交互式的应用程序。
Visual Basic的语法简单易学,对于初学者而言是一种理想的选择。
滚动字幕是一种在屏幕上以一定速度从右向左滚动显示的文本效果。
它被广泛应用于公共场所的广告牌、电视台的新闻节目以及一些网站的头部。
滚动字幕不仅能够吸引人们的注意力,还能够传达重要信息。
本文将介绍如何使用Visual Basic编写滚动字幕代码。
首先,我们将对Visual Basic进行简要介绍,包括其基本特点和应用领域。
然后,我们将详细探讨滚动字幕的作用和实现方法。
最后,我们将对本文进行总结,并展望滚动字幕在未来的应用前景。
通过学习本文,读者将能够了解Visual Basic的基本知识和滚动字幕的实现原理,从而能够运用这些知识编写自己的滚动字幕代码。
无论是对于对编程感兴趣的初学者还是有一定经验的开发者,本文都将提供有价值的信息和指导。
在这个数字化时代,掌握滚动字幕的编程技术将为开发者带来更多的机会和挑战。
1.2 文章结构文章结构是指文章中各部分的组成和顺序,它对于文章的逻辑性和条理性至关重要。
在本文中,文章的结构主要包括以下几个部分:1) 引言部分:引言部分是文章的开头,用于引入读者,并简要说明文章的主题和目的。
在本文中,引言部分将概述Visual Basic滚动字幕代码的背景和意义,并介绍本文的目的。
2) 正文部分:正文部分是文章的主体,具体阐述和探讨文章的主题。
在本文中,正文部分将包括以下几个方面内容:- Visual Basic简介:介绍Visual Basic的基本概念、特点和应用领域,以便读者对其有一定的了解。
- 滚动字幕的作用:分析滚动字幕在信息传递、广告宣传等方面的作用和价值,引导读者对滚动字幕有一定的认识。
vue实现消息的无缝滚动效果的示例代码
vue实现消息的⽆缝滚动效果的⽰例代码朋友的项⽬⾥要实现⼀个消息⽆缝滚动的效果,中途遇到了⼀点⼩bug,每组消息滚动完再次循环时会出现停留两倍的时间间隔问题,我研究了⼀天终于解决了这个1S的⼩问题项⽬环境vue-cli ,请⾃⾏配置好相应的,环境及路由,这⾥主要介绍实现的⽅法第⼀步在模板中使⽤v-for⽅法循环出消息列表<template><div id="box"><ul id="con1" ref="con1" :class="{anim:animate==true}"><li v-for='item in items'>{{}}</li></ul></div></template>第⼆步在<script>标签中放置消息数组和具体的method ⽅法。
<script>export default {data() {return {animate:false,items:[ //消息列表对应的数组{name:"马云"},{name:"雷军"},{name:"王勤"}]}},created(){setInterval(this.scroll,1000) // 在钩⼦函数中调⽤我在method ⾥⾯写的scroll()⽅法,注意此处不要忘记加this,我在这个位置掉了好⼏次坑,都是因为忘记写this。
},methods: {scroll(){let con1 = this.$refs.con1;con1.style.marginTop='-30px';this.animate=!this.animate;var that = this; // 在异步函数中会出现this的偏移问题,此处⼀定要先保存好this的指向setTimeout(function(){that.items.push(that.items[0]);that.items.shift();con1.style.marginTop='0px';that.animate=!that.animate; // 这个地⽅如果不把animate 取反会出现消息回滚的现象,此时把ul 元素的过渡属性取消掉就可以完美实现⽆缝滚动的效果了 },500)}}}</script><style>*{margin: 0 ;padding: 0;}#box{width: 300px;height: 32px;line-height: 30px;overflow: hidden;padding-left: 30px;border: 1px solid black;transition: all 0.5s;}.anim{transition: all 0.5s;}#con1 li{list-style: none;line-height: 30px;height: 30px;}</style>以上就是这篇⽂章的全部内容,希望对⼤家的学习有所帮助,也希望⼤家多多⽀持。
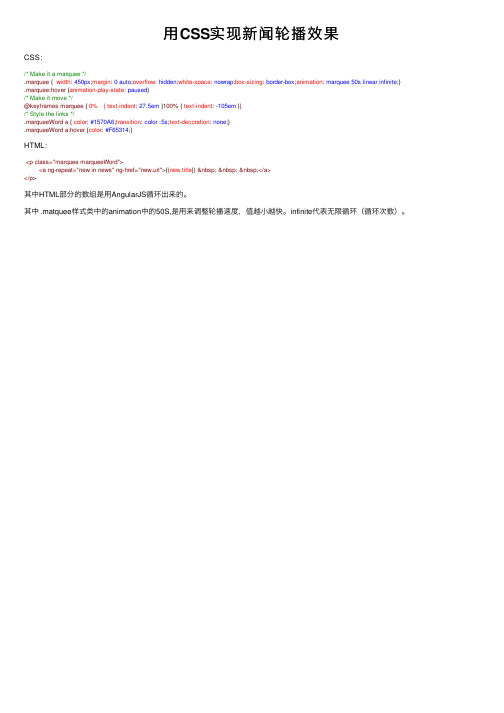
用CSS实现新闻轮播效果
用 CSS实现新闻轮播效果
CSS:
/* Make it a marquee */ .marquee { width: 450px;margin: 0 auto;overflow: hidden;white-space: nowrap;box-sizing: border-box;animation: marquee 50s linear infinite;} .marquee:hover {animation-play-state: paused} /* Make it move */ @keyframes marquee { 0% { text-indent: 27.5em }100% { text-indent: -105em }} /* Style the links */ .marqueeWord a { color: #1570A6;transition: color .5s;text-decoration: none;} .marqueeWord a:hover {color: #F65314;}
HTML:
<p class="marquee marqueeWord"> <a ng-repeat="new in news" ng-href="new.url">{{new.title}} </a>
</p>
其中HTML部分的数组是用AngularJS循环出来的。
其中 .matquee样式类中的animation中的50S,是用来调整轮播速度,值越小越快。infinite代表无限循环(循环次数)。
热点新闻滚动特效的js代码

热点新闻滚动特效的js代码复制代码代码如下:<!DOCTYPE html PUBLIC "-//W3C//DTD XHTML 1.0 Transitional//EN" "/TR/xhtml1/DTD/xhtml1-transitional.dtd"><html xmlns="/1999/xhtml"><head><meta http-equiv="Content-Type" content="text/html; charset=gb2312" /><title>热点新闻滚动</title><style type="text/css"><!--body {margin: 0px;font-size: 12px;color: #938C43;line-height: 150%;text-align:center;}a:link{color: #9D943A;font-size:12px;}a:hover{color: #FF3300;font-size:12px;}a:visited{color: #9D943A;font-size:12px;}a.red:link{color: #ff0000;font-size:12px;}a.red:hover{color: #ff0000;font-size:12px;}a.red:visited{color: #ff0000;font-size:12px;}#marqueeBox{background:#f7f7f7;border:1px solid silver;padding:1px;text-align:center;margin:0 auto;}--></style></head><body><h4>滚动新闻</h4><script language="JavaScript" type="text/javascript">var marqueeContent=new Array();marqueeContent[0]="<a href='https://' target='_blank'></a>";marqueeContent[1]="<a href='' target='_blank'>播放器之家</a>";marqueeContent[2]="<a href='' target='_blank'>素材之家</a>";marqueeContent[3]="<a href='' target='_blank'>个性名字⽹</a>";var marqueeInterval=new Array();var marqueeId=0;var marqueeDelay=2000;var marqueeHeight=20;function initMarquee() {var str=marqueeContent[0];document.write('<div id="marqueeBox" style="overflow:hidden;width:250px;height:'+marqueeHeight+'px" onmouseover="clearInterval(marqueeInterval[0])"onmouseout="marqueeInterval[0]=setInterval('startMarquee()',marqueeDelay)"><div>'+str+'</div></div>');marqueeId++;marqueeInterval[0]=setInterval("startMarquee()",marqueeDelay);}function startMarquee() {var str=marqueeContent[marqueeId];marqueeId++;if(marqueeId>=marqueeContent.length) marqueeId=0;if(document.getElementById("marqueeBox").childNodes.length==1) {var nextLine=document.createElement('DIV');nextLine.innerHTML=str;document.getElementById("marqueeBox").appendChild(nextLine);}else {document.getElementById("marqueeBox").childNodes[0].innerHTML=str;document.getElementById("marqueeBox").appendChild(document.getElementById("marqueeBox").childNodes[0]); document.getElementById("marqueeBox").scrollTop=0;}clearInterval(marqueeInterval[1]);marqueeInterval[1]=setInterval("scrollMarquee()",20);}function scrollMarquee() {document.getElementById("marqueeBox").scrollTop++;if(document.getElementById("marqueeBox").scrollTop%marqueeHeight==(marqueeHeight-1)){clearInterval(marqueeInterval[1]);}}initMarquee();</script></body></html></td></tr></table>。
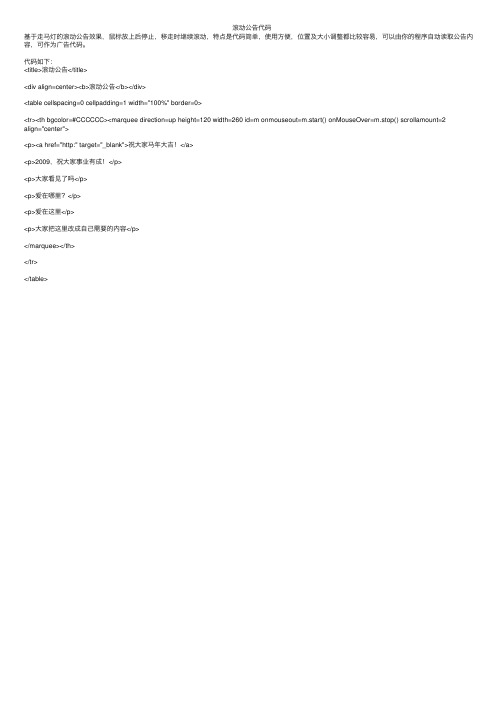
滚动公告代码
滚动公告代码
基于⾛马灯的滚动公告效果,⿏标放上后停⽌,移⾛时继续滚动,特点是代码简单,使⽤⽅便,位置及⼤⼩调整都⽐较容易,可以由你的程序⾃动读取公告内容,可作为⼴告代码。
代码如下:
<title>滚动公告</title>
<div align=center><b>滚动公告</b></div>
<table cellspacing=0 cellpadding=1 width="100%" border=0>
<tr><th bgcolor=#CCCCCC><marquee direction=up height=120 width=260 id=m onmouseout=m.start() onMouseOver=m.stop() scrollamount=2
align="center">
<p><a href="http:" target="_blank">祝⼤家马年⼤吉!</a>
<p>2009,祝⼤家事业有成!</p>
<p>⼤家看见了吗</p>
<p>爱在哪⾥?</p>
<p>爱在这⾥</p>
<p>⼤家把这⾥改成⾃⼰需要的内容</p>
</marquee></th>
</tr>
</table>。
动态图片新闻代码
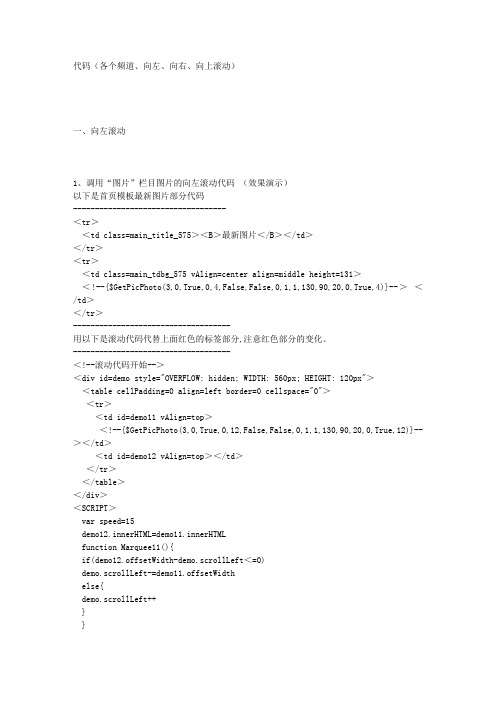
代码(各个频道、向左、向右、向上滚动)一、向左滚动1、调用“图片”栏目图片的向左滚动代码(效果演示)以下是首页模板最新图片部分代码-----------------------------------<tr><td class=main_title_575><B>最新图片</B></td></tr><tr><td class=main_tdbg_575 vAlign=center align=middle height=131><!--{$GetPicPhoto(3,0,True,0,4,False,False,0,1,1,130,90,20,0,True,4)}--></td></tr>------------------------------------用以下是滚动代码代替上面红色的标签部分,注意红色部分的变化。
------------------------------------<!--滚动代码开始--><div id=demo style="OVERFLOW: hidden; WIDTH: 560px; HEIGHT: 120px"><table cellPadding=0 align=left border=0 cellspace="0"><tr><td id=demo11 vAlign=top><!--{$GetPicPhoto(3,0,True,0,12,False,False,0,1,1,130,90,20,0,True,12)}--></td><td id=demo12 vAlign=top></td></tr></table></div><SCRIPT>var speed=15demo12.innerHTML=demo11.innerHTMLfunction Marquee11(){if(demo12.offsetWidth-demo.scrollLeft<=0)demo.scrollLeft-=demo11.offsetWidthelse{demo.scrollLeft++}}var MyMar1=setInterval(Marquee11,speed)demo.onmouseover=function() {clearInterval(MyMar1)}demo.onmouseout=function() {MyMar1=setInterval(Marquee11,speed)}</SCRIPT><!--滚动代码结束-->-----------------------------------2、文章频道图片向左滚动代码(效果演示)以下是文章频道模板最新图片部分代码-----------------------------------<tr><td Class="main_title_575"><b>最新图片{$ChannelShortName}</b></td></tr><tr><td Class="main_tdbg_575">{$GetPicArticle(ChannelID,0,True,0,4,false,false,0,3,2,130,90,20,0,True,4)} </td></tr><tr><td Class="main_shadow"></td></tr>------------------------------------用以下是滚动代码代替上面红色的标签,注意红色部分的变化。
JS实现的新闻列表自动滚动效果示例

JS实现的新闻列表⾃动滚动效果⽰例本⽂实例讲述了JS实现的新闻列表⾃动滚动效果。
分享给⼤家供⼤家参考,具体如下:<!DOCTYPE html><html lang="en"><head><meta charset="UTF-8"><title>Title</title><style type="text/css">#box{width:260px;height:100px;margin:0 auto;border:2px solid red;overflow: hidden}ul{padding:0;margin:0;list-style: none;overflow: hidden}ul li{height:24px;line-height: 24px;padding-left:10px;}a{text-decoration: none;color:#000;}a:hover{color:#f00}</style></head><body><div id="box"><ul id="con1" onMouseOut="Up()" onMouseOver="Stop()"><li><a href="#" rel="external nofollow" rel="external nofollow" rel="external nofollow" rel="external nofollow" rel="external nofollow" rel="external nofollow" rel="external nofollow" rel="external nofollow" rel="external nofollow" >1,课程html</a> </li><li><a href="#" rel="external nofollow" rel="external nofollow" rel="external nofollow" rel="external nofollow" rel="external nofollow" rel="external nofollow" rel="external nofollow" rel="external nofollow" rel="external nofollow" >2,课程css</a> </li><li><a href="#" rel="external nofollow" rel="external nofollow" rel="external nofollow" rel="external nofollow" rel="external nofollow" rel="external nofollow" rel="external nofollow" rel="external nofollow" rel="external nofollow" >3,课程js</a> </li><li><a href="#" rel="external nofollow" rel="external nofollow" rel="external nofollow" rel="external nofollow" rel="external nofollow" rel="external nofollow" rel="external nofollow" rel="external nofollow" rel="external nofollow" >4,课程jquery</a> </li><li><a href="#" rel="external nofollow" rel="external nofollow" rel="external nofollow" rel="external nofollow" rel="external nofollow" rel="external nofollow" rel="external nofollow" rel="external nofollow" rel="external nofollow" >5,课程html5</a> </li><li><a href="#" rel="external nofollow" rel="external nofollow" rel="external nofollow" rel="external nofollow" rel="external nofollow" rel="external nofollow" rel="external nofollow" rel="external nofollow" rel="external nofollow" >6,课程css3</a> </li><li><a href="#" rel="external nofollow" rel="external nofollow" rel="external nofollow" rel="external nofollow" rel="external nofollow" rel="external nofollow" rel="external nofollow" rel="external nofollow" rel="external nofollow" >7,课程hp</a> </li><li><a href="#" rel="external nofollow" rel="external nofollow" rel="external nofollow" rel="external nofollow" rel="external nofollow" rel="external nofollow" rel="external nofollow" rel="external nofollow" rel="external nofollow" >8,课程bpootstrap</a> </li> <li><a href="#" rel="external nofollow" rel="external nofollow" rel="external nofollow" rel="external nofollow" rel="external nofollow" rel="external nofollow" rel="external nofollow" rel="external nofollow" rel="external nofollow" >9,课程apicloud</a> </li> </ul><ul id="con2"></ul></div></body><script type="text/javascript">var box=document.getElementById("box");var con1=document.getElementById("con1");var con2=document.getElementById("con2");var s=document.getElementsByTagName("a");var speed=50;con2.innerHTML=con1.innerHTML;function ScrollUp(){if( box.scrollTop>=con1.scrollHeight){box.scrollTop=0;}elsebox.scrollTop++;}var i=setInterval("ScrollUp()",speed);function Stop(){clearInterval(i);}function Up(){i=setInterval("ScrollUp()",speed);}</script></html>更多关于JavaScript相关内容感兴趣的读者可查看本站专题:《》、《》、《》、《》、《》及《》希望本⽂所述对⼤家JavaScript程序设计有所帮助。
H5不同样式新闻垂直滚动效果

H5不同样式新闻垂直滚动效果变量解释:speed:滚动的速度;delay:暂停的时长;scrollTop :滚动的⾼度;scrollHeight:滚动元素的⾼度;1. ⽆缝垂直滚动(⽆停歇的⼀直滚动)<!doctype html><html><head><meta charset="utf-8"><title></title><meta name="viewport" content="width=device-width,initial-scale=1,minimum-scale=1,maximum-scale=1,user-scalable=no" /> <link href="css/mui.min.css" rel="stylesheet" /><style type="text/css">body{background-color: #FFFFFF;}.out{overflow: hidden;height: 21px;margin-top: 50px;padding-left: 20px;}</style></head><body><div class="out" id="roll"><div>111111111</div><div>222222222</div><div>333333333</div><div>44444444444</div><div>555555555</div><div>66666666</div><div>777777777777</div><div>888888888888</div></div><script type="text/javascript" src="js/mui.min.js" ></script><script type="text/javascript" src="js/jquery-1.8.2.min.js" ></script><script type="application/javascript">var speed = 100;window.onload = function(){var area = document.getElementById("roll");area.innerHTML += area.innerHTML;function scroll(){if(area.scrollTop >= area.scrollHeight/2){area.scrollTop = 0;}else{area.scrollTop++;}}setInterval(scroll,speed);}</script></body></html> 2. 间歇性垂直滚动(⼀次滚动⼀条)<!doctype html><html><head><meta charset="utf-8"><title></title><meta name="viewport" content="width=device-width,initial-scale=1,minimum-scale=1,maximum-scale=1,user-scalable=no" /> <link href="css/mui.min.css" rel="stylesheet" /><style type="text/css">body{background-color: #FFFFFF;}.out{overflow: hidden;height: 21px;margin-top: 50px;padding-left: 20px;}</style></head><body><div class="out" id="roll"><div>111111111</div><div>222222222</div><div>333333333</div><div>44444444444</div><div>555555555</div><div>66666666</div><div>777777777777</div><div>888888888888</div></div><script type="text/javascript" src="js/mui.min.js" ></script><script type="text/javascript" src="js/jquery-1.8.2.min.js" ></script><script type="application/javascript">var speed = 100;var delay = 2000;var height = 21;var time;window.onload = function(){var area = document.getElementById("roll");area.innerHTML += area.innerHTML;function scroll(){if(area.scrollTop % height == 0){clearInterval(time);setTimeout(start,delay);}else{area.scrollTop++;if(area.scrollTop >= area.scrollHeight/2){area.scrollTop = 0;}}}function start(){time = setInterval(scroll,speed);area.scrollTop++;}setTimeout(start,delay);}</script></body></html> 3. 间歇性垂直滚动(⼀次滚动两条)<!doctype html><html><head><meta charset="utf-8"><title></title><meta name="viewport" content="width=device-width,initial-scale=1,minimum-scale=1,maximum-scale=1,user-scalable=no" /> <link href="css/mui.min.css" rel="stylesheet" /><style type="text/css">body{background-color: #FFFFFF;}.out{overflow: hidden;height: 42px;margin-top: 50px;padding-left: 20px;}</style></head><body><div class="out" id="roll"><div>111111111</div><div>222222222</div><div>333333333</div><div>44444444444</div><div>555555555</div><div>66666666</div><div>777777777777</div><div>888888888888</div></div><script type="text/javascript" src="js/mui.min.js" ></script><script type="text/javascript" src="js/jquery-1.8.2.min.js" ></script><script type="application/javascript">var speed = 100;var delay = 2000;var height = 42;var time;window.onload = function(){var area = document.getElementById("roll");var counts = $("#roll").find("div").length;area.innerHTML = area.innerHTML + area.innerHTML + area.innerHTML;function scroll(){if(area.scrollTop % height == 0){clearInterval(time);setTimeout(start,delay);}else{area.scrollTop++;if(counts % 2 ==0 ){if(area.scrollTop >= area.scrollHeight/3){area.scrollTop = 0;}}else{if(area.scrollTop >= area.scrollHeight*2/3){area.scrollTop = 0;}}}}function start(){time = setInterval(scroll,speed);area.scrollTop++;}setTimeout(start,delay);}</script></body></html>原理:取出要显⽰⽂字的部分(这⾥暂且称其为a部分),复制⼀份a部分本⾝连接在a部分后⾯,形成重复⼀次的效果(这⾥暂且称之为aa部分);随着aa部分渐渐向上滚动,当aa部分滚动的⾼度与原本a部分的⾼度⼀样的时候,将aa部分迅速挪到最初始的位置,即可实现循环滚动的效果;。
JS实现公告上线滚动效果

JS实现公告上线滚动效果本⽂实例为⼤家分享了JS实现公告上线滚动效果的具体代码,供⼤家参考,具体内容如下实现的效果如下,新闻公告上下滚动。
代码:<!DOCTYPE html><html lang="en"><head><meta charset="UTF-8"><meta name="viewport" content="width=device-width, initial-scale=1.0"><meta http-equiv="X-UA-Compatible" content="ie=edge"><script type="text/javascript" src="/ajax/jQuery/jquery-3.1.0.min.js"></script><script src="./l-by-l.min.js"></script><title>Document</title><style>* {padding: 0;margin: 0;box-sizing: border-box;}.notice-news {width: 400px;height: 30px;background-color: #fff;border: 1px solid #ccc;margin: 20px;border-radius: 8px;display: flex;align-items: center;padding: 0 10px;overflow: hidden;}.hron-voice {width: 16px;height: 16px;background-image: url('./horn.png');background-repeat: no-repeat;background-size: 100% 100%;}.news-list {list-style: none;width: 320px;height: 18px;font-size: 12px;margin-left: 10px;overflow: hidden;/* transition: all .5s linear; */}.news-list li {width: 100%;overflow: hidden;white-space: nowrap;text-overflow: ellipsis;}</style></head><body><div class="notice-news"><div class="hron-voice"></div><ul class="news-list"><li>HTML称为超⽂本标记语⾔,是⼀种标识性的语⾔。
jQuery滚动新闻实现代码
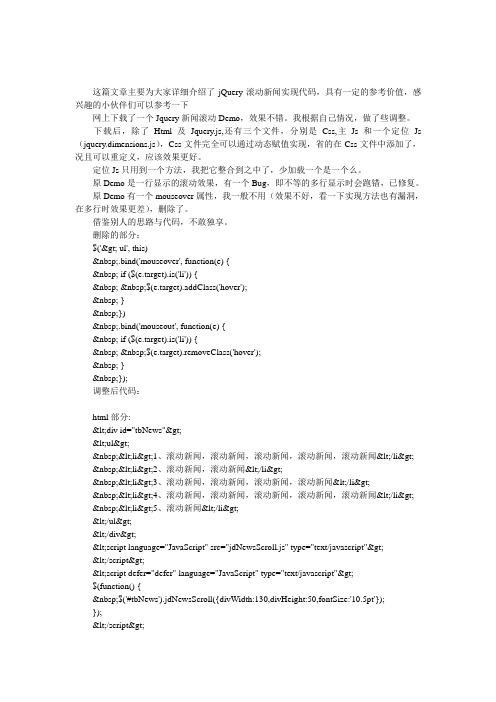
这篇文章主要为大家详细介绍了jQuery滚动新闻实现代码,具有一定的参考价值,感兴趣的小伙伴们可以参考一下网上下载了一个Jquery新闻滚动Demo,效果不错。
我根据自己情况,做了些调整。
下载后,除了Html及Jquery.js,还有三个文件,分别是Css,主Js和一个定位Js (jquery.dimensions.js),Css文件完全可以通过动态赋值实现,省的在Css文件中添加了,况且可以重定义,应该效果更好。
定位Js只用到一个方法,我把它整合到之中了,少加载一个是一个么。
原Demo是一行显示的滚动效果,有一个Bug,即不等的多行显示时会跑错,已修复。
原Demo有一个mouseover属性,我一般不用(效果不好,看一下实现方法也有漏洞,在多行时效果更差),删除了。
借鉴别人的思路与代码,不敢独享。
删除的部分:$('> ul', this) .bind('mouseover', function(e) { if ($(e.target).is('li')) { $(e.target).addClass('hover'); } }) .bind('mouseout', function(e) { if ($(e.target).is('li')) { $(e.target).removeClass('hover'); } });调整后代码:html部分:<div id="tbNews"><ul> <li>1、滚动新闻,滚动新闻,滚动新闻,滚动新闻,滚动新闻</li> <li>2、滚动新闻,滚动新闻</li> <li>3、滚动新闻,滚动新闻,滚动新闻,滚动新闻</li> <li>4、滚动新闻,滚动新闻,滚动新闻,滚动新闻,滚动新闻</li> <li>5、滚动新闻</li></ul></div><script language="JavaScript" src="jdNewsScroll.js" type="text/javascript"></script><script defer="defer" language="JavaScript" type="text/javascript">$(function() { $('#tbNews').jdNewsScroll({divWidth:130,divHeight:50,fontSize:'10.5pt'});});</script>Js代码:(function($){ var ELMS = []; $.fn.jdNewsScroll = function(settings) { settings = $.extend({}, arguments.callee.defaults, settings); $(this).css({"position":"relative","overflow":"hidden","width":settings.divWidth,"height":s ettings.divHeight}); $(this).find("ul").css({"position":"relative","list-style-type":"none","font-size":settings.font Size,"margin":"0px"}); $(this).find("li").css({"line-height":"130%","margin":"0px","padding":"2px 10px 1px 10px"}); $(this).each(function(){ this.$settings = settings; this.$pause = false; this.$counter = settings.beginTime; $(this).hover(function(){ $(this).jdNewsScrollPause(true) }, function(){ $(this).jdNewsScrollPause(false) }); ELMS.push(this); }); return this; }; $.fn.jdNewsScroll.defaults = { beginTime: 10, fontSize: '9pt', divWidth: '100%', divHeight: '200px', lineHeight: '130%', delay: 20, step: 2 }; $.fn.jdNewsScrollPause = function(pause) { return this.each(function() { this.$pause = pause; }); } function outerHeight(options) { if (!this[0]) 0; options = $.extend({ margin: false }, options || {}); return this[0] == window || this[0] == document ? this.height() : this.is(':visible') ? this[0].offsetHeight + (options.margin ? (num(this, 'marginTop') + num(this, 'marginBottom')) : 0) : this.height() + num(this,'borderTopWidth') + num(this, 'borderBottomWidth') + num(this, 'paddingTop') + num(this, 'paddingBottom') + (options.margin ? (num(this, 'marginTop') + num(this, 'marginBottom')) : 0); } setInterval(scroll, 80); function scroll() { for (var i = 0; i < ELMS.length; i++) { var elm = ELMS[i]; if (elm && !elm.$pause) { if (elm.$counter == 0) { var ul = $('> ul', elm)[0]; if (!elm.$steps) { elm.$steps = $('> li:first-child', ul).outerHeight(); elm.$step = 0; } if ((elm.$steps + elm.$step) <= 0) { elm.$counter = elm.$settings.delay; elm.$steps = false; $(ul).css('top', '0').find('> li:last-child').after($('> li:first-child', ul)); $('> *', ul).not('li').remove(); } else { elm.$step -= elm.$settings.step; if (-elm.$step > elm.$steps) { elm.$step = -elm.$steps; } ul.style.top = elm.$step + 'px'; } } else { elm.$counter--; } } } };})(jQuery);以上就是本文的全部内容,希望对大家的学习有所帮助。
- 1、下载文档前请自行甄别文档内容的完整性,平台不提供额外的编辑、内容补充、找答案等附加服务。
- 2、"仅部分预览"的文档,不可在线预览部分如存在完整性等问题,可反馈申请退款(可完整预览的文档不适用该条件!)。
- 3、如文档侵犯您的权益,请联系客服反馈,我们会尽快为您处理(人工客服工作时间:9:00-18:30)。
else
demo.scrollTop = demo.scrollTop +1 //1表示一次移动的象素
}
setInterval(qswhMarquee,100)//100 表示 滚动的时间
</script></div>
</td></tr></table>
}
function start_roll2(){
roll_layer2.scrollTop = 0;
roll_interval2 = window.setInterval('roll2()',speed2);
}
function text_switch2(){
roll_layer2.innerHTML=topic[cur2].innerHTML;
var offset2= 5;
var delay2=5000; //滚动速度设置
var cur2 = 0;
var roll_interval2;
var pasue_timeout2;
function roll2(){
now_pos2 = roll_layer2.scrollTop;
</table>
</div>
<div id=demo2>
</div>
<script>
var t=demo.scrollTop
demo2.innerText=demo1.innerText
function qswhMarquee(){
if(demo2.offsetTop-demo.scrollTop<=0)
var FGDemo1=document.getElementById('demo1'); //定义三个层的转换
var FGDemo2=document.getElementById('demo2');
FGDemo2.innerHTML=FGDemo1.innerHTML
function Marquee1(){
<DIV id=topic style="DISPLAY: none">
<table>
...... //插入滚动内容
</table>
</DIV>
<DIV id=topic style="DISPLAY: none">
这个用起来比较麻烦。可能是代码比较长的缘故。但是如果是图片滚动用起来效果可能比较好。�
roll_layer2.scrollTop+=offset2;
if (now_pos2==roll_layer2.scrollTop){
pasue2('stop');
}
}
function stop_roll2(){
window.clearInterval(roll_interval2);
滚动方法大全
一、我认为比较好用的一个方法
<table>
<tr>
<td>
<div id=demo style=overflow:hidden;height:150px>
<div id=demo1>
<table>
... //插入你要滚动的内容
</table>
</div>
<div id=demo2>
</div>
<script type="text/javascript">
var speed=60; //设置速度
var FGDemo=document.getElementById('demo');
}
}
function start2(){
text_switch2();
cur2=0;
pasue2("timeout");
}
start2();
//-->
</SCRIPT>
</TD></TR></TABLE>
<table>
...... //插入第二版显示的内容
</table>
</DIV>
<SCRIPT language=JavaScript>
<!--
var speed2=20;
}else if(act=='timeout'){
pasue_timeout2 = window.setTimeout("pasue2('switch');",delay2);
}else if(act=='switch'){
text_switch2();
start_roll2();
FGDemo.onmouseover=function() {clearInterval(MyMar1)}
FGDemo.onmouseout=function() {MyMar1=setInterval(Marquee1,speed)}
</script> </div>
</td>
</tr>
以上两个方法在同一页面可以使用多次。但是每次写方法的时候必须将变量名和DIV的名字做相应的改变。
否则会相互干扰。以致其中的一些不能达到效果下面这个方法在同一页面里好象只能用一次。我试过几次都没有能成功
三、比较适合图片的滚动。可能比较长
<TABLE>
<TR>
<TD >
<DIV id=roll_layer2 style="OVERFLOW: hidden; WIDTH: 100%; HEIGHT: 216px" align=center></DIV>
</table>
二、最简单的一个方法
<table><tr><td>
<div id=demo style=overflow:hidden;height:120px> //设置滚动的方向和滚动的高度
<div id=demo1>
<table>
..... //插入你要滚动的内容
if (++cur2==topic.length){
cur2=0;
}
roll_layer2.innerHTML+=topic[cur2].innerHTML;
}
function pasue2(act){
if (act=='stop'){
stop_roll2();
pasue2('timeout');
if(FGDemo2.offsetHeight-FGDemo.scrollTop<=0)
FGDemo.scrollTop-=FGDemo1.offsetHeight
else{
FGDemo.scrollTop++
}
}
var MyMar1=setInterval(Marquee1,speed)
