arduino语法手册函数部分
Arduino 语法手册
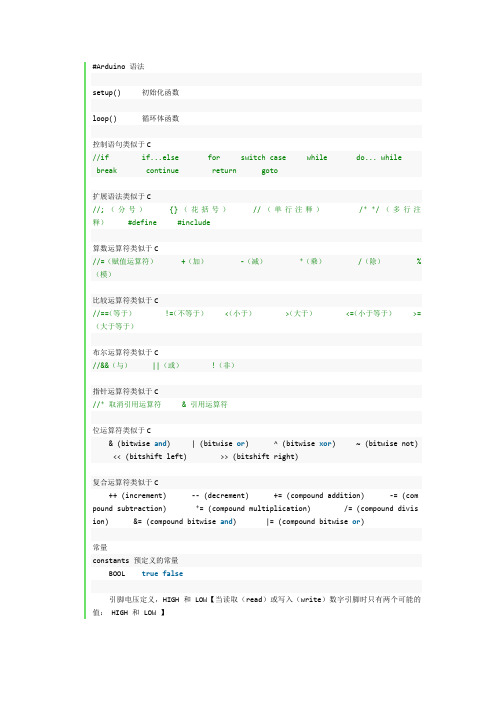
#Arduino 语法setup() 初始化函数loop() 循环体函数控制语句类似于C//if if...else for switch case while do... while break continue return goto扩展语法类似于C//;(分号) {}(花括号) //(单行注释) /* */(多行注释) #define #include算数运算符类似于C//=(赋值运算符) +(加) -(减) *(乘) /(除) %(模)比较运算符类似于C//==(等于) !=(不等于) <(小于) >(大于) <=(小于等于) >=(大于等于)布尔运算符类似于C//&&(与) ||(或) !(非)指针运算符类似于C//* 取消引用运算符 & 引用运算符位运算符类似于C& (bitwise and) | (bitwise or) ^ (bitwise xor) ~ (bitwise not) << (bitshift left) >> (bitshift right)复合运算符类似于C++ (increment) -- (decrement) += (compound addition) -= (com pound subtraction) *= (compound multiplication) /= (compound divis ion) &= (compound bitwise and) |= (compound bitwise or)常量constants 预定义的常量BOOL true false引脚电压定义,HIGH和LOW【当读取(read)或写入(write)数字引脚时只有两个可能的值: HIGH 和 LOW 】HIGH(参考引脚)的含义取决于引脚(pin)的设置,引脚定义为INPUT或OUTPUT时含义有所不同。
Arduino-语法手册
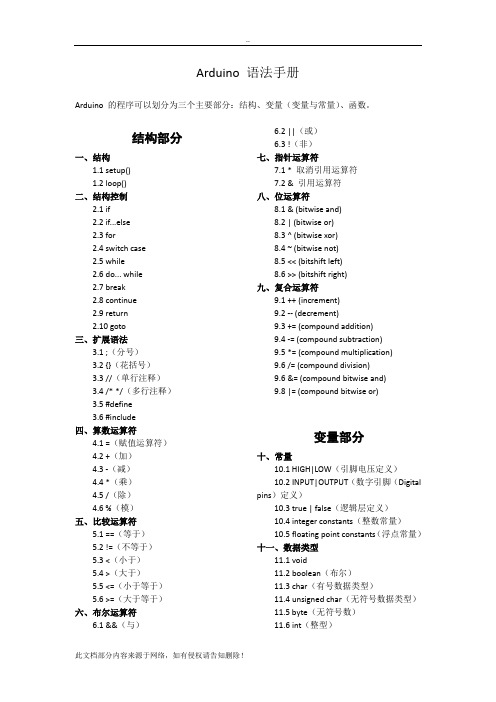
Arduino 语法手册Arduino 的程序可以划分为三个主要部分:结构、变量(变量与常量)、函数。
结构部分一、结构1.1 setup()1.2 loop()二、结构控制2.1 if2.2 if...else2.3 for2.4 switch case2.5 while2.6 do... while2.7 break2.8 continue2.9 return2.10 goto三、扩展语法3.1 ;(分号)3.2 {}(花括号)3.3 //(单行注释)3.4 /* */(多行注释)3.5 #define3.6 #include四、算数运算符4.1 =(赋值运算符)4.2 +(加)4.3 -(减)4.4 *(乘)4.5 /(除)4.6 %(模)五、比较运算符5.1 ==(等于)5.2 !=(不等于)5.3 <(小于)5.4 >(大于)5.5 <=(小于等于)5.6 >=(大于等于)六、布尔运算符6.1 &&(与)6.2 ||(或)6.3 !(非)七、指针运算符7.1 * 取消引用运算符7.2 & 引用运算符八、位运算符8.1 & (bitwise and)8.2 | (bitwise or)8.3 ^ (bitwise xor)8.4 ~ (bitwise not)8.5 << (bitshift left)8.6 >> (bitshift right)九、复合运算符9.1 ++ (increment)9.2 -- (decrement)9.3 += (compound addition)9.4 -= (compound subtraction)9.5 *= (compound multiplication)9.6 /= (compound division)9.6 &= (compound bitwise and)9.8 |= (compound bitwise or)变量部分十、常量10.1 HIGH|LOW(引脚电压定义)10.2 INPUT|OUTPUT(数字引脚(Digital pins)定义)10.3 true | false(逻辑层定义)10.4 integer constants(整数常量)10.5 floating point constants(浮点常量)十一、数据类型11.1 void11.2 boolean(布尔)11.3 char(有号数据类型)11.4 unsigned char(无符号数据类型)11.5 byte(无符号数)11.6 int(整型)11.7 unsigned int(无符号整型)11.8 word11.9 long(长整数型)11.10 unsigned long(无符号长整数型)11.11 float(浮点型数)11.12 double(双精度浮点数)11.13 string(char array/字符串)11.14 String object(String类)11.15 array (数组)十二、数据类型转换12.1 char()12.2 byte()12.3 int()12.4 word()12.5 long()12.6 float()十三、变量作用域& 修饰符13.1 variable scope(变量的作用域)13.2 static(静态变量)13.3 volatile13.4 const十四、辅助工具14.1 sizeof()函数部分十五、数字I/O15.1 pinMode()15.2 digitalWrite()15.3 digitalRead()十六、模拟I/O16.1 analogReference()16.2 analogRead()16.3 analogWrite() PWM十七、高级I/O17.1 tone()17.2 noTone()17.3 shiftOut()17.4 shiftIn()17.5 pulseIn()十八、时间18.1 millis()18.2 micros()18.3 delay()18.4 delayMicroseconds() 十九、数学运算19.1 min()19.2 max()19.3 abs()19.4 constrain()19.5 map()19.6 pow()19.7 sqrt()19.8 ceil()19.9 exp()19.10 fabs()19.11 floor()19.12 fma()19.13 fmax()19.14 fmin()19.15 fmod()19.16 ldexp()19.17 log()19.18 log10()19.19 round()19.20 signbit()19.21 sq()19.22 square()19.23 trunc()二十、三角函数20.1 sin()20.2 cos()20.3 tan()20.4 acos()20.5 asin()20.6 atan()20.7 atan2()20.8 cosh()20.9 degrees()20.10 hypot()20.11 radians()20.12 sinh()20.13 tanh()二十一、随机数21.1 randomSeed()21.2 random()二十二、位操作22.1 lowByte()22.2 highByte()22.3 bitRead()22.4 bitWrite()22.5 bitSet()22.6 bitClear()22.7 bit()二十三、设置中断函数23.1 attachInterrupt()23.2 detachInterrupt()二十四、开关中断24.1 interrupts()(中断)24.2 noInterrupts()(禁止中断)二十五、通讯25.1 Serial25.1.1 if (Serial)25.1.2 Serial.available()25.1.3 Serial.begin()25.1.4 Serial.end()25.1.5 Serial.find()25.1.6 Serial.findUntil()25.1.7 Serial.flush()25.1.8 Serial.parseFloat()25.1.9 Serial.parseInt()25.1.10 Serial.peek()25.1.11 Serial.print()25.1.12 Serial.println()25.1.13 Serial.read()25.1.14 Serial.readBytes()25.1.15 Serial.readBytesUntil()25.1.16 Serial.setTimeout()25.1.17 Serial.write()25.1.18 Serial.SerialEvent()25.2 Stream二十六、USB(仅适用于Leonardo 和Due)26.1 Mouse(键盘)26.2 Keyboard(鼠标)结构部分一、结构1.1 setup()在Arduino中程序运行时将首先调用setup() 函数。
Arduino语法手册范文
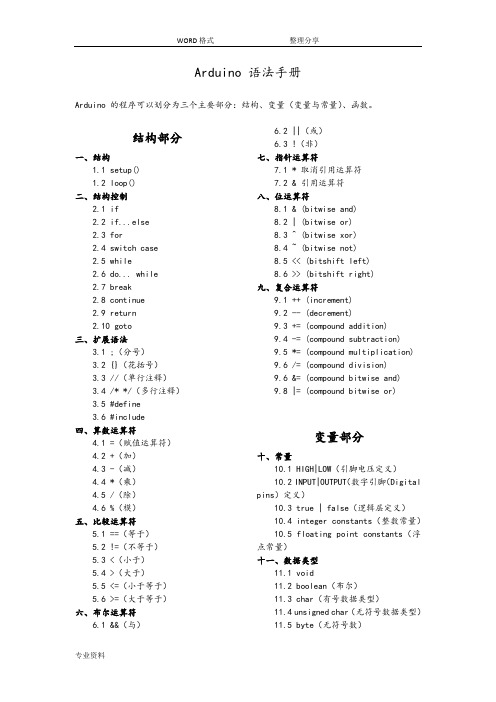
Arduino 语法手册Arduino 的程序可以划分为三个主要部分:结构、变量(变量与常量)、函数。
结构部分一、结构1.1 setup()1.2 loop()二、结构控制2.1 if2.2 if...else2.3 for2.4 switch case2.5 while2.6 do... while2.7 break2.8 continue2.9 return2.10 goto三、扩展语法3.1 ;(分号)3.2 {}(花括号)3.3 //(单行注释)3.4 /* */(多行注释)3.5 #define3.6 #include四、算数运算符4.1 =(赋值运算符)4.2 +(加)4.3 -(减)4.4 *(乘)4.5 /(除)4.6 %(模)五、比较运算符5.1 ==(等于)5.2 !=(不等于)5.3 <(小于)5.4 >(大于)5.5 <=(小于等于)5.6 >=(大于等于)六、布尔运算符6.1 &&(与)6.2 ||(或)6.3 !(非)七、指针运算符7.1 * 取消引用运算符7.2 & 引用运算符八、位运算符8.1 & (bitwise and)8.2 | (bitwise or)8.3 ^ (bitwise xor)8.4 ~ (bitwise not)8.5 << (bitshift left)8.6 >> (bitshift right)九、复合运算符9.1 ++ (increment)9.2 -- (decrement)9.3 += (compound addition)9.4 -= (compound subtraction)9.5 *= (compound multiplication)9.6 /= (compound division)9.6 &= (compound bitwise and)9.8 |= (compound bitwise or)变量部分十、常量10.1 HIGH|LOW(引脚电压定义)10.2 INPUT|OUTPUT(数字引脚(Digital pins)定义)10.3 true | false(逻辑层定义)10.4 integer constants(整数常量)10.5 floating point constants(浮点常量)十一、数据类型11.1 void11.2 boolean(布尔)11.3 char(有号数据类型)11.4 unsigned char(无符号数据类型)11.5 byte(无符号数)11.6 int(整型)11.7 unsigned int(无符号整型)11.8 word11.9 long(长整数型)11.10 unsigned long(无符号长整数型)11.11 float(浮点型数)11.12 double(双精度浮点数)11.13 string(char array/字符串)11.14 String object(String类)11.15 array (数组)十二、数据类型转换12.1 char()12.2 byte()12.3 int()12.4 word()12.5 long()12.6 float()十三、变量作用域 & 修饰符13.1 variable scope(变量的作用域)13.2 static(静态变量)13.3 volatile13.4 const十四、辅助工具14.1 sizeof()函数部分十五、数字 I/O15.1 pinMode()15.2 digitalWrite()15.3 digitalRead()十六、模拟 I/O16.1 analogReference()16.2 analogRead()16.3 analogWrite() PWM十七、高级 I/O17.1 tone()17.2 noTone()17.3 shiftOut()17.4 shiftIn()17.5 pulseIn()十八、时间18.1 millis()18.2 micros()18.3 delay()18.4 delayMicroseconds() 十九、数学运算19.1 min()19.2 max()19.3 abs()19.4 constrain()19.5 map()19.6 pow()19.7 sqrt()19.8 ceil()19.9 exp()19.10 fabs()19.11 floor()19.12 fma()19.13 fmax()19.14 fmin()19.15 fmod()19.16 ldexp()19.17 log()19.18 log10()19.19 round()19.20 signbit()19.21 sq()19.22 square()19.23 trunc()二十、三角函数20.1 sin()20.2 cos()20.3 tan()20.4 acos()20.5 asin()20.6 atan()20.7 atan2()20.8 cosh()20.9 degrees()20.10 hypot()20.11 radians()20.12 sinh()20.13 tanh()二十一、随机数21.1 randomSeed()21.2 random()二十二、位操作22.1 lowByte()22.2 highByte()22.3 bitRead()22.4 bitWrite()22.5 bitSet()22.6 bitClear()22.7 bit()二十三、设置中断函数23.1 attachInterrupt()23.2 detachInterrupt()二十四、开关中断24.1 interrupts()(中断)24.2 noInterrupts()(禁止中断)二十五、通讯25.1 Serial25.1.1 if (Serial)25.1.2 Serial.available()25.1.3 Serial.begin()25.1.4 Serial.end()25.1.5 Serial.find()25.1.6 Serial.findUntil()25.1.7 Serial.flush()25.1.8 Serial.parseFloat()25.1.9 Serial.parseInt()25.1.10 Serial.peek()25.1.11 Serial.print()25.1.12 Serial.println()25.1.13 Serial.read()25.1.14 Serial.readBytes()25.1.15 Serial.readBytesUntil()25.1.16 Serial.setTimeout()25.1.17 Serial.write()25.1.18 Serial.SerialEvent()25.2 Stream二十六、USB(仅适用于 Leonardo 和 Due)26.1 Mouse(键盘)26.2 Keyboard(鼠标)结构部分一、结构1.1 setup()在Arduino中程序运行时将首先调用 setup() 函数。
arduino 语法手册【word版】9p
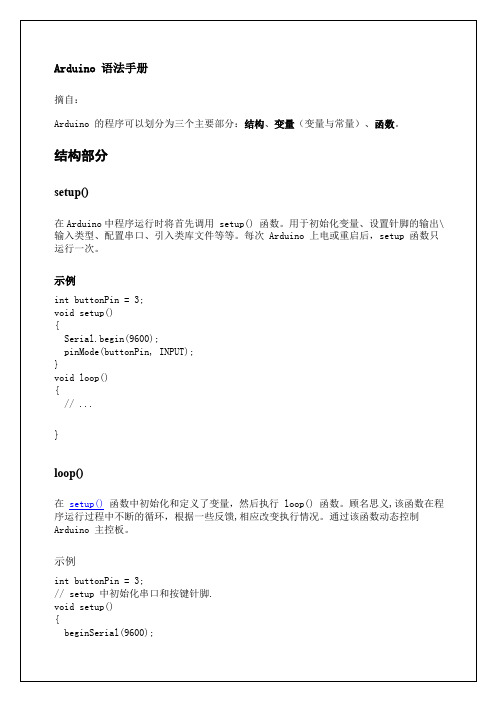
}while(X<100);//当x小于100时,继续运行
break
break用于退出do,for,while循环,能绕过一般的判断条件。它也能够用于退出switch语句。
例子
for(x=0;x<255;x++)
{
digitalWrite(PWMpin, x);
analogWrite(PWMpin, i);
if(i==255)x=-1;// 在峰值转变方向
delay(10);
}
}
switch case
和if语句相同,switch…case通过程序员设定的在不同条件下执行的代码控制程序的流程。特别地,switch语句将变量值和case语句中设定的值进行比较。当一个case语句中的设定值与变量值相同时,这条case语句将被执行。
的确在有的实例中goto语句可以派上用场,并简化代码。例如在一定的条件用if语句来跳出高度嵌入的for循环。
例子
for(byte r=0;r<255;r++){
for(byte g=255;g>-1;g--){
for(byte b=0;b<255;b++){
if(analogRead(0)>250){
voidloop(){
//写入漂亮的代码来测试这里。
return;
//剩下的功能异常的程序
//return后的代码永远不会被执行
}
goto
程序将会从程序中已有的标记点开始运行
语法
label:
goto label; //从label处开始运行
提示
arduino语法
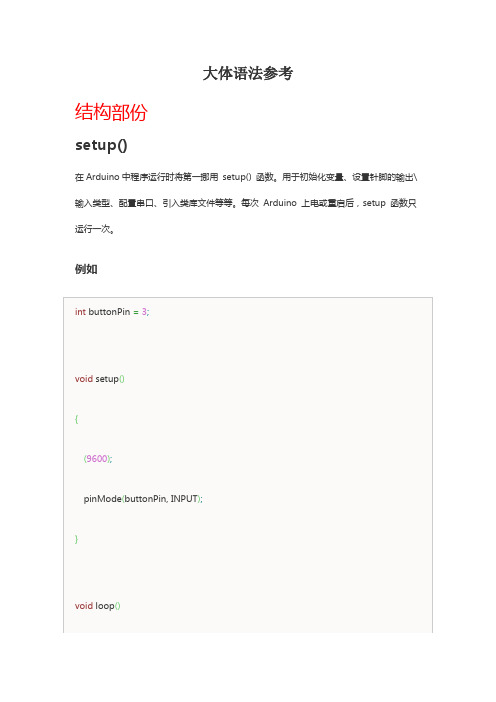
大体语法参考结构部份setup()在Arduino中程序运行时将第一挪用setup() 函数。
用于初始化变量、设置针脚的输出\输入类型、配置串口、引入类库文件等等。
每次Arduino 上电或重启后,setup 函数只运行一次。
例如loop()在函数中初始化和概念了变量,然后执行loop() 函数。
顾名思义,该函数在程序运行进程中不断的循环,依照一些反馈,相应改变执行情形。
通过该函数动态操纵Arduino 主控板。
例如.whil edo…while循环与循环运行的方式是相近的,只是它的条件判定是在每一个循环的最后,因此那个语句至少会被运行一次,然后才被终止。
扩展语法; 分号用于表示一句代码的终止。
例子:提示在每一行忘记利用分号作为结尾,将致使一个编译错误。
错误提示可能会清楚的指向缺少分号的那行,也可能可不能。
若是弹出一个令人费解或看似不合逻辑的编译器错误,第一件事确实是在错误周围检查是不是缺少分号。
{}大括号大括号(也称为“括号”或“大括号”)是C编程语言中的一个重要组成部份。
它们被用来区分几个不同的结构,下面列出的,有时可能使初学者混乱。
左大括号“{”必需与一个右大括号“}”形成闭合。
这是一个常常被称为括号平稳的条件。
在Arduino IDE(集成开发环境)中有一个方便的功能来检查大括号是不是平稳。
只需选择一个括号,乃至单击紧接括号的插入点,就能够明白那个括号的“伴侣括号”。
目前此功能略微有些错误,因为IDE会常常会以为在注释中的括号是不正确的。
关于初学者,和由BASIC语言转向学习C语言的程序员,常常不清楚如何利用括号。
毕竟,大括号还会在“return函数”、“endif条件句”和“loop函数”中被利用到。
由于大括号被用在不同的地址,这有一种专门好的编程适应以幸免错误:输入一个大括号后,同时也输入另一个大括号以达到平稳。
然后在你的括号之间输入回车,然后再插入语句。
如此一来,你的括号就可不能变得不平稳了。
Arduino参考手册-函数和变量及电路图
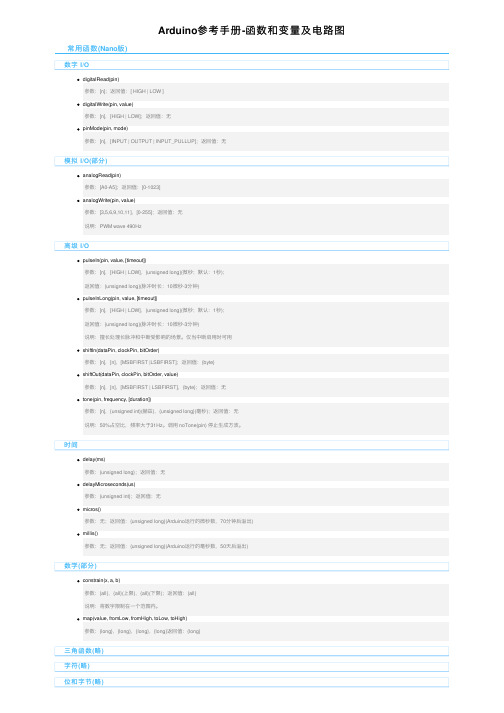
Arduino参考⼿册-函数和变量及电路图常⽤函数(Nano版)数字 I/OdigitalRead(pin)参数:[n];返回值:[ HIGH | LOW ]digitalWrite(pin, value)参数:[n],[HIGH | LOW];返回值:⽆pinMode(pin, mode)参数:[n],[INPUT | OUTPUT | INPUT_PULLUP];返回值:⽆模拟 I/O(部分)analogRead(pin)参数:[A0-A5];返回值:[0-1023]analogWrite(pin, value)参数:[3,5,6,9,10,11],[0-255];返回值:⽆说明:PWM wave 490Hz⾼级 I/OpulseIn(pin, value, [timeout])参数:[n],[HIGH | LOW],{unsigned long}(微秒;默认:1秒);返回值:{unsigned long}(脉冲时长:10微秒-3分钟)pulseInLong(pin, value, [timeout])参数:[n],[HIGH | LOW],{unsigned long}(微秒;默认:1秒);返回值:{unsigned long}(脉冲时长:10微秒-3分钟)说明:擅长处理长脉冲和中断受影响的场景。
仅当中断启⽤时可⽤shiftIn(dataPin, clockPin, bitOrder)参数:[n],[n],[MSBFIRST |LSBFIRST];返回值:{byte}shiftOut(dataPin, clockPin, bitOrder, value)参数:[n],[n],[MSBFIRST | LSBFIRST],{byte};返回值:⽆tone(pin, frequency, [duration])参数:[n],{unsigned int}(赫兹),{unsigned long}(毫秒);返回值:⽆说明:50%占空⽐,频率⼤于31Hz。
ARDUINO语法篇
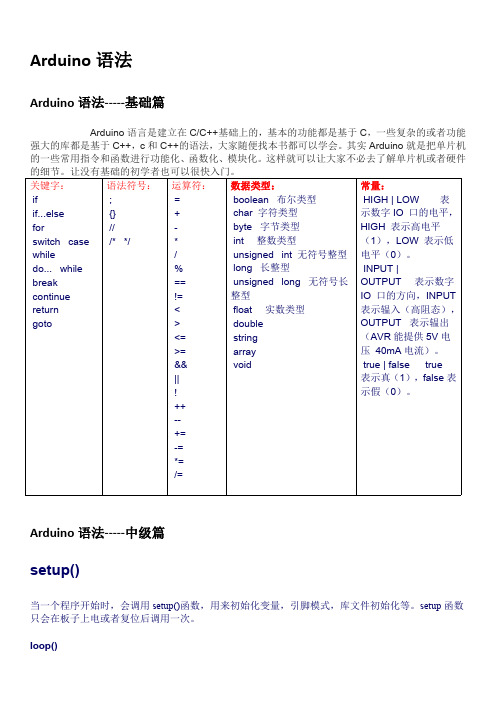
Arduino语法Arduino语法-----基础篇Arduino语言是建立在C/C++基础上的,基本的功能都是基于C,一些复杂的或者功能强大的库都是基于C++,c和C++的语法,大家随便找本书都可以学会。
其实Arduino就是把单片机的一些常用指令和函数进行功能化、函数化、模块化。
这样就可以让大家不必去了解单片机或者硬件Arduino语法-----中级篇setup()当一个程序开始时,会调用setup()函数,用来初始化变量,引脚模式,库文件初始化等。
setup函数只会在板子上电或者复位后调用一次。
loop()当setup函数初始化完变量以及设置完初始值后,loop函数就会像它的名字一样,不停的循环,从而使程序能够改变或者响应对Arduino板子的控制,使板子保持在活动的状态。
pinMode()把指定的引脚设置为输入或则输出模式,在Arduino1.0.1中可以使用INPUT_PULLUP把引脚模式设置为内部上拉.除此之外,输入模式明确禁止内部上拉。
pinMode(pin,mode)参数:pin:需要设置的引脚编号。
mode:INPUT输入,OUTPUT输出,INPUT_PULLUP内部上拉返回值:无digitalWrite()把引脚设置为HIGH或者LOW。
如果把一个引脚使用pinMode()设置为输出模式,如果参数是HIGH 引脚的电压会被设置为5V(3V或者3.3V),如果是LOW,引脚输出为0V(GND)。
如果引脚被设置为输入模式,使用digitalWrite()对该引脚写入HIGH,将会使能内部的20K上拉电阻,如果写入LOW会禁止内部上拉。
内部上拉可以点亮LED,只是很淡,所以如果LED很淡,应该是忘记把引脚设置为输出模式了.13脚一般不用做输入模式,因为它串联了一个LED和电阻,如果你使能了内部的20K上拉电阻,它的电压将会在1.7V左右而不是你锁期望的5V。
因为它串联的LED和电阻把电压拉低了,这也就意味着13脚始终读出的是LOW,如果你一定要把13脚用为输入脚,请给它接一个外部的下拉电阻。
Arduino-语法手册

Arduino 语法手册Arduino 的程序可以划分为三个主要部分:结构、变量(变量与常量)、函数。
结构部分一、结构1.1 setup()1.2 loop()二、结构控制2.1 if2.2 if...else2.3 for2.4 switch case2.5 while2.6 do... while2.7 break2.8 continue2.9 return2.10 goto三、扩展语法3.1 ;(分号)3.2 {}(花括号)3.3 //(单行注释)3.4 /* */(多行注释)3.5 #define3.6 #include四、算数运算符4.1 =(赋值运算符)4.2 +(加)4.3 -(减)4.4 *(乘)4.5 /(除)4.6 %(模)五、比较运算符5.1 ==(等于)5.2 !=(不等于)5.3 <(小于)5.4 >(大于)5.5 <=(小于等于)5.6 >=(大于等于)六、布尔运算符6.1 &&(与)6.2 ||(或)6.3 !(非)七、指针运算符7.1 * 取消引用运算符7.2 & 引用运算符八、位运算符8.1 & (bitwise and)8.2 | (bitwise or)8.3 ^ (bitwise xor)8.4 ~ (bitwise not)8.5 << (bitshift left)8.6 >> (bitshift right)九、复合运算符9.1 ++ (increment)9.2 -- (decrement)9.3 += (compound addition)9.4 -= (compound subtraction)9.5 *= (compound multiplication)9.6 /= (compound division)9.6 &= (compound bitwise and)9.8 |= (compound bitwise or)变量部分十、常量10.1 HIGH|LOW(引脚电压定义)10.2 INPUT|OUTPUT(数字引脚(Digital pins)定义)10.3 true | false(逻辑层定义)10.4 integer constants(整数常量)10.5 floating point constants(浮点常量)十一、数据类型11.1 void11.2 boolean(布尔)11.3 char(有号数据类型)11.4 unsigned char(无符号数据类型)11.5 byte(无符号数)11.6 int(整型)11.7 unsigned int(无符号整型)11.8 word11.9 long(长整数型)11.10 unsigned long(无符号长整数型)11.11 float(浮点型数)11.12 double(双精度浮点数)11.13 string(char array/字符串)11.14 String object(String类)11.15 array (数组)十二、数据类型转换12.1 char()12.2 byte()12.3 int()12.4 word()12.5 long()12.6 float()十三、变量作用域& 修饰符13.1 variable scope(变量的作用域)13.2 static(静态变量)13.3 volatile13.4 const十四、辅助工具14.1 sizeof()函数部分十五、数字I/O15.1 pinMode()15.2 digitalWrite()15.3 digitalRead()十六、模拟I/O16.1 analogReference()16.2 analogRead()16.3 analogWrite() PWM十七、高级I/O17.1 tone()17.2 noTone()17.3 shiftOut()17.4 shiftIn()17.5 pulseIn()十八、时间18.1 millis()18.2 micros()18.3 delay()18.4 delayMicroseconds() 十九、数学运算19.1 min()19.2 max()19.3 abs()19.4 constrain()19.5 map()19.6 pow()19.7 sqrt()19.8 ceil()19.9 exp()19.10 fabs()19.11 floor()19.12 fma()19.13 fmax()19.14 fmin()19.15 fmod()19.16 ldexp()19.17 log()19.18 log10()19.19 round()19.20 signbit()19.21 sq()19.22 square()19.23 trunc()二十、三角函数20.1 sin()20.2 cos()20.3 tan()20.4 acos()20.5 asin()20.6 atan()20.7 atan2()20.8 cosh()20.9 degrees()20.10 hypot()20.11 radians()20.12 sinh()20.13 tanh()二十一、随机数21.1 randomSeed()21.2 random()二十二、位操作22.1 lowByte()22.2 highByte()22.3 bitRead()22.4 bitWrite()22.5 bitSet()22.6 bitClear()22.7 bit()二十三、设置中断函数23.1 attachInterrupt()23.2 detachInterrupt()二十四、开关中断24.1 interrupts()(中断)24.2 noInterrupts()(禁止中断)二十五、通讯25.1 Serial25.1.1 if (Serial)25.1.2 Serial.available()25.1.3 Serial.begin()25.1.4 Serial.end()25.1.5 Serial.find()25.1.6 Serial.findUntil()25.1.7 Serial.flush()25.1.8 Serial.parseFloat()25.1.9 Serial.parseInt()25.1.10 Serial.peek()25.1.11 Serial.print()25.1.12 Serial.println()25.1.13 Serial.read()25.1.14 Serial.readBytes()25.1.15 Serial.readBytesUntil()25.1.16 Serial.setTimeout()25.1.17 Serial.write()25.1.18 Serial.SerialEvent()25.2 Stream二十六、USB(仅适用于Leonardo 和Due)26.1 Mouse(键盘)26.2 Keyboard(鼠标)结构部分一、结构1.1 setup()在Arduino中程序运行时将首先调用setup() 函数。
Arduino语法手册
18.3 delay() 18.4 delayMicroseconds() 十九、数学运算 19.1 min() 19.2 max() 19.3 abs() 19.4 constrain() 19.5 map() 19.6 pow() 19.7 sqrt() 19.8 ceil() 19.9 exp() 19.10 fabs() 19.11 floor() 19.12 fma() 19.13 fmax() 19.14 fmin() 19.15 fmod() 19.16 ldexp() 19.17 log() 19.18 log10() 19.19 round() 19.20 signbit() 19.21 sq() 19.22 square() 19.23 trunc() 二十、三角函数 20.1 sin() 20.2 cos() 20.3 tan() 20.4 acos() 20.5 asin() 20.6 atan() 20.7 atan2() 20.8 cosh() 20.9 degrees() 20.10 hypot() 20.11 radians() 20.12 sinh() 20.13 tanh() 二十一、随机数 21.1 randomSeed() 21.2 random() 二十二、位操作
也不会传送给处理器因此它们在atmega芯片上不占用体积注释的唯一作用就是使你自己理解或帮你回忆你的程序是怎么工作的或提醒她人你的程序是如何工作的小提示当测试代码的时候这能使这段代码成为注释而保留在程序中这个方法用于寻找问题代码或当编译器提示出错或错误很隐蔽时很有效也不会传送给处理器因此它们在atmega芯片上不占用体积注释的唯一作用就是使你自己理解或帮你回忆你的程序是怎么工作的或提醒她人你的程序是如何工作的小提示当测试代码的时候这能使这段代码成为注释而保留在程序中这个方法用于寻找问题代码或当资料内容仅供您学习参考如有不当或者侵权请联系改正或者删除
Arduino 语法手册函数部分
Arduino 语法手册函数部分摘自:/doku.php?id=arduino:arduino_language_re ference函数部分数字I/OpinMode()描述将指定的引脚配置成输出或输入。
详情请见digital pins。
语法pinMode(pin, mode)参数pin:要设置模式的引脚mode:INPUT或OUTPUT返回无例子ledPin = 13 // LED连接到数字脚13void setup(){pinMode(ledPin,OUTPUT); //设置数字脚为输出}void loop(){digitalWrite(ledPin,HIGH); //点亮LEDdelay(1000); // 等待一秒digitalWrite(ledPin, LOW); // 灭掉LED延迟(1000); //等待第二个}注意模拟输入脚也能当做数字脚使用,参加A0,A1,等描述给一个数字引脚写入HIGH或者LOW。
如果一个引脚已经使用pinMode()配置为OUTPUT模式,其电压将被设置为相应的值,HIGH 为5V(3.3V控制板上为3.3V),LOW为0V。
如果引脚配置为INPUT模式,使用digitalWrite()写入HIGH值,将使内部20K上拉电阻(详见数字引脚教程)。
写入LOW将会禁用上拉。
上拉电阻可以点亮一个LED让其微微亮,如果LED工作,但是亮度很低,可能是因为这个原因引起的。
补救的办法是使用pinMode()函数设置为输出引脚。
注意:数字13号引脚难以作为数字输入使用,因为大部分的控制板上使用了一颗LED与一个电阻连接到他。
如果启动了内部的20K上拉电阻,他的电压将在1.7V左右,而不是正常的5V,因为板载LED串联的电阻把他使他降了下来,这意味着他返回的值总是LOW。
如果必须使用数字13号引脚的输入模式,需要使用外部上拉下拉电阻。
语法digitalWrite(pin, value)参数pin: 引脚编号(如1,5,10,A0,A3)value: HIGH or LOW返回无例子int ledPin = 13; // LED连接到数字13号端口void setup(){pinMode(ledPin, OUTPUT); // 设置数字端口为输入模式}void loop(){digitalWrite(ledPin, HIGH); // 使LED亮delay(1000); // 延迟一秒digitalWrite(ledPin, LOW); // 使LED灭delay(1000); // 延迟一秒}13号端口设置为高电平,延迟一秒,然后设置为低电平。
arduino 语法
arduino 语法Arduino是一种开放源代码的电子平台,它很容易上手,可以用来学习电子知识、设计电路和制作原型,也可以用来控制各种机器和设备。
在使用Arduino时,了解其语法和基础知识是非常重要的,下面将详细介绍Arduino 的语法规则。
一、Arduino语法结构基本语法结构如下:```c++ void setup() { //初始化代码 } void loop () { //主程序代码 } ```这里的`setup()`和`loop()`是两个重要的函数。
`setup()`函数在程序开始运行时只会执行一次,而`loop()`函数会一直执行,直到取消程序。
在`setup()`函数中,主要负责各种初始化操作,如设定串口通信、引脚输入输出等等。
在`loop()`函数中,主要负责程序正常执行中需要的各种操作,如读取传感器、控制输出等等。
二、注释注释是代码中的一种重要元素,它可以帮助我们理解代码并方便代码更改和维护。
arduino注释语法有两种:1. 单行注释:```c++ //这是一条注释 ```2. 多行注释:```c++ /* 这是多行注释第二行注释 */ ```三、变量和常量在Arduino中,变量和常量有三种类型:1. 整数类型变量和常量整数类型包括:byte、int、unsigned int、long和unsigned long,其中byte类型是最小的长度,共占用1个字节,而long和unsigned long类型是占用最大长度,其占用长度为4个字节。
在Arduino中,整数型变量和常量的声明语法如下:```c++ type variable = value; ```其中,`type`是声明的变量类型,`variable`是变量名,`value`是变量的初值。
若没有初值声明变量,该变量被默认为0。
```c++ int a; // 声明一个int型变量a a = 3; // 定义变量a的值为3int b = 5; // 声明时直接定义即可 ```2. 浮点型变量和常量浮点型变量和常量在Arduino中被称为”double”类型,其占用长度为4个字节,在Arduino中,浮点型变量的声明方式与整数型变量类似。
Arduino-语法手册

Arduino 语法手册Arduino 的程序可以划分为三个主要部分:结构、变量(变量与常量)、函数。
结构部分一、结构1.1 setup()1.2 loop()二、结构控制2.1 if2.2 if...else2.3 for2.4 switch case2.5 while2.6 do... while2.7 break2.8 continue2.9 return2.10 goto三、扩展语法3.1 ;(分号)3.2 {}(花括号)3.3 //(单行注释)3.4 /* */(多行注释)3.5 #define3.6 #include四、算数运算符4.1 =(赋值运算符)4.2 +(加)4.3 -(减)4.4 *(乘)4.5 /(除)4.6 %(模)五、比较运算符5.1 ==(等于)5.2 !=(不等于)5.3 <(小于)5.4 >(大于)5.5 <=(小于等于)5.6 >=(大于等于)六、布尔运算符6.1 &&(与)6.2 ||(或)6.3 !(非)七、指针运算符7.1 * 取消引用运算符7.2 & 引用运算符八、位运算符8.1 & (bitwise and)8.2 | (bitwise or)8.3 ^ (bitwise xor)8.4 ~ (bitwise not)8.5 << (bitshift left)8.6 >> (bitshift right)九、复合运算符9.1 ++ (increment)9.2 -- (decrement)9.3 += (compound addition)9.4 -= (compound subtraction)9.5 *= (compound multiplication)9.6 /= (compound division)9.6 &= (compound bitwise and)9.8 |= (compound bitwise or)变量部分十、常量10.1 HIGH|LOW(引脚电压定义)10.2 INPUT|OUTPUT(数字引脚(Digital pins)定义)10.3 true | false(逻辑层定义)10.4 integer constants(整数常量)10.5 floating point constants(浮点常量)十一、数据类型11.1 void11.2 boolean(布尔)11.3 char(有号数据类型)11.4 unsigned char(无符号数据类型)11.5 byte(无符号数)11.6 int(整型)11.7 unsigned int(无符号整型)11.8 word11.9 long(长整数型)11.10 unsigned long(无符号长整数型)11.11 float(浮点型数)11.12 double(双精度浮点数)11.13 string(char array/字符串)11.14 String object(String类)11.15 array (数组)十二、数据类型转换12.1 char()12.2 byte()12.3 int()12.4 word()12.5 long()12.6 float()十三、变量作用域& 修饰符13.1 variable scope(变量的作用域)13.2 static(静态变量)13.3 volatile13.4 const十四、辅助工具14.1 sizeof()函数部分十五、数字I/O15.1 pinMode()15.2 digitalWrite()15.3 digitalRead()十六、模拟I/O16.1 analogReference()16.2 analogRead()16.3 analogWrite() PWM十七、高级I/O17.1 tone()17.2 noTone()17.3 shiftOut()17.4 shiftIn()17.5 pulseIn()十八、时间18.1 millis()18.2 micros()18.3 delay()18.4 delayMicroseconds() 十九、数学运算19.1 min()19.2 max()19.3 abs()19.4 constrain()19.5 map()19.6 pow()19.7 sqrt()19.8 ceil()19.9 exp()19.10 fabs()19.11 floor()19.12 fma()19.13 fmax()19.14 fmin()19.15 fmod()19.16 ldexp()19.17 log()19.18 log10()19.19 round()19.20 signbit()19.21 sq()19.22 square()19.23 trunc()二十、三角函数20.1 sin()20.2 cos()20.3 tan()20.4 acos()20.5 asin()20.6 atan()20.7 atan2()20.8 cosh()20.9 degrees()20.10 hypot()20.11 radians()20.12 sinh()20.13 tanh()二十一、随机数21.1 randomSeed()21.2 random()二十二、位操作22.1 lowByte()22.2 highByte()22.3 bitRead()22.4 bitWrite()22.5 bitSet()22.6 bitClear()22.7 bit()二十三、设置中断函数23.1 attachInterrupt()23.2 detachInterrupt()二十四、开关中断24.1 interrupts()(中断)24.2 noInterrupts()(禁止中断)二十五、通讯25.1 Serial25.1.1 if (Serial)25.1.2 Serial.available()25.1.3 Serial.begin()25.1.4 Serial.end()25.1.5 Serial.find()25.1.6 Serial.findUntil()25.1.7 Serial.flush()25.1.8 Serial.parseFloat()25.1.9 Serial.parseInt()25.1.10 Serial.peek()25.1.11 Serial.print()25.1.12 Serial.println()25.1.13 Serial.read()25.1.14 Serial.readBytes()25.1.15 Serial.readBytesUntil()25.1.16 Serial.setTimeout()25.1.17 Serial.write()25.1.18 Serial.SerialEvent()25.2 Stream二十六、USB(仅适用于Leonardo 和Due)26.1 Mouse(键盘)26.2 Keyboard(鼠标)结构部分一、结构1.1 setup()在Arduino中程序运行时将首先调用setup() 函数。
arduino语法
2.4 Arduino语法——变量和常量加载第一个程序后,要想写出一个完整的程序,需要了解和掌握Arduino语言,本节将对Arduino语言做一个初步讲解,首先介绍变量和常量。
2.4.1 变量变量来源于数学,是计算机语言中能储存计算结果或者能表示某些值的一种抽象概念。
通俗来说可以认为是给一个值命名。
当定义一个变量时,必须指定变量的类型。
如果要变量全是整数,这种变量称为整型(int),那么如果要定义一个名为LED的变量值为11,变量应该这样声明:int led 11;一般变量的声明方法为类型名+变量名+变量初始化值。
变量名的写法约定为首字母小写,如果是单词组合则中间每个单词的首字母都应该大写,例如ledPin、ledCount等,一般把这种拼写方式称为小鹿拼写法(pumpy case)或者骆驼拼写法(camel case)。
变量的作用范围又称为作用域,变量的作用范围与该变量在哪儿声明有关,大致分为如下两种。
(1)全局变量:若在程序开头的声明区或是在没有大括号限制的声明区,所声明的变量作用域为整个程序。
即整个程序都可以使用这个变量代表的值或范围,不局限于某个括号范围内。
(2)局部变量:若在大括号内的声明区所声明的变量,其作用域将局限于大括号内。
若在主程序与各函数中都声明了相同名称的变量,当离开主程序或函数时,该局部变量将自动消失。
使用变量还有一个好处,就是可以避免使用魔数。
在一些程序代码中,代码中出现但没有解释的数字常量或字符串称为魔数(magic number)或魔字符串(magic string)。
魔数的出现使得程序的可阅读性降低了很多,而且难以进行维护。
如果在某个程序中使用了魔数,那么在几个月(或几年)后将很可能不知道它的含义是什么。
为了避免魔数的出现,通常会使用多个单词组成的变量来解释该变量代表的值,而不是随意给变量取名。
同时,理论上一个常数的出现应该对其做必要地注释,以方便阅读和维护。
在修改程序时,只需修改变量的值,而不是在程序中反复查找令人头痛的“魔数”。
(完整)Arduino参考手册中文版
Arduino编程参考手册控制语句 (5)if (5)if。
.。
else (6)for (7)switch case (9)while (10)do。
.while (11)break (11)continue (12)return (12)goto (13)相关语法 (14)分号 (14)大括号 (14)注释 (16)define (17)include (18)算术运算符 (19)赋值 (19)加,减,乘,除 (19)取模 (20)比较运算符 (22)if(条件) and ==, !=, 〈,〉 (比较运算符) (22)布尔运算符 (23)指针运算符 (24)位运算 (25)位与 (25)位或 (26)位异或 (28)位非 (29)左移、右移 (30)复合运算符 (32)自加++ (32)自减—— (32)复合加+= (32)复合减—= (32)复合乘*= (32)复合除/= (33)复合与&= (33)复合或|= (33)变量 (33)常量 (33)宏定义 (34)整型常量 (35)浮点数常量 (37)数据类型 (37)void (37)boolean (38)char (39)unsigned char (39)byte (40)int (40)unsigned int (41)word (42)long (42)unsigned long (42)float (43)double (45)string (45)String(c++) (46)array (47)数据类型转换 (49)char() (49)byte() (49)int() (50)word() (50)long() (50)float() (51)变量作用域&修饰符 (51)变量作用域 (51)static (静态变量) (52)volatile (易变变量) (54)const (不可改变变量) (55)辅助工具 (56)sizeof()(sizeof运算符) (56)ASCII码表 (57)基本函数 (59)数字I/O (59)pinMode() (59)digitalWrite() (60)digitalRead() (61)模拟I/O (62)analogReference() (62)analogRead() (62)analogWrite() (63)高级I/O (64)shiftOut() (64)pulseIn() (65)时间 (66)millis() (66)delay(ms) (67)delayMicroseconds(us) (68)数学库 (68)min() (68)max() (69)abs() (69)constrain() (69)map() (69)pow() (71)sqrt() (71)三角函数 (71)sin(),cos(),tan() (71)随机数 (71)randomSeed() (71)random() (72)位操作 (72)设置中断函数 (73)a (73)achInterrupt() (73)detachInterrupt() (75)interrupts() (75)noInterrupts() (75)串口通讯 (76)begin() (76)available() (77)read() (78)flush() (80)print() (80)println() (83)write() (83)peak() (84)serialEvent() (84)程序结构(本节直译自Arduino官网最新Reference)在Arduino中,标准的程序入口main函数在内部被定义,用户只需要关心以下两个函数:setup()当Arduino板起动时setup()函数会被调用。
- 1、下载文档前请自行甄别文档内容的完整性,平台不提供额外的编辑、内容补充、找答案等附加服务。
- 2、"仅部分预览"的文档,不可在线预览部分如存在完整性等问题,可反馈申请退款(可完整预览的文档不适用该条件!)。
- 3、如文档侵犯您的权益,请联系客服反馈,我们会尽快为您处理(人工客服工作时间:9:00-18:30)。
;Arduino 语法手册函数部分摘自:函数部分数字 I/OpinMode()描述将指定的引脚配置成输出或输入。
详情请见digital pins。
语法pinMode(pin, mode)#参数pin:要设置模式的引脚mode:INPUT或OUTPUT返回无例子ledPin = 13语法…noTone(pin)参数pin: 所要停止产生声音的引脚返回无shiftOut()shiftOut())描述将一个数据的一个字节一位一位的移出。
从最高有效位(最左边)或最低有效位(最右边)开始。
依次向数据脚写入每一位,之后时钟脚被拉高或拉低,指示刚才的数据有效。
注意:如果你所连接的设备时钟类型为上升沿,你要确定在调用shiftOut()前时钟脚为低电平,如调用digitalWrite(clockPin, LOW)。
注意:这是一个软件实现;Arduino提供了一个硬件实现的SPI库,它速度更快但只在特定脚有效。
语法shiftOut(dataPin, clockPin, bitOrder, value)参数dataPin:输出每一位数据的引脚(int)clockPin:时钟脚,当dataPin有值时此引脚电平变化(int)bitOrder:输出位的顺序,最高位优先或最低位优先value: 要移位输出的数据(byte)^返回无shiftIn()描述将一个数据的一个字节一位一位的移入。
从最高有效位(最左边)或最低有效位(最右边)开始。
对于每个位,先拉高时钟电平,再从数据传输线中读取一位,再将时钟线拉低。
注意:这是一个软件实现;Arduino提供了一个硬件实现的SPI库,它速度更快但只在特定脚有效。
语法《shiftIn(dataPin,clockPin,bitOrder)参数dataPin:输出每一位数据的引脚(int)clockPin:时钟脚,当dataPin有值时此引脚电平变化(int)bitOrder:输出位的顺序,最高位优先或最低位优先返回读取的值(byte)pulseIn()描述《读取一个引脚的脉冲(HIGH或LOW)。
例如,如果value是HIGH,pulseIn()会等待引脚变为HIGH,开始计时,再等待引脚变为LOW并停止计时。
返回脉冲的长度,单位微秒。
如果在指定的时间内无脉冲函数返回。
此函数的计时功能由经验决定,长时间的脉冲计时可能会出错。
计时范围从10微秒至3分钟。
(1秒=1000毫秒=1000000微秒)语法pulseIn(pin, value)pulseIn(pin, value, timeout)参数pin:你要进行脉冲计时的引脚号(int)。
value:要读取的脉冲类型,HIGH或LOW(int)。
timeout (可选):指定脉冲计数的等待时间,单位为微秒,默认值是1秒(unsigned long)返回脉冲长度(微秒),如果等待超时返回0(unsigned long)|例子int pin = 7;unsigned long duration;void setup(){pinMode(pin, INPUT);}…void loop(){duration = pulseIn(pin, HIGH);;}时间millis();描述返回Arduino开发板从运行当前程序开始的毫秒数。
这个数字将在约50天后溢出(归零)。
参数无返回返回从运行当前程序开始的毫秒数(无符号长整数)。
例子unsigned long time;|void setup(){(9600);}void loop(){("Time:");time = millis();返回;无注意事项当中断函数发生时,delay()和millis()的数值将不会继续变化。
当中断发生时,串口收到的数据可能会丢失。
你应该声明一个变量来在未发生中断时储存变量。
使用中断在单片机自动化程序中当突发事件发生时,中断是非常有用的,它可以帮助解决时序问题。
一个使用中断的任务可能会读一个旋转编码器,监视用户的输入。
如果你想以确保程序始终抓住一个旋转编码器的脉冲,从来不缺少一个脉冲,它将使写一个程序做任何事情都要非常棘手,因为该计划将需要不断轮询的传感器线编码器,为了赶上脉冲发生时。
其他传感器也是如此,如试图读取一个声音传感器正试图赶上一按,或红外线槽传感器(照片灭弧室),试图抓住一个硬币下降。
在所有这些情况下,使用一个中断可以释放的微控制器来完成其他一些工作。
程序示例int pin = 13;《volatile int state = LOW;void setup(){pinMode(pin, OUTPUT);attachInterrupt(0, blink, CHANGE);}^void loop(){digitalWrite(pin, state);}void blink(){state = !state;|}detachInterrupt()detachInterrupt(interrupt)描述关闭给定的中断。
参数interrupt: 中断禁用的数(0或者1)./开关中断interrupts()interrupts()(中断)描述重新启用中断(使用noInterrupts()命令后将被禁用)。
中断允许一些重要任务在后台运行,默认状态是启用的。
禁用中断后一些函数可能无法工作,并传入信息可能会被忽略。
中断会稍微打乱代码的时间,但是在关键部分可以禁用中断。
参数无$返回无例子void setup() {}void loop(){、noInterrupts();语法对于所有的arduino板:if (Serial)Arduino Leonardo 特有:if (Serial1)Arduino Mega 特有:if (Serial1)if (Serial2)if (Serial3)参数无…返回布尔值:如果指定的串行端口是可用的,则返回true。
如果查询Leonardo的USB CDC串行连接之前,它是准备好的,将只返回false。
例子void setup() {语法(target)参数%target : 要搜索的字符串(字符)返回布尔型findUntil()()说明()从串行缓冲区读取数据,直到找到一个给定的长度或字符串终止位。
(如果目标字符串被发现,该函数返回true,如果超时则返回false。
()继承了Stream类。
语法(target, terminal)参数target : 要搜索的字符串(char) terminal : 在搜索中的字符串终止位 (char)返回布尔型…flush()flush()说明等待超出的串行数据完成传输。
(在及以上的版本中,flush()语句的功能不再是丢弃所有进入缓存器的串行数据。
)flush()继承了Stream类.语法()仅 Arduino Mega 可以使用的语法:()()()—参数无返回无parseFloat()描述,()命令从串口缓冲区返回第一个有效的浮点数. Characters that are not digits (or the minus sign) are skipped. parseFloat() is terminated by the first character that is not a floating point number.()继承了Stream类。
语法()参数无返回float、parseInt()parseInt()说明查找传入的串行数据流中的下一个有效的整数。
parseInt()继承了Stream类。
语法()下面三个命令仅适用于Arduino Mega:()()()@Parameters无返回int : 下一个有效的整数peek()说明]返回传入的串行数据的下一个字节(字符),而不是进入内部串行缓冲器调取。
也就是说,连续调用 peek()将返回相同的字符,与调用read()方法相同。
peek()继承自 Stream类。
语法()仅适用于Arduino Mega :()()()参数返回传入的串行数据的第一个字节(或-1,如果没有可用的数据的话)- int~print()说明以人们可读的ASCII文本形式打印数据到串口输出。
此命令可以采取多种形式。
每个数字的打印输出使用的是ASCII字符。
浮点型同样打印输出的是ASCII字符,保留到小数点后两位。
Bytes型则打印输出单个字符。
字符和字符串原样打印输出。
()打印输出数据不换行,()打印输出数据自动换行处理。
例如(78)输出为“78”输出为“”(“N”)输出为“N”(“Hello world.”)输出为“Hello world.”]也可以自己定义输出为几进制(格式);可以是BIN(二进制,或以2为基数),OCT(八进制,或以8为基数),DEC(十进制,或以10为基数),HEX(十六进制,或以16为基数)。
对于浮点型数字,可以指定输出的小数数位。
例如(78,BIN)输出为“1001110”(78,OCT)输出为“116”(78,DEC)输出为“78”(78,HEX)输出为“4E”,0)输出为“1”,2)输出为“”,4)输出为“”:你可以通过基于闪存的字符串来进行打印输出,将数据放入F()中,再放入()。
例如(F(“Hello world”)) 若要发送一个字节,则使用 ()。
语法(val)(val,格式)参数val:打印输出的值 - 任何数据类型格式:指定进制(整数数据类型)或小数位数(浮点类型)返回字节 print()将返回写入的字节数,但是否使用(或读出)这个数字是可设定的例子:)/ *使用for循环打印一个数字的各种格式。
* /int x = 0;()返回放置在缓冲区的字符数。
返回0意味着没有发现有效的数据。
()继承自 Stream 类.语法(buffer, length),元素buffer:用来存储字节(char[]或byte[])的缓冲区length:读取的字节数(int)返回bytereadBytesUntil()()说明¥()将字符从串行缓冲区读取到一个数组。
如果检测到终止字符,或预设的读取长度读取完毕,或者时间到了 (参见 ())函数将终止。
()返回读入数组的字符数。
返回0意味着没有发现有效的数据。
()继承自 Stream类。
语法(character, buffer, length)元素character :要搜索的字符(char)buffer :缓冲区来存储字节(char[]或byte[])length:读的字节数(int)返回《bytesetTimeout()()说明()设置使用() 或()时等待串口数据的最大毫秒值. 默认为1000毫秒。
()继承自Stream 类。
