Veeam_Availability_Orchestrator_Diagrams_FINAL
veeam_one_8_multitenant_monitoring_reporting

2 | Veeam ONE | Multi-Tenant Monitoring and Reporting | REV 2
CONTENTS
CONTENTS............................................................................................................................................ 3 CONTACTING VEEAM SOFTWARE....................................................................................................... 4 MULTI-TENANT MONITORING AND REPORTING ............................................................................... 5 How Access to Virtual Infrastructure Objects is Restricted .............................................................. 6 Permissions and Security Groups............................................................................................................... 7 Functional Restrictions ................................................................................................................................... 8 CONFIGURING ACCESS FOR USERS WITH RESTRICTED PERMISSIONS .................................................................................. 9 Step 1. Check Veeam ONE Security Group Membership .................................................................. 9 Step 2. Check Requirements for User Accounts ................................................................................... 9 Step 3. Assign Permissions on Infrastructure Inventory Objects .................................................10 Step 4. Provide Access to Veeam ONE ...................................................................................................11 CONFIGURATION EXAMPLE ...................................................................................................................................................12 APPENDIX A ...........................................................................................................................................................................19
veeam11使用手册

veeam11使用手册Veeam 11 使用手册Veeam 11 是一款功能强大的数据备份和恢复软件,旨在保护企业的关键数据和应用程序。
本手册将介绍 Veeam 11 的基本功能和使用方法,以帮助用户充分利用这一工具。
1. 安装和配置a. 下载 Veeam 11 安装程序并运行。
b. 阅读许可协议并同意后,选择安装类型(完整安装或自定义安装)。
c. 根据实际需求选择安装位置并完成安装过程。
d. 启动 Veeam 11,并按照向导指示配置连接至存储和虚拟化环境。
2. 创建备份作业a. 在 Veeam 11 控制台中,选择“备份与复制”选项卡。
b. 单击“创建备份作业”并为作业命名。
c. 选择要备份的虚拟机或物理服务器。
d. 配置备份计划和存储位置。
e. 定义备份作业的设置,如是否启用增量备份、应用程序一致性等。
3. 恢复数据a. 选择“备份与复制”选项卡并找到所需的备份文件。
b. 右键单击备份文件并选择“还原”。
c. 选择要还原的虚拟机或物理服务器。
d. 选择恢复点并确定还原选项,如覆盖或新建虚拟机。
e. 启动数据恢复过程并等待恢复完成。
4. 监控和报告a. 在 Veeam 11 控制台中,选择“监控”选项卡。
b. 查看备份和复制作业的状态、运行时间和结果。
c. 如果需要,可以设置警报和通知以及自动化任务。
d. 单击“报告”选项卡可生成备份和复制作业的详细报告。
5. 更新和维护a. 定期检查 Veeam 官方网站以获取最新的更新版本。
b. 下载并安装更新,以获得更好的性能和新的功能。
c. 定期备份 Veeam 服务器的配置和设置,以防止数据丢失。
d. 确保服务器上的存储空间足够支持备份和恢复操作。
通过本手册,您可以快速上手 Veeam 11,并了解如何使用该软件来保护和恢复关键数据。
请记住,定期进行备份和执行恢复测试是确保数据安全的关键步骤。
如果在使用 Veeam 11 过程中遇到问题,请参考官方文档或联系 Veeam 支持团队获取帮助。
Veeam_备份和灾难恢复解决方案

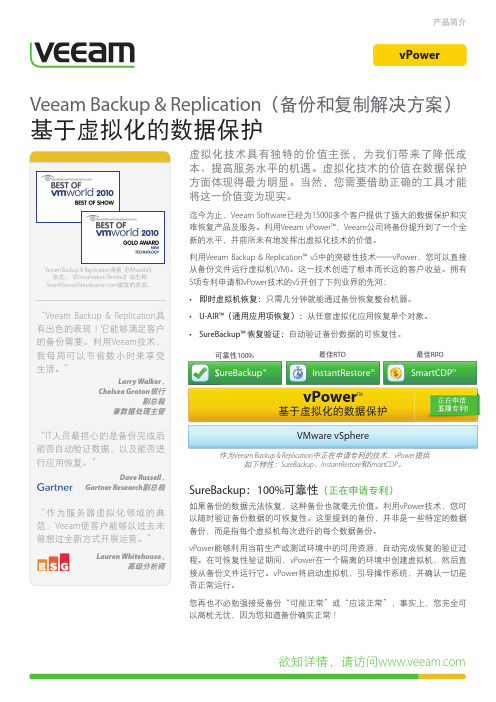
Veeam 备份和灾难恢复解决方案目录第1章摘要............................................................1.1前言........................................................1.2需求与挑战..................................................1.3我们如何满足您的要求........................................1.4V EEAM B ACKUP &R EPLICATION解决方案综述 ..................... 第2章VEEAM 备份和灾难恢复解决方案...................................2.1量身定制虚拟化平台备份容灾解决方案..........................2.1.1硬件部分方案介绍.........................................2.1.2软件部分方案介绍.........................................S URE B ACKUP:100%可靠性(正在申请专利)........................I NSTANT R ESTORE?:最快速的数据恢复...............................即时虚拟机恢复(Instant VM Recovery,正在申请专利)。
..........U-AIR(通用应用项恢复,正在申请专利)。
........................即时文件级恢复(Instant File-Level Recovery,正在申请专利)。
..S MART CDP?:接近连续的数据保护..................................二合一:备份和复制...............................................2.2V EEAM 备份和灾难恢复解决方案方案价值........................第3章方案优势........................................................ 第4章为什么选择VEEAM...............................................第1章摘要1.1前言随着虚拟化技术的广泛应用,对运用在虚拟化平台上的虚拟机的备份方式也在悄然发生改变,虚拟数据中心的备份方法可以沿袭物理机上的做法,在每个客机OS上安装一个备份软件,它能够把数据、分区甚至整个虚拟硬盘拷贝到其他地方去。
veeam备份实施方案

veeam备份实施方案Veeam备份实施方案。
一、背景介绍。
随着信息化建设的不断深入,企业对数据备份和恢复的需求日益增加。
在这样的背景下,Veeam备份解决方案成为了很多企业的首选。
Veeam备份解决方案以其高效、可靠、易用的特点,受到了广泛的认可和应用。
本文将介绍Veeam备份实施方案,帮助企业更好地了解和应用Veeam备份解决方案。
二、Veeam备份实施方案的优势。
1. 高效性,Veeam备份解决方案采用了先进的增量备份技术,能够在减少备份数据量的同时,保证备份的速度和效率。
2. 可靠性,Veeam备份解决方案采用了多重校验机制,确保备份数据的完整性和可靠性,提高了数据的安全性。
3. 易用性,Veeam备份解决方案提供了直观、简单的操作界面,用户可以轻松地进行备份任务的管理和监控,降低了备份管理的复杂性。
三、Veeam备份实施方案的具体步骤。
1. 确定备份需求,在实施Veeam备份方案之前,首先需要明确企业的备份需求,包括备份的数据量、备份的频率、备份的保留期等。
2. 确定备份架构,根据企业的实际情况,确定Veeam备份的架构,包括备份服务器、存储设备、网络架构等。
3. 安装配置Veeam备份软件,按照Veeam备份解决方案的部署指南,安装和配置Veeam备份软件,包括备份服务器的部署、存储设备的配置、网络的设置等。
4. 创建备份任务,根据备份需求,创建相应的备份任务,包括全量备份、增量备份、虚拟机备份等。
5. 监控和管理备份任务,通过Veeam备份软件提供的监控和管理功能,对备份任务进行实时监控和管理,确保备份任务的顺利进行和数据的安全性。
四、Veeam备份实施方案的注意事项。
1. 确保备份设备的稳定性和可靠性,避免备份过程中出现故障导致数据丢失。
2. 定期对备份数据进行验证和恢复测试,确保备份数据的完整性和可用性。
3. 注意备份数据的保密性,采取相应的安全措施,防止备份数据被非法获取和篡改。
veeam方案实施

veeam方案实施Veeam方案是一种用于数据备份和恢复的强大工具,它提供了全面可靠的解决方案,帮助企业保护其重要数据和业务运营。
本篇文章将全面介绍Veeam方案的实施过程和关键要点。
一、方案规划在实施Veeam方案之前,首先需要进行方案规划。
这一阶段的主要目标是根据企业的需求确定实施方案的范围和目标,并制定相应的计划。
在规划过程中需要考虑以下因素:1. 确定备份目标:明确需要备份的数据、服务器和虚拟机等对象,以及备份的时间频率和保留策略。
2. 容量规划:根据企业的数据量和增长预测,确定所需的存储容量,确保备份数据的安全和可恢复性。
3. 网络和带宽规划:评估网络基础设施,确保备份和恢复过程不会对网络性能造成负面影响。
4. 安全策略:制定安全策略,包括数据加密、身份验证和访问控制等措施,保护备份数据的机密性和完整性。
二、环境准备在正式开始Veeam方案的实施之前,需要对系统环境进行准备,确保Veeam软件能够正常运行。
以下是环境准备的关键步骤:1. 硬件和软件要求:查看Veeam方案的硬件和软件要求,确保按照要求进行环境配置。
2. 安装和配置Veeam软件:根据Veeam官方提供的文档,进行软件的安装和配置,确保各项功能正常运行。
3. 设置连接和认证:配置Veeam与其他环境组件(如存储设备、虚拟化平台等)的连接和认证,确保数据的可访问性。
三、实施过程在上述准备工作完成后,可以正式进入Veeam方案的实施阶段。
以下是实施过程的主要步骤:1. 数据收集:收集企业的数据和环境信息,包括需要备份的对象、现有的存储设备和网络拓扑等。
2. 制定实施计划:根据数据收集的结果,制定具体的实施计划,明确实施的时间、人员和资源等。
3. 部署和配置:根据实施计划,进行Veeam软件的部署和配置,确保备份和恢复功能的正常运行。
4. 测试和验证:对实施的方案进行测试和验证,确保备份数据的可恢复性和性能满足需求。
四、监控和管理Veeam方案的实施并不是一次性的过程,而是需要持续监控和管理的。
Veeam容灾平台安装配置与运维管理方案

超融合数据中心Veeam Backup & Replication 安装配置与运维管理方案目录Contents1产品介绍 (4)1.1软件架构 (4)1.2安装环境要求 (4)1.2.1虚拟化环境 (4)1.2.2虚拟机 (5)1.2.3Veeam Backup Server (5)1.2.4Backup Proxy (7)1.2.5Backup Repository Server (7)1.3部署方式 (8)1.3.1简单部署 (8)1.3.2高级部署 (9)1.3.3分布式部署 (9)2安装及部署 (11)2.1软件安装 (11)2.2Proxy设置 (14)2.3Repository设置 (16)3创建任务 (21)3.1备份过程 (21)3.1.1一般备份 (21)3.1.2应用备份 (27)3.1.3执行备份 (29)3.2虚机,文件和应用恢复 (31)3.2.1恢复类型 (31)3.2.2即时全虚拟机恢复(Instant VM Recovery) (31)3.2.3完整恢复 (38)3.2.4虚拟机文件恢复 (41)3.2.5虚拟磁盘恢复 (42)3.2.6文件恢复 (44)3.2.7SQL数据库应用恢复 (46)4复制(Replication) (50)4.1功能介绍 (50)4.2前提条件 (50)4.3复制过程 (51)4.4回滚 (57)4.4.1故障回滚 (57)4.4.2永久故障回滚 (58)4.4.3故障排除回切 (58)5总结 (60)1产品介绍Veeam Backup & Replication提供快速、灵活且可靠的虚拟化应用和数据恢复和容灾功能。
我们将备份和复制集于一体化解决方案中,并能提高数据保护价值,彻底改变数据保护方式,以用于VMware vSphere 和 Microsoft Hyper-V 虚拟环境的业务永远在线服务。
但是Veeam不仅仅只是用于进行备份。
Veeam Backup安装与基本配置(oxxy)

Veeam Backup & Replication的安装1、选择安装Veeam Backup & Replication,如果虚拟机没有安装.NET Framework 4.0,软件会自动安装。
T.&O.2、Veeam 欢迎界面。
3、接收Veeam 的协议条款。
T . & O .4、当在Veeam 官网下载安装文件时,会将1个月试用的license 发送到您的邮箱,本步骤就需要您导入license 进行注册,否则后续包括备份等最基本的功能都无法使用,而且,还没有找到可以安装完成后再次导入license 的界面。
5、选择安装Veeam 组件。
T . & O .6、安装相关的其它组件,点击install。
7、通过后,输入域管理员用户名和密码进行认证。
T .&O .8、选择新建数据库还是使用已有的数据库,选择默认会自动安装SQL Server2008R2 Express 版,如果已安装过数据库,请选择下面一项。
9、配置Veeam 的通信端口。
T . & O .10、选择安装目录。
11、准备安装。
T . & O .12、安装完成。
注:如果使用的是中文的操作系统,请修改如下注册表值1、前往HKEY_LOCAL_MACHINE\SOFTWARE\Microsoft\WindowsNT\CurrentVersion\GRE_Initialize2、然后修改以下三个 registry 设置: a. GUIFont.CharSet = 128 (十进制) b. GUIFont.Facename = Tahoma c. GUIFont.Height = 8 (十进制)3、重启Veeam 服务器。
T . & O .Veeam Backup & Replication 的基本配置1、打开Veeam Backup & Replication 软件2、首先是激活软件T . & O.3、选择License 文件进行激活。
NBU 概念
NBU1.NBU: NBU 是VERITAS 公司提供的企业级备份管理软件,它支持多种操作系统,包括Linux,Windows, OS/2, MAC2.NBU 包括Server 和 Client 软件:在需要连接存储设备的服务器上安装Server 软件;在需要提供数据进行备份的机器上安装Client 软件Server 和Client 之间通过TCP/IP Sockets 通讯3.Server: 连接磁带库的服务器4.Master Server: 主服务器,管理制定全网的备份策略,控制所有的备份作业,是集中的核心。
Master Server 可管理存储设备,控制备份/归档策略和恢复操作5.Media Server: 只连接存储设备,提供数据分流,并不提供控制备份/归档操作难度恢复操作,它的作用是分散网络负担,提高备份效率6.Policy:备份策略。
定义一台或者几台服务器的备份方法。
包括哪些服务器需要备份,备份哪些目录或文件,在什么时间备份,采用什么方式备份等。
配置NBU 主要指定义备份策略7.Schedule: 备份时间表。
8.Storage Unit: 存储单元。
指将备份作业按备份设备类型分组。
如4mm 磁带机,LTO磁带机,本地磁盘等。
在一种备份服务器上可能存在多种类型的备份设备。
9.Media Manager: 介质管理器。
是NBU软件的一个模块,针对磁带或者光盘设备。
它在备份或归档是调度磁带或光盘,并控制上带/卸带动作10.硬盘:NBU 可以将数据备份到本地硬盘上,它使用于需要快速备份的场合11.NDMP: NDMP 也是由介质管理器控制,但是连接到NDMP主机上12.Volume : 卷。
在Media Manager 中一盘磁带或一片光盘称为一个卷13.Volume Pool :卷池。
卷池是磁带或者光盘的集合。
通过制定卷池,可以将磁带按照组分配给用户,使不同类型的作业存放在不同的磁带组中14.Full backup: 全备份。
Veeam-虚拟机备份方案

Veeam-虚拟机备份方案简介Veeam Backup & Replication是一款针对虚拟化环境设计的备份和恢复软件。
通过Veeam Backup & Replication,用户可以对虚拟机进行高效、可靠的备份和还原操作。
本文将介绍Veeam Backup & Replication的特点和功能,以及其在虚拟机备份方案中的应用。
特点和功能1. 备份速度快Veeam Backup & Replication采用了全新的备份技术,能够提供快速、高效的备份和还原速度。
通过增量备份和备份复制等功能,Veeam Backup & Replication能够最大程度地减少备份时间,提高备份效率。
2. 数据冗余消除Veeam Backup & Replication通过去重和压缩等技术,能够最大限度地减少备份数据的存储空间占用。
这样不仅可以减少存储成本,还能够提高备份和恢复的效率。
3. 多种存储介质支持Veeam Backup & Replication支持多种存储介质,包括磁盘、磁带和云存储等。
用户可以根据自己的需求选择最合适的存储介质,以满足备份和还原的要求。
4. 自动化备份计划Veeam Backup & Replication提供了丰富的备份计划选项,用户可以根据自己的需求制定定期备份的计划。
同时,Veeam Backup & Replication还提供了自动化备份的功能,能够在用户设定的时间自动启动备份操作,减少人工干预,提高备份的可靠性。
5. 监控和报告功能Veeam Backup & Replication提供了实时的监控和报告功能,用户可以随时了解备份运行情况和存储空间使用情况等。
同时,Veeam Backup & Replication还支持自动生成备份报告,并将其发送到指定的收件人,以便用户及时了解备份的情况。
veeam原理
veeam原理Veeam原理什么是Veeam?Veeam是一款备份和恢复软件,被广泛用于虚拟化环境中,如VMware和Hyper-V。
它提供高效可靠的数据保护解决方案,帮助用户保护虚拟机和虚拟化工作负载的数据。
Veeam的工作原理Veeam的工作原理可以简单分为三个步骤:备份、复制和恢复。
1. 备份备份是Veeam的核心功能。
它通过创建虚拟机的备份副本来保护数据。
Veeam使用增量备份技术,首次备份会创建完整的备份文件,随后的备份只会记录已更改的数据块。
这种增量备份方案减少了备份时间和存储空间的需求。
2. 复制复制是Veeam的附加功能,用于通过创建虚拟机的副本来提供额外的数据保护层。
备份和复制之间的主要区别在于复制是一个实时进程,可以更频繁地复制虚拟机的新版本。
当数据丢失或发生故障时,恢复是至关重要的。
Veeam提供了多种恢复选项,包括整机恢复、文件级恢复和虚拟硬盘恢复。
整机恢复允许用户将备份的整个虚拟机恢复到原始位置,文件级恢复可以选择性地恢复单个文件或文件夹,而虚拟硬盘恢复可以恢复虚拟机的虚拟硬盘。
Veeam的关键特性和优势1. 可靠性和高效性Veeam使用先进的数据去重和压缩技术,减少备份的存储需求,并加快备份速度。
它还支持快照技术,可以在备份过程中创建虚拟机的一致快照,保证数据的完整性和一致性。
2. 灾难恢复能力Veeam提供了可靠的灾难恢复解决方案,允许用户在发生灾难时快速恢复数据。
它支持将备份数据复制到远程站点,以提供额外的保护层,并通过自动化的恢复流程简化了灾难恢复过程。
3. 监控和报告Veeam提供了监控和报告功能,可以实时监视备份过程和存储资源利用率。
用户可以通过可视化的仪表板了解备份健康状态,并生成报告以评估备份策略的效果。
Veeam是一款功能强大的备份和恢复软件,通过高效可靠的数据保护解决方案,保护虚拟机和虚拟化工作负载的数据。
它的工作原理包括备份、复制和恢复,可以通过增量备份、复制虚拟机副本和提供多种恢复选项来实现数据保护。
Veeam 虚拟机管理软件用户指南说明书
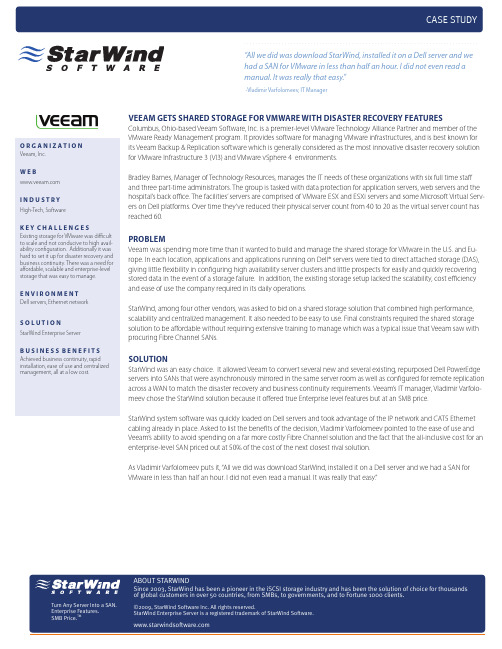
Veeam Gets shared storaGe for Vmware with disaster recoVery featuresColumbus, Ohio-based Veeam Software, Inc. is a premier-level VMware Technology Alliance Partner and member of the VMware Ready Management program. It provides software for managing VMware infrastructures, and is best known for its Veeam Backup & Replication software which is generally considered as the most innovative disaster recovery solution for VMware Infrastructure 3 (VI3) and VMware vSphere 4 environments.Bradley Barnes, Manager of Technology Resources, manages the IT needs of these organizations with six full time staff and three part-time administrators. The group is tasked with data protection for application servers, web servers and the hospital’s back office. The facilities’ servers are comprised of VMware ESX and ESXi servers and some Microsoft Virtual Serv-ers on Dell platforms. Over time they’ve reduced their physical server count from 40 to 20 as the virtual server count has reached 60. ProBLem Veeam was spending more time than it wanted to build and manage the shared storage for VMware in the U.S. and Eu-rope. In each location, applications and applications running on Dell® servers were tied to direct attached storage (DAS), giving little flexibility in configuring high availability server clusters and little prospects for easily and quickly recovering stored data in the event of a storage failure. In addition, the existing storage setup lacked the scalability, cost efficiencyand ease of use the company required in its daily operations.StarWind, among four other vendors, was asked to bid on a shared storage solution that combined high performance, scalability and centralized management. It also needed to be easy to use. Final constraints required the shared storage solution to be affordable without requiring extensive training to manage which was a typical issue that Veeam saw with procuring Fibre Channel SANs. soLutioN StarWind was an easy choice. It allowed Veeam to convert several new and several existing, repurposed Dell PowerEdgeservers into SANs that were asynchronously mirrored in the same server room as well as configured for remote replication across a WAN to match the disaster recovery and business continuity requirements. Veeam’s IT manager, Vladimir Varfolo-meev chose the StarWind solution because it offered true Enterprise level features but at an SMB price.StarWind system software was quickly loaded on Dell servers and took advantage of the IP network and CAT5 Ethernet cabling already in place. Asked to list the benefits of the decision, Vladimir Varfolomeev pointed to the ease of use and Veeam’s ability to avoid spending on a far more costly Fibre Channel solution and the fact that the all-inclusive cost for an enterprise-level SAN priced out at 50% of the cost of the next closest rival solution.As Vladimir Varfolomeev puts it, “All we did was download StarWind, installed it on a Dell server and we had a SAN for VMware in less than half an hour. I did not even read a manual. It was really that easy.”“All we did was download StarWind, installed it on a Dell server and wehad a SAN for VMware in less than half an hour. I did not even read amanual. It was really that easy.” -Vladimir Varfolomeev, IT ManagerCASE STUDY . . . . . . . . . . . . . . . . . . . . . . . . . . . . . . . . . . . . . . . . . . . . . . . . . . . . . . . . . . . . . . . . . . . . . . . . . . . . . . . . .o r G a N i z a t i o NVeeam, Inc.w e B i N d u s t r y High-Tech, SoftwareK e y c h a L L e N G e sExisting storage for VMware was difficultto scale and not conducive to high avail-ability configuration. Additionally it washard to set it up for disaster recovery andbusiness continuity. There was a need foraffordable, scalable and enterprise-levelstorage that was easy to manage.e N V i r o N m e N t Dell servers, Ethernet network s o L u t i o N StarWind Enterprise ServerB u s i N e s s B e N e f i t sAchieved business continuity, rapidinstallation, ease of use and centralizedmanagement, all at a low cost. ABOUT STARWINDEnterprise Features. SMB Price.TM。
Maestro Orchestrator (MHO) 基本设置指南说明书
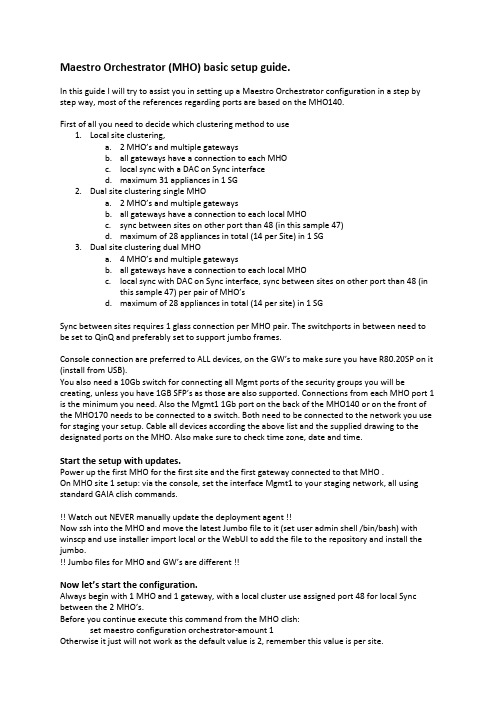
Maestro Orchestrator (MHO) basic setup guide.In this guide I will try to assist you in setting up a Maestro Orchestrator configuration in a step by step way, most of the references regarding ports are based on the MHO140.First of all you need to decide which clustering method to use1.Local site clustering,a. 2 MHO’s and multiple gatewaysb.all gateways have a connection to each MHOc.local sync with a DAC on Sync interfaced.maximum 31 appliances in 1 SG2.Dual site clustering single MHOa. 2 MHO’s and multiple gatewaysb.all gateways have a connection to each local MHOc.sync between sites on other port than 48 (in this sample 47)d.maximum of 28 appliances in total (14 per Site) in 1 SG3.Dual site clustering dual MHOa. 4 MHO’s and multiple gatewaysb.all gateways have a connection to each local MHOc.local sync with DAC on Sync interface, sync between sites on other port than 48 (inthis sample 47) per pair of MHO’sd.maximum of 28 appliances in total (14 per site) in 1 SGSync between sites requires 1 glass connection per MHO pair. The switchports in between need to be set to QinQ and preferably set to support jumbo frames.Console connection are preferred to ALL devices, on the GW’s to make sure you have R80.20SP on it (install from USB).You also need a 10Gb switch for connecting all Mgmt ports of the security groups you will be creating, unless you have 1GB SFP’s as those are also supported. Connections from each MHO port 1 is the minimum you need. Also the Mgmt1 1Gb port on the back of the MHO140 or on the front of the MHO170 needs to be connected to a switch. Both need to be connected to the network you use for staging your setup. Cable all devices according the above list and the supplied drawing to the designated ports on the MHO. Also make sure to check time zone, date and time.Start the setup with updates.Power up the first MHO for the first site and the first gateway connected to that MHO .On MHO site 1 setup: via the console, set the interface Mgmt1 to your staging network, all using standard GAIA clish commands.!! Watch out NEVER manually update the deployment agent !!Now ssh into the MHO and move the latest Jumbo file to it (set user admin shell /bin/bash) with winscp and use installer import local or the WebUI to add the file to the repository and install the jumbo.!! Jumbo files for MHO and GW’s are different !!Now let’s start the configuration.Always begin with 1 MHO and 1 gateway, with a local cluster use assigned port 48 for local Sync between the 2 MHO’s.Before you continue execute this command from the MHO clish:set maestro configuration orchestrator-amount 1Otherwise it just will not work as the default value is 2, remember this value is per site.Login to the WebUI of the MHO, for all clustering methods, remember the following: all security group configurations are done from the first member.Now in the WebUI go to the tab Orchestrator and see if it shows the powered-on gateway under Unassigned Gateways and all interfaces under Unassigned Interfaces.If all looks ok you can create a Security group, right mouse click on security groups and choose New Security GroupSet the IP and check set FTW on, give it a name and add a PSK.Drag the gateway to the gateways item under the Security Group you just created, from the right you drag eth1-Mgmt1 to the interfaces and add 1 or 2 extra interfaces.Make sure port 1 of the MHO is patched on the switch.From this point you need to wait for at least 6 minutes before you can connect to the Security Group (the gateway).Now let’s prepare the gatewaysSSH into the IP of the security Group and get ready to update the gateway to the latest JHF, set the admin password and change the admin shell to /bin/bash to be able to upload files with WinSCP, as you only want to do this once do not add more than 1 gateway to the security group!!!! Watch out NEVER manually update the deployment agent !!Next use WinSCP to copy the latest jumbo file to the gateway, import and install the jumbo before you continue.installer import local /home/admin/Check_Point_R80_20SP_JHF_MAIN_Bundle_T<##>_FULL.tgz installer install 1Run from gclish to update all assigned gateways in the group on the same site, until you set the site-amount in the security group (see below) you can only add gateways from the same site.Before adding more gateways you can issue the following command on the security group: set smo image auto-clone state onNow you can start the adding of gateways and additional security groups.The advice I got was to use cloning only during the setup phase.Ready to complete your setup.Now you are ready to add the 2nd MHO, depending on the clustering method, you need to change the settings for number of Orchestrators and sites.Best way forward is to setup sites with dual MHO independent from each other before connecting them together. When both sites are running and seeing all members and the first gateway you can hook them all together by a glass patch between the ports 47. (MHO1-S1 to MHO1-S2 and MHO2-S1 to MHO2-S2). Now SSH to each MHO and set the correct values as shown below:Single site dual MHO:on the MHO’s (after adding the 2nd):set maestro configuration orchestrator-amount 2--------------------------------------------------------------------------------------------------Dual site single MHO:On the MHO:set maestro configuration orchestrator-amount 1set maestro configuration orchestrator-site-amount 2set maestro port 1/47/1 type site_syncOn MHO1 Site1:set maestro configuration orchestrator-site-id 1On MHO1 Site2:set maestro configuration orchestrator-site-id 2In each security group in gclish, to be able to add gateways from multiple sites:set smo security-group site-amount 2 (number of sites, currently 2 is the max)--------------------------------------------------------------------------------------------------Dual site dual MHO:On all MHO’s:set maestro configuration orchestrator-amount 2set maestro configuration orchestrator-site-amount 2On the MHO1 both sites:set maestro port 1/47/1 type site_syncset maestro port 2/47/1 type site_syncOn MHO1 and MHO2 Site1:set maestro configuration orchestrator-site-id 1On MHO1 and MHO2 Site2:set maestro configuration orchestrator-site-id 2In each security group in gclish, to be able to add gateways from multiple sites:set smo security-group site-amount 2 (number of sites)set maestro configuration orchestrator-site-vlan xxxx--------------------------------------------------------------------------------------------------See CP-R80.20SP Getting Started Guide to change single to dual site, when you already have security groups defined and need to change the site amount.Important notice: UTP-SFP 1Gb only supported from Jumbo 191 and higher with auto config or change the speed manually:set maestro port 1/1/1 qsfp-mode 1GLicensesOn the MHO no license is required, the gw is licensed on it’s 192.0.2.x address.HA Licenses are NOT supported, you will need to upgrade those licenses to full blown licenses. What’s next?When you want to configure anything on the Global Clish of the Security Group, 1 member will always be down when it has the initial policy loaded, so push a policy to the Security Group.On single or dual site with dual MHO you will need to setup bond interfaces, for management and for the uplink interfaces in gclish, connect through the MHO and hop to the SG with: m 1 1 etc: add bonding group 1 mgmtset interface eth2-Mgmt1 state onadd bonding group 1 mgmt interface eth2-Mgmt1set bonding group 1 mode active-backupset interface magg1 ipv4-address 1.2.3.11 mask-length 26set management interface magg1delete interface eth1-Mgmt1 ipv4-addressadd bonding group 1 mgmt interface eth1-Mgmt1set bonding group 1 primary eth1-Mgmt1For a normal Uplink interface ethx-10:add bonding group 1add bonding group 1 interface eth1-10add bonding group 1 interface eth2-10set bonding group 1 mode 8023ADset bonding group 1 lacp-rate slowTo enable Jumbo frames just change the MTU size of the interfaces, including interface on a virtual Switch, to the value set in the network i.e. 9216, this value should be the same as the setting on the switchport.Downlink bonding, when you do not need NGTP, the throughput can be increased above the 10Gb, so downlink bonding would be useful, in a Dual MHO setup always use port 1 and 3 for MHO1 and port 2 and 4 for MHO 2!! Downlink bond groups are created automatically. Also minimize the number of ports where possible, MultiQueue is limited to 5 interfaces.The 40Gb/100Gb ports will not be numbered like the numbers on the box itself, but will be numbered with the uneven numbers only so 49, 51, when you use a splitter cable the bottom ports will be disabled! And numbering will just be 49, 50, 51, 52, this way the next port will always be 53.Handy commands and things to know:Check on the hardware neighbors, from any device in expert:lldpctlYou can ssh into a Security group IP to get to the SGMs.On the SGM:Move from expert to clish:clish is for the gateway specificgclish is to apply changes to the entire security group.set global-mode off/on from clishTo see the state of the groups on the MHO:asg monitorTo see what is not really going the way you think, on the MHO:asg diag verifyFor a full diag on a SG run:show smo verifiers reportJump ssh from the MHO to a gateway (expert mode only):m <sec grp> <gw> example: m 2 1Jump ssh from gateway to a gateway in same security group (expert mode only):m <site>_<gw> example: m 2_1To see the gclish config:asg_config showTo see the status and versions of the gateways/ports:asg stat -vasg monitor -allFind drops over all SGM’s, from expert:g_fw ctl zdebug dropsx_ …. Lot of scripts in expert press the <Tab> keytcpdump is not supported but cppcap isSNMP traps settings: start wizard with asg alertTo see the performance load:asg perf -vPerformance checkingasg perf hogsTo see the VSX status of current VSasg stat vsTo see the VSX status of all VS’sasg stat vs allvsx stat -v (expert only)asg perf -vs all -v -vvasg_vsx_verifyTo view the VSLS configuration:show configuration vslsVSLS:Per vsset chassis high-availability mode 3 vslsset chassis vsls system primary_chassis 0 / 1 / 2 prio op site 1 of 2 of auto set chassis high-availability vs chassis_priority weight per vs。
新一代数据备份解决方案Veeam Availability Suite v10

新一代数据备份解决方案Veeam Availability Suite v10作者:卫盟软件来源:《智能制造》2020年第02期云数据管理的备份解决方案厂商Veeam Software (卫盟软件)正式发布全新Veeam Availability Suite v10,它具有新的数据保护功能,提高了数据的可用性、可移植性和可扩展性。
Veeam的旗舰备份解决方案Veeam Availability Suite于2008年作为VeeamBackup&Replication首次推出,现为网络连接存储(NAS)提供现代文件数据保护,通过多虚拟机即时恢复(Multi-VM Instant Recovery)自动执行灾难恢复,大大强化了勒索软件保护。
随着平台扩展性、API的数据挖掘以及150多项主要功能的增强,Veeam推出了业内强大的新解决方案,为混合云环境提供完善的数据管理和保护。
Veeam Availability Suite产品解决方案基于Veeam Backup & Replication和Veeam Backup & Replication。
Veeam Backup & Replication提供了强大、可靠的数据保护功能,可针对所有主要平台和企业应用的云、虚拟及物理工作负载进行有效扩展。
Veeam ONE可提供对云端、虚拟和物理工作负载的全面可视性,有助于监控、报告并防范潜在问题,避免运营受到影响。
尽管目前市场上的许多产品均有备份、恢复或洞察方面的功能,但Veeam Availability Suite 具有一系列可靠功能,可通过以下多种方式确保业务安全:◎利用 24×7 全天候基础设施监控提高备份成功率,并做好灾难应对准备。
◎借助恶意活动警报,防止恶意软件和勒索软件对客户数据加密,并按需即时恢复。
◎通过跟踪整个基础设施,有效归划数据和备份空间增长。
一、全面灵活的备份Veeam Availability Suite v10通过更丰富的备份功能来大规模保护现代工作负载,通过S3对象锁的不可变备份实现更高的安全性,并支持更深入的生态系统API集成选项,使企业能够节省时间、降低成本并超额完成恢复目标。
Veeam One 中文介绍

“虽然当今数据中心正迅速采用服务 器虚拟化技术来提高运营效率、降 低资本支出和简化管理,但很多企 业的 IT部门仍旧在继续使用为物理 环境开发的监控和报告方法。组织 机构的监控和报告解决方案需要考 虑虚拟化环境的特殊需求。”
Cameron Haight, Gartner Reseam ONE荣获了《VMworld》杂志、 《Virtualization Review》杂志和 颁发的奖项。
随着服务器虚拟化技术走向成熟,出现了有效管理虚拟化环境的需求。 • 当今的虚拟机必须能够支持关键任务型生产负载。 • IT人员必须记录各个商业客户的使用情况。 • 必须遏制虚拟机的蔓延之势。 幸运的是,Veeam Software能够帮助您应对上述以及其它的VMware管理挑战。
支持的平台
• VMware vSphere 4.х • VMware Infrastructure 3 (VI3)
报告和回算
无论是为了遵从法规还是出于常识,您都需要记录虚拟化基础架构的信息。 但基础架构中的对象成百上千,而且每个对象又具有上百个设置,您怎样才 能捕获和记录所有这些信息呢?又如何确保记录文档能不断更新呢? 如果没有原生工具,您将只能编写脚本来执行这些任务,为此付出大量时间 和精力,甚至无法完成任务。但是,Veeam ONE能够为您自动发现和记录虚 拟化基础架构的相关信息。它为整个环境编制目录和图表,帮助您了解到各 个对象之间是否协调一致。Veeam ONE还备份所有的设置,当某个对象受损 或被误删时,您就能够恢复环境。 Veeam ONE还能发现未使用或未加以管理的虚拟机,并为回算提供使用情况 报告,这种功能对扼制虚拟机的蔓延至关重要。
解决方案简介
Veeam ONE
Veeam ONE: 一体化的VMware管理解决方案
veeam_backup介绍
您再也不必勉强接受备份“可能正常”或“应该正常”,事实上,您完全可 以高枕无忧,因为您知道备份确实正常!
主机: • ESX 4.x和3.x • ESXi 4.x和3.x(包括针对ESXi的复制)
软件: • vCenter Server 4.x(可选) • Virtual Center 2.x(可选)
虚拟机: • VMware支持的所有操作系统 • 任意应用程序 • 任意文件系统
产品简介
InstantRestore™:最快速的数据恢复
这就像给您的虚拟机增加了一个“临时备机”。要完成恢复,您可使用 Storage vMotion把虚拟机迁移到生产环境的存储设备上,而不会中断服务或 影响用户。如果您没有Storage vMotion,则只需使用Veeam备份和复制解决方 案中的这些内置功能来复制或热拷贝虚拟机。
U-AIR(通用应用项恢复,正在申请专利)。vPower 还支持在任何操作系统 上、从任何虚拟化应用快速恢复单个对象。对于用户不小心而误删除了重 要的电子邮件,或脚本更新记录有误这类老大难问题,这是一种全新的解决 方案。
产& Replication(备份和复制解决方案)
基于虚拟化的数据保护
Veeam Backup & Replication荣获《VMworld》 杂志、《Virtualization Review》杂志和
颁发的奖项。
© 2011年,Veeam软件公司版权所有。 所有商标是各自所有者的资产。
Avamar 系统管理员指南说明书
a system administrator’s guide to monitoring avamar EMC Proven Professional Knowledge Sharing 2011Kelly MillsSolutions ArchitectEMC Corporation*******************Table of ContentsExecutive Summary (3)Introduction (3)Audience (3)Avamar Architecture (4)Avamar Notification Features (4)Setting up the SYSLOG environment (4)Nagios Overview (9)Sample Nagios Configuration (10)Advanced Nagios Configuration (13)PLUGINS (13)PASSIVE CHECKS (14)Conclusion (15)Appendix (16)SAMPLE SWATCH AVAMAR CONFIGURATION (16)EMC Proven Professional Knowledge Sharing 2Executive SummaryBackup and recovery infrastructure is critical to the life of any business. Longer data retention requirements and legal regulations for data storage and retrieval contribute to the need for a robust but agile backup solution. Given strict recover time and recover point objectives that define many service level agreements, the backup team operates around the clock. This group must be conscious of costs and often work with constrained budgets. A monitoring solution needs to be dependable and cost effective.EMC Avamar® is a software/hardware backup and recovery solution that takes advantage of data commonality in the environment and deduplicates the data at the source client and globally at the Avamar server. Avamar detects changes at the subfile level and uses local cache files to speed file comparison and processing. The result is fast client-side processing, low network bandwidth utilization (as only the changed blocks are sent to the Avamar server), and lower storage consumption. Although Avamar includes mechanisms for self-alerting, external monitoring should be added.Nagios is a powerful enterprise-class monitoring system that enables organizations to quickly identify and resolve infrastructure problems. This Open Source tool—with a large community of developers and support—is easily customizable for your situation and add-ons can be created to meet your needs.Syslog-NG is a leading Open Source solution for log collection and management. It provides a central logging set up that can be used to filter messages with tools such as SWATCH.IntroductionThis article will describe a general solution for monitoring the Avamar environment from a Systems Administrator viewpoint using Nagios and Syslog. It will highlight some of Avamar’s built-in utilities and focus on how they can interact with external tools.AudienceThis article is intended for Avamar administrators with knowledge of UNIX/Linux administration. It is not intended as a step-by-step guide for installing and configuring each package but to make the user aware of the capabilities.EMC Proven Professional Knowledge Sharing 3Avamar ArchitectureAvamar is a disk-based backup solution. The Avamar software installs on top of EMC-provided hardware or qualified customer hardware. This article will focus on the EMC-provided data storage solution. Hardware configurations can consist of single node or multiple node implementations. A node is a physical server running the Red Hat Linux operating system. The two basic nodes are the Utility node and the Data node. The Utility node provides internal Avamar server processes and services, including the administrator server, jobs scheduling, authentication, and maintenance and web access. The Data node is dedicated to providing storage for the backups. In an Avamar single node implementation, the Utility and Data node functions reside on the same physical node. In a multiple node configuration, the Utility node is its own dedicated physical node. The amount of capacity and protection needed will determine the number of Data nodes.Avamar Notification FeaturesAvamar system activity and operational status is reported as various event codes to the Utility node MCS service. Examples of events include maintenance activity status, failed logins, or client activations. Each event contains useful information such as the event code, date and time stamp, category, type, summary, and what generated the event.Notification options can consist of email messages, pop-up alerts, Syslog, SNMP, and events sent directly to EMC support. For this article, we will use the Syslog feature to achieve our desired results. Notifications are configured as Profiles via the Avamar Console.Setting up the SYSLOG environmentThe building blocks for setting up the SYSLOG monitoring environment will be in this order:1. Identifying a server to act as the Monitoring server2. Setting up the SYSLOG-NG server3. Setting up SWATCH to filter the SYSLOG-NG messages4. Configuring SYSLOG on the Avamar nodes5. Setting up the Avamar SYSLOG ProfileYou will need a new or existing Linux/UNIX server in your environment that can be used as the central monitoring server. This sever can be a virtual machine or physical server. You need to install the base operating system such as Red Hat, Solaris, HPUX, or flavor of your choice. For details on installing the OS and packages, please consult the respective OS manuals.EMC Proven Professional Knowledge Sharing 4Download a copy of SYSLOG-NG for your OS to your central monitoring server. You will need to disable the syslog service that comes with your OS before installing. Install the SYSLOG-NG package. You can edit the syslog-ng.conf file to customize it with you preferences. For example, you can have SYSLOG-NG create a directory for each host that sends it a message and name the log file using your standard naming convention. Here is an example:Start the SYSLOG-NG process. Verify the process is running by using the ―ps‖ command.SWATCH, a free tool that uses pattern matching to filter log messages, will monitor log files as they are written in real-time. As patterns are matched, SWATCH will then carry out specific actions as defined in the configuration file. Those actions can be simple email notifications or execution of a script. Download a copy SWATCH for your OS platform and install as per the platform.Now we must edit the syslog-ng.conf file to have it call SWATCH when a new message arrives and process it. Here is an example:After the syslog-ng.conf file has been updated, we will need to configure the SWATCH configuration file to look for certain patterns and send notifications. You can use regular expressions for pattern matching. Please see a sample Avamar SWATCH configuration in the Appendix. In this example, we are watching for the Avamar code ―22605‖, which is a Node Offline event. We use the keyword watchfor.We then can use the keyword mail or pipe to act upon that match. In this example, we are using the pipe keyword to send the text of the message to a homegrown internal script called notify which then sends it along to a recipient.EMC Proven Professional Knowledge Sharing 5The complete stanza would look like this:Here is an example of the EMAIL alert message:The SYSLOG-NG service needs to be restarted each time that the swatchrc file is updated. SWATCH does have the ability to point the swatchrc configuration file against an existing log file for testing.Avamar now needs to be configured to take advantage of the central monitoring server.We must add a line to the /etc/syslog.conf file on ALL the Avamar nodes (including the spare node on multiple node implementation). This allows us to capture all system messages regardless of if the Avamar application is running. It also provides a central location for archiving syslog messages. The entry in the syslog.conf file on each Avamar node needs to point to the central monitoring server. For example, if the central monitoring server had IP 1.2.3.4, it would look like this:You will then need to restart the syslog service on the Avamar node using the command―service syslog restart‖.EMC Proven Professional Knowledge Sharing 6Back on the central monitoring server, in the location you configured for the host directories to be created, you should now see a directory for this Avamar node. That directory will contain a log file with a new entry.To capture Avamar application-generated syslog events, we need to create a profile in the Avamar console. Launch the Avamar console. From the Tools menu, click Manage Profiles.Click on Local Syslog to highlight and then click Copy. Save the new profile.EMC Proven Professional Knowledge Sharing 7Highlight the new profile and click Edit from the top menu. Click on the Syslog Notification tab. EMC Proven Professional Knowledge Sharing 8Enter the IP address of the central monitoring server. The port will stay at the default of 514. Check the ―Include extended event data‖ checkbox. This option causes the alert message to be delimited using tags for easier parsing by SWATCH. Click OK.Highlight the new profile you created and then click Enable from the top menu.A syslog central monitoring system is now in place. The benefits to this setup include:∙ALL default Avamar events are sent to central monitor for processing. This eliminates the need to pick and choose what alerts you want Avamar to send from the long list.∙In a multiple Avamar grid environment, you wouldn’t have to log in to each console and modify events that are no longer needed as this is done centrally.∙Syslog on the physical nodes will send server-based events outside of the Avamar application that might be specific to that hardware platform.∙In a multiple node configuration, the Spare node is now monitored using Syslog so that you can fix any issues before the need arises to use it.∙ A central SWATCH configuration provides a quick way to add alerts or notification options.Nagios OverviewNagios is a graphical monitoring application that can easily provide tactical overviews of your environment. You can monitor physical devices as well as process and services running on those devices. You can further customize Nagios by placing hosts and services into groups. Nagios provides methods for creating users and user groups. The notification section is highly configurable to meet your reporting needs. Nagios can monitor your environment in several ways.1. Active Checks: Nagios will use protocols such as PING and HTTP to externally connectto devices. Nagios can also use SSH or NRPE to connect to a device and run a plugin(script).2. Passive Checks: An outside process contacts Nagios.Nagios comes with many built-in plugins and commands that will enable you to start monitoring servers very quickly.EMC Proven Professional Knowledge Sharing 9Here is a screen shot of the tactical overview page:Sample Nagios ConfigurationOnce you download and install Nagios on your central monitoring server, you will need to set up some configuration files. First define contacts and contact groups in the Nagios contacts.cfg and contactsgroup.cfg file respectively. This will allow you to notify certain individuals or groups of people. You can set time ranges for notification as well as what types of severity alerts should be sent to which parties.In this example, we will set up Nagios to ―ping‖ our Avamar nodes to determine if they are up. For simplicity you can add all your nodes into a file called avamar_hosts.cfg. This file defines ALL Avamar nodes.EMC Proven Professional Knowledge Sharing 10A typical entry looks like this for each node:You can also create an avamar_group.cfg file that would group certain Avamar nodes together. For example, hostgroup ―avamar-servers‖ would contain ALL nodes, whereas hostgroup―avamar-utility-servers‖ would only contain the utility nodes. A typical entry would look like this:Now we can create a service configuration file that defines what we want Nagios to check for. This file contains default settings such as name of the service, what checks are allowed, if notifications are enabled, time period that checks are allowed, the contact group, polling interval, and so on.In this example, we created a file called avamar_service.cfg. This file contains our default settings for whenever this service is used. It also contains our ―ping‖ check. Here is an example of that check.As you can see, we are using the avamar-service default settings, we are applying this check against the hostgroup ―avamar-servers‖, the service description name will show up as PING in the browser, and last, we are calling the built-in command ―check-host-alive‖.Once all configuration changes are made, the Nagios service needs to be reloaded using the /etc/init.d/Nagios reload command. If errors are detected, you can troubleshoot by calling the Nagios binary and pointing to the configuration file, i.e. /usr/local/Nagios/bin/Nagios –v../etc/Nagios.cfgHere is a screen shot of the PING service for our node ―localhost‖:You can also drill down into the service for more detail:Advanced Nagios ConfigurationPLUGINSNagios can be set up to do very elaborate checks via plugins on the nodes. You might want to have Nagios check node capacity or GSAN status. The plugin on the node can return information to be displayed in the browser window and depending on the exit code, it can trigger the appropriate alert and notification. There are two ways that Nagios can connect to the server and run the plugin.1. NRPE – this is a daemon process that is installed and runs on each server to bemonitored2. SSH – With the use of SSH keys, Nagios can connect to the server and runcommandsIn this example, we will connect to a Utility node using SSH and run a plugin to see if any of the nodes are above 60% utilization. On the Avamar Utility node, we have created a script called―nodeutil‖. The purpose of this script is to check each node and put Nagios into a warning state if the node utilization is between 60% and 62%. It will put Nagios into a critical state if the node utilization is 63% or higher. Here is what Nagios looks like after the check is run:We can also connect to the utility node and run other plugins to check Avamar-specific services, for instance, the status of the GSAN. The logic of your plugin needs to be aware that the GSAN status changes based on the maintenance job that is running and should account for that. This prevents false Nagios alerts. Here is a screen shot of more checks that you can monitor:PASSIVE CHECKSPassive checks can also be used to update Nagios about events. In this example, we will tie together the SYSLOG/SWACTH setup used earlier to contact Nagios. Recall that SWACTH can run a script if a pattern is matched. Nagios has a built-in command that you can call and assign variables. In this case we have SWACTH call a homegrown script called ―alert_nagios‖ that looks at the error message to determine the node name and then calls the Nagios command―submit_check_result‖ .Here is our SWATCH configuration to check for Garbage Collect failure:Here are the ―alert_nagios‖ script contents:Here is what Nagios looks like after the check runs:You can also update Nagios the same way to show that a check was successful.Here is our SWATCH configuration to check for Garbage Collect success:Here is what Nagios looks like after the check:ConclusionMonitoring Avamar includes not only the application itself but the devices that make up the Avamar infrastructure. Syslog and Nagios are free tools that provide limitless options for building a solid central monitoring solution. These tools extend the packaged Avamar features to create a comprehensive monitoring system. The added capabilities and automated coverage help alleviate the time you spend worrying about backups.AppendixSAMPLE SWATCH AVAMAR CONFIGURATION。
VeeamAvailabilitySuite版本及功能介绍虚拟人

VeeamAvailabilitySuite版本及功能介绍虚拟人Veeam Availability Suite集合了Veeam Backup&Replication 与Veeam ONE for vSphere与Hyper-V实现Data Protection与Virtualization 的管理。
不同版本的价格不同,自然功能也就不同。
附件是版本差异。
具体而言,功能清单如下:•Full VM recovery - 将整个VM从一台VM恢复到另一台主机,支持快速回滚和变动块恢复;•Instant VM Recovery - 直接从备份存储快速回复VM的服务;•VM file and virtual disk recovery - 单独恢复vm的文件和磁盘文件;•Instant File-Level Recovery - 直接从常规的Windows、Linux、BSD、Mac OS、Novell、Solaris和Unix等17种常规系统执行文件级别恢复;•Veeam Explorer for Storage Snapshots(NetApp和HP) - 单独恢复VMs,HP 3PAR StoreServ、StoreVirtual和Store Virtual VSA等存储里的Guest文件与应用程序。
针对NetApp Data ONTAP 存储里FAS、FlexArray(V-Series)、Data ONTAP Edge和IBM N series snapshots执行恢复;•Veeam Explorer for Microsoft Active Directory - 搜索整个Active Directory对象类型,包括Users、Groups、Computer accounts、contacts,用户密码等讯息的恢复;•Veeam Explorer for Microsoft Exchange - 针对Microsoft Exchange 2010、2013的备份执行快速恢复,可移植性对里面的邮件、联系人等的单独恢复;•Veeam Explorer for Microsoft SQL - 单独恢复SQL数据库,执行PiT的数据恢复;•Veeam Explorer for Microsoft Sharepoint - 针对SharePoint 的备份执行高级搜索与单独恢复;•U-AIR(Universal Application-Item Recovery) - 针对任意的虚拟化应用执行备份文件回复;•1-Click File and VM recovery portal for help desk operators - WEB界面一键恢复Guest文件和虚拟机;•Microsoft Exchange item recovery portal for help desk operators - WEB界面一键恢复邮箱里的原始文件讯息;•Database recovery portal for Microsoft SQL DBAs - WEB界面一键恢复SQL备份数据库到原始服务器或新的SQL Server;•Self-service file restore portal f or application owners - 基于本地管理员权限执行自动化VM恢复接口检测;•Recovery delegation - 执行完整的WEB界面恢复与单独的VMs与相关用户权限托管;•Application-aware image-based backups - 创建Application 与Image-level VM备份;•VeeamZIP - Streamline ad-hoc备份压缩;•Quick Backup - 针对单独虚拟机备份任务执行快速、增量的备份;•Backup I/O control - 允许执行备份时的可接受I/O延迟级别设定,以便在备份时实现datastore级别的I/O负载控制;•Backup from Storage Snapshots(HP与NetApp)- 创建Image-based备份和replicas,支持HP 3PAR StoreServ、StoreVirtual、StoreVirtual VSA Snapshots与NetApp Data ONTAP、FlexArray、Data ONTAP Edge和IBM N Series;•Secondary backup to NetApp store - 创建包含存储快照备份的二级备份;•Synthentic full backup - 通过周期性完整备份实现长期增量备份以便节省时间和存储;•Built-in deduplication,compression and swap exclusion - 内置删重、压缩以及智能swap清除;•Backup Copy jobs - 针对到DR Storage的VM备份自动拷贝或选择性拷贝;•Veeam Cloud Connect - 快速、安全执行Cloud到备份数据的操作;•End-to-end encryption - 端到端AES 256加密的传输处理;•Native tape support - 支持本地带库执行文件备份,Windows、Linux等都支持;•Deduplicating storage integrations - 快速、高性能的实现针对存储内置的备份数据删重(EMC DataDomain Boost,ExaGrid);•Built-in WAN Acceleration - 50倍速的快速备份与带宽节省;•Image-based VM replication - Replicate Vms到Disaster Recovery执行高可用服务;•Assisted failover and failback - Replica rollback与failover 和faileback的辅助支持功能;•Near-CDP - 类似CDP的功能支持;•Replication from a backup - 从VM备份文件创建Replicas;•Planned Failover - 0数据丢失的便捷数据中心数据迁移;•1-Click Failover Orchestration - 内置一键式无中断自动化Failover;•Built-in WAN Acceleration - 接近50倍速的replica与带宽节省;•SureBackup - 备份有效性自动验证,支持自定义脚本;•SureReplica - 自动验证和测试Replica VM,支持自定义脚本;•On-Demand Sandbox - 从备份运行一个或多个VMs用作拍错、测试等用途;•Support for VMware vSphere and Microsoft Hyer-V - 支持vSphere 4.x+和Hyper-V 2008 R2 SP1+;•vSphere Web Client Plug-in - 执行VeeamZIP和Quick Backup,轻松监控相关的Capacity Planning;•Centralized Management Web UI(Veeam Enterprise Manager) - Web-based的管理窗口和工具;•Guest file system indexing - 单独针对Guest系统执行恢复索引服务支持;•vCloud Director support - 支持vCloud Director;•Multiple backup options - 直接从SAN、LAN或Hyervisor I/O stack执行备份;•Change block tracking - 利用变动数据块跟踪,最小化Backup 与Replication时间;•File Manager - Veeam FastSCP文件管理窗口;•Quick Migration - 在主机、存储等之间迁移虚拟机;•Clone jobs - 克隆备份任务设定等;•Task automation - 支持PowerShell;最高级版本Enterprise Plus版本支持RESTful API.。