readmine的用户手册
Redmine使用手册
安装Redmine系统要求Ruby on Rails 2.0.2数据库(参考下面的兼容数据库列表)可选的:SVN 客户端(版本不低于1.3),用于版本库浏览功能(必须配置到您的 PATH 设置中)RMagick (用于将甘特图输出至PNG图形文件)支持的数据库:MySQL 4 或更高版本(推荐)PostgreSQL 8 (8.3版本未经充分测试)SQLite 3 (请先阅读: /2007/1/29/using-sqlite3-with-rails )安装¶1. 下载并解压,或者检出 Redmine。
2. 创建一个空数据库,例如名称为 redmineMySQL数据库:create database redmine character set utf8;3. 复制 config/database.yml.example 到config/database.yml ,并在此文件中配置 "production" 环境下的数据库连接参数。
以MySQL数据库为例:production: adapter: mysql database: redmine host: localhost username: bduser password: bdpasswd4. 在程序的根目录下运行以下命令来创建数据库结构:rake db:migrate RAILS_ENV="production"此命令将创建数据表和管理员帐号。
5. 运行以下命令,向数据库中导入默认的配置数据:rake redmine:load_default_data RAILS_ENV="production"这一步操作是可选的,但强烈推荐您执行它,您也可以从头开始一步步填写自己的配置参数。
此命令将导入默认角色、跟踪标签、状态、工作流程和枚举值。
6. 运行WEBrick服务器来测试安装:ruby script/server -e production当WEBrick启动后,使用浏览器访问http://localhost:3000/ 您将看到系统的欢迎界面。
迅镭数据采集器C9用户手册

用户手册目录第一章简要说明 (1)1.1 设备清单 (1)1.2 安全事项 (1)1.3 电池充电 (1)1.4 电池安装 (2)1.5 配件 (3)第二章盘点机操作 (5)2.1 盘点机正面 (5)2.1.1 开机 (6)2.1.2 关机 (6)2.1.3 屏幕显示功能介绍 (6)2.2 盘点机功能说明 (7)2.2.1 无线枪 (7)2.2.2 收货/发货 (8)2.2.3 商品盘点 (8)2.2.4 商品查询 (10)2.2.5 数据下载 (11)2.2.6 系统设置 (11)2.2.7 程序更新 (11)第三章数据下载工具 (12)3.1安装 (12)3.2打开后台 (15)3.3下载程序 (16)3.4导入格式设置 (17)3.5演示导入Excel商品文件 (18)3.6演示导入带分隔符TXT商品文件 (22)3.7演示导入定长商品文件 (25)3.8下载商品资料 (26)3.9采集数据上传 (27)3.10采集数据查询 (27)3.11导出格式设置 (28)3.12清空数据 (30)第一章简要说明1.1 设备清单设备 数量 备注便携式盘点机 1台接收器 1台MINI-USB数据线 1根充电器 1台1.2 安全事项请阅读以下简明的规则,不遵守这些规则可能会导致危险或触犯法律。
本用户手册中提供了有关安全事项的更详细信息。
安全开机:当禁止使用无线设备或设备的使用会引起干扰或危险时,请不要开机。
干扰:所有的无线设备都可能受到干扰,从而影响性能。
合理的使用:仅可在产品文档中说明的用途上使用本设备。
维修服务:只有合格的维修人员才可以安装或修理本设备。
配件和电池:只可使用经认可的配件和电池,请勿连接不配套的产品。
防水性:本设备不具备防水性能,请保持其干燥。
制作备份:切记为设备中储存的全部重要信息制作备份或保留一份手写记录。
连接其他设备:连接其他设备时,请阅读该设备的用户手册以获得详细的安全说明或咨询厂商技术支持人员,请勿连接不配套的设备。
Focusrite RedNet AM2用户指南说明书

User Guide PRNT001073-05ContentsAbout this User Guide (3)Box Contents (3)IntRoDUCtIon . . . . . . . . . . . . . . . . . . . . . . . . . . . . . . . . . . . . . . . . . . . . . . . . . . . . . . . . . . . . . . . .4 InstALLAtIon GUIDe . . . . . . . . . . . . . . . . . . . . . . . . . . . . . . . . . . . . . . . . . . . . . . . . . . . . . . . . . . .5 RedNet AM2 Connections and Features (5)Top Panel (5)Rear Panel (7)Physical Characteristics (8)Power Requirements (8)ReDnet AM2 oPeRAtIon . . . . . . . . . . . . . . . . . . . . . . . . . . . . . . . . . . . . . . . . . . . . . . . . . . . . . . . .9 First Use and Firmware Updates (9)Digital Clocking (9)Pull Up and Pull Down Operation (9)otHeR ReDnet sYsteM CoMPonents . . . . . . . . . . . . . . . . . . . . . . . . . . . . . . . . . . . . . . . . . .10 UsInG ReDnet ContRoL . . . . . . . . . . . . . . . . . . . . . . . . . . . . . . . . . . . . . . . . . . . . . . . . . . . . . . .10 Reverse ID (10)Signal Metering (10)ID (Identification) (11)Tools Menu (11)APPenDIx . . . . . . . . . . . . . . . . . . . . . . . . . . . . . . . . . . . . . . . . . . . . . . . . . . . . . . . . . . . . . . . . . . . .12 Connector Pinouts (12)Ethernet Connectors (Dante) (12)XLR Connectors (12)1/4” Jack Connector (12)PeRfoRMAnCe AnD sPeCIfICAtIons . . . . . . . . . . . . . . . . . . . . . . . . . . . . . . . . . . . . . . . . . . . .13 Focusrite RedNet Warranty and Service (15)Registering Your Product (15)Customer Support and Unit Servicing (15)Troubleshooting (15)About this User GuideThis user guide applies to the RedNet AM2 Dante headphone and line output interface. It provides information about installing and using the unit, and how it can be connected into your system.A RedNet System User Guide is also available from the RedNet product pages of the Focusrite website. The guide provides a detailed explanation of the RedNet system concept, that will help you achieve a thorough understanding of its capabilities. We recommend that all users, including those already experienced in digital audio networking, take the time to read through the System User Guide so that they are fully aware of all the possibilities that RedNet and its software have to offer. Should either user guide not provide the information you need, be sure to consult:/rednet, which contains a comprehensive collection of common technical support queries.Box Contents• R edNet AM2 unit• D C power supply• S afety information cut sheet• R edNet Getting Started Guide• P roduct Registration Card – please follow the instructions on the card as it provides links to: RedNet ControlRedNet PCIe drivers (included with RedNet Control download)Audinate Dante Controller (installed with RedNet Control)Dante™ and Audinate™ are registered trademarks of Audinate Pty Ltd.IntRoDUCtIonThank you for purchasing the Focusrite RedNet AM2.RedNet AM2 provides two channels of premium D-A conversion in the form of a stereo monitoring unit, combining headphone and line outputs for monitoring of signals from the Dante Audio-over-IP network.RedNet AM2 includes two line-output XLRs plus a stereo TRS 1/4” jack socket. It provides high-quality digital to analogue conversion for accurate monitoring on loudspeakers or headphones and is designed to drive high or low impedance headphones at high levels with significant audio output power. Two large volume control knobs are provided for Headphone and Line output levels, the latter featuring a mute button with associated LED.The compact unit, mounted in an enclosure based around a sturdy road-worthy aluminium extrusion, is fitted with non-slip feet and can either sit securely on a flat surface or be mounted on top of a mic stand using the 3/8” BSW threaded bush incorporated in the base.Dual locking etherCON connectors are included on the rear-panel to connect to the network and to daisy-chain to additional network devices.The unit is powered via Power over Ethernet (PoE) or via the rear-panel barrel connector and included DC power supply. Each PSU’s status can be monitored remotely over the network and on the top panel.Tailored for all environments, each unit features two network ports, PoE and DC power options, rugged construction with latching connectors and remote monitoring – RedNet AM2 is the perfect portable break-out solution for analogue monitoring from a Dante network.1 . Headphone Level PotControls the volume level sent to the stereo headphone jack.2 . Line out Level PotControls the volume level sent to the Line Output XLRs.3 . Power IndicatorBi-colour LED indicates the power source being used:• Green: Power over Ethernet (PoE)• Red: External DC supply4 . Rednet network status IndicatorTri-colour LED indicates the network status:• Red (flashing) – Device is attempting to identify a network• Red/Green (flashing) – Device is trying to lock to an identified network• Green – D evice is locked to the network and is capable of passing audioInstALLAtIon GUIDeRednet AM2 Connections and featurestop Panel HEADPHONE LINE OUT MUTE SIGNAL NETWORK POWER 01001016574325 . signal Level IndicatorTri-colour LED indicates the highest signal level of the network receivers:• Green: Signal present (illuminates at -42 dBFS)• Orange: -6 dBFS• Red: 0 dBFSID Indication – When the RedNet Control or Dante Controller applications send an ID command to the RedNet AM2 unit, the Network (4) and Signal (5) LEDs will cycle through green–orange–red states for 10 seconds.6 . Line out Mute / Reverse ID switchPress to mute the line output XLRs – the LED illuminates red when mute is active.Press-and-hold the Mute button for 3 seconds to ‘push’ Reverse ID to the RedNet Control application.7 . Headphone InputStandard 1/4” stereo Jack for headphones.HEADPHONE LINE OUT MUTE SIGNAL NETWORK POWER 01001067top Panel . . . Continued5Rear Panel1 . network Port 1 / Primary Power Input*RJ45 [etherCON] connector for the Dante network. Use standard Cat 5e or Cat 6 network cables to connect RedNet AM2 to an Ethernet network switch.Power over Ethernet (PoE) can be used to power the RedNet AM2. Connect an appropriately powered Ethernet cable to network port 1.2 . network Port 2Second RJ45 [etherCON] network port which can be used to daisy-chain additional devices.This port does not accept PoE input and does not pass power out.This port cannot be used as the secondary connection on redundant networks – network ports 1 and 2 always function as a 2-port switch.3 . secondary Power Input*DC input for use where Power-over-Ethernet (PoE) is not available. Can be used in conjunction with PoE.When both power supplies are available, PoE will be the default supply.4 . Line out xLRsTwo balanced output channels which can, for example, be used for monitor loudspeakers.(Passive speakers will require external amplification.)do not power-up RedNet AM2 while monitoring through headphones. Refer to the Appendix on page 12 for connector pinouts.1342Physical CharacteristicsRedNet AM2 dimensions are illustrated in the diagram above.RedNet AM2 weighs 0.81 kg and is equipped with rubber feet for desktop mounting. The baseplate includes a female 3/8” BSW thread so the unit can be mounted on a microphone stand.RedNet AM2 generates little significant heat and is cooled by natural convection. The ambient operating temperature of the device is 50 degrees Celcius.Power RequirementsRedNet AM2 can be powered from two separate sources: Power-over-Ethernet (PoE) or DC input via external mains supply.Standard PoE requirements are: 37.0–57.0 V @ 1–2 A (approx.) – as supplied by many suitably equipped switches and external PoE injectors. Note that PoE can only be accepted at Network Port 1 and that power is not transmitted as an output on Network Port 2.PoE injectors used should be Gigabit capable.To use the 12 V DC input, connect the external plugtop PSU supplied to an adjacent mains outlet.Only use the DC PSU supplied with RedNet e of other external supplies may affect performance or could damage the unit.When both PoE and external DC supplies are connected, PoE becomes the default supply.The power consumption of the RedNet AM2 is: PoE 11.0W and DC Supply 9.8WPlease note that there are no fuses in RedNet AM2, or other user-replaceable components of any type. Please refer all servicing issues to the Customer Support Team (see “Customer Support and Unit Servicing” on page 15).ReDnet AM2 oPeRAtIonfirst Use and firmware UpdatesYour RedNet AM2 may require a firmware update* when it is first installed and switched on. Firmware updates are initiated and handled automatically by the RedNet Control application.*It is important that the firmware update procedure is not interrupted – either by switching off power to the RedNet AM2 or the computer on which RedNet Control is running,or by disconnecting either from the network.From time to time Focusrite will release RedNet firmware updates within new versions of RedNet Control. We recommend keeping all RedNet units up to date with the latest firmware version supplied with each new version of RedNet Control.The RedNet Control application will automatically inform the user if there is a firmware update available.Digital ClockingEach RedNet AM2 will automatically lock to a valid Network Master via its Dante connection. Alternatively, if a Network Master is not already present, the unit can be chosen as the Network Master by the user.Pull Up and Pull Down operationRedNet AM2 is able to operate at a specified pull up or pull down percentage as selected in the Dante Controller application.otHeR ReDnet sYsteM CoMPonentsThe RedNet hardware range includes various types of I/O interface and PCIe/ PCIeR digital audio interface cards which are installed in the system’s host computer or in a chassis. All the I/O units can be considered as “Break-Out” (and/or “Break-In”) boxes to/from the network, and all are built in mains-powered, 19” rackmount housings, unless otherwise stated. There are also three software items, RedNet Control (see below), Dante Controller and Dante Virtual Soundcard.UsInG ReDnet ContRoLRedNet Control will reflect the status of the RedNet units present in the system, presenting an image representing each hardware unit.The illustration above shows a RedNet AM2 with the Line Out Mute inactive and shows signal present on both channels. It has PoE power available and has a locked network connection.PoE power input – Illuminates if DC power is being received via the Ethernet cable.DC supply power input – Illuminates if power is being received from the external DCsupply.Locked – Unit is successfully locked to the network (changes to the red cross if not locked).Network Master – Illuminated indicating that this unit is the network master.Reverse IDA Reverse ID request from a RedNet AM2 unit will flash the black background in the device GUI.signal MeteringBoth audio channels have a virtual signal level meter.ID (Identification)Clicking on the ID icon will identify the physical device being controlled by cycling its front panel “Network” and “Signal” LEDs through green–orange–red states for 10 seconds.tools MenuClicking on the Tools icon will gain access to the following system settings:Line Level setup – Sets the analogue line output level at 0 dBFS:• +18 dBu• +24 dBu (factory default setting)Mute (Line out) – On/Off state.Mute on Power-up – On/Off state (factory default is On).Attenuation (Headphone) – The headphone output volume can be attenuated for safety. Available settings are:• 0 dB• 6 dB• 12 dB (factory default setting)Preferred Master – On/Off state.APPenDIxConnector Pinoutsethernet Connectors (Dante) Connector type:Applies to: NETWORK 1 & 2xLR ConnectorsConnector type: XLR(M)-3 receptacle Applies to: LINE OUTPUT 1 & 21/4” Jack ConnectorConnector type: Stereo receptacleApplies to:Headphone output 18PoE information only applicable to Network port 1PeRfoRMAnCe AnD sPeCIfICAtIonsfocusrite Rednet Warranty and serviceAll Focusrite products are built to the highest standards and should provide reliable performance for many years, subject to reasonable care, use, transportation and storage.Very many of the products returned under warranty are found not to exhibit any fault at all. To avoid unnecessary inconvenience to you in terms of returning the product please contact Focusrite support.In the event of a Manufacturing Defect becoming evident in a product within 12 months from the date of the original purchase Focusrite will ensure that the product is repaired or replaced free of charge.A Manufacturing Defect is defined as a defect in the performance of the product as described and published by Focusrite. A Manufacturing Defect does not include damage caused by post-purchase transportation, storage or careless handling, nor damage caused by misuse.Whilst this warranty is provided by Focusrite the warranty obligations are fulfilled by the distributor responsible for the country in which you purchased the product.In the event that you need to contact the distributor regarding a warranty issue, or an out-of-warranty chargeable repair, please visit: /distributorsThe distributor will then advise you of the appropriate procedure for resolving the warranty issue. In every case it will be necessary to provide a copy of the original invoice or store receipt to the distributor. In the event that you are unable to provide proof of purchase directly then you should contact the reseller from whom you purchased the product and attempt to obtain proof of purchase from them.Please do note that if you purchase a Focusrite product outside your country of residence or business you will not be entitled to ask your local Focusrite distributor to honour this limited warranty, although you may request an out-of-warranty chargeable repair.This limited warranty is offered solely to products purchased from an Authorised Focusrite Reseller (defined as a reseller which has purchased the product directly from Focusrite Audio Engineering Limited in the UK, or one of its Authorised Distributors outside the UK). This Warranty is in addition to your statutory rights in the country of purchase.Registering Your ProductFor access to Dante Virtual Soundcard, please register your product at: /registerCustomer support and Unit servicingYou can contact our dedicated RedNet Customer Support team free of charge:Email: ***************************Phone (UK): +44 (0)1494 462246Phone (USA): +1 (310) 322-5500troubleshootingIf you are experiencing problems with your RedNet AM2, we recommend that in the first instance, you visit our Support Answerbase at: /answerbase。
Redmine操作手册

关联到 •普通关联关系,问题A、B需要分别关闭
重复 •如果问题B重复于A,那么关闭A将自动 关闭B。
阻挡和被阻挡 •阻挡 :如果问题B阻挡A,A无法关闭, 除非B关闭。被阻挡相反。
优先于 •如果A优先于B,那么将B的起始日期自 动设置为A的截至日期+延迟天数+1。
新增问题要求
问题主题即问题的内容,要简洁,但一定要具体,让 人能一眼看明白
发现的错误、新提的要求、对工作的安 排等都可以被当作问题
项目活动
对于管理者来说可以看看项目 成员每天都在做什么工作
如果想看看近期有什么 新内容,可以把Wiki和帖 子选上,则可以看到Wiki 新增加的内容和讨论区 里面新发布的帖子
所有可以显示的活动 类型见右侧边栏(问 题、变更、新闻、文 档、文件、Wiki编辑 记录、帖子、耗时)
帮助绩效考核和个 人总结
有任何新的想法和 发现了新问题都可 以随时记录下来, 如果坚持使用 可以 彻底解决优秀想法 被遗忘的问题
Redmine的使用
我的工作台
提供一个跨项目的指 派给当前用户的问题 列表,显示问题的ID, 项目,跟踪标签类型 和主题
提供一个跨项目的指 派给当前用户的问题 列表,显示问题的ID, 项目,跟踪标签类型 和主题
Redmine用户手册
主要内容
简介 Redmine
使用 Redmine
管理 Redmine
Redmine简介
关于Redmine
Redmine是一个灵活的项目管理工具, 它可以有效地管理项目开发的整个流程(需求, 设计, 开发)
•„ 在一个Redmine平台上管理您的所有项目 在个Redmine平台上管理您的所有项目 •„ 用户在不同项目中可属于不同角色 •„ 项目可设定为公开的(所有人都可见)或者内部的(只有项目成员可见) •„ 可在项目中激活或隐藏模块(即:wiki、版本库、问题跟踪……)
关键性设备操作手册.doc
1.锚缆机操作规程----------------------------------------------------------------4 2.首尖舱污水遥控排水系统操作规程-----------------------------------------6 3.压载控制台操作规程-----------------------------------------------------------74. 货舱进水检测装置操作规程--------------------------------------------------95. 货舱污水处理操作规程--------------------------------------------------------116.报警监视系统操作规程--------------------------------------------------------127. 和面机/电炒锅操作规程------------------------------------------------------ 148. 电灶的使用与保养--------------------------------------------------------------159.粉碎机操作规程-----------------------------------------------------------------1610.烤箱的操作规程-----------------------------------------------------------------1711. 蒸馒头/蒸饭机的操作规程------------------------------------------------------1812. 货舱作业的安全规定----------------------------------------------------------1913. 甲板作业的安全规定---------------------------------------------------------2014. 开关舱作业的安全规定------------------------------------------------------2115. 系解缆作业的安全规定------------------------------------------------------2216. 舷外、水上作业的安全规定------------------------------------------------2417. AIS操作规程-------------------------------------------------------------------2518. C站操作规程-----------------------------------------------------------------2719. EPIRB 操作规程---------------------------------------------------------------2820. F站操作规程-----------------------------------------------------------------2921. GPS NAVIGATOR操作规程--------------------------------------------------3022. NAVTEX 操作规程-------------------------------------------------------------3323. NBDP 操作规程----------------------------------------------------------------3424. VDR 操作规程------------------------------------------------------------------3625. VHF 操作规程------------------------------------------------------------------3726. 电子海图操作规程------------------------------------------------------------3827. 雷达使用操作规程------------------------------------------------------------3928. 气象传真机操作规程---------------------------------------------------------4429. 自动舵操作规程---------------------------------------------------------------4730. 驾机联系制度------------------------------------------------------------------4831. 驾驶台规则---------------------------------------------------------------------5132. EEBD 操作规程----------------------------------------------------------------5233. 火警控制面板操作规程-----------------------------------------------------5334. 机舱大型二氧化碳灭火系统操作规程-----------------------------------5435. 机舱水雾灭火系统操作规程-----------------------------------------------5536. 救生筏释放程序--------------------------------------------------------------5637. 救生艇操作规程--------------------------------------------------------------5738. 消防员装备操作规程--------------------------------------------------------5839. 机炉舱规则--------------------------------------------------------------------6040. 机舱值班制度-----------------------------------------------------------------6241. 检修作业注意事项-----------------------------------------------------------6642. 主机操作规程-----------------------------------------------------------------6743. 副机操作规程-----------------------------------------------------------------6944. 燃油锅炉操作规程-----------------------------------------------------------7045. 主空压机操作规程-----------------------------------------------------------7246. 空调装置操作规程-----------------------------------------------------------7347.燃油分油机操作规程--------------------------------------------------------7448. 滑油分油机操作规程--------------------------------------------------------7549. 主机滑油泵操作规程--------------------------------------------------------7650. 主机缸套水泵操作规程-----------------------------------------------------7751. 主海水泵操作规程-----------------------------------------------------------7852. 重油驳运泵操作规程--------------------------------------------------------7953. 造水机操作规程--------------------------------------------------------------8054. 油水分离器操作规程--------------------------------------------------------8155. 生活污水处理装置操作规程-----------------------------------------------8256. 应急发电机操作规程--------------------------------------------------------8357. 应急救火泵操作规程--------------------------------------------------------8458. 应急空压机操作规程--------------------------------------------------------8559. 冰机操作规程-----------------------------------------------------------------8660. 焚烧炉操作规程--------------------------------------------------------------8764. 主配电板操作规程-----------------------------------------------------------8865. 应急配电板操作规程--------------------------------------------------------89 63. 压载泵操作规程--------------------------------------------------------------90目录64. 消防通用泵操作规程---------------------------------------------------------9165. 污水泵操作规程---------------------------------------------------------------9266. 机舱电力中断应急操作------------------------------------------------------9367. 触电的预防和急救------------------------------------------------------------9568. 总用电瓶及充放电板操作规程---------------------------------------------9669. 机舱报警检测系统操作规程------------------------------------------------9770. 机舱局部灭火系统操作规程------------------------------------------------9871. 机舱水雾灭火系统高压泵操作规程---------------------------------------9972. 主机机侧应急操作规程------------------------------------------------------10073. 主机盘车机操作规程---------------------------------------------------------10174. 饮水消毒柜操作规程---------------------------------------------------------10275. 砂轮机操作规程---------------------------------------------------------------10376. 气焊作业安全规定------------------------------------------------------------10477. 电焊作业安全规定------------------------------------------------------------10578. 车床作业安全规定----------------------------------------------------------10679. 救生艇机操作规程------------------------------------------------------------10780. 油渣泵操作规程---------------------------------------------------------------10881. 钻床作业操作规程------------------------------------------------------------10982. 火警T1016控制面板操作规程---------------------------------------------11083. 舵机操作规程------------------------------------------------------------------112锚缆机操作规程O P E R A T I O N I N S T R U C T I O N S F O R M O O R I N G W I N C H&W I N D L A S S 一、绞缆机操作的注意事项1)操作前必须要检查以下事项:●离合器的位置,齿轮箱上档位杆的位置,传感器上的指示灯,●检查刹车杆及刹车带是否完好,工作是否正常,●缆绳的出绳方向是否与刹车带底部连接块侧一致,●检查滚筒转动方向是否与操作杆指令方向一致,●检查所有的油脂润滑点,油位是否符合要求。
Redmine-特色--中文官方帮助手册
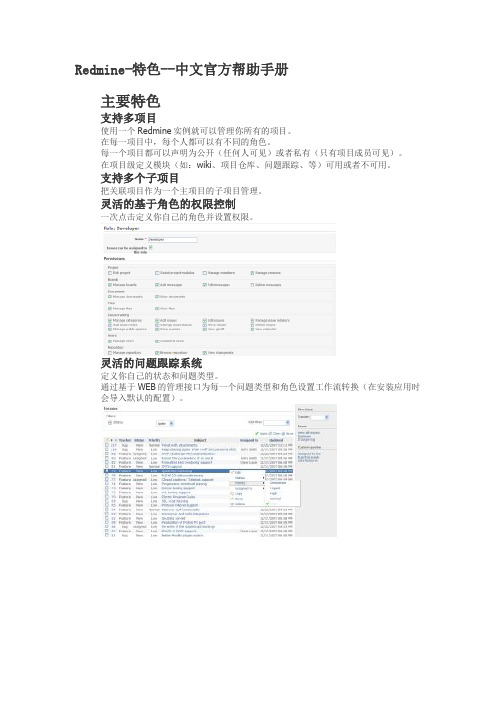
Redmine-特色--中文官方帮助手册主要特色支持多项目使用一个Redmine实例就可以管理你所有的项目。
在每一项目中,每个人都可以有不同的角色。
每一个项目都可以声明为公开(任何人可见)或者私有(只有项目成员可见)。
在项目级定义模块(如:wiki、项目仓库、问题跟踪、等)可用或者不可用。
支持多个子项目把关联项目作为一个主项目的子项目管理。
灵活的基于角色的权限控制一次点击定义你自己的角色并设置权限。
灵活的问题跟踪系统定义你自己的状态和问题类型。
通过基于WEB的管理接口为每一个问题类型和角色设置工作流转换(在安装应用时会导入默认的配置)。
甘特图和日历从开始到结束自动生成基于问题的甘特图和日历。
时间跟踪功能在项目或ticket级输入时间。
简明报表显示每个用户、问题类型、分类、活动使用时间。
用户自定义域你可以为每一个问题、时间条目、项目、用户定义你自己的自定义域。
可以使用不同的格式,如:文本、日期、布尔、下拉列表和复选框。
自定义域可以显示在问题列表,并且可以作为过滤条件。
新闻,文档和文件管理你可以很方便的方步信息和共享文件。
项目独立的wik和i论坛wiki使用textile语法,使用括号自由的在wiki内使用连接。
可以使用差异和注释查看。
项目仓库浏览和差异查看已经存在的项目仓库可以绑定到你的项目当中,Redmine让你浏览它们的内容,查看和寻找修改记录。
差异和注释查看器支持的配置管理系统有:Subversion, CVS, Mercurial, Darcs, Bazaar and Git。
订阅和Email通知项目活动、修改、新闻、问题、问题变更作为Atom 订阅使用。
多LDAP授权支持Redmine让你通过多个LDPA给用户授权。
当用户在目录里面时,庄户可以持续的被创建。
(可选)用户自己注册支持可选择的,你可以让用户自己在线注册。
有三种账户激活方式:自动(无确认需求)、手动(通过管理员)或者通过Email 发送自动生成的URL。
redmine用户操作手册
目录关于手册中方框标记部分的说明•Note是需要注意的部分。
•Hint是群英汇为Redmine扩展的部分。
2 用户账号•我的账号我的账号截图此界面可以修改用户的姓名、邮件地址、语言、以及时区和接收邮件的设置。
•邮件通知邮件通知的下拉框选项有:•只收取我跟踪或参与的项目的通知•收取我的项目的所有通知你可以根据自己的需要选择不同的邮件通知策略同时,你也可以选种下拉框下面的那个复选框(不要发送对我自己提交的修改的通知),这样就可以避免接收到你自己活动的邮件通知。
•我的工作台我的工作台截图该页面用于显示你所参与的项目的各种信息块。
默认情况下只有下面两个模块启用:•指派给我的问题提供一个跨项目的指派给当前用户的问题列表,显示问题的ID,项目,跟踪标类型签和主题。
•已报告的问题提供一个跨项目的由当前用户报告的问题列表,显示问题的ID,项目,跟踪标签类型和主题。
每一个用户可以通过点击"个性化定制本页"的链接个性化我的工作台。
然后用户可以选择哪些可用的模块被显示:•日历提供一个跨项目的每周日历概述•文档提供一个跨项目的最近文档概述•最近的新闻提供一个跨项目的最近新闻概述•耗时提供一个跨项目的关于当前用户最近7天工时的概述•跟踪的问题提供一个跨项目的由当前用户跟踪的问题列表•忘记密码如果你忘记了密码,可用点击登录界面上的"忘记密码"链接, 然后填入你的邮箱地址, 点击提交。
随后你将收到一封邮件, 点击该邮件里的那个超链接, 你将跳到一个修改用户密码的界面, 输入新密码以及确认密码。
这样, 你就可以用刚才新建的密码登录系统了。
Note•管理员可以禁用该功能•如果你的账号使用了外部认证(如LDAP),同样不能使用该功能。
因为外部认证的密码存储在LDAP中, Redmine不能修改LDAP里的信息。
•注册点击主页右上角的"注册"链接, 用户可以自己注册。
填写好表单提交后你将收到一封激活账号的邮件, 通过邮件里的链接, 可以激活你刚注册的账号。
redmine使用手册
神州数码融信质量管理体系Redmine General用户手册版本:V1.0文档编号保密等级作审批者人人最后修改日期最后审批日期最后批准日期核准修订记录日期版本修订说明初始稿修订人2014-8-1 V1 刘继斌目录1简介 (2)1.1 1.2概述 ................................................................................................................................. 2 缩略语 .. (2)2功能与操作 (2)2.1 2.2 2.3主页 ................................................................................................................................. 2 我的工作台 ..................................................................................................................... 3 项目 (5)2.3.1 活动...................................................................................................................7 新建任务...........................................................................................................7 任务...................................................................................................................8 干特图.............................................................................................................12 工作日历.........................................................................................................12 版本库.............................................................................................................13 讨论区.............................................................................................................14 新闻.. (14)2.3.2 2.3.3 2.3.4 2.3.5 2.3.6 2.3.7 2.3.8 2.3.9 Wiki .................................................................................................................15 文档. (15)2.3.101 简介1.1概述Redmine是一个开源的采用Ruby开发的基于web的项目管理和缺陷跟踪工具软件,是用ROR框架开发的一套跨平台项目管理系统。
Radmin 远程协助工具使用手册
Radmin远程协助工具使用手册2014年03月目录1. RADMIN 3 – 概述 (1)1.1使用简单 (1)1.2最高的安全级别 (1)1.3文本和语音聊天 (1)1.4支持多连接 (2)1.5其它特性 (2)2. RADMIN 3远程控制软件-工作原理 (2)3. RADMIN 3远程控制软件RADMIN VIEWER (3)4. RADMIN 3远程控制软件RADMIN SERVER (4)5. RADMIN 3 -安全性 (6)5.1加密技术 (6)5.2核心安全性 (6)5.2.1 Windows内嵌安全性 (6)5.2.2 Radmin安全性 (7)6. 如何安装和设置RADMIN 3 (7)7. 其他截图 (13)1. Radmin 3 –概述Radmin 是专用于Windows 的最安全、最快速、最受欢迎的远程访问软件解决方案之一,通过它,您可以就像坐在远程计算机前一样,在远程计算机上工作,并可以从多个位置访问远程计算机。
Radmin 完全支持Windows 8(32 位和64 位)、文件传输、多用户文字与语音聊天、Windows 安全、Kerberos 身份验证、所有数据流的256 位AES 加密、远程登录访问、多显示器支持和独特的DirectScreenTransfer™技术。
Radmin 使用现有的TCP/IP 协议—在LAN、WAN 和因特网中使用得最广泛的协议。
可将文件传输到远程计算机及从其传输出文件,且可以使用聊天或语音聊天与远程计算机的用户进行交流。
1.1 使用简单Radmin 非常易于学习和使用。
我们大多数的客户都认为Radmin 的主要优点在于简易。
所有的报告界面很直观,而程序也非常易于使用,没有无用的“增值”功能使它难以使用,不易学习或拖累它的性能。
1.2 最高的安全级别Radmin 以加密方式工作,所有的数据、屏幕图像、鼠标移动和键盘信号都使用256-位AES 强密钥,每个连接都采用随机生成的密钥。
Redmine使用手册

Redmine使用手册Redmine使用手册1、简介1.1 Redmine概述1.2 Redmine的功能和特点1.3 Redmine的优势和适用场景2、安装与部署2.1 硬件和软件要求2.2 和安装Redmine2.3 配置与数据库连接2.4 启动和访问Redmine3、用户管理3.1 创建用户和用户组3.2 权限设置和角色管理3.3 用户登录和认证3.4 密码和个人设置4、项目管理4.1 创建和配置项目4.2 项目成员与权限设置 4.3 任务和问题跟踪4.4 项目文档管理4.5 项目日历和进度管理5、任务管理5.1 创建任务5.2 任务分配5.3 任务优先级和截止日期 5.4 任务状态和进度更新5.5 任务的关联和依赖6、问题跟踪6.1 创建问题6.2 问题分配和优先级6.3 问题状态和解决方案 6.4 问题的关联和依赖6.5 问题的分类和标签7、文档管理7.1 创建和文档7.2 文档版本控制7.3 文档的共享和访问权限 7.4 文档的评论和讨论7.5 文档的在线编辑和协作8、日历和进度管理8.1 创建和管理日历8.2 日历上的事件和计划 8.3 日历与项目进度关联8.4 日历的分享和导出9、报表和统计9.1 创建和报表9.2 报表数据的筛选和排序 9.3 报表导出和分享9.4 数据统计和图表展示10、插件和扩展10.1 插件的安装和配置10.2 常用的Redmine插件介绍10.3 开发自定义插件的基本步骤10.4 插件的更新和升级附件:本文档涉及的附件包括Redmine安装包、示例项目数据、截图和其他相关文档。
注释:本文所涉及的法律名词及其注释请参考各自法律的官方文档。
readmine的用户手册

目录• 1 说明• 2 用户账号o2、1 我得账号o2、2 忘记密码o2、3 注册o2、4 我得工作台• 3 登录• 4 注册• 5 项目概述• 6 项目活动•7 问题跟踪o7、1 问题列表o7、2 路线图▪7、2、1 版本概述o7、3 日历o7、4 甘特图•8 实时跟踪•9 新闻•10 文档•11 文件•12 讨论区•13 Wikis•14 Redmine wiki得文本格式o14、1 链接▪14、1、1 Redmine链接▪14、1、2 wiki链接▪14、1、3 链接到其她资源▪14、1、4 转意字符▪14、1、5 外部链接o14、2 文本格式▪14、2、1 字体样式▪14、2、2 内嵌图片▪14、2、3 标题▪14、2、4 段落▪14、2、5 块引用▪14、2、6 无序列表▪14、2、7 有序列表▪14、2、8 表格▪14、2、9 内容列表▪14、2、10 宏(Macros)•15 版本库o15、1 版本库统计•16 项目配置•17 Redmine与其她工具整合o17、1 Redmine与TestLink得整合o17、2 Redmine与TortoiseSVN得整合o17、3 Redmine与Mylyn得整合▪17、3、1 通用得Web仓库链接器(Web Repository connector)▪17、3、1、1 配置步骤▪17、3、1、1、1 创建一个任务仓库(Task Repository)▪17、3、1、1、2 创建一个查询▪17、3、2 Redmine专用得Redmine-Mylyn Connector▪17、3、2、1 插件得依赖关系:▪17、3、2、2 客户端安装▪17、3、2、3 服务器端安装▪17、3、2、4 配置步骤▪17、3、2、4、1 在Eclipse中添加任务仓库▪17、3、2、4、2 为刚创建得任务仓库添加查询1 说明关于手册中方框标记部分得说明•Note就是需要注意得部分。
RedLine 雷达雷达警报器用户指南说明书
Owner’s ManualR A D A R •L A S E R •S A F E T Y •D E T E C T O RD U A L A N TE N N A E I N C R E D I B L E R A N GEQuick Reference GuideRear Laser Portdisplay) to silence the audio for a specific alert. (The audio will alert you to the next encounter.)Sensitivity Button (SENS)Switches between Highway, Auto, andrecommend the Highway for the best performance.Alert LampIndicates radar or laser alert.PreferencesRedLine is ready to go out of the box, just plug it in and turn it on. But you can also easily change 8 features for your preferences.To begin using your RedLine, just follow these simple steps1 Plug the small end of the power cord into the side jack of the detector, and plug the large end of the power cordinto your car’s lighter socket.2 Mount RedLine on your windshieldusing the supplied windshield Mount.3 Press the PWR button,located on the left side of the controlpanel, to turn RedLine on.4 Press and hold the VOLUME/MUTEbutton to adjust the volume level.Please read the manual to fully understand RedLine’s operation and features.QuickMount ButtonWindshield Mount into one of its fourPowerPress the PWRbutton to turnVolumeAutoMuteautomatically reduces the volume level ofInstallationWindshield MountPower ConnectionTo apply power to the RedLine, plug the small end of the power cord, (telephone-type connector) into the modular jack on the RedLine’s right side, and plug the lighter plug adapter into your vehicle’s lighter socket or accessory socket.Your RedLine operates on 12 volts DC negative ground only. The lighter plug provided is a standard size and will work in most vehicles. However, some vehicles may require the optional European sleeve to ensure a snug fit. If so, simply call our service department to order one. This sleeve slides over the power cord’s lighter plug adapter. Of course, your lighter socket must be clean and properly connected for proper operation.NOTE: Depending on your vehicle, the lighter socket may either be continuously on, or switched on and off with your ignition.Optional power cordsSee the Accessories section for details on our optional coiled SmartCord or Direct-wire power cords.2To adjust the RedLine on yourwindshield, use the QuickMountadjustment button located on the top ofthe RedLine, and slide RedLine forward orbackward to obtain a level position.When installed and adjusted properly,the back top edge of the RedLine shouldrest solidly against your windshield.User’s TipYou can leave the QuickMount Bracket inplace on your windshield, and easilyremove RedLine by pressing theadjustment button and sliding RedLine offthe mount. Again, be sure to position thebracket where it won’t present a hazard inthe event of an accident. Additionalmounts are available.Mounting LocationWARNING: ESCORT cannotanticipate the many ways RedLine canbe mounted. It is important that youmount RedLine where it will notimpair your view nor present ahazard in case of an accident.Where to mount RedLineFor optimum detection performance, werecommend the following:• Using the Windshield QuickMount,mount your RedLine level and highenough on your front windshield toprovide a clear view of the road from thefront and rear.wipers, other solid objects, and heavilytinted areas that might obstruct the radarantennae or laser lens.Windshield MountRedLine’s QuickMount WindshieldBracket is designed for unobtrusive andhassle-free mounting.1Depress the adjustment button on thetop of the RedLine (by the word ESCORT)and slide the QuickMount Bracket into theslot until it is locked into the positionwhich best fits the angle of yourwindshield (there are four settingsavailable). For extremely horizontal orextremely sloped windshields, theQuickMount Bracket can be bent.To ensure that the suction cupsadhere to the windshield firmly, be sureto keep both your windshield and thesuction cups clean.CAUTION! A few vehicles(including some Porsches) havewindshields with a soft anti-lacerative coating on the insidesurface. Use of suction cups willpermanently mar this coating.Consult your dealership or thevehicle owner’s manual todetermine if your windshield hasthis coating.ESCORT RADAR DETECTORS RADAR DETECTORS。
Redmine使用手册
Redmine使用手册一、 Redmine简介Redmine是基于ROR框架开发的一套跨平台项目管理系统,是项目管理系统的后起之秀,据说是源于Basecamp的ror版而来,支持多种数据库,除了和DotProject的功能大致相当外,还有不少自己独特的功能,例如提供wiki、新闻台、时间跟踪、feed聚合、导出pdf等,还可以集成其他版本管理系统和BUG跟踪系统,例如SVN、CVS、TD等等。
它具有以下功能:● 多项目和子项目支持● 可配置的用户角色控制● 可配置的问题追踪系统● 自动日历和甘特图绘制● 支持 Blog 形式的新闻发布、Wiki 形式的文档撰写和文件管理● RSS 输出和邮件通知● 每个项目可以配置独立的 Wiki 和论坛模块● 简单的任务时间跟踪机制● 用户、项目、问题支持自定义属性● 支持多种版本控制系统绑定(SVN、CVS、Git、Mercurial、Darcs)● 支持多 LDAP 用户认证● 支持用户自注册和用户激活● 多语言支持(已经内置了简体中文)● 多数据库支持(MySQL、SQLite、PostgreSQL)● 外观模版化定制(可以使用 Basecamp 、Ruby安装)接下来详细介绍redmine的使用。
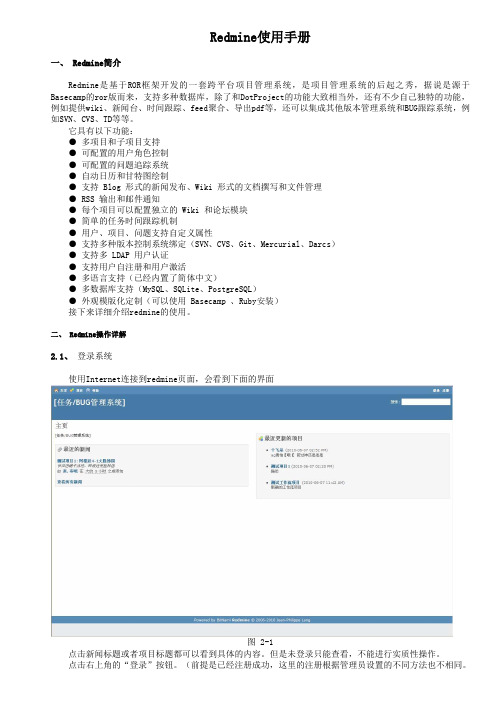
二、 Redmine操作详解2.1、登录系统使用Internet连接到redmine页面,会看到下面的界面图 2-1点击新闻标题或者项目标题都可以看到具体的内容。
但是未登录只能查看,不能进行实质性操作。
点击右上角的“登录”按钮。
(前提是已经注册成功,这里的注册根据管理员设置的不同方法也不相同。
一般情况下是管理员添加用户后用邮件通知,用户激活。
(还有的直接注册就可以登录了。
)会看到下面的界面未登录状态仅显示公开的项目页面左面是“最近的新闻”,右面是“最近更新的项目”左上角是快键菜单,点击“项目”可以看到所有公开的项目右上角有登陆和注册按钮图 2-2登陆成功后会看到“我的主页”界面图 2-3输入登录名,密码。
MyQR - Remember Me 应用程序安装和使用指南说明书

This app satisfies all those occasions when you want to REMEMBER ME;remember someone you met at a lunch or tradeshow without taking home a pocket full of business cards.Installation and configuration of the MyQR-Remember Me application is simple.It can be loaded from iTunes or Google Play.MyQR BASIC creates your own QR code and stores it on your iPhone,iPad,Android device or Android tablet as a virtual badge or business card that can be scanned by any QR code reader app on an iPhone or Android device.MyQR is also a QR reader.ENHANCED SETUP allows you to send the new contact to your org as a Lead. BASIC SETUP-Remember contacts in your address book.●Click here(MyQR on iTunes)to go to the iTunes app or search iTunes for MyQR.●Click here(MyQR on Google Play)to go to the Google Play app or search Google Play forMyQR.The iTunes app page looks like this–The Google Play app page looks like this–●Install the app to your iPhone,iPad,Android device or Android tablet.There is no limitation bymake or model.●Open MyQR app on your device.It will open automatically in Scan mode.●Touch Cancel to go to the configuration screen.Now let’s create your QR code.1.Touch the wrench for Settings.2.From Real Intelligence Settings page,touch MyQR.●Touch Save Settings.●All other Settings remain in the default positions and are applicable toENHANCED VCARD SETTINGS discussed below.●You are finished with Enhanced Set-up.You are now ready to open scanner(QRIcon on Real Intelligence desktop)and start scanning cards with QR that youwould like to add to your Leads.●The Event ORG ID setting determines which ORG to validatescans or to retrieve registration information from.3.On the Home screen,touch‘Generate MyQR’.4.Fill out your‘virtual business card’.It looks like this5.Touch Generate My QR when the form is completed.6.It is now ready for scanning.To scan others’codes,go back to the Home page of MyQR.1.Touch the QR icon to open the scanner.2.Point to QR code.Scanner will automatically capture the image when it is auto-focused. To scan websites,go back to Home page of MyQR.1.Touch the QR icon to open the scanner.2.Point to QR code.Scanner will automatically capture the image when it isauto-focused.3.Touch‘Auto go online’.ENHANCED SET-UP:for sending your new contact to your Leads1.Touch the Tools wrench on the configuration screen to enter your SFDC Org ID.2.Find your SFDC Org ID by logging in to your Salesforce instance.●Click your Username at top right.●Click Setup●In the left column under Administration Setup,click Company Profile.●Click Company Information.The screen looks like this–●You will find the Organization Id in the right-hand column.Copyand paste the Org ID(ID example:00DZ000000071c6is an example ORG)into theReal Intelligence Settings box‘Enter SFDC ORG ID’.●Setting up the Event ORG ID–The(ID example:00DZ000000071c6is the PropathORG)When this is set the events available from the Propath ORG can beretrieved with the Get Events button.In this case there is only one event the AAD2013Party.●Touch Save Settings.●All other Settings remain in the default positions and are applicable toENHANCED VCARD SETTINGS discussed below.●You are finished with Enhanced Set-up.You are now ready to open scanner(QRIcon on Real Intelligence desktop)and start scanning cards with QR that youwould like to add to your Leads.●The Event ORG ID setting determines which ORG to validatescans or to retrieve registration information from.Scan and send your new contact to your Leads●Scan card and touch‘Add to ’●Latest version emails the user a copy of the code that is generated from the leadin SFDC.ENHANCED SETTINGS–retrieve Social Profiles for new contacts via the Real Events app Enhanced functionality to retrieve social profiles is available on the AppExchange.Search‘Real Events’.With Real Events,Social Profiles for the contact will load when the card with the enhanced VCard QR is scanned.The screens will look like this:The Social Profile can be sent to your Salesforce Org as a Lead by touching‘Add to ’on the previous screen.The demographics and answers for each attendee can be customized and used for MatchMaking.Additional functionality for Qualifying a Lead can be customized.Including information associated with each Scan by each user.Actions to be taken for sending information/collateral to the scanned user or for guidance to the sales team can be configured.MyQR-Remember MeINSTALLATION and USERS GUIDE The Exhibitor Portal can be used to configure this and other settings for each Exhibitor.All of the social profiles can be exposed for Keynote speakers or the entire registered attendance.Please contact**************************to learn about all the features and capabilities of Real Events.Manage your Event and its’speakers,registrations,sessions,badges and ticketing all in one application.MyQR_Install and Users Guide-V311of11。
readmill用户手册说明书

TREADMILL USER’S MANUALCAUTIONREAD THIS MANUAL BEFORE USING YOUR EQUIPMENTContentsPoduct Brief Introduction (01)Security Considerations、Warnings (03)Installing Steps (06)Sport Suggestions and Guiding Principle (08)Product Instructions (10)Product Maintenance (13)◆Company Passed ISO9001:2000 Quality System Certification◆Most of our products have been passed European Union CE.RoHS, G ermanyTUV.GS,SGS Certification,and they are approved qualified two consecutive years for the sampling inspection performed by National Athlatic Sports Goods Inspection Certer.◆Our products fully obtain recognition from domestic and foreign customers ◆Business Policy: Satisfaction from customers is our good foundation.ONE PRODUCT INTRODUCTION Product Name: Motorized TreadmillModel Number:RUN 2.0SafetyRun platformTwofollowing safety matters.◆Treadmill is suitable to be placed in the room so as to avoid dampness. Itcan’t be splashed by water and can’t prevent any foreign materials.◆Before exercising, please wear suitable sports clothes and sports shoes.Prohibit running on the machine with naked feet and prohibit stretching the whole body on it.◆Power plug must be reliable and be grounded. Plug base should have specialcircuit so as to avoid being shared by other electrical equipments.◆Keep children far away from the machine in case of accidents.◆Avoid overload operation for a long time, otherwise, it will cause thedamage of motor and controller and accelerate the wear and aging of bearing, running belt and running board. Do machine maintenance regularly.◆Reduce indoor dust and keep the certain humidity in the room in case ofpowerful static. Otherwise, it may disturb the normal work of the electronic watch and the controller.◆After using, please switch off the machine power.◆When exercising, please clip the security lock cable to the clothes, so themachine will safely shut down when emergency occurs.◆If you feel uncomfortable or something abnormal in the using process,please stop exercising and consult your doctor.◆After using silicone oil, please keep it in a place out of the reach of childrento avoid serious result caused by accidental ingestion.Warnings: In order to reduce accidents or injuries to others, please observe the following rules:◆Before using the machine, please check whether the clothes are buttoned upor zipped up.◆Don’t wear clothes that easy to be hooked by treadmill.◆Don’t make the power li ne close to the hot objects.◆Don’t make children close to treadmill.◆Don’t use the treadmill in the open air.◆◆Non-professionals are not allowed to disassembleserious results may occur.◆This treadmill can only be used in the 20 amperes circuit.◆When the machine boots up, only one person is allowed to exercise on it.◆During the exercise, if you feel dizzy, chest pain, nausea or shortness ofbreath, please stop exercising immediately and consult your corresponding fitness trainer or doctor.Warnings! Compulsion!For people who are undertaking medical treatment or the following patients, please discuss with special doctors before use.(1)People who are suffering back pain or who suffered leg, waist, neck injuries. People who suffer leg, waist, neck and hand numbness (people who have inveterate diseases such as slipped disc, spine slipped disease, cervical protruding, etc.)(2)People who have deformed arthritis, rheumatism, gout.(3)People who have osteoporosis abnormality.(4)People who have circulation system troubles(heart disease, dysfunction of blood vessel, high blood pressure, etc)(5)People who have troubles in breathing organs.(6)People who are using artificial pacemaker to implant medical electrical instruments into the body.(7)People who have malignance.(8)People who suffer disturbance of blood circulation like thrombosis or serious dynamic fatty tumor, acute still fatty tumor etc., or all kinds of skin infections.(9)People who have perceived barriers caused by highly peripheral circulation obstacles that are caused by diabetes, etc.(10)People who have skin injuries.(11)People who have a high fever (less than 38°) caused by illness, etc. (12)People who have spine abnormalities or spine bending.(13)People who are in pregnancy or may be in pregnancy or who are in their period.(14)People who have abnormalities in the body and need rest.(15)(16)(17)In addition to the have specially feel abnormalities in their body.----May cause troubles or poor health◆During exercising process, if you feel pains, like waist pain, leg &footnumbness, dizziness, heartbeat that are different from that at ordinary times or abnormal adjusting feeling, please stop using immediately and consult your doctor.◆Don’t let children use this product and keep them away for the product.---- If fail to observe, there may be danger of injuries.◆When use, load or take out the product, or make it move, please confirmwhether there are people or pets around (back, bottom, front of product)Bans!◆Don’t use when the shell cracks and falls apart (inner structure is exposed)or welding parts fall off.----Otherwise, it may cause accidents or injuries.◆During exercising, don’t jump up or down.----Otherwise, injuries may be caused by falling down.◆Don’t use and keep it in the damp places outdoor or near the bath room andplaces that are wetted by water drops.◆Don’t use or keep it in the direct sunlight, places of high temperature li kearound the stove, or on the heating instruments such as electric blanket.----Otherwise, it may cause leakage of electricity or fire.◆Don’t use it when the power line or power plug is damaged or the plug baseloosens.----Otherwise, it may cause fire or electric shock.◆It can’t be simultaneously used by two people or more than two people.During use, notice that do not let people around get close to it.----Otherwise, accidents or injuries may be caused by falling down.◆People who can’t express their consciousness or can’t operate it are notallowed to use.----Otherwise, it may cause accidents or injuries.Avoid touching water!Bans!◆People who do little exercise usually don’t do intense sports suddenly.◆Don’t use it after meal, when feeling tired, a short time after exercising, orthe physical strength is abnormal.----Otherwise, it may harm the health.◆This product is suitable for home use and not suitable for a few unspecifiedplaces such as schools, gyms, etc.----Otherwise, it may have danger of injuries.◆Don’t use when you are eating, or taking other activities.◆Don’t use when feel heavy-headed after drinking alcohol.----Otherwise, it may cause accidents or injuries.◆Don’t use when needles, rubbish or water are attached to the power plug.----Otherwise, it may cause electric shock, short circuit or fire.Don’t use with wet hands!◆Don’t pull out or insert power plug with wet hand.----Otherwise, it may cause electric shock or injuries.Pull out power plug!◆when not use, pull out the plug from plug base.----Otherwise, dust and dampness will make insulation degrade, and then leakage of electricity and fire will be caused.Ground connection instrument!◆This product must be grounded. If the machine occurs malfunction, theground will provide a path of least resistance for the current in order to reduce the danger of electric shock.◆This product is installed with equipment grounding conductor and power ofground plug. The plug must be inserted into the proper plug base that have been right installed and grounded according to the local laws or regulations. Danger!◆If equipment grounding conductor is connected improperly, it may cause thedanger of electric shock.. If you doubt whether the grounding of this product is right, please authorize professional electrician to check. Even if the attached plug with this product does not match with the plug base, it alsocan’t be transformed, pleas e authorize professional electrician to install right plug base.◆Please make sure that the grounding plug of this product is connected to theplug base that has the same shape with it. This product can’t use plug base adapter.Three Installation stepsWhen installing, first simply fix all the screws, and then tighten up after the shelf has been installed.Step1Upright:1.Uplift part of the upright and electronic watch dial, use one M8*45 screw respectively on both sides of the treadmill to pass through the below connection hole, add the shims and tighten up the screws.2.Tighten up the two uprights with two M8*20 Screws。
remindR 0.0.1 用户指南说明书

Package‘remindR’October14,2022Title Insert and Extract``Reminders''from Function CommentsVersion0.0.1Description Insert/extract text``reminders''into/from function source codecomments or as the``comment''attribute of any object.The former can be handy in development as reminders of e.g.argumentrequirements,expected objects in the calling environment,required optionssettings,etc.The latter can be used to provide information of the object andas simple manual``tooltips''for users,among other things.Depends R(>=3.3.2)Imports assertthatLicense GPL-2|GPL-3Encoding UTF-8LazyData trueRoxygenNote6.0.1Suggests knitr,rmarkdownVignetteBuilder knitrNeedsCompilation noAuthor Bert Gunter[aut,cre]Maintainer Bert Gunter<**********************>Repository CRANDate/Publication2017-03-0713:41:43R topics documented:remindR-package (2)remind (2)Index51remindR-package Insert,extract,and print text"reminders"DescriptionremindR is a simple package to insert,extract,and print text"reminders"either in source code comments or as the"comment"attribute of any R object.DetailsThe primary intent is to allow addition and retrieval of informal text notes to oneself or collaborators during code development.These could be reminders about argument requirements,changes or additions to make,the structure of the function’s returned value,required options settings,etc.–basically anything that one wants to note.Generally such reminders will be ephemeral and brief.They are not intended as detailed development specifications.It is also possible to use such notes as minimal help"tooltips"for users.To facilitate this,the "remind<-"insertion and remind extraction functions wrap R’s comment functionality to use the "comment"attribute of any R object as a list of reminders.Author(s)Maintainer:Bert Gunter<**********************>remind Insert,extract,and print"reminders"for functions and objectsDescriptionInsert,extract,and print text(i.e.character vector)"reminders"either as the"comment"attribute of objects or as delimited comments within function source code.Usageremind(x,...)##Default S3method:remind(x,...)##S3method for class functionremind(x,begin="<<",end=">>",...)remind(x)<-value##S3method for class reminderprint(x,...)Argumentsx An R object/function for remind;a class"reminder"object for print...Additional arguments to methodsbegin Character string delimiting reminder beginningend Character string delimiting reminder endingvalue Character vector of text to attach as’comment’attributeDetailsExtracts text between the’begin’and’end’delimiting character strings within source code com-ments.This is mostly intended to enable easy addition and retrieval of informal text notes during the course of script/function development,aka’reminders’,e.g.tofix something,add a validity check,note additional argument requirements etc.Multiple such separately delimited reminders can be included.As a slight convenience,the function wraps R’s existing comment function to attach and extract reminders as the’comment’attribute of any R object.These can be used to provide information (provenance,context)on objects and even serve as a kind of minimal informal Help documentation for functions,i.e.a sort of simple manual"tooltip"functionality.ValueA list of S3class"reminder".NoteBecause there is nofixed syntax in source code comments,extracting reminders cannot be guaran-teed to always work correctly.Some simple checks have been included to warn when they may not be properly extracted,but this may not succeed in all cases.Also,retrieving reminders from functions depends on whether options(keep.source=TRUE)is in use when they are saved.See AlsocommentExamplesx<-1:3remind(x)remind(x)<-c("first comment","and a second")remind(x)remind(x)<-NULL##removes reminderremind(x)f<-function(x){y<-x##Some miscellaneous comments##Now<<This is reminder1>>and next##This is##yet another<<reminder2is this>>##some more stuffy}f(5)remind(f)remind(f)<-"something else"remind(f)##"tooltip"type example:my.summary<-function(x,fun=mean,...)fun(x)remind(my.summary)<-"Don t forget to include the na.rm argument if missing values might be present" remind(my.summary)rm(f,x,my.summary)Indexcomment,3print.reminder(remind),2remind,2remind<-(remind),2remindR(remindR-package),2remindR-package,25。
- 1、下载文档前请自行甄别文档内容的完整性,平台不提供额外的编辑、内容补充、找答案等附加服务。
- 2、"仅部分预览"的文档,不可在线预览部分如存在完整性等问题,可反馈申请退款(可完整预览的文档不适用该条件!)。
- 3、如文档侵犯您的权益,请联系客服反馈,我们会尽快为您处理(人工客服工作时间:9:00-18:30)。
Redmine 用户手册作者:北京群英汇信息技术有限公司网址:版本:日期:2010-08-13 11:18:52版权信息:目录1???说明2???用户账号o???我的账号o???忘记密码o???注册o???我的工作台3???登录4???注册5???项目概述6???项目活动7???问题跟踪o???问题列表o???路线图???版本概述o???日历o???甘特图8???实时跟踪9???新闻10???文档11???文件12???讨论区13???Wikis14???Redmine wiki的文本格式o???链接???Redmine链接???wiki链接???链接到其他资源???转意字符???外部链接o???文本格式???字体样式???内嵌图片???标题???段落???块引用???无序列表???有序列表???表格???内容列表???宏(Macros)15???版本库o???版本库统计16???项目配置17???Redmine与其他工具整合o???Redmine与TestLink的整合o???Redmine与TortoiseSVN的整合o???Redmine与Mylyn的整合???通用的Web仓库链接器(Web Repository connector)???配置步骤???创建一个任务仓库(Task Repository)???创建一个查询???Redmine专用的 Redmine-Mylyn Connector???插件的依赖关系:???客户端安装???服务器端安装???配置步骤???在Eclipse中添加任务仓库???为刚创建的任务仓库添加查询1???说明关于手册中方框标记部分的说明Note?是需要注意的部分。
Hint?是群英汇为Redmine扩展的部分。
2???用户账号???我的账号我的账号截图信息该区域用于修改用户的姓名、邮件地址和语言设置。
邮件通知邮件通知的下拉框选项有:o只收取我跟踪或参与的项目的通知o收取我的项目的所有通知你可以根据自己的需要选择不同的邮件通知策略同时,你也可以选种下拉框下面的那个复选框(不要发送对我自己提交的修改的通知),这样就可以避免接收到你自己活动的邮件通知。
首选项o隐藏我的邮件地址如果选中,那么在显示你个人信息的页面将不会显示你的邮件地址。
o时区用于设置你所在的时区,以便更好显示你的活动时间。
o显示注释用于设置注释显示的顺序。
按时间顺序此时问题(issues)的历史记录按照时间顺序显示,即先提交的comments显示在前面,具体可参见下面的截图。
按时间顺序(倒序)此时问题(issues)的历史记录按照时间顺序倒序显示,即先提交的comments显示在后面,具体可参见下面的截图。
按时间顺序按时间顺序(倒序)???忘记密码如果你忘记了密码,可用点击登录界面上的"忘记密码"链接, 然后填入你的邮箱地址, 点击提交。
随后你将收到一封邮件, 点击该邮件里的那个超链接, 你将跳到一个修改用户密码的界面, 输入新密码以及确认密码。
这样, 你就可以用刚才新建的密码登录系统了。
Note管理员可以禁用该功能如果你的账号使用了外部认证(如LDAP),同样不能使用该功能。
因为外部认证的密码存储在LDAP中, Redmine不能修改LDAP里的信息。
???注册点击主页右上角的"注册"链接, 用户可以自己注册。
填写好表单提交后你将收到一封激活账号的邮件, 通过邮件里的链接, 可以激活你刚注册的账号。
Note该功能需要管理员开启"允许自注册"功能, 并选择通过邮件激活账号???我的工作台点击主页左上角的"我的工作台"链接,页面将跳转的当前用户的工作台。
我的工作台截图该页面用于显示你所参与的项目的各种信息块。
默认情况下只有下面两个模块启用:指派给我的问题提供一个跨项目的指派给当前用户的问题列表,显示问题的ID,项目,跟踪标签类型和主题。
已报告的问题提供一个跨项目的由当前用户报告的问题列表,显示问题的ID,项目,跟踪标签类型和主题。
Hint群英汇为我的工作台添加了?任务日程安排?模块,同时修改了默认的布局:上面:任务日程安排左边:跟踪的问题右边:已报告的问题当指派给你的问题太多时,?指派给我的问题?区域中的问题显得杂乱无章,从而令你不知从哪一个问题先下手。
此时的你或许会想起了Mylyn(主要用于管理你的任务,设置日程安排):如果Redmine有Mylyn的功能,那么我的工作就井井有条了。
群英汇为Redmine添加的Mylyn日程安排功能,正是在这种呼声中诞生的。
该功能主要借鉴于Mylyn,因此如果你使用过Mylyn,那么你将会很熟悉该功能。
功能介绍:该模块会显示从当前日期开始一周的每一天以及本周(从本周一到本周日)、下周(从下周一到下周日)、下下周(从下下周一到下下周日)、未来(下下周以后)和None(没有设置计划日期的任务将显示在该组)这些组。
如果该组没有安排任务,则不会显示。
当前日期(今天)那一组不仅仅只显示规划到今天的任务,而且还会显示那些已经超过完成日期而未完成的任务(并用红色圆圈叹号图标标识), 以及那些已经超过计划日期而未完成任务(并用黄色三角叹号图标标识)同时对于那些计划日期设置在完成日期之后的任务,在分组时以完成日期为标准。
操作说明:在?None?组中选择某一问题或者多个问题(注意多个问题要在同一个项目,否则将会操作失败。
因为Redmine目前还不支持跨项目批量修改问题),点击鼠标右键,在弹出菜单中选择?计划日期?选项,进而在二级菜单中设置计划日期。
如果设置成功,系统提示?更新成功?,而且点击所设置的计划日期组,会发现该组多了一个任务,如下图红色方框圈中的内容。
同时,在项目的问题列表页面,如果该问题指派给你,那么当你点击鼠标右键时,在弹出菜单中会多出设置?计划日期?的选项。
否则不会显示该选项。
每一个用户可以通过点击"个性化定制本页"的链接,进入我的工作台设置界面。
在?我的工作台模块?下拉框中选择想要添加的模块,然后点击右侧的?新增?链接,完成模块添加。
同时在该页面可以通过拖拽,改变各个模块的布局。
最后别忘了点击右侧的?返回?链接退出自定义模式,Redmine将自动保存当前的布局。
下拉框中可选的模块有:日历提供一个跨项目的每周日历概述文档提供一个跨项目的最近文档概述最近的新闻提供一个跨项目的最近新闻概述耗时提供一个跨项目的关于当前用户最近7天工时的概述跟踪的问题提供一个跨项目的由当前用户跟踪的问题列表3???登录点击主页右上角的"登录"链接可跳到登录页面输入登录名和密码, 点击登录按钮, 即可进入系统。
Hint单点登录功能群英汇给Redmine添加了单点登录的功能:该功能主要是省去了多个应用重复输入登录信息的麻烦, 免去了员工记忆多个账号的烦恼。
加上单点登录功能之后, 在一个应用中登录之后, 不用再次输入登录名和密码就可以访问其他应用程序了 (前提是你的所有应用都支持单点登录)。
这样在一定程度上减少了密码的暴露几率, 提高了账号的安全性。
4???注册Hint群英汇集中管理平台,使用统一的用户注册平台群英汇的集中管理平台,包含用户注册和帐号管理功能,和集中管理平台整合的应用需关闭用户注册功能。
即群英汇部署的 Redmine,用户注册将跳转到集中管理平台。
如果管理员开启用户自注册,则允许用户在集中管理平台进行自注册,否则需要由管理员统一创建用户帐号。
下面是 Redmine 内置的用户注册界面,该操作需要管理员开启"允许用户注册"的功能。
注册截图注册用户需要填写的字段包括: 登录名, 密码, 名字, 姓氏和邮箱, 以及可选的用户语言字段。
注册流程根据管理员的设置, 用户的账号由以下几种激活方式:通过邮件认证激活账号用户注册后, 将收到一封激活账号的邮件, 通过点击邮件里的链接, 就可以激活刚注册的邮件。
手动激活账号用户注册后, 需要等待管理员手动激活刚注册的账号。
自动激活账号用户注册后, 直接可以用刚才注册的账号登录系统。
5???项目概述项目概述截图该页面提供一个关于该项目的总体概述左上角的问题跟踪区域列出了目前项中每一种问题跟踪标签的打开数量以及总共数量在成员区域列出该项目组的所有成员在最新新闻区域列出了项目的最新新闻6???项目活动项目活动截图该页面列出了该项目所有活动的历史记录, 这些活动包括:问题变更新闻文档文件Wiki编辑记录帖子耗时该页面的右边栏允许你选择具体显示哪类活动如果你想要同时显示子项目的活动, 那么你需要选种"子项目"复选框。
Hint修改查看项目活动的基准时间Redmine 将当天的日期作为显示项目活动的基准时间, 当你点击"活动"选项卡时, 它会显示前30天到当天的活动。
这样会出现一个问题: 当项目连续30天没有活动时, 项目活动首页会出现空白页。
群英汇的修改: 将最后一次活动时间作为基准时间, 这样就避免了上述问题的发生。
7???问题跟踪问题是Redmine的核心业务。
一个问题绑定到一个项目, 由某一用户创建, 可以关联到某一版本, 等等。
查看某一问题在问题列表页面点击某一问题的链接, 可以查看该问题的具体描述。
子任务该功能在版本引入。
可以将一个问题拆分为若干个子问题。
在使用redmine的过程中,可能有的用户会抱怨,只能将问题指派给一个项目成员,而不能指派给多个项目成员共同完成。
出现这种问题,从某种程度上来说,应该是你划分问题/任务过于粗糙(粒度过大),因此子任务功能就是为用户提供拆分问题/任务的操作,从另一方面解决了将一个问题/任务指派给多人。
首先需要在?角色和权限?设置中为某些角色开启?管理子任务?功能,这样该角色的用户才有创建子任务的权力。
操作步骤:o点击某一问题,进入问题查看页面。
然后点击子任务区域的?新增?链接,进入新建子任务页面。
o父任务字段的值系统自动获得,其他字段像创建问题一样输入,最后点击保存。
输入问题的描述信息成功创建子任务相关的问题允许开发者将某一问题与其他问题建立关联, 从而起到了删除重复问题, 简化工作流的作用。
当前版本允许建立的关联类型有:o关联到o重复如果问题B重复于A,那么关闭A将自动关闭B。
o阻挡如果问题B阻挡A,A无法关闭,除非B已经关闭。
o优先于如果A优先于B,那么将B的起始日期自动设置为A的截至日期+延迟天数+1。
o跟随于问题B跟随于A(例如A截至于21/04,B开始于22/04),这时如果将A的截至日期延迟2天,那么B的起始和截至日期将自动推迟2天。
点击问题显示页面相关问题区域的"新增"链接, 可根据具体的情况建立不同类型的问题关联。
