赫斯曼交换机RS2安装配置指南
赫思曼交换机网络管理界面设置教程
HRS H A N I C MN
HIR C M N SH A N
HRS HM NN I C A
HIR C M N SHAN
HIRS H A N C MN
Designed By Hao Pei
34
北京中达信泰科技有限公司
在“Redundancy->HIPER-Ring”页面中,您可以设置HIPER-Ring的功 能。
20
北京中达信泰科技有限公司
如果您想禁用WEB、Telnet或启用SSH网管功能,您可以在下面页面中 设置
Designed By Hao Pei
21
北京中达信泰科技有限公司
基于MAC或IP的端口安全可以在以下页面中设置。您可以选择放任不 管、发送报警或断然制止。
Designed By Hao Pei
Designed By Hao Pei
15
北京中达信泰科技有限公司
在‘Basic Settings->Load/Save’里,您可以导入/导出交换机的配置文件, 也可以清除您对交换机所做的任何功能配置甚至是恢复到出厂状态。
Designed By Hao Pei
16
北京中达信泰科技有限公司
如果您导入/导出交换机的配置,您需要在‘URL’后面的文本框中输入地 址。注意,导入/导出操作需要采用tftp的方式。 如果您额外购买了ACA21-USB外部存储适配器,您还可以在此处查看该 附件的工作状态。
双击要配置IP参数的交换机
Designed By Hao Pei
4
北京中达信泰科技有限公司
选中您要管理的交换机,点击‘WWW’按钮后,系统会自动打开您电脑上 安装的默认因特网浏览器进入下一步的管理操作。
赫斯曼交换机RS2安装配置指南

技术规格
传输速率
支持多种传输速率,如1Gbps、10Gbps等。
供电要求
支持直流或交流供电,适应不同的供电环境。
端口类型
提供以太网、光纤等不同类型的端口,满足 不同连接需求。
尺寸与重量
根据不同型号,设备尺寸和重量有所差异。
02
安装步骤
硬件安装
01
02
03
04
打开交换机包装,检查 所有硬件是否齐全。
测试更换硬件
在正式更换硬件之前,应在测试环境中测试硬件的性能和兼容性, 确保更换后的设备能够正常运行。
感谢您的观看
THANKS
04
解析
该故障代码表示交换机的网络配置出 现错误,可能是由于IP地址、子网掩 码等配置不正确引起的。
06
解析
该故障代码表示交换机的软件出现故障,可能 是由于软件缺陷或系统崩溃引起的。
故障预防措施
01
定期备份交换机配置文件,以防配置丢失或误操作 导致配置错误。
02
定期检查硬件设备连接,确保硬件设备正常工作。
将交换机固定在机架上, 确保稳定。
连接所有必要的电缆, 如控制台电缆、电源电 缆等。
按照指示正确连接各个 模块,确保所有模块都 已正确安装。
连接电缆
使用适当的电缆将交换机连接到计算 机或其他设备。
在连接电缆时,请遵循正确的线序和 颜色编码,以确保数据传输的正确性。
确保所有电缆都已牢固连接,没有松 动或损坏的电缆。
支持多种端口配置,便于未来 网络扩展和升级。
管理便捷
提供友好的管理界面和丰富的 管理功能,方便用户进行配置
和管理。
应用场景
01
02
03
企业网络
赫斯曼交换机配置主备链路(更新)
主备链路——单机耦合
主备链路拓扑图
主链路
MACH3001 模板:M-FAST 8TP Ip:192.168.1.30
备链路
RS30-1602O6O6SDAEHC01.0.08 Ip:192.168.1.33
MS201600SAAEHC01.0 模块:MM2-4TX Ip:192.168.1.10
按照网络拓扑连接设备,其中将RS20(192.168.1.11)的硬件Stand by开关置于1.
注意:在配置Coupling之前先不要将主备链路全部连接起来
8
Coupling配置
第二步:
使用HiDiscovery进入 RS20(192.168.1.11)配置Coupling.其 中Port3为Partner Conupling Port, Port4为Coupling Port.
与主链路相连的交换机 192.168.1.22
主链路和耦合端口的连接已经断开
与备链路相连的交换机 192.168.1.11
备链路激活,状态为Active
备链路激活,状态为Active
主链路和耦合端口的连接已经断开
16
Thank You End of Presentation
17
• 选择Redundancy:Ring/Network Coupling选项卡
2
Coupling配置
• 共计三种Coupling连接方式 – 1单机Coupling – 2双机Coupling – 3含控制线双击Coupling
• 根据DIP开关状态不同,可以 选择的配置类型不同 – Standby DIP 为on时可选 A/C/E – Standby DIP为off时可选 B/D
赫斯曼交换机的配置和使用

赫斯曼系列交换机配置及使用说明一.M ACH4002系列模块化核心交换机MACH4002 48G-L3P:全千兆模块化工业以太网核心交换机.设备自带16个千兆端口,其中8个为光、电互换Combo端口。
最多支持4个介质模块,可再扩展出32个千兆端口,最多可达48个千兆端口。
该交换机支持三层路由功能,220V AC冗余供电,0~70℃工作范围。
MACH4002 48+4G—L3P:千兆模块化工业以太网核心交换机。
设备自带4个千兆光、电互换Combo 端口和16个百兆电缆端口。
最多支持4个介质模块,可再扩展出32个百兆端口,最多可达48个百兆端口和4个千兆端口.该交换机支持三层路由功能,220V AC冗余供电,0~70℃工作范围。
1.设备的安装和拆卸:MACH4002系列核心交换机:该交换机采用标准的19寸机架式安装方式,4个介质模块及设备风扇均支持带电热插拔。
MACH4002 48G-L3P MACH4002 48+4G—L3P 下图为设备正面图示,其中包括有设备的连接端口、风扇、LED显示灯、报警输出节点、RJ11配置端口及USB配置端口。
LED显示灯位于正面左下方,如下图所示:交换机的背面为基本电源模块安装位置,如下图所示:2.设备的配置:设置IP地址的方法:1.通过超级终端的命令行(需要有专用的线缆:串口转V。
24);2.通过HiDiscovery 软件,搜索所有的网络设备,设置其IP地址和子网掩码;3.使用BOOTP和DHCP服务器来设置IP地址.(本方法不推荐在这里使用);4。
使用自动设置适配器ACA21(USB接口)常用的配置方法:1。
通过超级终端的命令行(同上);2.通过WEB界面(需要IE5.5以上,并且要装有JA V A 1。
3以上),在IE地址栏里输入交换机的IP地址,即可访问设置界面。
每次更改设置需要点击“SET”按键,并选择保存; 3. 使用网管软件HiVision进行配置,每次的修改同样需要进行SET和保存。
EtherScope网络通二代操作简易说明网络通操作简易说明

EtherScope网络通二代操作简易说明一、注意(1)本产品包含1 类激光,请勿直视激光端口,以免眼睛受到伤害。
(2)请勿将本产品与电话线连接。
(3)为防止湿气进入仪表,只能用稍微湿润的布清洁前面板的触摸屏。
二、操作指南1、有线LAN 的监控和故障诊断(1)启动仪表的电源。
(2)如有必要,还要配置接口类型(选择LAN 或WLAN 接口)。
(3)将以太网网线的一端插入仪表的RJ-45LAN 接口,另一端插入要测试的网段。
仪表运行一系列自动测试,并显示主页。
(4)查看每项测试的结果。
(5)对仪表的配置作必要的更改,以适合测试环境。
2、为有线LAN 配置仪表(1)在主页上,点触(设置)。
或者点触EtherScope 网络通图标,它位于标题栏的左上角。
从下拉列表中,点触仪表设置。
会显示仪表设置— TCP/IP 屏幕(仪表设置-TCP/IP 屏幕)。
在该该屏幕上,可以配置仪表的TCP/IP 设置。
(2)点触预览窗格中的超链接以显示其它配置屏幕,这些屏幕在TCP/IP 设置、管理TCP/IP、802.1Q/IP TOS 设置、802.1X 设置、主动测试、SNMP、连接日志、以太网设置、仪表安全设置、常规设置等部分加以描述。
(3)设置好后按保存设置,仪表以新设置开始测试。
3、光纤局域网故障诊断(1)安装SFP 光纤适配器:在仪表处于关机状态时,将保护罩卸下。
将光纤适配器插入,要确保它可靠地插入接口。
(卸除SFP 光纤适配器时:应确保仪表已关闭,并按下适配器背面上的释放卡扣。
)(2)启动仪表的电源。
仪表运行一系列自动测试,并显示主页。
注意:如果RJ-45 铜缆和SFP 光纤(SX,LX 或ZX)适配器同时连接到网络,当仪表尝试建立链接时,光纤连接要优先于铜缆连接。
当EtherScope 连接到千兆光纤接口时,它支持所有现有的局域网特性,但下列情况除外:(1)连接速度显示1000MB 及光纤类型(SX,LX 或ZX)(2)“线缆验证”和“信号验证”测试由光纤损耗测试取代4、运行诊断测试可以用以下两种方法之一访问诊断测试:(1)点触并从下拉列表中选择需要的测试。
赫斯曼交换机配置说明-TTT_00_04_MC-HandsOn

Notes: Content❑Hands-on L2 multicasting❑Hands-on L3 multicasting (routing)Tasks:T k❑Build up a tree structure without and with IGMP and check the behavior❑Build up a HIPER Ring structure without and with IGMP …❑Build up a routed network with DVMRP and check the behavior❑Build up a routed network with PIM-DM and check the behavior❑Build up a HIPER Ring with routed networks …B ild HIPER Ri ith t d t k© Hirschmann Automation and Control GmbHThis presentation, and the material here in, have been prepared for the purposes of education and training. These slides are the sole property of Hirschmann and of education and training These slides are the sole property of Hirschmann and its subsidiaries, and are not to be altered, duplicated or distributed in any way without express written permission by Hirschmann.❑Microsoft Windows 95 and NT 4.0 support IGMPv1.Notes:❑Microsoft Windows 98 and 2000 support IGMPv2.❑Microsoft Windows XP supports IGMPv3. But there are stilla lot other devices in a network with v2 only. Thus IGMPv2should be configured on devices (default of Hirschmanng(platform). A XP host receiving a v2 packet automaticallychanges to v2 till a timer expires.❑The IGMP snooping release can be configured globally only, thus it is identical in all VLANs.❑On HIPER Ring ports “Forwarding All” should be configured.In HIPER Ring one querier is enough❑In HIPER Ring one querier is enough.❑Querier selection is available as of IGMPv2. Pleaseremember the flooding problem mentioned in the appendixof last presentation.Local workaround is to configure static query ports indirection of the MC source segment.❑Querier interval by default = 125 s. Minimum accepted in Querier interval by default=125s Minimum accepted in3.0.03 = 2 s (depending on max response time)(Config)# set igmp querier tx-interval <seconds>Notes:Commands:❑> enable❑# show igmpsnooping❑# show running-config [all]#fiactivates IGMPsnooping ❑# config ❑(Config)# set igmp❑(Config)# set igmp querier tx-interval <seconds>❑Max response time must be less than querier interval. Default: 10 s(Config)# set igmp querier max-response-time <sec>activates IGMPsnooping(g)g p q p ❑Note:a Windows XP notebook connected to v1 and v2 queriers changed from v3 to v1 after 83 minutes.After changing querier version to v2 the XP client changed from v1to v2after 4:35minutes from v1 to v2 after 4:35 minutes.The next change from v2 to v1 happened after a couple of seconds.Notes:1.Build up a tree structure and produce a MC streama)no IGMP: check behavior if producer is located in sameand in different branch of consumerb)IGMPv1: check behavior if producer is located in sameand in different branch of consumerand in different branch of consumerc)IGMPv2: check behavior if producer is located in sameand in different branch of consumerd)IGMPv3: check behavior if producer is located in sameand in different branch of consumer2.Build up a HIPER Ring structure …a)no IGMP: check behavior if producer is located in sameand in different branch of consumerb)IGMPv1: check behavior if producer is located in sameand in different branch of consumerc)IGMPv2: check behavior if producer is located in sameand in different branch of consumerd)IGMPv3: check behavior if producer is located in sameand in different branch of consumer❑Due to its fast recovery time HIPER Ring is widely used asNotes: link redundancy solution on layer 2 combined with routedVLANs (VRRP for UCs).❑Thus regard special rules for MC routing over HIPER Ring.,❑There should be no distributed VLANs, thus broadcasts need not be propagated over the backbone. The backboneis a separate VLAN with separate subnet. This backboneVLAN is routed (VLAN routing) to the other subnetsconnected redundantly to router ports with VRRP.❑In the displayed application the use of DVMRP as MCIn the displayed application the use of DVMRP as MCrouting protocol is better than PIM-DM, because it uses itsown routing protocol and thus can detect …❑Please note: an IGMP enabled Hirschmann switch new connected first sends out querier packets to get allregistrations thus the next querier interval needs not toregistrations thus the next querier interval needs not toexpire.❑If a router port receives an IGMP packet with lower versionNotes: than globally configured then this port changes to that lowerrelease.❑IGMP snooping release should be configured same as IGMP release!Please note: by default both are v2. IGMP snooping releasecan be configured by web, IGMP release by CLI only (perinterface).❑Because IGMP snooping can be configured globally only IGMP snooping release is identical in all VLANs.CLI commands:❑> enable❑# show igmpsnooping❑# show ip igmp interface <slot/port>Example of configuration:Notes:❑(R1)> enable❑(R1)# configure❑(R1) (Configure)# ip igmp❑(R1) (Configure)# interface 1/1❑(R1) (Interface 1/1)# ip igmp(R1)(Interface1/1)#ip igmp❑(R1) (Interface 1/1)# ip igmp version <1|2|3>❑(R1) (Interface 1/1)# exit❑(R1)# show ip igmpOptional:No.of Group Specific Queries sent(2default):❑No. of Group Specific Queries sent (2 default):(R1) (Interface 1/1)# ip igmp last-member-query-count <1…20>❑Group Specific Query interval ( default):❑Query interval (125 s default):(R1) (Interface 1/1)# ip igmp query-interval <1…3600>❑Query max response time (100 1/10 s):(R1) (Interface 1/1)# ip igmp query-max-response-time <0…255>❑IGMP robustness (2 default):(R1) (Interface 1/1)# ip igmp robustness <0…255>(R1)(I t f1/1)#i i b t0255❑IGMP startup query count (2 default)(R1) (Interface 1/1)# ip igmp startup-query-count <1…20>❑IGMP startup query interval (1 s default):(R1) (Interface 1/1)# ip igmp startup-query-interval <1…300>❑IGMP snooping and thus the snooping querier is a globalNotes: function of a device.❑If the snoop-querier (IGMPv2 or v3) on a switch between two routers is active and the routers have a higher IPaddress than the switch, the switch will win the querierelection and thus the snoop queriers of the connectedrouters are disabled. As a result other switched ports at therouters will loose their querier, if there is no other availableand thus multicasting doesn’t work anymore.❑GMRP cannot be used simultaneously to IGMP, thus itNotes: cannot be used together with dynamic multicast routing.CLI commands:❑(Config) # set gmrp adminmode or # no set…(Config)#set gmrp adminmode or#no set❑(Config) # set gmrp interfacemode❑(Config) # set gmrp forward-all-groups❑(Interface x/y) #set gmrp interfacemode❑(Interface x/y) #set gmrp forward-all-groups❑> show gmrp configuration all>show gmrp configuration all❑> show gmrp configuration <slot/port>Notes: Multicast routing protocols are available in L3P firmwarepackage only!Which MC routing protocol should be selected?❑DVMRP uses its own routing protocol while PIM-DM uses DVMRP uses its own routing protocol while PIM DM usesthe UC protocol in operation. DVMRP knows better thetopology with advantage in routed switched networksespecially together with HIPER Ring, static routes withECMP.❑The opt-out protocols DVMRP and PIM-DM start flooding, asa result devices receive faster the streams.a result devices receive faster the streams.❑As opt-out solutions after expiration of the hold timer MCs are flooded again thus producing high load condition tillprunes are sent again.Holdtime DVMRP 2 h, fixedHoldtime PIM-DM 210 s, configurable till 18 h.❑Convergence after topology changes is faster at PIM DM.Convergence after topology changes is faster at PIM-DM.❑PIM offers configurable timers and thus a higher flexibility if necessary.❑DVMRP is limited to 32 hops.❑Enable unicast routing:Notes: (R1) (Configure)# ip routing❑Enable multicast routing(R1) (Configure)# ip multicast❑Note: if first “ip multicast” is entered with IGMP disabled and error message is displayed, but after “ip igmp” command theconfiguration is o.k.❑To route MCs over one single PIM-DM router there is no need for unicast routing but for routing MCs over cascadedneed for unicast routing, but for routing MCs over cascadedrouters a UC routing protocol is needed (usually OSPF).Notes: Example of configuration:❑(R1)> enable❑(R1)# configure❑(R1) (Configure)# ip igmp(R1)(C fi)#i i❑(R1) (Configure)# ip multicast❑(R1) (Configure)# ip dvmrp❑(R1) (Configure)# interface 1/1❑(R1) (Interface 1/1)# ip igmp❑(R1) (Interface 1/1)# ip dvmrp(R1)(Interface1/1)#ip dvmrp❑(R1) (Interface 1/1)# exit❑(R1) (Configure)# exit❑(R1)# show ip dvmrpNote:For training purposes it’s sufficient to disableDVMRP globally while it’s still enabled on theinterfaces andthen configure PIM-DM (see next slide).Example of configuration:Notes:❑(R1)> enable❑(R1)# configure❑(R1) (Configure)# ip igmp()(g)p❑(R1) (Configure)# ip multicast❑(R1) (Configure)# ip pimdm❑(R1) (Configure)# interface 1/1❑(R1) (Interface 1/1)# ip igmp❑(R1) (Interface 1/1)# ip pimdm mode❑(R1) (Interface 1/1)# exit❑(R1) (Configure)# exit(R1)(C fi)#i❑(R1)# show ip pimdm❑(R1)# show ip mcast❑(R1)# show ip igmpOptional:❑Configuration of holdtime in seconds (210 s default):(R1) (Configure)# ip pimdm holdtimes <30…64800>❑Configuration of hello time in seconds:(Interface s/p)# ip pimdm hello-interval <1…3600>Notes:Consecutive order of minimum configuration:❑Configure and enable router interfaces ❑Set prompt for a better orientation ❑Enable routingCLI command sequence:(replace x by router number)> enable# set prompt R x # configure(Config)# ip routing (Config)#show ip brief ❑Configure UC routing protocol globally❑Enable IGMP globally (automatically enables MC routing and IGMP snooping)❑Enable multicast forwarding (routing)Enable PIM SM globally (Config)# show ip brief (Config)# router ospf(Config-router)# router-id x .1.1.1(Config-router)# enable(Config-router)# redistribute connected [subnets](Config-router)# exit (Config)# ip igmp (Config)# ip multicast (Config)#ip pimsm ❑Enable PIM-SM globally ❑Set static Rendezvous Point ❑Configure routing interfaces❑Configure UC routing protocol per interface ❑Enable IGMP per interface, and set version Optionally change version (default =2)(Config)# ip pimsm(Config)# ip pimsm rp-address <ip-@> <MC @>…(Config)# interface <s/p>(Interface s/p)# ip address <ip-@> <mask>(Interface s/p)# routing(Interface s/p)# ip ospf area-id 0.0.0.0(Interface s/p)# ip ospf (Interface s/p)# ip igmp(Interface s/p)#ip igmp version <1|❑Optionally change version (default = 2)❑Enable PIM-SM on respective interfaces(Interface s/p)# ip igmp version <1|2|3>(Interface s/p)# ip pimsm mode (Interface s/p)# exit (Config)# exit # show ip pimsm# copy system:running-config nvram:startup-config # logoutThe IGMP version by default is 2.Notes: Please note that a Rendezvous Point must be configured on all PIM-SM enabled routers, even at the RP itself.The alternative is to define at least one Bootstrap router(BSR) and at least one RP candidate. At a customer site it’sgrecommended to configure 2 candidate RPs and 2 candidate BSRs for redundancy.Further commands:❑(Interface s/p)# show❑# show ip pimsm❑# show ip mcast#show ip mcast❑# show ip igmpOptional:❑Configuration of DR priority:(Interface s/p)# ip pimsm dr-priority <0…2,147,483,647>Configuration of hello interval in seconds(30s default):❑Configuration of hello interval in seconds (30 s default): (Interface s/p)# ip pimsm hello-interval <0…18000>❑Pre-requisite of PIM-SM is a correctly running UC routingNotes: protocol like OSPF.❑MC routing between 2 IFs on one router works if on this router an RP is defined. But the RP needs not to beconfigured itself.❑MC routing between 2 IFs on two routers only works if RP is defined on both routers and on the RP itself.❑For MC routing protocols at neighbor expiry only a trap is defined. For IGMP there is no trap implemented.❑Instead of statically define RPs, now BSR and RPNotes: candidates are configured from which a BSR and RP areelected.❑CLI commands:❑(Config)# ip pimsm bsr-candidate interface <slot/port>❑(Config)# ip pimsm rp-candidate interface <slot/port>Notes:1.Build up a routed network with DVMRPa)check behavior if producer is located in same and indifferent branch of consumer2.Build up a routed network with PIM-DM and check the2Build up a routed network with PIM DM and check thebehaviora)check behavior if producer is located in same and indifferent branch of consumer3.Build up a HIPER Ring with routed networks …a)check behavior if producer is located in same and indifferent branch of consumerAll MC packets with a TTL value less than the definedNotes: threshold were discarded at the specific interface.。
赫斯曼交换机配置配置HIPER-Ring(更新)
23
Thank You End of Presentation
24
在MACH3000和MACH4000系列中,作为环端口的Port1必须在第一个基板上,即在交换 机最底层的那个基板上.
4
HIPER-Ring
通过硬件RM开关设置HIPER-Ring 通过硬件RM开关设置HIPERRM开关设置HIPER
5
HIPER-Ring
第一步: 第一步:
按照网络拓扑结构连接设备,其中RS20为冗余管理器,将硬件RM开关置于1.
保存交换机的当前配置到本机中
21
HIPER-Ring
第六步: 第六步:
以上步骤已经将Hiper-Ring配置完毕, 此时MS20(冗余管理器)的RM指示灯为 黄色,说明环网断开,冗余链路激活.
将MACH-3001和MS20(192.168.1.22) 连接起来,此时环网中无断点, MS20 (冗余管理器)的RM指示灯为绿色,说 明冗余链路在工作中,待被激活. 如图:
关闭RSTP
18
HIPER-Ring
在MACH3001中,点击左侧的Switching→Rapid Spanning Tree→Global, 选择OFF并单击Set,如图:
关闭RSTP
19
HIPER-ห้องสมุดไป่ตู้ing
第四步: 第四步:
由于已经将MS20(192.168.1.22)硬件Ring Ports开关置于0,所以环端口为模块1的Port1 和Port2,另外其硬件RM开关为0,所以需要通过软件开启RM.点击左侧的Redundancy→ HIPER-Ring,选择Redundancy Manager中的On.如图:
冗余链路为Active 冗余链路为Active 说明环网中某条链路失效 冗余链路开始工作
赫思曼交换机操作说明-网络部蔡翔

19
路由设置
7.配置完成后 保存路由配 置,在 routing>global中 routing打上勾 点击set就可以 使路由的设置 生效
20
Industrial HiVision界面配置
1.打开程序
21
Industrial HiVision界面配置
1.打开程序 2.连接设备
22
Industrial HiVision界面配置
17
路由设置
1.routing-> interface-> Configuration 界面中点击 Wizard 2.进入基于 VLAN路由向导 3.选定VLAN1, 这里一定要注 意,进行VLAN 路由设置时一 定要将vlan1先 配置相应的路 由接口
18
路由设置
4.确认所对应 的vlan端口 5.输入对应的 路由接口IP地 址,可以输入 更多的IP地址 -通过second address来进行 添加 6.添加完路由 接口后的端 口,及附加端 口
33
基本操作流程
3. 划分VLAN ,设置核心交换机路由
34
基本操作流程
4.安装HiVision系列软件,并调试运行。
35
特色
Built-in misconfiguration insurance
36
特色
–LEDs –Web or management systems –relay contact –SFP diagnostic (temperature, optical power) –RMON statistics, history, alarms, events –Port mirroring –Logfile
9
RS2安装配置指南.ppt

软件版本
V5.0
新的Web界面(树型结构) 支持通过 HTTP 进行软件升级 Reset after update can be done separately 支持ACA11 支持SNMP-Vulnerability (CERT) proof 修正了HDX 错误: 在 V2.0 到 V4.0 下,端口不能定义为 HDX传输
安全性设置可以禁止非授权站点访问交换机
为本地访问 (V.24) 或 web 访问设置密码
read/only read/write
可访问的IP地址列表 最大可设定 8 个IP地址
WEB访问可以被禁止
新硬件
RS2-xx/xx 与 MICE 相同的硬件结构设计 序列号为 943 xxx -500 更低的功耗
V6.0
该版本只支持新硬件 支持端口镜像
v7.0特性
支持VLAN (40个 VLAN,VLAN号 1-1024) IEEE 802.1Q 支持端口优先级 支持IGMP Snooping 支持流量控制 IEEE 802.3x 支持SNTP (简单网络时间协议) RFC1769 端口连接中断后Fast Aging 可以手动配置信号输出触点
模式(如果端口定义为固定速率). 禁止自学习功能 可以修改r/o密码. Web界面的索引结构,更容易进行参数管理
软件版本v5.1以上
存储-转发模式 可定义MAC地址刷新时间 禁止自学习功能 支持GMRP 透明传递Spanning Tree控制帧 传送被标记的数据帧(不做修改) 2个优先级队列
RS2故障定位及处理
HDX/FDX MDI/MDI-X Standby 开关打开 形成环路, 但RM开关未打开 (RM = 0) RM+Standby 开关打开,然后重新启动
赫斯曼配置维护说明

成都地铁AFC-赫思曼系列交换机安装及使用说明一,赫思曼交换机介绍:1,MACH4002系列模块化核心交换机MACH4002 48+4G-L3P:千兆模块化工业以太网核心交换机。
设备自带4个千兆光、电互换Combo端口和16个百兆电缆端口。
最多支持4个介质模块,可再扩展出32个百兆端口,最多可达48个百兆端口和4个千兆端口。
该交换机支持三层路由功能,220V AC冗余供电,0~60℃工作范围。
1)设备的安装和拆卸:MACH4002系列核心交换机:该交换机采用标准的19寸机架式安装方式,4个介质模块及设备风扇均支持带电热插拔。
MACH4002 48+4G L3P下图为设备正面图示,其中包括有设备的连接端口、风扇、LED显示灯、报警输出节点、RJ11配置端口及USB配置端口。
LED显示灯位于正面左下方,如下图所示:交换机的背面为基本电源模块安装位置,如下图所示:2)冗余电源安装二, M S4128 L3E系列模块化交换机MS4128 L3E:千兆模块化工业以太网交换机。
设备自带一个主机模块,为交换机工作提供电源及相应的诊断配置端口。
交换机自身不具有任何端口,所有端口均需由介质模块扩展实现。
交换机最多可以支持4个千兆端口和24个百兆端口(加扩展板MB-2T)。
该交换机是三层交换机,支持RIP,及静态路由协议,24VDC冗余供电,0~60℃工作范围,导轨式安装。
1)设备的安装和拆卸:MS4128 L3E系列模块化交换机:该交换机采用标准的35mm卡轨式安装方式。
下图分别为设备自身图示及安装满介质模块的图示:第一个模块为千兆介质模块,最大能接四个千兆口(MM4-4TX/SFP),其余模块全是百兆模块,光口和电口可以混合,除主机模块不允许拆卸,其它介质模块均可更换,该交换机支持模块热插拔,冗余24VDC供电。
2)安装方法:模块安装于相应插槽后拧紧固定螺丝安装扩展底板须拆卸底板右侧固定螺丝(上下各一个)注意:为防止受力不均损坏产品,应先将底板与扩展底板分别安装至导轨后,沿导轨缓慢推动完成底板衔接。
HIRSCHMANN中文产品使用手册(RS系统工业以太网交换机)
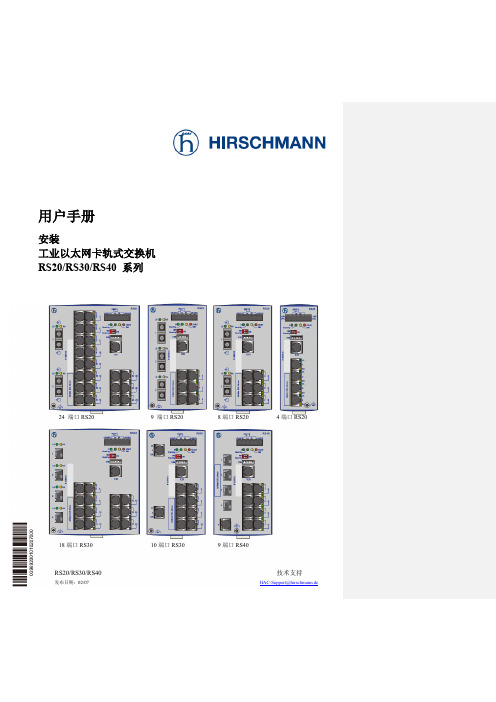
请遵守以下内容:该设备只能用于在产品目录和技术说明中描述的用途, 仅可于赫思曼自动化和控制有限公司推荐或许可的外部设备和部件相连 接。该产品只有在妥当并正确地运输、储存、安装和组装条件下,才能正 确而安全的运行。此外必须仔细操作和维护该设备。
电源电压
该设备设计为在特低的安全电压下运行,因此它们只能通过 PELV 电路或 SELV 替代电路连接至电源电压接头和信号触点,电压限制符合 IEC/EN 60950-1 标准。电源电压与外壳保持电绝缘。
4 进一步支持 .................................................................................................... 3735
RS20/RS30/RS40
3
发布日期: 02/07
安全指示
必须遵守该手册中的安全指示以保证您的个人安全并避免损坏设备和机 器。
2.2 状态显示 ...................ห้องสมุดไป่ตู้....................................................................................... 2725
2.3 进行基本设置.................................................................................................... 2826
该手册中具有版权的商标名称即使未做特别说明,也不应认为具有商标和商品名称保护法意义上的 自由使用权利,因此任何人都不得自由使用。
© 2007赫思曼自动化和控制有限公司
赫斯曼交换机RS2安装配置指南

v7.0特性
▪ 支持VLAN (40个 VLAN,VLAN号 1-1024) IEEE 802.1Q
▪ 支持端口优先级 ▪ 支持IGMP Snooping ▪ 支持流量控制 IEEE 802.3x ▪ 支持SNTP (简单网络时间协议) RFC1769 ▪ 端口连接中断后Fast ng ▪ 可以手动配置信号输出触点
BOOTP on/off (缺省设置: on) 保存配置:
Configuration - Config files ▪ 修改密码:
Security
▪ 链路状态
软件版本
▪ V2.0 ▪ V3.0
• 支持Bridge-MIB dot1d / MAC 地址表 • 支持与MACH3000的冗余连接 • 用户界面:
RS2故障定位及处理
▪ HDX/FDX ▪ MDI/MDI-X ▪ Standby 开关打开 ▪ 形成环路, 但RM开关未打开 (RM = 0) ▪ RM+Standby 开关打开,然后重新启
动
用户接口(V.24)
操作: • TAB 和/或
上/下键 菜单选择 • SPACE键选项切换 • ENTER键确认
特性: 管理
▪ 管理
• 通过 V.24 端口进行本地管理,使用超 级终端,缺省配置为9600 , 8N1
• 支持SNMP • 支持RMON • 支持Traps • 支持Web管理 • 支持BootP/DHCP
▪ 管理密码:
配置
▪ IP 地址, 子网掩码,网关地址: Configuration - System
▪ 故障触点: 交换机发生故障时,故障触点输出故障信 息.
安装
▪ 数据线连接
• 双绞线: 交换机之间或交换机与集线器之 间的连接使用交叉线,工作站与交换机 的连接使用直通线.
赫斯曼交换机环网,VLAN,路由配置
赫斯曼交换机环网,VLAN,路由配置西安开轩赫斯曼交换机配置环网、VLAN、路由董满权目录第一章配置环境说明 (3)1.1 HiDiscovery软件说明 (3)1.2 Hirschmann Industrial HiVision软件说明 (6)1.3 HiView软件说明 (8)第二章交换机配置 (9)2.1 配置环网协议Hiper-ring (13)2.2 VLAN划分 (16)2.3 路由功能 (19)第一章配置环境说明赫斯曼交换机配置需要的软件有HiDiscovery、Hirschmann Industrial HiVision、HiView。
以下对各种软件的功能进行大致说明。
1.1 HiDiscovery软件说明利用HiDiscovery软件可以对交换机的IP地址进行设置。
注意:输入密码时请注意大小写之分,并确保JAVA软件的版本足够新。
1.2Hirschmann Industrial HiVision软件说明软件Hirschmann Industrial HiVision可以扫描网络,生成网络拓扑结构图,同时能够监控网络状态。
Hirschmann Industrial HiVision界面如下图所示:在‘选项’->‘发现设备’->‘新建’中设置搜索设备的IP地址范围,并勾选‘激活’选项,如下图所示。
1.3HiView软件说明HiView软件是一款绿色版的交换机Web配置软件,内部集成JAVA,输入交换机的IP地址,即可访问。
第二章交换机配置主要内容:1.配置环网协议Hiper-ring2.VLAN划分3.路由功能在每一项的配置页面中,通常都会有“Set”和“Reload”两个按钮。
其中“Set”按钮的作用是使所修改的配置即时生效;“Reload”按钮的作用是刷新该页的数据。
因此,在对交换机进行配置修改后,都需要点击该页面中的“Set”按钮,以确保配置修改可以即时生效。
注意:点击“Set”按钮后,只是确保修改生效,并没有保存进交换机内部的配置文件。
赫斯曼交换机操作手册教学提纲

赫斯曼交换机操作手册赫斯曼交换机操作手册本网络系统包含一台万兆以太网交换机(MACH 4002)作为核心交换机,两台模块化交换机(MS4128)作为次级交换机。
网络系统要求划分为两个VLAN,两个VLAN之间需要通讯。
1、 Vlan配置核心交换机(MACH 4002)的管理地址分别为172.16.8.251。
两台次级交换机(MS 4128)的管理地址分别为172.16.8.252,172.16.8.253。
第一步:连接好所有设备,不考虑Port口位置。
第二步:VLAN规划本网络划分了两个VLAN,第一个名称为VLAN1,第二个名称为VLAN2,还有一个默认VLAN,名称为Defult。
Port口详细划分如下:MACH4002:VLAN1 Port口:4.1~4.6, 6.3~6.14VLAN2 Port口:3.1~3.8上联Port口:4.7,4.8,6.15,6.16管理Port口:6.1,6.2MS4128:(两台配置一样)VLAN1 Port口:2.3~1.4,3.1~3.4,4.1~4.4,5.1~5.4VLAN2 Port口:无上联Port口:1.1,1.2,2.1,2.2第三步:划分VLAN使用HiDiscovery扫描到网络内所有的交换机设备,对交换机的管理地址进行设置。
使用HiVision,在Configration-Preference中添加交换机管理地址的扫描网段,可以扫描到网络内的所有交换机如图:单击Vlan-Manager选项卡,选择Agent list,如图:选择Discovered devices中的所有设备并单击添加按钮将它们添加到Participating agents 中,并点击OK按钮,如图:选择“Edit”下拉菜单中的“Groups”,空白处右击选择“New”,在“Name”中输Vlan名称“Vlan1”,单击“Members”选项卡,选中需要添加的Port口,点击OK,如图:按照相同的步骤,创建第二个VLAN,名称为VLAN2,添加相应的Port口,点击OK。
赫斯曼交换机环网配置
环网配置更新_2台或是3台的环都适用准备工作:1. 将要进行环网配置的交换机先把链路连上,使物理链路成环。
2. 配置电脑连接到要配置的交换机上。
3. 在配置电脑上把赫思曼的配置软件“Hidiscovery”安装好。
4. 在配置的时候,请断开一根网线,使交换机成为线状,将PC接到线状拓扑一端的一台交换机,从远及近依次配置。
5. 无论是两台设备还是3台设备的MRP,都可以用此配置实现。
6. 每次修改配置都要按Set,然后Reload。
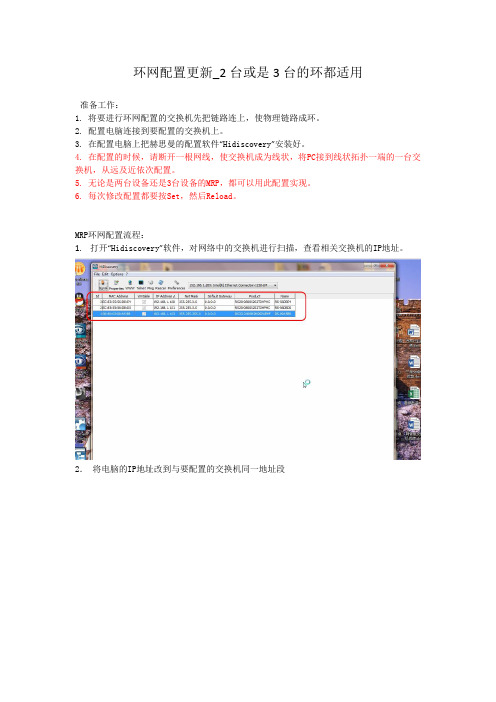
MRP环网配置流程:1.打开“Hidiscovery”软件,对网络中的交换机进行扫描,查看相关交换机的IP地址。
2.将电脑的IP地址改到与要配置的交换机同一地址段3.用网页登录交换机,在交换机的登陆界面,用户名选择“admin”,默认密码是“private”,点击“OK”确认。
4.登陆交换机以后,先把RSTP协议关掉。
方法如下:在左侧菜单选择“Redundancy”→“Spanning tree”→“Global”,在“operation”选项中选择“off”,然后点击“set”确认。
5. 开启MRP环网协议,方法如下:在左侧主菜单选择“redundancy”→“ring redundancy”,在主页面中选择“MRP”协议,把要做环网的端口选上(如图中1/3,1/4端口),恢复时间选择“200ms”,operation选择“On”,关于“Ring manager”选项,每个环网中只需其中一台交换机在“Ring manager”中选择“On”,剩下的交换机在此选项都选择“Off”即可。
最后点击“set”确认即可。
注意:由于断了一根线,有两台交换机在按set以后会报错,这是正常的。
6. 配置端口流出的打标模式。
进入Switching---VLAN---Static,将环所用的端口状态从U 改成T,示例中假设1/1与1/2口为环端口。
按Set,然后Reload。
7. Cell Switch的环中,有一台会分到一个端口连接到Zone Switch,这里我们假设是1/10口,将1/10口的状态从U改成T,没有连Zone Switch的交换机不需要这一步配置。
赫斯曼交换机环网配置基本操作
赫思曼交换机环网配置基本操作一、安装软件将随交换机附赠的光盘插入PC机或笔记本电脑的光驱中,右击“打开”。
1.在文件夹HiDiscovery中,选择HiDiscovery0227_windows_x86.exe(版本可能略有不同)进行HiDiscovery安装。
2.在文件夹Java中,选择 jre‐1_5_0_13‐windows‐i586‐p.exe双击进行安装。
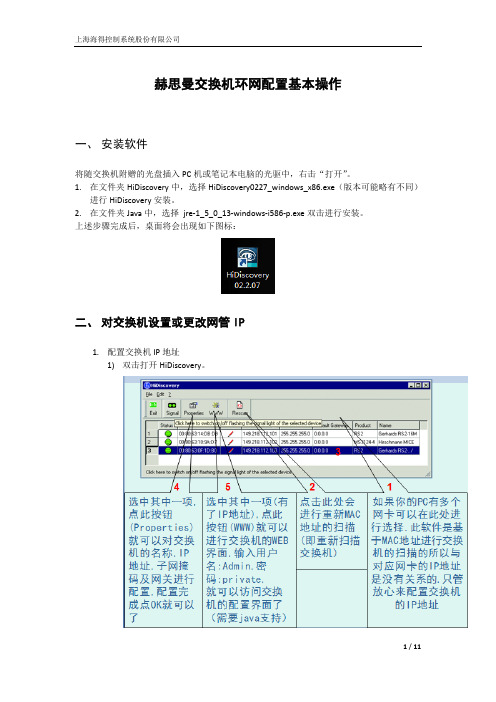
上述步骤完成后,桌面将会出现如下图标:二、对交换机设置或更改网管IP1.配置交换机IP地址1)双击打开HiDiscovery。
上述两图中的数字为中英文版软件的对照选项2)选中欲配置的交换机(如果是单机配置将只有一个条目),如果交换机已经相互连接则无法辨识交换机,可选中交换机后点击“Signal(信号)”按钮观察交换机指示灯的闪烁或通过MAC地址识别交换机。
3)双击欲配置交换机,弹出对话框,按照网络规划输入交换机名称、IP地址和子网掩码,点击OK。
如下图所示:三、环网与耦合配置注意!在配置环网或耦合时一定不要将冗余的连接线接到交换机上。
对环网和耦合来说拓扑上应该成环的,一定不要成环。
在冗余配置配置好以后再恢复冗余的连线。
1.将PC或笔记本电脑在网络属性中配置与交换机相同网段的IP。
2.可在浏览器中输入交换机IP进行访问,或通过HIDiscovery扫标出交换机列表,选中后点“WWW”按钮。
3.登陆交换机网管登陆界面(交换机型号不同,画面略有差异),Login中填写“admin”,Password中填写“private”。
4.完成登陆后进入交换机网管页面。
首先关闭RSTP功能。
1)在左侧导航栏中定位到“Redundancy →Spanning Tree → Global”2)在Operation中选中On3)点击下方的Set按钮4)在左侧导航栏中定位到“Redundancy →Spanning Tree → Port”5)在对应的环网端口和耦合端口的“stp active”功能取消(去掉“√”即可)5.配置环网配置环网时要注意。
赫斯曼交换机配置配置HIPER-Ring(更新)
关闭RSTP
19
HIPER-Ring
第四步:
由于已经将MS20(192.168.1.22)硬件Ring Ports开关置于0,所以环端口为模块1的Port1 和Port2,另外其硬件RM开关为0,所以需要通过软件开启RM.点击左侧的Redundancy→ HIPER-Ring,选择Redundancy Manager中的On.如图:
17
HIPER-Ring
第三步:
在配置HIPER-Ring之前应先关闭环内所有交换机的RSTP.在RS20中 RSTP默认为关闭状态,无需修改.在MS20中点击左侧的Redundancy→ Rapid Spanning Tree→Global ,选择OFF并单击Set,如图:
关闭RSTP
18
HIPER-Ring
MACH3001
192.168.1.33
MS20-1600SAAEHC & MM2-4TX1
192.168.1.11
MS20-1600SAAEHC & MM2-4TX1
192.168.1.22
双绞线
冗余链路 3
HIPER-Ring
设置HIPER-Ring可以通过两种方法来实现:
1.通过硬件RM开关设置.RM=0代表OFF;RM=1代表ON. 2.通过软件设置
关闭RSTP
8
HIPER-Ring
在MACH3001中,点击左侧的Switching→Rapid Spanning Tree→Global, 选择OFF并单击Set,如图:
关闭RSTP
赫斯曼交换机配置说明-TTT_00_04_MC-HandsOn

Notes: Content❑Hands-on L2 multicasting❑Hands-on L3 multicasting (routing)Tasks:T k❑Build up a tree structure without and with IGMP and check the behavior❑Build up a HIPER Ring structure without and with IGMP …❑Build up a routed network with DVMRP and check the behavior❑Build up a routed network with PIM-DM and check the behavior❑Build up a HIPER Ring with routed networks …B ild HIPER Ri ith t d t k© Hirschmann Automation and Control GmbHThis presentation, and the material here in, have been prepared for the purposes of education and training. These slides are the sole property of Hirschmann and of education and training These slides are the sole property of Hirschmann and its subsidiaries, and are not to be altered, duplicated or distributed in any way without express written permission by Hirschmann.❑Microsoft Windows 95 and NT 4.0 support IGMPv1.Notes:❑Microsoft Windows 98 and 2000 support IGMPv2.❑Microsoft Windows XP supports IGMPv3. But there are stilla lot other devices in a network with v2 only. Thus IGMPv2should be configured on devices (default of Hirschmanng(platform). A XP host receiving a v2 packet automaticallychanges to v2 till a timer expires.❑The IGMP snooping release can be configured globally only, thus it is identical in all VLANs.❑On HIPER Ring ports “Forwarding All” should be configured.In HIPER Ring one querier is enough❑In HIPER Ring one querier is enough.❑Querier selection is available as of IGMPv2. Pleaseremember the flooding problem mentioned in the appendixof last presentation.Local workaround is to configure static query ports indirection of the MC source segment.❑Querier interval by default = 125 s. Minimum accepted in Querier interval by default=125s Minimum accepted in3.0.03 = 2 s (depending on max response time)(Config)# set igmp querier tx-interval <seconds>Notes:Commands:❑> enable❑# show igmpsnooping❑# show running-config [all]#fiactivates IGMPsnooping ❑# config ❑(Config)# set igmp❑(Config)# set igmp querier tx-interval <seconds>❑Max response time must be less than querier interval. Default: 10 s(Config)# set igmp querier max-response-time <sec>activates IGMPsnooping(g)g p q p ❑Note:a Windows XP notebook connected to v1 and v2 queriers changed from v3 to v1 after 83 minutes.After changing querier version to v2 the XP client changed from v1to v2after 4:35minutes from v1 to v2 after 4:35 minutes.The next change from v2 to v1 happened after a couple of seconds.Notes:1.Build up a tree structure and produce a MC streama)no IGMP: check behavior if producer is located in sameand in different branch of consumerb)IGMPv1: check behavior if producer is located in sameand in different branch of consumerand in different branch of consumerc)IGMPv2: check behavior if producer is located in sameand in different branch of consumerd)IGMPv3: check behavior if producer is located in sameand in different branch of consumer2.Build up a HIPER Ring structure …a)no IGMP: check behavior if producer is located in sameand in different branch of consumerb)IGMPv1: check behavior if producer is located in sameand in different branch of consumerc)IGMPv2: check behavior if producer is located in sameand in different branch of consumerd)IGMPv3: check behavior if producer is located in sameand in different branch of consumer❑Due to its fast recovery time HIPER Ring is widely used asNotes: link redundancy solution on layer 2 combined with routedVLANs (VRRP for UCs).❑Thus regard special rules for MC routing over HIPER Ring.,❑There should be no distributed VLANs, thus broadcasts need not be propagated over the backbone. The backboneis a separate VLAN with separate subnet. This backboneVLAN is routed (VLAN routing) to the other subnetsconnected redundantly to router ports with VRRP.❑In the displayed application the use of DVMRP as MCIn the displayed application the use of DVMRP as MCrouting protocol is better than PIM-DM, because it uses itsown routing protocol and thus can detect …❑Please note: an IGMP enabled Hirschmann switch new connected first sends out querier packets to get allregistrations thus the next querier interval needs not toregistrations thus the next querier interval needs not toexpire.❑If a router port receives an IGMP packet with lower versionNotes: than globally configured then this port changes to that lowerrelease.❑IGMP snooping release should be configured same as IGMP release!Please note: by default both are v2. IGMP snooping releasecan be configured by web, IGMP release by CLI only (perinterface).❑Because IGMP snooping can be configured globally only IGMP snooping release is identical in all VLANs.CLI commands:❑> enable❑# show igmpsnooping❑# show ip igmp interface <slot/port>Example of configuration:Notes:❑(R1)> enable❑(R1)# configure❑(R1) (Configure)# ip igmp❑(R1) (Configure)# interface 1/1❑(R1) (Interface 1/1)# ip igmp(R1)(Interface1/1)#ip igmp❑(R1) (Interface 1/1)# ip igmp version <1|2|3>❑(R1) (Interface 1/1)# exit❑(R1)# show ip igmpOptional:No.of Group Specific Queries sent(2default):❑No. of Group Specific Queries sent (2 default):(R1) (Interface 1/1)# ip igmp last-member-query-count <1…20>❑Group Specific Query interval ( default):❑Query interval (125 s default):(R1) (Interface 1/1)# ip igmp query-interval <1…3600>❑Query max response time (100 1/10 s):(R1) (Interface 1/1)# ip igmp query-max-response-time <0…255>❑IGMP robustness (2 default):(R1) (Interface 1/1)# ip igmp robustness <0…255>(R1)(I t f1/1)#i i b t0255❑IGMP startup query count (2 default)(R1) (Interface 1/1)# ip igmp startup-query-count <1…20>❑IGMP startup query interval (1 s default):(R1) (Interface 1/1)# ip igmp startup-query-interval <1…300>❑IGMP snooping and thus the snooping querier is a globalNotes: function of a device.❑If the snoop-querier (IGMPv2 or v3) on a switch between two routers is active and the routers have a higher IPaddress than the switch, the switch will win the querierelection and thus the snoop queriers of the connectedrouters are disabled. As a result other switched ports at therouters will loose their querier, if there is no other availableand thus multicasting doesn’t work anymore.❑GMRP cannot be used simultaneously to IGMP, thus itNotes: cannot be used together with dynamic multicast routing.CLI commands:❑(Config) # set gmrp adminmode or # no set…(Config)#set gmrp adminmode or#no set❑(Config) # set gmrp interfacemode❑(Config) # set gmrp forward-all-groups❑(Interface x/y) #set gmrp interfacemode❑(Interface x/y) #set gmrp forward-all-groups❑> show gmrp configuration all>show gmrp configuration all❑> show gmrp configuration <slot/port>Notes: Multicast routing protocols are available in L3P firmwarepackage only!Which MC routing protocol should be selected?❑DVMRP uses its own routing protocol while PIM-DM uses DVMRP uses its own routing protocol while PIM DM usesthe UC protocol in operation. DVMRP knows better thetopology with advantage in routed switched networksespecially together with HIPER Ring, static routes withECMP.❑The opt-out protocols DVMRP and PIM-DM start flooding, asa result devices receive faster the streams.a result devices receive faster the streams.❑As opt-out solutions after expiration of the hold timer MCs are flooded again thus producing high load condition tillprunes are sent again.Holdtime DVMRP 2 h, fixedHoldtime PIM-DM 210 s, configurable till 18 h.❑Convergence after topology changes is faster at PIM DM.Convergence after topology changes is faster at PIM-DM.❑PIM offers configurable timers and thus a higher flexibility if necessary.❑DVMRP is limited to 32 hops.❑Enable unicast routing:Notes: (R1) (Configure)# ip routing❑Enable multicast routing(R1) (Configure)# ip multicast❑Note: if first “ip multicast” is entered with IGMP disabled and error message is displayed, but after “ip igmp” command theconfiguration is o.k.❑To route MCs over one single PIM-DM router there is no need for unicast routing but for routing MCs over cascadedneed for unicast routing, but for routing MCs over cascadedrouters a UC routing protocol is needed (usually OSPF).Notes: Example of configuration:❑(R1)> enable❑(R1)# configure❑(R1) (Configure)# ip igmp(R1)(C fi)#i i❑(R1) (Configure)# ip multicast❑(R1) (Configure)# ip dvmrp❑(R1) (Configure)# interface 1/1❑(R1) (Interface 1/1)# ip igmp❑(R1) (Interface 1/1)# ip dvmrp(R1)(Interface1/1)#ip dvmrp❑(R1) (Interface 1/1)# exit❑(R1) (Configure)# exit❑(R1)# show ip dvmrpNote:For training purposes it’s sufficient to disableDVMRP globally while it’s still enabled on theinterfaces andthen configure PIM-DM (see next slide).Example of configuration:Notes:❑(R1)> enable❑(R1)# configure❑(R1) (Configure)# ip igmp()(g)p❑(R1) (Configure)# ip multicast❑(R1) (Configure)# ip pimdm❑(R1) (Configure)# interface 1/1❑(R1) (Interface 1/1)# ip igmp❑(R1) (Interface 1/1)# ip pimdm mode❑(R1) (Interface 1/1)# exit❑(R1) (Configure)# exit(R1)(C fi)#i❑(R1)# show ip pimdm❑(R1)# show ip mcast❑(R1)# show ip igmpOptional:❑Configuration of holdtime in seconds (210 s default):(R1) (Configure)# ip pimdm holdtimes <30…64800>❑Configuration of hello time in seconds:(Interface s/p)# ip pimdm hello-interval <1…3600>Notes:Consecutive order of minimum configuration:❑Configure and enable router interfaces ❑Set prompt for a better orientation ❑Enable routingCLI command sequence:(replace x by router number)> enable# set prompt R x # configure(Config)# ip routing (Config)#show ip brief ❑Configure UC routing protocol globally❑Enable IGMP globally (automatically enables MC routing and IGMP snooping)❑Enable multicast forwarding (routing)Enable PIM SM globally (Config)# show ip brief (Config)# router ospf(Config-router)# router-id x .1.1.1(Config-router)# enable(Config-router)# redistribute connected [subnets](Config-router)# exit (Config)# ip igmp (Config)# ip multicast (Config)#ip pimsm ❑Enable PIM-SM globally ❑Set static Rendezvous Point ❑Configure routing interfaces❑Configure UC routing protocol per interface ❑Enable IGMP per interface, and set version Optionally change version (default =2)(Config)# ip pimsm(Config)# ip pimsm rp-address <ip-@> <MC @>…(Config)# interface <s/p>(Interface s/p)# ip address <ip-@> <mask>(Interface s/p)# routing(Interface s/p)# ip ospf area-id 0.0.0.0(Interface s/p)# ip ospf (Interface s/p)# ip igmp(Interface s/p)#ip igmp version <1|❑Optionally change version (default = 2)❑Enable PIM-SM on respective interfaces(Interface s/p)# ip igmp version <1|2|3>(Interface s/p)# ip pimsm mode (Interface s/p)# exit (Config)# exit # show ip pimsm# copy system:running-config nvram:startup-config # logoutThe IGMP version by default is 2.Notes: Please note that a Rendezvous Point must be configured on all PIM-SM enabled routers, even at the RP itself.The alternative is to define at least one Bootstrap router(BSR) and at least one RP candidate. At a customer site it’sgrecommended to configure 2 candidate RPs and 2 candidate BSRs for redundancy.Further commands:❑(Interface s/p)# show❑# show ip pimsm❑# show ip mcast#show ip mcast❑# show ip igmpOptional:❑Configuration of DR priority:(Interface s/p)# ip pimsm dr-priority <0…2,147,483,647>Configuration of hello interval in seconds(30s default):❑Configuration of hello interval in seconds (30 s default): (Interface s/p)# ip pimsm hello-interval <0…18000>❑Pre-requisite of PIM-SM is a correctly running UC routingNotes: protocol like OSPF.❑MC routing between 2 IFs on one router works if on this router an RP is defined. But the RP needs not to beconfigured itself.❑MC routing between 2 IFs on two routers only works if RP is defined on both routers and on the RP itself.❑For MC routing protocols at neighbor expiry only a trap is defined. For IGMP there is no trap implemented.❑Instead of statically define RPs, now BSR and RPNotes: candidates are configured from which a BSR and RP areelected.❑CLI commands:❑(Config)# ip pimsm bsr-candidate interface <slot/port>❑(Config)# ip pimsm rp-candidate interface <slot/port>Notes:1.Build up a routed network with DVMRPa)check behavior if producer is located in same and indifferent branch of consumer2.Build up a routed network with PIM-DM and check the2Build up a routed network with PIM DM and check thebehaviora)check behavior if producer is located in same and indifferent branch of consumer3.Build up a HIPER Ring with routed networks …a)check behavior if producer is located in same and indifferent branch of consumerAll MC packets with a TTL value less than the definedNotes: threshold were discarded at the specific interface.。
- 1、下载文档前请自行甄别文档内容的完整性,平台不提供额外的编辑、内容补充、找答案等附加服务。
- 2、"仅部分预览"的文档,不可在线预览部分如存在完整性等问题,可反馈申请退款(可完整预览的文档不适用该条件!)。
- 3、如文档侵犯您的权益,请联系客服反馈,我们会尽快为您处理(人工客服工作时间:9:00-18:30)。
环间冗余
Master
main link
CP1e_4RS2.245
redundant link
Slave
数据线只能连接到端口 1
控制线—交叉线
© Hirschmann
Slide 15
环间冗余的恢复
Master
main link
redundant link
Slave
© Hirschmann
Slide 16
© Hirschmann
Slide 26
CP1e_4RS2.245
Any Questions?
© Hirschmann
Slide 38
CP1e_4RS2.245
收
B
RS2 RS1
Port B B
A RS1 A
CP1e_4RS2.245
© Hirschmann
Slide 12
环形冗余—断点出现
如果 10 个监测帧丢失 RM
Port A
RA
e
端口A 与端口B的内部 s
连接将自动建立
e
t
重构数据帧从两个端口 RS2
RS2
发送,清除在环上的交 换机学到的MAC地址
RS2-FX-LH/FX-LH – 长距离传输接口 SMF,最长传输距离达80 km (29 dB连接概算) 其余功能与RS2-FX/FX相同
© Hirschmann
Slide 2
CP1e_4RS2.245
RS2-XX/XX – 安装
安装到导轨上
卡槽上沿卡入导轨 用力下压
从导轨上拆下
螺丝刀顶住 弹簧卡片, 取下交换机.
© Hirschmann
Slide 7
CP1e_4RS2.245
软件版本
V2.0 V3.0
支持Bridge-MIB dot1d / MAC 地址表 支持与MACH3000的冗余连接 用户界面:
端口设置: Autoneg, 速率, 传输模式 可以设置为禁止Web访问管理
静态地址 端口镜像
© Hirschmann
Slide 6
CP1e_4RS2.245
配置
IP 地址, 子网掩码,网关地址: Configuration - System
BOOTP on/off (缺省设置: on) 保存配置:
Configuration - Config files 修改密码:
Security
链路状态 用户组设置 (通过Web和 SNMP设置) Aging time (缺省: 30s) 通过HiVision设置 端口设置: on/off, HDX/FDX, 10/100
© Hirschmann
Slide 5
CP1e_4RS2.245
特性: 管理
管理
通过 V.24 端口进行本地管理,使用超级终端,缺省配置为 9600 , 8N1
支持SNMP 支持RMON 支持Traps 支持Web管理 支持BootP/DHCP
管理密码: r/o: public r/w: private
© Hirschmann
Slide 10
CP1e_4RS2.245
软件版本v5.1以上
访问控制
IP 地址 密码 允许/禁止Web方式访问
端口安全性 – 入侵检测
支持环形冗余结构 – 恢复时间 < 0.5 s (50台交换机)
软件升级 通过 V.24 接口 通过 TFTP 通过 HTTP
SNMP 接口(Hivision)
© Hirschmann
Slide 23
CP1e_4RS2.245
RMON(HiVision)
© Hirschmann
Slide 24
CP1e_4RS2.245
Web 界面功能
软件升级 保存/载入配置 配置IP 地址 配置端口 设置GMRP 修改密码 支持端口分析 恢复为默认设置
模式(如果端口定义为固定速率). 禁止自学习功能 可以修改r/o密码. Web界面的索引结构,更容易进行参数管理
© Hirschmann
Slide 9
CP1e_4RS2.245
软件版本v5.1以上
存储-转发模式 可定义MAC地址刷新时间 禁止自学习功能 支持GMRP 透明传递Spanning Tree控制帧 传送被标记的数据帧(不做修改) 2个优先级队列
该版本只支持新硬件 支持端口镜像
© Hirschmann
Slide 18
CP1e_4RS2.245
v7.0特性
支持VLAN (40个 VLAN,VLAN号 1-1024) IEEE 802.1Q 支持端口优先级 支持IGMP Snooping 支持流量控制 IEEE 802.3x 支持SNTP (简单网络时间协议) RFC1769 端口连接中断后Fast Aging 可以手动配置信号输出触点
CP1e_4RS2.245
© Hirschmann
Slide 4
安装
数据线连接
双绞线: 交换机之间或交换机与集线器之间的连接使用交叉线, 工作站与交换机的连接使用直通线.
光纤: 光纤连接比双绞线连接更具有安全性.
控制线
双绞线: 交叉线 线缆要求: 线缆电阻不超过10 欧姆 注意: 控制线没有数据传送,只有控制信号传送
CP1e_4RS2.245
安全性 – 访问控制
安全性禁止非授权的访问
端口安全性 (入侵检测) 可以在端口定义 MAC地址,只容许该MAC地址访问这个端口. 并且 可以定义别的MAC地址访问这个端口时交换机的动作. 不做反应/ 发送陷阱信息 /发送陷阱信息并且关闭端口
安全性设置可以禁止非授权站点访问交换机
© Hirschmann
Slide 11
CP1e_4RS2.245
环形冗余—正常模式
端口 A与 B之间没有连 接(逻辑断点)
每个端口拥有自己的 MAC 地址
Port A A
断点监测帧每 20ms 发 送一次
监测帧从两个端口交替 B
发送 (A 然后 B, 然后 A,
然后 B, etc.)
RS1
监测帧由另一个端口接
© Hirschmann
Slide 3
CP1e_4RS2.245
RS2-XX/XX – 安装
连接电源: 正极接到1和5接线柱, 负极接到 3接线柱.
如果只连接单路电源,并且 故障触点也同时连接, 请将 1 和 5接线柱短接, 否则,故障指示灯亮,有故障报警输出
+24 V +24 V*
故障触点: 交换机发生故障时,故障触点输出故障信息. 2 和 4 接线柱输出故障信息.
安装配置指南
© Hirschmann
Slide 1
CP1e_4RS2.245
卡轨系列交换机 RS2
RS2-xx/xx 2 个全双工/半双工上联端口,光口或双绞线接口(100 Mbit/s
FDX) (自适应关闭情况下,100 Mbit/s, 全双工) 5 个双绞线接口,10/100M自适应 通过GL认证
为本地访问 (V.24) 或 web 访问设置密码
read/only read/write
可访问的IP地址列表 最大可设定 8 个IP地址
WEB访问可以被禁止
© Hirschmann
Slide 17
CP1e_4RS2.245
新硬件
RS2-xx/xx 与 MICE 相同的硬件结构设计 序列号为 943 xxx -500 更低的功耗 V6.0
用户接口(V.24)
操作: • TAB 和/或
上/下键 菜单选择 • SPACE键选项切换 • ENTER键确认
Screenshot: rel. 5.0
© Hirschmann
Slide 21
CP1e_4RS2.245
用户接口(Web界面)
© Hirschmann
Slide 22
CP1e_4RS2.245
Reset A
Port B RB e s e t
RS2
CP1e_4RS2.245
© Hirschmann
Slide 13
环间冗余
Master
main link
CP1e_4RS2.245
redundant link
Slave
数据线只能连接到端口 1
控制线—交叉线
© Hirschmann
Slide 14
© Hirschmann
Slide 19
CP1e_4RS2.245
RS2故障定位及处理
HDX/FDX MDI/MDI-X Standby 开关打开 形成环路, 但RM开关未打开 (RM = 0) RM+Standby 开关打开,然后重新启动
© Hirschmann
Slide 20
CP1e_4RS2.245
V4.0
支持GMRP 扩展的用户界面 支持DHCP 支持端口安全Biblioteka 设置© Hirschmann
Slide 8
CP1e_4RS2.245
软件版本
V5.0
新的Web界面(树型结构) 支持通过 HTTP 进行软件升级 Reset after update can be done separately 支持ACA11 支持SNMP-Vulnerability (CERT) proof 修正了HDX 错误: 在 V2.0 到 V4.0 下,端口不能定义为 HDX传输
