牛牛安装包界面控件使用说明
蒙科立网络控件使用说明书doc版

蒙科立网络控件使用说明书本软件只用于个人蒙古文网站开发,如果用于制作课件或在应用程序里使用,请与我公司联系。
一、安装方法1.已经自动安装网络控件的用户可以跳过本节。
2.运行网络平台安装包进行安装。
蒙文字体输入法也将自动安装到您的系统中。
二、控件属性设置Alignment:对齐方式,取值范围为:0,1,20:表示均齐显示文字1:上对齐显示文字2:中对齐显示文字BackColor:背景颜色,可选任一颜色。
ForeColor:前景颜色(文字颜色),可选任一颜色。
Border:设置边框,取值范围为:0,1,2,30:没有边框1:下边框2:四边边框3:黑色加粗四边边框BorderColor:设置边框颜色,颜色可以任意选择。
Font:设置字体,可以任选字体。
也可通过其它方式设置。
FontSize:取值为数字,设置字号。
FontName:设置字体名。
蒙文字体名称有:MenksoftQagan、MenksoftHar-a、MenksoftGarqag、MenksoftScnin、 MenksoftHawang FontItalic:取值范围为0或1,用来设置字符斜体属性。
FontUnderline:取值范围为0或1,用来设置字符下划线属性。
FontBold:取值范围为0或1,用来设置字符粗体属性。
HyperLinkAddress:超链接地址。
LimitBorder:设置边界,取值形式有两种(用数字表示)。
示例:20:表示上下左右边界均是2020、10:表示左右边界为20,上下边界为10 SpaceDistence:设置行间距和段间距,取值形式有两种形式(用数字表示)。
示例:10:表示行间距和段间距都为1010、20:表示行间距为10,段间距为20Text:蒙古文文字编辑处,即控件中显示的内容。
Transparence:取值范围为0或1,设置控件的透明属性。
选择1的时候透明显示。
三、控件方法介绍1、Title功能使用方法:可以为一段文本提供标题<title><in100,50><fontsize=17><textcolor=255,255,255><fontname=Menksoft Hawang></title><title></title>之间表示为标题,<in 100,50>表示上下留多大空间,<font size>表示字体大小,<font name>表示字体名,<textcolor>表示文字颜色,我们使用RGB的格式来设置它。
Realtek Dragon 网络管理软件用户指南说明书
Realtek Dragon User Guide1. Using the Dragon SoftwareThank you for purchasing Dragon Software. Realtek Dragon is the best network management product available for online games. The Dragon software is used to control the network bandwidth on Windows 7, Windows8, Windows10 or later platforms.Many users play online game (League of Legend, StarCraft2, Overwatch), watch video streaming (YouTube, Netflix) or listen to online audio (KKBOX, Spotify), and download files through P2P software at the same time. P2P software would affect the network quality seriously and delay the real-time programs. Dragon network management uses advanced feature cooperate with Realtek Gaming Ethernet adapter to deliver more intelligence and more control than traditional network interface. Dragon Bandwidth Control software automatically detects foreground/group traffic and prioritize it as six bandwidth priority levels (the highest priority, high priority, normal priority, low priority, lower priority, and the lowest priority) for optimum performance. User can set traffic limit by visualize network management, manually adjust application priority, or block certain high network traffic applications, to prevent this application interfered with user concerned gaming process.Dragon network management default settings deliver first priority in foreground group processes. The benefits of latency, network traffic, and intelligence will help user to get better user experience and lower down traffic lag issue on the platform.2. Starting the Realtek Dragon SoftwareRealtek Dragon network management software loads at Startup. Once installed, the Realtek Dragon network management icon shows on system tray (the right bottom corner of the screen). Mouse right click on the tray icon to show the application window.Users also can start Dragon network management from the “start” menu by left click the icon in following path“Start->Programs->Realtek->Dragon->Dragon.exe”.The following picture is the Realtek Dragon network management main page. There are three areas in this page, such as Feature Page, Mode Selection, and Application List areas.There are MAIN PAGE, SETTINGS, and INFO tabs in Feature Page area, and there are some modes in Mode Selection area, such as AUTO, GAME, STREAM, BROWSER, WORK, R-rowStorm, and BT modes. In Application List area, there are all running programs which require internet access, in other words, if the program doesn’t need to transmit packets from internet, it will not be displayed on Application List area.As you see the picture shown above, the Dragon default setting in MAIN PAGE is AUTO mode. We will describe the definitions of AUTOmode, GAME mode, STREAM mode, BROWSER mode, and Work mode later.Dragon was a TSR program, user can minimize this window by click “Cross Button”2.1 Feature pagesThe Dragon software provides 3 tabs, “MAIN PAGE”, “SETTINGS”, and “INFO”. When Dragon launches, it will display MAIN PAGE, because more information user concerned is contained in this page.2.1.1MAIN PAGE tab – Mode Selection AreaIn MAIN PAGE tab, there are Mode Selection area and Application List page. In Mode Selection area, there are five modes “AUTO”, “GAME”, “STREAM”, “BROWSER”, and “WORK”. There are also two extra modes “R-rowStorm” and “BT” if the platform has multiple supported adapters. The definitions of each mode is shown below:A.AUTO Mode:Dragon adjusts priority for applicationsaccording to defined criterion automatically.User also can change priority by itself.B.GAME Mode:The process belongs to game such as Leagueof Legend, WarCraft3 Diablo3 etc. will get thehighest bandwidth priority, and the otherprocesses will get lower bandwidth priority.C.STREAM Mode:The process belongs to Stream such as PPSwill get the highest bandwidth priority, andthe other processes will get lower bandwidthpriority.D.BROWSER Mode:The process belongs to browser such asChrome, Edge, Firefox etc. will get the highest bandwidth priority,and the other processes will get lower bandwidth priority.E.WORK Mode:The process belongs to work such as Skype, LINE, Teams etc. willget the highest bandwidth priority, and the other processes willget lower bandwidth priority.F.R-rowStorm:If there are multiple supported adapters and connected, user canbind one process to any adapter by changing its priority.G.BT:If there are multiple supported adapters and connected, choosethis mode will teaming multiple adapters to speedup BTdownload/upload.For Example:As the picture shown above. If user select AUTO mode, the game process, such as League of Legends, will be assigned to the highest priority (Level6). The browser process, such as Chrome, will be assigned to high priority (Level5). The BT process, such as BitComet, will be assigned to the lowest priority (Level1). Other processes are assigned to normal priority (Level4).If user select GAME mode, all gaming processes will be assigned to the highest priority, and other processes will be assigned to lower priority, as the picture shown below.If user select BROWSER mode, all processes that belong to browser will be assigned to the highest priority, and other processes will be assigned to lower priority, as the picture shown below.If user select R-rowStorm mode, process will transmit packets by dedicated adapter according to the priority mapping table in SETTINGS page.If user select BT mode, BT processes will be assigned to the highest priority and Dragon will teaming multiple adapters to speedup BT transmission.2.1.2MAIN PAGE tab – Application List AreaAs the picture shown above, there shows some information of each process in this area, such as GROUP, APPLICATION, BANDWIDTH, PRIORITY, and BLOCK.Because we divide all processes to six different groups, such as Game, Browser, Stream, Work, BT and undefined groups. We use different colors and icons to present these groups, so user can easily understand group information in groupcolumn:1. it means Game group2. it means Browser group3. it means Stream group4. it means Work group5. it means BT groupFor Example, please see the picture show right, chrome belongs to Browser group, League of Legends belongs to Game group, QyClient belongs to Stream group, Skype belongs to Work group, and BitComet belongs to BT group.User can limit the upload or download bandwidth easily by dragging the upload limitation bar or download limitation bar.User can change priority by left click priority button.The priority will change from the following order:Highest->High-> Normal-> Low->Lower->LowestThe priority icons shown below:User can lock or unlock bandwidth by clicking the lock button.User can change the process, which belongs to undefined group, to Game/Stream/Browser/Work group by clicking group button in undefined process row.If user changed undefined group process to Game/Stream/Browser/ Work group, the group color changes to blue/green/pink/yellow, the same as original Game/Stream/Browser/ Work group.Because original undefined process is changed toGame/Stream/Browser/Work group by user, the priority assignment method will be changed by Game/Stream/Browser/Work group policy. For example, if user changes mode to Game mode, this process will be assigned to the highest priority (Level6), as the picture shown below.User also can change back to undefined group by click group button again.2.2.SETTINGS tabIn this page, there have two setting areas, R-rowStorm and Advanced. There must be at least two supported adapters with connected status on PC, otherwise the item “R-rowStorm” will not be displayed on this page.2.2.1SETTINGS tab – R-rowStrom pageIn this page, it shows the network adapters and priority binding status. As the picture shown above, it means the highest priority (Level6), and high priority (Level5) will transmit packets via adapter1 Ethernet. The normal priority (Level4), low priority (Level3), Lower priority (Level2), and the lowest priority (Level1) will transmit packets via adapter2 Ethernet. Adapter3 WiFi is disabled and cannot be selected, because the status is disconnected. If the status changes to connected, it will be changed to enable.As the picture show above, when R-rowStorm feature is enabled, the group column will change to adapter column. It shows which network adapter channel used to connect to internet. For example, League of Legends.exe transmits packets via ethernet network adapter1, chrome.exe transmits packets via ethernet network adapter2, andBitComet.exe transmits packets via ethernet network adapter2, too.2.2.2SETTINGS tab – Advanced pageUser can open Advanced page by clicking Advanced button. In this setting page, user can enable/disable Display Program Icon,enable/disable Website Recognition feature, or reset application list to default by clicking “Reset” button.Application list shows applications with their icons. If user disables Display Program Icon feature, these icons will not be shown.If user enables Website Recognition feature, Dragon will isolate more famous websites to independent items from browser applications, such as Google, Yahoo, Netflix, YouTube, etc. User can set their priority level, adjust bandwidth limit, or block them individually. Please refer to the picture in the next page. tabThere are five sub-pages in INFO page, including System Info, Alarm, Mobile Hotspot, Network Traffic, and About pages. User can get theinformation of system, and the statistical data of network in this page.2.3.1INFO tab – System InfoAs the picture shown above, if there arethree Dragon supported network adapters inthe computer, they will be listed in the left ofthe page. Here shows some information ofthese adapters such as IP address and linkstatus.In this page, user also can get the hardwareinformation like CPU model, RAM, VGA, and theoperating system. Here also shows the networkmaximum bandwidth including upload anddownload.2.3.2INFO tab - AlarmIn Alarm page, Dragon provides Advanced Alarm Message feature to monitor and record network quality.In the above picture, user can set alarm threshold, and set tracing server by themselves. The information will show on E.K.G diagram.1.It is immediate ping latency.2.It is average ping latency.3.It is ping lost percentage information.If user enable this feature, it will monitor network quality of user’s platform continuously until disable. Dragon will save this information. If user want to check previous network quality, they can click open file dialog to open previous data.2.3.3INFO tab – Mobile HotspotIn Mobile Hotspot page, user can share network through WiFi adapter by choosing an Ethernet adapter. User can input his own SSID and KEY, or use the default values if available. After enabling this function, mobile device can search the SSID and connect to it. When device connected, it will be shown in the Mobile Hotspot status list.The bandwidth usage of Mobile Hotspot function will be shown in the MAIN PAGE, called MobileHotspot process. User can adjust itsbandwidth limit, priority, and block it like other processes.2.3.4INFO tab – Network TrafficIn Network Traffic page, there are statistical data about instant network traffic as below.Or the top5 processes (network download/upload usage).2.3.5INFO tab - AboutIn this page, it shows information of “Version” and “Copyright”. User can update Dragon database by clicking “UPDATE” button.。
Pinnacle 软件中文版操作手册
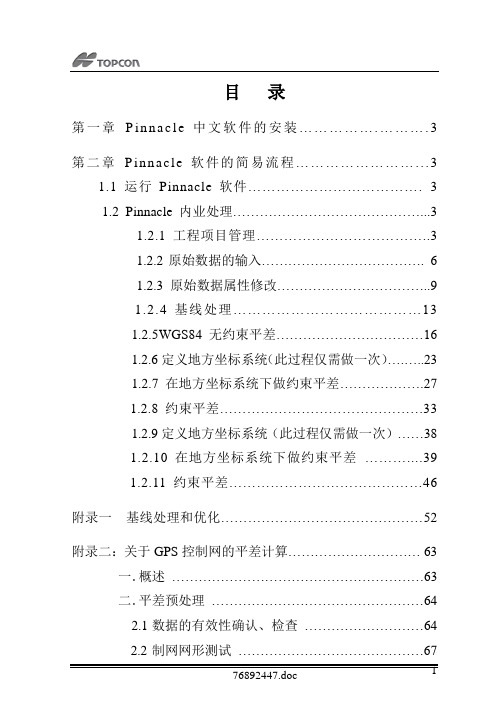
目录第一章P i n n a c l e中文软件的安装 (3)第二章P in n a c le软件的简易流程 (3)1.1运行Pinnacle软件 (3)1.2 Pinnacle内业处理 (3)1.2.1工程项目管理 (3)1.2.2原始数据的输入 (6)1.2.3原始数据属性修改 (9)1.2.4基线处理 (13)1.2.5WGS84无约束平差 (16)1.2.6定义地方坐标系统(此过程仅需做一次) (23)1.2.7在地方坐标系统下做约束平差 (27)1.2.8约束平差 (33)1.2.9定义地方坐标系统(此过程仅需做一次) (38)1.2.10在地方坐标系统下做约束平差 (39)1.2.11约束平差 (46)附录一基线处理和优化 (52)附录二:关于GPS控制网的平差计算 (63)一.概述 (63)二.平差预处理 (64)2.1数据的有效性确认、检查 (64)2.2制网网形测试 (67)2.3环闭合差和重复基线测试 (69)2.4主要基线集构造器………………………….... . 712.5控制点兼容性测试 (72)三.WGS84下的自由网平 (73)四.控制网约束平差 (79)五.控制网图中的误差椭球 (85)第一章Pinnacle中文软件的安装建议Pinnacle软件的安装步骤如下:1.装Pinnacle软件的英文版2.调入大地水准模型文件(注:当地坐标系统可以不需要安装)3.安装Pinnacle软件中文版(注:安装的路径一定与英文版相同)4.安装软件的帮助文件(注:帮助软件仍是英文版,可以根据自己的情况选择是否安装,建议安装目录与英文版相同)第二章Pinnacle软件的简易流程1.1运行Pinnacle软件Pinnacle 软件安装完后,点击开始\程序\Topcon Positioning System\Pinnacle汉化版,运行Pinnacle 程序,也可双击桌面上的Pinnacle图标。
知从科技有限公司木牛基础软件平台产品手册说明书

知从木牛基础软件OBD产品手册知从®木牛基础软件平台知从木牛基础软件OBD产品手册知从®木牛基础软件平台1功能概述知从木牛基础软件平台( ZC.MuNiu )为汽车电子控制器产品开发,提供完整的基础软件平台解决方案。
该产品参考AUTOSAR、OSEK等国际规范。
有基于AUTOSAR ARTOP架构的上位机配置工具,支持上汽、一汽、吉利、广汽、长安、长城等整车厂通讯、诊断、网络管理规范。
知从木牛基础软件平台,主要包括:操作系统、通讯协议栈(CAN\ LIN)、诊断协议栈(UDS\OBD\J1939)、网络管理(OSEK\AUTOSAR)、标定协议栈(XCP\CCP)、存储协议栈、加密模块(CRYPTO)、复杂驱动等模块,配套知从的Bootloader刷新程序和上位机工具,可以根据不同的客户项目要求进行配置和再开发。
知从科技提供基础软件产品的同时,也提供控制器基础软件功能实现的开发服务。
OBD系统(On-Board Diagnostics System)是一种车辆故障检测和诊断系统,用于监测和报告车辆排放控制系统的故障和性能。
它可以通过使用车载电脑监测车辆在实际使用时排放系统的工作状况,并能监测排放系统的故障,通过点亮故障指示器(MIL)通知车辆驾驶员出现故障,同时存储故障代码识别所监测到的故障。
ISO_15031-5_2016和GB18352.6-2016规定了OBD系统在车辆排放控制方面的具体要求和指导。
2应用领域汽车OBD(On-Board Diagnostics)是车辆上的诊断系统,用于监测和报告车辆排放控制系统的故障和性能。
OBD产品广泛应用于以下领域:发动机管理系统(EMS)变速器控制器(TCU)制动控制器(BCU)电机控制器(MCU)电子驻车系统(EPB)电池管理系统控制器(BMS)…3配置环境Hardware (Chip) Aurix TC387Compilers Supported Tasking V6.3r1Evaluation Hardware TC387QPDebugger (SW) TRACE32 PowerView for TriCore V2020.02 Debugger (HW) PowerDebug PRO Ethernet(劳特巴赫) V3.0 Configuration Tools ZCMuNiu4.4_03ENZST01000101Configuration Environment Win7/Win10 64bitTasking编译选项-Ctc38x --lsl-core=vtc -t -I"D:\ENZST01\Bsw04_387\prj" -Wa-H"sfr/regtc38x.def" -Wa-gAHLs --emit-locals=-equs,-symbols -Wa-Ogs -Wa--error-limit=42--iso=99 --language=-gcc,-volatile,+strings,-kanji --fp-model=3 --switch=auto --align=0 --default-near-size=0 --default-a0-size=0 --default-a1-size=0 -O2 --tradeoff=0 --compact-max-size=200 -g --error-limit=42 --sourceTasking链接选项-Ctc38x --lsl-core=vtc -t -I"D:\ENZST01\Bsw04_387\prj" -Wl-o"${PROJ}.hex":IHEX:4 --hex-format=s "..\0_Code\5_lsl\user.lsl" -Wl-OtxycL -Wl--map-file="${PROJ}.mapxml":XML -Wl-mcrfiklSmNOduQ -Wl--error-limit=42 -g --fp-model=3 --c++=034开发背景AUTOSAR组织成立于2003年,主要由欧洲汽车制造商、部件供应商及其他电子、半导体和软件系统公司联合建立。
金牛考勤软件V使用说明
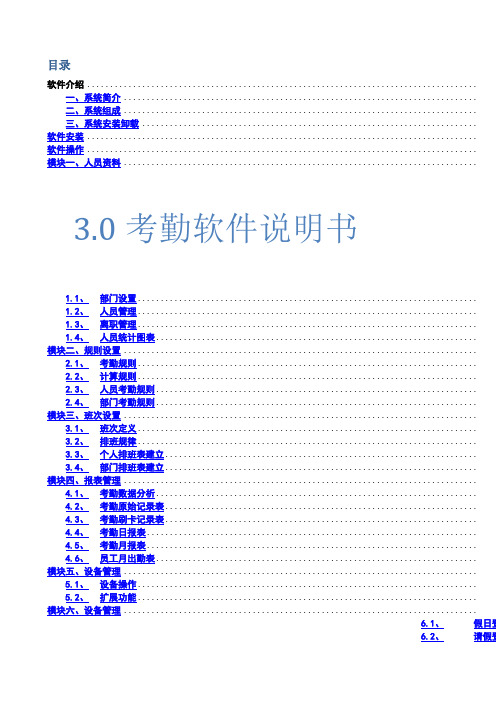
目录软件介绍.....................................................................................一、系统简介 .............................................................................二、系统组成 .............................................................................三、系统安装卸载 .........................................................................软件安装.....................................................................................软件操作.....................................................................................模块一、人员资料............................................................................. 3.0考勤软件说明书1.1、部门设置..........................................................................1.2、人员管理..........................................................................1.3、离职管理..........................................................................1.4、人员统计图表......................................................................模块二、规则设置.............................................................................2.1、考勤规则..........................................................................2.2、计算规则..........................................................................2.3、人员考勤规则......................................................................2.4、部门考勤规则......................................................................模块三、班次设置.............................................................................3.1、班次定义..........................................................................3.2、排班规律..........................................................................3.3、个人排班表建立....................................................................3.4、部门排班表建立....................................................................模块四、报表管理.............................................................................4.1、考勤数据分析......................................................................4.2、考勤原始记录表....................................................................4.3、考勤刷卡记录表....................................................................4.4、考勤日报表........................................................................4.5、考勤月报表........................................................................4.6、员工月出勤表......................................................................模块五、设备管理.............................................................................5.1、设备操作..........................................................................5.2、扩展功能..........................................................................模块六、设备管理.............................................................................6.1、假日登6.2、请假登6.3、加班登记..........................................................................6.4、手工签卡.......................................................................... 模块七、设备管理.............................................................................7.1、系统权限..........................................................................7.2、修改用户密码......................................................................7.3、数据库备份........................................................................7.4、数据库恢复........................................................................7.5、数据库更新........................................................................7.6、数据库压缩........................................................................7.7、数据清理.......................................................................... 附录、常见问题...............................................................................软件介绍一、系统简介现代企业分工愈来愈精细、竞争愈来愈激烈,各企业都想尽办法在管理上要效益,而员工考勤烦琐复杂,企业要投入较多的人力、物力、时间,购买打卡钟、打卡、统计,结果费事费力,还经常出错.员工考勤成了企业发展的烦恼。
LEDPlayer软件使用说明
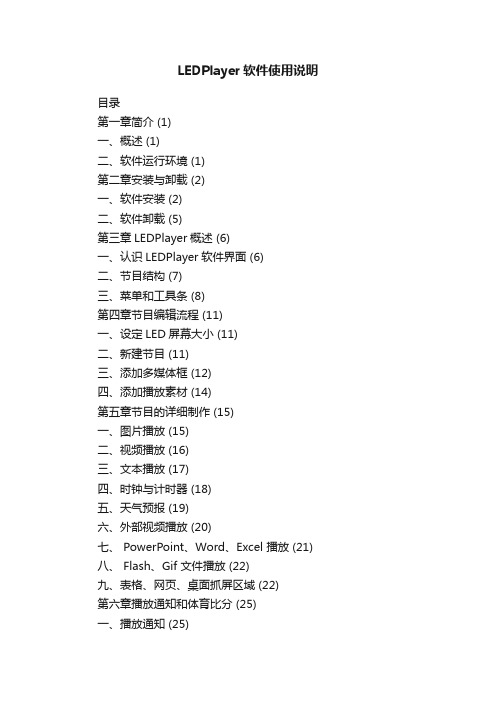
LEDPlayer软件使用说明目录第一章简介 (1)一、概述 (1)二、软件运行环境 (1)第二章安装与卸载 (2)一、软件安装 (2)二、软件卸载 (5)第三章LEDPlayer概述 (6)一、认识LEDPlayer软件界面 (6)二、节目结构 (7)三、菜单和工具条 (8)第四章节目编辑流程 (11)一、设定LED屏幕大小 (11)二、新建节目 (11)三、添加多媒体框 (12)四、添加播放素材 (14)第五章节目的详细制作 (15)一、图片播放 (15)二、视频播放 (16)三、文本播放 (17)四、时钟与计时器 (18)五、天气预报 (19)六、外部视频播放 (20)七、 PowerPoint、Word、Excel 播放 (21)八、 Flash、Gif 文件播放 (22)九、表格、网页、桌面抓屏区域 (22)第六章播放通知和体育比分 (25)一、播放通知 (25)二、体育比分 (26)第七章软件设置 (28)一、启动设置 (28)第八章常见问题解答 (29)第一章简介一、概述LEDPlayer是一款用于LED显示屏控制和播放的专业软件。
该软件采用了先进的技术,功能丰富、性能优越,兼具友好的操作界面,易学易用。
LEDPlayer支持视频、音频、图像、文字、Flash、Gif、抓屏模式等形式的媒体文件的播放;支持Word、Excel、PPT的显示;支持时钟、计时、天气预报的显示;支持外部视频信号(TV、AV、S-Video)的播放。
软件支持多页面多分区的节目编辑,提供了丰富灵活的视频切换功能、分区特效,以及三维特效动画。
该软件搭建了一个能让您充分发挥创意的平台,让显示屏的显示效果得到完美展现。
LEDPlayer支持ZH系列接收卡、发送卡,支持一台PC机控制多个LED显示屏, 支持对LED显示屏的智能参数设置。
LEDPlayer目前支持简体中文、英文三种语言。
二、软件运行环境该软件支持Windows XP\Windows Server 2003\ WIN 7\WIN8等操作系统。
led电子屏软件安装与使用说明
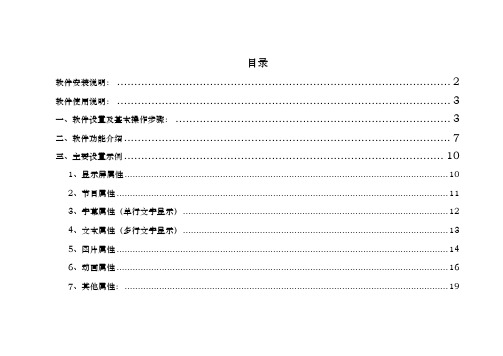
目录软件安装说明: (2)软件使用说明: (3)一、软件设置及基本操作步骤: (3)二、软件功能介绍 (7)三、主要设置示例 (10)1、显示屏属性 (10)2、节目属性 (11)3、字幕属性(单行文字显示) (12)4、文本属性(多行文字显示) (13)5、图片属性 (14)6、动画属性 (16)7、其他属性: (19)光盘包含:软件安装说明:1、双击“利路通动卡软件.exe”,进行安装。
安装后桌面建立一个图标。
2、双击桌面软件图标。
①出现,请安装光盘“NET环境.exe”后启动软件;②软件正常启动后及安装完成软件使用说明:一、软件设置及基本操作步骤:1、打开软件。
界面如下:2、点击菜单栏“文件”,“新建”,写好项目名称后,保存即可。
3、点击菜单栏里“设置”按钮,在下拉的菜单里选择“屏设置”,打开屏参设置对话框,如下图所示:3、在控制卡选项中,选择对应的控制卡。
4、使用串口时请首先设置串口号(串口号在计算机设备管理器中查找),点击通讯检测。
显示屏列表区可增加,便于多屏调试控制卡选择显示屏说明,便于记录显示屏位置单元板色彩选择单元板种类选择单元板数据极性和OE 极性调整 单元板块数设置串口通讯检在硬件连接正常,并且确保硬件没有问题的情况下,会出现“连接成功”,连接不通会出现“连接失败”。
5、使用U盘口,请往下操作。
6、在屏参设置下面选择单元板,设置显示屏的宽、高,此处为单元板的块数(非点数),然后点击“确定”。
7、点击“字幕”或者“文本”“图片”“动画”,添加节目元素。
(字幕为单行显示,文本为多行显示)通过屏显示框下部的按钮对节目元素进行大小,位置的编辑,或手动拉送黄色边框进行编辑。
8、双击绿色的区域,在打开的对话框里输入容,并且对字体、大小、位置等容进行编辑,编辑好关闭该对话框。
9、在主界面下方对显示方式、速度、停留时间等容做调整。
10、使用串口,点击,等待容传送完毕。
如果提示发送超时,请在“屏参设置”界面里,重新“通讯检测”或者重启软件。
牛牛截图控件桌面版调用说明
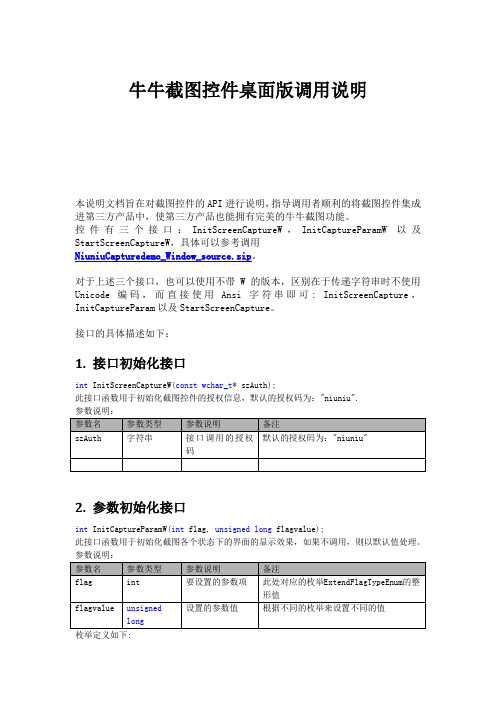
牛牛截图控件桌面版调用说明本说明文档旨在对截图控件的API进行说明,指导调用者顺利的将截图控件集成进第三方产品中,使第三方产品也能拥有完美的牛牛截图功能。
控件有三个接口:InitScreenCaptureW,InitCaptureParamW以及StartScreenCaptureW,具体可以参考调用NiuniuCapturedemo_Window_source.zip。
对于上述三个接口,也可以使用不带W的版本,区别在于传递字符串时不使用Unicode编码,而直接使用Ansi字符串即可: InitScreenCapture,InitCaptureParam以及StartScreenCapture。
接口的具体描述如下:1. 接口初始化接口int InitScreenCaptureW(const wchar_t* szAuth);此接口函数用于初始化截图控件的授权信息,默认的授权码为:"niuniu".2. 参数初始化接口int InitCaptureParamW(int flag, unsigned long flagvalue);此接口函数用于初始化截图各个状态下的界面的显示效果,如果不调用,则以默认值处理。
参数说明:枚举定义如下:typedef enum ExtendFlagTypeEnum{emPensize = 1, //emDrawType, //emTrackColor, //emEditBorderColor, //emTransparent, //emWindowAware,emDetectSubWindowRect,emSetSaveName,emSetMagnifierBkColor, //设置放大镜的背景色,不设置则透明emSetMagnifierLogoText, //设置放大镜上的LOGO字符,可提示快捷键,如:牛牛截图(CTRL + SHIFT + A)emSetWatermarkPictureType=20, //设置水印的类型emSetWatermarkPicturePath, //设置水印的路径emSetWatermarkTextType, //设置水印文字的类型emSetWatermarkTextValue, //设置水印文字emSetMosaicType, //设置马赛克类型,1为矩形,2为画线emSetToolbarText, //设置工具栏上的各按钮的tooltip及显示的文字};a). 水印图片设置参数说明:此处的参数值是一个字符串,以|为分割符,如://nShowType|nMinWidth|nMinHeight|nMaxWidth|nMaxHeight|nShowOffset未授权时,此参数对应的设置将采用默认值,不可修改;默认支持的图片大小为200*200,超过此大小的地方,将仅显示是在200*200范围内的图片。
牛牛安装包界面控件使用说明
牛牛安装包界面控件使用说明本说明文档旨在对nsNiuniuSkin.dll控件的使用进行说明,指导调用者顺利的将牛捉安装包界面控件控件集成进安装包中,使第三方产品也能拥有完美的安装包的UI体验功能。
官方网址:/牛牛安装包界面控件是一个可集成于NSIS的插件,采用Duilib开发,在使用时,安装包制作者只需要做如下两件事情:1. 通过配置Duilib的资源,设计好界面显示的元素2. 在NSIS的脚本中,通过NSIS脚本调用nsNiuniuSkin.dll的相关接口,集成UI及安装包的业务功能在控件的资源中,采用的是通过TAB控件来实现不同阶段的安装界面,比如:选择路径、许可协议、安装进度、完成、卸载等,在实际使用中,通过NSIS脚本来设置当前需要显示的TAB页,即可完美的呈现出需要的界面UI了。
在我们的示例中,提供了两份安装的界面如下:注意,最新版本的控件已经将可用的NSIS及7z的相关文件包含在示例包中,可以通过一键打包批处理脚本进行打包了,具体如下:1). 将要打包的文件复制到FilesToInstall目录下,可以包含文件及若干层的目录2). 修改相关项目下的skin目录下的资源文件及xml脚本来配置UI3). 添加相关(或者在我原来的示例上修改,这样更快)的NSIS脚本文件,并与UI相匹配4). 指定好相关的ICO、licence等信息5). 执行build.bat脚本,一键打包,build脚本会做三件事:将FilesToInstall 目录下的文件打包成app.7z;将skin目录下的文件打包成skin.zip;调用nsis 编译程序,编译nsi文件,输出安装包。
以上描述的build脚本为全自动执行,可以轻松集成进您现有的软件发布流程中,实现自动化打包发布。
牛牛安装包界面控件包含的接口较多,以下逐一进行介绍[以下接口调用及参数说明按在NSIS脚本中的调用示例来说明]:1.接口初始化接口InitSkinPage此接口函数用于初始化nsNiuniuSkin.dll控件的配置信息.调用示例:nsNiuniuSkin::InitSkinPage "$PLUGINSDIR\" "${INSTALL_LICENCE_FILENAME}"参数说明:2.重新设置许可协议的文件名nsNiuniuSkin::ResetLicenseFile $hInstallDlg "newlicensename.rtf"设置后,许可协议显示控件将会重新加载许可协议文件,这个比较适合用于多语言版本的不同许可协议加载显示。
LED软件使用操作说明(精)
一.运行环境1. 操作系统基于 WIN98/WIN2000/WINXP/WIN7下的集成环境;硬件配置 CPU: Pentium 300MHz以上, 内存 :64M以上2. 安装(绿色软件无需安装1. 此软件不需要安装, 不能在光盘里面操作 , 把光盘里面的软件包先复制粘贴到您的电脑上,然后再再打开软件。
2. 如是 QQ 传过来或网上下载的软件压缩包,请先解压后再使用。
3. 如需要将小图标单独放到电脑桌面,请从软件包中的小图标右键发送到桌面快捷方式 ,再从桌面上打开软件使用,否则会出错!3. 串口接线 (235直通4.U 盘要求 (16G 以下的 U 盘都可以, 带有杀毒和加密软件的 U 盘不能用串口调试简要步骤:1. 进入“硬件配置”设置好屏参,然后点“加载屏参到显示屏” ,退出, 2. 然后添加节目分区编辑好内容和特技方式, 3. 然后点“下载节目”就可以。
U 盘调试简要步骤:1. 先把 U 盘插到电脑上进入“硬件配置”设置好屏参,然后点“保存屏参” ,退出, 2. 然后添加节目分区编辑好内容和特技方式, 3. 然后点“保存到 U盘”就可以。
二 . 具体操作如下。
.打开软件进入软件界面图 3-1系统界面由以下部分组成(图 3-1 :区域 1:主菜单;区域 2:工具栏;区域 3:节目表;区域 4:属性窗口;区域 5:显示屏分区显示预览;区域 6:显示屏整屏显示预览;区域 7:快捷菜单栏三.系统参数设置在设置系统参数之前, 可以通过在菜单工具栏中“查找显示屏” , 如果连接成功,系统提示“已经查找到COM ” ,如果通讯失败,系统将提示连接失败,这时需要检查 232通讯线路是否有损坏,或者接口是否接触不良。
在菜单【设置】 -【硬件配置】单击出现如图 3-9-1的密码输入对话框, 键入“ 168” , 单击确认。
(系统默认的密码是 168 弹出“硬件配置”对话框如图 3-9-2所示。
图 3-9-1高级设置包括单元板类型、通讯方式设置、显示屏设置等功能。
力控组态软件教程
力控组态软件教程第一节选型及安装力控通用监控组态软件的正式发行企业版分为开发版和运行版,软件是根据点数进行计价的,点数是指实际监控的外部I/O设备参数的个数,即软件内部的实时数据库DB中I/O连接项的个数,软件内部的中间变量、间接变量等不计点。
力控演示版的开发版和运行版分别有64点的限制,完全免费的不限点数的开发版可以直接咨询三维力控销售部和各地办事处,索要注册号即可以使用,力控正式发行的开发版没有点数和时间的限制,购买软件时,开发版随运行版免费赠送,运行版分为通用监控版、WWW网络版等。
1. 力控的运行版本1) 通用监控版运行在单台PC上完成监控,该版本不包括扩展组件。
2) 标准网络版由2套通用监控版软件通过以太网可以构成标准的服务器/客户端应用模式,标准服务器端只授权5客户使用,客户端在5个客户端的基础上可增加10、20、50、无限客户端。
3) WWW网络版用标准的IE浏览器作为“瘦”客户端,在Internet/Intranet上来监控WWW 服务器的上的数据,瘦客户端在5个客户端的基础上可增加10、20、50、无限客户端。
2. 扩展组件包括PC控制策略程序、GPRS组件、数据库ODBC通讯组件、CommServer通讯组件、DataServer数据转发组件、远程数据库历史备份程序等组件。
3.系统要求1)硬件配置目前市面上流行的机型完全满足力控的运行要求,推荐配置如下:CPU:Pentium(R) 4 CPU 2.0GHz以上。
内存:512M以上。
显示器:VGA、SVGA以及支持桌面操作系统的图形适配器,显示256色以上。
并行口或USB口:安装产品授权的加密锁。
2)软件要求软件没有经过授权,也可以开发和运行,但有如下限制:数据库连接项支持64点,运行系统在线运行时间是1小时。
软件支持的操作系统:WINNT4.0(补丁6)/WIN2000 /WINXP/WIN 2003。
可用于win XP、win7,win10未试过,估计可以?3)硬件加密锁软件是通过硬件加密锁进行授权,软件经过授权后可以长时间运行,产品提供的加密锁包括:并口硬件加密锁和USB口硬件加密锁,硬件加密锁使用前必须安装驱动程序。
AWE Jeep Wrangler JL 系列喇叭系统安装指南说明书

INSTALLATION GUIDE:AWE Jeep Wrangler JL ExhaustFor up -to -date– information, please visit the products page on AWE Welcome to the AWE family, and congratulations on your purchase of the AWE Exhaust system for the Jeep JL.Exquisite build quality and craftsmanship, coupled with industry leading performance, distinguish this exhaust system from all others.*For up to the minute fitment information, be sure to visit the AWE website. As always, AWE Performance Specialists are standing by for any questions, right here .THIS GUIDE IS INTENDED FOR THE FOLLOWING PART NUMBERS:3015-21003 AWE Trail Edition Catback Exhaust for Jeep JL/JLU 3.6L 3015-21005 AWE Trail Edition Catback Exhaust for Jeep JL/JLU 2.0T3015-32001 AWE Tread Edition Axleback Dual Exhaust for Jeep JL/JLU 3.6L/2.0T - Chrome Silver Tips 3015-33001AWE Tread Edition Axleback Dual Exhaust for Jeep JL/JLU 3.6L/2.0T - Diamond Black Tips3015-11001 AWE Resonated Mid Pipe for Jeep JL/JLU 3.6L 3020-11001 AWE Non -Resonated Mid Pipe for Jeep JL/JLU 3.6L 3015-11003 AWE Resonated Mid Pipe for Jeep JL/JLU 2.0T 3020-11003 AWE Non-Resonated Mid Pipe for Jeep JL/JLU 2.0TSymbol Part Number Description QTY JL 3.6L ONLY—3015-21003D55JL Jeep Wrangler 3.6L Flared Inlet 75/76MM with 3X6 Resonator1JL 2.0L ONLY—3015-21005D53JL Jeep Wrangler 2.0L Flared Inlet 80-81MM with 3X6 Resonator1JL ALLD58JL Jeep Wrangler Extension Tube For (JLU 4 door)1D57JL Jeep Wrangler Rear Tube1TAS300 3.00in Accu-Seal, Stainless Steel Band Clamp23910-11012Hanger Clamp Kit - 2 Split C-Clamps and 1 Allen Wrench 9/641Symbol Part Number Description QTY JL ALLD49JL Jeep Wrangler Axle Back Inlet Tube1D50JL Jeep Wrangler Twin HR1 Assembly1D51JL Jeep Wrangler Driver Outlet Tube1D52JL Jeep Wrangler Passenger Outlet Tube1TAS300 3.00in Accu-Seal, Stainless Steel Band Clamp1TAS250 2.50in (63.5mm) Accu-Seal, Stainless Steel Band Clamp3BHM8X079SS00C Barrel Hardware Clamp2 3910-11012Hanger Clamp Kit - 2 Split C-Clamps and 1 Allen Wrench 9/641 Chrome Tips ONLY—3015-3200161000078Chrome Plated 77mm Inlet, 114mm OD 2 Black Tips ONLY— 3015-3300161000474Black Chrome 77mm Inlet, 114mm OD 2Symbol Part Number Description QTY JL ALLD58JL Jeep Wrangler Extension Tube For (JLU 4 door)1D59JL Jeep Wrangler Over Axle Tube1TAS300 3.00in Accu-Seal, Stainless Steel Band Clamp2 Resonated 3.6L — 3015-11001D55JL Jeep Wrangler 3.6L Flared Inlet 75/76MM with 3X6 Resonator1 Non-Resonated 3.6L — 3020-11001D56JL Jeep Wrangler 3.6L Flared Inlet 75/76MM Non Res1 Resonated 2.0L – 3015-11003D53JL Jeep Wrangler 2.0L Flared Inlet 80-81MM with 3X6 Resonator1 Non-Resonated 2.0L—3020-11003D54JL Jeep Wrangler 2.0L Flared Inlet 80-81MM Non Res1To begin remove the OE rear muffler, this is achieved by loosening the exhaust clamp (A ) and detaching the 2 OE hangers (B ).Soak all bolts in penetrant fluid before working.Note: OE hangers WILL be reused.To remove the mid pipe, loosen the OE ball clamp bolt, than the OE ball socket has a locking tab that will need to be disengaged.To do so insert a pick and bend the tab out (A ) as shown in Figure 2-1. Next pull the ball socket clamp off of the slip ,joint (B ) as shown in Figure 2-2.NOTE: Always refer to the manufacturer ’s service manual for precise torque specifications on all OEM fasteners.CAUTION: The exhaust may be VERY HOT — allow adequate time for the system to cool down before disassembly. Severe burns and injury will occur if skin comes into contact with a hot exhaust system.IF ONLY INSTALLING THE AXLE -BACK EXHAUST SYSTEM, SKIP TO STEP 8With the mid pipe unbolted, detach the exhaust from the OE hanger and remove the OE mid pipe from the vehicle, as shown in Figure 3.Note: OE rubber hanger mount will be reused.Install the AWE front pipe, use the OE ball clamp (A), at this point just snug the clamp to allow for future alignment, as shown in Figure 4. Note:D53 -Resonated 2.0LD54 -Non-Resonated 2.0LD55 -Resonated 3.6LD56 -Non-Resonated 3.6L4 DOOR / JLU - ONLYIf installing the AWE mid pipe onto a 4 door, install the straight tube (D58) onto the AWE front pipe, as shown in Figure 6.2 Doors will NOT use this pipe.It is crucial to install each section and exhaust band clamps correctly to prevent loose joints, exhaust leaks and rattles.Arrow A shows the expanded pipe and the preinstalled exhaust clamp being brought up to the corresponding pipe.Arrow B shows the overlapping pipe installed correctly over the corresponding pipe.Arrow C shows the exhaust band clamp being brought to the edge of the expanded pipe.NOTES:•Do not fully torque any exhaust clamp until the entire exhaust has been installed and adjusted.• Torque specification is a minimum of 60 ft/lbsPosition the AWE over axle tube (D59) by firstinserting the hanger bar into the OE rubberhanger, then slip the AWE tube together, asshown in Figure 7.If ONLY installing the AWE mid pipe,insert AWE tube into OE axle back andtight all clamps to at least 60 ft-lbs.AWE axle back install ONLYWith a supplied clamp, insert the AWE axleback inlet (D49) into the mid pipe, as shown inFigure 8.Install the OE driver and passenger hangers onto the AWE twin HR assembly (D50), asshown in Figure 9.With a supplied clamp (A), insert the AWE twin HR assembly (D50) into the inlet pipe, as shown in Figure 10.Re-attach the OE hanger to the chassis using the same hardware removed earlier, as shown in Figure 11-1 and 11-2.Snug the two clamps enough to keep the pipefrom moving while aligning the rest of thesystem, as shown in Figure 12.Install the AWE driver (D51) and passenger (D52) side tubes, with the supplied clamps, as shown in Figure 13-1 and Figure 13-2.Note: Only snug the clamps enough to hold the weight of the tube, while you align the system.It is crucial to install each section and exhaustband clamps correctly to prevent loose joints,exhaust leaks and rattles.Arrow A shows the expanded pipe and thepreinstalled exhaust clamp being brought up tothe corresponding pipe.Arrow B shows the overlapping pipe installedcorrectly over the corresponding pipe.Arrow C shows the exhaust band clamp beingbrought to the edge of the expanded pipe.NOTES:• Do not fully torque any exhaustclamp until the entire exhaust hasbeen installed and adjusted.• Torque specification is a minimum of60 ft/lbsFor the best tip fitment, align the barrel style tipclamp to cover only the slot, shown by Arrow ATorque the tip clamp to 18 ft./lbs.NOTES:• It is required to apply anti-seize to thethreads to prevent thread binding,shown by Arrow B• It is okay to have the clamp extendbeyond the edge of the tip inlet.Install the AWE tips onto the axle back, snug the clamps in place, as shown in Figure 16-1 and 16-2.Check for proper clearance and tighten all clamps in the system to at least 60 ft/lbs, as shown in Figure 17.Note: It Is important to align the HRassembly (D50) parallel to the rear cross brace. Shown by arrow AFor the rear sections, hanger bar collar clamps are provided to prevent side to side movement of the exhaust system. After sliding the exhaust hanger bar through the OEM grommet, install the collar clamp on the outside end of the bar as shown in Figure 18AWE Trail Systems ONLYInstall the AWE Trail over axle (D57) by installing it from the rear over the axle, as shown in Figure 19-1. Then attach the OE rubber hanger (A) then press the slip fit together, as shown in Figure 19-2.Make the OE hanger (A) and the AWE hangerbar (B) as close to parallel as possible, asshown in Figure 20. This will help to get correctfitment.It is crucial to install each section and exhaust band clamps correctly to prevent loose joints, exhaust leaks and rattles.Arrow A shows the expanded pipe and the preinstalled exhaust clamp being brought up to the corresponding pipe.Arrow B shows the overlapping pipe installed correctly over the corresponding pipe.Arrow C shows the exhaust band clamp being brought to the edge of the expanded pipe.NOTES:• Do not fully torque any exhaustclamp until the entire exhaust hasbeen installed and adjusted.• Torque specification is a minimum of60 ft/lbsFor the rear sections, hanger bar collar clamps are provided to prevent side to side movement of the exhaust system. After sliding the exhaust hanger bar through the OEM grommet, install the collar clamp on the outside end of the bar as shown in Figure 22With the correct fitment, install the supplied hanger clamps onto the 2 locations marked by (B), as shown in Figure 23.Check for proper clearance and tighten all clamps in the system to at least 60 ft/lbs.Once installed properly, your AWE exhaust will provide years of trouble -free performance.The exhaust volume and sound will settle with usage; 800-1000 miles is required to break -in new exhaust systems.Also, please note that the rear 180Technology® resonator has a small drain hole to allow condensation to escape. Water drops from this area are normal.Periodic cleaning of exhaust tips is necessary to maintain proper finish, especially in areas prone to road salt and caustic deicing solutions. Use a mild soap and water solution or car wax to clean the finish. Avoid using abrasive polishes, as they can scratch the finish.Up -to -date warranty information is found HERE .Any questions or comments,please do not hesitate to contact us:AWE199 Precision Drive Horsham, PA 19044215-658-1670 CONTACT FORMIssueSolutionExhaust is not fitting correctlyMost fitment issues are due to improperly adjusted exhaust. This includes tip fitments and rattling due to chassis contact. Check out our fitment guide for more installation tips.Wrong or missing partsDouble check the parts list for your system and compare them with what you received. Fill out our contact form, found below and let us know what parts you need.。
鼎立软件的安装和使用说明正式版
排列后如下图:
3.2电子电图与基站信息的加载:
之后点亮“小地球”
现在开始加载基站地图信息:
从导航栏里把“CDMA文件夹”拖入MAP窗口中:
此时在MAP窗口中会出现下图:(表示基站添加成功)
3.3测试模板的建立与拨号测试:
建立模板并输入名字:
输入被叫号码:这里我们用10000客服做为被测试对象。
单击“下一步”然后进行相关设置:
单击“下一步”。
、
点击确定
点击完成
前台软件装载完成。
安装完毕:
1.3Navigator的安装:
找到安装包进行安装:
1.4 GPS驱动的安装:
找到 后双击,出现
双击打开 。
然后Finish就OK .
1.4
1.5测试手机LG-KX206驱动安装方法:
让电脑识别手机端口。手动安装驱动。
指定安装路径:
安装完成。
第二章Pioneer3.6.1.35软件的界面说明:
2.1软件界面简介:
第三章
3.1设备的硬件连接,打开软件,端口识别,记录,排列窗口:
开始设置:
硬件设备的连接:
添加GPRS硬件连接:
添加手机硬件连接:
添加完毕后单击“ok”
单击开始连接:
连接成功后单击“开始记录”
开始排列窗口:
TxAGC发射功率调整增益:越小越好
TxPWR手机发射功率:越小越好
Total Ec/Io总的码片速率比干扰:>-12dB
FFER误帧率:{0~100%}
4.4
显示的是当前A-set C-set N-set的情况,包括频点和扰码。一个扰码对应一个小区。
4.5CDMA-Finger窗口:
牛牛截图控件

牛牛截图控件浏览器版调用说明牛牛截图控件浏览器版调用说明 (1)1.接口初始化接口 (2)2.参数初始化接口 (2)3.启动截图接口 (7)4.截图完成后向浏览器通知的事件 (8)5.其他接口 (9)6.调用示例 (10)本说明文档旨在对截图控件的浏览器控件进行说明,指导调用者顺利的将截图控件集成进第三方网页中,使第三方网页也能拥有完美的牛牛截图功能。
牛牛截图网页演示页面请访问:/testcapture.htm写在前面的话:牛牛截图控件目前支持的功能比较丰富,接口比较丰富,但能保证基本功能的接口并不复杂,在查看文档时,请自行根据自己的需求查看相应的接口;添加水印、获取剪贴板中的图片属于高级功能,如果不需要,这部分可以忽略。
提醒:牛牛截图的核心的调用代码已经全部封装在了niuniucapture.js中,一般情况下,你不需要修改只文件内容,只需要引用,并且自己另外写JS来与UI 集成即可,具体见示例(capturewrapper.js)。
牛牛截图控件浏览器版能在目前所有的主流浏览器上正常工作,以下的接口说明适用于所有浏览器,并且提供相应的Javascript调用示例。
控件主要有三个接口:InitCapture,InitParam以及Capture,这些接口均是暴露给浏览器的Javascript调用,具体可以参考调用WebNiuniuCapturedemo_source.zip,接口的具体描述如下:1.接口初始化接口int InitCapture (const char* szAuth);此接口函数用于初始化截图控件的授权信息,默认的授权码为:"niuniu"。
2.参数初始化接口int InitParam (int flag, unsigned long flagvalue);此接口函数用于初始化截图各个状态下的界面的显示效果,如果不调用,则以默认值处理。
枚举定义如下:typedef enum ExtendFlagTypeEnum{emPensize = 1, //emDrawType, //emTrackColor, //emEditBorderColor, //emTransparent, //emWindowAware,emDetectSubWindowRect,emSetSaveName,emSetMagnifierBkColor, //设置放大镜的背景色,不设置则透明emSetMagnifierLogoText, //设置放大镜上的LOGO字符,可提示快捷键,如:牛牛截图(CTRL + SHIFT + A)emSetPreCaptureWindowTitle, //设置网页上截图时弹出窗口的标题emSetPreCaptureWindowTransparent=18,//设置预截图窗口的透明度emSetWatermarkPictureType=20, //设置水印的类型emSetWatermarkPicturePath, //设置水印的路径emSetWatermarkTextType, //设置水印文字的类型emSetWatermarkTextValue, //设置水印文字emSetMosaicType, //设置马赛克的样式emSetTooltipText, //设置工具栏图标的TOOLTIP及完成按钮的文字};枚举项的说明如下:此处的参数值是一个字符串,以|为分割符,如://nShowType|nMinWidth|nMinHeight|nMaxWidth|nMaxHeight|nShowOffset未授权时,此参数对应的设置将采用默认值,不可修改;默认支持的图片大小为200*200,超过此大小的地方,将仅显示是在200*200范围内的图片。
明牛简易项目操作说明

明牛简易项目操作说明一.准备工作: (2)二.:平台操作 (2)1.1.申请账户 (2)1.2.登陆账户 (3)三.MNGate操作(硬件配置) (4)1.1.新建项目 (4)1.2.添加采集器 (4)1.3.添加设备: (6)1.4.联机操作 (6)1.5.同步配置文件 (8)四.第三节:画图工具操作 (9)1.1.新建画面 (9)1.2.画布参数 (9)1.3.工具栏说明 (10)一. 准备工作:到官网的技术支持-- 软件下载目录下载文档以及帮助手册;1.MNGate配置软件:MNConfig软件及MNConfig操作手册2.平台:注册平台账户,并下载i-Preception操作手册3.APP:下载安卓版APP安装包或者微信二维码关注如果有用到:1.OPC客户端,下载OPCClient软件,操作方式见MNConfig操作手册;2.OPC服务器,下载MNOPCServer软件及MNOPCServer操作手册;3.报表功能,下载MNReport-Excel软件,操作方式见i-Preception操作手册。
二. :平台操作1.1.申请账户通过官网申请账户,申请地址如下:。
(已有账户就无需申请)此处用户名用于账户登录,申请成功之后,手机会发送信息到用户手机。
1.2.登陆账户通过官网登陆,登陆地址登录成功之后,界面如下:树结构菜单功能解释:我的主页:做一副主画面作为首页展示。
数据源管理:MNGate和末端设备的状态查看,实时数据监视和控制。
报表管理:可以制作报表,查看报表。
趋势曲线:显示实时曲线和历史曲线;历史曲线需要在数据源管理里面设置保存方可查看和显示。
报警管理:显示末端设备的报警信息。
配置方式详情见《MNConfig操作手册_V2.0》设备管理:添加设备,可以将变量、画面、报警等赋予每个设备。
组态管理:制作画面。
权限管理:新增人员,添加权限。
三. MNGate操作(硬件配置)打开下载完成的MNConfig软件,安装完成之后双击打开。
FLStudio10新插件NewTone中文使用手册
NewToneNewtone是一个校正音高和时间操作的编辑器。
它可以切片、校正、编辑人声、乐器和录制的其它声音。
另一个实时校正音高的插件是Pitcher(功能也巨强大,与其说校音插件,不如说是变音怪杰)。
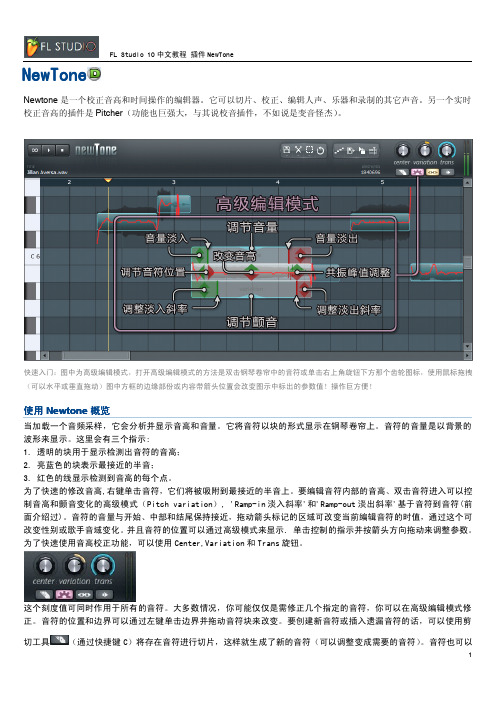
快速入门:图中为高级编辑模式,打开高级编辑模式的方法是双击钢琴卷帘中的音符或单击右上角旋钮下方那个齿轮图标,使用鼠标拖拽(可以水平或垂直拖动)图中方框的边缘部份或内容带箭头位置会改变图示中标出的参数值!操作巨方便!使用Newtone概览当加载一个音频采样,它会分析并显示音高和音量。
它将音符以块的形式显示在钢琴卷帘上。
音符的音量是以背景的波形来显示。
这里会有三个指示:1.透明的块用于显示检测出音符的音高;2.亮蓝色的块表示最接近的半音;3.红色的线显示检测到音高的每个点。
为了快速的修改音高,右键单击音符,它们将被吸附到最接近的半音上。
要编辑音符内部的音高、双击音符进入可以控制音高和颤音变化的高级模式(Pitch variation),'Ramp-in淡入斜率'和'Ramp-out淡出斜率'基于音符到音符(前面介绍过)。
音符的音量与开始、中部和结尾保持接近,拖动箭头标记的区域可改变当前编辑音符的时值,通过这个可改变性别或歌手音域变化。
并且音符的位置可以通过高级模式来显示.单击控制的指示并按箭头方向拖动来调整参数。
为了快速使用音高校正功能,可以使用Center,Variation和Trans旋钮。
这个刻度值可同时作用于所有的音符。
大多数情况,你可能仅仅是需修正几个指定的音符,你可以在高级编辑模式修正。
音符的位置和边界可以通过左键单击边界并拖动音符块来改变。
要创建新音符或插入遗漏音符的话,可以使用剪切工具(通过快捷键C)将存在音符进行切片,这样就生成了新的音符(可以调整变成需要的音符)。
音符也可以连接在一起(方法是SHIFT+CTRL同时再单击音符可将音符相连。
注意此方法必须是在激活剪切工具的条件下)。
- 1、下载文档前请自行甄别文档内容的完整性,平台不提供额外的编辑、内容补充、找答案等附加服务。
- 2、"仅部分预览"的文档,不可在线预览部分如存在完整性等问题,可反馈申请退款(可完整预览的文档不适用该条件!)。
- 3、如文档侵犯您的权益,请联系客服反馈,我们会尽快为您处理(人工客服工作时间:9:00-18:30)。
牛牛安装包界面控件使用说明
本说明文档旨在对nsNiuniuSkin.dll控件的使用进行说明,指导调用者顺利的将牛捉安装包界面控件控件集成进安装包中,使第三方产品也能拥有完美的安装包的UI体验功能。
官方网址:/
牛牛安装包界面控件是一个可集成于NSIS的插件,采用Duilib开发,在使用时,安装包制作者只需要做如下两件事情:
1. 通过配置Duilib的资源,设计好界面显示的元素
2. 在NSIS的脚本中,通过NSIS脚本调用nsNiuniuSkin.dll的相关接口,集成UI及安装包的业务功能
在控件的资源中,采用的是通过TAB控件来实现不同阶段的安装界面,比如:选择路径、许可协议、安装进度、完成、卸载等,在实际使用中,通过NSIS脚本来设置当前需要显示的TAB页,即可完美的呈现出需要的界面UI了。
在我们的示例中,提供了两份安装的界面如下:
注意,最新版本的控件已经将可用的NSIS及7z的相关文件包含在示例包中,可以通过一键打包批处理脚本进行打包了,具体如下:
1). 将要打包的文件复制到FilesToInstall目录下,可以包含文件及若干层的目录
2). 修改相关项目下的skin目录下的资源文件及xml脚本来配置UI
3). 添加相关(或者在我原来的示例上修改,这样更快)的NSIS脚本文件,并与UI相匹配
4). 指定好相关的ICO、licence等信息
5). 执行build.bat脚本,一键打包,build脚本会做三件事:将FilesToInstall 目录下的文件打包成app.7z;将skin目录下的文件打包成skin.zip;调用nsis 编译程序,编译nsi文件,输出安装包。
以上描述的build脚本为全自动执行,可以轻松集成进您现有的软件发布流程中,实现自动化打包发布。
牛牛安装包界面控件包含的接口较多,以下逐一进行介绍[以下接口调用及参数说明按在NSIS脚本中的调用示例来说明]:
1.接口初始化接口
InitSkinPage
此接口函数用于初始化nsNiuniuSkin.dll控件的配置信息.
调用示例:
nsNiuniuSkin::InitSkinPage "$PLUGINSDIR\" "${INSTALL_LICENCE_FILENAME}"
参数说明:
2.重新设置许可协议的文件名
nsNiuniuSkin::ResetLicenseFile $hInstallDlg "newlicensename.rtf"
设置后,许可协议显示控件将会重新加载许可协议文件,这个比较适合用于多语言版本的不同许可协议加载显示。
3.设置安装包标题
SetWindowTile
此接口函数用于指定安装包的标题。
调用示例:
nsNiuniuSkin::SetWindowTile $hInstallDlg "${PRODUCT_NAME}安装程序"
4.设置当前显示的TAB页
nsNiuniuSkin::ShowPageItem $hInstallDlg "wizardTab" ${INSTALL_PAGE_CONFIG}
5.路径选择相关接口
4.1 通知接口来浏览安装路径
nsNiuniuSkin::SelectInstallDir
Pop $0
通知界面控件来浏览安装路径,并且将路径获取到变量中。
再调用此接口后,应该再调用SetControlAttribute接口来将安装的路径设置到控件界面上。
4.2 通知接口来浏览安装路径扩展接口
nsNiuniuSkin::SelectInstallDirEx $hInstallDlg "请选择安装路径"
Pop $0
此接口是SelectInstallDir的扩展接口,在SelectInstallDir的基础上,支持设置文件选择框的标题。
6.显示界面控件
nsNiuniuSkin::ShowPage 0
当界面绑定事件完成后,通过此接口来调用显示控件,此接口将会阻塞运行。
7.弹出提示框接口
1) 以下代码用于初始化子窗口弹窗,同时返回其句柄:
nsNiuniuSkin::InitSkinSubPage "msgBox.xml" "btnOK" "btnCancel,btnClose"
2) 以下代码用于根据弹窗窗口的句柄设置其UI控件的属性,控制显示变化:
nsNiuniuSkin::SetControlAttribute $hInstallSubDlg "lblTitle" "text" "提示"
3) 以下代码将弹窗显示出来:
nsNiuniuSkin::ShowSkinSubPage 0
参数说明:
8.指定界面上指定控件的属性
nsNiuniuSkin::SetControlAttribute $hInstallDlg "btnClose" "enabled" "false" nsNiuniuSkin::SetControlAttribute $hInstallDlg "lblInstalling" "text" "正在卸载..."
此接口用于指定界面的指定元素的指定属性,比如:是否可用、是否可见、是否选中、文字、背景图等等
参数说明:
注:
可以通过此接口设置所有的通用属性;一般可以利用此接口来设置指定控件的文本、是否可用、是否可见、位置、大小、背景图、文本颜色等;比如可以用于设置复选框是否选中等等。
通用的属性列表项可以参照下图:
设置示例如下:
9.获取控件的通用属性
nsNiuniuSkin::GetControlAttribute $hInstallDlg "editDir" "text"
Pop $2
此接口用于获取界面的指定元素的指定属性,比如:是否可用、是否可见,文本等等
通用的属性列表项可以参照下图:
10. 绑定UI
上控件的相关事件
GetFunctionAddress $0 OnExitDUISetup
nsNiuniuSkin::BindCallBack $hInstallDlg "btnClose" $0
此接口用于绑定一个按钮点击的回调函数或一个RichEdit
控件的文字变化时的回调函数。
注:
1). 当绑定的控件是一个RichEdit 控件时,其中的文本内容变化时就会触发绑定的函数;可以通过绑定路径的控件,同时在绑定的函数中获取路径,做否合法的判断。
2). 为了能够将通过Ctrl+F4关闭窗口,以及通过在任务栏关闭窗口的事件通知到NSIS 中,此处需要绑定一个特殊的名称,这个特殊的名称是:syscommandclose ,如下:
11.结束安装
nsNiuniuSkin::ExitDUISetup
此接口被调用时,将会退出安装进程
12.字符串处理辅助接口
nsNiuniuSkin::StringHelper "c:\test\test\" "\" "" "trimright"; 如果源字符串的最后一个字符是\,则将其去掉
pop $0
nsNiuniuSkin::StringHelper "c:\AAA\dst" "AAA" "bbb" "replace" ;将源码中的AAA替换成bbb
pop $0
nsNiuniuSkin::StringHelper "c:\AAA\dst" "\" "" " getrightbychar " ;将源码中的以\分隔的最后一段返回,此例中返回dst
pop $0
这是一个为了简化在NSIS脚本中的字符串处理而提供的辅助函数,有需要者可以使用。
13.其他信息
具体的NSIS脚本及DUILIB的配置文件可以参看DEMO,有如下几个注意事项:
1). DUILIB资源必需打包成zip压缩包,且名称必需是skin.zip
2). 在NSIS脚本中,安装与卸载界面中按如下方式指定:
此处将插件释放目录指定为duilib资源包及许可协议文件的释放路径。
3). 在实际的安装过程中,为了让进度信息尽可能准确,采用的是7z解压的方式
这就要求在制作安装包之前,需要将要安装的文件打包成一个7z 的压缩包,再在NSIS中指定安装:
在NSIS中,有相关的7z插件来解压,这里需要在线程中调用,以免界面卡住:
4). 目前提供的示例仅包含了常见的与UI界面相关的NSIS脚本;需要进一步的处理特定的注册表写入、文件备份等操作,需要自行另外再写NSIS脚本。
5). 界面的安装过程中的图片支持轮播,并且可以设置间隔时间,在XML中的写法如下:。
