linux查看驱动版本
linux驱动开发(一)

linux驱动开发(⼀)1:驱动开发环境要进⾏linux驱动开发我们⾸先要有linux内核的源码树,并且这个linux内核的源码树要和开发板中的内核源码树要⼀直;⽐如说我们开发板中⽤的是linux kernel内核版本为2.6.35.7,在我们ubuntu虚拟机上必须要有同样版本的源码树,我们再编译好驱动的的时候,使⽤modinfo XXX命令会打印出⼀个版本号,这个版本号是与使⽤的源码树版本有关,如果开发板中源码树中版本与modinfo的版本信息不⼀致使⽆法安装驱动的;我们开发板必须设置好nfs挂载;这些在根⽂件系统⼀章有详细的介绍;2:开发驱动常⽤的⼏个命令lsmod :list moduel 把我们机器上所有的驱动打印出来,insmod:安装驱动rmmod:删除驱动modinfo:打印驱动信息3:写linux驱动⽂件和裸机程序有很⼤的不同,虽然都是操作硬件设备,但是由于写裸机程序的时候是我们直接写代码操作硬件设备,这只有⼀个层次;⽽我们写驱动程序⾸先要让linux内核通过⼀定的接⼝对接,并且要在linux内核注册,应⽤程序还要通过内核跟应⽤程序的接⼝相关api来对接;4:驱动的编译模式是固定的,以后编译驱动的就是就按照这个模式来套即可,下⾯我们来分下⼀下驱动的编译规则:#ubuntu的内核源码树,如果要编译在ubuntu中安装的模块就打开这2个#KERN_VER = $(shell uname -r)#KERN_DIR = /lib/modules/$(KERN_VER)/build# 开发板的linux内核的源码树⽬录KERN_DIR = /root/driver/kernelobj-m += module_test.oall:make -C $(KERN_DIR) M=`pwd` modulescp:cp *.ko /root/porting_x210/rootfs/rootfs/driver_test.PHONY: cleanclean:make -C $(KERN_DIR) M=`pwd` modules cleanmake -C $(KERN_DIR) M=`PWD` modules这句话代码的作⽤就是到 KERN_DIR这个⽂件夹中 make modules把当前⽬录赋值给M,M作为参数传到主⽬录的Makefile中,实际上是主⽬录的makefile中有⽬标modules,下⾯有⼀定的规则来编译驱动;#KERN_VER = $(shell uname -r)#KERN_DIR = /lib/modules/$(KERN_VER)/build我们在ubuntu中编译内核的时候⽤这两句代码,因为在ubuntu中为我们保留了⼀份linux内核的源码树,我们编译的时候直接调⽤那个源码树的主Makefile以及⼀些头⽂件、内核函数等;了解规则以后,我们设置好KERN_DIR、obj-m这两个变量以后直接make就可以了;经过编译会得到下⾯⼀些⽂件:下⾯我们可以使⽤lsmod命令来看⼀下我们ubuntu机器现有的⼀些驱动可以看到有很多的驱动,下⾯我们使⽤insmod XXX命令来安装驱动,在使⽤lsmod命令看⼀下实验现象可以看到我们刚才安装的驱动放在了第⼀个位置;使⽤modinfo来打印⼀下驱动信息modinfo xxx.ko这⾥注意vermagic 这个的1.8.0-41是你⽤的linux内核源码树的版本号,只有这个编译的版本号与运⾏的linux内核版本⼀致的时候,驱动程序才会被安装注意license:GPL linux内核开元项⽬的许可证⼀般都是GPL这⾥尽量设置为GPL,否则有些情况下会出现错误;下⾯使⽤rmmod xxx删除驱动;-------------------------------------------------------------------------------------5:下⾯我们分析⼀下驱动。
linux 驱动 list 使用方法

linux 驱动 list 使用方法1. Linux驱动list是一个重要的命令,可以列出系统中加载的所有驱动程序。
The Linux driver list is an important command that canlist all the loaded drivers in the system.2.通过使用lsmod命令,可以查看当前系统中加载的驱动程序列表。
By using the lsmod command, you can view the list of loaded drivers in the current system.3.驱动程序列表包括了每个驱动程序的名称、大小、使用次数等详细信息。
The driver list includes detailed information such as the name, size, and number of uses for each driver.4.使用modprobe命令可以动态加载或卸载驱动程序。
The modprobe command can be used to dynamically load or unload drivers.5.通过在命令后加入驱动程序的名称,可以具体操作某一个驱动程序。
By adding the name of the driver after the command, you can specifically operate on a particular driver.6.驱动程序列表对于系统管理员和开发人员来说非常有用。
The driver list is very useful for system administrators and developers.7.你可以使用grep命令来筛选特定的驱动程序。
You can use the grep command to filter specific drivers.8.使用insmod命令可以手动加载某个内核模块。
如何在Linux系统中安装驱动程序

如何在Linux系统中安装驱动程序Linux系统作为一个开源的操作系统,广泛应用于各种设备和领域。
而安装驱动程序是在Linux系统中使用外部硬件设备的关键步骤之一。
在本文中,我们将学习如何在Linux系统中安装驱动程序的方法和步骤。
1. 检查硬件设备在安装驱动程序之前,首先需要确定硬件设备的型号和制造商。
可以通过查询设备的型号或者查看设备的相关文档来获取这些信息。
这是非常重要的,因为不同的设备可能需要不同的驱动程序来正确地工作。
2. 更新系统在安装驱动程序之前,确保你的Linux系统已经是最新的状态。
可以通过在终端中运行以下命令来更新系统:```sudo apt-get updatesudo apt-get upgrade```更新系统可以确保你拥有最新的软件包和驱动程序,以获得更好的兼容性和性能。
3. 查找合适的驱动程序一般来说,大部分硬件设备的驱动程序都可以在Linux系统的软件仓库中找到。
可以通过使用包管理器(如apt、yum等)来查找并安装合适的驱动程序。
运行以下命令来搜索并安装特定的驱动程序:```sudo apt-cache search 驱动程序名称sudo apt-get install 驱动程序名称```注意替换“驱动程序名称”为具体的驱动程序名称。
安装驱动程序可能需要输入管理员密码和确认安装。
如果你无法在软件仓库中找到合适的驱动程序,可以转向设备的制造商网站或者开源社区来获取。
下载驱动程序后,根据驱动程序提供的文档和说明来安装。
4. 编译和安装驱动程序有些驱动程序可能需要手动编译和安装。
在这种情况下,你需要确保你的系统已经安装了编译工具(如GCC、make等)。
在终端中切换到驱动程序所在的目录,并按照以下步骤进行编译和安装:```./configuremakesudo make install```以上命令将分别进行配置、编译和安装驱动程序。
在进行安装之前,可能需要输入一些配置选项或者确认安装。
Linux下查看网卡驱动和版本信息
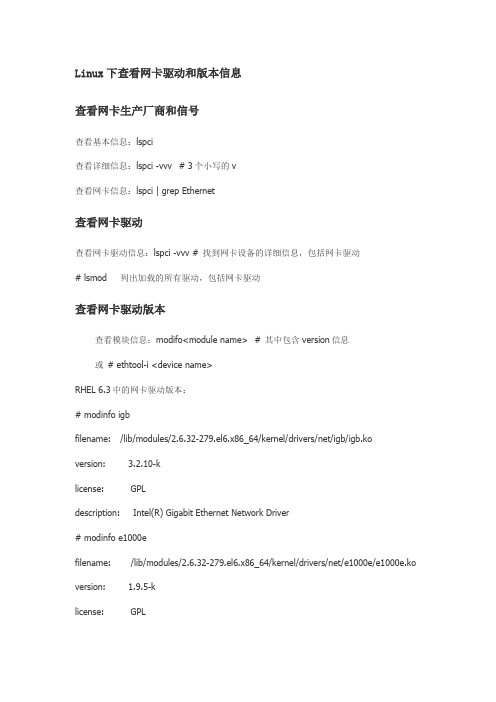
Linux下查看网卡驱动和版本信息查看网卡生产厂商和信号查看基本信息:lspci查看详细信息:lspci -vvv # 3个小写的v查看网卡信息:lspci | grep Ethernet查看网卡驱动查看网卡驱动信息:lspci -vvv # 找到网卡设备的详细信息,包括网卡驱动# lsmod 列出加载的所有驱动,包括网卡驱动查看网卡驱动版本查看模块信息:modifo<module name> # 其中包含version信息或# ethtool-i <device name>RHEL 6.3中的网卡驱动版本:# modinfo igbfilename: /lib/modules/2.6.32-279.el6.x86_64/kernel/drivers/net/igb/igb.ko version: 3.2.10-klicense: GPLdescription: Intel(R) Gigabit Ethernet Network Driver# modinfo e1000efilename: /lib/modules/2.6.32-279.el6.x86_64/kernel/drivers/net/e1000e/e1000e.ko version: 1.9.5-klicense: GPLdescription: Intel(R) PRO/1000 Network Driverauthor: Intel Corporation,<linux.nics@># modinfo e1000filename: /lib/modules/2.6.32-279.el6.x86_64/kernel/drivers/net/e1000/e1000.ko version: 8.0.35-NAPIlicense: GPLdescription: Intel(R) PRO/1000 Network Driver# modinfo ixgbefilename: /lib/modules/2.6.32-279.el6.x86_64/kernel/drivers/net/ixgbe/ixgbe.ko version: 3.6.7-klicense: GPLdescription: Intel(R) 10 Gigabit PCI Express NetworkDriver# modinfo r8169filename: /lib/modules/2.6.32-279.el6.x86_64/kernel/drivers/net/r8169.ko version: 2.3LK-NAPIlicense: GPLdescription: RealTek RTL-8169 Gigabit Ethernet driver查看网络接口队列数查看网卡接口的中断信息:#cat /proc/interrupts | grep eth0或# ethtool-S eth0查看网卡驱动源码的版本号解压Intel网卡驱动源码,打开解压缩目录下的*.spec文件查看驱动的版本。
Linux下安装NVIDIA显卡驱动
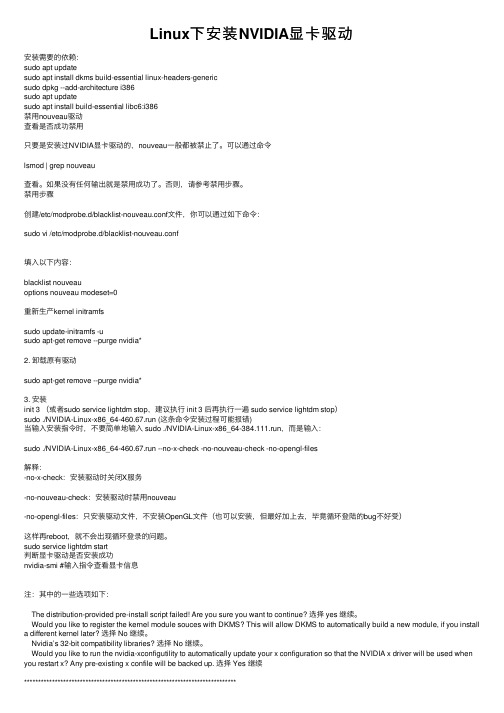
Linux下安装NVIDIA显卡驱动安装需要的依赖:sudo apt updatesudo apt install dkms build-essential linux-headers-genericsudo dpkg --add-architecture i386sudo apt updatesudo apt install build-essential libc6:i386禁⽤nouveau驱动查看是否成功禁⽤只要是安装过NVIDIA显卡驱动的,nouveau⼀般都被禁⽌了。
可以通过命令lsmod | grep nouveau查看。
如果没有任何输出就是禁⽤成功了。
否则,请参考禁⽤步骤。
禁⽤步骤创建/etc/modprobe.d/blacklist-nouveau.conf⽂件,你可以通过如下命令:sudo vi /etc/modprobe.d/blacklist-nouveau.conf填⼊以下内容:blacklist nouveauoptions nouveau modeset=0重新⽣产kernel initramfssudo update-initramfs -usudo apt-get remove --purge nvidia*2. 卸载原有驱动sudo apt-get remove --purge nvidia*3. 安装init 3 (或者sudo service lightdm stop,建议执⾏ init 3 后再执⾏⼀遍 sudo service lightdm stop)sudo ./NVIDIA-Linux-x86_64-460.67.run (这条命令安装过程可能报错)当输⼊安装指令时,不要简单地输⼊ sudo ./NVIDIA-Linux-x86_64-384.111.run,⽽是输⼊:sudo ./NVIDIA-Linux-x86_64-460.67.run --no-x-check -no-nouveau-check -no-opengl-files解释:-no-x-check:安装驱动时关闭X服务-no-nouveau-check:安装驱动时禁⽤nouveau-no-opengl-files:只安装驱动⽂件,不安装OpenGL⽂件(也可以安装,但最好加上去,毕竟循环登陆的bug不好受)这样再reboot,就不会出现循环登录的问题。
linux下安装USB无线网卡驱动

安装方法及步骤:一、准备工作2、到/projects/ndiswrapper下载最新的ndiswrapper包,我的版本是ndiswrapper-1.52.tar.gz3、准备好网卡在Winxp下的驱动程序。
驱动程序最好是最新的,指定给XP用的。
二、安装及配置1、安装(1)解压:tar -zxvf ndiswrapper-1.52.tar.gz(2)进入ndiswrapper-1.52:cd ndiswrapper-1.52(3)编译:make//在此操作之前必需先把编译环境搭建好,即:安装好开发环境。
(4)安装:make install //如果不采取默认的安装路径,则可以用。
configure ——prefix="/etc/local"来指定安装目录。
//此目录是自建。
(5)查看安装后的版本ndiswrapper -v | grep //此处似乎不对。
如安装成功则显示version: 1.51(6)获取该无线网卡的WindowsXP驱动,(7)进入该驱动所在目录:cd /home/tsm/dwl_g520(8)安装无线网卡驱动:ndiswrapper -i net5211.inf(9)查看驱动是否安装:ndiswrapper -l//如:显示net5211(驱动名称):driver installed(10)写入配置文件:ndiswrapper -mndiswrapper -mandiswrapper -mi(11)启动后模块自动加载:modprobe ndiswrapper注:安装出现问题的仔细按照下面小问题的步骤会解决问题的:小问题:我是用ndiswrapper安装windows下的inf驱动的sony本本384M内存,4M集成显存,usb1.0接口,跑windows速度比较慢,就像装个轻量级的操作系统。
无线网卡的ID是0cf3:1006,查询得到芯片对应驱动为ar9271.fw装过几次puppy(4.0、4.1、5.1)多是因为usb无线网卡无法驱动只好作罢。
Linux下查看版本号的命令

Password:
[root@taishan ~]# lsb_release -a
-bash: lsb_release: command not found
[root@taishan ~]# lsb_release -a
-bash: lsb_release: command not found
[root@taishan ~]# cat /etc/redhat-release
[root@3.5.5Biz-46 ~]#
这个命令适用于所有的linux,包括Redhat、SuSE、Debian等发行版。
2) 登录到linux执行cat /etc/redhat-release ,例如如下:
[root@3.5.5Biz-46 ~]# cat /etc/redhat-release
LSB Version: 1.3
Distributor ID: RedHatEnterpriseAS
Descrīption: Red Hat Enterprise Linux AS release 4 (Nahant Update 1)
Release: 4
Codename: NahantUpdate1
redhat-release-4AS-2.4
[root@3.5.5Biz-46 ~]#
这种方式下可看到一个所谓的release号,比如上边的例子是2.4
这个release号和实际的版本之间存在一定的对应关系,如下:
redhat-release-3AS-1 -> Redhat Enterprise Linux AS 3
sc@taishan /home/sc > uname -rcat /etc/issue
Linux命令行中的硬件信息查看和驱动管理
Linux命令行中的硬件信息查看和驱动管理在Linux命令行中,我们可以通过一些命令来查看硬件信息和管理驱动,这对于系统维护和故障排除非常重要。
本文将介绍几个常用的命令及其用法,帮助您快速获取硬件信息和管理驱动。
1. 查看硬件信息1.1 lshw命令lshw(或者lswhw)是一个用于查看硬件信息的命令,可以列出系统中所有硬件的详细信息,包括处理器、内存、硬盘、网卡等。
使用示例:```$ sudo lshw```运行以上命令后,您将看到完整的硬件信息列表,可以通过滚动查看或者使用管道和grep命令过滤感兴趣的部分。
1.2 lspci命令lspci命令用于列出系统中所有PCI设备的信息,包括显卡、网卡、声卡等。
使用示例:```$ lspci```该命令会输出PCI设备的详细信息,可以通过管道和grep进行过滤。
1.3 lsusb命令lsusb命令用于列出系统中所有USB设备的信息。
使用示例:```$ lsusb```该命令会输出USB设备的详细信息,可以通过管道和grep进行过滤。
2. 管理驱动2.1 modprobe命令modprobe命令用于加载和卸载Linux内核模块,包括驱动程序。
使用示例:```$ sudo modprobe <module_name> // 加载模块$ sudo modprobe -r <module_name> // 卸载模块```其中,`<module_name>`为要加载或卸载的模块名称。
2.2 lsmod命令lsmod命令用于列出当前已加载的内核模块。
使用示例:```$ lsmod```该命令会输出已加载模块的列表,包括模块名称、使用次数等信息。
2.3 rmmod命令rmmod命令用于卸载已加载的内核模块。
使用示例:```$ sudo rmmod <module_name>```其中,`<module_name>`为要卸载的模块名称。
linux安装网卡驱动教程

linux安装网卡驱动教程在Linux系统中,网卡驱动是一个必需的组件,它允许计算机与网络相连,进行数据的传输和通信。
虽然大多数Linux发行版会自动安装一些常用的网卡驱动,但某些特殊型号的网卡可能需要手动安装对应的驱动程序。
下面是一个详细的Linux安装网卡驱动的教程,帮助你完成这个过程。
1. 首先,你需要确定你的网卡型号和型号。
可以通过以下命令获取:```lspci | grep Ethernet```这将列出系统中所有的以太网适配器,包括网卡的型号和型号。
2. 一旦你确定了网卡的型号和型号,你可以在厂商的官方网站或者第三方驱动程序网站上查找和下载对应的驱动程序。
确保选择与你的Linux发行版和内核版本兼容的驱动程序。
3. 下载驱动程序后,将其保存在你的计算机上的一个可访问的位置,比如家目录。
4. 打开终端,在命令行中输入以下命令以进入驱动程序所在目录:```cd ~/下载```这里假设你将驱动程序保存在`~/下载`目录下。
如果你将其保存在其他目录,请将命令中的路径替换为实际位置。
5. 解压驱动程序文件。
这可以通过以下命令完成:```tar zxvf 驱动程序文件名.tar.gz```这里的`驱动程序文件名`应该是你下载的驱动程序文件的实际名称。
6. 进入驱动程序文件夹。
这可以通过以下命令完成:```cd 驱动程序文件夹名```这里的`驱动程序文件夹名`是解压后的驱动程序文件夹的实际名称。
7. 阅读驱动程序的安装说明文档。
通常情况下,驱动程序的文件夹中都会包含一个README文件或者INSTALL文件,其中提供了安装驱动程序所需的具体步骤和说明。
8. 一般来说,安装驱动程序的第一步是编译驱动程序的源代码。
在终端中输入以下命令以编译驱动程序:```make```这将根据驱动程序的源代码编译出可执行的二进制文件。
9. 安装编译好的驱动程序。
在终端中输入以下命令以安装驱动程序:```sudo make install```这需要管理员权限,所以你可能需要输入管理员密码。
Linux安装显卡驱动

Linux安装显卡驱动##############################Centos⼆、Centos Stream8安装nvidia显卡驱动1,禁⽤nouveau(1)查看是否禁⽤系统⾃带的驱动:lsmod | grep nouveau有显⽰信息,就说明没有禁⽤。
(2)打开/etc/modprobe.d/blacklist.conf ,添加: blacklist nouveau(3)打开 /usr/lib/modprobe.d/dist-blacklist.conf,添加两⾏: blacklist nouveau options nouveau modeset=0PS:即使没有对应的⽂件,也要新建⽂件然后添加2、重建⽂件系统(1)备份镜像,命令如下: mv /boot/initramfs-$(uname -r).img /boot/initramfs-$(uname -r)-nouveau.img(2)重建⽂件系统,命令如下: dracut /boot/initramfs-$(uname -r).img $(uname -r)3、重启系统(1)如果此时不重启,则nouveau还没有被禁⽤:若此时运⾏显卡安装程序,则有如下报错:(2)重启之后,则nouveau被禁⽤4、安装dkms(1)yum install kernel-devel epel-release(2)sudo yum -y install dkms #必须kernel-devel和epel-release安装结束后再安装dkms! PS:如果不安装dkms,直接运⾏驱动安装程序,则有如下报错:如: sh ./2080Ti-NVIDIA-Linux-x86_64-510.54.run安装时,选择No选择No选择Ok,这个不影响安装选择Yes安装完成!6、测试成功!⼀、Centos安装AMD显卡驱动1、检查⾃⼰的显卡类型 lspci | grep -i vga3、将安装包解压后安装,./amdgpu-pro-install -y --opencl=pal,legacy完成!PS:如果碰到yum安装报错:[Errno 256] No more mirrors to try.可以尝试:yum clean allyum makecacheyum -y update##############################Ubuntu五、关于驱动遇到的⼀些问题重启服务器,出现连接不上NVIDIA驱动的情况,执⾏nvidia-smi,报错NVIDIA-SMI has failed because it couldn't communicate with the NVIDIA driver. Make sure that the latest NVIDIA driver is installed and running.恢复⽅法:step1: sudo yum install dkmsstep2: ls /usr/src|grep nvidia (查询驱动版本号)nvidia-410.48step3: sudo dkms install -m nvidia -v 410.48附:lspci | grep -i nvidia 查询nvidia的显卡四,⼿动安装我的系统是ubuntu16.04 ,显卡是RTX105001 前期⼯作1.1 禁⽤nouveauubuntu 16.04默认安装了第三⽅开源的驱动程序nouveau,安装nvidia显卡驱动⾸先需要禁⽤nouveau,不然会碰到冲突的问题,导致⽆法安装nvidia显卡驱动。
linux查看网卡驱动信息
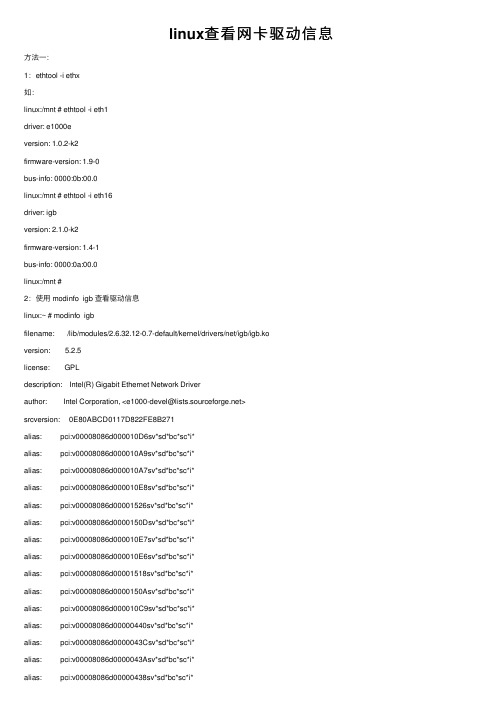
linux查看⽹卡驱动信息⽅法⼀:1:ethtool -i ethx如:linux:/mnt # ethtool -i eth1driver: e1000eversion: 1.0.2-k2firmware-version: 1.9-0bus-info: 0000:0b:00.0linux:/mnt # ethtool -i eth16driver: igbversion: 2.1.0-k2firmware-version: 1.4-1bus-info: 0000:0a:00.0linux:/mnt #2:使⽤ modinfo igb 查看驱动信息linux:~ # modinfo igbfilename: /lib/modules/2.6.32.12-0.7-default/kernel/drivers/net/igb/igb.koversion: 5.2.5license: GPLdescription: Intel(R) Gigabit Ethernet Network Driverauthor: Intel Corporation, <e1000-devel@>srcversion: 0E80ABCD0117D822FE8B271alias: pci:v00008086d000010D6sv*sd*bc*sc*i*alias: pci:v00008086d000010A9sv*sd*bc*sc*i*alias: pci:v00008086d000010A7sv*sd*bc*sc*i*alias: pci:v00008086d000010E8sv*sd*bc*sc*i*alias: pci:v00008086d00001526sv*sd*bc*sc*i*alias: pci:v00008086d0000150Dsv*sd*bc*sc*i*alias: pci:v00008086d000010E7sv*sd*bc*sc*i*alias: pci:v00008086d000010E6sv*sd*bc*sc*i*alias: pci:v00008086d00001518sv*sd*bc*sc*i*alias: pci:v00008086d0000150Asv*sd*bc*sc*i*alias: pci:v00008086d000010C9sv*sd*bc*sc*i*alias: pci:v00008086d00000440sv*sd*bc*sc*i*alias: pci:v00008086d0000043Csv*sd*bc*sc*i*alias: pci:v00008086d0000043Asv*sd*bc*sc*i*alias: pci:v00008086d00000438sv*sd*bc*sc*i*alias: pci:v00008086d00001516sv*sd*bc*sc*i*alias: pci:v00008086d00001511sv*sd*bc*sc*i*alias: pci:v00008086d00001510sv*sd*bc*sc*i*alias: pci:v00008086d00001527sv*sd*bc*sc*i*alias: pci:v00008086d0000150Fsv*sd*bc*sc*i*alias: pci:v00008086d0000150Esv*sd*bc*sc*i*alias: pci:v00008086d00001524sv*sd*bc*sc*i*alias: pci:v00008086d00001523sv*sd*bc*sc*i*alias: pci:v00008086d00001522sv*sd*bc*sc*i*alias: pci:v00008086d00001521sv*sd*bc*sc*i*alias: pci:v00008086d00001539sv*sd*bc*sc*i*alias: pci:v00008086d0000157Csv*sd*bc*sc*i*alias: pci:v00008086d0000157Bsv*sd*bc*sc*i*alias: pci:v00008086d00001538sv*sd*bc*sc*i*alias: pci:v00008086d00001537sv*sd*bc*sc*i*alias: pci:v00008086d00001536sv*sd*bc*sc*i*alias: pci:v00008086d00001533sv*sd*bc*sc*i*alias: pci:v00008086d00001F45sv*sd*bc*sc*i*alias: pci:v00008086d00001F41sv*sd*bc*sc*i*alias: pci:v00008086d00001F40sv*sd*bc*sc*i*depends: hwmon,dcasupported: externalvermagic: 2.6.32.12-0.7-default SMP mod_unload modversionsparm: InterruptThrottleRate:Maximum interrupts per second, per vector, (max 100000), default 3=adaptive (array of int) parm: IntMode:Change Interrupt Mode (0=Legacy, 1=MSI, 2=MSI-X), default 2 (array of int)parm: Node:set the starting node to allocate memory on, default -1 (array of int)parm: LLIPort:Low Latency Interrupt TCP Port (0-65535), default 0=off (array of int)parm: LLIPush:Low Latency Interrupt on TCP Push flag (0,1), default 0=off (array of int)parm: LLISize:Low Latency Interrupt on Packet Size (0-1500), default 0=off (array of int)parm: RSS:Number of Receive-Side Scaling Descriptor Queues (0-8), default 1, 0=number of cpus (array of int)parm: VMDQ:Number of Virtual Machine Device Queues: 0-1 = disable, 2-8 enable, default 0 (array of int)parm: max_vfs:Number of Virtual Functions: 0 = disable, 1-7 enable, default 0 (array of int)parm: MDD:Malicious Driver Detection (0/1), default 1 = enabled. Only available when max_vfs is greater than 0 (array of int) parm: QueuePairs:Enable Tx/Rx queue pairs for interrupt handling (0,1), default 1=on (array of int)parm: EEE:Enable/disable on parts that support the feature (array of int)parm: DMAC:Disable or set latency for DMA Coalescing ((0=off, 1000-10000(msec), 250, 500 (usec)) (array of int)parm: LRO:Large Receive Offload (0,1), default 0=off (array of int)parm: enable_debug:Set to 1 to enable debug tracing into the syslog (uint)parm: debug:Debug level (0=none, ..., 16=all) (int)linux:~ #⽅法⼆:1:dmesg | grep ethx如:linux:~ # dmesg | grep eth17[ 30.351872] igb 0000:0a:00.1: eth17: (PCIe:2.5Gb/s:Width x4) 00:0b:ab:52:fb:b3[ 30.351952] igb 0000:0a:00.1: eth17: PBA No: ffffff-0ff[429171.548763] device eth17 entered promiscuous mode[429173.116530] igb: eth17 NIC Link is Up 1000 Mbps Full Duplex, Flow Control: RX [429173.118867] ADDRCONF(NETDEV_UP): eth17: link is not ready[429173.121176] ADDRCONF(NETDEV_CHANGE): eth17: link becomes ready [429183.236266] eth17: no IPv6 routers present[1641503.272376] igb 0000:0a:00.1: eth17: (PCIe:2.5Gb/s:Width x4) 00:0b:ab:52:fb:b3 [1641503.272460] igb 0000:0a:00.1: eth17: PBA No: ffffff-0ff[1641598.356110] device eth17 entered promiscuous mode[1641598.369229] igb: eth17 NIC Link is Up 1000 Mbps Full Duplex, Flow Control: RX [1641598.372636] ADDRCONF(NETDEV_UP): eth17: link is not ready [1641598.374978] ADDRCONF(NETDEV_CHANGE): eth17: link becomes ready [1641608.564181] eth17: no IPv6 routers present[1701779.787471] igb 0000:0a:00.1: eth17: (PCIe:2.5GT/s:Width x4)[1701779.787473] igb 0000:0a:00.1: eth17: MAC: 00:0b:ab:52:fb:b3[1701779.787555] igb 0000:0a:00.1: eth17: PBA No: FFFFFF-0FF[1702124.805650] device eth17 entered promiscuous mode[1702141.839131] ADDRCONF(NETDEV_UP): eth17: link is not ready [1702144.057474] igb: eth17 NIC Link is Up 1000 Mbps Full Duplex, Flow Control: None [1702144.059425] ADDRCONF(NETDEV_CHANGE): eth17: link becomes ready [1702154.705520] eth17: no IPv6 routers present[1712008.630151] igb 0000:0a:00.1: eth17: (PCIe:2.5GT/s:Width x4)[1712008.630153] igb 0000:0a:00.1: eth17: MAC: 00:0b:ab:52:fb:b3[1712008.630235] igb 0000:0a:00.1: eth17: PBA No: FFFFFF-0FF[1712100.136186] device eth17 entered promiscuous mode[1712101.873823] ADDRCONF(NETDEV_UP): eth17: link is not ready [1712104.159209] igb: eth17 NIC Link is Up 1000 Mbps Full Duplex, Flow Control: None [1712104.161548] ADDRCONF(NETDEV_CHANGE): eth17: link becomes ready [1712114.854722] eth17: no IPv6 routers presentlinux:~ #2:使⽤ modinfo igb 查看驱动信息(结果同⽅法⼀中的)。
linux查看网卡型号、驱动版本、队列数

一、如何查看网卡生产厂家和型号?lspci命令查看基本信息 lspci,详细信息lspci -vvv00:00.0 Host bridge: Intel Corporation 5520 I/O Hub to ESI Port (rev 13)00:01.0 PCI bridge: Intel Corporation 5520/5500/X58 I/O Hub PCI Express Root Port 1 (rev 13)00:02.0 PCI bridge: Intel Corporation 5520/5500/X58 I/O Hub PCI Express Root Port 2 (rev 13)00:03.0 PCI bridge: Intel Corporation 5520/5500/X58 I/O Hub PCI Express Root Port 3 (rev 13)00:04.0 PCI bridge: Intel Corporation 5520/X58 I/O Hub PCI Express Root Port 4 (rev 13)00:05.0 PCI bridge: Intel Corporation 5520/X58 I/O Hub PCI Express Root Port 5 (rev 13)00:06.0 PCI bridge: Intel Corporation 5520/X58 I/O Hub PCI Express Root Port 6 (rev 13)00:07.0 PCI bridge: Intel Corporation 5520/5500/X58 I/O Hub PCI Express Root Port 7 (rev 13)00:08.0 PCI bridge: Intel Corporation 5520/5500/X58 I/O Hub PCI Express Root Port 8 (rev 13)00:09.0 PCI bridge: Intel Corporation 5520/5500/X58 I/O Hub PCI Express Root Port 9 (rev 13)00:0a.0 PCI bridge: Intel Corporation 5520/5500/X58 I/O Hub PCI Express Root Port 10 (rev 13)00:0d.0 Host bridge: Intel Corporation Device 343a (rev 13)00:0d.1 Host bridge: Intel Corporation Device 343b (rev 13)00:0d.2 Host bridge: Intel Corporation Device 343c (rev 13)00:0d.3 Host bridge: Intel Corporation Device 343d (rev 13)00:0d.4 Host bridge: Intel Corporation 5520/5500/X58 Physical Layer Port 0 (rev 13)00:0d.5 Host bridge: Intel Corporation 5520/5500 Physical Layer Port 1 (rev 13)00:0d.6 Host bridge: Intel Corporation Device 341a (rev 13)00:0e.0 Host bridge: Intel Corporation Device 341c (rev 13)00:0e.1 Host bridge: Intel Corporation Device 341d (rev 13)00:0e.2 Host bridge: Intel Corporation Device 341e (rev 13)00:0e.3 Host bridge: Intel Corporation Device 341f (rev 13)00:0e.4 Host bridge: Intel Corporation Device 3439 (rev 13)00:14.0 PIC: Intel Corporation 5520/5500/X58 I/O Hub System Management Registers (rev 13)00:14.1 PIC: Intel Corporation 5520/5500/X58 I/O Hub GPIO and Scratch Pad Registers (rev 13)00:14.2 PIC: Intel Corporation 5520/5500/X58 I/O Hub Control Status and RAS Registers (rev 13)00:1c.0 PCI bridge: Intel Corporation 82801JI (ICH10 Family) PCI Express Root Port 100:1c.4 PCI bridge: Intel Corporation 82801JI (ICH10 Family) PCI Express Root Port 500:1d.0 USB Controller: Intel Corporation 82801JI (ICH10 Family) USB UHCI Controller #100:1d.1 USB Controller: Intel Corporation 82801JI (ICH10 Family) USB UHCI Controller #200:1d.2 USB Controller: Intel Corporation 82801JI (ICH10 Family) USB UHCI Controller #300:1d.3 USB Controller: Intel Corporation 82801JI (ICH10 Family) USB UHCI Controller #600:1d.7 USB Controller: Intel Corporation 82801JI (ICH10 Family) USB2 EHCI Controller #100:1e.0 PCI bridge: Intel Corporation 82801 PCI Bridge (rev 90)00:1f.0 ISA bridge: Intel Corporation 82801JIB (ICH10) LPC Interface Controller01:03.0 VGA compatible controller: ATI Technologies Inc ES1000 (rev 02) 02:00.0 System peripheral: Hewlett-Packard Company iLO3 Slave instrumentation & System support (rev 04)02:00.2 System peripheral: Hewlett-Packard Company iLO3 Management Processor Support and Messaging (rev 04)02:00.4 USB Controller: Hewlett-Packard Company Proliant iLO2/iLO3 virtual USB controller (rev 01)03:00.0 Ethernet controller: Broadcom Corporation NetXtreme II BCM5709 Gigabit Ethernet (rev 20)03:00.1 Ethernet controller: Broadcom Corporation NetXtreme II BCM5709 Gigabit Ethernet (rev 20)04:00.0 Ethernet controller: Broadcom Corporation NetXtreme II BCM5709 Gigabit Ethernet (rev 20)04:00.1 Ethernet controller: Broadcom Corporation NetXtreme II BCM5709 Gigabit Ethernet (rev 20)05:00.0 RAID bus controller: Hewlett-Packard Company Smart Array G6 controllers (rev 01)09:00.0 Ethernet controller: Intel Corporation 82599EB 10-GigabitSFI/SFP+ Network Connection (rev 01)09:00.1 Ethernet controller: Intel Corporation 82599EB 10-GigabitSFI/SFP+ Network Connection (rev 01)机器上有Broadcom的千兆网卡和intel的万兆网卡,型号分别是BCM5709和82599EB二、查看网卡驱动两个办法:方法1:lspci -vvv09:00.1 Ethernet controller: Intel Corporation 82599EB 10-GigabitSFI/SFP+ Network Connection (rev 01)Subsystem: Intel Corporation Ethernet Server Adapter X520-2 Physical Slot: 2Control: I/O+ Mem+ BusMaster+ SpecCycle- MemWINV- VGASnoop- ParErr+ Stepping- SERR- FastB2B- DisINTx+Status: Cap+ 66MHz- UDF- FastB2B- ParErr- DEVSEL=fast >TAbort- <TAbort- <MAbort- >SERR- <PERR- INTx-Latency: 0, Cache Line Size: 64 bytesInterrupt: pin B routed to IRQ 34Region 0: Memory at fbd00000 (64-bit, non-prefetchable)[size=1M]Region 2: I/O ports at 5020 [size=32]Region 4: Memory at fbcf0000 (64-bit, non-prefetchable)[size=16K]Capabilities: [40] Power Management version 3Flags: PMEClk- DSI+ D1- D2- AuxCurrent=0mAPME(D0+,D1-,D2-,D3hot+,D3cold-)Status: D0 NoSoftRst- PME-Enable- DSel=0 DScale=1 PME- Capabilities: [50] MSI: Enable- Count=1/1 Maskable+ 64bit+Address: 0000000000000000 Data: 0000Masking: 00000000 Pending: 00000000Capabilities: [70] MSI-X: Enable+ Count=64 Masked-Vector table: BAR=4 offset=00000000PBA: BAR=4 offset=00002000Capabilities: [a0] Express (v2) Endpoint, MSI 00DevCap: MaxPayload 512 bytes, PhantFunc 0, Latency L0s <512ns, L1 <64usExtTag- AttnBtn- AttnInd- PwrInd- RBE+ FLReset+ DevCtl: Report errors: Correctable+ Non-Fatal+ Fatal+ Unsupported+RlxdOrd+ ExtTag- PhantFunc- AuxPwr- NoSnoop+ FLReset-MaxPayload 256 bytes, MaxReadReq 4096 bytes DevSta: CorrErr+ UncorrErr- FatalErr- UnsuppReq+ AuxPwr- TransPend-LnkCap: Port #0, Speed 5GT/s, Width x8, ASPM L0s, Latency L0 unlimited, L1 <32usClockPM- Surprise- LLActRep- BwNot-LnkCtl: ASPM Disabled; RCB 64 bytes Disabled- Retrain- CommClk-ExtSynch- ClockPM- AutWidDis- BWInt- AutBWInt- LnkSta: Speed 5GT/s, Width x8, TrErr- Train- SlotClk+ DLActive- BWMgmt- ABWMgmt-DevCap2: Completion Timeout: Range ABCD, TimeoutDis+ DevCtl2: Completion Timeout: 50us to 50ms, TimeoutDis- LnkCtl2: Target Link Speed: 2.5GT/s, EnterCompliance- SpeedDis-, Selectable De-emphasis: -6dBTransmit Margin: Normal Operating Range, EnterModifiedCompliance- ComplianceSOS-Compliance De-emphasis: -6dBLnkSta2: Current De-emphasis Level: -6dBCapabilities: [100] Advanced Error ReportingUESta: DLP- SDES- TLP- FCP- CmpltTO- CmpltAbrt- UnxCmplt- RxOF- MalfTLP- ECRC- UnsupReq+ ACSViol-UEMsk: DLP- SDES- TLP- FCP- CmpltTO- CmpltAbrt- UnxCmplt- RxOF- MalfTLP- ECRC- UnsupReq+ ACSViol-UESvrt: DLP- SDES- TLP- FCP- CmpltTO- CmpltAbrt- UnxCmplt- RxOF- MalfTLP- ECRC- UnsupReq- ACSViol-CESta: RxErr- BadTLP- BadDLLP- Rollover- Timeout- NonFatalErr+CEMsk: RxErr- BadTLP- BadDLLP- Rollover- Timeout- NonFatalErr-AERCap: First Error Pointer: 00, GenCap+ CGenEn- ChkCap+ ChkEn-Capabilities: [140] Device Serial Number90-e2-ba-ff-ff-17-8f-48Capabilities: [150] Alternative Routing-ID Interpretation (ARI) ARICap: MFVC- ACS-, Next Function: 0ARICtl: MFVC- ACS-, Function Group: 0Capabilities: [160] Single Root I/O Virtualization (SR-IOV) IOVCap: Migration-, Interrupt Message Number: 000IOVCtl: Enable- Migration- Interrupt- MSE- ARIHierarchy-IOVSta: Migration-Initial VFs: 64, Total VFs: 64, Number of VFs: 64, Function Dependency Link: 01VF offset: 128, stride: 2, Device ID: 10edSupported Page Size: 00000553, System Page Size: 00000001Region 0: Memory at 00000000e4300000 (64-bit, prefetchable)Region 3: Memory at 00000000e4400000 (64-bit, prefetchable)VF Migration: offset: 00000000, BIR: 0 Kernel driver in use: ixgbeKernel modules: ixgbe方法2:lsmodModule Size Used bypf_ring 368053 48ipmi_devintf 8023 0ipmi_si 42399 0ipmi_msghandler 35958 2 ipmi_devintf,ipmi_sibonding 122971 0ipv6 322986 1 bondingpower_meter 9349 0hpwdt 6990 0hpilo 7903 0sg 30218 0bnx2 77468 0ixgbe 200013 0dca 7195 1 ixgbemdio 4738 1 ixgbemicrocode 112877 0serio_raw 4824 0iTCO_wdt 12092 0iTCO_vendor_support 3062 1 iTCO_wdti7core_edac 18094 0edac_core 46701 1 i7core_edacshpchp 33488 0ext3 133515 7jbd 54520 1 ext3mbcache 7990 1 ext3hpsa 51776 8radeon 926887 1ttm 67043 1 radeondrm_kms_helper 34744 1 radeondrm 213765 3 radeon,ttm,drm_kms_helper hwmon 2496 2 power_meter,radeoni2c_algo_bit 5768 1 radeoni2c_core 31274 4radeon,drm_kms_helper,drm,i2c_algo_bitdm_mod 75507 0三、如何查看网卡驱动版本也有两种办法:方法1) modinfomodinfo bnx2filename: /lib/modules/2.6.32-131.21.1.tb477.el6.x86_64/kernel/ drivers/net/bnx2.kofirmware: bnx2/bnx2-rv2p-09ax-6.0.17.fwfirmware: bnx2/bnx2-rv2p-09-6.0.17.fwfirmware: bnx2/bnx2-mips-09-6.2.1a.fwfirmware: bnx2/bnx2-rv2p-06-6.0.15.fwfirmware: bnx2/bnx2-mips-06-6.2.1.fwversion: 2.1.6license: GPLdescription: Broadcom NetXtreme II BCM5706/5708/5709/5716 Driver author: Michael Chan <mchan@>srcversion: ECE369A7D0A9096343A3B3Falias: pci:v000014E4d0000163Csv*sd*bc*sc*i*alias: pci:v000014E4d0000163Bsv*sd*bc*sc*i*alias: pci:v000014E4d0000163Asv*sd*bc*sc*i*alias: pci:v000014E4d00001639sv*sd*bc*sc*i*alias: pci:v000014E4d000016ACsv*sd*bc*sc*i*alias: pci:v000014E4d000016AAsv*sd*bc*sc*i*alias: pci:v000014E4d000016AAsv0000103Csd00003102bc*sc*i* alias: pci:v000014E4d0000164Csv*sd*bc*sc*i*alias: pci:v000014E4d0000164Asv*sd*bc*sc*i*alias: pci:v000014E4d0000164Asv0000103Csd00003106bc*sc*i* alias: pci:v000014E4d0000164Asv0000103Csd00003101bc*sc*i* depends:vermagic: 2.6.32-131.21.1.tb477.el6.x86_64 SMP mod_unload modversionsparm: disable_msi:Disable Message Signaled Interrupt (MSI) (int)modinfo ixgbefilename: /lib/modules/2.6.32-131.21.1.tb477.el6.x86_64/kernel/ drivers/net/ixgbe/ixgbe.koversion: 3.0.12-k2-1license: GPLdescription: Intel(R) 10 Gigabit PCI Express Network Driver author: Intel Corporation, <linux.nics@> srcversion: 612CB82E4460BB4174B1E2Calias: pci:v00008086d00001528sv*sd*bc*sc*i*alias: pci:v00008086d000010F8sv*sd*bc*sc*i*alias: pci:v00008086d0000151Csv*sd*bc*sc*i*alias: pci:v00008086d00001529sv*sd*bc*sc*i*alias: pci:v00008086d0000152Asv*sd*bc*sc*i*alias: pci:v00008086d000010F9sv*sd*bc*sc*i*alias: pci:v00008086d00001514sv*sd*bc*sc*i*alias: pci:v00008086d00001507sv*sd*bc*sc*i*alias: pci:v00008086d000010FBsv*sd*bc*sc*i*alias: pci:v00008086d00001517sv*sd*bc*sc*i*alias: pci:v00008086d000010FCsv*sd*bc*sc*i*alias: pci:v00008086d000010F7sv*sd*bc*sc*i*alias: pci:v00008086d00001508sv*sd*bc*sc*i*alias: pci:v00008086d000010DBsv*sd*bc*sc*i*alias: pci:v00008086d000010F4sv*sd*bc*sc*i*alias: pci:v00008086d000010E1sv*sd*bc*sc*i*alias: pci:v00008086d000010F1sv*sd*bc*sc*i*alias: pci:v00008086d000010ECsv*sd*bc*sc*i*alias: pci:v00008086d000010DDsv*sd*bc*sc*i*alias: pci:v00008086d0000150Bsv*sd*bc*sc*i*alias: pci:v00008086d000010C8sv*sd*bc*sc*i*alias: pci:v00008086d000010C7sv*sd*bc*sc*i*alias: pci:v00008086d000010C6sv*sd*bc*sc*i*alias: pci:v00008086d000010B6sv*sd*bc*sc*i*depends: mdio,dcavermagic: 2.6.32-131.21.1.tb477.el6.x86_64 SMP mod_unload modversionsparm: IntMode:Change Interrupt Mode (0=Legacy, 1=MSI,2=MSI-X), default 2 (array of int)parm: FdirMode:Flow Director filtering modes (0=Off,1=Hashing) default 1 (array of int)parm: max_vfs:Maximum number of virtual functions to allocate per physical function (uint)方法2: ethtoolethtool -i eth3driver: bnx2version: 2.1.6firmware-version: bc 5.2.2 NCSI 2.0.6bus-info: 0000:03:00.1ethtool -i eth0driver: ixgbeversion: 3.0.12-k2-1firmware-version: 3.13-0bus-info: 0000:09:00.0四、如何查看网络接口队列数cat /proc/interrupts | grep eth053: 4143055 0 0 0 0 0 0 0 0 0 0 0 0 0 0 0 0 0 0 0 0 0 0 0 IR-PC I-MSI-edge eth0-TxRx-054: 20 4143035 0 0 0 0 0 0 0 0 0 0 0 0 0 0 0 0 0 0 0 0 0 0 IR-PC I-MSI-edge eth0-TxRx-155: 20 0 4143035 0 0 0 0 0 0 0 0 0 0 0 0 0 0 0 0 0 0 0 0 0 IR-PC I-MSI-edge eth0-TxRx-256: 20 0 0 4143035 0 0 0 0 0 0 0 0 0 0 0 0 0 0 0 0 0 0 0 0 IR-PC I-MSI-edge eth0-TxRx-357: 20 0 0 0 4143035 0 0 0 0 0 0 0 0 0 0 0 0 0 0 0 0 0 0 0 IR-PC I-MSI-edge eth0-TxRx-458: 20 0 0 0 0 41430 35 0 0 0 0 0 0 0 0 0 0 0 0 0 0 0 0 0 0 IR-PC I-MSI-edge eth0-TxRx-559: 20 0 0 0 0 0 4143035 0 0 0 0 0 0 0 0 0 0 0 0 0 0 0 0 0 IR-PC I-MSI-edge eth0-TxRx-660: 20 0 0 0 0 0 0 4143035 0 0 0 0 0 0 0 0 0 0I-MSI-edge eth0-TxRx-761: 20 0 0 0 0 0 0 0 4143035 0 0 0 0 0 0 0 0 0 0 0 0 0 0 0 IR-PC I-MSI-edge eth0-TxRx-862: 20 0 0 0 0 0 0 0 0 4143035 0 0 0 0 0 0 0 0 0 0 0 0 0 0 IR-PC I-MSI-edge eth0-TxRx-963: 20 0 0 0 0 0 0 0 0 0 4143035 0 0 0 0 0 0 0 0 0 0 0 0 0 IR-PC I-MSI-edge eth0-TxRx-1064: 20 0 0 0 0 0 0 0 0 0 0 4143035 0 0 0 0 0 0 0 0 0 0 0 0 IR-PC I-MSI-edge eth0-TxRx-1165: 20 0 0 0 0 0 0 0 0 0 0 0 4143035 0 0 0 0 0 0 0 0 0 0 0 IR-PC I-MSI-edge eth0-TxRx-1266: 20 0 0 0 0 0 0 0 0 0 0 0 0 4143035 0 0 0 0 0 0 0 0 0 0 IR-PC I-MSI-edge eth0-TxRx-1367: 20 0 0 0 0 0 0 0 0 0 0 0 0 0 4143035 0 0 0 0 0 0 0 0 0 IR-PC I-MSI-edge eth0-TxRx-1468: 20 0 0 0 0 0 0 0 0 0 0 0 0 0 0 4143035 0 0 0 0 0 0 0 0 IR-PC I-MSI-edge eth0-TxRx-1569: 20 0 0 0 0 0 0 0 0 0 0 00 0 0 0 0 0 IR-PC I-MSI-edge eth0-TxRx-1670: 20 0 0 0 0 0 0 0 0 0 0 0 0 0 0 0 0 4143035 0 0 0 0 0 0 IR-PC I-MSI-edge eth0-TxRx-1771: 20 0 0 0 0 0 0 0 0 0 0 0 0 0 0 0 0 0 4143035 0 0 0 0 0 IR-PC I-MSI-edge eth0-TxRx-1872: 20 0 0 0 0 0 0 0 0 0 0 0 0 0 0 0 0 0 0 4143035 0 0 0 0 IR-PC I-MSI-edge eth0-TxRx-1973: 20 0 0 0 0 0 0 0 0 0 0 0 0 0 0 0 0 0 0 0 4143035 0 0 0 IR-PC I-MSI-edge eth0-TxRx-2074: 20 0 0 0 0 0 0 0 0 0 0 0 0 0 0 0 0 0 0 0 0 4143035 0 0 IR-PC I-MSI-edge eth0-TxRx-2175: 20 0 0 0 0 0 0 0 0 0 0 0 0 0 0 0 0 0 0 0 0 0 4143035 0 IR-PC I-MSI-edge eth0-TxRx-2276: 20 0 0 0 0 0 0 0 0 0 0 0 0 0 0 0 0 0 0 0 0 0 0 4143035 IR-PC I-MSI-edge eth0-TxRx-2377: 38 0 0 0 0 0 0 0 0 0 0 0 0 0 0 0 0 0 0 0 0 0 0 0 IR-PC I-MSI-edge eth0:lsc可以看到有24个队列另外,ethtool也可以看到: ethtool -S eth0NIC statistics:rx_packets: 0tx_packets: 0rx_bytes: 0tx_bytes: 0rx_pkts_nic: 0tx_pkts_nic: 0rx_bytes_nic: 0tx_bytes_nic: 0lsc_int: 38tx_busy: 0non_eop_descs: 0rx_errors: 0tx_errors: 0rx_dropped: 0tx_dropped: 0multicast: 0broadcast: 0rx_no_buffer_count: 0collisions: 0rx_over_errors: 0rx_crc_errors: 0rx_frame_errors: 0hw_rsc_aggregated: 0hw_rsc_flushed: 0fdir_match: 0fdir_miss: 0rx_fifo_errors: 0rx_missed_errors: 0tx_aborted_errors: 0tx_carrier_errors: 0tx_fifo_errors: 0tx_heartbeat_errors: 0tx_timeout_count: 0tx_restart_queue: 0rx_long_length_errors: 0 rx_short_length_errors: 0 tx_flow_control_xon: 0rx_flow_control_xon: 0tx_flow_control_xoff: 0 rx_flow_control_xoff: 0rx_csum_offload_errors: 0 alloc_rx_page_failed: 0 alloc_rx_buff_failed: 0 rx_no_dma_resources: 0fcoe_bad_fccrc: 0rx_fcoe_dropped: 0rx_fcoe_packets: 0rx_fcoe_dwords: 0tx_fcoe_packets: 0tx_fcoe_dwords: 0tx_queue_0_packets: 0tx_queue_0_bytes: 0tx_queue_1_packets: 0tx_queue_1_bytes: 0tx_queue_2_packets: 0tx_queue_2_bytes: 0tx_queue_3_packets: 0tx_queue_3_bytes: 0tx_queue_4_packets: 0tx_queue_4_bytes: 0tx_queue_5_packets: 0tx_queue_5_bytes: 0tx_queue_6_packets: 0tx_queue_6_bytes: 0tx_queue_7_packets: 0tx_queue_7_bytes: 0tx_queue_8_packets: 0tx_queue_8_bytes: 0tx_queue_9_packets: 0tx_queue_9_bytes: 0tx_queue_10_packets: 0tx_queue_10_bytes: 0tx_queue_11_packets: 0tx_queue_11_bytes: 0tx_queue_12_packets: 0tx_queue_12_bytes: 0tx_queue_13_packets: 0tx_queue_13_bytes: 0tx_queue_14_packets: 0tx_queue_14_bytes: 0tx_queue_15_packets: 0tx_queue_15_bytes: 0tx_queue_16_packets: 0tx_queue_16_bytes: 0tx_queue_17_bytes: 0 tx_queue_18_packets: 0 tx_queue_18_bytes: 0 tx_queue_19_packets: 0 tx_queue_19_bytes: 0 tx_queue_20_packets: 0 tx_queue_20_bytes: 0 tx_queue_21_packets: 0 tx_queue_21_bytes: 0 tx_queue_22_packets: 0 tx_queue_22_bytes: 0 tx_queue_23_packets: 0 tx_queue_23_bytes: 0 rx_queue_0_packets: 0 rx_queue_0_bytes: 0rx_queue_1_packets: 0 rx_queue_1_bytes: 0rx_queue_2_packets: 0 rx_queue_2_bytes: 0rx_queue_3_packets: 0 rx_queue_3_bytes: 0rx_queue_4_packets: 0 rx_queue_4_bytes: 0rx_queue_5_packets: 0 rx_queue_5_bytes: 0rx_queue_6_packets: 0 rx_queue_6_bytes: 0rx_queue_7_packets: 0 rx_queue_7_bytes: 0rx_queue_8_packets: 0 rx_queue_8_bytes: 0rx_queue_9_packets: 0 rx_queue_9_bytes: 0rx_queue_10_packets: 0 rx_queue_10_bytes: 0 rx_queue_11_packets: 0 rx_queue_11_bytes: 0 rx_queue_12_packets: 0 rx_queue_12_bytes: 0 rx_queue_13_packets: 0 rx_queue_13_bytes: 0 rx_queue_14_packets: 0 rx_queue_14_bytes: 0rx_queue_15_bytes: 0 rx_queue_16_packets: 0 rx_queue_16_bytes: 0 rx_queue_17_packets: 0 rx_queue_17_bytes: 0 rx_queue_18_packets: 0 rx_queue_18_bytes: 0 rx_queue_19_packets: 0 rx_queue_19_bytes: 0 rx_queue_20_packets: 0 rx_queue_20_bytes: 0 rx_queue_21_packets: 0 rx_queue_21_bytes: 0 rx_queue_22_packets: 0 rx_queue_22_bytes: 0 rx_queue_23_packets: 0 rx_queue_23_bytes: 0。
linux网卡驱动安装方法

linux网卡驱动安装方法1、查找网卡芯片,确立网卡型号,并确立linux内核版本,到对应的网卡官网下载驱动。
2、安装步骤(这里以RTL8110为例)1)cd到网卡驱动所在文件夹,解压:# tar vjxf r8168-8.aaa.bb.tar.bz2//关于解压命令查看《Linux下软件包的解压方式大全》2)进入文件夹:# cd r8168-8.aaa.bb3)安装(需安装kernel-source,否则会失败):# make clean modules (as root or with sudo)# make install# depmod -a# insmod ./src/r8168.ko (or r8168.o in linux kernel 2.4.x)4)通过以下指令查看驱动是否已经启动.# lsmod | grep r8168# ifconfig -a如果能看到类似“ethX”的结果输出, 说明已成功驱动网卡.5)配置并激活ethX.# ifconfig ethX up,where X=0,1,2,...3、附realtek RTL8168B驱动readme文档:<Linux device driver for Realtek Ethernet controllers>This is the Linux device driver released for RealTek RTL8168B/8111Band RTL8168C/8111C, Gigabit Ethernet controllers with PCI-Expressinterface.<Requirements>- Kernel source tree (supported Linux kernel 2.6.x and 2.4.x)- For linux kernel 2.4.x, this driver supports 2.4.20 and latter.- Compiler/binutils for kernel compilation<Quick install with proper kernel settings>Unpack the tarball :# tar vjxf r8168-8.aaa.bb.tar.bz2Change to the directory:# cd r8168-8.aaa.bbIf you are running the target kernel, then you should be able to do :# make clean modules (as root or with sudo)# make install# depmod -a# insmod ./src/r8168.ko (or r8168.o in linux kernel 2.4.x)You can check whether the driver is loaded by using following commands.# lsmod | grep r8168# ifconfig -aIf there is a device name, ethX, shown on the monitor, the linuxdriver is loaded. Then, you can use the following command to activate the ethX.# ifconfig ethX up,where X=0,1,2,...<Set the network related information>1. Set manuallya. Set the IP address of your machine.# ifconfig ethX "the IP address of your machine"b. Set the IP address of DNS.Insert the following configuration in /etc/resolv.conf.nameserver "the IP address of DNS"c. Set the IP address of gateway.# route add default gw "the IP address of gateway"2. Set by doing configurations in /etc/sysconfig/network-scripts/ifcfg-ethX for Redhat and Fedora, or /etc/sysconfig/network/ifcfg-ethX for SuSE. There are two examples to set network configurations.a. Fix IP address:DEVICE=eth0BOOTPROTO=staticONBOOT=yesTYPE=ethernetNETMASK=255.255.255.0IPADDR=192.168.1.1GA TEWAY=192.168.1.254BROADCAST=192.168.1.255b. DHCP:DEVICE=eth0BOOTPROTO=dhcpONBOOT=yes<Modify the MAC address>There are two ways to modify the MAC address of the NIC.1. Use ifconfig:# ifconfig ethX hw ether YY:YY:YY:YY:YY:YY,where X is the device number assigned by Linux kernel, andYY:YY:YY:YY:YY:YY is the MAC address assigned by the user.2. Use ip:# ip link set ethX address YY:YY:YY:YY:YY:YY,where X is the device number assigned by Linux kernel, andYY:YY:YY:YY:YY:YY is the MAC address assigned by the user.<Force Link Status>1. Force the link status when insert the driver.If the user is in the path ~/r8168, the link status can be forcedto one of the 5 modes as following command.# insmod ./src/r8168.ko speed=SPEED_MODE duplex=DUPLEX_MODE autoneg=NWAY_OPTION,whereSPEED_MODE = 1000 for 1000Mbps= 100 for 100Mbps= 10 for 10MbpsDUPLEX_MODE = 0 for half-duplex= 1 for full-duplexNW AY_OPTION = 0 for auto-negotiation off (true force)= 1 for auto-negotiation on (nway force)For example:# insmod ./src/r8168.ko speed=100 duplex=0 autoneg=1will force PHY to operate in 100Mpbs Half-duplex(nway force).2. Force the link status by using ethtool.a. Insert the driver first.b. Make sure that ethtool exists in /sbin.c. Force the link status as the following command.# ethtool -s ethX speed SPEED_MODE duplex DUPLEX_MODE autoneg NWAY_OPTION,whereSPEED_MODE = 1000 for 1000Mbps= 100 for 100Mbps= 10 for 10MbpsDUPLEX_MODE = half for half-duplex= full for full-duplexNW AY_OPTION = off for auto-negotiation off (true force)= on for auto-negotiation on (nway force)For example:# ethtool -s eth0 speed 100 duplex full autoneg on本文出自:中国E动网[]中国领先互联网接入服务提供商!11年品质保障!-- 中国E动网[]。
Linux之如何查看linux系统是centos还是ubuntu,并如何查看系统版本号

Linux之如何查看linux系统是centos还是ubuntu,并如何查看系统版本号前⾔1、当我们拿到⼀个 Linux 服务器的时候,我怎么知道他是 centos 系统,还是 ubantu 系统?2、如果知道是 centos系统了,那我怎么知道他是 centos7.6还是 centos8.0 还是其它的版本?lsb_release 查看系统先使⽤ yum 安装 redhat-lsb:yum install -y redhat-lsb安装完成后,使⽤ -a 查看[root@yoyo ~] lsb_release -aLSB Version: :core-4.1-amd64:core-4.1-noarchDistributor ID: CentOS Description: CentOS Linux release 7.6.1810 (Core)Release: 7.6.1810Codename: Core于是我们就可以知道是 centos 7.6版本。
redhat-release如果已经知道是 centos 系统了,可以直接 cat 查看版本号:[root@yoyo ~]# cat /etc/redhat-releaseCentOS Linux release 7.6.1810 (Core)uname 查看内核版本查看内核版本可以⽤ uname -a[root@yoyo ~]# uname -aLinux iZ2vchn8sk983jm605yhshZ 3.10.0-957.21.3.el7.x86_64 #1 SMP Tue Jun 18 16:35:19 UTC 2019 x86_64 x86_64 x86_64 GNU/Linux也可以 cat /proc/version[root@iZ2vchn8sk983jm605yhshZ ~]# cat /proc/versionLinux version 3.10.0-957.21.3.el7.x86_64 (mockbuild@)(gcc version 4.8.5 20150623 (Red Hat 4.8.5-36) (GCC) ) #1 SMP Tue Jun 18 16:35:19 UTC 2019。
查看显卡命令
查看显卡命令查看显卡的命令可以帮助用户了解计算机上安装的显卡型号、驱动程序和性能参数等信息。
下面是常用的查看显卡命令及其说明:1. dxdiagdxdiag是Windows操作系统自带的一个系统诊断工具,可用于查看显卡信息。
具体步骤如下:a. 在Windows开始菜单中搜索"dxdiag"并打开该程序。
b. 在打开的窗口中,切换到"显示(Display)"选项卡。
c. 显卡的型号、驱动程序版本和内存信息等将显示在"Device"(设备)部分。
2. MSINFO32MSINFO32是Windows系统的一个信息工具,可以查看包括显卡在内的系统硬件和软件配置信息。
使用方法如下:a. 打开"运行"对话框(快捷键:Win + R)。
b. 输入"msinfo32"并按下回车键。
c. 在打开的窗口中,展开"组件"下的"显示器"选项,就能看到显卡的具体信息。
3. gpuzGPU-Z是第三方工具,专门用于查看显卡信息。
用户可以从官方网站下载并安装该软件。
使用步骤如下:a. 安装GPU-Z并打开程序。
b. 在主界面上,将显示显卡的型号、厂商、显存大小、核心和记忆频率等详细参数。
4. nvidia-sminvidia-smi是一款由NVIDIA官方提供的命令行工具,用户可以用它查看NVIDIA显卡的状态和性能信息。
在Windows上用法如下:a. 打开命令提示符(快捷键:Win + R,输入"cmd"并回车)。
b. 输入"nvidia-smi"并回车。
c. 显示当前系统上安装的NVIDIA显卡的详细信息,包括型号、驱动版本、显存使用情况等。
5. lspcilspci是Linux系统下的命令行工具,可以查看计算机硬件信息,包括显卡信息。
使用方法如下:a. 打开终端。
linux服务器安装网卡驱动一般步骤(总结)

1.linux服务器安装网卡驱动一般步骤(总结)现在很多服务器安装linux可能会出现网卡,硬盘raid驱动无法等现象,现在将一般安装驱动方法介绍如下:一般服务器自带的光盘里面,有一张是专门的驱动盘。
1、将盘放入光驱2、挂载mount /dev/cdrom /mnt/cdrom 当挂载U盘时,可以到vi /etc/fstab 查看U盘的挂载属性目录3、找到驱动目录,猜测是如下目录cd /mnt/cdrom/driver/net/linux/redhat4.24、里面会有tgz后缀的文件,拷贝到rootcp 名.tgz /root5、解压编辑安装tar xvfz 名.tgzcd 名makemake install6、扫描硬件service kudzu start7、会跳出兰框,按任意键,选择configure,设置IP地址。
OK案例1:IBM X 3650 安装网卡驱动Red Hat Enterprise Linux4.2以后版本可以自动识别IBM X 3650网卡驱动,但是以前版本却不行,下面介绍低版本安装网卡驱动方法:1 Red Hat Enterprise Linux 3版本U6以上可以识别阵列卡,但是无法加载网卡驱动;如果不是U6的版本,需要手动输入linux dd加载阵列卡驱动来继续安装操作系统。
2 安装前题:在开发工具和系统内核全安装安装GCC、kernel-devel、rpmbuild 3个相关包。
说明:rpmbuild ---SRPM是RPM包source 的发布形式, 可分为包含原始代码的(src.rpm)包和不包含原始代码的(nosrc.rpm)包两种.其中,src.rpm包含原始代码也就是src.rpm类似的包都要用rpmbuild命令安装。
rpm -ivh rpm-build-4.2-1.i386.rpmrpm -ivh kernel-devel-2.6.9-5.EL.i686.rpm3、下载网卡驱动bnx2-1.4.36c-1.src.rpm,下载页面:/support/397307-AA1/more_info_local_24340.html4 安装网卡驱动rpm –ivh bnx2-1.4.36c-1.src.rpmcd /usr/src/redhatrpmbuild –bb SPECS/bnx2.specrpm -ivh RPMS/i386/bnx2-1.4.36c-1.i386.rpm --forcerpm -ivh RPMS/i386/bnx2-debuginfo-1.4.36c-1.i386.rpm --force5 reboot后机器启动到扫描新硬件时弹出配置向导,可以配置IP或者跳过此步骤进系统再用系统工具-网络设备控制来配。
linux怎么查看硬件raid
linux怎么查看硬件raid你们知道怎么查看Linux中的硬件raid吗?下面是店铺带来的关于linux怎么查看硬件raid的内容,欢迎阅读!linux怎么查看硬件raid?1.硬件RAID分板载的和独立RAID卡的,如果是板载集成的,需要在BIOS里设置开启RAID选项,默认设置应该就是开启的。
2.如果是独立的RAID卡,需要在BIOS里设置关闭板载RAID选项。
然后开机的时候有提示进入RAID卡,进入里面设置,一般都是RAID 1,做好RAID以后,就可以安装系统了。
3.安装linux的时候,需要加载RAID驱动,一般是把RAID驱动放在软驱里,在安装linux,加载第三方驱动时进行选择,如果linux 安装程序发现了硬盘,那说明RAID没有问题,然后就是和正常安装一样了。
软件raid:只能通过Linux系统本身来查看cat /proc/mdstat可以看到raid级别,状态等信息。
硬件raid:最佳的办法是通过已安装的raid厂商的管理工具来查看,有cmdline,也有图形界面。
如Adaptec公司的硬件卡就可以通过下面的命令进行查看:# /usr/dpt/raidutil -L all可以看到非常详细的信息。
当然更多情况是没有安装相应的管理工具,只能依靠Linux本身的话一般我知道的是两种方式:# dmesg |grep -i raid# cat /proc/scsi/scsi显示的信息差不多,raid的厂商,型号,级别,但无法查看各块硬盘的信息。
另外经过实际测试,Dell的服务器可以通过命令来显示,而HP、IBM等的服务器通过上面的命令是显示不出的。
只能够通过装硬件厂商的管理工具来查看。
linux查看显卡

linux查看显卡
Linux系统下,可以使用一些命令和工具来查看显卡信息。
1. lspci命令:用于列举PCI设备的信息,包括显卡。
```shell
lspci | grep -i vga
```
这个命令会列出计算机上安装的显卡信息,包括制造商、型号和供应商信息。
2. lshw命令:用于显示硬件的信息,包括显卡。
```shell
sudo lshw -C display
```
这个命令会显示所有可用的显示设备的详细信息,包括制造商、型号、驱动程序等。
3. nvidia-smi命令:适用于NVIDIA显卡,用于查看显卡的相
关信息。
```shell
nvidia-smi
```
这个命令会显示NVIDIA显卡的状态、驱动程序版本、显存
使用情况等信息。
4. glxinfo命令:用于查看OpenGL相关的信息。
```shell
glxinfo | grep "OpenGL version"
```
这个命令会显示OpenGL版本信息,可以用来确认显卡是否支持OpenGL。
5. inxi命令:适用于Debian和Ubuntu系统,用于查看系统信息,包括显卡。
```shell
inxi -G
```
这个命令会显示显卡的详细信息,包括制造商、型号和驱动程序等。
以上是一些常用的命令和工具来查看Linux系统下的显卡信息。
不同的Linux发行版可能会有所不同,可以根据实际情况选择
合适的命令来查看显卡信息。
Linux中查看显卡硬件信息
Linux中查看显卡硬件信息Linux中查看显卡硬件信息lspci -vnn | grep VGA -A 12lshw -C display查看当前使⽤的显卡驱动sudo lshw -c video | grep configuration检查显卡驱动的详情:modinfo i915我们可以使⽤ glxinfo 命令来获查看得 OpenGL 的详细信息:glxinfo | grep OpenGL查看3D加速是否有效glxinfo | grep renderingTesting:glxgears -info=================tom@tom-laptop:~/Tool$ lspci |grep -i vga00:02.0 VGA compatible controller: Intel Corporation Mobile GM965/GL960 Integrated Graphics Controller (primary) (rev 0c)// 00:02.0 据此, 继续查看详细:tom@tom-laptop:~/Tool$ lspci -v -s 00:02.000:02.0 VGA compatible controller: Intel Corporation Mobile GM965/GL960 Integrated Graphics Controller (primary) (rev 0c) (prog-if 00 [VGA controller]) Subsystem: Hewlett-Packard Company Mobile GM965/GL960 Integrated Graphics Controller (primary)Flags: bus master, fast devsel, latency 0, IRQ 16Memory at e4400000 (64-bit, non-prefetchable) [size=1M]Memory at d0000000 (64-bit, prefetchable) [size=256M]I/O ports at 4000 [size=8][virtual] Expansion ROM at 000c0000 [disabled] [size=128K]Capabilities: <access denied>Kernel driver in use: i915Kernel modules: i915, intelfb//i915 据此, 继续查看详细modinfo i915=================1、查看linux内核,GCC版本cat /proc/version2、查看Linux内核uname -a3、查看产品版本lsb_release -a=================。
- 1、下载文档前请自行甄别文档内容的完整性,平台不提供额外的编辑、内容补充、找答案等附加服务。
- 2、"仅部分预览"的文档,不可在线预览部分如存在完整性等问题,可反馈申请退款(可完整预览的文档不适用该条件!)。
- 3、如文档侵犯您的权益,请联系客服反馈,我们会尽快为您处理(人工客服工作时间:9:00-18:30)。
Linux下查看驱动版本以及硬件信息
2009-05-13 09:58
lsmod 看看你要查看的驱动模块名字,例如100M网卡e100
modinfo e100 则会出现相关的版本信息
常用命令整理如下:
用硬件检测程序kuduz探测新硬件:service kudzu start ( or restart)
查看CPU信息:cat /proc/cpuinfo
查看板卡信息:cat /proc/pci
查看PCI信息:lspci (相比cat /proc/pci更直观)
查看内存信息:cat /proc/meminfo
查看USB设备:cat /proc/bus/usb/devices
查看键盘和鼠标:cat /proc/bus/input/devices
查看系统硬盘信息和使用情况:fdisk & disk - l & df
查看各设备的中断请求(IRQ):cat /proc/interrupts
查看系统体系结构:uname -a
dmidecode查看硬件信息,包括bios、cpu、内存等信息
dmesg | more 查看硬件信息
对于“/proc”中文件可使用文件查看命令浏览其内容,文件中包含系统特定信息:Cpuinfo 主机CPU信息
Dma 主机DMA通道信息
Filesystems 文件系统信息
Interrupts 主机中断信息
Ioprots 主机I/O端口号信息
Meninfo 主机内存信息
Version Linux内存版本信息
另外我们还可以使用hardinfo 这个软件来查看硬件信息。
通常,linux系统启动的时候当加载网卡的时候,会产生一条日志信息写道/var/log/messages或者dmesg里面,这里面就有比较详细的网卡信息,包括版本号码等。
对于网卡:
用ethtool -i ethX可以查询该网络设备的版本信息
包括driver版本信息和firmware版本信息
用此命令也能看到总线信息和该设备所用的driver模块名称
假定该网卡使用的驱动模块是intel的e1000
再用modinfo e1000就可看到该driver模块的详细信息
查看网卡属性:ethtool -g eth0;查看网卡信息:dmesg。