SpringBoot实现定时任务
SpringBoot定时任务(schedule、quartz)

SpringBoot定时任务(schedule、quartz)Scheduled 只适合处理简单的计划任务,不能处理分布式计划任务。
优势:是spring框架提供的计划任务,开发简单,执⾏效率⽐较⾼。
且在计划任务数量太多的时候,可能出现阻塞,崩溃,延迟启动等问题。
Scheduled定时任务是spring3.0版本之后⾃带的⼀个定时任务。
其所属Spring的资源包为:spring-context-support。
所以需要使⽤Scheduled定时任务机制时,需要在⼯程中依赖对应资源,具体如下:<!-- scheduled所属资源为spring-context-support --><dependency> <groupId>org.springframework</groupId> <artifactId>spring-context-support</artifactId></dependency> 如果在spring应⽤中需要启⽤Scheduled定时任务,则需要在启动类上增加注解@EnableScheduling,代表启⽤Scheduled定时任务机制。
具体如下:@SpringBootApplication@EnableSchedulingpublic class AppStarter { public static void main(String[] args) { SpringApplication.run(AppStarter.class, args); }} Scheduled定时任务的核⼼在于注解@Scheduled,这个注解的核⼼属性是cron,代表定时任务的触发计划表达式。
这个表达式的格式为:@Scheduled(cron="seconds minutes hours day month week") 或@Scheduled(cron="seconds minutes hours day month week year") 推荐使⽤第⼀种表达式形式,因为在很多其他技术中都有不同的定时任务机制,其中⽤于设置触发计划的表达式都是第⼀种cron表达式。
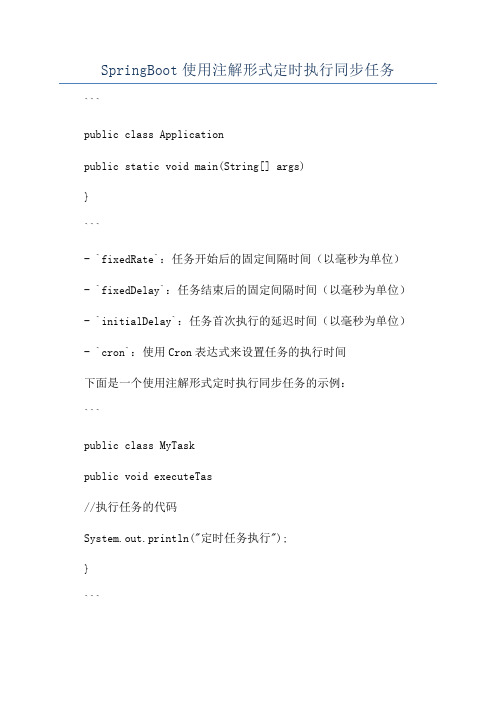
SpringBoot使用注解形式定时执行同步任务

SpringBoot使用注解形式定时执行同步任务
```
public class Application
public static void main(String[] args)
}
```
- `fixedRate`:任务开始后的固定间隔时间(以毫秒为单位)- `fixedDelay`:任务结束后的固定间隔时间(以毫秒为单位)- `initialDelay`:任务首次执行的延迟时间(以毫秒为单位)- `cron`:使用Cron表达式来设置任务的执行时间
下面是一个使用注解形式定时执行同步任务的示例:
```
public class MyTask
public void executeTas
//执行任务的代码
System.out.println("定时任务执行");
}
```
在上面的示例中,`executeTask`方法将以固定的1秒间隔执行。
每次执行任务时,将输出"定时任务执行"。
需要注意的是,定时任务默认是在单个线程中执行的。
如果一个任务的执行时间超过了任务的间隔时间,那么下一个任务将等待上一个任务完成后才会执行。
总结起来,使用注解形式定时执行同步任务可以极大地简化定时任务的管理和实现。
通过注解,可以方便地设置任务的执行时间,并且可以灵活地使用不同的属性来满足不同的需求。
同时,注解形式还提供了一些方便的功能,如线程池的配置和任务的取消。
SpringBoot三种定时任务实现方式

SpringBoot三种定时任务实现方式在Spring Boot项目中,实现定时任务是常见需求。
Spring Boot提供了多种灵活的方式来实现定时任务,包括基于注解的方式、基于接口的方式以及使用外部任务调度工具等。
定时任务作为一种系统调度工具,在一些需要有定时作业的系统中应用广泛,如每逢某个时间点统计数据、在将来某个时刻执行某些动作...定时任务在主流开发语言均提供相应的API供开发者调用,在Java中,实现定时任务有很多种方式,原生的方式实现一个完整定时任务需要由Timer、TimerTask两个类,Timer 是定时器类,用来按计划开启后台线程执行指定任务,TimerTask一个抽象类,它的子类代表一个可以被Timer计划的任务。
除此之外,还可以用ScheduledExecutorService类或者使用第三方jar库Quartz,其中Quartz是一个优秀的定时任务框架,发展至今已经非常成熟,以致后来其他的定时任务框架的核心思想或底层大多源于Quartz。
springboot作为Java的一种开发框架,在springboot项目中实现定时任务不仅可以使用Java提供的原生方式,还可以使用springboot提供的定时任务API。
本文将详细介绍三种常用的Spring Boot定时任务实现方式,并提供相应的例子代码。
1. 基于注解的方式(@Scheduled)使用@Scheduled注解是实现Spring Boot定时任务最简单直接的方式。
首先,你需要在Spring Boot的启动类或者配置类上添加@EnableScheduling注解来启用定时任务支持。
然后,在需要定时执行的方法上添加@Scheduled注解,并指定cron表达式或固定间隔。
例子代码:在上面的代码中,@Scheduled注解分别使用了cron表达式和固定频率(fixedRate)两种方式来定义定时任务。
需要注意的是,@EnableScheduling 注解只需要在Spring Boot的启动类或配置类上添加一次。
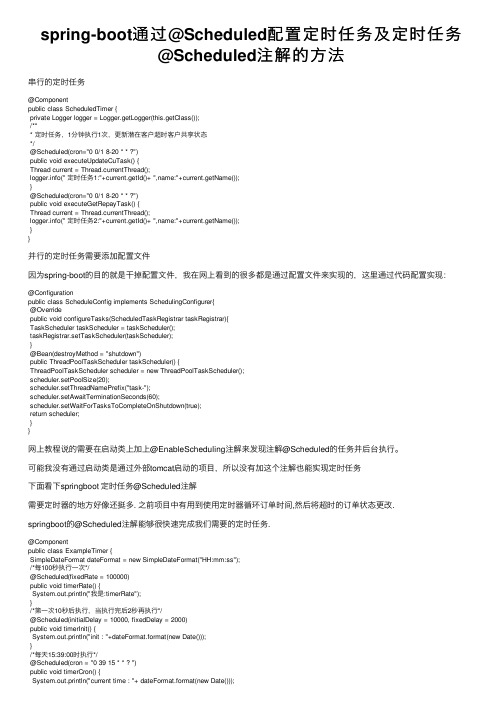
spring-boot通过@Scheduled配置定时任务及定时任务@Scheduled注解的方法

spring-boot通过@Scheduled配置定时任务及定时任务@Scheduled注解的⽅法串⾏的定时任务@Componentpublic class ScheduledTimer {private Logger logger = Logger.getLogger(this.getClass());/*** 定时任务,1分钟执⾏1次,更新潜在客户超时客户共享状态*/@Scheduled(cron="0 0/1 8-20 * * ?")public void executeUpdateCuTask() {Thread current = Thread.currentThread();(" 定时任务1:"+current.getId()+ ",name:"+current.getName());}@Scheduled(cron="0 0/1 8-20 * * ?")public void executeGetRepayTask() {Thread current = Thread.currentThread();(" 定时任务2:"+current.getId()+ ",name:"+current.getName());}}并⾏的定时任务需要添加配置⽂件因为spring-boot的⽬的就是⼲掉配置⽂件,我在⽹上看到的很多都是通过配置⽂件来实现的,这⾥通过代码配置实现:@Configurationpublic class ScheduleConfig implements SchedulingConfigurer{@Overridepublic void configureTasks(ScheduledTaskRegistrar taskRegistrar){TaskScheduler taskScheduler = taskScheduler();taskRegistrar.setTaskScheduler(taskScheduler);}@Bean(destroyMethod = "shutdown")public ThreadPoolTaskScheduler taskScheduler() {ThreadPoolTaskScheduler scheduler = new ThreadPoolTaskScheduler();scheduler.setPoolSize(20);scheduler.setThreadNamePrefix("task-");scheduler.setAwaitTerminationSeconds(60);scheduler.setWaitForTasksToCompleteOnShutdown(true);return scheduler;}}⽹上教程说的需要在启动类上加上@EnableScheduling注解来发现注解@Scheduled的任务并后台执⾏。
详解SpringBoot创建定时任务(配合数据库动态执行)

详解SpringBoot创建定时任务(配合数据库动态执⾏)序⾔:创建定时任务⾮常简单,主要有两种创建⽅式:⼀、基于注解(@Scheduled) ⼆、基于接⼝(SchedulingConfigurer).前者相信⼤家都很熟悉,但是实际使⽤中我们往往想从数据库中读取指定时间来动态执⾏定时任务,这时候基于接⼝的定时任务就⼤派⽤场了。
⼀、静态定时任务(基于注解)基于注解来创建定时任务⾮常简单,只需⼏⾏代码便可完成。
@Scheduled 除了⽀持灵活的参数表达式cron之外,还⽀持简单的延时操作,例如 fixedDelay ,fixedRate 填写相应的毫秒数即可。
@Configuration //1.主要⽤于标记配置类,兼备Component的效果。
@EnableScheduling // 2.开启定时任务public class SimpleScheduleConfig {//3.添加定时任务@Scheduled(cron = "0/5 * * * * ?")private void configureTasks() {System.err.println("执⾏定时任务1: " + LocalDateTime.now());}}Cron表达式参数分别表⽰:秒(0~59)例如0/5表⽰每5秒分(0~59)时(0~23)⽉的某天(0~31)需计算⽉(0~11)周⼏(可填1-7 或 SUN/MON/TUE/WED/THU/FRI/SAT)启动应⽤,可以看到控制台的信息如下:诚然,使⽤Scheduled 确实很⽅便,但缺点是当我们调整了执⾏周期的时候,需要重启应⽤才能⽣效,这多少有些不⽅便。
为了达到实时⽣效的效果,可以使⽤接⼝来完成定时任务。
⼆、动态定时任务(基于接⼝)为了演⽰效果,这⾥选⽤ Mysql数据库和 Mybatis 来查询和调整定时任务的执⾏周期,然后观察定时任务的执⾏情况。
SpringBoot中定时任务的3种实现方式

SpringBoot中定时任务的3种实现⽅式Ref定时任务的实现⽅式⽅式1:基于java.util.Timer定时器,实现类似闹钟的定时任务⽅式2:使⽤ Quartz、elastic-job、xxl-job 等开源第三⽅定时任务框架,适合分布式项⽬应⽤。
该⽅式的缺点是配置复杂。
⽅式3:使⽤ Spring 提供的⼀个注解@Schedule,开发简单,使⽤⽐较⽅便。
java.util.Timer实现定时任务基于java.util.Timer定时器,实现类似闹钟的定时任务。
这种⽅式在项⽬中使⽤较少,参考如下Demo。
import java.util.Date;import java.util.Timer;import java.util.TimerTask;public class SpringbootAppApplication {/*** main⽅法* @param args*/public static void main(String[] args) {SpringApplication.run(SpringbootAppApplication.class, args);System.out.println("Server is running ...");TimerTask timerTask = new TimerTask() {@Overridepublic void run() {System.out.println("task run:"+ new Date());}};Timer timer = new Timer();timer.schedule(timerTask,10,3000);}}复制代码ScheduledExecutorService实现定时任务该⽅法类似Timer,参考如下Demo。
public class TestScheduledExecutorService {public static void main(String[] args) {ScheduledExecutorService service = Executors.newSingleThreadScheduledExecutor();/*** @param command the task to execute 任务体* @param initialDelay the time to delay first execution ⾸次执⾏的延时时间* @param period the period between successive executions 任务执⾏间隔* @param unit the time unit of the initialDelay and period parameters 间隔时间单位*/service.scheduleAtFixedRate(()->System.out.println("task ScheduledExecutorService "+new Date()), 0, 3, TimeUnit.SECONDS);service.scheduleAtFixedRate(()->System.out.println("task ScheduledExecutorService "+new Date()), 0, 3, TimeUnit.SECONDS);}}复制代码@Schedule实现定时任务Demo1. ⾸先,在项⽬启动类上添加@EnableScheduling注解,开启对定时任务的⽀持。
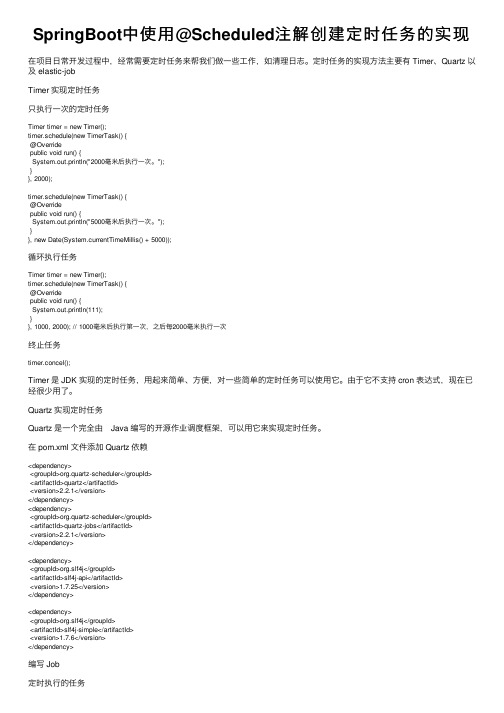
SpringBoot中使用@Scheduled注解创建定时任务的实现

SpringBoot中使⽤@Scheduled注解创建定时任务的实现在项⽬⽇常开发过程中,经常需要定时任务来帮我们做⼀些⼯作,如清理⽇志。
定时任务的实现⽅法主要有 Timer、Quartz 以及 elastic-jobTimer 实现定时任务只执⾏⼀次的定时任务Timer timer = new Timer();timer.schedule(new TimerTask() {@Overridepublic void run() {System.out.println("2000毫⽶后执⾏⼀次。
");}}, 2000);timer.schedule(new TimerTask() {@Overridepublic void run() {System.out.println("5000毫⽶后执⾏⼀次。
");}}, new Date(System.currentTimeMillis() + 5000));循环执⾏任务Timer timer = new Timer();timer.schedule(new TimerTask() {@Overridepublic void run() {System.out.println(111);}}, 1000, 2000); // 1000毫⽶后执⾏第⼀次,之后每2000毫⽶执⾏⼀次终⽌任务timer.concel();Timer 是 JDK 实现的定时任务,⽤起来简单、⽅便,对⼀些简单的定时任务可以使⽤它。
由于它不⽀持 cron 表达式,现在已经很少⽤了。
Quartz 实现定时任务Quartz 是⼀个完全由 Java 编写的开源作业调度框架,可以⽤它来实现定时任务。
在 pom.xml ⽂件添加 Quartz 依赖<dependency><groupId>org.quartz-scheduler</groupId><artifactId>quartz</artifactId><version>2.2.1</version></dependency><dependency><groupId>org.quartz-scheduler</groupId><artifactId>quartz-jobs</artifactId><version>2.2.1</version></dependency><dependency><groupId>org.slf4j</groupId><artifactId>slf4j-api</artifactId><version>1.7.25</version></dependency><dependency><groupId>org.slf4j</groupId><artifactId>slf4j-simple</artifactId><version>1.7.6</version></dependency>编写 Job定时执⾏的任务public class QuartzJob implements Job{public void execute(JobExecutionContext context) throws JobExecutionException {JobDataMap jobDataMap = context.getJobDetail().getJobDataMap();String hello = (String) jobDataMap.get("hello");System.err.println(hello);}}编写 Taskpublic void task() {// 该 map 可在 job 中获取JobDataMap map = new JobDataMap();map.put("hello", "world");JobDetail jobDetail = newJob(QuartzJob.class).withIdentity("myJob", "myGroup").setJobData(map).build();/** 简单定时器** 执⾏时间间隔* withIntervalInMilliSeconds 毫秒* withIntervalInSeconds 秒* withIntervalInMinutes 分钟* withIntervalInHours ⼩时** 执⾏次数* repeatForever 重复执⾏* withRepeatCount 次数*/SimpleScheduleBuilder scheduleBuilder = simpleSchedule().withIntervalInSeconds(3).withRepeatCount(10);/** corn定时器** corn表达式,使⽤更灵活* corn表达式在线⽣成 /*/CronScheduleBuilder cronScheduleBuilder = CronScheduleBuilder.cronSchedule("0 0 0 1 * ?");Trigger trigger = newTrigger().startAt(new Date()).//startNow() 默认现在开始withIdentity("myTrigger", "myGroup").//withSchedule(scheduleBuilder).build();withSchedule(cronScheduleBuilder).build();try {//1.创建Scheduler⼯⼚SchedulerFactory schedulerFactory = new StdSchedulerFactory();//2.获取实例Scheduler scheduler = schedulerFactory.getScheduler();//3.设置jobDetail详情和trigger触发器scheduler.scheduleJob(jobDetail, trigger);//4.定时任务开始scheduler.start();} catch (SchedulerException e) {e.printStackTrace();}}在项⽬启动的时候调⽤ task ⽅法即可启动定时任务。
springboot系列之八:SpringBoot处理定时任务

springboot系列之⼋:SpringBoot处理定时任务项⽬经常会⽤到定时任务,springboot⾃然是可以通过整合相关组件来实现的。
⽬前常⽤的定时任务的实现有两种:1. 通过spring ⾃带的定时器任务@Schedule来实现2. 通过Quartz来实现本次借⽤上⼀篇的既有项⽬结构进⾏案例调试。
⼀、cron表达式⽆论上⾯说的哪种实现⽅式,都需要⽤到cron表达式,因此不得不先介绍下它。
Cron表达式是⼀个字符串,由6或7个域组成,每个域有不同的含义,每个域之间⽤空格隔开。
有2中格式:Seconds Minutes Hours DayofMonth Month DayofWeek Year (7个域)Seconds Minutes Hours DayofMonth Month DayofWeek (6个域)每个域可能出现的值:Seconds:有效范围为0-59的整数Minutes:有效范围为0-59的整数Hours:有效范围为0-23的整数DayofMonth:有效范围为0-31的整数Month:有效范围为1-12的整数或JAN-DECDayofWeek:有效范围为1-7的整数或SUN-SAT两个范围。
1表⽰星期天,2表⽰星期⼀,依次类推Year:有效范围为1970-2099年除了以上内容外,还可能出现⼀些特殊字符:(1)*:表⽰匹配该域的任意值,假如在Minutes域使⽤*, 即表⽰每分钟都会触发事件。
(2)?:只能⽤在DayofMonth和DayofWeek两个域。
它也匹配域的任意值,但实际不会。
因为DayofMonth和DayofWeek会相互影响。
例如想在每⽉的10⽇触发调度,不管10⽇到底是星期⼏,则只能使⽤如下写法: 13 13 15 10 * ?, 其中最后⼀位只能⽤(3)-:表⽰范围,例如在Minutes域使⽤5-20,表⽰从5分到20分钟每分钟触发⼀次(4)/:表⽰起始时间开始触发,然后每隔固定时间触发⼀次,例如在Minutes域使⽤5/20,则意味着5分钟触发⼀次,⽽25,45等分别触发⼀次.(5),:表⽰列出枚举值值。
【spring-boot】springboot整合quartz实现定时任务

【spring-boot】springboot整合quartz实现定时任务在做项⽬时有时候会有定时器任务的功能,⽐如某某时间应该做什么,多少秒应该怎么样之类的。
spring⽀持多种定时任务的实现。
我们来介绍下使⽤spring的定时器和使⽤quartz定时器 1.我们使⽤spring-boot作为基础框架,其理念为零配置⽂件,所有的配置都是基于注解和暴露bean的⽅式。
2.使⽤spring的定时器: spring⾃带⽀持定时器的任务实现。
其可通过简单配置来使⽤到简单的定时任务。
@Component@Configurable@EnableSchedulingpublic class ScheduledTasks{@Scheduled(fixedRate = 1000 * 30)public void reportCurrentTime(){System.out.println ("Scheduling Tasks Examples: The time is now " + dateFormat ().format (new Date ()));}//每1分钟执⾏⼀次@Scheduled(cron = "0 */1 * * * * ")public void reportCurrentByCron(){System.out.println ("Scheduling Tasks Examples By Cron: The time is now " + dateFormat ().format (new Date ()));}private SimpleDateFormat dateFormat(){return new SimpleDateFormat ("HH:mm:ss");}}没了,没错,使⽤spring的定时任务就这么简单,其中有⼏个⽐较重要的注解: @EnableScheduling:标注启动定时任务。
SpringBoot实现定时任务和异步调用

SpringBoot实现定时任务和异步调⽤本⽂实例为⼤家分享了SpringBoot实现定时任务和异步调⽤的具体代码,供⼤家参考,具体内容如下环境:jdk1.8;spring boot2.0.2;Maven3.3摘要说明:定时任务:定时任务是业务场景中经常出现的⼀种情况如:定时发送邮件,短信、定时统计监控数据、定时对账等异步调⽤:⼀个都买流程可能包括下单、发货通知、短信推送、消息推送等,其实除了下单这个主要程序是主程序,其他⼦程序可以同时进⾏且不影响主程序的运⾏,这个时候就可以使⽤异步调⽤来调⽤这些⼦程序;步骤:1.定时任务a.在spring boot主类上使⽤注解@EnableScheduling启动定时任务:package com.example.demo;import org.springframework.boot.SpringApplication;import org.springframework.boot.autoconfigure.SpringBootApplication;import org.springframework.scheduling.annotation.EnableScheduling;//启动定时任务@EnableScheduling@SpringBootApplicationpublic class DemoApplication {public static void main(String[] args) {SpringApplication.run(DemoApplication.class, args);}}b.实现定时任务(使⽤@Component注解来标注组件)/*** @模块名:demo* @包名:ponent* @描述:SchedulingComponent.java* @版本:1.0* @创建⼈:cc* @创建时间:2018年9⽉29⽇上午10:19:37*/package ponent;import java.util.Date;import org.springframework.scheduling.annotation.Scheduled;import ponent;/*** @模块名:demo* @包名:ponent @类名称: SchedulingComponent* @类描述:【类描述】⽤于测试定时任务 @版本:1.0* @创建⼈:cc* @创建时间:2018年9⽉29⽇上午10:19:37*/@Componentpublic class SchedulingComponent {/**** @⽅法名:testScheduling1* @⽅法描述【⽅法功能描述】测试定时任务,没三秒执⾏⼀次* @修改描述【修改描述】* @版本:1.0* @创建⼈:cc* @创建时间:2018年9⽉29⽇上午10:26:20* @修改⼈:cc* @修改时间:2018年9⽉29⽇上午10:26:20*/@Scheduled(fixedRate = 3000)public void testScheduling1() {System.out.println("执⾏时间为"+new Date()+"执⾏testScheduling1");}}@Scheduled注解和之前spring使⽤xml配置定时任务类似:@Scheduled(fixedRate = 5000) :上⼀次开始执⾏时间点之后5秒再执⾏@Scheduled(fixedDelay = 5000) :上⼀次执⾏完毕时间点之后5秒再执⾏@Scheduled(initialDelay=1000, fixedRate=5000) :第⼀次延迟1秒后执⾏,之后按fixedRate的规则每5秒执⾏⼀次@Scheduled(cron="*/5 * * * * *") :通过cron表达式定义规则c.上述⽅法写好后启动服务看下控制台结果:2.异步调⽤a.⾸先在spring boot主类上使⽤注解@EnableAsync启动异步调⽤package com.example.demo;import org.springframework.boot.SpringApplication;import org.springframework.boot.autoconfigure.SpringBootApplication;import org.springframework.scheduling.annotation.EnableAsync;//启动异步调⽤@EnableAsync@SpringBootApplicationpublic class DemoApplication {public static void main(String[] args) {SpringApplication.run(DemoApplication.class, args);}}b.sping boot异步调⽤很简单,只需使⽤@Async注解标明⽅法(接⼝⽅法)异步package ponent;public interface TaskComponent {void test1() throws Exception;void test2() throws Exception;void test3() throws Exception;}package ponent.impl;import java.util.Random;import org.springframework.scheduling.annotation.Async;import ponent;import ponent.TaskComponent;@Componentpublic class TaskComponentImpl implements TaskComponent {public static Random random = new Random();@Override@Asyncpublic void test1() throws InterruptedException {System.out.println("开始做任务⼀");long start = System.currentTimeMillis();Thread.sleep(random.nextInt(10000));long end = System.currentTimeMillis();System.out.println("完成任务⼀,耗时:" + (end - start) + "毫秒");}@Override@Asyncpublic void test2() throws InterruptedException {System.out.println("开始做任务⼆");long start = System.currentTimeMillis();Thread.sleep(random.nextInt(10000));long end = System.currentTimeMillis();System.out.println("完成任务⼆,耗时:" + (end - start) + "毫秒");}@Override@Asyncpublic void test3() throws InterruptedException {System.out.println("开始做任务三");long start = System.currentTimeMillis();Thread.sleep(random.nextInt(10000));long end = System.currentTimeMillis();System.out.println("完成任务三,耗时:" + (end - start) + "毫秒");}}c.使⽤测试类进⾏测试:package com.example.demo;import org.junit.Test;import org.junit.runner.RunWith;import org.springframework.beans.factory.annotation.Autowired;import org.springframework.boot.test.context.SpringBootTest;import org.springframework.boot.test.context.SpringBootTest.WebEnvironment;import org.springframework.boot.web.server.LocalServerPort;import org.springframework.test.context.junit4.SpringRunner;import ponent.TaskComponent;@RunWith(SpringRunner.class)// 引⼊SpringBootTest并⽣成随机接⼝@SpringBootTest(webEnvironment = WebEnvironment.RANDOM_PORT)public class AsyncTest {// 注⼊随机接⼝@LocalServerPortprivate int port;@Autowiredprivate TaskComponent taskComponent;@Testpublic void testTask() {try {taskComponent.test1();taskComponent.test2();taskComponent.test3();System.out.println("执⾏主线程");// 主线程休眠10秒等待上述异步⽅法执⾏Thread.sleep(10000);}catch (Exception e) {System.out.println(e);}}}执⾏结果如下;可以看出三个异步⽅法互不影响,且不影响主线程的运⾏执⾏主线程开始做任务⼀开始做任务⼆开始做任务三完成任务⼀,耗时:1401毫秒完成任务⼆,耗时:4284毫秒完成任务三,耗时:5068毫秒d.对于这些异步执⾏的调⽤往往会给我们带来思考是不是异步调⽤越多越好,答案当然是否;所以在这⾥引⼊线程池来进⾏异步调⽤控制:在spring boot主类上标注线程池:package com.example.demo;import java.util.concurrent.Executor;import java.util.concurrent.ThreadPoolExecutor;import org.springframework.boot.SpringApplication;import org.springframework.boot.autoconfigure.SpringBootApplication;import org.springframework.context.annotation.Bean;import org.springframework.context.annotation.Configuration;import org.springframework.scheduling.annotation.EnableAsync;import org.springframework.scheduling.annotation.EnableScheduling;import org.springframework.scheduling.concurrent.ThreadPoolTaskExecutor;//启动定时任务@EnableScheduling@SpringBootApplicationpublic class DemoApplication {public static void main(String[] args) {SpringApplication.run(DemoApplication.class, args);}// 启动异步调⽤@EnableAsync@Configurationclass TaskPoolConfig {// 核⼼线程数(setCorePoolSize)10:线程池创建时候初始化的线程数// 最⼤线程数(setMaxPoolSize)20:线程池最⼤的线程数,只有在缓冲队列满了之后才会申请超过核⼼线程数的线程// 缓冲队列(setQueueCapacity)200:⽤来缓冲执⾏任务的队列// 允许线程的空闲时间(setKeepAliveSeconds)60秒:当超过了核⼼线程出之外的线程在空闲时间到达之后会被销毁// 线程池名的前缀(setThreadNamePrefix):设置好了之后可以⽅便我们定位处理任务所在的线程池// 线程池对拒绝任务的处理策略(setRejectedExecutionHandler):这⾥采⽤了CallerRunsPolicy策略,当线程池没有处理能⼒的时候,该策略会直接在 execute// ⽅法的调⽤线程中运⾏被拒绝的任务(setWaitForTasksToCompleteOnShutdown);如果执⾏程序已关闭,则会丢弃该任务// setWaitForTasksToCompleteOnShutdown(true)该⽅法就是这⾥的关键,⽤来设置线程池关闭的时候等待所有任务都完成再继续销毁其他的Bean,这样这些异步任务的销毁就会先于Redis线程池的销毁。
SpringBoot中并发定时任务的实现、动态定时任务的实现(看这一篇就够了)

SpringBoot中并发定时任务的实现、动态定时任务的实现(看这⼀篇就够了)原创不易,如需转载,请注明出处,否则将追究法律责任!!!⼀、在JAVA开发领域,⽬前可以通过以下⼏种⽅式进⾏定时任务1、单机部署模式Timer:jdk中⾃带的⼀个定时调度类,可以简单的实现按某⼀频度进⾏任务执⾏。
提供的功能⽐较单⼀,⽆法实现复杂的调度任务。
ScheduledExecutorService:也是jdk⾃带的⼀个基于线程池设计的定时任务类。
其每个调度任务都会分配到线程池中的⼀个线程执⾏,所以其任务是并发执⾏的,互不影响。
Spring Task:Spring提供的⼀个任务调度⼯具,⽀持注解和配置⽂件形式,⽀持Cron表达式,使⽤简单但功能强⼤。
Quartz:⼀款功能强⼤的任务调度器,可以实现较为复杂的调度功能,如每⽉⼀号执⾏、每天凌晨执⾏、每周五执⾏等等,还⽀持分布式调度,就是配置稍显复杂。
2、分布式集群模式(不多介绍,简单提⼀下)问题:I、如何解决定时任务的多次执⾏?II、如何解决任务的单点问题,实现任务的故障转移?问题I的简单思考:1、固定执⾏定时任务的机器(可以有效避免多次执⾏的情况,缺点就是单点故障问题)。
2、借助Redis的过期机制和分布式锁。
3、借助mysql的锁机制等。
成熟的解决⽅案:1、Quartz:可以去看看这篇⽂章[Quartz分布式]( https:///jiafuwei/p/6145280.html)。
2、elastic-job:(https:///elasticjob/elastic-job-lite)当当开发的弹性分布式任务调度系统,采⽤zookeeper实现分布式协调,实现任务⾼可⽤以及分⽚。
3、xxl-job:(https:///xuxueli/xxl-job)是⼤众点评员发布的分布式任务调度平台,是⼀个轻量级分布式任务调度框架。
4、saturn:(https:///vipshop/Saturn) 是唯品会提供⼀个分布式、容错和⾼可⽤的作业调度服务框架。
springboot集成schedule实现定时任务

springboot集成schedule实现定时任务背景在项⽬开发过程中,我们经常需要执⾏具有周期性的任务。
通过定时任务可以很好的帮助我们实现。
我们拿常⽤的⼏种定时任务框架做⼀个⽐较:从以上表格可以看出,Spring Schedule框架功能完善,简单易⽤。
对于中⼩型项⽬需求,Spring Schedule是完全可以胜任的。
1、springboot集成schedule1.1 添加maven依赖包由于Spring Schedule包含在spring-boot-starter基础模块中了,所有不需要增加额外的依赖。
<dependencies><dependency><groupId>org.springframework.boot</groupId><artifactId>spring-boot-starter</artifactId></dependency><dependency><groupId>org.springframework.boot</groupId><artifactId>spring-boot-starter-test</artifactId><scope>test</scope></dependency></dependencies>1.2 启动类,添加启动注解在springboot⼊⼝或者配置类中增加@EnableScheduling注解即可启⽤定时任务。
@EnableScheduling@SpringBootApplicationpublic class ScheduleApplication {public static void main(String[] args) {SpringApplication.run(ScheduleApplication.class, args);}}1.3.添加定时任务我们将对Spring Schedule三种任务调度器分别举例说明。
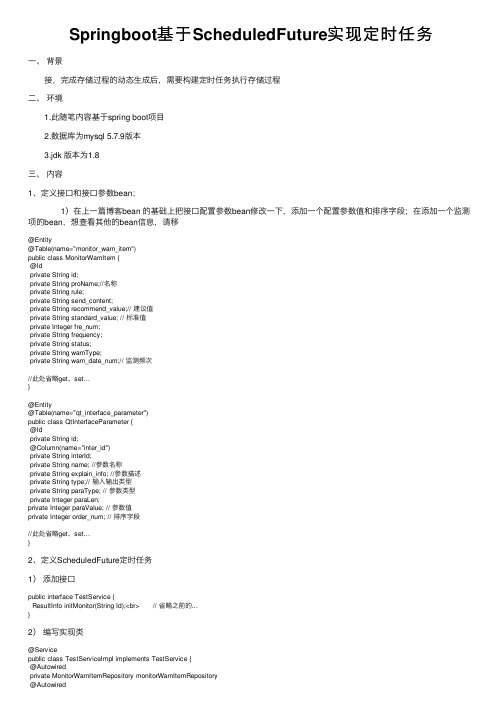
Springboot基于ScheduledFuture实现定时任务

Springboot基于ScheduledFuture实现定时任务⼀、背景 接,完成存储过程的动态⽣成后,需要构建定时任务执⾏存储过程⼆、环境 1.此随笔内容基于spring boot项⽬ 2.数据库为mysql 5.7.9版本 3.jdk 版本为1.8三、内容1、定义接⼝和接⼝参数bean; 1)在上⼀篇博客bean 的基础上把接⼝配置参数bean修改⼀下,添加⼀个配置参数值和排序字段;在添加⼀个监测项的bean,想查看其他的bean信息,请移@Entity@Table(name="monitor_warn_item")public class MonitorWarnItem {@Idprivate String id;private String proName;//名称private String rule;private String send_content;private String recommend_value;// 建议值private String standard_value; // 标准值private Integer fre_num;private String frequency;private String status;private String warnType;private String warn_date_num;// 监测频次//此处省略get、set…}@Entity@Table(name="qt_interface_parameter")public class QtInterfaceParameter {@Idprivate String id;@Column(name="inter_id")private String interId;private String name; //参数名称private String explain_info; //参数描述private String type;// 输⼊输出类型private String paraType; // 参数类型private Integer paraLen;private Integer paraValue; // 参数值private Integer order_num; // 排序字段//此处省略get、set…}2、定义ScheduledFuture定时任务1)添加接⼝public interface TestService {ResultInfo initMonitor(String Id);<br> // 省略之前的...}2)编写实现类@Servicepublic class TestServiceImpl implements TestService {@Autowiredprivate MonitorWarnItemRepository monitorWarnItemRepository@Autowiredprivate ThreadPoolTaskScheduler threadPoolTaskScheduler;@Beanpublic ThreadPoolTaskScheduler threadPoolTaskScheduler() {return new ThreadPoolTaskScheduler();}List<Map<String, Object>> mapList = new ArrayList<Map<String, Object>>(); // 新建任务信息集合/*** 初始化监测项** @param Id* @return*/@Override@Transactionalpublic ResultInfo initMonitor(String Id) {ResultInfo info = new ResultInfo();String msg = "";MonitorWarnItem item = monitorWarnItemRepository.findId(Id);msg =buildTask(item);info.setResult(1);info.setMsg("初始化成功,初始化返回信息:" + msg);System.out.println(msg);// ⽇志打印return info;}/*** 配置任务信息** @param qt* @return*/private String buildTask(MonitorWarnItem qt) {String msg = "";if (IsFure(qt.getId())) {List<QtInterface> InterList = qtInterfaceRepository.QueryInterFaceByItemId(qt.getId());if (InterList.size() > 0) {Map<String, Object> map_future = new HashMap<>();ScheduledFuture<?> future;// 监测任务List<QtInterfaceParameter> para = qtInterfaceParameterRepository.QueryInfoByInterId(InterList.get(0).getId()); // 查找参数信息List<String> map = new ArrayList<>(para.size());if (para.size() > 0) { // 参数集合for (QtInterfaceParameter pa : para) {for (int item = 1; item <= para.size(); item++) {if (item == pa.getOrder_num()) { // 根据字段排序来设置参数值的顺序map.add(pa.getPara_value()); // 设置值item++;}}}}QuartzTaskService service = new QuartzTaskService(InterList.get(0).getName(), map, jdbcTemplate, qt);if (!"".equals(qt.getWarn_date_num()) && qt.getWarn_date_num() != null) {future = threadPoolTaskScheduler.schedule(service, new CronTrigger(qt.getWarn_date_num()));// 初始化任务,第⼆个参数是Cron表达式 if (future != null) {map_future.put("future", future);map_future.put("id", InterList.get(0).getItemId());map_future.put("status", "0");mapList.add(map_future);}} else {msg += " 监测项:" + qt.getProName() + " 监测频次字段为空,不能执⾏计划!";}} else {msg += " 监测项:" + qt.getProName() + " 没有查找到接⼝配置信息";}} else {msg += " 监测项:" + qt.getProName() + " 已经启动,请不要重复启动。
springboot定时任务(多线程)

springboot定时任务(多线程)直接上代码:1、定义⼀个配置类import org.springframework.beans.factory.annotation.Value;import org.springframework.context.annotation.Bean;import org.springframework.context.annotation.Configuration;import org.springframework.scheduling.annotation.EnableAsync;import org.springframework.scheduling.concurrent.ThreadPoolTaskExecutor;import java.util.concurrent.Executor;@Configuration@EnableAsyncpublic class ScheduleConfig {@Value("${schedule.corePoolSize}") // 引⼊yml配置private int corePoolSize;@Value("${schedule.maxPoolSize}")private int maxPoolSize;@Value("${schedule.queueCapacity}")private int queueCapacity;@Beanpublic Executor taskExecutor() {ThreadPoolTaskExecutor executor = new ThreadPoolTaskExecutor();executor.setCorePoolSize(corePoolSize);executor.setMaxPoolSize(maxPoolSize);executor.setQueueCapacity(queueCapacity);executor.initialize();return executor;}}application.ymlschedule:corePoolSize: 10maxPoolSize: 100queueCapacity: 102、定义需要按时执⾏的服务corn语句在线⽣成器:说明:可能会遇到定时任务⼀下次执⾏多次的情况,这是由于执⾏速度很快,corn语句匹配仍然⽣效导致的。
SpringBoot下的Job定时任务

SpringBoot下的Job定时任务编写Job定时执⾏任务⼗分有⽤,能解决很多问题,这次实习的项⽬⾥做了⼀下系统定时更新三⽅系统订单状态的功能,这⾥⽤到了Spring的定时任务使⽤的⾮常⽅便,下⾯总结⼀下如何使⽤:⼀,@scheduled注解@scheduled这个注解是定时任务的核⼼所在,在某个⽅法上⾯标记此注解,即为此⽅法设置定时调⽤,当然调⽤的频率时间还需要在cron中设置。
例如:@Scheduled(cron = "0 */10 * * * ? ")public void handleOrderStatus() {//定时任务代码}//这⾥就是每隔10分钟调⽤⼀次此⽅法关于cron的介绍如下:⼀个cron表达式有⾄少6个(也可能7个)有空格分隔的时间元素。
按顺序依次为秒(0~59)分钟(0~59)⼩时(0~23)天(⽉)(0~31,但是你需要考虑你⽉的天数)⽉(0~11)天(星期)(1~7 1=SUN 或 SUN,MON,TUE,WED,THU,FRI,SAT)7.年份(1970-2099)其中每个元素可以是⼀个值(如6),⼀个连续区间(9-12),⼀个间隔时间(8-18/4)(/表⽰每隔4⼩时),⼀个列表(1,3,5),通配符。
由于"⽉份中的⽇期"和"星期中的⽇期"这两个元素互斥的,必须要对其中⼀个设置?.0 0 10,14,16 * * ? 每天上午10点,下午2点,4点0 0/30 9-17 * * ? 朝九晚五⼯作时间内每半⼩时0 0 12 ? * WED 表⽰每个星期三中午12点"0 0 12 * * ?" 每天中午12点触发"0 15 10 ? * *" 每天上午10:15触发"0 15 10 * * ?" 每天上午10:15触发"0 15 10 * * ? *" 每天上午10:15触发"0 15 10 * * ? 2005" 2005年的每天上午10:15触发"0 * 14 * * ?" 在每天下午2点到下午2:59期间的每1分钟触发"0 0/5 14 * * ?" 在每天下午2点到下午2:55期间的每5分钟触发"0 0/5 14,18 * * ?" 在每天下午2点到2:55期间和下午6点到6:55期间的每5分钟触发"0 0-5 14 * * ?" 在每天下午2点到下午2:05期间的每1分钟触发"0 10,44 14 ? 3 WED" 每年三⽉的星期三的下午2:10和2:44触发"0 15 10 ? * MON-FRI" 周⼀⾄周五的上午10:15触发"0 15 10 15 * ?" 每⽉15⽇上午10:15触发"0 15 10 L * ?" 每⽉最后⼀⽇的上午10:15触发"0 15 10 ? * 6L" 每⽉的最后⼀个星期五上午10:15触发"0 15 10 ? * 6L 2002-2005" 2002年⾄2005年的每⽉的最后⼀个星期五上午10:15触发"0 15 10 ? * 6#3" 每⽉的第三个星期五上午10:15触发有些⼦表达式能包含⼀些范围或列表例如:⼦表达式(天(星期))可以为 “MON-FRI”,“MON,WED,FRI”,“MON-WED,SAT”“*”字符代表所有可能的值因此,“*”在⼦表达式(⽉)⾥表⽰每个⽉的含义,“*”在⼦表达式(天(星期))表⽰星期的每⼀天“/”字符⽤来指定数值的增量例如:在⼦表达式(分钟)⾥的“0/15”表⽰从第0分钟开始,每15分钟在⼦表达式(分钟)⾥的“3/20”表⽰从第3分钟开始,每20分钟(它和“3,23,43”)的含义⼀样“?”字符仅被⽤于天(⽉)和天(星期)两个⼦表达式,表⽰不指定值当2个⼦表达式其中之⼀被指定了值以后,为了避免冲突,需要将另⼀个⼦表达式的值设为“?”“L” 字符仅被⽤于天(⽉)和天(星期)两个⼦表达式,它是单词“last”的缩写但是它在两个⼦表达式⾥的含义是不同的。
SpringBoot下定时任务的实现方法

SpringBoot下定时任务的实现⽅法参考江南⼀点⾬⼤佬的⽂章:cron⼯具⽹站:写在前⾯:Linux下的Cron跟Spring下的Cron表达式有些许的不⼀样,注意到⽹站上去验证SpringBoot中实现定时任务的两种⽅式 在 Spring + SpringMVC 环境中,⼀般来说,要实现定时任务,我们有两中⽅案,⼀种是使⽤ Spring ⾃带的定时任务处理器 @Scheduled 注解,另⼀种就是使⽤第三⽅框架Quartz 。
Spring Boot 源⾃ Spring+SpringMVC ,因此天然具备这两个 Spring 中的定时任务实现策略,当然也⽀持 Quartz,本⽂我们就来看下 Spring Boot 中两种定时任务的实现⽅式;⼀、@Scheduled使⽤ @Scheduled ⾮常容易,直接创建⼀个 Spring Boot 项⽬,并且添加 web 依赖spring-boot-starter-web,项⽬创建成功后,添加@EnableScheduling注解1、开启定时任务:@EnableScheduling@SpringBootApplicationpublic class Springboot19ScheduledApplication {public static void main(String[] args) {SpringApplication.run(Springboot19ScheduledApplication.class, args);}}2、配置定时任务:具体的表达式请参考上⾯的⽹址⾃⾏验证import org.springframework.context.annotation.Configuration;import org.springframework.scheduling.annotation.Scheduled;import java.util.Date;/*** @ClassName ScheduledTaskConfig* @Author zhangzhixi* @Description 定时任务配置类* @Date 2022-2-27 19:20* @Version 1.0*/@Configurationpublic class ScheduledTaskConfig {@Scheduled(fixedRate = 2000)public void fixedRate() {System.out.println("fixedRate>>>" + new Date());}@Scheduled(fixedDelay = 2000)public void fixedDelay() {System.out.println("fixedDelay>>>" + new Date());}@Scheduled(initialDelay = 2000, fixedDelay = 2000)public void initialDelay() {System.out.println("initialDelay>>>" + new Date());}/*** 每5秒执⾏⼀次*/@Scheduled(cron = "0/5 * * * * *")public void cron() {System.out.println("cronExpression>>>" + new Date());}}1. ⾸先使⽤ @Scheduled 注解开启⼀个定时任务。
SpringBoot整合Xxl-job实现定时任务的全过程

SpringBoot整合Xxl-job实现定时任务的全过程⽬录前⾔⼀、部署调度中⼼1、项⽬下载2、初始化数据3、修改properties配置⽂件⼆、部署SpringBoot项⽬1、引⼊依赖2、创建配置类3、修改配置⽂件4、创建执⾏器5、启动SpringBoot项⽬三、通过调度中⼼进⾏任务调度1、添加执⾏器2、添加任务3、任务调度中⼼发起任务调度四、⼩结总结前⾔XXL-JOB是⼀个分布式任务调度平台,其核⼼设计⽬标是开发迅速、学习简单、轻量级、易扩展。
现已开放源代码并接⼊多家公司线上产品线,开箱即⽤。
如果是单机并且定时任务不多的情况,可以选择Timer注解@Scheduled或者Cron⼯具类等⽅式来实现,但是这有个缺点,那就是定时任务会写死在代码中,⼀旦启动,就不能暂停或者修改。
如果修改的话,整个还项⽬要重新编译,这属实⾮常的⿇烦。
本篇⽂章将会介绍如何通过xxl-job来实现任务的调度⼀、部署调度中⼼1、项⽬下载下⾯是调度中⼼代码的gitee地址,可以colon到本地/xuxueli0323/xxl-job2、初始化数据在下载好的项⽬中的doc/db⽬录下有⼀个tables_xxl_job.sql⽂件,先放到⾃⼰的数据库中执⾏,其实就是初始化好调度中⼼需要的表结构和数据3、修改properties配置⽂件⼆、部署SpringBoot项⽬1、引⼊依赖<dependency><groupId>com.xuxueli</groupId><artifactId>xxl-job-core</artifactId><version>2.2.0</version></dependency>2、创建配置类@Configurationpublic class XxlJobConfig {private Logger logger = LoggerFactory.getLogger(XxlJobConfig.class);@Value("${xxl.job.admin.addresses}")private String adminAddresses;@Value("${xxl.job.executor.appname}")private String appName;@Value("${xxl.job.executor.ip}")private String ip;@Value("${xxl.job.executor.port}")private int port;@Value("${xxl.job.accessToken}")private String accessToken;@Value("${xxl.job.executor.logpath}")private String logPath;@Value("${xxl.job.executor.logretentiondays}")private int logRetentionDays;@Beanpublic XxlJobSpringExecutor xxlJobExecutor() {(">>>>>>>>>>> xxl-job config init.");XxlJobSpringExecutor xxlJobSpringExecutor = new XxlJobSpringExecutor();xxlJobSpringExecutor.setAdminAddresses(adminAddresses);xxlJobSpringExecutor.setAppname(appName);xxlJobSpringExecutor.setIp(ip);xxlJobSpringExecutor.setPort(port);xxlJobSpringExecutor.setAccessToken(accessToken);xxlJobSpringExecutor.setLogPath(logPath);xxlJobSpringExecutor.setLogRetentionDays(logRetentionDays);return xxlJobSpringExecutor;}}3、修改配置⽂件xxl:job:admin:addresses: http://127.0.0.1:8080/xxl-job-admin #部署的调度中⼼的urlexecutor:appname: xxl-job-volunteer-executor #执⾏器的名字ip:port: 9999 #调度中⼼调⽤执⾏器时使⽤的端⼝logpath: /data/apploggs/xxl-job/jobhandler #⽇志路径logretentiondays: 30 #⽇志保留天数accessToken:4、创建执⾏器@Componentpublic class XxlJobSample {// myDemoJob是任务的名字,也是Spring中bean的名字@XxlJob("myDemoJob")public ReturnT<String> myDemoJob(String value) {System.out.println("myDemoJob:定时任务触发:" + value);return ReturnT.SUCCESS;}}5、启动SpringBoot项⽬启动成功后会看到下⾯两⾏⽇志信息,可以看到成功连接到了调度中⼼然后注册了将要被调度任务>>>>>>>>>>> xxl-job register jobhandler success, name:myDemoJob, jobHandler:com.xxl.job.core.handler.impl.MethodJobHandler@1f94dd63[class ponent.XxlJobSample#myDemoJob] >>>>>>>>>>> xxl-job remoting server start success, nettype = class com.xxl.job.core.server.EmbedServer, port = 9999三、通过调度中⼼进⾏任务调度1、添加执⾏器输⼊配置⽂件中配置的appName,名称可以随意2、添加任务新增调度任务查看调度任务3、任务调度中⼼发起任务调度在SpringBoot项⽬中可以看到控制台输出如下信息:2022-01-16 11:54:05.039 INFO 7836 --- [Pool-1148366645] c.xxl.job.core.executor.XxlJobExecutor : >>>>>>>>>>> xxl-job regist JobThread success, jobId:7, handler:com.xxl.job.core.handler.impl.MethodJobHandler@1f94dd63[class pone myDemoJob:定时任务触发:testParam2022-01-16 11:55:38.059 INFO 7836 --- [ Thread-22] com.xxl.job.core.thread.JobThread : >>>>>>>>>>> xxl-job JobThread stoped, hashCode:Thread[Thread-22,10,main]四、⼩结⾄此,SpringBoot整合Xxl-job就完成了,刚才的⽰例代码其实对于原来的项⽬还是有⼀定的侵⼊性的,上⾯仅仅演⽰了BEAN运⾏模式,说⽩了就是调⽤加了@XxlJob的⽅法。
SpringBoot实现动态定时任务

SpringBoot实现动态定时任务项⽬情况:在当前项⽬中需要⼀个定时任务来清除过期的校验码,如果使⽤数据库存储过程的话不⽅便维护。
因此采⽤SpringBoot⾃带的⽅式来设置定时任务。
技术说明:SpringBoot⾃带的⽅式有两种可以实现:⼀种是使⽤@Scheduled注解的⽅式,只需要在启动类或者它所在的类上添加@EnableScheduling注解允许执⾏定时任务,并且设置Schecduled注解的参数,诸如:1.cron是设置定时执⾏的表达式,如 0 0/5 * * * ?每隔五分钟执⾏⼀次2.zone表⽰执⾏时间的时区3.fixedDelay 和fixedDelayString 表⽰⼀个固定延迟时间执⾏,上个任务完成后,延迟多长时间执⾏4.fixedRate 和fixedRateString表⽰⼀个固定频率执⾏,上个任务开始后,多长时间后开始执⾏5.initialDelay 和initialDelayString表⽰⼀个初始延迟时间,第⼀次被调⽤前延迟的时间⽰例代码如下:package com.allcom.service;import com.allcom.dao.MysqlDao;import org.springframework.beans.factory.annotation.Autowired;import org.springframework.scheduling.annotation.Scheduled;import org.springframework.stereotype.Service;/*** @Author: zy* @Description: 定时任务* @Date: 2018/7/12_15:15**/@Servicepublic class TaskService {@Autowiredprivate MysqlDao mysqlDao;@Scheduled(fixedRate = 5*1000)public void deleteInvalidCheckCode() {mysqlDao.deleteInvalidCheckCode();}}另⼀种⽅式是通过⾃定义配置类的⽅式,步骤如下:第⼀步:新建⼀个类实现SchedulingConfigurer接⼝,并添加@Configuration注解,@EnableScheduling注解可以写在这⾥也可以写在启动类上,这⾥我写在了启动类上。
在SpringBoot中动态实现定时任务配置

在SpringBoot中动态实现定时任务配置在⽇常的项⽬开发中,往往会涉及到⼀些需要做到定时执⾏的代码,例如⾃动将超过24⼩时的未付款的单改为取消状态,⾃动将超过14天客户未签收的订单改为已签收状态等等,那么为了在Spring Boot中实现此类需求,我们要怎么做呢?Spring Boot早已考虑到了这类情况,先来看看要怎么做。
第⼀种⽅式是⽐较简单的,先搭建好Spring Boot微服务,加上这个注解 @EnableScheduling :/*** @author yudong* @date 2019/8/24*/@EnableScheduling // 开启定时任务功能@ComponentScan(basePackages = "org.javamaster.b2c")@EnableTransactionManagement@SpringBootApplicationpublic class ScheduledApplication {static Logger logger = LoggerFactory.getLogger(ScheduledApplication.class);public static void main(String[] args) {SpringApplication.run(ScheduledApplication.class, args);("定时任务页⾯管理地址:{}", "http://localhost:8089/scheduled/task/taskList");}}然后编写定时任务类:/*** @author yudong* @date 2019/8/24*/@Componentpublic class FixedPrintTask {Logger logger = LoggerFactory.getLogger(getClass());private int i;@Scheduled(cron = "*/15 * * * * ?")public void execute() {("FixedPrintTask execute times:{}", ++i);}}@Scheduled(cron ="*/15 * * * * ?")注解表明这是⼀个需要定时执⾏的⽅法,⾥⾯的cron属性接收的是⼀个cron表达式,这⾥我给的是 */15 * * * * ? ,这个的意思是每隔15秒执⾏⼀次⽅法,对cron表达式不熟悉的同学可以百度⼀下⽤法。
- 1、下载文档前请自行甄别文档内容的完整性,平台不提供额外的编辑、内容补充、找答案等附加服务。
- 2、"仅部分预览"的文档,不可在线预览部分如存在完整性等问题,可反馈申请退款(可完整预览的文档不适用该条件!)。
- 3、如文档侵犯您的权益,请联系客服反馈,我们会尽快为您处理(人工客服工作时间:9:00-18:30)。
SpringBoot 定时任务@Scheduled实现定时任务
在启动项中加入@EnableScheduling
在定时任务中加入@Component交于Spring管理
使用@Scheduled(fixedDelay = 5000) 5秒跑一次任务
支持支持cron表达式
按顺序依次为
秒(0~59)
分钟(0~59)
小时(0~23)
天(月)(0~31,但是你需要考虑你月的天数)
月(0~11)
天(星期)(1~7 1=SUN 或 SUN,MON,TUE,WED,THU,FRI,SAT)
7.年份(1970-2099)
其中每个元素可以是一个值(如6),一个连续区间(9-12),一个间隔时间(8-18/4)(/表示每隔4小时),一个列表(1,3,5),通配符。
由于"月份中的日期"和"星期中的日期"这两个元素互斥的,必须要对其中一个设置?.
0 0 10,14,16 * * ? 每天上午10点,下午2点,4点
0 0/30 9-17 * * ? 朝九晚五工作时间内每半小时
0 0 12 ? * WED 表示每个星期三中午12点
"0 0 12 * * ?" 每天中午12点触发
"0 15 10 ? * *" 每天上午10:15触发
"0 15 10 * * ?" 每天上午10:15触发
"0 15 10 * * ? *" 每天上午10:15触发
"0 15 10 * * ? 2005" 2005年的每天上午10:15触发
"0 * 14 * * ?" 在每天下午2点到下午2:59期间的每1分钟触发
"0 0/5 14 * * ?" 在每天下午2点到下午2:55期间的每5分钟触发
"0 0/5 14,18 * * ?" 在每天下午2点到2:55期间和下午6点到6:55期间的每5分钟触发
"0 0-5 14 * * ?" 在每天下午2点到下午2:05期间的每1分钟触发
"0 10,44 14 ? 3 WED" 每年三月的星期三的下午2:10和2:44触发
"0 15 10 ? * MON-FRI" 周一至周五的上午10:15触发
"0 15 10 15 * ?" 每月15日上午10:15触发
"0 15 10 L * ?" 每月最后一日的上午10:15触发
"0 15 10 ? * 6L" 每月的最后一个星期五上午10:15触发
"0 15 10 ? * 6L 2002-2005" 2002年至2005年的每月的最后一个星期五上午10:15触发
"0 15 10 ? * 6#3" 每月的第三个星期五上午10:15触发
有些子表达式能包含一些范围或列表
例如:子表达式(天(星期))可以为“MON-FRI”,“MON,WED,FRI”,“MON-WED,SAT”
“*”字符代表所有可能的值
因此,“*”在子表达式(月)里表示每个月的含义,“*”在子表达式(天(星期))表示星期的每一天
“/”字符用来指定数值的增量
例如:在子表达式(分钟)里的“0/15”表示从第0分钟开始,每15分钟在子表达式(分钟)里的“3/20”表示从第3分钟开始,每20分钟(它和“3,23,43”)的含义一样。
