406DUO充电器中文说明书
B6充电器中文详细说明书

B6充电器说明书充电器参数:—电压值:DC11.0-18.0V AC100-240, -50/60HZ—最大充电功率50W—最大放电功率5W—充电电流值:0.1-5.0A—放电电流值:0.1-1.0A—单个电池的电流:300mah/cell—镍氢/镍镉电池个数:1-15cell—锂离子/聚合物级数:1-6节(注:支持Li-Fe电池,即A123)—PB电池电压:2-20V—重量:580g—尺寸:133*87*33mmB6如何外接电源?就将跟充电器的的夹子夹到大功率的稳压电源或者开关电源上面,红色为正极,黑色为负极,电压允许范围:11~18v,电流要求5A以上,官方要求最低12v5a***不要问12v10a会不会烧坏充电器,答案是肯定不会的,就像你200W的主机用500W的电源不会因为电源功率大而烧掉一样道理B6原配一堆充电线材,充电前,先将长的那根蕉插(公)以及T插(公)线接到充电器右侧的母蕉插里面(红正黑负),然后根据自己要冲的电池类型选择合适的适配线,再将适配线的T插(母)插到刚才那根长线的T插(母)上,最好接上要充的电池上面就可以了。
举例图:冲接受电:B6的使用方法按键功能Batt. TypeStop 按钮:电池种类以及停止按钮,接电后即可使用该按钮在主菜单中进行切换,充电时可随时按此键停止;Dec. / Inc.< Status > 按钮:减小以及增加按钮,设置各种数值时Dec.是减小,Inc.是增加,充电时按这两个按钮以浏览电池不同信息;StartEnter 按钮:开始以及确定按钮。
接通电源,即显示主菜单此时可以按Batt. Type / Stop 按钮,在主要的几个菜单中进行切换,它们是:Program SelectLiPo BATT对锂电系列进行充电的主菜单Program SelectMiMH BATT对镍氢电进行充电的主菜单Program SelectNiCd BATT对镍镉电进行充电的主菜单Program SelectPb BATT充Pb电的主菜单Program SelectSave Data保存设定数据菜单Program SelectLoad Data加载数据菜单User SetProgram->使用者设定菜单1. 锂电1.) 充电开机后显示主菜单:Program SelectLiPo BATT按Start / Enter按钮确定屏幕显示LiPo CHARGE*.*A *.*V(*S)这个是锂电充电,非平衡充,不推荐所以要继续按Inc. > ,屏幕显示:LiPo BALANCE*.*A *.*V(*S)这个就是传说中的锂电平衡充电功能了,我们要用的就是平衡充电,所以要在这里进行操作,如下:按Start / Enter,A前面的数字闪烁按Dec. < 或者 Inc. >改变改数值大小,这个是充电电流选择,锂聚合物电池最多不可超过1c,也就是4400mah电池最高用4.4a,2200mah电池最高用2.2a,这样类推;建议保守点用0.5c,即4400mah电池用2.2a,依此类推Dec. < 减小该数值,Inc. > 增加该数值按Start / Enter,V(*S)前面的数字闪烁按Dec. < 或者 Inc. >改变改数值大小,这个是选择电池额定电压,为3.7的倍数,车用电池一般为7.4v,即2S(每3.7v=1S)长按Start / Enter,出现如下屏幕:Battery CheckWait…如果电池连接不正确,则显示:CONNECTION BREAK如连接正确,则显示:上行:R: *SER S: *SER(说明一下:R: *SER是指充电器自动检测到的电池节数,S: *SER是你设置的电池节数,如果数值不等,请不要开始充电,以免损坏电池)下行:CANCEL(STOP)与CONFIRM(ENTER)来回切换此时按Start / Enter开始充电,按Batt. Type / Stop取消充电,返回设置界面充电界面:Li*S *.*A *.**VCHG ***:** *****第一行:锂电节数,即时充电电流,即时电池总电压第二行:充电指示,充电耗时,充进的电量数充满之后显示:FULL(后面还有一串英文以及数字)***充电过程中可随时按Batt. Type / Stop按钮停止充电***充电过程中壳随时按Start / Enter按钮改变充电电流,改变后记得再次确认即可***充电过程中可随时按 Inc. > 观看各节电池单独电压***充电过程中可随时按 Dec. < 观看各设定参数2.)放电选择LiPo DISCHARGE功能,界面:LiPo DISCHARGE*.*A *.*V(*S)操作方法跟充电一样,设置好放电电流和放电截至电压即可,电压为3的倍数级增减,7.4v锂电请设为6.0V(2S)***注意:现在IMAX对旗下的B5进行了一定的改造,以前B5的平衡充是将电池平衡充接头接上去就可以平衡充电,现在新版B5以及B6,都必须同时接上放电接头以及平衡充电接头,方可进行对锂电的充放(如图所示)***补充一点:LiPoCHARGE / LiPo FAST CHG不知道具体作用,按照字面意思是锂聚合物电池充电/锂聚合物快速充电,因为都不知道与平衡充电有什么联系,所以不建议使用。
TC40电池充电器说明书

Battery Charger TC40 Owner’s Manual© Dolgin Engineering 1019 Massachusetts Ave. Lexington, MA 02420 • (781) 863-1813 • 1 IntroductionThe TC40 Battery Charger is electrically compatible with all 7.2V Li-Ion camera batteries rated 2200 mAh or higher. The modular design allows for different battery models to be charged when the appropriate adapter plate is fitted. With the appropriate power cord, the charger can be powered by a 12V automobile power source.Standard Features• Four simultaneous charge positions for fast charging of 4 batteries.• Fast, safe, and reliable charging. The battery pack can be left on the charger after the charge is complete. • Dynamic Power Management (DPM) minimizes battery charge time. By dynamically adjusting battery charge current, more current is allocated to the deeper discharged battery. Through this process allbatteries are ready to use at about the same time.• Wide range input power compatibility (100-240VAC 50-60Hz), 12V with the DC cigarette lighter cord. • Compact, lightweight design for easy portability. Dimensions 10.5"x 4"x 1.5"BatteriesThe charger is capable of charging 4 batteries at the same time. It accepts Sony L/M (VX2xx or similar), Panasonic DVX100, Canon BPxx (XL/GL), and JVC BNVxx style batteries. The charger must be configured with the appropriate plate to match the battery style.The battery must to be rated at least 2200 mah capacity , as smaller size battery packs are not designed to accept the charger fast charge.Charging timeThe time to full charge depends on the battery pack rated capacity, its state of charge prior to insertion, and its age. A fully discharged new 2200 mAh battery will be fully charged (more than 90%) in about 2.5 hours. A 5600 mAh pack will take approximately 3.5 - 4 hours to charge (4.5 -5 hours when 2 batteries in the same bank* are being charged). Since a depleted battery pack absorbs charge current faster, than a partially charged one, most of the charge energy is absorbed during the initial stage of charging and then the rate of charge levels off towards the end.Charge channelsLEDs indicate each battery’s state of charge. Dynamic Power Management (DPM) minimizes battery charge time. By dynamically adjusting battery charge current, more current is allocated to the deeper discharged of the two batteries (in the same bank). Through this process both batteries are ready to use at about the same timeOperationChargingUpon plugging the charger in into an electrical source the green and red LEDs will blink every 3 seconds to indicate the charger is powered on. Insert a battery into the battery plate and the charger will initiate the charge routine. While charging is in progress, the red LED will illuminate. Approaching charge completion, the Green LED will blink at 90% readiness level, and will be steady ON on completion.Status LEDs1. Red ON Battery is inserted; charge in progress2. Green blinking Battery is charged over 90%3. Green ON Ready* Charging positions are grouped in 2 banks of 2 plates. In order to get the fastest charge time, when charging 2 batteries, place them in positions 1, 3.。
拓微集成 TP4065 3mA-600mA线性锂离子电池充电器 手册说明书
南京拓微集成电路有限公司NanJing Top Power ASIC Corp.数据手册DATASHEETTP4065(3mA-600mA线性锂离子电池充电器)TP4065 线性锂离子电池充电器产品简介TP4065是一款完整的单节锂电池充电器,世界首创带电池正负极反接保护、输入电源正负极反接保护的单芯片,兼容大小3mA-600mA充电电流。
采用涓流、恒流、恒压控制,SOT23-5封装与较少的外部元件数目使得TP4065成为便携式应用的理想选择。
TP4065可以适合USB电源和适配器电源工作。
由于采用了内部PMOSFET架构,加上防倒充电路,所以不需要外部检测电阻器和隔离二极管。
热反馈可对充电电流进行自动调节,以便在大功率操作或高环境温度条件下对芯片温度加以限制。
充满电压可分为两档:4.35V、4.2V。
充电电流可通过一个电阻器进行外部设置。
当电池达到预设电压之后,充电电流降至设定值1/10,TP4065将自动终止充电。
当输入电压(交流适配器或USB电源)被拿掉时,TP4065自动进入一个低电流状态,电池漏电流在1μA以下。
TP4065的其他特点包括电源自适应、欠压闭锁、自动再充电和一个用于指示充电状态的引脚。
产品特点•兼容大小3mA-600mA的可编程充电电流;• V CC输入端反接保护;•锂电池正负极反接保护;•用于单节锂离子电池;•电源自适应;•具有可在无过热危险的情况下实现充电速率最大化的热调节功能;•带涓流、恒流、恒压控制;•可直接从USB端口给电池充电;•精度达到±1%的预设充电电压;•最高输入可达8.0V;•自动再充电;• 1个充电状态开漏输出引脚;• C/10充电终止;•待机模式下的供电电流为65μA;•软启动限制了浪涌电流;•采用5引脚SOT-23封装。
应用·微型锂电池、充电座、移动电源·蜂窝电话、PAD、MP3播放器·蓝牙应用典型应用:图1 500mA 单节锂电池充电器注:建议接R1耗散电阻,可获得较大的充电电流,又可提高整机的可靠性。
308DUO充电器使用手册

24V60A全自动充电机使用说明书
深圳市好科星电子有限公司CD-24V60A 型24V60A 全自动充电机使用说明书均充、浮充自动转换,多挡电流选择开关电源技术,体积小、重量轻、效率高、全隔离全自动充电机采用当今先进的无工频变压器开关电源技术,体积小、重量轻、效率高;结合智能充电技术,以延长蓄电池使用寿命和及时为蓄电池充满电为宗旨,针对克服工频型充电机的缺点而设计,与工频型充电机比较能显著延长蓄电池使用寿命,做到完全免人工值守的全自动工作状态,特别适用于无人值守的充电场合。
可长期连接到蓄电池以保持充满电状态,适合用作汽车或发电机等设备的辅助启动电源及补充充电电源。
本全自动充电机适用于容量(20〜1000)Ah的开启式或全密圭寸蓄电池作配套充电用,既可用于临时充电,也可用于长期浮充。
1 传统充电机及简易充电机大多由工频变压器和整流(或可控硅调压)电路组成,甚至用可控硅直接调节市电向蓄电池充电,虽电路简单,但有不容忽视的缺点:①体积笨重,运输、使用不便;②缺乏完善的保护功能,可靠性差;③充电需人工值守,不断调整充电电流,难以做到既使电池充足电又不造成过充电;④用可控硅直接调节市电,则与市电不隔离有触电危险,并且破坏市电波形及产生很大的供电线路损耗。
2 蓄电池的过放电、过充电和长期欠充满都会造成蓄电池的极板提前老化,缩短蓄电池的使用寿命。
因此为避免此类情况发生、延长蓄电池使用寿命,在设备用电特性及配套蓄电池不变的情况下,选择不同功能类型的充电机就成了延长蓄电池使用寿命的关键因素。
这也就是为什么有些采用传统充电机的用户反映电池的使用寿命不如厂方提供的标称寿命长的原因。
二、主要特点•开关电源控制芯片采用进口军用级IC,其余元件则采用进口工业等级器件,充电机的原理设计优化合理,生产工艺严格完善,保证机器的可靠性和稳定性。
•严格按照蓄电池充电特性曲线进行充电,设计的充电程式是“(预设)恒流充电—(到达均充稳压值)恒压减流一(自动判别转为)浮充”,具有充电速度快、充电还原效率高、无需人工值守、超长时间充电无过充电危险、确保蓄电池使用寿命等优点。
维德 锂电智能充电机使用说明书
使用说明书USER MANUAL锂电智能充电机Lithium intelligent charger欢迎使用本公司充电机产品,熟读《使用操作手册》令使用者方便、快捷、安全地操作该充电机Welcome to use our charger products.Read"User Manual"so that users can operate the charger conveniently,quickly and safely.◆注意事项Attention说明书提供安装、参数、故障诊断与日常维护相关注意事项,为了确保正确地安装与操作本充电机,请在装机之前,详细阅读说明书,妥善保存并交由机器的使用者。
Instructions provide installation,parameters,trouble shooting and routine maintenance related matters needing attention.In order to ensure the correct installation and operation of this charger,please read the instructions carefully before installation,and properly save and hand it to the user of the machine.◆特别声明Special notice◇禁止对说明书内容的全部或部份进行未经授权的转换或复制。
Unauthorized conversion or reproduction of all or any part of the contents of this manual is prohibited.◇说明书中包含的内容若有改变不另行通知。
The contents of this manual are subject to change without notice.◇如发现说明书有任何错误或遗漏,请与制造商或经销商联系。
安东宝 性能系列电池充电器 使用说明书
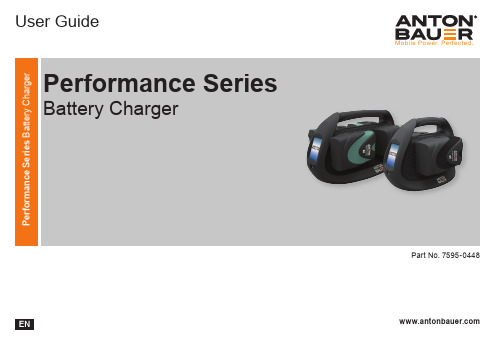
Mobile Power. Perfected.User GuidePart No. 7595-0448Performance SeriesBattery ChargerCopyright © 2016All rights reservedOriginal Instructions: EnglishAll rights reserved throughout the world. No part of this document may be stored in a retrieval system, transmitted, copied or reproduced in any way, including, but not limited to, photocopy, photograph, magnetic or other record without the prior agreement and permission in writing of the Vitec Group Plc.DisclaimerThe information contained in this manual is believed to be correct at the time of printing. Vitec Videocom Inc. reserves the right to make the changes to the information or specifications without obligation to notify any person of such revisions or changes. Changes will be incorporated in new versions of the publication.We are making every effort to ensure that our manuals are updated on a regular basis to reflect changes to the product specifications and features. Should this manual not contain information on the core functionality of your product, please let us know. You may be able to access the latest revision of this manual from our website.Vitec Videocom Inc. reserves the right to make changes to product design and functionality without notification. TrademarksAll product trademarks and registered trademarks are the property of The Vitec Group Plc.All other trademarks and registered trademarks are the property of the respective companies.Published by:Vitec Videocom Inc.Email:*************************************ContentsSafety (2)Warning Symbols Used in these Instructions (2)Intended Use (2)About this user guide (4)Introduction (4)Important (4)Anton/Bauer Battery Compatibility (4)Third Party V-Mount Compatibility (5)Components and Connections (6)Wi-Fi Capability (6)Mini USB Port (6)DC XLR Output (6)AC Mains Power (6)Attaching a Battery to the Charger (7)To Release the Battery (7)Operation (8)Self-Test (8)Three Stage Charging Methodology (8)Video Battery Touchscreen (9)Video Battery Touchscreen (10)Battery Testing or Calibration (11)System Settings (12)Global Transport Feature (Quad Only) (13)Auto-Dim and Auto-Shutoff (14)Powering DC Auxiliary Equipment (15)Technical Specifications (16)After Sales Support (17)General Notices (18)2SafetyImportant information on the safe installation and operation of this product. Read this information before operating the product. For your personal safety, read these instructions. Do not operate the product if you do not understand how to use it safely. Save these instructions for future reference.Warning Symbols Used in these InstructionsSafety cautions are included in these instructions. These safety instructions must be followed to avoid possible personal injuryand avoid possible damage to the product.WARNING! Where there is a risk of personal injury or injury to others, comments appear supported by the warning triangle symbol. Where there is a risk of damage to the product, associated equipment, process or surroundings, comments appearsupported by the word ‘Caution’.ELECTRIC SHOCK Where there is a risk of electric shock, comments appear supported by the hazardous voltage warning triangle.Intended UseThe Anton/Bauer ® Performance Series Chargers deliver all of the proven reliability of previous Anton/Bauer chargers in a portable power system addressing both Gold Mount ® and V-mount configurations. The technology advancements of this charger deliver the features and performance of several essential power products in one economic and portable package while reducing power consumption.Electrical ConnectionWARNING! Risk of electric shock. Do not removecover, no user serviceable parts inside the product.WARNING! Risk of electric shock. Always check cables for signs of damage. Damaged cables cancause personal injury and/or damage the equipment.WARNING! It is the responsibility of the localorganisation to ensure that the product is periodically checked for electrical safety in accordance with localregulations.CAUTION! This product must be connected to apower supply of the same voltage (V) and current (A) as indicated on the product. Refer to the technicalspecifications for the product.CAUTION! AC Mains plug or appliance coupler is to be used as a power disconnect device; make sure it isreadily accessible.CAUTION! All data connections to other devices must be made using shielded cables.Safety CAUTION! Slots and openings are intended forventilation purposes to ensure reliable operation ofthe product and protect it from overheating. Do notblock or cover any slots and openings.WARNING! Protect the product from water, moistureand dust. The presence of electricity near water canbe dangerous.WARNING! Charger must not to be exposed todripping or splashing and not to be used near objectsfilled with liquids.WARNING! When cleaning the product, use a softdamp cloth only. Do not wet the exposed metal partsof the charging unit. Do not use solvents, detergentsor scouring agents.MaintenanceWARNING! The fitting of non-approved parts oraccessories, or the carrying out of non-approvedalterations or servicing can be dangerous and couldaffect the safety of the product. It may also invalidatethe terms and conditions of the product warranty.RISK OF ELECTRICAL SHOCK: Refer servicing toqualified service personnel.3About this user guideIntroductionThe Anton/Bauer® Performance Series Chargers deliver all of the proven reliability of previous Anton/Bauer chargers in a portable power system addressing both Gold Mount® and V-mount configurations. The technology advancements of this charger deliver the features and performance of several essential power products in one economic and portable package while reducing power consumption.This user guide covers the safe and reliable operation of the Performance Series chargers.ImportantSpecial precautions and handling instructions are contained in this user guide and should be strictly adhered to for safe and reliable operation. Contact Anton/Bauer Customer Support Group with any questions regarding this product.Anton/Bauer Battery CompatibilityAnton/Bauer Performance Series Chargers are compatible with all Digital Series and most Logic Series® Anton/Bauer batteries. For questions onproduct compatibility please contact the Anton/Bauer Customer Support Group.4About this user guideThird Party V-Mount CompatibilityWe have tested specific competitor V-Mount batteries and verifiedtheir compatibility (see table below).However, there is no guarantee that the Performance SeriesCharger can charge any third party battery to 100% full capacity.The list below does not constitute all of the potential compatiblebatteries, therefore it is the recommendation of Vitec Videocom toutilize Anton/Bauer batteries solely with compatible Anton/Bauerchargers to avoid any potential performance degradation.57Attaching a Battery to the ChargerTo attach a battery to either the Gold Mount or V-Mount adapter on the charger:1. Slide the battery onto the adapter, ensuring the Gold MountT-stud or V-Mount are aligned in the corresponding slots.2. The battery is fully engaged when the latch makes an audible“click”.Components and ConnectionsTo Release the Battery1. Depress the latch and hold.2. Slide the battery off the connector.8Self-TestUpon applying AC mains power, the charger will initiate a briefself-test mode. Self-test mode is complete when the charger screen displays battery information on the position being used.ChargingAs with all Anton/Bauer chargers, charging with a Performance Series Charger is fully automatic. Mount any applicable battery to any open position on the charger and the Performance Series Charger will automatically determine the appropriate charge routineand execute it.In some cases a battery may be discharged to a very low voltage level causing the battery to be unrecognizable to the charger when first attached.Three Stage Charging MethodologyIn general, the Performance Series Chargers (Gold Mount and V-Mount) will deliver a three stage charge routine to each battery.will deliver a high rate charge matched to the capabilities of the battery (typically a one or two hour rate,depending on battery type). During this stage, six separate cutoff methods are in operation, simultaneously, ensuring the fastest, safest charge for that battery.charging is a BALANCING or “stabilizing” mode which calculates each battery pack type to offset any imbalance of the battery’s cells, created by unequal self-discharge or any capacity mismatch of the individual cells in the pack. This stage can vary in duration from zero to as much as 16 hours, depending on the condition of the battery. The Stage Two charge reduces current automatically as the battery charges maintaining the cells at a safe voltage level. A battery will typically leave Stage Two in 2-4 hours under average operating conditions.charging is the Anton/Bauer exclusive Lifesaver ® maintenance mode. This patented pulse routine keeps batteries fully charged, free from self-discharge - indefinitely - without damaging heat associated with a so-called “trickle charge”. The Stage Three programming monitors the self-discharge of thebattery, providing charge only when the battery self-discharges toabout 95% of its capacity.Anton/Bauer recommends that batteries remain on the charger and plugged into AC mains power for best results. The Lifesaver mode will keep them 100% charged.Picking the right battery: A check mark on the battery symbol indicates the best battery to use first.Removal of AC Mains PowerIf AC mains power is removed, it is highly recommended that the batteries are removed from the charger, thus avoiding any additional self-discharge of the battery.Operation9OperationVideo Battery TouchscreenAll Performance Series Chargers come standard with a touch screen interface. The intuitive interface displays all critical battery data and access to all charger functions.When a battery has been attached to the charger the display willshow the current status of the battery.Wait (Prepaaring to discharge)Transportation discharge (Battery is discharging)Transportation complete (Reached the set discharge level)1234610Video Battery TouchscreenWhen a battery has been selected the following details are available.% Charged100% 6.0 Ah5.8 Ah 5.8 Ah DischargeNo 23° C 10110852-201510.0Nameplate LearnedPresent StatusCalibrate TemperatureCycles Serial No DOMFW REV:Digital G90112111098723456Operation11Battery Testing or CalibrationTo manually run a standard test:1. Attach a battery to any open chargeposition and touch the related battery icon on the charger LCD.2. Touch the battery test icon to begin thestandard test.3. When testing is complete, discharge and test data will berevealed in the screen.OperationSystem SettingsSystem Settings access information such as the charger softwarerevision, Wi-Fi settings, Transportation Discharge (quad only)Auto-Dim and Auto-Shutoff functions.Operation11213OperationGlobal Transport Feature (Quad Only)Use this setting to discharge all batteries to a desired charge state in order to transport safely.1. With one or more batteries mounted on the charger, press thesettings button (1).2. On the System Settings window Press the On, Off button (2) onGlobal Trans enable.Off23. On the Confirm Global Trans Mode window use the arrows toadjust the desired discharge percentage.4. Press the green tick button to activate Transportation Mode orthe red cross to de-activate the mode.5. 6. Press the home button and the screen will revert to the homescreen. The battery symbols will display the airplane symbol to confirm the discharge process has begun. The cooling fan will operate while discharging takes place.Wait.Transportation discharge.Transportation complete7. To discharge an individual battery while the others remain oncharge.8. From the home screen, press the desired battery icon.9. Press thebutton to access the disharge menu for thatbattery only, for Transportation mode repeat instructions from step 4. For Test Discharge follow the Battery Testing instructions on page 11.Auto-Dim and Auto-ShutoffThe user can choose to engage either the Auto-Dim or Auto-Shutoff function of the charger LCD in the Settings menu. The user may alsoopt to have both options turned on.To select, go to the Settings screen and select on or off for each option.Auto-Dim: This feature turns off the back lit LCD screen after one minute of non-use if the AC mains power is removed, a battery is present and XLR camera output is not in use. The back light will turn back on if the LCD is touched or AC mains power is restored.To select, go to the Settings screen and select on or off for Auto-Dim.Auto-Shutoff: This feature will turn off the charger circuitry entirely after five minutes of non-use if the AC mains power is removed, a battery is present and XLR camera output is not in use. Circuitry will turn back on when AC mains power is restored.To select, go to the Settings screen and select on or off for Auto-Shutoff.Operation1415Powering DC Auxiliary Equipment1. Attach one end of the XLR4accessory cable (available separately) to the charger.2. Attach the other end to the“DC in” four pin XLR on the camera/camcorder. A battery can be attached when AC mains power is not present to provide DC power output after five seconds.1.2.3.Press the DC XLR Output icon, located on the lower right hand of the Performance Charger LCD.OperationPhysical DataPerformance QUADHeight8.70 inches (22.10 cm)Length16.50 inches (41.91 cm)Width9.90 inches (25.15 cm)Weight8.0 lbs (3.6 kg) Performance DUALHeight8.70 (22.10 cm)Length11.30 (28.70 cm)Width8.50 (21.59 cm)Weight7.0 lbs (3.2 kg)Environmental DataOperating temperature range-0°C to +40°C (-32°F to +104°F)Electrical DataSupply VoltageAC Input: 100-240 VAC, 50/60 Hz. Wide Range InputPower Output70 Watt, 16 VDC Power Supply OutputTechnical SpecificationsIn some cases a battery may be discharged to a very lowvoltage level causing the battery to be unrecognizable to thecharger when first attached.16After Sales Support17General NoticesFCC NoticeThis equipment has been tested and found to comply with the limits for a Class B digital device pursuant to Part 15 of the FCC Rules. These limits are designed to provide reasonable protection against harmful interference when the equipment is operated in a commercial environment. This equipment generates, uses, and can radiate radio frequency and, if not installed and used in accordance with the instruction manual, may cause harmful interference to radio communications. Operation of this equipment in a residential area is likely to cause harmful interference in which case the user will be required to correct the interference at their own expense.This equipment has been approved by one or more agencies. All changes and/or modifications not expressly approved by Anton/ Bauer could void the users’ warranty and authority to operate this equipment. There are no serviceable parts in this equipment.18This warranty for the product specified in this document (“Product”) is given by Vitec Videocom, Inc. (“Anton/Bauer”), 14 Progress Drive, Shelton, Connecticut 06484. If you (the purchaser of the Product from Anton/Bauer, or the person for whom the Product was purchased, if it was a gift) have any questions regarding Product applications, Product specification, or to obtain warranty serviceon this or any Anton/Bauer product, contact the company at the address above.THIS PRODUCT MUST BE REGISTERED WITH ANTON/BAUER WITHIN 30 DAYS OF PURCHASE TO ASSURE WARRANTY COVERAGE. REGISTER ONLINE AT:Warranty registration, including the serial numbers of Anton/Bauer chargers used with this battery, must be supplied to Anton/Bauer. Anton/Bauer will warranty the Product only against defects in material and workmanship for the period as follows from the date of purchase, in accordance with the terms set forth below, and then, only if the Product is used exclusively in conjunction with compatible Anton/Bauer chargers. If this charger is returned to Anton/Bauer for warranty service it will be required that you provide model names and serial numbers of compatible Anton/Bauer chargers with which this product was used.MAXX II Warranty 24 months: Anton/Bauer will repair or replace the Product at Anton/Bauer’s option and cost.This warranty shall be effective only if Anton/Bauer receives notice of such defects in materials or workmanship during the period of the warranty. The liability of Anton/Bauer hereunder is expressly limited to a claim for repair or replacement of the Product or as otherwise stated herein at Anton/Bauer’s sole discretion. Notice of any claim under this warranty shall be delivered to Anton/Bauer during the period of the warranty and the Product shall be returned with its packaging promptly, at your expense, to an Anton/Bauer Customer Support Center or to the address above. Upon receipt of the Product and a record of your compliance with the conditions of this warranty, Anton/Bauer will repair or replace the Product and return it to you, or issue a credit, as applicable. You are responsible for all shipping and handling charges to and from authorized facility.THIS WARRANTY DOES NOT APPLY TO AND IS VOID INTHE CASE OF DEFECTS OR DAMAGE RESULTING FROM ACCIDENTS, DISASTER, NEGLECT, MISUSE, IMPROPER INSTALLATION, IMPROPER OR UNAUTHORIZED SERVICE OR MAINTENANCE, UNAUTHORIZED REPLACEMENT PARTS OR ATTACHMENTS; OR DYSFUNCTION OR MALFUNCTION OF, OR CAUSED BY, ANY OTHER PRODUCT OR DEVICE.Misuse includes any use of the Product in other than its intended application, including the use of this Product with any charging device or accessory not manufactured by and/or specified by Anton/ Bauer. This warranty does not cover, and Anton/Bauer assumes no responsibility for, any equipment or devices used in conjunction with the Product.ANTON/BAUER DISCLAIMS ANY LIABILITY FOR INCIDENTAL OR CONSEQUENTIAL DAMAGES FOR BREACH OF ANY WRITTEN OR IMPLIED WARRANTY OF THE PRODUCT. UNDER NO CIRCUMSTANCES WILL ANTON/BAUER BE RESPONSIBLE FOR ANY SPECIAL, INCIDENTAL OR CONSEQUENTIAL DAMAGES.This Warranty is to be construed and enforced in accordance with the law of the State of Connecticut, including the provisions ofthe Uniform Commercial Code as adopted and from time to time amended in the State of Connecticut, and not the Convention for the International Sale of Goods. This choice of Connecticut law is exclusive of any Connecticut law that would require reliance on any law foreign to Connecticut.Warranty19WarrantyShould any action of law or in equity be brought by any person under this Warranty, such action shall be brought only in the United States District Court for the District of Connecticut, or in any Superior Court in Fairfield County, Connecticut, USA. Some states do not allow limitations on how long a warranty lasts, so the time period limitation herein may not apply to you. Some states do not allow the exclusion or limitation of incidental or consequential damages, so the above limitation or exclusion may not apply to you. This warranty gives you specific legal rights and you may have other legal rights which may vary from state to state. Use of unauthorized equipment in conjunction with Anton/Bauer products constitutes misuse under our warranties and may limit or void those warranties. Anton/Bauer does not authorize, condone, recommend, or otherwise assume any liability or responsibility resulting from the use of any battery, charger, or accessory made by Anton/Bauer with any battery, charger or accessory not manufactured, produced or sold by Anton/ Bauer. Anton/Bauer only authorizes the use of original Anton/Bauer products with this Product. Use only original Anton/Bauer equipment with this Product.2021Mobile Power. Perfected. Publication Part No. 7595-0448 Rev. B。
B6充电器中文详细说明书
B6充电器说明书充电器参数:-电压值:DC11.0-18.0V AC100-240,-50/60HZ-最大充电功率50W—最大放电功率5W—充电电流值:0.1—5。
0A—放电电流值:0。
1-1.0A-单个电池的电流:300mah/cell—镍氢/镍镉电池个数:1—15cell-锂离子/聚合物级数:1—6节(注:支持Li—Fe电池,即A123)—PB电池电压:2-20V-重量:580g—尺寸:133*87*33mmB6如何外接电源?就将跟充电器的的夹子夹到大功率的稳压电源或者开关电源上面,红色为正极,黑色为负极,电压允许范围:11~18v,电流要求5A以上,官方要求最低12v5a***不要问12v10a会不会烧坏充电器,答案是肯定不会的,就像你200W的主机用500W的电源不会因为电源功率大而烧掉一样道理B6原配一堆充电线材,充电前,先将长的那根蕉插(公)以及T插(公)线接到充电器右侧的母蕉插里面(红正黑负),然后根据自己要冲的电池类型选择合适的适配线,再将适配线的T插(母)插到刚才那根长线的T插(母)上,最好接上要充的电池上面就可以了。
举例图:冲接受电:B6的使用方法按键功能Batt. TypeStop按钮:电池种类以及停止按钮,接电后即可使用该按钮在主菜单中进行切换,充电时可随时按此键停止;Dec. / Inc。
〈Status >按钮:减小以及增加按钮,设置各种数值时Dec.是减小,Inc.是增加,充电时按这两个按钮以浏览电池不同信息;StartEnter按钮:开始以及确定按钮。
接通电源,即显示主菜单Program SelectLiPo BATT对锂电系列进行充电的主菜单Program SelectMiMH BATT对镍氢电进行充电的主菜单Program SelectNiCd BATT对镍镉电进行充电的主菜单Program SelectPb BATT充Pb电的主菜单Program SelectSave Data保存设定数据菜单Program SelectLoad Data加载数据菜单User SetProgram->使用者设定菜单1。
- 1、下载文档前请自行甄别文档内容的完整性,平台不提供额外的编辑、内容补充、找答案等附加服务。
- 2、"仅部分预览"的文档,不可在线预览部分如存在完整性等问题,可反馈申请退款(可完整预览的文档不适用该条件!)。
- 3、如文档侵犯您的权益,请联系客服反馈,我们会尽快为您处理(人工客服工作时间:9:00-18:30)。
406DUO 使用说明书( V1.2.0 )目录使用须知 ................................................................................................................................................................. - 4 - ● 安全须知........................................................................................................................................................... - 4 - ● 版权声明........................................................................................................................................................... - 4 - ● 406DUO性能特点......................................................................................................................................... - 5 - ● 外观参数........................................................................................................................................................... - 5 - ● 电性能参数....................................................................................................................................................... - 5 - 设备简介 ................................................................................................................................................................. - 6 - ● 406DUO部件、接口名称............................................................................................................................. - 6 - ● 406DUO按键功能、界面图标 ..................................................................................................................... - 6 - ● 406DUO标准配件......................................................................................................................................... - 8 - ● 406DUO选购配件......................................................................................................................................... - 8 - 充电器的连线 ......................................................................................................................................................... - 9 - ● 电源输入地线不能与输出地线连通............................................................................................................... - 9 - ● 接线顺序........................................................................................................................................................... - 9 - ● 双通道的连线方式........................................................................................................................................... - 9 - ◆ 通道异步模式连线方式 ............................................................................................................................... - 9 - ◆ 通道同步模式连线方式 ............................................................................................................................... - 9 - 充电器充放电程序设置及使用 ........................................................................................................................... - 10 - ● 电源设置......................................................................................................................................................... - 10 - ● 程序添加与管理............................................................................................................................................. - 11 - ● 运行充电器程序............................................................................................................................................. - 11 - ● 程序运行状态................................................................................................................................................. - 12 - ● 错误提示......................................................................................................................................................... - 13 - ● 程序编辑......................................................................................................................................................... - 13 - ◆ LiPo/LiIo/LiFe电池的充放电设置.......................................................................................................... - 14 -❑ LiPo/LiIo/LiFe电池充电设置 ............................................................................................................ - 14 - LiPo/LiIo/LiFe电池的非平衡充电 .............................................................................................. - 15 - LiPo/LiIo/LiFe电池的平衡充电 .................................................................................................. - 15 - LiPo/LiIo/LiFe电池充电Advanced设置 .................................................................................... - 16 - LiPo/LiIo/LiFe电池充电SAFETY设置 ..................................................................................... - 16 - ❑ LiPo/LiIo/LiFe电池储存模式设置 .................................................................................................... - 17 - ❑ LiPo/LiIo/LiFe电池放电设置 ............................................................................................................ - 17 - To channel模式设置 ..................................................................................................................... - 17 - LiPo/LiIo/LiFe电池放电Advanced设置 .................................................................................... - 18 - LiPo/LiIo/LiFe电池放电Safety设置 .......................................................................................... - 18 - ❑ LiPo/LiIo/LiFe电池循环充放电设置 ................................................................................................ - 18 - ❑ LiPo/LiIo/LiFe电池执行平衡功能 .................................................................................................... - 18 - ◆ NiMH/NiCd电池的充放电设置 .............................................................................................................. - 19 -❑ NiMH/NiCd电池充电设置................................................................................................................. - 19 - NiMH/NiCd电池充电Advanced设置 ........................................................................................ - 19 - NiMH/NiCd电池充电Safety设置 .............................................................................................. - 19 -❑ NiMH/NiCd电池放电设置................................................................................................................. - 20 - NiMH/NiCd电池放电Safety设置 .............................................................................................. - 20 - ❑ NiMH/NiCd电池循环充放电设置..................................................................................................... - 20 - ◆ Pb电池的充放电设置 .............................................................................................................................. - 20 -❑ Pb电池充电设置 ................................................................................................................................ - 20 - Pb电池充电Advanced设置 ........................................................................................................ - 21 - Pb电池充电Safety设置 .............................................................................................................. - 21 - ❑ Pb电池电池放电设置......................................................................................................................... - 21 - ❑ Pb电池循环充放电设置..................................................................................................................... - 21 - ◆ NiZn电池的充放电设置.......................................................................................................................... - 21 -❑ NiZn电池充电设置 ............................................................................................................................ - 21 - NiZn电池的非平衡充电 .............................................................................................................. - 22 - NiZn电池的平衡充电 .................................................................................................................. - 22 - NiZn电池充电Advanced设置 .................................................................................................... - 22 - NiZn充电SAFETY设置 ............................................................................................................. - 22 - ❑ NiZn电池放电设置 ............................................................................................................................ - 22 - To channel模式设置 ..................................................................................................................... - 22 - NiZn电池放电Advanced设置 .................................................................................................... - 22 - NiZn电池放电Safety设置 .......................................................................................................... - 22 - ❑ NiZn电池循环充放电设置 ................................................................................................................ - 22 - 406DUO参数设置 ............................................................................................................................................... - 23 - ● 406DUO参数设置....................................................................................................................................... - 23 - ◆ Charger Setup ............................................................................................................................................ - 23 -❑ 温度&风扇设置..................................................................................................................................... - 23 - ❑ 提示音设置............................................................................................................................................ - 24 - ❑ LCD设置............................................................................................................................................. - 24 - ❑ 输出功率设置........................................................................................................................................ - 24 - ❑ 电源设置................................................................................................................................................ - 25 - ❑ 保存&加载配置文件设置..................................................................................................................... - 25 - ❑ 通信方式................................................................................................................................................ - 26 - ❑ 语言设置................................................................................................................................................ - 26 - ❑ 设备校准................................................................................................................................................ - 27 - ◆ Extra Function ........................................................................................................................................... - 28 -❑ 日志文件管理........................................................................................................................................ - 28 - ❑ 伺服器测试............................................................................................................................................ - 28 - ❑ 脉冲测试................................................................................................................................................ - 29 - ● USB & SD卡的使用.................................................................................................................................... - 30 - ● 保修及服务..................................................................................................................................................... - 30 - 406DUO固件升级 ............................................................................................................................................... - 31 - ● 通过USB接口更新固件 ............................................................................................................................... - 31 - ● 通过SD卡更新固件...................................................................................................................................... - 32 - 406DUO接入LogView ....................................................................................................................................... - 33 - ● LogView的使用步骤................................................................................................................................... - 33 - 重要提示 ............................................................................................................................................................... - 35 - ● 反射充电模式的充电原理............................................................................................................................. - 35 -● 电源回充模式................................................................................................................................................. - 35 - ● 通道再生模式................................................................................................................................................. - 35 - ◆ Resistance or bulbs .................................................................................................................................... - 35 - ◆ Charging battery ........................................................................................................................................ - 36 - ● 锂电池外部扩展放电模式............................................................................................................................. - 36 - 附录....................................................................................................................................................................... - 37 - ● 通道运行状态指示......................................................................................................................................... - 37 - ● 通道控制状态指示......................................................................................................................................... - 37 - ● 错误指示......................................................................................................................................................... - 37 -使用须知●安全须知使用充电器前,请认真阅读本章节内容;以便于您更放心、更安全的使用充电器。