林内抽烟机说明书
使用说明书-林内
意烫伤。
禁止
如将锅柄置于排气口上,锅柄受热,损
伤锅柄。
烹饪以外不要使用 请勿用于烘干衣服类、引燃蜂窝煤等 可能引起火灾、损伤器具。 请勿将排气扇、冷暖风机的风吹到器 具上,可能引起器具损伤、动作不良。
禁止
不要让儿童触摸 可能发生受伤或烫伤等意外事故。 提示: 不要误使用燃烧器的操作按钮。 使用中,不要操作燃气阀门来熄火, 避免烫伤或意外事故发生。
大锅架 灶具用火力调节杆 灶具用操作按钮 各个按钮上 标明了所对 应的灶眼
左侧点火锁定开关
烤箱门 烤箱拉手 电池盖 电池更换信号灯 盛水盘 盛水盘支架
大锅架 小锅架 排气口罩子 排气口 烹调时排气处
面板
烤箱用火力调节杆 右侧点火锁定开关 烤箱用操作按钮 按钮上表示了 的图标
烤箱烤网
1
各部分的名称及作用
保养工具和洗涤剂
14
除了本使用说明书之外,还有安装
保养要点
14
说明书。由于在器具的移置、替换、
常见的故障识别和处理
16
修理中要用到,因此请与本说明书
电池更换
18
一起妥善保管。
关于安装
18
如果使用说明书遗失,可向售后服
器具安装后长期不使用的处置/规格
19
务中心联系。
各部分的名称及作用
强火力燃烧器 小火燃烧器 标准燃烧器 (附温度传感器)
家庭用
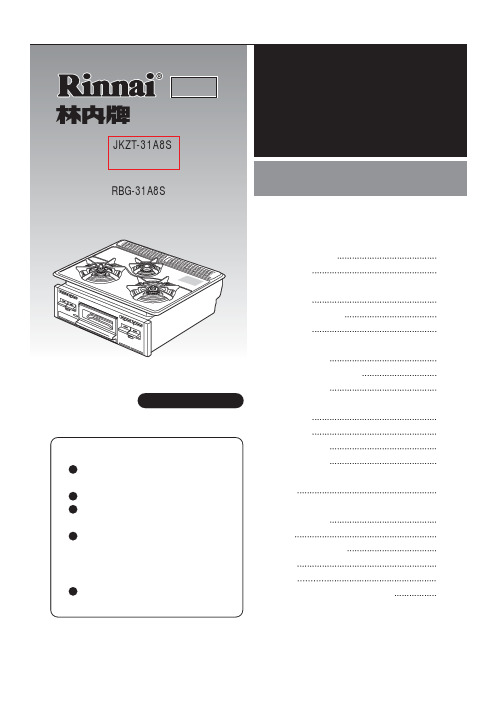
型 号:JKZT-31A8S 产品编号:RBG-31A8S(有水单面烧烤型)
烤箱灶
使用说明书
成套厨房用(嵌入式)
目录
各部分的名称及作用
1
安全注意事项
3
使用前的准备
干电池的安装
5
林内Rinnai JZT-2Q2LGHU JZT-2QALGHP家用嵌入式智能型燃气灶使用安装说明书

RB-2Q2LGHU RB-2Q2LGHU(W) 即使发生这样的情况图示以RB-2Q2LGHU 为例,RB-2Q2LGHU(W)、RB-2Q2LGHP、RB-2Q2LGH外观略有不同RB-2Q2LGHP RB-2Q2LGH中国大陆RoHS法规标示要求根据中国大陆《电器电子产品有害物质限制使用管理办法》(也称为中国大陆RoHS),以下部分列出了本产品中可能包含的有害物质的名称和含量本表适用之产品家用燃气灶产品中有害物质的名称及含量部件名称有害物质铅(Pb)汞 (Hg)镉 (Cd)六价铬(Cr(VI))多溴联苯(PBB)多溴二苯醚(PBDE)面板(钢化玻璃、不锈钢)○○○○○○钣金件(本体、支架等)○○○○○○搪瓷锅架(钣金、铸铁)○○○○○○燃烧器(不锈钢)*○○○○○○燃烧器(铜火盖、铝/铜底座)*×○○○○○炉头(铸铁)*○○○○○○铝合金件(炉头、面板框)*○○○○○○阀门×○○○○○进气管组件、连络管×○○○○○点火器、电子基板*×○○○○○点火针○○○○○○热电偶、电磁阀、温度传感器*×○○○○○旋钮(金属、塑料)○○○○××线束*○○○○○○塑料件(电池盒、显示板等)○○○○○○橡胶件(密封圈、密封条等)○○○○○○支撑垫、密封垫等○○○○○○螺钉、螺母、垫片等○○○○○○电池○○○×○○本表格依据SJ/T 11364的规定编制○:表示该有害物质在该部件所有均质材料中的含量均在GB/T 26572规定的限量要求以下。
×:表示该有害物质至少在该部件的某一均质材料中的含量超出GB/T 26572规定的限量要求。
* 表示仅部分型号的燃气灶产品含有该零部件。
本表格表明机器内部含有有害物质,数据是根据材料类型,由材料供应商提供并经我们验证后做成的。
某些材料包含的有害物质,按照现在的技术基准不能被替代,我们一直在为改善此项目而努力。
林内内嵌式燃气灶使用说明书
JK0063-031×03 (00)210500060000052765701. 重要警告 (2)2. 安全说明 (3)3. 产品阵容 (5)4. 组件和部件名称 (5)5. 安装 (6)6. 操作说明 (11)7. 维护 (12)8. 故障排除 (12)9. 技术规格 (13)非常感谢您选购林内内嵌式燃气灶。
林内人相信,每次您使用林内产品时,您都能感受到源自产品本身安全性和高品质的便捷舒适之感。
为了实现产品性能的最优化,并保证您的林内内嵌式燃气灶保持最佳的状态,请按照以下的说明小心操作。
1安装并使用林内产品前,请仔细阅读以下所述的说明并按照这些说明进行操作。
由于安装和使用不当造成的任何损失 ,厂家概不负责。
本说明书应与产品一同保存,以便将来参考使用,请尽量将本说明书转交给产品新的所有人。
1.1 总则•产品及其附件在使用过程中会发热。
•用动物油或植物油烹饪食物时无人看管可能发生危险并可能引起火灾。
切勿尝试用水灭火,应先关闭本产品,再用锅盖或灭火毯盖住火焰。
•本产品不得通过外接定时器或独立遥控系统的方式进行操作。
• 请勿在灶台表面存放杂物。
• 请勿使用蒸汽清洁器对产品进行清洁。
1.2 儿童和易受伤害人群警告!窒息、受伤或终生残疾危险•本产品可供年满 8 岁以上的儿童使用,身体机能、感官机能或精神机能下降或经验和知识不足的人员,如果有成人或负责其安全的人员监督,也可以使用产品。
•切勿让儿童玩弄本产品。
•将所有包装材料放在儿童不能接触的地方。
•本产品工作或处于冷却过程时,应让儿童或宠物远离。
•切勿让儿童在无成人看管的情况下独自清洁和维护本产品。
22.1 安装警告!仅限具有相关资质的技术人员安装和维修本产品。
•除去所有包装材料。
• 切勿安装或使用损坏的产品。
•应按照说明保持与其他产品和设备的最小距离。
•移动本产品时,务必佩戴安全手套,小心操作。
• 防止产品底部接触任何蒸汽和湿气。
•防止产品跌落,切勿将产品安装在门附近或窗户下方。
Rinnai RB-3Si-C 三燃气烈士建造烹饪机操作手册说明书

Attention: when installing the casing• Adjust screw position as bench cut out size.• If length of screw is not enough long (RHS/LHS screw) please change with longer screw (M5x80) which included in packaging•Confirm that six screws are secured firmly into the casing. (Eight screws are included.)•Confirm that the four screws are secured firmly into the top plate pushing plate. (Four screws are included.)RB3SS-31-2x01The fixing Screw M5 x 304 PcsThe fixing Screw M5 x 30 / M5 x 80Each 2 PcsThe fixing Screw x 4 pcs.040113GENTHREE-BURNERS GAS COOKERINSTRUCTION MANUALRB-3Si-CComponents and FeaturesTrouble Shooting Manual for Rinnai RB-3Si Built-in HobMaintenance•Wipe the tempered glass with a soft damp cloth and mild detergent • Wash the Pan Support and Burner Covers in warm water and detergent.Components and parts namesIn order to obtain the best results and to maintain your Rinnai Built-In Hob in the best condition, please read the instruction carefully.FAULTCAUSE1. No Ignition Spark electrode is wet, especially in high humidity season Dry the electrode with clean tissue or dry cloth.2. Flame cannot be heldIncorrect turning of gas control knob.Push and turn the gas control knob anti-clockwise until a ‘click’ sound is heard. Hold for a few seconds until flame is ignited.4. Yellow flameAccumulated grease and dirt on the burner.Wash the burner in warm water with detergent. Leave it to dry; then place it back in the correct position.3.No main flame Gas Regulator has been turned off Open gas regulator completely REMEDYStainless Top PlateCasingKnob Pan Support HPan Support MDrip Pan H Burner CoverTop Plate Pushing PlateDrip Pan S S Burner CoverInstallation1. Pan SupportFit Pan Support Legs into Top Plate.(Fig.2)2. Drip PanFit drip pan into burner correctly, without any gap.(see Fig.3)3. Installation of Gas HoseOperating Instruction Ignition•Install the built-in hob in well ventilated area and keep away from any combustible or inflammable object i.e. paper, oil, etc.•If the built-in hob is to be installed near any combustible surrounding i.e. wooden walls, wooden shelves, etc, there should be a distance of more than 15cm (6 in) away from the surrounding combustible. If the surrounding materials are fireproof, the clearance is not required.•Place the built-in hob on a stable and level surface• This built in hob is to be used for cooking purposes only. Do not use it to dry towel, clothes or any other materials over it.• Make sure that the following parts are fitted properly before use.• A specific rubber hose for built-in hob must be used .•The rubber hose must not be bent during installation and must be of an appropriate length ( less than 2m).•During installation, make sure that the rubber hose does not come into contact with the body of the built-in hob pass through the bottom part of the built-in hob to prevent melting of the hose.• Place the securing ring over the rubber hose and connect the rubber hose to the coupler below therear side of the built-in hob till the marked red line. Then secure the rubber hose in position with the securing ring (For LP Gas). • The connection must be performed by a qualified person according to the relevant standards (For LPGas). For Town Gas / Natural Gas, the task must be executed by a qualified licensed technician.•Do not use any other gas except for the ones indicated on the specification label of the built-in hob.•LPG is the abbreviation for Liquefied Petroleum Gas, while TG is Town Gas supplied through pipelines.•For liquefied petroleum gas, please use conventional household low pressure regulators. The standard pressure for LPG gas is 280 mm H O that for TG gas is 100 mm H O.• Do not increase the gas pressure• Never turn the LPG gas container upside down or subject to high temperatures or direct sunlight.•Conversion of built-in hob from one gas type to another must be performed by a qualified technicianas major components need to be replaced.221. Depress the control knob to about 2 mm and turn to the left (counter clock-wise) to the “ON” position.2.When the control knob is being turned for ignition, sparks are generated to ignite the burning device, accompanied by clicking sound.4. Precaution gas(Fig.3)XFig. 2G APCut-Out Hole SizeSpecification1. The tempered glass and stainless top plate is beautiful and stylish.2.The enamel pan supports are durable and will not deform, making it stable for your cooking vessels.3. The automatic continuous ignition device will ensure a 100% ignition rate.4.Each built-in hob is equipped with a safety valve which will cut off the gas supply automatically if the flame is accidentally extinguished (For SV model only).FeaturesGas Type Gas Consumption per hour Respective gas consumption (kW)Main RHS / LHS Gas Connecting Tube3.552.503.721.35L.P.G (30 mbar)Nozzle/injector size 3.600.90Ø9.5 mm gas specific rubber hose ½ In Thread (male)Ø9.5 mm gas specific rubber hoseT.G. (18 mbar)Nozzle/injector size N.G. (30 mbar)Nozzle/injector sizeSmall Center 1.401.501.400.831.450.6065725~840435~480550How to Handle Safety Device and Change Battery1. If the flame is extinguished during operation, the Flame Failure Safety Device will automatically cut off the gas within second.If you notice that the flame has been extinguished, please turn the knob to “OFF” position.2. The Safety Sensor is delicate, please do not use stiff brushes or rough cleaning pads when cleaning.•Aeration is preset at factory during assembly; please do not attempt to adjust it.•Battery Box is located at bottom of right front (Size C, 1.5V x 1) (Fig.5).Open the cabinet door, and change the battery.1.After use, turn the control knob right to the “OFF” position, and the flame will be extinguished.2.Make sure that the control knob is fully turned to the “OFF”position, lest there would be a danger of gas leakage.3. After extinguishing the flame, do not touch the conductive parts of the hobs as they remain at very high temperatures.4. There may be a slight hissing sound after the flames is extinguished.5. If the built-in-hob is not in use, turn off the main gas supply to avoid gas leakage or unnecessary accidents.Flame ExtinguishingFig. 5Gas InletFront Side”C” Size Battery(1.5Vx1)3. Do not release the control knob for 2-5 seconds after the sparks have ignited the burner to activate the safety device. Otherwise, the ignition will fail.4.In the event of the burner flames being accidentally extinguished , turn off the burner control and do not attempt to re-ignite the burner for at least 1 min.The device shall not be operated for more than 15 seconds. If the burner has not lit up after 15 seconds, stop operating the built-in hob and open the compartment door and/or wait for at least 1 minute before attempting to ignite the burner again.5. Flame can be adjusted between “MAX”, “MED”and “MIN” position, please adjust flame slowly. As shown by Fig. 4:Off Max flameMed flame Min flame6. Do not clean the top of the sensor with a hard brush, as it may damage the sensor.R0 ~ R110Fig. 4Product Net Weight Model IgnitionOverall Dimension Cut out hole sizeBuilt-in Hob RB-3Si 13.5 kg 9 mm x 510 mm 9 x 870 mm 435~480 mm x 725~840 mmR0 mm ~ R110 mmContinuous Ignition “C” Size Battery (1.5V x 1)Burners 280 mmMax MainMin 120 mmDiameters of pan which may be used on cooker* Maximum weight for each burners 20 kg.。
林内商用产品介绍
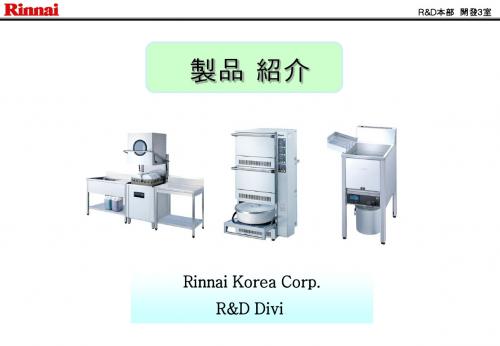
E(大型) • 型号: RSB-903H/W
仕样
• 尺寸(mm) : 900(W)x750(D)x850(H) /72㎏
• 燃气连接 :1/2”(15A)
• 燃气消费量 : △ LPG : 0.8 Kg/h △ LNG : 9,500 Kcal/h
• 燃气连接:¢9.5(HOSE END) • 内部空间 : 500 * 400(mm) • 燃起消费量 : △ LPG : 1.0 Kg/h △ LNG : 12,300Kcal/h
特征
• 压电式自动点火
• 紫外线BURNER(陶瓷) • 点火手柄在正面使用更加方便 • 可调烤网,支撑台的高度(约 300mm) • 采用了耐久性性良好的不锈钢材料 • 可调火力(强,弱)
• 燃气连接 ::¢9.5(HOSE END)
• 燃气消费量 : △ LPG : 1.0 Kg/h △ LNG : 12,500Kcal/h
特征
• 压电式自动点火
• 点火手柄在正面使用更加方便 • 采用了耐久性性良好的不锈钢材料 • 可调火力(强,弱) • 紫外线BURNER(陶瓷) • 可调烤网,支撑台的高度(约105mm上下移动)
特徵
• 压电式自动点火
• 点火手柄在正面使用更加方便 • 采用了耐久性性良好的不锈钢材料 • 可调火力(强,弱) • 紫外线BURNER(陶瓷) • 可调烤网,支撑台的高度(约105mm上下移动)
R&D本部 開發3室
•产品名 : 燃器烤炉(下火式) • 型号 : RG-640F
仕样
• 尺寸(mm) : 770(W)x630(D)x275(H) /21㎏
•使用电压: AC 220V 50Hz , AC 220V 60Hz (單相) • 燃气连接 :¢9.5(HOSE END) • 额定耗电量: 16W • 燃气消费量 : △ LPG : 1.08 Kg/h △ LNG : 13,000 Kcal/h
锅炉用builtin灶具操作引导书说明书
Operation / Installation ManualBuilt-In Hob (LPG / NG)RB-72S RB-72G RB-73TS RB-73TG RB-92G RB-93TS RB-93US RB-93TG RB-93UGRinnai CorporationE n g l i s h252741警告!只有合格的人员才能转换此设备. 从灶具主体上拆下锅架支架,燃烧器和旋钮。
. 使用十字螺丝刀拆下不锈钢顶板。
小心不要在拆卸钢制顶板 时损坏电极和热电偶。
. 使用附带的钥匙拧松文丘里管的支架,如图1所示。
. 使用#12&#14型固定扳手拆下铜针上的螺母和文丘里管上 的喷嘴,如图2所示。
. 从文丘里管中取出所有喷嘴,并放回正确的喷嘴。
确保风门板和减震器弹簧正确安装。
. 将螺母和喷嘴拧紧到铜管上。
. 如果使用城镇煤气,使用扳手卸下LPG 适配器, 如果使用LPG ,则使用扳手安装。
确保它足够紧。
. 进行所有接头的泄漏试验,以确保没有发现泄漏。
. 将所有部件重新放回到炉盘上。
. 更改标签以显示气体类型更改。
Pic 2Pic 1气种置换NG 换LPG & LPG 换NGRB70-021-4130317• 切勿使用超大的炊具或超负荷使用 烹饪器具。
• 不要取下锅架,并用锅架围住燃烧 器,因为这会使热量集中并偏转到 燃气灶上。
• 不要在锅和锅支架之间放置任何东西,例如火焰温度计, 石棉垫,否则可能会对器具造成严重损坏。
• 不要将炊具盘放在锅架支撑面 上,否则可能不稳并翻侧。
• 只能使用设备制造商提供或推 荐的锅支架。
警示强化玻璃ContentGuide to Appliances RB-72S / RB-72G / RB-73TS / RB-73TG / RB-92G / RB-93TS Guide to Appliances RB-93TG / RB-93US / RB-93UGGuide to the AppliancesSpecificationSafety InstructionsUsing for the first timeInstallation GuideOperationSuitable PansCleaning and CareTrouble Shooting GuideRinnai Customer Care CentersConversion from NG to LPG & LPG to NGCaution For the Tempered Glass 123468913151619202121Rinnai Customer Care CentersChina |中国Guangzhou Rinnai Gas & ElectricRoom 2805, No.31 Jianghe Building,Tianshou Road, Guangzhou, China广州林内燃具电器有限公司中国广州天河区天寿路31号江河大厦2805室Tel 电话: (86) 20 3821 7976Email 邮箱:*******************.cnURL 网址: IndonesiaCustomer Care of PT. Rinnai IndonesiaJl. Raya Pejuangan No.21,Komp. Ruko Sastra Graha No.11 -13Jakarta 11530Tel:(62************(Customercare)*************(SMS Center)E mail :**************************URL : www.rinnai.co.idMacau |澳門Rinnai Appliance Service CenterEdificio Industrial, 3andar F.A da Zona Macau林內爐具服務中心澳門青洲跨境工業大廈3樓F座Phone電話 :+853 2852-7799Fax 傳真 : +853 2827-0572URL 网址: /moPhilippinesMitsui Industia Corporation10 Buenaventura St., Cor MacArthurHighway, Dalandan Valenzuela City,PhilippinesTel : (63) 2 292 9177 / 292 9179Fax : (63) 2 292 8187SingaporeRinnai Holdings (Pacific) Pte Ltd 61 Ubi Road 1#02-20 & 21Oxley BizhubSin gap ore 408727Tel : (65) 6748 9478 Fax : (65) 6745 9240Email:********************:www.rinnai.sgThailand | ประเทศไทยRinnai (Thailand) Co., Ltd. / Lucky Flame Co., Ltd.61/1 Soi Kingkaew 9, Kingkaew Rd.Racha Thewa, Bangphli, Samutprakarn 10540,Thailandเลขที่ 61/1 ซอยก่่งแกว9 ถนนก่่งแกประเทศไทย10540Tel : (66) 2 3124330 -40Email:*********************.thURL : www.luckyflame.co.thVietnam | Việt NamRong Viet Commerce Company Limited120 3/2 Street, Ward 12, District 10,Ho Chi Minh City, VietnamCông Ty TNHH Th ngươM i ạRôồn g Vi t ệ120 Đngườ3/2, Ph ngườ12, Qu nậ10,TP. H ôồChí Minh, Vi t ệNamTel : (84) 8 3862 3409 Fax : (84) 8 5404 1964Email:************************URL : www. 40MalaysiaRinnai (M) Sdn BhdD2-3-G & D2-3-1, BlockD2, Pusat PerdaganganDana 1, Jalan PJU 1A/46, 47301 Petaling Jaya,Selangor Darul Ehsan, Malaysia.Tel: (60) 3 7832 0037 / 7832 0038 / 7832 0039Fax: (60) 3 7832 0036 Toll Free : 1800-88-3180Email:***********************.myURL: .myGuide to the AppliancesRB-72SRB-73TS1SmallBurnerLeft Control Right ControlBig BurnerBig BurnerBig Burner Big BurnerBig BurnerRB-72GLeft Control Right ControlExtra Small BurnerLeft Control Right ControlRear RightControlLeft Control Right ControlRear RightControlBig Burner Extra Small BurnerRB-73TGSmallBurnerRB-92GBig Burner Big BurnerLeft Control Right ControlLeft Control Right ControlRear RightControlBig Burner Small BurnerRB-93TSMediumBurner常见问题与解决方法问题可能导致的原因解决方法无点火(DC)自动点火功能不工作燃烧器火焰不均匀。
林内JSQ26-D66W JSQ31-D66W 热水燃气 热水器说明书

4使用方法z 为了防止被热水烫伤,使用莲蓬头淋浴时请勿直接往头部和身上淋水,应该先以手确认热水温度后再行使用。
z 为了防止被热水烫伤,使用过高温的热水之后,因为管路中还残留有高温的热水,再次使用莲蓬头淋浴时,请务必先用手确认热水的温度适合之后再行使用。
z 为了防止万一发生事故,长时间不使用热水器时,请关闭运行开关、进水阀、燃气阀。
本体操作部的使用方法1 按下“电源键”按钮 z 数字显示器的数字亮起,并显示前次所设定的温度。
z 初次使用时或停电后再次通电时显示为40℃。
(当热水器连续通电超过大约6小时以后,显示为停电前的设定温度, 如果设定温度大于50℃时,恢复到50℃。
)2 按下温度调节按钮选择所需的温度 z 要高温的时候按“”,要低温的时候按“”。
z 可设定的温度有下列16段温度。
热水使用中水温可调节范围ECO 功能启动下的可调节范围 z 往“”按时,会变化至60℃。
每按一次变化一段。
如果按住“”1.5秒以上时,会连续变化至48℃。
48℃以上时每按一次变化一段,往“”按时,会变化至35℃。
但是,当热水使用中从48℃以下往“”按时,只能变化至48℃,必须关闭热水龙头以后才能往上调温;而往“”按时,可以从60℃变化至35℃。
这是为了防止淋浴时发生烫伤事故而设计的安全锁定功能。
z 浴缸模式下燃烧时:当温度设定为43℃以上时,只能向下调节,不能向上调节。
待机状态可设定水温范围清洗餐具温度淋浴温度使用方法3 打开热水龙头,已设定好温度的热水立刻出来。
z热水使用中,燃烧指示灯点亮。
z热水流量的多少请用水龙头调节。
z热水使用完毕,关闭热水龙头后,燃烧指示灯熄灭。
z再度使用时,只需打开热水龙头立即有设定好的热水流出来。
4 模式设定普通模式(机器出厂默认模式为普通模式)z点击“上调键”或“下调键”改变温度设定。
z普通模式下温度可调节范围为35℃、37℃~48℃、50℃、55℃、60℃,出厂预设温度为40℃。
林内燃气灶使用说明书

規格Specifications*禁止使用錫紙碟Never use aluminum tray.the Chinese version shall prevail.注意:Cautions*產品規格及設計如有變更,恕不另行通知。
Specifications are subject to change without prior notice.*中英文版本如有出入,一概以中文版本為準。
If there is any inconsistency or ambiguity between the English version and the Chinese version,型號 LJ-108LJ-1088氣體 額定熱負荷 (kW)4.94.94.9內徑8.8毫米軟喉咀氣體壓力 2900Pa2900Pa點火方式壓電點火Piezoelectric ignitionModel Gas typeRated heat input左爐頭 Left 右爐頭 Right燃氣入口接駁Gas inlet connectionGas pressure Gas ignition system產品尺寸 闊 x 深 x 高 (毫米)Product dimensions W x D x H (mm)Inner diameter 8.8mm flexible tubing gas hose 香港石油氣 HK LPG香港石油氣 HK LPG680 x 410 x 115280 x 410 x 115Thank you for purchasing our product.Before using the product make sure thatyou have followed the safety instructions.Please keep this manual for future reference. There will be improvements on our products. Information is subject to change without prior notice.increase LJ-108 / LJ-1088LIGHTING GAS STOVES TRADING LTD.Flat C&D, 13/F, Fou Wah Industrial Building,10-16 Pun Shan St, Tsuen Wan, Hong KongUser’s Manual(香港石油氣 HK LPG)內容Content氣體接駁需知Gas connection and warning ................................... P.1Parts identification .................................................... P.2各部名稱安裝前須知使用方法清潔及保養常見故障及處理方法Before installation ..................................................... P.3Operating instructions .............................................. P.4-5Cleaning and maintenance ....................................... P.6-7Trouble shooting ...................................................... P.8-9Specifications ............................................................P.10TroubleCauseSolutionBurners cannot be ignitedoffNo flameSmell of gasYellow flameUnstable flame*Warning: If the cooking range cannot be ignited by the above suggested solutions,do not attempt to ignite by other means. Please contact our repair center for repair.規格The main gas supply is turned The ignition knob is notpressed properly or adequatelyGas valve is leakingThe burner cap is not placed properlyNot enough gas in the gascylinder The gas meter control valve and / or the stoves shut-off valve has been turned off Burner cap is blocked by aluminium foilGas pipe had been damaged or not connected well Grease and dirt is accumulated on the burner cap Open gas meter cock and / or Turn it back to the turn off mode. Then, press and turn it anti-clockwise slowly. Since the burner is ignited, keep pressing it for few secondsReplace the burner cap properlyReplace a new gas cylinderContact gas supply company or Wash the burner cap with warm water and detergent. Mop it dayand place it properly appliance isolating cock completelyRemove aluminium foil the registered gas intallers for checkingTurn on the main gas supplyThey should stop the gas flow immediately by turning off the emergency control valvesupstream of the gas meters or the consumers can disconnect the regulators of the LPG cylinders to cut gas supply.Extinguish all naked flames and open all windows and doors wide to disperse the gas.注意!根據香港氣體安全條例,任何氣體裝置工程,包括爐具和接駁喉管的安裝,必須由註冊氣體裝置技工執行,而該技工已於相關的氣體工程類別註冊及受聘於註冊氣體工程承辦商。
林内RH-ER15GA RH-ER16GA系列吸油烟机使用及安装说明书
1
2
注:空气性能特性曲线及阻力曲线不作为明示参数的一致性评价依据。
静压(P a )
标引序号说明: 1 — 空气性能特性曲线 2 — 排烟阻力曲线
上海林内有限公司
Shanghai Rinnai Co., Ltd.
公司地址:上海市奉贤区团青公路4500号 电话:(021)67583500 传真:(021)67583555 邮编:201411上海林内有限公司售后服务中心地址:上海市奉贤区团青公路4500号 传真:(021)67583555
邮编:201411上海林内有限公司展示厅地址:上海市南京西路499号 电话:(021)63590262
邮编:200003全国服务热线:4006990606
SX021-608
敬告:
由于产品的改进,本说明书中的某些内容,插图可能与产品不完全一致,恕不另行通知,产品规格以器具铭牌为准,请谅解。
扫描此二维码获取林内官网扫描此二维码获取林内官方微信服务号扫描此二维码获取售后网点。
cxw200ju01s产品知识
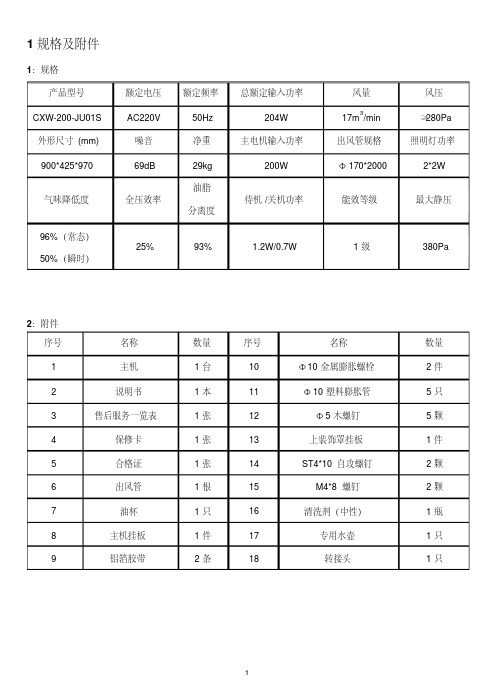
1规格及附件1:规格产品型号额定电压额定频率总额定输入功率风量风压CXW-200-JU01S AC220V 50Hz 204W 17m3/min ≥280Pa 外形尺寸(mm) 噪音净重主电机输入功率出风管规格照明灯功率900*425*970 69dB 29kg 200W Φ170*20002*2W油脂气味降低度全压效率待机/关机功率能效等级最大静压分离度96%(常态)25% 93% 1.2W/0.7W 1级380Pa 50%(瞬时)2:附件序号名称数量序号名称数量1 主机1台10 Φ 10金属膨胀螺栓2件2 说明书1本11 Φ 10塑料膨胀管5只3 售后服务一览表1张12 Φ 5木螺钉5颗4 保修卡1张13 上装饰罩挂板1件5 合格证1张14 ST4*10自攻螺钉2颗6 出风管1根15 M4*8螺钉2颗7 油杯1只16 清洗剂(中性)1瓶8 主机挂板1件17 专用水壶1只9 铝箔胶带2条18 转接头1只12外部装配部件图3 外形尺寸图4 安装方法及注意事项1:安装方法①如安装参考图所示,在墙上钻5个深度约为60mm的Φ10孔,最上方2孔埋入2个Φ 10金属膨胀螺栓,其余3孔埋入Φ 10塑料膨胀管,用膨胀螺栓的螺母和2只Φ5木螺钉将主机挂板紧固在墙上(中间一孔暂不拧螺钉)。
②若需安装上装饰罩,请在主机挂板正上方的适当位置,钻2个Φ10孔(如安装参考图所示),分别埋入2只Φ10塑料膨胀管,用Φ5只木螺钉将上装饰罩挂板水平紧固在墙上。
③将主机挂在主机挂板上,并确保主机挂牢和平稳。
④如安装参考图所示,将Φ5木螺钉拧入主机挂板的中间孔,以防主机掀翻。
⑤将出风管插入出风口环槽底部,用2只ST4*10自攻螺钉将出风管固定在出风口上,并在衔接处用铝箔胶带固定密封。
⑥将出风管从预先钻好的Φ185墙孔中引出室外,室外的出口应低于室内。
若墙内排烟口径小于出风管时,可采用转接头进行转接,连接方式见右图。
注意: 1. 加装转接头后,会降低吸烟排气能力。
侧吸式吸油烟机
感谢您选用林内牌吸油烟机安装使用前请仔细阅读本说明书,并将本说明书保存好以备参考。
请在保修卡上仔细填写机号、购买日期、购买商店、发票号码等内容,并将保修卡寄出。
由于产品的不断改进,您所得到的产品可能与本说明书上图示不一致,请以实物为准,请谅解。
目录部件名称………………………………1安装245678..........................................使用方法....................................使用注意事项..............................常见故障的识别与处理..................维护与保养.................................产品规格与外形尺寸.....................客户服务 (9)2012年06月版公司地址:上海市浦东北路1520号 电话:(021)68466982 传真:(021)68467179 邮编:201208上海林内有限公司售后服务中心地址:09992上海市浦东北路150号 传真:(021)6846 邮编:201208上海地区安装维修热线:4069906060 全国监督咨询电话:4006990606上海林内有限公司展示厅地址:上海市南京西路499号 电话:(021)63590262 邮编:200003产品型号侧吸式吸油烟机CXW-220-JSE客户服务尊敬的用户,您好:感谢您使用我们的产品,我公司将依据《中华人民共和国消费者权益保护法》、《中华人民共和国产品质量法》及《部分商品修理更换退货责任规定》的有关规定,凭保修卡和有效发票为您提供服务。
1. 根据国家规定,用户自购买之日起即享受三包服务。
三包有效期自发票开具 之日算起。
请用户妥善保存好保修卡和购机发票。
如用户遗失发票,将按出 厂日期推算三包有效期。
2. 根据国家规定,下列情况不属于保修范围:◆消费者因使用、安装、维护、保管不当造成损坏的;◆非承担三包维修者维修造成损坏的;◆无三包凭证及有效发票的;◆三包凭证型号、编号与维修产品不符或者涂改的;◆因不可抗力造成损坏的;◆由于产品使用环境,例如:电源、温度、湿度等非本公司所能控制的因素 引起的一切损坏和损失的。
抽油烟机说明书

抽油烟机说明书尊敬的用户:感谢您选择使用我们的抽油烟机,并给予我们的产品信任。
为了确保您能充分了解和正确使用我们的抽油烟机,我们编写了以下说明书,希望能为您提供清晰的使用指南。
一、产品概述我们的抽油烟机是一种家用厨房电器,主要用于吸附和排除烹饪过程中产生的油烟、异味和热气等有害物质,确保厨房空气的清洁与流通。
我们的产品结构合理、设计前卫,外观精致美观,操作简便,具有以下特点:1. 强劲的排风功能:通过高效电机及优质风叶的配合,实现了快速、高效的排风效果,有效清除油烟和异味,保持厨房空气清新。
2. 多档调速:内置多档风速调节功能,您可以根据不同的烹饪需求选择适当风速,保证烹饪时的灵活性和舒适性。
3. 超静音设计:通过科学的降噪技术和优质材料的使用,使得我们的抽油烟机在工作时噪音极低,不会对您的生活和休息造成干扰。
4. 易于清洁:我们的抽油烟机设计合理,可拆卸清洗,方便快捷,确保产品始终保持洁净卫生。
二、安装说明1. 安全须知:在安装我们的抽油烟机之前,请务必仔细阅读并理解以下安全须知:1.1 请确保安装环境通风良好,不要堵塞抽油烟机的进出风口。
1.2 请确保电气安装符合国家/地区的相关规范,避免因错误电气连接引起安全隐患。
1.3 请在使用过程中,保持抽油烟机与可燃物体保持一定的距离,避免因接触火源引起事故。
1.4 请勿将抽油烟机安装于高温、潮湿或易燃的环境中,避免影响产品安全性能。
2. 安装步骤:我们提供了详细的安装图解供您参考,在安装之前,您可以阅读以下步骤:2.1 确定安装位置:请根据您的厨房布局和操作需求,选择适当的安装位置,确保与烹饪设备之间有足够的间隔。
2.2 安装支架:将抽油烟机支架固定于安装位置,确保支架水平牢固。
2.3 安装油烟机:将抽油烟机的连接口与支架连接好,确保稳定。
2.4 连接电源:根据产品说明书上的电气连接图,正确接入电源线,确保安全可靠。
2.5 安装检查:在完成以上步骤后,请检查安装是否牢固可靠,所有电气接线是否正确无误。
林内JZR-3WAX JZR-2WAX家用嵌入式燃气灶说明书
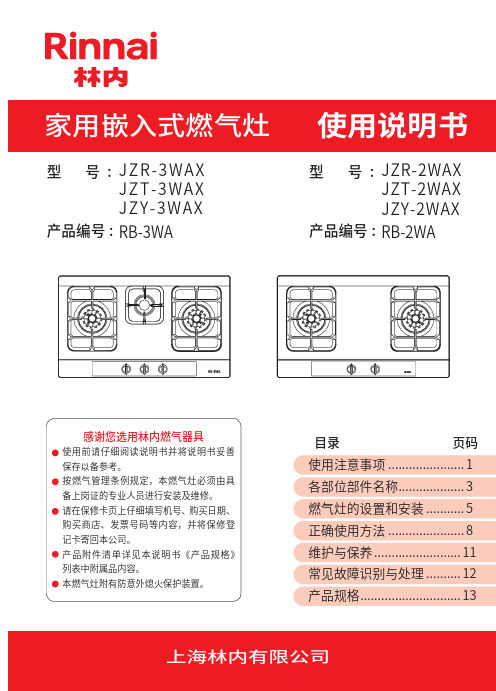
RB-3WA产品编号:型号:RB-2WA产品编号:型号:目录 页码使用注意事项.......................1各部位部件名称.. (3)燃气灶的设置和安装............5正确使用方法.. (8)维护与保养..........................11常见故障识别与处理.. (12)产品规格 (13)上海林内有限公司JZR-3WAXJZT-3WAX JZY-3WAXJZR-2WAXJZT-2WAXJZY-2WAX灶具在使用期间会发热,注意避免接触发热单元。
金属物体如刀、叉、勺和盖不应放在灶台上,因为它们可能变热。
除烹饪外,本燃气灶不得做为他用(如:干燥衣物、煤球助燃等)。
严防小孩擅动燃气灶,操作错误易引起烫伤或火灾。
以防引起异常燃烧或一氧化碳中毒。
禁止禁止禁止燃气灶使用过程中,请打开排气扇,使燃烧废气顺利排至室外,以保持室内空气畅通。
防止通风不良造成一氧化碳中毒。
使用过程中,经常确认火焰是否正常燃烧,使用完毕,请将燃气灶关闭,外出或就寝前一定要关闭燃气阀门。
异常情况(异常燃烧、异常声音、地震、火灾)发生时,请立即停止使用,关闭燃气阀。
发生燃气泄漏时,请立即关闭燃气总阀,敞开门窗保持通风。
这时切忌点火、使用电器开关,火苗、电火花易引起燃气爆炸。
点火时偶遇放手后旋钮未弹起、脉冲音持续,请将燃气灶旋钮至关闭位置。
重新点火若故障仍持续,请通知售后服务维修。
国家对家用燃具有以下安全使用年限规定:燃具从售出当日起,燃气灶具的判废年限应为 8 年。
禁止通风注意必须执行告用户环境影响书:尊敬的用户,图中所示各零部件均在包装箱中,请在装配前按上图逐个 认识各部件。
为保护我们的环境,请按照环保规则处理包装废弃物。
纸质材料请再次循环利用或交给纸品回收站,泡沫聚苯乙烯和塑料薄膜请交给专门废品回收站。
用后的废旧干电池,请按环保要求弃于专用的废物箱。
置于架子上或有落下物的场所,以及塑料请按图示尺寸或包装箱内开孔指示板在料理台上开孔。
TFT-600 TFT-700 TFT-900 抽拉式抽油煙機使用說明書说明书
Please read these instructions and warranty information carefully before use and keep them handy for future reference.在使用之前請詳細閱讀「使用說明書」及「保用條款」,並妥為保存。
即時網上登記保用Online Warranty RegistrationTFT-600 / TFT-700 / TFT-900抽拉式抽油煙機Slide-Out Type Range HoodTFT SERIESU S E R M A N U A L請即進行保用登記﹗有關保用條款細則,請看本說明書最後一頁。
Please register your warranty information now!For Warranty Terms & Conditions, please refer to the last page of this user manual.ContentDear Customer,Thank you for buying our hood. Please read these instructions carefully for its optimum installation, use and maintenance.Notice before installationThis hood is designed for fitting in a cabinet or on some other support.Warning: consult local regulations regarding fumes outlets. Do not connect the hood to a fume, ventilation or hot air duct. Confirm that room ventilation is appropriate with the local authorities. Make sure the maximum air extraction flow rate for the appliances in the room does not exceed 4 Pa (0.04 mbar). The room must have adequate ventilation if an extractor hood is used simultaneously with appliances that run on gas or other fuels. The evacuated air must be extracted through ducts that are used for evacuating fumes from appliances that run on gas or other fuels. Regulations regarding air extraction must be complied with.This product is intended for HOUSEHOLD USE only.Use a rigid PVC pipe or aluminium pipe with a min. Ø l25 mm or Ø l52 mm to evacuate fumes outside. The above restrictions do not apply to hoods with no fumes outlet to outside (recirculation system with activated charcoal filter).Install the hood in line with the instructions on the template. For gas cooking appliances only: the minimum distance to the hood must be at least 65 cm.Warning: Failure to install the screws or fixing device in accordance with these instructions may result in electrical hazards.InstallationThe cooker hood is supplied with2 pipe conectors Ø l25 mm or Ø l52 mm3 Spacer (F, H)4 Screws (C)2 Bulbs (LED)To fixing the Hood, use the 4 screws (C)φ6mm supplied with the hood.Close the space that remains between the hood and the wall, adjusting the spacer (F). Before completing any connection, make sure the house voltage corresponds with the voltage indicate on the data label.Connecting the hood to the gridWarning: before connecting the hood: switch off the electricity supply and checkthat the supplied voltage and frequency coincide with that indicated on the appliance nameplate.If the extractor hood has a plug, connect it to a power socket in line with applicable regulations, located in an accessible area.If the terminals of the plug are unmarked or if you are in any doubt consult a qualified electrician.If it is not supplied fit a plug normalized in the cord for the load showed on the rating label.Notice before useWarning: the hood may stop working during an electrostatic discharge (e. g. lightning). This involves no risk of damage. Switch off the electricity supply to the hood and reconnect after one minute.This appliance can be used by children aged from 8 years and above and persons with reduced physical, sensory or mental capabilities or lack of experience and knowledge if they have been given supervision or instruction concerning use of the appliance in a safe way and understand the hazards involved. Children shall not play with the appliance. Cleaning and user maintenance shall not be made by children without supervision.To avoid the risk of fire, clean the metal filter regularly, permanently control pans containing hot oil and do not flambé food underneath the hood.Do not use the hood if it shows signs of damage or imperfection. Contact an official distributor or authorized dealer.Accessible parts may heat up when using cooking appliances.Suction VersionIf the hood is to be installed as a SUCTION hood, connect the plastic outlet piece (A) supplied with the hood (152mm diameter pipe for better performance and lower noise levels.Filtering Version (optional accessory)When there is no exhaust duct for venting out-door, you can use a carbon filter (B/D). The air is depurate by the filter and put again in the surrounding.Control panelC1 Extractor on and offC2 Two extractor speedsFor more product informationThe air is released in the room through a connecting pipe, which goes through the hanging cupboard and us connected to the connecting ring supplied (A) Fig 1.To use the appliance in this version, proceed as follows:Open the metal grids (E)To proceed to change the charcoal filter (B/D), uscrew the screw and remove the grids.CARE & MAINTENANCEHood maintenanceWarning: always switch off the electricity supply before carrying out maintenance work on the hood. In the event of a fault, contact an official distributor or authorized dealer.Exterior cleaning: use non-corrosive, liquid detergent and avoid the use of abrasive cleaning products.Grease filters: to avoid fires, clean thoroughly once a month. To do so, remove the filters and wash with hot water and detergent. If using a dishwasher, position the filters vertically to prevent solid remains from depositing on them. Do not use polish to clean or shine.Activated charcoal filters: replace the every 3 months. (optional accessory)Important: increase the filter cleaning/replacement frequency if the hood is used for more than 2 hours a day. Always use genuine filters from the manufacturer.Bulb replacementWarning: do not handle the bulbs until the electricity supply has been switched off and they have cooled.Important: use new bulbs according to that indicated on the hood nameplate.On cooker hoods equipped with lamps, the lights should only be used during operation of the motor. They should not be left on permanently and used as a light source.The manufacturer:•Declares that this product meets all basic requirements regarding low-voltage electrical equipment established in Directive 2006/95/EC of 12 December 2006 and electro-magnetic compatibility established in Directive 2004/108/EC of 15 December 2004.• Is not responsible for any failure to observe the instructions given in this manual and current safety regulations for the correct use of the equipment.•Reserves the right to make any modifications to the equipment or this manual without prior notice.TECHNICAL SPECIFICATIONSSpecifications are subject to change without prior notice.If there is any inconsistency or ambiguity between the Chinese version and the English version, the English version shall prevail.Refer to for the most up-to-date version of the User Manual.尊敬的用戶:感謝您購買我們的抽油煙機產品。
- 1、下载文档前请自行甄别文档内容的完整性,平台不提供额外的编辑、内容补充、找答案等附加服务。
- 2、"仅部分预览"的文档,不可在线预览部分如存在完整性等问题,可反馈申请退款(可完整预览的文档不适用该条件!)。
- 3、如文档侵犯您的权益,请联系客服反馈,我们会尽快为您处理(人工客服工作时间:9:00-18:30)。
林内抽烟机说明书篇一:林内热水器使用说明方法林内热水器使用说明方法一:林内热水器使用及保养说明1、林内热水器日常使用说明:★初次使用时的操作步骤A、打开进水阀;B、打开出水阀检查有水后关闭;C、打开燃气阀;D、插上电源插头;或打开插座上的开关。
(请勿用潮湿的手触摸电源插头)★遥控器操作提示音的关闭、打开方法A、在任何状态下,将“开/关”按钮按压约5秒左右;发出“吡”的声音,提示音打开;B、在有提示音的状态下,将“开/关”按钮按压约5秒左右;即可取消提示音;C、初始设定(出厂时)有提示音的设定;D、如果关闭电源开关或拔掉电源插头,过段时间就会返回初始设定。
★排放热水/调节热水温度(1)A、在热水器关闭状态下,按动“开/关”按钮,“优先”按钮灯点亮,显示屏上显示的是原设定温度;B、按动“降温”、“升温”按钮可调节出水温度,温度一旦设定就会被存储;C、热水温度的设定值从37℃~48℃可连续调节,每按动一次“降温”或“升温”按钮,温度值变化1℃,从48℃以后每按动一次“降温”或“升温”按钮,温度设定值为50℃、60℃、70℃。
D、初始设定(出厂时)为42℃。
热水器一旦停止运转,重新使用的情况下,如果前一次的设定温度在50℃以上,为安全起见,重新使用时温度为48℃。
林内热水器温度依次分为:37 38 39 40 41 42 43 44 45 46 47 48 50 60 70 75清洗餐具等淋浴、供给热水等供给热水等高温E、打开出水阀(热水龙头),燃烧指示灯应点亮。
热水器正常工作。
F、使用后关闭热水龙头。
燃烧指示灯应熄灭。
2、日常检查、保养的方法A、排气筒是否出现脱落、破裂及灰尘堵塞等情况?不在排气筒出现脱落、破裂、堵塞的状态下使用。
B、检查进风口是否堵塞,堵塞时需进行清洁。
C、热水器外壳的污秽、水汽可用湿布擦拭当污秽较严重时可用中性洗涤剂擦拭。
D、操作部和遥控器的表面出现污浊时请用湿布擦拭。
E、请勿使用挥发性油剂及油脂类的洗涤剂清洁操作部和遥控器。
有时会导致变形。
F、排水栓的过滤器被细小沙石等杂物堵塞时,有时会出现热水排放不畅或水温不稳定的情况因此.请按如下方法进行清洁。
1)使用热水后.机器内部的热水处于高温状态,因此,请在机器冷却之后再进行排水。
(旨在防止烫伤)。
2)热水或冷水从排水栓等处流出因此请在热水器下面放置容器来接排水。
G、即使使用过程中未出现故障.为了防止意外的事故放心地长期使用建议每年进行一次以上的定期检查。
请与本公司维修部或服务网点洽谈。
篇二:说明书人工林采伐调查设计说明书根据《黑龙江省森林采伐更新技术规程》以及为了促进农民造林积极性,结合我朝阳乡边河村个人所有的落叶松人工林已达到中龄林标准,为促进林木生长,为改善林分质量,我乡成立了由站长、技术员、村长等5人组成的调查小组,对这4个小班进行了采伐作业调查设计。
经认真调查确定对这4个小班进行生长抚育伐作业。
调查方法罗盘仪导线测量的方法,每个测点用GPS定位,实测经营面积,并转绘成图,闭合差在1/200以内,符合精度要求,以平均标准木法求得标准地株数及蓄积,进而推算全林蓄积(依据《黑龙江省地方主要树种树高级立木材积表》DB1998)。
经外业汇总,形成内业材料,上报审批。
一、作业区概况:作业区1小班位于朝阳乡边河村北,作业区地势平坦,交通便利,林内卫生状况良好,便于作业。
作业面积18亩。
作业区2小班位于朝阳乡边河村北,作业区地势平坦,交通便利,林内卫生状况良好,便于作业。
作业面积39亩。
作业区3小班位于朝阳乡边河村南,作业区地势平坦,交通便利,林内卫生状况良好,便于作业。
作业面积33亩。
作业区4小班位于朝阳乡边河村南,作业区地势平坦,交通便利,林内卫生状况良好,便于作业。
作业面积12亩。
二、作业区林相情况:作业区1小班为落叶松纯林,1984年栽植,初植株数为3300株/公顷,现树高为9米,胸径为10厘米,现公顷株数为1605株,公顷蓄积为57立方米。
作业区2小班为落叶松纯林,1984年栽植,初植株数为3300株/公顷,现树高为9米,胸径为10厘米,现公顷株数为1605株,公顷蓄积为57立方米。
作业区3小班为落叶松纯林,1984年栽植,初植株数为3300株/公顷,现树高为8.5米,胸径为10厘米,现公顷株数为1560株,公顷蓄积为56立方米。
作业区4小班为落叶松纯林,1984年栽植,初植株数为3300株/公顷,现树高为8.5米,胸径为10厘米,现公顷株数为1560株,公顷蓄积为56立方米。
三、施工要求1、时间要求:全部作业起止时间XX年月日至XX年月日。
2、质量要求:起树采伐要求零公分下锯,尽量降低伐根。
打枝、平滑不留桩。
造材合格率达97%以上,合理造材,提高木材利用率。
3、安全要求:作业人员必须戴安全帽,人为控制树倒方向。
3级风以上不准起树。
4、其它要求:完全按设计施工,树干达到2米,小头直径足4厘米的必须造材,提高林木利用率。
四、设计出材量作业区1小班自用材消耗蓄积3立方米,出材2立方米,出材率80%,采伐株数72株。
作业区2小班自用材消耗蓄积4立方米,出材3立方米,出材率80%,采伐株数125株。
作业区3小班自用材消耗蓄积3立方米,出材2立方米,出材率80%,采伐株数98株。
作业区4小班自用材消耗蓄积2立方米,出材2立方米,出材率80%,采伐株数50株。
自用材总消耗蓄积12立方米,出材9立方米,出材率80%,采伐总株数345株。
朝阳乡林业工作站XX年月日篇三:林内燃气热水器之24种常见现象的解决办法燃气热水器之24怪现象现象一:水不热原因1:燃气压力低:燃气管道堵塞、燃气管路压力低;解决方法:自查燃气管道是否堵塞(可从燃气表具处接一根管道到热水器燃气进口处,直接与热水器相接,如热水器能正常工作即从表具到热水器进口处的管路有堵塞),请燃气公司检查燃气管路压力。
原因2:水流量过大:管道压力过大、管道口径太大;解决方法:可关小进水管的阀门及提高热水器的设定温度。
原因3:设置不当,应调在高档或冬天,而现在调在中档或春秋档;解决方法:按说明书上的使用方法正确设置。
现象二:水太烫原因1:水压低、水流量小、水管堵塞;解决方法:a.将水管调换到一定的口径;b.加装增压泵;c.清理热水器进水管过滤网;d.调整热水器上的水量调节到大;e.调换花洒,花洒眼应尽量大。
原因2:燃气压力过高主要体现在液化气(LPG)上;解决方法:调换液化气的减压阀(必须是劳动牌),将燃气压力调至要求值。
原因3:设置不当,主要是将热水器设置在高温区造成。
解决方法:按说明书上的使用方法正确设置。
现象三:热水器点燃后有一段冷水,重新开水后又有一段冷水原因:这主要是强排风热水器的特性,不是故障。
强排风热水器是为了提高用户使用的安全性,在热水器点燃前设置了前清扫,在热水器熄火后进行后清扫,将热水器中原有的废气排出热水器内,所以造成重新开水后又有一段冷水出现,另外,由于用户的龙头到热水器出水管的距离长短,及热水器将冷水加热到热水需一定的时间,造成热水器点燃后有一段冷水的原因。
用户可缩短该段时间,将热水器先设置在高温档,等水热后再将水温设置在需使用温度。
现象四:智能恒温系列热水器的常见故障代码显示01不是故障代码,代表热水器已运行了30分钟,提醒用户注意使用安全。
显示11、12、14、16、31、32、72、73、90等,以上数字显示都是热水器出现故障后的代码,都必须进行保修。
现象五:风机运转声音原因:1.新用户新使用的用户不了解机器内部装有鼓风装置,工作时电机加上风动产生的声音是有一定响声的。
2.原是自然排气式机器用户与强排气式机器对比,强排机装有鼓风装置,工作时电机加上风动产生的声音是原有的自然排气机器所没有的,因此用户感觉机器工作声音响。
3.恒温机由于使用的是直流变速电机,运转是按机器的实际输出热负荷来调节转速,加之直流电机本身较交流电机运转平稳,因此电机运转声音相对较轻。
非恒温机采用的是交流电机,电机运转恒定不变,声音相对就较响一些。
因此恒温机的运转声音较轻;非恒温机运转声音较响一些。
现象六:燃烧声音原因:主要是原使用自然排气式的老用户,他们不了解强排式热水器的声音来源:一是封闭燃烧,(能率热水器采用的是封闭式燃烧)由于燃烧时受热的强热空气受困在换热器中,产生剧烈的振荡从而发出较敞开式燃烧响得多的声音。
这里还有一个空气箱原理,将燃烧的响声在换热器里作了放大并通过换热器壁传向空间。
二是强排机装有鼓风装置,工作时电机加上风动产生的声音是原有的自然排气机器所没有的,二者相加声音当然要比自然排气的热水器要响得多。
现象七:振动声音原因:主要是原使用自然排气式的老用户,他们不了解强排式热水器的声音来源:一是封闭燃烧,(能率热水器采用的是封闭式燃烧)由于燃烧时受热的强热空气受困在换热器中,产生剧烈的振荡从而发出较敞开式燃烧响得多的声音。
这里还有一个空气箱原理,将燃烧的响声在换热器里作了放大并通过换热器壁传向空间。
二是强排机装有鼓风装置,工作时电机加上风动产生的声音是原有的自然排气机器所没有的,二者相加声音当然要比自然排气的热水器要响得多。
现象八:出水过热,调温不良原因:快捷式热水器出水的温度与出水量是密切相关的,机器在输出相同的功率(火力)下,出水量小必然会引起出水温升高,出水量大出水温度相对就低,当出水量小到超出了机器的正常工作所必须的最小极限量时,必然就会使出水过热,此时无法调节水温。
现象九:出水量小,引起停机原因:当出水量小到超出了机器的正常工作所必须的最小极限量时,必然就会使出水过热,严重的会使智能型机器显示16故障;普通机器引发温度继电器工作,使机器停止工作或停机后又启动。
现象十:出水量小,引出异声原因:当出水量小到超出了机器的正常工作所必须的最小极限量时,机器内部水温加热到接近沸点,此时水管壁受热对流作用,发出异常声响。
现象十一:出水量小原因:造成出水量小的原因常见的有使用水箱顶层用户、用户水管堵塞、系统水压偏低,用户水阀门未开大等。
现象十二:普通机火力切换选择不对引起调温不良原因:由于火力选择不当,再加上水量调节不匹配,导致出水温度太热或不热。
出现这种情况往往是用户对热水器的工作原理不了解或错误的认为如同锅炉洗浴,选择是高温大火力后加冷水兑水调温。
也有用户以节约为本,选择偏小火力又要求较大水量使用造成水温不够。
现象十三:恒温机温度设定不正确引起调温不良原因:由于用户对恒温热水器的性能不理解,对温度的设定做了错误的操作,如,设定高温再加冷水兑水调温导致调温不良,严重的还会引起显示16,造成停机。
现象十四:设定温度偏低于出水温度原因:主要原因有二点:1.水量控制不良,出水良大于机器的热负荷能力2.热水输送管道过长,保温性较差,散热较多。
