Cisco_MDS_9124光纤交换机安装配置手册
cisco 9124 光纤交换机配置
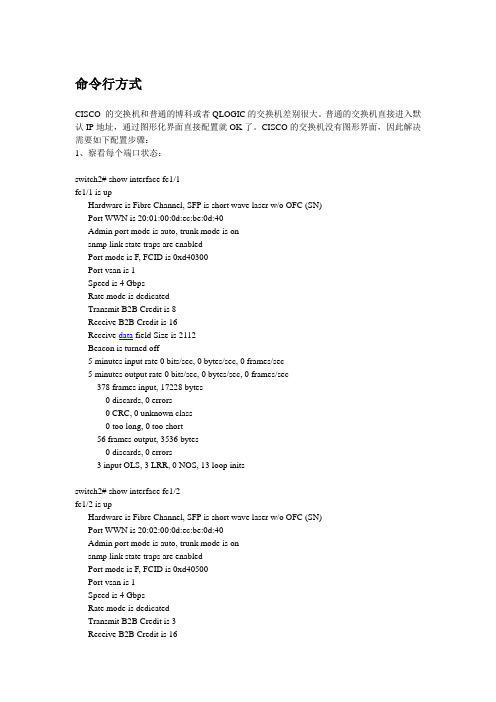
命令行方式CISCO 的交换机和普通的博科或者QLOGIC的交换机差别很大。
普通的交换机直接进入默认IP地址,通过图形化界面直接配置就OK了。
CISCO的交换机没有图形界面,因此解决需要如下配置步骤:1、察看每个端口状态:switch2# show interface fc1/1fc1/1 is upHardware is Fibre Channel, SFP is short wave laser w/o OFC (SN)Port WWN is 20:01:00:0d:ec:be:0d:40Admin port mode is auto, trunk mode is onsnmp link state traps are enabledPort mode is F, FCID is 0xd40300Port vsan is 1Speed is 4 GbpsRate mode is dedicatedTransmit B2B Credit is 8Receive B2B Credit is 16Receive data field Size is 2112Beacon is turned off5 minutes input rate 0 bits/sec, 0 bytes/sec, 0 frames/sec5 minutes output rate 0 bits/sec, 0 bytes/sec, 0 frames/sec378 frames input, 17228 bytes0 discards, 0 errors0 CRC, 0 unknown class0 too long, 0 too short56 frames output, 3536 bytes0 discards, 0 errors3 input OLS, 3 LRR, 0 NOS, 13 loop initsswitch2# show interface fc1/2fc1/2 is upHardware is Fibre Channel, SFP is short wave laser w/o OFC (SN)Port WWN is 20:02:00:0d:ec:be:0d:40Admin port mode is auto, trunk mode is onsnmp link state traps are enabledPort mode is F, FCID is 0xd40500Port vsan is 1Speed is 4 GbpsRate mode is dedicatedTransmit B2B Credit is 3Receive B2B Credit is 16Receive data field Size is 2112Beacon is turned off5 minutes input rate 0 bits/sec, 0 bytes/sec, 0 frames/sec5 minutes output rate 0 bits/sec, 0 bytes/sec, 0 frames/sec11839 frames input, 476672 bytes0 discards, 0 errors0 CRC, 0 unknown class0 too long, 0 too short161 frames output, 8952 bytes0 discards, 0 errors1 input OLS, 1 LRR, 0 NOS, 33 loop initsswitch2# show interface fc1/3fc1/3 is down (Link failure: Link Reset)Hardware is Fibre Channel, SFP is short wave laser w/o OFC (SN) Port WWN is 20:03:00:0d:ec:be:0d:40Admin port mode is auto, trunk mode is onsnmp link state traps are enabledPort vsan is 1Receive data field Size is 2112Beacon is turned off5 minutes input rate 0 bits/sec, 0 bytes/sec, 0 frames/sec5 minutes output rate 0 bits/sec, 0 bytes/sec, 0 frames/sec966 frames input, 39704 bytes0 discards, 0 errors0 CRC, 0 unknown class0 too long, 0 too short89 frames output, 4424 bytes0 discards, 0 errors1 input OLS, 1 LRR, 0 NOS, 32 loop inits3 output OLS, 1 LRR, 5 NOS, 3 loop initsInterface last changed at Sat Aug 8 19:16:01 2009switch2# show interface fc1/7fc1/7 is upHardware is Fibre Channel, SFP is short wave laser w/o OFC (SN) Port WWN is 20:07:00:0d:ec:be:0d:40Admin port mode is auto, trunk mode is onsnmp link state traps are enabledPort mode is F, FCID is 0xd40000Port vsan is 1Speed is 4 GbpsRate mode is dedicatedTransmit B2B Credit is 8Receive B2B Credit is 16Receive data field Size is 2112Beacon is turned off5 minutes input rate 0 bits/sec, 0 bytes/sec, 0 frames/sec5 minutes output rate 0 bits/sec, 0 bytes/sec, 0 frames/sec296 frames input, 13284 bytes0 discards, 0 errors0 CRC, 0 unknown class0 too long, 0 too short301 frames output, 12820 bytes0 discards, 0 errors3 input OLS, 2 LRR, 1 NOS, 155 loop initsswitch2# show interface fc1/8fc1/8 is upHardware is Fibre Channel, SFP is short wave laser w/o OFC (SN) Port WWN is 20:08:00:0d:ec:be:0d:40Admin port mode is auto, trunk mode is onsnmp link state traps are enabledPort mode is F, FCID is 0xd40200Port vsan is 1Speed is 2 GbpsRate mode is dedicatedTransmit B2B Credit is 3Receive B2B Credit is 16Receive data field Size is 2112Beacon is turned off5 minutes input rate 0 bits/sec, 0 bytes/sec, 0 frames/sec5 minutes output rate 0 bits/sec, 0 bytes/sec, 0 frames/sec1265 frames input, 54276 bytes0 discards, 0 errors0 CRC, 0 unknown class0 too long, 0 too short309 frames output, 15104 bytes0 discards, 0 errors6 input OLS, 4 LRR, 0 NOS, 92 loop inits1、配置VSANVSAN的作用是隔离每一个交换机端口:switch2# conf tEnter configuration commands, one per line. End with CNTL/Z. switch2(config)# vsan databaseswitch2(config-vsan-db)# vsan 4000 name sw2switch2(config-vsan-db)# vsan 4000 interface fc1/1Traffic on fc1/1 may be impacted. Do you want to continue? (y/n) y switch2(config-vsan-db)# vsan 4000 interface fc1/2Traffic on fc1/2 may be impacted. Do you want to continue? (y/n) y switch2(config-vsan-db)# vsan 4000 interface fc1/7Traffic on fc1/7 may be impacted. Do you want to continue? (y/n) y switch2(config-vsan-db)# vsan 4000 interface fc1/8Traffic on fc1/8 may be impacted. Do you want to continue? (y/n) y switch2(config-vsan-db)# endswitch2# show vsan 4000 membershipvsan 4000 interfaces:fc1/1 fc1/2 fc1/7 fc1/82、创建ZONE并且添加ZONE成员。
光纤交换机配置手册
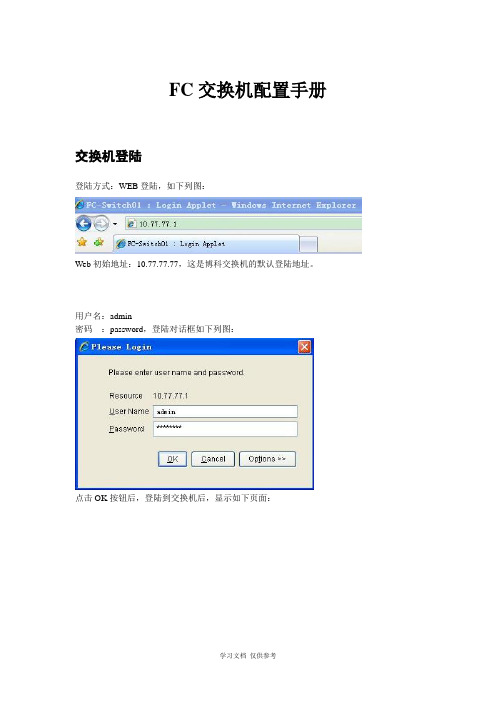
FC交换机配置手册交换机登陆登陆方式:WEB登陆,如下列图:Web初始地址:10.77.77.77,这是博科交换机的默认登陆地址。
用户名:admin密码:password,登陆对话框如下列图:点击OK按钮后,登陆到交换机后,显示如下页面:在下面这个图中,显示了交换机的一些设置参数。
在下面这个图中,显示交换机硬件等的状态。
例如图中中上半部分表示交换机的端口,绿色表示已经端口正常,并已经与客户端建立通信。
表示交换机电源状态,绿色指示灯表示电源正常。
下面这个图,这个图中的按钮,均为交换机的一些功能键,可查看交换机状态,以及进行交换机功能设置等。
交换机zoing划分方法点击左下角进入zoing划分页面:Zoing划分主要可按照两种方式进行:1.按照端口划分:即把同一个链路上的设备在光纤交换机上的端口划分为一个Zoing。
这种划分方式更换交换机端口后,Zoing会改变,需要重新划分。
2.按照WWn划分,即把同一个链路上的设备的WWN号〔每一个光纤卡对应唯一一个WWN号〕划分为一个Zoing,这种划分方式更换客户端的光纤卡后,Zoing会改变,需要重新划分。
我们采用的为第二种方式,即按照WWN划分。
点击红框中的按键”zone”:,即可进行zoing的划分。
上图为zoing的一些功能按键,其中:New Zong :建立新的zoingDelete :删除一个已经建立的zoingRename :重命名一个Zoing。
Copy :拷贝一个zoing。
点击New Zoing ,即可创建一个zoing。
点击后出现如下页面:,输入Zoing名称后,将WWN号添加到右侧空白处:点开图中交换机的端口上的加号,即显示出下一级目录,选中图中的EMULEX CORPORATION 10:00:00:00:C9:72:9E:58,点击中间的添加到右侧。
即将选中设备的WWN号添加到这个Zoing中。
点击这个图中红框内的按钮,进入Zone配置页面:在第一次进入这个页面时需要新建一个Zone config,以后进入就不需要建立了。
MDS_9124光纤交换机配置手册
Cisco MDS 9124交换机配置手册北京众志和达信息技术有限公司2010年12月版本控制目录版本控制 (2)1 MDS 初始化配置 (4)1.1配置串口登录 (4)1.2 License 配置 (4)1.3配置管理地址 (6)1.4配置telnet登录 (6)1.5初始化端口类型 (7)1.6配置FC ID (8)2配置MDS Zone (10)2.1配置VSAN (10)2.2配置Domain IDs (11)2.4配置Zone (13)2.5创建设备别名 (14)2.3配置Zoneset (15)2.6激活Zoneset (16)2.7保存配置 (16)2.8实例演示 (17)3 MDS 维护 (18)3.1常用命令查询 (18)3.2使用默认zone (19)附件:配置NPV (20)Cisco MDS 9000系列交换机的管理和配置可以使用CLI和基于GUI的Cisco MDS 9000 Fabric Manager两种方式进行管理。
本文主要介绍了Cisco MDS 9124交换机在CLI方式下配置Zone的方法和步骤,该方法也同样适用于使用Cisco MDS NX-OS Release 4.1版本的其它9000系列交换机。
1 MDS 初始化配置1.1配置串口登录Cisco MDS 9000系列交换机在默认没有配置的情况下,只能通过串口进行参数设置如右图所示:初次启动并进入MDS 交换机之后,会出现“Would you liketo enter the basic configuration dialog (yes/no): yes”提示,这里表示是否需要启动向导模式配置该交换机,此处输入“NO”。
然后根据提示输入管理员密码。
1.2 License 配置Cisco MDS 交换机不同于Brocade交换机之处为Cisco MDS 交换机可以单独为某个指定的端口配置license,暂时不使用的端口可以释放端口的license。
思科Cisco交换机配置手册配置教程
思科Cisco交换机配置手册配置教程配置接口特性这一章详细说明交换机上的接口和描述怎么配置他们。
这章有以下这些内容:●理解接口类型●使用接口命令●配置二层接口●监控和维护第二层接口●配置第三从接口注意:需要完整的有关该章的语法和应用信息,请参考Catalyst 3550 Multilayer Switch Command Reference和Cisco IOS Interface Command Referencefor Release 12.1.理解接口类型这个部分描述了不同的接口类型,以及其它章节所包括的详细配置这些接口的一些参考内容。
其他章节描述了物理接口特性的配置过程。
这部分包括:基于端口的VLAN (Port-Based VLANs)交换端口(Switch Ports)以太网通道端口组(EtherChannel Port Groups)交换虚拟接口(Switch Virtual Interfaces)被路由端口(Routed Ports)连接接口(Connecting Interfaces)基于端口的VLAN (Port-based Vlans)一个Vlan是一个按功能、组、或者应用被逻辑分段的交换网络,并不考虑使用者的物理位置。
要更多关于Vlan的信息请看“Configuring VLANS”。
一个端口上接受到的包被发往属于同一个Vlan的接收端口。
没有一个第三层的设备路由Vlan间的流量,不同Vlan的网络设备无法通讯。
为了配置普通范围(Normal-range) Vlan(Vlan IDs 1-1005),使用命令:config-vlan模式(global) vlan vlan-id或vlan-configuration模式(exec) vlan database针对Vlan ID 1-1005的vlan-configration模式被保存在vlan数据库中。
为配置扩展范围(extended-range)Vlans (Vlan ID 1006-4094),你必须使用config-vlan模式,并把VTP的模式设为transparent透明模式。
Cisco思科光纤交换机配置说明.doc
Cisco思科光纤交换机配置说明Cisco思科光纤交换机配置说明的方法1. 初始化信息首次设置,必须通过console进行连接(需要U口转DB9针的接口线,专门卖接口线的有卖大约30元),然后进行初始化设计,以后设定IP后可通过LAN进行登陆具体步骤:(红色字体部分着重注意,需要进行设置,大部分按照默认设置即可,而且设置的部分进入管理工具软件可以更改) ---- System Admin Account Setup ----Enter the password for admin : passwordConfirm the password for admin : password--- Basic System Configuration Dialog ---This setup utility will guide you through the basic configuration of the system. Setup configures only enough connectivity for management of the system.Press Enter at any time to skip any dialog. Use ctrl-c at anytime to skip the remaining dialogs.Would you like to enter the basic configuration dialog (yes/no): y Create another login account (yes/no) [n]:Configure read-only SNMP community string (yes/no) [n]: Configure read-write SNMP community string (yes/no) [n]:Enter the switch name: Pxx-MDS-x (where xx is your pod number and x is the switch number; for example:P01-MDS-1)Continue with Out-of-band (mgmt0) management configuration? (yes/no) [y]:Mgmt0 IPv4 address : 10.0.x.y (where x is your pod number and y is 5 for MDS-1 and 3 for MDS-2)(客户)0.16Mgmt0 IPv4 netmask : 255.255.255.0Configure the default gateway? (yes/no) [y]:IPv4 address of the default gateway : 10.0.x.254 (where x is your pod number)Configure advanced IP options? (yes/no) [n]:Enable the telnet service? (yes/no) [y]:Enable the ssh service? (yes/no) [n]:Configure the ntp server? (yes/no) [n]:Configure default switchport interface state (shut/noshut) [shut]: (注意一下)noshutConfigure default switchport trunk mode (on/off/auto) [on]:Configure default zone policy (permit/deny) [deny]:Enable full zoneset distribution (yes/no) [n]:NOTE:初始设定的配置对新的VSAN起作用,即原始VSAN1无这些配置解决办法:1 zone default-zone permit VSAN2 新建NEW VSAN2 将port转移VSAN2里面。
CiscoMDS设备配置安装手册完整

CiscoMDS设备配置安装手册完整(可以直接使用,可编辑优质资料,欢迎下载)分行IT底子设施资源整合项目Cisco MDS 9513设备配置安装手册——VER 1.0中国建立银行信息技能治理部SFB项目组2007年7月文档信息文档修订记载目录第1章功效概述 (3)1.1C ISCO MDS9513构建存储网络方案 (3)1.2C ISCO MDS9513设备简介 (6)第2章园地要求 (15)2.1电源和冷却装置 (15)2.2机房情况要求 (15)2.3物理规格 (15)2.4设备承重要求 (15)第3章组件说明 (16)3.1C ISCO MDS9513资源列表 (16)3.2C ISCO MDS9513端口列表 (18)3.3B LADE SERVER 连接 (18)第4章组件安装 (20)4.1C ISCO MDS9513安装配置原则 (20)4.2C ISCO MDS9513配置操纵步调 (21)第5章运营维护 (37)5.1C ISCO MDS9513软件版本升级 (37)5.2电源和电扇状态说明 (37)5.3线卡事情状态说明 (37)5.4引擎事情状态说明 (38)5.5C ISCO MDS9513常用功效排错 (38)5.6C ISCO MDS9513排错东西排错 (39)第1章功效概述1.1 Cisco MDS 9513 构建存储网络方案数据中心的SAN网络接纳Cisco MDS 9513互换机构架存储网络,连接后端存储盘阵和主机、办事器及磁带库系统。
Cisco公司的MDS9513设备为模块化、高密度、高性价比的智能多层存储网络光纤互换机,每台互换机提供可凭据需要配置24端口或48端口1/2/4Gb FC板卡,MDS9513单机箱最达提供528个模块化配置的FC端口。
极具竞争力的经济性:Cisco MDS 9513 设备接纳优化的端口连接设计,可提供4G2G、1G 速率自适应FC端口。
光纤交换机级联配置文档CISCO
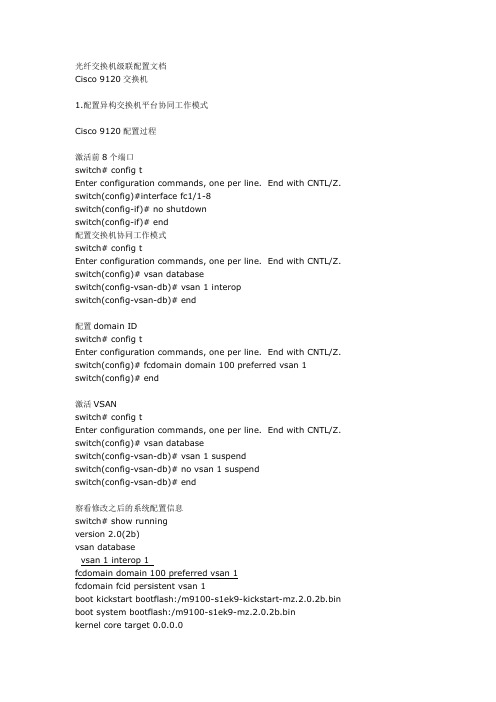
光纤交换机级联配置文档Cisco 9120交换机1.配置异构交换机平台协同工作模式Cisco 9120配置过程激活前8个端口switch# config tEnter configuration commands, one per line. End with CNTL/Z. switch(config)#interface fc1/1-8switch(config-if)# no shutdownswitch(config-if)# end配置交换机协同工作模式switch# config tEnter configuration commands, one per line. End with CNTL/Z. switch(config)# vsan databaseswitch(config-vsan-db)# vsan 1 interopswitch(config-vsan-db)# end配置domain IDswitch# config tEnter configuration commands, one per line. End with CNTL/Z. switch(config)# fcdomain domain 100 preferred vsan 1switch(config)# end激活VSANswitch# config tEnter configuration commands, one per line. End with CNTL/Z. switch(config)# vsan databaseswitch(config-vsan-db)# vsan 1 suspendswitch(config-vsan-db)# no vsan 1 suspendswitch(config-vsan-db)# end察看修改之后的系统配置信息switch# show runningversion 2.0(2b)vsan databasevsan 1 interop 1fcdomain domain 100 preferred vsan 1fcdomain fcid persistent vsan 1boot kickstart bootflash:/m9100-s1ek9-kickstart-mz.2.0.2b.bin boot system bootflash:/m9100-s1ek9-mz.2.0.2b.binkernel core target 0.0.0.0kernel core limit 1snmp-server user admin network-admin auth md5 0xeec64ba2afbe9b65e13b23882ac6ae05priv 0xeec64ba2afbe9b65e13b23882ac6ae05 localizedkeyusername admin password 5 $1$V3smTQpb$MTvub69DkVBxdCt9BsEDB1 role network-admincallhomeswitch-priority 7snmp-server enable traps licenseinterface mgmt0ip address 192.168.70.139 255.255.255.0interface fc1/1no shutdowninterface fc1/2no shutdowninterface fc1/3no shutdowninterface fc1/4no shutdowninterface fc1/5no shutdowninterface fc1/6no shutdowninterface fc1/7no shutdowninterface fc1/8no shutdowninterface fc1/9interface fc1/10interface fc1/11interface fc1/12interface fc1/13interface fc1/14interface fc1/15interface fc1/16interface fc1/17interface fc1/18interface fc1/19interface fc1/20switch#察看端口连接状态信息switch# show interface brief------------------------------------------------------------------------------- Interface Vsan Admin Admin Status FCOT Oper Oper Port Mode Trunk Mode Speed ChannelMode (Gbps)-------------------------------------------------------------------------------fc1/1 1 auto on up swl F 2 --fc1/2 1 auto on up swl F 2 --fc1/3 1 auto on up swl E 2 --fc1/4 1 auto on notConnected swl -- --fc1/5 1 FX -- notConnected swl -- --fc1/6 1 FX -- notConnected swl -- --刀片中心光纤交换机模块配置禁止交换机brocadessm:USERID> switchdisable修改Domain IDbrocadessm:USERID> configureConfigure...Fabric parameters (yes, y, no, n): [no] yesDomain: (1..239) [1] 99R_A_TOV: (4000..120000) [10000]E_D_TOV: (1000..5000) [2000]WAN_TOV: (0..30000) [0]MAX_HOPS: (7..19) [7]Data field size: (256..2112) [2112]Sequence Level Switching: (0..1) [0]Disable Device Probing: (0..1) [0]Suppress Class F Traffic: (0..1) [0]Switch PID Format: (1..2) [1]Per-frame Route Priority: (0..1) [0]Long Distance Fabric: (0..1) [0]BB credit: (1..27) [16]Insistent Domain ID Mode (yes, y, no, n): [no]Virtual Channel parameters (yes, y, no, n): [no]Zoning Operation parameters (yes, y, no, n): [no]RSCN Transmission Mode (yes, y, no, n): [no]Arbitrated Loop parameters (yes, y, no, n): [no]System services (yes, y, no, n): [no]Portlog events enable (yes, y, no, n): [no]ssl attributes (yes, y, no, n): [no]http attributes (yes, y, no, n): [no]snmp attributes (yes, y, no, n): [no]rpcd attributes (yes, y, no, n): [no]cfgload attributes (yes, y, no, n): [no]webtools attributes (yes, y, no, n): [no]WARNING: The domain ID will be changed. The port level zoning may be affectedbrocadessm:USERID> msPlMgmtDeactivateSwitch is in Offline state.修改协同工作模式brocadessm:USERID> interoper mode 1The switch effective configuration will be lost when the operating mode is changed; do you want to continue? (yes, y, no, n): [no] yInteropmode is enabledNote: It is recommended that you reboot this switch for the new change to take effect.重新引导交换机brocadessm:USERID> fastbootBroadcast message from root (pts/0) Tue Jun 13 10:07:45 2006...The system is going down for reboot NOW !!USERIDPassword:Please change your passwords now.Use Control-C to exit or press 'Enter' key to proceed.Password was not changed. Will prompt again at next loginuntil password is changed.brocadessm:USERID>brocadessm:USERID> switchenable察看修改配置之后的交换机状态brocadessm:USERID> switchshowswitchName: brocadessmswitchType: 22.0switchState: OnlineswitchMode: InteropswitchRole: PrincipalswitchDomain: 99switchId: fffc63switchWwn: 10:00:00:05:1e:02:78:c6zoning: OFFswitchBeacon: OFFArea Port Media Speed State==============================0 0 id 2G No_Light1 1 cu 2G Online F-Port 21:00:00:14:5e:24:a9:042 2 cu 2G Online F-Port 21:00:00:14:5e:24:a9:363 3 cu 2G Online F-Port 21:00:00:14:5e:24:a9:7a4 4 cu 2G Online F-Port 21:00:00:14:5e:24:a9:b65 5 cu 2G Online F-Port 21:00:00:14:5e:24:a9:286 6 cu 2G Online F-Port 21:00:00:14:5e:24:aa:f67 7 cu 2G Online F-Port 21:00:00:14:5e:24:aa:f08 8 cu 2G Online F-Port 21:00:00:14:5e:24:a9:389 9 cu 2G No_Light10 10 cu 2G No_Light11 11 cu 2G No_Light12 12 cu 2G No_Light13 13 cu 2G No_Light14 14 cu 2G No_Light15 15 id 2G Online E-Port 20:01:00:0d:ec:06:b4:41 (downstream)2.划分zoneCisco 9120划分zone察看fabric连接设备port wwn 信息switch# show fcns database vsan 1--------------------------------------------------------------------------FCID TYPE PWWN (VENDOR) FC4-TYPE:FEATURE--------------------------------------------------------------------------0x630100 N 21:00:00:14:5e:24:a9:04 scsi-fcp0x630200 N 21:00:00:14:5e:24:a9:36 scsi-fcp0x630300 N 21:00:00:14:5e:24:a9:7a scsi-fcp0x630400 N 21:00:00:14:5e:24:a9:b6 scsi-fcp0x630500 N 21:00:00:14:5e:24:a9:28 scsi-fcp0x630600 N 21:00:00:14:5e:24:aa:f6 scsi-fcp0x630700 N 21:00:00:14:5e:24:aa:f0 scsi-fcp0x630800 N 21:00:00:14:5e:24:a9:38 scsi-fcp0x640000 N 20:07:00:a0:b8:21:19:9f (SymBios) scsi-fcp:both0x640100 N 20:06:00:a0:b8:21:19:9f (SymBios) scsi-fcp:bothTotal number of entries = 10创建zone分别创建2个zone,前4个刀片服务器与DS4300 2个控制器组成的zone,第4到第8个刀片服务器与DS4300 2个控制器组成的zone。
Cisco交换机配置教程

不同型号Cisco交换机特点
适用于中型企业或大型企业分支 机构,提供增强的安全、QoS和 多层交换功能。
适用于大型数据中心和云计算环 境,提供极高的端口密度、低延 迟和先进的虚拟化功能。
2960系列 3750系列 4500系列 Nexus系列
适用于中小型企业分支机构,提 供基本的安全和QoS功能。
Cisco交换机支持命令缩写,可输入部分字母后按Tab键自动补全命令。
查看设备状态和信息
查看设备型号和版本
使用“show version”命令查看交 换机的型号、版本号、硬件配置等信 息。
查看接口状态
使用“show interfaces”命令查看 交换机所有接口的状态、配置和统计 信息。
查看MAC地址表
拓展学习资源推荐(书籍、网站等)
01
02
03
04
书籍推荐
《Cisco交换机配置与管 理》、《网络工程师必 读——交换机/路由器配 置与管理》等。
网站推荐
Cisco官方网站、华为企 业网络学院、网络技术 论坛等。
在线课程推荐
Coursera、网易云课堂、 51CTO学院等在线教育 平台上提供的相关课程。
验证配置
使用`show ip route`命令查看路由表,确认静态路由已正 确添加。
动态路由协议简介及配置示例
动态路由协议概述
动态路由协议能够自动学习和更新网络拓 扑,常见的动态路由协议包括RIP、EIGRP、 OSPF等。
验证配置
使用`show ip ospf neighbor`和`show ip ospf route`命令查看OSPF邻居和路由信息。
应用ACL到接口 将定义好的ACL规则应用到交换机的具体接口上, 实现对进出接口数据流的访问控制。
CiscoMDS光纤交换机安装配置手册

CISCO MDS9124光纤交换机安装配置手册版本 v1.0二零零九年七月神州数码(中国)技术中心文档控制更改记录审阅发布目录目录 (3)第1章介绍 (4)第2章初始化光纤交换机 (5)第3章 Fabric Manager (7)3.1、软件介绍 (7)3.2、软件安装 (10)第4章 zone划分 (14)4.1、 VSAN概念 (14)4.2、 zone配置过程 (17)4.3、命令列表 (27)第1章 CISCO MDS9124介绍Cisco® MDS 9124 24端口多层光纤阵列交换机拥有24个端口,支持4、2和1 Gbps 速率,在紧凑的1机架单元(1RU)机型中,以廉宜价格提供了灵活性、高可用性、安全性和易用性,实现了出色的价值。
Cisco MDS 9124能以8端口的增量,灵活地从8端口扩展到24端口,可满足部门存储局域网(SAN)交换机和企业SAN 中边缘交换机的密度需求。
Cisco MDS 9124支持快速配置和任务向导,能够快速、简便地部署在任何规模的网络中。
它采用了Cisco MDS 9000 SAN-OS 软件,包括先进的存储网络特性和功能,与Cisco MDS 9500系列多层导向器和Cisco MDS 9200系列多层光纤阵列交换机兼容,在核心-边缘部署中提供了透明的端到端服务交付能力。
端口介绍: 10/100-Mbps Ethernet 10/100-Mbps Ethernet management port + console port management port + console port 24 auto-sensing 4-Gbps FC 24 auto-sensing 4-Gbps FC ports in 4-port groups ports in 4-port groups 256MB compact flash, 256MB compact flash, 512MB SDRAM512MB SDRAMDual hot-swappable Dual hot-swappable power supplies power supplies 3 fixed fans + 1 fan per 3 fixed fans + 1 fan per power supply power supply第2章初始化光纤交换机MDS9124光纤交换机加电需要进行初始化设置,本身的Management Port没有默认的IP,需要初始化的时候设置,用串口线连接Console Port,具体的设置过程如下:--- Basic System Configuration Dialog ---This setup utility will guide you through the basicconfiguration of the system. Setup configures only enoughconnectivity for management of the system.Press Enter in case you want to skip any dialog. Use ctrl-c atanytime to skip away remaining dialogs.Would you like to enter the basic configuration dialog (yes/no):yEnter the password for "admin" : adminCreate another login account (yes/no) [n]: nConfigure SNMPv3 Management parameters (yes/no) [y]: ySNMPv3 user name [admin]: adminSNMPv3 user authentication password : admin123The same password will be used for SNMPv3 privacy as well.Configure read-only SNMP community string (yes/no) [n]:<Enter>Configure read-write SNMP community string (yes/no) [n]:<Enter>Enter the switch name: mds9124-1 (where NNN is your switch modeland X is your pod number; for example, mds9506-1)Continue with Out-of-band (mgmt0) management configuration?(yes/no) [y]: yMgmt0 IP address : 192.168.1.46 (Use the IP address of yourswitch from Table 1 in Appendix B of the lab reference guidecalled “Accessing the Remote Lab”. You can also derive the IPaddress of your switch by replacing X with your pod number, andY with 3 [if you are working on a MDS 9216) or 5 (if you areworking on the MDS 9506].)Mgmt0 IP netmask : 255.255.255.0Continue with In-band (vsan1) management configuration?(yes/no) [n]: <Enter>Enable the ip routing capabilities? (yes/no) [y]: yConfigure static route? (yes/no) [y]: nConfigure the default network? (yes/no) [y]: nConfigure the default gateway? (yes/no) [y]: <Enter>IP address of the default gateway : 192.168.1.1(where X is your pod number)Configure the DNS IP address? (yes/no) [n]: <Enter>Configure the default domain name? (yes/no) [n]: <Enter> Enable the telnet service? (yes/no) [y]: <Enter>Enable the ssh service? (yes/no) [n]: <Enter>Configure the ntp server? (yes/no) [n]: <Enter>Configure default switchport interface state (shut/noshut) [shut]: <Enter>Configure default switchport trunk mode (on/off/auto) [on]: <Enter>Configure default zone policy (permit/deny) [deny]: <Enter> Enable full zoneset distribution (yes/no) [n]: <Enter>The following configuration will be applied:username admin password admin role network-adminsnmp-server user admin network-admin auth md5 admin123 priv admin123switchname mds9214-1interface mgmt0ip address 192.168.1.46 255.255.255.0no shutdownip default-gateway 192.168.1.1telnet server enableno ssh server enablesystem default switchport shutdownsystem default switchport trunk mode onno zone default-zone permit vsan 1-4093no zoneset distribute full vsan 1-4093Would you like to edit the configuration? (yes/no) [n]: <Enter> Use this configuration and save it? (yes/no) [y]: <Enter>第3章Fabric Manager3.1、软件介绍简介Cisco® Fabric Manager是一种基于Web、易于使用的响应性应用,能够用集成式方法实现交换机和网络管理,从而简化存储局域网(SAN)中Cisco MDS 9000系列交换机的管理。
C 系列光纤交换机 - Cisco MDS san switch 中常用的命令

C 系列光纤交换机- Cisco MDS san switch 中常用的命令1. 通过以下命令可以查看接口信息:Cisco9124e# show interface brief-------------------------------------------------------------------------------Interface Vsan Admin Admin Status SFP Oper Oper PortMode Trunk Mode Speed ChannelMode (Gbps)------------------------------------------------------------------------------- bay1 2 auto on up -- F 4 -- bay2 1 auto on extDisabled -- -- -- bay3 1 auto on down -- -- -- bay4 1 auto on extDisabled -- -- -- bay5 1 auto on extDisabled -- -- -- bay6 1 auto on extDisabled -- -- -- bay7 1 auto on extDisabled -- -- -- bay8 1 auto on extDisabled -- -- -- bay9 1 auto on extDisabled -- -- -- bay10 1 auto on extDisabled -- -- -- bay11 1 auto on down -- -- -- bay12 1 auto on extDisabled -- -- -- bay13 1 auto on extDisabled -- -- -- bay14 1 auto on extDisabled -- -- -- bay15 1 auto on extDisabled -- -- -- bay16 1 auto on extDisabled -- -- ---------------------------------------------------------------------------------Interface Vsan Admin Admin Status SFP Oper Oper PortMode Trunk Mode Speed ChannelMode (Gbps)------------------------------------------------------------------------------ ext1 2 auto on up swl FL 4 -- ext2 2 auto on up swl FL 4 -- ext3 1 auto on sfpAbsent -- -- -- ext4 1 auto on sfpAbsent -- -- -- ext5 1 auto on sfpAbsent -- -- -- ext6 1 auto on sfpAbsent -- -- -- ext7 1 auto on sfpAbsent -- -- -- ext8 1 auto on sfpAbsent -- -- --------------------------------------------------------------------------------- Interface Status Speed(Gbps)------------------------------------------------------------------------------- sup-fc0 up 1 ------------------------------------------------------------------------------- Interface Status IP Address Speed MTU------------------------------------------------------------------------------- mgmt0 up 16.157.125.51/22 100 Mbps 15002. 查看VSAN的情况:Cisco9124e# show fcdomain domain-listVSAN 1 Number of domains: 1Domain ID WWN--------- -----------------------0x64(100) 20:01:00:0d:ec:80:f6:c1 [Local] [Principal]VSAN 2 Number of domains: 1Domain ID WWN--------- -----------------------0x11(17) 20:02:00:0d:ec:80:f6:c1 [Local] [Principal]3. 查看zone的配置:Cisco9124e# show zone status vsan 1VSAN: 1 default-zone: deny distribute: active only Interop: default mode: basic merge-control: allowsession: nonehard-zoning: enabled broadcast: unsupportedDefault zone:qos: none broadcast: unsupported ronly: disabledFull Zoning Database :DB size: 4 bytesZonesets:0 Zones:0 Aliases: 0Active Zoning Database :Database Not AvailableStatus:Cisco9124e# show zone status vsan 2VSAN: 2 default-zone: permit distribute: active only Interop: default mode: basic merge-control: allowsession: nonehard-zoning: enabled broadcast: unsupportedDefault zone:qos: none broadcast: unsupported ronly: disabledFull Zoning Database :DB size: 4 bytesZonesets:0 Zones:0 Aliases: 0Active Zoning Database :Database Not Available Status:4. 配置zone:Cisco9124e# conf tEnter configuration commands, one per line. End with CNTL/Z. Cisco9124e(config)# zone name zone2 vsan 2Cisco9124e(config-zone)# member fwwn 20:10:00:0d:ec:80:f6:c0 Cisco9124e(config-zone)# member fwwn 20:0a:00:0d:ec:80:f6:c0 Cisco9124e(config-zone)# member fwwn 20:0e:00:0d:ec:80:f6:c0 Cisco9124e(config-zone)# exitCisco9124e(config)# zoneset name zoneset2 vsan 2Cisco9124e(config-zoneset)# member zone2Cisco9124e(config-zoneset)# exitCisco9124e(config)# zoneset activate name zoneset2 vsan 2 Zoneset activation initiated. check zone statusCisco9124e(config)# exitCisco9124e# show zoneset activezoneset name zoneset2 vsan 2zone name zone2 vsan 2* fcid 0x110200 [fwwn 20:10:00:0d:ec:80:f6:c0]* fcid 0x1100ef [fwwn 20:0a:00:0d:ec:80:f6:c0]* fcid 0x1101ef [fwwn 20:0e:00:0d:ec:80:f6:c0]zone name $default_zone$ vsan 2Cisco9124e#。
Cisco_MDS_9124光纤交换机安装配置手册

CISCO MDS9124光纤交换机装置配置手册之欧侯瑞魂创作二零零九年七月神州数码(中国)技术中心文档控制更改记录审阅发布目录目录3第1章介绍4第2章初始化光纤交换机4第3章 Fabric Manager63.1、软件介绍63.2、软件装置10第4章 zone划分144.1、 VSAN概念144.2、 zone配置过程174.3、命令列表27第1章CISCO MDS9124介绍Cisco® MDS 9124 24端口多层光纤阵列交换机拥有24个端口,支持4、2和1 Gbps 速率,在紧凑的1机架单位(1RU)机型中,以廉宜价格提供了灵活性、高可用性、平安性和易用性,实现了超卓的价值.Cisco MDS 9124能以8端口的增量,灵活地从8端口扩展到24端口,可满足部份存储局域网(SAN)交换机和企业SAN 中边缘交换机的密度需求.Cisco MDS 9124支持快速配置和任务向导,能够快速、简便地布置在任何规模的网络中.它采纳了Cisco MDS 9000 SAN-OS 软件,包括先进的存储网络特性和功能,与Cisco MDS 9500系列多层导向器和Cisco MDS 9200系列多层光纤阵列交换机兼容,在核心-边缘布置中提供了透明的端到端服务交付能力.端口介绍: 10/100-Mbps Ethernet 10/100-Mbps Ethernet management port + console port management port + console port 24 auto-sensing 4-Gbps FC 24 auto-sensing 4-Gbps FC ports in 4-port groups ports in 4-port groups 256MB compact flash, 256MB compact flash, 512MB SDRAM512MB SDRAMDual hot-swappable Dual hot-swappable power supplies power supplies 3 fixed fans + 1 fan per 3 fixed fans + 1 fan per power supply power supply第2章初始化光纤交换机MDS9124光纤交换机加电需要进行初始化设置,自己的Management Port 没有默认的IP,需要初始化的时候设置,用串口线连接Console Port,具体的设置过程如下:--- Basic System Configuration Dialog ---This setup utility will guide you through the basicconfiguration of the system. Setup configures only enoughconnectivity for management of the system.Press Enter in case you want to skip any dialog. Use ctrl-cat anytime to skip away remaining dialogs.Would you like to enter the basic configuration dialog(yes/no): yEnter the password for "admin" : adminCreate another login account (yes/no) [n]: nConfigure SNMPv3 Management parameters (yes/no) [y]: ySNMPv3 user name [admin]: adminSNMPv3 user authentication password : admin123The same password will be used for SNMPv3 privacy as well.Configure read-only SNMP community string (yes/no) [n]:<Enter>Configure read-write SNMP community string (yes/no) [n]:<Enter>Enter the switch name: mds9124-1(where NNN is your switchmodel and X is your pod number; for example, mds9506-1)Continue with Out-of-band (mgmt0) management configuration?(yes/no) [y]: yMgmt0 IP address : (Use the IP address of your switch fromTable 1 in Appendix B of the lab reference guide called“Accessing the Remote Lab”. You can also derive the IPaddress of your switch by replacing X with your pod number,and Y with 3 [if you are working on a MDS 9216) or 5 (ifyou are working on the MDS 9506].)Mgmt0 IP netmask :Continue with In-band (vsan1) management configuration?(yes/no) [n]: <Enter>Enable the ip routing capabilities? (yes/no) [y]: yConfigure static route? (yes/no) [y]: nConfigure the default network? (yes/no) [y]: nConfigure the default gateway? (yes/no) [y]: <Enter>IP address of the default gateway : (where X is your pod number)Configure the DNS IP address? (yes/no) [n]: <Enter>Configure the default domain name? (yes/no) [n]: <Enter>Enable the telnet service? (yes/no) [y]: <Enter>Enable the ssh service? (yes/no) [n]: <Enter>Configure the ntp server? (yes/no) [n]: <Enter>Configure default switchport interface state (shut/noshut)[shut]: <Enter>Configure default switchport trunk mode (on/off/auto) [on]:<Enter>Configure default zone policy (permit/deny) [deny]:<Enter>Enable full zoneset distribution (yes/no) [n]: <Enter>The following configuration will be applied:username admin password admin role network-adminsnmp-server user admin network-admin auth md5 admin123 privadmin123switchname mds9214-1interface mgmt0ip addressno shutdownip default-gatewaytelnet server enableno ssh server enablesystem default switchport shutdownsystem default switchport trunk mode onno zone default-zone permit vsan 1-4093no zoneset distribute full vsan 1-4093Would you like to edit the configuration? (yes/no) [n]:<Enter>Use this configuration and save it? (yes/no) [y]: <Enter> 第3章Fabric Manager3.1、软件介绍简介Cisco® Fabric Manager是一种基于Web、易于使用的响应性应用,能够用集成式方法实现交换机和网络管理,从而简化存储局域网(SAN)中Cisco MDS 9000系列交换机的管理.Cisco Fabric Manager能够为存储管理员提供网络级管理功能,包括识别、多交换机配置、连续网络监控和故障排除.这种功能强年夜的方法能够年夜年夜缩短交换机的设置时间,提高整个网络的可靠性,并提供丰富的诊断信息,帮手解决网络问题和配置纷歧致性.利用Cisco Fabric Manager的直观图形界面,存储管理员可以对交换机配置进行比较,对Cisco MDS 9000系列交换机进行配置战略检查,为通报第三方毛病管理应用设置阈值,实时检查单台设备的统计数据和总体统计数据,以及分析历史性能统计数据等.所有这些功能都可以通过一个平安的界面执行,而且几乎能够从任何位置远程管理Cisco Fabric Manager的特点嵌入交换机的Java应用——将交换机与网络管理集成到随每台Cisco MDS 9000系列交换机供应的一个性能优化工具中.矩阵可视化——执行集中式自动识别,并显示存储网络拓扑、连接和区域/虚拟存储局域网(VSAN)重点标注,使相关人员能够快速了解网络状况和发现配置问题.多个视图,包括矩阵、设备和总结——简化多台交换机的配置和监控,支持配置复制.全面配置多台交换机——提供集成式网络、交换机和端口级配置,简化区域、VSAN、IP光纤通道(FCIP)、小型计算机系统接口(iSCSI)、IBM光纤连接(FICON)和智能服务配置.灵活监控和警报——以表格和图形格式显示实时和历史性能监控统计数据,基于阈值的警报的配置,包括呼叫抵家,有利于相关人员对例外情况作出快速响应.历史性能监控——提供表格和图形陈说,显示交换机间链路(ISL)上、主机和存储连接上以及某些光纤通道源站点和目标站点之间的每日、每周、每月和每年流量.提供网络级统计数据的前10名陈说和每日汇总陈说能年夜年夜简化网络热点分析.强年夜的配置分析功能——执行区域合并分析和配置检查,简化问题的解决过程,增进网络胜利合并,并自动解决配置纷歧致性问题.网络诊断——用Fibre Channel Ping和Traceroute检测网络和交换机的把持状况,使管理员能够快速发现网络连接和性能问题.全面的平安性——利用简单网络管理协议第3版本(SNMP v3)、平安壳协议(SSH)和基于角色的接入控制(RBAC)防止非授权管理接入.设备识别Cisco Fabric Manager使用基于标准的协议,自动识别所有设备,并将一个或多个网络互相连接起来.所有可用的交换机、主机总线适配器(HBA)和存储设备都可以被识别到.识别信息包括设备名称、软件版本号、厂商、ISL、PortChannels和VSAN等.拓扑映射Cisco Fabric Manager能够依照设备识别信息显示拓扑图,从而提供多个网络的准确视图.用户只需在界面上拖动鼠标,就可以修改拓扑图的图标安插,还可以突出显示某些配置信息,例如超越使用阈值的区域、VSAN和ISL.灵活的视图Cisco Fabric Manager提供的集成式网络和交换机管理方法,所有交换机统计数据和标准配置参数都可以通过矩阵视图、设备视图和总体视图显示出来.把持员只需点击一下鼠标,就可以看到相关的视图和配置参数.状态和性能监控Cisco Fabric Manager能够利用SNMP陷阱和设备抽查为Cisco MDS 9000系列提供连续的状态和事件监控.新设备将自动添加到拓扑图中,并清楚地注明对现有设备和互联有不良影响的各种修改,以便快速发现和解决问题.为消除冗余记录项,还将对网络事件进行过滤.利用颜色编码和分类功能,还可以进一步增强关键事件记录信息的可访问性.事件管理先进的事件管理配置是Cisco Fabric Manager的另一个重要特性.远程监控(RMON)警报阈值、事件过滤和呼叫抵家设置增强了发现问题和通报问题的能力.另外,这些警报还可以发送给第三方毛病和警报应用,以实现呼叫派遣、故障单和审计跟踪功能.诊断Cisco Fabric Manager包括了许多业界领先的强年夜光纤通道网络诊断工具.这些诊断工具称为Fibre Channel Traceroute和Fibre Channel Ping,可以提供全面的连接分析.利用Traceroute,可以跟踪光纤通道网络内从任意两点开始的路径.逐跳延迟计算以表格方式显示,路径中的交换机在拓扑图中重点标注,以帮手把持员快速发现路由问题.平安性Cisco Fabric Manager为Cisco MDS 9000系列提供了很多平安办法,以防止非授权管理访问和欺诈,包括RADIUS认证支持、SNMPv3、SSH和RBAC.另外,VSAN和区域管理也可以增强网络的平安性.高级特性Cisco Fabric Manager支持许多高级特性,包括全球名称、域名参数和名称服务器,利用这些特性,管理员能够轻松地监控和配置光纤通道网络服务.服务器可以连续运行Cisco Fabric Manager服务,例如识别、状态和事件监控以及历史性能监控.16个Cisco Fabric Manager客户机—用户接口可以同时访问这台Cisco Fabric Manager服务器.每台管理服务器可以监控多个光纤通道网络,以便快速访问多个网络的配置参数和拓扑图,这时,不需要重新翻开应用就能漫游到另一个网络.利用用户信息漫游功能,无论Cisco Fabric Manager客户机—用户界面何时翻开,都可以应用用户的喜好设置和拓扑图版面修改,这样,无论用哪台交换机进行管理,都可以坚持一致的外观.规格系统要求Cisco Fabric Manager客户机和服务器的硬件和软件要求如下:处置器对Windows和Linux:Intel Pentium III 500 MHz处置器(最低)对Solaris: Sun UltraSPARC 550 MHz(最低)内存128MB(最低)磁盘空间Cisco Fabirc Manager应用——6MBJava Virtual Machine——35MB历史性能统计数据——每个端口或每股受监控流量76MB软件Windows 2000或 XP,Solaris 2.8,Red Hat Linux 把持系统Java Virtual Machine 1.3或更高版本(建议使用1.4x版本)TCP/IP软件栈协议Cisco Fabirc Manager使用以下标准协议:SNMP 1、2c和3HTTP远程方法执行(RMI)3.2、软件装置初始化设置MDS光纤交换机,管理端口IP为:192.168.1.46,用户名:admin,密码:admin123.http登岸光纤交换机:点击Fabric Manager点击运行点击Finish这里输入密码为password,此密码为Fabric Manager密码.输入光纤交换机的管理端口的IP、用户名(admin)、密码(admin123). 系统发现此交换机,选上,然后点击Open.此为Fabric Manager界面,左侧项为系统VSAN、ISL等信息,右侧为自动发现的光纤拓扑,由于本次试验只有一台光纤交换机,并没有连接其它设备,因此拓扑图只显示了MDS9124一台.第4章zone划分在划分zone之前,需要了解VSAN的概念,明白VSAN和ZONE之间的区别与联系. 4.1、VSAN与Zone的概念IBM CISCO MDS 9000 SAN 光纤家族产物引入了虚拟存储局域网(VSAN)的技术,它提供这样的一种能力, 即:在一个单一物理光纤系统构架内,提供了多种的虚拟的光纤环境.每VSAN 包括自力的(专有的) 光纤服务,设计于在存储资源域中的提供增强的扩展性,可靠性和自力性. 这尤其在隔离被分派到分歧VSAN 的高可用资源领域之间的服务把持和毛病切换事件方面十分有用. 每VSAN 包括硬件运行的区域(ZONE),专用的光纤服务和管理能力等组件, 就好像 VSAN 被配置成一个自力的物理光纤环境一样.所以 VSAN的设计是更有效,更灵活的SAN,SAN的资源可以在较多的用户中被分派配和共享,同时,支持对流量的平安隔离,并在VSAN基础上维持对资源域的自力控制.没有VSAN时,需要自力(分离)的SAN基础构架:有了VSAN的概念,可以公用相同的SAN基础构架,构建自力的SAN环境:VSAN 和SAN 的区域(ZONE)是分歧条理的概念,VSAN间可以共享相同的物理拓扑,ZONE是在一个VSAN中隔离物理端口流量的方法,在一个VSAN中的一个端口可以属于分歧的ZONE, 但分歧VSAN中的端口是绝对不能通讯的.如下图所示:VSAN 提供下列各项特征:●流量隔离:流量被包括在 VSAN 鸿沟里面,而且设备只存在于一个 VSAN 内, 这保证了在用户组之间的绝对隔离.●扩展性: VSAN 是覆盖在单一物理的 SAN 之上. 能够建立一些逻辑的 VSAN 层的能力增加了 SAN 的扩展性.●基于VSAN 的光纤服务:在每一VSAN 基础上的光纤服务的复制增加了扩展性和可用性.●冗余性:在相同的物理 SAN 上建立的VSAN 确保了冗余性.如果一个 VSAN 失败,配置在主机和交换机之间的备份路径将提供冗余的呵护.●简易的配置:使用者可能在不变更 SAN 的物理结构基础上,对VSAN 进行增加、删除或改变.对从一个VSAN 移动一个设备到另一个VSAN 只在端口水平进行配置,不需要在物理上修改.●共享的拓扑图:多个 VSAN 能共享同样的物理拓扑.●相同的 FCIDs :相同的光纤通道ID (FCIDs) 可以被指定到另外一个 VSAN 的一个主机,从而增加了的 VSAN 扩展性.●必需的协议:所有的VSAN 必需运行相同的协议,如FSPF ,域管理器以及区域(zone ).●自力性:在一个VSAN 中对光纤的配置不影响另外的 VSAN 的流量●牵制战略:引起一个VSAN 的通讯中断的事件被包括在那个VSAN 里面, 是不会牵扯到其他的 VSAN .●隔离性:在分歧VSAN 之间是不成能通讯的.从以下的图中可以看到,客户A和B共享SAN 的基础构架,但它们属于分歧的SAN,它们有各自自力的FSPF路由表,域管理器,自力的区域(ZONE)和光纤服务,用户A完全感觉不到用户B的存在.VSAN1中的一个通讯故障将不会影响到另一个VSAN2.一个端口不能属于多个VSAN,因此可以把它们看成份开的光纤网络.4.2、zone配置过程在了解了VSAN的概念,以及VSAN与zone之间的关系之后,下面就来对交换机做zone 的划分,MDS9124默认有一个VSAN:VSAN0001,在此上面作zone的划分.首先进入device mananger界面,了解端口状态及编号的位置:在zone的划分的时候,推荐依照端口号进行划分,因此这里需要根据光纤链路的实际连接情况,找出对应的光纤交换机端口号.下面是zone划分的详细过程:进入Edit Local Full Zone Database.先创立zone.输入zone的名称为ibm01_zone_1.选择此zone包括的端口号,这里选择1和11端口.创立完毕后,依次依照上面的步伐来创立其它的zone. 创立zoneset.输入zoneset名:ibm_zoneset将上面创立的zone拖到新创立的zoneset中.激活此zoneset,注意zoneset是zone的合集,也就是类似于其它光纤交换机中的配置文件的概念,可以创立多个zoneset,可是只能激活一个,其它的备用.进入命令模式,观察zone和zoneset是否已被激活.4.3、命令列表下面为罕见把持的命令:。
cisco MDS9124存储交换机 注册
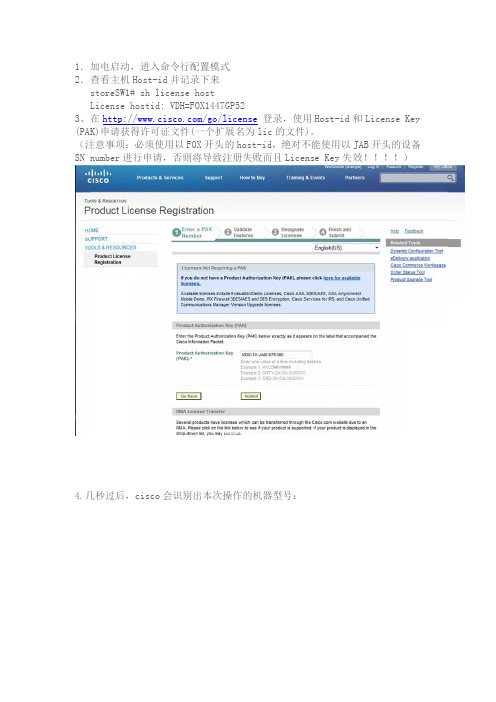
1.2.3、(PA (注SN4.几加电启动,查看主机H storeSW1#License h 在http://AK)申请获得注意事项:number 进行几秒过后,进入命令Host-id 并# sh licen hostid: VD /www.cisco 得许可证文必须使用以行申请,否cisco会识令行配置模式并记录下来nse hostDH=/go/l 文件(一个扩以FOX 开头否则将导致注识别出本次操式7GP52license 登扩展名为lic 的host-id 注册失败而操作的机器登录,使用c 的文件)。
d,绝对不能而且Licens器型号:Host-id 和能使用以JA se Key失效License JAB 开头的设效!!!!Key 设备)5.填(切填写本次注切记,电子注册时购买到子邮件地址一到的注册文一定要正确文件PAK 码确):(MDS 以FO O X 开头),以及个人信信息6.填“G 填写完毕之Goback”:之后,会有 个汇总确认认的信息,如果之前前有填错的地方,可以以点7。
8.提Cisco 网站提示注册成站会处理刚才成功!cisco 才填写的信o会在一个小信息和申请小时内将.l 的license lic的注册e:册文件发送到到邮箱里。
9.登到交登录邮箱,交换机内的获得CISCO CF 卡上:O 许可证文 文件(文件扩扩展名为li i c)后,复复制许可证文文件MDS5.MDS6.MDS 详细httcon 9214#copy 安装许可证9124#inst 查看许可证9124#show 细设置请登p://www.cnfiguratio y tftp://x 证文件all licen证使用情况w license 登陆CISCO 网/on_guides_x.x.x.x/MD nse bootfl 况usage网站查询配/en/US/pro_list.html DS20110427lash:/MDS2配置手册:oducts/ps6l702581124520070523206029/produ 5.lic boot 04134504.lucts_insta tflash: licallation_a and_。
Cisco交换机配置教程

Cisco交换机配置教程Cisco交换机在网络届处于绝对领先地位,高端冗余设备(如:冗余超级引擎,冗余负载均衡电源,冗余风扇,冗余系统时钟,冗余上连,冗余的交换背板),高背板带宽,高多层交换速率等都为企业网络系统的高速稳定运行提供良好解决方案。
这就是为什么大型企业都选择Cisco交换机做核心层和分布层等主要网络设备。
被过滤广告Cisco分为高中低端交换机,分别面向不同层次。
但是多数Cisco交换机都基于Cisco自家的IOS( Internet Operating System )系统。
所以设置都是大同小异。
让我们从零开始,一步一步教大家学会用Cisco交换机。
第一步:利用电脑超级终端与交换机建立连接可进行网络管理的交换机上有一个“Console”端口,它是专门用于对交换机进行配置和管理的。
可以通过Console端口连接和配置交换机。
用Cisco自带的Console线,RJ-45端接入Cisco交换机Console口,Com口端接入电脑Com1或Com2口,必须注意的是要记清楚接入的是那个Com口。
按照步骤开启超级终端:开始-程序-附件-通讯-超级终端(图2)(图2)点击文件-新建连接(图3)(图3)输入超级终端名称,选择数据线所连端口(注意选择Com口时候要对应Console线接入电脑的Com口):图4(图4)确定-点击还原为默认值(图5)(图5)确定后开启交换机此时交换机开始载入IOS,可以从载入IOS界面上看到诸如IOS版本号,交换机型号,内存大小等数据当屏幕显示Press RETURN to get started的时候按回车就能直接进入交换机第二步:学习交换机的一些初级命令首先我们要知道Cisco配置界面分两种,一种是基于CLI(Command-line Interface 命令行界面),一种是基于IOS(Internetwork Operting System 互联网操作系统)。
暂时我们先探讨基于IOS的Cisco交换机。
光纤交换机级联配置文档CISCO
光纤交换机级联配置文档Cisco 9120交换机1.配置异构交换机平台协同工作模式Cisco 9120配置过程激活前8个端口switch# config tEnter configuration commands, one per line. End with CNTL/Z. switch(config)#interface fc1/1-8switch(config-if)# no shutdownswitch(config-if)# end配置交换机协同工作模式switch# config tEnter configuration commands, one per line. End with CNTL/Z. switch(config)# vsan databaseswitch(config-vsan-db)# vsan 1 interopswitch(config-vsan-db)# end配置domain IDswitch# config tEnter configuration commands, one per line. End with CNTL/Z. switch(config)# fcdomain domain 100 preferred vsan 1switch(config)# end激活VSANswitch# config tEnter configuration commands, one per line. End with CNTL/Z. switch(config)# vsan databaseswitch(config-vsan-db)# vsan 1 suspendswitch(config-vsan-db)# no vsan 1 suspendswitch(config-vsan-db)# end察看修改之后的系统配置信息switch# show runningversion 2.0(2b)vsan databasevsan 1 interop 1fcdomain domain 100 preferred vsan 1fcdomain fcid persistent vsan 1boot kickstart bootflash:/m9100-s1ek9-kickstart-mz.2.0.2b.bin boot system bootflash:/m9100-s1ek9-mz.2.0.2b.binkernel core target 0.0.0.0kernel core limit 1snmp-server user admin network-admin auth md5 0xeec64ba2afbe9b65e13b23882ac6ae05priv 0xeec64ba2afbe9b65e13b23882ac6ae05 localizedkeyusername admin password 5 $1$V3smTQpb$MTvub69DkVBxdCt9BsEDB1 role network-admincallhomeswitch-priority 7snmp-server enable traps licenseinterface mgmt0ip address 192.168.70.139 255.255.255.0interface fc1/1no shutdowninterface fc1/2no shutdowninterface fc1/3no shutdowninterface fc1/4no shutdowninterface fc1/5no shutdowninterface fc1/6no shutdowninterface fc1/7no shutdowninterface fc1/8no shutdowninterface fc1/9interface fc1/10interface fc1/11interface fc1/12interface fc1/13interface fc1/14interface fc1/15interface fc1/16interface fc1/17interface fc1/18interface fc1/19interface fc1/20switch#察看端口连接状态信息switch# show interface brief------------------------------------------------------------------------------- Interface Vsan Admin Admin Status FCOT Oper Oper Port Mode Trunk Mode Speed ChannelMode (Gbps)-------------------------------------------------------------------------------fc1/1 1 auto on up swl F 2 --fc1/2 1 auto on up swl F 2 --fc1/3 1 auto on up swl E 2 --fc1/4 1 auto on notConnected swl -- --fc1/5 1 FX -- notConnected swl -- --fc1/6 1 FX -- notConnected swl -- --刀片中心光纤交换机模块配置禁止交换机brocadessm:USERID> switchdisable修改Domain IDbrocadessm:USERID> configureConfigure...Fabric parameters (yes, y, no, n): [no] yesDomain: (1..239) [1] 99R_A_TOV: (4000..120000) [10000]E_D_TOV: (1000..5000) [2000]WAN_TOV: (0..30000) [0]MAX_HOPS: (7..19) [7]Data field size: (256..2112) [2112]Sequence Level Switching: (0..1) [0]Disable Device Probing: (0..1) [0]Suppress Class F Traffic: (0..1) [0]Switch PID Format: (1..2) [1]Per-frame Route Priority: (0..1) [0]Long Distance Fabric: (0..1) [0]BB credit: (1..27) [16]Insistent Domain ID Mode (yes, y, no, n): [no]Virtual Channel parameters (yes, y, no, n): [no]Zoning Operation parameters (yes, y, no, n): [no]RSCN Transmission Mode (yes, y, no, n): [no]Arbitrated Loop parameters (yes, y, no, n): [no]System services (yes, y, no, n): [no]Portlog events enable (yes, y, no, n): [no]ssl attributes (yes, y, no, n): [no]http attributes (yes, y, no, n): [no]snmp attributes (yes, y, no, n): [no]rpcd attributes (yes, y, no, n): [no]cfgload attributes (yes, y, no, n): [no]webtools attributes (yes, y, no, n): [no]WARNING: The domain ID will be changed. The port level zoning may be affectedbrocadessm:USERID> msPlMgmtDeactivateSwitch is in Offline state.修改协同工作模式brocadessm:USERID> interoper mode 1The switch effective configuration will be lost when the operating mode is changed; do you want to continue? (yes, y, no, n): [no] yInteropmode is enabledNote: It is recommended that you reboot this switch for the new change to take effect.重新引导交换机brocadessm:USERID> fastbootBroadcast message from root (pts/0) Tue Jun 13 10:07:45 2006...The system is going down for reboot NOW !!USERIDPassword:Please change your passwords now.Use Control-C to exit or press 'Enter' key to proceed.Password was not changed. Will prompt again at next loginuntil password is changed.brocadessm:USERID>brocadessm:USERID> switchenable察看修改配置之后的交换机状态brocadessm:USERID> switchshowswitchName: brocadessmswitchType: 22.0switchState: OnlineswitchMode: InteropswitchRole: PrincipalswitchDomain: 99switchId: fffc63switchWwn: 10:00:00:05:1e:02:78:c6zoning: OFFswitchBeacon: OFFArea Port Media Speed State==============================0 0 id 2G No_Light1 1 cu 2G Online F-Port 21:00:00:14:5e:24:a9:042 2 cu 2G Online F-Port 21:00:00:14:5e:24:a9:363 3 cu 2G Online F-Port 21:00:00:14:5e:24:a9:7a4 4 cu 2G Online F-Port 21:00:00:14:5e:24:a9:b65 5 cu 2G Online F-Port 21:00:00:14:5e:24:a9:286 6 cu 2G Online F-Port 21:00:00:14:5e:24:aa:f67 7 cu 2G Online F-Port 21:00:00:14:5e:24:aa:f08 8 cu 2G Online F-Port 21:00:00:14:5e:24:a9:389 9 cu 2G No_Light10 10 cu 2G No_Light11 11 cu 2G No_Light12 12 cu 2G No_Light13 13 cu 2G No_Light14 14 cu 2G No_Light15 15 id 2G Online E-Port 20:01:00:0d:ec:06:b4:41 (downstream)2.划分zoneCisco 9120划分zone察看fabric连接设备port wwn 信息switch# show fcns database vsan 1--------------------------------------------------------------------------FCID TYPE PWWN (VENDOR) FC4-TYPE:FEATURE--------------------------------------------------------------------------0x630100 N 21:00:00:14:5e:24:a9:04 scsi-fcp0x630200 N 21:00:00:14:5e:24:a9:36 scsi-fcp0x630300 N 21:00:00:14:5e:24:a9:7a scsi-fcp0x630400 N 21:00:00:14:5e:24:a9:b6 scsi-fcp0x630500 N 21:00:00:14:5e:24:a9:28 scsi-fcp0x630600 N 21:00:00:14:5e:24:aa:f6 scsi-fcp0x630700 N 21:00:00:14:5e:24:aa:f0 scsi-fcp0x630800 N 21:00:00:14:5e:24:a9:38 scsi-fcp0x640000 N 20:07:00:a0:b8:21:19:9f (SymBios) scsi-fcp:both0x640100 N 20:06:00:a0:b8:21:19:9f (SymBios) scsi-fcp:bothTotal number of entries = 10创建zone分别创建2个zone,前4个刀片服务器与DS4300 2个控制器组成的zone,第4到第8个刀片服务器与DS4300 2个控制器组成的zone。
MDS9124
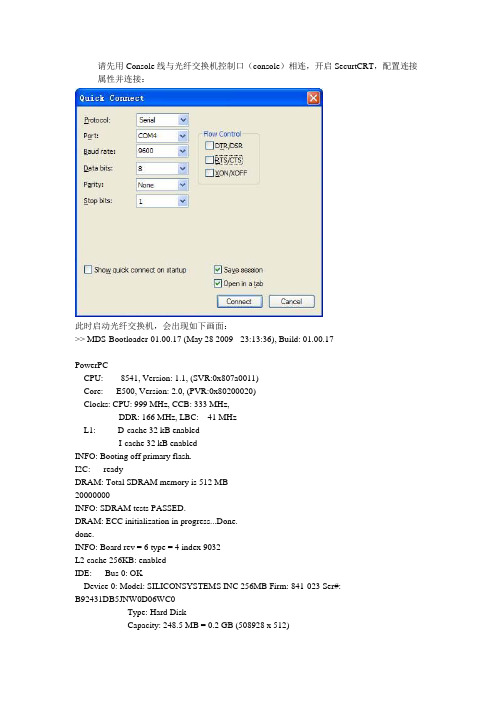
请先用Console线与光纤交换机控制口(console)相连,开启SecurtCRT,配置连接属性并连接:此时启动光纤交换机,会出现如下画面:>> MDS-Bootloader-01.00.17 (May 28 2009 - 23:13:36), Build: 01.00.17PowerPCCPU: 8541, Version: 1.1, (SVR:0x807a0011)Core: E500, Version: 2.0, (PVR:0x80200020)Clocks: CPU: 999 MHz, CCB: 333 MHz,DDR: 166 MHz, LBC: 41 MHzL1: D-cache 32 kB enabledI-cache 32 kB enabledINFO: Booting off primary flash.I2C: readyDRAM: Total SDRAM memory is 512 MB20000000INFO: SDRAM tests PASSED.DRAM: ECC initialization in progress...Done.done.INFO: Board rev = 6 type = 4 index 9032L2 cache 256KB: enabledIDE: Bus 0: OKDevice 0: Model: SILICONSYSTEMS INC 256MB Firm: 841-023 Ser#:B92431DB5JNW0D06WC0Type: Hard DiskCapacity: 248.5 MB = 0.2 GB (508928 x 512)Booting bootflash:/m9100-s2ek9-kickstart-mz.4.1.3a.bin ... .................Automatic boot of image at addr 0x00000000 ...Starting kernel...Entered kgdb_console_init:1960INIT: version 2.85 bootingChecking all filesystems....r.ERROR: bootflash: has unrecoverable error; please do "format bootflash:"done./etc/rc.d/rcS.d/S30procps: line 34: log_action_begin_msg: command not found/etc/rc.d/rcS.d/S30procps: line 36: log_action_end_msg: command not foundSetting the System Clock using the Hardware Clock as reference...System Clock set. Local time: Thu Nov 26 01:11:15 UTC 2009Loading system softwareUncompressing system image: bootflash:/m9100-s2ek9-mz.4.1.3a.bin CCCCCCCCCCCCCCCCCCCCCCCCCCCCCCCCCCCCCCCCCCCCCCCCCCCCCCCCCCC CCCCCCCCCCCCCCCCCCCCCCCCCCCCCCCCCCCCCCCCCCCCCCCCCCCCCCCCCCC CCCCCCCCCCCCCCCCCCCCCCCCCCCCCCCCCCCCCCCCCCCCCCCCCCCCCCCCCCC CCCCCCCCCCCCCCCCCCCCCCCCCCCCCCCCCCCCCCCCCCCCCCCCCCCCCC INIT: Entering runlevel: 3Starting NFS servers: nfsd mountd.2009 Nov 26 01:11:49 %KERN-2-SYSTEM_MSG: Starting kernel... - kernel2009 Nov 26 01:11:49 %KERN-1-SYSTEM_MSG: Entered kgdb_console_init:1960 - kernel ---- System Admin Account Setup ----Do you want to enforce secure password standard (yes/no) [y]: 2009 Nov 26 01:12:14switch %PLATFORM-2-PS_OK: Power supply 2 ok (Serial number PAC132430JE)2009 Nov 26 01:12:14 switch %PLATFORM-2-PS_FANOK: Fan in Power supply 2 ok2009 Nov 26 01:12:14 switch %PLATFORM-2-FAN_OK: Fan module ok输入“no”则对密码强度没有要求,建议直接回车或者输入“y”(要求密码要有8位以上、包含大写字母、小写字母、数字特殊符号中的三种),此时会出现如下画面:Enter the password for "admin":输入密码后要求再次确认(如不符合密码规则,则要求重新输入)。
CISCO交换机配置手册
CISCO交换机配置手册V1.0作者:乖乖猪目录前言 (4)第一章交换机配置基础 ......................................... 错误!未定义书签。
1.1配置方式 ................................................ 错误!未定义书签。
第二章交换机基本配置 .. (4)2.1用户认证 (5)2.1.1特权口令 (5)2.1.2VTY口令 (6)2.2设备名称 (6)2.3SNMP网管串 (6)2.4交换机管理IP (6)2.5综合实验 (7)第三章交换机高级配置 (7)3.1VLAN(虚拟局域网) (7)3.1.1简介 (7)3.1.2命令 (46)3.1.3案例一(VTP方式) (49)3.1.4案例二(VTP方式) (50)3.2STP(生成树协议) (53)3.2.1简介 (53)3.2.2命令 (67)3.2.3案例一(PVST/PVST+ / Rapid -PVST+ 常用) (68)3.2.4案例二(MST VLAN数量大使用) (71)3.2.5案例三(STP 不常用) (72)3.3E THER C HANNEL (75)3.3.1简介 (75)3.3.2命令 (79)3.3.3案例一(强制模式) (80)3.3.4案例二(PAGP模式) (82)3.3.5案例三(LACP模式) (84)3.3.6案例四(交换机与服务器) (85)3.3.7案例五(三层模式) (94)3.4HSRP(思科私有) (95)3.4.1简介 (95)3.4.2命令 (96)3.4.3案例一 (97)3.4.4案例二 (111)3.4.5案例三 (116)3.5VRRP (119)3.5.1简介 (119)3.5.2命令 (124)3.5.3案例一 (125)3.5.4案例二 (132)3.6DHCP (133)3.6.1简介 (133)3.6.2命令 (139)3.6.3案例一 (140)3.6.4案例二 (141)3.6.5案例三 (143)3.7VACL(不常用) (145)3.7.1简介 (145)3.7.2命令 (145)3.7.3案例 (148)3.8端口限速 (151)3.8.1简介 (151)3.8.2案例一(三层交换机QOS) (151)3.8.3案例二(三层交换机风暴控制) (153)第四章日常维护 (155)4.1密码恢复 (155)4.1.1CatOS交换机密码恢复 (155)4.1.2CATALYST 2900,3500XL的密码恢复 (159)4.1.3CATALYST 2940,2950L的密码恢复 (159)4.1.4CATALYST 2955的密码恢复 (159)4.1.5CATALYST 3550,3560,3750的密码恢复 (163)4.1.6CATALYST 6500密码恢复 (164)4.2ISO备份升级 (178)4.2.1TFTP方式 (178)4.2.2Xmodem方式 (180)4.3端口镜像 (182)4.3.1简介 (182)4.3.2命令 (183)4.3.3案例 (185)4.4交换机堆叠 (193)4.4.1简介 (193)4.4.2命令 (198)4.4.3案例一(3750) (199)第五章专业术语解释 (204)5.1冲突域、广播域 (204)5.2CSMA/CD (205)5.3交换机的几种主要技术参数详解和计算 (206)5.4POE (213)前言本手册是作者多年学习整理汇编而成,主要目的是方便大家设备调试使用。
9124思科光纤交换机配置管理使用手册
9124光纤交换机配置管理使用手册1.初始化信息 (3)2.交换机基本配置 (4)2.1.配置交换机管理地址 (4)2.2.LICENSE注册 (4)2.3.配置VSAN (6)2.4.配置ZONESET (6)2.5.配置ZONE (7)2.6.TRUNKING的配置 (7)3.标准配置模板 (8)4.常用检查命令 (9)5.常用配置命令 (9)5.1.删除创建的ZONE (9)5.2.清除配置 (9)5.3.设置配置口超时 (10)5.4.安装与清除license (10)5.5.显示指定License (10)5.6.显示全部Licenses (10)5.7.显示ID (11)5.8.命名交换机 (11)5.9.设置管理口 (11)5.10.禁止与使能Telnet 与ssh (11)5.11.下载配置文件 (12)5.12.保存配置 (12)5.13.创建与设置VSAN (12)5.14.分配VSAN成员 (12)5.15.删除VSAN (13)5.16.浏览VSAN设置 (13)5.17.设置FC端口 (14)5.18.设置Zone (15)5.19.设置Zone Sets (15)5.20.激活Zone Set (15)5.21.浏览Zone信息 (15)5.22.恢复管理员口令 (18)5.23.设置端口速率 (19)1.初始化信息在启动交换机后,会有类似如下的信息显示:---- System Admin Account Setup ----Enter the password for "admin": 输入admin管理员密码,系统设为P@ssw0rd Confirm the password for "admin": 再次输入admin管理员密码,P@ssw0rd---- Basic System Configuration Dialog ----This setup utility will guide you through the basic configuration ofthe system. Setup configures only enough connectivity for managementof the system.Please register Cisco MDS 9000 Family devices promptly with yoursupplier. Failure to register may affect response times for initialservice calls. MDS devices must be registered to receive entitledsupport services.Press Enter at anytime to skip a dialog. Use ctrl-c at anytimeto skip the remaining dialogs.Would you like to enter the basic configuration dialog (yes/no): noMDS Switchswitch login: adminPassword:TAC support: /tacCopyright (c) 2002-2005, Cisco Systems, Inc. All rights reserved. The copyrights to certain works contained herein are owned by other third parties and are used and distributed under license.Some parts of this software are covered under the GNU Public License. A copy of the license is available at/licenses/gpl.html.switch#然后,可以按照类似以太网交换机配置的方法来配置交换机了。
- 1、下载文档前请自行甄别文档内容的完整性,平台不提供额外的编辑、内容补充、找答案等附加服务。
- 2、"仅部分预览"的文档,不可在线预览部分如存在完整性等问题,可反馈申请退款(可完整预览的文档不适用该条件!)。
- 3、如文档侵犯您的权益,请联系客服反馈,我们会尽快为您处理(人工客服工作时间:9:00-18:30)。
CISCO MDS9124光纤交换机安装配置手册版本二零零九年七月神州数码(中国)技术中心文档控制更改记录审阅发布目录目录..................................................... 错误!未定义书签。
第1章介绍.............................................. 错误!未定义书签。
第2章初始化光纤交换机.................................. 错误!未定义书签。
第3章 Fabric Manager .................................... 错误!未定义书签。
、软件介绍.......................................... 错误!未定义书签。
、软件安装.......................................... 错误!未定义书签。
第4章 zone划分......................................... 错误!未定义书签。
、 VSAN概念......................................... 错误!未定义书签。
、 zone配置过程..................................... 错误!未定义书签。
、命令列表.......................................... 错误!未定义书签。
第1章 CISCO MDS9124介绍Cisco ® MDS 9124 24端口多层光纤阵列交换机拥有24个端口,支持4、2和1 Gbps 速率,在紧凑的1机架单元(1RU)机型中,以廉宜价格提供了灵活性、高可用性、安全性和易用性,实现了出色的价值。
Cisco MDS 9124能以8端口的增量,灵活地从8端口扩展到24端口,可满足部门存储局域网(SAN)交换机和企业SAN 中边缘交换机的密度需求。
Cisco MDS 9124支持快速配置和任务向导,能够快速、简便地部署在任何规模的网络中。
它采用了Cisco MDS 9000 SAN-OS 软件,包括先进的存储网络特性和功能,与Cisco MDS 9500系列多层导向器和Cisco MDS 9200系列多层光纤阵列交换机兼容,在核心-边缘部署中提供了透明的端到端服务交付能力。
端口介绍: 10/100-Mbps Ethernet 10/100-Mbps Ethernet management port + console port management port + console port 24 auto-sensing 4-Gbps FC 24 auto-sensing 4-Gbps FC ports in 4-port groups ports in 4-port groups 256MB compact flash, 256MB compact flash, 512MB SDRAM512MB SDRAMDual hot-swappable Dual hot-swappable power supplies power supplies 3 fixed fans + 1 fan per 3 fixed fans + 1 fan per power supply power supply第2章初始化光纤交换机MDS9124光纤交换机加电需要进行初始化设置,本身的Management Port没有默认的IP,需要初始化的时候设置,用串口线连接Console Port,具体的设置过程如下:--- Basic System Configuration Dialog ---This setup utility will guide you through the basic configuration of thesystem. Setup configures only enough connectivity for management of thesystem.Press Enter in case you want to skip any dialog. Use ctrl-c at anytime toskip away remaining dialogs.Would you like to enter the basic configuration dialog (yes/no): yEnter the password for "admin" : adminCreate another login account (yes/no) [n]: nConfigure SNMPv3 Management parameters (yes/no) [y]: ySNMPv3 user name [admin]: adminSNMPv3 user authentication password : admin123The same password will be used for SNMPv3 privacy as well.Configure read-only SNMP community string (yes/no) [n]: <Enter>Configure read-write SNMP community string (yes/no) [n]: <Enter>Enter the switch name: mds9124-1 (where NNN is your switch model and X isyour pod number; for example, mds9506-1)Continue with Out-of-band (mgmt0) management configuration (yes/no) [y]:yMgmt0 IP address : (Use the IP address of your switch from Table 1 inAppendix B of the lab reference guide called “Accessing the Remote Lab”.You can also derive the IP address of your switch by replacing X with your pod number, and Y with 3 [if you are working on a MDS 9216) or 5 (if you are working on the MDS 9506].)Mgmt0 IP netmask : with In-band (vsan1) management configuration (yes/no) [n]: <Enter>Enable the ip routing capabilities (yes/no) [y]: yConfigure static route (yes/no) [y]: nConfigure the default network (yes/no) [y]: nConfigure the default gateway (yes/no) [y]: <Enter>IP address of the default gateway : (where X is your pod number) Configure the DNS IP address (yes/no) [n]: <Enter>Configure the default domain name (yes/no) [n]: <Enter>Enable the telnet service (yes/no) [y]: <Enter>Enable the ssh service (yes/no) [n]: <Enter>Configure the ntp server (yes/no) [n]: <Enter>Configure default switchport interface state (shut/noshut) [shut]:<Enter>Configure default switchport trunk mode (on/off/auto) [on]: <Enter> Configure default zone policy (permit/deny) [deny]: <Enter>Enable full zoneset distribution (yes/no) [n]: <Enter>The following configuration will be applied:username admin password admin role network-adminsnmp-server user admin network-admin auth md5 admin123 priv admin123 switchname mds9214-1interface mgmt0ip address shutdownip default-gateway server enableno ssh server enablesystem default switchport shutdownsystem default switchport trunk mode onno zone default-zone permit vsan 1-4093no zoneset distribute full vsan 1-4093Would you like to edit the configuration (yes/no) [n]: <Enter>Use this configuration and save it (yes/no) [y]: <Enter>第3章 Fabric Manager3.1、软件介绍简介Cisco®Fabric Manager是一种基于Web、易于使用的响应性应用,能够用集成式方法实现交换机和网络管理,从而简化存储局域网(SAN)中Cisco MDS 9000系列交换机的管理。
Cisco Fabric Manager能够为存储管理员提供网络级管理功能,包括识别、多交换机配置、连续网络监控和故障排除。