EMC DS-300B光纤交换机配置文档
(完整版)博科光纤交换机基本配置
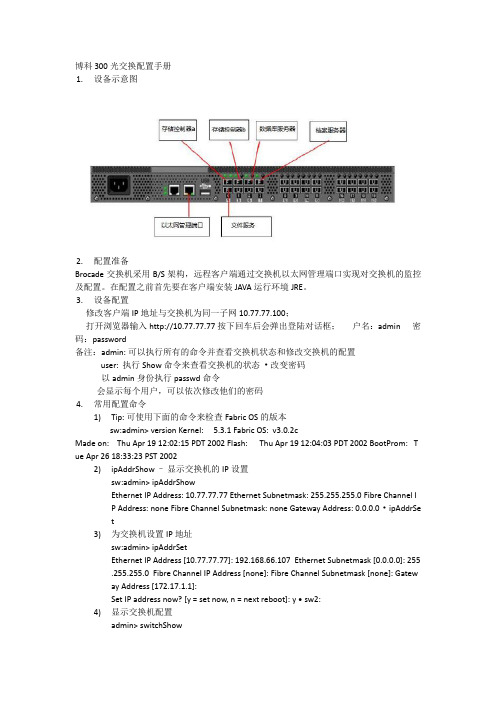
博科 300光交换配置手册1.设备示意图2.配置准备Brocade交换机采用B/S架构,远程客户端通过交换机以太网管理端口实现对交换机的监控及配置。
在配置之前首先要在客户端安装JAVA运行环境JRE。
3.设备配置修改客户端IP地址与交换机为同一子网10.77.77.100;打开浏览器输入http://10.77.77.77按下回车后会弹出登陆对话框;户名:admin 密码:password备注:admin: 可以执行所有的命令并查看交换机状态和修改交换机的配置user: 执行Show命令来查看交换机的状态•改变密码以admin身份执行passwd命令会显示每个用户,可以依次修改他们的密码4.常用配置命令1)Tip: 可使用下面的命令来检查Fabric OS的版本sw:admin> version Kernel: 5.3.1 Fabric OS: v3.0.2cMade on: Thu Apr 19 12:02:15 PDT 2002 Flash: Thu Apr 19 12:04:03 PDT 2002 BootProm: T ue Apr 26 18:33:23 PST 20022)ipAddrShow –显示交换机的IP设置sw:admin> ipAddrShowEthernet IP Address: 10.77.77.77 Ethernet Subnetmask: 255.255.255.0 Fibre Channel IP Address: none Fibre Channel Subnetmask: none Gateway Address: 0.0.0.0 • ipAddrSet3)为交换机设置IP地址sw:admin> ipAddrSetEthernet IP Address [10.77.77.77]: 192.168.66.107 Ethernet Subnetmask [0.0.0.0]: 255.255.255.0 Fibre Channel IP Address [none]: Fibre Channel Subnetmask [none]: Gateway Address [172.17.1.1]:Set IP address now? [y = set now, n = next reboot]: y • sw2:4)显示交换机配置admin> switchShowswitchName: sw2 switchType: 9.1 switchState: Online switchMode: Native switchRole: Subordinate switchDomain: 97 switchId: fffc61switchWwn: 10:00:00:60:69:04:23:03 switchBeacon: OFFport 0: id 2G No_Light port 1: id 2G No_Light port 2: id 2G No_Light port 3: id 2G No_Lightport 4: id 2G Online F-Port 10:00:00:00:c9:20:d0:99 port 5: id 2G No_Lightport 6: id N2 Online E-Port 10:00:00:60:69:50:3e:1b “sw2” (downstream)port 7: id 1G Online L-Port 8 Private, 2 phantom port 8: id 1G No_Light port 9: id N2 No_Light port 10: id 2G No_Lightport 11: id N1 Online port 12: id 2G No_Lightport 13: id 2G Online E-Port 10:00:00:60:69:50:02:73 “sw8" (upstream) (Trunk master)port 14: id N2 No_Light5)显示交换机运行状态admin> switchstatusshowSwitch Health Report Report time: 06/22/2015 07:53:50 AMSwitch Name: adminIP address: 192.168.99.9SwitchState: HEALTHYDuration: 00:05Power supplies monitor HEALTHYTemperatures monitor HEALTHYFans monitor HEALTHYFlash monitor HEALTHYMarginal ports monitor HEALTHYFaulty ports monitor HEALTHYMissing SFPs monitor HEALTHYFabric Watch is not licensedDetailed port information is not included6)显示交换机配置信息admin> cfgshowDefined configuration:cfg: cfg_1 a750l1_vtl12; b750l1_v7000; b750l2_v7000; b750l2_vtl12; ha1;vm1l_v7000; vm2l_v7000; vm3l_v7000; vtape; xenserver_a;xenserver_bzone: a750l1_vtl121,2; 1,20; 1,21; 1,22; 1,23zone: b750l1_v70001,0; 1,1; 1,2zone: b750l2_v70001,0; 1,1; 1,3zone: b750l2_vtl121,3; 1,20; 1,21; 1,22; 1,23zone: ha1 1,2; 1,3zone: vm1l_v70001,0; 1,1; 1,4zone: vm2l_v70001,0; 1,1; 1,5zone: vm3l_v70001,0; 1,1; 1,6zone: vtape 1,20; 1,21; 1,22; 1,23zone: xenserver_a1,0; 1,1; 1,8zone: xenserver_b1,0; 1,1; 1,77)备份交换机配置admin> configuplocadadmin> Protocol (scp or ftp):ftp (输入协议,如果你是FTP就输入FTP)admin> host: (FTP服务器地址:192.168.99.100)admin> user name: (用户名)admin> filename: 备份文件名称admin> password: 密码8)已有备份文件还原admin> switchdisable 停用交换机所有交换端口admin>configdownloadadmin>Protocol (scp or ftp):ftpadmin>Server Name or IP Address [host]:admin>User Name [user]:admin>File Name [config.txt]:config.txt.........admin>Do you want to continue [y/n]:yadmin>Password:admin>reboot9)划分zone定义:zone是当你有不同平台的主机连到SAN上时,用来隔离不同主机对磁盘阵列的存取,严格一点的,任何一台主机连到交换机访问任何一个存储设备都要作zone。
emc存储容灾技术解决方案设计

EMC VNX5400存储容灾技术解决方案2017年8月文案大全易安信电脑系统(中国)一、需求分析随着各行业数字化进程的推进,数据逐渐成为企事业单位的运营核心,用户对承载数据的存储系统的稳定性要求也越来越高。
虽然不少存储厂商能够向用户提供稳定性极高的存储设备,但还是无法防止各种自然灾难对生产系统造成不可恢复的毁坏。
为了保证数据存取的持续性、可恢复性和高可用性,远程容灾解决方案应运而生,而远程复制技术则是远程容灾方案中的关键技术之一。
远程复制技术是指通过建立远程容灾中心,将生产中心数据实时或分批次地复制到容灾中心。
正常情况下,系统的各种应用运行在生产中心的计算机系统上,数据同时存放在生产中心和容灾中心的存储系统中。
当生产中心由于断电、火灾甚至地震等灾难无法工作时,则立即采取一系列相关措施,将网络、数据线路切换至容灾中心,并且利用容灾中心已经搭建的计算机系统重新启动应用系统。
容灾系统最重要的目标就是保证容灾切换时间满足业务连续性要求,同时尽可能保持生产中心和容灾中心数据的连续性和完整性,而如何解决生产中心到容灾中心的数据复制和恢复则是容灾备份方案的核心容。
本方案采用EMC MirrorView 复制软件基于磁盘阵列(VNX5300-VNX5400)的数据复制技术。
它是由磁盘阵列自身实现数据文案大全的远程复制和同步,即磁盘阵列将对本系统中的存储器写I/O操作复制到远端的存储系统中并执行,保证生产数据和备份数据的一致性。
由于这种方式下数据复制软件运行在磁盘阵列,因此较容易实现生产中心和容灾容灾中心的生产数据和应用数据或目录的实时拷贝维护能力,且一般很少影响生产中心主机系统的性能。
如果在容灾中心具备了实时生产数据、备用主机和网络环境,那么就可以当灾难发生后及时开始业务系统的恢复。
文案大全二、设计拓扑图文案大全设计说明:1、2台存储和业务服务器同时接入到SAN网络中,互相能访问;2、两台存储之间通过光鲜链路分别连接2个控制器,实现存储冗余。
EMC DS300B光纤交换机安装实施文档V1.0
命令行配置流程 (3)扩展端口激活流程 (3)创立Ali (5)创立Zone (5)仓∣J立Configurations (5)激活,保存config (6)博科交换机常用命令 (6)图形界面配置流程 (8)结语: (11)B-Series Switch Products:Select a B-Seriβs asset type ▼IM Series Switch Products:Select a M∙Series asset type_ 曰 MDS-Series Switch Products: Select a MDS∙Series asset type ▼ B and M Series Software Products: Select a softvrare asset type...For first time users and visitors to this web site, we offer licensing overviews in our help section by product series or type,the features of this web site.First time B-Series switch users - Please review the B-Senes licensing overview in the help section.First time M-Series switch users - Please review the M-Series licensing overview in the help section.First time MDS-Series switch users - Please review the MDS-Series licensing overview in the help section.First time B- and M Series software users - Please review the Connectπx Manager licensing overview in the help section.选择具体的交换机型号,自动进入下一步Home > Connectri× > View B-Series SwitchesApplication Options■ Select Asset Tvoe■ View Switches■ He ∣D Sgjtion EMC Connectri× Software Licensing: View B-Series Switches You can perform these license operations on this page: • Convert a Transaction Code into a software license for a switch. • View existing swιtch∕license registration details. •List existing swιtch∕lιcense registrations.First time users: Please take a minute to review the licensing overview in the he ∣D section.Need to convert a Transaction Code for a switch not listed below)选择 Need to convert a Transaction Code for a switch not listed below?命令行配置流程扩展端口激活流程博科光纤交换机标配一般只激活了局部端口,在客户需要增加端口时,需要另外购置 license 在光纤交换机上激活。
博科光纤交换机和EMC存储配置

博科光纤交换机和E M C存储划分操作指南目录1、背景【拓扑描述】...................... 错误!未指定书签。
2、存储划分的准备工作:.................. 错误!未指定书签。
3、存储划分的步骤:...................... 错误!未指定书签。
1、在光纤交换机上建立逻辑的链路;.... 错误!未指定书签。
2、在存储上应用链路和策略;.......... 错误!未指定书签。
4、例子(广州资源池):.................. 错误!未指定书签。
1、准备工作.......................... 错误!未指定书签。
a、查看服务器WWN号.............. 错误!未指定书签。
b、在相应的EMC存储上查看........ 错误!未指定书签。
c、在光纤交换机上,查看服务器连接过来的WWN号,并确定服务器连接到光纤交换机上的对应端口号。
....... 错误!未指定书签。
d、使用telnet登陆光纤交换交换机上查看WWN号对应的端口号错误!未指定书签。
e、查看光纤交换机上是否有对应的zone和端口号,以及zoneconfig配置。
................................. 错误!未指定书签。
2、创建newzone,并添加path。
........ 错误!未指定书签。
a、创建newzone: ................ 错误!未指定书签。
b、创建完成后开始添加PATH ....... 错误!未指定书签。
c、使用zoneconfig,应用zoneconfig,并使用zoneconfig生效。
错误!未指定书签。
d、登陆EMC存储查看添加结果...... 错误!未指定书签。
3、在EMC上配置存储.................. 错误!未指定书签。
a、注册主机(把添加进来的主机的WWN号注册)错误!未指定书签。
光纤交换机配置详解

光纤交换机配置详解目录第1章S A N结构的存储区域(Z O N E)的规划 (2)第2章收集光纤交换机的配置信息 (5)2.1总体信息 (5)2.2Zone配置信息 (5)第3章网上参考文档 (6)3.1参考文档1 (6)3.2参考文档2 (7)3.3参考文档3 (8)第1章SAN结构的存储区域(ZONE)的规划在传统的没有SAN网络存在的系统中,网络中的各台主机是相互独立的,主机只能访问自己的硬盘,数据不会在存储级丧失安全性。
为了是SAN网络的可用性,在部署SAN架构的时候,一般都采用了冗余的架构,为了使这些可用的设备互不影响,,使主机访问存储设备路径的唯一性,需要对SAN架构中的存储设备,光纤交换机,主机划分不同的ZONE。
具体划分ZONE的方法详见下实例。
一号工程在实施之初大多数都采用如下的方案,这种方案存在一定的隐患,即光纤交换机没有冗余,这种方案如果不进行ZONE的设置,可能会导致系统不能使用存储阵列的情况。
我们建议个烟厂的系统管理员对一号工程的SAN网络进行检查,并对系统进行设置。
一.环境:DB2:HBA1/HBA2WAS:HBA1/HBA2FAST600:控制器A/控制器BSAN Switch: ibm h08或ibm h16二.配置原则:以一块HBA卡对应一个控制器的原则进行zone配置连接示意图三.具体配置操作步骤和方法:1. 用网线连接到交换机的管理口#telnet 10.77.77.77用户名:admin密码:password2. 查看交换机器端口连接#switchshowArea Port Media Speed State==============================0 0 id N2 Online F-Port 10:00:00:00:c9:42:a0:44(DB2_HBA1)1 1 id N2 Online F-Port 10:00:00:00:c9:45:b6:ea (DB2_HBA2)2 2 id N2 Online F-Port 20:05:00:a0:b8:18:d2:0a (WAS_HBA1)3 3 id N2 Online F-Port 20:04:00:a0:b8:18:d2:0a (WAS_HBA2)4 4 id N4 Online (控制器A)5 5 id N4 Online (控制器B)6 6 id N4 No_Light7 7 id N4 No_Light8 8 -- N4 No_Module (No POD License) Disabled3.划分zone输入以下命令zoneCreate "zone1","1,0;1,4"zoneCreate "zone2","1,1;1,5"zoneCreate "zone3","1,2;1,4"zoneCreate "zone4","1,3;1,5"cfgCreate "ibmp630","zone1;zone2; zone3; zone3"cfgEnable "ibmp630"cfgSave4.最后查看ZONE的划分做最后校验# zoneshowDefined configuration:cfg: ibmp630 zone1; zone1; zone1; zone1zone: zone1 1,0; 1,4 zone: zone2 1,1; 1,5 zone: zone3 1,2; 1,4 zone: zone4 1,3;1,5 Effective configuration: cfg: ibmp630zone: zone1 1,01,4 zone: zone2 1,11,5 zone: zone3 1,21,4 zone: zone4 1,31,5第1章收集光纤交换机的配置信息1.1 总体信息#switchshow例子1:例子2:1.2 Zone配置信息#zoneshow例子1:例子2:第2章网上参考文档2.1 参考文档1来源:/logs/14713887.html在SAN的环境中,光纤交换机(FC Switch)起着至关重要的作用,而FC Switch 的配置目前有GUI界面和CLI两种方式,GUI界面操作简单,但是花费时间较长,适合做较少配置时使用;CLI配置操作相对复杂,但是效率高,适合做大量配置时使用。
EMC光交换机配置
EMC光交换机配置switch# show intfc1/1 is down (Administratively down)Hardware is Fibre Channel, SFP is short wave laser w/o OFC (SN)Port WWN is 20:01:00:0d:ec:67:81:00Admin port mode is auto, trunk mode is onsnmp link state traps are enabledPort vsan is 1Receive data field Size is 2112Beacon is turned off5 minutes input rate 0 bits/sec, 0 bytes/sec, 0 frames/sec5 minutes output rate 0 bits/sec, 0 bytes/sec, 0 frames/sec1 frames input, 196 bytes0 discards, 0 errors0 CRC, 0 unknown class0 too long, 0 too short1 frames output, 196 bytes0 discards, 0 errors0 input OLS, 0 LRR, 0 NOS, 0 loop inits0 output OLS, 0 LRR, 0 NOS, 0 loop initsfc1/2 is down (Administratively down)Hardware is Fibre Channel, SFP is short wave laser w/o OFC (SN)Port WWN is 20:02:00:0d:ec:67:81:00Admin port mode is auto, trunk mode is onsnmp link state traps are enabledPort vsan is 1Receive data field Size is 2112Beacon is turned off5 minutes input rate 0 bits/sec, 0 bytes/sec, 0 frames/sec5 minutes output rate 0 bits/sec, 0 bytes/sec, 0 frames/sec1 frames input, 152 bytes0 discards, 0 errors0 CRC, 0 unknown class0 too long, 0 too short1 frames output, 152 bytes0 discards, 0 errors0 input OLS, 0 LRR, 0 NOS, 0 loop inits0 output OLS, 0 LRR, 0 NOS, 0 loop initsfc1/3 is down (Administratively down)Hardware is Fibre Channel, SFP is short wave laser w/o OFC (SN)Port WWN is 20:03:00:0d:ec:67:81:00Admin port mode is auto, trunk mode is onsnmp link state traps are enabledPort vsan is 1Receive data field Size is 2112Beacon is turned off5 minutes input rate 0 bits/sec, 0 bytes/sec, 0 frames/sec5 minutes output rate 0 bits/sec, 0 bytes/sec, 0 frames/sec1 frames input, 212 bytes0 discards, 0 errors0 CRC, 0 unknown class0 too long, 0 too short1 frames output, 212 bytes0 discards, 0 errors0 input OLS, 0 LRR, 0 NOS, 0 loop inits0 output OLS, 0 LRR, 0 NOS, 0 loop initsfc1/4 is down (Administratively down)Hardware is Fibre Channel, SFP is short wave laser w/o OFC (SN)Port WWN is 20:04:00:0d:ec:67:81:00Admin port mode is auto, trunk mode is onsnmp link state traps are enabledPort vsan is 1Receive data field Size is 2112Beacon is turned off5 minutes input rate 0 bits/sec, 0 bytes/sec, 0 frames/sec5 minutes output rate 0 bits/sec, 0 bytes/sec, 0 frames/sec1 frames input, 156 bytes0 discards, 0 errors0 CRC, 0 unknown class0 too long, 0 too short1 frames output, 156 bytes0 discards, 0 errors0 input OLS, 0 LRR, 0 NOS, 0 loop inits0 output OLS, 0 LRR, 0 NOS, 0 loop initsfc1/5 is down (Administratively down)Hardware is Fibre Channel, SFP is short wave laser w/o OFC (SN)Port WWN is 20:05:00:0d:ec:67:81:00Admin port mode is auto, trunk mode is onsnmp link state traps are enabledPort vsan is 1Receive data field Size is 2112Beacon is turned off5 minutes input rate 0 bits/sec, 0 bytes/sec, 0 frames/sec5 minutes output rate 0 bits/sec, 0 bytes/sec, 0 frames/sec1 frames input, 164 bytes0 discards, 0 errors0 CRC, 0 unknown class0 too long, 0 too short1 frames output, 164 bytes0 discards, 0 errors0 input OLS, 0 LRR, 0 NOS, 0 loop inits0 output OLS, 0 LRR, 0 NOS, 0 loop initsfc1/6 is down (Administratively down)Hardware is Fibre Channel, SFP is short wave laser w/o OFC (SN)Port WWN is 20:06:00:0d:ec:67:81:00Admin port mode is auto, trunk mode is onsnmp link state traps are enabledPort vsan is 1Receive data field Size is 2112Beacon is turned off5 minutes input rate 0 bits/sec, 0 bytes/sec, 0 frames/sec5 minutes output rate 0 bits/sec, 0 bytes/sec, 0 frames/sec1 frames input, 116 bytes0 discards, 0 errors0 CRC, 0 unknown class0 too long, 0 too short1 frames output, 116 bytes0 discards, 0 errors0 input OLS, 0 LRR, 0 NOS, 0 loop inits0 output OLS, 0 LRR, 0 NOS, 0 loop initsfc1/7 is down (Administratively down)Hardware is Fibre Channel, SFP is short wave laser w/o OFC (SN)Port WWN is 20:07:00:0d:ec:67:81:00Admin port mode is auto, trunk mode is onsnmp link state traps are enabledPort vsan is 1Receive data field Size is 2112Beacon is turned off5 minutes input rate 0 bits/sec, 0 bytes/sec, 0 frames/sec5 minutes output rate 0 bits/sec, 0 bytes/sec, 0 frames/sec1 frames input, 216 bytes0 discards, 0 errors0 CRC, 0 unknown class0 too long, 0 too short1 frames output, 216 bytes0 discards, 0 errors0 input OLS, 0 LRR, 0 NOS, 0 loop inits0 output OLS, 0 LRR, 0 NOS, 0 loop initsfc1/8 is down (Administratively down)Hardware is Fibre Channel, SFP is short wave laser w/o OFC (SN)Port WWN is 20:08:00:0d:ec:67:81:00Admin port mode is auto, trunk mode is onsnmp link state traps are enabledPort vsan is 1Receive data field Size is 2112Beacon is turned off5 minutes input rate 0 bits/sec, 0 bytes/sec, 0 frames/sec 5 minutes output rate 0 bits/sec, 0 bytes/sec, 0 frames/sec 1 frames input, 196 bytes0 discards, 0 errors0 CRC, 0 unknown class0 too long, 0 too short1 frames output, 196 bytes0 discards, 0 errors0 input OLS, 0 LRR, 0 NOS, 0 loop inits0 output OLS, 0 LRR, 0 NOS, 0 loop initsfc1/9 is down (Administratively down)Hardware is Fibre Channel, SFP is shortwave laser w/o OFC (SN)Port WWN is 20:09:00:0d:ec:67:81:00Admin port mode is auto, trunk mode is onsnmp link state traps are enabledPort vsan is 1Receive data field Size is 2112Beacon is turned off5 minutes input rate 0 bits/sec, 0 bytes/sec, 0 frames/sec 5 minutes output rate 0 bits/sec, 0 bytes/sec, 0 frames/sec 1 frames input, 108 bytes0 discards, 0 errors0 CRC, 0 unknown class0 too long, 0 too short1 frames output, 108 bytes0 discards, 0 errors0 input OLS, 0 LRR, 0 NOS, 0 loop inits0 output OLS, 0 LRR, 0 NOS, 0 loop initsfc1/10 is down (Administratively down)Hardware is Fibre Channel, SFP is short wave laser w/o OFC (SN)Port WWN is 20:0a:00:0d:ec:67:81:00Admin port mode is auto, trunk mode is onsnmp link state traps are enabledPort vsan is 1Receive data field Size is 2112Beacon is turned off5 minutes input rate 0 bits/sec, 0 bytes/sec, 0 frames/sec5 minutes output rate 0 bits/sec, 0 bytes/sec, 0 frames/sec1 frames input, 216 bytes0 discards, 0 errors0 CRC, 0 unknown class0 too long, 0 too short1 frames output, 216 bytes0 discards, 0 errors0 input OLS, 0 LRR, 0 NOS, 0 loop inits0 output OLS, 0 LRR, 0 NOS, 0 loop initsfc1/11 is down (Administratively down)Hardware is Fibre Channel, SFP is short wave laser w/o OFC (SN)Port WWN is 20:0b:00:0d:ec:67:81:00Admin port mode is auto, trunk mode is onsnmp link state traps are enabledPort vsan is 1Receive data field Size is 2112Beacon is turned off5 minutes input rate 0 bits/sec, 0 bytes/sec, 0 frames/sec5 minutes output rate 0 bits/sec, 0 bytes/sec, 0 frames/sec1 frames input, 116 bytes0 discards, 0 errors0 CRC, 0 unknown class0 too long, 0 too short1 frames output, 116 bytes0 discards, 0 errors0 input OLS, 0 LRR, 0 NOS, 0 loop inits0 output OLS, 0 LRR, 0 NOS, 0 loop initsfc1/12 is down (Administratively down)Hardware is Fibre Channel, SFP is short wave laser w/o OFC (SN)Port WWN is 20:0c:00:0d:ec:67:81:00Admin port mode is auto, trunk mode is onsnmp link state traps are enabledPort vsan is 1Receive data field Size is 2112Beacon is turned off5 minutes input rate 0 bits/sec, 0 bytes/sec, 0 frames/sec5 minutes output rate 0 bits/sec, 0 bytes/sec, 0 frames/sec1 frames input, 204 bytes0 discards, 0 errors0 CRC, 0 unknown class0 too long, 0 too short1 frames output, 204 bytes0 discards, 0 errors0 input OLS, 0 LRR, 0 NOS, 0 loop inits0 output OLS, 0 LRR, 0 NOS, 0 loop initsfc1/13 is down (port activation license not available)Hardware is Fibre Channel, SFP is short wave laser w/o OFC (SN)Port WWN is 20:0d:00:0d:ec:67:81:00Admin port mode is auto, trunk mode is onsnmp link state traps are enabledPort vsan is 1Receive data field Size is 2112Beacon is turned off5 minutes input rate 0 bits/sec, 0 bytes/sec, 0 frames/sec5 minutes output rate 0 bits/sec, 0 bytes/sec, 0 frames/sec1 frames input, 168 bytes0 discards, 0 errors0 CRC, 0 unknown class0 too long, 0 too short1 frames output, 168 bytes0 discards, 0 errors0 input OLS, 0 LRR, 0 NOS, 0 loop inits0 output OLS, 0 LRR, 0 NOS, 0 loop initsfc1/14 is down (Administratively down)Hardware is Fibre Channel, SFP is short wave laser w/o OFC (SN)Port WWN is 20:0e:00:0d:ec:67:81:00Admin port mode is auto, trunk mode is onsnmp link state traps are enabledPort vsan is 1Receive data field Size is 2112Beacon is turned off5 minutes input rate 0 bits/sec, 0 bytes/sec, 0 frames/sec5 minutes output rate 0 bits/sec, 0 bytes/sec, 0 frames/sec1 frames input, 220 bytes0 discards, 0 errors0 CRC, 0 unknown class0 too long, 0 too short1 frames output, 220 bytes0 discards, 0 errors0 input OLS, 0 LRR, 0 NOS, 0 loop inits0 output OLS, 0 LRR, 0 NOS, 0 loop initsfc1/15 is down (Administratively down)Hardware is Fibre Channel, SFP is short wave laser w/o OFC (SN)Port WWN is 20:0f:00:0d:ec:67:81:00Admin port mode is auto, trunk mode is onsnmp link state traps are enabledPort vsan is 1Receive data field Size is 2112Beacon is turned off5 minutes input rate 0 bits/sec, 0 bytes/sec, 0 frames/sec5 minutes output rate 0 bits/sec, 0 bytes/sec, 0 frames/sec1 frames input, 148 bytes0 discards, 0 errors0 CRC, 0 unknown class0 too long, 0 too short1 frames output, 148 bytes0 discards, 0 errors0 input OLS, 0 LRR, 0 NOS, 0 loop inits0 output OLS, 0 LRR, 0 NOS, 0 loop initsfc1/16 is down (Administratively down)Hardware is Fibre Channel, SFP is short wave laser w/o OFC (SN)Port WWN is 20:10:00:0d:ec:67:81:00Admin port mode is auto, trunk mode is onsnmp link state traps are enabledPort vsan is 1Receive data field Size is 2112Beacon is turned off5 minutes input rate 0 bits/sec, 0 bytes/sec, 0 frames/sec5 minutes output rate 0 bits/sec, 0 bytes/sec, 0 frames/sec1 frames input, 216 bytes0 discards, 0 errors0 CRC, 0 unknown class0 too long, 0 too short1 frames output, 216 bytes0 discards, 0 errors0 input OLS, 0 LRR, 0 NOS, 0 loop inits0 output OLS, 0 LRR, 0 NOS, 0 loop initsfc1/17 is down (SFP not present)Hardware is Fibre ChannelPort WWN is 20:11:00:0d:ec:67:81:00Admin port mode is auto, trunk mode is onsnmplink state traps are enabledPort vsan is 1Receive data field Size is 2112Beacon is turned off5 minutes input rate 0 bits/sec, 0 bytes/sec, 0 frames/sec 5 minutes output rate 0 bits/sec, 0 bytes/sec, 0 frames/sec 1 frames input, 220 bytes0 discards, 0 errors0 CRC, 0 unknown class0 too long, 0 too short1 frames output, 220 bytes0 discards, 0 errors0 input OLS, 0 LRR, 0 NOS, 0 loop inits0 output OLS, 0 LRR, 0 NOS, 0 loop initsfc1/18 is down (SFP not present)Hardware is Fibre ChannelPort WWN is 20:12:00:0d:ec:67:81:00Admin port mode is auto, trunk mode is onsnmp link state traps are enabledPort vsan is 1Receive data field Size is 2112Beacon is turned off5 minutes input rate 0 bits/sec, 0 bytes/sec, 0 frames/sec 5 minutes output rate 0 bits/sec, 0 bytes/sec, 0 frames/sec 1 frames input, 116 bytes0 discards, 0 errors0 CRC, 0 unknown class0 too long, 0 too short1 frames output, 116 bytes0 discards, 0 errors0 input OLS, 0 LRR, 0 NOS, 0 loop inits0 output OLS, 0 LRR, 0 NOS, 0 loop initsfc1/19 is down (SFP not present)Hardware is Fibre ChannelPort WWN is 20:13:00:0d:ec:67:81:00Admin port mode is auto, trunk mode is onsnmp link state traps are enabledPort vsan is 1Receive data field Size is 2112Beacon is turned off5 minutes input rate 0 bits/sec, 0 bytes/sec, 0 frames/sec 5 minutes output rate 0 bits/sec, 0 bytes/sec, 0 frames/sec 1 frames input, 120 bytes0 discards, 0 errors0 CRC, 0 unknown class0 too long, 0 too short1 frames output, 120 bytes0 discards, 0 errors0 input OLS, 0 LRR, 0 NOS, 0 loop inits0 output OLS, 0 LRR, 0 NOS, 0 loop initsfc1/20 is down (SFP not present)Hardware is Fibre ChannelPort WWN is 20:14:00:0d:ec:67:81:00Admin port mode is auto, trunk mode is onsnmp link state traps are enabledPort vsan is 1Receive data field Size is 2112Beacon is turned off5 minutes input rate 0 bits/sec, 0 bytes/sec, 0 frames/sec 5 minutes output rate 0 bits/sec, 0 bytes/sec, 0 frames/sec 1 frames input, 144 bytes0 discards, 0 errors0 CRC, 0 unknown class0 too long, 0 too short1 frames output, 144 bytes0 discards, 0 errors0 input OLS, 0 LRR, 0 NOS, 0 loop inits0 output OLS, 0 LRR, 0 NOS, 0 loop initsfc1/21 is down (SFP not present)Hardware is Fibre ChannelPort WWN is 20:15:00:0d:ec:67:81:00Admin port mode is auto, trunk mode is onsnmp link state traps are enabledPort vsan is 1Receive data field Size is 2112Beacon is turned off5 minutes input rate 0 bits/sec, 0 bytes/sec, 0 frames/sec 5 minutes output rate 0 bits/sec, 0 bytes/sec, 0 frames/sec1 frames input, 108 bytes0 discards, 0 errors0 CRC, 0 unknown class0 too long, 0 too short1 frames output, 108 bytes0 discards, 0 errors0 input OLS, 0 LRR, 0 NOS, 0 loop inits0 output OLS, 0 LRR, 0 NOS, 0 loop initsfc1/22 is down (SFP not present)Hardware is Fibre ChannelPort WWN is 20:16:00:0d:ec:67:81:00Admin port mode is auto, trunk mode is onsnmp link state traps are enabledPort vsan is 1Receive data field Size is 2112Beacon is turned off5 minutes input rate 0 bits/sec, 0 bytes/sec, 0 frames/sec 5 minutes output rate 0 bits/sec, 0 bytes/sec, 0 frames/sec 1 frames input, 200 bytes0 discards, 0 errors0 CRC, 0 unknown class0 too long, 0 too short1 frames output, 200 bytes0 discards, 0 errors0 input OLS, 0 LRR, 0 NOS, 0 loop inits0 output OLS, 0 LRR, 0 NOS, 0 loop initsfc1/23 is down (SFP not present)Hardware is Fibre ChannelPort WWN is 20:17:00:0d:ec:67:81:00Admin port mode is auto, trunk mode is onsnmp link state traps are enabledPort vsan is 1Receive data field Size is 2112Beacon is turned off5 minutes input rate 0 bits/sec, 0 bytes/sec, 0 frames/sec 5 minutes output rate 0 bits/sec, 0 bytes/sec, 0 frames/sec 1 frames input, 112 bytes0 discards, 0 errors0 CRC, 0 unknown class0 too long, 0 too short1 frames output, 112 bytes0 discards, 0 errors0 input OLS, 0 LRR, 0 NOS, 0 loop inits0 output OLS, 0 LRR, 0 NOS, 0 loop initsfc1/24 is down (SFP not present)Hardware is Fibre ChannelPort WWN is 20:18:00:0d:ec:67:81:00Admin port mode is auto, trunk mode is onsnmp link state traps are enabledPort vsan is 1Receive data field Size is 2112Beacon is turned off5 minutes input rate 0 bits/sec, 0 bytes/sec, 0 frames/sec 5 minutes output rate 0 bits/sec, 0 bytes/sec, 0 frames/sec 1 frames input, 192 bytes0 discards, 0 errors0 CRC, 0 unknown class0 too long, 0 too short1 frames output, 192 bytes0 discards, 0 errors0 input OLS, 0 LRR, 0 NOS, 0 loop inits0 output OLS, 0 LRR, 0 NOS, 0 loop initssup-fc0 is upHardware is Fibre ChannelSpeed is 1 Gbps5874 packets input, 1087868 bytes0 multicast frames, 0 compressed0 input errors, 0 frame, 0 overrun 0 fifo5874 packets output, 1087868 bytes, 0 underruns 0 output errors, 0 collisions, 0 fifo0 carrier errorsmgmt0 is down (Initializing)Hardware is FastEthernetAddress is 000d.ec3d.fdb0Internet address is 192.168.0.22/24MTU 1500 bytes893 packets input, 208787 bytes0 multicast frames, 0 compressed0 input errors, 0 frame, 0 overrun 0 fifo794 packets output, 358531 bytes, 0 underruns0 output errors, 0 collisions, 0 fifo0 carrier errors。
光纤交换机配置详解

光纤交换机配置详解目录第1章S A N结构的存储区域(Z O N E)的规划 (2)第2章收集光纤交换机的配置信息 (6)2.1总体信息 (6)2.2Zone配置信息 (6)第3章网上参考文档 (7)3.1参考文档1 (7)3.2参考文档2 (8)3.3参考文档3 (14)第1章SAN结构的存储区域(ZONE)的规划在传统的没有SAN网络存在的系统中,网络中的各台主机是相互独立的,主机只能访问自己的硬盘,数据不会在存储级丧失安全性。
为了是SAN网络的可用性,在部署SAN架构的时候,一般都采用了冗余的架构,为了使这些可用的设备互不影响,,使主机访问存储设备路径的唯一性,需要对SAN架构中的存储设备,光纤交换机,主机划分不同的ZONE。
具体划分ZONE的方法详见下实例。
一号工程在实施之初大多数都采用如下的方案,这种方案存在一定的隐患,即光纤交换机没有冗余,这种方案如果不进行ZONE的设置,可能会导致系统不能使用存储阵列的情况。
我们建议个烟厂的系统管理员对一号工程的SAN网络进行检查,并对系统进行设置。
一.环境:DB2:HBA1/HBA2WAS:HBA1/HBA2FAST600:控制器A/控制器BSAN Switch: ibm h08或ibm h16二.配置原则:以一块HBA卡对应一个控制器的原则进行zone配置连接示意图三.具体配置操作步骤和方法:1. 用网线连接到交换机的管理口#telnet 10.77.77.77用户名:admin密码:password2. 查看交换机器端口连接#switchshowArea Port Media Speed State==============================0 0 id N2 Online F-Port 10:00:00:00:c9:42:a0:44(DB2_HBA1)1 1 id N2 Online F-Port 10:00:00:00:c9:45:b6:ea (DB2_HBA2)2 2 id N2 Online F-Port 20:05:00:a0:b8:18:d2:0a (WAS_HBA1)3 3 id N2 Online F-Port 20:04:00:a0:b8:18:d2:0a (WAS_HBA2)4 4 id N4 Online (控制器A)5 5 id N4 Online (控制器B)6 6 id N4 No_Light7 7 id N4 No_Light8 8 -- N4 No_Module (No POD License) Disabled3.划分zone输入以下命令zoneCreate "zone1","1,0;1,4"zoneCreate "zone2","1,1;1,5"zoneCreate "zone3","1,2;1,4"zoneCreate "zone4","1,3;1,5"cfgCreate "ibmp630","zone1;zone2; zone3; zone3" cfgEnable "ibmp630"cfgSave4.最后查看ZONE的划分做最后校验# zoneshowDefined configuration:cfg: ibmp630 zone1; zone1; zone1; zone1 zone: zone1 1,0; 1,4zone: zone2 1,1; 1,5zone: zone3 1,2; 1,4zone: zone4 1,3;1,5Effective configuration:cfg: ibmp630zone: zone1 1,01,4zone: zone2 1,11,5 zone: zone3 1,21,4 zone: zone4 1,31,5第1章收集光纤交换机的配置信息1.1 总体信息#switchshow例子1:例子2:1.2 Zone配置信息#zoneshow例子1:例子2:第2章网上参考文档2.1 参考文档1来源:/logs/14713887.html在SAN的环境中,光纤交换机(FC Switch)起着至关重要的作用,而FC Switch 的配置目前有GUI界面和CLI两种方式,GUI界面操作简单,但是花费时间较长,适合做较少配置时使用;CLI配置操作相对复杂,但是效率高,适合做大量配置时使用。
EMC、光纤交换机及服务器配置过程总结v
EMC、光纤互换机及办事器配置历程总结目录1概述 (3)2光纤互换机配置 (4)现有光纤互换机信息 (4)sw01 (4)Sw02 (5)设备连接汇总表 (5)光纤互换机配置 (6)术语 (6)光纤互换机配置历程 (6)3办事器agent安装 (10) (10)安装Agent (10)安装powerpath ODM补丁 (11)安装powerpath (13)Linux AS4 (14)参数配置 (14)安装配置PowerPath (15)安装agent (15)Windows 2003 (15)安装PowerPath (15)安装Agent (22)4EMC配置 (27)EMC识别办事器 (28)RAID Group的创建 (29)LUN的创建 (30)Storage Group的创建 (31)LUN到办事器的分派 (32)5办事器识盘确认 (34) (34)Linux AS4 (34)Windows 2003 (34)版本记载1概述本文主要从实用的角度整个描述EMC的分别、光纤互换机的配置以及办事器的设置,最终实现SAN情况中办事器乐成分派EMC空间。
首先我们在光纤互换机上界说一些通道即zone,允许办事器与EMC通讯;其次EMC 能够识别到办事器并将EMC空间分别给办事器;最后办事器乐成识别到EMC分别的空间。
本文根据配置顺序对付配置历程中的步调一一描述:本文配置历程配景:p550DB、mttest、gfstest1、gfstest2四台办事器需要通过光纤互换机连接EMC,p550DB、mttest能且只能访问EMC分派的独立空间;gfstest1、gfstest2也能能且只能够访问EMC分别的独立空间。
2光纤互换机配置2.1 现有光纤互换机信息现有SAN网络中使用光纤互换机两台,具体信息如下:2.1.1sw012、端口物理连接如下:2.1.2Sw02互换机型号EMC Conectrix DS16B3,端口物理连接如下:2.1.3设备连接汇总表2.2 光纤互换机配置2.2.1术语配置Zone需要涉及到三个工具的配置Alias,Zone,Configuration:Alias可以把设备的WWN或Domain,Port声明为Alias,用于更好更直观的标示设备;同时当Zone中的某个成员调换时,如果界说了Alias,只要修改Alias的界说就可以调解Zone 中的成员,而不消修改Zone的配置。
光纤交换机简单配置手册.docx
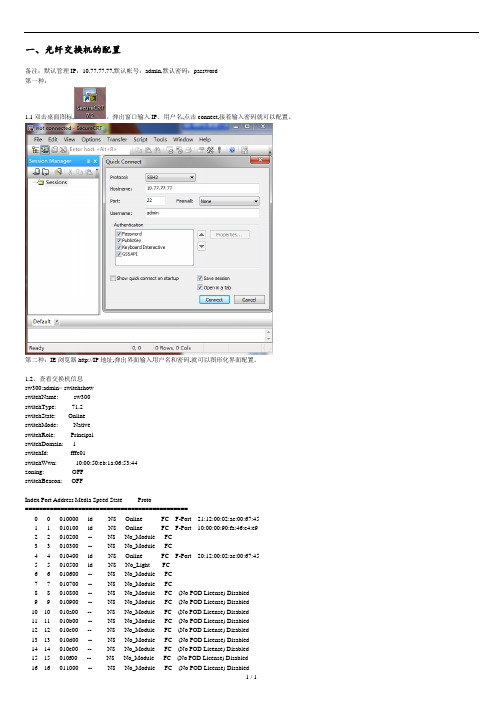
一、光纤交换机的配置备注:默认管理IP:10.77.77.77,默认帐号:admin,默认密码:password第一种:1.1双击桌面图标,。
弹出窗口输入IP、用户名,点击connect,接着输入密码就可以配置。
第二种:IE浏览器http://IP地址,弹出界面输入用户名和密码,就可以图形化界面配置。
1.2、查看交换机信息sw300:admin> switchshowswitchName: sw300switchType: 71.2switchState: OnlineswitchMode: NativeswitchRole: PrincipalswitchDomain: 1switchId: fffc01switchWwn: 10:00:50:eb:1a:06:53:44zoning: OFFswitchBeacon: OFFIndex Port Address Media Speed State Proto==============================================0 0 010000 id N8 Online FC F-Port 21:12:00:02:ac:00:67:451 1 010100 id N8 Online FC F-Port 10:00:00:90:fa:46:c4:e92 2 010200 -- N8 No_Module FC3 3 010300 -- N8 No_Module FC4 4 010400 id N8 Online FC F-Port 20:12:00:02:ac:00:67:455 5 010500 id N8 No_Light FC6 6 010600 -- N8 No_Module FC7 7 010700 -- N8 No_Module FC8 8 010800 -- N8 No_Module FC (No POD License) Disabled9 9 010900 -- N8 No_Module FC (No POD License) Disabled10 10 010a00 -- N8 No_Module FC (No POD License) Disabled11 11 010b00 -- N8 No_Module FC (No POD License) Disabled12 12 010c00 -- N8 No_Module FC (No POD License) Disabled13 13 010d00 -- N8 No_Module FC (No POD License) Disabled14 14 010e00 -- N8 No_Module FC (No POD License) Disabled15 15 010f00 -- N8 No_Module FC (No POD License) Disabled16 16 011000 -- N8 No_Module FC (No POD License) Disabled17 17 011100 -- N8 No_Module FC (No POD License) Disabled18 18 011200 -- N8 No_Module FC (No POD License) Disabled19 19 011300 -- N8 No_Module FC (No POD License) Disabled20 20 011400 -- N8 No_Module FC (No POD License) Disabled21 21 011500 -- N8 No_Module FC (No POD License) Disabled22 22 011600 -- N8 No_Module FC (No POD License) Disabled23 23 011700 -- N8 No_Module FC (No POD License) Disabled1.3、查看licenseshow信息。
光纤交换机简单配置手册.docx

一、光纤交换机的配置备注:默认管理IP:10.77.77.77,默认帐号:admin,默认密码:password第一种:1.1双击桌面图标,。
弹出窗口输入IP、用户名,点击connect,接着输入密码就可以配置。
第二种:IE浏览器http://IP地址,弹出界面输入用户名和密码,就可以图形化界面配置。
1.2、查看交换机信息sw300:admin> switchshowswitchName: sw300switchType: 71.2switchState: OnlineswitchMode: NativeswitchRole: PrincipalswitchDomain: 1switchId: fffc01switchWwn: 10:00:50:eb:1a:06:53:44zoning: OFFswitchBeacon: OFFIndex Port Address Media Speed State Proto==============================================0 0 010000 id N8 Online FC F-Port 21:12:00:02:ac:00:67:451 1 010100 id N8 Online FC F-Port 10:00:00:90:fa:46:c4:e92 2 010200 -- N8 No_Module FC3 3 010300 -- N8 No_Module FC4 4 010400 id N8 Online FC F-Port 20:12:00:02:ac:00:67:455 5 010500 id N8 No_Light FC6 6 010600 -- N8 No_Module FC7 7 010700 -- N8 No_Module FC8 8 010800 -- N8 No_Module FC (No POD License) Disabled9 9 010900 -- N8 No_Module FC (No POD License) Disabled10 10 010a00 -- N8 No_Module FC (No POD License) Disabled11 11 010b00 -- N8 No_Module FC (No POD License) Disabled12 12 010c00 -- N8 No_Module FC (No POD License) Disabled13 13 010d00 -- N8 No_Module FC (No POD License) Disabled14 14 010e00 -- N8 No_Module FC (No POD License) Disabled15 15 010f00 -- N8 No_Module FC (No POD License) Disabled16 16 011000 -- N8 No_Module FC (No POD License) Disabled17 17 011100 -- N8 No_Module FC (No POD License) Disabled18 18 011200 -- N8 No_Module FC (No POD License) Disabled19 19 011300 -- N8 No_Module FC (No POD License) Disabled20 20 011400 -- N8 No_Module FC (No POD License) Disabled21 21 011500 -- N8 No_Module FC (No POD License) Disabled22 22 011600 -- N8 No_Module FC (No POD License) Disabled23 23 011700 -- N8 No_Module FC (No POD License) Disabled1.3、查看licenseshow信息。
EMC设备配置操作说明
EMC系统操作手册EMC光纤交换机、磁盘阵列操作手册设备型号:DS_300B&EMC CX-4 240承建单位:宁夏希望信息产业有限公司监理单位:深圳市东方天成管理顾问有限公司建设单位:宁夏医科大学附属医院编写日期:二零一零年一月目录1.1 EMC DS_300B_A (3)1.2 定义zone (4)2.1 EMC DS_300B_B (7)2.2 定义zone (8)3.1 EMC B300_B 配置信息 (11)4.1 EMC CX-4 240 配置信息 (16)4.2 初始化阵列系统 (16)4.3 阵列的设置 (20)4.4 主机软件安装和配置 (29)5.1 端口对照表 (34)1.1 EMC DS_300B_A在浏览器的地址栏里输入EMC DS_300B的默认ip地址10.77.77.77,用户名admin,密码password,定义本机的管理地址为10.0.11.63,管理机器名称为DS_300B_A,定义完毕后信息如下根据Manufacturer serial number ALJ0634E06B;Supplier serial number BRCALJ0634E06B;上网注册得到的License ID,激活8-15端口。
由图中可以看出,前面16个端口为深灰色可用状态。
1.2 定义zone定义zone,在zone admin 界面下定义Zone1,根据DS_300B_A端口对照表,将交换机的0,1,2端口加入到zone1当中,然后保存启动zone1,配置信息如下将交换机的0,1,3端口加入到zone2当中,然后保存启动zone2将交换机的0,1,4端口加入到zone3当中,然后保存启动zone3。
在交换机名称定义里,填入DS_300B_A,交换机信息如下修改交换机的默认管理地址为10.0.11.63,网关定义为10.0.11.1,以方便在网络中进行管理。
交换机许可信息如下,由下图可以看出总共激活16个端口。
光纤交换机配置详解

光纤交换机配置详解目录第1章S A N结构的存储区域(Z O N E)的规划 (2)第1章收集光纤交换机的配置信息 (6)1.1总体信息 (6)1.2Zone配置信息 (6)第2章网上参考文档 (7)2.1参考文档1 (7)2.2参考文档2 (8)2.3参考文档3 (14)第1章SAN结构的存储区域(ZONE)的规划在传统的没有SAN网络存在的系统中,网络中的各台主机是相互独立的,主机只能访问自己的硬盘,数据不会在存储级丧失安全性。
为了是SAN网络的可用性,在部署SAN架构的时候,一般都采用了冗余的架构,为了使这些可用的设备互不影响,,使主机访问存储设备路径的唯一性,需要对SAN架构中的存储设备,光纤交换机,主机划分不同的ZONE。
具体划分ZONE的方法详见下实例。
一号工程在实施之初大多数都采用如下的方案,这种方案存在一定的隐患,即光纤交换机没有冗余,这种方案如果不进行ZONE的设置,可能会导致系统不能使用存储阵列的情况。
我们建议个烟厂的系统管理员对一号工程的SAN网络进行检查,并对系统进行设置。
一.环境:DB2:HBA1/HBA2WAS:HBA1/HBA2FAST600:控制器A/控制器BSAN Switch: ibm h08或ibm h16二.配置原则:以一块HBA卡对应一个控制器的原则进行zone配置连接示意图三.具体配置操作步骤和方法:1. 用网线连接到交换机的管理口#telnet 用户名:admin密码:password2. 查看交换机器端口连接#switchshowArea Port Media Speed State==============================0 0 id N2 Online F-Port 10:00:00:00:c9:42:a0:44(DB2_HBA1)1 1 id N2 Online F-Port 10:00:00:00:c9:45:b6:ea (DB2_HBA2)2 2 id N2 Online F-Port 20:05:00:a0:b8:18:d2:0a (WAS_HBA1)3 3 id N2 Online F-Port 20:04:00:a0:b8:18:d2:0a (WAS_HBA2)4 4 id N4 Online (控制器A)5 5 id N4 Online (控制器B)6 6 id N4 No_Light7 7 id N4 No_Light8 8 -- N4 No_Module (No POD License) Disabled3.划分zone输入以下命令zoneCreate "zone1","1,0;1,4"zoneCreate "zone2","1,1;1,5"zoneCreate "zone3","1,2;1,4"zoneCreate "zone4","1,3;1,5"cfgCreate "ibmp630","zone1;zone2; zone3; zone3" cfgEnable "ibmp630"cfgSave4.最后查看ZONE的划分做最后校验# zoneshowDefined configuration:cfg: ibmp630 zone1; zone1; zone1; zone1 zone: zone1 1,0; 1,4zone: zone2 1,1; 1,5zone: zone3 1,2; 1,4zone: zone4 1,3;1,5Effective configuration:cfg: ibmp630zone: zone1 1,01,4zone: zone2 1,11,5 zone: zone3 1,21,4 zone: zone4 1,31,5第1章收集光纤交换机的配置信息1.1 总体信息#switchshow例子1:例子2:1.2 Zone配置信息#zoneshow例子1:例子2:第2章网上参考文档2.1 参考文档1来源:在SAN的环境中,光纤交换机(FC Switch)起着至关重要的作用,而FC Switch的配置目前有GUI界面和CLI两种方式,GUI界面操作简单,但是花费时间较长,适合做较少配置时使用;CLI配置操作相对复杂,但是效率高,适合做大量配置时使用。
EMC DS-300B光纤交换机配置文档

EMC DS300B光纤交换机配置Zone
系统要求:使用WEB方式连接,配置机器需要安装有JAVA
光纤交换机默认的IP地址:10.77.77.77
默认的子网掩码:255.255.255.0
1.给配置机器配置一个和光纤交换机相同网段的IP地址.
例如:10.77.77.50/24
2.把网线一端插入光前交换机的网络配置口,
备注:光纤交换机上有2个管理口,1个是用串口方式,这里使用的是IP管理口.
3.使用IE,直接键入:10.77.77.77
输入用户名和密码.
默认用户名:admin
默认密码:password
4.下图为初试界面
5.点击界面左侧的Zone Admin
6.下图为Zone Admin的界面
7先点击红线标出的Zone,然后点击绿线标出New Zone,会出现输入Zone Name 的对话框.
8. 先选择Zone名称,然后把交换机的端口添加进Zone内.
9. 然后创建Zone Congfig组
10. 选择congfig名称,然后把配置好的Zone添加进congfig中
11. 然后Save Config ,然后Enable Config。
博科光纤交换机和EMC存储配置
博科光纤交换机和EMC存储划分操作指南目录1、背景【拓扑描述】 (2)2、存储划分的准备工作: (2)3、存储划分的步骤: (2)1、在光纤交换机上建立逻辑的链路; (2)2、在存储上应用链路和策略; (3)4、例子(广州资源池): (3)1、准备工作 (3)a、查看服务器WWN号 (3)b、在相应的EMC存储上查看 (4)c、在光纤交换机上,查看服务器连接过来的WWN号,并确定服务器连接到光纤交换机上的对应端口号。
(7)d、使用telnet登陆光纤交换交换机上查看WWN号对应的端口号 (8)e、查看光纤交换机上是否有对应的zone和端口号,以及zone config配置。
(12)2、创建new zone,并添加path。
(14)a、创建new zone: (14)b、创建完成后开始添加PATH (15)c、使用zone config,应用zone config,并使用zoneconfig生效。
(17)d、登陆EMC存储查看添加结果 (19)3、在EMC上配置存储 (20)a、注册主机(把添加进来的主机的WWN号注册) (20)b、查看注册成功的主机状态以及PATH (22)c、注册完主机后建立存储分组 (22)d、建立完存储分组后开始添加主机host和存储LUN (24)添加主机 (24)e、本次划完存储的最终结果 (27)4、验证 (29)5、四川资源池中不同存储界面的例子: (30)1、背景【拓扑描述】2、存储划分的准备工作:a、在服务器上,获取服务器的WWN号,以及各个端口的状态;b、在光纤交换机上,获取服务器连接的光纤交换机设备管理ip和端口;c、在存储上,确定什么类型的存储、存储容量和数量、以及挂载方式是共享或是独享的;d、在光纤交换机和存储上是否已经划分过存储,如果划分过就省去好多操作;3、存储划分的步骤:1、在光纤交换机上建立逻辑的链路;a、建立zone;b、在新建的zone中添加路径;c、使用当前zone config,使zone config生效;2、在存储上应用链路和策略;a、对添加过来的WWN号进行注册,并建立相应的主机;b、建立存储组,并添加对应的存储LUN和主机HOST;先介绍一下在光纤交换机上建立逻辑链路的方法【实际上建立zone并划分】:第一种是根据port划分,直接是光纤交换机的端口连接存储端的端口,比如光纤交换机上的port1连接到存储端的port4。
博科300光纤交换机配置手册及操作方法教程
博科300光纤交换机配置手册及操作方法教程交换机管理的最基本方法,通过命令行的方式直接登录到交换机上,通过交换机上操作系统(Fabric OS)提供的命令对交换机作管理工作。
能完成对单台交换机管理的所有功能,对操作者对管理命令非常熟悉。
接下来是小编为大家收集的博科300光纤交换机配置手册及操作方法教程,希望能帮到大家。
博科300光纤交换机配置手册及操作方法教程WEB TOOLS:图形界面的管理工具,通过浏览器对交换机完成管理工作。
视觉效果比Telnet好很多,并且在性能监视时能提供多种视图。
能完成对单台交换机管理的大多数功能,适合大多数用户使用。
Fabric Manager:对SAN网络中的交换机进行批量管理的工具。
能对SAN网络中的多台交换机,在一个管理站一次性的完成管理工作。
方便SAN网络的统一管理。
SNMP 网络管理的标准协议在Brocade交换机上运行有SNMP模块,让网络中的SNMP管理工作站对SAN网络完成管理工作。
通过管理工具,能完成对整个SAN网络的监视,但能修改的参数有限。
对操作者要求较高。
Fabric Access API为了让SAN网络能和很多上层的管理软件紧密集成,Brocade公司在他的交换机上提供了API编程接口,让其他的应用软件可以方便的通过该接口,直接访问交换机上的各种信息。
让网络管理软件能直接监视并管理光纤通道网络。
与交换机交互,可以使用三种方式:串口以太网口光纤口缺省的串口参数是:9600,N,8,1缺省IP访问方式是:IP地址: 10.77.77.77用户名: admin密码:password时区: Pacific time交换机名称:switch可使用ipAddrSet命令来重新设置交换机的IP地址。
在200和300系列交换机之中,只能同时支持一个T elnet进程。
Brocade的交换机可以使用命令行和图形界面方式进行管理。
代表性的CLI方法代表性的如:Telnet,HyperTerm和tip。
ds300配置和安装指南
IBM服务器DS300配置指南2005-12-16 10:58:18 menling 来源:中华服务器网点击:534次加入收藏夹使用一台PC机作为管理节点,安装Server Raid Manager 7.21。
通过直连网线与DS30 0管理端口(eth0)连接,作为配置阵列以及监控盘柜工作状态。
在X服务器上安装ISCSI 适配器,并通过五类或者六类网线连接ISCSI接口与DS300数据口(eth2/eth3),作为数据传输网络。
配置过程:1.分别在X服务器上安装操作系统,安装完成后,通过ISCSI卡带的光盘安装驱动程序。
在系统内安装ISCSI适配器管理软件SANsurfer Control ix,安装方法:打开光盘,运行文件夹32bit windows SSIX内install程序,然后按照提示安装程序至完成。
2.软件安装完成后,打开DS300管理节点(PC机)。
运行“telnet: 192.168.70.124”(第一个控制器管理端口默认IP地址为192.178.70.123;第二个控制器管理端口默认IP地址为192.168.70.124),通过T elnet查看DS300数据端口IP地址。
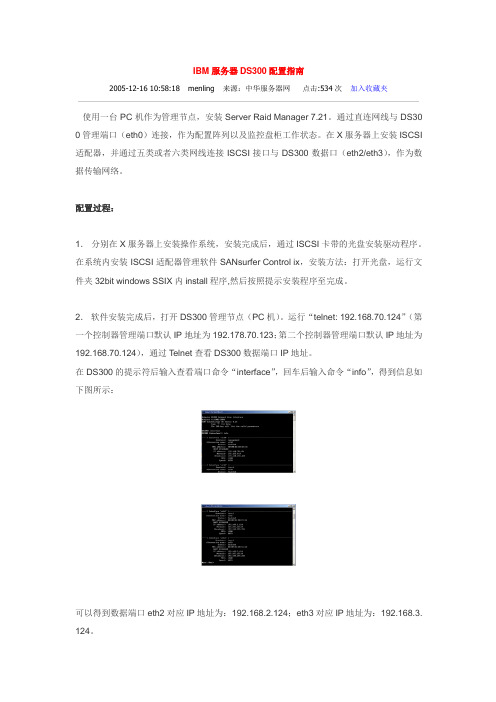
在DS300的提示符后输入查看端口命令“interface”,回车后输入命令“info”,得到信息如下图所示:可以得到数据端口eth2对应IP地址为:192.168.2.124;eth3对应IP地址为:192.168.3. 124。
如果两个数据端口的IP在一个网段,需要将其设全部更改为不同网段的IP地址。
3.打开服务器上的iSCSI管理程序SAN surfer Controlix,如下图所示:打开“HBA Options”,在“HAB Alias Name”一栏目给该适配器命名:如X335a;然后记录下iSCSI适配器的iqn号码“HBA iSCSI Name: .microsoft:x335a”(该号码也可以在Ctrl-Q中读到,并且支持符合命名规则的更改)。
博科300光纤交换机的配置
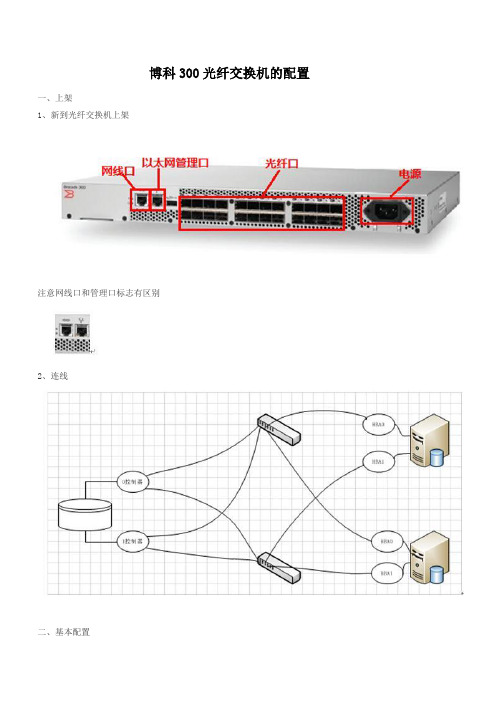
博科300光纤交换机的配置一、上架1、新到光纤交换机上架注意网线口和管理口标志有区别2、连线二、基本配置1、配置IP、修改用户密码a.新的光纤交换机默认ip为:10.77.77.77,需直连配置ipb.登录机器配置ip,用户名:admin,密码默认为passwordc.登入后的界面如下,右下角可以看到ip地址和登录用户名d.修改ip和用户密码“Manage”“Switch Admin”“Network”/“User”e.修改完成后有如下提示,需要重新登录2、启用端口a.“Manage”“Port Admin”,查看Speed(Gb/s)、Port Status,点击“Enable”(之前需要把光纤线插好,根据对应端口启用)b.检查机器状态三、配置Zone1、创建Alias首先,我们要找到主机设备的光纤HBA卡的WWN号:linux系统可以用如下的命令进行查询[14:19:21 root()@storedg host1]# cd /sys/class/fc_host/host1/ [14:19:34 root()@storedg host1]# cat port_name0x21000024ff0a6767[14:20:29 root()@storedg host2]# cat port_name0x21000024ff0a7aa2AIX系统可以用如下的命令进行查询[14:22:27 root@vposdb1 /]# lsdev -Cc adapter -S a | grep fcsfcs0 Available 04-08 FC Adapterfcs1 Available 04-09 FC Adapterfcs2 Available 02-08 FC Adapterfcs3 Available 02-09 FC Adapter[14:22:40 root@vposdb1 /]# lscfg -vpl fcs0fcs0 U78A0.001.DNWKYDT-P1-C4-T1 FC AdapterPart Number.................03N5029EC Level....................ASerial Number...............1D638080C6Manufacturer................001DCustomer Card ID Number (5759)FRU Number.................. 03N5029Device Specific.(ZM) (3)Network Address.............10000000C95A933EROS Level and ID............02C82774Device Specific.(Z0)........1036406DDevice Specific.(Z1) (00000000)Device Specific.(Z2) (00000000)Device Specific.(Z3) (03000909)Device Specific.(Z4)........FFC01231Device Specific.(Z5)........02C82774Device Specific.(Z6)........06C12715Device Specific.(Z7)........07C12774Device Specific.(Z8)........20000000C95A933EDevice Specific.(Z9)........BS2.71X4Device Specific.(ZA)........B1F2.70A5Device Specific.(ZB)........B2F2.71X4Device Specific.(ZC) (00000000)Hardware Location Code......U78A0.001.DNWKYDT-P1-C4-T1PLATFORM SPECIFICName: fibre-channelModel: LP11000Node: fibre-channel@1Device Type: fcpPhysical Location: U78A0.001.DNWKYDT-P1-C4-T“Alias”,以WWN地址划分Zone,命令格式“服务器名称_对应的HBA卡”◊“Zone Admin”◊a.“Manage”在找到WWN号以后,进入光纤交换机的管理界面b.在左边Port&Attached Devices(28 Members)中选择所对应的端口,点击Add Member将需要划分到一个zone的端口添加到右方的Alias Members 中2、创建Zonea.“Manage”“Zone Admin”“Zone”,根据Alias划分Zone,命名格式“服务器名称_对应的HBA卡_存储名称_对应0控制器的端口_对应1控制器的端口”b.根据Alias添加Zone在创建zone的时候,你需要把主机HBA卡的alias跟存储的alias添加到同一个zone中3、创建Zone Configa.“Manage”“Zone Admin”“Zone Config”b.使用默认的configure,选择创建好的Zones名字,点选“Add member”,将zone添加到config members中c.保存配置,注意下面状态栏的状态,当出现“end of commit;”时表示保存成功d.启用配置配置完成,下面开始存储的配置。
emcds-300b光纤交换机配置文档
EMC DS300B光纤交换机配置Zone
系统要求:使用WEB方式连接,配置机器需要安装有JAVA
1.光纤交换机默认的IP地址: 默认的子网掩码:给
配置机器配置一个和光纤交换机相同网段的IP地址.
2.例如:把网线一端插入光前交换机的网络配置口,
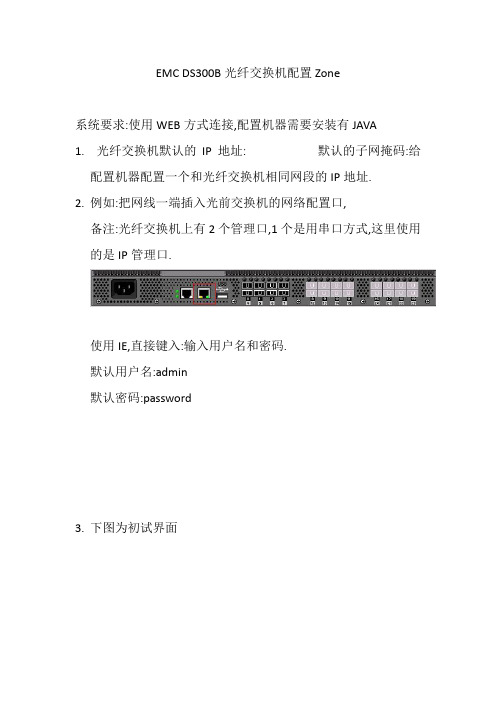
备注:光纤交换机上有2个管理口,1个是用串口方式,这里使用的是IP管理口.
使用IE,直接键入:输入用户名和密码.
默认用户名:admin
默认密码:password
3.下图为初试界面
4.点击界面左侧的Zone Admin
6.下图为Zone Admin的界面
7先点击红线标出的Zone,然后点击绿线标出New Zone,会出现输入Zone Name 的对话框.
8. 先选择Zone名称,然后把交换机的端口添加进Zone内.
9. 然后创建Zone Congfig组
10. 选择congfig名称,然后把配置好的Zone添加进congfig中
11. 然后Save Config ,然后Enable Config。
光纤交换机配置详解

光纤交换机配置详解目录第1章SAN结构的存储区域(ZONE)的规划 (2)第1 章收集光纤交换机的配置信息 (6)1.1 总体信息 (6)1.2 Zone 配置信息 (6)第2章网上参考文档. (7)2.1 参考文档1 (7)2.2 参考文档2 (8)2.3 参考文档3 (14)第1章SAN 结构的存储区域(ZONE) 的规划在传统的没有SAN 网络存在的系统中,网络中的各台主机是相互独立的,主机只能访问自己的硬盘,数据不会在存储级丧失安全性。
为了是SAN 网络的可用性,在部署SAN 架构的时候,一般都采用了冗余的架构,为了使这些可用的设备互不影响,,使主机访问存储设备路径的唯一性,需要对SAN 架构中的存储设备,光纤交换机,主机划分不同的ZONE 。
具体划分ZONE 的方法详见下实例。
一号工程在实施之初大多数都采用如下的方案,这种方案存在一定的隐患,即光纤交换机没有冗余,这种方案如果不进行ZONE 的设置,可能会导致系统不能使用存储阵列的情况。
我们建议个烟厂的系统管理员对一号工程的SAN 网络进行检查,并对系统进行设.环境:DB2 :HBA1/HBA2WAS:HBA1/HBA2FAST600 :控制器A/控制器BSAN Switch: ibm h08 或ibm h16.配置原则:以一块HBA 卡对应一个控制器的原则进行zone 配置连接示意图三.具体配置操作步骤和方法:1. 用网线连接到交换机的管理口#telnet 用户名:admin 密码:password2. 查看交换机器端口连接#switchshowArea Port Media Speed State00id N2Online F-Port10:00:00:00:c9:42:a0:44 DB2_HBA1)11id N2Online F-Port10:00:00:00:c9:45:b6:ea DB2_HBA2)22id N2Online F-Port20:05:00:a0:b8:18:d2:0a WAS_HBA1)33id N2Online F-Port20:04:00:a0:b8:18:d2:0a WAS_HBA2)44id N4Online (控制器A)55id N4Online (控制器B)66id N4No_Light77id N4No_Light88--N4No_Module (No POD License) Disabled3. 划分zone 输入以下命令zoneCreate "zone1","1,0;1,4"zoneCreate "zone2","1,1;1,5"zoneCreate "zone3","1,2;1,4"zoneCreate "zone4","1,3;1,5"cfgCreate "ibmp630","zone1;zone2; zone3; zone3"cfgEnable "ibmp630"cfgSave4. 最后查看ZONE 的划分做最后校验# zoneshowDefined configuration:cfg: ibmp630 zone1; zone1; zone1; zone1zone:zone11,0; 1,4zone:zone21,1; 1,5zone:zone31,2; 1,4zone:zone41,3;1,5Effective configuration:cfg:ibmp630zone:zone11,01,4 zone: zone21,11,5zone:zone3 1,21,4zone:zone4 1,31,5第1章收集光纤交换机的配置信息1.1 总体信息#switchshow例子1:例子2:1.2 Zone 配置信息#zoneshow例子1:例子2:第2章网上参考文档2.1 参考文档1来源:在SAN 的环境中,光纤交换机( FC Switch )起着至关重要的作用,而FC Switch 的配置目前有GUI 界面和CLI 两种方式,GUI 界面操作简单,但是花费时间较长,适合做较少配置时使用;CLI 配置操作相对复杂,但是效率高,适合做大量配置时使用。
- 1、下载文档前请自行甄别文档内容的完整性,平台不提供额外的编辑、内容补充、找答案等附加服务。
- 2、"仅部分预览"的文档,不可在线预览部分如存在完整性等问题,可反馈申请退款(可完整预览的文档不适用该条件!)。
- 3、如文档侵犯您的权益,请联系客服反馈,我们会尽快为您处理(人工客服工作时间:9:00-18:30)。
EMC DS300B光纤交换机配置Zone
系统要求:使用WEB方式连接,配置机器需要安装有JAVA
光纤交换机默认的IP地址:
默认的子网掩码:
1.给配置机器配置一个和光纤交换机相同网段的IP地址.
例如:/24
2.把网线一端插入光前交换机的网络配置口,
备注:光纤交换机上有2个管理口,1个是用串口方式,这里使用的是IP管理口.
3.使用IE,直接键入:
输入用户名和密码.
默认用户名:admin
默认密码:password
4.下图为初试界面
5.点击界面左侧的 Zone Admin
6.下图为Zone Admin的界面
7先点击红线标出的Zone,然后点击绿线标出New Zone,会出现输入Zone Name 的对话框.
8. 先选择Zone名称,然后把交换机的端口添加进Zone内.
9. 然后创建Zone Congfig组
10. 选择congfig名称,然后把配置好的Zone添加进congfig中
11. 然后Save Config ,然后Enable Config。
