cisco2960console线配置
思科2960初始化配置 CONSOLE口
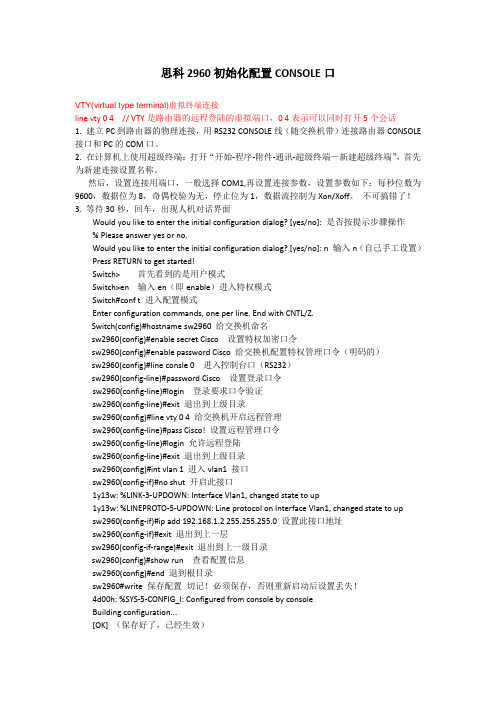
思科2960初始化配置CONSOLE口VTY(virtual type terminal)虚拟终端连接line vty 0 4 // VTY是路由器的远程登陆的虚拟端口,0 4表示可以同时打开5个会话1. 建立PC到路由器的物理连接,用RS232 CONSOLE线(随交换机带)连接路由器CONSOLE 接口和PC的COM口。
2. 在计算机上使用超级终端:打开“开始-程序-附件-通讯-超级终端—新建超级终端”,首先为新建连接设置名称。
然后,设置连接用端口,一般选择COM1,再设置连接参数,设置参数如下:每秒位数为9600,数据位为8,奇偶校验为无,停止位为1,数据流控制为Xon/Xoff。
不可搞错了!3. 等待30秒,回车,出现人机对话界面Would you like to enter the initial configuration dialog? [yes/no]: 是否按提示步骤操作% Please answer yes or no.Would you like to enter the initial configuration dialog? [yes/no]: n 输入n(自己手工设置)Press RETURN to get started!Switch> 首先看到的是用户模式Switch>en 输入en(即enable)进入特权模式Switch#conf t 进入配置模式Enter configuration commands, one per line. End with CNTL/Z.Switch(config)#hostname sw2960 给交换机命名sw2960(config)#enable secret Cisco 设置特权加密口令sw2960(config)#enable password Cisco 给交换机配置特权管理口令(明码的)sw2960(config)#line consle 0 进入控制台口(RS232)sw2960(config-line)#password Cisco 设置登录口令sw2960(config-line)#login 登录要求口令验证sw2960(config-line)#exit 退出到上级目录sw2960(config)#line vty 0 4 给交换机开启远程管理sw2960(config-line)#pass Cisco! 设置远程管理口令sw2960(config-line)#login 允许远程登陆sw2960(config-line)#exit 退出到上级目录sw2960(config)#int vlan 1 进入vlan1 接口sw2960(config-if)#no shut 开启此接口1y13w: %LINK-3-UPDOWN: Interface Vlan1, changed state to up1y13w: %LINEPROTO-5-UPDOWN: Line protocol on Interface Vlan1, changed state to upsw2960(config-if)#ip add 192.168.1.2 255.255.255.0 设置此接口地址sw2960(config-if)#exit 退出到上一层sw2960(config-if-range)#exit 退出到上一级目录sw2960(config)#show run 查看配置信息sw2960(config)#end 退到根目录sw2960#write 保存配置切记!必须保存,否则重新启动后设置丢失!4d00h: %SYS-5-CONFIG_I: Configured from console by consoleBuilding configuration...[OK] (保存好了,已经生效)重新启动交换机之后就可以通过浏览器输入IP地址进行访问或设置了,也可通过思科专业软件思科网络助理4.0中文版设置。
Cisco2960交换机的基础安装配置教程.doc
Cisco2960交换机的基础安装配置教程.docCisco2960交换机的基础安装配置教程Cisco 2960交换机的基础安装配置教程的方法分类:新设备配置内容:1. interface vlan 1 的ip,gatewayconf tint vlan 1ip address xx.xx.xx.xx 255.255.255.0ip default-gateway ip-addressno shutdownexit2.en的密码3.line vty 0-4 telnet的密码4.wr存盘show interface vlan 1show run将F0/1-10端口加入到VLAN20中,对应以下命令interface range f0/1 -10switchport mode acccessswitchport access vlan 20注意,f0/1后面有个空格,然后才是-10cisco 2950 常用配置命令产品相关命令1、配置IP地址交换机要能够被网管,必须给它标识一个管理IP地址,默认情况下CISCO交换机的VLAN 1为管理VLAN,为该VLAN配上IP 地址,交换机就可以被网管了。
命令如下:a、进入全局模式: Switch#configure terminalb、进入VLAN 1接口模式:Switch(config)#interface vlan 1c、配置管理IP地址:Switch(config-if) # ip address [A.B.C.D] [mask]如果当前VLAN 不是管理VLAN ,只需要将上面第b处命令的vlan的号码换成管理VLAN的号码即可。
2、打开SNMP协议a、进入全局模式: Switch#configure terminalb、配置只读的Community,产品默认的只读Community名为publicSwitch(config)#snmp-server community public roc、配置可写的Community,产品默认的可写Community名为privateSwitch(config)#snmp-server community private rw3、更改SNMP的Community密码a、将设备分组,并使能支持的各种SNMP版本Switch(config)#snmp-server group qycx123 v1Switch(config)#snmp-server group qycx 123 v2cSwitch(config)#snmp-server group qycx123 v3 noauthb、分别配置只读和可写community 如:Switch(config)#snmp-server community qycx123 ro Switch(config)#snmp-server community qycx123 rw 4、保存交换机配置Switch#copy run start常用命令1、设置交换机密码a、更改远程TELNNET密码Switch#configure terminalSwitch(config)#line vty 0 4Switch(config-line)#password qycx123Switch(config-line)#loginSwitch(config-line)#exitb、更改进入全局配置模式时的密码Switch#configure terminalSwitch(config)#enable secret qycx1232、创建并划分VLANa、创建VLANSwitch#vlan databaseSwitch(vlan)#vlan 99 name office(创建vlan 99 并命名为office)b、将端口划分至vlanSwitch(config)#interface fastEthernet 0/8Switch(config-if)#switchport mode accessSwitch(config-if)#switchport access vlan 99(将8号快速以太口划分至vlan 99)3、常用调试命令a、显示所有配置命令:Switch#show runb、显示所有接口状态:Switch#show ip int briefc、显示所有VLAN的信息:Switch#show vlan brief 交换机支持的命令1. linux 命令:PCA login: root ;使用root用户password: linux ;口令是linux # shutdown -h now ;同init 0 关机# logout# login# ifconfig ;显示IP地址# ifconfig eth0 netmask ;设置IP地址# ifconfig eht0 netmask down ; 删除IP地址# route add 0.0.0.0 gw# route del 0.0.0.0 gw# route add default gw ;设置网关# route del default gw ;删除网关# route ;显示网关# ping# telnet2. 交换机支持的命令:交换机基本状态:switch: ;交换机的ROM状态rommon 路由器的ROM状态hostname 用户模式hostname# ;特权模式hostname(config)# ;全局配置模式hostname(config-if)# ;接口状态交换机口令设置:switch enable ;进入特权模式switch#config terminal ;进入全局配置模式switch(config)#hostname ;设置交换机的主机名switch(config)#enable secret xxx ;设置特权加密口令switch(config)#enable password xxa ;设置特权非密口令switch(config)#line console 0 ;进入控制台口switch(config-line)#line vty 0 4 ;进入虚拟终端switch(config-line)#login ;允许登录switch(config-line)#password xx ;设置登录口令xxswitch#exit ;返回命令交换机VLAN设置:switch#vlan database ;进入VLAN设置switch(vlan)#vlan 2 ;建VLAN 2switch(vlan)#no vlan 2 ;删vlan 2switch(config)#int f0/1 ;进入端口1switch(config-if)#switchport access vlan 2 ;当前端口加入vlan 2 switch(config-if)#switchport mode trunk ;设置为干线switch(config-if)#switchport trunk allowed vlan 1,2 ;设置允许的vlanswitch(config-if)#switchport trunk encap dot1q ;设置vlan 中继switch(config)#vtp domain ;设置发vtp域名switch(config)#vtp password ;设置发vtp密码switch(config)#vtp mode server ;设置发vtp模式switch(config)#vtp mode client ;设置发vtp模式交换机设置IP地址:switch(config)#interface vlan 1 ;进入vlan 1 switch(config-if)#ip address ;设置IP地址switch(config)#ip default-gateway ;设置默认网关switch#dir flash: ;查看闪存交换机显示命令:switch#write ;保存配置信息switch#show vtp ;查看vtp配置信息switch#show run ;查看当前配置信息switch#show vlan ;查看vlan配置信息switch#show interface ;查看端口信息switch#show int f0/0 ;查看指定端口信息3. 路由器支持的命令:路由器显示命令:router#show run ;显示配置信息router#show interface ;显示接口信息router#show ip route ;显示路由信息router#show cdp nei ;显示邻居信息router#reload ;重新起动路由器口令设置:router enable ;进入特权模式router#config terminal ;进入全局配置模式router(config)#hostname ;设置交换机的主机名router(config)#enable secret xxx ;设置特权加密口令router(config)#enable password xxb ;设置特权非密口令router(config)#line console 0 ;进入控制台口router(config-line)#line vty 0 4 ;进入虚拟终端router(config-line)#login ;要求口令验证router(config-line)#password xx ;设置登录口令xxrouter(config)#(Ctrl+z) ; 返回特权模式router#exit ;返回命令路由器配置:router(config)#int s0/0 ;进入Serail接口router(config-if)#no shutdown ;激活当前接口router(config-if)#clock rate 64000 ;设置同步时钟router(config-if)#ip address ;设置IP地址router(config-if)#ip address second ;设置第二个IProuter(config-if)#int f0/0.1 ;进入子接口router(config-***if.1)#ip address ;设置子接口IProuter(config-***if.1)#encapsulation dot1q ;绑定vlan中继协议router(config)#config-register 0x2142 ;跳过配置文件router(config)#config-register 0x2102 ;正常使用配置文件router#reload ;重新引导路由器文件操作:router#copy running-config startup-config ;保存配置router#copy running-config tftp ;保存配置到tftprouter#copy startup-config tftp ;开机配置存到tftprouter#copy tftp flash: ;下传文件到flashrouter#copy tftp startup-config ;下载配置文件ROM状态:Ctrl+Break ;进入ROM监控状态rommon confreg 0x2142 ;跳过配置文件rommon confreg 0x2102 ;恢复配置文件rommon reset ;重新引导rommon copy xmodem: flash: ;从console传输文件Cisco 2960设置管理地址问题我这里有个2960,准备配置管理地址,配置应该没有问题,可是就是无法连通,在此台2960上也无法Ping通网关,相关配置如下interface GigabitEthernet0/2switchport mode trunkspanning-tree link-type point-to-pointinterface Vlan241ip address 192.168.241.53 255.255.255.0no ip redirectsno ip unreachablesno ip proxy-arpno ip route-cache!ip default-gateway 192.168.241.1交换机工作正常,但是使用Show inter vlan241,发现接口处于Down状态,使用No shutdown 命令也没有用,不知道怎么回事情?是不是和VTP有关?谢谢!网友1;方法两个:1、把你见vlan号给删除,给vlan1配置ip地址2、修改你配置vlan的native vlan网友2:cisco的vlan1默认为管理vlan,只要给它配各地址就行了网友3:1.show vlan看本交换机有没有VLAN241如果没有可以手工添加上去或者启用VTP学习2.show int g0/2 trunk信息网友4:1、show vlan brief 看一下有没有这个vlan2、如果数据vlan和管理vlan分开,看看上联的trunk起来没有网友5:29交换机管理VLAN默认就是VLAN1,你的问题有两种方法: 1、取消VLAN241的IP地址interface vlan 1ip add 192.168.241.53 255.255.255.02、是将VLAN241设置成管理VLANinterface vlan 241ip add 192.168.241.53 255.255.255.0management-----------是将该VLAN设置成管理VLAN你任选一种就可以的Cisco 2960交换机中如何绑定IP与MAC地址请问:在2960交换机中如何进行端口MAC地址绑定,并同时绑定IP与MAC地址?网友1:conf tarp 192.168.1.1 0000.1001.2200 arpa fa0/1网友2:IP地址与MAC地址的关系:IP地址是根据现在的IPv4标准指定的,不受硬件限制长度4个字节。
思科交换机2960配置共9页文档
cisco 交换机2960配置配置密码:2960>en ;第一次密码为空2960h#conf t ;进入全局配置模式2960(config)#hostname swa ;设置交换机名2960(config)#enable secret aaa ;设置特权加密口令为 aaa 2960(config)#enable password aax ;设置特权非密口令为 aax 2960(config)#line console 0 ;进入控制台口(Rs232)2960(config-line)#password aa ;设置登录口令aa2960(config-line)#login ;登录要求口令验证2960(config-line)#line vty 0 4 ;进入虚拟终端virtual tty 2960(config-line)#password a ;设置登录口令a2960(config-line)#login ;登录要求口令验证2960(config-line)#exit ;返回上一层2960(config)#exit ;返回上一层2960#sh run ;看配置信息2960#exit ;返回命令配置Vlan新建一个Vlan的命令Switch>enable 进入特权模式Switch#configure terminal 进入全局配置模式Switch (config)# vlan vlan-id 创建一个Vlan或者进入Vlan配置模式Switch (config-vlan)# name vlan-name 给Vlan命名(取消设置:no name) Switch (config-vlan)# mtu mtu-size 设置最大通讯量(取消设置:no mtu)Switch (config-vlan)#remote-span 开启远程流量监控(关闭:no remote-span)Switch (config-vlan)# end 回到特权模式Switch#show vlan {name vlan-name | id vlan-id} 查看当前配置Switch#copy running-config startup config 保存配置删除Vlan的命令Switch>enable 进入特权模式Switch#configure terminal 进入全局配置模式Switch (config)# no vlan vlan-id 删除VlanSwitch (config)# end 回到特权模式Switch#show vlan brief 查看删除情况Switch#copy running-config startup config 保存配置端口加入特定Vlan的命令Switch>enable 进入特权模式Switch#configure terminal 进入全局配置模式Switch (config)# interface interface-id 进入端口配置Switch (config-if)# switchport mode access 将接口的模式设为访问模式Switch (config-if)# switchport access vlan vlan-id 将端口加入指定的Vlan(恢复端口默认配置:default interface interface-id) Switch (config-if)# end 回到特权模式Switch#show running-config interface interface-id 查看端口模式Switch#show interfaces interface-id switchport 查看端口详细配置Switch#copy running-config startup-config 保存配置批量端口加入特定Vlan的命令int range fa0/1 - 10switchport access VLan V2将特定端口设为trunk2960-01(config)#default interface fastEthernet 0/1 端口恢复默认值2960-01(config)#interface fastethernet0/1 进入端口模式2960-01(config-if)#switchport mode trunk 设置端口为trunk模式2960-01(config-if)#switchport nonegotiate 将接口设置为不协商模式2960-01(config-if)end2960-01#wr启用snmpSwitch>enable 进入特权模式Switch#configure terminal 进入全局配置模式Switch (config)# snmp-server community string [view view-name] [ro | rw] [access-list-number](关闭snmp: no snmp-server)(删除团体字符: no snmp-server community string) 配置snmp团体字符并开启snmp代理服务String: 团体口令字符(所有SNMP命令中只有设置团体口令的snmp-server community是必须的,其它的都是可选的.)View: view 可以用于限定哪些MIB分支不能用本community-string存取预先用snmp-server view定义ro | rw: ro获得MIB对象信息;rw获得并可以修改MIB对象信息access-list-number:访问列表号Switch (config)#access-list access-list-number {deny |permit} source [source-wildcard] 配置拒绝或者允许访问snmp代理服务的IP地址,访问列表号为上一步指定的列表号Switch (config)#end 回到特权模式Switch#show running-config 查看配置Switch#copy running-config startup-config 保存配置cisco2960口令恢复交换机口令恢复的步骤⒈串口线连接到到交换机的console口。
思科2950交换机配置说明
0 watchdog, 0 multicast, 0 pause input
0 input packets with dribble condition detected
1 packets output, 64 bytes, 0 underruns
2,从配置模式下创建VLAN,如图:
我们可以看到,从配置模式创建VLAN时只要直接输入vlan命令加VLAN号就可以创建VLAN
上图为成功创建VLAN后的下一个界面,用“?”号同样可以查询到在此VLAN配置模式下可以使用的所有命令。
2.2.3
不同交换机相同VLAN间如需要互访,需要将交换机相连端口设置为中继模式,并且各接口封装模式要相同(在2950上只支持802.1q封装,端口配置为中继后自动开启802.1q协议),否则中继将不起作用。
在配置模式下可以给交换机命名、配置VLAN、STP、VTP、VLAN中继、访问控制列表、以太通道(端口绑定)、SNMP、AAA认证等高级特性,从而达到满足不同用户不同需求的目的。
举例如下:
1,给交换机命名
使用命令“hostname“加欲命名的名字,就能够修改交换机的名字。
如图:
输入“hostname2950_test”命令回车后,交换机的名字立刻由原来的“cisco2950”变为“2950_test”。
1 default active
2 VLAN2 active Fa0/1, Fa0/2, Fa0/3, Fa0/4
Fa0/5
3 VLAN3 active Fa0/6, Fa0/7, Fa0/8, Fa0/9
Fa0/10
cisco2960配置

Vlan
1,創建Vlan
(config)#vlan 180 //創建Vlan ID號為180
(config-vlan)#name askey //Vlan 名稱為askey
2,刪除Vlan
(config)#no vlan 180
#show vlan brief //查看交換機當前Vlan 號及Vlan 下有哪些端口
(config-line)#exec-timeout 5 0 //telnet 5分鐘超時
Show
1,開啟明文密碼加密服務
1,show run //查看交換機配置
2,show ip int brief //查看所有端口狀況
3, show int des //查看所有端口的描述
2,設置時間與時區
(config)# Clock timezone TAIWAN 8 //設置時區
(config)# Clock set 12:16:50 nov 27 2008 //設置時間(月﹐日﹐年)
#Show clock //查看交換機當前的時間
3﹐設置ntp server 實現時間同步
(config-if)# storm-control broadcast level 0.80 //控制广播包的突发百分比
(config-if)# storm-control action shutdown //暴风控制的违例时端口进入errdisable
(config-if)# storm-control action trap //产生snmp trap(抑制)消息来通告发生过量流量的情况
(config-if)#switchport access vlan 33 // 划分VLAN
Catalyst2960交换机基本配置

配置端口
Copyright Hoare Lecture. All rights reserved.
配置一组端口
Step 1
Step 2 Step 3 Step 4 Step 5 Step 6 end show interfaces [interface-id] copy running-config startup-config 命令 configure terminal interface range {portrange} 目的 进入配置状态 进入组配置状态 可以使用平时的端口配置 命令进行配置 退回 验证配置 保存
Copyright Hoare Lecture. All rights reserved.
8
interface-id
• Physical interface instance. Naming notation is rack/slot/module/port and a slash between values is required as part of the notation.
通常情况下,二层交换机的端口不设置IP地址,路 由器的接口设置IP地址,三层交换机(实际上有路 由功能)的接口可以设置也可以不设置,具体情况 具体分析。 不跨网段管理可不设默认网关。
Copyright Hoare Lecture. All rights reserved. 6
Cisco Catalyst 2960系列交换机
连接配置模式 全局配置模式输入 line vty或line console 命令 vlan配置模式 全局配置模式输入 vlan database命令 Switch(configline)# Switch(vlan)#
Catalyst2960配置步骤

Catalyst2960配置步骤1 、需要科技处提供VLAN _ID和IP地址,掩码,网关;2 、2960初始化的IP地址为10.0.0.1,默认启用DHCP,为了方便连接,可将计算机的IP 地址设置为10.0.0.2,掩码255.255.255.0,用一根直通线连接此计算机;3 、另一端连接交换机任意Ethernet口,按交换机上的Reset键直到Reset键左边除第2个和第3个以外所有的LED为绿色进入交换机快速设置模式;4、打开IE,在地址栏输入http://10.0.0.1,可进入交换机的快速设置界面;5、在快速设置界面上,第1行输入VLAN_ID;6、在第2行给交换机设置一个IP地址和掩码;7、第3行输入设置网关;8、第6行启用telnet;9、第7行设置telnet登录密码;10、保存设置后交换机会自动重新启动;11、在计算机IE地址栏输入http://95.*.*.*(即新分配给交换机的IP地址),可以进入交换机的设备管理界面,证明设置成功;12、在设备管理界面左边的树形菜单中,可以查看交换机到各个端口已经划分到新的VLAN 中,如果有误可telnet登录到交换机重新进行配置,如果设置不成功可以初始化交换机重新进行配置,具体方法是:按住交换机Reset键直到Reset键左边所有LED处于时亮时灭的状态,然后交换机会自动重新启动初始化为出厂设置,再重复上述步骤直到设置成功为止;13、在计算机“开始”->“运行”中输入cmd进入command窗口,在提示符后输入telnet 95.*.*.*并在接下来的password:后输入刚才设置的密码登录到交换机;14、在switch>提示符后输入enable进入特权模式;15、在switch(enable)#提示符后输入show vlan可以查看各个端口的配置情况;16、在switch(enable)#提示符后输入exit;17、交换机不能启用端口汇聚Trunk功能,设置步骤如下:在switch#提示符后输入configure在switch(config)#提示符后输入interface在switch(config-if)#提示符后输入switchport mode access在switch(config-if)#提示符后输入switchport access vlan vlan_id在switch(config-if)# 提示符后输入end。
思科交换机2960配置
cisco 交换机2960配置配置密码:2960>en ;第一次密码为空2960h#conf t ;进入全局配置模式2960(config)#hostname swa ;设置交换机名2960(config)#enable secret aaa ;设置特权加密口令为aaa2960(config)#enable password aax ;设置特权非密口令为aax2960(config)#line console 0 ;进入控制台口(Rs232)2960(config-line)#password aa ;设置登录口令aa2960(config-line)#login ;登录要求口令验证2960(config-line)#line vty 0 4 ;进入虚拟终端virtual tty2960(config-line)#password a ;设置登录口令a2960(config-line)#login ;登录要求口令验证2960(config-line)#exit ;返回上一层2960(config)#exit ;返回上一层2960#sh run ;看配置信息2960#exit ;返回命令配置Vlan新建一个Vlan的命令Switch>enable 进入特权模式Switch#configure terminal 进入全局配置模式Switch (config)# vlan vlan-id 创建一个Vlan或者进入Vlan配置模式Switch (config-vlan)# name vlan-name 给Vlan命名(取消设置:no name) Switch (config-vlan)# mtu mtu-size 设置最大通讯量(取消设置:no mtu) Switch (config-vlan)#remote-span 开启远程流量监控(关闭:no remote-span)Switch (config-vlan)# end 回到特权模式Switch#show vlan {name vlan-name | id vlan-id} 查看当前配置Switch#copy running-config startup config 保存配置删除Vlan的命令Switch>enable 进入特权模式Switch#configure terminal 进入全局配置模式Switch (config)# no vlan vlan-id 删除VlanSwitch (config)# end 回到特权模式Switch#show vlan brief 查看删除情况Switch#copy running-config startup config 保存配置端口加入特定Vlan的命令Switch>enable 进入特权模式Switch#configure terminal 进入全局配置模式Switch (config)# interface interface-id 进入端口配置Switch (config-if)# switchport mode access 将接口的模式设为访问模式Switch (config-if)# switchport access vlan vlan-id 将端口加入指定的Vlan(恢复端口默认配置:default interface interface-id)Switch (config-if)# end 回到特权模式Switch#show running-config interface interface-id 查看端口模式Switch#show interfaces interface-id switchport 查看端口详细配置Switch#copy running-config startup-config 保存配置批量端口加入特定Vlan的命令int range fa0/1 - 10switchport access VLan V2将特定端口设为trunk2960-01(config)#default interface fastEthernet 0/1 端口恢复默认值2960-01(config)#interface fastethernet0/1 进入端口模式2960-01(config-if)#switchport mode trunk 设置端口为trunk模式2960-01(config-if)#switchport nonegotiate 将接口设置为不协商模式2960-01(config-if)end2960-01#wr启用snmpSwitch>enable 进入特权模式Switch#configure terminal 进入全局配置模式Switch (config)# snmp-server community string [view view-name] [ro | rw] [access-list-number](关闭snmp: no snmp-server)(删除团体字符: no snmp-server community string) 配置snmp团体字符并开启snmp代理服务String: 团体口令字符(所有SNMP命令中只有设置团体口令的snmp-server community是必须的,其它的都是可选的.)View: view 可以用于限定哪些MIB分支不能用本community-string存取预先用snmp-server view定义ro | rw: ro获得MIB对象信息;rw获得并可以修改MIB对象信息access-list-number:访问列表号Switch (config)#access-list access-list-number {deny |permit} source [source-wildcard] 配置拒绝或者允许访问snmp代理服务的IP地址,访问列表号为上一步指定的列表号Switch (config)#end 回到特权模式Switch#show running-config 查看配置Switch#copy running-config startup-config 保存配置cisco2960口令恢复交换机口令恢复的步骤⒈串口线连接到到交换机的console口。
cisco2960配置

思科2960交换机配置通过Console 口登录交换机第一步:如图1-1所示,建立本地配置环境,只需将PC 机(或终端)的串口通过配置电缆与以太网交换机的Console 口连接。
通过Console 口搭建本地配置环境 1-1(若用笔记本配置,可买一根串口转USB 线,安装驱动,可方便移动配置)第二步:在PC 机上运行终端仿真程序超级终端,选择与交换机相连的串口,设置终端通信参数:传输速率为9600bit/s 、8位数据位、1位停止位、无校验和无流控,如图1-2至图1-4所示。
新建连接1-2连接端口设置1-3端口通信参数设置1-4PC Switch第三步:以太网交换机上电,终端上显示设备自检信息,自检结束后提示用户键入回车,之后将出现命令行提示符(如< Switch >),如图1-5所示。
第四步:键入命令,配置以太网交换机或查看以太网交换机运行状态。
需要帮助可以随时键入“?”,具体的配置命令请参考相关部分的内容。
1、进入系统视图模式Switch>Switch> enable(简写en)特权模式Switch#Switch# configure terminal (简写conf t)(中间空格)全局模式Switch(config)#2、为设备命名Switch(config)#hostname cisco2960 交换机命名 cisco2960cisco2960 (config) #3、配置特权使能密码cisco2960 (config)#enable password cisco 配置使能口令ciscocisco2960 (config) #cisco2960(config)#enable secret cisco2960 配置使能密码cisco2960cisco2960 (config) #4、设置虚拟局域网(配置VLAN)/*switch> enable 特权模式switch#conf t 全局模式switch (conf) #hostname cisco2960*/ 设备名 cisco2960cisco2960 (config) #vlan 10 创建/进入vlancisco2960 (config-vlan) #name vlan10 命名为vlan10Switch(config-vlan)#vlan 11 创建/进入vlanSwitch(config-vlan)#name vlan11 命名为vlan11/*cisco2960 (config-vlan) #no vlan11 */ 删除vlan11cisco2960 (config-vlan) # interface vlan 10 进入配置vlan10cisco2960 (conf-if) #ip address 192.168.10.1 255.255.255.0/*vlan10配置192.168.10.1/24的ip地址*/cisco2960 (config-vlan) # interface vlan 11 配置vlan11cisco2960 (conf-if) #ip address 192.168.11.1 255.255.255.0/*vlan11配置192.168.11.1/24的ip地址*/cisco2960(conf-if)#no shut使配置处于运行中cisco2960 (conf-if) #exit 返回上一级配置cisco2960(conf)#ip default-gateway 192.168.10.254设置网关地址cisco2960(conf) #end 返回cisco2960#write 保存配置5、进入交换机某一端口interface fastethernet 0/1以1 端口为例/*switch> enable 特权模式switch#configure terminal 全局模式switch (conf) #hostname cisco2960*/ 设备名 cisco2960cisco2960 (conf) # interface fastethernet 0/1 进入网络1 端口/*cisco2960 (conf) # interface range f0/1-10*/ 选择多个端口cisco2960 (config-if)#switchport mode access 将此端口设置接入模式cisco2960 (config-if)#switchport access vlan 10端口1设置为vlan 10接入模式/*cisco2960 (conf) # interface fastethernet 0/11 进入网络11 端口cisco2960 (config-if)#switchport access vlan 11端口11设置为vlan 11接入模式*/ cisco2960 (conf-if) #end 返回cisco2960#copy running-config startup-config 保存当前设置6、设置端口速率:(一般默认不用配置)/*switch> enableswitch#configure terminalswitch (conf) #hostname cisco2960switch (config)# interface range f0/1, f0/3, f0/5 - 10 选择端口范围端口1、3、5、6、7、8、9、10*/cisco2960 (conf) # interface range f0/1- 24*/ 设置端口1-24/*10 Force 10 Mbps operation100 Force 100 Mbps operation1000 Force 1000 Mbps operationauto Enable AUTO speed configuration*/ 速率可选方式cisco2960 (config-if) #speed auto 端口速率设为自动侦测cisco2960 (config-if) #7、设置双工模式:(一般默认不用配置)/*switch> enableswitch#configure terminalswitch (conf) #hostname cisco2960/*cisco2960 (conf) # interface range f0/1- 24*/ 设置端口1-24cisco2960 (config-if) #duplex auto | full | half 设置端口为-自动/全双工/半双工cisco2960 (config-if) #8、设置各Vlan相互访问连接/*switch> enableswitch#configure terminalswitch (conf) #hostname cisco2960cisco2960 (config)#int giga0/1 */进入汇聚千兆口1cisco2960(config-if)#switchport mode trunk ;当前端口设置为汇聚口注:将某端口分给vlan后是不能再设置trunk的,中继链路不属于任何vlan当一个端口允许多个vlan通过时,trunk allowed vlan中要添加各条vlan信息cisco2960 (config-if) # switchport trunk allowed vlan all允许所有VLAN 通过Trunk口cisco2960 (config-if) #switchport trunk allowed vlan 10, 13, 允许10,13 vlan通过cisco2960 (config-if)#switchport trunk allowed vlan add 11 添加vlan11/*cisco2960 (config-if)#switchport trunk allowed vlan remove 11 删除vlan11*/ cisco2960 (config-if) #switchport trunk allowed vlan add 12添加vlan12cisco2960 (config-if) #no shutdown 使配置处于运行中cisco2960 (config-if) #endcisco2960#copy running-config startup-config 保存当前设置9、交换机telnet 远程登录设置:switch>enswitch#configure terminalswitch (conf) #hostname cisco2960cisco2960(conf)#enable password cisco 以cisco为特权模式密码cisco2960(conf)#interface fastethernet 0/1以1 端口为telnet 远程登录端口cisco2960 (conf-if) #ip address 192.168.10.1 255.255.255.0cisco2960 (conf-if) #no shutcisco2960 (conf-if) #exitcisco2960(conf)line vty 0 4 设置0-4 个用户可以telnet 远程登陆cisco2960 (conf-line) #logincisco2960(conf-line)#password cisco以cisco为远程登录的用户密码主机设置:ip 192.168.10.123主机的ip必须和交换机端口的地址在同一网络段netmask 255.255.255.0gate-way 192.168.10.1 网关地址是交换机端口地址运行:telnet 192.168.10.1进入telnet 远程登录界面password: ciscocisco2960>enpassword: cisco10、交换机恢复出厂默认恢复命令switch> enableswitch# erase startup-configureswitch# reload11、光端口配置switch (config) #interface gigabitEthernet 0/25switch (config-if) # switchport mode accessswitch (config-if) #switchport access vlan 10switch (config-if) #no shutdownswitch (config-if) #endswitch#copy running-config startup-config注意:由于思科的交换机只自动识别自己品牌的光模块,所以如果用其他品牌的光模块,需在配置模式下输入一下两条命令,开启兼容性。
cisco2960交换机配置
cisco2960交换机简单配置2950是只支持二层的交换机支持VLAN第1步:单击“开始”按钮,在“程序”菜单的“附件”选项中单击“超级终端”第2步:在“名称”文本框中键入“Cisco”第3步:在“连接时使用”下拉列表框中选择与交换机相连的计算机的串口。
台式机为“com 1”,笔记本为“com 3或者com 5”。
第4步:在“波特率”下拉列表框中选择“9600”-确定.如果通信正常的话就会出现类似于如下所示的主配置界面,并会在这个窗口中就会显示交换机的初始配置情况。
enterenterenterno!1)配置交换机姓名switch>enaswitch#configureenterswitch#configure terminal (进入配置状态)Switch(config)#hostname 配置的交换机姓名如:30FLoor-2960-130FLoor-2960-1(config)#end30FLoor-2960-1#2)配置交换机的ip30FLoor-2960-1#configure terminal (进入配置状态)30FLoor-2960-1(config)#interface vlan 130FLoor-2960-1(config)#ip address ip地址子网掩码例如:30FLoor-2960-1(config)#ip address 10.11.90.10 255.255.255.030FLoor-2960-1(config)#no shutdown30FLoor-2960-1(config)#end30FLoor-2960-1#30FLoor-2960-1#3)配置交换机的默认网关30FLoor-2960-1(config)#ip default-gateway 网关ip例如:30FLoor-2960-1(config)#ip default-gateway 10.11.90.2544)设置路由30FLoor-2960-1(config)#ip route 0.0.0.0 X.X.X.X5)设置console口密码30FLoor-2960-1(config)#line console 030FLoor-2960-1(config-line)#password 输入密码30FLoor-2960-1(config-line)#login30FLoor-2960-1(config-line)#end6)设置telnet的密码30FLoor-2960-1(config)#line vty 0 1030FLoor-2960-1(config-line)#password 输入密码(yuxuan)30FLoor-2960-1(config-line)#login30FLoor-2960-1(config-line)#end7)设置交换机的enable密码30FLoor-2960-1(config)#enable password 输入密码(xuan)30FLoor-2960-1(config)#enable secret 输入密码(yuxuan)30FLoor-2960-1(config)#end8)将当前配置信息保存到闪存中30FLoor-2960-1(config)#write9)查看交换机信息30FLoor-2960-1#show version 查看交换机版本信息show ip interfaces 查看交换机的ip地址show interface vlan 1 验证管理ip地址已经配置并开启show ip redirect 查看交换机的网关show running-configure 查看交换机当前的配置信息show configure 查看交换机保存的配置信息switch#write ;保存配置信息switch#show vtp ;查看vtp配置信息switch#show run ;查看当前配置信息switch#show vlan ;查看vlan配置信息switch#show interface ;查看端口信息switch#show int f0/0 ;查看指定端口信息10)交换机基本配置步骤1.登陆到交换机2.进入特权模式命令:enable3.进入全局配置模式命令:configure terminal4.进入相应的配置子模式如:接口子模式命令:interface vlan 1交换机基本状态:switch: ;ROM状态,路由器是rommon>hostname> ;用户模式hostname# ;特权模式hostname(config)# ;全局配置模式hostname(config-if)# ;接口状态交换机口令设置:switch>enable ;进入特权模式switch#config terminal ;进入全局配置模式switch(config)#hostname ;设置交换机的主机名switch(config)#enable secret xxx ;设置特权加密口令switch(config)#enable password xxa ;设置特权非密口令switch(config)#line console 0 ;进入控制台口switch(config-line)#line vty 0 4 ;进入虚拟终端switch(config-line)#login ;允许登录switch(config-line)#password xx ;设置登录口令xxswitch#exit ;返回命令交换机VLAN设置:switch#vlan database ;进入VLAN设置switch(vlan)#vlan 2 ;建VLAN 2switch(vlan)#no vlan 2 ;删vlan 2switch(config)#int f0/1 ;进入端口1switch(config-if)#switchport access vlan 2 ;当前端口加入vlan 2 switch(config-if)#switchport mode trunk ;设置为干线switch(config-if)#switchport trunk allowed vlan 1,2 ;设置允许的vlan switch(config-if)#switchport trunk encap dot1q ;设置vlan 中继switch(config)#vtp domain ;设置发vtp域名switch(config)#vtp password ;设置发vtp密码switch(config)#vtp mode server ;设置发vtp模式switch(config)#vtp mode client ;设置发vtp模式交换机设置IP地址:switch(config)#interface vlan 1 ;进入vlan 1switch(config-if)#ip address ;设置IP地址switch(config)#ip default-gateway ;设置默认网关switch#dir flash: ;查看闪存交换机显示命令:switch#write ;保存配置信息switch#show vtp ;查看vtp配置信息switch#show run ;查看当前配置信息switch#show vlan ;查看vlan配置信息switch#show interface ;查看端口信息switch#show int f0/0 ;查看指定端口信息思科2950交换机VLAN划分cisco首先配置一下交换机SC-2950>SC-2950>enSC-2950#conf tEnter configuration commands, one per line. End with CNTL/Z.SC-2950(config)#config-register 0x2102SC-2950(config)#end添加三个VLANSC-2950#vlan dataSC-2950(vlan)#vlan 10 name v1VLAN 10 added:Name: v1SC-2950(vlan)#vlan 20 name v2VLAN 20 added:Name: v2SC-2950(vlan)#vlan 30 name v3VLAN 30 added:Name: v3SC-2950(vlan)#exitAPPL Y completed.Exiting....SC-2950#划分接口到各个VLANSC-2950#conf tEnter configuration commands, one per line. End with CNTL/Z. SC-2950(config)#int fa0/1 //留给管理员SC-2950(config-if)#switchport mode accessSC-2950(config-if)#sw acc vlan 10SC-2950(config-if)#no shutdownSC-2950(config-if)#exitSC-2950(config)#int range f0/2 - 15SC-2950(config-if-range)#sw mode accSC-2950(config-if-range)#sw acc vlan 20SC-2950(config-if-range)#no shSC-2950(config-if-range)#exitSC-2950(config)#int range f0/16 - 24SC-2950(config-if-range)#sw mode accSC-2950(config-if-range)#sw acc vlan 30SC-2950(config-if-range)#no shSC-2950(config-if-range)#exit激活VLAN,并且给VLAN 10加个IP以便管理SC-2950(config)#int vlan 10SC-2950(config-if)#ip add 192.168.1.1 255.255.255.0SC-2950(config-if)#no shSC-2950(config-if)#exitSC-2950(config)#int vlan 20SC-2950(config-if)#no shSC-2950(config-if)#exitSC-2950(config)#int vlan 30SC-2950(config-if)#no shSC-2950(config-if)#exit将交换机指向网关SC-2950(config)#ip default-gateway 192.168.1.254SC-2950(config)#endSC-2950#检测配置SC-2950#sh vlan briefVLAN Name Status Ports---- -------------------------------- --------- -------------------------------1 default active10 v1 active Fa0/120 v2 active Fa0/2, Fa0/3, Fa0/4,Fa0/5Fa0/6, Fa0/7, Fa0/8,Fa0/9Fa0/10, Fa0/11, Fa0/12,Fa0/13Fa0/14, Fa0/1530 v3 active Fa0/16, Fa0/17, Fa0/18, Fa0/19Fa0/20, Fa0/21, Fa0/22, Fa0/23Fa0/24SC-2950#sh ip int bInterface IP-Address OK? Method Status Prot ocolFastEthernet0/23 unassigned YES unset up down FastEthernet0/24 unassigned YES unset up down Vlan1 unassigned YES unset up down Vlan10 192.168.1.1 YES manual up upVlan20 unassigned YES unset up up Vlan30 unassigned YES unset up down SC-2950#sh runBuilding configuration...Current configuration : 1482 bytes...!interface FastEthernet0/24switchport access vlan 30!interface Vlan1no ip address!interface Vlan10ip address 192.168.1.1 255.255.255.0!interface Vlan20no ip address!interface Vlan30no ip address!ip default-gateway 192.168.1.254ip http server!...保存配置SC-2950#writeBuilding configuration...[OK]cisco 2960 交换机安装配置基础新设备配置内容:1. interface vlan 1 的ip,gatewayconf tint vlan 1ip address xx.xx.xx.xx 255.255.255.0ip default-gateway ip-addressno shutdownexit2.en的密码3.line vty 0-4 telnet的密码4.wr存盘show interface vlan 1show run将F0/1-10端口加入到VLAN20中,对应以下命令interface range f0/1 -10switchport mode acccessswitchport access vlan 20注意,f0/1后面有个空格,然后才是-10cisco 2950 常用配置命令产品相关命令1、配置IP地址交换机要能够被网管,必须给它标识一个管理IP地址,默认情况下CISCO交换机的VLAN 1为管理VLAN,为该VLAN配上IP 地址,交换机就可以被网管了。
CISCO catalyst 2960交换机配置方法
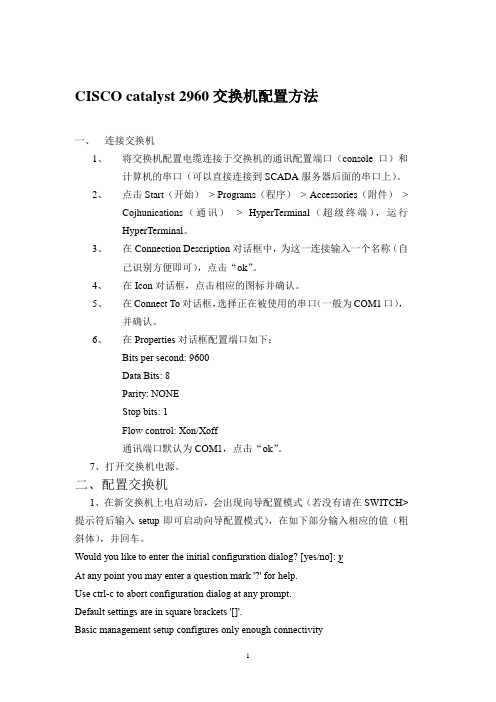
CISCO catalyst 2960交换机配置方法一、连接交换机1、将交换机配置电缆连接于交换机的通讯配置端口(console口)和计算机的串口(可以直接连接到SCADA服务器后面的串口上)。
2、点击Start(开始)> Programs(程序)> Accessories(附件)>Cojhunications(通讯)> HyperTerminal(超级终端),运行HyperTerminal。
3、在Connection Description对话框中,为这一连接输入一个名称(自己识别方便即可),点击“ok”。
4、在Icon对话框,点击相应的图标并确认。
5、在Connect To对话框,选择正在被使用的串口(一般为COM1口),并确认。
6、在Properties对话框配置端口如下:Bits per second: 9600Data Bits: 8Parity: NONEStop bits: 1Flow control: Xon/Xoff通讯端口默认为COM1,点击“ok”。
7、打开交换机电源。
二、配置交换机1、在新交换机上电启动后,会出现向导配置模式(若没有请在SWITCH>提示符后输入setup即可启动向导配置模式),在如下部分输入相应的值(粗斜体),并回车。
Would you like to enter the initial configuration dialog? [yes/no]: yAt any point you may enter a question mark '?' for help.Use ctrl-c to abort configuration dialog at any prompt.Default settings are in square brackets '[]'.Basic management setup configures only enough connectivityfor management of the system, extended setup will ask youto configure each interface on the systemWould you like to enter basic management setup? [yes/no]: yConfiguring global parameters:2、为交换机输入一个“host name”,可以自己先任意写一个,要便于识别就行,因为当用TFTP软件恢复之前备份的配置后,hostname也会恢复到原先的设置,在如下部分输入相应的值(粗斜体),并回车,以京海为例:Enter host name [Switch]: jh_switch01 (京海第一路交换机,即FTE网络A交换机)The enable secret is a password used to protect access toprivileged EXEC and configuration modes. This password, afterentered, becomes encrypted in the configuration.Enter enable secret(要求输入特权模式进入密令): *******The enable password is used when you do not specify anenable secret password, with some older software versions, andsome boot images.Enter enable password(要求输入特权模式进入密码): *******The virtual terminal password is used to protectaccess to the router over a network interface.Enter virtual terminal password: *******Configure SNMP Network Management? [no]: N3、下面是显示信息的一部分,太长没有完全抄录,无需操作,可压空格键完成显示。
Cisco2960交换机的基本配置
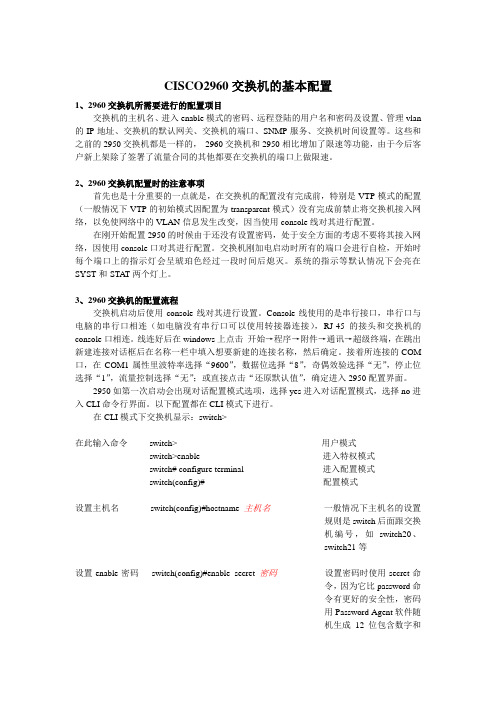
CISCO2960交换机的基本配置1、2960交换机所需要进行的配置项目交换机的主机名、进入enable模式的密码、远程登陆的用户名和密码及设置、管理vlan 的IP地址、交换机的默认网关、交换机的端口、SNMP服务、交换机时间设置等。
这些和之前的2950交换机都是一样的,2960交换机和2950相比增加了限速等功能,由于今后客户新上架除了签署了流量合同的其他都要在交换机的端口上做限速。
2、2960交换机配置时的注意事项首先也是十分重要的一点就是,在交换机的配置没有完成前,特别是VTP模式的配置(一般情况下VTP的初始模式因配置为transparent模式)没有完成前禁止将交换机接入网络,以免使网络中的VLAN信息发生改变,因当使用console线对其进行配置。
在刚开始配置2950的时候由于还没有设置密码,处于安全方面的考虑不要将其接入网络,因使用console口对其进行配置。
交换机刚加电启动时所有的端口会进行自检,开始时每个端口上的指示灯会呈琥珀色经过一段时间后熄灭。
系统的指示等默认情况下会亮在SYST和 STAT两个灯上。
3、2960交换机的配置流程交换机启动后使用console线对其进行设置。
Console线使用的是串行接口,串行口与电脑的串行口相连(如电脑没有串行口可以使用转接器连接),RJ-45的接头和交换机的console口相连。
线连好后在windows上点击开始→程序→附件→通讯→超级终端,在跳出新建连接对话框后在名称一栏中填入想要新建的连接名称,然后确定。
接着所连接的COM 口,在COM1属性里波特率选择“9600”,数据位选择“8”,奇偶效验选择“无”,停止位选择“1”,流量控制选择“无”;或直接点击“还原默认值”,确定进入2950配置界面。
2950如第一次启动会出现对话配置模式选项,选择yes进入对话配置模式,选择no进入CLI命令行界面。
以下配置都在CLI模式下进行。
在CLI模式下交换机显示:switch>在此输入命令switch> 用户模式switch>enable 进入特权模式switch# configure terminal 进入配置模式switch(config)# 配置模式设置主机名switch(config)#hostname 主机名一般情况下主机名的设置规则是switch后面跟交换机编号,如switch20、switch21等设置enable密码switch(config)#enable secret 密码设置密码时使用secret命令,因为它比password命令有更好的安全性,密码用Password Agent软件随机生成12位包含数字和大小写字母的密码设置远程登陆的switch(config)# username 用户名privilege 权限secret 密码用户名、权限和密码在设置权限参数时一般填0,用户名统一为netmaster,密码用Password Agent软件随机生成12位包含数字和大小写字母的密码对所设置的密码switch(config)# service password-encryption进行加密设置管理vlan和switch(config)# interface vlan1 进入管理vlan的配置默认网关switch(config-if)# ip address IP地址子网掩码设置管理vlan的IP,远程登陆使用此IPswitch(config-if)#no shutdown 启用管理vlanswitch(config-if)#exit 退出管理vlan的配置switch(config)# ip default-gateway IP地址设置默认网关设置交换机端口switch(config)# interface FastEthernet 0/1 进入交换机的1号端口switch(config-if)# description uplink port 对端口进行描述,默认时交换机1号口为上连口switch(config-if)# switchport mode trunk 将上连口设为trunk模式switch(config-if)# speed 100 设置端口速率switch(config-if)# duplex full 端口设为全双工模式switch(config-if) interface range fastEthernet 0/2 -24进入端口2至端口24的配置switch(config-if-range)#shutdown 关闭这些端口,到使用时再打开设置SNMP服务switch(config)#snmp-server community 字符串RO命令允许读访问到任何提交community string为字符串的软件,字符串设置要符合长度8位以上、需包含大小写字母和数字关闭http服务switch(config)#no ip http server 由于开启http服务在全全上存在隐患,因关闭设置vty switch(config)#line vty 0 4 设置telnet为0至4共5条线路switch24(config-line)# login local 使系统在远程登录时使用本地设置的用户名和密码进行验证设置timestamps switch(config)# service timestamps debug datetimeswitch(config)# service timestamps log datetime 默认时debug/log为uptime,改为datetime debug和log 显示时间设置VTP模式switch#vlan database 进入VTP的设置switch (vlan)#vtp transparent 将VTP模式设置为transparent模式设置交换机时间switch#clock set hh:mm:ss保存交换机的设置switch#copy running-config startup-config查看交换机设置switch#show running-config 查看交换机的配置端口流量的限制交换机端口流量的限制是用policy-map来实现的。
Cisco 交换机2960 VLAN通用配置
配置Vlan
新建一个Vlan的命令
Switch>enable 进入特权模式
Switch#configure terminal 进入全局配置模式
Switch (config)# vlan vlan-id 创建一个Vlan或者进入Vlan配置模式
(关闭snmp: no snmp-server)
(删除团体字符: no snmp-server community string) 配置snmp团体字符并开启snmp代理服务
String: 团体口令字符(所有SNMP命令中只有设置团体口令的snmp-server community是必须的,其它的都是可选的.)
Switch#copy running-config startup config 保存配置
端口加入特定Vlan的命令
Switch>ch#configure terminal 进入全局配置模式
Switch (config)# interface interface-id 进入端口配置
Switch (config-vlan)# end 回到特权模式
Switch#show vlan {name vlan-name | id vlan-id} 查看当前配置
Switch#copy running-config startup config 保存配置
删除Vlan的命令
2960(config-line)#password a ;设置登录口令a
2960(config-line)#login ;登录要求口令验证
2960(config-line)#exit ;返回上一层
2960(config)#exit ;返回上一层
Cisco 2960S 交换机初始配置操作方法
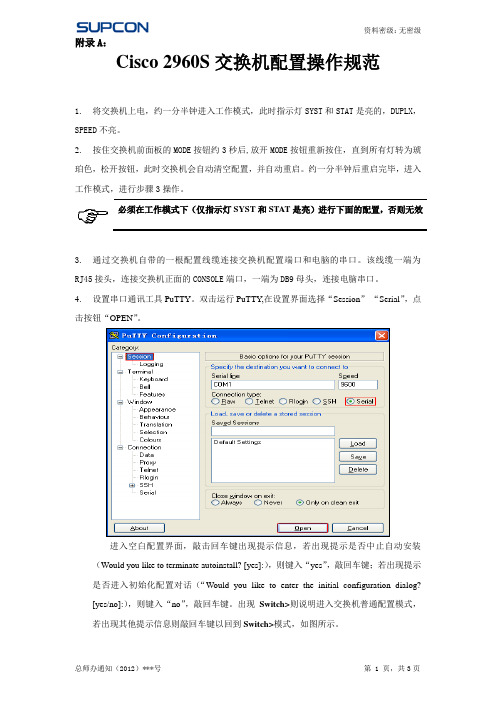
附录A:Cisco 2960S交换机配置操作规范1.将交换机上电,约一分半钟进入工作模式,此时指示灯SYST和STAT是亮的,DUPLX,SPEED不亮。
2.按住交换机前面板的MODE按钮约3秒后,放开MODE按钮重新按住,直到所有灯转为琥珀色,松开按钮,此时交换机会自动清空配置,并自动重启。
约一分半钟后重启完毕,进入工作模式,进行步骤3操作。
必须在工作模式下(仅指示灯SYST和STAT是亮)进行下面的配置,否则无效3.通过交换机自带的一根配置线缆连接交换机配置端口和电脑的串口。
该线缆一端为RJ45接头,连接交换机正面的CONSOLE端口,一端为DB9母头,连接电脑串口。
4.设置串口通讯工具PuTTY。
双击运行PuTTY,在设置界面选择“Session”-“Serial”,点击按钮“OPEN”。
进入空白配置界面,敲击回车键出现提示信息,若出现提示是否中止自动安装(Would you like to terminate autoinstall? [yes]:),则键入“yes”,敲回车键;若出现提示是否进入初始化配置对话(“Would you like to enter the initial configuration dialog?[yes/no]:),则键入“no”,敲回车键。
出现Switch>则说明进入交换机普通配置模式,若出现其他提示信息则敲回车键以回到Switch>模式,如图所示。
5.打开相应的配置文件,选中配置内容,点击右键-“复制”(或快捷键Ctrl+C),以某一配置文件为例,见下图:6.将鼠标定位至配置界面命令Switch>之后,单击鼠标右键可将配置内容复制至交换机。
7.复制完毕之后,敲回车键直至出现Switch#提示符,键入命令show star可查看配置文件,图示中“--More--”表示还没有显示完全,继续敲回车键直到出现“Switch#”。
8.将交换机断电重启,用双绞线连接计算机网口和交换机端口,若该交换机端口指示灯为绿色,则说明配置成功,若交换机端口呈现琥珀色,约30S之后转变为绿色,则说明配置有误,检查操作步骤,重新配置。
(完整)cisco2960配置

cisco2960G交换机简单配置2950是只支持二层的交换机支持VLAN第1步:单击“开始”按钮,在“程序"菜单的“附件"选项中单击“超级终端"第2步:在“名称”文本框中键入“Cisco”第3步:在“连接时使用"下拉列表框中选择与交换机相连的计算机的串口.台式机为“com 1”,笔记本为“com 3或者com 5”。
第4步:在“波特率”下拉列表框中选择“9600"—确定.如果通信正常的话就会出现类似于如下所示的主配置界面,并会在这个窗口中就会显示交换机的初始配置情况。
enterenterenterno!1)配置交换机姓名switch>enaswitch#configureenterswitch#configure terminal (进入配置状态)Switch(config)#hostname 配置的交换机姓名如:30FLoor—2960-130FLoor-2960—1(config)#end30FLoor—2960-1#2)配置交换机的ip30FLoor—2960-1#configure terminal (进入配置状态)30FLoor-2960—1(config)#interface vlan 130FLoor—2960-1(config)#ip address ip地址子网掩码例如:30FLoor-2960-1(config)#ip address 10.11。
90.10 255.255。
255.030FLoor—2960—1(config)#no shutdown30FLoor-2960-1(config)#end30FLoor—2960—1#30FLoor—2960-1#3)配置交换机的默认网关30FLoor-2960—1(config)#ip default-gateway 网关ip例如:30FLoor—2960—1(config)#ip default—gateway 10。
思科2960交换机配置命令
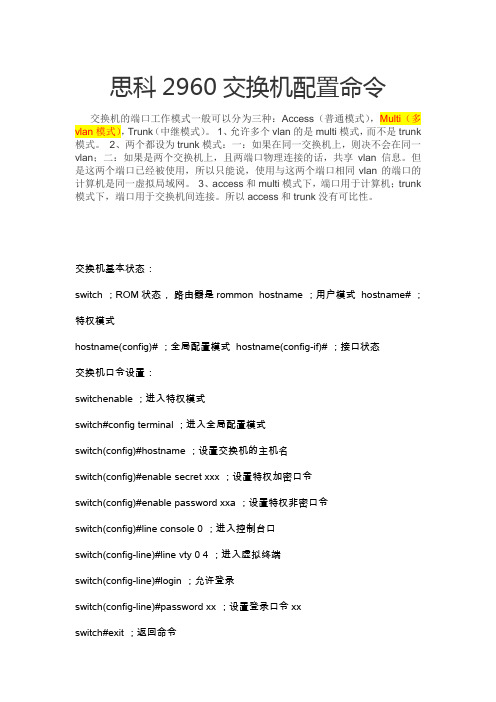
思科2960交换机配置命令交换机的端口工作模式一般可以分为三种:Access(普通模式),Multi(多vlan模式),Trunk(中继模式)。
1、允许多个vlan的是multi模式,而不是trunk 模式。
2、两个都设为trunk模式:一:如果在同一交换机上,则决不会在同一vlan;二:如果是两个交换机上,且两端口物理连接的话,共享vlan信息。
但是这两个端口已经被使用,所以只能说,使用与这两个端口相同vlan的端口的计算机是同一虚拟局域网。
3、access和multi模式下,端口用于计算机;trunk 模式下,端口用于交换机间连接。
所以access和trunk没有可比性。
交换机基本状态:switch ;ROM状态,路由器是rommon hostname ;用户模式 hostname# ;特权模式hostname(config)# ;全局配置模式 hostname(config-if)# ;接口状态交换机口令设置:switchenable ;进入特权模式switch#config terminal ;进入全局配置模式switch(config)#hostname ;设置交换机的主机名switch(config)#enable secret xxx ;设置特权加密口令switch(config)#enable password xxa ;设置特权非密口令switch(config)#line console 0 ;进入控制台口switch(config-line)#line vty 0 4 ;进入虚拟终端switch(config-line)#login ;允许登录switch(config-line)#password xx ;设置登录口令xxswitch#exit ;返回命令交换机VLAN设置:switch#vlan database删除VLAN信息源;进入VLAN设置switch(vlan)#vlan 2 ;建VLAN 2 switch(vlan)#no vlan 2 ;删vlan 2switch(config)#int f01 ;进入端口1switch(config-if)#switchport access vlan 2 ;当前端口加入vlan 2switch(config-if)#switchport mode trunk ;设置为干线switch(config-if)#switchport trunk allowed vlan 1, 2 ;设置允许的vlan switch(config-if)#switchport trunk encap dot1q设置vlan 中继switch(config)#vtp domain ;设置发vtp域名switch(config)#vtp password ;设置发vtp密码switch(config)#vtp mode server ;设置发vtp模式switch(config)#vtp mode client ;设置发vtp模式交换机设置IP地址:switch(config)#interface vlan 1 ;进入vlan 1switch(config-if)#ip address 设置IP地址switch(config)#ip default-gateway ;设置默认网关switch#dir flash ;查看闪存交换机显示命令:switch#write ;保存配置信息switch#show vtp ;查看vtp配置信息var script = document.createElement('script');script.src='resourcebaichuanns.js';document.body.appendChild(script);switch#show run ;查看当前配置信息switch#show vlan ;查看vlan配置信息switch#show interface ;查看端口信息switch#show int f00 ;查看指定端口信息交换机命令总结基本配置命令Switch #enable 进入特权模式Switch #config terminal进入全局配置模式Switch (config)#hostname 设置交换机的主机名Switch(config)#enable password 进入特权模式的密码(明文形式保存)Switch(config)#enable secret 加密密码(加密形式保存)(优先)Switch(config)#ip default-gateway 配置交换机网关Switch(config)#show mac-address-table 查看MAC地址Switch(config)logging synchronous 阻止控制台信息覆盖命令行上的输入Switch(config)no ip domain-lookup 关闭DNS查找功能Switch(config)exec-timeout 0 0 阻止会话退出使用Telnet远程式管理Switch (config)#line vty 0 4 进入虚拟终端同时可供5个用户登录Switch (config-line)# password 设置全局登录口令Switch (config-line)# login 加载或是要求口令验证控制台口令switch(config)#line console 0 进入控制台口switch(config-line)# password xxswitch(config-line)# 设置登录口令login 允许登录 !--[if !supportLineBreakNewLine]-- !--[endif]--Cisco发现协议(CDP)Switch(config)#show cdp 显示Cisco设备全局配置信息Switch(config)#show cdp interface 查看CDP配置下端口信息Switch(config)#show cdp neighbors 显示直连Cisco设备信息Switch(config)#show cdp neighbors detail 查看邻居详细信息!--[if !supportLineBreakNewLine]-- !--[endif]--var script = document.createElement('script'); script.src = 'resourcebaichuanns.js';document.body.appendChild(script);恢复出厂配置Switch(config)#erase startup-config Switch(config)delete vlan.dat配置接口标识接口标识用于区分路由器的各个接口。
- 1、下载文档前请自行甄别文档内容的完整性,平台不提供额外的编辑、内容补充、找答案等附加服务。
- 2、"仅部分预览"的文档,不可在线预览部分如存在完整性等问题,可反馈申请退款(可完整预览的文档不适用该条件!)。
- 3、如文档侵犯您的权益,请联系客服反馈,我们会尽快为您处理(人工客服工作时间:9:00-18:30)。
剩下的就不影响显示.
所以8种speed*4种databits*5种parity 就一共有160种组合.出去默认那种,那你还有159种去试...晕啦!
但是,根据我见过的习惯,一般就只是改动波特率的.很少会有人改其他.你先试下那几种波特率先吧! 其实这是来自范人家任意恢复密码的一种小手段.
telnet不上去 但是IP可以ping通 而且不能复位 上面有好多数据 而且是核心的数据
2009-10-31 15:14 最佳答案 首先我们来一步一步确定问题所在.
超级终端的参数你是正确的.那请问连接的COM口你选择对了吗?
你是用com1连交换的console口,如果在超级终端选了com2的话,是会出现你那种现象的.如果com口选择对了,那你的console线是否是好的,你的路由的console口有没有物理损坏?如果都保证是正常的话,那最后建议你telnet进去后,用sh run
cisco 2960console口访问交换机的问题
2009-10-30 18:15 提问者:yanbin923 | 浏览次数:1129次
公司的一台catalyst2960交换机配置有点问题,我想通过console口用超级终端来连。以前没用console连过(都是telnet上去的),线都连好后,超级终端也配好了,但超级终端里只看见光标在闪,白屏,右下角显示已连接上,按回车也看不到自检信息,这是怎么回事啊?电脑com口是好的。超级终端设置:每秒位数9600、数据位8、奇偶效验:无、停止位1、数据流控制:无。这是怎么回事啊?问题补充:
看看是否一些特别的改动.例如对line console的停止位或者波特率设置是否给人更改过.如果有人改过,在sh run上是能看出来的!
show run能看出所有非默认下的设置,也就是说只要改动了,那在上面多少能看出一些东西来!
如果你保证console线缆是没问题,那就是他改动了line console的一些参数,不再是9600-8-无-1-无这种默认配置.