WinForm中打印控件的用法
printpreviewdialog使用详解

printpreviewdialog使用详解PrintPreviewDialog是.NET Framework中的一个控件,它允许用户在打印文档之前预览文档的打印效果。
下面将详细介绍PrintPreviewDialog的使用方法。
首先,你需要在你的Windows Forms应用程序中添加PrintPreviewDialog控件。
这可以通过Visual Studio的设计器完成,也可以通过代码手动添加。
一旦添加了这个控件,你就可以使用它来显示打印预览。
使用PrintPreviewDialog之前,你需要准备要打印的内容。
这通常是通过PrintDocument对象完成的。
PrintDocument对象包含了打印页面所需要的所有信息,包括要打印的内容、页面设置和打印设置等。
你可以通过添加PrintPage事件处理器来定义打印内容。
下面是一个简单的示例,演示了如何使用PrintPreviewDialog来预览一段文本:csharpusing System;using System.Drawing;using System.Drawing.Printing;using System.Windows.Forms;public class PrintPreviewExample : Form{private Button printPreviewButton;private PrintPreviewDialog printPreviewDialog;private PrintDocument printDocument;public PrintPreviewExample(){printPreviewButton = new Button();printPreviewButton.Text = "Print Preview";printPreviewButton.Click += newEventHandler(printPreviewButton_Click);printDocument = new PrintDocument();printDocument.PrintPage += new PrintPageEventHandler(printDocument_PrintPage);printPreviewDialog = new PrintPreviewDialog();printPreviewDialog.Document = printDocument;Controls.Add(printPreviewButton);}private void printPreviewButton_Click(object sender, EventArgs e){printPreviewDialog.ShowDialog();}private void printDocument_PrintPage(object sender, PrintPageEventArgs e) {string text = "Hello, Print Preview!";using (Font font = new Font("Arial", 20)){e.Graphics.DrawString(text, font, Brushes.Black, 100, 100);}}}在这个示例中,我们首先创建了一个PrintPreviewDialog和一个PrintDocument对象。
C#打印控件的使用

// must be set
PrintDialog1.Document = docToPrint;//把PrintDialog的Document属性设为上面配置好的PrintDocument的实例
privateSystem.IO.Stream streamToPrint;
stringstreamType;
// This method will set properties on the PrintDialog object and
// then display the dialog.
publicvoidStartPrint(Stream streamToPrint,stringstreamType)
// Declare the PrintDocument object.
privateSystem.Drawing.Printing.PrintDocument docToPrint =
newSystem.Drawing.Printing.PrintDocument();//创建一个PrintDocument的实例
{
this.streamToPrint=streamToPrint;
this.streamType=streamType;
// Allow the user to choose the page range he or she would
// like to print.
System.Windows.Forms.PrintDialog PrintDialog1=newPrintDialog ();//创建一个PrintDialog的实例。
C#中printDocument打印、预览、打印机设置和打印属性的方法
private void Form1_Load(object sender, System.EventArgs e){//获取或设置一个值,该值指示是否发送到文件或端口printDocument1.PrinterSettings.PrintToFile = true;//设置打印时横向还是纵向ndscape = true;}private void fileOpenMenuItem_Click(object sender, System.EventArgs e){OpenFile();}private void OpenFile(){openFileDialog1.Filter = "Text Files (*.txt)|*.txt";//打开文本的类型//获取文件对话框的初始目录(StartupPath)获得bin文件下的文件openFileDialog1.InitialDirectory = System.Windows.Forms.Application.StartupPath;DialogResult userResponse = openFileDialog1.ShowDialog();//MessageBox.Show(userResponse.ToString());if (userResponse==DialogResult.OK){filePath = openFileDialog1.FileName.ToString();//转换文件路径}}private void MyPrintPage(object sender, System.Drawing.Printing.PrintPageEventArgs e) //充分利用e { int topMargin = printDocument1.DefaultPageSettings.Margins.Top;//上边距int leftMargin = printDocument1.DefaultPageSettings.Margins.Left;//左边距float linesPerPage = 0;//页面行号float verticalPosition = 0;//绘制字符串的纵向位置float horizontalPosition=leftMargin;//左边距string textLine = null;//行字符串currentLine = 0;//行计数器// float Xline=0;//int line=0;// Calculate the number of lines per page.linesPerPage = e.MarginBounds.Height / myFont.GetHeight(e.Graphics);// Xline=e.MarginBounds.Width/myFont.GetHeight();// for each text line that will fit on the page, read a new line from the documentwhile (currentLine < linesPerPage ){textLine = streamToPrint.ReadLine();if(textLine == null) { break;}// 求出已经打印的范围verticalPosition = topMargin + currentLine * myFont.GetHeight(e.Graphics);// 设置页面的属性e.Graphics.DrawString(textLine, myFont, myBrush, horizontalPosition, verticalPosition); // 增加行数currentLine ++;}// If more lines of text exist in the file, print another page.if (textLine != null){e.HasMorePages = true;}else{e.HasMorePages = false;}}private void printPreviewButton_Click(object sender, System.EventArgs e){try{streamToPrint = new StreamReader(filePath);try{PrintPreview();}finally{streamToPrint.Close();}}catch(Exception ex){MessageBox.Show(ex.Message);}}private void runtimeDialogButton_Click(object sender, System.EventArgs e){try{streamToPrint = new StreamReader(filePath);try{RuntimeDialog();}finally{streamToPrint.Close();}}catch(Exception ex){MessageBox.Show(ex.Message);}}private void printPreviewControlButton_Click(object sender, System.EventArgs e) {try{streamToPrint = new StreamReader(filePath);try{PrintPreviewControl();}finally{streamToPrint.Close();}}catch(Exception ex){MessageBox.Show(ex.Message);}}private void RuntimeDialog(){PrintPreviewDialog pPDlg;pPDlg = new PrintPreviewDialog();pPDlg.Document = pDoc;pPDlg.WindowState = FormWindowState.Maximized;pPDlg.PrintPreviewControl.Columns = 2;pPDlg.ShowDialog();pPDlg.Dispose();}private void PrintPreviewControl(){Form formPreview = new Form();PrintPreviewControl previewControl = new PrintPreviewControl(); previewControl.Document = printDocument1;previewControl.StartPage = 2;formPreview.WindowState = FormWindowState.Maximized; formPreview.Controls.Add(previewControl);formPreview.Controls[0].Dock = DockStyle.Fill;formPreview.ShowDialog();formPreview.Dispose();}private void PrintPreview(){//设置页面的预览的页码//设置显示页面显示的大小(也就是原页面的倍数)printPreviewDialog1.PrintPreviewControl.StartPage = 0; printPreviewDialog1.PrintPreviewControl.Zoom =1.0;//设置或返回窗口状态,即该窗口是最小化、正常大小还是其他状态。
C#打印、打印预览、页面设置案例
操作方式:
1.新建一个项目,其中有两个form(Form1,Form2)
2.在Form1中添加菜单mainMenu1,一个richTextBox1(定义为Public),一个打印文档控件PrintDocument,名称为MyPrintDC。一个状态栏名称为myStatus。
关于(mnAbout)
3.在Form2中添加一个标签:查找内容,文本(txtSearch),命令按钮(btnSearch) 查找一下个,命令按钮(btnCancel)取消
4.Form1中代码:
加入引用:
using System.IO;
在控件定义阶段中加入:
private StringReader myReader;
Graphics myGraphics=e.Graphics;
Font myPrintFont=this.richTextBox1.Font;
//计算一页行数
float iLinePage=e.MarginBounds.Height/myPrintFont.GetHeight(myGraphics);
this.richTextBox1.SelectedText ="";
this.mnCopy.Enabled =false;
this.mnCut.Enabled =false;
this.mnPaste.Enabled =true;
}
}
}
复制菜单(mnCopy):
if (this.richTextBox1.SelectedText!="")
{
C#打印控件的使用实例
C#打印控件的使⽤实例C#打印控件的使⽤是如何的呢?我们在编写C#打印控件实⽤程序的时候怎么操作呢?⾸先弄⼀个printDocument控件,然后在打印的按钮中直接调⽤printDocument1.print()事件. 再次就是写printDocument的PrintPag事件了. 下⾯C#打印控件的使⽤具体实例:1. //C#打印控件的使⽤实例2. privatevoid button1_Click(object sender, EventArgs e)3. {4. printDocument1.Print();5. }6. privatevoid printDocument1_PrintPage(object sender,7. System.Drawing.Printing.PrintPageEventArgs e)8. {9. Font tabelTextFont = new Font("宋体", 10);10. if (dataGridView1.DataBindings != null)11. {12. int[] columnsWidth =13. newint[dataGridView1.Columns.Count];14. //C#打印控件的使⽤之得到所有列的个数15. int[] columnsLeft=newint[dataGridView1.Columns.Count];16. //for (int c = 0; c < columnsWidth.Length; c++)17. //C#打印控件的使⽤之得到列标题的宽度18. {19. columnsWidth[c] = (int)e.Graphics.MeasureString(20. dataGridView1.Columns[c].HeaderText , tabelTextFont).Width;21. }22. for (int rowIndex = 0;23. rowIndex < dataGridView1.Rows.Count; rowIndex++)24. //C#打印控件的使⽤之rowindex当前⾏25. {26. for (int columnIndex = 0;27. columnIndex < dataGridView1.Columns.Count; columnIndex++)28. //C#打印控件的使⽤之当前列29. {30. int w = (int)e.Graphics.MeasureString(31. dataGridView1.Columns[columnIndex].Name ,32. tabelTextFont).Width; columnsWidth[columnIndex] =33. w > columnsWidth[columnIndex] ? w : columnsWidth[columnIndex];34. }35. }//C#打印控件的使⽤36. int rowHidth = 20;37. int tableLeft=60;38. int tableTop=70;39. columnsLeft[0]=tableLeft;40. for (int i=1;i<=columnsWidth.Length -1;i++)41. {42. columnsLeft[i] = columnsLeft[i - 1] + columnsWidth[i - 1]+15;43. }44. StringFormat sf=new StringFormat ();45. sf.Alignment=StringAlignment.Center ;//居中打印46. e.Graphics.DrawString("欢迎⽯印死了开的交流!",47. new Font("宋体", 15), Brushes.Black, new Point(48. e.PageBounds.Width / 2, 20),sf );//打印标题49. for (int c = 0; c < columnsWidth.Length; c++)50. //打印表中的列名51. {52. e.Graphics.DrawString(dataGridView1.Columns[c].HeaderText,53. new Font ("宋体",10,FontStyle.Bold),54. Brushes.Black, new Point(columnsLeft[c], tableTop));55. e.Graphics.DrawLine(Pens.Black,56. new Point(columnsLeft[c]-5, tableTop - 5),57. new Point(columnsLeft[c]-5, tableTop +58. (dataGridView1 .Rows .Count+1)*rowHidth));59. }//C#打印控件的使⽤60. e.Graphics.DrawLine(Pens.Black,61. new Point(columnsLeft[dataGridView1.Columns.Count - 1] +62. columnsWidth[dataGridView1.Columns.Count - 1],63. tableTop - 5), new Point(columnsLeft[dataGridView1.Columns.Count - 1] +64. columnsWidth[dataGridView1.Columns.Count - 1],65. tableTop + (dataGridView1.Rows.Count + 1) * rowHidth));66. //画最后⾯的线67. e.Graphics.DrawLine(Pens.Black, new Point(columnsLeft[0] - 5,68. tableTop - 5), new Point(columnsLeft[dataGridView1.Columns.Count - 1] +69. columnsWidth[dataGridView1.Columns.Count - 1], tableTop - 5));70. for (int rowIndex = 0;71. rowIndex < dataGridView1.Rows.Count; rowIndex++)//打印表中的内容72. {73. for (int columnIndex = 0;74. columnIndex < dataGridView1.Columns.Count; columnIndex++)75. {76. e.Graphics.DrawString(77. dataGridView1.Rows[rowIndex].Cells[columnIndex].Value.ToString(),78. tabelTextFont, Brushes.Black, new Point(columnsLeft[columnIndex],79. tableTop + rowHidth * (rowIndex + 1)));80. }81. e.Graphics.DrawLine(Pens.Black,82. new Point(columnsLeft[0]-5,83. tableTop + (rowIndex +1) * rowHidth-5),84. new Point(columnsLeft[dataGridView1.Columns.Count - 1] +85. columnsWidth[dataGridView1.Columns.Count - 1], tableTop +86. (rowIndex +1)*rowHidth-5));//循环画⾏87. }88. //C#打印控件的使⽤之89. }另外要是想有打印预览的话,那就还要⼀个printPreviewDialog控件了。
winform打印

Winform 打印报表(从网上看到的代码,感觉不错,上传以做备忘)winform 打印原理..1.先在画布上面画好表格2.然后传入要打印的数据代码如下:using System;using System.Collections.Generic;using System.Text;using System.Windows.Forms;using System.Drawing.Printing;using System.Drawing;namespace Etaocn.Util{public class Printer{private DataGridView dataview;private PrintDocument printDoc;//打印有效区域的宽度int width;int height;int columns;double Rate;bool hasMorePage = false;int currRow = 0;int rowHeight = 20;//打印页数int PageNumber;//当前打印页的行数int pageSize = 20;//当前打印的页码int PageIndex;int AreaHeight;private int PageWidth; //打印纸的宽度private int PageHeight; //打印纸的高度private int LeftMargin; //有效打印区距离打印纸的左边大小private int TopMargin;//有效打印区距离打印纸的上面大小private int RightMargin;//有效打印区距离打印纸的右边大小private int BottomMargin;//有效打印区距离打印纸的下边大小int rows;private string[] footer;/**////<summary>///构造函数///</summary>///<param name="dataview">要打印的DateGridView</param>///<param name="printDoc">PrintDocument用于获取打印机的设置</param>public Printer(DataGridView dataview, PrintDocumentprintDoc,string[] footer){this.footer = footer;this.dataview = dataview;this.printDoc = printDoc;PageIndex = 0;//获取打印数据的具体行数this.rows = dataview.RowCount;this.columns = dataview.ColumnCount;//判断打印设置是否是横向打印if (!ndscape){PageWidth =printDoc.DefaultPageSettings.PaperSize.Width;PageHeight =printDoc.DefaultPageSettings.PaperSize.Height;}else{PageHeight =printDoc.DefaultPageSettings.PaperSize.Width;PageWidth =printDoc.DefaultPageSettings.PaperSize.Height;}LeftMargin = printDoc.DefaultPageSettings.Margins.Left-50; TopMargin = printDoc.DefaultPageSettings.Margins.Top+60; RightMargin = printDoc.DefaultPageSettings.Margins.Right;BottomMargin =printDoc.DefaultPageSettings.Margins.Bottom-100;height = PageHeight - TopMargin - BottomMargin - 2;width = PageWidth - LeftMargin - RightMargin - 2;double tempheight = height;double temprowHeight = rowHeight;while (true){string temp = Convert.ToString(tempheight /Math.Round(temprowHeight, 3));int i = temp.IndexOf('.');double tt = 100;if (i != -1){tt =Math.Round(Convert.ToDouble(temp.Substring(temp.IndexOf('.'))), 3); }if (tt <= 0.01){rowHeight = Convert.ToInt32(temprowHeight);break;}else{temprowHeight = temprowHeight + 0.01;}}pageSize = height / rowHeight;if ((rows + 1) <= pageSize){pageSize = rows + 1;PageNumber = 1;}else{PageNumber = rows / (pageSize - 1);if (rows % (pageSize - 1) != 0){PageNumber = PageNumber + 1;}}/**////<summary>///初始化打印///</summary>private void InitPrint(){PageIndex = PageIndex + 1;if (PageIndex == PageNumber){hasMorePage = false;if (PageIndex != 1){pageSize = rows % (pageSize - 1) + 1;}}else{hasMorePage = true;}}//打印头private void DrawHeader(Graphics g){Font font = new Font("宋体", 11, FontStyle.Regular);int temptop = (rowHeight / 2) + TopMargin + 1;int templeft = LeftMargin + 1;for (int i = 0; i < this.columns; i++){string headString =this.dataview.Columns[i].HeaderText;float fontHeight = g.MeasureString(headString, font).Height;float fontwidth = g.MeasureString(headString, font).Width;float temp = temptop - (fontHeight) / 3;g.DrawString(headString, font, Brushes.Black, new PointF(templeft, temp));templeft = templeft +(int)(this.dataview.Columns[i].Width / Rate) + 1;}//画表格private void DrawTable(Graphics g){Rectangle border = new Rectangle(LeftMargin, TopMargin, width, (pageSize) * rowHeight);g.DrawRectangle(new Pen(Brushes.Black, 1), border);for (int i = 1; i < pageSize; i++){if (i != 1){g.DrawLine(new Pen(Brushes.Black, 1), newPoint(LeftMargin + 1, (rowHeight * i) + TopMargin + 1), new Point(width + LeftMargin, (rowHeight * i) + TopMargin + 1));}else{g.DrawLine(new Pen(Brushes.Black, 1), newPoint(LeftMargin + 1, (rowHeight * i) + TopMargin + 1), new Point(width + LeftMargin, (rowHeight * i) + TopMargin + 1));}}//计算出列的总宽度和打印纸比率Rate = Convert.ToDouble(GetDateViewWidth()) /Convert.ToDouble(width);int tempLeft = LeftMargin + 1;int endY = (pageSize) * rowHeight + TopMargin;for (int i = 1; i < columns; i++){tempLeft = tempLeft + 1+ (int)(this.dataview.Columns[i - 1].Width / Rate);g.DrawLine(new Pen(Brushes.Black, 1), newPoint(tempLeft, TopMargin), new Point(tempLeft, endY));}}/**////<summary>///获取打印的列的总宽度///</summary>///<returns></returns>private int GetDateViewWidth(){int total = 0;for (int i = 0; i < this.columns; i++){total = total + this.dataview.Columns[i].Width;}return total;}//打印行数据private void DrawRows(Graphics g){Font font = new Font("宋体", 11, FontStyle.Regular);int temptop = (rowHeight / 2) + TopMargin + 1+ rowHeight;for (int i = currRow; i < pageSize + currRow - 1; i++) {int templeft = LeftMargin + 1;for (int j = 0; j < columns; j++){string headString =this.dataview.Rows[i].Cells[j].Value.ToString();float fontHeight = g.MeasureString(headString, font).Height;float fontwidth = g.MeasureString(headString, font).Width;float temp = temptop - (fontHeight) / 3;while (true){if (fontwidth <=(int)(this.dataview.Columns[j].Width / Rate)){break;}else{headString = headString.Substring(0, headString.Length - 1);fontwidth = g.MeasureString(headString, font).Width;}}g.DrawString(headString, font, Brushes.Black, new PointF(templeft, temp));templeft = templeft +(int)(this.dataview.Columns[j].Width / Rate) + 1;}temptop = temptop + rowHeight;}currRow = pageSize + currRow - 1;AreaHeight = temptop;}/**////<summary>///在PrintDocument中的PrintPage方法中调用///</summary>///<param name="g">传入PrintPage中PrintPageEventArgs中的Graphics</param>///<returns>是否还有打印页有返回true,无则返回false</returns>public bool Print(Graphics g){InitPrint();DrawTable(g);DrawHeader(g);DrawRows(g);//打印页码string pagestr = PageIndex + " / " + PageNumber;Font font = new Font("宋体", 11, FontStyle.Regular);g.DrawString(pagestr, font, Brushes.Black, newPointF((PageWidth / 2) - g.MeasureString(pagestr, font).Width, PageHeight - (BottomMargin / 2) - g.MeasureString(pagestr,font).Height));// 打印查询的功能项名称return hasMorePage;}}}。
C#利用word(模板)标签功能打印和form自带的打印功能
C#利⽤word(模板)标签功能打印和form⾃带的打印功能利⽤word标签功能打印实现public void DocumentPrint(Request request){Microsoft.Office.Interop.Word.Application app = null;Microsoft.Office.Interop.Word.Document doc = null;object missing = System.Reflection.Missing.Value;object templateFile = @"D:\Downloads\试卷命题印刷流程单.doc";try{app = new Microsoft.Office.Interop.Word.ApplicationClass();doc = app.Documents.Add(ref templateFile, ref missing, ref missing, ref missing);try{#region替换书签object markName = "书签名";Microsoft.Office.Interop.Word.Bookmark bm = doc.Bookmarks.get_Item(ref markName);...#endregion}catch{}//打印app.Visible = false;//doc.PrintPreview();//要预览必须先把app.Visible设置成truedoc.PrintOut(ref missing, ref missing, ref missing, ref missing,ref missing, ref missing, ref missing, ref missing, ref missing,ref missing, ref missing, ref missing, ref missing, ref missing,ref missing, ref missing, ref missing, ref missing);}catch (Exception exp){throw new Exception(exp.Message);}//销毁word进程finally{object saveChange = Microsoft.Office.Interop.Word.WdSaveOptions.wdDoNotSaveChanges;if (doc != null)doc.Close(ref saveChange, ref missing, ref missing);if (app != null)app.Quit(ref missing, ref missing, ref missing);}}利⽤form⾃带的打印功能public void DocumentPrint(PrintDocument docToPrint){//打印开始前docToPrint.BeginPrint += new PrintEventHandler(docToPrint_BeginPrint);//打印输出(过程)docToPrint.PrintPage += new PrintPageEventHandler(docToPrint_PrintPage);//打印结束docToPrint.EndPrint += new PrintEventHandler(docToPrint_EndPrint); PrintDocument docToPrint = new PrintDocument();PrintDialog pd = new PrintDialog();//string filepath = @"D:\Downloads\试卷命题印刷流程单.doc";//fs = new FileStream(filepath, FileMode.Open, FileAccess.Read);pd.Document = docToPrint;if (DialogResult.OK == pd.ShowDialog()) //如果确认,将会覆盖所有的打印参数设置{//页⾯设置对话框(可以不使⽤,其实PrintDialog对话框已提供页⾯设置)PageSetupDialog psd = new PageSetupDialog();psd.Document = docToPrint;if (DialogResult.OK == psd.ShowDialog()){//打印预览PrintPreviewDialog ppd = new PrintPreviewDialog();ppd.Document = docToPrint;if (DialogResult.OK == ppd.ShowDialog())docToPrint.Print(); //打印}}}private void docToPrint_BeginPrint(object sender, PrintEventArgs e){//也可以把⼀些打印的参数放在此处设置}private void docToPrint_PrintPage(object sender, PrintPageEventArgs e){//打印啥东东就在这写了Graphics g = e.Graphics;Brush b = new SolidBrush(Color.Black);Font titleFont = new Font("宋体", 16);string title ="";//这⾥是打印内容g.DrawString(title, titleFont, b, new PointF((e.PageBounds.Width - g.MeasureString(title, titleFont).Width) / 2, 20));//e.Cancel//获取或设置是否取消打印//e.HasMorePages //为true时,该函数执⾏完毕后还会重新执⾏⼀遍(可⽤于动态分页)}private void docToPrint_EndPrint(object sender, PrintEventArgs e){//打印结束后相关操作}两种⽅法都不是特别完美。
C#-WinForm-打印控件

C#-WinForm-打印控件打印控件绘制如下窗体⼀、PrintDocument -打印的基础⾸先放置PrintDocument控件,双击事件PrintPage设置要打印的样式//第⼀步设置打印属性private void printDocument1_PrintPage(object sender, System.Drawing.Printing.PrintPageEventArgs e){//设置字体样式Font f = new System.Drawing.Font("微软雅⿊", 16);f = richTextBox1.Font;//设置字体颜⾊Brush b = new SolidBrush(richTextBox1.ForeColor);//e.绘制.画字符串(要打印的⽂本,⽂本格式,画刷-颜⾊和纹理,位置坐标)e.Graphics.DrawString(richTextBox1.Text, f, b, 20, 10);}//字体样式设置private void button4_Click(object sender, EventArgs e){DialogResult dr = fontDialog1.ShowDialog();if (dr == DialogResult.OK){richTextBox1.Font = fontDialog1.Font;richTextBox1.ForeColor = fontDialog1.Color;}}设置Document⼆、PageSetupDialog - 打印页⾯设置//第⼆步设置打印页⾯设置private void button1_Click(object sender, EventArgs e){pageSetupDialog1.Document = printDocument1;pageSetupDialog1.ShowDialog();}打印页⾯设置三、1、PrintPreviewContol - 打印预览格式⼀,在窗体中设置预览区域//第三步打印预览⼀private void button2_Click(object sender, EventArgs e){printPreviewControl1.Document = printDocument1;}打印预览⼀2、PrintPreviewDialog - 打印预览格式⼆,在弹窗中预览//第三步打印预览⼆private void button2_Click(object sender, EventArgs e){printPreviewDialog1.Document = printDocument1;printPreviewDialog1.ShowDialog();}打印预览⼆四、PrintDialog - 开始打印//第四步开始打印private void button3_Click(object sender, EventArgs e) {printDialog1.Document = printDocument1;DialogResult dr = printDialog1.ShowDialog();if (dr == DialogResult.OK){printDocument1.Print();}}开始打印。
c#winform实现打印功能(未完)
c#winform实现打印功能(未完)
1.打印控件介绍(Document属性设置为PrintDocument1;ShowDialog()⽅法显⽰对话窗)
PrintDialog控件(打印会话):⽤于选择打印机、选择要打印的页以及确定其他与打印相关的设置。
PrintPreviewControl控件(打印预览控制):⽤于按⽂档打印时的外观显⽰⽂档。
(通常只有在希望编写⾃⼰的打印预览⽤户界⾯时才使⽤)
PrintPreviewDialog控件(打印预览会话):⽤于显⽰⽂档打印后的外观。
(通常UseAntiAlias属性设为true,开启防锯齿功能;)PrintDocument控件(打印⽂档):设置打印的⽂档。
(这个最重要,⽐较常见的是PrintPage事件和Print⽅法。
PrintPage事件在需要为当前页打印的输出时发⽣。
调⽤Print⽅法开始⽂档的打印进程。
)
PageSetupDialog控件(页⾯设置会话):⽤于设置页⾯详细信息以便打印。
注意:CS⽂件头部要引⽤using System.Drawing.Printing;
实例:⽤tableLayoutPanel+dataGridView实现单据打印(⽐GDI绘制表格后打印容易实现)。
winform打印和预览
winform打印和预览 在windows应⽤程序中⽂档的打印是⼀项⾮常重要的功能,在以前⼀直是⼀个⾮常复杂的⼯作,Microsoft .Net Framework的打印功能都以组件的⽅式提供,为程序员提供了很⼤的⽅便。
由于⼯作中常⽤到印功功能,个⼈写了⼀个专门打印DataGridView对象⼀个类,可以实现预览和打印功能,⽽且⾃动缩放字段、添加颜⾊;在预览时可以根据不同的⽐例查看效果,可以查看第⼏页数据和直接打印第⼏页的数据。
请看效果图。
⼆、附上调⽤代码三、提供源码:1using System;2using System.Collections.Generic;3using System.Linq;4using System.Text;5using System.Drawing.Printing;6using System.Windows.Forms;7using System.Drawing;8using ponent;9namespace Bll10 {11///<summary>12///打印13///开⼼懒⼈14/// 2014-10-1015///</summary>16public class PrintDataGridView17 {1819static DataGridView dgv;20static string titleName = ""; //标题名称21static string titleName2 = ""; //第⼆标题名称22static int rowIndex = 0; //当前⾏23static int page = 1; //当前页24static int rowsPerPage = 0; //每页显⽰多少⾏25///<summary>26///打印DataGridView27///</summary>28///<param name="dataGridView">要打印的DataGridView</param>29///<param name="title">标题</param>30///<param name="title2">第⼆标题,可以为null</param>31public static void Print(DataGridView dataGridView, string title, string title2)32 {33try34 {35if (dataGridView == null) { return; }36 titleName = title;37 titleName2 = title2;38 dgv = dataGridView;39 PrintPreviewDialog ppvw = new PrintPreviewDialog();40 ppvw.PrintPreviewControl.Zoom = 1.0; //显⽰⽐例为100%41 PrintDocument printDoc = new PrintDocument();42 PrintDialog MyDlg = new PrintDialog();43 MyDlg.Document = printDoc;44 printDoc.DefaultPageSettings.PaperSize = new PaperSize("A4", 850, 1000);45 printDoc.DefaultPageSettings.Margins = new Margins(60, 60, 60, 60); //设置边距46 ppvw.Document = printDoc; //设置要打印的⽂档47 ((Form)ppvw).WindowState = FormWindowState.Maximized; //最⼤化48 rowIndex = 0; //当前⾏49 page = 1; //当前页50 printDoc.PrintPage += new PrintPageEventHandler(printDoc_PrintPage); //打印事件51 printDoc.EndPrint += new PrintEventHandler(printDoc_EndPrint);52 ndscape = true; // 设置打印为横向53 ppvw.ShowDialog(); //打开预览5455 }56catch (Exception ex)57 {58 MessageBox.Show(ex.Message, "错误", MessageBoxButtons.OK, MessageBoxIcon.Error);59 }6061 }6263static void printDoc_EndPrint(object sender, PrintEventArgs e)64 {65 rowIndex = 0; //当前⾏66 page = 1; //当前页67 rowsPerPage = 0;//每页显⽰多少⾏68 }69private static void printDoc_PrintPage(object sender, PrintPageEventArgs e)70 {7172//标题字体73 Font titleFont = new Font("微软雅⿊", 16, FontStyle.Bold);74//标题尺⼨75 SizeF titleSize = e.Graphics.MeasureString(titleName, titleFont, e.MarginBounds.Width);76//x坐标77int x = e.MarginBounds.Left;78//y坐标79int y = Convert.ToInt32(e.MarginBounds.Top - titleSize.Height);80//边距以内纸张宽度81int pagerWidth = e.MarginBounds.Width;82//画标题83 e.Graphics.DrawString(titleName, titleFont, Brushes.Black, x + (pagerWidth - titleSize.Width) / 2, y);84 y += (int)titleSize.Height;85if (titleName2 != null && titleName2 != "")86 {8788//画第⼆标题89 e.Graphics.DrawString(titleName2, dgv.Font, Brushes.Black, x + (pagerWidth - titleSize.Width) / 2 + 200, y);90//第⼆标题尺⼨91 SizeF titleSize2 = e.Graphics.MeasureString(titleName2, dgv.Font, e.MarginBounds.Width);92 y += (int)titleSize2.Height;9394 }9596//表头⾼度97int headerHeight = 0;98//纵轴上内容与线的距离99int padding = 6;100//所有显⽰列的宽度101int columnsWidth = 0;102//计算所有显⽰列的宽度103foreach (DataGridViewColumn column in dgv.Columns)104 {105106//隐藏列返回107if (!column.Visible) continue;108//所有显⽰列的宽度109 columnsWidth += column.Width;110 }111112//计算表头⾼度113foreach (DataGridViewColumn column in dgv.Columns)114 {115116//列宽117int columnWidth = (int)(Math.Floor((double)column.Width / (double)columnsWidth * (double)pagerWidth));118//表头⾼度119int temp = (int)e.Graphics.MeasureString(column.HeaderText, column.InheritedStyle.Font, columnWidth).Height + 2 * padding;120if (temp > headerHeight) headerHeight = temp;121 }122123//画表头124125foreach (DataGridViewColumn column in dgv.Columns)126 {127128//隐藏列返回129if (!column.Visible) continue;130//列宽131int columnWidth = (int)(Math.Floor((double)column.Width / (double)columnsWidth * (double)pagerWidth));132//内容居中要加的宽度133float cenderWidth = (columnWidth - e.Graphics.MeasureString(column.HeaderText, column.InheritedStyle.Font, columnWidth).Width) / 2;134if (cenderWidth < 0) cenderWidth = 0;135//内容居中要加的⾼度136float cenderHeight = (headerHeight + padding - e.Graphics.MeasureString(column.HeaderText, column.InheritedStyle.Font, columnWidth).Height) / 2; 137if (cenderHeight < 0) cenderHeight = 0;138//画背景139 e.Graphics.FillRectangle(new SolidBrush(Color.LightGray), new Rectangle(x, y, columnWidth, headerHeight));140//画边框141 e.Graphics.DrawRectangle(Pens.Black, new Rectangle(x, y, columnWidth, headerHeight));142////画上边线143144//e.Graphics.DrawLine(Pens.Black, x, y, x + columnWidth, y);145146////画下边线147148//e.Graphics.DrawLine(Pens.Black, x, y + headerHeight, x + columnWidth, y + headerHeight);149150////画右边线151152//e.Graphics.DrawLine(Pens.Black, x + columnWidth, y, x + columnWidth, y + headerHeight);153154//if (x == e.MarginBounds.Left)155156//{157158////画左边线159160// e.Graphics.DrawLine(Pens.Black, x, y, x, y + headerHeight);161162//}163164//画内容165 e.Graphics.DrawString(column.HeaderText, column.InheritedStyle.Font, new SolidBrush(column.InheritedStyle.ForeColor), new RectangleF(x + cenderWidth, y + cenderHeight, columnWidth, headerHeight)); 166 x += columnWidth;167168 }169170 x = e.MarginBounds.Left;171 y += headerHeight;172while (rowIndex < dgv.Rows.Count)173 {174175 DataGridViewRow row = dgv.Rows[rowIndex];176if (row.Visible)177 {178179int rowHeight = 0;180foreach (DataGridViewCell cell in row.Cells)181 {182183 DataGridViewColumn column = dgv.Columns[cell.ColumnIndex];184if (!column.Visible || cell.Value == null) continue;185int tmpWidth = (int)(Math.Floor((double)column.Width / (double)columnsWidth * (double)pagerWidth));186int temp = (int)e.Graphics.MeasureString(cell.Value.ToString(), column.InheritedStyle.Font, tmpWidth).Height + 2 * padding;187if (temp > rowHeight) rowHeight = temp;188 }189190foreach (DataGridViewCell cell in row.Cells)191 {192193 DataGridViewColumn column = dgv.Columns[cell.ColumnIndex];194if (!column.Visible) continue;195int columnWidth = (int)(Math.Floor((double)column.Width / (double)columnsWidth * (double)pagerWidth));196 e.Graphics.DrawRectangle(Pens.Black, new Rectangle(x, y, columnWidth, rowHeight));197198if (cell.Value != null)199 {200201//内容居中要加的宽度202203float cenderWidth = (columnWidth - e.Graphics.MeasureString(cell.Value.ToString(), cell.InheritedStyle.Font, columnWidth).Width) / 2;204205if (cenderWidth < 0) cenderWidth = 0;206207//内容居中要加的⾼度208209float cenderHeight = (rowHeight + padding - e.Graphics.MeasureString(cell.Value.ToString(), cell.InheritedStyle.Font, columnWidth).Height) / 2;210211if (cenderHeight < 0) cenderHeight = 0;212213////画下边线214215//e.Graphics.DrawLine(Pens.Black, x, y + rowHeight, x + columnWidth, y + rowHeight);216217////画右边线218219//e.Graphics.DrawLine(Pens.Black, x + columnWidth, y, x + columnWidth, y + rowHeight);220221//if (x == e.MarginBounds.Left)222223//{224225////画左边线226227// e.Graphics.DrawLine(Pens.Black, x, y, x, y + rowHeight);228229//}230231//画内容232233 e.Graphics.DrawString(cell.Value.ToString(), column.InheritedStyle.Font, new SolidBrush(cell.InheritedStyle.ForeColor), new RectangleF(x + cenderWidth, y + cenderHeight, columnWidth, rowHeight)); 234235 }236237 x += columnWidth;238239 }240241 x = e.MarginBounds.Left;242243 y += rowHeight;244245if (page == 1) rowsPerPage++;246247//打印下⼀页248249if (y + rowHeight > e.MarginBounds.Bottom)250 {251252 e.HasMorePages = true;253254break;255256 }257258 }259260 rowIndex++;261262 }263264//页脚265string footer = " 第 " + page + " 页,共 " + Math.Ceiling(((double)dgv.Rows.Count / rowsPerPage)).ToString() + " 页";266//画页脚267 e.Graphics.DrawString(footer, dgv.Font, Brushes.Black, x + (pagerWidth - e.Graphics.MeasureString(footer, dgv.Font).Width) / 2, e.MarginBounds.Bottom); 268 page++;269270 }271272273 }274275 }View Code。
DevExpressWinform通用控件打印方法(允许可自定义边距)z

DevExpressWinform通⽤控件打印⽅法(允许可⾃定义边距)z DevExpress Winform 通⽤控件打印⽅法,包括gridcontrol,treelist,pivotGridControl,ChartControl,LayoutControl...(所有⽀持打印功能的控件) ,同时允许⽤户⾃定义报表标题,报表纸张类型(A4,A3...),报表边距/// <summary>/// 打印功能/// </summary>/// <param name="panel">打印控件</param>/// <param name="title">标题</param>/// <param name="pageSize">纸张类型</param>/// <param name="margins">边距</param>protected virtual void Print(IPrintable panel, string title = null, PaperKind pageSize = PaperKind.A4, System.Drawing.Printing.Margins margins = null){PrintingSystem ps = new PrintingSystem();CompositeLink link = new CompositeLink(ps); PrintableComponentLink printableLink = new PrintableComponentLink() { Component = panel };ps.Links.Add(link);link.Links.Add(printableLink);ndscape = true;//横向link.PaperKind = pageSize;//设置纸张⼤⼩if (margins == null)margins = new System.Drawing.Printing.Margins(10, 10, 50, 50);link.Margins = margins;//判断是否有标题,有则设置if (!string.IsNullOrEmpty(title)){PageHeaderFooter phf = link.PageHeaderFooter as PageHeaderFooter;phf.Header.Content.Clear();phf.Header.Content.AddRange(new string[] { "", title, "" });phf.Header.Font = new System.Drawing.Font("宋体", 14, System.Drawing.FontStyle.Bold);phf.Header.LineAlignment = BrickAlignment.Center;phf.Footer.Content.AddRange(new string[] { "", String.Format("打印时间: {0:g}", DateTime.Now), "" });}link.CreateDocument(); //建⽴⽂档ps.PreviewRibbonFormEx.Show();//进⾏预览}。
打印控件_精品文档

打印控件引言打印控件是一种用于在计算机上管理和控制打印任务的软件工具。
它提供了一个用户友好的界面,使用户能够方便地完成打印操作。
本文将介绍打印控件的定义、功能、使用方法以及一些常见问题和解决方案。
一、打印控件的定义打印控件是指在计算机上安装的用于管理和控制打印任务的软件程序。
它通常是作为操作系统或特定应用软件的一部分提供给用户使用的。
打印控件可以通过操作系统的打印服务或通过第三方软件来实现。
二、打印控件的功能1. 打印设置:打印控件提供了各种打印设置选项,包括页面大小、纸张类型、打印质量等。
用户可以根据需要进行自定义设置,以满足特定的打印需求。
2. 打印预览:打印控件通常提供打印预览功能,用户可以在打印前预览打印内容和样式,以确保打印效果符合预期。
3. 打印管理:打印控件能够管理和监控打印任务的状态,包括打印队列、打印进度、错误提示等。
用户可以通过打印控件来取消或重新排队打印任务。
4. 打印驱动程序:打印控件通常包含打印机驱动程序,用于将用户的打印任务转换为打印机可识别的指令和数据。
三、打印控件的使用方法使用打印控件可以非常简单。
以下是一个基本的使用流程:1. 打开应用程序或文档,选择要打印的内容。
2. 在菜单栏或工具栏中找到打印选项。
3. 点击打印选项,弹出打印设置对话框。
4. 在打印设置对话框中,设置所需的打印参数,如纸张尺寸、打印质量等。
5. 点击打印预览按钮,预览打印内容和样式。
6. 确认无误后,点击打印按钮即可开始打印。
四、常见问题和解决方案1. 打印机无法正常工作:如果打印机无法正常工作,首先检查打印机是否连接正常,打印机驱动程序是否安装正确。
如果问题仍然存在,可以尝试重新启动计算机或联系打印机厂商的技术支援。
2. 打印内容不符合预期:如果打印内容与预览不一致,可以检查打印设置是否正确,页面尺寸、打印方向等参数是否正确设置。
另外,也可以尝试打印其他文档或应用程序,以确定是否是特定文档或应用程序的问题。
C#lodop打印控件的使用

C#lodop打印控件的使⽤先看效果图:lodop插件需要安装实现打印的前提条件图⽚如下:把下⾯这段代码加⼊到 web 前端需要打印功能页的相应位置<script language="javascript" src="LodopFuncs.js"></script><object id="LODOP_OB" classid="clsid:2105C259-1E0C-4534-8141-A753534CB4CA" width=0 height=0> <embed id="LODOP_EM" type="application/x-print-lodop" width=0 height=0></embed></object>我⾃⼰封装的打印js代码(封装成 table 格式的数据 )1function prn1_preview() {2var LODOP = getLodop(document.getElementById('LODOP_OB'), document.getElementById('LODOP_EM'));3 LODOP.PRINT_INIT("打印控件功能演⽰_Lodop功能_打印表格");45var theads = "<thead ><tr><th width='300px'>菜名</th><th width='50px'>份数</th><th width='50px'>价格</th><th width='150px'>姓名</th><th width='150px'>时间</th></tr></thead>"6var tableBodyStar = "<table border='1'>";7var tableBodyEnd = "</table>";8var tableHead = "<caption style='width:200px;'>点餐列表</caption>"910var tableBody;1112 $(LodopValue).each(function () {1314var menuname = "<tr><th width='300px'>" + this.menu_name;15var listnumber = "</th><td width='50px'>" + this.list_number;16var clistprice = "</td><td width='50px'>" + this.clist_price;17var employeeloginName = "</td><td width='150px'>" + this.employee_loginName;18var clisttime = "</td><td width='150px'>" + timeS(this.clist_time);19// alert(menuname);20 tableBody += menuname + listnumber + clistprice + employeeloginName + clisttime + "</td></tr>";21// alert(tableBody);22 });2324var t = tableBodyStar;25 t += tableHead;26 t += theads;27 t += tableBody;28 t += tableBodyEnd;2930 LODOP.ADD_PRINT_HTM(60, 20, 800, 1000, t );31 LODOP.PREVIEW();32 };注意:上⾯的 LodopValue 是我定义的⼀个全局变量,是datagrid ⾥⾯的数据:onLoadSuccess: function (data){var rows = data.rows;}LodopValue = rows; // 打印的数据主要是 rows中的数据。
C#winform打印excel的方法

C#winform打印excel的⽅法前⾔c#做winform程序要求⽣成并打印Excel报告,为了不安装Office相应组件,我选择了NPOI来⽣成Excel报告,⽤winform的PrintDocument控件来触发打印操作,⽽难点在于如何将excel转换成Graphics对象,在NPOI中我只找到了excel打印的设置(如横向/纵向),还需要打开excel去触发打印操作,但项⽬要求是⼀次性直接实现打印,要⽤PrintDocument控件⽽不是再去操作excel。
不得已重新搜索,发现了类库Spire.xls,最终实现了要求。
有什么错误或更简洁的⽅法还请⼴⼤博友不吝赐教。
思路⽤npoi⽣成Excel =》⽤spire.xls转换成图⽚.png =》获取⽣成的图⽚,利⽤Graphic的drawimage⽅法对图⽚进⾏操作,当然了,如果不介意的话,可以不对图⽚进⾏操作:) =》使⽤printDocument控件的print⽅法实现打印( 当然这⾥可以直接⽤spire.xls直接⽣成Excel,但是Spire.xls的免费版本有每个sheet最多有150⾏的限制 )知识点【0】NPOI使⽤⽅法【1】winform的printDocument控件理解:PrintDocument控件的作⽤是定义⼀个向打印机发送输出的对象,有BeginPrint,PrintPage,EndPrint⽅法,当执⾏printdocument.Print()语句时,会检查是否存在BeginPrint⽅法,存在则先调⽤。
然后调⽤PrintPage⽅法,该⽅法会向PrintPageEcentArgs类中获得⼀个空⽩的Graphics对象,我们可以对Graphics对象进⾏操作(可以理解对画布进⾏绘制,Graphics对象有内置的类似DrawString,DrawPie的⽅法),在PrintPage⽅法的最后,会向打印设备发送这个Graphics 对象。
C#.NET控件
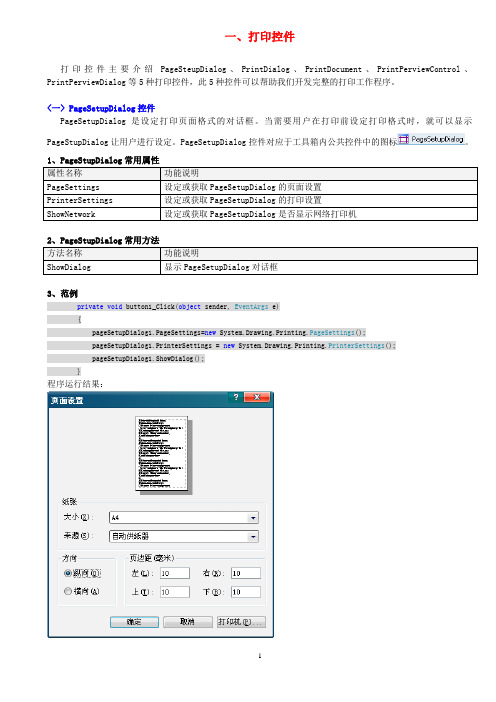
一、打印控件打印控件主要介绍PageSteupDialog、PrintDialog、PrintDocument、PrintPerviewControl、PrintPerviewDialog等5种打印控件,此5种控件可以帮助我们开发完整的打印工作程序。
<一> PageSetupDialog控件PageSetupDialog是设定打印页面格式的对话框。
当需要用户在打印前设定打印格式时,就可以显示PageStupDialog让用户进行设定。
PageSetupDialog控件对应于工具箱内公共控件中的图标。
3、范例private void button1_Click(object sender, EventArgs e){pageSetupDialog1.PageSettings=new System.Drawing.Printing.PageSettings();pageSetupDialog1.PrinterSettings = new System.Drawing.Printing.PrinterSettings();pageSetupDialog1.ShowDialog();}程序运行结果:<二> PrintDialog控件PrintDialog是准备开始打印前的对话框,此对话框有选取打印机、选择打印页面,以及与打印相关的设置。
等到设置完成后,只要用户单击“打印”按钮,就会把文件打印出来。
PrintDialog控件对应于工具箱同公共控件中的图标。
1、范例说明:下例是一个PrintDialog的程序范例。
本范例仅给出打印对话框,并没有打印出任何文件,关于设定打印文件,参考PrintDocument控件。
private void button1_Click(object sender, EventArgs e){printDialog1.AllowSomePages = true; //设定PrintDialog1可以选择打印范围printDialog1.AllowCurrentPages = true; //设定PrintDialog1显示"当前页面"选项printDialog1.ShowDialog(); //显示PrintDialog对话框.}程序运行结果<三> PrintDocument控件PrintDocument是真正将文件打印出来的组件。
winform自带打印控件(转)

winform自带打印控件(转)在Winform中的打印主要可以通过三种方式来实现:一种是使用Winform提供的类,另一种是使用控件,还有一种就是利用水晶报表的打印。
打印控件主要优势是方便快捷,一般应用于简单、固定、单调的模板打印,其主要常用控件有:(1) PrintDocument:是一个可用于设置属性来描述有关打印的信息,并且可用于调用方法Print()或通过事件PrintPage来打印文档的组件。
(2) PrintDialog:允许用户选择打印机并指定文档中要打印的部分。
(3) PrintPreviewDialog:此控件是一个打印预览对话框,用于显示文档的打印效果。
该控件包含用于打印、放大、显示一页或多页以及关闭对话框的按钮。
(4) PageSetupDialog:主要用来设置页面大小,页边距等。
------------------------------------------------------建个winform工程,拖如上四个控件,再拖三个按钮public Form1(){InitializeComponent();this.printDialog1.Document = this.printDocument1;//必要的this.printPreviewDialog1.Document = this.printDocument1;this.pageSetupDialog1.Document = this.printDocument1;}private void button3_Click(object sender, EventArgs e){//打印if (this.printDialog1.ShowDialog() == DialogResult.OK)this.printDocument1.Print();}private void button1_Click(object sender, EventArgs e){//打印预览this.printPreviewDialog1.ShowDialog();}private void button2_Click(object sender, EventArgs e){//打印设置this.pageSetupDialog1.ShowDialog();}private void printDocument1_PrintPage(object sender, System.Drawing.Printing.PrintPageEventArgs e){//双击printDocument控件,这才是真正开始干活的,在这里面写你想要打印信息Font font = new Font("Tahoma", 12, FontStyle.Underline);//设置画笔Brush bru = Brushes.Blue;Pen pen = new Pen(bru);pen.Width = 5;//设置各边距int nLeft = this.pageSetupDialog1.PageSettings.Margins.Left;int nTop = this.pageSetupDialog1.PageSettings.Margins.Top;int nRight = this.pageSetupDialog1.PageSettings.Margins.Right;int nBottom = this.pageSetupDialog1.PageSettings.Margins.Bottom;int nWidth = this.pageSetupDialog1.PageSettings.PaperSize.Width-nRight-nLeft;int nHeight = this.pageSetupDialog1.PageSettings.PaperSize.Height-nTop-nBottom;//打印各边距e.Graphics.DrawLine(pen, nLeft, nTop, nLeft, nTop + nHeight);e.Graphics.DrawLine(pen, nLeft+nWidth, nTop, nLeft+nWidth, nTop + nHeight);e.Graphics.DrawLine(pen, nLeft, nT op, nLeft+nWidth, nT op);e.Graphics.DrawLine(pen, nLeft, nT op+nHeight, nLeft + nWidth, nT op+nHeight);//在离左边距20,右边距20的位置打印e.Graphics.DrawString("haha xixi", font, bru, nLeft+20, nTop+20);//如果要打印datagridView在这里遍历便可}但是如果想打印一张表的数据,我建义你使用水晶报表,这样就方便得多.水晶报表(Crystal Report)是业内最专业、功能最强的报表系统,它除了强大的报表功能外,最大的优势是实现了与绝大多数流行开发工具的集成和接口。
winform printrange用法 -回复

winform printrange用法-回复中括号内的内容为WinForm PrintRange的用法。
WinForm PrintRange 是一个用于打印指定范围的窗体控件的功能。
它提供了一种简单而有效的方式来定制打印的内容,从而满足用户的需求。
本文将详细介绍如何使用WinForm PrintRange,帮助读者全面了解它的用法和使用技巧。
首先,让我们从WinForm PrintRange 的基本概念开始。
PrintRange 是一个用于控制打印范围的类。
可以通过将PrintRange 对象与打印文档关联,来指定要打印的内容的范围。
PrintRange 提供了几个重要的属性和方法,以便进行打印范围的设置和管理。
第一步是创建一个PrintRange 对象。
可以使用PrintRange 类的构造函数来创建一个新的实例。
例如,可以使用以下代码创建一个名为printRange 的PrintRange 对象:PrintRange printRange = new PrintRange();接下来,我们需要指定要打印的范围。
PrintRange 类提供了几个属性来实现这一点。
其中最常用的属性是StartPage 和EndPage。
StartPage 属性指定要打印的起始页面的页码,而EndPage 属性指定要打印的结束页面的页码。
可以使用以下代码来设置这些属性的值:printRange.StartPage = 1;printRange.EndPage = 3;以上代码将设置打印范围为从第一页到第三页。
除了指定页面范围,PrintRange 还支持设置打印的起始行和结束行。
可以使用StartRow 和EndRow 属性来设置这些值。
例如,以下代码将设置打印范围为从第一行到第十行:printRange.StartRow = 1;printRange.EndRow = 10;在设置完打印范围之后,我们需要将PrintRange 对象与打印文档关联起来。
- 1、下载文档前请自行甄别文档内容的完整性,平台不提供额外的编辑、内容补充、找答案等附加服务。
- 2、"仅部分预览"的文档,不可在线预览部分如存在完整性等问题,可反馈申请退款(可完整预览的文档不适用该条件!)。
- 3、如文档侵犯您的权益,请联系客服反馈,我们会尽快为您处理(人工客服工作时间:9:00-18:30)。
4、从DataTable中读出数据
for (int row = 0; row < objDataTable.Rows.Count; row++)
{
DataRow objDataRow = objDataTable.Rows[row];
e.Graphics.DrawString("发货日期", new Font("Arial", 10), Brushes.Red, StartX + 665, StartY);
e.Graphics.DrawString("员工编号", new Font("Arial", 10), Brushes.Red, StartX + 760, StartY);
例如:
1、从控件中取出数据放入DataTable
DataTable objDataTable = (DataTable)this.dataGridView1.DataSource;
2、设置打印时的横坐标和纵坐标
e.Graphics.DrawString("计划发货数", new Font("Arial", 10), Brushes.Red, StartX + 475, StartY);
e.Graphics.DrawString("实际发货数", new Font("Arial", 10), Brushes.Red, StartX + 570, StartY);
2、设置宽度和高度
printPreviewDialog1.Width = Screen.PrimaryScreen.Bounds.Width;
printPreviewDialog1.Height = Screen.PrimaryScreen.Bounds.Height;
e.Graphics.DrawString("打印时间:" + DateTime.Now.ToString(), new Font("Arial", 8), Brushes.Red, 560, 100);
e.Graphics.DrawString("单号", new Font("Arial", 10), Brushes.Red, StartX, StartY);
WinForm中打印控件的用法Winform
一、放三个有关打印的控件printDialog、printDocument、printPreviewDialog
二、设置printPreviewDialog控件的Document属性,该属性一般会设置为printDocument控件
三、写printDocument中的PrintPage事件,在该事件设置打印的位置和样式
}
StartX = 0;
StartY += 50;
}
四、然后打印 (也就是点击打印按钮或者别的控件)
1、设置显示页面的大小
printPreviewDialog1.PrintPreviewControl.Zoom = 1.0;
e.Graphics.DrawString("品种", new Font("Arial", 10), Brushes.Red, StartX + 285, StartY);
e.Graphics.DrawString("规格", new Font("Arial", 10), Brushes.Red, StartX + 380, StartY);
printPreviewDialog1.ShowDialog();
e.Graphics.DrawString("批号", new Font("Arial", 10), Brushes.Red, StartX + 95, StartY);
e.Graphics.DrawString("区域编号", new Font("Arial", 10), Brushes.Red, StartX + 190, StartY);
int StartX = 0;
int StartY = 120;
3、设置标题的内容、字体、字体大小、颜色、坐标位置
e.Graphics.DrawString("广东步步高电子工业有限公司出库批次情况", new Font("Arial", 20), Brushes.Black, 100, 40);
for (int i = 0; i < objDataTable.Columns.Count; i++)
{
eString(), new Font("Arial", 9), Brushes.Black, StartX, StartY + 50);
e.Graphics.DrawString("-----------", new Font("Arial", 10), Brushes.Blue, StartX, StartY + 70);
StartX = StartX + 95;
