android中使用sqlite
android sqlite3 sql select 用法

android sqlite3 sql select 用法
在 Android 开发中,可以使用 SQLite3 数据库,并通过 SQL 的`SELECT`语句来从数据库中获取数据。
以下是`SELECT`语句的基本用法:
```sql
SELECT column1, column2, ...
FROM table_name
WHERE condition;
```
其中:
- `column1, column2, ...`是你想要选择的列名,可以指定一个或多个列,用逗号分隔。
- `table_name`是要从中选择数据的表名。
- `WHERE condition`是可选的条件,用于筛选结果。
如果省略,则将返回表中的所有行。
例如,以下是一个简单的示例,选择名为`students`表中的所有列:
```sql
SELECT * FROM students;
```
如果你只想选择特定的列,可以这样做:
```sql
SELECT name, age FROM students;
```
还可以使用`WHERE`子句来添加条件:
```sql
SELECT * FROM students WHERE age > 18;
```
这将返回`students`表中`age`列大于 18 的所有行。
你可以根据自己的需求进行组合和扩展这些查询语句。
请注意,在实际使用中,还需要
考虑适当的错误处理和数据库操作的封装。
安卓sqlite常用语句
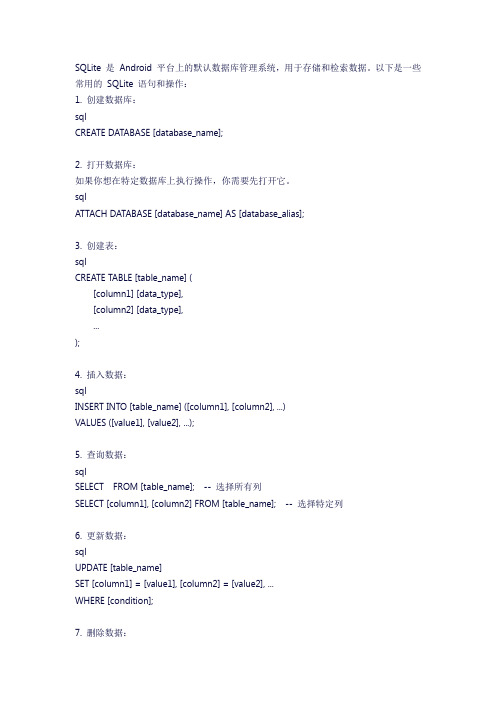
SQLite 是Android 平台上的默认数据库管理系统,用于存储和检索数据。
以下是一些常用的SQLite 语句和操作:1. 创建数据库:sqlCREATE DATABASE [database_name];2. 打开数据库:如果你想在特定数据库上执行操作,你需要先打开它。
sqlATTACH DATABASE [database_name] AS [database_alias];3. 创建表:sqlCREATE TABLE [table_name] ([column1] [data_type],[column2] [data_type],...);4. 插入数据:sqlINSERT INTO [table_name] ([column1], [column2], ...)VALUES ([value1], [value2], ...);5. 查询数据:sqlSELECT FROM [table_name]; -- 选择所有列SELECT [column1], [column2] FROM [table_name]; -- 选择特定列6. 更新数据:sqlUPDATE [table_name]SET [column1] = [value1], [column2] = [value2], ...WHERE [condition];7. 删除数据:sqlDELETE FROM [table_name] WHERE [condition];8. 创建索引:创建索引可以加速查询速度。
sqlCREATE INDEX [index_name] ON [table_name] ([column1], [column2], ...);9. 创建触发器:触发器是与特定表相关联的特殊类型的存储过程,它自动执行特定操作。
例如,当向表中插入、更新或删除记录时,触发器可以自动执行。
10. 创建视图:视图是基于一个或多个表的虚拟表。
android之sqlite实现增删改查

Sqlite 实现简单的增删改查主界面:功能实现:1)增加数据:2)全部显示3)清除显示4)全部删除5):ID删除6)ID查询:7)ID更新:主要代码段:DBOpenHelper.javapackage com.chen.dao;import android.content.Context;import android.database.sqlite.SQLiteDatabase;import android.database.sqlite.SQLiteOpenHelper;import android.util.Log;public class DBOpenHelper extends SQLiteOpenHelper { private static final int VERSION=2;//版本private static final String DBNAME="user.db";//数据库名字//创建数据库public DBOpenHelper(Context context) {super(context, DBNAME, null, VERSION);}@Override/** 创建表*/public void onCreate(SQLiteDatabase db) {db.execSQL("create table if not exists u_user(_id integer primary key,name varchar(20),age integer,tall varchar(5))");}//版本被更新时执行@Overridepublic void onUpgrade(SQLiteDatabase db, int oldVersion, int newVersion) {}}UserDAO.javapackage com.chen.dao;import java.util.ArrayList;import java.util.List;import er;import android.content.Context;import android.database.Cursor;import android.database.sqlite.SQLiteDatabase;public class UserDAO {private DBOpenHelper helper;//写入,不然会是出错,是空指针public UserDAO(Context context){helper=new DBOpenHelper(context);}/*** 添加用户信息*/public void add(User user){SQLiteDatabase db=helper.getWritableDatabase();String sql="Insert into u_user(_id,name,age,tall) values(?,?,?,?)";db.execSQL(sql, new Object[]{user.getId(),user.getName(),user.getAge(),user.getTall()});db.close();}/*** 删除用户信息*/public void delete(Integer...id){if(id.length>0){StringBuffer sb=new StringBuffer();for(int i=0;i<id.length;i++){sb.append("?").append(",");}sb.deleteCharAt(sb.length()-1);SQLiteDatabase database=helper.getWritableDatabase();String sql="delete from u_user where _id in ("+sb+")";database.execSQL(sql, (Object[])id);}}/*** 删除表里的全部数据*/public void delelteall(){SQLiteDatabase database=helper.getWritableDatabase();String sql = "delete from u_user";database.execSQL(sql);}/*** 用户修改*/public void update(User user){SQLiteDatabase db=helper.getWritableDatabase();//写入数据库中注意!!!!不能放在外面String sql="update u_user set name=?,age=?,tall=? where _id=?";db.execSQL(sql, new Object[]{user.getName(),user.getAge(),user.getTall(),user.getId()});}/*** 查找用户信息*/public User find(int userid){SQLiteDatabase db=helper.getWritableDatabase();//写入数据库中注意!!!!不能放在外面String sql="select _id,name,age,tall from u_user where _id=?";Cursor cursor=db.rawQuery(sql, new String[]{String.valueOf(userid)});if(cursor.moveToNext()){return new User(cursor.getInt(cursor.getColumnIndex("_id")),cursor.getString(cursor.getColumnIndex("name")),cursor.getInt(cursor.getColumnIndex("age")),cursor.getString(cursor.getColumnIndex("tall")));}return null;}/*** 显示用户*/public Cursor select() {SQLiteDatabase db = helper.getReadableDatabase();Cursor cursor = db.query("u_user",null, null, null, null,null, "_id desc");return cursor;}}MainActivity.javapackage com.chen.database;/*** writer:ManMan*Email:*******************/import erDAO;import er;import android.app.Activity;import android.database.Cursor;import android.os.Bundle;import android.util.Log;import android.view.View;import android.view.View.OnClickListener;import android.widget.Button;import android.widget.EditText;import android.widget.ListView;import android.widget.SimpleCursorAdapter;import android.widget.TextView;import android.widget.Toast;public class MainActivity extends Activity implements OnClickListener{ private static final String TAG = "Add";private EditText edname,edage,edtall,id;private Button add,deleteshow,show,iddelete,idupdate,idshow,deleteall;private TextView tedatashow;private ListView datashow;/** Called when the activity is first created. */@Overridepublic void onCreate(Bundle savedInstanceState) {super.onCreate(savedInstanceState);setContentView(yout.main);edname = (EditText)findViewById(R.id.edname);edage = (EditText)findViewById(R.id.edage);edtall = (EditText)findViewById(R.id.edtall);id = (EditText)findViewById(R.id.id);tedatashow = (TextView)findViewById(R.id.tedatashow);datashow = (ListView)findViewById(R.id.datashow);add = (Button)findViewById(R.id.add);deleteshow = (Button)findViewById(R.id.deleteshow);show = (Button)findViewById(R.id.show);iddelete = (Button)findViewById(R.id.iddelete);idupdate = (Button)findViewById(R.id.idupdate);idshow = (Button)findViewById(R.id.idshow);deleteall = (Button)findViewById(R.id.deleteall);add.setOnClickListener(this);deleteshow.setOnClickListener(this);show.setOnClickListener(this);iddelete.setOnClickListener(this);idupdate.setOnClickListener(this);idshow.setOnClickListener(this);deleteall.setOnClickListener(this);}public void onClick(View v) {/** 添加数据*/if(v==add){if(!id.getText().toString().equals(null)&&!edname.getText().toString().equals(null)&&!edage .getText().toString().equals(null)&&!edtall.getText().toString().equals(null)){try{UserDAO userdao = new UserDAO(MainActivity.this);User user = new User(Integer.valueOf(id.getText().toString()), edname.getText().toString(),Integer.valueOf(edage.getText().toString()), edtall.getText().toString());userdao.add(user);Toast.makeText(MainActivity.this, "成功添加!", Toast.LENGTH_LONG).show();tedatashow.setText("新添数据为:"+"\n"+"ID:"+Integer.valueOf(id.getText().toString())+","+"姓名:"+edname.getText().toString()+","+"年龄:"+Integer.valueOf(edage.getText().toString())+","+"身高:"+edtall.getText().toString()+",");//设置为空edage.setText("");edname.setText("");edtall.setText("");id.setText("");}catch (Exception e) {Log.i(TAG, "出错了");Log.i(TAG, e.getMessage());}}else if(id.getText().toString().equals(null)){Toast.makeText(MainActivity.this, "ID不能为空!", Toast.LENGTH_LONG) .show();}}/** 清除显示*/if(v==deleteshow){tedatashow.setText("");}/** 全部显示*/if(v==show){try{UserDAO userdao = new UserDAO(MainActivity.this);Cursor cursor = userdao.select();/** 构建Listview适配器*/SimpleCursorAdapter adapter = new SimpleCursorAdapter(this, yout.showuser, cursor, new String[]{"_id","name","age","tall" },newint[]{R.id.textView1,R.id.textView2,R.id.textView3,R.id.textView4});datashow.setAdapter(adapter);}catch (Exception f) {Log.e("err",f.getMessage());Log.e("err",null, f.getCause());Toast.makeText(MainActivity.this, "显示不了", Toast.LENGTH_LONG).show();}}/** ID删除*/if(v==iddelete){UserDAO userDAO=new UserDAO(MainActivity.this);//注意不能放在外面userDAO.delete(Integer.valueOf(id.getText().toString()));Toast.makeText(MainActivity.this, "您成功删除了"+Integer.valueOf(id.getText().toString()), Toast.LENGTH_LONG).show();id.setText("");}/** 全部删除*/if(v==deleteall){UserDAO userDAO=new UserDAO(MainActivity.this);//注意不能放在外面userDAO.delelteall();Toast.makeText(MainActivity.this, "您已经把数据全部删除了", Toast.LENGTH_LONG).show();}/** ID更新*/if(v==idupdate){UserDAO userDAO=new UserDAO(MainActivity.this);//注意不能放在外面User user=userDAO.find(Integer.valueOf(id.getText().toString()));user.setName(edname.getText().toString());user.setAge(Integer.valueOf(edage.getText().toString()));user.setTall(edtall.getText().toString());userDAO.update(user);Toast.makeText(MainActivity.this, "修改成功", Toast.LENGTH_LONG).show();}/** ID查询*/if(v==idshow){UserDAO userDAO=new UserDAO(MainActivity.this);//注意不能放在外面User user=userDAO.find(Integer.valueOf(id.getText().toString()));tedatashow.setText("ID:"+user.getId()+" "+"姓名:"+user.getName()+" "+"年龄:"+user.getAge()+" "+"身高"+user.getTall());}/***/}}User.javapackage com.chen.modl;public class User {private int id;private String name;private int age;private String tall;/** 构造方法*/public User(){super();}public User(int id,String name,int age,String tall){ this.id=id;=name;this.age=age;this.tall=tall;}public int getId() {return id;}public void setId(int id) {this.id = id;}public String getName() {return name;}public void setName(String name) { = name;}public int getAge() {return age;}public void setAge(int age) {this.age = age;}public String getTall() {return tall;}public void setTall(String tall) {this.tall = tall;}//复写toString()方法进行查找public String toString(){return"id:"+id+"name:"+name+"age"+age+"tall"+tall;}}Main.xml<?xml version="1.0"encoding="utf-8"?><LinearLayoutxmlns:android="/apk/res/android"android:orientation="vertical"android:layout_width="fill_parent"android:layout_height="fill_parent"><LinearLayoutandroid:orientation="horizontal"android:layout_width="wrap_content"android:layout_height="wrap_content"><!--姓名 --><TextViewandroid:text="姓名:"android:layout_width="wrap_content"android:layout_height="wrap_content"/><EditTextandroid:id="@+id/edname"android:layout_height="wrap_content"android:layout_width="278dp"/></LinearLayout><LinearLayoutandroid:orientation="horizontal"android:layout_width="wrap_content"android:layout_height="wrap_content"><!--年龄 --><TextViewandroid:text="年龄:"android:layout_width="wrap_content"android:layout_height="wrap_content"/><EditTextandroid:id="@+id/edage"android:layout_width="278dp"/></LinearLayout><!--身高 --><LinearLayoutandroid:orientation="horizontal"android:layout_width="wrap_content"android:layout_height="wrap_content" ><TextViewandroid:text="身高:"android:layout_width="wrap_content"android:layout_height="wrap_content" /><EditTextandroid:id="@+id/edtall"android:layout_height="wrap_content"android:layout_width="278dp"/></LinearLayout><!--按钮 --><LinearLayoutandroid:orientation="horizontal"android:layout_width="wrap_content"android:layout_height="wrap_content" ><Buttonandroid:id="@+id/add"android:text="添加数据"android:layout_width="wrap_content"android:layout_height="wrap_content"android:layout_marginLeft="3dip"/><Buttonandroid:id="@+id/show"android:text="全部显示"android:layout_width="wrap_content"android:layout_height="wrap_content" /><Buttonandroid:id="@+id/deleteshow"android:text="清除显示"android:layout_width="wrap_content"/><Buttonandroid:id="@+id/deleteall"android:text="全部删除"android:layout_width="wrap_content"android:layout_height="wrap_content" /></LinearLayout><!--按钮 --><LinearLayoutandroid:orientation="horizontal"android:layout_width="wrap_content"android:layout_height="wrap_content"><TextViewandroid:text="ID:"android:layout_width="wrap_content"android:layout_height="wrap_content"android:layout_marginLeft="3dip"android:layout_weight="1"/><EditTextandroid:id="@+id/id"android:layout_width="75dip"android:layout_height="wrap_content"android:layout_marginLeft="3dip"android:layout_weight="2"/><Buttonandroid:id="@+id/iddelete"android:text="ID删除"android:layout_width="wrap_content"android:layout_height="wrap_content"android:layout_marginLeft="5dip"android:layout_weight="1"/><Buttonandroid:id="@+id/idshow"android:text="ID查询"android:layout_width="wrap_content"android:layout_height="wrap_content"android:layout_weight="1"/><Buttonandroid:id="@+id/idupdate"android:text="ID更新"android:layout_width="wrap_content"android:layout_height="wrap_content"android:layout_weight="1"/></LinearLayout><TextViewandroid:text="数据库数据显示:"android:layout_width="wrap_content"android:layout_height="wrap_content" /><TextViewandroid:id="@+id/tedatashow"android:layout_width="fill_parent"android:layout_height="wrap_content"android:textSize="15dip"/><ListViewandroid:id="@+id/datashow"android:layout_width="fill_parent"android:layout_height="wrap_content"android:textSize="15dip"/></LinearLayout>。
android中SQLite的使用总结,用excSQL和rawQuery方法实现一般得增删改查
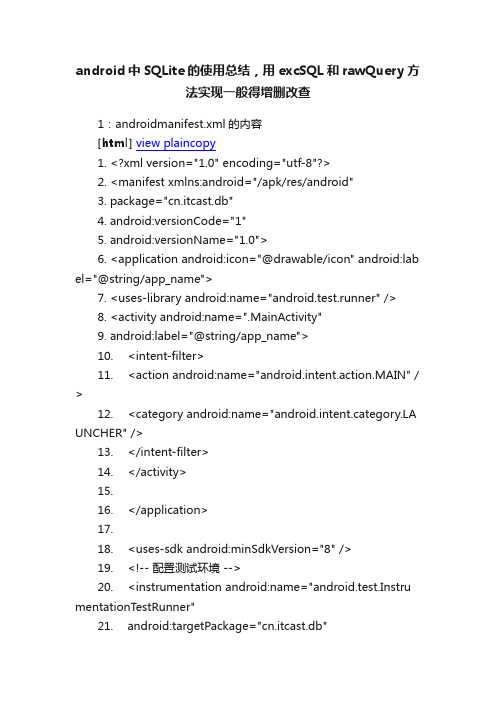
android中SQLite的使用总结,用excSQL和rawQuery方法实现一般得增删改查1:androidmanifest.xml的内容[html]view plaincopy1.<?xml version="1.0" encoding="utf-8"?>2.<manifest xmlns:android="/apk/res/android"3.package="cn.itcast.db"4.android:versionCode="1"5.android:versionName="1.0">6.<application android:icon="@drawable/icon" android:lab el="@string/app_name">7.<uses-library android:name="android.test.runner" />8.<activity android:name=".MainActivity"9.android:label="@string/app_name">10.<intent-filter>11.<action android:name="android.intent.action.MAIN" / >12.<category android:name=" UNCHER" />13.</intent-filter>14.</activity>15.16.</application>17.18.<uses-sdk android:minSdkVersion="8" />19.<!-- 配置测试环境 -->20.<instrumentation android:name="android.test.Instru mentationTestRunner"21.android:targetPackage="cn.itcast.db"22.android:label="T est for My App"/>23.24.</manifest>2:Person类[java]view plaincopy1.package cn.itcast.domain;2.3.public class Person {4.5.private Integer id;6.private String name;7.8.public Person() {9.10.}11.12.public Integer getId() {13.return id;14.}15.16.public void setId(Integer id) {17.this.id = id;18.}19.20.public String getName() {21.return name;22.}23.24.public void setName(String name) { = name;26.}27.28.@Override29.public String toString() {30.return "Person [id=" + id + ", name=" + name + "]";31.}32.33.}3:DBOpenHelper类,该类继承了SQLiteOpenHelper类[java]view plaincopy1.package cn.itcast.service;2.3.import android.content.Context;4.import android.database.sqlite.SQLiteDatabase;5.import android.database.sqlite.SQLiteOpenHelper;6.import android.database.sqlite.SQLiteDatabase.CursorFac tory;7.8.public class DBOpenHelper extends SQLiteOpenHelper {9.10.private static final String DATABASENAME = "cn.itcast. db";11.private static final int DATABASEVERSION = 1;12.13./*14.* 构造函数15.*/16.public DBOpenHelper(Context context) {17.super(context, DATABASENAME, null, DATABASEVERSION);18.}19.20./*21.* 数据库第一次生成时调用该方法,创建一些表或者初始化一些数据22.* @see android.database.sqlite.SQLiteOpenHelper#on Create(android.database.sqlite.SQLiteDatabase)23.*/24.@Override25.public void onCreate(SQLiteDatabase db) {26.db.execSQL("create table person(personid integer pri mary key autoincrement, name varchar(20))");27.}28.29.@Override30.public void onUpgrade(SQLiteDatabase db, int oldVer sion, int newVersion) {31.32.}33.34.}4:PersonService类[java]view plaincopy1.package cn.itcast.service;2.3.import java.util.ArrayList;4.import java.util.List;5.6.import android.content.Context;7.import android.database.Cursor;8.import android.database.sqlite.SQLiteDatabase;9.import cn.itcast.domain.Person;10.11.public class PersonService {12.13.private DBOpenHelper dbOpenHelper;14.15.public PersonService(Context context) {16.this.dbOpenHelper = new DBOpenHelper(context);17.}18.19./*20.* save a person to the database21.*/22.public void save(Person person) {23.SQLiteDatabase database = dbOpenHelper.getWritabl eDatabase();24.database.execSQL("insert into person(name) values (?) ", new Object[]{person.getName()});25.}26.27./*28.* updata a person to the database29.*/30.public void update(Person person) {31.SQLiteDatabase database = dbOpenHelper.getWritabl eDatabase();32.database.execSQL("update person set name=? wherepersonid=?", new Object[]{person.getName(), person.getId()});33.}34.35./*36.* delete a person from the database according to the id37.*/38.public void delete(Integer id) {39.SQLiteDatabase database = dbOpenHelper.getWritabl eDatabase();40.database.execSQL("delete from person where personi d=?", new Object[]{id.toString()});41.}42.43./*44.* find a person from the database according to the id45.*/46.public Person find(Integer id) {47.SQLiteDatabase database = dbOpenHelper.getReadab leDatabase();48.Cursor cursor = database.rawQuery("select * from per son where personid=?", new String[]{id.toString()});49.Person person = null;50.if(cursor.moveT oFirst()) {51.Integer personid = cursor.getInt(cursor.getColumnInd ex("personid"));52.String name = cursor.getString(cursor.getColumnIndex ("name"));53.person = new Person();54.person.setId(personid);56.}57.return person;58.}59.60./*61.* get the data of person accroding to the offset and m axResult62.*/63.public List<Person> getScrollData(Integer offset, Integ er maxResult) {64.SQLiteDatabase database = dbOpenHelper.getReadab leDatabase();65.Cursor cursor = database.rawQuery("select * from per son limit ?,?", new String[] {offset.toString(), maxResult.toString() });66.int idIndex = 0;67.int nameIndex = 0;68.List<Person> personList = null;69.70.if(cursor.getCount() >= 0) {71.idIndex = cursor.getColumnIndex("personid");Index = cursor.getColumnIndex("name");73.personList = new ArrayList<Person>();74.}75.76.while(cursor.moveToNext()) {77.Integer personid = cursor.getInt(idIndex);78.String name = cursor.getString(nameIndex);79.Person person = new Person();81.person.setName(name);82.personList.add(person);83.}84.return personList;85.}86.87./*88.* get the count of the database89.*/90.public long getCount(){91.SQLiteDatabase database = dbOpenHelper.getReadab leDatabase();92.Cursor cursor = database.rawQuery("select count(*) fr om person", null);93.cursor.moveToFirst();94.return cursor.getLong(0);95.}96.97.}5:PersonServiceT est类[java]view plaincopy1.package cn.itcast.db;2.3.import java.util.List;4.5.import android.test.AndroidTestCase;6.import android.util.Log;7.import cn.itcast.domain.Person;8.import cn.itcast.service.DBOpenHelper;9.import cn.itcast.service.PersonService;10.11.public class PersonServiceTest extends AndroidT estCase {12.private static final String TAG = "PersonServiceTest";13.14./*15.* 测试生成数据库的方法16.*/17.public void testCreateDB() throws Throwable {18.DBOpenHelper dbOpenHelper = new DBOpenHelper( this.getContext());19.dbOpenHelper.getWritableDatabase(); //第一次调用该方法会生成数据库20.21.}22.23./*24.* 测试保存方法25.*/26.public void testSave() throws Throwable{27.PersonService personService = new PersonService(this .getContext());28.29.Person person1 = new Person();30.person1.setName("zhangsan");31.personService.save(person1);32.33.Person person2 = new Person();34.person2.setName("lisi");35.personService.save(person2);36.37.Person person3 = new Person();38.person3.setName("wangwu");39.personService.save(person3);40.41.}42.43.public void testDelete() {44.PersonService personService = new PersonService(this .getContext());45.personService.delete(1);46.47.}48.49./*50.* 测试更新方法51.*/52.public void testUpdate() {53.PersonService personService = new PersonService(this .getContext());54.Person person = personService.find(1);55.person.setName("zhaoliu");56.personService.update(person);57.58.}59.60./*61.* 测试获得数据方法63.public void testGetScrollData() throws Throwable{64.PersonService personService = new PersonService(this .getContext());65.List<Person> persons = personService.getScrollData(0 , 3);66.for(Person person : persons) {67.Log.i(TAG, person.toString());68.}69.}70.71./*72.* 测试根据id查找的方法73.*/74.public void testFind() throws Throwable{75.PersonService personService = new PersonService(this .getContext());76.Person person = personService.find(1);77.Log.i(TAG, person.toString());78.79.}80.81./*82.* 测试获得数量的方法83.*/84.public void testGetCount() {85.PersonService personService = new PersonService(this .getContext());86.long count = personService.getCount();87.Log.i(TAG, count + "");89.}。
Android学习之SQLite数据库存储
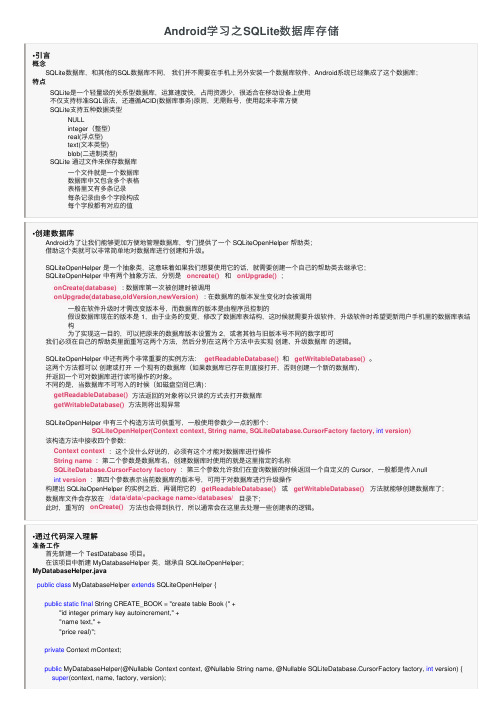
Android 学习之SQLite 数据库存储•引⾔概念 SQLite 数据库,和其他的SQL 数据库不同, 我们并不需要在⼿机上另外安装⼀个数据库软件,Android 系统已经集成了这个数据库;特点SQLite 是⼀个轻量级的关系型数据库,运算速度快,占⽤资源少,很适合在移动设备上使⽤不仅⽀持标准SQL 语法,还遵循ACID(数据库事务)原则,⽆需账号,使⽤起来⾮常⽅便SQLite ⽀持五种数据类型NULLinteger (整型)real(浮点型)text(⽂本类型)blob(⼆进制类型)SQLite 通过⽂件来保存数据库⼀个⽂件就是⼀个数据库数据库中⼜包含多个表格表格⾥⼜有多条记录每条记录由多个字段构成每个字段都有对应的值•创建数据库 Android 为了让我们能够更加⽅便地管理数据库,专门提供了⼀个 SQLiteOpenHelper 帮助类; 借助这个类就可以⾮常简单地对数据库进⾏创建和升级。
SQLiteOpenHelper 是⼀个抽象类,这意味着如果我们想要使⽤它的话,就需要创建⼀个⾃⼰的帮助类去继承它; SQLiteOpenHelper 中有两个抽象⽅法,分别是 和 ;: 数据库第⼀次被创建时被调⽤: 在数据库的版本发⽣变化时会被调⽤⼀般在软件升级时才需改变版本号,⽽数据库的版本是由程序员控制的假设数据库现在的版本是 1,由于业务的变更,修改了数据库表结构,这时候就需要升级软件,升级软件时希望更新⽤户⼿机⾥的数据库表结构为了实现这⼀⽬的,可以把原来的数据库版本设置为 2,或者其他与旧版本号不同的数字即可 我们必须在⾃⼰的帮助类⾥⾯重写这两个⽅法,然后分别在这两个⽅法中去实现 创建、升级数据库 的逻辑。
SQLiteOpenHelper 中还有两个⾮常重要的实例⽅法: 和 。
这两个⽅法都可以 创建或打开 ⼀个现有的数据库(如果数据库已存在则直接打开,否则创建⼀个新的数据库), 并返回⼀个可对数据库进⾏读写操作的对象。
在Android应用中利用SQLite进行本地数据库操作

在Android应用中利用SQLite进行本地数据库操作随着移动应用的不断发展,电子设备成为人们生活中不可或缺的一部分。
而Android操作系统作为最广泛使用的移动操作系统之一,它提供了强大的开发平台,为开发者们提供了各种各样的开发工具和API。
其中,SQLite作为Android应用中的一种轻量级数据库管理系统,被广泛应用于数据存储和管理。
本文将介绍在Android应用中通过SQLite实现本地数据库操作的方法。
1. 简介SQLite是一种无服务器的自包含的数据库引擎,它在Android操作系统中作为默认的关系型数据库引擎。
它无需独立的服务器进程,将数据库引擎与应用程序合并在一起,使得应用程序可以直接操作数据库。
SQLite在移动设备上非常流行,因为它占用的磁盘空间相对较少,并且提供了性能高效的操作方式。
2. 创建数据库在Android应用中使用SQLite进行本地数据库操作,首先需要创建一个数据库。
Android提供了SQLiteOpenHelper类来管理数据库的创建和升级。
在创建数据库之前,首先需要定义数据库的结构,包括表的结构和字段信息。
接着,通过继承SQLiteOpenHelper类,重写onCreate()方法和onUpgrade()方法,可以自动创建数据库和升级数据库。
3. 创建表使用SQLite进行本地数据库操作时,需要在数据库中创建表来存储数据。
通过执行SQL语句,可以在数据库中创建表以及定义表中的字段信息。
SQLite支持多种数据类型,包括整型、浮点型、文本型等。
通过在SQL语句中指定字段的名称和类型,可以创建适合应用需求的表。
4. 插入数据插入数据是在数据库中进行本地数据库操作的常见操作之一。
通过执行SQL 语句的INSERT INTO语句,可以将数据插入到数据库的表中。
通过使用ContentValues类,可以方便地设置插入数据的字段值。
通过调用SQLiteDatabase 类的insert()方法,可以执行插入数据的操作。
android sqlite query方法

android sqlite query方法在Android开发中,使用SQLite数据库进行查询是一个常见的操作。
下面是一个简单的例子,展示如何在Android中执行一个SQLite查询:1. 创建数据库助手类:首先,你需要创建一个帮助类来管理你的数据库。
这个类通常会包含创建数据库、打开数据库和执行查询的方法。
2. 定义表格:在数据库中定义一个表格。
例如,你可以创建一个名为`Users`的表格,其中包含`id`, `name`, 和`age`字段。
3. 执行查询:使用`SQLiteDatabase`的`query`方法来执行查询。
这个方法需要指定表名、列名、筛选条件等。
4. 处理结果:查询结果通常会返回一个`Cursor`对象。
你可以遍历这个对象来获取查询到的数据。
下面是一个示例代码,展示如何在Android中执行一个简单的SQLite查询:```javaimport ;import ;import ;import ;import ;public class DatabaseHelper extends SQLiteOpenHelper {private static final String DATABASE_NAME = "";private static final int DATABASE_VERSION = 1;private static final String TABLE_NAME = "Users";private static final String COLUMN_ID = "id";private static final String COLUMN_NAME = "name";private static final String COLUMN_AGE = "age";private static final String COLUMN_CREATED_AT = "created_at";public DatabaseHelper(Context context) {super(context, DATABASE_NAME, null, DATABASE_VERSION); }Overridepublic void onCreate(SQLiteDatabase db) {String createTableQuery = "CREATE TABLE " + TABLE_NAME + " (" +COLUMN_ID + " INTEGER PRIMARY KEY AUTOINCREMENT, " +COLUMN_NAME + " TEXT, " +COLUMN_AGE + " INTEGER, " +COLUMN_CREATED_AT + " DATETIME DEFAULT CURRENT_TIMESTAMP" +");";(createTableQuery);}Overridepublic void onUpgrade(SQLiteDatabase db, int oldVersion, int newVersion) {("DROP TABLE IF EXISTS " + TABLE_NAME);onCreate(db);}public void addUser(String name, int age) {SQLiteDatabase db = ();ContentValues contentValues = new ContentValues();(COLUMN_NAME, name);(COLUMN_AGE, age);(TABLE_NAME, null, contentValues);();}public Cursor getUsers() {SQLiteDatabase db = ();String selectQuery = "SELECT FROM " + TABLE_NAME;Cursor cursor = (TABLE_NAME, null, null, null, null, null, null); return cursor;}}```在上面的代码中,我们定义了一个`DatabaseHelper`类,它包含了创建数据库、添加用户和查询用户的方法。
android sqlite 插入数据的方法
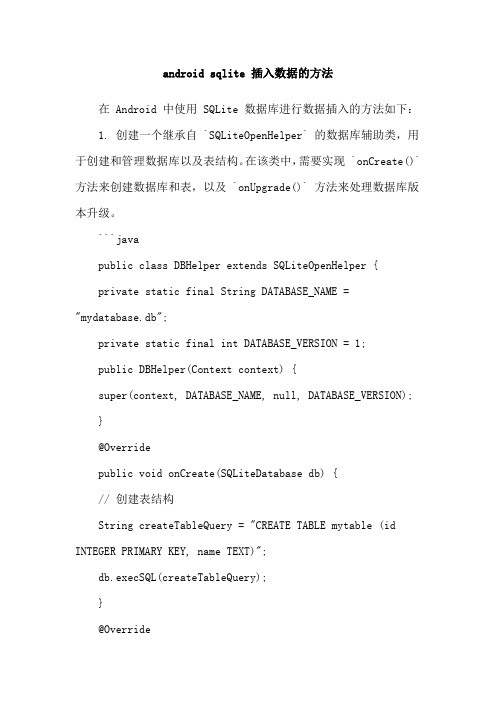
android sqlite 插入数据的方法在 Android 中使用 SQLite 数据库进行数据插入的方法如下: 1. 创建一个继承自 `SQLiteOpenHelper` 的数据库辅助类,用于创建和管理数据库以及表结构。
在该类中,需要实现 `onCreate()` 方法来创建数据库和表,以及 `onUpgrade()` 方法来处理数据库版本升级。
```javapublic class DBHelper extends SQLiteOpenHelper {private static final String DATABASE_NAME = "mydatabase.db";private static final int DATABASE_VERSION = 1;public DBHelper(Context context) {super(context, DATABASE_NAME, null, DATABASE_VERSION); }@Overridepublic void onCreate(SQLiteDatabase db) {// 创建表结构String createTableQuery = "CREATE TABLE mytable (id INTEGER PRIMARY KEY, name TEXT)";db.execSQL(createTableQuery);}@Overridepublic void onUpgrade(SQLiteDatabase db, int oldVersion, int newVersion) {// 处理数据库版本升级if (oldVersion < 2) {// 执行相应的更新操作}}}```2. 在需要插入数据的地方,获取可写入的数据库实例,并使用`insert()` 方法插入数据。
```javaDBHelper dbHelper = new DBHelper(context);SQLiteDatabase db = dbHelper.getWritableDatabase();ContentValues values = new ContentValues();values.put("name", "John Doe");long newRowId = db.insert("mytable", null, values);if (newRowId != -1) {// 插入成功} else {// 插入失败}db.close();```在上述代码中,我们首先实例化了 `DBHelper` 类,并获取了可写入的数据库实例。
AndroidKotlin使用SQLite案例详解

AndroidKotlin使⽤SQLite案例详解Kotlin使⽤SQLite⾸先确定我们的⽬标,SQLite只是⼀种⼯具,我们需要掌握就是增删改查就可以,我们真正需要动脑的还是项⽬中的业务逻辑。
我这篇⽂章写得⽐较适合新⼿,没⽤过SQLite的同学。
前期准备⼯作新建⼀个类MyDataBaseHelper继承⾃SQLiteOpenHelper,代码如下:class MyDatabaseHelper(var context: Context, name: String, version: Int) :SQLiteOpenHelper(context, name, null, version) {public var createBook="create table Book (" +"id integer primary key autoincrement," +"author text," +"price real," +"pages integer," +"name text)"override fun onCreate(db: SQLiteDatabase?) {// 下⾯这个todo 如果不注释掉的话就会报错。
// TODO("not implemented") //To change body of created functions use File | Settings | File Templates.db?.execSQL(createBook)Toast.makeText(context,"Create Successed",Toast.LENGTH_LONG).show()}override fun onUpgrade(db: SQLiteDatabase?, oldVersion: Int, newVersion: Int) {// TODO("not implemented") //To change body of created functions use File | Settings | File Templates.db?.execSQL("drop table if exists Book")onCreate(db)}}对数据进⾏操作操作⽐较简单,下⾯直接看代码:Activity中class MySQLite : AppCompatActivity() {override fun onCreate(savedInstanceState: Bundle?) {super.onCreate(savedInstanceState)setContentView(yout.activity_my_sqlite)val dbHelper=MyDatabaseHelper(this,"BookStore.db",1)/*** 创建表*/btnCreateDataBase.setOnClickListener {dbHelper.writableDatabase}/*** 添加数据*/btnAddData.setOnClickListener {val db=dbHelper.writableDatabaseval Values1=ContentValues().apply {// 第⼀条数据put("name","The Da Vinci Code")put("author","Dan Broen")put("pages",454)put("price",16.96)}db.insert("Book",null,Values1)val values2=ContentValues().apply {// 第⼆条数据put("name","The Lost Symbol")put("author","Dan Brown")put("pages",510)put("price",19.95)}db.insert("Book",null,values2)}btnUpdateData.setOnClickListener {val db=dbHelper.writableDatabaseval values=ContentValues()values.put("price",10.99)db.update("Book",values,"name=?", arrayOf("The Da Vinci Code"))}btnDeleteData.setOnClickListener {val db=dbHelper.writableDatabasedb.delete("Book","pages>?", arrayOf("500"))}btnQueryData.setOnClickListener {val db=dbHelper.writableDatabase// 查询Book表中所有数据// 这⾥获取到是Cursor对象val cursor=db.query("Book",null,null,null,null,null,null)if (cursor.moveToFirst()){do {val name=cursor.getString(cursor.getColumnIndex("name"))val author=cursor.getString(cursor.getColumnIndex("author"))val pages=cursor.getString(cursor.getColumnIndex("pages"))val price=cursor.getString(cursor.getColumnIndex("price"))Log.d("MainActivity","book name is $name")Log.d("MainActivity","author is $author")Log.d("MainActivity","pages is $pages")Log.d("MainActivity","price is $price")}while (cursor.moveToNext())}cursor.close()}}}布局⽂件<?xml version="1.0" encoding="utf-8"?><androidx.constraintlayout.widget.ConstraintLayout xmlns:android="/apk/res/android" xmlns:app="/apk/res-auto"xmlns:tools="/tools"android:layout_width="match_parent"android:layout_height="match_parent"tools:context=".sqlite.MySQLite"><Buttonandroid:id="@+id/btnCreateDataBase"android:layout_width="match_parent"android:layout_height="wrap_content"android:text="CreateDataBase"android:textAllCaps="false"app:layout_constraintTop_toTopOf="parent" /><Buttonandroid:id="@+id/btnAddData"android:layout_width="match_parent"android:layout_height="wrap_content"android:text="AddData"android:textAllCaps="false"app:layout_constraintTop_toBottomOf="@+id/btnCreateDataBase" /><Buttonandroid:id="@+id/btnUpdateData"android:layout_width="match_parent"android:layout_height="wrap_content"android:text="UpdateData"android:textAllCaps="false"app:layout_constraintTop_toBottomOf="@+id/btnAddData" /><Buttonandroid:id="@+id/btnDeleteData"android:layout_width="match_parent"android:layout_height="wrap_content"android:text="DeleteData"app:layout_constraintTop_toBottomOf="@+id/btnUpdateData" /><Buttonandroid:layout_width="match_parent"android:layout_height="wrap_content"android:id="@+id/btnQueryData"android:text="Query Data"android:textAllCaps="false"app:layout_constraintTop_toBottomOf="@+id/btnDeleteData"/></androidx.constraintlayout.widget.ConstraintLayout>到此这篇关于Android Kotlin使⽤SQLite案例详解的⽂章就介绍到这了,更多相关Android Kotlin使⽤SQLite内容请搜索以前的⽂章或继续浏览下⾯的相关⽂章希望⼤家以后多多⽀持!。
android sqlite insert的返回值

在Android中,当你使用SQLite数据库进行插入操作时,通常情况下并没有一个直接的返回值来表示插入操作是否成功。
这是因为SQLite的INSERT操作是一个原子操作,要么完全成功,要么完全失败,不会因为中间某个环节失败而导致数据不一致。
但是,你可以通过以下几种方式来间接判断插入操作是否成功:
1.使用lastInsertId()方法:
如果你在插入操作时指定了一个自增的主键,那么在插入操作完成后,你可以调用lastInsertId()方法来获取这个新插入的记录的自增ID。
如果这个方法返回-1,那么表示插入操作失败。
2.捕获异常:
如果在进行插入操作时出现了异常,那么这意味着插入操作失败了。
你可以通过捕获SQLException来处理这种情况。
3.查询数据库:
在插入操作后,你可以执行一个查询来检查新插入的记录是否存在。
如果存在,那么插入操作成功;否则,插入操作失败。
注意:为了提高效率,如果知道有数据被成功插入,建议直接使用lastInsertId()或者异常处理来确定结果,而不是进行额外的查询操作。
Android中SQLite使用方法
Android中SQLite使用方法分享一下在Android中如何使用SQLite。
现在的主流移动设备像Android、iPhone等都使用SQLite作为复杂数据的存储引擎,在我们为移动设备开发应用程序时,也许就要使用到SQLite来存储我们大量的数据,所以我们就需要掌握移动设备上的SQLite开发技巧。
对于Android平台来说,系统内置了丰富的API来供开发人员操作SQLite,我们可以轻松的完成对数据的存取。
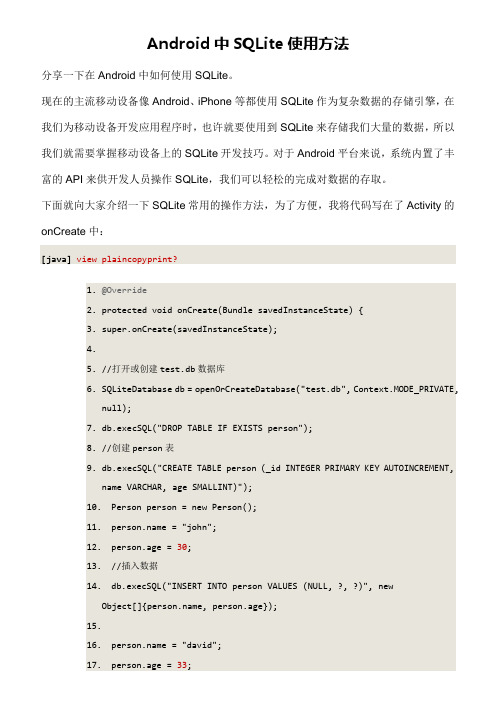
下面就向大家介绍一下SQLite常用的操作方法,为了方便,我将代码写在了Activity的onCreate中:[java]view plaincopyprint?1.@Override2.protected void onCreate(Bundle savedInstanceState) {3.super.onCreate(savedInstanceState);4.5.//打开或创建test.db数据库6.SQLiteDatabase db = openOrCreateDatabase("test.db", Context.MODE_PRIVATE,null);7.db.execSQL("DROP TABLE IF EXISTS person");8.//创建person表9.db.execSQL("CREATE TABLE person (_id INTEGER PRIMARY KEY AUTOINCREMENT,name VARCHAR, age SMALLINT)");10.Person person = new Person(); = "john";12.person.age = 30;13.//插入数据14.db.execSQL("INSERT INTO person VALUES (NULL, ?, ?)", newObject[]{, person.age});15. = "david";17.person.age = 33;18.//ContentValues以键值对的形式存放数据19.ContentValues cv = new ContentValues();20.cv.put("name", );21.cv.put("age", person.age);22.//插入ContentValues中的数据23.db.insert("person", null, cv);24.25.cv = new ContentValues();26.cv.put("age", 35);27.//更新数据28.db.update("person", cv, "name = ?", new String[]{"john"});29.30.Cursor c = db.rawQuery("SELECT * FROM person WHERE age >= ?", newString[]{"33"});31.while (c.moveToNext()) {32.int _id = c.getInt(c.getColumnIndex("_id"));33.String name = c.getString(c.getColumnIndex("name"));34.int age = c.getInt(c.getColumnIndex("age"));35.Log.i("db", "_id=>" + _id + ", name=>" + name + ", age=>" + age);36.}37. c.close();38.39.//删除数据40.db.delete("person", "age < ?", new String[]{"35"});41.42.//关闭当前数据库43.db.close();44.45.//删除test.db数据库46.// deleteDatabase("test.db");47.}在执行完上面的代码后,系统就会在/data/data/[PACKAGE_NAME]/databases目录下生成一个“test.db”的数据库文件,如图:上面的代码中基本上囊括了大部分的数据库操作;对于添加、更新和删除来说,我们都可以使用[java]view plaincopyprint?1.db.executeSQL(String sql);2.db.executeSQL(String sql, Object[] bindArgs);//sql语句中使用占位符,然后第二个参数是实际的参数集除了统一的形式之外,他们还有各自的操作方法:[java]view plaincopyprint?1.db.insert(String table, String nullColumnHack, ContentValues values);2.db.update(String table, Contentvalues values, String whereClause, StringwhereArgs);3.db.delete(String table, String whereClause, String whereArgs);以上三个方法的第一个参数都是表示要操作的表名;insert中的第二个参数表示如果插入的数据每一列都为空的话,需要指定此行中某一列的名称,系统将此列设置为NULL,不至于出现错误;insert中的第三个参数是ContentValues类型的变量,是键值对组成的Map,key代表列名,value代表该列要插入的值;update的第二个参数也很类似,只不过它是更新该字段key为最新的value值,第三个参数whereClause表示WHERE 表达式,比如“age > ? and age < ?”等,最后的whereArgs参数是占位符的实际参数值;delete方法的参数也是一样。
android:SQLite更新数据

android:SQLite更新数据学习完了如何向表中添加数据,接下来我们看看怎样才能修改表中已有的数据。
SQLiteDatabase 中也是提供了⼀个⾮常好⽤的 update()⽅法⽤于对数据进⾏更新,这个⽅法接收四个参数,第⼀个参数和 insert()⽅法⼀样,也是表名,在这⾥指定去更新哪张表⾥的数据。
第⼆个参数是 ContentValues 对象,要把更新数据在这⾥组装进去。
第三、第四个参数⽤于去约束更新某⼀⾏或某⼏⾏中的数据,不指定的话默认就是更新所有⾏。
那么接下来我们仍然是在 DatabaseTest 项⽬的基础上修改,看⼀下更新数据的具体⽤法。
⽐如说刚才添加到数据库⾥的第⼀本书,由于过了畅销季,卖得不是很⽕了,现在需要通过降低价格的⽅式来吸引更多的顾客,我们应该怎么操作呢?⾸先修改 activity_main.xml 中的代码,如下所⽰:android:layout_width="match_parent" android:layout_height="match_parent"android:orientation="vertical" >……<Button android:id="@+id/update_data" android:layout_width="match_parent" android:layout_height="wrap_content"android:text="Update data"/></LinearLayout>布局⽂件中的代码就已经⾮常简单了,就是添加了⼀个⽤于更新数据的按钮。
然后修改MainActivity 中的代码,如下所⽰:public class MainActivity extends Activity {private MyDatabaseHelper dbHelper;@Overrideprotected void onCreate(Bundle savedInstanceState) { super.onCreate(savedInstanceState); setContentView(yout.activity_main); dbHelper = new MyDatabaseHelper(this, "BookStore.db", null, 2);……Button updateData = (Button) findViewById(R.id.update_data);updateData.setOnClickListener(new OnClickListener() {@Overridepublic void onClick(View v) {SQLiteDatabase db = dbHelper.getWritableDatabase();ContentValues values = new ContentValues();values.put("price", 10.99);db.update("Book", values, "name = ?", new String[] { "The DaVinci Code" });}});}}这⾥在更新数据按钮的点击事件⾥⾯构建了⼀个 ContentValues 对象,并且只给它指定了⼀组数据,说明我们只是想把价格这⼀列的数据更新成 10.99。
Android操作SQLite数据库(增、删、改、查、分页等)及ListView显示数据的方法详解
Android操作SQLite数据库(增、删、改、查、分页等)及ListView显⽰数据的⽅法详解本⽂实例讲述了Android操作SQLite数据库(增、删、改、查、分页等)及ListView显⽰数据的⽅法。
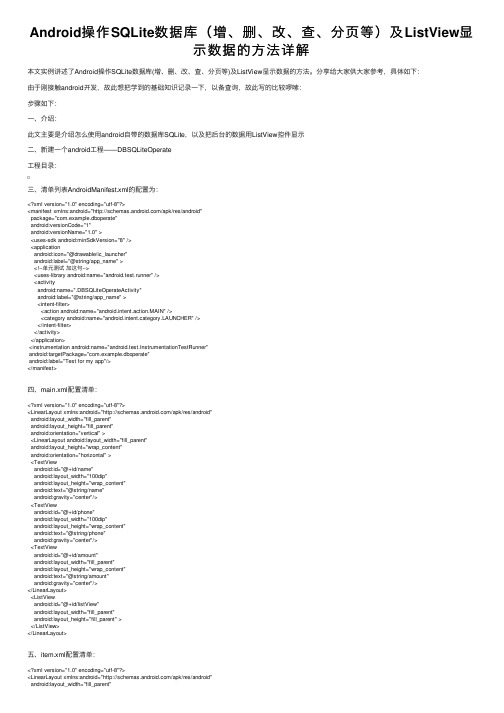
分享给⼤家供⼤家参考,具体如下:由于刚接触android开发,故此想把学到的基础知识记录⼀下,以备查询,故此写的⽐较啰嗦:步骤如下:⼀、介绍:此⽂主要是介绍怎么使⽤android⾃带的数据库SQLite,以及把后台的数据⽤ListView控件显⽰⼆、新建⼀个android⼯程——DBSQLiteOperate⼯程⽬录:三、清单列表AndroidManifest.xml的配置为:<?xml version="1.0" encoding="utf-8"?><manifest xmlns:android="/apk/res/android"package="com.example.dboperate"android:versionCode="1"android:versionName="1.0" ><uses-sdk android:minSdkVersion="8" /><applicationandroid:icon="@drawable/ic_launcher"android:label="@string/app_name" ><!--单元测试加这句--><uses-library android:name="android.test.runner" /><activityandroid:name=".DBSQLiteOperateActivity"android:label="@string/app_name" ><intent-filter><action android:name="android.intent.action.MAIN" /><category android:name="UNCHER" /></intent-filter></activity></application><instrumentation android:name="android.test.InstrumentationTestRunner"android:targetPackage="com.example.dboperate"android:label="Test for my app"/></manifest>四、main.xml配置清单:<?xml version="1.0" encoding="utf-8"?><LinearLayout xmlns:android="/apk/res/android"android:layout_width="fill_parent"android:layout_height="fill_parent"android:orientation="vertical" ><LinearLayout android:layout_width="fill_parent"android:layout_height="wrap_content"android:orientation="horizontal" ><TextViewandroid:id="@+id/name"android:layout_width="100dip"android:layout_height="wrap_content"android:text="@string/name"android:gravity="center"/><TextViewandroid:id="@+id/phone"android:layout_width="100dip"android:layout_height="wrap_content"android:text="@string/phone"android:gravity="center"/><TextViewandroid:id="@+id/amount"android:layout_width="fill_parent"android:layout_height="wrap_content"android:text="@string/amount"android:gravity="center"/></LinearLayout><ListViewandroid:id="@+id/listView"android:layout_width="fill_parent"android:layout_height="fill_parent" ></ListView></LinearLayout>五、item.xml配置清单:<?xml version="1.0" encoding="utf-8"?><LinearLayout xmlns:android="/apk/res/android"android:layout_width="fill_parent"android:layout_height="fill_parent"android:orientation="horizontal" ><TextViewandroid:id="@+id/name"android:layout_width="100dip"android:layout_height="wrap_content"android:text="@string/name"android:gravity="center"/><TextViewandroid:id="@+id/phone"android:layout_width="100dip"android:layout_height="wrap_content"android:text="@string/phone"android:gravity="center"/><TextViewandroid:id="@+id/amount"android:layout_width="fill_parent"android:layout_height="wrap_content"android:text="@string/amount"android:gravity="center"/></LinearLayout>六、string.xml配置清单:<?xml version="1.0" encoding="utf-8"?><resources><string name="hello">Hello World, DBSQLiteOperateActivity!</string><string name="app_name">ExampleDBSQLiteOperate8</string><string name="name">姓名</string><string name="phone">电话</string><string name="amount">存款</string></resources>七、DBSQLiteOperateActivity.java Activity类的源码:package com.example.dboperate;import java.util.ArrayList;import java.util.HashMap;import java.util.List;import java.util.Map;import com.example.adapter.PersonAdapter;import com.example.domain.Person;import com.example.service.PersonService;import android.app.Activity;import android.database.Cursor;import android.os.Bundle;import android.view.View;import android.view.View.OnClickListener;import android.widget.AdapterView;import android.widget.AdapterView.OnItemClickListener;import android.widget.ListView;import android.widget.SimpleAdapter;import android.widget.SimpleCursorAdapter;import android.widget.Toast;public class DBSQLiteOperateActivity extends Activity {ListView listView;PersonService personService;OnItemClickListener listViewListener;/** Called when the activity is first created. */@Overridepublic void onCreate(Bundle savedInstanceState) {super.onCreate(savedInstanceState);setContentView(yout.main);listViewListener = new OnItemClickListener(){@Overridepublic void onItemClick(AdapterView<?> parent, View view, int position, long id) {//得到listView控件ListView listView = (ListView)parent;//1、如果使⽤⾃定义适配器,返回的是Person对象//得到该条⽬数据// Person person = (Person)listView.getItemAtPosition(position);// //⼴播出去// Toast.makeText(getApplicationContext(), person.toString(), Toast.LENGTH_LONG).show(); //2、如果使⽤showList2()⽅法中的适配器时,则取得的值是不⼀样的,返回的是cursor// Cursor cursor = (Cursor)listView.getItemAtPosition(position);// int personid = cursor.getInt(cursor.getColumnIndex("_id"));// Toast.makeText(getApplicationContext(), personid+"", Toast.LENGTH_LONG).show();//3、如果使⽤showList()⽅法中的适配器时,则取得的值是不⼀样的,返回的是map@SuppressWarnings("unchecked")Map<String,Object> map = (Map)listView.getItemAtPosition(position);String name = map.get("name").toString();String personid = map.get("personid").toString();Toast.makeText(getApplicationContext(), personid +"-"+ name, Toast.LENGTH_LONG).show(); }};listView = (ListView) this.findViewById(R.id.listView);listView.setOnItemClickListener(listViewListener);personService = new PersonService(this);showList();}private void showList() {List<Person> persons = personService.getScrollData(0, 50);List<HashMap<String,Object>> data = new ArrayList<HashMap<String,Object>>();for(Person person : persons){HashMap<String,Object> item = new HashMap<String,Object>();item.put("name", person.getName());item.put("phone", person.getPhone());item.put("amount", person.getAmount());item.put("personid", person.getId());data.add(item);}SimpleAdapter adapter = new SimpleAdapter(this,data,yout.item, new String[]{"name","phone","amount"}, new int[]{,R.id.phone,R.id.amount});listView.setAdapter(adapter);}public void showList2(){Cursor cursor = personService.getCursorScrollData(0, 50);//该适配器要求返回的结果集cursor必须包含_id字段,所以需要对取得结果集进⾏处理SimpleCursorAdapter adapter = new SimpleCursorAdapter(this,yout.item,cursor,new String[]{"name","phone","amount"}, new int[]{,R.id.phone,R.id.amount} ); listView.setAdapter(adapter);}/*** ⾃定义适配器*/public void showList3(){List<Person> persons = personService.getScrollData(0, 50);/*** 第⼀个参数:上下⽂context,第⼆个参数:要显⽰的数据,第三个参数:绑定的条⽬界⾯*/PersonAdapter adapter = new PersonAdapter(this, persons, yout.item);listView.setAdapter(adapter);}}⼋、person.java 实体类源码:package com.example.domain;public class Person {private Integer id;private String name;private String phone;private Integer amount;public Integer getId() {return id;}public void setId(Integer id) {this.id = id;}public String getName() {return name;}public void setName(String name) { = name;}public String getPhone() {return phone;}public void setPhone(String phone) {this.phone = phone;}public Person(String name, String phone) { = name;this.phone = phone;}public Person(Integer id, String name, String phone,Integer amount) {super();this.id = id; = name;this.phone = phone;this.amount = amount;}public Person() {super();}public Integer getAmount() {return amount;}public void setAmount(Integer amount) {this.amount = amount;}@Overridepublic String toString() {return "Person [id=" + id + ", name=" + name + ", phone=" + phone+ ", amount=" + amount + "]";}}九、DBOperateHelper.java 业务类源码:package com.example.service;import android.content.Context;import android.database.sqlite.SQLiteDatabase;import android.database.sqlite.SQLiteDatabase.CursorFactory;import android.database.sqlite.SQLiteOpenHelper;public class DBOperateHelper extends SQLiteOpenHelper {public DBOperateHelper(Context context) {//默认创建的数据库⽂件保存在<包名>/database///第⼀个参数是上下⽂,第⼆个参数是数据库名称,第三个是游标⼯⼚为null时使⽤数据库默认的游标⼯⼚,第四个是数据库版本号但是不能为0,⼀般⼤于0super(context, "smallpig", null, 4);}/*** 数据库每⼀次被创建时被调⽤*/@Overridepublic void onCreate(SQLiteDatabase sqldb) {sqldb.execSQL("create table person(personid integer primary key autoincrement,name varchar(20),phone varchar(12) null)");}/*** 每⼀次数据库版本号发⽣变动时触发此⽅法* ⽐如如果想往数据库中再插⼊⼀些表、字段或者其他信息时通过修改数据库版本号来触发此⽅法*/@Overridepublic void onUpgrade(SQLiteDatabase db, int oldVersion, int newVersion) {//db.execSQL("alter table person add phone varchar(12) null");\db.execSQL("alter table person add amount Integer null");}}⼗、PersonService.java 业务类源码:package com.example.service;import java.util.ArrayList;import java.util.List;import android.content.Context;import android.database.Cursor;import android.database.sqlite.SQLiteDatabase;import com.example.domain.Person;public class PersonService {private DBOperateHelper dbOperateHelper;public PersonService(Context context) {this.dbOperateHelper = new DBOperateHelper(context);}/*** 保存记录* @param person*/public void save(Person person){//得到数据库实例,⾥⾯封装了数据库操作⽅法SQLiteDatabase sqldb = dbOperateHelper.getWritableDatabase();//sqldb.execSQL("insert into person(name,phone) values('"+person.getName()+"','"+person.getPhone()+"')");//利⽤占位符可以避免注⼊,但是注意数组参与与占位符对应的字段要⼀⼀对应sqldb.execSQL("insert into person(name,phone,amount) values(?,?,?)",new Object[]{person.getName(),person.getPhone(),person.getAmount()});//关闭数据库sqldb.close();}/*** 删除记录* @param id*/public void delete(Integer id){SQLiteDatabase sqldb = dbOperateHelper.getWritableDatabase();sqldb.execSQL("delete from person where personid=?",new Object[]{id});sqldb.close();}/*** 更新记录* @param person*/public void update(Person person){SQLiteDatabase sqldb = dbOperateHelper.getWritableDatabase();sqldb.execSQL("update person set name=?,phone=?,amount=? where personid=?",new Object[]{person.getName(),person.getPhone(),person.getAmount(),person.getId()}); sqldb.close();}/*** 通过ID查询记录* @param id* @return*/public Person find(Integer id){/*** getWritableDatabase 与 getReadableDatabase 的区别:* getReadableDatabase会先返回getWritableDatabase(可写),如果调⽤getWritableDatabase失败* 则才会调⽤getReadableDatabase后续⽅法,使数据库只读* 当写⼊的数据超过数据库⼤⼩则调⽤getWritableDatabase会失败* 所以只读时则可以使⽤此⽅法,其它情况(只要不是超过数据库⼤⼩)也可以使⽤此⽅法*/SQLiteDatabase sqldb = dbOperateHelper.getReadableDatabase();Cursor cursor = sqldb.rawQuery("select * from person where personid=?", new String[]{String.valueOf(id)});int personid;String name;String phone;int amount;Person person = null;if(cursor.moveToFirst()){personid = cursor.getInt(cursor.getColumnIndex("personid"));name = cursor.getString(cursor.getColumnIndex("name"));phone = cursor.getString(cursor.getColumnIndex("phone"));amount = cursor.getInt(cursor.getColumnIndex("amount"));person = new Person(personid,name,phone,amount);}cursor.close();return person;}/*** 返回指定长度记录,limit 3,5,适⽤于分页* @param offset 起始* @param maxResult 长度* @return*/public List<Person> getScrollData(int offset,int maxResult){SQLiteDatabase sqldb = dbOperateHelper.getReadableDatabase();Cursor cursor = sqldb.rawQuery("select * from person order by personid asc limit ?,?", new String[]{String.valueOf(offset),String.valueOf(maxResult)});int personid;String name;String phone;int amount;Person person = null;List<Person> persons = new ArrayList<Person>();while(cursor.moveToNext()){personid = cursor.getInt(cursor.getColumnIndex("personid"));name = cursor.getString(cursor.getColumnIndex("name"));phone = cursor.getString(cursor.getColumnIndex("phone"));amount = cursor.getInt(cursor.getColumnIndex("amount"));person = new Person(personid,name,phone,amount);persons.add(person);}cursor.close();return persons;}/*** 返回cursor* @param offset 起始* @param maxResult 长度* @return*/public Cursor getCursorScrollData(int offset,int maxResult){SQLiteDatabase sqldb = dbOperateHelper.getReadableDatabase();Cursor cursor = sqldb.rawQuery("select personid as _id,name,phone,amount from person order by personid asc limit ?,?", new String[]{String.valueOf(offset),String.valueOf(maxResult)}); return cursor;}/*** 返回总记录数* @return*/public long getCount(){SQLiteDatabase sqldb = dbOperateHelper.getReadableDatabase();Cursor cursor = sqldb.rawQuery("select count(*) from person", null);//该查询语句值返回⼀条语句cursor.moveToFirst();long result = cursor.getLong(0);cursor.close();return result;}public void payment(){SQLiteDatabase sqldb = dbOperateHelper.getWritableDatabase();sqldb.beginTransaction();//开启事务try{sqldb.execSQL("update person set amount = amount -10 where personid=1");sqldb.execSQL("update person set amount = amount + 10 where personid=2");sqldb.setTransactionSuccessful();//设置事务标志位true} finally {//结束事务:有两种情况:commit\rollback,事务提交或者回滚是由事务的标识决定的//事务为ture则提交,事务为flase则回滚,默认为falsesqldb.endTransaction();}}}⼗⼀、OtherPersonService.java 业务类源码:package com.example.service;import java.util.ArrayList;import java.util.List;import com.example.domain.Person;import android.content.ContentValues;import android.content.Context;import android.database.Cursor;import android.database.sqlite.SQLiteDatabase;import android.database.sqlite.SQLiteDatabase.CursorFactory;import android.database.sqlite.SQLiteOpenHelper;public class OtherPersonService {private DBOperateHelper dbOperateHelper;public OtherPersonService(Context context) {this.dbOperateHelper = new DBOperateHelper(context);}/*** 保存记录* @param person*/public void save(Person person){//得到数据库实例,⾥⾯封装了数据库操作⽅法SQLiteDatabase sqldb = dbOperateHelper.getWritableDatabase();//sqldb.execSQL("insert into person(name,phone) values('"+person.getName()+"','"+person.getPhone()+"')");//利⽤占位符可以避免注⼊,但是注意数组参与与占位符对应的字段要⼀⼀对应//sqldb.execSQL("insert into person(name,phone) values(?,?)",new Object[]{person.getName(),person.getPhone()});ContentValues values = new ContentValues();values.put("name", person.getName());values.put("phone", person.getPhone());values.put("amount", person.getAmount());//第⼀个参数是表名,第三个为字段值集合,第⼆个参数是空值字段,当第三个字段值集合为空时,系统会⾃动插⼊⼀条第⼆个参数为空的sql语句//否则当第三个参数为空时,如果第⼆个参数也为空,那么插⼊表就会找不到插⼊的字段信息,会报错sqldb.insert("person", "name", values );//关闭数据库sqldb.close();}/*** 删除记录* @param id*/public void delete(Integer id){SQLiteDatabase sqldb = dbOperateHelper.getWritableDatabase();//sqldb.execSQL("delete from person where personid=?",new Object[]{id});//第⼀个参数是表名,第⼆个是where后⾯的条件⽤占位符表⽰,第三个对应占位符为参数值sqldb.delete("person", "personid=?", new String[]{Integer.toString(id)});sqldb.close();}/*** 更新记录* @param person*/public void update(Person person){SQLiteDatabase sqldb = dbOperateHelper.getWritableDatabase();//sqldb.execSQL("update person set name=?,phone=? where personid=?",new Object[]{person.getName(),person.getPhone(),person.getId()});//第⼀个参数为表名,第⼆个是⼀个更新值集合,采⽤键值对的形式,每个更新的字段对应更新值//第三个参数是where后⾯条件字段⽤占位符标识,第四个参数是对应where占位符的值ContentValues values = new ContentValues();values.put("name", person.getName());values.put("phone", person.getPhone());values.put("amount", person.getAmount());sqldb.update("person", values , "personid=?", new String[]{person.getId().toString()});sqldb.close();}/*** 通过ID查询记录* @param id* @return*/public Person find(Integer id){/*** getWritableDatabase 与 getReadableDatabase 的区别:* getReadableDatabase会先返回getWritableDatabase(可写),如果调⽤getWritableDatabase失败* 则才会调⽤getReadableDatabase后续⽅法,使数据库只读* 当写⼊的数据超过数据库⼤⼩则调⽤getWritableDatabase会失败* 所以只读时则可以使⽤此⽅法,其它情况(只要不是超过数据库⼤⼩)也可以使⽤此⽅法*/SQLiteDatabase sqldb = dbOperateHelper.getReadableDatabase();//Cursor cursor = sqldb.rawQuery("select * from person where personid=?", new String[]{String.valueOf(id)});//第⼀个参数是表名;第⼆个参数是查询显⽰的字段,null时默认查询显⽰所有字段;//第三个参数是where查询条件占位符;第四个是占位符对应的值;//第五个参数是group by条件;第六个是having条件;第七个是order by条件Cursor cursor = sqldb.query("person", null, "personid=?", new String[]{id.toString()}, null, null, null);int personid;String name;String phone;int amount;Person person = null;if(cursor.moveToFirst()){personid = cursor.getInt(cursor.getColumnIndex("personid"));name = cursor.getString(cursor.getColumnIndex("name"));phone = cursor.getString(cursor.getColumnIndex("phone"));amount = cursor.getInt(cursor.getColumnIndex("amount"));person = new Person(personid,name,phone,amount);}cursor.close();return person;}/*** 返回指定长度记录,limit 3,5,适⽤于分页* @param offset 起始* @param maxResult 长度* @return*/public List<Person> getScrollData(int offset,int maxResult){SQLiteDatabase sqldb = dbOperateHelper.getReadableDatabase();//Cursor cursor = sqldb.rawQuery("select * from person order by personid asc limit ?,?", new String[]{String.valueOf(offset),String.valueOf(maxResult)}); //第⼀个参数是表名;第⼆个参数是查询显⽰的字段,null时默认查询显⽰所有字段;//第三个参数是where查询条件占位符;第四个是占位符对应的值;//第五个参数是group by条件;第六个是having条件;第七个是order by条件//第⼋个参数是limit ?,? 条件Cursor cursor = sqldb.query("person", null, null, null, null, null, "personid",offset+","+maxResult); int personid;String name;String phone;int amount;Person person = null;List<Person> persons = new ArrayList<Person>();while(cursor.moveToNext()){personid = cursor.getInt(cursor.getColumnIndex("personid"));name = cursor.getString(cursor.getColumnIndex("name"));phone = cursor.getString(cursor.getColumnIndex("phone"));amount = cursor.getInt(cursor.getColumnIndex("amount"));person = new Person(personid,name,phone,amount);persons.add(person);}cursor.close();return persons;}/*** 返回总记录数* @return*/public long getCount(){SQLiteDatabase sqldb = dbOperateHelper.getReadableDatabase();//Cursor cursor = sqldb.rawQuery("select count(*) from person", null);//第⼀个参数是表名;第⼆个参数是查询显⽰的字段,null时默认查询显⽰所有字段;//第三个参数是where查询条件占位符;第四个是占位符对应的值;//第五个参数是group by条件;第六个是having条件;第七个是order by条件Cursor cursor = sqldb.query("person", new String[]{"count(*)"}, null, null, null, null, null);//该查询语句值返回⼀条语句cursor.moveToFirst();long result = cursor.getLong(0);cursor.close();return result;}}⼗⼆、PersonServiceTest.java 单元测试类源码:package com.example.test;import java.util.List;import com.example.domain.Person;import com.example.service.DBOperateHelper;import com.example.service.PersonService;import android.test.AndroidTestCase;import android.util.Log;public class PersonServiceTest extends AndroidTestCase {public void testCreateDB() throws Exception{DBOperateHelper dbHelper = new DBOperateHelper(getContext());dbHelper.getWritableDatabase();}public void testSave() throws Exception{PersonService ps = new PersonService(getContext());for(int i=1;i<=100;i++){Person person = new Person();person.setName("我是"+i);person.setPhone(String.valueOf(Long.parseLong("188********")+i));ps.save(person);Log.i("PersonService",person.toString());}}public void testDelete() throws Exception{PersonService ps = new PersonService(getContext());ps.delete(10);}public void testUpdate() throws Exception{PersonService ps = new PersonService(getContext());ps.update(new Person(1,"xiaopang","188********",0));}public void testFind() throws Exception{PersonService ps = new PersonService(getContext());Person person = ps.find(1);Log.i("PersonService", person.toString());}public void testGetScrollData() throws Exception{PersonService ps = new PersonService(getContext());List<Person> persons = ps.getScrollData(3, 5);for(Person person:persons){Log.i("PersonService",person.toString());}}public void testGetCount() throws Exception{PersonService ps = new PersonService(getContext());Long count = ps.getCount();Log.i("PersonService",count.toString());}public void testUpdateAmount() throws Exception{PersonService ps = new PersonService(getContext());Person person1 = ps.find(1);Person person2 = ps.find(2);person1.setAmount(100);person2.setAmount(100);ps.update(person1);ps.update(person2);}public void testPayment() throws Exception{PersonService ps = new PersonService(getContext());ps.payment();}}⼗三、OtherPersonServiceTest 单元测试类源码:package com.example.test;import java.util.List;import com.example.domain.Person;import com.example.service.DBOperateHelper;import com.example.service.OtherPersonService;import android.test.AndroidTestCase;import android.util.Log;public class OtherPersonServiceTest extends AndroidTestCase {public void testCreateDB() throws Exception{DBOperateHelper dbHelper = new DBOperateHelper(getContext());dbHelper.getWritableDatabase();}public void testSave() throws Exception{OtherPersonService ps = new OtherPersonService(getContext());for(int i=1;i<=100;i++){Person person = new Person();person.setName("我是"+i);person.setPhone(String.valueOf(Long.parseLong("188********")+i));ps.save(person);Log.i("PersonService",person.toString());}}public void testDelete() throws Exception{OtherPersonService ps = new OtherPersonService(getContext());ps.delete(10);}public void testUpdate() throws Exception{OtherPersonService ps = new OtherPersonService(getContext());ps.update(new Person(1,"xiaopang","188********",0));}public void testFind() throws Exception{OtherPersonService ps = new OtherPersonService(getContext());Person person = ps.find(1);Log.i("PersonService", person.toString());}public void testGetScrollData() throws Exception{OtherPersonService ps = new OtherPersonService(getContext());List<Person> persons = ps.getScrollData(3, 5);for(Person person:persons){Log.i("PersonService",person.toString());}}public void testGetCount() throws Exception{OtherPersonService ps = new OtherPersonService(getContext());Long count = ps.getCount();Log.i("PersonService",count.toString());}}⼗四、注意事项以及相关知识点:1、掌握SQLite数据库如何创建数据库、建⽴表、维护字段等操作继承SQLiteOpenHelper类,构造函数调⽤⽗类构造函数创建数据库,利⽤onCreate创建表,利⽤onUpgrade更新表字段信息2、掌握SQLite数据库如何增、删、改、查以及分页取得SQLiteDatabase的实例,然后调⽤该实例的⽅法可以完成上述操作SQLiteDataBase提供两种操作上述功能的⽅式:⼀是直接调⽤execSQL书写sql语句,另⼀种是通过insert、update、delete、query等⽅法来传值来拼接sql,前⼀种适合熟练掌握sql 语句的3、对需要数据同步的处理请添加事务处理,熟悉事务的处理⽅式4、了解各个⽅法参数的意义以及传值5、掌握ListView显⽰后台数据的使⽤⽅法SimpleAdapter、SimpleCursorAdapter以及⾃定义适配器的使⽤,以及OnItemClickListener取值时各个适配器返回值的区别以及取值⽅法6、多学、多记、多练、多思,加油!更多关于Android相关内容感兴趣的读者可查看本站专题:《》、《》、《》、《》、《》及《》希望本⽂所述对⼤家Android程序设计有所帮助。
sqlite应用场景

sqlite应用场景SQLite是一种轻量级的关系型数据库管理系统,它广泛应用于各种领域。
本文将从以下几个方面详细介绍SQLite的应用场景。
一、移动端应用SQLite因其轻量级、高效、易于集成等特点在移动端应用中被广泛使用。
比如,安卓系统中的联系人、通话记录、短信等数据均储存在SQLite数据库中。
除了系统自带的功能,许多安卓应用都使用SQLite作为其本地储存方式。
而iOS系统中也采用SQLite作为内置数据库,应用开发者也可以使用SQLite对App中各种数据进行储存和管理。
二、桌面应用SQLite也可以在桌面应用程序中被广泛使用。
由于其轻量级特点,SQLite极易部署和集成到各种桌面应用程序中,并且可以实现高效的本地数据储存和管理。
比如,许多常用的桌面应用程序,如编辑器、图片管理器、音乐播放器等都采用SQLite作为其本地数据库储存方式,提供用户便捷的本地数据管理功能。
三、嵌入式系统在嵌入式系统领域,由于SQLite占用的存储空间极小,且具有高效的数据查询、处理能力,因此SQLite也经常被应用在嵌入式系统中。
比如,许多智能家居、智能穿戴等IoT设备都使用SQLite作为其本地数据库储存方式,提供设备数据管理和本地应用程序的支持。
四、Web应用虽然SQLite主要是用于本地应用储存数据,但也可以在Web应用中被使用。
我们可以使用SQLite提供的API和语法操作数据库表。
SQLite借助Php中的PDO类支持,可使用SQLite操作Web项目中的数据存储,而且由于SQLite数据占用很少的磁盘空间,所以这个不会增加服务器负载。
总而言之,SQLite应用场景十分广阔,它适用于各种不同的应用场景,并且可以轻松部署和集成到不同的应用程序之中。
无论是移动端应用还是桌面应用、嵌入式系统,SQLite的高效、易用、灵活的特点都让它成为了广大开发者的首选之一。
AndroidSQLite数据库增删改查操作
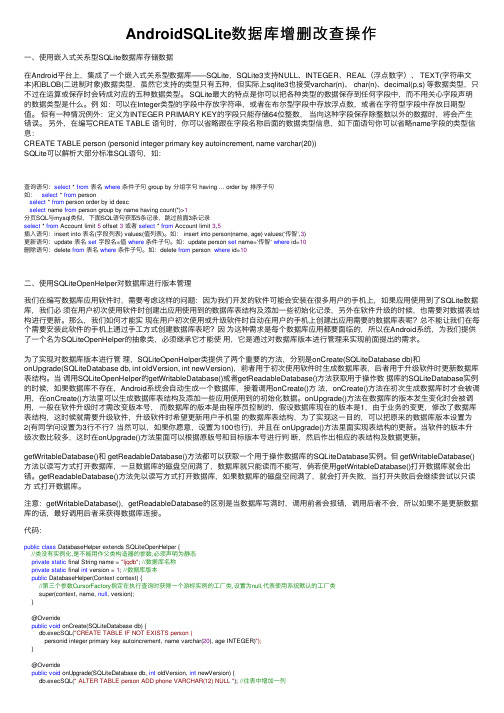
AndroidSQLite数据库增删改查操作⼀、使⽤嵌⼊式关系型SQLite数据库存储数据在Android平台上,集成了⼀个嵌⼊式关系型数据库——SQLite,SQLite3⽀持NULL、INTEGER、REAL(浮点数字)、 TEXT(字符串⽂本)和BLOB(⼆进制对象)数据类型,虽然它⽀持的类型只有五种,但实际上sqlite3也接受varchar(n)、 char(n)、decimal(p,s) 等数据类型,只不过在运算或保存时会转成对应的五种数据类型。
SQLite最⼤的特点是你可以把各种类型的数据保存到任何字段中,⽽不⽤关⼼字段声明的数据类型是什么。
例如:可以在Integer类型的字段中存放字符串,或者在布尔型字段中存放浮点数,或者在字符型字段中存放⽇期型值。
但有⼀种情况例外:定义为INTEGER PRIMARY KEY的字段只能存储64位整数,当向这种字段保存除整数以外的数据时,将会产⽣错误。
另外,在编写CREATE TABLE 语句时,你可以省略跟在字段名称后⾯的数据类型信息,如下⾯语句你可以省略name字段的类型信息:CREATE TABLE person (personid integer primary key autoincrement, name varchar(20))SQLite可以解析⼤部分标准SQL语句,如:查询语句:select * from表名where条件⼦句 group by 分组字句 having ... order by 排序⼦句如:select * from personselect * from person order by id descselect name from person group by name having count(*)>1分页SQL与mysql类似,下⾯SQL语句获取5条记录,跳过前⾯3条记录select * from Account limit 5 offset 3或者select * from Account limit 3,5插⼊语句:insert into 表名(字段列表) values(值列表)。
关于android studio sqlite数据库实验总结
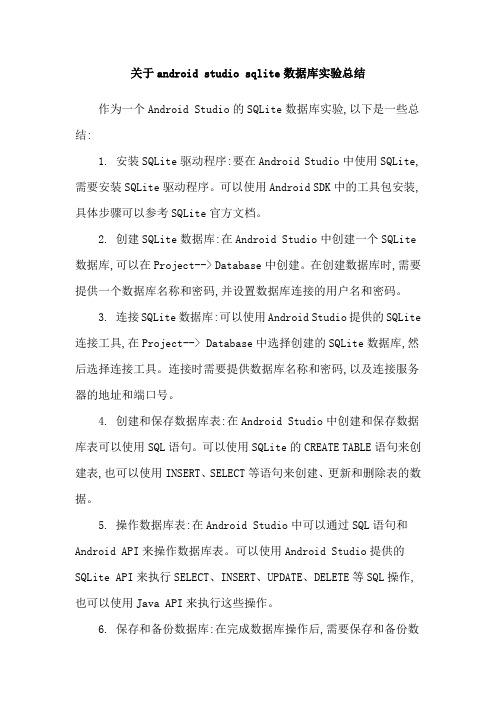
关于android studio sqlite数据库实验总结作为一个Android Studio的SQLite数据库实验,以下是一些总结:1. 安装SQLite驱动程序:要在Android Studio中使用SQLite,需要安装SQLite驱动程序。
可以使用Android SDK中的工具包安装,具体步骤可以参考SQLite官方文档。
2. 创建SQLite数据库:在Android Studio中创建一个SQLite 数据库,可以在Project--> Database中创建。
在创建数据库时,需要提供一个数据库名称和密码,并设置数据库连接的用户名和密码。
3. 连接SQLite数据库:可以使用Android Studio提供的SQLite 连接工具,在Project--> Database中选择创建的SQLite数据库,然后选择连接工具。
连接时需要提供数据库名称和密码,以及连接服务器的地址和端口号。
4. 创建和保存数据库表:在Android Studio中创建和保存数据库表可以使用SQL语句。
可以使用SQLite的CREATE TABLE语句来创建表,也可以使用INSERT、SELECT等语句来创建、更新和删除表的数据。
5. 操作数据库表:在Android Studio中可以通过SQL语句和Android API来操作数据库表。
可以使用Android Studio提供的SQLite API来执行SELECT、INSERT、UPDATE、DELETE等SQL操作,也可以使用Java API来执行这些操作。
6. 保存和备份数据库:在完成数据库操作后,需要保存和备份数据库。
可以使用Android Studio提供的SQLite连接工具来保存数据库,也可以使用其他工具来备份数据库。
7. 调试数据库操作:在Android Studio中可以通过SQLite连接工具和Android API来调试数据库操作。
AndroidSQLite数据库加密的操作方法

AndroidSQLite数据库加密的操作⽅法⼀、前⾔SQLite是⼀个轻量级的、跨平台的、开源的嵌⼊式数据库引擎,也是⼀个关系型的的使⽤SQL语句的数据库引擎,读写效率⾼、资源消耗总量少、延迟时间少,使其成为移动平台数据库的最佳解决⽅案(如Android、iOS)但是Android上⾃带的SQLite数据库是没有实现加密的,我们可以通过Android Studio直接导出应⽤创建的数据库⽂件,然后通过如SQLite Expere Personal 这种可视化⼯具打开数据库⽂件进⾏查看数据库的表结构,以及数据,这就导致存储在SQLite中的数据可以被任何⼈查看,如果是⼀些账号密码,或者聊天数据等,那么我们的应⽤就⾯临着严重的安全漏洞隐患;⼆、数据库加密⽅法因为Android⾃带的SQLite数据库本⾝是没有实现加密的,那我们如何实现对数据库的加密呢?(1)对SQLite数据库的数据进⾏加密我们可以在程序中对保存到数据库中的数据进⾏加密后保存,然后查询数据的时候,对查询的数据进⾏解密后使⽤,如果还不希望别⼈看到数据库的表结构,我们可以对数据库名字,表名,表中的字段名字使⽤MD5等加密⼿段加密后再进⾏操作;这种⽅法是可以达到数据库加密的⽬的的,但是相对来说操作就⽐较繁琐了(2)使⽤SQLCipher对SQLite数据库加密SQLCipher是基于SQLite基础之上实现了数据库加密的开源库,可以采⽤第三⽅的开源框架SQLCipher,SQLCipher是基于原⽣SQlite数据库进⾏扩展,实现数据库整体加密(数据库⽂件加密),提供的数据库的操作接⼝,和原⽣的SQLite数据库操作接⼝基本⼀样的;我们创建或者打开数据库都需要密码,我们打开数据库时的密码,需要和创建数据库时的密码保护⼀致,否则打开数据库时会报错,提⽰打开的⽂件不是⼀个数据库⽂件net.sqlcipher.database.SQLiteException: file is not a database;我们导出的数据库⽂件,通过SQLite Expere Personal这类可视化⼯具也是⽆法直接打开的;但是可以使⽤DB Browser for Sqlite这个数据库查看⼯具进⾏查看,查看的时候输⼊创建数据库时使⽤的加密密码SQLCipher的特点:SQLCipher 占⽤空间⼩,性能好,因此⾮常适合保护嵌⼊式应⽤程序数据库,⾮常适合移动开发。
Android中对数据库进行的增删查改操作
Android中对数据库进行的增删查改操作Android开发中,数据库是一项重要的技术,用于存储和管理应用程序的结构化数据。
在开发过程中,对数据库进行增删查改操作是常见的需求。
本文将介绍Android中对数据库进行增删查改操作的方法和技巧。
一、引入数据库依赖在Android开发中,使用SQLite数据库是一种常见的选择。
首先,我们需要引入SQLite数据库的依赖库。
在项目的build.gradle文件中,添加以下代码:```dependencies {implementation 'androidx.sqlite:sqlite:2.1.0'}```二、创建数据库在进行数据库操作之前,我们需要先创建数据库。
在Android中,可以继承SQLiteOpenHelper类来创建和管理数据库。
下面是一个创建数据库的示例代码:```javapublic class MyDatabaseHelper extends SQLiteOpenHelper {private static final String DATABASE_NAME = "my_database";private static final int DATABASE_VERSION = 1;public MyDatabaseHelper(Context context) {super(context, DATABASE_NAME, null,DATABASE_VERSION);}@Overridepublic void onCreate(SQLiteDatabase db) {db.execSQL("CREATE TABLE IF NOT EXISTS users (id INTEGER PRIMARY KEY AUTOINCREMENT, name TEXT, age INTEGER)");}@Overridepublic void onUpgrade(SQLiteDatabase db, int oldVersion, int newVersion) {// 在数据库版本更新时执行的操作}}```在上述代码中,我们通过`CREATE TABLE`语句创建了一个名为"users"的表,该表包含id、name和age三个字段。
androidstudio sqlite cursor用法

androidstudio sqlite cursor用法在Android Studio中,使用SQLite数据库时,可以使用Cursor 类来执行查询操作并获取查询结果。
要使用Cursor类,首先需要获取一个可读的数据库实例,例如:```javaSQLiteDatabase db = dbHelper.getReadableDatabase();```然后,可以使用db.rawQuery()方法来执行查询,并将结果返回到Cursor对象。
以下是一个示例代码:```javaCursor cursor = db.rawQuery("SELECT * FROM table_name", null);```在上面的代码中,"SELECT * FROM table_name"是SQL查询语句,可以根据具体需求进行修改。
第二个参数传入了查询参数,如果没有查询参数,可以传入null。
接下来,可以使用Cursor对象的方法来遍历查询结果,例如使用moveToNext()方法移动到下一条记录,使用getColumnIndex()方法获取指定列的索引,使用getString()或getInt()等方法获取该列的值。
以下是一个示例代码:```javawhile (cursor.moveToNext()) {int id = cursor.getInt(cursor.getColumnIndex("id"));String name =cursor.getString(cursor.getColumnIndex("name"));// 其他列的获取// ...}```在使用完Cursor对象后,需要关闭它,以释放资源:```javacursor.close();```这是使用Cursor类进行查询操作的基本流程,根据具体需求,可以对以上代码进行修改和扩展。
- 1、下载文档前请自行甄别文档内容的完整性,平台不提供额外的编辑、内容补充、找答案等附加服务。
- 2、"仅部分预览"的文档,不可在线预览部分如存在完整性等问题,可反馈申请退款(可完整预览的文档不适用该条件!)。
- 3、如文档侵犯您的权益,请联系客服反馈,我们会尽快为您处理(人工客服工作时间:9:00-18:30)。
每个应用程序都要使用数据,Android应用程序也不例外,Android使用开源的、与操作系统无关的SQL数据库--大名鼎鼎的SQLite。
SQLite是一款轻量级数据库,它的设计目的是嵌入式,而且它占用的资源非常少,在嵌入式设备中,可能只需要几百KB,这也是Android 系统采用SQLite 数据库的原因之一吧。
简介∙轻量级使用SQLite 只需要带一个动态库,就可以享受它的全部功能,而且那个动态库的尺寸想当小。
∙独立性SQLite 数据库的核心引擎不需要依赖第三方软件,也不需要所谓的“安装”。
∙隔离性SQLite 数据库中所有的信息(比如表、视图、触发器等)都包含在一个文件夹内,方便管理和维护。
∙跨平台SQLite 目前支持大部分操作系统,不至电脑操作系统更在众多的手机系统也是能够运行,比如:Android。
∙多语言接口SQLite 数据库支持多语言编程接口。
∙安全性SQLite 数据库通过数据库级上的独占性和共享锁来实现独立事务处理。
这意味着多个进程可以在同一时间从同一数据库读取数据,但只能有一个可以写入数据。
SQLite使用介绍首先先来看一下本篇例子继承SQLiteOpenHelper 类实现的dbHelper 类。
package com.terry;import android.content.ContentValues;import android.content.Context;import android.database.Cursor;import android.database.sqlite.SQLiteDatabase;import android.database.sqlite.SQLiteOpenHelper;import android.database.sqlite.SQLiteDatabase.CursorFactory;public class dbHelper extends SQLiteOpenHelper {private final static String DATABASE_NAME="sec_db";private final static int DATABASE_VERSION=1;private final static String TABLE_NAME="sec_pwd";public final static String FIELD_ID="_id";public final static String FIELD_TITLE="sec_Title";public dbHelper(Context context){super(context, DATABASE_NAME,null, DATABASE_VERSION);}@Overridepublic void onCreate(SQLiteDatabase db) {// TODO Auto-generated method stubString sql="Create table "+TABLE_NAME+"("+FIELD_ID+" integer primary key autoincrement,"+FIELD_TITLE+" text );";db.execSQL(sql);}@Overridepublic void onUpgrade(SQLiteDatabase db, int oldVersion, int newV ersion) {// TODO Auto-generated method stubString sql=" DROP TABLE IF EXISTS "+TABLE_NAME;db.execSQL(sql);onCreate(db);public Cursor select(){SQLiteDatabase db=this.getReadableDatabase();Cursor cursor=db.query(TABLE_NAME, null, null, null, null, nu ll, " _id desc");return cursor;}public long insert(String Title){SQLiteDatabase db=this.getWritableDatabase();ContentValues cv=new ContentValues();cv.put(FIELD_TITLE, Title);long row=db.insert(TABLE_NAME, null, cv);return row;}public void delete(int id){SQLiteDatabase db=this.getWritableDatabase();String where=FIELD_ID+"=?";String[] whereValue={Integer.toString(id)};db.delete(TABLE_NAME, where, whereValue);}public void update(int id,String Title){SQLiteDatabase db=this.getWritableDatabase();String where=FIELD_ID+"=?";String[] whereValue={Integer.toString(id)};ContentValues cv=new ContentValues();cv.put(FIELD_TITLE, Title);db.update(TABLE_NAME, cv, where, whereValue);}}创建和打开数据库上篇通过构造函数来创建数据库,看一下构造函数的方法android.database.sqlite.SQLiteOpenHelper.SQLiteOpenHelper(Cont ext context, String name, CursorFactory factory, int version)public SQLiteOpenHelper (Context context, String name, SQLiteD atabase.CursorFactory factory, int version)Since: API Level 1Create a helper object to create, open, and/or manage a databa se. The database is not actually created or opened until one of getWritableDatabase() or getReadableDatabase() is called.Parameterscontext to use to open or create the databasename of the database file, or null for an in-memory database factory to use for creating cursor objects, or null for the d efaultversion number of the database (starting at 1); if the databa se is older, onUpgrade(SQLiteDatabase, int, int) will be used to upgrade the databasePublic Methods大体可以理成如下:如果进入此函数,不存在此数据库则创建,如果存在此数据库则打开连接,只要进入此方法就可以用打开的连接获得getWritableDatabase()或getReadableDatabase()这两个方法。
∙创建表--》Create Table一个数据库中可以包含多个表,每一条数据都存在指定的表中,要创建可以通过execSQL 方法来执行一条SQL 语句。
上面的方法为代码public void onCreate(SQLiteDatabase db) {// TODO Auto-generated method stubString sql="Create table "+TABLE_NAME+"("+FIELD_ID+" i nteger primary key autoincrement,"+FIELD_TITLE+" text );";db.execSQL(sql);}上面代码创建了表名为“sec_pwd” 的数据表,表内存在一个integer 类型的主键和一个text 类型的字段,并执行创建该表。
∙添加数据--》Insert上面的代码封装了一个使用SQLite 的insert 方法,向表中添加数据,但是insert 方法要求把数据都打包到ContentValues 中,ContentValue 其实可就是一个HashTable,Key值是字段名称,Value 值是字段的值。
通过ContentValues 的put 方法就可以把数据库放到ContentValue 对象中,然后插入到表中去。
代码为:public long insert(String Title){SQLiteDatabase db=this.getWritableDatabase();ContentValues cv=new ContentValues();cv.put(FIELD_TITLE, Title);long row=db.insert(TABLE_NAME, null, cv);return row;}∙删除数据--》Delete依此类推,添加数据用Insert,那么删除数据为Deletepublic void delete(int id){SQLiteDatabase db=this.getWritableDatabase();String where=FIELD_ID+"=?";String[] whereValue={Integer.toString(id)};db.delete(TABLE_NAME, where, whereValue);}∙修改数据--》Updatepublic void update(int id,String Title){SQLiteDatabase db=this.getWritableDatabase();String where=FIELD_ID+"=?";String[] whereValue={Integer.toString(id)};ContentValues cv=new ContentValues();cv.put(FIELD_TITLE, Title);db.update(TABLE_NAME, cv, where, whereValue);}可根据自己需要修改字段自行加参数。