keystone
KEYSTONE EPI-2电动执行器 使用说明书

GENERAL APPLICATIONThe EPI-2 is available in six sizes and is designed for on/off or modulating control of butterfly, ball, rotary plug valves or dampers in a wide range of heavy industrial, chemical and petrochemical plants on and offshore.KEYSTONE EPI-2 ELECTRIC ACTUATORSFEATURES• Low or high voltage single phase DC or AC power supply with 3-phase option• Multiple adjustable stroking times to suit specific applications• Interchangeable base plate and range ofshaft inserts enable simple connection to any valve type• Intelligent control unit prevents overheating • Epicyclical gearing ensures reliable and smooth operation• Top-mounted position indicator• Constantly-engaged, hand wheel-operated manual override in case of power failure • Bluetooth™ wireless connectivity fornon-intrusive configuration, operation and diagnostics• Optional local control panel for manual valve operation with additional open/close indicator • Simple upgrade options for modulating control and network communication via DeviceNet or Profibus DP protocols• Latched-type output contacts for fully open/fully close remote indication. Output contacts for monitor and blinker/local selector indication are also availableBluetooth™ is a trademark of Bluetooth SIG. Inc, USAThe EPI-2 series are compact, intelligent quarter-turn electric actuators for the accurate control of valves with torques from 35 to 2000 Nm / 308 to 17,700 lb.in.APPROVALS Waterproof:IP66/68 or NEMA 4/4X/6(NEMA ICS6/NEMA 250)CAN/CSA C22.2 No 139-10and UL 429-2009Explosionproof: Ex d e IIB T5 Gb (Gas) Ex tb IIIC T100°C Db (Dust) (prefix c for model 2000)TECHNICAL DATA Power supply:Single phase from 24 to 48 V DC or AC at 50/60 HzSingle phase from 100to 240 V DC or AC at 50/60 Hz3-phase from 208-240V AC, 380-480 V AC and 500-575 V ACVoltage fluctuations: +/-10%Frequency: +/- 5%Torque output: From 35 to 2000 Nm /308 to 17,700 lb.in.Ambient temperature Standard range: -25°C to +70°C /-13°F to 158°FLow temp range: -40°C to +70°C /-40°F to 158°FConduit entry: M25/1” NPT4016131731383426203930353633372322282524151812464841492732474219101114434544292150835476912COMPONENT PARTS - MODELS 063/E006-125/E013-250/E025-500/E051-1000/E091Part DescriptionQuantity1 Nut UNI5588 M6 22 Nut UNI5588 M8 23 Eccentric14 Planocentric gear 25 Spacer16 Ball bearing type 16002 17 Ball bearing type 16004 28 Ball bearing type 600119 ESH screw UNI5931- M6x8 110 HSHC screw UNI5931- M6x16 411 HSHC screw UNI5931- M4x14 712 HSHC screw UNI5931- M6x18 213 HSHC screw UNI5931- M6x25 414 HSHC screw UNI5931- M8x20 415 HSSC screw UNI5933- M4x10 116 Cover assembly117 Drive and control unit 118 Handwheel119 Output drive assembly 120 Standard housing 121 Stopper222 Terminal block 123 Worm shaft flange124 Anti-loosening washer UNI 8842-J6 125 Base plate ISO 5211 / F05-F07 126 Cover gasket1*27 Dowel pin UNI EN 22338 128 Earth stud 129 Fixed anulus 130 Gasket 1*31 Indicator132 Indicator shaft133 Manual worm shaft 134 Motor pinion135 O-ring Di=10.77/W=2.62 1*36 O-ring Di=18.77/W=1.78 1*37 O-ring Di=52.07/W=2.62 1*38 O-ring Di=6.07/W=1.78 1*39 Plug140 Position label141 Power clamps protection 142 Ring243 Ring for pins alignement 144 Ring RW 7 UNI7433 245 Seal washer 8.3 246 Sliding ring147 Snap ring for shaft D.6 148 Terminal block cover 149 Terminal board gasket 1*50Wheel1* Indicates recommended spare partsCOMPONENT PARTS - MODEL 2000/E171Part Description Quantity1Nut M20 ISO 4032 EN 24032 22Ball bearing type 6006 13Ball bearing type 16004 14Ball bearing type 61908 15HSHC screw UNI5931- M6x16 36HSHC screw UNI5931- M12x30 47HSHC screw UNI5931- M12x65 48HSHC screw UNI5931- M8x25 A4-7069EPI-2 actuator1 10Base housing1 11Base plate ISO 5211 / F12-F16 1 12Bearing support1 13Bushing2 14Bushing1 15Bushing1 16Bushing1 17Dowel pin UNI EN 22338 D 8x20 type B4 18Gasket 1* 19Hex head screw M20x80 UNI EN 240172 20Idle wheel shaft1 21Needle bearing type NKI 22/162 22O-ring Di=82.22/W=2.62 1* 23Position wheel1 24Seal washer 20.3 2 25Selector gear1 26Sliding ring1 27Upper vover1 28Wheel2* Indicates recommended spare partsDESIGN FEATURESMechanical connection to the valveEPI-2 actuators feature a multi drilled base plate and a range of drive inserts to allow direct mounting to almost all valve types according the EN ISO 5211 and other manufacturers’ standards.Power supplyEPI-2 can simply be connected to the local power supply. It accepts any single phase input voltages (from 24 to 48 V DC or AC and 100 to 240 V DC or AC). Alternatively 3 phase voltages from 208-240 V AC, 380-480 V AC and 500-575 V AC are also availableElectric motor thermostatA thermostat to protect the motor temperature in hot applications is included as standard in the control circuit of the electric actuator. HeaterA heater is standard available within theunit and is powered from the motor power supply. It is automatically activated when the temperature drops below 10°C in order to prevent condensation.Actuator serviceThe standard actuator is suitable for open/close and modulating applications.Compact and light designEPI-2 actuators are very compact and balanced for easy installation to small valves minimizing pipe work stress or loads to the valve shaft. Actuator configurationEach actuator is equipped with 2 rotary switches on the logic board to configureeach function and parameter like position, torque, open/close speed and output contacts. Additionally each optional module has itsown additional switches for its specific configuration.Local manual overrideA constantly engaged manual override (not rotating during motor operation) is fitted to all EPI-2 actuators.Torque and sizingThe EPI-2 range comprises of six models,for operating torques of up to 2000 Nm /17,700 lb.in. with a configurable operation time from 15 to 180 seconds. The nominal output torque value is constant along the entire stroke. Non-intrusive configurationWith Bluetooth® wireless technology enabled on your PDA or PC all configuration requirements can be undertaken without opening the unit. Direct access to the EPI-2 is then availablefor configuration and predictive/preventative maintenance information, including valve position, actuator speed, output torque, alarm and status.Position monitoringThe EPI-2 provides a local mechanical position indication. For remote indication the positionis detected by a non-contact sensor. The open and close position are configured via the electronic control card.Electronic controlsInternal drive to reverse the actuator rotation direction via remote control signals with internal 24 V DC or external 24 V DC/AC up to 120 V DC/AC power supply.Output contacts4 latched-type output contacts for fully open/ fully close remote indication; 1 output contact for monitor (loss of power, torque alarm, high temperature alarm, travel alarm, position sensor, hardware malfunction, local interface malfunction, local selector in LOCAL); 1 output contact for blinker/local selector indication (local selector feature only with OM3 installed).P1✓PA ✓✓✓P6✓✓P7✓✓P3✓5P ✓✓6P ✓✓✓5D ✓✓6D ✓✓✓PG✓OPTIONAL MODULES AND PERFORMANCEOPTIONAL MODULESOPTIONAL MODULES SELECTION TABLEOrder code OM1 I/Oadditional moduleOM3 local interfaceBluetooth componentOM9 PDP V0/V1OM11 DeviceNet OM133-wires moduleNOTES1. Each optional module (OMx) will be provided with its own installation and maintenance instructions.2. All modules except OM13 are available for both single phase and 3-phase voltage versions.3. Bluetooth component is integrated in the OM1, OM9 and OM11 card: not available for integration by localorganizations, as a stand alone unit.4. OM13 is not available with 3-phase supply and for LV version (single phase voltage from 24 to 48 V DC/V AC).OM1 I/0 additional moduleAnalog position INPUT 4-20 mA or 0-10 V DC Analog position OUTPUT 4-20 mA or 0-10 V DC 4 additional SPST output contacts Optional Bluetooth interfaceMonitor relayInformation about loss of input signal andBluetooth failure are available on monitor relay output contact.OM3 local interface Local/remote selector OP/CL pushbuttons2 LEDs for local indication Available in WP versionOM13 3-wire module 110/240 V AC3-wire control module for open/close Bus communication – network interfaces OM9) Profibus DP V0/V1OM11) DeviceNet063/E00663/600152848125/E013125/1300152848250/E025250/2500152848500/E051500/51001528481000/E0911000/91002445802000/E1712000/1770053100180PERFORMANCE AND APPROVALSOPERATING TIMESNominal torque Operating time (secs 90°) at selected step Model (Nm / lb.in.)864Times are guaranteed with a tolerance of ±10% on the 90° strokeApprovalsWaterproof IP66/68 or NEMA 4/4X/6 (NEMA ICS6/NEMA 250)CAN/CSA C22.2 No 139-10 and UL 429-2009ExplosionproofEx d e IIB T5 Gb (Gas)Ex tb IIIC T100°C Db (Dust)(prefix c for model 2000)PaintingESPC for 1000 hrs salt spray resistance (ASTM D 2247-02 and ASTM B117-97)Vibration and noise1 to 500 Hz with2 g peak acceleration (IEC60068-2-6-appendix B)65 dB (grade A) (EN 21680)063/E0069.410.78.3 4.5 3.3 4.6 2.7 3.1 2.5 1.3 1.4 2.6 2.7 4.9 6.9F0717 125/E0139.410.79.1 4.5 3.3 4.6 2.7 3.1 2.5 1.3 2.1 3.4 3.4 4.9 6.9F1021 250/E02511.613.111.3 5.1 4.3 6.1 2.7 3.7 3.0 1.3 2.5 3.7 3.67.19.1F1236 500/E05111.613.111.3 5.1 4.3 6.1 2.7 3.7 3.0 1.3 2.5 3.7 3.67.19.1F1240 1000/E09113.413.714.3 5.5 4.3 6.7 2.7 4.1 3.2 1.3 5.5 6.8 6.59.49.1F1657 063/E006239272210114.0851186980.0633235.567.067.5125175F077.5 125/E013239272230114.0851186980.0633253.586.086.5125175F109.5 250/E025295332287129.010********.0763263.595.092.0180230F1216.5 500/E051295332287129.010********.0763263.595.092.0180230F1218.0 1000/E091340349364138.510917169104.58132140.0172.5164.0240230F1626.0 OVERALL DIMENSIONS - MODELS 063/E006-125/E013-250/E025-500/E051-1000/E091EPI-2 BASE UNIT MODELS 063/E006 TO 1000/E091 - METRIC (mm / kg)Model A B H a1b1b2b3c d e h1h2h3øv x F kgEPI-2 BASE UNIT MODELS 063/E006 TO 1000/E091 - IMPERIAL (in / lb)Model A B H a1b1b2b3c d e h1h2h3øv x F lb NOTESW = Nr. 4 cable entries M25x1.5 acc. to ISO 724/965-1 (others available as special versions)X = Space for cover removalF = ISO 5211 Standard flange (others available)2000/E17113.415.219.918.3 5.57.310.5 6.7 2.7 4.1 3.2 1.39.410.710.49.49.1F10-F14992000/E17113.415.219.918.35.57.310.5 6.7 2.7 4.1 3.2 1.39.410.710.49.49.1F12-F161032000/E171340387506464138.5185.526617169104.58132240272.5264240230F10-F1445.02000/E171340387506464138.5185.526617169104.58132240272.5264240230F12-F1646.5EPI-2 MODEL 2000/E171 - METRIC (mm / kg)Model A A1B H a1a11b1b2b3c d e h1h2h3øv x F kg EPI-2 MODEL 2000/E171 - IMPERIAL (in / lb)Model A A1B H a1a11b1b2b3c d e h1h2h3øv x F lb NOTESW = Nr. 4 cable entries M25x1.5 acc. to ISO 724/965-1 (others available as special versions)X = Space for cover removalF = ISO 5211 Standard flange (others available)063/E0069.411.2 4.5 6.38.310.6 6.910.41718125/E0139.411.2 4.5 6.39.111.4 6.910.42122250/E02511.613.4 5.1 6.911.313.79.113.03435500/E05111.613.4 5.1 6.911.313.79.113.037391000/E09113.415.25.57.314.316.79.113.05158063/E006239285114.0160.02102701752657.58.0125/E013239285114.0160.02302901752659.510.0250/E025*********.0175.028734723033015.516.0500/E0512********.0175.028734723033017.017.51000/E091340387138.5185.536442523033023.026.5EPI-2 WITH OPTIONAL MODULES - METRIC (mm / kg)Model A A1a1a11H H1X X1kg [1]kg [2]EPI-2 WITH OPTIONAL MODULES - IMPERIAL (in / lb)Model A A1a1a11H H1X X1lb [1]lb [2]1. Weight with Beacon option module 2. Weight with local interface moduleNOTES1. Dimensions a1 and A are for the standard unit.2. Dimensions a11 and A1 are for the standard unit plus a local interface option.3. Dimensions H and X are for the standard unit.4. Dimensions H1 and X1 are for the standard unit plus a Beacon type indicator.5. X / X1 indicates the space for cover removal.6. All other dimensions are as the standard unit.E006 1.1251/4 x 1/4 1.34 1.751/4" - 20 UNC3.253/8" - 16 UNC -- 1.37E013 1.37510 x 8 mm 2.05-- 3.253/8" - 16 UNC 1.1251/4 x 1/4 2.12E025 1.8751/2 x 3/8 2.05 3.253/8" - 16 UNC 5.001/2" - 13 UNC 1.1251/4 x 1/4 2.12E051 1.8751/2 x 3/8 2.05 3.253/8" - 16 UNC 5.001/2" - 13 UNC 1.6251/4 x 1/4 2.44E091 2.2501/2 x 3/84.805.001/2" - 13 UNC6.503/4" - 10 UNC 1.8751/2 x 3/8 4.25E171 2.2501/2 x 3/84.805.001/2" - 13 UNC6.503/4" - 10 UNC1.8751/2 x 3/84.25OUTPUT DRIVE DIMENSIONSKEYSTONE DIRECT MOUNT SYSTEM The same direct mounting brought to the market place by Keystone for valves and actuators, with even more flexibility.Keystone Valve pioneered the direct mounting compact valve actuator system.The EPI 2 continues this customer oriented system with additional flexibility aimed at allowing the customer more actuator with every purchase.Actuator BaseShaft InsertsB ADEFCThe EPI 2 has dual mounting bolt circles and dual shaft acceptance with most units.This feature allows coverage of more valve sizes and types with less actuator models.DIMENSIONS (INCHES)Standard BoreBolt CircleStandard Shaft Inserts KeyedDepthA BCF Key Size Model Bore Dia.Key Depth Dia.Holes Dia.HolesL1L2L335363233342021CLC1CLC2OPC1OPC222232425262728293031123432WIRING DIAGRAM - BASE VERSIONNOTES1. Power connection L1-L2 for V DC or V AC single phase motor supply from 24 V to 48 V or from 100 V to 240 V.Power connection L1-L2-L3 for 3 phase motor supply from 208 V to 575 V (check the actuator label for the correct voltage to be applied).2. Remote command options.Note 1Note 6Remote commands(Note 2, 5)MONITORRELAYGROUNDBLINKERLOCALSELECTORRELAYOutput contacts(Note 3, 4)Optional moduleOM33. Contacts shown in intermediate position CLC1-CLC2 end of travel signaling in closing.Contacts shown in intermediate position OPC1-OPC2 end of travel signaling in opening.4. Output contact rating 240 V AC / 5 A ; 30 V DC / 5A ; 120 V DC / 0.5 A.5. Control command rating 24 to 120 V AC or DC.6. Blinker or local selector monitoring function (when OM3 is present) to be configured.External supply 24 / 120 V AC External supply 24 / 120 V DC063/E006815 2.26 1.010.5900.4730.3340.289 2.02 1.010.6050.4760.2220.196628 1.600.840.4050.3340.2530.217 1.530.750.4150.3430.1580.138448 1.380.730.3170.2650.2090.176 1.300.640.3180.2600.1200.106125/E013815 4.20 1.700.9800.8100.4300.420 4.50 1.81 1.0400.8200.3900.340628 2.60 1.280.7800.6300.3700.340 2.65 1.270.8100.6400.3000.260448 2.04 1.000.6800.5600.3400.290 2.100.960.7200.5700.2700.220250/E02581510.30 4.90 2.440 1.9700.9200.8009.70 4.80 2.520 1.9500.9000.7806288.20 3.80 1.650 1.3500.6400.5707.20 3.60 1.650 1.3200.6300.540448 6.40 3.30 1.440 1.1700.5600.500 6.80 3.20 1.460 1.1400.5400.470500/E05181514.50 6.80 3.200 2.520 1.150 1.00014.007.00 3.220 2.530 1.1200.9806289.50 4.60 1.900 1.5500.7600.6709.30 4.50 1.920 1.5400.7200.6204487.00 3.40 1.550 1.2400.6000.5307.10 3.40 1.510 1.2400.5800.5001000/E09182414.50 6.80 3.200 2.520 1.150 1.00014.007.00 3.220 2.530 1.1200.9806459.50 4.60 1.900 1.5500.7600.6709.30 4.50 1.920 1.5400.7200.6204807.00 3.40 1.550 1.2400.6000.5307.10 3.40 1.510 1.2400.5800.5002000/E17185314.50 6.80 3.200 2.520 1.150 1.00014.007.00 3.220 2.530 1.1200.98061009.50 4.60 1.900 1.5500.7600.6709.30 4.50 1.920 1.5400.7200.62041807.003.401.5501.2400.6000.5307.103.401.5101.2400.5800.500CURRENT ABSORPTION - SINGLE PHASE AND DC VOLTAGECURRENT ABSORPTION - SINGLE PHASE AND DC VOLTAGEModel Selected step Operating time (secs/90°)Current absorption (A)24 V AC48 V AC 90 V AC 110 V AC 230 V AC 264 V AC 24 V DC 48 V DC 90 V DC 110 V DC 230 V DC 264 V DC063/E0068150.2260.1760.1076280.1650.1010.0804480.1320.0830.057125/E0138150.3440.2270.1716280.2950.1800.1434480.2450.1550.125250/E0258150.8000.730.520.490.370.3406280.5900.560.410.350.290.2804480.5300.500.370.300.270.250500/E051815 1.0730.970.650.580.460.4306280.7200.640.470.390.320.3104480.5900.550.410.320.290.2801000/E091824 1.0730.970.650.580.460.4306450.7200.640.470.390.320.3104800.5900.550.410.320.290.2802000/E171853 1.0730.970.650.580.460.43061000.7200.640.470.390.320.31041800.5900.550.410.320.290.280CURRENT ABSORPTION - THREE PHASE VOLTAGECURRENT ABSORPTION - THREE PHASE VOLTAGEModel Selected stepOperating time (secs/90°)Current absorption (A)208 V AC 240 V AC380 V AC 400 V AC 480 V AC500 V AC 575 V ACSELECTION GUIDEExample KPD063LV PD P12D4 ProductKPD ISO 5211 with double star insertKPE ISO 5211 with flat or key insertKPU Non-ISO flangeKPB ISO 5211 flange - insert not machinedKPK Key non-ISO flange - insert not machinedKEU(NPT) US version ISO 5211 flangewith ISO insert, 4x 1"NPT entriesModels063Model 063/E00606B Model 063/E006 with Beacon125Model 125/E01312B Model 125/E013 with Beacon250Model 250/E02525B Model 250/E025 with Beacon500Model 500/E05150B Model 500/E051 with Beacon1K0Model 1000/E0911KB Model 1000/E091 with Beacon2K0Model 2000/E1712KB Model 2000/E171 with BeaconVoltageLV1-phase 24-48 V AC/DC3A3-phases 208-240 V ACHV1-phase 100-240 V AC/DC3B3-phases 380-480 V AC3C3-phases 500-575 V ACSpeed/DutyPD Standard speed range and standard duties for model 063/E006 to 500/E051PE Standard speed range and standard duties for model 1000/E091PF Standard speed range and standard duties for model 2000/E171Option modules00No optional modules P7 OM1/Bluetooth5D OM11/BluetoothP1 OM1P3 OM36D OM11/OM3/BluetoothPA OM1/OM3/Bluetooth5P OM9/Bluetooth PG OM13P6 OM1/OM36P OM9/OM3/BluetoothApprovals/Protections0Standard protection NEMA 4/4X/6 (IP66/68M) - CSA certificate T°amb from -40°C to +60°C / -40°F to +140°F2Standard protection NEMA 4/4X/6 (IP66/68M) T°amb from -25°C to +70°C / -13°F to +158°F3Standard protection NEMA 4/4X/6 (IP66/68M) T°amb from -40°C to +70°C / -40°F to +158°F4Explosionproof IP66/68 (NEMA 4/4X/6) + Ex d e IIB T5 Gb - EX tb IIC T100°C Db T°amb from -20°C to +65°C / -4°F to +149°F (prefix c for model 2000)9Explosionproof IP66/68 (NEMA 4/4X/6) + Ex d e IIB T5 Gb - EX tb IIIC T100°C Db T°amb from -40°C to +65°C / -40°F to +149°F (prefix≈c for model 2000)Flange/Insert00No flange insertB4Model 063/E006 flange ISO 5211/F05/F07 - insert not machined (KPB)B5Model 125/E013 flange ISO 5211/F07/F10 - insert not machined (KPB)B5Model 250/E025 flange ISO 5211/F07/F10/F12 - insert not machined (KPB)B6Model 500/E051 flange ISO 5211/F10/F12 - insert not machined (KPB)B7Models 1000/E091-2000/E171 flange ISO 5211/F10/F14 - insert not machined (KPB)BA Models 1000/E091-2000/E171 flange ISO 5211/F12/F16 - insert not machined (KPB)D4Model 063/E006 ISO 5211 (KPD)D5Models 125/E013-250/E025 ISO 5211 (KPD)D6Model 500/E051 ISO 5211 (KPD)D7Models 1000/E091-2000/E171 F10 to F14 ISO 5211 (KPD)DA Models 1000/E091-2000/E171 F12 to F16 ISO 5211 (KPD)E3Model 063/E006 ISO 5211 (KPE)E5Models 125/E013-250/E025 ISO 5211 (KPE)E6Model 500/E051 ISO 5211 (KPE)E9Models 1000/E091-2000/E171 F12 to 16 ISO 5211 (KPE)K4Model 063/E006 flange key 44.45-82.6 - insert not machined (KPK)K8Model 125/E025 flange key 82.6 - insert not machined (KPK)K8Model 250/E025 flange key 82.6-127 - insert not machined (KPK)KA Model 500/E051 flange key 82.6-127 - insert not machined (KPK)KC Models 1000/E091-2000/E171 flange key 127-165 - insert not machined (KPK)U4Model 063/E006 non-ISO (KPU)U8Models 125/E013-250/E025 non-ISO (KPU)UA Model 500/E051 non-ISO (KPU)UC Models 1000/E091-2000/E171 non-ISO (KPU)ORDERING INFORMATION - US MARKETS ONLYExample E006A L W5000 ModelE EPI-2 quarter-turn electricSize006Model E006013Model E013025Model E025051Model E051091Model E091171Model E171Local indicatorA Standard windowVoltage ratingsL1-phase 24-48 V AC/DCH1-phase 100-240 V AC/DCA3-phases 208-240 VACB3-phases 380-480 VACC3-phases 500-575 VACClassification and temperature ratingW1NEMA 4/4X/6 (IP66/68M)Ambient temp: -13°F to 158°F (-25°C to 70°C)W2NEMA 4/4X/6 (IP66/68M)Ambient temp: -40°F to 158°F (-40°C to 70°C)W5CSA 139 (C-US)NEMA 4/4X/6 (IP66/68M)AWWAAmbient temp: -40°F to 140°F (40°C to 60°C)Option modules00NONE, standard On-Off configurationP1Servoamp w/retransmission (OM1)P3Local interface (OM3)P6Servoamp w/retransmission, local interface (OM1/OM3)P7Servoamp w/retransmission, Bluetooth® communication (OM1/Bluetooth)PA Servoamp w/retransmission, local interface, Bluetooth® communication (OM1/OM3/Bluetooth)3D DeviceNet™ bus communication (OM11)5D DeviceNet™ bus communication, Bluetooth® communication (OM11/Bluetooth)6D DeviceNet™ bus communication, local interface, Bluetooth® communication (OM11/OM3/Bluetooth)3P PDP V0/V1 bus communication (OM9)5P PDP V0/V1 bus communication, Bluetooth® communication (OM9/Bluetooth)6P PDP V0/V1 bus communication, local interface, Bluetooth® communication (OM9/OM3/Bluetooth)PG3-wire interface card (OM13)Special option code0Standard。
keystone架构分析

Keystone基本概念介绍1. UserUser即用户,他们代表可以通过keystone进行访问的人或程序。
Users通过认证信息(credentials,如密码、API Keys等)进行验证。
2. TenantTenant即租户,它是各个服务中的一些可以访问的资源集合。
例如,在Nova 中一个tenant可以是一些机器,在Swift和Glance中一个tenant可以是一些镜像存储,在Quantum中一个tenant可以是一些网络资源。
Users默认的总是绑定到某些tenant上。
3. RoleRole即角色,Roles代表一组用户可以访问的资源权限,例如Nova中的虚拟机、Glance中的镜像。
Users可以被添加到任意一个全局的或租户内的角色中。
在全局的role中,用户的role权限作用于所有的租户,即可以对所有的租户执行role规定的权限;在租户内的role中,用户仅能在当前租户内执行role 规定的权限。
4. ServiceService即服务,如Nova、Glance、Swift。
根据前三个概念(User,Tenant 和Role)一个服务可以确认当前用户是否具有访问其资源的权限。
但是当一个user尝试着访问其租户内的service时,他必须知道这个service是否存在以及如何访问这个service,这里通常使用一些不同的名称表示不同的服务。
在上文中谈到的Role,实际上也是可以绑定到某个service的。
例如,当swift需要一个管理员权限的访问进行对象创建时,对于相同的role我们并不一定也需要对nova进行管理员权限的访问。
为了实现这个目标,我们应该创建两个独立的管理员role,一个绑定到swift,另一个绑定到nova,从而实现对swift进行管理员权限访问不会影响到Nova或其他服务。
5. EndpointEndpoint,翻译为“端点”,我们可以理解它是一个服务暴露出来的访问点,如果需要访问一个服务,则必须知道他的endpoint。
keystone介绍
keystone介绍Keystone介绍:keystone 是OpenStack的组件之⼀,⽤于为OpenStack家族中的其它组件成员提供统⼀的认证服务,包括⾝份验证、令牌的发放和校验、服务列表、⽤户权限的定义等等。
云环境中所有的服务之间的授权和认证都需要经过keystone. 因此 keystone 是云平台中第⼀个即需要安装的服务。
作为 OpenStack 的基础⽀持服务,Keystone 做下⾯这⼏件事情:1. 管理⽤户及其权限2. 维护 OpenStack Services 的 Endpoint3. Authentication(认证)和 Authorization(鉴权)学习 Keystone,得理解下⾯这些概念:UserUser 指代任何使⽤ OpenStack 的实体,可以是真正的⽤户,其他系统或者服务。
当 User 请求访问 OpenStack 时,Keystone 会对其进⾏验证。
Horizon 在 Identity->Users 管理 Useradmin:openstack平台的超级管理员,负责openstack服务的管理和访问权限demo:常规(⾮管理)任务应该使⽤⽆特权的项⽬和⽤户,所有要创建 demo 项⽬和 demo ⽤户除了 admin 和 demo,OpenStack 也为 nova、cinder、glance、neutron 服务创建了相应的 User。
admin 也可以管理这些 User。
CredentialsCredentials 是 User ⽤来证明⾃⼰⾝份的信息,可以是:1. ⽤户名/密码2. Token3. API Key4. 其他⾼级⽅式AuthenticationAuthentication 是 Keystone 验证 User ⾝份的过程。
User 访问 OpenStack 时向 Keystone 提交⽤户名和密码形式的TokenToken 是由数字和字母组成的字符串,User 成功 Authentication 后 Keystone ⽣成 Token 并分配给 User。
KEYSTONE

内件代码
数字 061 064 285 323 723 805 070 067
字母 CLE2 CLE3 CYE3 CYE2 CEE3 CEE2 CDE3 CDE2
阀体 铸铁 铸铁 铸铁 铸铁 铸铁 铸铁 铸铁 铸铁
连接标准 ● AE=AS 2129 表 E ● AN=ANSI 150 B16-1 150 ● 其他法兰标准可按客户要求
FAR1 对夹式
FAR2 支耳式
尺寸(mm)
阀门 阀杆 尺寸 连接 A B B 1 C D E F K Q ( m m ) 代码 350 C A G 339 425 525 305 76 152 76 267 333 400 C A H 390 484 588 336 102 152 76 310 381 450 D A J 441 543 635 368 108 203 108 346 429 500 D A J 491 597 689 403 127 203 108 381 476 600 D A J 591 718 N / A 495 151 203 108 432 575 750 D A K 743 879 N / A 584 168 203 108 533 729 900 D A V 895 1048 N / A 705 200 203 140 635 876
阀板 铝青铜 铝青铜 镀镍球铁 镀镍球铁 316 不锈钢 316 不锈钢 球铁 球铁
阀杆 316 不锈钢 316 不锈钢 316 不锈钢 316 不锈钢 316 不锈钢 316 不锈钢 316 不锈钢 316 不锈钢
阀座 乙丙橡胶 丁腈橡胶 丁腈橡胶 乙丙橡胶 丁腈橡胶 乙丙橡胶 丁腈橡胶 乙丙橡胶
材料规格 A S T M A - 1 2 6 ,B 类 ASTM B-148 ,UNS C 95200A 级 ASTM A-536 GR 65/45/12 ASTM A-743 ,CF8M ASTM A-276 UNS S31600 -
艾默生 KEYSTONE OPTISEAL弹性阀座蝶阀 数据表

KEYSTONE OPTISEAL弹性阀座蝶阀应用于通用行业的对夹式和支耳式弹性阀座蝶阀特点• 顶部轴套吸收执行机构侧推力负载• 执行机构法兰符合ISO 5211标准• 可应用于高固体含量、有光泽的、无硅的涂料系统,确保优异的耐腐蚀性• 延长型阀体颈部,可直接满足管道绝缘保温的安装• 阀体定位孔便于在管道法兰之间安装和居中• 圆弧状抛光阀板边缘,实现完全的同心密封,降低扭矩,延长阀座寿命,达到气泡级密封关闭• 阀座可现场更换,阀座将阀体及阀杆与流体介质完全隔离• 主阀杆密封超过阀门的压力额定值,防止流体介质通过阀杆区泄漏到大气中• 副阀杆密封提供备用安全功能• 阀门安装在管道中无需法兰垫片• 高C v 值• 顶部和底部阀杆轴承,最优化了阀杆的支撑并最小化了阀杆摩擦(配置尺寸最大到DN 300),装配于除铸铁阀体之外的所有阀体材料• 对夹式和支耳式阀体设计,符合EN 593、ISO 5752/5 短结构标准• 所有阀门符合压力设备指令PED(97/23/EU)模块H - 带有CE 标志• 阀门可提供:KIWA, DNV, CU-TR 等证书一般应用食品和饮料加工,干固体块料输送、造纸厂、淤浆处理等,可提供无润滑脂或无硅油的阀门,用于涂料或氧气系统等特殊用途。
带有内衬PTFE 的阀座和PTFE 包覆的一体式阀板阀杆的OptiSeal ,非常适合需要卓越的耐化学性和无毒特性的应用场合。
技术数据压力(bar): 16 (铸铁阀体: 10 bar)管线末端压力(bar): 6-10-16温度(°C): -40至+160尺寸(DN): 40至300对夹式连接方式的法兰钻孔标准:DN 40-300: P N 10/16, ASME/ASTM B16.5Cl#150, JIS 10K, BS 表E 支耳式连接方式的法兰钻孔标准: PN 10/16 ASME/ASTM B16.5 Cl#150A SME/ASTM B16.47 Cl#150 系列AJIS 5K/10K弹性阀座蝶阀注1. 在订货时,必须详细说明阀门的法兰钻孔标准。
手动安装OpenStack 实验2:认证服务Keystone的安装、配置

实验二:认证服务Keystone的安装、配置实验目的本次实验的目的是为了让学生通过实际安装配置Keystone来加深对Keystone组件的理解。
(本次实验Keystone安装在controller上)实验内容配置认证服务配置apache服务创建服务实体和API端点创建一个domain,projects、users、roles验证操作创建OpenStack脚本实验步骤①、首先输入密码123456,登录进入虚拟机。
②、然后单击Terminal,进入命令行界面。
③、由于所有步骤与操作均需要在root权限下执行,所以需要切换到root用户下:su输入密码:1234561. 配置认证服务(CONTROLLER下)以root用户身份进入数据库(本环境中默认MYSQL数据库密码为123456):mysql -u root -p创建keystone数据库:CREATE DATABASE keystone;赋予keystone相关权限(替换KEYSTONE_DBPASS为你自己的密码,如123456):GRANT ALL PRIVILEGES ON keystone.* TO 'keystone'@'localhost' IDENTIFIED BY '123456';GRANT ALL PRIVILEGES ON keystone.* TO 'keystone'@'%' IDENTIFIED BY '123456';退出数据库:quit生成一个20位随机值作为初始配置期间管理令牌并记录下来:openssl rand -hex 10例如:我们这里生成的值为34755335fed9c5827e34禁用keystone自动启动:echo "manual" > /etc/init/keystone.override安装软件包keystone apache2 libapache2-mod-wsgi:apt-get install keystone apache2 libapache2-mod-wsgi编辑/etc/keystone/keystone.conf:gedit /etc/keystone/keystone.conf在[DEFAULT]下面添加(替换ADMIN_TOKEN为之前生成的20位随机数,例如本例中生成的34755335fed9c5827e34),记得把注释的#去掉。
任务十Keystone基本运维命令及其应用
任务十Keystone基本运维命令及其应用一.任务前提环境:本地主机安装终端软件,通过终端软件连接到安装成功的先电IaaS云平台中的控制节点,通过命令进行运维操作。
本地主机需安装浏览器,推荐使用谷歌浏览器或者火狐浏览器,通过浏览器登陆云平台Dashboard界面进行运维的操作。
二.任务涉及节点:controller三.任务目标:1.熟悉云平台用户,租户查看的命令;2.熟悉云平台用户,租户以及角色创建与删除的命令;3.能够熟练使用命令以及云平台Dashboard界面进行用户与租户的管理;4.能够使用命令查看以及修改云平台的服务端点。
四. 任务内容:步骤一:查看用户,租户,以及角色基本信息在使用Keystone命令前我们首先要执行环境变量的文件,该文件我们在实训项目3中已经创建过,找到其路径并通过source命令执行。
之后我们通过keystone user-list查看当前云平台上有哪些用户,命令如下,结果如图1所示。
(此处有视频:12-1(1)Keystone基本运维命令及其应用)[root@controller ~]# keystone user-list图1 查看用户的反馈结果从反馈的信息我们可以看到目前平台上所有的用户,表中第一列的id字段表明每个用户都有一个唯一的与之相对应的id值,第二列name字段显示了当前已存在用户的用户名,第三列enable字段的值表明所对应的用户是否被激活,显然,“Ture”为激活状态,非激活状态这里的值应该是“False”只有激活的用户才能登陆并使用云平台。
我们可以进一步用keystone user-get命令查看某一个特定用户的信息,例如我们想查看admin用户的信息,我们可以在上述命令之后直接跟admin用户名,或直接跟admin用户所对应的id,命令如下,结果如图2所示。
[root@controller ~]# keystone user-get admin(或[root@controller ~]# keystone user-get bc23d4f89c314521a030f620bf548a7e)图2 查看特定用户的反馈结果令如下,结果如图的id看service(或也可以通过(或[root@controller ~]# keystone role-get d11b8aa687544f4bac050652c3175caa)我们可以使用user3,批注 [a1]:示。
keystone的工作流程
keystone的工作流程Keystone is a robust and versatile identity service in the OpenStack cloud computing platform. It plays a key role in managing user authentication and authorization within an OpenStack environment. Keystone acts as a central directory of users, providing a unified way to access OpenStack services such as Nova, Swift, and Neutron. It also helps in handling user credentials, managing role-based access control, and integrating with external identity providers.Keystone的工作流程包括用户认证和授权,其核心在于管理OpenStack环境中的用户身份。
它是OpenStack平台中的一个重要组件,为用户提供一种统一的方式访问OpenStack的各项服务,如Nova、Swift和Neutron。
同时也负责处理用户凭证、管理基于角色的访问控制,并与外部身份提供者进行集成。
Keystone的工作流程十分关键,因为它直接影响了用户对云计算平台的访问和使用体验。
用户通过Keystone进行登录认证后,可以根据其所属角色获得相应的权限,进而使用不同的服务。
此外,Keystone还可以通过身份映射的方式与外部身份提供者进行对接,使用户可以使用已有的身份验证体系来访问OpenStack平台。
这种整合还可以提高用户的便利性和安全性,避免用户需要管理多个身份信息。
Keystone 6英寸表面装载光盘灯(选色技术)商品说明书
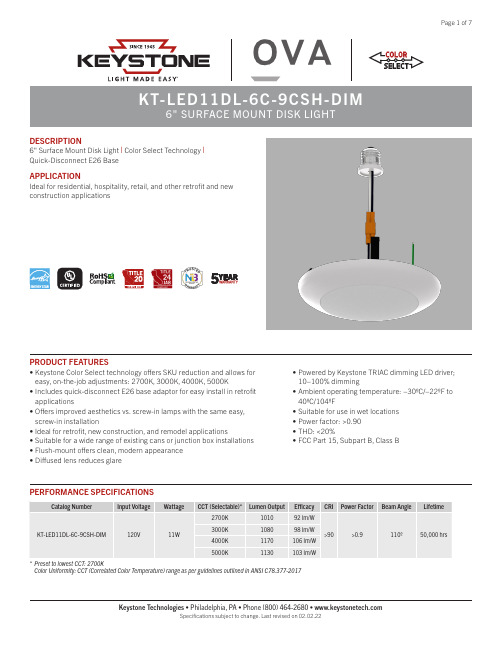
DESCRIPTION6" Surface Mount Disk Light | Color Select Technology | Quick-Disconnect E26 BaseAPPLICATIONIdeal for residential, hospitality, retail, and other retrofit and new construction applicationsPERFORMANCE SPECIFICATIONSC olor Uniformity: CCT (Correlated Color Temperature) range as per guidelines outlined in ANSI C78.377-2017PRODUCT FEATURES• Keystone Color Select technology offers SKU reduction and allows for easy, on-the-job adjustments: 2700K, 3000K, 4000K, 5000K• Includes quick-disconnect E26 base adaptor for easy install in retrofit applications• Offers improved aesthetics vs. screw-in lamps with the same easy, screw-in installation• Ideal for retrofit, new construction, and remodel applications• Suitable for a wide range of existing cans or junction box installations • Flush-mount offers clean, modern appearance • Diffused lens reduces glare• Powered by Keystone TRIAC dimming LED driver; 10−100% dimming• Ambient operating temperature: −30ºC/−22ºF to 40ºC/104ºF• Suitable for use in wet locations • Power factor: >0.90• THD: <20%• FCC Part 15, Subpart B, Class BPHOTOMETRIC SPECIFICATIONSLUX DISTANCE CURVECurves show illuminated area and average illumination when lamp is at various distances.2 ft4 ft 6 ft 8 ft10 ft 12 ft 14 ft16 ft 18 ft 20 ftHeightPOLAR CANDELA DISTRIBUTIONBeam Angle (50%): 106.8ºUnit: cdC 0/C180–106.7C90/C270–107.090−90FRICTION CLIPS POSITIONINGMeasure J-Box/housing internal diameter and adjust spring clip position to achieve a tight fit.Note: Mounting spring clips incorrectly in positions larger than measured internal diametermay cause breakage of the spring clips during installation.COLOR SELECT (CCT) ADJUSTMENTThis fixture is equipped with field-adjustable Keystone Color Select technology. 1. Ensure power is off to the fixture. 2. Adjust dip switch to desired setting.COLOR SELECT ADJUSTMENT SWITCH Set dip switch to adjust CCT between 2700K, 3000K, 4000K, and 5000K.Fixture comes preset at 2700K.1. Shut off power at the source of the recessed housing into which you are installing fixture. Remove existing trim and CFL or incandescent bulb. Note: Follow all federal and local regulations when disposing of lamps and removed components.2. Unscrew the screws on socket bracket; push bracket upward to the top.3. Remove existing socket mounting plate from the housing, then remove lamp socket from the plate.INSTALLATION INSTRUCTIONSINSTALLATION WITH EXISTING HOUSINGThe existing luminaire housing must be equal to or larger than over-all inner dimensions illustrated below (compatible with most 3”, 4”, 5”, and 6” recessed housings).(Installation Instructions continued on next page)INSTALLATION INSTRUCTIONS (continued)4. Measure housing internal diameter and adjust friction clip positions (see Friction Clips Positioning on page 3).7. Secure fixture ground (green) wire to the recessed housing.8. Guide the disk light into the housing for a tight fit. 6. Screw E26 base adaptor into the recessed housing.5. Select desired CCT using adjustment switch on disk base (see Color Select (CCT) Adjustment on page 3).9. Push the disk light up until light is flush with ceiling.INSTALLATION WITH EXISTING HOUSING(continued)(Installation Instructionscontinued on next page)2. Lock the bracket on existing J-Box with two screws.1. Shut off power at the source of the J-Box into which you are installing fixture. Ensure that J-Box is securely fixed on the ceiling surface.3. Ensure that live (black), neutral (white), and ground (green) wires are accessible from J-Box.Wire nut live (black) wire with disk light black wire, wire nut neutral (white) wire with disk light white wire, and wire nut ground (green) with disk light ground (green) wire.Select desired CCT using adjustment switch on disk base (see Color Select (CCT) Adjustment on page 3).4. Carefully tuck wires inside J-Box, align springs with bracket center and push disk light up inside J-Box until flush with the ceiling surface.INSTALLATION INSTRUCTIONS (continued)INSTALLATION WITH J-BOXThe existing J-Box must be equal to or larger than these over-all inner dimensions: Minimum volume: 12.56"3; Minimum length: 3.2"; Minimum height: 1.57" (compatible with standard J-Box).CATALOG NUMBER BREAKDOWNKT-LED11DL-6C-9CSH-DIM121035467891 Keystone Technologies2 LED Technology3 Wattage4 Fixture Type5 Nominal Size6 Shape7 CRI8 Special Indicator9 Color Select Designation 10 DimmingOPTIONAL ACCESSORY (sold separately)Easy Code。
美国Keystone 石笼挡墙系统(Keystone Compac

SECTION A SECTION A: BASIC INSTALLATIONBASICINSTALLATIONThis section will take you through the step-by-step process of installing your retaining wall.Covered in this section is a basic gravity wall installation and also installation procedures forgeogrid reinforced walls. While this section may not cover every construction issue you mayencounter on your project, it gives a basic overview and helpful hints for the installation of aKeystone retaining wall.Tools and materials that will be required:• 12-inch, 48-inch, 72-inch levels• Tape measure• Shovel• Excavating equipment• Personal protective equipment (PPE)• 5-lb dead blow hammer• Heavy hammer and masonry cold chisel• Stringline• Compaction equipment (determined by size and scope of wall)• Concrete saw• Block splitter• Keystone structural units and caps• Structural geogrid, if required• Unit drainage fill• Backfill material• Leveling pad material• Exterior grade concrete adhesive• Geotextile fabric• 4-inch drainage pipe1. Site Examination / PermittingSelect the location and length for the retaining wall. Call before you dig! In the United States, calling 811 before every digging job gets your underground utility lines marked for free and helps preventundesired consequences. Digging without calling can disruptservice to an entire neighborhood, harm you and those around youand potentially result in fines and repair costs. Take the necessary measurements, prepare plans, research zoning requirements for your area and obtain proper building permits for your project. Local permitting may require a soils investigation and/or engineered documentation and drawings.Installation: Step-by-Step2. Excavation / EmbedmentVerify that the layout dimensions are correct and excavate to the lines and grades shown on the construction drawings or to fielddimensions. Remove all surface vegetation, organic soils and debris, and verify that the foundation subgrade is in proper condition prior to leveling pad installation. Do not proceed with installation until soft soils or any other unsatisfactory conditions have been corrected.Embedment RecommendationsFor small Keystone gravity walls, a minimum of 6-inches embedment is required.For reinforced soil Keystone walls, the minimum depth ofembedment as a ratio to wall height may be determined in the provided table (page 11).STEP 2Sloping ToeThe minimum embedment required with a 3:1 or steeper slopein front of the wall should be based on the establishment ofa minimum 4-foot horizontal bench in front of the wall and establishing a minimum embedment from that point. Fill slopes usually have poor compaction near the edge of slope, and all slopes are subject to erosion and superficial instability (see Figure A:2, right).The depth of embedment should be increased when any of the following conditions occur:• W eak bearing soils• P otential scour of wall toe• S ubmerged wall applications• S ignificant shrink/swell/frost properties of foundation soils• Global stability concernsInstallation: Step-by-Step3. Prepare the Base Leveling PadStart the leveling pad at the lowest elevation along the wall alignment (see Figure A:3, below). The minimum leveling padwidth shall be unit depth plus 12 inches. The leveling pad shall be level front-to-back and side-to-side and consist of 6 inches of well-compacted (95% standard proctor or greater) angular granular fill (road base or ½-inch to ¾-inch crushed stone). Lean unreinforced concrete (2,000 psi minimum) is also acceptable to use as a leveling pad. Step the leveling pad up in 8-inch increments at the appropriate elevation change in the foundation. Do not use rounded material (i.e. PEA GRAVEL or SAND) for leveling pad material.NOTES:• C onstruct leveling pad with crushed stone or 2,000 psi ± unreinforced concrete.• T he leveling pad foundation is to be approved by the site geotechnical engineer prior to leveling pad placement.4. Install the Base CoursePlace the first course of Keystone units (Keystone Compac unitsshown for illustrative purposes) end-to-end, with face of wall corners touching (do not leave gaps between units) on the prepared base. Ensure that all units are in full contact with the base and properly seated by gently tapping each block corner with the dead blow hammer as required. Level the first course front-to-back, side-to-side, and unit-to-unit down the length of the wall. At base elevation changes, maintain a minimum embedment at step-up locations. A level base course is critical for accurate and acceptable results. (See Figure A:4, below.) Lay out corners and curves in accordance with the “Corners and Curves” section of this manual (page 33).6. Install Unit Drainage Fill, Drainage Pipe, Backfilland CompactionInstall drainage pipe behind wall unit and outlet drain to stormsystem or daylight. See drainage section for additional details(page 54). Once the pins have been installed, provide ½-¾ inch(13-19mm) crushed stone unit drainage material to a minimumtotal distance of 24 inches (610mm) from wall face. Fill all openspaces between units and open cavities/cores with the sameunit drainage material. Place the wall backfill behind the unitdrainage fill in maximum 8 inch (203mm) lifts and compact to 95%Standard Proctor Density or 92% Modified Proctor Density withthe appropriate compaction equipment. Use only hand-operatedequipment within 3 feet (1m) of the retaining wall face.NOTE:• D rainage pipe should maintain positive drainage to daylight; outlet the drainpipe at low points every 30 to 50-feet on center at ends of wall, if appropriate. Alternatively, a raised drain may be utilized per the detail on page 55 of this manual.7. Install Additional CoursesRemove all excess unit drainage material from the top surface of all the units. Hold the unit so the pin connecting cores of the upper block insert directly over the pin of the lower block course, and push the unit forward to contact the pins of the lower unit. (See Figure A:9, below.) Check level front-to-back and side-to-side, shim the units or grind as necessary. It is important to check level front-to-back and side-to-side on every course to maintain proper wall batter and alignment. Proper shimming materials can be any non-degradable material, including but not limited to, asphalt shingles, scrap pieces of geogrid, etc. Shimming of block is not allowed on courses with geogrid reinforcement.Continue backfilling, installing additional units and checking level to the desired top elevation. Follow wall unit and unit drainage fill installation closely with backfill. Maximum stacked vertical height of wall units prior to unit drainage fill, backfill placement and compaction shall not exceed 2 courses.For gravity walls, continue this construction sequence to complete the wall and proceed to Step 10. For geogrid reinforced walls, continue with Step 8 and Step 9.9. Reinforced Backfill PlacementInstall next course of units over the geogrid to secure in place.Tension the geogrid by pulling it towards the embankment. Placea stake through the end of the geogrid into the ground or placefill over the back edge of geogrid to hold it taut and in place. Donot excessively tension geogrid; this may pull units out of properalignment.Proceed with placement of the unit drainage fill and the backfill inthe reinforced zone. Specifications for the material to be used asbackfill in the reinforced zone should be defined in the engineeredplans. Place this material nearest to the units, moving progressivelytoward the staked end of the geogrid. This procedure will keep thegeogrid under tension. Compact the reinforced and drainage fillmaterial to a minimum 95% standard proctor density (ASTM D698)or 92% modified proctor density (ASTM D1557). Or see compactionrequirements stated in the engineered plans. Install additionalcourses as described in Step 7, until the next reinforcementelevation. Repeat Steps 8 and 9.Only hand-operated compaction equipment can be allowed within3-feet of the back surface of the units. At the end of each day’soperation, grade the backfill away from the wall and direct runoffaway from the wall face.10. Capping the WallComplete your wall with the appropriate Keystone capping units.These units are available in a variety of sizes and shapes. Availabilityof these units will vary by region. For cap unit descriptions andplacement variations see the section, “Wall Finishing” (page 45)of this manual. Sweep the lower units clean and make sure they aredry. Use exterior grade concrete adhesive on the top surface of thelast course before applying cap units (see Figure A:11, below).STEP 1011. Finished Grade and LandscapingThe Keystone retaining wall is now complete. Final grading,planting or other surface material can now be put into place.Typically an 8-inch thick layer of low permeable soil is installed asthe final layer of material. This is to help prevent water infiltrationinto the retained or reinforced zone of the retaining wall. Rememberthat finished grade conditions affect the wall’s performance. Fillplaced behind the wall should be graded to flush with the top backof the cap unit. Such conditions should not be altered from theoriginal design.Loadings that include slopes, parking lots and buildings should bemaintained as designed. Any changes to the top-of-wall finishedgrade must be evaluated prior to wall completion (see FiguresA:12-A:13, page 19).KEYSTONE COMPAC® STRAIGHTNOTES:• D rain should be at bottom of wall when possible. Utilize raised drain location when bottom of wall drainage is not possible.• S ee Drainage Section (page 55) for additional details.。
Keystone几种token生成的方式分析
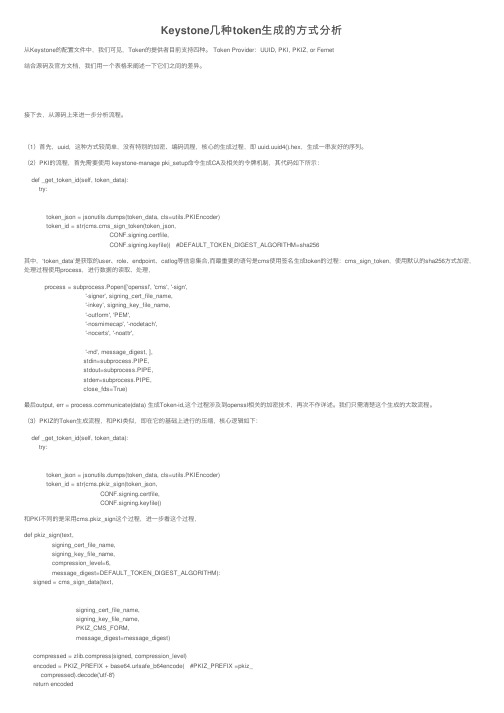
Keystone⼏种token⽣成的⽅式分析从Keystone的配置⽂件中,我们可见,Token的提供者⽬前⽀持四种。
Token Provider:UUID, PKI, PKIZ, or Fernet结合源码及官⽅⽂档,我们⽤⼀个表格来阐述⼀下它们之间的差异。
接下去,从源码上来进⼀步分析流程。
(1)⾸先,uuid,这种⽅式较简单,没有特别的加密、编码流程,核⼼的⽣成过程,即 uuid.uuid4().hex,⽣成⼀串友好的序列。
(2)PKI的流程,⾸先需要使⽤ keystone-manage pki_setup命令⽣成CA及相关的令牌机制,其代码如下所⽰:def _get_token_id(self, token_data):try:token_json = jsonutils.dumps(token_data, cls=utils.PKIEncoder)token_id = str(cms.cms_sign_token(token_json,CONF.signing.certfile,CONF.signing.keyfile)) #DEFAULT_TOKEN_DIGEST_ALGORITHM=sha256其中,‘token_data’是获取的user、role、endpoint、catlog等信息集合,⽽最重要的语句是cms使⽤签名⽣成token的过程:cms_sign_token,使⽤默认的sha256⽅式加密,处理过程使⽤process,进⾏数据的读取、处理,process = subprocess.Popen(['openssl', 'cms', '-sign','-signer', signing_cert_file_name,'-inkey', signing_key_file_name,'-outform', 'PEM','-nosmimecap', '-nodetach','-nocerts', '-noattr','-md', message_digest, ],stdin=subprocess.PIPE,stdout=subprocess.PIPE,stderr=subprocess.PIPE,close_fds=True)最后output, err = municate(data) ⽣成Token-id,这个过程涉及到openssl相关的加密技术,再次不作详述。
keystone简介

4
Keystone职责
5
keystone在整个OpenStack中主要负责两个 工作:
跟踪用户及监管用户权限
为每个组件服务提供一个可用的服务目录 和相应的API入口端点
Keystone基本概念
6
Tenant(“租户”或项目)
一个Tenant就是一个项目,这个项目中必须包含相关 的:user、角色等,它是OpenStack中服务调度的基 本单元
User(用户)
OpenStack中的User可以理解成为一个实体,这种实 体可能是使用OpenStack云服务的任何个人、系统、 甚至是OpenStack中的一个组件服务。
Role(角色)
一般情况,一个租户中往往要包含用户和角色,用户必 须依赖于某一个租户(项目),而用户的加入必须以一 种角色加入租户(项目)中。
Token(令牌)
Token(令牌)是一种在访问OpenStack API和资源时提供 的一种字符串
8
9
的 工 作 原 理
keystone
10
11
12
13
14
15
16
17
Keystone相关配置文件
18
/etc/keystone/keystone.conf
admin_token选项:这个参数是用来访问Keystone服务的,相 等于访问keyston这扇“门”的钥匙,客户端可以使用该 Token访问Keystone服务、查看信息、创建其他服务等。在 keystone的配置文件中默认值是ADMIN,读者可以修改这个 token,只要在部署OpenStack其他组件时的keystone令牌需 要保持一致。
Keystone相关配置文件
Keystone 命令应用
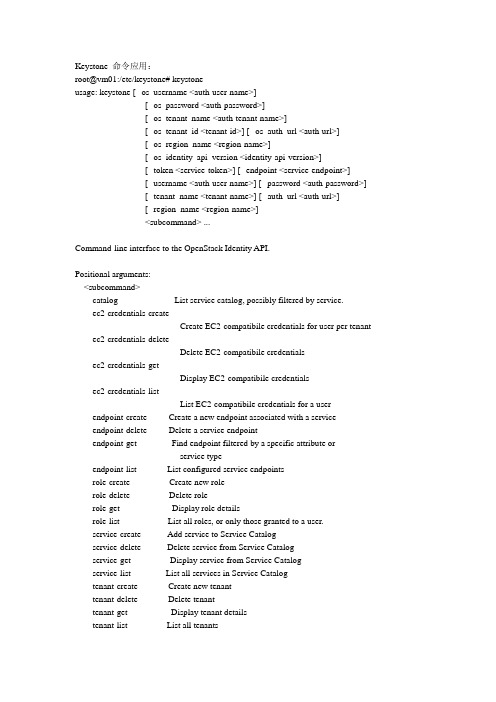
Keystone 命令应用:root@vm01:/etc/keystone# keystoneusage: keystone [--os_username <auth-user-name>][--os_password <auth-password>][--os_tenant_name <auth-tenant-name>][--os_tenant_id <tenant-id>] [--os_auth_url <auth-url>][--os_region_name <region-name>][--os_identity_api_version <identity-api-version>][--token <service-token>] [--endpoint <service-endpoint>][--username <auth-user-name>] [--password <auth-password>][--tenant_name <tenant-name>] [--auth_url <auth-url>][--region_name <region-name>]<subcommand> ...Command-line interface to the OpenStack Identity API.Positional arguments:<subcommand>catalog List service catalog, possibly filtered by service.ec2-credentials-createCreate EC2-compatibile credentials for user per tenant ec2-credentials-deleteDelete EC2-compatibile credentialsec2-credentials-getDisplay EC2-compatibile credentialsec2-credentials-listList EC2-compatibile credentials for a user endpoint-create Create a new endpoint associated with a serviceendpoint-delete Delete a service endpointendpoint-get Find endpoint filtered by a specific attribute orservice typeendpoint-list List configured service endpointsrole-create Create new rolerole-delete Delete rolerole-get Display role detailsrole-list List all roles, or only those granted to a user.service-create Add service to Service Catalogservice-delete Delete service from Service Catalogservice-get Display service from Service Catalogservice-list List all services in Service Catalogtenant-create Create new tenanttenant-delete Delete tenanttenant-get Display tenant detailstenant-list List all tenantstenant-update Update tenant name, description, enabled statustoken-get Display the current user tokenuser-create Create new useruser-delete Delete useruser-get Display user details.user-list List usersuser-password-updateUpdate user passworduser-role-add Add role to useruser-role-remove Remove role from useruser-update Update user's name, email, and enabled statusdiscover Discover Keystone servers and show authenticationprotocols andhelp Display help about this program or one of itssubcommands.Optional arguments:--os_username <auth-user-name>Defaults to env[OS_USERNAME]--os_password <auth-password>Defaults to env[OS_PASSWORD]--os_tenant_name <auth-tenant-name>Defaults to env[OS_TENANT_NAME]--os_tenant_id <tenant-id>Defaults to env[OS_TENANT_ID]--os_auth_url <auth-url>Defaults to env[OS_AUTH_URL]--os_region_name <region-name>Defaults to env[OS_REGION_NAME]--os_identity_api_version <identity-api-version>Defaults to env[OS_IDENTITY_API_VERSION] or 2.0 --token <service-token>Defaults to env[SERVICE_TOKEN]--endpoint <service-endpoint>Defaults to env[SERVICE_ENDPOINT]--username <auth-user-name>Deprecated--password <auth-password>Deprecated--tenant_name <tenant-name>Deprecated--auth_url <auth-url>Deprecated--region_name <region-name>Deprecated*****************************Tenant******************************************** keystone tenant-create --name wangyankeystone tenant-listkeystone tenant-delete f12770e9998b46e8958808d587ed6168keystone tenant-listkeystone tenant-get 0c3a208f3ee64c22af84b8117abdbc66keystone tenant-create --name wangyan --description "A user" --enabled Truekeystone tenant-create --name Haerbin --description "A Beautiful City" --enabled Falsekeystone tenant-create --name Haerbin1 --description "A Beautiful City" --enabled Fkeystone tenant-create --name Haerbin2 --description "A Beautiful City" --enabled Tkeystone tenant-create --name Haerbin3 --description "A Beautiful City" --enabled tkeystone tenant-create --name Haerbin4 --description "A Beautiful City" --enabled f*****************************User******************************************** keystone user-create --name wangyankeystone user-listkeystone user-delete f38a3aeb73f449f68a02c9688a639a4bkeystone user-listkeystone user-get e151febcbec547c09c4adc7e02f76474keystone user-create --name wangyan --tenant_id d1f38bad183f4fa096b1cfce69dfaa42keystone user-create --name wangyan --tenant_id 6e2d77d312c6407cb6337a4b038f4b41 --pass wangyan --email wangyan4172@ --enabled f //密码是经过加密的keystone user-get a02dbdffe61f4354a7b69d153bd7fc2d*****************************Role******************************************** keystone role-listkeystone role-create --name wangyankeystone role-delete ab6bb26208af40458f50c00a4fa7b542keystone role-listkeystone role-get fa7787fc8d8e452f9658e5ada1447ffd*****************************Service******************************************** keystone service-listkeystone service-get f0b0ae31c25b4752b2e439029ed352b9keystone service-create --name wangyan --description "Test" --type wangyankeystone service-listkeystone service-delete 7a54887abfc045f49c2b65d75fff356froot@vm01:~# keystone service-list。
任务三Keystone的手工安装与配置

任务三 Keystone的手工安装与配置一.任务前提环境:成功完成任务3中所有内容后开始本实验,或者从已完成任务的镜像开始,继续完成本任务内容。
二.任务涉及节点:controller三.任务目标:1.完成Keystone基本组件的安装;2.完成Keystone数据库的创建以及授权;3.完成Keystone主配置文件的修改;4.完成Keystone安全与认证配置;5.完成Keystone用户、租户、角色以及服务和端点的创建;6.完成Keystone环境变量脚本的创建。
四.任务步骤及其详解:(此处有视频:6-1Keystone的安装及其配置)步骤一:Keystone基本组件的安装在controller节点上执行yum源安装命令安装Keystone依赖包,命令如下。
[root@controller ~]# yum -y install openstack-keystone python-keystoneclient执行上述安装命令成功后,我们可以看到成功标志,所有Keystone依赖包都安装完成,如图1所示。
图1 Keystone依赖包安装完成反馈结果步骤二:创建Keystone数据库并授权首先,登陆MySQL数据库,命令如下。
[root@controller ~]# mysql -uroot -p000000登陆后,我们首先创建Keystone数据库,命令如下。
mysql>CREATE DATABASE keystone;看到提示Query OK, 1 row affected (0.00 sec),表明数据库创建成功。
接着创建MySQL的Keystone用户,并赋予其Keystone数据库的操作权限,命令如下。
mysql> GRANT ALL PRIVILEGES ON keystone.* TO 'keystone'@'localhost' IDENTIFIED BY '000000';mysql> GRANT ALL PRIVILEGES ON keystone.* TO 'keystone'@'%' IDENTIFIED BY '000000';mysql> exit上述SQL语句中,第一个Keystone为表名,第二个Keystone为MySQL的用户名,“*”代表该库中所有表,“%”代表所有主机,localhost代表本机。
3.1keystone管理认证用户

1
keystone管理认证用户
管理认证用户
绑定用户和租户权限
从上面操作可以看出,绑定用户权限需要用户名称、角色名称和租户名称 等信息。具体命令格式如下:
$keystone user-role-add --user <user> --role <role> [-tenant <tenant>]
1
keystone管理认证用户
[--description <tenant-description>] [--enabled <true|false>]
1
keystone管理认证用户
管理认证用户
创建角色
角色限定了用户的操作权限。如下创建一个角色“compute-user”:
$keystone role-create --name=compute-user 从上面操作可以看出创建角色需要角色名称信息。具体命令格式如下: $keystone role-create --name <role-name>
1
keystone管理认证用户
相关概念
租户(Tenant)
Tenant即租户,早期版本又称为project,它是 各个服务中的一些可以访问的资源集合。比如 通过nova创建虚拟机时要指定到某个租户中, 在cinder创建卷也要指定到某个租户中,用户 访问租户的资源前,必须与该租户关联,并且 指定该用户在该租户下的角色。
管理认证用户
图形化用户管理
图形化界面操作
以管理员身份登录到 dashboard,进入“管 理员/认证面板/项目” 可以看到项目(租户) 列表如图所示。
1
keystone管理认证用户
- 1、下载文档前请自行甄别文档内容的完整性,平台不提供额外的编辑、内容补充、找答案等附加服务。
- 2、"仅部分预览"的文档,不可在线预览部分如存在完整性等问题,可反馈申请退款(可完整预览的文档不适用该条件!)。
- 3、如文档侵犯您的权益,请联系客服反馈,我们会尽快为您处理(人工客服工作时间:9:00-18:30)。
宾馆比喻:
• User 住宾馆的人 • Credentials 身份证 • Authentication 认证你的身份证 • Token 房卡 • Tenant 宾馆 • Service 宾馆可以提供的服务类别,比如,饮食类,娱乐类 • Endpoint 具体的一种服务,比如吃烧烤,打羽毛球 • Role VIP 等级,VIP越高,享有越高的权限
keystone的重要作用
通俗的说
•
如果把宾馆比作为Tenant,住宿的人就是User ,而宾 馆就是 Tenant,宾馆可以提供多种诸如住宿、娱乐、饮 食等多种服务(Service),具体来说,住宿是一种具体 的服务(Endpoint)。就住宿而言,有普通间和总统套 房,如果你的VIP等级(Role)高,你可以享受到豪华的 总统套房。入住前,我们需要拿身份证开房 (Credential),认证身份证不是冒牌货后 (Authenticaiton),会给你一个房卡(Token),然后 你拿着房卡,就可以进入房间和享受各种服务。
keystone 的内容包括:
User: 直译过来就是用户,如果意译的话就是马甲 :) 也就是一个 人的账号,当然一个人可以有多个马甲,你懂得。 Crenditial: 用来证明用户身份的证据,大白话就是“信物”, 这是一个逻辑概念。具体可以是密码,驾照、身份证等。 Authentication: 鉴权,也即对用户身份鉴别的一个过程。 Token: 令牌。对用户鉴权完毕之后,Keystone会为用户颁发一 个令牌,这样用户在请求其他服务的时候,只需要亮出自己的令 牌即可,而不需要发送自己的密钥。当然以防仿冒令牌,令牌是 有时限的。
组织支持——发展前景!!!!!!
• OpenStack虽然有些方面还不太成熟,然而它有全球大 量的组织支持,大量的开发人员参与,发展迅速。国际 上已经有很多使用OpenStack搭建的公有云、私有云、 混合云,例如:RackspaceCloud、惠普云、 MercadoLibre的IT基础设施云、AT&T的CloudArchitec 、戴尔的OpenStack解决方案等等。而在国内 OpenStack的热度也在逐渐升温生了浓厚的兴趣并参与其中。
openstack的大门
openstack的核心组件keystone
Openstack是一个SOA的架构,理论上各个子项目独立提供相关的服务,互 不依赖。例如Nova提供计算服务,Swift提供对象存储服务,Glance提供镜像 服务等。但是实际上(至少从Openstack目前开源实现上来看),所有组件都依 赖于Keystone提供3A(Account, Authentication, Authorization)(帐号、身份 验证、授权服务)。除了3A之外,Keystone还对外提供服务目录(Service Catalog)服务,类似于UDDI服务的概念,用户(无论是Dashboard, API Client)都需要访问Keystone获取服务列表,以及每个服务的地址(Openstack 中称为Endpoint)。所以,学习Openstack第一个必须搞定的组件必然是 Keystone。
openstack
之
keystone
了解一下openstack
• OpenStack是一个由NASA(美国国家航空航天局)和 Rackspace合作研发并发起的,以Apache许可证授权的自由软 件和开放源代码项目。
• OpenStack是一个开源的云计算管理平台项目,由几个主要的组 件组合起来完成具体工作。OpenStack支持几乎所有类型的云环 境,项目目标是提供实施简单、可大规模扩展、丰富、标准统一 的云计算管理平台。OpenStack通过各种互补的服务提供了基础 设施即服务(IaaS)的解决方案,每个服务提供API以进行集成每年营收7亿美 元,增长率超过了20%。
THANK YOU
基于云平台openstack认证服务组 件keystone的研究
keystone的重要概念
Service:服务。之前提到过,Keystone提供了系统能 够提供的服务目录,例如Nova, Glance, Swift等。 Endpoint:直译为端点,其实指的是访问服务的地址。 如果细分的话,又可以进一步分为对外提供服务的地址, 管理地址等。 Role: 权限。这就是3A中的Authorization,也即赋予该 用户的权限。我们知道Openstack提供的是一个多租户环 境,在Openstack中租户对应到项目(Project)。一个用户 可以同时属于多个不同的项目,当然在不同的项目中可 以充当不同的角色,也即拥有不同的权限。
