Octane用户手册-中文版
OctaneSdkWorkbook_net英频杰(Impinj)读写器sdk使用手册

REV 1.0 2010-12-14 Proprietary and Confidential Copyright © 2010, Impinj, Inc.Impinj, Octane, and Speedway are eitherregistered trademarks or trademarks of Impinj, Inc.For more information, contact rfid_info@Octane 1.0 C# SDK Workbook2. Proprietary and Confidential Revision 1.0, Copyright © 2010 Impinj, Inc.ContentsIntroduction (4)Key Features (4)Getting Started with the Octane SDK (4)Pre Workshop Tasks (4)Task 1 Computer and Reader (4)Task 2–Unzip SDK (5)Task 3 – Install Visual C# 2010 Express (5)Task 4 – Exercise Examples (5)Task 5 Preparing for Exercises..................................................................................................7 Settings 10Query, Save, and Load Settings (11)Read Tags Synchronously (13)Read Tags Asynchronously (15)Read Tags Using Periodic Trigger (17)Read Tags Using GEN 2 Filter (18)Read User Memory (20)Read Serialized TID (22)Tag Access (24)Program EPC (25)Program User Memory (26)Kill Tags .....................................................................................................................................28 GPIO 30General Purpose Inputs (31)General Purpose Outputs (34)Subscribe, Test Power, and Thread (36)Subscribing to Reader Events (36)Power Ramp (37)Proper Threading Technique using Windows Presentation Format (WPF) (40)Notices: (45)Octane 1.0 SDK C# WorkbookRevision 1.0, Copyright © 2010 Impinj, Inc. Proprietary and Confidential 3.FiguresFigure 1 Speedway Reader Connections (5)Figure 3 Viewing Codin in C# OctaneSdk Sample (6)Figure 4 Visual Studio New Project Dialog Box (7)Figure 5 Visual Studio Adding References for OctandSdk (8)Figure 6 Visual Studio Add Reference Dialog Box (8)Figure 7 Adding Impinj.OctaneSdk Reference to C#.NET Program.cs ......................................... 8 Figure 8 EPC Gen 2 tag memory banks including EPC (1, or 01 in binary), TID (2, or 10) andUser (3 or 11). (13)Figure 9 Memory and features available on Monza 4 models (13)Figure 10 Impinj GPIO Connectivity Box (31)Figure 11 New WFP Project Dialog (40)Figure 12 WPF Code form (40)Figure 13 WPF Form Example (41)Octane 1.0 C# SDK Workbook4. Proprietary and Confidential Revision 1.0, Copyright © 2010 Impinj, Inc.IntroductionThe Octane SDK includes the core library that increases the usability of the Impinj Reader by simplifying the creation of Reader applications. It does this by acting as a wrapper for extracting, modifying, and the application of a Reader’s Low Level Reader Protocol (LLRP) settings. This provides high-level control over Reader settings, tag query, and tag-write operations which reduces the effort necessary to manipulate Reader functionality.Font Group Example StyleCode command Example 1 Reader =>File namesOctanesdk.zip Example codeusing Impinj.OctaneSdk; namespace QueryReaderSettingsKey FeaturesThe core library is delivered in multiple programming languages and is completed by a variety of documentation. On-Reader applications (C++ only) are written in the same manner as off-Reader applications, and all programming languages have a consistent implementation. The documentation is available in traditional online help .chm files, and also includes examples and templates:• Speedway Reader API• C#, C++ Linux• Examples, Templates, and Online HelpGetting Started with the Octane SDKThe Octane SDK is delivered in binary form as a DLL. Sample content is delivered as source code. Before the exercises in this workbook can be accomplished, the SDK must be unzipped. Visual Studio 2010 (VS2010) C# Express must be installed.Pre Workshop TasksTask 1 Computer and Reader1. Acquire a computer and Revolution Reader, and then network them together.2. To complete the tag access exercise, a Reader antenna and a few tags are required. Use Monza 4tags if available, but any EPC GEN 2 type will work.3. Connect the GPIO board or GPIO Connector Box to the multi-purpose DE15 connector, andconnect the Reader antenna to port 1 as shown in Figure 1 below.Octane 1.0 SDK C# WorkbookRevision 1.0, Copyright © 2010 Impinj, Inc. Proprietary and Confidential 5.Figure 1 Speedway Reader ConnectionsTask 2–Unzip SDK1. Octanesdk.zip contains the libraries, technical reference (Help text), and this Workbook.2. Unzip the file to a local directory.Note: This tutorial is included with the OctaneSdk. If you update to a new OctaneSdk version, check the OctaneSdk web page for a current version of this document.Task 3 – Install Visual C# 2010 ExpressTo install VS2010 C# Express, complete the following steps:1.Download and run the VS2010 installer, here:/express/downloads/#2010-Visual-CS .2. Restart your computer to complete the installation process. .3. Launch VS2010 and allow it to complete the one-time initialization process. This should take about 2 to 3 minutes.Task 4 – Exercise Examples1. From VS2010, select File, then Open Project.2. Select the /octane/cs/sdk/OctaneSdk.sln . file.3. Complete the file conversion. (This sample file was built using VS 2008.)Octane 1.0 C# SDK Workbook6. Proprietary and Confidential Revision 1.0, Copyright © 2010 Impinj, Inc.4. Right click on the desired program file (xxxxx.cs ) and then select View Code to view the code foreach project. See Figure 3.Figure 2 Viewing Codin in C# OctaneSdk Sample5. In the Solution Explorer, right click on Example1_QueryFeatures and then select Set As StartUpProject.6. Select Debug, and then Start Debugging. Enter your Reader’s name at the prompt and press enter.7. When done reviewing the Reader’s details, press any key to exit.Figure 1Exercise Example 1prompt: Example 1 Reader => {your reader’s name or IP address} output: Model Speedway R220 Software Version 4.4.1.3 Firmware Version 4.4.0.17 PCBA Version 270-001-003 FPGA Version 4.4.0.240 Regulator Region ETSI_EN_302_208_v1_2_1 Antennas 1:Connected 2:Unconnected 3:N/A 4:N/A prompt: Done => {press any key}Octane 1.0 SDK C# WorkbookRevision 1.0, Copyright © 2010 Impinj, Inc. Proprietary and Confidential 7.Note: The output from your Reader will be different from the above example, depending on the Reader model, region, and version information.8. Build and run the other examples to increase your skill using the SDK. Right click the Exampleproject, select Set As StartUp Project, and then Debug, and finally Start Debugging.Task 5 Preparing for Exercises1. For each exercise, create a new project by clicking File, and then New Project.2. Select Console Application as the template type in the New Project dialog3. Name the New Project something easy to remember. By default the project will be created in MyDocuments/Visual Studio 2010/Projects. See Figure 4.The project will be created in its ownfolder.Figure 3 Visual Studio New Project Dialog Box3. Select Solution Explorer and right click on the References folder, and then select Add Reference.Each time a project is created, the SDK libraries must be imported into the new project.Octane 1.0 C# SDK Workbook8. ProprietaryFigure 4 Visual S4. Browse to /OctaneSdk/Libr5. Click OK.Figure 5 Vis6. Type “using Impinj.OctaneIntellisense helps with thisFigure 6 Adding Impin7.Select File and then Save AOctane 1.0 SDK C# WorkbookRevision 1.0, Copyright © 2010 Impinj, Inc. Proprietary and Confidential 9.The new project is now prepared for the exercises.Octane 1.0 C# SDK Workbook10. Proprietary and Confidential Revision 1.0, Copyright © 2010 Impinj, Inc.SettingsSpeedway Readers have a wide range of capabilities. With so many capabilities, it requires configuration to reduce them to a manageable subset. The capabilities can be thought of as a programming language, or a set of tools waiting for a purpose. That purpose is defined by Reader settings. The settings are aprogram that describes what capabilities are used and how they behave. That means that the operation of Reader is critically dependent on the proper settings. The application depends upon the Reader. As a programmer, you must understand the settings and how they affect the Reader’s operation.The easiest way to get guaranteed success changing a Reader’s settings is to have the library catalog a default, or “best guess” settings object. Once that object is returned, the Reader settings can be changed with the default. Settings can be modified in code, written to disk, edited, and loaded back in. Settings are expressed as XML on disk, and also as a class .Query Services NameDescription QueryFactorySettingsDetermines most basic settings from the Reader’s capabilities and features. QuerySettingsIf the settings were changed, this returns current settings configuration. QueryFeatureSetDefinition of features that are available on the Reader. QueryStatus The current state of the Reader, antennas,and more.Command Services NameDescription ConnectConnects to a Reader allowing query and command services to transact. DisconnectAfter disconnect, no services are available until next connect. ClearSettingsDeletes the Readers settings and returns to the factory default settings. ApplySettings Replaces theReader’s current settings with the passed-in settings.Query, Save, and Load SettingsIn the following exercise you will connect to the Reader, save settings to an XML file, then edit and load the XML file to apply changes to the Reader settings.using System;using System.Collections.Generic;using System.Linq;using System.Text;using Impinj.OctaneSdk;namespace QueryReaderSettings{class Program{// Create an instance of the SpeedwayReader class.static SpeedwayReader Reader = new SpeedwayReader();static void DisplayCurrentSettings(){// Query the current reader settings and print the results.Console.WriteLine("Reader Settings");Console.WriteLine("---------------");Settings settings = Reader.QuerySettings();Console.WriteLine("Reader mode : {0}", settings.ReaderMode);Console.WriteLine("Search mode : {0}", settings.SearchMode);Console.WriteLine("Session : {0}", settings.Session);Console.WriteLine("Rx sensitivity (Antenna 1) : {0} dBm",settings.Antennas[1].RxSensitivityInDbm);Console.WriteLine("Tx power (Antenna 1) : {0} dBm",settings.Antennas[1].TxPowerInDbm);Console.WriteLine("");}static void Main(string[] args){try{// Connect to the reader.// Replace "SpeedwayR-xx-xx-xx" with your// reader's host name or IP address.Reader.Connect("SpeedwayR-xx-xx-xx");// Query the reader features and print the results.Console.WriteLine("Reader Features");Console.WriteLine("---------------");FeatureSet features = Reader.QueryFeatureSet();Console.WriteLine("Model name : {0}", features.ModelName);Console.WriteLine("Model number : {0}", features.ModelNumber);Console.WriteLine("Reader identity : {0}", features.ReaderIdentity);Console.WriteLine("Firmware version : {0}",features.FirmwareVersion);Console.WriteLine("Antenna count : {0}\n", features.AntennaCount);// Write the reader features to file.features.Save("features.xml");Revision 1.0, Copyright © 2010 Impinj, Inc. Proprietary and Confidential11.// Query the current reader status.Console.WriteLine("Reader Status");Console.WriteLine("---------------");Status status = Reader.QueryStatus();Console.WriteLine("Is connected : {0}", status.IsConnected);Console.WriteLine("Is singulating : {0}", status.IsSingulating);Console.WriteLine("Temperature : {0} degrees\n",status.TemperatureInCelsius);// Configure the reader with the factory deafult settings.Reader.ApplyFactorySettings();// Display the current reader settings.DisplayCurrentSettings();// Save the settings to file in XML format.Console.WriteLine("Saving settings to file.");Settings settings = Reader.QuerySettings();settings.Save("settings.xml");// Wait here, so we can edit the// settings.xml file in a text editor.Console.WriteLine("Edit settings.xml and press enter.");Console.ReadLine();// Load the modified settings from file.Console.WriteLine("Loading settings from file.");settings = Settings.Load("settings.xml");// Apply the settings we just loaded from file.Console.WriteLine("Applying settings from file.\n");Reader.ApplySettings(settings);// Display the settings again to show the changes.DisplayCurrentSettings();// Disconnect from the reader.Reader.Disconnect();}catch (OctaneSdkException e){Console.WriteLine("Octane SDK exception : {0}", e.Message);}catch (Exception e){Console.WriteLine("Exception : {0}", e.Message);}// Wait for the user to press enter.Console.WriteLine("Press enter when done.");Console.ReadLine();}}}12.Proprietary and Confidential Revision 1.0, Copyright © 2010 Impinj, Inc.Revision 1.0, Copyright © 2010 Impinj, Inc. Proprietary and Confidential13.There are three memory banks on an EPC GEN 2 tag that you need to know how to query: the Electronic Product Code (EPC), User Memory, and Tag Identification (TID).Figure 7 EPC Gen 2 tag memory banks including EPC (1, or 01 in binary), TID (2, or 10)and User (3 or 11).Note: the data locations in figure 8. Focus attention on the EPC. The actual EPC begins at word2 (or hex address 20). Prior to the EPC is the 16 bit Cyclic Redundancy Check or CRC (word 0)and the Protocol Control (or PC) word (word 1).The exercises in this section enable you to read the three memory banks using two different approaches: synchronously and asynchronously. You will also apply the feature sets of the SDK such as filters where only tags with specific data will respond and serialized TID (tag returns EPC and TID together using one command). Figure 8 shows the memory available for the various version of the Impinj Monza 4 tag IC.Figure 8 Memory and features available on Monza 4 modelsRead Tags SynchronouslyIn this exercise, you will configure the Reader so that observed tag data is stored in Reader memory and a report of all observed tags is sent only when commanded by the client application.using System;using System;using System.Collections.Generic;using System.Linq;using System.Text;using Impinj.OctaneSdk;namespace ReadTagsSync{class Program{// Create an instance of the SpeedwayReader class.static SpeedwayReader Reader = new SpeedwayReader();static void Main(string[] args){try{// Connect to the reader.// Replace "SpeedwayR-xx-xx-xx" with your// reader's host name or IP address.Reader.Connect("SpeedwayR-xx-xx-xx");// Remove all settings from the reader.Reader.ClearSettings();// Get the factory default settings// We'll use these as a starting point// and then modify the settings we're// interested inSettings settings = Reader.QueryFactorySettings();// Tell the reader to include the antenna number// in all tag reports. Other fields can be added// to the reports in the same way by setting the// appropriate Report.IncludeXXXXXXX property.settings.Report.IncludeAntennaPortNumber = true;// Wait until the tag query has ended// before sending the tag report.settings.Report.Mode = ReportMode.WaitForQuery;// Apply the newly modified settings.Reader.ApplySettings(settings);// Read tags for 5 secondsConsole.WriteLine("Reading tags...");TagReport tagReport = Reader.QueryTags(5);// Print out the results.foreach (Tag tag in tagReport.Tags){Console.WriteLine("EPC : {0} Antenna : {1}",14.Proprietary and Confidential Revision 1.0, Copyright © 2010 Impinj, Inc.tag.Epc, tag.AntennaPortNumber);}// Disconnect from the reader.Reader.Disconnect();}catch (OctaneSdkException e){Console.WriteLine("Octane SDK exception: {0}", e.Message);}catch (Exception e){Console.WriteLine("Exception : {0}", e.Message);}// Wait for the user to press enter.Console.WriteLine("Press enter when done.");Console.ReadLine();}}}Read Tags AsynchronouslyIn this exercise, you will configure the reader to report each tag to the client application as soon as it is observed. This is known as “asynchronous reporting”.using System;using System.Collections.Generic;using System.Linq;using System.Text;using Impinj.OctaneSdk;namespace ReadTagsAsync{class Program{// Create an instance of the SpeedwayReader class.static SpeedwayReader Reader = new SpeedwayReader();static void Main(string[] args){try{// Connect to the reader.// Replace "SpeedwayR-xx-xx-xx" with your// reader's host name or IP address.Reader.Connect("SpeedwayR-xx-xx-xx");// Remove all settings from the reader.Reader.ClearSettings();// Get the factory default settings// We'll use these as a starting point// and then modify the settings we're// interested inSettings settings = Reader.QueryFactorySettings();// Tell the reader to include the antenna numberRevision 1.0, Copyright © 2010 Impinj, Inc. Proprietary and Confidential15.// in all tag reports. Other fields can be added// to the reports in the same way by setting the// appropriate Report.IncludeXXXXXXX property.settings.Report.IncludeAntennaPortNumber = true;// Send a tag report for every tag read.settings.Report.Mode = ReportMode.Individual;// Apply the newly modified settings.Reader.ApplySettings(settings);// Assign the TagsReported handler.// This specifies which function to call// when tags reports are available.Reader.TagsReported += new EventHandler<TagsReportedEventArgs>(OnTagsReported);// Start reading.Reader.Start();// Wait for the user to press enter.Console.WriteLine("Press enter when done.");Console.ReadLine();// Stop reading.Reader.Stop();// Disconnect from the reader.Reader.Disconnect();}catch (OctaneSdkException e){Console.WriteLine("Octane SDK exception: {0}", e.Message);}catch (Exception e){Console.WriteLine("Exception : {0}", e.Message);}}static void OnTagsReported(object sender, TagsReportedEventArgs args){// This function is called asynchronously// when tag reports are available.// Loop through each tag in the report// and print the data.foreach (Tag tag in args.TagReport.Tags){Console.WriteLine("EPC : {0} Antenna : {1}",tag.Epc, tag.AntennaPortNumber);}}}}16.Proprietary and Confidential Revision 1.0, Copyright © 2010 Impinj, Inc.Read Tags Using Periodic TriggerThere may be cases where you want the reader to conduct ‘polling’ or examination for tags. During polling, the reader initiates a scan for tags for a specified period of time and then waits for a set period before scanning again. An example of this would be a “smart-shelf” application where the user does not need to know the instant that a tagged item is placed on, or removed from the shelf. Updating polling every 10 seconds is sufficient and reduces both network and RF congestion.There are a number of trigger types and settings available: refer to the SDK Quick Reference Guide or the SDK Compiled HTML Help File for more information.using System;using System.Collections.Generic;using System.Linq;using System.Text;using Impinj.OctaneSdk;namespace ReadTagsPeriodicTrigger{class Program{// Create an instance of the SpeedwayReader class.static SpeedwayReader Reader = new SpeedwayReader();static void Main(string[] args){try{// Connect to the reader.// Replace "SpeedwayR-xx-xx-xx" with your// reader's host name or IP address.Reader.Connect("SpeedwayR-xx-xx-xx");// Remove all settings from the reader.Reader.ClearSettings();// Get the factory default settings// We'll use these as a starting point// and then modify the settings we're// interested inSettings settings = Reader.QueryFactorySettings();// Tell the reader to include the antenna number// in all tag reports. Other fields can be added// to the reports in the same way by setting the// appropriate Report.IncludeXXXXXXX property.settings.Report.IncludeAntennaPortNumber = true;// Send a tag report for every tag read.settings.Report.Mode = ReportMode.Individual;// Reading tags for 5 seconds every 10 secondssettings.AutoStart.Mode = AutoStartMode.Periodic;settings.AutoStart.PeriodInMs = 10000;settings.AutoStop.Mode = AutoStopMode.Duration;settings.AutoStop.DurationInMs = 5000;// Apply the newly modified settings.Reader.ApplySettings(settings);Revision 1.0, Copyright © 2010 Impinj, Inc. Proprietary and Confidential17.// Assign the TagsReported handler.// This specifies which function to call// when tags reports are available.Reader.TagsReported += new EventHandler<TagsReportedEventArgs>(OnTagsReported);// Wait for the user to press enter.Console.WriteLine("Press enter when done.");Console.ReadLine();// Stop reading.Reader.Stop();// Disconnect from the reader.Reader.Disconnect();}catch (OctaneSdkException e){Console.WriteLine("Octane SDK exception: {0}", e.Message);}catch (Exception e){Console.WriteLine("Exception : {0}", e.Message);}}static void OnTagsReported(object sender, TagsReportedEventArgs args){// This function is called asynchronously// when tag reports are available.// Loop through each tag in the report// and print the data.foreach (Tag tag in args.TagReport.Tags){Console.WriteLine("EPC : {0} Antenna : {1}",tag.Epc, tag.AntennaPortNumber);}}}}Read Tags Using GEN 2 FilterThe Impinj Revolution Reader and Monza tags support what is known as GEN 2 filtering. There are two possible approaches to take when you only want to read certain tags based on their data. You can either use either EPC, User, TID, or a combination of these. One is to have all the tags in the read- zone and backscatter their data to the reader, then use filtering in the application layer (your program).The other method, which you will utilize here, is to configure the reader so that it commands only tags matching the filter to respond while the others will stay silent. This is useful when applied in the physical layer: only tags matching the filter will backscatter data and it can decrease the amount of RF and tag-to-tag interference.using System;18.Proprietary and Confidential Revision 1.0, Copyright © 2010 Impinj, Inc.using System.Collections.Generic;using System.Linq;using System.Text;using Impinj.OctaneSdk;namespace ReadTagsFiltered{class Program{// Create an instance of the SpeedwayReader class.static SpeedwayReader Reader = new SpeedwayReader();static void Main(string[] args){try{// Connect to the reader.// Replace "SpeedwayR-xx-xx-xx" with your// reader's host name or IP address.Reader.Connect("SpeedwayR-xx-xx-xx");// Remove all settings from the reader.Reader.ClearSettings();// Get the factory default settings// We'll use these as a starting point// and then modify the settings we're// interested inSettings settings = Reader.QueryFactorySettings();// Tell the reader to include the antenna number// in all tag reports. Other fields can be added// to the reports in the same way by setting the// appropriate Report.IncludeXXXXXXX property.settings.Report.IncludeAntennaPortNumber = true;// Send a tag report for every tag read.settings.Report.Mode = ReportMode.Individual;// Setup a tag filter.// Only the tags that match this filter will respond.// We're only going to use filter #1.settings.Filters.Mode = TagFilterMode.OnlyFilter1;// We want to apply the filter to the EPC memory bank.settings.Filters.TagFilter1.MemoryBank = MemoryBank.Epc;// Start matching at address 0x20, since the// first 32-bits of the EPC memory bank are the// CRC and control bits.settings.Filters.TagFilter1.BitPointer = 0x20;// Our filter is 16-bits long (the first word of the EPC).settings.Filters.TagFilter1.BitCount = 16;// Only match tags with EPCs that start with "3008"settings.Filters.TagFilter1.TagMask = "3008";// We want to include tags that match this filter.// Alternatively, we could exclude tags that// match the filter.settings.Filters.TagFilter1.FilterOp = TagFilterOp.Match;// Apply the newly modified settings.Reader.ApplySettings(settings);Revision 1.0, Copyright © 2010 Impinj, Inc. Proprietary and Confidential19.// Assign the TagsReported handler.// This specifies which function to call// when tags reports are available.Reader.TagsReported += new EventHandler<TagsReportedEventArgs>(OnTagsReported);// Start reading.Reader.Start();// Wait for the user to press enter.Console.WriteLine("Press enter when done.");Console.ReadLine();// Stop reading.Reader.Stop();// Disconnect from the reader.Reader.Disconnect();}catch (OctaneSdkException e){Console.WriteLine("Octane SDK exception: {0}", e.Message);}catch (Exception e){Console.WriteLine("Exception : {0}", e.Message);}}static void OnTagsReported(object sender, TagsReportedEventArgs args){// This function is called asynchronously// when tag reports are available.// Loop through each tag in the report// and print the data.foreach (Tag tag in args.TagReport.Tags){Console.WriteLine("EPC : {0} Antenna : {1}",tag.Epc, tag.AntennaPortNumber);}}}}Read User MemoryThe Impinj Monza 4 tags offer up to 512 bits of user memory. In this exercise you will query the user memory using exception handling best practices.using System;using System.Collections.Generic;using System.Linq;using System.Text;using Impinj.OctaneSdk;namespace ReadUserMemory{class Program20.Proprietary and Confidential Revision 1.0, Copyright © 2010 Impinj, Inc.{// Create an instance of the SpeedwayReader class.static SpeedwayReader Reader = new SpeedwayReader();static void Main(string[] args){try{// Connect to the reader.// Replace "SpeedwayR-xx-xx-xx" with your// reader's host name or IP address.Reader.Connect("SpeedwayR-xx-xx-xx");// Configure the reader with the factory deafult settings.Reader.ApplyFactorySettings();// Define how we want to perform the read.ReadUserMemoryParams readParams = new ReadUserMemoryParams();// Use antenna #1.readParams.AntennaPortNumber = 1;// No access password required for this tag.readParams.AccessPassword = null;// Start reading from the base of user memory (address 0).readParams.WordPointer = 0;// Read 32 words of user memory (512-bits).readParams.WordCount = 32;// Read the first tag we see.// Alternatively, we could choose a specific// tag by EPC or other identifier.readParams.TargetTag = null;// Timeout in 5 seconds if the read operation fails.readParams.TimeoutInMs = 5000;// Perform the read and check the results.ReadUserMemoryResult result = Reader.ReadUserMemory(readParams);if (result.ReadResult.Result == AccessResult.Success){Console.WriteLine("Tag read successful. Memory contents : {0}", result.ReadResult.ReadData);}else{Console.WriteLine("Error reading tag : {0}",result.ReadResult.Result);}// Disconnect from the reader.Reader.Disconnect();}catch (OctaneSdkException e){Console.WriteLine("Octane SDK exception: {0}", e.Message);}catch (Exception e){Console.WriteLine("Exception : {0}", e.Message);}。
惠斯卡纳-泽诺亚 G320RC 发动机 用户手册说明书
Thank you for using ZENOAH ENGINE.●Please read this Owner’s Manual thoroughly before operating and use theengine correctly according to this Owner’s Manual.(For safety reasons, please contact your sales dealer before operating this engine if there is something that you do not understand.)●This engine has been designed for the use of radio control car.Please use this engine in conjunction with the manual for radio control car or radio control equipment you are going to use.●Any modification of the engine or any use of other applications is prohibited.●The purchaser (user) shall bear all obligations and responsibilities stipulated by law, local ordinance and the likes.Husqvarna Zenoah Co., Ltd. shall bear no responsibility whatsoever.115 64 99-26 (402)OWNER'S MANUALModel: G320RCModel code: 9672890012CONTENTSSPECIFICATIONS (4)SAFETY PRECAUTIONS (5)FUELING SYSTEM (6)ENGINE STARTING (8)OPERATION (9)MAINTENANCE (10)SPECIAL TOOLS (15)SERVICE GUIDE (16)TROUBLE SHOOTING (20)PARTS LIST (22)WARRANTY (26)3SPECIFICATIONSEngine Type G320RCOverall Size (L x W x H)167 x 216 x 197mmWeight 2.30kgDisplacement31.8cm3Clutch Engagement6000rpm (STD Spring)Carburetor Type WT-1107Spark Plug NGK CMR7HSpark Plug Gap0.65mmRotating Direction Counter-Clockwise (View From PTO) 4●These safety precautions are to prevent you and those people in the vicinity from incurring harm or damage. Make sure to observe these precautions and constantly strive to ensure safety.●Safe use of the engine is your personal obligation and responsibility. Constantly take care to act with good judgment as you enjoy your hobbies.•The fuel is toxic. Do not let it get into your eyes or mouth. Store it in a cool place, out of the reach of infants and children.•Use of open flames around the fuel is strictly prohibited, because of danger of fire.•To prevent burns, make sure not to touch the engine while it is operating or immediately after it has stopped.•Do not run the motor in poorly ventilated places. Do not breathe the exhaust, as it is a health hazard.•Please wear clothing that facilitates your safety. Remove all scarves,5overly long sleeves, neckties and the like. Failure to do so could result in injury.•When mounting the engine to a model, make sure to follow the model’s operating manual. If necessary, reinforce the engine mounting unit and the peripheral parts.FUELING SYSTEM•Mix gasoline (octane over 95) and high grade 2 cycle engine oil (mixing use type;JASO FC grade or ISO-L-EGC grade) at mixing ratio 25:1.•The mixing ratio is according to the oil recommendation.[ NOTE ]1)Gasoline may contain maximum of 10% Ethanol (grain alcohol) or up to 15% MTBE(Methyl tertiary-butyl ether).Gasoline containing Methanol (Wood Alcohol) is NOT approved.6FUELING SYSTEM2)Gasoline is very flammable. Avoid smoking and any fires near fuel.3)To prevent all possible problems on fueling system, make sure to use the fuel filterwhich has more than 300 mesh or equivalent and gasoline proof rubber pipe or equivalent.Incorrect fuel filter may cause engine trouble like fuel passage stuffing in carburetor, or piston surface scratching etc.4)When fueling, make sure that no fuel touches the hot parts.5)Assemble the fuel line so that it does not touch the hot parts. Also, check that thereis no fuel leakage due to cracks, or hardening.6)The picture below shows the tank dimensions for use with the 1799-85400 PIPECOMP.Tank Dimensions78ENGINE STARTINGFig.1•Push the primer pump several times until overflown fuel flows out. (Fig.1)•Close the choke lever(Fig.2), and move the throttle lever 1/4~1/3 open position.•Pull the starter(knob) quickly until first firing noise.(Fig.3)•Open the choke(Fig.2), throttle idle~1/4 open •Pull the starter quickly•Operate engine for a few minutes for the warming up.•In case of engine warm condition, choking may not be necessary.•Over choking may cause starting difficulty due to wet spark plug.In this case change spark plug or dry it, and remove fuel rest in the cylinder by pulling starter.OPERATION•This engine is already tuned up to get high power and high speed, and needs correct maintenance to keep such high performance.•The details for operation may be described in the separate owners manual to be issued by car manufacturer.•Be sure to have the engine cool down for 30 seconds at idle speed after full throttle running.9MAINTENANCE1) MAINTENANCE CHARTBefore Every EveryItems Action Use25 hours100 hours NoteLeakage,Check✔Damage/CrackIdling Speed Check/Adjust✔✔✔Air-cleaner Check/Cleaning✔✔Replace if necessary Spark Plug(gap)Check/Adjust✔✔↑Cylinder(barrel)Check/Cleaning✔✔↑Piston, Ring Check/Cleaning✔✔↑Muffler & Bolt Check/Cleaning✔✔✔↑Bearings Check/Cleaning✔✔↑Crank Shaft Check/Alignment✔↑102) SPECIFICATIONS AND TECHNICAL DATAItems Unit G320RC RemarksBore x Stroke mm 38 x 28Displacementcm 331.8Effective Compression Ratio9.7Type Walbro WT Carburetor Venture(mm)ø13.5Starting Recoil StarterType TCIIgnitionTiming BTDC 30°/8000rpmStandard CMR7H NGK CR8HIXwith Terminal Nut Option(Hot Type)CMR6H↑Clutch Engagement Speedrpm 6000STD Spring No load max Speedrpm 20000Idling Speed rpm 4000Max. Net Power kW/rpm 2.40/13000Max. Net Torque N.m/rpm 2.00/9000Fuel Consumptiong/kW·h 519Carburetor H 1 7/8 ±1/4Standard settingL 1 3/8 ±1/4↑Option(For Race)Spark Plug3) MAINTENANCE SPECIFICATIONSG320RCItems Standard Limit Measuring Device RemarksBore (mm)ø38Plating damaged Eye CheckingDiameter (mm)ø37.97ø37.87Micro MeterPiston Ring1.01 1.11Thickness GaugeGroove width (mm)Piston Pin Hole (mm)ø9.01ø9.05Cylinder Gauge Clearance betweenPiston and 0.03~0.060.15Cylinder (mm)Clearance betweenGroove and 0.02~0.040.1Thickness Gauge Piston Ring (mm)End Gap (mm)0.1~0.20.5Thickness GaugeWidth (mm)0.980.93Micro Meter Piston Pin Diameter (mm)ø9ø8.98Micro Meter Connecting Rod Small end (mm)ø12ø12.05Cylinder Gauge Crankshaft Dia. at Main Bearing (mm)ø12ø11.98Micro Meter Eccentricity (mm)—0.07Dial GaugeAxial Play (mm)—0.5Thickness GaugeGritty orrMain Bearing——Feels Flat Spot At the skirt end and the right angle to the piston pin.When inserted in a new cylinder.Piston CylinderPiston RingMicro Meter Cylinder Gauge4) CARBURETORItems Standard Limit Measuring Device Remarks Metering Lever set (mm) 1.65±0.16Vanier Inlet Valve Opening Pressure (kg/cm2) 1.3~2.3Leak TesterInlet Valve Closing Pressure (kg/cm2)0.7~1.7Leak Tester5) IGNITION SYSTEMItems Standard Limit Measuring Device Remarks Spark Plug Air Gap (mm)0.6~0.70.7Thickness GaugeIgnition Coil/Flywheel Air Gap (mm)0.30.4Thickness GaugePrimary0.7—Volt Meter Secondary6100—Volt Meter Reading between primary terminal and iron core.Reading between sparking cord end and iron core.Coil Resistance(Ω)6) TIGHTENING TORQUEItems Screw Size Standard (N·m)Limit (N·m)RemarksCarburetor M5 (P=0.8) 3.4 2.9~3.9Apply Three Bond TB1342H Insulator M5 (P=0.8) 4.4 3.9~4.9(Low Strength) or equivalent Case, Clutch M5 (P=0.8) 3.4 2.9~3.9Clutch (Plate)M6 (P=1.0) 6.4 4.9~7.8Clutch (Shoe)M6 (P=1.0) 6.4 4.9~7.8Rotor M8 (P=1.0)12.79.8~14.7Cylinder M5 (P=0.8)7.9 6.9~8.8Crankcase M5 (P=0.8) 6.4 4.9~7.8Spark Plug M10 (P=1.0)10.88.8~12.8Muffler M5 (P=0.8)8.8 6.9~9.8Muffler (Stay)M4 (P=0.7) 1.7 1.5~1.9Fan Cover M5 (P=0.8) 3.4 2.9~3.9Apply Three Bond TB1342H Cylinder Cover M4 (P=0.7) 1.7 1.5~1.9(Low Strength) or equivalent Cover. TR M4 (P=0.7) 1.3 1.0~1.5Ignition Coil M4 (P=0.7) 3.2 2.5~3.9Starter Case M4 (P=0.7) 1.3 1.0~1.5Tapping Screw TP 4.3 2.4 1.9~2.9SPECIAL TOOLSPart NamePart No.External AppearanceUsage 1Puller Assy2890-96100To remove rotor.2Piston Stopper 4810-962203Rod Assy 848W10000To remove/install piston pin.4Air Gap Gauge 3330-97310To set ignition coil.5Hex Wrench 3304-976116Snap Ring Pliers 5500-96110To remove snap ring.To hold crankshaft when disassembling/assembling clutch and rotor.For socket screw of Hex.3mm, 4mm and 5mm.1) REMOVING CLUTCH SHOE1.Remove the housing and plug cap.2.Remove the spark plug and fit the stopper(4810-96220) into the plug hole.3.Remove clutch bolts(14mm Hex.).2) REMOVING ROTOR (FAN)4.Remove the rotor nut(12mm Hex.).5.Remove the rotor using the puller assy (2890-96100).Apply 8mm puller bolts.3) ASSEMBLING ROTORInsert the gauge(3330-97310) in between the rotor magnet metal and the coil.Tighten screws while pressing the coil against the rotor.Air Gap 0.3 ~ 0.4mm4) REMOVING PISTON PIN1.Remove snap rings from both sides of the piston pin.2.Engage the rod assy(848W10000) to the piston pin and gently tap with a plastic hammer to push out the pin while holding piston firmly.Hard hammering may damage the big end of the connecting rod.Plastic HammerRod AssyPiston5) INSTALLING PISTON1.Make sure to point the arrow mark on the piston to the exhaust side.2.Fit the circlip in the groove so as to face the end gap below.Deformed circlip may come off during engine operation and damage the engine.6) CARBURETOR ADJUSTMENTThe carburetor comes with a standard setting, it is for optimum performance under the barometric pressure and climatic conditions at factory, so it may be re-adjusted according to load applied.Idle rpm :4000 ±300 rpm (STD Spring)H needle : 1 7/8 ±1/4L needle : 1 3/8 ±1/4Arrow Mark CirclipEnd GapPistonCover, TRHex2.5mmArea to apply 7) APPLY LIQUID GASKETApply the liquid gasket (Three Bond TB1217F) when taking the Cover, TR on or off.Apply a thin layer. Do not let the liquid casket enterthe cylinder. This could cause damage to the engine.TROUBLE SHOOTING1) ENGINE DOES NOT STARTDescription Cause Countermeasure No spark in the spark plugSpark Plug 1. Wet spark plug electrodes Make them dry2. Carbon deposited on the electrodes Cleaning3. Insulation failure by insulator damage Exchange4. Inproper spark gap Adjust to 0.6~0.7mm5. Burn out of electrodes ExchangeMagneto 1. Ignition coil inside failure Exchange2. Damaged cable sheath or disconnected cable Exchange or repairSwitch 1. Switch is OFF ON the switch2. Switch failure Exchange3.Primary wiring earthed RepairSparks appear in the spark plugCompression & 1. Over sucking of fuel Drain excess fuelfueling is normal 2. Too rich fuel Adjust carburetor3. Overflow Carburetor adjust or exchange4. Clogging of air cleaner Wash with mixed gasoline5. Faulty fuel Change with proper fuelFueling normal but 1. Worn out cylinder, piston, or piston ring Exchangepoor compression 2. Gas leakage from cylinder and crank case gasket Apply liquid gasket and reassemble.No fuel supply 1. Choked breather air hole Cleaning2. Clogged carburetor Cleaning3. Clogged fuel filter Exchange fuel filterTROUBLE SHOOTING2) LACK OF POWER OR UNSTABLE RUNNINGDescription Cause Countermeasure Compression is normal 1. Air penetration from fuel pipe joints, etc Secure connectionand no misfire 2. Air penetration from intake tube joint orChange gasket or tightening screwscarburetor joint3. Water in fuel Change with good fuel4. Piston start to seizure Replace piston(and cylinder)5. Muffler choked with carbon CleaningOverheating 1. Fuel too lean Adjust carburetor2. Clogging of cylinder fin with dust Cleaning3. Poor fuel quality Exchange with proper fuel4. Carbon deposited in the combustion chamber Cleaning5. Spark plug electrode red hot Thoroughly clean, adjust spark gap[ 0.6~0.7(0.023~0.028in) ] Others 1. Dirty air cleaner Wash with mixed gasoline2. Over loading Reduce load3. Cover, TR leakage Apply liquid gasket2122PARTS LIST G320RC (967289001)23PARTS LISTG320RC (967289001)G320RC (967289001)2425WARRANTY TERMS1)Scope of ApplicationThis engine manufactured by Husqvarna Zenoah Co., Ltd. (herein after “Zenoah”).And sold to the user directly or through distributor/manufacturer, shall entitle to be covered by this warranty.2)Limits of WarrantyZenoah warrants that;1.The quality disclosed in the specifications.2.The engine which shall be considered defective by Zenoah, caused by material orproduction fault.3)Limits of Compensation1.Zenoah compensates such quality, material and production faults by repairing orreplacing through distributor/manufacture.2.Zenoah shall not compensate any other accompanied or benefit losses caused touser and distributor/manufacture by such faults and through repairing orreplacing.264)Term of WarrantyThree (3) months after purchased by end- user subject to 12 months from produced month.5)Exempt from WarrantyZenoah shall not warrant this engine even if the fault has been caused during the period of terms of Warranty, in case that.1.Any faults, failures caused from neglect of proper operation and maintenancedescribed in OWNER’S MANUAL.2.Any modification not approved by Zenoah.3.Normal abrasion and deterioration.4.Consuming parts.ing any parts which have not been certified by Zenoah.6.Add-on or modified use.271-9 Minamidai, Kawagoe-city, Saitama, 350-1165 Japan Phone: (+81)49-243-1117 Fax: (+81)49-243-7197。
Octane Ro
目录Octane Rō 控制台指南•控制台功能 (1)•动态显示器 (LCD) (2)•键盘按钮 (5)软件管理 (7)其他支持信息 (8)•清洁和维护 (8)•电源要求 (8)•重要安全信息 (8)•客户支持 (8)iOctane Rō™ 控制台指南选择Octane Rō 划船机,尽情享受健身乐趣!这款先进的划船机激发您不断挑战自我并指导您达到出色的锻炼效果。
标准控制台提供多种预设锻炼程序,通过先进的电子装置进行控制,让您保持训练兴趣和动力。
通过本指南来熟悉机器功能、数据显示器和键盘按钮;然后坐上机器,开始划船,选择锻炼程序并调整设置。
开始享受吧!控制台功能Octane Rō划船机标准控制台具有多项功能,可提升您的健身体验。
• 集成式LCD显示屏,提供重要的锻炼数据,包括一个数字转速表,可突出显示卡路里消耗/分和卡路里消耗峰值,以及间隔计数、距离、总卡路里消耗和划桨次数;• 无线心率显示(兼容 ANT+ 和 Bluetooth®设备);• 预设锻炼程序按钮,让您可以快速选择喜爱的锻炼。
REcoveRY SpRiNtQUickStaRtENtERPaUsEClEar tiMEMax 14 INtERval INtERval caloRiEGoalDistaNcegoalMaxciRcUit515带数字转速表的LCD预设锻炼程序按钮实时运动数据12动态显示器 (LCD)515 恢复或力量训练时间冲刺或有氧运动时间Ant+心率显示器蓝牙心率显示器距离计数器卡路里转速表心率功率间隔计数器阻力(等级)划桨计数器配速卡路里计数器锻炼时间锻炼程序显示Octane R ō 划船机控制台配有 LCD,显示重要锻炼数据,并突出显示锻炼的关键细节。
设置和进行锻炼时观察显示器 — 该显示器会提示您、指导您、鼓励您,并提供动态反馈。
显示说明恢复或力量训练时间在 MAX 14间隔训练 或 间隔训练 程序中,倒计时显示剩余恢复时间,以分和秒为单位。
Octane用户手册

Version 1.0 Beta 2.2用户手册Eco bot by lechuOctane Render 使用手册Version 1.0 Beta 2.2 (May 25, 2010)All Rights ReservedRefractive Software LTD 2010Cover art by LechuBy Phillip BeauchampTomislav Corak图解视口(Graph Editor)Octane Render的场景与材质都以节点node的方式处理。
这也方便了复杂材质的编辑。
如果你不知道怎样使用节点,不要被吓着..你要知道,在不使用节点的情况下,我们同样也能得到很棒的渲染效果!渲染视口上方的一排工具栏允许用户对渲染进程的各个方面进行操作:标尺渲染进程控制图片导出自动对焦状态材质取样器自动对焦二次取样粘土渲染模式立体影像效果渲染进度GPU动态信息重置相机位置转盘动画喜爱相机视点观察者视角渲染对象(Render Target) 渲染分辨率相机设置(Camera)在图解视口(Graph Editor)中右击可以在场景中增加节点。
我们可以通过右击-添加物体(Objects)将新场景导入Octane。
图解视口中也提供快速按钮让你快速定位不同的节点类型。
显示/隐藏对象节点(Target Nodes)显示/隐藏材质节点(Material Nodes)显示/隐藏网格节点(Mesh Nodes)显示/隐藏材质类型节点(Texture Nodes)你可以查看如下信息:CUDA DRIVER — 查看当前的CUDA DRIVER 及RUNTIME版本。
ACTIVE / INACTIVE CUDA DEVICE(s) — T如果你有多个显卡,允许你指定让Octane使用哪块显卡渲染。
DEVICE INFORMATION — 显示当前设备的信息。
DEVICE MEMORY USAGE —显示当前的显存使用量,以几何体、材质、渲染对象等分类。
FIELD MANUAL OCTANE 潜伏枪弹管说明书

Failure to follow installation and maintenance instructions detailed in this manual may result in serious personal injury and damage to the firearm. Do not attempt to use this product unless you have specific training and experience in the use of firearms.Because suppressed firearms make less noise than unsuppressed firearms, it is easy to forget that they are still firearms and capable of causing bodily injury and property damage. Remember, a suppressed firearmshould be treated with the same safety and caution as anunsuppressed firearm.Firearm silencers are user-attached firearm muzzle devices,and as such are subject to improper attachment issuesunless the procedures outlined in this manual are followedprecisely.Before installing the silencer on the host firearm, be surethat the firearm is unloaded and the action is opened sothat the firearm is visibly clear of any ammunition. If youare at all unsure as to the proper procedures to ensure thatyour firearm is unloaded, please consult your firearm user’smanual/instructions and/or contact a properly licenseddealer or the manufacturer or gunsmith of your firearm.Check the fit between barrel and silencer before firing! Thethread mount must be fully shouldered on the barrel. Thereshould be no visible gap between the barrel shoulder andthe face of the silencer thread mount. Poor accuracy andproduct damage may result if the silencer is not properlyshouldered.WarningCONTINUED ON NEXT PAGESilencers must be free of obstructions such as mud, dirt, etc. DO NOT attempt to shoot through an obstructed silencer. If submerged in water, the user must allow sufficient time to drain the silencer completely.The silencer is designed to suppress the initial muzzle blast and subsequent projectile de-corking pressure. The silencer doesn’t contact or otherwise interact with the bullet, allowing the projectile to travel at its default speed.Because of this, a sonic crack may be produced by theprojectile as it breaks the sound barrier.Depending on the geography of the area, the sonic crackmay vary in volume. This is solely a function of the projectilebreaking the sound barrier and is not related to productperformance.To ensure your silencer remains secure while firing, itis of the utmost importance that you frequently verifythe silencer is securely tightened onto the barrel. Werecommend checking the security of the attachment after30 discharges of the firearm.Before removing the silencer from the host firearm, be surethat the firearm is unloaded and the action is opened sothat it is visibly clear of any ammunition. When removingthe silencer, use extreme caution as it may be hot to thetouch after firing. Use heat-resistant gloves to avoid burnsor other injuries. Once the silencer is removed from thehost firearm, SilencerCo recommends using a threadprotector or other muzzle device to protect the muzzlethreads and crown, during storage or transport.WarningFor optimum performance and to avoid damage to your silencer, SilencerCo recommends using only SilencerCo mounts and accessories. Whichever way you choose to mount your silencer to your firearm, you should take care to ensure that the Octane is mounted securely before firing. SilencerCo offers mounts in all common barrel thread patterns. Users must ensure they are using the proper mounts that match their barrel threads and that there is a proper shoulder for the mount to seat against. Following these instructions will help to prevent the problems and dangers that can arise from improper installation.Mounting Options OCTANE 9OCTANE 45E xce ll e nt p is to l a n d su b gu n su p p re s si o n. Us e r serviceability with increased caliber versatility. Offering premium performance at an affordable price point.Visit for further informationOverview & Product Specs CALIBERS 9MM & 300 BLK Subsonic MATERIALSStainless Steel,AluminumLENGTH7.50”WEIGHT9.0 - 12.2 ozDIAMETER1.40”CALIBERS 9MM to 45ACP & 300 BLK Subsonic MATERIALS Stainless Steel,Aluminum LENGTH 8.50”WEIGHT 10.0 – 13.3 oz DIAMETER 1.40”PistonMountASRMountDirectThreadMountOctaneOCTANE 9 BAFFLE STACKOCTANEFRONTCAPOCTANE 45 BAFFLE STACK3-LugMountAll mounting systems canbe used with the Octane 9and Octane 45.3-LUGMUZZLEDEVICE3-LUGMOUNTPISTONSPRINGORFIXEDBARREL SPACERSPRINGRETAINERALPHAASRMOUNTALPHADIRECTTHREADMOUNTANY ASRMUZZLEDEVICEOCTANE 9 BAFFLE STACKOCTANE 45 BAFFLE STACKALIGNMENT MARKS Assembly & DisassemblyAlign all baffles facing the same orientation and click together to create a baffle stack. Baffles are all the same (except for Octane 45, which has one shorter baffle) and can be assembled in any order.For best performance, use the alignment marks on the outside of the baffles to ensure the cutouts on the baffles are properly oriented.Snap the expansion chamber onto the exposed cone end (not flat end) of the baffle stack so that the ridge inside the expansion chamber is closest to the cone.Slide baffle stack with attached expansion chamber into the silencer tube, expansion chamber first, until it stops against the piston housing inside the tube.Twist front cap onto silencer; hand tighten with the sprocketed end of piston. For extra leverage, insert a screwdriver through piston holes and twist.To disassemble, perform steps in reverse order.ALIGNMENT MARKSDirect Thread Mount QUICK REFERENCEThe Alpha Direct Thread Mount is recommended for use on firearms that are equipped with a fixed barrel.Insert the Alpha Direct Thread Mount into the rear of the silencer and tighten down with provided tool.Align back of silencer with the threaded barrel of host firearm; hand tighten until it is seated securely against the shoulder of your barrel.READY FOR USETo remove, perform steps in reverse order.OCTANE FRONT CAP OCTANE 9 or 45ALPHA DIRECT THREAD MOUNT Fixed Barrel Spacer for Left-Hand Threads If your host firearm has a fixed barrel AND left-hand threads, It may be beneficial to use a piston mounting method rather than a Direct Thread Mount. See Piston Mount for more information.OCTANEFRONT CAP OCTANE 9 or 45ALPHA ASR MOUNT ANY ASR MUZZLE DEVICE ASR SystemQUICK REFERENCEMUZZLE BRAKE SINGLE PORT MUZZLE BRAKE FLASH HIDER CORRECTORIENTATION MUZZLE DEVICESThread the ASR muzzle device onto the barrel. Use the provided shim kit to ensure proper ASR muzzle brake alignment. Timing with shims is not necessary on ASR flash hiders. Tighten onto barrel using the wrench flats at the rear of the brake. Use of Rocksett™ or another high-temp threadlocker is recommended to secure the muzzle device. Muzzle devices should be tightened to approximately 20-30 ft-lbs. CONTINUED ON NEXT PAGEASR SystemASR MOUNTThread on the ASR mount body. Use one of the includedspanner wrenches to hold the Octane body and the other to tighten the ASR mount body to approximately 20-30 ft-lbs. To remove, perform steps in reverse order.ASR SystemCONTINUEDVerify the ASR collar is in the unlocked position before installing. Install the Octane by sliding the back end over the muzzle device, then screw the silencer onto the muzzle device until it stops (hand tight, approximately 10-15 ft-lbs.). Rotate the ASR collar to the locked position.READY FOR USETo remove, perform steps in reverse order.The ASR (Active Spring Retention) Mount is a proprietary quick-attach/detach mounting system. It features a secondary locking collar, which ensures the silencer does not back off during normal use due to shock and vibration from firing and transport. It requires a compatible muzzle device (muzzle brake or flash hider). SilencerCo recommends the use of the included shim kit if any indexing of the muzzle device is required. Crush washers are NOT recommended as they do not crush uniformly and WILL cause improper mounting and potential silencer damage. For proper alignment, it is essential that the muzzle device seats against a 90° barrel shoulder.Spring vs. Fixed Barrel SpacerWhen using a piston to attach your silencer to a firearm witha fixed barrel, (most pistol caliber carbines), a fixed barrelspacer MUST be used in lieu of the spring.If your host firearm has a fixed barrel AND left-handthreads, it can be beneficial to use a piston and fixed barrelspacer rather than a direct thread mount. The piston’s toothengagement with the silencer will ensure tightening left-hand to the host firearm cannot simultaneously loosen theright-hand threads of the mount itself.Piston Mount QUICK REFERENCEOCTANEFRONT CAP OCTANE 9 or 45SPRING RETAINER FIXED BARREL SPACER SPRING ORPISTONPiston MountCONTINUEDPlace spring or fixed barrel spacer over piston and seatinto spring retainer. Insert the assembly into the rear of thesilencer; tighten until securely seated.Align back of silencer with the threaded barrel of host firearm; hand tighten until it is seated securely against the shoulder of your barrel.READY FOR USEPISTON ASSEMBLY (NORMAL USE)PISTON ASSEMBLY (FIXED BARREL SPACER)3-LUG MUZZLE DEVICES 3-LUG MOUNT 3-LUG MOUNT Use of 3-Lug mounts will require both the mount and an appropriate muzzle device. Screw the 3-Lug mount into the back of the silencer without spring. Tighten with provided 3-pin wrench. 3-LUG MUZZLE DEVICE Thread the appropriate 3-Lug muzzle device onto the barrel threads and tighten to approximately 10-20 ft-lbs. For proper alignment, it is essential that the muzzle device seats against a 90° barrel shoulder.Depending on the thread pattern, some muzzle devices willshoulder on the nose of the barrel.OCTANEFRONT CAP OCTANE 9 or 453-LUG MUZZLE DEVICE 3-LUGMOUNT 3-LugQUICK REFERENCE3-LugCONTINUEDMOUNTING TO THE FIREARMPlace the silencer with the 3-Lug mount over the 3-Lug muzzle device, aligning the lugs with the cutouts. Compress the silencer against the muzzle device, turn the silencer body 60 degrees, then release. Pull on the silencer to ensure it is securely mounted before firing.READY FOR USETo remove, perform steps in reverse order.WARNING You must use only 9mm muzzle devices with9mm 3-Lug mounts and 45 muzzle devices with 45 3-Lugmounts. While a 9mm muzzle device will fit inside the 45 3-Lugmount, there is excessive clearance between them. This willcause blowback towards the shooter and will greatly increasethe chance of silencer damage due to potential misalignmentof the mount to muzzle device.WARNING A 45 caliber projectile will not fit down thebore! Use 9mm or smaller ONLY.MaintenanceThe Octane is designed to be easily maintained by the user. It is recommended that the silencer and its individual components be disassembled and cleaned at regular intervals, or whenever the silencer is shot “wet”. Shooting “wet” implies that water or a lubricant (5cc’s or less) has been placed inside the silencer as a way to aid in the cooling of gases and increase sound suppression. Each component has a suggested method for cleaning.OUTER TUBEThe aluminum tube, front cap, and spring retainer shouldNOT be soaked in chemicals or used in an ultrasoniccleaner due to the potential for damage to the finish andthe potential to erase the serial number due reactionwith the aluminum tube. We recommend using a dampcloth or non-abrasive brush to gently wipe or scrub awaydebris.BAFFLESDisassemble the Octane as listed in the instructions andclean using the following suggested products. Dry allcomponents thoroughly before reassembling. If using awater-based cleaner, be sure to lightly coat the baffles withoil or other corrosion-resistant product after cleaning.SCRUBBINGVarious gun cleaning solvents and general CLP (cleaner/lubricant/protectant) gun oils can be used to help breakup the fouling on your baffles. Utilizing a nylon brush,q-tips,and rags or paper towels, etc, you can successfullyclean your baffles with some time scrubbing. Don’t use hardmetal tools to scrape lead and carbon off your componentsas you may damage the metal. Abide by the safetyprecautions previously mentioned in this manual regardinglead at all times. Dispose of leaded materials in accordancewith your local laws.CONTINUED ON NEXT PAGEMaintenance CONTINUEDBLASTINGBlasting with soda media is an excellent way to clean baffles and other components. A blast cabinet or handheld soda blaster is required for this method. DO NOT blast parts with glass bead, aluminum oxide, or other hard media; this will etch and damage your components. Note that your media will become exposed to lead during this process. Good containment, ventilation, gloves, and a breathing mask should be used to protect yourself and those around you from lead particulates that become airborne. Dispose ofcontaminated blast media appropriately and in accordancewith local, state, and federal regulations.ULTRASONIC CLEANINGUltrasonic cleaning is a 50/50 mix of water and “PurplePower” cleaner and works very well for cleaning baffles.Do NOT use this method on outer tube. Note that thissolution will contain lead. Dispose of appropriately and inaccordance with local, state, and federal regulations. DONOT dump it down the drain or outside.PISTON ASSEMBLYTo clean the piston assembly, remove from the silencer anddisassemble. Use an abrasive brush or pad and solvent toscrub away carbon buildup. Do not use sand paper as itcould ruin the finish and cause malfunction.PISTON HOUSINGTo clean the piston housing, insert a screwdriver or otherscraping tool and dislodge any large debris.O-RINGSInside the indexing ring of the spring retainer is an O-Ring,which seals the gases from escaping the silencer whenthe piston is actuated during firing. To maintain, use whitelithium grease, break free, or light gun oil. The O-Ring willneed to be replaced once you notice a substantial amountof wear and tear after heavy use or after breakage occurs.To replace, simply disassemble the booster and insert a newViton Size-018 O-Ring into the groove on the inside of thespring retainer, directly under the threads.Silencerco, LLC (“SilencerCo”) warrants to you that if any product sold by SilencerCo and used for its intended use ever becomes defective, SilencerCo will repair or replace the product at no charge, other than shipping, subject to the conditions set forth below.T H E WA R R A N T Y E X T E N D S O N LY T O T H E O R I G I N A L R E G I S T E R E D PU R C H A S E R. T his warranty does not cover damage to our products or host firearm resulting from careless or irresponsible handling adjustments or modifications to its intended design, negligence, or other unforeseeable abuse. SilencerCo assumes no liability for unsafe or illegal use of the silencer by its purchaser or any other user that comes in contact with the product after purchase. SilencerCo assumes no responsibility for physical injury or property damage resulting from careless or irresponsible handling or by any use contrary to the recommendations, warnings and cautions generally listed in this manual. SilencerCo does not cover damage to the silencer or host firearm resulting from improper “hand-loaded, reloaded, previously used or otherwise defective ammunition.” THIS WARRANTY IS FURTHER REGULATED BY RELEVANT AND APPLICABLE STATE AND FEDERAL LAWS.If SilencerCo determines that you satisfy the conditions for warranty coverage under this limited warranty, SilencerCo will, at no charge, replace or repair the SilencerCo productLimited Lifetime Warrantywith the same or similar model subject to the terms herein. If no replacement is available, and SilencerCo determines that the product cannot be repaired, SilencerCo will replace your nonperforming or defective unit with a unit that, in SilencerCo’s sole determination, is substantially similar to your lawfully purchased and registered product. This warranty extends to any and all parts as originally sold by us, but does not extend to any altered product or firearm that is altered or rebuilt after original purchase, damaged through abuse, misuse through lack of proper care and maintenance, or used other than for its legal intended purposes. SILENCERCO’S LIABILIT Y FOR BREACH OF ANY WARR ANT Y WITH RESPECT TO A SILENCERCO PRODUCT SHALL BE LIMITED TO REPLACING OR REPAIRING THE NONPERFORMING OR DEFECTIVE PRODUCT AS DESCRIBED IN THIS LIMITED WARRANTY. THIS LIMITED WARRANTY SHALL BE YOUR SOLE AND E XCLUSIVE REMEDY WITH RESPECT TO A NONPERFORMING OR DEFECTIVE PRODUCT, AND SILENCERCO WILL NOT BE LIABLE FOR ANY OTHER DAMAGES, INCLUDING DIRECT, INCIDENTAL OR CONSEQUENTIAL DAMAGES OR DIMUNITION IN VALUE DUE TO REPAIR OR REPLACEMENT WITH A DIFFERENT PRODUCT.For assistance with repairs, please contact our consumer service department at 801-417-5384.***********************************。
octane-说明书

octane-说明书光圈(光圈)Aperture (aperture) 场景中相机的光圈。
选择低值将具有广泛的景深,其中一切都在焦点。
选择较高的值将创建浅景深(DOF),其中前景和背景中的对象将失焦。
立体声(立体声)Stereo (stereo) 这使启用立体声立体声渲染成为可能。
当激活时,渲染将能够用红/蓝3D眼镜观看LeftFilter(leftFilter)/ RightFilter (righFilter)左右滤镜颜色用于调整用于在渲染中创建立体效果的颜色。
透视校正Perspective correction镜头移位(lensShift)当您想从与人眼相似的高度渲染高楼建筑/结构的图像,但保持垂直线平行时,这对于建筑渲染非常有用。
近剪辑深度(nearClipDepth)主要目的是内部场景,你想得到一个良好的拍摄整个房间,但你不能这样,没有一个非常大的FOV,因为你需要保持相机在房间内。
使用相机剪辑(近平面),您可以将摄像机放在房间外 - 降低 FOV并增加您前面的剪辑平面距离,直到最近的墙被剪切掉。
几何不会改变,只有相机的剪辑,这意味着阴影,反射和折射仍然受限制的几何。
正射(正投影)(orthographic)这启用或禁用正交相机模式。
当激活时,所有相同长度的平行边缘显示为相同的长度,而不管应该由对象的取向导致的透视。
光圈边缘(aperture_edge)这控制光圈内所有点处的光圈边缘检测。
较低的值将给受到浅景深(DOF)影响的焦点外物体(例如前景和背景中的物体)提供更明显的边缘。
失真(失真)(distortion)调整球面和柱面失真。
渲染的图像显示整个球体,并使用等距圆柱投影,也称为纬线投影。
相机模式(摄像模式)Camera Mode (cameramode)提供使用球面相机镜头或圆柱相机镜头的选项响应Response:利用测量的相机响应曲线可以选择。
请参阅附录2的所有设置的例子。
晕晕Vignetting:调整此参数增加的呈现的角变变的量。
octane 说明书
光圈(光圈)Aperture (aperture) 场景中相机的光圈。
选择低值将具有广泛的景深,其中一切都在焦点。
选择较高的值将创建浅景深(DOF),其中前景和背景中的对象将失焦。
立体声(立体声)Stereo (stereo) 这使启用立体声立体声渲染成为可能。
当激活时,渲染将能够用红/蓝3D眼镜观看LeftFilter(leftFilter)/ RightFilter(righFilter)左右滤镜颜色用于调整用于在渲染中创建立体效果的颜色。
透视校正Perspective correction镜头移位(lensShift)当您想从与人眼相似的高度渲染高楼建筑/结构的图像,但保持垂直线平行时,这对于建筑渲染非常有用。
近剪辑深度(nearClipDepth)主要目的是内部场景,你想得到一个良好的拍摄整个房间,但你不能这样,没有一个非常大的FOV,因为你需要保持相机在房间内。
使用相机剪辑(近平面),您可以将摄像机放在房间外- 降低FOV并增加您前面的剪辑平面距离,直到最近的墙被剪切掉。
几何不会改变,只有相机的剪辑,这意味着阴影,反射和折射仍然受限制的几何。
正射(正投影)(orthographic)这启用或禁用正交相机模式。
当激活时,所有相同长度的平行边缘显示为相同的长度,而不管应该由对象的取向导致的透视。
光圈边缘(aperture_edge)这控制光圈内所有点处的光圈边缘检测。
较低的值将给受到浅景深(DOF)影响的焦点外物体(例如前景和背景中的物体)提供更明显的边缘。
失真(失真)(distortion)调整球面和柱面失真。
渲染的图像显示整个球体,并使用等距圆柱投影,也称为纬线投影。
相机模式(摄像模式)Camera Mode (cameramode)提供使用球面相机镜头或圆柱相机镜头的选项视场(fovx)Field of View (fovx) 设置场景中摄像机的水平视场的x坐标。
视野(fovy)Field of View (fovy)这设置了场景中摄像机的垂直视场的y坐标曝光Exposure::。
科蒂斯说明书-1212P
测量篇 ------------------------------------ 23 注意事项 ---------------------------------- 27
1
安全指南
在开始操作前务必仔细阅读本手册! !
只有合格人员才允许安装和使用本产品。合格人员是指经过培 训,并按既定安全惯例和标准进行安装,调试和使用的人员。
34 制动电流限制
值越大,制动能力越强
BOOST CURRENT
35 峰值电流限制
值越大,爬坡及翻越障碍能力越强
BOOST TIME
36 峰值电流允许时间
超过时间则关闭 BOOST 功能
INHIBIT MENU
TYPE 37 速度抑制类型
速度限制设置用
最小值 最大值 缺省值 单 位
5
30
10
%
40
100
4
6
10
16
25
4
永磁电机
电机是将电池电能转换成机械能,驱动电动车车轮旋转的部件。 使用
电机的周围应保持清洁干燥,其内外部不应放置其它物件; 严禁与强磁性物体并存; 输入电压等级需确保正确; 使用中若发现电机有异常声音或气味,应立即停车检查; 电机和控制器之间的走线应尽可能短; 碳刷寿命约 2000H,需及时更换碳刷。
永磁电机控制器使用
说明书
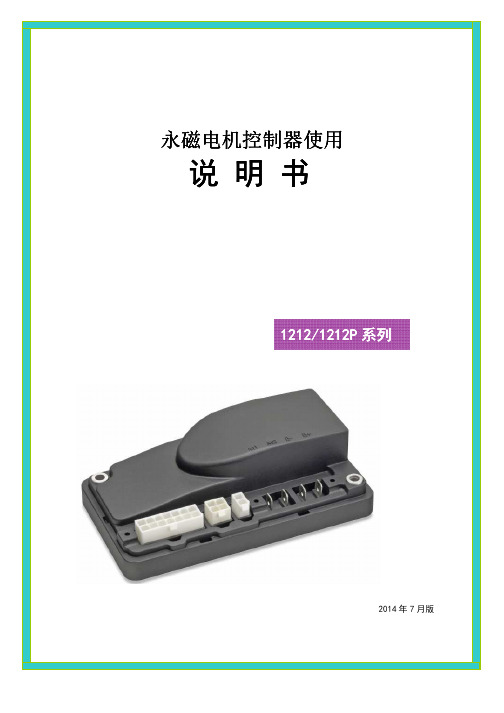
1212/1212P 系列
2014 年 7 月版
1212 系列
永磁控制器 使用说明书
尊敬的用户:
您好! 欢迎您使用 CURTIS 控制器。为了您在使用我们的产品前,能够更好的了解 我们的产品,请您仔细的阅读本说明书,如有其它疑问,请随时与我们联系。
科蒂斯(中国)
潘基自动洗车机用户手册说明书
IndexAccessories and Modifications.... 182Accessories................................. 182Additional Safety Precautions.. 183Modifications............................. 183ACCESSORY (Ignition KeyPosition)........................................ 81Accessory Power Socket.............. 113Additives, Engine Oil..................... 232Airbag (SRS)................................ 9, 45Air Cleaner Element...................... 249Air Conditioning Filter.................. 262Air Conditioning System...... 118, 125Maintenance............................... 261Usage................................. 121, 127Air Outlets (Vents)............... 120, 125Air Pressure, Tires........................ 264Alcohol in Gasoline........................ 332Aluminum Wheels, Cleaning........ 287Antifreeze....................................... 235Anti-lock Brakes (ABS)Indicator................................ 59, 201Operation.................................... 200Anti-theft, Audio System............... 171Anti-theft Steering Column Lock .. 80Appearance Care........................... 285Audio System........................ 133, 148Automatic Lighting Off Feature.... 68Automatic Seat Belt Tensioners.... 43Automatic Speed Control................ 74Automatic Transmission............... 192Capacity, Fluid................... 326, 328Checking Fluid Level................ 243Shifting........................................ 193Shift Lever Position Indicator.. 193Shift Lever Positions................. 193Shift Lock Release (196)BatteryCharging SystemIndicator............................ 58, 310Jump Starting............................. 303Maintenance............................... 256Specifications..................... 327, 329Before Driving............................... 173Belts, Seat..................................... 8, 41Beverage Holder............................ 110Body Repair (292)BrakesAnti-lock System (ABS)............ 200Break-in, New Linings .............. 174Bulb Replacement............. 276, 277Fluid............................................ 246Parking........................................108System Indicator.................. 59, 313Wear Indicators......................... 199Braking System.............................. 199Break-in, New Car......................... 174Brightness Control, Instruments... 69Brights, Headlights......................... 67Bulb ReplacementBack-up Lights........................... 277Brake Lights ...................... 276, 277Ceiling Light............................... 281Courtesy Lights......................... 281Front Parking Lights................. 275Front Side Marker Lights......... 274Headlights.................................. 272High-mount Brake Light.......... 279License Plate Lights.................. 280Rear Side Marker Lights.......... 278Specifications..................... 327, 329CONTINUEDIndexBulb ReplacementSpotlights.................................... 281Trunk Light................................ 282Turn Signal Lights..................... 274Bulbs, Halogen. (272)Capacities Chart.................... 326, 328Carbon Monoxide Hazard.............. 52Carrying Cargo.............................. 184Cassette PlayerCare.............................................160Operation........................... 145, 156CAUTION, Explanation of............... ii CD Changer.......................... 142, 161CD Player........................................ 140Ceiling Light................................... 114Center Pocket................................ 113Certification Label......................... 324Chains............................................. 269Changing OilHow to.........................................232When to....................................... 220Changing a Flat Tire ..................... 295Changing Engine Coolant. (237)Charging System Indicator.... 58, 310Checklist, Before Driving............. 188Child Safety...................................... 20Child Seats........................................ 25Tether Anchorage Points........... 40Cleaner Element, Air..................... 249CleaningAluminum Wheels..................... 287Carpeting.................................... 288Exterior.......................................286Fabric.......................................... 289Interior........................................ 288Leather........................................289Seat Belts.................................... 289Vinyl............................................ 289Windows..................................... 290Climate Control System................ 125Clock, Setting the .......................... 109Clutch Fluid.................................... 247CO in the Exhaust......................... 334Coin Box......................................... 113Cold Weather, Starting in............. 190Compact Spare............................... 294Console Compartment.................. 111Consumer Information*................ 340Controls, Instruments and.. (55)CoolantAdding.........................................235Checking..................................... 180Proper Solution.......................... 235Replacing.................................... 237Temperature Gauge.................... 64Corrosion Protection..................... 291Courtesy Lights............................. 115Crankcase Emissions ControlSystem......................................... 334Cruise Control Operation............... 74Customer Relations Office.. (341)DANGER, Explanation of................. ii Dashboard.................................... 2, 56Daytime Running Lights................. 68Defects, Reporting Safety............. 344Defogger, Rear Window................. 72Defrosting the Windows...... 123, 131Dimensions............................. 326, 328Dimming the Headlights................ 67DipstickAutomatic Transmission........... 243Engine Oil...................................178IndexDirectional Signals........................... 69Disc Brake Wear Indicators......... 199Disposal of Used Oil...................... 234DoorsLocking and Unlocking............... 81Monitor Light............................... 61Power Door Locks....................... 81DOT Tire Quality Grading........... 330Downshifting, 5-speed ManualTransmission.............................. 191Drive Belts...................................... 262Driver and Passenger Safety............ 5Driving............................................ 187Economy..................................... 181In Bad Weather.......................... 205In Foreign Countries.. (333)Economy, Fuel............................... 181Emergencies on the Road............. 293Battery, Jump Starting.............. 303Brake System Indicator............ 313Changing a Flat Tire................. 295Charging System Indicator...... 310Checking the Fuses. (315)Low Oil Pressure Indicator...... 309Malfunction IndicatorLamp....................................... 311Manually Closing Moonroof.... 314Overheated Engine................... 306Emergency Brake.......................... 108Emergency Flashers....................... 71Emergency Towing....................... 320Emergency Trunk Opener............. 87Emissions Controls........................ 334Emissions Testing, State .............. 337EngineCoolant Temperature Gauge ..... 64Drive Belts.................................. 262Malfunction IndicatorLamp................................. 59, 311Oil Pressure Indicator......... 58, 309Oil, What Kind to Use............... 230Overheating................................ 306Specifications..................... 327, 329Speed Limiter.................... 192, 196Starting........................................189Ethanol in Gasoline ....................... 332Evaporative Emissions Controls.. 334Exhaust Fumes.. (52)Expectant Mothers, Use of SeatBelts by......................................... 18Exterior, Cleaning the. (286)Fabric, Cleaning............................. 289Fan, Interior........................... 118, 129Features, Comfort andConvenience............................... 117Filling the Fuel Tank..................... 175FiltersAir Cleaner................................. 249Air Conditioning........................ 262Oil................................................ 2325-speed Manual TransmissionChecking Fluid Level................ 245Shifting the................................. 191Flashers, Hazard Warning.............. 71Flat Tire, Changing a.................... 295Floor Mats...................................... 288FluidsAutomatic Transmission........... 243Brake.. (246)CONTINUEDIndexFluidsClutch..........................................247Manual Transmission............... 245Power Steering........................... 248Windshield Washers................. 242FM Stereo RadioReception........................... 134, 149Folding Rear Seat.......................... 100Foreign Countries, Driving in...... 333Four-way Flashers........................... 71Front Airbags............................... 9, 45Fuel..................................................174Fill Door and Cap....................... 175Gauge............................................ 64Octane Requirement................. 174Oxygenated................................ 332Reserve Indicator......................... 62Tank, Filling the......................... 175Fuses, Checking the. (315)Gas Mileage, Improving................ 181Gasohol........................................... 332Gasoline.......................................... 174Fuel Reserve Indicator................ 62Gauge............................................ 64Octane Requirement................. 174Tank, Filling the......................... 175Gas Station Procedures................. 175GaugesEngine Coolant Temperature .... 64Fuel................................................64Speedometer................................ 63Tachometer.................................. 63GAWR (Gross Axle WeightRating) ....................................... 208Gearshift Lever PositionsAutomatic Transmission........... 1935-speed ManualTransmission.......................... 191Glass Cleaning............................... 290Glove Box......................................... 88GVWR (Gross Vehicle WeightRating) (208)Halogen Headlight Bulbs.............. 272Hazard Warning Flashers............... 71Headlights......................................... 67Aiming......................................... 272Automatic Lighting OffFeature...................................... 68Daytime Running Lights............. 68High Beam Indicator................... 62Lights On Indicator..................... 62Reminder Chime.......................... 67Replacing Halogen Bulbs ......... 272Turning on.................................... 67Head Restraints............................... 99Heating and Cooling...................... 118High Altitude, Starting at.............. 190High-Low Beam Switch .................. 67HomeLink UniversalTransmitter.................................. 89Hood Latch..................................... 251Hood, Opening the........................ 176Horn................................................... 66Hydraulic Clutch............................ 247Hydroplaning. (206)Identification Number, Vehicle.... 324IgnitionKeys............................................... 77Switch............................................80IndexTiming Control System............. 335Immobilizer System......................... 78Important Safety Precautions .......... 6Indicators, Instrument Panel.......... 57Infant Restraint................................ 20Infant Seats....................................... 29Tether Anchorage Points........... 40Inflation, Proper Tire .................... 264Inside Mirror.................................. 106Inspection, Tire.............................. 265Instrument Panel......................... 2, 56Instrument Panel Brightness......... 69Interior Cleaning............................ 288Interior Lights................................ 114Introduction.. (i)Jacking up the Car......................... 297Jack, Tire........................................ 296Jump Starting (303)Keys (77)Label, Certification........................ 324Lane Change, Signaling.................. 69Lap/Shoulder Belts................... 15, 41LightsBulb Replacement..................... 272Indicator........................................ 57Parking.......................................... 67Turn Signal................................... 69Load Limit...................................... 185LOCK (Ignition Key Position)....... 80Lockout Prevention......................... 82LocksAnti-theft Steering Column........ 80Fuel Fill Door............................. 175Glove Box..................................... 88Power Door.................................. 81Trunk............................................ 86Low Coolant Level......................... 180Lower Gear, Downshifting to a.... 191Low Oil Pressure Indicator.... 58, 309Lubricant SpecificationsChart................................... 326, 328Luggage (184)Maintenance................................... 215Owner Maintenance Checks.... 227Record.................................. 225-226Required Indicator....................... 65Safety...........................................216Schedule.............................. 220-224Malfunction IndicatorLamp..................................... 59, 311Manual Transmission.................... 191Manual Transmission Fluid ......... 245Meters, Gauges................................ 63Methanol in Gasoline.................... 332Mirrors, Adjusting......................... 106Moonroof........................................ 105Closing Manually....................... 314Operation (105)Neutral Gear Position.................... 195New Vehicle Break-in ................... 174Normal Shift Speeds. (192)CONTINUED。
沃尔玛电动自行车用户手册说明书

LIST OF COMPONENTSDISPLAY DEVICEBUTTON FUNCTIONALITYNAVIGATING TIPS:•button.•can press either OK or button to•certain features.USB CABLE PROTECTIVE BAG BEFORE YOU BEGIN CARB/EPA COMPLIANCE NOTE: The stickers included in some products apply to products that have received CARB exemption for emissions compliance. This product may meet the emissions compliance requirements of the California Air Resources Board and Federal Environmental Protection Agency. If so, it is legal for sale and use on pollution-controlled vehicles operated on public streets and highways. The device must be installed and operated according to the instructions provided in this user’s manual. Included with these compliant products is a sticker (similar to the one pictured above) for you to keep in your vehicle. You can either adhere it somewhere on the vehicle (e.g., the inside end of driver’s door) or simply store it in your glove box. The purpose of these stickers is to inform anyone who may have questions regarding the use of your Superchips product and how it affects emissions.1 Double-click the Ignition Icon2 Connect your device to the computer using the supplied USB cable.(Ignition will automatically search for updates related to your device.)6 If required, read and Accept the disclaimer .7 Fill in the required information and click Go to Review .(Here you can check the information you filled in before submitting the order .)8 Click the Place Order button to complete your order .9 If a purchase was made, follow steps 1-3 above to complete the update.1453678PRODUCT UPDATES USING IGNITIONIgnitionand the internet (if possible).11QUICK TUNESTEP 6 - Select a tuning level.Loading your Vehicle Application...Please Wait Stock Files are Saved Successfully!Press OK to continue Select TuningPage 1 of 1Performance Tow 87 Octane Mileage XS SAVE Stock w/ OptionsSTEP 7 - Push left arrow to close out of custom options.STEP 8 - Install the “Tune” File by pressing OK.STEP 8 - Turn the Ignition Off. Press OK to continue.KEY:x= Towing is not recommended for this tune .S= Octane Requirements vary for gas vehicles. Follow recommended guidelines on the device.$= Tow rated up to Superchips recommended tow limits. See limits for your vehicle displayed by the Flashpaq during the programming process.0= Tow rated up to OEM max towing recommendation.Availability of specific tunes may vary based on your vehicle’s make and model:x S Performance - Designed for maximum engine and transmission performance. ---------------------------------------------------------------------------------------------------------------------------------x87 Performance - Designed for non-towing applications and requires the use of 87 octane gas for best results.---------------------------------------------------------------------------------------------------------------------------------x91 Performance - Designed for premium horsepower, torque, and driveability. The tune is calibrated for 2WD, 4WD-HI, and 4WD-LO. Requires 91 octane gasfor best results.---------------------------------------------------------------------------------------------------------------------------------x93 Performance - Designed for maximum horsepower, torque, and driveability. The tune is calibrated for 2WD, 4WD-HI, and 4WD-LO. Requires 93 octane gasfor best results.---------------------------------------------------------------------------------------------------------------------------------x87 Octane - Designed to allow you to run 87 octane regardless of themanufacturer’s recommendation.---------------------------------------------------------------------------------------------------------------------------------S$Light Load Tow - Optimizes engine and transmission performance for mid-weight range towing applications---------------------------------------------------------------------------------------------------------------------------------0Heavy Load Tow - Requires the use of 91 octane gas or better and is used for optimized engine and transmission performance for heavy towing applications.---------------------------------------------------------------------------------------------------------------------------------Towing - Requires the use of 91 octane gas or better and is used for optimized towing up to the OEM recommended towing limits. This tune is safe to use in 4WD-HI or 4WD-LO and is available for all Jeeps covered by Superchips.NOTE: If a towing tune is not available, use 87 Tune with 91 Octane fuel.Crawling Tune - Is a Superchips exclusive tune offering low throttle response and high low-end torque designed for precision low-speed maneuvers. This tune is currently only available for JK Jeep models.----------------------------------------------------------------------------------------------------------------------------------x Extreme - This is an aggressive tune used for maximum horsepower, torque, and driveability.----------------------------------------------------------------------------------------------------------------------------------Mileage XS - Requires 87 octane gas and is used for fuel mileage gains. The tune is calibrated for 2WD, 4WD-HI, and 4WD-LO uses.----------------------------------------------------------------------------------------------------------------------------------Stock - Returns vehicle to factory stock. Removed all Superchips tuning from your vehicle. It is recommended that you calibrate your vehicle back to stock prior to taking it in for service or maintenance.Mileage XS SAVE Stock w/ Options specific requirements.the OBDII port.Rev LimiterSpeed LimiterGear RatioTire SizeFan TempAFM / DODContinueSelect OptionsRev LimiterSpeed LimiterGear RatioTire SizeFan TempAFM / DODContinue Installing EnginePerformance Tuningis now InstalledPress OK to Continue STEP 9 - Allowthe file to beinstalled.STEP 10 - Turnthe ignition Off.STEP 11 - PressOK to return tothe main menu.1415 ADVANCED TUNING OPTIONSi T he vehicle must have appropriate speed rated tires.i Do not exceed proper operating conditions. i O bey all traffic laws. i F or use only on a controlled track. Never exceed legal limits on publicroadways.---------------------------------------------------------------------------------------------------------------------------------Rev Limiter - Adjusts engine rev limiter by increments or fixed values.i D o not exceed proper operating conditions.-------------------------------------------------------------------------------------------------------------Tire Size - This feature has been moved to the “Vehicle Functions” menu, underAdditional Features.Axle (Gear) Ratio - Corrects the speedometer , odometer and automatic transmission shift points for rear end gear changes. i Confirm aftermarket parts are installed before adjusting this option.------------------------------------------------------------------------------------------------------------------------------------Automatic Transmission Shift Points - Adjusts transmission shift points for optimized driveability and operation.---------------------------------------------------------------------------------------------------------------------------------Automatic Transmission Shift Pressure - Adjust transmission shift pressure in PSI to allow for a more aggressive shifts.---------------------------------------------------------------------------------------------------------------------------------Cooling Fan - Adjusts fan turn ON temperature. ---------------------------------------------------------------------------------------------------------------------------------Manual Transmission Skip Shift - Enables or disables Computer Aided Gear Selection (CAGS) for manual transmissions.---------------------------------------------------------------------------------------------------------------------------------Spark Advance Set - Reduces the spark timing.---------------------------------------------------------------------------------------------------------------------------------MDS Disable - Enables or disables the factory Multi- Displacement System. NOTE: On 13-14 Hemi Trucks, the dash light will continue to illuminate even when the feature is actually disabled.---------------------------------------------------------------------------------------------------------------------------------Increasing the height ofyour vehicle raises thecenter of gravity and canaffect stability and control.Use caution on turns andwhen making steeringcorrections.WARNINGAvailability of specific options may vary based on your vehicle’s make and model:---------------------------------------------------------------------------------------------------------------------------------Speed Limiter - Adjusts the top speed limiter by increments or fixed values.alQuestions and Answers Q: Can my Flashpaq program more than one vehicle at a time?A: No, only after you return your first vehicle back to factory stock. -----------------------------------------------------------------------------Q: Does Superchips support custom tuning?A: Not at this time. -----------------------------------------------------------------------------Q: What aftermarket accessories will my Flashpaq work with?A: Flashpaq programmers are engineered to work with the following parts right out of the box: throttle body spacers, shorty headers, cat-back exhaust system, and cold air intake kits. Compatibility may vary by make and model. ----------------------------------------------------------------------------- Q: How do I change my vehicle’s calibration?A: Refer to the TUNING sections of this guide for detailed instructions.NOTICE:Before taking your vehicle into a service center, return your vehicle to stock. The service center might reprogram your vehicle with an updated program without your knowledge. If you do not use this device to return your vehicle to factory stock and your vehicle is reprogrammed by the service center, the programmer will no longer be able to program your vehicle. STEP 1 - Plug the OBDII port.Installing EngineSTEP 6 - Allow the stock settings to be re-installed.Install the Stock File?18RETURNING YOUR VEHICLE TO STOCK COMMON TUNING QUESTIONS STEP 2 - Enter STEP 3 - Turn STEP 4 - Select Select TuningPerformance Tow 87 Octane Mileage XS SAVE Stock w/ Options StockSTEP 5 - Install the Stock File by pressing OK.STEP 7 - Turn the Ignition Off. Press OK to continue.STEP 8 -PressOK to return to the main menu.Select TuningVehicle was Returned toStock SuccessfullyPress OK to continueFor specific Dodge vehicles, the option to modify various features using Quick Options is available. WARNINGNOTICE:Do not remove or bump the OBD-II connector while changing Quick option settings. If you do, the vehicle may not start.Do not make adjustments to your vehicle while parked in unsafe locations including heavy traffic or places without cell phone service.STEP 1 - Enter the Tuning Menu by pressing OK.STEP 3 - the list. STEP 2 - Select Quick Options.specific needs.Select TuningFog Light w/ Highs Cutoff Engine Idle : This feature allows the user to increase the engine Idle RPM momentarily.Gear Ratio : This feature allows you to adjust the gear ratio after they have been modified.Mobile Desoot: For diesel engines with particulate filters, use this feature to activate a regeneration cycle.Spark Adv : This feature gives the option to retard the timing down a min. of 6 degrees.Tire Size : This feature allows you modify the programmed Tire Height. Transfer Case LO Adjustment : Allows you to adjust the transfer case settingswhile in 4-LO.The availability of the following features depends on the year & model of your vehicle.QUICK OPTIONS QUICK OPTIONS EXPLAINEDREAD DTCThis feature allows you to troubleshoot issues that your vehicle may be experiencing. Most vehicles will illuminate the in-dash check engine light. A Diagnostic Trouble Code (DTC) arises when a vehicle’s computer detects a sensor failure or a parameter outside of specific range.CLEAR DTC This feature allows you to clear the DTC and turns off the check engine light.NOTE: If a DTC persists, this could indicate a vehicle malfunction. We recommend seeking a qualified professional in resolving the issue. Program the vehicle back to stock prior to service.STEP 5 - Allow the device to search for DTCs.STEP 6 - Read andfollow the on-screeninstructions.Pressing UP or DOWNwill cycle through theDTCsPressing OK or LEFTwill exitPress OK to ContinueSTEP 7 - Push the/ arrows toview each DTC.DTC - 1of2P0090Fuel Pres Reg Ctrl CircSTEP 8 - Press OKto return to theDTC menu.STEP 5 - Allow thedevice to search forDTCs to clear.STEP 6 - Read andfollow the on-screeninstructions.Vehicle DTCsSuccessfully ClearedPress OK to ContinueSTEP 8 - Press OK to return to the DTCmenu.If you would like to view Parameter IDs (PIDs) specific to your vehicle, following these instructions to learn how to view them using your Flashpaq device.Do not exceed legal speed limits on public roadways.VIEWING GAUGESSTEP 5 - Select a PID Group, then select a total of 4 PIDs. Use the / arrows to switch between screens. OK to select.While viewing gauges, press OK to startDatalogging Press OK again to stopDatalogging Press OK to continueSTEP 6 - Follow the on-screeninstructions. Note the RED highlights.See DataLogging for more information. Select 4 PIDs within thefollowing menu Press OK to continue...PID Groups 1/1Engine MiscFuel Trim/Press Time/Distance Oxygen Sensors Misc Non-Engine Egr/EvapCatalyst Temp Throttle DetailDATA LOGGINGbutton again, to stop the recording.The separator lines will change from Red to which indicates that the device is actively (datalogging).Data logging allows you to record specific vehicle information while driving. Follow these instructions to find out how to datalog, and how it may be helpful to your particular needs.Do not exceed legal speed limits on public roadways.The information will be stored on the device and may be retrieved using a computer . For more information continue to the next section.Engine Misc 1/1Calc Eng LoadEngine Coolant Temp Manifold Abs Pressure Engine RPM Spark AdvanceIntake Air Temperature Mass Air FlowAbs Throttle PositionWARNING WARNINGBATTERY VOLTAGESTEP 1 -Plug the device into the OBDII port.STEP 2 - Enterthe Scan Menu.STEP 3 - Select the Battery Voltage option.STEP 4 - Press OK to return to the previousscreen.DATA LOGGING RETRIEVALfiles.STEP 4 -STEP 5 - Open the folder named DataLogs.STEP 6 -VEHICLE INFOTUNING LEVELStockVIN#################Vehicle Files########DEVICE INFOSTEP 1 - Plug the device into the OBDII port.STEP 2 - Enterthe Info Menu.STEP 3 - Selectthe Device Infooption.STEP 4 - PressOK to returnto the previousscreen.I left Flashpaq tuning in my vehicle and went to my dealer for service, now my Flashpaq will not work?P The dealership likely updated your vehicle’s calibrations, and saved over the tuning. The Flashpaq does not recognize the new iles in your vehicle.----------------------------------------------------------------------------My programmer did not complete programming and went into recovery mode? P Flashpaq programmers are designed with ‘Recovery Mode’which means if, for any reason, the programming process does not finish, the programmer will automatically program your vehicle back to the factory stock settings.It is necessary to follow the screen prompts, possiblyrequiring several ‘Ignition On’ and ‘Ignition Off’ sequences. When recovery is complete your vehicle is at factory stock.My Flashpaq does not power up when plugged into the OB-DII port?P Your vehicle’s OBDII port is powered through a fuse the fuse may be blown. (In most vehicles, this is the same fuse shared by the cigarette lighter)P Try the Flashpaq on another vehicle to make sure it powers up. If it does, then the wiring on the vehicle you are trying to program may be the issue (See your dealer for service).----------------------------------------------------------------------------My Flashpaq Says: “Non-Stock File Detected...” P Your vehicle may have been programmed by anotherdevice. Use that device to set your vehicle back to stock before using the Flashpaq.----------------------------------------------------------------------------When reading the vehicle’s trouble codes (DTCs), I received a P1000 error code? P P1000 is a DTC that sometimes appears after a vehicle isprogrammed or the battery cables are unplugged from the battery. It will automatically clear after several drive cycles.It cannot be removed using the ‘DTC Clear’ function.You are now able to start your vehicle normally. Youmay now attempt to program your vehicle again. In the event that recovery is unsuccessful or fails to complete the programming cycle, a status message will display on the programmer. NOTICE: It is NOT recommended to store your programmer in your vehicle in extreme heat, direct sunlight or extreme cold (temperatures near or below freezing). These conditions can cause malfunction or damage to the programmer.IgnitionSTORAGE AND MAINTENANCESAFETY GUIDELINESThroughout this User Manual you will see important messages regarding your safety or the protection of your vehicle. These messages are designated by the words WARNING, CAUTION, or NOTICE.A WARNING indicates a hazardous situation which, if not avoided, willresult in death or serious injury.A CAUTION indicates a hazardous situation which, if not avoided, could result in minor or moderate injury.NOTICEA NOTICE indicates a condition that could cause damage to the product or your vehicle.The Superchips Product you have purchased is a high-performanceproduct. As such, it does present some risks of which you should be fully aware. Do not use this product until you have carefully read the following safety information and the Owner Agreement.WARNINGCAUTIONBefore using device, read and understand the user manual, including these additionalsafety instructions. Failure to do so could result in DEATH or SERIOUS INJURY.•Do not exceed legal speed limits on public roadways. Violating traffic laws is dangerous and could result in injury or vehicle damage or both.•Use any enhanced speed capabilities of this product only in closed circuit, legally sanctioned racing environments expressly for this purpose. Violating traffic laws is dangerous and could result in injury or vehicle damage or both.Do not operate the device while driving. Distracted driving could result in traffic accidents,death or serious injury, and/or damage to your vehicle.•Always perform all adjustments or changes while stopped. Changing a setting while driving can interfere with your attention to roadway conditions and could result in injury or vehicle damage or both.•Do not stack products. “Stacking” performance-enhancing devices or other improper installation can cause power train failure on the road. Other products may have features incompatible with your Superchips device. Follow all installation and operating instructions.•Some modifications may affect other parts of your vehicle. For example, if you remove/adjust the speed limiter in your vehicle, be sure your tires and other components are rated for the increased speeds they will have to withstand. Not doing so can lead to loss of vehicle control. Modify the speed limiter only for use in closed circuit, legally sanctioned racing environments, not for use on public roadways.WARNINGSAFETY WARNING & CAUTIONCheck out the performance chips and programmers we offer.。
Octane用户手册-中文版

Version 1.0 Beta 2.2用户手册Eco bot by lechuOctane Render 使用手册Version 1.0 Beta 2.2 (May 25, 2010)All Rights ReservedRefractive Software LTD 2010Cover art by LechuBy Phillip Beauchamptable of contents 附录1——高级技巧通过命令行渲染44 绕轴动画设置49 天空动画设置50 问题汇总51 法线贴图52 模型导出脚本53 附录2——相机响应曲线相机响应曲线样本59安装和预览Tomislav Corak软件需求:Octane Render适用于如下操作系统:∙ Windows XP (32 and 64 bit)∙ Windows Vista (32 and 64 bit)∙ Windows 7 (32 and 64 bit)∙ Linux (64 bit only)∙ Macintosh OSXMicrosoft Windows 安装程序可能需要如下runtime包:Visual C++ 2008 Redistributable Package驱动程序:软件运行需要安装如下驱动。
驱动安装错误可能会导致严重的问题。
Refractive Software不能保证支持用户的所有不同版本驱动程序。
/object/cuda_3_0_downloads.html图解视口(Graph Editor)Octane Render的场景与材质都以节点node的方式处理。
这也方便了复杂材质的编辑。
如果你不知道怎样使用节点,不要被吓着..你要知道,在不使用节点的情况下,我们同样也能得到很棒的渲染效果!渲染视口上方的一排工具栏允许用户对渲染进程的各个方面进行操作:标尺渲染进程控制自动对焦状态材质取样器二次取样粘土渲染模式立体影像效果渲染进度GPU动态信息重置相机位置转盘动画观察者视角渲染对象(Render Target) 渲染分辨率相机设置(Camera)在图解视口(Graph Editor)中右击可以在场景中增加节点。
潘基自动汽车操作手册说明书

IndexAdditional Safety Information (24)Door Locks............................... 25Driving With Pets..................... 26Seat-back Position................... 24Storing Cargo Safety ............... 25Advice For Pregnant Women....... 18Air ConditionerCare........................................ 131Operation.................................. 64Air Filter........................................ 119Air Pressure, Tires....................... 127Aluminum Alloy Wheels.............. 135Antenna.......................................... 71Antifreeze .. See "Radiator coolant "Anti-lock Brake System (ABS).. (34)Anti-lock Brake Fluid............. 116ABS Warning Light.................. 41Anti-theft Steering Column LockSystem...................................... 86Appearance Care ........................ 133Ashtrays......................................... 58Audio System ................................ 71Automatic TransmissionDriving Technique.................... 94Fluid......................................... 111Operation.................................. 93Shift Lever Position Indicator. 38BatteryCharging System Warning Light... 39Jump Starting........................ 144Maintenance........................... 122Specification.......................... 149Beeper SystemFasten Seat Belt Beeper...........12Key Reminder........................... 86Light Reminder Chime ............. 49Belts,Seat.........................................See "The Seat Belt Systemand How it Work "Beverage Holder............................. 57Body Repair.................................. 137Brake Warning Light...................... 41BrakesAnti-lock Brake System(ABS)..................................... 34Anti-lock Brake Fluid. (116)ABS Warning Light.................. 41Brake Failure Warning Light.... 41Brake Fluid.............................. 116Brake System Design............ 115Brake Wear............................ 115Brake Wear Indicators........... 115Parking Brake........................... 54Parking Brake Warning Light.. 41Break-in Period................................. 2BulbReplacement.......................... 125Specification.......................... 149Buzzer........... See "Beeper System "Capacities..................................... 148Care and Cleaning........................ 133Catalytic Converter..................... 155Certification Label....................... 150Chains,Tires ................................. 128Check Engine Warning Light ........ 40Child Proof Door Locks ................... 5Child Safety.................................... 27General Guidlines forRestraining Children Under40 Pounds (18kg)................. 28Important Safety Reminders .. 28Using a Seat BeltLocking Clip.......................... 32Using Child RestraintsWith Tethers........................ 31Restraining an InfantWho Weighs Less Than20 Pounds (9kg)...................29Restraining a ChildWho Weighs Between 20 and 40 Pounds(9 and 18kg).......................... 30Restraining a Child Who Weighs Over40 Pounds (18kg)................. 33Storing a Child Seat................. 33Where Should Children Sit ? ... 27Cigarette Lighter............................ 58Clock............................................... 56Clutch Fluid .................................. 117COMPACT Spare Tire................. 138Coolant Temperature Gauge........ 37Cooling(with A/C).. (64)(cont'd)Index (cont'd)Cooling System............................ 112Crankcase Emission Control System ...... 153Cruise ControlIndicator.................................... 38Operation. (52)Daytime Running Light (DRL) (51)DRL Indicator Light.................. 42Defogger............... ......................... 47Defroster........................................ 67Dimmer Switch, Headlights.......... 49DoorsChild Proof Door Lock ............... 5Locks........................................... 3Power Door Locks..................... 4Warning Light........................... 43Door Locks..................................... 25Driving With Pets (26)EmergencyChanging Flat Tire.................. 140Hazard Warning System ......... 50If Your Gets Stuck................. 147Jump Starting........................ 144Towing.................................... 146Warning and Indicator Lights.. 38Emission Controls........................ 153EngineCoolant................................... 112Coolant Temperature Gauge .. 37Exhaust Controls ................... 154Identification Number............ 150Oil and Filter........................... 107Oil Pressure Warning Light..... 40Specification.......................... 149Engine Exhaust Gas Warning........ 89Evaporative Emission ControlSystem ................................... 153Exhaust Gas Recirculation.......... 154Exterior Care . (134)FiltersAir........................................... 119Engine Oil................................ 108Fuel (119)Fluid.................................... See "Oil "Foreign Countries,Operation in .... 83Front SeatAdjustment................................. 6FuelFiller Door and Cap................... 84Filter........................................ 119Gasohol..................................... 82Gasoline..................................... 82Gauge........................................ 36Requirement............................. 82Reserve Warning Light............ 41FuseChecking and Replacing ........ 123Specification.. (149)Gasoline........................... See "Fuel "Gas Station Information. Back cover Gauges............................................ 36General Guidelines for RestrainingChildren Under40 Pounds (18kg)................. 28Glove Box (56)Hazard Warning System ............... 50HeadlightsFlasher...................................... 49High Beam Indicator................. 38High Beam/Low Beam Switch .............................................. 49Reminder Chime ...................... 49Switch ...................................... 49Headlight High Beam Indicator Light.................................................. 38Head Restraints................................ 7Heating............................................ 65High BeamIndicator Light .......................... 38Switch ...................................... 49Hood Latch..................................... 54How the Driver's Airbag Works... 21How the SRS Indicator Light Works (22)Identification Numbers (15)IgnitionKeys............................................ 3Switch....................................... 86Ignition Switch Light...................... 50Important Safety Reminders................................... 11, 20, 28Indicator Lights .............................. 38Inflation Pressures, Tire .............. 127Instrument Panel............................ 35Instrument Panel Brightness Control.................................................. 50Interior Light................................... 51Interior Trim Care (133)Jack.............................................. 140Jump Starting (144)KeysDoor Locks................................. 3Glove Box ................................. 56Ignition....................................... 86Key Reminder Beeper.............. 86Keys........................................... 3Trunk Lock (5)Lap Belt........................................... 13Lap/Shoulder Belt.......................... 12LightsBulb Replacement.................. 125Daytime Running Lights .......... 51Fuse Replacement................. 123Light Reminder Chime ............. 49Operation.................................. 49Warning and Indicator Light.... 38LocksAnti-theft Steering ColumnLock .............................................. 86Child Proof Door Locks ............. 5Doors........................................... 3Fuel Filler Door ......................... 84Glove Box................................ 56Power Door Lock....................... 4Trunk........................................... 5Lumbar Support. (8)MaintenanceIndicator.................................... 44Records.................................. 103Schedule................................. 100Manual TransmissionMaximum Allowable Speeds .. 91Oil............................................ 110Recommended Shift Speeds .. 91Shifting..................................... 90Meters, Gauges......... See "Gauges "MirrorsManual Mirrors......................... 48Power Mirrors.......................... 48Rearview Mirrors..................... 48MoonroofIf the Moonroof Won't Close.. 70Maintenance............................. 70Operation. (69)Numbers, Identification (150)Octane Rating,Gasoline..................... See "Fuel "Odometer....................................... 36OilClutch Fluid............................. 117Engine Oil................................ 107Fluid Locations....................... 106Oil Pressure Warning Light..... 40Power Steering Fluid ............. 118Transmission Oil/Fluid........... 110Operation In Foreign Countries . (83)Panel Brightness Control............... 50Parking Brake................................. 54PGM-FICheck Engine Warning Light... 40System................................... 154PowerDoor Locks................................. 4Mirrors ...................................... 48Steering . (118)(cont'd)Index (cont'd)Windows................................... 55Pressures, Tire Inflation .............. 127Preventive Service. (136)Radiator Coolant.......................... 112Radio............................................... 71Rearview Mirrors........................... 48Rear Window Defogger................. 47Reminder Lights................... See "Warning lights "ReplacementAir Filter.................................. 119Bulbs........................................ 125Engine Oil................................ 108Fuel Filter................................ 119Fuses.......................................123Oil Filter................................... 108Radiator Coolant.................... 113Spark Plugs............................. 120Tires........................................ 129Wiper Blades.......................... 121Restraining an Infant Who WeighsLess Than 20 Pounds (9kg)..... 29Restraining a Child Who WeighsBetween 20 and 40 Pounds(9 and 18kg).......................... 30Restraining a Child Who WeighsOver 40 Pounds (18kg) ........... 33Rust Prevention (135)ShiftingAutomatic................................. 925-Speed.................................... 90Spare TireChanging a Flat Tire............... 140COMPACT Spare Tire........... 138Specifications........................ 148Spark Plugs .................................. 120Specifications .............................. 148Speedometer................................. 36SRS Indicator Light........................ 42Starting the Engine ........................ 87SteeringAnti-theft Column Lock .......... 86Power Steering ...................... 118Tilt Steering.............................. 45Stereo Sound SystemOperation.................................. 71Storing a Child Seat....................... 33Storing Cargo Safety ..................... 25Stuck Car..................................... 147Sunshade........................................ 69Supplemental Restraint System(SRS)..................................... 19How the Driver's Airbag Work s .............................................. 21Important Safety Reminder.... 20How the SRS Indicator LightWorks.................................... 22System Service........................ 23System Service Precautions .. 23Safety Defects, Reporting.......... 158Safety Indicator Lights.................. 43Safety Items................................... 88Seat-back Position......................... 24Seat Belt Maintenance .................. 18Seat Belt System Components.... 12Seat Belt Warning Lightand Beeper................................ 12SeatsDriver's Center Armrest ........... 8Driver's Lumbar Support .......... 8Front Seat................................... 6Head Restraints.......................... 7Rear Seat Armrest..................... 8Trunk Access from Reat Seat.. 9Shift Lever Position Indicator. (38)Tachometer.................................... 36Temperature Gauge, Coolant....... 37The Seat Belt System andHow it Works........................... 11Advice For Pregnant Women . 18Important Safety Reminders .. 11Lap Belt..................................... 13Lap/Shoulder Belt .................... 12Seat Belt Maintenance ............ 18Seat Belt System Components ...............................................12Wearing Seat Belts Properly... 13Wearing the Lap Belt............... 16Wearing the Lap/Shoulder Belt ...............................................14Why Wear Seat Belts.............. 11Tilt Steering....................................45TireAir Pressure............................ 127Balancing ................................ 130Chains..................................... 128Changing a Flat Tire............... 140COMPACT Spare .................. 138DOT Tire Quality Grades....... 151Inflation Pressures................. 127Requirement........................... 151Rotation.................................. 130Snow Tires............................. 128Spare Tire............................... 138Specification.......................... 148Tools............................................. 140Towing ......................................... 146Towing a Trailer............................. 95TransmissionCapacity ................................. 148Identification Number............ 150Oil/Fluid................................... 110Shifting the Automatic............ 92Shifting the Manual.................. 90Tread Wear.................................. 151Trip Meter...................................... 36TrunkAccess From Rear Seat............ 9Lid................................................ 5Lid Warning Light..................... 43Turn Signals (49)Using a Seat Belt Locking Clip...... 32Using Child Restraints With Tethers (31)Vehicle Identification Number ... 150Ventilation.. (59)Warning Lights............................... 38Warranty Service........................ 156WasherReservoir Capacity.................. 46Windshield Washer.................. 46Washing........................................ 134Waxing......................................... 134Wearing Seat Belts Properly .. (13)Wearing the Lap Belt .................... 16Wearing the Lap/Shoulder Belt.... 14Wheels.......................................... 135Where Should Children Sit ? ......... 27Why Wear Seat Belts.................... 11WindowsAppearance Care .................. 133Power Windows ...................... 55Windshield Defogger..................... 47Windshield Washer ....................... 46Windshield Wipers ........................ 46Wiper Blades................................ 121Wipers.. (46)Your Occupant ProtectionSystem......................................10。
ALM Octane Service用户指南说明书

FlyerALM Octane ServiceGet started and move ahead with the next generation of Value Stream and Application Lifecycle ManagementExecutive SummaryFor present-day software companies, the race is on to offer the best solution on the market. Modern business trends show that this race has neither a finish line nor a designated track. Every relevant feature, security update, and user experience improvement counts—and they must be shipped out on time. T o achieve this end, modern software makers are turn-ing to Value Stream Management (VSM) and scaling agile practices to deliver value to their customers with all the quality, security and best experience that is required.A value stream is the implementation pathway that a solution travels as it goes from concept to deliverable. VSM encompasses all the prac-tices and strategies that enable an efficient value stream to ensure frictionless and con-tinuous delivery of value to our end-users. The Scaled Agile Framework (SAFe)is operational agility at scale and draws from Agile and Lean principles to create a model that promotes adaptability, operational efficiency, collabo-ration, improved product quality, and shorter time-to-market at an enterprise level.OpenT ext™ ALM Octane includes integrated planning, continuous integration, test manage-ment, and release management enabled for SAFe. With these capabilities, Agile teams and DevOps toolchains deliver high-quality soft-ware with insight, traceability, analytics-focused end-to-end visibility, and continuous quality. OpenT ext™ValueEdge is a cloud-based value stream management (VSM) and DevOps plat-form. Adopt at your own pace with a modular platform that covers your entire digital value stream—from planning to building, testing, de-livering, and running your applications.OpenText™Professional Services can helpyou start quickly and on the right foot with ourValueEdge and ALM Octane Services. We willhelp you set the solid foundation you need toquickly leverage your investment in your ALMsolutions and tackle your journey to the digiti-zation of everything.Available ServicesProfessional Services team offers the followingservices to assist you to implement and adoptALM Octane:■ValueEdge or ALM Octane Quick Start■ValueEdge or ALM Octane Foundation■ALM Octane for DevOpsEach service is designed to provide you withhands-on experience implementing, configur-ing, administering, and using ValueEdge or ALMOctane at the level you require.Quick Start ServiceThe Quick-Start service establishes a solidfoundation for a successful implementationof OpenText ValueEdge or ALM Octane. Weevaluate your current environment and recom-mend key actions that will enable your orga-nization to modernize your IT services. Basedupon our experience helping customers withsimilar projects, we can get you started theright way to achieve quick wins.The QuickStartservice duration is 5 days and can be pur-chased using SKU: PS-AB073—Lifecycle andPortfolio Management.Foundation ServiceThe Foundation Service is designed for ourcustomers who are ready to ramp up onValueEdge or ALM Octane. This service runsfor a duration of 10 to 20 days and can includethe following activities:■Planning your implementation■Running a workshop to understand howwe can adapt ValueEdge or ALM Octane toyour existing approach and help you adoptthe solution■Configuring ValueEdge or ALM Octane inaccordance with our workshop findings forone workspace■The creation and configuration of onepipeline■The implementation of supported outof the box integrations (OpenT ext or3rd Party) such as:– CI pipeline add-ins– IDE add-ins– ChatOps add-ins– T est automation tools (either directlyintegrated through CI tools)■Provide mentoring to assistyou for one workspace to:– Build your backlog– Organize your releases, sprints,storyboards, and teams– Work with application modules– Configure and run manual, Gherkin,and automated tests and test suites– Run and manage your pipeline– Configure and use dashboardsThroughout the implementation, we workwith you side by side and coach your team.We share our recommended practices to ad-vance your team’s self-sufficiency in using,configuring, and maintaining your solution. Ourconsultants can enhance your knowledge ofScrum, Kanban, or SAFe methods, and assistyour teams to better understand how theseapproaches can be aligned with ValueEdgeor ALM Octane. The Foundation service can be purchased using quantities our 5 day ser-vice SKUs for Application Delivery: On-site PS-AA698 ALM or Remote PS-AA700 ALM. DevOps ServiceThe DevOps service is an extension of our Foundation service and intended to provide customers the tools and capabilities to con-tinue and extend their DevOps journey.The service runs for 20 to 40 days and the ex-tensions for this service include:■A tailored solution design■Deployments in a Dev and Prod environment for ALM Octane■Configuration of workspaces■Integration supported platforms as agreed with the OpenT ext Professional Services team. This can be electedfrom a range of supported:– Pipeline add-ins– IDE platforms– ChatOps platforms– T est automation tools (either directlyintegrated or through CI tools)– Synchronizing tools such as OpenT extALM and PPM or Atlassian Jira■Agile coaching for 2 weeks covering either Scrum, Kanban or SAFe■Hypercare after production go live for1 weekThe DevOps service can be purchased us-ing quantities our 5 day service SKUs for Application Delivery: On-site PS-AA698 ALM or Remote PS-AA700 ALM.Benefits■Accelerate time-to-value by rapidly implementing your solution with confidence based on our recommended architecture and practices, and expert, side-by-side coaching■Drive better decision making with greater insight into your application lifecycle and value streams, delivered through smartanalytics and dashboards■Fast track and improve collaboration with alignment of Agile, non-Agile and DevOps teams around a single unified platform ■Improve your understanding of valuestreams and your software deliveryprogress and application build andtest quality with traceability betweenrequirements, stories, code, builds, tests,and releases■Streamline and accelerate softwaredelivery by managing your backlogs,releases, application pipeline, quality,and tracking in a single unified platformSpecialist ServicesOpenT ext also offers further services for Value-Edge or ALM Octane. These include:E-Signature for ALMThe OpenText E-Signature solution handlesworkflow for ALM/Quality Center or ALMOctane or ValueEdge including an electronicsignature that conforms with health and lifescience regulatory requirements and indus-try guidelines such as Title 21 CFR Part 11,GAMP5, SOX, and HIPAA.More information on E-Signature for ALM canbe found here.GDPR for ALMThe GDPR Accelerator for ALM provides yourorganization with the ability to manage andtrack your GDPR implementation changesthrough ValueEdge, ALM Octane, or ALM/Quality Center.More information on GDPR for ALM can befound here.Migration Services fromALM/Quality CenterThe ALM/Quality Center to ALM Octane Mi-gration service is for established customersof ALM/Quality Center seeking to transportassets and data to a modernized platform. TheALM Octane Migration services acceleratestime to value and gets you up and running withALM Octane quickly.More information for migration service fromALM/Quality Center to ALM Octane can befound here.The OpenT ext ProfessionalServices DifferenceOpenText provides unmatched capabilitieswith a comprehensive set of consulting and im-plementation services and unique intellectualproperty that help you drive innovation throughstreamlined and efficient software delivery:■Proven OpenT ext software solutionimplementation expertise■More than 20 years of experience helpinglarge, complex, global organizations realizevalue from their OpenT ext softwareinvestments■Rich intellectual property and unparalleledreach into product engineering■Education and support services to ensureadoptionLearn more atOpenT ext Professional Services/opentext261-000217-001 | O | 09/23 | © 2023 Open T ext。
老鹰C4D学习笔记 100天进阶建模计划Cinema4D Arnold Octane学习手册中文说明
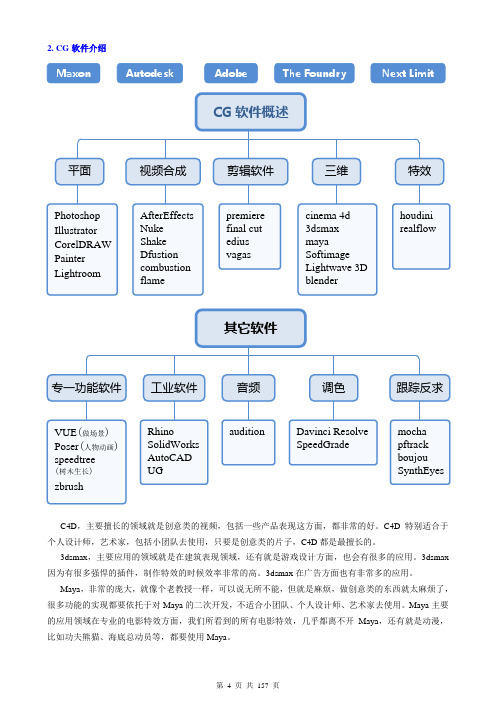
2. CG软件介绍C4D,主要擅长的领域就是创意类的视频,包括一些产品表现这方面,都非常的好。
C4D特别适合于个人设计师,艺术家,包括小团队去使用,只要是创意类的片子,C4D都是最擅长的。
3dsmax,主要应用的领域就是在建筑表现领域,还有就是游戏设计方面,也会有很多的应用。
3dsmax 因为有很多强悍的插件,制作特效的时候效率非常的高。
3dsmax在广告方面也有非常多的应用。
Maya,非常的庞大,就像个老教授一样,可以说无所不能,但就是麻烦,做创意类的东西就太麻烦了,很多功能的实现都要依托于对Maya的二次开发,不适合小团队、个人设计师、艺术家去使用。
Maya主要的应用领域在专业的电影特效方面,我们所看到的所有电影特效,几乎都离不开Maya,还有就是动漫,比如功夫熊猫、海底总动员等,都要使用Maya。
3.C4D 应用领域学好C4D 可以从事什么行业、什么职业?网页设计 电视包装 大屏开场动画 企业宣传片包装 平面设计 影视广告 创意视频 辅助电影特效 电商设计 影视片头扁平MG 动画UI 设计C4D 的应用方向更倾向于创意和视觉上的酷炫,而在电影特效方面,用的非常的少。
电影特效主要用的软件是Maya 和Houdini ,但不是说在电影特效上面C4D 就完全用不上,C4D 在电影特效上用的最多的是图表动画。
C4D 不擅长的是,比如制作 “金刚”这样的怪兽、“变形金刚”这种非常庞大的的特效。
4.C4D 界面讲解视图菜单:(1) /:将当前视图恢复到默认视图,也就是新建一个工程时的视图;(2)①:先选择对象,然后点击,则以该对象为视角来观察视图(比如灯光); ② 切换回默认视图: //;(3)::显示效果会受到所有灯光的影响,并随着灯光的改变而改变;(光影,就是受灯光影响。
) :显示效果不受场景中灯光的影响,只受C4D 中默认灯光的影响;:不受任何灯光的影响(包括默认灯光),没有阴影明暗的变化,显示效果为纯色。
微Focus ALM Octane软件版本16.1.200 Windows升级指南说明书

Upgrade Guide for WindowsGo to Help Center onlinehttps:///octane/ALM OctaneSoftware version: 16.1.200Document release date: May2023Send Us FeedbackLet us know how we can improve your experience with theUpgrade Guide for Windows.Send your email to: **********************Legal Notices©Copyright2023Open Text.The only warranties for products and services of Open Text and its affiliates and licensors (“Open Text”)are as may be set forth in the express warranty statements accompanying such products and services.Nothing herein should be construed as constituting an additional warranty.Open Text shall not be liable for technical or editorial errors or omissions contained herein.The information contained herein is subject to change without notice.DisclaimerCertain versions of software and/or documents(“Material”)accessible here may contain branding from Hewlett-Packard Company(now HP Inc.)and Hewlett Packard Enterprise Company.As of September1,2017,the Material is now offered by Micro Focus,a separately owned and operated company.Any reference to the HP and Hewlett Packard Enterprise/HPE marks is historical in nature,and the HP and Hewlett Packard Enterprise/HPE marks are the property of their respective owners.ContentsUpgrade4 Upgrade paths4 Prepare for upgrade5 Verify Elasticsearch re-indexing(ES version8.x)7 Step1: Deploy the new version and start ALM Octane8 Step2: Configure and upgrade cluster nodes9 Step3: Upgrade spaces in ALM Octane9 Step4: Verify that spaces upgraded successfully10 Rollback11 After the upgrade's setup validation phase11 After site schema has been upgraded12 After space schema has been upgraded13 After upgrade completed14 After upgrading cluster nodes14 Upgrade ALM Octane in Docker15 Get default configuration files from the ALM Octane docker image15 Upgrade ALM Octane in Docker16 Install a patch18UpgradeThis document describes how to upgrade an existing installation of an on-premises ALM Octane server on Windows.This section includes:l"Upgrade paths"belowl"Prepare for upgrade"on the next pagel"Step1: Deploy the new version and start ALM Octane"on page 8l"Step2: Configure and upgrade cluster nodes"on page 9l"Step3: Upgrade spaces in ALM Octane"on page 9l"Step4: Verify that spaces upgraded successfully"on page 10 Upgrade pathsALM Octane allows you to choose between two upgrade paths:l Short-term path(STP).Upgrade to each new service pack(for example,from 16.1.100to16.1.200).If you choose this path,you will need to go through all the interim service packs in order to upgrade to the following release.l Long-term path(LTP).Upgrade directly from one release to the next(for example from16.0.100to16.1.100,to the next LTP release),without having to upgrade to each of the interim service packs.The current version is an STP service pack,meaning that you can only upgrade to 16.1.200from16.1.100.If you have not yet upgraded to ALM Octane16.1.100, upgrade now.Prepare for upgradeBefore upgrading,review the following:1.Check that all spaces are up to date,first in Settings> Site>Spaces,andthen in Settings> Site>POST UPGRADE JOBS.Delete any spaces that you do not want to upgrade to prevent problems in future upgrades.2.Verify that your server machine,and if relevant,all cluster nodes,meet allprerequisites.This includes checking the supported versions for all third party tools,such as Elasticsearch,and upgrading accordingly.For details,see"Prerequisites"in the ALM Octane Installation Guide for Windows.3.Stop the ALM Octane service on the server,and if relevant,on all clusternodes.4.Create backups of:l The repository located in C:\Program Files\Octane\repo(or in a clusterinstallation:\\MACHINE_NAME\REPO_NAME)l Existing ALM Octane configuration files including octane.confl Your databasel Elasticsearchl If you are using ALM Octane Synchronizer,back up:o C:\Program Files\Octane\wrapper\wrapper.confo service.locator.properties(C:\Program Files\Octane\webapps)5.Take note of any special aspects of your configuration,such as:6.Before upgrading,remove all patches or hotfixes at WEB-INF\lib and WEB-INF\classes.Example of a full path for Windows environment:l C:\Octane\webapps\root\WEB-INF\classesl C:\Octane\webapps\root\WEB-INF\libVerify Elasticsearch re-indexing(ES version8.x) In this service pack,Elasticsearch re-index is mandatory.l Space re-index.Spaces that have not been re-indexed are not accessible to users.You must complete re-index before upgrading.If you do not,you can re-index after upgrading,but access to the shared space is blocked until re-index is completed successfully.l Site re-index.ALM Octane does not enforce re-index at the site level.It is the responsibility of the site admin to verify that site re-index is complete.If re-index is not complete,the index will not perform properly following upgrade. For example,audit data may be inaccurate.In addition,upgrade to Elasticsearch 8may fail in future releases.For instructions on performing re-index,refer to the ALM Octane Upgrade Guide for version16.1.100.Step1: Deploy the new version and startALM Octane1.Download the ALM Octane package.https:///mysoftware/download/downloadCenter2.Download and deploy the new version of ALM Octane using:3.On the server machine,select Start> ALM Octane> Start ALM Octane.4.Check the C:\Program Files\octane\log\wrapper.log file.If you do not see the"Server is ready!"message,correct the errors shown in the log.l If you encounter a recoverable error in the wrapper.log or upgrade.log files, fix the problem and restart the server to resume upgrade.l If the log file contains the error message“The value https://<server URL>is invalid URL”,refer to the section Upgrading non-standard top-level domains.l The following is required if you configured trust on the ALM Octane server,when connecting to a remote location such as the database server.If yourJava trust store(<java_home>/jre/lib/security/cacerts)uses a non-default password,enter this password in octane.conf in the java-default-trust-store-password parameter.Step2: Configure and upgrade cluster nodes After the upgrade on the first node has completed successfully,you can upgrade the remaining nodes in a cluster.To configure and upgrade cluster nodes:1.Deploy the new version of ALM Octane to each node.2.On each node,select Start> ALM Octane> Start ALM Octane.3.Check the C:\Program Files\octane\log\wrapper.log file.If you encounter arecoverable error in the wrapper.log or upgrade.log files,fix the problem and restart the server to resume upgrade.Step3: Upgrade spaces in ALM OctaneAfter upgrading,log into ALM Octane as the site admin to upgrade each space.To upgrade spaces in ALM Octane:1.In a browser,navigate to<ServerURL>:<port>/ui?site.2.Log in with the user name and password defined in the octane.conf file.To upgrade all spaces at once,log in as the site admin.3.Click Site and then click the Spaces tab.4.Select one or more spaces and click Upgrade.Upgrade is available only if the space needs to be upgraded.5.Individual workspaces are upgraded in the background.Step4: Verify that spaces upgraded successfullyVerify that all spaces were upgraded successfully from the previous version.To verify that a space has been upgraded,check that:l The space status is Active(or Inactive if it was previously deactivated).l The space version is updated to the current version.In addition,check that all post-upgrade jobs were completed in Settings>Site> POST UPGRADE JOBS.RollbackThis section describes how to roll back after upgrading an on-premisesALM Octane server.This may be necessary if for some reason the upgrade fails or performance is slow.Depending on when you want to roll back,there are different steps to perform.This section includes:l"After the upgrade's setup validation phase"belowl"After site schema has been upgraded"on the next pagel"After space schema has been upgraded"on page 13l"After upgrade completed"on page 14l"After upgrading cluster nodes"on page 14After the upgrade's setup validation phaseYou can roll back after the upgrade's setup validation phase,whether it passed or failed.If the upgrade reached setup validation,the following have been modified:l Previously-deployed filesl ALM Octane configuration files,including octane.confTo roll back the deployed files,including octane.conf1.Uninstall the new ALM Octane version using Windows Add/Remove Programs.2.Install the previous ALM Octane version,as described in the ALM Octane HelpCenter> Installation Guide for Windows(for the previous version).3.Revert to backups of ALM Octane configuration files,including octane.conf.4.If necessary,copy back the folder in which you stored the repository,such asC:\Program Files\Octane\repo.5.Start the ALM Octane service.After site schema has been upgradedYou can roll back after the site schema has been upgraded.If the upgrade upgraded the site schema,the following has been modified:l Previously-deployed filesl Elasticsearch indexesl ALM Octane configuration files,including octane.confl The site schemaTo roll back the site schema1.Stop the ALM Octane service.2.Revert to a backup of the site schema.3.Revert to a backup of Elasticsearch indexes.4.Uninstall the new ALM Octane version using Windows Add/Remove Programs.5.Install the previous ALM Octane version,as described in the ALM Octane HelpCenter> Installation Guide for Windows(for the previous version).6.If necessary,copy back the repository folder located in C:\ProgramFiles\Octane\repo(or<Repository folder>for cluster configuration).7.Revert to backups of ALM Octane configuration files,including octane.conf.8.Start the ALM Octane service.After space schema has been upgradedIf the upgrade upgraded the space schema,the following have been modified:l Previously-deployed filesl Elasticsearch indexesl ALM Octane configuration files,including octane.confl The site schemal The space schemaRolling back a single space is relevant after upgrade of a space failed.In this case, fixes are required depending on the cause of the failure,as seen in the logs and in the UI.To roll back changes to the space schema:1.Revert to the backup of the space schema.2.Revert to the backups of Elasticsearch indexes related to the specific space.Space-specific indexes can be identified by the space logical name embedded in their name,using the pattern mqm_{space logical name}_*.Note: There are multiple Elasticsearch indexes for each space.Make sure to roll back all of them.3.Revert to the repository backup of this specific space.4.Fix what caused the upgrade to fail.5.Run the following API to repair the space:POST{octane server}/admin/shared_spaces/repair?ids={space_id}Tip:To repair multiple spaces,provide the space_ids separated by commas.6.Upgrade again.After upgrade completedIf the upgrade completed successfully,the following have been modified:l Previously-deployed filesl ALM Octane configuration files,including octane.confl The site schemal The space schema(s)l Elasticsearch indexesl ALM Octane repository filesTo roll back the entire upgrade1.Follow the procedure"To roll back the site schema"on page 12.2.Revert to backups of all space schemas.3.Revert to backups of all Elasticsearch indexes.4.Revert to backup of the previous repository.After upgrading cluster nodesIf you upgraded additional cluster nodes,the following has been modified on the cluster nodes:l Previously-deployed filesl ALM Octane configuration files,including octane.confTo roll back the previously-deployed files1.Uninstall the new ALM Octane version using Windows Add/Remove Programs.2.Install the previous version on a node.3.Revert to backups of ALM Octane configuration files,including octane.conf.4.Deploy ALM Octane on each cluster node as described in the ALM Octane HelpCenter> Installation Guide for Windows(for the previous version).5.Start the ALM Octane service on each cluster node.Upgrade ALM Octane in DockerThis section describes how to upgrade ALM Octane in Docker.This section includes:l"Get default configuration files from the ALM Octane docker image"below l"Upgrade ALM Octane in Docker"on the next pageGet default configuration files from the ALM Octane docker imageBefore upgrading,make sure you have default configuration files from the new ALM Octane Docker image.1.In Docker Desktop,select Images in the left pane.2.Locate the ALM Octane version you want to upgrade.Note that only on-premises versions of ALM Octane are supported.3.Click Run and go to Optional Settings.4.In Container name,enter a name of your choice.5.In Ports,enter8080to use HTTP.6.In Volumes,enter the following:C:\OctaneDockerConfFiles\conf for opt/octane/confC:\OctaneDockerConfFiles\log for opt/octane/logC:\OctaneDockerConfFiles\repo for opt/octane/repo7.Click Run to execute the Docker image for the fist time.The first run should fail with errors because ALM Octane has not beenconfigured.8.Open C:\OctaneDockerConfFiles\repo.The conf-discover folder containsthe default ALM Octane configuration files.Copy them to a backup location.Upgrade ALM Octane in DockerThis section describes how to start a new ALM Octane container using the configuration from a previous version,and upgrade the data.1.Stop your ALM Octane container.2.Back up your Oracle or MSSQL database.3.Back up Elasticsearch.4.Back up the conf and log folders(if mapped).5.Back up the REPO folder,which includes the conf-discover and storagefolders.6.Download the new ALM Octane Docker image.7.Overwrite the.xml files in the folder conf-discover(in the REPO folder)withthe.xml files from the default configuration files for the new version.For details see"Get default configuration files from the ALM Octane docker image"on the previous page.8.Click the Run button and open Optional Settings.9.In Optional Settings,define the new container name.10.In Optional Settings,define the identical container configuration as yourcurrent ALM Octane container configuration.This means that the ports,and the mapping of the conf,log,and repo mount folders should be the same in the new container as your current container.11.Run the new ALM Octane container configuration.12.Validate that the container works by checking the container's Log tab,or thewrapper.log and octane.log files in the mapped log folder.13.Continue with the regular space upgrade procedure,as described in"Step3: Upgrade spaces in ALM Octane"on page 9.Install a patchThis section describes how to install a hotfix patch,without upgradingALM Octane.1.Stop the ALM Octane service.2.Create backups of:l The repositoryl Existing ALM Octane configuration files,including octane.confl Your databasel Elasticsearch3.Run the installer file containing the fix as you would do for a regular upgrade.4.Start the ALM Octane service and validate that the issue is fixed.There is no need to upgrade the spaces.。
汽车后服务业英汉对照实用手册中英文EXCEL版
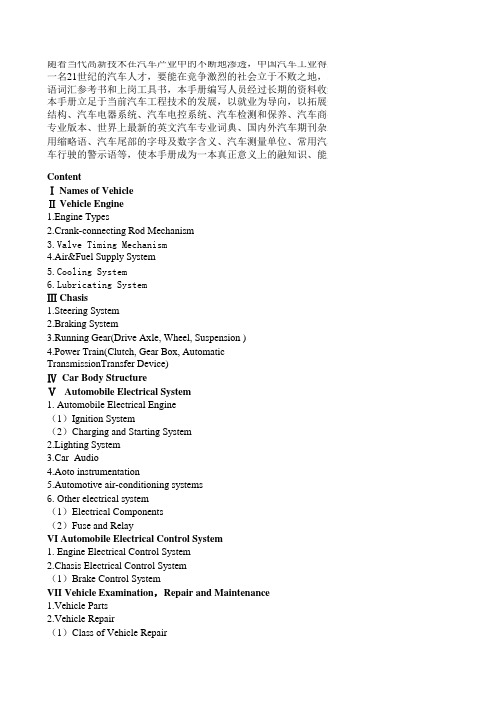
随着当代高新技术在汽车产业中的不断地渗透,中国汽车工业得到了一名21世纪的汽车人才,要能在竞争激烈的社会立于不败之地,掌握这些高新汽车词汇、术语已是当务语词汇参考书和上岗工具书,本手册编写人员经过长期的资料收集、整理,汇编完成《汽车后服务业英本手册立足于当前汽车工程技术的发展,以就业为导向,以拓展知识、培养能力为目标,主要划分为“汽结构、汽车电器系统、汽车电控系统、汽车检测和保养、汽车商务”八个部分。
为使手册更具前沿性、权的专业版本、世界上最新的英文汽车专业词典、国内外汽车期刊杂志、各大汽车公司的技术资料,汇集常用缩略语、汽车尾部的字母及数字含义、汽车测量单位、常用汽车电线颜色缩写、进口汽车仪表标识汽车行驶的警示语等,使本手册成为一本真正意义上的融知识、能力、创新为一体的全新汽车词汇、术ContentⅠ Names of VehicleⅡ Vehicle Engine1.Engine Types2.Crank-connecting Rod Mechanism3.Valve Timing Mechanism4.Air&Fuel Supply System5.Cooling System6.Lubricating SystemⅢ Chasis1.Steering System2.Braking System3.Running Gear(Drive Axle, Wheel, Suspension )4.Power Train(Clutch, Gear Box, Automatic TransmissionTransfer DevicⅣ Car Body StructureⅤ Automobile Electrical System1. Automobile Electrical Engine(1)Ignition System(2)Charging and Starting System2.Lighting System3.Car Audio4.Aoto instrumentation5.Automotive air-conditioning systems6.Other electrical system(1)Electrical Components(2)Fuse and RelayVI Automobile Electrical Control System1. Engine Electrical Control System2.Chasis Electrical Control System(1)Brake Control SystemVII Vehicle Examination,Repair and Maintenance1.Vehicle Parts2.Vehicle Repair(1)Class of Vehicle Repair(2)Vehicle Repair(3)Vehicle Failure3.Class of Vehicle Maintenance4.Instrument and Device(1)Vehicle maintenance technology terminology(2)Vehicle Inspection and Maintenance Tools & Equipmenteful Sentences of Vehicle Repair6.Car BeautyV III Automobile Business1.Automobile SaleUseful Sentences of Automobile Sale2.After-sale ServiceUseful Sentences of After-sale Service3.Automobile InsuranceUseful Sentences of Automobile Insurance附录1:汽车VIN码附录2:常用车型名称英汉对照附录3:汽车常用缩略语1.汽车行业缩略语2.汽车技术缩略语3.汽车维修缩略语附录4:汽车尾部的字母及数字含义附录5:汽车测量单位附录6:常用汽车电线颜色缩写附录7:进口汽车仪表标识英汉对照表附录8:BENZ发动机实车测试值中英文对照附录9:汽车行驶的警示语车身结构示意图Ⅰ Names of Vehicleair cushion carair-cooled carambulanceautomobile carrierbaggage carbuscable-testing carcargo-buscoachcompact carcontainer carrierconvertiblecoupediesel-engined passenger car double-deck busdrop head coupeduel fuel vehicledust car (refuse collector) extra heavy off- road vehiclefire engineforward control passenger car four-wheel drivefront-wheel drivefuel-cell carfull-trailer towing vehicle gas guzzlergeneral -purpose vehicle heavy off -road vehicleheavy truckheavy vehiclesintermediate carjeepkartinglight trucklight-off-road vehiclelight-vanlimousine (pullman saloon)long-wheelbase truckmedium off-road vehiclemedium truckmini-truckmixer truckmulticylinder carnotchbackone-seaterowing vehicle passenger sedans and light commercial vehicles petrol-electric carpick-upplatform truck (flat bed truck)policecarrecreational and off-road vehicles refrigerated vanroadstersedansemi-trailer towing vehicleseven-seatershort-wheel base truck sightseeing bus (touring bus)single fuel vehiclesnowplowstation wagonstation wagonsemi-caterpillar vehiclestreet sprinkler (street flusher) subcompact cartaxiTrailertipping vehicletowing vehicletrailer trucktruck (lorry)vanwreckerWheeledⅡ Vehicle Engine1.Engine Typesair cooled engineeffective powereffective torqueengine speed characteristicfour stroke enginetwo stroke enginewater cooled engine2.Crank-connecting Rod Mechanism big end bearingbig end capborecompression ratiocompression ringcompression strokeconnecting rodcounter weightcrankshaftcylinder blockcylinder sleeve, cylinder liner detonationflywheelgrooveknockmain bearingmain bearing capmain shelloil ringpistonpiston headpiston pinpiston ringpiston skirtpiston toppulleyslotstrokeswept volume, displacement torsional vibration damperunited chamberworking strokeworking volume3.Valve Timing Mechanism camshaftcylinder headdual over head camshaft exhaust manifoldexhaust strokeexhaust valveintake strokeintake valvemulti-valve engineover head camshaftover head valvepump diaphragmpush rodrockersediment cupsilencer, mufflersingle over head camshaft tappettiming geartiming phasevalve clearancevalve guidevalve seatvalve springvalve stem4.Air&Fuel Supply System accelerating system advancerair cleaneranti-knock propertyball shape chambercarbcarb adjustment carburetorchokecoefficient of excessive air combined governor combustion chamber combustion mixture complex governor condensing pointcouplingdelivery valvediaphragm carburettordistilelectronic controlemissions carburetor evaporating propertyfeedback carburetorfilter cartridgefixed speed governorfloatfloat carburettorfloat chamberflyweightfuel injection pumpfuel pumpfuel tankfull speed governorgasoline direct injection gasoline filtergasoline, petrolgovernorhigh pressure fuel pipeidle systemignition propertyinjectorintake manifoldintegrated fuel control carburetor intermediate coolerjet carburetormain supply system mechanical centrifugal governor metering jetmodified carburetormulti-nozzle carburetormuti-point injectionneedle valvenon feedback carburetor plungerpneumatic governorprecise couplepri-combustion chamberpri-combustion periodprimary filter programmed carburetor rapid combustion period relief valveresearch octane number secondary filtersingle point injection slow combustion period sonic-nozzle carburetor specific fuel consumption tanktheoretical mixturethick mixture thickening systemthin mixturethrottle percentage transfer pump turbocharger turbulence chambertwo speed governor viscosity5.Cooling Systemanti-freezing liquidbig circulation compensation reservoir distributive pipedrain valvefanfinspre-heatingradiatorshuttersmall circulation thermostatV beltwater jacketwater pump6.Lubricating System bypass valve crankcase ventilationdip stickgreaselubricantoil cooleroil filleroil filteroil passageoil pressure sensoroil pumpoil sealoil sumppressure lubricationsplash lubricationsuction filterⅢ Chasis1.Steering System ackerman steeringackerman steering linkdageair-power steeringall linkage tyep steering system assemblies and partsballball and socket steering knuckleball studcenter steering linkdagecentral king pin type steering systme collapsible steering columncompression springconstant flow hydraulic power steering gear constant pressure hydraulic power steering gear constant ratio steeringcover of steering gearcross shaftdead axledivided ackerman steering linkagedrag linkelliott steering knuckleelliott type axleend plugenergy-absorbing steering columnfast steering (quick steering)forward efficiencyfree play of steering wheelfront axlefront wheel spindlehousinghydraulic accumulator power steering hydraulic constant flow type power steering hydraulic power steerigin-line steering gearintegral power steering gearintegral type power steeringintermediate steering rodinternal leakage in steering control valve knuckleknuckle armknuckle pin(king pin)knuckle spindlelimited flowmanual steering gearmanual steering systemmanual steering systemmax. swing angle of steering pitman arm max. working pressuremax.rotating angle of pitman arm shaftno king pin type steering systemoil reservoiroversteeringparallelogram linkage steeringpitman armpitman arm shaftpower cylinderpower steerig pumppower steeringpower steering systempower steering system layoutpower steering systme response characteristic pre-opened play of steering contol valve pressure loss in steering control valverack and pinion steering gearrated working pressurereactive valverecirculating ball and nut steering gear recirculating ball steering gearrecirculating ball-lever and peg steering gear recirculating ball-rack and sector steering gear reverse efficiencyreverse elliott axlereverse elliott steering knucklereverse rotating torque of steering gearrollerroller shaftrotary valve typerotating torque of steering gearscrew and nut steering gearsectorside coverslow steeirngsocketsplit tie rod type tie rod linkagespool valve typesteeirn gcontrol valve presrue loss characteristtic steerign gear efficiencysteering armsteering columnsteering columnsteering control mechanismsteering drag linksteering drive shaftsteering forcesteering force characteristic steering gar cleanrancesteering gear angle ratiosteering gear angle ratio characteristic steering gear clearance characterstic steering gear efficeieny characteristic steering gear max. output torque steering gear ratiosteering gear with variable ratio steering geometrysteering inner articulated shaft steering knucklesteering knuckle armsteering knuckle thrust bearing steering linkagesteering linkage angle ratiosteering mometnsteering nutsteering oil pumpsteering pinionsteering racksteering reservoirsteering resisting torquesteering screwsteering shaftsteering spindlesteering systemsteering system of trailersteering system stiffnesssteering tie rodsteering universal jointsteering wheelsteering wormstudswing armtelescopic steering column theoretical displacement of pumptie rodtie rod armtie rod endtie rod linkagetilt and telescopic steering columntilt steering wheeltorsion bartorsional stiffness of steering geartotal number of steering wheel turnstotal turns of steering geartotally -opened play of steering control valve tube and ball type steering columnturning radiusundersteeringvalve housingvalve spoolvariable ratio steeringworm and crankpin steering gearworm and peg steering gearworm and roller steering gear2.Braking Sytemactive braking distanceactive braking timeactuating timeadjustable camair compressorair pressure governoralarm pressureauxiliary brakebrake base platebrake calipersbrake chamberbrake discbrake fluidbrake shoebrake shoe carrierbrake valvebraking efficiency factrobraking energy sourcebraking equipmentbraking force distaribution ratebraking mechanicsbraking system hysteresisbraking torquebraking workbuild-up time of braking forceconstituent elementscut-off traveldisc brakedistrubing residual braking torquedrum brakeexhaust brakingfluid braking systemgradual brakinginitial response timeinstantaneous braking powerleading shoeloss of travelmain braking timemaster cylindermean fully developed braking deceleration (MFDD) mechanism hysteresis timemid-travelopening travelpercentage of the braking efficiencypneumatic braking systemreaction timereaction time of driverreduction ratiorelease timereserve brake travelreservoirretainer springretarderretractionrptection pressureservo braking systemspare travelstopping distancestopping tiemtotal braking distancetotal braking forcetotal braking tiemtrailing shoevacuum boosterwheel cylinder3.Running Gear(Drive Axle,Wheel,Suspension ) Running GearframesuspensionDrive Axleaxle housingaxle shaftbevel geardifferentialdifferential lockdifferential side geardouble gear (speed) final drive double reductiondrive pinionfinal drivefinal drive rear coverfloat type axle shafthypoid gearinter-axle differential lock penetrable final drivering gearsemi-float type axle shaft single reductiontorque sensitive differential wheel reductionWheelbeadbelted layerbleed valvecambercastercord, plycrown, treadhub capI-sectionking pin inclinationnylonpatternprotectorpunctureradial tirerimside wallspare tiresteering and driving axle steering axlesteering wheel alignment support axletoe-intubetubeless tiretyre, tirevalve corewheel hubSuspensionauxiliary springbellow type air springcentral boltclipcoil springcompensation valve compression valvecontrol devicediaphragm type air spring double action shock absorber double wishbone suspensiongas filled shock absorber independent suspensionintake valvejounceleaf springlink ringmain springMcPhaeson typepressure adjustable shock absorber reboundrebound valvereservoirrubber springshacklesingle action shock absorbersock absorberspring eyespring platespring, elastic elementsprung massstabilizer, anti-roll barstatic deformationsteering axisstrut typesuspension stiffnesstandem axle suspensiontelescopic shock absorbertorsional bartrailing arm typetransversal type suspensionU-boltunsprung mass4.Power Train(Clutch, Gear box, Transfer Device) Power Trainautomatic transmissioncontinuously variable transmissiondefinite ratioselectrical transmissiongeneral layouthydro-mechanical transmissionindefinite ratioslateral engine positioningmechanical transmissionreductionstatic-hydraulic transmissiontransfer case, transfer boxvariable ratiosClutchcentral spring clutchclearance adjustmentcover platediaphragm spring clutchdriven partdriving partdual disc clutchfriction linerfriction surfacehubmaster cylindernon-linearoverloadpedalpedal free strokepedal working strokepressure platerelease bearingrelease forkrelease leverrelease sleeverivetslipsmooth engagementsplinethorough separationworking cylinderGear Boxball jointconstant meshcounter shaftdirect gearhandlehigh gearinput shaft, drive shaftinter-locklow gearneutral gearoutput shaft, main shaft overdrivepower take-offreverse gearreverse gear shaftself-lockshiftshifting forkshifting leversliding sleevesynchro conesynchronizerthe first gearthe second gearthe third geartop geartransaxleAutomatic Transmission System Automatic Overdrive Transaxle Automatic TransmissionAutomatic Transmission FluidElectronic Continuously Variable Transmission Electronic Controlled Transmission Electronic Controlled Transmission Intelligent Infinitely Variable TransmissionOne Way ClutchRDLVD RDLV DualRDLVS RDLV SingleReverse Delay Valvehydraulic couplingimpellerplanet carrierplanet pinionplanet carrierplanet wheel carrierplanetary gear systemplanetary gear carrierstatorsun geartorque converterturbineTransfer DevicebladeCardan type U-jointconstant angular velocitydual Cardan type U-jointflexible U-jointinner race housinglubricating fitting, nippleneedle bearingouter race shellretainer, ball cagering gearRzeppa type U-jointseamless steel tubespider, center crossuniversal joint, U-jointWeiss type U-jointyoke, forkⅣ Car body structureair conditionerbody shellbraking signal lightcarrying platformcenter pillar, “B” pillarcowl, shrouddash board, fire walldoor lockengine compartmentfloor boardfloor panelfront fender apronfront fender, front wingfront pillar, “A” pillarhead boardhead restraintheaterhood, bonnetlaminated glasspassenger compartmentrear end panelrear pillar, “C” pillarrear view mirrorrocker panelroofroof railsafety seat beltseatseparate frame constructionside boardstreamlinesun visortail boardtightening latchtoughened glasstrunktrunk lid, deck lidunitary construction, integral body warning signalweather stripwindow regulatorwindscreen, windshieldwiperⅤ Automobile Electrical System 1. Automobile Electrical Engine (1)Ignition Systembreakercentral electrodecentrifugal ignition advancerceramic insulatorcondenserdelay vacuum bypass systemdiodedistributordistributor rotor armdistributor signaldistributor vacuum advance control valve distributor vacuum advance solenoid distributor vacuum control switch distributor vacuum vent valvefiring orderfixed contactHall effectheat sensitive resistanceheat valueignition advanceignition advancerignition coilmoving contactnon-contact ignition systemoctane number rectifierprimary windingsecondary windingsemi-conductor ignition systemside electrodesilicon rectified A.C. motorspark gapspark plugterminaltransistortriodevacuum ignition advancer(2) Charging and Starting System anodebattery cellbrushcablecathodecrankingelectric heater plugelectrolyteelectro-magnetic controlfan bladegeneratorrotorseparatorserial wound D.C. motorsilicon rectified A.C. motorstarter ringstarting motorstatorstorage batteryvoltage regulator2.Lighting Systembackup (reversing) lampclearance lampcombination tail lamp lightig equipmetn combined lampsconcealable lampdipped headlightsdischarge lampdoor lock warning lampend outline marker lampengine compartment lampeven number of lampsfog lampgrouped lampshazard warning lampheadlamp cleanerheadlamp levelling deviceheadlightheadlights on full beamheight lampidentification lampinstrument panel lamplamplamps constituting a pairlicense plate lamplightslower-beam (dipped beam) headlamp luggage boot lampoperational tell-taleparking lamppilot lampquivalent lampsrear registration plate lampreflex reflexting deviceretractable lampretro reflecting deviceside marker lampsidelightssingle lampspecial warning lampstep lamp (courtesy light)stop lamptail lamptrun signal lampturn light indicatorupper-beamupper-beam(main beam headlamp)width lampworking lamp3.Car AudioAM/FM(SELECTOR)AUTO REVERSEAUTO STOPBALANCEBALANCE CONTROLBAND SELECTION SWITCHBASS CONTROLSCASSETTE EJECT(SWITCH)CASSETTE TAPE SLOTCLOCK/RADIO FREQUENCY LED DISPLAY DIAL POINTERFADERFADER CONTROLFF*PROG*REWFF*REWFF/EJECTFM STEREOFREQ RANGEFREQ RECALLFRONT(FEAR)SPEAKERHCCHOUR*MINUTE SETJUST/TUNEKEYINGKNOBLINE OUTLOCKABLE FAST FORWARDLOCKABLE FAST REWINDLOUDNESSMANUAL*SEEKMANUD TUNIND KNOBMEMORY INDICATORMEMORY SWITCHMETAL/CRO2 TAPE SWITCHMONO/STEREOMONO/STEREO SWITCH-OVEVON-OFF SWITCH & VOLUME CONTROLPOWER SWITCH,VOLUME&STEREO BALANCE CONTROLS PREST STATION SWITCHPROG(PROGRAM)PROGRAM SWITCHPUSH*CLOCKRANGE BUTTONROD ANTSCALESCANSCAN MEMOSEEKSELECTORSMCSNCSTEREO INDICATORTAPE DIRECTION INDICATORTAPE RUN INDICATORTONETONE CONTROLTRACK INDICATORTREBLETUNETUNING/CLOCK SET KNOBVOLUME CONTROL COMBINED WITH ON/OFF4. Auto instrumentationammeterbraking signal lightfuel gaugeinstrument voltage regulatormileage recorderoil pressure gaugespeedometertach tachometerturning indicatorwarning signalwater temperature gauge5. Automotive air-conditioning systems A/CA/C CLTCHACACCACCACCACCSAIR COND RLYAIR-CHVAIR-DVLVCOMP6. Other electrical system(1)Electrical ComponentsalarmalternatoramplifieranchorA-post, A-pillarApp.APREVLVarmaturBarrelBatteryBlowerBuzzerCentral Power SupplyClutchCompensatorCondenserConverterCourtesyCylindricalDashpotDefoggerDevicefairingHornInhibitorInverterLimiterLtr LighterLtr Limiter MagnetoMemory Microphone phototubepowerradiatorreceiver recirculatorrectifierrRegulatorRelayrelay-actuated resistanceResistorRheostatSelect Switch Starting Motor ThrottleT-QTrack(2)Fuse and Relay aligned position amplitude control angular displacement armature control branched optical cable breakoutcladding mode stripper component side concentric conductor conductive foil conductive pattern conductorcontact adhesion contact weldcontinuous current at locked-rotor control synchrodouble sided boardedge board contactseffective coreelectrical error of null position exciting voltagefiber claddingfiber coreflat cable, ribbon cableflexible conductorflexible printed boardfusegeargraded index fibergridhollow conductorhysteresis synchronous motor induction phase shifter inductosyninertial damping servomotor lectrical micro-machinelimited torque motorlinear revolverlocked-rotor characteristic locked-rotor exciting current locked-rotor exciting power locked-rotor torquemetal-clad platemixermode couplingmode scramblermonomode fibermultilayer printed board multimode fibernull voltageoptical cable connectoroptical coupleroptical fiberoptical fiber cableoptical fiber connectoroptical fiber dispersionoptical fiber spliceoptical filteroptical injectoroptical isolatoroptical switchout of synchronismoutput contactpeak control power at locked-rotor peak current at locked-rotorphase reference voltageplain conductorprinted boardprinted board assemblyprinted circuitprinted componentprinted wiringproportional revolverptical attenuatorquadrature-axis output impedance quadrature-axis voltagereed relayreversing timerevolverrunning torque-frequency characteristic self breaking timeservomotorsine-cosine revolversingle sided boardslipping timeslow-melted fusesolder sidesolid conductorsplitterstarting inertial-frequency characteristic starting torque-frequency characteristic static synchronizing torque characteristic step anglestep index fiberstep pitchstepping motorstranded conductorsynchrosynchro receiversynchro transformersynchro transmittersynchronizing torquetachogeneratortatic friction torquetime relaytinsel conductortorque motortorque synchrotorque-angular displacement characteristic transformation ratiovoltage gradientwavelength division multiplexerVI Automobile Electrical Control System 1. Engine Electrical Control SystemAir Injection ReactorBANK1 Injector Bank #1BANK2 Injector Bank #2BANK3 Injector Bank #3By-Pass Air ControlBypath Air Control ValveCanister Purge SolenoidCanister Purge ValveCentral Processing UnitControl unitCoolant Temperature SensorCoolant Temperature SwitchCoolant Temperature Thermo Switch Crank Position SensorCrankshaft Position SensorElectronic Control UnitEngine Calibration UnitEngine Control UnitEngine Coolant TemperatureEngine Coolant TemperatureEngine Cutoff TimerExhaust Gas Oxygen Signal Return Exhaust Gas Oxygen(sensor)Exhaust Gas RecirculationIdle Vacuum ValveIntake Valve ThrottleO2SENSOR Oxygen SensorOil Temperature SwitchOuter Vent ValveOver-Temperature Control SystemOX1 Oxygen Sensor1OX2 Oxygen Sensor2OXD Oxidation CatalystOXS Oxygen SensorVacuum Control Modulator ValveVacuum Control Moudulator (nozzle)WH Closed Throttle Switch2.Chasis Electrical Control SystemBrake Control SystemAcceleration Slip RegulationElectric Brakeforce Dis-tributionElectronic Stabilty ProgramTraction Control SystemVehicle Stability ControlVII Vehicle Examination,Repair and Maintenance 1.Vehicle Partsacceleratoraccessoryadapteradmissionaerialaftercooleraftercoolingagitatoraimeraimingalarmalignerapronarborarmarrowautobulbbacklitebainistersbarrelbellowsconditionerdashdashpotdeicerevaporatorexcluderholderinverterlimiterpositionerpre-mufflerprocessorreducerscrapertransducertyreundercoatengine mounting2.Vehicle Repair(1)Class of Vehicle Repair adjustingassembling clearancecold running-incurrent repair of vehicle disassemblingfittinghot running-inindividual repairinspectioninspection and classification of parts instrumentlimiting clearancemajor repair of vehiclemedium repair of vehiclemileage between repairmotor vehicle liquidation operation of vehicle maintenance parts repairperiod of accelerated wear permissible clearance reassemblingreconditioningregulating repairremovalremoverrepair on technical condition repair sizerunning-inrunning-in conditionsrunning-in periodrunning-in processscheduled repairscrappingseparatingtechnical checkingtechnological process of vehicle maintenance technological process of vehicle repair technology of vehicle maintenance technology of vehicle repairunit repairunscheduled repairwithdrawing(2)Vehicle Repairaccidental defectadhesionagingbad condition of vehicleblockingbreakdownburningcavitationchemical wearcorrosion weardamagedefectdeformationdesign defectfailure wearfatiguefatigue weargaggood condition of vehiclegummingheatlimiting condition of vehiclelimiting wearmaintainability of vehiclemalfunctioningmanufacturing defectmechanical wearnormal wearoperational defectparameters for technical condition of vehicle permissible wearpittingregularity for change of technical condition of vehicle replacingrestorationscoringscratchingseizuresystem of vehicle maintenance and repairtechnical condition of vehiclethermic wearvehicle wear-outvinylwarpwear of vehicle partwear processwear rateworking ability of vehicle(3)Vehicle Failureabnormal knockingafter drippingautoignitionback firebackflowbearing scoreblow-byblowingblowoutbrake fadeburn rubbercarbon foulingcarburetor icingcheckclogged filterclutch explosioncollapse of piston skirtcomplete failurecritical failurecylinder scorecylinder stickingdefective shock absorberdefective vacuum advance。
索尼电子产品用户手册说明书
IndexAccessoriesInstallation................................... 95ACCESSORY(Ignition Key Position).............. 46AddingAutomatic TransmissionFluid........................................ 128Brake Fluid................................ 130Clutch Fluid............................... 131Engine Coolant......................... 123Engine Oil.................................. 119Manual Transmission Fluid... 129Power Steering Fluid .............. 132Windshield Washer fluid......... 127Additional Safety Information..... 15Door Locks.................................. 15Driving with Pets ....................... 16Seat-back Position..................... 15Storing Cargo Safely ................. 16Additives, Engine Oil.................. 120AdjustmentsMirrors......................................... 55Seats.............................................. 50Steering Wheel (41)Airbag (SRS).................................... 11Air Cleaner.................................... 133Air Conditioning............................. 66Maintenance.............................. 141Usage............................................ 66Air Outlets (Vents)......................... 64Air Pressure, Tires ...................... 142Alcohol and Drugs.......................... 23Alcohol in Gasoline ........................ 88Antifreeze...................................... 123Anti-lock Brakes (ABS)Description................................ 188Indicator Light...................32, 108Operation................................... 108Anti-theft Steering ColumnLock.............................................. 46Appearance Care.......................... 155Ashtrays........................................... 60Audio System.................................. 71Automatic. Speed Control............. 42Automatic Transmission............ 102Capacity, Fluid.......................... 186Checking Fluid Level.............. 128Shifting....................................... 102Shift Lever Positions............... 102Shift Lock Release. (105)BatteryCharging System Light............. 31Jump Starting............................ 171Maintenance.............................. 136Specifications............................ 187Before Driving................................ 87Belts, Seat.......................................... 4Body Repair................................... 161BrakesAnti-lock System (ABS).......... 107Break-in, New Linings.............. 88Fluid............................................ 130Light, Burned-out.................... 148Parking......................................... 57System Light............................... 31Wear Indicators........................ 106Brakes, ABSDescription................................ 188Operation................................... 108System Indicator................32, 108Braking System............................ 106Break-in, New Car . (88)CONTINUEDIndexBrightness Control,Instruments................................. 38Brights, Headlights........................ 37Bulb ReplacementBack-up Lights (151)Brake Lights .....................150,151Front Parking Lights .............. 149Front Side Marker Lights...... 149Headlights................................. 148High-mount Brake Light........ 151License Plate Lights................ 152Rear Side Marker Lights........ 150Specifications............................ 187Turn Signal Lights .................. 149Bulbs, Halogen (148)Cables, Jump Starting With ....... 172Capacities Chart........................... 186Carbon Monoxide Hazard ............ 24Cargo, Loading............................... 96Cassette PlayerCare............................................... 85Operation...............................75, 82CAUTION, Explanation of (ii)Certification Label....................... 184Chains............................................. 147Change OilHow to........................................ 121When to...................................... 113Changing a Flat Tire................... 165Changing Engine Coolant........... 124Charging System Light.........31, 176Check Engine Light..............32, 177CheckingAutomatic TransmissionFluid........................................ 128Battery Condition..................... 136Brake Fluid................................ 130Clutch Fluid............................... 131Engine Belts.............................. 142Engine Coolant......................... 123Engine Oil.................................. 119Fuses........................................... 179Manual Transmission Fluid... 129Power Steering Fluid .............. 132Checklist, Before Driving............. 98Child Safety..................................... 17Cigarette Lighter........................... 60Cleaner, Air.. (133)CleaningExterior...................................... 156Interior ....................................... 159Seat Belts................................... 159Vinyl............................................159CLEAN Light................................. 85Clock, Setting the........................... 58Clutch Fluid................................... 131CO in the Exhaust........................ 190Cold Weather, Starting in........... 100Compact Spare.............................. 164Console Compartment................... 59Consumer Information................ 195Controls, Instruments and............ 27CoolantAdding........................................ 123Checking.................................... 123Proper Solution......................... 123Temperature Gauge.................. 35Corrosion Protection................... 160Crankcase Emission ControlSystem........................................ 190Cruise Control Operation.............. 42Cup Holder....................................... 59Customer Relations Office.........195IndexDANGER, Explanation of.............. ii Dashboard........................................ 28Daytime Running Lights.............. 37Dead Battery, What to Do........... 171Defects, Reporting Safety ............ 25Defogger, Rear Window ............... 40Defrosting the Windows............... 70DEXRON® II AutomaticTransmission Fluid.................. 128Dimensions.................................... 186Dimming the Headlights .............. 37DipstickAutomatic Transmission........ 128Engine Oil.................................. 119Directional Signals......................... 38Disabled, Towing Your Car If ... 182Disc Brake Wear Indicators....... 106Disposal of Used Oil..................... 122DoorsLocking and Unlocking............ 47Power Door Locks ..................... 47DOT Tire Quality Grading......... 145Downshifting, 5-speed ManualTransmission (101)Driving (97)Economy...................................... 94In Bad Weather......................... 108In Foreign Countries.. (89)Economy, Fuel................................ 94Emergencies on the Road........... 163Battery, Jump Starting............ 171Changing a Flat Tire............... 165Charging System Light........... 176Check Engine Light................. 177Checking the Fuses................. 180Low Oil Pressure Light........... 175Malfunction IndicatorLamp....................................... 177Manually Closing Moonroof .. 178Overheated Engine.................. 173Emergency Brake.......................... 57Emergency Flashers...................... 40Emission Controls........................ 190EngineBelts............................................ 142Check Light........................32, 177Coolant Temperature Gauge (35)Malfunction IndicatorLamp.................................32, 177Oil Pressure Light..............31, 175Oil, What Kind to Use ............. 120Overheating............................... 174Specifications............................ 186Ethanol in Gasoline........................ 88Evaporative EmissionControls...................................... 190Exhaust Fumes............................... 24Expectant Mothers, Use ofSeat Belts by................................ 10Exterior, Cleaning the.. (156)Fabric, Cleaning........................... 159Fan, Interior.................................... 66Fan, Radiator.................................. 26Features, Comfort andConvenience................................ 63Filling the Fuel Tank.................... 90FiltersFuel (134)Oil (121)CONTINUEDIndexFirst Gear, Shifting...................... 1015-speed Manual TransmissionChecking Fluid Level.............. 1295-speed Manual Transmission,Shifting the................................ 101Flashers, Hazard Warning ........... 40Flat Tire, Changing a.................. 165FluidsAutomatic Transmission........ 128Brake.......................................... 130Clutch ......................................... 131Manual Transmission.............. 129Power Steering......................... 132Windshield Washer.................. 127FM Stereo RadioReception............................... 72, 78Folding Rear Seat........................... 51Foreign Countries, Driving in...... 89Four-way Flashers......................... 40Front End, Towing by Emergency Wrecker...................................... 182Fuel................................................... 88Fill Door and Cap ....................... 90Filter........................................... 134Gauge............................................ 35Octane Requirement.. (88)Oxygenated................................. 88Tank, Filling the ........................ 90Fuses, Checking the .. (179)Gas Mileage, Improving................ 94Gasohol.............................................88Gasoline............................................ 88Filter........................................... 134Gauge............................................35Octane Requirement................. 88Tank, Filling the ........................ 90Gas Station Procedures................. 90GaugesEngine Coolant Temperature.. 35Fuel............................................... 35Gearshift Lever PositionsAutomatic Transmission........ 1025-speed Manual Transmission ..................................................101Glass Cleaning.............................. 160Glove Box . (57)Halogen Headlight Bulbs............ 148Hazard Warning Flashers ............ 40HeadlightsDaytime Running Lights.......... 37High Beam Indicator................. 33High Beams, Turning on.......... 37Low Beams, Turning on........... 37Reminder Chime........................ 37Replacing Halogen Bulbs ....... 148Turning on................................... 37Heating and Cooling...................... 64High Altitude, Starting at.......... 100High-Low Beam Switch ............... 37Hood, Opening the.......................... 91Horn.................................................. 45Hot Coolant, Warning about...... 123Hydraulic Clutch.......................... 131Hydroplaning . (109)Identification Number,Vehicle ....................................... 184If Your Car Has to be Towed.....182IndexIgnitionKeys..............................................45Switch........................................... 46Timing Control System........... 191Indicator Lights, InstrumentPanel.............................................29Infant Restraint.............................. 19Inflation, Proper Tire .................. 143Inside Mirror................................... 55Inspection, Tire............................. 142Instrument Panel............................ 28Instrument Panel Brightness....... 38Interior Cleaning.......................... 159Interior Lights................................ 61Introduction. (i)Jacking up the Car....................... 166Jack, Tire....................................... 165Jump Starting.. (171)Keys (45)Label, Certification...................... 184Lane Change, Signaling................ 38Lap/Shoulder Belts.......................... 6Lap Belt.............................................. 6Leaking of Exhaust into Car ....... 24Lighter, Cigarette.......................... 60LightsBulb Replacement.................... 148Indicator....................................... 29Parking......................................... 37Turn Signal................................. 38Loading Cargo................................ 96LOCK (Ignition Key Position)..... 46LocksAnti-theft Steering Column..... 46Fuel Fill Door.............................. 90Glove Box.................................... 57Power Door.................................. 47Trunk ........................................... 48Low Coolant Level....................... 123Lower Gear, Downshifting to a. 101Low Oil Pressure Light.........31, 175Lubricant Specifications Chart. 186Luggage. (96)Maintenance................................... 111Periodic Items..............................117Record................................. 115-116Schedule.............................. 113-114Malfunction IndicatorLamp.....................................32, 177Manual Transmission.................. 101Manual Transmission Fluid....... 129Maximum Shift Speeds............... 102Meters, Gauges............................... 34Methanol in Gasoline..................... 89Mirrors, Adjusting......................... 55Moonroof ......................................... 54Closing Manually..................... 178Operation. (54)Neutral Gear Position ................. 104New Vehicle Break-in................... 88Normal Shift Speeds.................... 101NOTICE, Explanation of................ ii Numbers, Identification.. (184)CONTINUED。
- 1、下载文档前请自行甄别文档内容的完整性,平台不提供额外的编辑、内容补充、找答案等附加服务。
- 2、"仅部分预览"的文档,不可在线预览部分如存在完整性等问题,可反馈申请退款(可完整预览的文档不适用该条件!)。
- 3、如文档侵犯您的权益,请联系客服反馈,我们会尽快为您处理(人工客服工作时间:9:00-18:30)。
Version 1.0 Beta 2.2用户手册Eco bot by lechuOctane Render 使用手册Version 1.0 Beta 2.2 (May 25, 2010)All Rights ReservedRefractive Software LTD 2010Cover art by LechuBy Phillip Beauchamptable of contents 附录1——高级技巧通过命令行渲染44 绕轴动画设置49 天空动画设置50 问题汇总51 法线贴图52 模型导出脚本53 附录2——相机响应曲线相机响应曲线样本59安装和预览Tomislav Corak软件需求:Octane Render适用于如下操作系统:∙ Windows XP (32 and 64 bit)∙ Windows Vista (32 and 64 bit)∙ Windows 7 (32 and 64 bit)∙ Linux (64 bit only)∙ Macintosh OSXMicrosoft Windows 安装程序可能需要如下runtime包:Visual C++ 2008 Redistributable Package驱动程序:软件运行需要安装如下驱动。
驱动安装错误可能会导致严重的问题。
Refractive Software不能保证支持用户的所有不同版本驱动程序。
/object/cuda_3_0_downloads.html图解视口(Graph Editor)Octane Render的场景与材质都以节点node的方式处理。
这也方便了复杂材质的编辑。
如果你不知道怎样使用节点,不要被吓着..你要知道,在不使用节点的情况下,我们同样也能得到很棒的渲染效果!渲染视口上方的一排工具栏允许用户对渲染进程的各个方面进行操作:标尺渲染进程控制自动对焦状态材质取样器二次取样粘土渲染模式立体影像效果渲染进度GPU动态信息重置相机位置转盘动画观察者视角渲染对象(Render Target) 渲染分辨率相机设置(Camera)在图解视口(Graph Editor)中右击可以在场景中增加节点。
我们可以通过右击-添加物体(Objects)将新场景导入Octane。
图解视口中也提供快速按钮让你快速定位不同的节点类型。
显示/隐藏对象节点(Target Nodes)显示/隐藏材质节点(Material Nodes)显示/隐藏网格节点(Mesh Nodes)显示/隐藏材质类型节点(Texture Nodes)你可以查看如下信息:CUDA DRIVER — 查看当前的CUDA DRIVER 及RUNTIME版本。
ACTIVE / INACTIVE CUDA DEVICE(s) — T如果你有多个显卡,允许你指定让Octane使用哪块显卡渲染。
DEVICE INFORMATION — 显示当前设备的信息。
DEVICE MEMORY USAGE —显示当前的显存使用量,以几何体、材质、渲染对象等分类。
渲染前的导出与预备工作pedrojafetBlender 2.49Daz Studio开始使用Octane RenderOverride settings during individual import(覆盖导入设置)—决定是否使用用户设置的参数。
Import MTL file(导入MTL文件) —确定是否导入相对应的MTL文件中的所有材质。
Material Types(材质类型)—允许用户自定义需要导入的材质类型。
Import Image Textures(导入贴图材质)—使用MTL文件中的贴图材质。
Texture Types(材质类型)—允许用户决定导入材质贴图的数据类型。
Object Smoothing(平滑物体)—容许用户对材质平滑参数进行调节,包括顶点法线和平滑组。
Meta Objects(关联物体)—允许用户设置一种材质来确定相机的位置。
拥有这种转换材质的物体位置决定了相机的放置。
在弹出的窗口中定位选择需要导入的obj文件。
场景会自动导入并进行计算。
在网格节点(Mesh Node)上方的每个倒三角都代表了场景中的一种材质。
将鼠标放在其上4x4 的二次取样。
在导航时二次取样起作用,导航一旦停止即自动转换到正常采样状态。
导航中采用4x4二次取样:Direct Lighting用来快速渲染,忽略计算全局光照和光线反射。
Direct Lighting 模式不精确真实,如果你是追求照片效果则不推荐使用。
Ray Epsilon (rayepsilon)ray epsilon 是新发射光线偏移的距离,以保证光线不与几何体交错。
此数值保留默认值。
Maximum Samples (maxsamples)此数值控制在渲染进程停止之前,每个像素点采样的最大数量。
每像素采样数量越大,渲染结果越纯净。
没有确定的对应数值对应较好的渲染结果。
Filter (filter)决定是否开启反锯齿。
以速度的牺牲取得较好的画质。
Path Tracing Direct LightingPath TracingPath Tracing 是用来渲染照片效果的最好核心。
渲染时间比Direct Lighting长,但能提供较高的照片画质。
Maximum Depth (maxdepth)光线在物体表面反射/折射的最长时间值。
较大的数值意味着较长的渲染时间和更真实的结果。
对于室外场景渲染推荐使用数值为4。
室内自然光效 (阳光与天光)需要更高的数值,如设置为8。
尽管可以使用更高的参数,但是在现实中这个数值不会超过16.Russian Roulette Probability (rrprob)RRprob决定在光线传递时随机终止传递路径的概率。
此参数建议保留默认值。
Ray Epsilon (rayepsilon)ray epsilon 是新发射光线偏移的距离,以保证光线不与几何体交错。
此数值保留默认值。
Maximum Samples (maxsamples)此数值控制在渲染进程停止之前,每个像素点采样的最大数量。
每像素采样数量越大,渲染结果越纯净。
没有确定的对应数值对应较好的渲染结果。
Filter (filter)决定是否开启反锯齿。
以速度的牺牲取得较好的画质Octane Render现在提供总共三种材质:材质调节– 参数类型每种材质都可以通过二级参数进行调节。
这些参数可以被设置为不同的数值类型或节点,来创造丰富的渲染结果。
这些参数可以大体分类为两种:材质与数值。
Values(数值)Bool—有true(真)和false(假)两个值Float—单独的标尺控制一个数值Float2—两个标尺调节两个数值(X,Y)。
Float3—三个标尺控制三个参数(X,Y,Z)。
Float3DaylightSystem—用来控制天光参数的值。
Int—单个整数值。
Int2—两个标尺控制两个整数值 (X,Y)。
Int2resolution—一对控制渲染分辨率的数值。
int2XY—两个标尺控制两个整数值 (X,Y)。
材质调节 - 参数类型材质 用来赋予材质的颜色和质地。
RGBspectrum—调节材质的RGB值FloatTexture—对于材质的单一数值变量调节FloatImage—用于数值(value)的贴图材质 (为了正确使用此贴图,导入的网格必须是UV 贴图)。
T即使是彩图导入,材质也显示为灰度图像,以节约GPU显存。
invert(反转)选择框用来反转图像(用于凹凸贴图和透明贴图)。
Image—用于参数(parameter)的数据。
(为了正确使用此贴图,导入的网格必须是UV贴图)。
即使导入灰度图像,材质也以彩图类型计算,因此更加消耗显存。
GaussianSpectrum— 以高斯光谱范围赋予材质。
wavelength(波长)用于设置光谱范围中心,width(宽度)设置光谱范围。
范围越窄,颜色越纯净和饱和。
什么时候使用FloatImage/Image数值?有些参数不需要使用全色颜色数据。
如果使用全色数据格式计算,会比灰度数据消耗更多的显存,即使用户使用的是灰度图像。
由于使用GPU渲染对于显存的消耗非常苛刻,Floatimage格式数值允许用户载入彩色材质但内部使用灰度数据进行计算,进而节省珍贵的显存容量。
如果需要使用全彩色数据(如法线贴图和漫射贴图),那么你可以选择使用Image数值计算。
材质混合使用会有更精彩效果。
Clamp(钳制)Clamp材质需要一个输入材质(input),控制材质的最大(Maximum)与最小(M inimum)钳制。
Minimum 0 / Maximum 0.5 Minimum 0.5 / Maximum 1.0Sine Wave, Saw Wave and Triangle Wave此材质创造出的多种条带效果:Saw Wave Triangle Wave Triangle WaveWood ExampleGlossy Materials Glossy materials have four parameters to adjust:Diffuse (Kd) The Kd value gives the material it’s color.Specularity (Ks) The Ks value determines the amount of specularity on the mesh.Film Width (filmwidth) This controls the thickness of a optical, thin film on the material. This is useful in creat-ing rainbow or oil slick effects.Film Index (filmindex)This controls the Index of Refraction of the thin film.Roughness The roughness determines the amount of reflection that will be present. A low rough-ness value will create blurry reflections and a high value will produce a mirror like re-flection. Values below 40 are not recommended.Bump / Normal Both the Bump and Normal channels can load images to control the amount of bumpmapping and normal mapping (respectively.) The Bump channel should be set tofloatimage to load a bump map. The Normal channel should be set to the image data type to load a full color normal map.Opacity Opacity sets the transparency of the material. Set the data type to floatimage to load an image to set the transparency (use the Invert checkbox if necessary to adjustwhether black or white regions are considered transparentNormal Smoothing Normal Smoothing is a Boolean value that sets whether to smooth the normals of allmeshes sharing that material. When off, the materials can be faceted and polygonal.光泽的材料固有色反射薄膜在材料表面薄膜效果处理,创造出渐变的色彩或者是油膜效果。