(摩莎)串口服务器使用说明(TCPIP模式)
Moxa Nport 5110 TCP IP 连接指南说明书

came.TCP/IP CONNECTION GUIDE MOXA to CATOconnection GUIDEThis manual describes how to install and setup a Moxa Nport 5110TCP/IP Serial Device to enable a Simplekey 4 Door controller to be connected to an Ethernet network.TO BE READ IN CONJUNCTION WITH THENport 5100 Series User’s Manual1Overview (4)The NPORT 5110 Device (4)2Pre-configuration (5)CAME KMS default MOXA network settings: (5)3Information required from installer (5)4Installing the MOXA (6)Power Supply (6)5Connecting the MOXA to CATO (7)CATO (7)CATO connection overview (7)MOXA to CATO connections (8)6Final Commissioning (8)Publication Number: 2.02CAME KMS Publication Date: August 2022This document is to be used in conjunction with the Nport 5100 Series User’s Manual Version 5 April 2019 available at /productThis manual describes how to install and setup a Moxa Nport 5110 TCP/IP Serial Device to enable a Simplekey 4 Door controller to be connected to an Ethernet network.Previous experience with port forwarding and basic networking is assumed.The Moxa Nport 5110 is a hardware product which enables the System Controller to communicate with a local Ethernet Network using it’s RS232 port. The NPORT 5110 has been tested and approved for operation with Simplekey controllers and is available direct from Key Management Systems.In order to connect a Simplekey 4 Controller to the website the following are required:• 1x MOXA Nport 5110 device.• 1x KMS CATO PCB.One System Controller can be controlled to any single MOXA, when using a MOXA only a single system controller can be controlled, connecting two system controllers together is no longer possible.In operation the device places the serial data from the Simplekey Controller into a TCP/IP wrapper before sending it out over the network. Data moving in the other direction i.e. from the network to the NPORT 5110 undergoes the same process in reverseCAME KMS will undertake the initial configuration of the MOXA, these settings rarely need to be changed, please consult CAME KMS Technical support for bespoke setup requirements.• IP Address assignment via DCHP• Port 950• Baudrate = 115200• Data bits = 8• Stop Bits = 2• Parity = none• Flow Control = None• FIFO = enabled• Interface = RS-232The MOXA is password protected, if the device requires unlocking for re-configuration please contact CAME KMS Technical Support.A factory reset of the device is possible which will remove all pre-configuration. Please consult the MOXA Nport series manual for further details.Note: KMS are not responsible for the re-configuration if the MOXA has been factory reset.3KMS will require the following from the installation contractor before a successful connection can be made:• Externally facing IP address – A Static IP address is advantageous in most scenarios as no further changes are required in the event of the IP address changes.• Port number opened and directed at the MOXATwo mounting tags are provided, one each side of the MOXA. It is important to install the MOXA in a location where it can not be easily tampered with, yet no more than 25 metres from the CATO board due to RS232 signal distance limitations. The Ethernet cable can be run up to 100 metres from the router of network switch.yPower is provided by supplied via UK 3 pin plug socket. Alternatively a power jack can be supplied so a 12v connection is taken from the local system PSU.The MOXA connects to the CATO, this is a mezzanine PCB which connects on top of the Simplekey 4 controller. This is pre-fitted by CAME KMS at the factory and should not be removed unless absolutely necessary.Warning! Irreversible damage may occur if the CATO is not fitted correctly on the System Controller.See next page for MOXA to CATO wiring configuration.CAME KMS supply a pre-made DB9 female connection lead, in the event of broken terminations see the pinout table below.6 Final CommissioningOnce all steps have been taken please contact CAME KMS Technical support for connection verification. The installation will require the final steps as per any GPRS connection:• Correct communications between the CAME KMS cloud server and site based TCP/IP device.• Events are being received for each door on the system and events are correct for that door.• Remotely unlock every door on the system to ensure all locks, readers and outputs work as configured.• Make system adjustments including lock release time, door open warning times, trades profiles and any re-labelling of doors.All 3 LED’s shown be active on the front of the MOXA , the Tx/Rx Led will only blink when data is parsed between the MOXA and CATO, this may not be continuous.See the MOXA LED indicator status table below.CAME S.p.A.Came cancelli automatici S.p.A.is certified for Quality and Environment UNI EN ISO 9001UNI EN ISO 14001BS OHSAS 18001CAME KMS/kms。
MOXA串口服务器中文使用文档
MOXA串口服务器中文使用文档一、引言二、安装1.要开始使用MOXA串口服务器,首先需要将设备连接到计算机上。
将设备的以太网端口连接到计算机上的以太网接口,并将串行设备连接到设备的串口接口。
2.将设备的电源适配器插入电源插座,并将适配器的连接线插入设备的电源接口。
3.打开计算机上的浏览器,输入设备的IP地址,在浏览器中打开设备的管理界面。
三、配置1.在设备的管理界面中,点击"配置"选项卡,进入设备的配置界面。
2.在配置界面中,可以配置设备的网络设置、串口配置和其他高级设置。
3.首先要配置设备的网络设置,包括IP地址、子网掩码、网关等信息。
确保设备的网络设置与计算机的网络设置相匹配,以便能够正确地连接到网络。
4.然后要配置设备的串口设置,包括波特率、数据位、停止位、校验位等信息。
根据需要配置串口的参数,以确保与串行设备的通信正常。
5.在完成网络和串口配置后,可以进行其他高级设置,如用户管理、安全设置、升级固件等。
根据需要进行相应的配置。
四、使用1.配置完成后,可以通过网络连接到MOXA串口服务器,并与串行设备进行通信。
2.打开计算机上的终端模拟程序,使用串口连接到设备的IP地址和端口号。
3.在终端模拟程序中,可以通过串口与串行设备进行交互。
发送命令或数据到串行设备,并接收串行设备返回的响应。
4.可以使用终端模拟程序提供的功能来控制串行设备,如发送命令、接收数据、保存日志等。
五、注意事项1.在使用MOXA串口服务器时,要确保设备的网络设置和串口设置正确无误,以确保与串行设备的通信正常。
2.在与串行设备进行通信时,要注意设备的串口配置与串行设备的要求相匹配,以确保数据的正确传输。
3.在进行高级设置时,要谨慎操作,避免对设备的正常运行产生不良影响。
六、总结本文档介绍了MOXA串口服务器的安装、配置和使用方法。
通过按照文档中的步骤进行操作,用户可以成功地将串行设备连接到网络,并实现与串行设备的通信。
MOXA NPort Express TCP IP 到 RS-232 服务器用户手册说明书
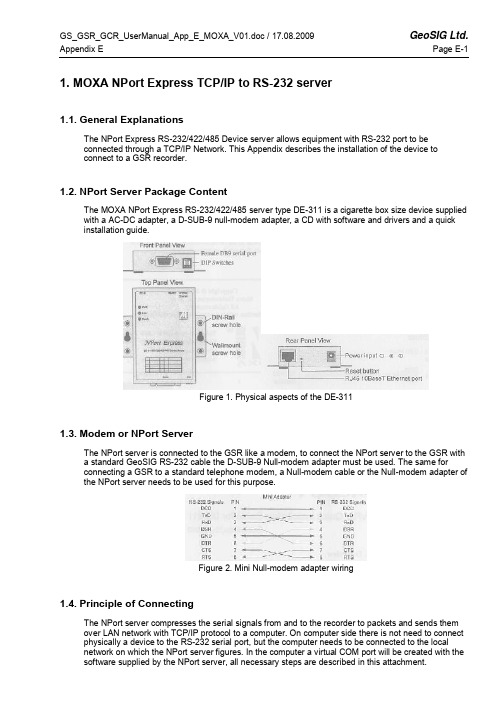
1. MOXA NPort Express TCP/IP to RS-232 server1.1. General ExplanationsThe NPort Express RS-232/422/485 Device server allows equipment with RS-232 port to beconnected through a TCP/IP Network. This Appendix describes the installation of the device toconnect to a GSR recorder.1.2. NPort Server Package ContentThe MOXA NPort Express RS-232/422/485 server type DE-311 is a cigarette box size device supplied with a AC-DC adapter, a D-SUB-9 null-modem adapter, a CD with software and drivers and a quick installation guide.Figure 1. Physical aspects of the DE-3111.3. Modem or NPort ServerThe NPort server is connected to the GSR like a modem, to connect the NPort server to the GSR witha standard GeoSIG RS-232 cable the D-SUB-9 Null-modem adapter must be used. The same forconnecting a GSR to a standard telephone modem, a Null-modem cable or the Null-modem adapter of the NPort server needs to be used for this purpose.Figure 2. Mini Null-modem adapter wiring1.4. Principle of ConnectingThe NPort server compresses the serial signals from and to the recorder to packets and sends them over LAN network with TCP/IP protocol to a computer. On computer side there is not need to connect physically a device to the RS-232 serial port, but the computer needs to be connected to the localnetwork on which the NPort server figures. In the computer a virtual COM port will be created with the software supplied by the NPort server, all necessary steps are described in this attachment.1.5. Configuring the NPort ServerFollowing steps must be done to establish a connection between computer and GSR1.5.1. Recorder Side (NPort Server)•Set 3 dip switches on NPort Server to OFF (low)•Connect NPort server to the GSR with the standard RS-232 cable supplied and use the Null-Modem mini adapter•Connect NPort server to the network with a standard RJ45 cable (Cable is not supplied in shipment)•Connect the AC-DC adapter, or another 12 VDC supply(Warning, with the AC-DC adapter the network communication is lost during a mains power failure) •When Power is available the 3 LED on the front of the NPort server must be on after approximately10 seconds (PWR: Red, Link: Green, Ready: Green) If not then refer to the MOXA manual1.5.2. Computer Side•Insert the MOXA installation CD into the computer, a menu will appear, press “Installation”•Choose all utilities to be installed like belowFigure 3. Installation Select Utilities•Continue installation and keep default settings•Choose to run configurator (Default) and finish installation)(Configurator can be launched from the start menu à Programs à NPort Management SuiteFigure 4. Installation Configure NPort Settings•The configurator application is now started•In configurator choose indicated button for a broadcast search, the network will be searched and all available NPort servers will be shownFigure 5. ConfiguratorFigure 6. Configurator after broadcast search•The factory default IP address of the NPort server is static and set to 192.168.127.254, to set up the correct device refer to the serial number that figures on the bottom of the device.1.5.3. Configuration of the Device•Now the device is visible on the network it must be set up therefor execute following steps:•Note: In case of trouble the device can be reset with pressing for more than 10 seconds on the reset button, factory defaults will be restored.•Double click on the row of the device to be set up, following window will pop upFigure 7. Configuration of NPort Server•Select the setting that need to be changed, the textbox next to will become active.•Depending on the network, either choose a static IP address, or select an IP configuration (For example DHCP if such server is available on the network). It is important to choose a correct IPaddress, please ask to your local network administrator who can tell which setting to use. For usinga direct connection to the computer the best option is to use directly the serial port. In case of ademo a direct connection from the NPort server to the computer is possible, but needs a crossedRJ45 cable. In direct connection static IP addresses for computer and NPort server must be used. Check the first three blocks of the IP Address, usually for local networks the first two are: 192.168, the third value can change between 0 and 255 and should be the same as the one on the computer. The fourth value is the subscriber number, avoid duplicate IP Addresses on one network that result in conflicts.•Add a server with the second menu button•Follow the steps of installing▪à Best to search automatically the LAN for an IP Address▪à In the displayed list choose the right NPort by help of the name, serial number or IP address if known•Select NPort you wish to connect to•Choose the COM port (Best way is to choose the next free port)Figure 10. Choose COM Port•Continue with scrolling with default settings until you come back in the Real COM Installer• A new device has been addedFigure 11. Real COM Installer, with new device•No further operations are needed, properties can be viewed by double clicking on the device•Application can be closed•Start GeoDAS and configure the GSR recorder as described in the GeoDAS manual1.6. Working behind NAT router to private IPIf you want to allow NPort to use private IP behind your NAT/firewall, you should use NAPT protocol to map the Public IP to NPort's private IP in your NAT router. Most of routers/firewalls all support this function now. For example, when you configure NPort's private IP as 192.168.1.1, and the NATrouter's Public IP is 61.x.x.x. Next, you should map TCP/UDP port numbers shown as follow:Protocol Public IP Port No. NPort Private IP Port No.TCP 61.x.x.x 23 192.168.1.1 23TCP 61.x.x.x 4000 192.168.1.1 4000TCP 61.x.x.x 950 192.168.1.1 950TCP 61.x.x.x 966 192.168.1.1 966UDP 61.x.x.x 1029 192.168.1.1 10291.7. TroubleshootingIn case GeoDAS reports an error accessing the GSR, and the correct COM port is selected, theproblem is in most of the cases in the assignment of IP addresses. Verify in such case that the first three groups of values in the IP address of the device are the same as the ones on the computer, and that there is no conflict with another subscriber.1.8. Further SettingsFor further settings please refer to the user manual on the CD supplied with the NPort server.。
MOXA串口服务器设置步骤
串口服务器设置MOXA的串口服务器设置可以通过网络或MOXA提供的专用设置软件:NPort Administrator来设置,所有设备的默认IP地址是:192.168.127.254。
我们的设备的操作模式可以提供Real COM,TCP Server,TCP Client,UDP等操作模式,本公司的上位机软件主要支持TCP Server 和Real COM模式,下面是设备如何设置这两种模式的方式。
TCP Server 模式设置1、通过网络来设置一、确认上位机IP地址首先确认上位机的IP地址,在电脑:开始—运行输入cmd按确定后出现下面对话框,在对话框中输入ipconfig按回车键出现下面对话框上图显示本机的IP地址是:192.168.1.22二、通过IE来设置1、添加IP在网上邻居—右键—属性—本地连接—右键—属性—常规—双击协议(TCP/IP)出现下面对话点击右下角高级出现下面对话框在IP地址栏里点击添加出现下面对话框在对话框中输入IP地址,我输入的是:192.168.127.200 在IE里输入IP地址:192.168.127.254 就出现下面界面在Network Settings里设置IP地址,改成:192.168.1.254,因为我本机是192.168.1.22,所以要改成同一网段内,设置好后点击Submit设置串口设备的波特率等参数,点击Submit设置操作模式,本次在Operation mode右边的下拉列表选择TCP Server Mode 模式,设置端口号,设备默认端口号是4001,设置好后点击Submit点击Save/Restart , 点击Submit设置完成2、通过专用软件来设置一、安装MOXA的NPort Administrator 软件安装完后打开NPort Administrator,出现下面的界面点击Search出现如下界面这说明已经找到设备,点击Stop 出现下面对话框2、选中主对话框里的NPort 5110 双击进入设置界面,点击Networt 设置IP地址,例如:192.168.1.200,设置前先在IP Address 上面的白色小框框打上钩设置前设置后2、设置串口参数,点击Serial,进入下面的界面点住Modify左边的小框框后,点住大对话框里的Port 1 双击,进入下面界面,设置串口的一些参数。
Moxa NPort 5100A 串口到网络设备服务器说明书

NPort5100A Series1-port RS-232/422/485serial device serversFeatures and Benefits•Power consumption of only1W•Fast3-step web-based configuration•Surge protection for serial,Ethernet,and power•COM port grouping and UDP multicast applications•Screw-type power connectors for secure installation•Real COM/TTY drivers for Windows and Linux•Standard TCP/IP interface and versatile TCP and UDP operation modes•Connects up to8TCP hostsCertificationsIntroductionThe NPort®5100A device servers are designed to make serial devices network-ready in an instant and give your PC software direct access to serial devices from anywhere on the network.The NPort®5100A device servers are ultra-lean,ruggedized,and user-friendly,making simple and reliable serial-to-Ethernet solutions possible.A Greener Serial-to-Ethernet SolutionThe MiiNe is a small but powerful Arm-based serial-to-Ethernet SoC with RAM and Flash embedded.With the MiiNe inside,the NPort®5110A Series'power consumption is less than1W.The NPort®5100A Series saves at least50%on power consumption compared to existing solutions on the market,helping engineers meet the tough environmental compliance challenges found in today’s industrial environments.Surge Protection for Serial,Ethernet,and PowerSurge,which is typically caused by high voltages that result from switching and lightning transients,is a common threat to all electrical devices. Moxa’s leading-edge surge immunity solution,which is applied to the NPort®5100A’s serial,power,and Ethernet lines,is tested and proven compliant with IEC61000-4-5.This state-of-the-art surge protection provides a robust serial-to-Ethernet solution that can protect electrical devices from voltage spikes and withstand electrically noisy environmental conditions.3-Step Web-based ConfigurationThe NPort®5100A’s3-step web-based configuration tool is straightforward and user-friendly.The NPort®5100A’s web console guides users through three simple configuration steps that are necessary to activate the serial-to-Ethernet application.With this fast3-step web-based configuration,a user only needs to spend an average of30seconds to complete the NPort®settings and enable the application,saving a great amount of time and effort.Easy to TroubleshootNPort®5100A device servers support SNMP,which can be used to monitor all units over Ethernet.Each unit can be configured to send trap messages automatically to the SNMP manager when user-defined errors are encountered.For users who do not use SNMP manager,an email alert can be sent ers can define the trigger for the alerts using Moxa’s Windows utility,or the web console.For example,alerts can be triggered by a warm start,a cold start,or a password change.AppearanceSpecificationsEthernet Interface10/100BaseT(X)Ports(RJ45connector)1Magnetic Isolation Protection 1.5kV(built-in)Ethernet Software FeaturesConfiguration Options Windows Utility,Serial Console,Telnet Console,Web Console(HTTP/HTTPS) Management DHCP Client,ARP,BOOTP,DNS,HTTP,HTTPS,ICMP,IPv4,LLDP,SMTP,SNMPv1/v2c,TCP/IP,Telnet,UDPFilter IGMP v1/v2Windows Real COM Drivers Windows95/98/ME/NT/2000,Windows XP/2003/Vista/2008/7/8/8.1/10(x86/x64),Windows2008R2/2012/2012R2(x64),Windows Embedded CE5.0/6.0,Windows XPEmbeddedLinux Real TTY Drivers Kernel versions:2.4.x,2.6.x,3.x,4.x,and5.xFixed TTY Drivers SCO UNIX,SCO OpenServer,UnixWare7,QNX4.25,QNX6,Solaris10,FreeBSD,AIX5.x,HP-UX11i,Mac OS XAndroid API Android3.1.x and laterMIB RFC1213,RFC1317Serial InterfaceConnector DB9maleNo.of Ports1Serial Standards NPort5110A:RS-232NPort5130A:RS-422,RS-485NPort5150A:RS-232,RS-422,RS-485Operation Modes Disabled,Ethernet Modem,Pair Connection,Real COM,Reverse Telnet,RFC2217,TCPClient,TCP Server,UDPBaudrate Supports standard baudrates(unit=bps):50,75,110,134,150,300,600,1200,1800,2400,4800,7200,9600,19200,38400,57600,115200,230.4k,460.8k,921.6kData Bits5,6,7,8Stop Bits1,1.5,2Parity None,Even,Odd,Space,MarkFlow Control RTS/CTS(RS-232only),DTR/DSR(RS-232only),XON/XOFFPull High/Low Resistor for RS-4851kilo-ohm,150kilo-ohmsRS-485Data Direction Control ADDC®(automatic data direction control)Terminator for RS-485120ohmsSerial SignalsRS-232TxD,RxD,RTS,CTS,DTR,DSR,DCD,GNDRS-422Tx+,Tx-,Rx+,Rx-,GNDRS-485-4w Tx+,Tx-,Rx+,Rx-,GNDRS-485-2w Data+,Data-,GNDPower ParametersNo.of Power Inputs1Input Current NPort5110A:82.5mA@12VDCNPort5130A:89.1mA@12VDCNPort5150A:92.4mA@12VDCInput Voltage12to48VDCSource of Input Power Power input jackReliabilityAutomatic Reboot Trigger Built-in WDTPhysical CharacteristicsHousing MetalDimensions(with ears)75.2x80x22mm(2.96x3.15x0.87in)Dimensions(without ears)52x80x22mm(2.05x3.15x0.87in)Weight340g(0.75lb)Installation Desktop,DIN-rail mounting(with optional kit),Wall mountingEnvironmental LimitsOperating Temperature Standard Models:0to60°C(32to140°F)Wide Temp.Models:-40to75°C(-40to167°F)Storage Temperature(package included)-40to75°C(-40to167°F)Ambient Relative Humidity5to95%(non-condensing)Standards and CertificationsEMC EN55032/24EMI CISPR32,FCC Part15B Class AEMS IEC61000-4-2ESD:Contact:6kV;Air:8kVIEC61000-4-3RS:80MHz to1GHz:10V/mIEC61000-4-4EFT:Power:2kV;Signal:1kVIEC61000-4-5Surge:Power:2kV;Signal:0.5kVIEC61000-4-6CS:150kHz to80MHz:10V/m;Signal:10V/mIEC61000-4-8PFMFIEC61000-4-11DIPsSafety UL60950-1DeclarationGreen Product RoHS,CRoHS,WEEEMTBFTime2,231,530hrsStandards Telcordia(Bellcore)Standard TR/SRWarrantyWarranty Period5yearsDetails See /warrantyPackage ContentsDevice1x NPort5100A Series device serverPower Supply1x power adapter,suitable for your region(standard temp.models only) Documentation1x quick installation guide1x warranty cardDimensionsNPort5110A NPort5150ANPort5130AOrdering InformationModel NameOperating Temp.Baudrate Serial Standards No.of Serial Ports Input Current Input Voltage NPort 5110A 0to 60°C 50bps to 921.6kbpsRS-232182.5mA @12VDC 12-48VDC NPort 5110A-T -40to 75°C 50bps to 921.6kbpsRS-232182.5mA @12VDC 12-48VDC NPort 5130A 0to 60°C 50bps to 921.6kbps RS-422/485189.1mA @12VDC 12-48VDCNPort5130A-T-40to75°C 50bps to921.6kbpsRS-422/485189.1mA@12VDC12-48VDCNPort5150A0to60°C 50bps to921.6kbpsRS-232/422/485192.4mA@12VDC12-48VDCNPort5150A-T-40to75°C 50bps to921.6kbpsRS-232/422/485192.4mA@12VDC12-48VDCAccessories(sold separately)CablesCBL-F9M9-150DB9female to DB9male serial cable,1.5mCBL-F9M9-20DB9female to DB9male serial cable,20cmConnectorsADP-RJ458P-DB9F DB9female to RJ45connectorMini DB9F-to-TB DB9female to terminal block connectorDIN-Rail Mounting KitsDK35A DIN-rail mounting kit,35mmPower AdaptersPWR-12050-WPAU-S1Locking barrel plug,12VDC,0.5A,100to240VAC,Australia(AU)plug,0to40°C operatingtemperaturePWR-12050-WPCN-S1Locking barrel plug,12VDC,0.5A,100to240VAC,China(CN)plug,0to40°C operating temperature PWR-12050-WPEU-S1Locking barrel plug,12VDC,0.5A,100to240VAC,Continental Europe(EU)plug,0to40°C operatingtemperaturePWR-12050-WPUK-S1Locking barrel plug,12VDC,0.5A,100to240VAC,United Kingdom(UK)plug,0to40°C operatingtemperaturePWR-12050-WPUSJP-S1Locking barrel plug,12VDC,0.5A,100to240VAC,United States/Japan(US/JP)plug,0to40°Coperating temperaturePWR-12150-AU-SA-T Locking barrel plug,12VDC,1.5A,100to240VAC,Australia(AU)plug,-40to75°C operatingtemperatureApplicable Models:NPort5110A-TNPort5130A-TNPort5150A-TPWR-12150-CN-SA-T Locking barrel plug,12VDC,1.5A,100to240VAC,China(CN)plug,-40to75°C operatingtemperatureApplicable Models:NPort5110A-TNPort5130A-TNPort5150A-TPWR-12150-EU-SA-T Locking barrel plug,12VDC,1.5A,100to240VAC,Continental Europe(EU)plug,-40to75°Coperating temperatureApplicable Models:NPort5110A-TNPort5130A-TNPort5150A-TPWR-12150-UK-SA-T Locking barrel plug,12VDC,1.5A,100to240VAC,United Kingdom(UK)plug,-40to75°C operatingtemperatureApplicable Models:NPort5110A-TNPort5130A-TNPort5150A-TPWR-12150-USJP-SA-T Locking barrel plug,12VDC1.5A,100to240VAC,United States/Japan(US/JP)plug,-40to75°Coperating temperatureApplicable Models:NPort5110A-TNPort5130A-TNPort5150A-TPower CordsCBL-PJ21NOPEN-BK-30Locking barrel plug to bare-wire cable©Moxa Inc.All rights reserved.Updated Mar04,2020.This document and any portion thereof may not be reproduced or used in any manner whatsoever without the express written permission of Moxa Inc.Product specifications subject to change without notice.Visit our website for the most up-to-date product information.。
MOXA串口服务器调试规范(TCP Server Mode)
MOXA串口服务器调试规范(TCP Server Mode)一、前言总结目前现场调试的经验,为减少调试过程中出现问题的机率,防止因串口服务器配置不正确,影响工程项目调试进展,现发布MOXA串口服务器调试规范.二、串口服务器参数配置MOXA串口服务器需配置的参数有以下几个:◆串口服务器名称◆串口服务器IP及掩码◆串口服务器工作模式以下分别介绍具体配置方法:1.串口服务器名称参见“设备基础参数分配策略”中,关于名称的规范要求,在“串口服务器”配置界面中按要求填写名称。
2.串口服务器IP及掩码参见“设备基础参数分配策略”中,关于IP及掩码的规范要求,在“串口服务器”配置界面中按要求填写IP及掩码。
3.串口服务器工作模式●运行“NPort Administrator”程序,程序主界机如下图:●点击工具栏中按钮,搜索当前在线的“串口服务器”。
搜索完成后,将在列表中显示当前搜索到的“串口服务器”。
如准备配置的“串口服务器”未搜索到,请检查与设备网络联接是否正常。
●在列表中,双击需配置的“串口服务器”,弹出串口服务器配置窗体,如下图●点击“Basic”标签页,界面如下图:●勾选“Modify”,然后在Server Name一栏按要求填入名称●勾选“Network”标签页,界面如下图:●勾选“Modify”,在IP Address填入分配的IP,在Netmask填入分配的子网掩码。
●勾选“Serial”标签页,界面如下图:●勾选“Modify”,然后双击列表中第一项,弹出”端口设置”界面,如下图●在上图中填入配置的波特率检验等参数。
●点击“OK”完成此端口配置●点击“Operating mode”标签页,界面如下图:●勾选“Modify”,然后双击列表中第一项,弹出”工作模式”配置界面,如下图在“Operating Mode”下拉列表中,选择“TCP Server Mode”,下方会显示该工作模式相关的设置参数,如上图:●在“Max Connection”下拉列表中,选择“4”。
MOXA NPort 5200系列串口设备联网服务器 说明书
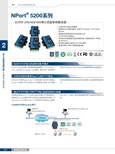
> NPort® 5200系列标准TCP/IP接口和多样的操作模式为现存的软件提供Real COM/TTY驱动通过TCP/IP或COM/TTY端口远程控制串口设备NPort® 5200系列串口设备联网服务器提供了TCP Server、TCP Client和UDP Server Client模式,使用了统一标准的网由于NPort®提供Real COM/TTY驱动功能,软件设计者透过COM/TTY的串口可以立即与TCP/IP网络进行连接。
这个卓越设备通过指定NPort® 5200的IP地址和端口号,服务器可以直接透过Scoket程序对串口设备进行数据读取和控制。
在Windows/Linux下基于COM/TTY的程序可以通过Moxa提供络API (Winsock,BSO Sockets)来确保网络软件的兼容性。
的特征能保障您的软件投资并且享受串口设备联网带来的好处。
的COM/TTY驱动,通过网络直接对串口设备的资料进行读取。
COM驱动/网络Sockets模式远程主机(Windows或Linux)Ethernet192.168.10.2:4001NPort® 5230/5232最多32个串口2线RS-485本地主机(Windows或Linux)Internet2-242-25 e-mail :china@ 免费技术热线:800-820-5036串口设备联网服务器 > NPort ® 5200系列2外观规格以太网端口数:1速率:10/100 Mbps ,自适应MDI/MDIX 接头:8针RJ45电磁隔离保护:内建1.5 KV 串口端口数:2串口标准:NPort ® 5210:RS-232NPort ®5230:1个RS-232,1个RS-422/485NPort ®5232/5232I :RS-422/485端口类型:NPort ® 5210:RJ45 (8-pin)NPort ®5230/5232/5232I :接线端子 (5针/口)串口保护:全信号15 KV ESD 保护2 KV 光电隔离 (NPort ® 5232I/5232I-T)RS-485数据流向控制:ADDC ® (数据流向自动控制)串口通讯参数数据位:5,6,7,8停止位:1,1.5,2校验位:None ,Even ,Odd ,Space ,Mark 流量控制:RTS/CTS (仅RS-232),DTR/DSR (仅NPort 5210),XON/XOFF 波特率:110 bps ~ 230.4 Kbps 串口信号RS-232:NPort ® 5210:TxD ,RxD ,RTS ,CTS ,DTR ,DSR ,DCD ,GNDNPort ® 5230:TxD ,RxD ,RTS ,CTS ,GNDRS-422:Tx+,Tx-,Rx+,Rx-,GND RS-485-4w :Tx+,Tx-,Rx+,Rx-,GND RS-485-2w :Data+,Data-,GND 软件特点网络协议:ICMP ,IP ,TCP ,UDP ,DHCP ,BOOTP ,Telnet ,DNS ,SNMP V1/V2c ,HTTP ,SMTP ,SNTP配置方式:Web Console ,Serial Console (NPort ® 5210/5230 only),Telnet Console ,Windows UtilityWindows Real COM 驱动:Windows 95/98/ME/NT/2000,Windows XP/2003/Vista/2008/7 x86/x64,Embedded CE 5.0/6.0,XP EmbeddedFixed TTY驱动:SCO Unix ,SCO OpenServer ,UnixWare 7,UnixWare 2.1,SVR 4.2,QNX 4.25,QNX 6,Solaris 10,FreeBSD ,AIX 5.x ,HP-UX 11iLinux Real TTY 驱动:Linux kernel 2.4.x ,2.6.x 机械特性外壳:金属,IP30防护等级重量:NPort® 5210:340 gNPort ®5230/5232:360 g NPort ®5232I :380 g 尺寸:NPort ® 5210/5230/5232:无挂耳:67 x 100.4 x 22 mm (2.64 x 3.95 x 0.87 in)含挂耳:90 x 100.4 x 22 mm (3.54 x 3.95 x 0.87 in)NPort ®5232I:无挂耳:67 x 100.4 x 35 mm (2.64 x 3.95 x 1.37 in)含挂耳:90 x 100.4 x 35 mm (3.54 x 3.95 x 1.37 in)工作环境工作温度:标准型号:0 ~ 55 ˚C (32 ~ 131 ˚F)宽温型号:-40 ~ 75 ˚C (-40 ~ 167 ˚F)工作湿度:5 ~ 95% RH 存储温度:-40 ~ 85 ˚C (-40 ~ 185 ˚F)电源需求输入电压:12 ~ 48 VDC 电源功耗:NPort ® 5210:325 mA @ 12 V ,190 mA @ 24 V NPort ®5230:325 mA @ 12 V ,190 mA @ 24 VNPort ®5232:280 mA @ 12 V ,150 mA @ 24 VNPort ® 5230NPort ® 5210NPort ® 5232电源输入接线端子12 ~ 48 VDC以太网RJ45 10/100 Mbps重启按钮导轨安装工具(可选)RS-422/485RS-2328针RJ45,RS-232RS-422/485电源输入接线端子12 ~ 48 VDC电源输入接线端子 12 ~ 48 VDC以太网RJ45 10/100 Mbps重启按钮重置按钮以太网RJ45 10/100 MbpsDK-35A 导轨安装套件可选附件2-27 e-mail :china@ 免费技术热线:800-820-5036串口设备联网服务器 > NPort ® 5200系列2订购信息包装清单•NPort ® 5200系列串口设备联网服务器• 电源插座转3-pin 电源转接头• 软件光盘及文档• 快速安装指南 (打印版)•保修卡PIN RS-2321DSR (in)2RTS (out)3GND 4TxD (out)5RxD (in)6DCD (in)7CTS (in)8DTR (out)18针脚定义NPort ® 5210/5210-T (RS-232)8针RJ45接头NPort ® 5230/5230-TNPort ® 5232/5232I/5232-T/5232I-T (RS-232/422/485,端子连接器)(RS-422/485,端子连接器)可选型号NPort ®5210:2口RS-232串口设备联网服务器,0 ~ 55 ˚C 工作温度NPort ®5230:2口设备联网服务器,带1个RS-232口,1个RS-422/485口,0 ~ 55 ˚C 工作温度NPort ® 5232:2口RS-422/485串口设备联网服务器,0 ~ 55 ˚C 工作温度NPort ®5232I :2口RS-422/485串口设备联网服务器,带2 KV 光电隔离,0 ~ 55 ˚C 工作温度NPort ® 5210-T :2口RS-232串口设备联网服务器,-40 ~ 75 ˚C 工作温度NPort ®5230-T :2口串口设备联网服务器,1个RS-232口,1个RS-422/485口,-40 ~ 75 ˚C 工作温度NPort ® 5232-T :2口RS-422/485串口设备联网服务器,-40 ~ 75 ˚C 工作温度NPort ®5232I-T :2口RS-422/485串口设备联网服务器,带2 KV 光电隔离,-40 ~ 75 ˚C 工作温度可选配件(须单独购买)DK-35A :可选配件DIN-Rail 电源:详情见附件接线端子:详情见附件R xC T R T G N G N R x R x T x + /D a t a T x T x - / D a t a -R x G N R x T x + / D a t a T x - / D a t a -R x G N R x T x + / D a t a T x - / D a t a -。
MOXA串口服务器产品配置说明书
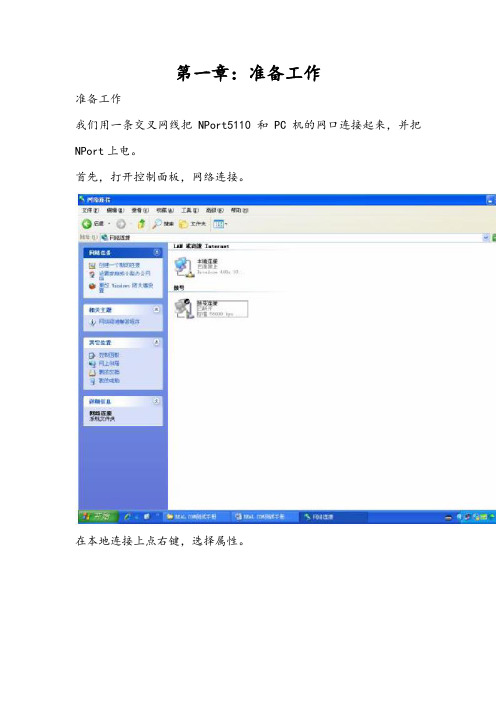
第一章:准备工作准备工作我们用一条交叉网线把NPort5110 和PC机的网口连接起来,并把NPort上电。
首先,打开控制面板,网络连接。
在本地连接上点右键,选择属性。
双击进入 Internet协议(TCP/IP),点击“使用下面的IP地址”写入 IP 地址和子网掩码,记住要和NPORT 的IP 地址在同一子网段。
如NPORT 默认IP为192.168.127.254,255.255.255.0;就需要把PC 机的IP 地址设为192.168.127.XXX,255.255.255.0,最后一个数字不同即可。
点击确定。
第二章:网络和串口参数配置搜索 NPort打开NPort Administrator(可以在光盘的对应位置找到这个软件,安装好),点击Search,此时请确认网络防火墙已经关闭。
会搜索到我们的NPort5110,点击stop,停止搜索。
网络参数配置双击右边空白处的NPort 设备,会出现以下界面,点击选择Network 选项卡,点击Modify修改。
可以看到以下界面:我们可以在里面修改NPort的以下参数:IPAddress:IP地址。
Netmask:子网掩码。
Gateway:网关。
IP Configuration:可以配置为静态IP(Static),或者为DHCP(动态IP)。
DNS Server1和2:DNS,域名解析服务器。
串口参数配置点击 Serial选项卡,点击Modify修改,双击端口进去,可以看到以下界面:我们可以在里面修改以下参数:Baud Rate:波特率,NPort5000 系列只能支持标准波特率,如9600,115200bps 等。
Parity:校验。
None:无校验Even:偶校验。
Odd:奇校验。
Space:空。
Mark:标志。
Data Bits:数据位。
Stop Bits:停止位。
Flow Control:流量控制。
None:无流量控制。
XON/XOFF:软件流控。
摩莎串口服务器基础配置说明
摩莎串口服务器基础配置说明1.连接设置首先,我们需要将摩莎串口服务器与网络连接起来。
通过网线将摩莎串口服务器的LAN口连接到局域网中的交换机或路由器上。
确保网线连接正常后,通过查看设备的IP地址,确定摩莎串口服务器的IP地址。
2.IP地址设置摩莎串口服务器默认的IP地址设置是DHCP自动获取IP地址,如果网络环境支持DHCP,则摩莎串口服务器将自动获取IP地址。
如果网络环境不支持DHCP,我们可以通过串口或Telnet登录到串口服务器的命令行界面,使用命令手动配置IP地址。
在命令行界面,输入config命令,进入配置模式。
然后使用set命令设置IP地址、子网掩码、网关等参数,最后通过save命令保存配置。
3.用户管理摩莎串口服务器支持多用户管理,可以设置不同的用户名和密码,以及不同的权限。
通过串口或Telnet登录到串口服务器的命令行界面,使用命令设置用户信息。
在命令行界面,输入config命令,进入配置模式。
然后使用user命令设置用户名和密码,使用privilege命令设置权限级别。
最后通过save命令保存配置。
4.串口配置摩莎串口服务器支持多个串口设备的连接,通过网络将这些串口设备接入到远程管理中。
通过串口或Telnet登录到串口服务器的命令行界面,使用命令配置串口参数。
在命令行界面,输入config命令,进入配置模式。
然后使用port命令设置串口参数,包括串口号、波特率、数据位、停止位、校验位等。
最后通过save命令保存配置。
5.远程访问配置完成后,我们可以使用浏览器、Telnet或其他远程管理工具访问和管理摩莎串口服务器。
在浏览器中输入摩莎串口服务器的IP地址,或使用Telnet工具连接到摩莎串口服务器的IP地址和端口号。
然后输入用户名和密码进行身份验证,即可远程访问和管理串口设备。
6.日志管理摩莎串口服务器可以记录操作日志和系统日志,帮助管理员了解设备的运行情况和故障信息。
通过串口或Telnet登录到串口服务器的命令行界面,使用命令查看和清除日志信息。
摩莎串口服务器基础配置说明
MOXA 串口服务器基础功能配置与调试常用的工作模式有:relcom模式(虚拟串口模式)、UDP模式、TCP模式。
能用到的搜索软件有:Nport Adnimistrator suite 和Nport Windows driver managerNport Adnimistrator suite 这个软件有搜索与映射COM的功能;Nport Windows driver manager 这个软件是一款用于映射COM的软件,映射的COM口能够在设备管理器里面体现。
下面介绍到的是:使用Nport Adnimistrator suite以及WEB界面配置串口服务器。
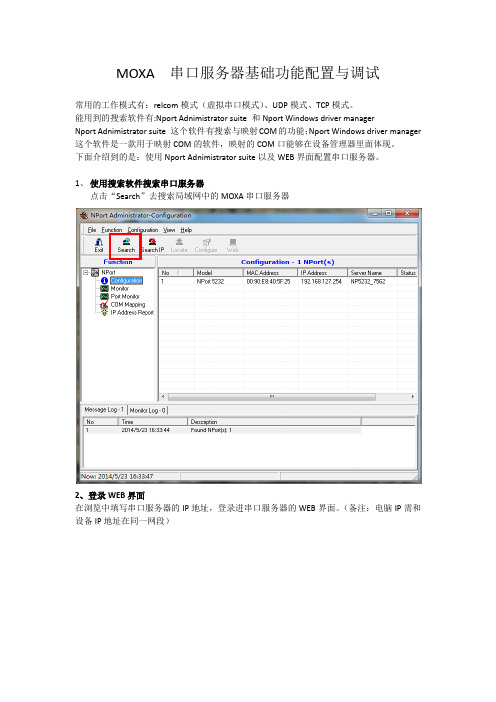
1、使用搜索软件搜索串口服务器点击“Search”去搜索局域网中的MOXA串口服务器2、登录WEB界面在浏览中填写串口服务器的IP地址,登录进串口服务器的WEB界面。
(备注:电脑IP需和设备IP地址在同一网段)3、修改IP地址在菜单Network Settings下,可以修改设备的IP地址。
4、设置串口参数在菜单Serial Settings下,可以修改串口的串口参数。
一、虚拟串口模式(Real COM Mode)的应用1、在WEB界面的Operating Settings菜单栏下,选择模式为:Real COM Mode2、在软件的COM Mapping菜单栏之下,点击工具栏的Add按钮,添加映射COM口二、TCP模式的应用1、设置成TCP server模式TCP server模式可以指定本地TCP端口号:如下图所示的端口号4001。
TCP server模式是指接入串口服务器的终端设备为server服务端,采集数据的上位机(PC电脑或服务器)为客户端;2、设置成TCP client模式TCP client模式需要指定TCP server的IP地址以及端口号TCP client模式是指接入串口服务器的终端设备为client客户端,采集数据的上位机(PC电脑或服务器)为服务端;三、UDP模式的应用在WEB界面的Operating Settings菜单栏下,选择UDP mode,可以指定多组IP地址段。
moxa串口服务器配置方法图解教程
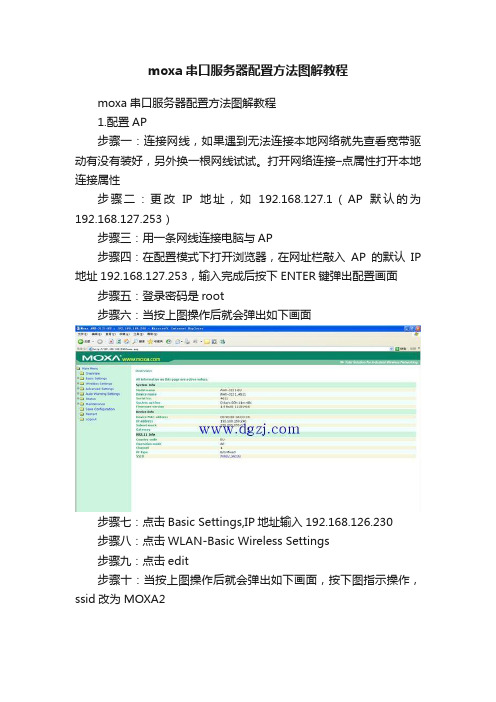
moxa串口服务器配置方法图解教程moxa串口服务器配置方法图解教程1.配置AP步骤一:连接网线,如果遇到无法连接本地网络就先查看宽带驱动有没有装好,另外换一根网线试试。
打开网络连接–点属性打开本地连接属性步骤二:更改IP地址,如192.168.127.1(AP默认的为192.168.127.253)步骤三:用一条网线连接电脑与AP步骤四:在配置模式下打开浏览器,在网址栏敲入AP的默认IP 地址192.168.127.253,输入完成后按下ENTER键弹出配置画面步骤五:登录密码是root步骤六:当按上图操作后就会弹出如下画面步骤七:点击Basic Settings,IP地址输入192.168.126.230步骤八:点击WLAN-Basic Wireless Settings步骤九:点击edit步骤十:当按上图操作后就会弹出如下画面,按下图指示操作,ssid改为MOXA2步骤十一:当按上图操作后就会弹出如下画面,按下图设置安全模式及密码,用的是WPA2,WEP,密码是passphrase:hust1234567。
步骤十二:点击restart,然后重启,重启完成后设置完成。
2.串口服务器设置步骤一:先插网线连接电脑,再给串口服务器供电,进入配置模式步骤二:moxa默认以太网IP地址:192.168.126.254,所以在浏览器上面输入此网址进入配置界面,默认无密码,直接登录步骤三:点击WIZARD,然后设置IP地址,这是串口服务器的无线IP地址哦,默认是192.168.127.254,设置为192.168.126.231,代表一号agv小车步骤四:上一步完成后,把ssid改成MOXA2,代表的是AP的ssid。
步骤五:进入安全属性配置,点击WPA2–psk,然后下面选WEP,就可以在passphrase上面输入密码hust1234567。
步骤六:operation mode选择TCP sercer,然后输入TCP port 8989,那个cmd port保持默认的不用管步骤七:选择串口参数:9600,none,8,1,none,enable,rs-232步骤八:点击submit,然后完成后点击WLAN Settings-profile,点击general步骤九:点击restart,然后restart system,submit,至此,就可以等待重启,重启后完成串口服务器的配置3.判断是否配置正确先打开AP,然后再打开串口服务器,此时等待5秒钟,在工作模式下串口服务器就会连上AP了,说明配置正确,如果连接不上说明串口服务器的密码那里可能没有和AP配置时保持一致。
MoxaNportServerTcp方式配置说明
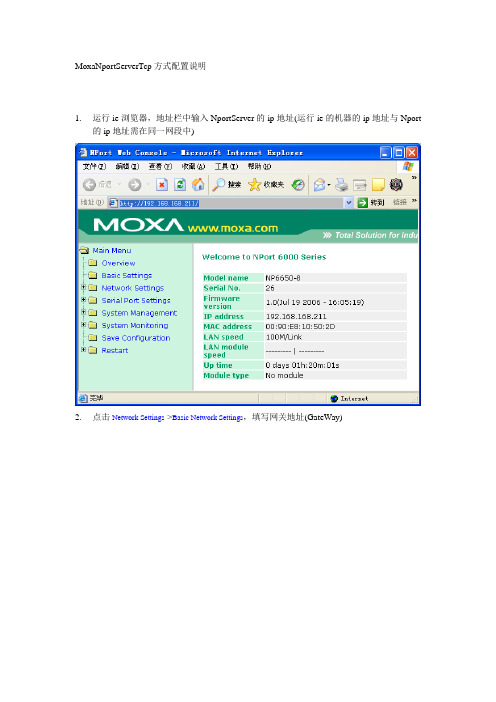
MoxaNportServerTcp方式配置说明1.运行ie浏览器,地址栏中输入NportServer的ip地址(运行ie的机器的ip地址与Nport的ip地址需在同一网段中)2.点击Network Settings->Basic Network Settings,填写网关地址(GateWay)3.以下图例说明port1的设置点击Serial Port Settings->Port 1->Operation Modes按照上图设置完毕,并将“Apply the above settings to all serial ports”选项打勾,那么该NportServer上的所有端口都被设置为TCP服务端方式了。
Serial Port Settings->Port 1->Communication Parameters为该port的串口设置Serial Port Settings->Port 1->Data Buffering/Log如无特殊需要则该处保持默认设置Serial Port Settings->Port 1->Modem Settings modem拨号设置,如不需拨号,则选择disable//*****注意********************************************************//更改设置后,需点击页面下端的“Submit”按钮,会弹出如下界面点击“Save/Restart”,则更改的设置将生效,NportServer会重启,在重启完毕前将无法用IE 浏览器访问NportServer4.如何查看每个NportServer端口所对应的TCP服务端口号?点击Serial Port Settings->Port??->Operation Modes(其中port??为你所想查询的端口)红圈中即为该端口所对应的TCP服务端口号南京恒星技术部陈皓晞。
MOXA 串口服务器中文使用文档

MOXA串口联网服务器NPORT 5130 特点- 以太网口支持100/10M自适应,串口支持RS-422,RS-485(2w/4w)- 低成本、信用卡大小- 支持Windows/Linux COM串口驱动程序模式- 提供包括TCP Server、TCP Client、UDP Server/Client和Ethernet Modem 在内的不同socket操作模式- 无需PC、可通过网络连接两个串口设备的对等连接模式- 易于使用、可用于批量安装的Windows工具- 所有信号内置15 KV突波保护- 支持网络管理协议SNMP MIB-II- 可通过网络Web/Telnet进行配置MOXA针对串口联网服务器开发了软件NPort Administrator,方便用户配置,下面我就着重讲如何用NportAdministration 配置NPORT产品,图一1、NPORT 5130提供多种操作模式,例如:Realcom模式,Tcp server模式,Tcp client模式,Udp模式。
图二2、配置方法:2.1、安装NPORT administration 软件。
2.2、打开软件,如图:图三点击Search,可以搜索到局域网中所有的NPORT设备,包括和主机IP不同网段的NPORT设备。
搜索到设备如下图:图四如图可以显示设备的型号,MAC地址,IP地址,以及设备的名称。
(默认IP:192.168.127.254)2.3、基本设置界面介绍选中要配置的设备,点击右键——Configuer,或者是双击,进入设备配置界面,如图:图五如图五,Basic界面可以设置设备的名称,设备的时钟(默认读取主机时钟),以及登陆设备的方式。
(提醒:必须勾选Modofy才能对配置进行修改,否则只能对查看配置)2.4、网络设置页面介绍图六如图六,Network界面配置Ip地址相关信息。
设置串口联网服务器IP地址与主机IP为同一个网段。
MOXA串口服务器设置步骤
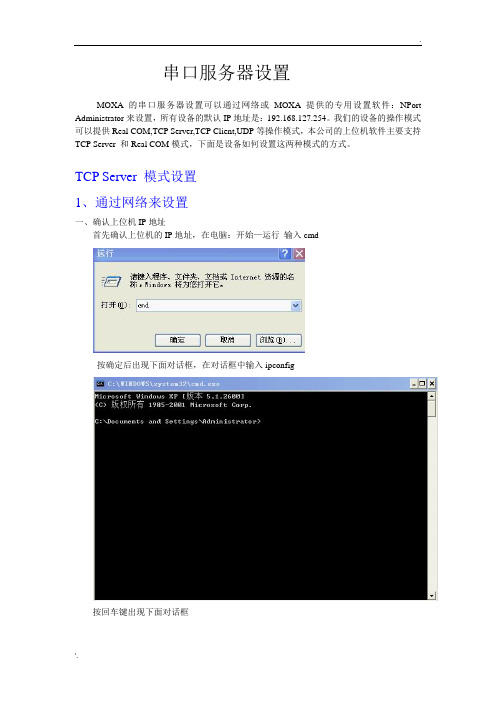
MOXA串口服务器的Real COM模式设置只能通过MOXA的专用软件来设置,它是在操作系统上虚拟一个串口,在硬件管理里是无法找到的,下面是基本设置,前期设置跟TCP Serverm模式设置是一样的,就是最后一步操作模式选择Real COM模式,设备一般默认是Real COM模式,所以一般不设也没关系的。设置完成后还需要虚拟串口。
点击进入Serial Parameters进入下面界面,设置串口波特率,这个波特率要跟你的上位机软件设置成一样。
点击OK进入下面界面
点住主对话框里的NPort 5110,鼠标右击选择Enable(激活),在选择上面对话框的Apply保存,设置完毕。
----------------------------------------------------------------------------------------------------------------------
串口服务器设置
MOXA的串口服务器设置可以通过网络或MOXA提供的专用设置软件:NPort Administrator来设置,所有设备的默认IP地址是:192.168.127.254。我们的设备的操作模式可以提供Real COM,TCP Server,TCP Client,UDP等操作模式,本公司的上位机软件主要支持TCP Server和Real COM模式,下面是设备如何设置这两种模式的方式。
前
点击后出现的界面
一般默认是Real COM Mode,所以直接点击OK好了。
点击OK
鼠标点住COM Mapping右击Add Target
点击前
点击后
选中对话框里的No 1前的小框框,点击OK,出现如下界面。
MOXA串口服务器中文使用文档
MOXA串口服务器中文使用文档一、设备安装1.确认设备完好:打开包装检查设备是否有损坏、是否齐全,并确认设备的规格型号。
2.连接设备:将串口服务器与电源适配器连接,同时将其与电脑或网络交换机通过网线连接。
二、设备配置1.IP地址分配:通过网线将串口服务器连接到网络交换机,打开电脑浏览器,输入设备的默认IP地址(通常是192.168.0.1)进行登录。
2.登录设置界面:在浏览器中输入设备的IP地址,登录后进入设置界面。
3.配置网络参数:设定设备的网络参数,如IP地址、子网掩码、网关等,确保设备能正常连接到网络。
4.配置串口参数:设置串口服务器的串口串行参数,如波特率、数据位、校验位、停止位等。
三、设备使用1.连接串口设备:将需要连接的串口设备插入串口服务器的串口口,注意正确连接好串口线。
2.设备管理界面:打开电脑浏览器,输入设备的IP地址,登录后进入设备管理界面。
3.设备配置:在设备管理界面中,可以对设备进行配置,如设定串口通信参数、串口流控制和数据转发等。
4.远程访问:通过设备的IP地址,可以实现远程访问和远程控制,方便用户进行设备管理和数据传输。
5.数据传输:通过串口服务器,可以实现串口设备和电脑之间的数据传输,支持多种串口设备的协议转换。
四、常见问题解决1. 如何找到设备的 IP 地址:可以通过在电脑上运行ipconfig命令,或者使用设备提供的网络管理工具来查找设备的 IP 地址。
2. 如何进行设备的初始设置:可以通过按下设备背面的 Reset 按钮将设备恢复至出厂设置,然后重新进行设备的配置。
3.无法连接到设备:请检查设备的网络连接是否正常,确保设备的IP地址设置正确且与计算机处于同一局域网内。
4.串口无法正常通信:请检查串口线的连接是否正确,串口参数设置是否与串口设备一致。
以上是MOXA串口服务器中文使用文档的简要介绍,详细内容包括设备的安装、配置和使用等方面。
通过按照文档所述的步骤,用户可以顺利地使用MOXA串口服务器,并能解决常见的问题。
MOXA串口服务器产品配置说明
MOXA串口服务器产品配置说明MOXA串口服务器是一种专用设备,可将串口数据转换为网络数据进行传输。
它可以将串口设备连接到局域网(LAN)或广域网(WAN)上,使串口设备能够通过网络进行远程控制和监控。
以下是对MOXA串口服务器产品的详细配置说明。
1.网络配置:MOXA串口服务器支持多种网络连接方式,例如以太网、Wi-Fi和CDMA等。
用户可以根据网络环境和需求选择合适的连接方式。
在进行网络配置时,用户需要设置IP地址、子网掩码和网关信息,并确保网络连接正常。
2.串口配置:3.协议转换:MOXA串口服务器可以将串口数据转换为TCP/IP或UDP数据,并通过网络进行传输。
用户可以根据实际需求选择采用的协议类型。
在进行协议转换配置时,用户需要设置串口和网络协议的转换方式,例如透明传输、Modbus协议或自定义协议等。
4.远程访问:5.设备管理:6.告警和日志记录:MOXA串口服务器具有告警和日志记录功能,用户可以设置告警条件和方式,以及日志记录的级别和类型。
在进行告警和日志配置时,用户可以根据实际需求选择告警的方式、级别和类型,并设置日志记录的存储位置和周期。
7.兼容性和可扩展性:MOXA串口服务器可与各种串口设备兼容,并具有较强的可扩展性。
用户可以根据实际需求选择适用的串口设备,并通过扩展模块或插件来扩展功能。
在进行兼容性和可扩展性配置时,用户需要根据实际需求选择适用的设备和扩展模块,并进行相应的配置。
总结:MOXA串口服务器是一种非常实用的网络设备,通过它可以使串口设备能够通过网络进行远程控制和监控。
在进行配置时,用户需要进行网络配置、串口配置、协议转换、远程访问、设备管理、告警和日志记录等相关设置。
通过合理的配置,可以使MOXA串口服务器能够更好地满足用户的需求,并实现更高效、稳定和安全的串口通信。
MOA串口服务器设置步骤
串口服务器设置MOXA的串口服务器设置可以通过网络或MOXA提供的专用设置软件:NPort Administrator来设置,所有设备的默认IP地址是:192.168.127.254。
我们的设备的操作模式可以提供Real COM,TCP Server,TCP Client,UDP等操作模式,本公司的上位机软件主要支持TCP Server 和Real COM模式,下面是设备如何设置这两种模式的方式。
TCP Server 模式设置1、通过网络来设置一、确认上位机IP地址首先确认上位机的IP地址,在电脑:开始—运行输入cmd按确定后出现下面对话框,在对话框中输入ipconfig按回车键出现下面对话框上图显示本机的IP地址是:192.168.1.22二、通过IE来设置1、添加IP在网上邻居—右键—属性—本地连接—右键—属性—常规—双击协议(TCP/IP)出现下面对话点击右下角高级出现下面对话框在IP地址栏里点击添加出现下面对话框在对话框中输入IP地址,我输入的是:192.168.127.200 在IE里输入IP地址:192.168.127.254 就出现下面界面在Network Settings里设置IP地址,改成:192.168.1.254,因为我本机是192.168.1.22,所以要改成同一网段内,设置好后点击Submit设置串口设备的波特率等参数,点击Submit设置操作模式,本次在Operation mode右边的下拉列表选择TCP Server Mode 模式,设置端口号,设备默认端口号是4001,设置好后点击Submit点击Save/Restart , 点击Submit设置完成2、通过专用软件来设置一、安装MOXA的NPort Administrator 软件安装完后打开NPort Administrator,出现下面的界面点击Search出现如下界面这说明已经找到设备,点击Stop 出现下面对话框2、选中主对话框里的NPort 5110 双击进入设置界面,点击Networt 设置IP地址,例如:192.168.1.200,设置前先在IP Address 上面的白色小框框打上钩设置前设置后2、设置串口参数,点击Serial,进入下面的界面点住Modify左边的小框框后,点住大对话框里的Port 1 双击,进入下面界面,设置串口的一些参数。
- 1、下载文档前请自行甄别文档内容的完整性,平台不提供额外的编辑、内容补充、找答案等附加服务。
- 2、"仅部分预览"的文档,不可在线预览部分如存在完整性等问题,可反馈申请退款(可完整预览的文档不适用该条件!)。
- 3、如文档侵犯您的权益,请联系客服反馈,我们会尽快为您处理(人工客服工作时间:9:00-18:30)。
MOXA (摩莎)串口服务器
使用说明书
系统版本:R2.0 (Cover Title 2) 文档编号:CHI-PT-NJBL-A0-SHAN
内容简介
《串口服务器使用手册》本手册主要讲解了串口服务器软件安装及串口服务器的配置,指导现场工程师对串口服务器的数据配置。
本手册共分2章节,分别为:
第一章:概述
第二章:软件的安装和设置
本文档的读者范围:
公司员工
版权声明
本文档属南京北路自动化系统有限责任公司版权所有,侵权必究。
本文档专供用户、本公司职员以及经本公司许可的人员使用,未经公司书面同
意,任何单位或个人不得以任何方式复制、翻印、改编、摘编、转载、翻译、
注释、整理、出版或传播手册的全部或部分内容。
南京北路自动化系统有限责任公司位于南京江宁经济技术开发区,是南京市高新技术企业,现有高级工程师、工程师及其他专业技术人员100余名。
是专业从事煤矿通信、自动化、信息化产品的研发、生产、销售及服务的高科技公司。
公司拥有ISO9001:2000质量管理体系认证,坚持“质量第一、用户至上、至诚服务、持续改进”的质量方针,得到了广大客户的信赖和支持。
目前公司产品覆盖全国10多个省、自治区,并在多个煤炭主产区设有售后服务机构。
公司以满足客户需求为己任,不断生产高性价比的产品,为客户创造价值。
南京北路自动化系统有限责任公司
联系地址:南京市江宁开发区菲尼克斯路99号
邮政编码:211106
电话号码:(025)52187543
传真:(025)52185703
邮件地址:njbestway@
客户服务电话:400-611-5166
客户支持网站:
目录
1概述 (1)
2软件的安装和设置 (1)
2.1扫描软件安装 (1)
2.2扫描软件的设置 (3)
插图目录
图2-1 光盘中安装程序 (1)
图2-2 安装后程序中 (2)
图2-3 扫描软件图 (2)
图2-4 串口服务器查找图 (3)
图2-5 主界面图 (4)
图2-6 Basic界面 (5)
图2-7主串口服务器UDP Mode设置图 (8)
图2-8从串口服务器UDP Mode设置图 (9)
图2-9 波特率设置1图 (10)
图2-10 波特率设置2图 (10)
1概述
MOXA(摩莎)串口服务器是把485/232信号转换成网络TCP/IP信号,在工业
以太网络上传输信号的设备。
本文主要讲解MOXA(摩莎)串口服务器软件安
装,设置和使用等。
2软件的安装和设置
2.1扫描软件安装
打开MOXA(摩莎)串口服务器带的光盘,选择“X:\Software\Windows”(X
为光驱所在的盘符),如下图:
图2-1光盘中安装程序
打开“Npadm_Setup_Ver1.10_Build_08042811.zip”直接点击“下一步”安装,
安装完成后在“开始”程序里可以看到,如下图:
直接点击运行,如下图:
图2-3扫描软件图
2.2扫描软件的设置
点击“Search”,如下图:
图2-4串口服务器查找图等待5秒钟出现如下图界面:
图2-5主界面图
点击你所需要设置的串口服务器,在“Basic”界面中,刻意修改串口服务器的名字(名字只能是数字和字母,不能是汉字)、时区、日期和时间等。
如下
图:
图2-6Basic界面
在“Network”界面修改串口服务器的IP地址,子网掩码等(有的网络需要设置相应的网关才能相互通信),如下图:
在“Operating Mode”界面,勾选“Modly”,如下图:
双击“Real COM Mode”,弹出对话框,如下图:在“Operating Mode”进行模式的选择,我们选择“TCP server Mode”模式。
如这个串口服务器是主串口服务器(设IP地址为:192.168.10.231),它接受从下面所有的串口服务器传上来的数据,然后再通过这个串口服务器连接到人员定位的服务器上。
它的端口设置成4004(默认的端口是4001,为了与别的端口不冲突),”Local TCP Port”为本设备端口号,“Max connection”对应井下串口服务器的最大连接数,这个选项中有1,2,3,4四个选项。
图2-7主串口服务器TCP Mode设置图
Delimiter 1和Delimiter 2 为接收到某个字符后再发送,人员定们数据服务器以7E结尾所以应设置为7E(弊端:当数据量大的时候,当7E结尾后再发送收导致数据延时)。
Packing Length和Delimiter不可同时使用。
如果这个串口服务器是从串口服务器(井下的串口服务器),设自己的端口为5011,需要访问的IP地址就是主串口服务器的IP地址,传输的端口为主串口服
务器的端口地址4004.设置如下图:
图2-8从串口服务器TCP Mode设置图
在“Serial”界面,设置波特率,波特率为9600,如下图:
图2-9波特率设置1图
图2-10波特率设置2图
没有新的说明下,不要擅自更改!。
