lvs安装完整步骤
LVS+Keepalived_DR模式安装配置
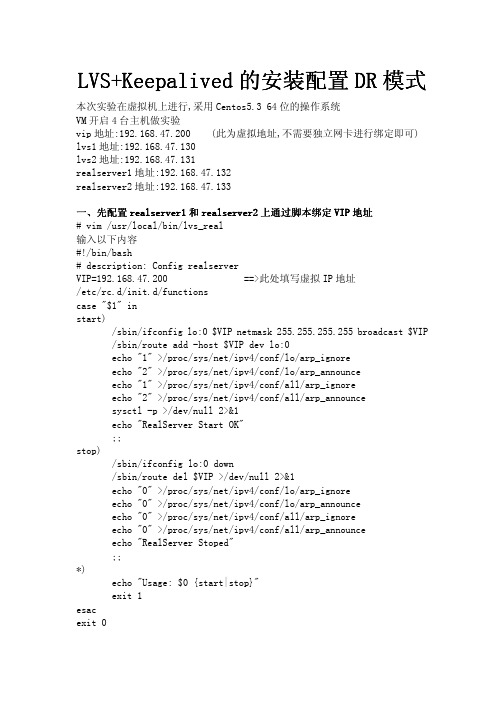
本次实验在虚拟机上进行,采用 Centos5.3 64 位的操作系统 VM 开启 4 台主机做实验 vip 地址:192.168.47.200 (此为虚拟地址,不需要独立网卡进行绑定即可) lvs1 地址:192.168.47.130 lvs2 地址:192.168.47.131 realserver1 地址:192.168.47.132 realserver2 地址:192.168.47.133 一、先配置 realserver1 和 realserver2 上通过脚本绑定 VIP VIP 地址 # vim /usr/local/bin/lvs_real 输入以下内容 #!/bin/bash # description: Config realserver VIP=192.168.47.200 ==>此处填写虚拟 IP 地址 /etc/rc.d/init.d/functions case "$1" in start) /sbin/ifconfig lo:0 $VIP netmask 255.255.255.255 broadcast $VIP /sbin/route add -host $VIP dev lo:0 echo "1" >/proc/sys/net/ipv4/conf/lo/arp_ignore echo "2" >/proc/sys/net/ipv4/conf/lo/arp_announce echo "1" >/proc/sys/net/ipv4/conf/all/arp_ignore echo "2" >/proc/sys/net/ipv4/conf/all/arp_announce sysctl -p >/dev/null 2>&1 echo "RealServer Start OK" ;; stop) /sbin/ifconfig lo:0 down /sbin/route del $VIP >/dev/null 2>&1 echo "0" >/proc/sys/net/ipv4/conf/lo/arp_ignore echo "0" >/proc/sys/net/ipv4/conf/lo/arp_announce echo "0" >/proc/sys/net/ipv4/conf/all/arp_ignore echo "0" >/proc/sys/net/ipv4/conf/all/arp_announce echo "RealServer Stoped" ;; *) echo "Usage: $0 {start|stop}" exit 1 esac exit 0
搭建高可用LVS负载均衡集群服务器

搭建高可用LVS负载均衡集群服务器LVS(Linux Virtual Server)是一种用于构建高可用负载均衡集群的技术。
它基于Linux操作系统,能够将负载分摊到多台服务器上,提高系统的可用性和性能。
本文将介绍如何搭建高可用LVS负载均衡集群服务器。
1.硬件准备在搭建LVS负载均衡集群之前,需要准备一些硬件设备。
首先需要一台或多台运行Linux操作系统的物理服务器作为后端服务器,这些服务器将实际处理来自客户端的请求。
其次,需要一台或多台用于负载均衡的服务器,即LVS负载均衡调度器,它将接收客户端请求,并将请求分发到后端服务器上。
2.安装操作系统在LVS负载均衡集群中,建议使用CentOS或其他类似的Linux操作系统。
安装操作系统时,确保选择的版本兼容LVS的设计和配置。
3.安装软件包在安装操作系统之后,需要安装所需的软件包。
LVS负载均衡集群的核心软件包是ipvsadm,它提供了管理五层负载均衡器的工具。
可以使用以下命令安装ipvsadm软件包:```sudo apt-get install ipvsadm```4.配置网络在配置LVS负载均衡集群之前,需要确保网络环境正确配置。
每个后端服务器都应该有一个私有IP地址,这个地址用于内部通信。
此外,LVS 负载均衡调度器也需要一个公共IP地址,客户端将使用该地址来访问服务。
5.配置LVS负载均衡调度器在配置LVS负载均衡调度器之前,首先需要启用内核IPVS模块。
使用以下命令加载IPVS模块:```sudo modprobe ip_vs```然后,可以使用ipvsadm工具配置LVS负载均衡调度器。
以下是一个简单的配置示例:``````其中,“-A”选项添加新的负载均衡虚拟服务器,“-t”选项指定负载均衡器的IP地址和端口,“-s”选项指定负载均衡算法(这里使用了wrr算法,也可以使用其他算法),“-a”选项添加新的真实服务器,“-r”选项指定后端服务器的IP地址,“-g”选项表示会话保持。
lvs 简单用法

lvs 简单用法LVS(Linux Virtual Server)是一个基于Linux操作系统的高性能、可扩展的负载均衡器。
它允许将网络流量均匀分配到多个后端服务器,从而提高系统的可用性和性能。
为了使用LVS,首先要确保在服务器上安装了ipvsadm工具包。
使用以下命令可以检查是否安装了该工具包:```ipvsadm -v```如果未安装ipvsadm,可以使用以下命令安装:```sudo apt-get install ipvsadm```安装完ipvsadm后,可以开始配置LVS。
配置LVS需要进行以下几个步骤:1. 配置LVS调度器:LVS调度器是负责接收客户端请求并将其转发至后端服务器的组件。
可以通过编辑`/etc/sysctl.conf`文件来配置LVS调度器。
添加以下行以启用IP转发:```net.ipv4.ip_forward = 1```然后使用以下命令使配置生效:```sudo sysctl -p```2. 配置LVS服务:编辑`/etc/ipvsadm.conf`文件,添加以下内容来配置LVS服务:```# 清除旧的配置sudo ipvsadm --clear# 添加LVS虚拟服务sudo ipvsadm -A -t <虚拟服务IP>:<端口> -s <调度算法>```这里需要将`<虚拟服务IP>`和`<端口>`替换为实际的虚拟服务IP和端口,`<调度算法>`可以选择使用的调度算法,例如`rr`表示使用轮询(Round Robin)算法。
3. 添加后端服务器:使用以下命令将后端服务器添加至LVS服务中:```sudo ipvsadm -a -t <虚拟服务IP>:<端口> -r <后端服务器IP>:<端口> -g```这里需要将`<虚拟服务IP>`和`<端口>`替换为实际的虚拟服务IP和端口,`<后端服务器IP>`和`<端口>`替换为实际的后端服务器IP和端口。
LVS和Heartbeat的安装配置说明

LVS和Heartbeat的安装配置说明索引:LVS,Heartbeat,集群调度摘要:本文描述开源工具LVS和Heartbeat的安装和配置作者:吕跃强作者:吕跃强1.LVS1.1.LVS介绍LVS是LINUX VIRTUL SERVER的简称,是由章文嵩博士主持的著名开放源码项目,一个实现“三高”系统的解决方案。
LVS旨在解决高速发展的Web商务中日益凸现的问题:如何在有限资金投入的情况下,最大幅度的提高Web站点的潜在服务性能。
核心就是通过一组服务器来进行负载均衡,通过前端的负载调度器(Load Balancer),无缝地将网络请求调度到真实服务器上,从而使得服务器集群的结构对客户是透明的,客户访问集群系统提供的网络服务就像访问一台高性能、高可用的服务器一样。
客户程序不受服务器集群的影响不需作任何修改。
系统的伸缩性通过在服务机群中透明地加入和删除一个节点来达到,通过检测节点或服务进程故障和正确地重置系统达到高可用性。
由于我们的负载调度技术是在Linux内核中实现的,我们称之为Linux虚拟服务器(Linux Virtual Server)。
以下为其大体的结构图LVS的设计根据透明性、性能、高可用性、可管理性和可编程性的指导思想实现的。
我们把前面那台负载均衡机器叫做:director server(DR)。
后面的实际服务机器叫做:real server(RS)具体介绍请参考以下网址:/zh1.2.LVS的三种负载均衡模式调度器的实现技术中,IP负载均衡技术是效率最高的,IP虚拟服务器软件(IPV S)是在linux内核中实现的。
1.2.1.NAT模式NAT用法本来是因为网络IP地址不足而把内部保留IP地址通过映射转换成公网地址的一种上网方式(原地址NAT)。
如果把NAT的过程稍微变化,就可以成为负载均衡的一种方式。
原理其实就是把从客户端发来的IP包的IP头目的地址在DR上换成其中一台REAL SERVER的IP地址并发至此REAL SERVER,而REAL SERVER则在处理完成后把数据经过DR主机发回给客户端,DR在这个时候再把数据包的原IP地址改为DR接口上的IP地址即可。
LVS 介绍和安装

一、LVS 介绍和安装LVS (Linux Virtual Server )即Linux 虚拟服务器,是由章文嵩博士主导的开源负载均衡项目,目前LVS 已经被集成到Linux 内核模块中。
该项目在Linux 内核中实现了基于IP 的数据请求负载均衡调度方案。
LVS 的IPVS 模块在Linux 内核2.4 之后以上都被默认支持了,只需要安装ipvsadm 管理配置软件即可。
作用和优势:①工作在网络层,可以实现高性能,高可用的服务器集群技术。
②廉价,可把许多低性能的服务器组合在一起形成一个超级服务器。
③易用,配置非常简单,且有多种负载均衡的方法。
④稳定可靠,即使在集群的服务器中某台服务器无法正常工作,也不影响整体效果。
⑤可扩展性非常好。
安装ipvsadm 只在负载均衡调度服务器上安装即可shell > yum -y install ipvsadmLVS 的常见工作方式:①NAT( 地址转换)②DR( 直接路由)LVS 调度算法:1.Fixed Scheduling Method 静态调度方法①RR 轮询调度器通过"轮叫"调度算法将外部请求按顺序轮流分配到集群中的真实服务器上,它均等地对待每一台服务器,而不管服务器上实际的连接数和系统负载。
②WRR 加权轮询调度器通过"加权轮叫"调度算法根据真实服务器的不同处理能力来调度访问请求。
这样可以保证处理能力强的服务器处理更多的访问流量。
调度器可以自动问询真实服务器的负载情况,并动态地调整其权值。
③DH 目标地址hash 算法也是针对目标IP 地址的负载均衡,但它是一种静态映射算法,通过一个散列(Hash )函数将一个目标IP 地址映射到一台服务器。
目标地址散列调度算法先根据请求的目标IP 地址,作为散列键(Hash Key )从静态分配的散列表找出对应的服务器,若该服务器是可用的且未超载,将请求发送到该服务器,否则返回空。
Linux集群服务LVS概述与安装配置详解
Linux集群服务LVS概述与安装配置详解LVS项目从成立到现在为止,受到不少关注,LVS集群系统已被应用于很多重负载的站点。
到目前为止,该系统已在美、英、德、澳等国的几十个站点上正式使用。
目前,一些大型LVS应用实例如下:1.英国国家JANET Cache Service()是为英国150所以上的大学提供Web Cache服务。
他们用28个结点的LVS集群代替了原有现50多台相互独立的Cache服务器,用他们的话说现在速度就跟夏天一样,因为夏天是放假期间没有很多人使用网络。
2.Linux的门户站点()用LVS将很多台V A Linux SMP服务器组成高性能的WEB服务,已使用将近一年。
3.SourceForge()是在全球范围内为开发源码项目提供WEB、FTP、Mailing List和CVS等服务,他们也使用LVS将负载调度到十几台机器上。
4.世界上最大的PC制造商之一采用了两个LVS集群系统,一个在美洲,一个在欧洲,用于网上直销系统。
5.以RealPlayer提供音频视频服务而闻名的Real公司()使用由20台服务器组成的LVS集群,为其全球用户提供音频视频服务。
在2000年3月时,整个集群系统已收到平均每秒20,000个连接的请求流。
Walk()用多台服务器构造LVS系统,提供1024个虚拟服务,其中本项目的一个美国镜像站点()。
7.RedHat()从其6.1发行版起已经包含LVS代码,他们开发了一个LVS集群管理工具叫Piranha,用于控制LVS集群,并提供了一个图形化的配置界面。
8.V A Linux()向客户提供基于LVS的服务器集群系统,并且提供相关的服务和支持。
安装LVS安装LVS和配置LVS的工作比较繁杂,读者在配置的过程中需要非常细心和耐心。
在本节我们将对其进行详细地介绍。
主要包括如下几个核心步骤:1.获取支持LVS的内核源代码如果读者需要使用LVS,需要下载2.4.23以后版本的内核源代码。
lvs安装文档

lvs安装文档1.安装lvs应用模块1、安装依赖包:yum -y install ipvs*2、验证本机ip_vs模块是否加载[root@client lvs]# grep -i 'ip_vs' /boot/config-2.6.32-431.el6.x86_64CONFIG_IP_VS=mCONFIG_IP_VS_IPV6=y# CONFIG_IP_VS_DEBUG is not setCONFIG_IP_VS_TAB_BITS=12CONFIG_IP_VS_PROTO_TCP=yCONFIG_IP_VS_PROTO_UDP=yCONFIG_IP_VS_PROTO_AH_ESP=yCONFIG_IP_VS_PROTO_ESP=yCONFIG_IP_VS_PROTO_AH=yCONFIG_IP_VS_PROTO_SCTP=yCONFIG_IP_VS_RR=mCONFIG_IP_VS_WRR=mCONFIG_IP_VS_LC=mCONFIG_IP_VS_WLC=mCONFIG_IP_VS_LBLC=mCONFIG_IP_VS_LBLCR=mCONFIG_IP_VS_DH=mCONFIG_IP_VS_SH=mCONFIG_IP_VS_SED=mCONFIG_IP_VS_NQ=mCONFIG_IP_VS_FTP=mCONFIG_IP_VS_PE_SIP=m2.安装lvs2.1.编写lvs drsrever脚本:2.1.1.修改functions权限:(functions这个脚本是给/etc/init.d里边的文件使用的(可理解为全局文件)。
)chmod 755 /etc/rc.d/init.d/functions2.1.2.创建lvs文件夹cd /usr/localmkdir –m 755 lvscd /lvs2.1.3.编写脚本2.1.4.执行脚本chmod 755 lvs_dr.sh./lvs-dr.sh start2.1.5.查看:ipvsadm –ln看到上面信息说明ipvsadm启动成功。
LVS安装手册

目录1第一部分LVS体系结构 (2)1.1网络结构(图) (2)1.2Lvs 工作模式: (2)2第二部分lvs软件安装: (3)2.1安装前准备工作:(以小频道lvs系统安装为例) (3)2.2进行软件安装: (3)2.2.1 安装ipvsadm软件 (3)2.2.2 安装keepalived 软件 (4)2.3建立配置文件 (4)2.3.1配置 lvs 双机 HA 同时提供服务 (4)2.3.2 后台真实服务器虚拟地址配置: (8)3第三部分:应用管理: (9)3.1启动/关闭lvs调度器: (9)3.2系统虚拟IP管理: (9)1第一部分LVS体系结构1.1网络结构(图)如上图:CMS服务器是安装CMS新闻发布系统,web服务器是用户访问的网站,database数据库是CMS系统所需要的数据库服务器。
1.2Lvs 工作模式:1.2.1地址转换模式NA TNAT的网络结构呈现为一种类似防火墙的私有网结构,通过内部IP地址,将服务结点池同互联网隔离开来。
服务结点无法和客户端直接通信,不论是请求数据还是应答数据,都需要经过负载均衡器进行IP包处理工作1.2.2IP隧道模式IPIPIPIP模式采用的是开放的网络结构,服务结点拥有合法的互联网IP地址,可以通过路由路径将应答包直接返回给客户端。
因此,负载均衡器仅仅处理进入集群的请求数据包,而返回包不经过路由器。
因此,这种模式称作单工连接模式(单方向连接工作模式)。
负载均衡器和服务结点的连接可以是LAN,也可以在不同的网络上,只需要保证负载均衡器能够将IP 包发送至服务结点即可.1.2.3直接路由模式DR和IPIP模式一样,DR模式也是采用单工的连接方式,应答数据不再经过均衡器而直接返回给客户端。
服务结点也必须拥有能够到达客户端的合法IP地址。
而且,DR模式中,负载均衡器和服务结点必须位于同一个网段。
2第二部分lvs软件安装:2.1安装前准备工作:(以小频道lvs系统采用DR 模式安装为例)1、下载ipvsadm-1.242、下载keepalived-1.153、保证网络正常连接;4、合理分配虚拟IP:2.2进行软件安装:2.2.1安装ipvsadm软件# tar –zxvf ipvsadm-1.24# ln –s /usr/src/linux-2.6.18.8 /usr/src/linux# cd ipvsadm-1.24#./configure#make;make install确定ipvs 模块是否已经装载:2.2.2安装keepalived 软件# tar –zxvf keepalived-1.15# cd keepalived-1.15# ./configure# make# make install2.3建立配置文件2.3.1配置 lvs 双机 HA 同时提供服务Lvs1的配置文件 /usr/local/etc/keepalived/keepalived.confglobal_defs {router_id LVS_DEVEL}vrrp_instance VI_1 {state MASTERinterface eth1virtual_router_id 51priority 200advert_int 1authentication {auth_type PASSauth_pass 1111}virtual_ipaddress {124.238.253.100}}vrrp_instance VI_2 {state BACKUPinterface eth1virtual_router_id 52priority 100advert_int 1authentication {auth_type PASSauth_pass 1111}virtual_ipaddress {124.238.253.101}}#小频道virtual_server 124.238.253.100 80 { delay_loop 6lb_algo rrlb_kind DRpersistence_timeout 60protocol TCPreal_server 124.238.253.188 80 { weight 1TCP_CHECK {connect_timeout 15nb_get_retry 3delay_before_retry 3connect_port 80}}real_server 124.238.253.155 80 { weight 1TCP_CHECK {connect_timeout 15nb_get_retry 3delay_before_retry 3connect_port 80}}}virtual_server 124.238.253.101 80 { delay_loop 6lb_algo rrlb_kind DRpersistence_timeout 60protocol TCPreal_server 124.238.253.188 80 {weight 1TCP_CHECK {connect_timeout 15nb_get_retry 3delay_before_retry 3connect_port 80}}real_server 124.238.253.155 80 {weight 1TCP_CHECK {connect_timeout 15nb_get_retry 3delay_before_retry 3connect_port 80}}}Lvs2的配置文件 /usr/local/etc/keepalived/keepalived.conf global_defs {router_id LVS_DEVEL}vrrp_instance VI_1 {state BACKUPinterface eth1virtual_router_id 51priority 100advert_int 1authentication {auth_type PASSauth_pass 1111}virtual_ipaddress {124.238.253.100}}vrrp_instance VI_2 {state MASTERinterface eth1virtual_router_id 52priority 200advert_int 1authentication {auth_type PASSauth_pass 1111}virtual_ipaddress {124.238.253.101}}#小频道virtual_server 124.238.253.100 80 { delay_loop 6lb_algo rrlb_kind DRpersistence_timeout 60protocol TCPreal_server 124.238.253.188 80 { weight 1TCP_CHECK {connect_timeout 10nb_get_retry 3delay_before_retry 3connect_port 80}}real_server 124.238.253.155 80 { weight 1TCP_CHECK {connect_timeout 10nb_get_retry 3delay_before_retry 3connect_port 80}}}virtual_server 124.238.253.101 80 {delay_loop 6lb_algo rrlb_kind DRpersistence_timeout 60protocol TCPreal_server 124.238.253.188 80 {weight 1TCP_CHECK {connect_timeout 10nb_get_retry 3delay_before_retry 3connect_port 80}}real_server 124.238.253.155 80 {weight 1TCP_CHECK {connect_timeout 15nb_get_retry 3delay_before_retry 3connect_port 80}}}2.3.2后台真实服务器虚拟地址配置:在小频道真实服务器124.238.253.155/124.238.253.188 执行如下脚本#/home/tools/lvs.sh startLvs.sh 脚本内容:#!/bin/bash#description:start realserver#chkconfig 235 26 26VIP1=124.238.253.100VIP2=124.238.253.101/etc/rc.d/init.d/functionscase "$1" instart)echo " start LVS of REALServer"/sbin/ifconfig lo:0 $VIP1 broadcast $VIP1 netmask 255.255.255.255 up/sbin/ifconfig lo:1 $VIP2 broadcast $VIP2 netmask 255.255.255.255 up echo "1" >/proc/sys/net/ipv4/conf/lo/arp_ignoreecho "2" >/proc/sys/net/ipv4/conf/lo/arp_announceecho "1" >/proc/sys/net/ipv4/conf/all/arp_ignoreecho "2" >/proc/sys/net/ipv4/conf/all/arp_announce;;stop)/sbin/ifconfig lo:0 down/sbin/ifconfig lo:1 downecho "close LVS Directorserver"echo "0" >/proc/sys/net/ipv4/conf/lo/arp_ignoreecho "0" >/proc/sys/net/ipv4/conf/lo/arp_announceecho "0" >/proc/sys/net/ipv4/conf/all/arp_ignoreecho "0" >/proc/sys/net/ipv4/conf/all/arp_announce;;*)echo "Usage: $0 {start|stop}"exit 1esac# shell end3第三部分:应用管理:3.1启动/关闭lvs调度器:启动lvs#/usr/local/sbin/keepalived –D -f /usr/local/etc/keepalived/keepalived.conf 关闭lvs# killall -9 keepalived;ipvsadm -C3.2系统虚拟IP管理:查看虚拟IP地址# ip address list删除虚拟IP地址# ip addr del 124.238.253.100 dev eth1。
LVS安装配置

Lvs安装配置这篇文档将解释怎样建立和管理可提供高质量的web和ftp服务的lvs(linux虚拟服务器)集群。
-------------------------------------------------------------------------------目录-------------------------------------------------------------------------------简介一个lvs集群的组件lvs集群的背景硬件/网络的要求lvs路由的必要条件集群节点内部连接的必要条件安装软件配置一个lvs集群例子---建立一个5节点的集群[目录]简介linux虚拟服务器集群是一个被特别配置的,可提供高性能web和ftp服务的服务器的集合。
在下面的图表中阐述了lvs集群是怎样工作的。
到达一个lvs集群的服务请求被寻址到一个虚拟的服务器上。
一个公开广告的,完整网域名称与一个浮动的ip地址相关联,这种浮动ip地址能迁移到不同的节点。
Figure 1. LVS Cluster Interactions_/\__/\_| |/ Internet \\_ _ _ _/\/ \/ \/||Virtual Server IP/FQDN|------------------------------------------||eth0 |eth0------|----- -------|-----| Primary | | Backup || Node | | Node | LVS| | | | routers------|----- -------|-----|eth1 |eth1|-------|------------|-----------------|---|| | || | || | ||----|----| |----|----| |----|----|| Web/FTP | | Web/FTP | | Web/FTP | real| Node#1 | | Node#2 | ... | Node#n | servers|_________| |_________| |_________|一个lvs集群由一个或两个路由节点和很多数量的web/ftp服务器(底部)组成。
AS4_LVS_V4安装文档
redhatAS4.2安装集群LVS环境描述:本文在配置LVS时使用四台linux一台做Directorserver(192.168.2.120)Load Director一台做为备份主节点(192.168.2.121)两台做realserver(192.168.2.122\192.168.2.123)虚拟VIP:192.168.2.200一、DR上安装ipvsadm1.1DR上安装ipvsadm先重新编译ipvsadm的源代码并使用rpm安装#rpmbuild--rebuild ipvsadm-1.24-6.src.rpm#rpm-vhi/usr/src/redhat/RPMS/i386/ipvsadm-1.24-6.i386.rpm#rpm-vhi/usr/src/redhat/RPMS/i386/ipvsadm-debuginfo-1.24-6.i386.rpm1.2DR上配置ipvsadm配置文件,此文件在ldirector失效时仍然能提供服务。
#ipvsadm-C#ipvsadm-A-t192.168.2.200:80-s rr#ipvsadm-a-t192.168.2.200:80–r192.168.2.122:80-g#ipvsadm-a-t192.168.2.200:80-r192.168.2.123:80-g#/etc/rc.d/init.d/ipvsadm save<保存当前配置到/etc/sysconfig/ipvsadm文件中>1.3在DR上启用IP转发;开启ip_forward功能(/etc/sysctl.conf)。
#vi/etc/sysctl.conf<修改以下值>net.ipv4.ip_forward=1#Enables source route verificationnet.ipv4.conf.default.rp_filter=1<查看上述是否成功>#/sbin/sysctl–p输出为:net.ipv4.ip_forward=1net.ipv4.conf.default.rp_filter=1net.ipv4.conf.default.accept_source_route=0kernel.sysrq=0kernel.core_uses_pid=1二、配置基于高可用Lvs+heartbeat2.1安装rpm包需要按顺序安装#rpm-vhi libnet-1.1.2.1-2.1.i386.rpmrpm-vhi perl-Net-SSLeay-1.32-1.el4.rf.i386.rpmrpm-vhi perl-TimeDate-1.16-1.2.el4.rf.noarch.rpmrpm-vhi perl-MailTools-2.04-1.el4.rf.noarch.rpmrpm-vhi heartbeat-pils-2.1.4-4.1.i386.rpm-----------------------rpm-vhi heartbeat-stonith-2.1.4-4.1.i386.rpmrpm-vhi heartbeat-2.1.4-4.1.i386.rpmrpm-vhi heartbeat-devel-2.1.4-4.1.i386.rpmrpm-vhi heartbeat-ldirectord-2.1.4-4.1.i386.rpm拷贝ha.cf,haresources authkeys等文件到/etc/ha.d/目录下cd/usr/share/doc/packages/heartbeat/cp ha.cf haresources authkeys/etc/ha.d/cd/usr/share/doc/heartbeat-ldirectord-2.1.4/cp ldirectord.cf/etc/ha.d/2.2设置双机脚本ha.cf(/etc/ha.d/ha.cf):此文件负责测试两台DR的状态,如果主机有故障将自动切换到备机上去。
使用LVS实现负载均衡原理及安装配置详解

使用LVS实现负载均衡原理及安装配置详解负载均衡集群是load balance 集群的简写,翻译成中文就是负载均衡集群。
常用的负载均衡开源软件有nginx、lvs、haproxy,商业的硬件负载均衡设备F5、Netscale。
这里主要是学习LVS 并对其进行了详细的总结记录。
一、负载均衡LVS基本介绍LB集群的架构和原理很简单,就是当用户的请求过来时,会直接分发到Director Server上,然后它把用户的请求根据设置好的调度算法,智能均衡地分发到后端真正服务器(real server)上。
为了避免不同机器上用户请求得到的数据不一样,需要用到了共享存储,这样保证所有用户请求的数据是一样的。
LVS是Linux Virtual Server 的简称,也就是Linux虚拟服务器。
这是一个由章文嵩博士发起的一个开源项目,它的官方网站是现在LVS 已经是Linux 内核标准的一部分。
使用LVS 可以达到的技术目标是:通过LVS 达到的负载均衡技术和Linux 操作系统实现一个高性能高可用的Linux 服务器集群,它具有良好的可靠性、可扩展性和可操作性。
从而以低廉的成本实现最优的性能。
LVS 是一个实现负载均衡集群的开源软件项目,LVS架构从逻辑上可分为调度层、Server集群层和共享存储。
二、LVS的基本工作原理1.当用户向负载均衡调度器(Director Server)发起请求,调度器将请求发往至内核空间2.PREROUTING链首先会接收到用户请求,判断目标IP确定是本机IP,将数据包发往INPUT链3.IPVS是工作在INPUT链上的,当用户请求到达INPUT时,IPVS会将用户请求和自己已定义好的集群服务进行比对,如果用户请求的就是定义的集群服务,那么此时IPVS会强行修改数据包里的目标IP地址及端口,并将新的数据包发往POSTROUTING链4.POSTROUTING链接收数据包后发现目标IP地址刚好是自己的后端服务器,那么此时通过选路,将数据包最终发送给后端的服务器三、LVS的组成LVS 由2部分程序组成,包括ipvs 和ipvsadm。
lvs1
第一部分安装lvs1:安装libnet[root@localhost pack]# tar zxvf libnet-1.1.5.tar.gz[root@localhost pack]# cd libnet-1.1.5[root@localhost libnet-1.1.5]# ./configure[root@localhost libnet-1.1.5]# make&&make install2:安装ipvsadm[root@localhost pack]# rpm -ivh ipvsadm-1.24-10.i386.rpmPreparing... ########################################### [100%] 1:ipvsadm ########################################### [100%] [root@localhost pack]#ipvsadm 显示版本信息[root@localhost ~]# ipvsadmIP Virtual Server version 1.2.1 (size=4096)Prot LocalAddress:Port Scheduler Flags-> RemoteAddress:Port Forward Weight ActiveConn InActConn3:配置ipvsadm[root@localhost ~]# ipvsadm –C 将其中的数据表清空[root@localhost ~]# ifconfig eth0:0 配置虚拟vip[root@localhost ~]# ifconfig eth0:0 192.168.1.233 broadcast 192.168.1.233 netmask 255.255.255.0 up[root@localhost ~]# route add -host 192.168.1.233 dev eth0:0[root@localhost ~]# ifconfig增加轮训[root@localhost ~]# ipvsadm -A -t 192.168.1.233:80 -s rr[root@localhost ~]# ipvsadm -a -t 192.168.1.233:80 -r 192.168.1.235 -g[root@localhost ~]# ipvsadm -a -t 192.168.1.233:80 -r 192.168.1.236 -g[root@localhost ~]# ipvsadm[root@localhost ~]# ipvsadm --save>/etc/sysconfig/ipvsadm 保存配置可以不用这个,用脚本来实现1:增加开机启动脚本配置[root@localhost ~]# vi lvs.sh#!/bin/shVIP=192.168.1.233RIP1=192.168.1.235RIP2=192.168.1.236Gw=192.168.1.1#set the virtual IP Address/sbin/ifconfig eth0:0 $VIP netmask 255.255.255.0 up/sbin/route add -host $VIP dev eth0:0#Clear IPVS table/sbin/ipvsadm -C#set LVS/sbin/ipvsadm -A -t $VIP:80 -s rr/sbin/ipvsadm -a -t $VIP:80 -r $RIP1:80 -g/sbin/ipvsadm -a -t $VIP:80 -r $RIP2:80 -g#Run LVS/sbin/ipvsadm#end[root@localhost ~]# chmod 755 lvs.sh[root@localhost ~]# echo "sh /root/lvs.sh" >>/etc/rc.d/rc.local第二:在两台apche上配置在235 236两台正式服务器配置[root@localhost ~]# vi realserver.sh 启动脚本#!/bin/sh#set the Virtual IP AddressVIP=192.168.1.233/sbin/ifconfig eth0:0 $VIP broadcast $VIP netmask 255.255.255.0 up /sbin/route add -host $VIP dev eth0:0#off ARPecho "1">/proc/sys/net/ipv4/conf/lo/arp_ignoreecho "2">/proc/sys/net/ipv4/conf/lo/arp_announceecho "1">/proc/sys/net/ipv4/conf/all/arp_ignoreecho "2">/proc/sys/net/ipv4/conf/all/arp_announce# runsysctl -p#end[root@localhost ~]# chmod 755 realserver.sh[root@localhost ~]# echo "sh /root/realserver.sh">>/etc/rc.d/rc.local [root@localhost ~]# ifconfig另一台236服务器做相同的一遍将236的测试页面修改一下[root@localhost ~]# cd /usr/local/apache/htdocs/[root@localhost htdocs]# mv index.html index.html.bak[root@localhost htdocs]# cat index.html.bak >index.html[root@localhost htdocs]# vi index.html<html><body><h1>Oh my good!</h1></body></html>之后到windows机器上测试下http://192.168.1.236/2:测试lvs轮训是否有问题http://192.168.1.233/刷新两遍看下是不是,出现两个网页,页面Oh my good!在刷新下It works!第三部分通过隧道模式访问:1::2:先将以前的绑定取消[root@localhost ~]# ipvsadm -C[root@localhost ~]# ipvsadm配置lvs服务端[root@localhost ~]# vi lvs.sh#!/bin/shVIP=192.168.1.233RIP1=192.168.1.235RIP2=192.168.1.236Gw=192.168.1.1#set the virtual IP Address/sbin/ifconfig tunl0 $VIP netmask 255.255.255.0 broadcast $VIP up /sbin/route add -host $VIP dev tunl0#Clear IPVS table/sbin/ipvsadm -C#set LVS/sbin/ipvsadm -A -t $VIP:80 -s wrr/sbin/ipvsadm -a -t $VIP:80 -r $RIP1:80 -i/sbin/ipvsadm -a -t $VIP:80 -r $RIP2:80 -i#Run LVS/sbin/ipvsadm#end两台apache真实服务器配置[root@localhost ~]# vi realserver.sh#!/bin/sh#set the Virtual IP AddressVIP=192.168.1.233/sbin/ifconfig tunl0 $VIP netmask 255.255.255.0 broadcast $VIP up /sbin/route add -host $VIP dev tunl0#off ARPecho "1">/proc/sys/net/ipv4/conf/tunl0/arp_ignoreecho "2">/proc/sys/net/ipv4/conf/tunl0/arp_announceecho "1">/proc/sys/net/ipv4/conf/all/arp_ignoreecho "2">/proc/sys/net/ipv4/conf/all/arp_announce# runsysctl -p#end第四部分:配置高可用lvs+heartbeat在从lvs2上安装相关组件并配置为跟lvs1一样(1):安装libnet[root@localhost pack]# tar zxvf libnet-1.1.5.tar.gz[root@localhost pack]# cd libnet-1.1.5[root@localhost libnet-1.1.5]# ./configure[root@localhost libnet-1.1.5]# make&&make install(2):安装ipvsadm[root@localhost pack]# rpm -ivh ipvsadm-1.24-10.i386.rpmPreparing... ########################################### [100%] 1:ipvsadm ########################################### [100%] [root@localhost pack]#ipvsadm 显示版本信息[root@localhost ~]# ipvsadmIP Virtual Server version 1.2.1 (size=4096)Prot LocalAddress:Port Scheduler Flags-> RemoteAddress:Port Forward Weight ActiveConn InActConn(3):配置ipvsadm将lvs1上的脚本拷贝过来运行并加入开机运行[root@localhost ~]# vi lvs.sh#!/bin/shVIP=192.168.1.233RIP1=192.168.1.235RIP2=192.168.1.236Gw=192.168.1.1#set the virtual IP Address/sbin/ifconfig tunl0 $VIP netmask 255.255.255.0 broadcast $VIP up /sbin/route add -host $VIP dev tunl0#Clear IPVS table/sbin/ipvsadm -C#set LVS/sbin/ipvsadm -A -t $VIP:80 -s wrr/sbin/ipvsadm -a -t $VIP:80 -r $RIP1:80 -i/sbin/ipvsadm -a -t $VIP:80 -r $RIP2:80 -i#Run LVS/sbin/ipvsadm#end[root@localhost ~]# echo "sh /root/lvs.sh">>/etc/rc.d/rc.local [root@localhost ~]# chmod 755 lvs.sh[root@localhost ~]# ipvsadm -C[root@localhost ~]# sh -x ./lvs.sh2:在lvs1 与lvs2服务器上安装heartbeat切换轮训热备补充下图参数集群中活跃节点的数量在两台lvs安装[root@localhost pack]# groupadd haclient && useradd -g haclient hacluster[root@localhost pack]# tar jxvf Heartbeat-2-1-STABLE-2.1.4.tar.bz2[root@localhost pack]# cd Heartbeat-2-1-STABLE-2.1.4[root@localhost Heartbeat-2-1-STABLE-2.1.4]# vi lib/plugins/HBcomm/hbaping.c将326行修改下,不然会报错如下:cc1: warnings being treated as errorshbaping.c: In function 'hbaping_new':hbaping.c:241: warning: ISO C90 forbids mixed declarations and codehbaping.c: In function 'hbaping_read':hbaping.c:326: warning: pointer targets in passing argument 2 of 'msg2wirefmt' differ in signednessgmake[4]: *** [hbaping.lo] Error 1gmake[4]: Leaving directory `/root/pack/heartbeat-2.1.3/lib/plugins/HBcomm'gmake[3]: *** [all-recursive] Error 1gmake[3]: Leaving directory `/root/pack/heartbeat-2.1.3/lib/plugins/HBcomm'gmake[2]: *** [all-recursive] Error 1gmake[2]: Leaving directory `/root/pack/heartbeat-2.1.3/lib/plugins'gmake[1]: *** [all-recursive] Error 1gmake[1]: Leaving directory `/root/pack/heartbeat-2.1.3/lib'make: *** [all-recursive] Error 1将326行修改为326 pkt = msg2wirefmt(nmsg, lenp);修改为如下:326 pkt = NULL;[root@localhost Heartbeat-2-1-STABLE-2.1.4]# ./ConfigureMe configure --disable-swig wig --disable-snmp-subagen[root@localhost Heartbeat-2-1-STABLE-2.1.4]# make[root@localhost Heartbeat-2-1-STABLE-2.1.4]# make install3:在主从lvs上拷贝配置文件[root@localhost Heartbeat-2-1-STABLE-2.1.4]# cp doc/ha.cf /etc/ha.d/[root@localhost Heartbeat-2-1-STABLE-2.1.4]# cp doc/haresources /etc/ha.d/[root@localhost Heartbeat-2-1-STABLE-2.1.4]# cp doc/authkeys /etc/ha.d/[root@localhost Heartbeat-2-1-STABLE-2.1.4]# cp ldirectord/ldirectord.cf /etc/ha.d/4:配置主从节点lvs补充下图参数集群中活跃节点的数量(1):主节点234的lvs配置:1>[root@localhost ~]# cp lvs.sh /etc/init.d/[root@localhost ~]# cp lvs.sh /etc/ha.d/resource.d/上两行是为了资源配置文件你能够找到2>[root@localhost Heartbeat-2-1-STABLE-2.1.4]# chmod 600 /etc/ha.d/authkeys [root@localhost Heartbeat-2-1-STABLE-2.1.4]# vi /etc/ha.d/authkeys改为如下:auth 3#1 crc#2 sha1 HI!3 md5 Hello!3>资源文件haresources的配置[root@localhost Heartbeat-2-1-STABLE-2.1.4]# vi /etc/ha.d/haresources找到如下一行:#node1 10.0.0.170 Filesystem::/dev/sda1::/data1::ext2修改为:Localhost 192.168.1.233 lvs.shLocalhost 是指主节点的名称:通过uname –n获得其名称192.168.1.233是指VIP设置值lvs.sh 是指资源文件4>ha.cf的配置[root@localhost Heartbeat-2-1-STABLE-2.1.4]# vi /etc/ha.d/ha.cf debugfile /var/log/ha-debuglogfile /var/log/ha-loglogfacility local0keepalive 2deadtime 30warntime 10initdead 120udpport 694bcast eth0 # Linuxauto_failback onwatchdog /dev/watchdognode localhostnode localhostping_group group1 192.168.1.234 192.168.1.237respawn hacluster /usr/lib/heartbeat/ipfailapiauth ipfail gid=haclient uid=haclusterhopfudge 1(2):从节点237的lvs配置:补充下图参数集群中活跃节点的数量1>[root@localhost ~]# cp lvs.sh /etc/init.d/[root@localhost ~]# cp lvs.sh /etc/ha.d/resource.d/上两行是为了资源配置文件你能够找到2>root@localhost Heartbeat-2-1-STABLE-2.1.4]# chmod 600 /etc/ha.d/authkeys [root@localhost Heartbeat-2-1-STABLE-2.1.4]# vi /etc/ha.d/authkeys改为如下:auth 3#1 crc#2 sha1 HI!3 md5 Hello!3>资源文件haresources的配置[root@localhost Heartbeat-2-1-STABLE-2.1.4]# vi /etc/ha.d/haresources找到如下一行:#node1 10.0.0.170 Filesystem::/dev/sda1::/data1::ext2修改为:Localhost 192.168.1.233 lvs.shLocalhost 是指主节点的名称:通过uname –n获得其名称192.168.1.233是指VIP设置值lvs.sh 是指资源文件4>ha.cf的配置[root@localhost Heartbeat-2-1-STABLE-2.1.4]# vi /etc/ha.d/ha.cf[root@localhost Heartbeat-2-1-STABLE-2.1.4]# cat /etc/ha.d/ha.cf |grep -v "#" |grep -v "^$" debugfile /var/log/ha-debuglogfile /var/log/ha-loglogfacility local0keepalive 2deadtime 30warntime 10initdead 120udpport 694bcast eth0 # Linuxauto_failback onwatchdog /dev/watchdognode localhostnode localhostping_group group1 192.168.1.234 192.168.1.237respawn hacluster /usr/lib/heartbeat/ipfailapiauth ipfail gid=haclient uid=haclusterhopfudge 1(3)测试1>在两台lvs分别启动lvs看下是否成功[root@localhost ~]# /etc/init.d/heartbeat start2>在ie浏览器里看下是否能够正常访问http://192.168.1.233/3>将主节点关机,等30秒钟,看下是否还能访问,在ie浏览器输入vip地址看下在lvs1 192.168.1.234 #shudown –r now在ie浏览器30秒后http://192.168.1.233/看下是否能够正常访问(4)配置ldirectored1>主节点从节点的参数配置[root@localhost ~]# vi /etc/ha.d/ldirectord.cf[root@localhost ~]# cat /etc/ha.d/ldirectord.cf |grep -v "#"|grep -v "^$" checktimeout=3checkinterval=1fallback=127.0.0.1:80autoreload=yeslogfile="/var/log/ldirectord.log"quiescent=yesvirtual=192.168.6.233:80real=192.168.1.235:80 gatereal=192.168.1.236:80 gatefallback=127.0.0.1:80 gateservice=httprequest="index.html"receive="Test Page"scheduler=wrrprotocol=tcpchecktype=negotiatecheckport=80virtualhost=192.168.1.2332>将资源配置重新配置[root@localhost ~]# vi /etc/ha.d/haresourceslocalhost 192.168.1.233 lvs.sh 这行修改为localhost 192.168.1.233 lvs.sh ldirectord3>启动directord[root@localhost ~]# /etc/init.d/ldirectord start(5)安装相关依赖包1>[root@localhost need-pack]# tar zxvf Compress-Zlib-1.10.tar.gz [root@localhost need-pack]# cd Compress-Zlib-1.10[root@localhost Compress-Zlib-1.10]# perl Makefile.PL [root@localhost Compress-Zlib-1.10]# make[root@localhost Compress-Zlib-1.10]# make install2>[root@localhost need-pack]# tar zxvf HTML-Tagset-3.20.tar.gz [root@localhost need-pack]# cd HTML-Tagset-3.20[root@localhost HTML-Tagset-3.20]# perl Makefile.PL[root@localhost HTML-Tagset-3.20]# make[root@localhost HTML-Tagset-3.20]# make install3>[root@localhost need-pack]# tar zxvf HTML-Parser-3.56.tar.gz [root@localhost need-pack]# cd HTML-Parser-3.56[root@localhost HTML-Parser-3.56]# perl Makefile.PL[root@localhost HTML-Parser-3.56]# make[root@localhost HTML-Parser-3.56]# make install4>[root@localhost need-pack]# tar zxvf TimeDate-1.16.tar.gz [root@localhost need-pack]# cd TimeDate-1.16[root@localhost TimeDate-1.16]# perl Makefile.PL[root@localhost TimeDate-1.16]# make[root@localhost TimeDate-1.16]# make install5>[root@localhost need-pack]# tar zxvf Pod-Escapes-1.04.tar.gz [root@localhost need-pack]# cd Pod-Escapes-1.04[root@localhost Pod-Escapes-1.04]# perl Makefile.PL[root@localhost Pod-Escapes-1.04]# make[root@localhost Pod-Escapes-1.04]# make install6>[root@localhost need-pack]# tar zxvf Pod-Simple-3.18.tar.gz [root@localhost need-pack]# cd Pod-Simple-3.18[root@localhost Pod-Simple-3.18]# perl Makefile.PL[root@localhost Pod-Simple-3.18]# make[root@localhost Pod-Simple-3.18]# make install7>[root@localhost need-pack]# tar zxvf Test-Pod-1.26.tar.gz[root@localhost need-pack]# cd Test-Pod-1.26[root@localhost Test-Pod-1.26]# perl Makefile.PL[root@localhost Test-Pod-1.26]# make[root@localhost Test-Pod-1.26]# make install8>[root@localhost need-pack]# tar zxvf MailTools-2.04.tar.gz[root@localhost need-pack]# cd MailTools-2.04[root@localhost MailTools-2.04]# perl Makefile.PL[root@localhost MailTools-2.04]# make[root@localhost MailTools-2.04]# make install9>[root@localhost need-pack]# tar zxvf libwww-perl-5.812.tar.gz[root@localhost need-pack]# cd libwww-perl-5.812[root@localhost libwww-perl-5.812]# perl Makefile.PL 选择默认就可以了Do you want to install lwp-request? [y]Do you want to install lwp-mirror? [y]Do you want to install lwp-rget? [y]Do you want to install lwp-download? [y]The lwp-request program will use the name it is invoked with to determine what HTTP method to use. I can set up alias for the most common HTTP methods. These alias are also installed in/usr/bin.Do you want to install the GET alias? [n]Do you want to install the HEAD alias? [n]Do you want to install the POST alias? [n][root@localhost libwww-perl-5.812]# make[root@localhost libwww-perl-5.812]# make install(5)测试工作到两台apache服务器上[root@localhost ~]# echo "Test Page">>/usr/local/apache/htdocs/index.html 到windows下http://192.168.1.233/。
LVS 安装

一.LVS安装1.命令检查kernel是否已经支持LVS的ipvs模块:modprobe -l |grep ipvs/lib/modules/2.6.9-42.ELsmp/kernel/net/ipv4/ipvs/ip_vs_rr.ko/lib/modules/2.6.9-42.ELsmp/kernel/net/ipv4/ipvs/ip_vs_sh.ko2.如果有类似上面的输出,表明系统内核已经默认支持了IPVS模块。
接着就可以安装IPVS 管理软件了。
tar zxvf ipvsadm-1.26.tar.gzcd ipvsadm-1.26makemake install3.如果出现报错,检查环境:ip_vs.h:15:29: error: netlink/netlink.h: No such file or directoryip_vs.h:16:31: error: netlink/genl/genl.h: No such file or directoryip_vs.h:17:31: error: netlink/genl/ctrl.h: No such file or directoryIn file included from libipvs.h:13,from libipvs.c:23:ip_vs.h:520: error: array type has incomplete element typeip_vs.h:521: error: array type has incomplete element typeip_vs.h:522: error: array type has incomplete element typeip_vs.h:523: error: array type has incomplete element typeip_vs.h:524: error: array type has incomplete element typeip_vs.h:525: error: array type has incomplete element typelibipvs.c: In function ‘ipvs_nl_message’:libipvs.c:57: warning: implicit decla ration of function ‘nlmsg_alloc’libipvs.c:57: warning: assignment makes pointer from integer without a castlibipvs.c:61: warning: implicit declaration of function ‘genlmsg_put’libipvs.c:61: error: ‘NL_AUTO_PID’ undeclared (first use in this function)libipvs.c:61: error: (Each undeclared identifier is reported only oncelibipvs.c:61: error: for each function it appears in.)libipvs.c:61: error: ‘NL_AUTO_SEQ’ undeclared (first use in this function)libipvs.c: In function ‘ipvs_nl_noop_cb’:libipvs.c:69: e rror: ‘NL_OK’ undeclared (first use in this function)libipvs.c: At top level:libipvs.c:72: error: expected declaration specifiers or ‘...’ before ‘nl_recvmsg_msg_cb_t’libipvs.c: In function ‘ipvs_nl_send_message’:libipvs.c:76: warning: implicit declara tion of function ‘nl_handle_alloc’libipvs.c:76: warning: assignment makes pointer from integer without a castlibipvs.c:78: warning: implicit declaration of function ‘nlmsg_free’libipvs.c:82: warning: implicit declaration of function ‘genl_connect’libip vs.c:85: warning: implicit declaration of function ‘genl_ctrl_resolve’libipvs.c:91: warning: implicit declaration of function ‘nl_handle_destroy’libipvs.c:96: warning: implicit declaration of function ‘nl_socket_modify_cb’libipvs.c:96: error: ‘NL_CB_VALID’ undeclared (first use in this function) libipvs.c:96: error: ‘NL_CB_CUSTOM’ undeclared (first use in this function) libipvs.c:96: error: ‘func’ undeclared (first use in this function)libipvs.c:99: warning: implicit declaration of function ‘nl_send_auto_complete’libipvs.c:102: warning: implicit declaration of function ‘nl_recvmsgs_default’libipvs.c: In function ‘ipvs_init’:libipvs.c:127: error: too many arguments to function ‘ipvs_nl_send_message’libipvs.c: In function ‘ipvs_getinfo_parse_cb’:libip vs.c:149: warning: implicit declaration of function ‘nlmsg_hdr’libipvs.c:149: warning: initialization makes pointer from integer without a cast libipvs.c:152: warning: implicit declaration of function ‘genlmsg_parse’libipvs.c:159: warning: implicit decla ration of function ‘nla_get_u32’libipvs.c:162: error: ‘NL_OK’ undeclared (first use in this function)libipvs.c: In function ‘ipvs_getinfo’:libipvs.c:176: error: too many arguments to function ‘ipvs_nl_send_message’libipvs.c: In function ‘ipvs_flush’:l ibipvs.c:199: error: too many arguments to function ‘ipvs_nl_send_message’libipvs.c: In function ‘ipvs_nl_fill_service_attr’:libipvs.c:215: warning: implicit declaration of function ‘nla_nest_start’libipvs.c:215: warning: assignment makes pointer from integer without a cast libipvs.c:219: warning: implicit declaration of function ‘NLA_PUT_U16’libipvs.c:222: warning: implicit declaration of function ‘NLA_PUT_U32’libipvs.c:225: warning: implicit declaration of function ‘NLA_PUT’libipvs.c:229: warning: i mplicit declaration of function ‘NLA_PUT_STRING’libipvs.c:236: warning: implicit declaration of function ‘nla_nest_end’libipvs.c:239: warning: label ‘nla_put_failure’ defined but not usedlibipvs.c: In function ‘ipvs_add_service’:libipvs.c:255: error: t oo many arguments to function ‘ipvs_nl_send_message’libipvs.c: In function ‘ipvs_update_service’:libipvs.c:276: error: too many arguments to function ‘ipvs_nl_send_message’libipvs.c: In function ‘ipvs_del_service’:libipvs.c:296: error: too many argumen ts to function ‘ipvs_nl_send_message’libipvs.c: In function ‘ipvs_zero_service’:libipvs.c:321: error: too many arguments to function ‘ipvs_nl_send_message’libipvs.c: In function ‘ipvs_nl_fill_dest_attr’:libipvs.c:334: warning: assignment makes pointer from integer without a cast libipvs.c:348: warning: label ‘nla_put_failure’ defined but not usedlibipvs.c: In function ‘ipvs_add_dest’:libipvs.c:366: error: too many arguments to function ‘ipvs_nl_send_message’libipvs.c: In function ‘ipvs_update_dest’:libipvs.c:396: error: too many arguments to function ‘ipvs_nl_send_message’libipvs.c: In function ‘ipvs_del_dest’:libipvs.c:425: error: too many arguments to function ‘ipvs_nl_send_message’libipvs.c: In function ‘ipvs_set_timeout’:libipvs.c:452: error: too many arguments to function ‘ipvs_nl_send_message’libipvs.c:454: warning: label ‘nla_put_failure’ defined but not usedlibipvs.c: In function ‘ipvs_start_daemon’:libipvs.c:473: warning: assignment makes pointer from integer without a castlibipvs.c:483: error: too many arguments to function ‘ipvs_nl_send_message’libipvs.c: In function ‘ipvs_stop_daemon’:libipvs.c:504: warning: assignment makes pointer from integer without a castlibipvs.c:514: error: too many arguments to function ‘ipvs_nl_send_message’libipvs.c: At top level:libipvs.c:526: warning: ‘struct nlattr’ declared inside parameter listlibipvs.c: In function ‘ipvs_parse_stats’:libipvs.c:530: warning: implicit declaration of function ‘nla_parse_nested’libipvs.c:548: warning: implicit dec laration of function ‘nla_get_u64’libipvs.c: In function ‘ipvs_services_parse_cb’:libipvs.c:562: warning: initialization makes pointer from integer without a castlibipvs.c:592: warning: implicit declaration of function ‘nla_get_u16’libipvs.c:598: warni ng: implicit declaration of function ‘nla_data’libipvs.c:599: warning: passing argument 2 of ‘memcpy’ makes pointer from integer without a cast/usr/include/string.h:44: note: expected ‘const void * __restrict__’ but argument is of type ‘int’libipvs.c:604: warning: implicit declaration of function ‘nla_get_string’libipvs.c:605: warning: passing argument 2 of ‘strncpy’ makes pointer from integer without a cast /usr/include/string.h:131: note: expected ‘const char * __restrict__’ but argument is of type ‘int’libipvs.c:610: warning: passing argument 2 of ‘strncpy’ makes pointer from integer without a cast /usr/include/string.h:131: note: expected ‘const char * __restrict__’ but argument is of type ‘int’libipvs.c:614: warning: implicit declaration of functi on ‘nla_memcpy’libipvs.c:618: warning: passing argument 2 of ‘ipvs_parse_stats’ from incompatible pointer type libipvs.c:526: note: expected ‘struct nlattr *’ but argument is of type ‘struct nlattr *’libipvs.c: In function ‘ipvs_get_services’:libipvs.c:649: error: ‘NLM_F_DUMP’ undeclared (first use in this function)libipvs.c:650: error: too many arguments to function ‘ipvs_nl_send_message’libipvs.c: In function ‘ipvs_dests_parse_cb’:libipvs.c:728: warning: initialization makes pointer from integer without a castlibipvs.c:759: warning: passing argument 2 of ‘memcpy’ makes pointer from integer without a cast/usr/include/string.h:44: note: expected ‘const void * __restrict__’ but argument is of type ‘int’libipvs.c:771: warning: passing argument 2 of ‘ipvs_parse_stats’ from incompatible pointer type libipvs.c:526: note: expected ‘struct nlattr *’ but argument is of type ‘struct nlattr *’libipvs.c: In function ‘ipvs_get_dests’:libipvs.c:809: error: ‘NLM_F_DUMP’ undeclared (first use in this function)libipvs.c:813: warning: assignment makes pointer from integer without a castlibipvs.c:829: error: too many arguments to function ‘ipvs_nl_send_message’libipvs.c: In function ‘ipvs_get_service’:libipvs.c:939: error: too many arguments to function ‘ipvs_nl_send_message’libipvs.c: In function ‘ipvs_timeout_parse_cb’:libipvs.c:972: warning: initialization makes pointer from integer without a castlibipvs.c:986: error: ‘NL_OK’ undeclared (first use in this function)libipvs.c: In function ‘ipvs_get_timeout’:libipvs.c:1005: error: too many arguments to function ‘ipvs_nl_send_message’libipvs.c: In function ‘ipvs_daemon_parse_cb’:libipvs.c:1023: warning: initialization makes pointer from integer without a castlibipvs.c:1048: warning: passing argument 2 of ‘strncpy’ makes pointer from integer without a cast/usr/include/string.h:131: note: expected ‘const char * __restrict__’ but argument is of type ‘int’libipvs.c:1051: error: ‘NL_OK’ undeclared (first use in this function)libipvs.c: In function ‘ipvs_get_daemon’:libipvs.c:1071: error: ‘NLM_F_DUMP’ undeclared (first use in this function)libipvs.c:1072: error: too many arguments to function ‘ipvs_nl_send_message’make[1]: *** [libipvs.o] Error 1rpm -qa | grep poptpopt-1.13-7.el6.x86_64popt-devel-1.13-7.el6.x86_64rpm -qa | grep libnllibnl-1.1-14.el6.x86_64libnl-devel-1.1-14.el6.x86_644.重新进行make如果出现:ipvsadm.o: In function `parse_options':/usr/src/ipvsadm-1.26/ipvsadm.c:432: undefined reference to `poptGetContext'/usr/src/ipvsadm-1.26/ipvsadm.c:435: undefined reference to `poptGetNextOpt'/usr/src/ipvsadm-1.26/ipvsadm.c:660: undefined reference to `poptBadOption'/usr/src/ipvsadm-1.26/ipvsadm.c:502: undefined reference to `poptGetNextOpt'/usr/src/ipvsadm-1.26/ipvsadm.c:667: undefined reference to `poptStrerror'/usr/src/ipvsadm-1.26/ipvsadm.c:667: undefined reference to `poptBadOption'/usr/src/ipvsadm-1.26/ipvsadm.c:670: undefined reference to `poptFreeContext'/usr/src/ipvsadm-1.26/ipvsadm.c:677: undefined reference to `poptGetArg'/usr/src/ipvsadm-1.26/ipvsadm.c:678: undefined reference to `poptGetArg'/usr/src/ipvsadm-1.26/ipvsadm.c:679: undefined reference to `poptGetArg'/usr/src/ipvsadm-1.26/ipvsadm.c:690: undefined reference to `poptGetArg'/usr/src/ipvsadm-1.26/ipvsadm.c:693: undefined reference to `poptFreeContext' collect2: ld returned 1 exit statusmake: *** [ipvsadm] Error 1需要安装popt-staticpopt-static-1.13-7.el6.x86_64.rpmrpm -ivh popt-static-1.13-7.el6.x86_64.rpm安装完成后使用命令ipvsadm,检查安装是否成功。
使用LVS实现负载均衡原理及安装配置详解

如上图。FULLNAT模式对入报文做了DNAT+SNAT,即将报文的目的地址改为RS的地址,源地址改为LVS设备地址;RS上不需要配置路由策略,出报文到了LVS设备上后做 SNAT+DNAT,即将报文的源地址改为LVS设备上的地址,目的地址改为真实的用户地址。
LVS FULLNAT类型特性
ipvsadm:用户空间的命令行工具,规则管理器,用于管理集群服务及RealServer ipvs:工作于内核空间的netfilter的INPUT钩子之上的框架
LVS集群类型中的术语
Director:负载均衡器,也称VS(Virtual Server) RS:真实服务器(RealServer) CIP:客户端IP(Client IP) VIP: Client所请求的,提供虚拟服务的IP,可以用Keepalive做高可用 DIP:在Director实现与RS通信的IP RIP:RealServer IP
1.VIP是公网地址,RIP和DIP是私网地址,且通常不在同一IP网络,因此,RIP的网关一般不会指向DIP 2.RS收到的请求报文源地址是DIP,因此只需响应给DIP, Dirctor收到RS的回复报文后将其发往Client 3.请求和响应报文都经由Dirctor 4.支持端口映射
三、LVS调度方法(Scheduler)
2.2 LVS/DR(Direct Routing直接路由) 通过为请求报文重新封装一个MAC首部进行转发,源MAC是DIP所在的接口的MAC,目标MAC是挑选出的RS的RIP所在接口的MAC地址;源IP/PORT,以及目标IP/PORT均保持不变, 请求报文经过Dirctor但响应报文不再经过Dirctor
二、LVS集群的类型
LVS转发模式有四种: lvs-nat: 修改请求报文的目标IP lvs-dr: 操纵封闭新的MAC地址 lvs-tun: 在原请求IP报文之外新加一个IP首部 lvs-fullnat: 修改请求报文的源和目标IP
CentOS6.3下部署LVS(NAT)+keepalived实现高性能高可用负载均衡

CentOS6.3下部署LVS(NAT)+keepalived实现⾼性能⾼可⽤负载均衡⼀、简介VS/NAT原理图:⼆、系统环境实验拓扑:系统平台:CentOS 6.3Kernel:2.6.32-279.el6.i686LVS版本:ipvsadm-1.26keepalived版本:keepalived-1.2.4三、安装0、安装LVS前系统需要安装popt-static,kernel-devel,make,gcc,openssl-devel,lftp,libnl*,popt*1、在两台Director Server上分别配置LVS+KeepalivedLVS install -------------[root@CentOS-LVS_MASTER ~]# wget /software/kernel-2.6/ipvsadm-1.26.tar.gz [root@CentOS-LVS_MASTER ~]# ln -s /usr/src/kernels/2.6.32-279.el6.i686//usr/src/linux/[root@CentOS-LVS_MASTER ~]# tar zxvf ipvsadm-1.26.tar.gz[root@CentOS-LVS_MASTER ~]# cd ipvsadm-1.26[root@CentOS-LVS_MASTER ipvsadm-1.26]# make && make installKeepalived install -------------[root@CentOS-LVS_MASTER ~]# wget /software/keepalived-1.2.4.tar.gz[root@CentOS-LVS_MASTER ~]# tar zxvf keepalived-1.2.4.tar.gz[root@CentOS-LVS_MASTER ~]# cd keepalived-1.2.4[root@CentOS-LVS_MASTER keepalived-1.2.4]# ./configure && make && make install######### 将keepalived做成启动服务,⽅便管理##########[root@CentOS-LVS_MASTER ~]# cp /usr/local/etc/rc.d/init.d/keepalived /etc/init.d/[root@CentOS-LVS_MASTER ~]# cp /usr/local/etc/sysconfig/keepalived /etc/sysconfig/[root@CentOS-LVS_MASTER ~]# mkdir /etc/keepalived/[root@CentOS-LVS_MASTER ~]# cp /usr/local/etc/keepalived/keepalived.conf /etc/keepalived/[root@CentOS-LVS_MASTER ~]# cp /usr/local/sbin/keepalived /usr/sbin/[root@CentOS-LVS_MASTER ~]# service keepalived start | stop2、开启路由转发[root@CentOS-LVS_MASTER ~]# vim /etc/sysctl.confnet.ipv4.ip_forward = 1[root@CentOS-LVS_MASTER ~]# sysctl -p3、配置Keepalived[root@CentOS-LVS_MASTER ~]# less /etc/keepalived/keepalived.conf! Configuration File for keepalivedglobal_defs {router_id LVS_MASTER #BACKUP上修改为LVS_BACKUP}vrrp_instance VI_1 {state MASTER #BACKUP上修改为BACKUPinterface eth0virtual_router_id 51priority 100 #BACKUP上修改为80advert_int 1authentication {auth_type PASSauth_pass 1111}virtual_ipaddress {10.0.0.227}}vrrp_instance LAN_GATEWAY {state MASTER #BACKUP上修改为LVS_BACKUPinterface eth1virtual_router_id 52priority 100 #BACKUP上修改为80advert_int 1authentication {auth_type PASSauth_pass 1111}virtual_ipaddress {192.168.10.10}}virtual_server 10.0.0.227 80 {delay_loop 6lb_algo rrlb_kind NAT# persistence_timeout 5protocol TCPreal_server 192.168.10.4 80 {weight 3TCP_CHECK {connect_timeout 3nb_get_retry 3delay_before_retry 3connect_port 80}}real_server 192.168.10.5 80 {weight 3TCP_CHECK {connect_timeout 3nb_get_retry 3delay_before_retry 3connect_port 80}}}BACKUP服务器同上配置,先安装lvs再安装keepalived,然后配置/etc/keepalived/keepalived.conf,只需将批注部分改⼀下即可。
lvs heartbeat安装配置完全

LVS heartbeat 集群的部署安装配置笔记System RHEL5.3 需要的支持软件gcc 编译器glibc库等HA HA节点提供的服务为 Heartbeat 和 LVSReal Real节点提供http等服务Heartbeat 提供双机热备的服务LVS 为Real节点的应用提供负载均衡Ldirectord 监控Real节点的应用服务load blancer 用到的软件Heartbeat-STABLE-2-1-Sldirectord 所需的库文件的安装(不安装启动出现问题)perl-Mai一、关闭不必要的服务services=`chkconfig --list|cut -f1|cut -d" " -f1`for ser in $servicesdoif [ "$ser" == "network" ] || [ "$ser" == "syslog" ] || [ "$ser" == "sshd" ] || [ "$ser" == "crond" ] || [ "$ser" == "atd" ];thenchkconfig "$ser" onelsechkconfig "$ser" offfidonereboot--------------------------------------------------------------------------------二、各服务器的 /etc/hosts 文件保持一致并编辑/etc/sysconfig/network与hostname一致vi /etc/hosts192.168.0.101 heartbeat101192.168.0.102 heartbeat102192.168.0.103 real103192.168.0.104 real104三、测试心跳线minicom -s配置串口(串口心跳接口配置)最后说一下如何测试心跳线是否联通:分别登陆两台服务器,在主机A的终端输入以下内容:shell> cat </dev/ttyS0在主机B的终端输入以下内容:Shell> echo hello >/dev/ttyS0主机A的终端会有以下反馈:cat </dev/ttyS0hello出现则表明主机A 跟主机B之间的串口心跳线已经可以通讯,心跳线已经生效。
lvs搭建
LVS搭建拟稿人:宋佳恒时间:2016.1.19 LVS是Linux Virtual Server的简写,意即Linux虚拟服务器,是一个虚拟的服务器集群系统。
LVS采用三层结构:负载均衡器(集群对外面的前端机,负责将客户的请求发送到一组服务器上执行。
),服务器池(一组真正执行服务请求的服务器。
),共享存储(它为服务器池提供一个共享的存储区,这样很容易使得服务器池拥有相同的内容,提供相同的服务。
)。
本文将以搭建简单的demo 为例,介绍LVS环境的搭建。
一.搭建环境负载均衡器:10.4.101.232真实服务器1:10.4.101.233真实服务器2: 10.4.101.234VIP: 10.4.101.6一.IPVS安装1.检查Load Balancer服务器是否已支持ipvs。
>modprobe -l|grep ipvs若有类似以下输出,则表示服务器已支持ipvs:2.检查是否有必须的依赖包:Kernel-devel、gcc、openssl、openssl-devel、popt 。
>rpm -q kernel-devel>rpm -q gcc>rpm -q openssl>rpm -q openssl-devel>rpm -q popt若有类似以下输出,则表示服务器已安装这些依赖包:如果未安装,输入>yum install 依赖包名3.在负载均衡器上安装ipvsadmipvs具体实现是由ipvsadm这个程序来完成。
>yum install –y ipvsadm检测ipvsadm是否安装成功>ipvsamd若出现下图则表示安装成功三.配置负载均衡器新建lvsdr文件>vi /etc/init.d/lvsdr输入以下内容保存,给lvsdr赋予执行权限。
四.配置真实服务器新建realserver文件保存,realserver赋予执行权限。
LVS图形化安装

一、LVS 集群软件安装原生的lvs 软件都是tar 包格式,由于本次试验采用的是RHEL 5.4系统自带了一个叫piranha 的图形化配置工具,所以本次试验就以此为基础进行配置了。
在红帽的系统安装盘中,将piranha 和ipvsadm 两个rpm包拷贝出来[root@AR Cluster]# cp /media/RHEL_5.4\i386\DVD/Cluster/piranha-0.8.4-13.el5.i386.rpm /home/wgw/[root@AR Cluster]# cp /media/RHEL_5.4\i386\DVD/Cluster/ipvsadm-1.24-10.i386.rpm/home/wgw/安装RPM 包先安装ipvsadm-1.24-10.i386.rpm 再安装piranha-0.8.4-13.el5.i386.rpm[root@AR Cluster]# rpm -ivh ipvsadm-1.24-10.i386.rpmwarning: ipvsadm-1.24-10.i386.rpm: Header V3 DSA signature: NOKEY, key ID 37017186Preparing... ########################################### [100%] 1:ipvsadm ########################################### [100%][root@AR Cluster]# rpm -ivh piranha-0.8.4-13.el5.i386.rpmwarning: piranha-0.8.4-13.el5.i386.rpm: Header V3 DSA signature: NOKEY, key ID 37017186Preparing... ########################################### [100%] 1:piranha ########################################### [100%]安装结束后给piranha 图形界面配置登录密码[root@AR Cluster]# piranha-passwdNew Password:Verify:Adding password for user piranha开启piranha 图形界面[root@AR wgw]#service piranha-gui startLVS 图形化安装2012年4月7日20:07备注:若启动出现错误:那么先关闭SELINUX# vi /etc/sysconfig/selinux# This file controls the state of SELinux on the system.# SELINUX= can take one of these three values:# enforcing -SELinux security policy is enforced.# permissive -SELinux prints warnings instead of enforcing. # disabled -SELinux is fully disabled.SELINUX=disable# SELINUXTYPE= type of policy in use. Possible values are:# targeted -Only targeted network daemons are protected. # strict -Full SELinux protection.SELINUXTYPE=targeted然后重启机器,如果不想重启系统,使用命令setenforce 0注:setenforce 1 设置SELinux 成为enforcing模式setenforce 0 设置SELinux 成为permissive模式在lilo或者grub的启动参数中增加:selinux=0,也可以关闭selinux再关闭iptables#service iptables stop二、LVS集群软件配置在浏览器里访问AR主机的3636端口http://192.168.1.100:3636/点击Login按钮并输入用户名和密码默认的用户名是piranha 密码就是刚才设置的密码默认的用户名是piranha 密码就是刚才设置的密码配置CONTROL/MONITORING登录后看到的界面为LVS监控界面,通过此界面可以设定监控数据的刷新时间、修改管理密码,如下图所示。
Garmin Livescope Plus LVS34 艉舷安装套件安装说明说明书

LIVESCOPE™ PLUS LVS34 艉舷安装套件安装说明重要安全信息为避免可能的人身伤害,务必始终在钻孔、切割或研磨时戴上防护眼镜、护耳用具和防尘面具。
注意钻孔或切割时,请始终检查表面反面的情况以避免船舶受损。
该设备应该由合格的海事安装人员安装。
为获得最佳性能并避免损坏船只,您必须按照这些说明安装 Garmin®设备。
请阅读所有安装说明,然后继续安装。
如果您在安装时遇到困难,请联系 Garmin 产品支持。
操作注意事项了解周围环境并确保船只安全运行。
注意为了避免可能损坏换能器、支架和艉舷,您应该在浅水中或在未知深度或水下障碍物的区域缓慢操作您的船只。
艉舷安装支架并非设计成在撞击时脱落,撞击水下物体可能会损坏换能器、支架和船只的艉舷。
因撞击水下物体而对换能器、支架或船只造成的损坏不在保修范围之内。
当以高于 19 公里/小时(12 英里/小时)的速度操作时,换能器的性能受到限制,底部回波减弱,深度信息和警报可能不会针对潜在的浅层区域发出警告。
当换能器以较高的速度运行时,由于换能器在水中受到的阻力,可能会对船只的运行产生显著影响:•船只的最高速度可能低于未安装换能器时的航速。
•船只的转向可能会拉向安装换能器的一侧。
•船只的艉舷可能会在安装换能器的一侧升起。
软件更新在安装本设备时,您必须更新 Garmin 海图仪软件。
有关更新软件的说明,请访问并查看您的海图仪的用户手册。
安装支持视频安装此设备时,您可以在线观看视频以获得帮助。
您可以通过访问 Web 浏览器中的/videos/lvs34或使用智能手机扫描此二维码查看此视频。
所需工具•钻机和钻头•17 毫米(5/8英寸)扳手•具有 17 毫米(5/8英寸)套筒的扭力扳手•封口胶带• 2 号十字螺丝刀•海事密封剂安装注意事项•不得将换能器安装在推进器的路径上。
•对于装有舷外和船尾驱动发动机的船只,您应将换能器安装在推进器下行冲程的一侧,通常在右舷。
- 1、下载文档前请自行甄别文档内容的完整性,平台不提供额外的编辑、内容补充、找答案等附加服务。
- 2、"仅部分预览"的文档,不可在线预览部分如存在完整性等问题,可反馈申请退款(可完整预览的文档不适用该条件!)。
- 3、如文档侵犯您的权益,请联系客服反馈,我们会尽快为您处理(人工客服工作时间:9:00-18:30)。
route add -host 192.168.137.65 dev tunl0 #路由器如果不加入这句话强制加入ip,路由可能会误认为其是192.168.137.0网段,这样路由看到目标ip是192.168.137.65后就不会走eth0网卡
4-7 - 保留未使用
8 -不回应所有(本地地址)的arp查询
all/ 和{interface}/ 下两者同时比较,取较大一个值生效.
tcpdump使用
tcpdump -i eth0 92.168.137.0 netmask 255.255.255.0 dev eth0
route add -host 192.168.137.66 dev lo:0
#arp_ignore arp忽略 arp_announce arp宣告
echo "1" > /proc/sys/net/ipv4/conf/lo/arp_ignore
echo "2" > /proc/sys/net/ipv4/conf/lo/arp_announce
tunr2 192.168.137.62 主机名:r2-tun
vip 192.168.137.65
2、配置tunds:
echo "1" > /proc/sys/net/ipv4/ip_forward
ifconfig tunl0 192.168.137.65 broadcast 192.168.137.65 netmask 255.255.255.255 up #tunl0是隧道协议
10.最少队列调度(Never Queue Scheduling NQ)
无需队列。如果有台realserver的连接数=0就直接分配过去,不需要在进行sed运算。
arp_ignore和arp_announce内核参数:
arp_announce : INTEGER
默认为0
对网络接口上本地IP地址发出的ARP回应作出相应级别的限制:
echo "1" > /proc/sys/net/ipv4/conf/all/arp_ignore
echo "2" > /proc/sys/net/ipv4/conf/all/arp_announce
LVS的10个调度算法
1. 大锅饭调度(Round-Robin Scheduling RR)
drr1 192.168.137.63 主机名:r1-dr
drr2 192.168.137.64 主机名:r2-dr
vip 192.168.137.66
2、配置drds:
echo "1" > /proc/sys/net/ipv4/ip_forward
ifconfig eth0:0 192.168.137.66 netmask 255.255.255.255 up
natr1 192.168.137.53 主机名:r1-nat
natr2 192.168.137.54 主机名:r2-nat
2、配置netds:
echo 1 > /proc/sys/net/ipv4/ip_forward #开启路由管道 也就是说机器变成了路由器 各网卡之间可以通信
ipvsadm -C
3、配置natr1、natr2:
route add default gw 192.168.137.44 #配置lvs为网关
route -n #查看网关
tun模式:
1、首先规划服务器:
tunds 192.168.137.60 主机名:lvs-tun
tunr1 192.168.137.61 主机名:r1-tun
echo "1" > /proc/sys/net/ipv4/conf/all/arp_ignore
echo "2" > /proc/sys/net/ipv4/conf/all/arp_announce
dr模式:
1、首先规划服务器:
drds 192.168.137.59 主机名:lvs-dr
lc - 根据最小连接数分派
4. 带权重的谁不干活就给谁分配(Weighted Least-Connections WLC 默认)
wlc - 带权重的。机器配置好的权重高。
5. 基于地区的最少连接调度(Locality-Based Least-Connection Scheduling LBLC)
基于wlc算法。这个必须举例来说了
ABC三台机器分别权重123 ,连接数也分别是123。那么如果使用WLC算法的话一个新请求进入时它可能会分给ABC中的任意一个。使用sed算法后会进行这样一个运算
A:(1+1)/1
B:(1+2)/2
C:(1+3)/3
根据运算结果,把连接交给C 。
个人理解的算法是(1+当前连接数)/权重。
#rr轮循
#m为nat模式
ipvsadm -A -t 192.168.24.142:8080 -s rr
ipvsadm -a -t 192.168.24.142:8080 -r 192.168.137.53 -m
ipvsadm -a -t 192.168.24.142:8080 -r 192.168.137.54 -m
提高约束级别有益于从指定的目标接受应答,而降低级别可以给予更多的arp查询者以反馈信息(关于arp代理这一段我普遍翻译地不好,去啃一下tcp/ip bible的卷一,然后再翻译吧)
arp_ignore : INTEGER
默认为0
定义对目标地址为本地IP的ARP询问不同的应答模式
0 - (默认值): 回应任何网络接口上对任何本地IP地址的arp查询请求(比如eth0=192.168.0.1/24,eth1=10.1.1.1/24,那么即使eth0收到来自10.1.1.2这样地址发起的对10.1.1.1 的arp查询也会回应--而原本这个请求该是出现在eth1上,也该有eth1回应的)
3 - 不回应该网络界面的arp请求,而只对设置的唯一和连接地址做出回应(do not reply for local addresses configured with scope host,only resolutions for global and link addresses are replied 翻译地似乎不好,这个我的去问问人)
确定不同程度的限制,宣布对来自本地源IP地址发出Arp请求的接口
0 - (默认) 在任意网络接口上的任何本地地址
1 -尽量避免不在该网络接口子网段的本地地址. 当发起ARP请求的源IP地址是被设置应该经由路由达到此网络接口的时候很有用.此时会检查来访IP是否为所有接口上的子网段内ip之一.如果改来访IP不属于各个网络接口上的子网段内,那么将采用级别2的方式来进行处理.
route add -host 192.168.137.65 dev tunl0
#1表示apr忽略vip、2表示apr宣告真实ip
echo "1" > /proc/sys/net/ipv4/conf/tunl0/arp_ignore
echo "2" > /proc/sys/net/ipv4/conf/tunl0/arp_announce
ipvsadm -C
#-A是转换 -t是tcp协议 -s是算法 -r是实体机 -g是dr模式,也是隧道模式(本来应该-i是隧道模式,但是不work)
ipvsadm -A -t 192.168.137.65:80 -s rr
ipvsadm -a -t 192.168.137.65:80 -r 192.168.137.61 -g
rr - 纯轮询方式,比较垃圾。把每项请求按顺序在真正服务器中分派。
2. 带权重的大锅饭调度(Weighted Round-Robin Scheduling WRR)
wrr -带权重轮询方式。把每项请求按顺序在真正服务器中循环分派,但是给能力较大的服务器分派较多的作业。
3. 谁不干活就给谁分配(Least-Connection LC)
route add -host 192.168.137.66 dev eth0:0
ipvsadm -C
ipvsadm -A -t 192.168.137.66:80 -s rr
ipvsadm -a -t 192.168.137.66:80 -r 192.168.137.63 -g #g为dr模式
lblc - 缓存服务器集群。基于本地的最小连接。把请求传递到负载小的服务器上。
6. 带有复制调度的基于地区的最少连接调度(Locality-Based Least-Connection Scheduling with Replication Scheduling LBLCR)
lblcr - 带复制调度的缓存服务器集群。某页面缓存在服务器A上,被访问次数极高,而其他缓存服务器负载较低,监视是否访问同一页面,如果是访问同一页面则把请求分到其他服务器。
ipvsadm -a -t 192.168.137.66:80 -r 192.168.137.64 -g
3、配置drr1、drr2:
ifconfig lo:0 192.168.137.66 netmask 255.255.255.255 up #注意不能配置成eth0:0,否则配置apr忽略和宣告会对eth0生效,那就乱套了
