硅酮结构胶质量控制手册
硅 酮 结 构 密 封 胶 使 用 工 艺 指 南 一

硅酮结构密封胶使用工艺指南一、适用范围本指南规定了一般要求、结构胶粘结装配玻璃单元件工艺、设计参考、结构性粘结装配玻璃单元件工艺、工艺过程检测质量控制检测方法、对进行粘结测试的地方进行修补、关于粘结性、相容性试验的一些要求。
本指南适用于莫斯卡硅酮结构胶粘结装配结构玻璃单元件工艺和过程控制检测方法,也可以用于中空玻璃结构的制作。
二、一般规定2.1建议所有使用本公司产品的用户直接到本公司或本公司在当地的专卖店销售部以及本公司指定的销售商处订购,以便获得质量可靠的产品及有利的技术支持。
2.2所有使用本公司产品的隐框、半隐框玻璃幕墙在设计制作及安装过程中都必须严格遵守JGJ102-2003《玻璃幕墙工程技术规范》,胶缝的设计按所给的公式进行。
2.3所有幕墙设计中选用的基材和附件都必须送到本公司或相关机构进行粘结性和相容性试验,在出具可以使用的报告后才能投入实际施工。
2.4使用本产品的用户必要时应尽早将幕墙的设计图纸送到本公司,由专业人员对使用结构胶的各节点进行审查,出具可以使用的审查报告后放能进行施工。
2.5双组分结构胶在每次开泵注胶之前都应进行混合均匀性(蝴蝶)试验,方法见GB16776-2005《建筑用硅酮结构密封胶》附录D.4或本文第五部分(5.2);在使用过程中每一天都必须进行一次拉断时间测试,方法见本文第五部分(5.3)。
2.6在玻璃幕墙单元件制作过程中,必须进行随批剥离粘结性试验,方法见GB16776-2005《建筑用硅酮结构密封胶》或本文第五部分(5.4),如果粘结破坏面积大于5%,说明施工操作有问题,应立即停止新的单元件制作,查找原因,及时进行整改,同时将该批单元件产品作为重点进行切胶剥离粘结性试验,若试验仍不合格,则必须返工重新制作。
2.7对于已制作完成的幕墙单元件成品,应按GB16776-2005进行切胶剥离粘结性试验,或本文第五部分(5.4)。
胶必须充满整个内腔且无气泡与空隙,粘结破坏面积应少于5%否则必须追溯检查该批产品的施工操作技术,由技术部质量部门提出具体的处理意见。
GE 硅酮结构胶 MSDS

Product Description
accelerated cure silicone structural glazing adhesive
Typical Performance Properties
• Silicone durability - exhibits excellent long term resistance to ultraviolet radiation, high and low temperatures, rain, snow and natural weathering with negligible change in elasticity. • Stable consistency (uncured state) - supplied as a lightweight paste the consistency of which remains relatively unchanged over a wide temperature range. The material will extrude easily from the cartridge or container and remains workable under almost any practical temperature without requiring heating (other sealant types can stiffen upon exposure to cooler conditions and require heating in order to dispense and work the material). • Thermal stability (cured state) - once cured, the material remains flexible over a temperature range of -55°F (-48°C) to 250°F (121°C). • Primerless adhesion - bonds to most conventional substrates and finishes including: glass, glass coatings, ceramic frits, fluropolymer and powder coated paints, conversion-coated and anodized aluminum. Some finishes may require a primer. • Low sag or slump - which may be used for application to horizontal, vertical or overhead surfaces. • Accelerated cure - faster early hour cure properties to facilitate handling of assembled units. • High tensile strength - increases safety factors in SSG designs. • High tear strength - useful in Protective Glazing applications. • Compatible with these GE sealants insulating glass products: IGS3703, IGS3713-D1, IGS3729, IGS3723, IGS3733. • Compatible with these GE sealants weatherproofing sealants: SCS2000, SCS2700, SCS9000, SCS2800 series. • Compatible with these GE sealants SSG products: SSG4000AC structural glazing adhesive and SSG4800J, SCS2000, SSG4400 series. • Non-corrosive cure byproduct with low odor.
杭州之江JS-8000硅酮结构胶说明书

杭州之江JS-8000硅酮结构胶——上海连宝说明JS8000双组份硅酮结构密封胶为一种双组分,中性固化适用于建筑幕墙用的高性能硅酮结构密封胶,其具有下列独特的优越特性:1、其结构性能得到原国家经贸委硅酮结构胶领导小组的认定;2、对广泛的幕墙基材包括镀膜陶瓷、反光玻璃、阳极氧化和喷涂铝材以及不锈钢等金属材料均具有卓越的粘结性;3、高标准的机械物理特性;4、中性固化无毒且无腐蚀性;5、优越的耐高低温性-50℃至150℃优异的结构性强度;6、固化后具优秀的耐候特征及优良的抗紫外线耐高温及湿度性能;7、无批号配套限制。
结构性应用需提前将材料样品及图纸送交之江公司测试及审核。
基本用途JS8000硅酮结构结构密封胶设计用于结构性应用,例如在工厂装配的玻璃与金属材料间的粘结,固化后形成耐久、具弹性及防水密封层。
固化中性脱醇型固化,固化于室温下会散发少量乙醇。
性能数据JS-8000双组份硅酮结构密封胶在无需底漆的情况下对绝大多数的建筑基材均具优良的粘接性能,其典型物理特性更适应于广泛的温度范围。
性能满足GB 16776-2005、ASTM C 1184、ETAG 002。
性能数据下列数据仅供参考,不建议用于制定规范使用方法JS8000结构胶对大多数镀膜及非镀膜玻璃和金属间隔物均无需底漆且具优越的黏结性。
此结构胶与其他之江中性固化相容包括JS2000、888、222、225以及JS997中空玻璃密封胶和大多数常见的施工附属材料,最重要的是于施工前必须提供建材样品进行粘接力及相容性试验施工应用方法为求达到最佳物理性能JS8000硅酮结构密封胶应将主剂及固化剂用密闭混合系统混合。
JS8000适用于市面上一般双组份硅酮胶混合机器。
无论用手混合或用手动混合器都不会带来满意的效果,那时因为混合剂一旦加入空气之后便会使其原有的特性有所改变。
JS8000硅酮结构密封胶无需批号配套使用。
JS8000硅酮结构密封胶的固化剂在使用前必需先行搅拌以避免运输过程中可能产身的沉淀现象。
杭州之江JS6000硅酮结构胶说明书

杭州之江JS-6000中性硅酮结构密封胶——上海连宝之江JS6000建筑用结构硅酮密封胶是一种单组分、中性固化、专为建筑幕墙中的结构粘结装配而设计的。
可在很宽的气温条件下轻易地挤出使用,依靠空气中的水分固化成优异、耐用的高模量、高弹性的硅酮橡胶。
JS6000对大部分的建筑材料,不需用底漆,都能产生优越的粘结性。
它具有下列优越的特性:1、容易使用:可以随时挤出使用。
2、中性固化:适用于大多数建筑材料而不会产生不良反应或腐蚀作用。
3、优异的粘结性:无需底漆,可与大多数建筑材料形成很强的粘结力。
4、极佳的耐老化稳定性。
5、固化后即具有高模量性能,又可承载接口±25%的伸缩位移能力。
结构性装配须提前将材料样品和装配图纸送与之江公司测试与审核。
基本用途之江JS6000建筑用结构硅酮密封胶是专为建筑幕墙中的结构粘结装配而设计的。
结构性应用包括:在工厂或工地组装的玻璃和金属材料之间的装配,完全固化后密封胶可形成可承载结构强度的耐久、弹性的防水界面。
使用限制之江JS6000建筑用结构硅酮密封胶适用于结构性装配。
在下列情况下也不宜使用:Δ所有会渗出油脂、增塑剂或溶剂的材料,某些未硫化或部分硫化的橡胶和胶带等;Δ密不通风的部位(硅酮密封胶需空气中的水分固化);Δ长期浸水、终年地下潮湿的环境;Δ油漆表面,可能会因漆膜龟裂或剥落而造成密封失败;Δ结霜或潮湿的表面;Δ会直接接触食品的表面;Δ易遭到机械磨损的地方;Δ防火密封系统。
物性指标(供参考)下列数据仅供参考,不建议用于制定规范材料特性的技术资料之江JS6000建筑用结构硅酮密封胶可在-25~50℃环境条件下保持良好的粘稠度,容易挤出使用;固化后在-50~150℃保持良好的弹性。
包装之江JS6000建筑用结构硅酮密封胶以净容量300毫升塑料管或净容量590毫升铝塑薄膜包装提供给客户。
颜色之江JS6000建筑用耐候硅酮密封胶仅提供一种标准颜色:黑色。
也可根据客户需求提供其它颜色。
[应用]硅酮结构密封胶使用工艺指南
![[应用]硅酮结构密封胶使用工艺指南](https://img.taocdn.com/s3/m/41549779842458fb770bf78a6529647d272834e6.png)
[应用]硅酮结构密封胶使用工艺指南硅酮结构密封胶使用工艺指南,工艺过程质量控制检测方法5.1 表干时间回弹特性的测试对于单组分密封胶,每周或每一批号的材料应进行表干时间和回弹特性的测试,用于检查密封胶的工作整平时间以及确保密封胶能完全固化。
当材料表面固化时间与正常时间有很大的差距时(需要非常长的时间),表示材料可能过期或保存不当。
5.1.1在PE膜上打上约2mm厚的胶条。
5.1.2每隔几分钟,用适当的工具轻轻碰触胶表面,工具不会粘着在胶表面时的时间称之为胶表干时间。
5.1.3如果表干时间大于3小时,请暂停使用此材料,同时与我公司联系。
5.1.4让胶固化24小时后,将胶从PE膜上撕下,慢慢地拉伸胶条,判断密封胶是否已固化并具有弹性橡胶体特征。
在被拉伸到断裂点之前撤消拉伸外力时,弹性橡胶的回弹应能基本上恢复到它原来的长度,说明胶体已发生固化,可以使用。
如果胶没有固化,请与我公司联系。
5.2混合均匀性试验(蝴蝶试验)双组分结构胶在每次开泵注胶前应进行混合均匀性试验(蝴蝶试验)。
取一张白色厚纸(A4大小),沿长边将纸对折后展开,用混胶注胶机沿折缝处注入5~10克的密封胶,然后把纸叠合起来,挤压纸面使密封胶分散成半圆形薄层,然后把纸打开观察密封胶,如果密封胶均匀黑色,则表示密封胶混合较好,可用于生产使用;如果密封胶有白色条纹,说明密封胶混合不均匀,不能使用,检查设备或操作程序,解决问题后,重新取样,检查合格后才能使用。
5.3双组分结构胶拉断时间测试在使用过程中,每一天都必须进行一次拉断时间测试,以确定基料与固化剂之间的比例。
5.3.1从混胶机挤取约2/3~3/4纸杯密封胶,将一干净木棒插入纸杯中心,定期从纸杯中提起木棒。
5.3.2从纸杯中提起木棒并抽拉密封胶,如果密封胶呈线状不发生断裂,表明密封未到拉断的时间,应继续测试直到密封胶被拉断,记录从纸杯注入密封胶到拉断的时间。
5.3.3正常比例的双组分产品拉断时间应该在20~60分钟之间,否则基料/固化剂比例应该进行调节。
道康宁DC995硅酮密封胶说明书
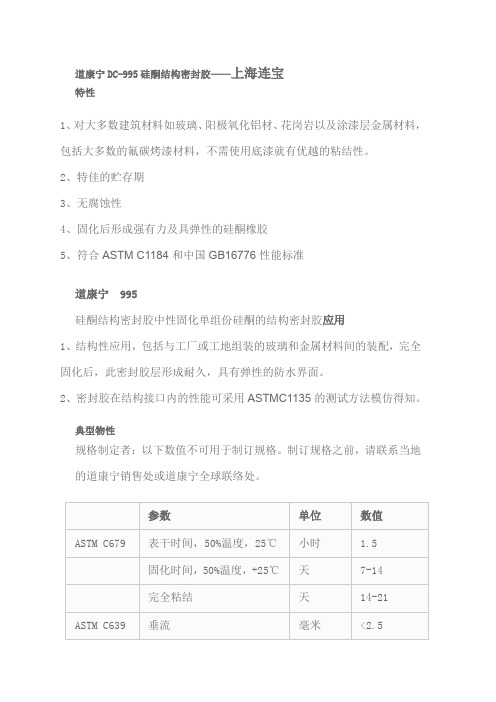
道康宁DC-995硅酮结构密封胶——上海连宝特性1、对大多数建筑材料如玻璃、阳极氧化铝材、花岗岩以及涂漆层金属材料,包括大多数的氟碳烤漆材料,不需使用底漆就有优越的粘结性。
2、特佳的贮存期3、无腐蚀性4、固化后形成强有力及具弹性的硅酮橡胶5、符合ASTM C1184和中国GB16776性能标准道康宁995硅酮结构密封胶中性固化单组份硅酮的结构密封胶应用1、结构性应用,包括与工厂或工地组装的玻璃和金属材料间的装配,完全固化后,此密封胶层形成耐久,具有弹性的防水界面。
2、密封胶在结构接口内的性能可采用ASTMC1135的测试方法模仿得知。
典型物性规格制定者:以下数值不可用于制订规格。
制订规格之前,请联系当地的道康宁销售处或道康宁全球联络处。
固化后—在温度25℃,温度50%施工后 21 天情况下依照美国ASTM G-53 QUV 4500 小时测试ASTM C1135 25%抗拉强度 MPa 0.3550%抗拉强度 MPa 0.54ASTM: 美国试验与材料协会说明道康宁 995 硅酮结构密封胶是专门为结构装配而设计的单组份,高稳定性,中性固化的弹性密封胶。
道康宁 995 硅酮结构密封胶实际上并不受阳光、雨水、风雪、和高低温的影响。
它的耐候性使它即使暴露在恶劣天气条件下,若完全固化后,依然保持本质不变。
接口的原始设计性能不会因老化和暴露在大气中而产生显著的变化,密封胶仍维持耐水和耐候特性。
固化后的密封胶在-40℃的低温和+150℃的高温范围内,仍保持弹性,而不会脆化,龟裂或被撕裂。
道康宁 995 硅酮结构密封胶与大多数的反射玻璃和中空玻璃都相容。
道康宁建筑工程技术服务要选择一种合适的建筑工程用结构密封胶变地越来越困难这是因为1、现有的密封胶种类繁多2、日新月异的建筑材料和表面处理技术3、材料间的相容性。
GESSG4400双组份硅酮结构密封胶说明书
GESSG4400双组份硅酮结构密封胶说明书
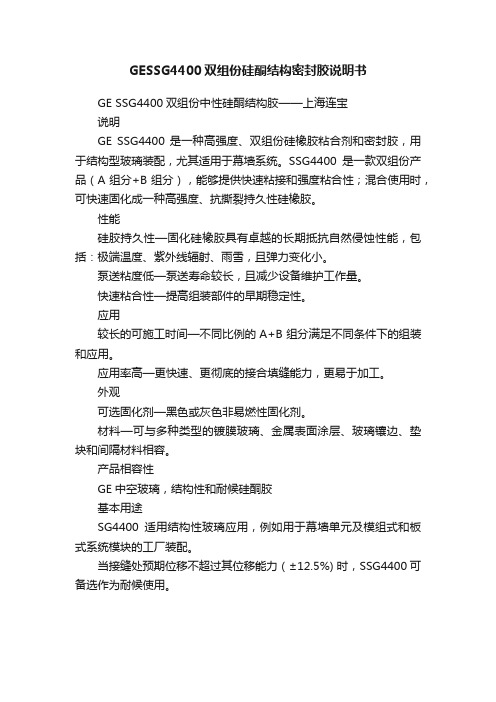
GE SSG4400双组份中性硅酮结构胶——上海连宝
说明
GE SSG4400 是一种高强度、双组份硅橡胶粘合剂和密封胶,用于结构型玻璃装配,尤其适用于幕墙系统。
SSG4400是一款双组份产品(A组分+B组分),能够提供快速粘接和强度粘合性;混合使用时,可快速固化成一种高强度、抗撕裂持久性硅橡胶。
性能
硅胶持久性—固化硅橡胶具有卓越的长期抵抗自然侵蚀性能,包括:极端温度、紫外线辐射、雨雪,且弹力变化小。
泵送粘度低—泵送寿命较长,且减少设备维护工作量。
快速粘合性—提高组装部件的早期稳定性。
应用
较长的可施工时间—不同比例的A+B组分满足不同条件下的组装和应用。
应用率高—更快速、更彻底的接合填缝能力,更易于加工。
外观
可选固化剂—黑色或灰色非易燃性固化剂。
材料—可与多种类型的镀膜玻璃、金属表面涂层、玻璃镶边、垫块和间隔材料相容。
产品相容性
GE中空玻璃,结构性和耐候硅酮胶
基本用途
SG4400适用结构性玻璃应用,例如用于幕墙单元及模组式和板式系统模块的工厂装配。
当接缝处预期位移不超过其位移能力(±12.5%) 时,SSG4400可备选作为耐候使用。
白云牌超高性能结构胶设计、施工手册

白云牌超高性能硅酮结构胶设计与施工手册由于当前高层或者超高层建筑日益增多,而高层或超高层建筑外幕墙多采用隐框或者半隐框玻璃幕墙,玻璃板块大,其所受风荷载和自重荷载大,此情况下仅采用符合GB16776-2005《建筑用硅酮结构密封胶》的硅酮结构胶很难满足工程的设计要求,外幕墙结构胶宽厚度值易超过JGJ102-2003《玻璃幕墙工程技术规范》的相关规定。
如采用白云牌超高性能结构胶进行超规范设计,设计计算与施工应按照如下事项进行:一 结构胶宽度设计计算1.1硅酮结构胶的粘接宽度C s 应按照《玻璃幕墙工程技术规范》JGJ102-2003规定: 非抗震设计时,可取第1、3款计算的较大值;抗震设计时,可取第 2、3款计算的较大值。
(1)、在风荷载作用下,粘接宽度C S 应按下式计算: Cs=12000f wa(1) 式中 W — 作用在计算单元上的风荷载设计值(Kpa ); a — 矩形玻璃板的短边和长边长度(mm )f1—硅酮结构密封胶在风荷载或地震作用下的强度设计值。
(2)、在风荷载和水平地震作用下,粘接宽度C S 应按下式计算: Cs=(W+0.5qE). a2000.f1 (2)式中 W — 作用在计算单元上的风荷载设计值(Kpa ); qE —作用在计算单元上的地震作用设计值(Kpa )f1—硅酮结构密封胶在风荷载或地震作用下的强度设计值。
(3)、在玻璃永久荷载作用下,粘接宽度C S 应按下式计算: Cs=qGab2000(a+b).f2 (3)式中 qG —幕墙玻璃单位面积重力荷载设计值(Kpa );a、b—分别为矩形玻璃板的短边和长边长度(mm);f2—硅酮结构密封胶在永久荷载或地震作用下的强度设计值。
1.2硅酮结构密封胶的强度设计值f1,f2的取值注意事项:高层或超高层建筑隐框或半隐框玻璃幕墙,应采取附加的安全措施,如设计计算时将f1取0.4N/mm2,玻璃左右两端应设置安全夹、铝合金扣板等,防止风荷载与地震荷载作用导致玻璃的坠落;如设计计算时将f2取0.02N/mm2,玻璃上下两端应设置两个铝合金或不锈钢托条、带钩托盘、金属件等,防止因重力荷载作用过大导致玻璃的坠落。
硅酮耐候结构胶质量保证书

硅酮耐候结构胶质量保证书尊敬的客户:我司向您保证,我司生产的硅酮耐候结构胶均严格按照国家标准和行业规定进行生产,并对其质量承担法律责任。
现对我司生产的硅酮耐候结构胶提供如下质量保证:一、产品性能保证1. 我司生产的硅酮耐候结构胶是一种单组份、中性、室温固化硅酮结构胶。
2. 该产品具有优异的耐气候老化性,能有效抵抗紫外线、臭氧、风雨等自然因素的影响。
3. 硅酮耐候结构胶具有良好的粘接性,在通常情况下无需底涂固化后对大多数建材均能产生良好的粘接力。
4. 该产品有黑白等多种颜色,可供客户选择。
二、产品质量保证1. 我司承诺,产品出厂前将进行严格的质量检验,确保产品合格率达到100%。
2. 产品安装调试并验收合格后一年内,如产品自身出现质量问题,我司负责进行免费维修。
如果产品超出了我们的保修期限,我们也会在合理的范围内给您提供相应的有偿服务。
3. 属于下列情况之一的不给予免费保修,但可以实行合理的有偿服务:a. 超过保修期;b. 不能提供购买凭证的;c. 未按产品使用说明书的要求使用、维修而造成损坏的(特别注意发生进水、摔坏以及人为的损坏);d. 客户擅自维修、拆卸产品的或者客户委托非我司指定的维修人员维修,拆卸产品的;e. 使用非正规的劣质通信电缆造成的损坏;f. 由于水灾、火灾、雷击、地震等不可抗拒灾害造成产品发生故障或损坏的;g. 其它非产品自身原因造成的故障或损坏。
三、技术支持与服务1. 产品使用过程中出现问题,我司技术人员将做到有问必答,属于产品质量问题的,我司保证24小时内给予明确答复或解决方案。
2. 我司将根据客户需求提供详细的产品使用培训和技术指导,确保客户能正确、高效地使用产品。
四、产品储存与运输1. 产品应存放在阴凉、干燥、通风的地方,避免阳光直射和高温,以免影响产品质量。
2. 产品运输过程中,应按照非危险品运输要求进行,避免剧烈震动、碰撞和潮湿。
五、产品颜色、位移能力、固化时间和产地1. 产品的颜色有黑色、白色等多种选择。
双组份硅酮中空玻璃密封胶使用手册
双组份硅酮中空玻璃密封胶使用手册
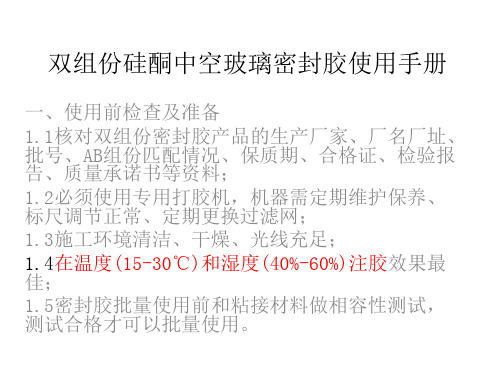
❖适用期检测方法:
拉断时间和主剂与固化剂的混合比例有关,同时可提供胶的 工作时间及胶内部深度固化时间的参考。拉断时间会因主剂与固 化剂的混合比例不同而有所不同。空气中水汽条件、温度、湿度 均会影响到拉断时间。
双组份硅酮中空玻璃胶使用手册
剥离玻剥离粘结性测试测试
对基材进行粘接性测试作为检验实际生产粘接性的一种方法。 • 质量控制所有的粘接性测试不能替代单元板片的切割,但只作为非 • 破坏方式下的连续性监控粘接性的一种可行方法。
取与中空玻璃同批次玻璃试验块,在制作中空玻璃时随工 艺对玻璃试验块进行清洗、干燥,在施打密封胶时随即在玻 璃试验块上施打密封胶,将试验块置于23±2℃的环境下, 双组分胶一般1~2天,待其固化后按图2进行粘结性试验,A) 为粘结破坏;B)为内聚破坏,内聚破坏才为合格。
事中控制!
双组份硅酮中空玻璃胶使用手册
双组份硅酮中空玻璃密封胶使用手册
❖ 解决措施: 4、不与聚硫胶及其它种类的密封胶掺合。
不同类别的密封胶组分不一样,固化体系也不尽相同,不能掺合。
双组份硅酮中空玻璃密封胶使用手册
四、 现象:硅酮密封胶与基材粘接不良。
双组份硅酮中空玻璃密封胶使用手册
❖ 原因分析: 1、 基材表面不干净,残留有油渍、污渍等。 2、A、B组分混合比例不正确。 3、养护时间不足。 4、底漆过多或失效。
适用期、表干时间的检测对中空玻璃制造过程密封胶质量的 控制非常有效,对密封胶的使用是否有异常可以起到快速反映。 涂胶密实度的检测是保证密封完整性。
事前预防!
双组份硅酮中空玻璃密封胶使用手册
❖ 混合均匀性检测方法: 检查A组份即主剂和和B组份即固化剂是否充分混合均匀可以通 过蝴蝶试验进行检测。蝴蝶试验在每次开机,包括间断后的开机都应进 行。
结构胶操作手册p

硅酮结构胶施工操作手册1、质量标准:1.1玻璃合框后的板块厚度允许偏差:±0.5㎜1.2玻璃合框后组件长宽尺寸允许偏差:±1.01.3胶缝的宽度允许偏差:+0.5厚度允许偏差:+0.31.4胶缝饱满密实,外观光滑平整,无气泡,空隙和飞边。
1.5玻璃合框后的组件周边玻璃与铝框位置差:±1.01.6单边或两对边有副框的玻璃合框时,副框侧面与玻璃面垂直允许偏差:±30ˊ1.7随批试验件剥离粘结试验合格。
1.8玻璃饰面表面质量:a:饰面表面不能有残胶,污迹,腐蚀,裂纹等缺陷。
b:钢化玻璃表面不允许有伤痕。
c:装饰表面每平方米内划伤、擦伤,应符合下列要求。
1)0.1—0.3㎜,宽划伤,长度小于100㎜的≤4条。
2)擦伤总面积:≤300m㎡2、操作过程:2.1根据工序卡,读懂图纸和细目,不清楚时问工艺员。
2.2按领料单领料,核对组件所有的材料的规格尺寸、厚度、颜色和表面质量,发现问题及时反馈,调整、处理。
a:型材:检查长、宽尺寸,对角线差、阶差,表面质量,阶差如能用胶皮锤修平的要进行修整。
b:结构胶:检查出厂日期,批量、颜色、保质期、外观质量,结构胶与耐候胶必须配套使用,并与配套的铝型材,玻璃,单双面垫条及与它直接相接触的材料,做相容性和粘结性实验,合格后方可使用。
c:玻璃:检查长、宽尺寸、厚度颜色,外面质量。
d:单双面垫条:检查宽度,厚度,胶层质量。
e:清洗剂:丙酮,异丙醇,丁醇,二甲苯等,具体选用应按相容性粘结性试验报告指定的清理用溶剂。
f:抹布(或胶脂棉)抹布采用白色清洁、柔软、烧毛处理的棉布。
g:保护胶带,推荐采用纸基压敏胶带粘贴后容易撕胶,不留痕迹。
2.3清洗:a:用干净抹布清除玻璃和型材表面浮灰等脏物。
b:将溶剂倒出至每一块干净抹布或胶脂棉上润湿,以同一方向擦洗玻璃和铝型材的粘接面,清洗宽度为粘接棉界的1.5—2倍。
c:用第二块干的抹布或脱脂棉在溶剂挥发前,将溶剂及污物 表面沿第一块抹布或脱脂棉擦洗方向擦洗。
硅酮结构胶质量控制手册

硅酮结构胶装配质量控制手册梦想启动未来前言20世纪中期以来, 由于建筑材料的发展, 最初的混凝土墙体被玻璃, 铝板, 石材等各种材料所取代, 到目前为止幕墙系统得到了长足的发展。
建筑外墙最大的成功是将它的外观表现和使用功能得到完整的结合。
对于使用功能来讲, 多表现为其防雨水, 防气漏, 隔音, 保温等耐候性能。
检验建筑物外墙耐候性能好坏的一个重要因素就是密封胶的性能。
1947年××公司建立了世界上第一个有机硅生产基地, 进行全球性的密封胶研究、生产和销售。
半个多世纪以来, ××公司对于硅酮胶积累了丰富的经验, 不仅提供优质的产品, 而且提供客户完整的解决方案。
在所有结构胶、密封胶使用过程中,××公司都要求客户严格按照产品操作管理手册进行加工和管理。
对于不同项目的需求××公司提供以下服务:●××公司对工程进行合理化建议, 提供正确的密封胶。
●对密封胶的接口图纸设计进行审核。
针对客户的不同应用,××公司的技术人员能够提供适合的产品建议。
在选用××密封胶产品前,××技术人员会对工程内所有使用的硅酮结构胶, 耐候胶的应用进行审核, 在工程开始以前, 图纸审核及实验测试必须完成。
●××公司将对所有与密封胶接触的基材进行粘着性测试, 对与密封胶接触的双面胶条,橡胶垫块,泡沫棒等进行相容性测试, 对石材进行污染性测试。
●××公司对于具体工程进行现场技术支持。
结构胶的施工为了更好地确保结构胶的表现, 请严格遵守下列施工步骤。
同时请记录有关打胶细节, 这也是获得××公司质量保证的必要条件。
由于环境的千差万别, 此施工步骤并不能被视为唯一的质量保证标准, 具体情况请咨询××公司相关技术人员。
CY230201 硅酮结构胶应用技术手册

十、 工程常见问题分析 ...................................................... 15 1. 常见问题及原因分析 .................................................... 15 2. 减少硅酮结构密封胶失效的方法 .......................................... 15
2
一、
硅酮结构密封胶介绍
硅酮结构密封胶(以下简称硅酮结构胶)是 强度高,能承受较大荷载,且耐老化、耐疲劳、 耐腐蚀,在预期寿命内性能稳定,适用于承受强 力的结构件粘接用胶粘剂。在幕墙中用于板材与 金属构架、板材与板材、板材与玻璃之间的结构 用粘接材料。如隐框玻璃幕墙中玻璃与铝框的结 构部位的粘结(见图 1) ,全玻幕墙中玻璃板块与 玻璃肋之间的粘结,以及中空玻璃的二道粘结密 封等 。
二、
硅酮结构胶分类
图 1 玻璃与铝框的结构部位粘结
1. 按组分分类
通常可分为单组分和双组分两大类。 1.1 单组分
单组分硅酮结构胶使用时可以直接将密封胶挤注到用胶部位,十分方便。一般是通过与空气的水分发 生反应进行固化的, 固化过程由表面逐渐向深层进行。 因此, 其深层固化速度相对较慢, 而且对施工深度、 宽度、环境温度、环境湿度等有一定要求,尤其受环境湿度影响较大。单组分因其使用简便等原因,一般 适用于现场作业。 1.2 双组分 双组分由 A(主剂) 、B(固化剂)两个组分组成,使用时需要先将两个组分混合均匀,然后在一定的 时间内将胶注入用胶部位,混合超过一定时间硅酮结构胶就无法使用。双组分硅酮结构密封胶必须使用双 组分混合设备方能进行施工,手工混胶一方面不均匀,另一方面也会裹入气泡,影响使用效果。因此,双 组分产品在使用时与单组分相比相对复杂。不过双组分硅酮结构密封胶两个组分混合均匀即可固化,在固 化过程中不需要与空气中的水分发生反应,表面与深层同时固化,深层固化速度快,而且固化速度可以通 过调节 A、B 组分的混合比例进行调整,不受施工环境、湿度影响。另外,采用双组分打胶机可以大大提 高效率,幕墙施工单位一般都采用双组分打胶机用于幕墙板块制作。
西卡硅酮结构胶使用手册(英文)

General GuidelinesI n d u s t r yFebruary 2008 / Version 1Structural Silicone Glazing with Sikasil ® AdhesivesGeneral Guidelines Structural Silicone Glazing with Sikasil® AdhesivesTable of ContentPurpose and General Information 3 Introduction 41. Design and Joint Dimensioning 42. Working Place Conditions 4Pre-treatment 43. Surface4. Processing and Product Application 6 4.1 Two-component Structural Silicone Adhesives 6 4.2 One-component Structural Silicone Adhesives 84.3 Masking of Areas Adjacent to the Joint 85. Movement of Bonded Elements 9Assurance 10 6. Quality6.1 Testing the Mixing Ratio (2-component products only) 10 6.2 Marble Test for Homogeneity (2-component products only) 10 6.3 Butterfly Test for Homogeneity (2-component products only) 11 6.4 Pot Life (Snap Time) Testing (2-component products only) 12 6.5 Skin-over Time and Tack-free Time (1-component products only) 13 6.6 Shore A Hardness Measurement 14 6.7 Peel Adhesion Test 14 6.8 Tensile Adhesion Tests on H-specimens 15 6.9 Visual Inspection 17 6.10 Factory Deglazing 18 6.11 Recommended Basic Quality Control Scheme 19 6.12 Recommendations for Logbook Content 20© February 2008 / Version 1 / Sika Services AG - 2 -General Guidelines Structural Silicone Glazing with Sikasil® AdhesivesPurpose and General InformationThis document contains recommendations and hints for the application of Sikasil® SG adhesives in structural bonding applications. These guidelines are relevant for the following products:- Sikasil® SG-500- Sikasil® SG-500 CN- Sikasil® SG-18- Sikasil® SG-20- Sikasil® SG-20+- Sikasil® GS-630The information herein is offered for general guidance only. Since structural sealant glazing is a critical application and conditions as well as substrates may vary greatly, the customer must test the suitability of the product for each specific project and contact Sika for advice.Sikasil® adhesives in high demanding and critical applications, such as structural glazing or window bonding, may only be used after a detailed examination and written approval of the corresponding project details by the Technical Service Department of Sika Industry.For detailed information about specific silicone products and surface pre-treatment agents please refer to the actual Product Data Sheets (PDS), Material Safety Data Sheets (MSDS) and Calcula-tion Value Sheets.- 3 - © February 2008 / Version 1 / Sika Services AGGeneral Guidelines Structural Silicone Glazing with Sikasil® AdhesivesIntroductionSikasil® SG and Sikasil® GS adhesives are condensation-curing, one- and two-part silicone prod-ucts suitable for bonding glass panes or insulating glass units to a support frame (usually: anodized aluminum, polyester powder-coated aluminium, PVDF-coated aluminium or stainless steel). This technique is known as structural silicone glazing.1. Design and Joint DimensioningJoints must be properly dimensioned as changes are no longer possible after construction or adhe-sive application, respectively. Basis for calculation of the necessary joint dimensions are the technical values of the adhesive and the adjacent building materials, the exposure of the building elements, their construction and size as well as external loads (wind, snow, climatic loads, etc.). Sika offers a comprehensive project service package including design reviews and structural joint dimensioning. For more information please contact the Technical Service Department of Sika Industry.2. Working Place ConditionsThe working place should be as dust-free as possible. Ideal conditions are 23°C (73°F) and 50% relative humidity. As these conditions are usually attainable only in laboratory, one should try to make the plant conditions as close as possible. Although Sikasil® SG and Sikasil® GS adhesives may be processed within 5 - 40°C, the optimum application temperature of the products is between 15 and 30°C.All substrates must be stored under the same conditions (i.e. between 5 and 40°C) at least 24 hours prior to the application of Sikasil® SG or GS in order to avoid condensation on the surfaces.Pre-treatment3. SurfaceSurfaces must be clean, dry and free from oil, grease and dust. Place the glass or panel to be glazed. Care must be taken to not contaminate pre-treated surfaces during any phase of production. If contamination occurs, surfaces have to be pre-treated again.The following information is offered for general guidance only. Advice on specific pre-treatment meth-ods based on laboratory adhesion tests will be given on request. Please note that with the exception of clear float glass, Sika has to test the adhesion of structural silicone adhesives on a project-by-project basis on production-run samples of the original materials used in the specific project. It is binding to use the surface pre-treatment agents recommended in the laboratory report, otherwise© February 2008 / Version 1 / Sika Services AG - 4 -General Guidelines Structural Silicone Glazing with Sikasil ® Adhesives- 5 - © February 2008 / Version 1 / Sika Services AGthe warranty for the adhesion behaviour of Sikasil ® silicone adhesives is null and void.SubstrateSurface Pre-treatment Float glass(including tempered, toughened, laminated andtinted types)Sika ®Cleaner-205 or Sika ®Cleaner P*Pyrolytically coated glassCeramic-coated (enamelled) glassSika ®Cleaner-205Stainless steelAnodized aluminumPolyester powder-coated aluminumPVDF-coated aluminum* Si k a ® Cleaner-205 leave marks on pre-treated surfaces. If this is not acceptable and the adjacent areacan not be masked, Sika ® Cleaner P can be used instead.Important noteSika ®Cleaner-205 is not a simple cleaning solvent but contains a bonding agent which forms an activating film on the substrate surface. On some surfaces, for example on certain glossy powder-coated aluminium profiles, this film may be visible and change the appearance of the profile. Therefore, it is important to treat and apply Sika ®Cleaner-205 like a primer and to use masking tapes in critical (visual) areas if necessary.General Guidelines Structural Silicone Glazing with Sikasil® Adhesives3.1 Application Procedure of Sika®Cleaner-2051. Moisten a clean, dry, oil-free and lint-free cloth or paper with the product and apply iton the surface. Make sure to turn the cloth or paper to expose new surface, or replaceit regularly in order to avoid wiping residues back onto the surface. If the surface is notfree of contaminant, the process has to be repeated.2. Unlike ordinary cleaning agents, the surface treated with Sika® Cleaner-205 must not bedried subsequently with a cloth or paper!3. Drying time: The required minimum drying times are as follows (depending on theenvironmental conditions in the workshop):- 10 minutes if temperatures are at least 5°C- 5 minutes if temperatures are at least 10°C- 2 minutes if temperatures are at least 15°CIn case of doubt, contact Technical Service Department of Sika Industry.4. If cleaned (“activated”) parts are not bonded/sealed immediately, protect them againstsubsequent contamination.5. Adhesive application should take place within 2 hours after the application of Sika®Cleaner-205. Otherwise the procedure as described above has to be repeated beforebonding.For more details about Sika®Cleaner-205 refer to the actual Product Data Sheet.3.2 Application Procedure of Sika® Cleaner PSika® Cleaner P is a solvent-based cleaning agent and is applied by the “two-cloths-method”:1. Moisten a clean, dry, oil-free and lint-free cloth or paper with Sika® Cleaner P and rub itover the surface. Make sure to turn the cloth or paper to expose new surface, or replaceit regularly, in order to avoid wiping residues back onto the surface.2. Then wipe-off the surface using a clean, dry, oil-free and lint-free cloth or paper.Never wait until Sika® Cleaner P has evaporated from the surface; because dissolvedcontaminants would be left behind.3. Repeat this procedure until the surface is clean.4. If you are not bonding the cleaned parts immediately, protect them against subsequentcontamination.5. If more than two hours have passed since cleaning, always repeat the cleaning processbefore bonding.For more details about Sika®Cleaner-P refer to the actual Product Data Sheet.© February 2008 / Version 1 / Sika Services AG - 6 -General Guidelines Structural Silicone Glazing with Sikasil® Adhesives4. Processing and Product Application4.1 Two-component Structural Silicone Adhesives4.1.1 Preparation- After opening the 200 litre drum containing the A-part (base) remove the plastic cover sheet.- After opening the pails containing the B-part (catalyst) cut open the welded plastic bag and attach it to the outer edge of the pail with tape. This prevents the inliner to besucked in by the pump. Remove the cover foil.Alternatively – if the pump is equipped with a filter - the whole inliner containing the B-component may be turned around and opened by cutting a cross.- Sikasil® SG-500 A-part as well as B-part have a paste-like consistency. To process the two components, a pump system with follower plate is required.- Due to its reactivity with atmospheric moisture, the B-part of Sikasil®SG-500 has not to be exposed to air for more than 5 minutes. Should a thin layer of a resinous materialhave developed on top, it has to be removed with a spatula or a similar tool beforeinstalling the container under the pump.- Neither the A-part nor the B-part require stirring because both components show very little tendency to separate.4.1.2 MixingTo obtain the ultimate physical properties indicated in the corresponding Product Data Sheet, Sikasil®SG-500 2-component adhesives have to be thoroughly mixed using an airless mixing system.For mixing ratio by weight and volume, refer to the corresponding Product Data Sheet. Only small deviations of ±10% from the mixing ratio indicated in the Product Data Sheet are tolerated. For a proper adjustment of the mixing ratio consult the manual of the pump equipment. If further assist-ance is required, contact the equipment manufacturer. Lot matching of Sikasil® SG-500 catalyst and base is not required.The mixer open time, i. e. the time the material can remain in the mixer without flushing or extrusion of product, is significantly shorter than the snap time (pot life) indicated in the Product Data Sheets. In order to maintain a long life time of the static mixer, the alarm on the equipment has to be set to the values shown in the following table.- 7 - © February 2008 / Version 1 / Sika Services AGGeneral Guidelines Structural Silicone Glazing with Sikasil® AdhesivesProduct Mixer open time Alarm time (equipment) Sikasil® SG-500approx. 8 - 10 min approx. 6 minSikasil® SG-500 CN approx. 7 – 9 min approx. 6 minAbove mentioned times significantly vary with different temperatures and must be verified by tests under actual conditions. If the alarm time is set too long cured rubber particles are visible in the ex-truded material.Sikasil® SG-500 two-part silicone adhesives are usable with commercially available two-part silicone mixing and dispensing equipment with static or dynamic mixers. For recommendations contact Sys-tem Engineering Department of Sika Industry.During shutdown, it is recommended that the dispensing and mixing equipment are purged with non-catalyzed base (A-component) in order to retard the curing of the adhesive. Usually, the necessary amount of A-part to purge corresponds to the threefold volume of the mixing system (for systems with a static mixer).Alternatively, a freezer can be used for downtimes up to 24 hours (temperature -40°C or below). However, the reaction will not stop at -40°C but will only be slowed down.During prolonged production breaks additionally flushing with a cleaning agent such as Sika® Mixer Cleaner is recommended. Cleaning the mixer by burning the silicone residues is not advisable.When restarting production after shutdown, mixed silicone must be purged until obtaining a homoge-neous mixture. Depending on the equipment, between 1 and 3 liters of Sikasil® SG-500 are needed for that purpose if static mixers are used. The quality of the mixing and the correctness of the mix-ing ratio must be checked (butterfly or marble test, mixing ratio by weight, see chapter 6 “Quality Assurance” and ff).4.1.3 ApplicationSikasil® SG-500 2-component silicone adhesives must be applied evenly and free of air bubbles. Tooling of the joint should be carried out as soon as possible after adhesive application but not later than half the pot life (snap time) indicated in the actual Product Data Sheet. It must be ensured that the joint is completely filled and that the joint dimensions correspond to the calculated values.Detergent or soap and water are not allowed for tooling.© February 2008 / Version 1 / Sika Services AG - 8 -General Guidelines Structural Silicone Glazing with Sikasil® Adhesives4.2 One-component Structural Silicone Adhesives4.2.1 Preparation- If working from drums or pails open the container, cut open the welded plastic bag and attach it to the outer edge of the vessel with tape. Remove the cover foil.- All one-component Sikasil® SG and GS adhesives cure with atmospheric moisture.These products may not be exposed to air for more than 5 minutes.- Before installing the drum or pail into the pump equipment, cured material under the follower plate have to be removed thoroughly.- If working from cartridges or unipacks, follow the instructions given by the gun manufac-turer.4.2.2 ApplicationSikasil® SG and Sikasil® GS adhesives are applied by equipment with a metering pump, or manually directly from the cartridge or unipack.The adhesive must be applied evenly and free from air bubbles. These one-component product form a skin after a certain time (skin time), which varies according to humidity and temperature. For further details refer to the actual Product Data Sheets. Tooling and smoothing of joints should be carried out as soon as possible after the adhesive application and not later than half of the skin time indicated in the actual Product Data Sheet. It must be ensured that the joint is completely filled and that the joint dimensions correspond to the calculated values.Detergent or soap and water are not allowed for tooling.4.3 Masking of Areas Adjacent to the JointsTo assure neat bond lines and protect areas adjacent to the structural joint, use a masking tape. The tape must not touch the pre-treated surface areas to which the silicone has to adhere. The tape should be removed immediately after tooling. Do not wait longer than 5 minutes or joints might be damaged.- 9 - © February 2008 / Version 1 / Sika Services AGGeneral Guidelines Structural Silicone Glazing with Sikasil® Adhesives5. Movement of Bonded ElementsBonded units should not be exposed to stress until certain strength has developed. Since adhesion and strength build-up depend on the adhesive used, environmental conditions and the substrates, respectively, only general recommendations regarding the time can be given. If the situation is ambiguous temporary mechanical supports, retaining devices or Sika® Spacer Tape HD should be used to prevent loads acting on the joint during storage, transportation and installation. For more information please contact the Technical Service Department of Sika Industry.Step Conditions Time after bonding1-component adhe-sivesTime after bonding2-component ad-hesivesInitial curing and adhesion build-up Store units stress-freein horizontal position7 days 1 dayStrength-build up and increase of adhesion Store units with dead-load support vertically8 - 14 days 2 - 3 daysFurther strength and adhesion increase Transportation of unitsvertically w/ support15 - 21 days 4 - 7 daysUltimate strengthand adhesionreachedInstallation of Elements> 21 days> 7 daysThe structurally glazed units must not be moved to the job site until the adhesive has fully cured and it can be demonstrated through quality control testing that the adhesive has achieved full adhesion. Transportation of elements is possible earlier than stated in the table above if tensile adhesion tests on H-specimens (see chapter 6 “Quality Assurance”) kept under the same conditions as the bonded elements give a value of 0.7 N/mm2 and the failure mode is ≥95% cohesive.Depending on the factory conditions and organization of the production process, different times for movement of bonded elements can be agreed upon. This requires an audit of the customer’s produc-tion by the Technical Service Department of Sika Industry.© February 2008 / Version 1 / Sika Services AG - 10 -Assurance6. QualityA perfect result means carrying out each processing step perfectly. Sika therefore recommends that structural glazing applicators install a strict quality control system. Quality control is the primary re-sponsibility of the processor but Sika will assist customers in setting up a comprehensive program and train staff to carry out the mandatory tests.The following sections describe quality procedures and a schedule when to run these tests. Local and regional regulations such as EOTA ETAG 002 (“Guideline for European Technical Approval for Structural Sealant Glazing Systems [SSGS]”) may require a different quality control scheme. Please contact your local Sika office or the Technical Service Department of Sika Industry for further information.6.1 Testing the Mixing Ratio (2-component products only)The easiest way to check the mixing ration is by weight.- In normal mixing and metering systems, the two components can be fed separately via special valves.- The balance should be as accurate as 0.1 g- Pump both components simultaneously. To achieve maximum accuracy, extrude at least0.5 litre of component A.- Weigh the components and calculate the mixing ratio.- For the correct mixing ratio refer to the corresponding Product Data Sheet.Important noteIf the ratio by weight is outside the ±10% range stop work! Adjust the mixture to the required ratio be-fore continuing. In the event of problems with setting the mixing ratio, please contact the equipment manufacturer. Another good way of checking the mixing ratio is to compare the pot life (snap time) of the machine-mixed material with the pot life of a mixture weighed by hand in an exact ratio as stated in the corresponding Product Data Sheet.6.2 Marble Test for Homogeneity (2-component products only)The mixture must be homogeneous to ensure that Sikasil® SG-500 has the ideal properties. This can be tested by the marble test (glass plate test):- Apply a cone of mixed Sikasil® SG-500 to a float glass plate.- Take a second glass pane and press it onto the pane with the adhesive, taking care to exclude air bubbles.Important:If you see white or deep-black strips, or pronounced light-gray marbling, the adhesive is not properly mixed or an insufficient amount of material was discharged after the last shutdown. Never use such material for bonding. To eliminate the defect, follow the equipment manufacturer’s instructions. If a static mixer is in use, it may have to be replaced.Picture 1: Positive test = ideal mixing Picture 2: Negative test = inadequate mixing6.3 Butterfly Test for Homogeneity (2-component products only)The butterfly test is an alternative to the marble test.- Fold a sheet of paper down the center and open it again.- Apply mixed Sikasil® SG-500 over the fold.- Fold the paper again and press it together that the silicone adhesive spreads out. Hint:a cartridge can be used to roll over the paper.- Unfold the paper. The silicone adhesive must have a homogeneous color.Important noteIf you see white or deep-black strips, or pronounced light-gray marbling, the adhesive is not properly mixed or an insufficient amount of material was discharged after the last shutdown. Never use such material for bonding. To eliminate the defect, follow the equipment manufacturer’s instructions.If a static mixer is in use, it has to be cleaned or replaced. After an adequate curing time, double check the mixing quality by cutting open the thicker center section of the adhesive and checking it for streaks and marbling.Picture 3: Positive test = ideal mixing Picture 4: Negative test = inadequate mixin6.4 Pot Life (Snap Time) Testing (2-component products only)- Extrude 10 to 20 ml freshly mixed silicone adhesive (purge mixer sufficiently) from the machine into a small plastic cup (for example made of polyethylene).- Stir it briefly and vigorously with a wooden spatula, and then remove the spatula.- Repeat this operation every 5 minutes for Sikasil® SG-500 and SG-500 CN.- The pot life or snap time is the time from extrusion of the silicone adhesive until the point at which it no longer forms long strings when the spatula is removed, but breaksoff in short lengths.- The measured value should not deviate by more than 25% from the pot life indicated in the certificate of analysis supplied with each batch of product.Please be aware of the fact that the snap time strongly depends on the temperature of the mate-rial.Picture 5: Material shows paste-like behaviour: Picture 6: Material shows rubber-like behaviour: snap time not yet reached snap time reached6.5 Skin Time and Tack-free Time (1-component products only)- With one-part silicone adhesives, check the skin-over time and tack-free time as follows:- Using a spatula, apply about 30 g of the adhesive to paper or film in a thickness of about 3 to 4 mm.- Test every three minutes whether the adhesive surface has changed by probing with a clean finger tip.- The skin-over time is the point at which the adhesive no longer sticks to the finger. Tack-free time is the point at which the surface feels dry (no longer tacky).The skin-over time given in the Product Data Sheets was determined under standard climatic condi-tions (23 °C, 50 % relative humidity). Higher temperature and higher humidity reduce the skin over time and tack-free time. If there are drastic deviations (more than ±50%) from the values given in the acceptance test certificate, discontinue bonding and consult the Technical Service Department of Sika Industry.Pictures 7 - 9: Press the finger tip lightly on the adhesive and lift off. The skin time is the point at which the adhesive no longer sticks to the finger (image on the right).6.6 Shore A Hardness MeasurementCheck the Shore A hardness according to ISO 868 using a conventional trailer pointer device. The test specimens must have a smooth, flat surface and a thickness of at least 6 mm. This Shore A hardness measurement is an indication of a correct mixing ratio and thru-cure speed. The minimum Shore A hardness of Sikasil® structural glazing adhesives after 24 hours at room temperature is indicated in the following table:Product Shore A HardnessSikasil® SG-500≥ 30Sikasil® SG-500 CN≥ 25Sikasil® SG-18≥ 15Sikasil® SG-20≥ 12Sikasil® SG-20+≥ 15Sikasil® GS-630≥ 12Important noteThe above mentioned values were determined at 23°C / 50% relative humidity. Since temperature and – for 1-component products also humidity – have a significant influence on the curing speed of condensation-curing silicone adhesives, actual Shore A hardness values may vary depending on the factory conditions.6.7 Peel Adhesion Test- Extrude a bead of Sikasil® SG or GS of at least 15 cm length onto a clean substrate of original material (pre-treatment exactly as in production line).- Draw a template (doctor blade) over the bead to ensure it is of uniform size (about 15 mm wide and 6 mm high).- Store the test specimens at room temperature for 24 hours (2-component products) or72 hours (1-component products), respectively.- Carry out the test by cutting approx. 3 cm of one end of the bead from the substrate with a sharp knife or glass scraper.- Fold back the loose end at an acute angle of about 30°, and try to detach the cured rubber from the substrate.- If the cured silicone cannot be detached, use the knife or glass scraper to cut it through to the substrate (see picture below) several times while still pulling.- Repeat this procedure until at least 50% of the bead length has been tested.In the test carried out after 24 hours or 72 hours, respectively, the bead must not detach from the substrate during pulling (i.e. 100 % cohesive failure).Picture 10: Peel adhesion test6.8 Tensile Adhesion Tests on H-specimensH test specimens with a joint dimension of 12 x 12 x 50 mm are produced for the tensile test.- For this purpose, use original materials that have been pre-treated like on the production line.- Fix the glass and/or metal test specimens to be bonded, with spacers and, if applicable, distance pieces such that a joint measuring 12 x 12 x 50 mm can be filled.- Prepare at least 2 bubble-free test specimens per test series with Sikasil® silicone adhesive. Remove excess material with a spatula or other tool.- Demold the test specimen after storage at room temperature (remove spacers, adhesive tape or clamps).- Determine the mechanical parameters (tensile strength) after at least 72 hours (2-component products) and 21 days (1-component products) by means of a tensiletesting equipment or other suitable apparatus (pulling speed: 5 mm/min).If a tensile strength of less than 0.7 MPa (Sikasil® GS-630: 0.5 MPa) is attained talk to Sika before continuing. The failure mode must be at least 95% cohesive.For details regarding this tensile adhesion test please refer to Sika’s Corporate Quality Procedure CQP 555-1 which is available upon request.Picture 11: PTFE spacers, PTFE tape Picture 12: Arrangement and fixation of the (recommended for 1-component samples with a rubber band and tapeadhesives) and substrate pieces(e.g. glass)Picture 13: Injection of the silicone Picture 14: Removal of excess of silicone adhesive adhesive into the jointPicture 15 Removal of PTFE tape after 7 days Picture 16 Alternative test arrangement (1-component adhesives). (suitable for profiles)The PTFE spacers should beremoved after 1 day already.Drawing 1 Dimensions of PTFE jig for alternative test arrangement6.9 Visual InspectionEach bonded element should be inspected visually in order to avoid mistakes in installation and adhesive application. The following should be checked for each panel:- Correct joint dimensioning according to the drawings- Complete joint filling according to drawings- No bubble inclusions in the joint- Correct installation of spacer tapes, gaskets, setting blocks, dead load support (if applicable).6.10 Factory DeglazingThe main purpose of this test is to identify joints that are inadequately filled as a result of difficult joint design (deep, narrow or L-shaped joints). Deglazing should be carried out before moving the bonded elements to the jobsite or when the adhesive has cured completely throughout.- Using a sharp knife, cut out an adhesive tab down as far as the spacer tape or spacer gasket. Cut as close as possible to the glass/metal interface so that approx. 1 to 2 mmof adhesive remains on the adhesive surfaces: Make one cut perpendicular to the jointand two cuts approximately 10 cm apart parallel to the glass and metal.- Pull the adhesive tab out of the joint at a 90° angle. The adhesive must tear 100% cohesively. It must not detach from either of the two adhesive surfaces and must notshow any air bubbles.- Check the joint dimensions and compare with values provided in the drawings and approved by Sika. Notify the Technical Service Department of Sika Industry immediatelyif the joint dimensions do not match the definitions in the drawing.- Immediately after the test, reseal the cut-out joint using the adhesive recommended by Sika. Prior cleaning is not necessary if the cut surfaces are clean and smooth,and sealing is carried out immediately after the test. When the repair adhesive hascompletely cured, the element can be installed in the façade (see chapter 5).- In the case of L-shaped or very deep joints, Sika recommends completely cutting out the glass pane and removing it. This allows a more accurate check on joint filling and airinclusions.The number and frequency of deglazing tests should be coordinated with Sika.。
建筑用硅酮结构密封胶实施细则

建筑用硅酮结构密封胶实施细则导言:构筑物的密封是确保其结构完整性和防水性的重要方面之一。
在建筑行业中,硅酮结构密封胶被广泛应用于各种密封工作中。
本文档旨在提供建筑用硅酮结构密封胶实施细则,以确保施工效果的质量和持久性。
一、胶料概述硅酮结构密封胶是一种高性能密封材料,主要由有机硅树脂、辅助填料和交联剂组成。
具有良好的耐高温、耐低温、耐候性和耐腐蚀性。
它可以有效填充和密封建筑结构的缝隙,防止水分、空气和灰尘的渗透。
二、施工前准备1. 确定施工区域:在施工开始前,明确需要进行密封的建筑区域。
仔细检查建筑结构的缝隙和裂缝,确保其干净和无尘。
2. 胶料选择:根据密封区域的特点和要求,选择适合的硅酮结构密封胶。
参考硅酮结构密封胶的技术规格,确定其适用性和性能指标。
3. 工具准备:准备必要的工具和辅助材料,如密封枪、刮刀、清洁剂、涂胶刷等。
确保这些工具干净且适合使用。
三、施工步骤1. 清洁和处理:在施工开始前,清洁待密封的表面,并确保其完全干燥。
若有需要,使用清洁剂去除污垢和油渍。
2. 胶料涂覆:将硅酮结构密封胶装入密封枪中,通过挤压胶枪使胶料均匀涂覆在需要密封的表面上。
注意保持施工速度均匀。
3. 封缝和填充:使用刮刀或涂胶刷将硅酮结构密封胶填充到需要密封的缝隙和裂缝中。
确保胶料充分填充,并使用刮刀平整表面。
4. 美观处理:根据需要,在密封完成后,使用刮刀或涂胶刷进行美观处理。
确保表面平整、无气泡和杂质。
5. 干燥时间:根据硅酮结构密封胶的规定,留出足够的干燥时间。
在此期间,避免人员和物体接触密封区域,以免影响施工质量。
6. 检查和维护:密封完成后,定期检查密封区域的状况。
如发现损坏或老化,及时进行维护和修补。
四、注意事项1. 安全措施:在施工过程中,注意使用个人防护装备,如手套、口罩、护目镜等。
避免密封胶直接接触皮肤和口腔。
2. 环境条件:施工时,注意环境的温度和湿度。
确保施工区域没有雨水、霜冻或强风。
3. 储存和保管:储存硅酮结构密封胶时,避免阳光直射和高温环境。
GBT16776建筑用硅酮结构密封胶

GB/T16776建筑用硅酮结构密封胶1 范围本标准规定了建筑用硅酮结构密封胶(简称硅酮结构胶)的术语、分类和标记、要求、试验方法、检验规则、包装、标志、运输和贮存。
本标准适用于建筑幕墙及其它结构粘接装配用硅酮结构密封胶。
2 规范性引用文件下列文件中的条款通过本标准的引用而成为本标准的条款。
凡是注日期的引用文件,其随后所有的修改单(不包括勘误的内容)或修订版均不适用于本标准,然而,鼓励根据本标准达成协议的各方研究是否可使用这些文件的最新版本。
凡是不注日期的引用文件,其最新版本适用于本标准。
GB/T 531-1999 橡胶袖珍硬度计压入硬度试验方法(ISO 7619:1986,Rubber-Determination hardness by means of pocket hardness meters,IDT)GB/T 13477.1-2003 建筑密封材料试验方法第1部分:试验基材的规定(ISO 13640:1999, Building construction—Jointing products—Specifications for test substrates,MOD)GB/T 13477.3-2003 建筑密封材料试验方法第3部分:使用标准器具测定密封材料挤出性的方法(ISO9048:1987,Building construction—Jointing products—Determination of extrudability of sealants using standardized apparatus,MOD)GB/T 13477.5-2003 建筑密封材料试验方法第5部分:表干时间的测定GB/T 13477.6-2003 建筑密封材料试验方法第6部分:流动性的测定(ISO 7390:1987,Building construction—Jointing products—Determination of resistance to flow,MOD)GB/T 13477.8-2003 建筑密封材料试验方法第8部分:拉伸粘结性的测定(ISO8339:1984,Building construction—Jointing products—Sealants—Determination of tensile properties,MOD)GB/T 13477.18-2003 建筑密封材料试验方法第18部分:剥离粘结性的测定GB/T 14682 建筑密封材料术语JC/T 485-1992(1997)建筑窗用弹性密封剂3 术语GB/T 14682确定的术语和定义适用于本标准。
硅酮结构密封胶使用规范
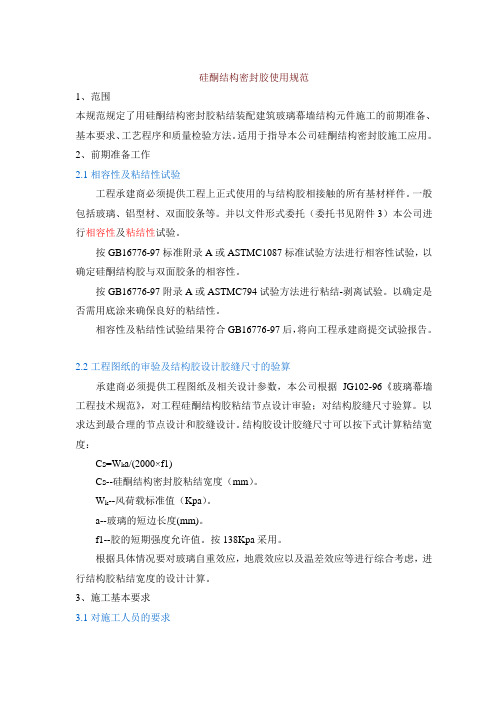
硅酮结构密封胶使用规范1、范围本规范规定了用硅酮结构密封胶粘结装配建筑玻璃幕墙结构元件施工的前期准备、基本要求、工艺程序和质量检验方法。
适用于指导本公司硅酮结构密封胶施工应用。
2、前期准备工作2.1相容性及粘结性试验工程承建商必须提供工程上正式使用的与结构胶相接触的所有基材样件。
一般包括玻璃、铝型材、双面胶条等。
并以文件形式委托(委托书见附件3)本公司进行相容性及粘结性试验。
按GB16776-97标准附录A或ASTMC1087标准试验方法进行相容性试验,以确定硅酮结构胶与双面胶条的相容性。
按GB16776-97附录A或ASTMC794试验方法进行粘结-剥离试验。
以确定是否需用底涂来确保良好的粘结性。
相容性及粘结性试验结果符合GB16776-97后,将向工程承建商提交试验报告。
2.2工程图纸的审验及结构胶设计胶缝尺寸的验算承建商必须提供工程图纸及相关设计参数,本公司根据JG102-96《玻璃幕墙工程技术规范》,对工程硅酮结构胶粘结节点设计审验;对结构胶缝尺寸验算。
以求达到最合理的节点设计和胶缝设计。
结构胶设计胶缝尺寸可以按下式计算粘结宽度:Cs=W k a/(2000×f1)Cs--硅酮结构密封胶粘结宽度(mm)。
W k--风荷载标准值(Kpa)。
a--玻璃的短边长度(mm)。
f1--胶的短期强度允许值。
按138Kpa采用。
根据具体情况要对玻璃自重效应,地震效应以及温差效应等进行综合考虑,进行结构胶粘结宽度的设计计算。
3、施工基本要求3.1对施工人员的要求实现玻璃幕墙单元件的粘结密封,依赖于施工操作人员的高度责任心和严格、熟练的正确操作,这些人员应具有以下条件:3.1.1有高度责任心,懂得玻璃幕墙的安全可靠性与施工质量密切相关。
3.1.2熟悉结构胶施工工艺程序,熟练掌握粘结密封操作技术和施工工具;能看懂工程图纸规定的粘结密封部位及配套材料状况。
3.1.3掌握粘结密封失败后的排故方法和技术安全的基本知识。
- 1、下载文档前请自行甄别文档内容的完整性,平台不提供额外的编辑、内容补充、找答案等附加服务。
- 2、"仅部分预览"的文档,不可在线预览部分如存在完整性等问题,可反馈申请退款(可完整预览的文档不适用该条件!)。
- 3、如文档侵犯您的权益,请联系客服反馈,我们会尽快为您处理(人工客服工作时间:9:00-18:30)。
硅酮结构胶装配质量控制手册梦想启动未来前言20世纪中期以来, 由于建筑材料的发展, 最初的混凝土墙体被玻璃, 铝板, 石材等各种材料所取代, 到目前为止幕墙系统得到了长足的发展。
建筑外墙最大的成功是将它的外观表现和使用功能得到完整的结合。
对于使用功能来讲, 多表现为其防雨水, 防气漏, 隔音, 保温等耐候性能。
检验建筑物外墙耐候性能好坏的一个重要因素就是密封胶的性能。
1947年××公司建立了世界上第一个有机硅生产基地, 进行全球性的密封胶研究、生产和销售。
半个多世纪以来, ××公司对于硅酮胶积累了丰富的经验, 不仅提供优质的产品, 而且提供客户完整的解决方案。
在所有结构胶、密封胶使用过程中,××公司都要求客户严格按照产品操作管理手册进行加工和管理。
对于不同项目的需求××公司提供以下服务:●××公司对工程进行合理化建议, 提供正确的密封胶。
●对密封胶的接口图纸设计进行审核。
针对客户的不同应用,××公司的技术人员能够提供适合的产品建议。
在选用××密封胶产品前,××技术人员会对工程内所有使用的硅酮结构胶, 耐候胶的应用进行审核, 在工程开始以前, 图纸审核及实验测试必须完成。
●××公司将对所有与密封胶接触的基材进行粘着性测试, 对与密封胶接触的双面胶条,橡胶垫块,泡沫棒等进行相容性测试, 对石材进行污染性测试。
●××公司对于具体工程进行现场技术支持。
结构胶的施工为了更好地确保结构胶的表现, 请严格遵守下列施工步骤。
同时请记录有关打胶细节, 这也是获得××公司质量保证的必要条件。
由于环境的千差万别, 此施工步骤并不能被视为唯一的质量保证标准, 具体情况请咨询××公司相关技术人员。
1. 施工温度的影响××公司的结构胶在很宽的施工温度范围内(-40ºC ~+80ºC) 都可以挤出使用。
但××公司一般建议客户的施工温度为4ºC ~49ºC, 在此范围内密封胶容易施工效果较好。
然而在北方温度较低的时候, 对于施工控制一般来说比较困难, 施工时请注意以下几点:i) 表面的清洁。
接口表面必须是干净、干燥、无灰尘污油污. 在冬季,材料表面容易产生霜冻, 必须在注胶前清理干净, 可以选用适当的溶剂清洗. IPA (异丙醇) 是一种较好的清洁剂, 可以溶解在水中,所以非常适合在冬天使用,它能有效去除基材表面的冷凝水及霜冻, 形成干净的表面。
也可选用其他溶剂,需要进行现场测试确保表面清洁。
ii) 在清洁完毕以后, 尽快施打密封胶, 建议在30分钟内, 以免在表面重新结霜。
iii) 底漆的使用不仅可以增加材料的粘接性, 而且可以加快密封胶和基材的粘接力的产生。
iv) 在冬季施工, 由于温度和湿度都比较低, 产品固化的时间较在标准条件下有所增长。
2. 材料的清洁步骤1. 对于需要用结构胶粘接的基材应除去所有松散物质(如污物和灰尘) ,任何油类、霜或其它污物。
2. 用“两块抹布二次擦拭”的方法清洁需要施用结构胶的基材表面:a) 非多孔性材料用溶剂浸湿一块干净的抹布,并用它擦拭整个与结构胶接触的区域,然后用第二块抹布在溶剂挥发之前将溶剂及污物从基材表面擦去。
b) 多孔性材料能够吸收液体的基材均被视为多孔性材料。
对于一些多孔性材料, 如混凝土、花岗岩、大理石、其他石材,拂去灰尘是不足够的, 多孔性材料表面清洁必须用钢丝刷、真空吸尘器和用不含油的压缩空气清除表面上疏松的颗粒。
若表面是脏的,就必须用溶剂使用“二块抹布清洁法”来进行清洁,在施打胶前,必须等其挥发完毕。
3. 应注意不要让已被溶剂清除的污物落到已清洁过的表面上,因为任何残余物都会使板材(上漆金属或反光玻璃) 表面变色或污染。
4. 当清洁深而窄的接口时,将干净的抹布缠绕在一个干净的窄锋软膏刀/油灰刮刀上,这样可以着力于被清洁表面。
5. 最好于清洁完一小时内注胶(对灰尘更多的环境时间更短)。
如果已清洁的表面重又暴露于雨水或污物中,应再次清洗此表面。
6. 在抹布被染污后应及时更换干净的,应使用小块白色抹布。
因为这样容易看出染污以及在每次清洁之后丢弃掉。
7. 不要用使用过的抹布浸蘸溶剂,这将会污染所有的溶剂,应将溶剂从小容器内倾倒在干净抹布上,并且应使用干净的容器贮存溶剂。
用污染的溶剂清洗会产生结构胶粘合不好等问题。
8. 清洁剂一般推荐采用异丙醇(IPA) 、丁酮(MEK) 、二甲苯(XYLENE) 等。
在不同工程中使用的溶剂,在测试时请注明具体工程使用的清洁剂。
使用未经粘合测试报告指明的溶剂时,应向××公司询问。
9. 溶剂清洗应在良好通风的地方进行。
使用溶剂之处附近不应有任何种类的烟、火花、电焊和火苗,应遵守清洗溶剂警告标签上的所有要求。
3. 底漆的施打步骤1. 正确使用底漆或助粘剂有助于使原本不易粘合的表面产生强而持续的密封粘合。
它能够有助于加速结构胶粘合的进展,特别是在低温的情况下施工。
2. 底漆应在溶剂清洗之后施用结构胶之前使用。
3. 在小容器内倒入足够立即使用的底漆,将装有剩余底漆的瓶子盖紧,以防其变干或水分渗入到底漆中。
4. 必要时遮盖住接口边缘以防止底漆施于接口面以外的区域。
5. 用自然硬手刷或一个干净的无绒棉布或其它认可的擦拭材料在接口表面涂上一层薄而均匀的底漆,切勿倾倒或过多使用底漆, 否则会导致胶与底漆之间粘着力的丧失。
过量多余的底漆可用一块清洁、干燥及不脱绒的布或者非金属丝刷在打胶前先清除。
6. 必须在底漆完全干化后才能施用密封胶,否则会使粘合能力下降。
底漆干化时间取决于环境温度和湿度。
大多数底漆含有快速蒸发溶剂,因此干燥时间大多介于3-5分钟(根据不同情形,挥发速度有所不同,具体请咨询××技术人员)。
7. 仅对将于1小时之内进行密封的表面施用底漆,当灰尘较多时,密封胶应在底漆干燥后立即施用。
8. 底漆内含有挥发性溶剂,因此应在通风较好的地方施用底漆。
使用底漆的地方及其附近不能有任何类型的烟、火花、电焊和火苗。
9. 对相关基材仅使用粘合测试报告中指明的底漆类型,请咨询××有机硅代表关于底漆的推荐和使用底漆的事项。
4. 密封胶的应用程序1. 在施用底漆之前,如果需要可用掩盖纸胶带将接口外表面掩盖住。
2. 用盖布将结构胶施用区域之下的任何水平表面盖住以防止在刮胶期间刮下的多余的结构胶污染这些区域。
3. 单组份结构胶可以直接从筒状/肠状包装中用手动或气动喷枪来使用,气动喷枪的操作压力不宜超过40psi,以防止密封胶内产生气泡。
4. 双组份结构胶须使用打胶泵设备,按特定比例均匀混合,参阅双组份结构胶质量控制程序,并向××公司技术人员咨询泵的类型和操作程序。
5. 结构胶的施用应用一次完整的操作来完成,使结构胶均匀连结地以圆柱状挤出注胶枪嘴。
枪嘴出口直径应小于注胶接口厚度,以便枪嘴伸入接口1/2深度。
枪嘴应均匀缓慢地移动并确保接口内已充满结构胶,防止枪嘴移动过快而产生气泡或空穴。
6. 施用了结构胶之后立即进行表面修饰,通常的方法是用一刮刀用力将接口外多出的结构胶用力向接口内压并顺序将接口表面刮平整,使结构胶与接口的侧边相接触。
这样有助于减少内部空穴和保证良好的基材接触。
7. 不要用水、肥皂或洗涤剂压实,因为它们可能会污染表面附近未固结的密封胶。
8. 压实完成后立即除去掩盖纸胶带。
9. 在较低的温度下施工(施工温度在4ºC以下), 请遵循”施工温度的影响”;不要在基材表面非常热(大于49ºC) 的情况下施用结构胶,如果将密封胶施于很热的基材上时可能会在基材表面附近产生气泡。
10. 在结构胶施用和表面修饰后,随即在玻璃─铝框上标上日期及编号,水平搬放至固化养护区进行养护。
在搬放过程中不允许使结构胶接口及其相粘合的基材间产生任何的位移和错位,否则会影响密封胶的粘合质量。
11. 在固化期间不要再次搬动,固化期玻璃─铝框不要受阳光的照射。
12. 在确定接口内的密封胶完全固化后才能搬动玻璃─铝框,并经过认真的切装配框检查合格后才能装运和安装。
结构装配的质量控制1. 总则1. 在工程开始之前,凡与结构胶相接触的所有基材均需在××实验室(或国家实验室)进行粘合性和相容性测试,基材样品应为本工程所用有基材的代表。
2. 在工程进行过程中,如果某些基材的表面可能与已经测试的样品不符,如供应商、油漆表面装饰的改变等,则应将新样品再送交××实验室。
3. 工程开始之前结构胶应用的各节点细节需经××检验和认可,因此任何原因造成的现场变化都应向××公司做咨询。
4. 工程开始之前,应对实际幕墙组框进行粘合剥离与切开检测,以确定底材上的结构胶在特定工厂环境和大气条件下的固化及粘合发展情况。
5. 对于双组份结构胶,在每次开泵注胶装配的一开始都必须进行蝴蝶测试,以检查是否混合均匀。
在装配的每一天必须至少进行一次拉断时间测试。
6. 粘合剥离样品(通常是大约300毫米长铝型材或玻璃) 应在每天工厂或工作现场准备。
应记录样品制备的日期和使用的结构胶的批号。
当温度大于20°C时,对单组份结构胶应在7-10天后进行粘合剥离测试,以检测粘合性,对双组份结构胶应在3-4天后进行检测。
7. 如果有任何的粘合剥离样品显示出较差的粘合结果,那么当天装配的产品板材应作为失败的并进行切装配框以检测粘合性。
因为剥离样品的粘合失败可能是由于很多原因,包括表面清洁不净、基材装饰变化、结构胶性能变化等,应尽快与供应商和××公司技术代表取得联系确定原因和补救措施。
8. 即使剥离样品显示出好的粘合性,幕墙制造商仍应对任意抽样的板材进行常规的切开装配框测试,以检测密封胶使用中的实际粘合和操作。
对于主要的工程和要求书面保证的工程,××公司的代表应至少一次在场,以亲眼目睹切装配框测试及其结果并记录在表中。
有××代表在场的情况下进行的切开装配框测试数量,应在工程开始之前由制造商和××公司协定。
9. 制造商必须保留所有板材的完整的装配记录(施工日期、密封胶的类型和批号等等) 和所进行的质量控制记录(粘合、剥离性、蝴蝶测试和拉断测试等)。
10. 所有的幕墙板材必须具有识别标签或标记,这些可以用来追踪装配的日期、密封胶的批号以及在幕墙上的实际安装位置。