淋浴房一固二连动款安装说明书
尚高淋浴房多林1661-1安装使用说明书
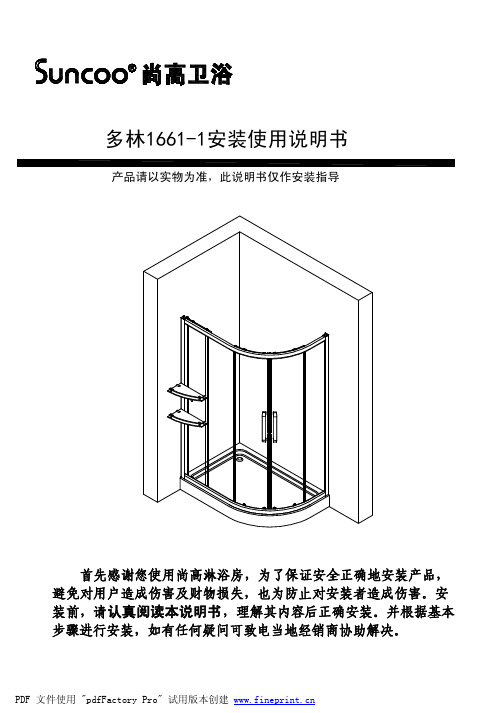
多林1661-1安装使用说明书首先感谢您使用尚高淋浴房,为了保证安全正确地安装产品,避免对用户造成伤害及财物损失,也为防止对安装者造成伤害。
安装前,请认真阅读本说明书,理解其内容后正确安装。
并根据基本步骤进行安装,如有任何疑问可致电当地经销商协助解决。
产品请以实物为准,此说明书仅作安装指导钢化玻璃不能进行切割、钻孔或硬物敲击;搬移或安装过程中,小心确保玻璃边、角部位不受撞击,以防爆裂伤人。
建议:将本产品安装在尚高淋浴底盆或石基上,开始淋浴房安装前,请拿出、排列并确认所有的零部件。
1.贴墙铝材 2支2.带磁条边铝材 1支3.11*10软平磁条 1支4.双齿单边胶条 2支5.6厘180°磁条 1支6.上导轮 6套7.小活动玻璃 1片8.F形挡水胶条 6支9.细夹铝材 1支10.固定玻璃共2片11.弧玻 2片12.上、下路轨各1支13.90°、135°磁条各1支14.边铝材 1支15.置物架 2套16.小锥形拉手 1套17.下导轮 6套18.拉手 2套19.去水器 1个20.底盆 1套安装步骤:è①将底盆去水安装好并放置到指定的安装位置,调整底部水平支撑角上螺母并观察支撑角,直至盆面水平,要求每个支撑点都应与地面直接接触(如图1);若使用石基,则将其放置在指定的安装位置,用卷尺测量两边是否符合尺寸,并用水平尺测量石基表面是否水平,用水泥或玻璃胶将其固定密封。
Arrayè②(注意区分上、下框架放置在底盆位置与其呈一平行线位标记,(如图2)è③移开贴墙铝材及框架,在已画记号地方钻孔,打入膨胀胶粒,用锤子将其打入墙体内,然后把淋浴房框架放置在底盆(或石基)上,用的自攻螺丝将贴墙铝材固定在墙上,并盖上装饰盖。
(如图3)图3è④将框架两边卡入贴墙铝材,如发现安装位置与墙面上下不垂直时,需调整直至贴墙铝材和边铝材完全吻合,然后在调节位置(一般均在边铝材的上端或下端)各钻一个3.2的孔,用STX14的自攻螺丝左右各一个将其固定并盖上装饰盖。
淋浴房技术手册

淋浴房技术手册淋浴房技术手册1:简介1.1 本手册的目的本手册旨在提供淋浴房的技术指导,包括使用方法、安装要求、维护保养等方面的详细信息,以帮助用户正确使用淋浴房,并确保其长时间、安全地使用。
1.2 读者对象本手册适用于淋浴房的用户、安装工程师、维护人员等有关人员,提供相关技术知识和操作指南。
2:淋浴房的类型2.1 固定式淋浴房2.1.1 定义固定式淋浴房是指一种完全固定在墙壁和地板上的淋浴设备,它通常由淋浴板、围栏、淋浴系统等组成。
2.1.2 材料固定式淋浴房通常使用不锈钢、玻璃、钢化玻璃等材料制作。
2.1.3 安装要求固定式淋浴房需要安装在墙壁和地板上,确保固定稳固,符合相关安装标准。
2.2 可移动式淋浴房2.2.1 定义可移动式淋浴房是指一种可以拆卸和移动的淋浴设备,它通常由淋浴板、围栏、淋浴系统等组成。
2.2.2 材料可移动式淋浴房通常使用塑料、铝合金、玻璃纤维等材料制作。
2.2.3 安装要求可移动式淋浴房需要放置在平稳的地面上,确保稳定,避免倾斜和不安全的情况。
3:淋浴房的安装3.1 安装准备工作3.1.1 确定安装位置在安装淋浴房之前,需要确定合适的安装位置,考虑到水和电源的供应、排水系统的设置等因素。
3.1.2 准备所需工具和材料在安装淋浴房之前,要准备必要的工具和材料,如螺丝刀、电钻、扳手、胶水、密封胶等。
3.2 安装步骤3.2.1 固定式淋浴房的安装a) 安装墙面支架:根据淋浴房的尺寸和材料,安装相应的墙面支架。
b) 安装地板底座:在地板上安装淋浴房的底座,确保牢固。
3.2.2 可移动式淋浴房的安装a) 拼装淋浴板和围栏:根据说明书的指导,将淋浴板和围栏进行拼装。
b) 连接淋浴系统:将淋浴系统与淋浴板连接,确保连接紧固。
4:淋浴房的使用方法4.1 打开水源在使用淋浴房之前,需要打开水源,确保水流通畅。
可以根据需要调节水温和水压。
4.2 进入淋浴房打开淋浴房的门,进入淋浴房,并确保门关好,防止水溅出。
淋浴门安装说明书

Pleasekeepthismanualandproductcodenumberforfuturereferenceandfororderingreplacementpartsifnecessary.GENERAL INSTRUCTIONS● Read this manual carefully and completely before proceeding.● It is recommended that you wear safety glasses at all times during the installation.INSTALLATION OVER CERAMIC TILES● If your shower door is to be installed over ceramic tiles, the tiles should lay completely under the wall jamb.● Silicone should be used to seal the gap where the ceramic tiles meet the fixed panel.NOTICE● Caulking : no sealant is required inside the shower, unless otherwise stated.● Some models are equipped with clear sealing gaskets.CARE FOR YOUR SHOWER DOOR● Never use scouring powder pads or sharp instruments on metal pieces or glass panels.An occasional wiping down with a mild soap diluted in water is all that is needed to keep the panels andmetal parts looking new● We recommend wiping the glass panels with a squeegee after each use.Product specifications are subject to change without noticeTools RequiredSpirit level Tape measure Power drill Drill Bits Screw driver Silicone GunPencil Hacksaw Rubber hammer Safety glassesDetailed Diagram of Shower Enclosure ComponentsFixed panel ①②③④⑤⑥⑦⑧⑩⑪⑨⑫⑬⑭⑮⑯Guide Rail 112StopperRoller-A1Glass fastener21Sliding door 1Roller-B1Fixed panel seal⑳⑰⑱⑲㉑Wall profile cover cap-A Wall profile cover cap-B 11Wall bracket-A Wall bracket-B 2248mm Wall plug 4screw ST5x401Back to back door pull1Door sealPicture Qty 1234567810111213141516181920211screw ST4x3016mm Wall plug1Guide block1Door sweep1Anti-splash thresholdPicture Qty PictureQty①②AA-1 AAA-2A-3A-4R a i ll e n gt h =E -1"F i x e dp a n elEFF-1F-2F-4F-3F⑤⑥GGGHHS l i d in g do o rH-1H-2①②③Sliding door①②H-3HHJJ Fixed panelSliding doorKM MK ⑧。
欧萝芭整体淋浴房使用说明书

欧萝芭整体淋浴房使用说明书1. 引言欧萝芭整体淋浴房是一款高品质的淋浴设备,它采用先进的技术和设计,为用户提供舒适、安全和便利的淋浴体验。
本使用说明书将详细介绍欧萝芭整体淋浴房的安装、使用和维护方法,以确保用户正确操作并延长产品寿命。
2. 安装2.1 准备工作在安装之前,请确保您已具备以下准备工作: - 确定所选位置是否合适,并留出足够的空间进行安装和使用。
- 确保水源、电源和排水管道的位置符合要求。
- 检查所需安装工具是否齐全。
2.2 安装步骤请按照以下步骤进行安装: 1. 清理安装区域,确保地面平整、干净。
2. 根据产品尺寸,在地面上标记出正确的位置。
3. 使用电钻将固定螺丝孔打入地面,并插入膨胀螺丝。
4. 将底座固定在地面上,并使用水平仪进行调整,确保底座水平。
5. 根据产品要求,连接水源和排水管道。
6. 将淋浴房主体组件安装在底座上,并使用螺丝固定。
7. 安装调节阀和喷头,确保连接紧固。
8. 检查所有连接是否牢固,并进行最后的调整。
3. 使用方法3.1 打开淋浴房在使用欧萝芭整体淋浴房之前,请确保以下操作: - 关闭冷热水阀门,以免热水或冷水直接喷出。
- 检查排水管道是否通畅。
3.2 调节温度和水流欧萝芭整体淋浴房配备了温度和水流控制器,您可以按照以下步骤进行调节: 1. 打开冷热水阀门,调节至适宜温度。
2. 转动控制器,调整所需的水流强度。
3.3 进入淋浴房当您完成温度和水流的调节后,请按以下步骤进入淋浴房: 1.打开淋浴房门,并确保门关闭完全。
2. 在进入之前,检查地面是否湿滑,以免滑倒。
3.4 使用注意事项 - 在使用淋浴房时,请不要过度用力关闭门,以免损坏门轨道。
- 使用淋浴房时,请注意保持平衡,以避免摔倒。
- 使用结束后,请及时关闭冷热水阀门,以节约能源。
4. 维护与清洁为了保持欧萝芭整体淋浴房的良好状态和延长使用寿命,请按照以下建议进行维护和清洁: - 每次使用后,用软布擦拭淋浴房表面,以去除水渍和污垢。
科勒诗乐开门淋浴房一固一活安装说明书

SKYLINE 诗乐INSTALLATION INSTRUCTIONS安装说明书PIVOT, SCREEN, 1D1P (ON WALL), 8mm 开门淋浴房,一字型,一固一活(上墙),8mmK-81017T-FM-SHPZHONGSHAN KOHLER SHOWER CO., LTD. NO13-1, XINGYE ROAD, ZHONGSHAN TORCHDEVELOPMENT ZONE, ZHONGSHAN, GUANGDONG, CHINA POST CODE: 528437中山科勒卫浴有限公司 广东省中山市中山火炬开发区兴业路 13-1 号 邮编:528437• 说明书中所有的资料是按最新出版的产品资料编写而成。
科勒中国有限公司保留任何时候无须通知即可改变产品特性、包装或产品可供类型的权利。
• 说明书包括重要的安装、清洁及保养方面的内容,请把这些资料交给用户阅读,保管。
• 确保在安装淋浴房之前已经完整正确地安装了浴室和完工墙面材料。
淋浴区墙地面应做防水处理,并不得布置有电器开关、插座。
确保地面排水通畅。
• 在进行淋浴房安装之前,请拿出、排列并确认所有的零部件。
请参考第 2 页上所示的分解图。
• 对尺寸与本标准产品不同的定制淋浴房,参照本说明书进行安装。
• 本产品符合 QB 2584-2007。
• All information is based on the latest product informationavailable at the time of publication. Kohler China Ltd. reserves the right to make changes in productcharacteristics, packaging, or availability at any time without notice.• These instructions contain important care, cleaning, andwarranty information-please leave these instructions for the consumer.• Make sure that the bath and the finished wall material arecompletely and correctly installed prior to installing your shower door. Prepare waterproof layer to wall and floor of the showering area. It is not allowed for any presence of electric switches and sockets. Make sure the floor drain runs smoothly.• Before starting the door installation, lay out and identify allthe parts. Use the exploded view illustrated on page 2 for reference.• For the installation method of customized shower withdifferent dimensions, please refer to this instructions.• The product complies with QB 2584-2007.警告:可能有人员伤害或者产品损坏的危险。
淋浴设备使用说明书
淋浴设备使用说明书Section 1:安全须知1.1 使用前的准备在使用淋浴设备之前,请确保已经仔细阅读并理解该使用说明书的内容。
如果有任何疑问,请咨询专业人士。
1.2 电源要求淋浴设备的电源需求是XXX伏特,XXX安培。
请确保插座和电源线符合设备的电气要求。
1.3 安全使用为了确保您的安全,请严格按照以下步骤操作淋浴设备:a) 在使用之前,请确保产品外观完好并未受损。
b) 使用干燥的手操作控制面板,避免发生电击危险。
c) 在淋浴过程中,避免将电源线接触到水源。
d) 使用结束后,请将淋浴设备的电源断开。
Section 2:产品组装2.1 零部件清单在开始组装淋浴设备之前,请确保您已经收到以下零部件:a) 主机及其配件b) 水龙头和喷头c) 控制面板和线缆d) 安装必备的螺栓和螺母e) 其他(根据实际情况而定)2.2 组装步骤为了确保正确组装淋浴设备,请按照以下步骤进行操作:a) 首先,清洁并准备好地面,确保无尘无污染。
b) 按照组件清单,将各个组件按照说明书上的指示连接到主机上。
c) 安装好水龙头和喷头,并确保紧固。
d) 连接控制面板和主机,确认线缆连接正确无误。
e) 最后,将淋浴设备固定在合适的位置,并进行测试以确保所有功能正常。
Section 3:使用方法3.1 操作面板淋浴设备配备了智能控制面板,以方便用户进行操作。
以下是操作面板上的主要功能:a) 开/关机按钮:长按此按钮可打开或关闭淋浴设备。
b) 水温调节:通过旋转按钮可以调整淋浴水温。
c) 喷头选择:通过点击按钮选择不同的喷头模式。
d) 时间控制:可以设置淋浴时间,确保淋浴过程合理节水。
3.2 淋浴过程以下是淋浴设备的使用步骤:a) 打开淋浴设备电源。
b) 调节水温至合适的舒适度,以确保您的舒适感。
c) 选择您喜欢的喷头模式,如按摩、雨淋等。
d) 开始淋浴,并确保躺在安全舒适的位置。
e) 在您设定的时间结束后,淋浴设备会自动关闭。
如需提前结束,您也可以手动关闭。
淋浴房安装步骤,看完你就明白了!
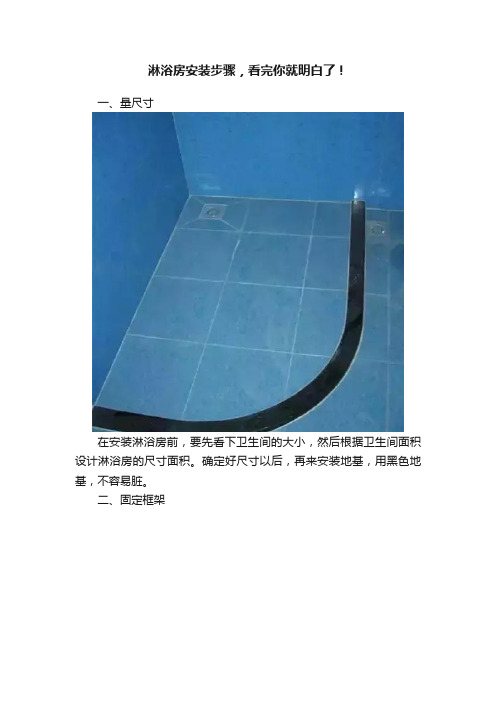
淋浴房安装步骤,看完你就明白了!
一、量尺寸
在安装淋浴房前,要先看下卫生间的大小,然后根据卫生间面积设计淋浴房的尺寸面积。
确定好尺寸以后,再来安装地基,用黑色地基,不容易脏。
二、固定框架
淋浴房尺寸量好了以后,做好标记以后就可以开始在墙上打孔固定框架了。
三、上螺丝固定
四、安装钢化玻璃墙
固定好框架后,就是装上6厘全钢化玻璃墙,就是上下各用两个U型槽仔夹紧玻璃,卡在铝合金框架上就可以啦。
五、安装玻璃门
安装双开弧形的淋浴门,这是用上下各两个两轮吊轨安装在铝合金框槽,左右两边各装上一个止动防撞珠就可以啦,请看图:右边的那两个是吊轮,左边那个透明的就是止动防撞珠啦!
六、安装拉手
把手设计的都有相应的螺丝孔,只用用螺丝刀拧上即开。
七、防积水
防积水淋浴房在铝合金框的下部分是L型设计的,一般的淋浴房都是U型设计的,这样,通常冲完凉后就积了一圈水,清洁也麻烦!L 型的有水也自己流走了,根本不用清理,可谓懒人设计呀!。
宝丽莱淋浴房安装说明书(适用于其它品牌淋浴房的安装 )
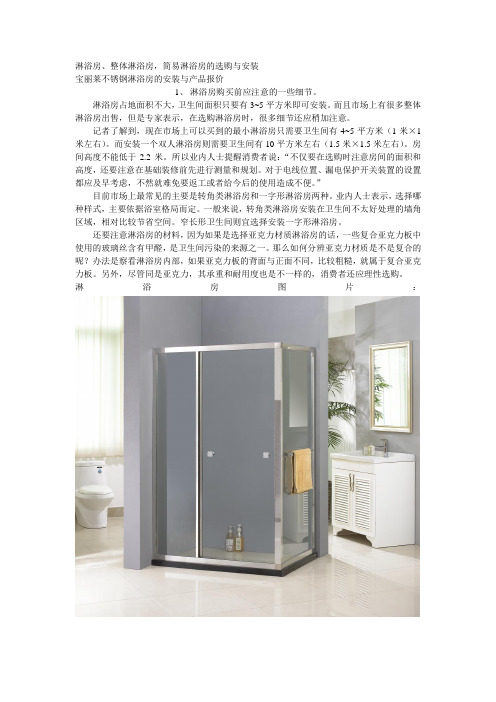
淋浴房、整体淋浴房,简易淋浴房的选购与安装宝丽莱不锈钢淋浴房的安装与产品报价1、淋浴房购买前应注意的一些细节。
淋浴房占地面积不大,卫生间面积只要有3~5平方米即可安装。
而且市场上有很多整体淋浴房出售,但是专家表示,在选购淋浴房时,很多细节还应稍加注意。
记者了解到,现在市场上可以买到的最小淋浴房只需要卫生间有4~5平方米(1米×1米左右)。
而安装一个双人淋浴房则需要卫生间有10平方米左右(1.5米×1.5米左右)。
房间高度不能低于2.2米。
所以业内人士提醒消费者说:“不仅要在选购时注意房间的面积和高度,还要注意在基础装修前先进行测量和规划。
对于电线位置、漏电保护开关装置的设置都应及早考虑,不然就难免要返工或者给今后的使用造成不便。
”目前市场上最常见的主要是转角类淋浴房和一字形淋浴房两种。
业内人士表示,选择哪种样式,主要依据浴室格局而定。
一般来说,转角类淋浴房安装在卫生间不太好处理的墙角区域,相对比较节省空间。
窄长形卫生间则宜选择安装一字形淋浴房。
还要注意淋浴房的材料,因为如果是选择亚克力材质淋浴房的话,一些复合亚克力板中使用的玻璃丝含有甲醛,是卫生间污染的来源之一。
那么如何分辨亚克力材质是不是复合的呢?办法是察看淋浴房内部,如果亚克力板的背面与正面不同,比较粗糙,就属于复合亚克力板。
另外,尽管同是亚克力,其承重和耐用度也是不一样的,消费者还应理性选购。
淋浴房图片:关注墙体防渗,汲排水和地漏的处理细节淋浴文化在现代人生活中逐渐被重视,进而展现出无穷的魅力和生机,装点卫生间,打造浪漫生活是家居装修的重头戏,一个经过巧妙构思及用心打点的卫生间,除了赏心悦目以外,请关注墙体防渗,汲排水和地漏的处理细节,做好细节免却日后烦恼。
墙体防渗的处理—房地产公司的毛坯房墙体是未经过防水处理的,在贴磁砖前应事先刮一层防渗水泥然后再贴磁砖,贴完磁砖后应要求装修工人对磁砖缝进行墙缝处理,这样可避免卫生间的水通过砖缝渗透到外墙,免受不厌其烦之苦。
淋浴房安装步骤说明

淋浴房安装步骤说明淋浴房的安装步骤可以分为以下几个步骤:1.准备工作:在开始安装淋浴房之前,首先需要准备必要的工具和材料,例如切割工具、螺丝刀、螺丝扳手、墙面防水材料、密封胶等。
还需要测量淋浴房的尺寸,确保安装的尺寸合适,并购买符合尺寸的淋浴房。
2.安装基座:首先要安装淋浴房的基座,基座通常由铝合金或塑料材质制成。
将基座放置在淋浴区域,并使用水平尺测量确保其水平。
然后使用螺丝固定基座的每个角落。
在固定之前,还需要在基座底部涂抹一层密封胶,以防止水分渗透。
3.安装玻璃墙:接下来,安装淋浴房的玻璃墙。
先在地面上铺好保护垫,然后将玻璃墙放置在基座上,确保其与基座紧密贴合。
使用螺丝固定玻璃墙,并使用水平尺来检查其垂直度。
如果有必要,可以使用垫片调整玻璃墙的位置。
安装完第一块玻璃墙后,再安装其他的玻璃墙,确保它们之间的缝隙均匀。
最后,使用密封胶在玻璃墙与基座之间进行密封。
4.安装淋浴门:在安装淋浴门之前,先确保门框的尺寸与淋浴房的尺寸相匹配。
将门框插入到玻璃墙的垂直槽中,然后固定门框与玻璃墙的连接件。
确保门框的水平度,并对其进行调整,以使门开关顺畅。
安装完门框后,再安装门扇,确保门扇与门框紧密贴合,没有松动。
5.安装喷头和其他配件:安装淋浴房的最后一步是安装喷头和其他附属配件,例如挂钩、花洒架等。
根据喷头和配件的类型和规格,使用工具将它们固定在适当的位置。
确保管道连接牢固,并使用密封胶对连接处进行密封,以防止漏水。
6.测试和清洁:在安装完成后,进行必要的测试,例如打开水龙头,测试水流和喷头是否正常工作,检查是否有漏水等问题。
如果发现问题,及时进行修复。
然后,清洁淋浴房的外表面,并清除安装过程中留下的任何污垢和残留物。
总结:以上是淋浴房的安装步骤。
在安装之前,确保做好必要的准备工作,并且按照正确的步骤进行安装。
如果对安装程序不熟悉,建议请专业人士进行安装,以确保安装质量和使用安全。
乐斯怡淋浴房使用说明书

乐斯怡淋浴房使用说明书
乐斯怡整体淋浴房使用说明书
步骤一:先在要安装的位置安置好石基,将下轨安置在石基正中间,再安装左右两侧固定玻璃。
然后再安装两侧边料(安装边料时应先将铝材塞卡入上下到过中再用4*35的螺丝将边料与上下导轨锁住)。
步骤二:将靠墙铝材卡入左右两边的边料中;再将装好的淋浴房框架放置在石基正中间,在调节好放置位置后,在靠墙铝材上开孔处用铅笔做上标记;用充气钻在墙面所做标记处钻孔;。
用胶锤将绿色膨胀胶锤入墙体;将装好后的淋浴房房体框架移至到石基上用螺丝锁住并装上螺丝装饰盖。
步骤三:安装上滑轮;将安装好上滑轮的活动玻璃挂装入上导轨中。
步骤四:安装活动门玻上的下滑轮,由于活动门已经挂装在上导轨上,活动门玻上的下滑轮安装时安装方法(先将滑轮安装在活动门玻璃上,由于下滑轮是可以调节的在安装好下滑轮后,按住调节键在将其卡入下轨);安装挡水条与磁条;安装活动门玻上的拉手。
注意事项一:保证滑轮运行轨道的顺畅,推拉不畅时可加些润滑油或花生油。
注意事项二:当轨道式淋浴房的滑轮处于松动或脱落状态时,要及时找维修人员调整保证滑轮对活动门的有效承载,再用纸巾沾花生油清洁轨
道内的异物,保证顺畅滑动;避免用力撞击活动门,以免造成活动门脱落。
注意事项三:不得用尖锐硬物撞击玻璃,特别是四边四角。
整体淋浴房安装说明书(卫浴)

Cabin Installation1. Choose the location where you will be installing the tray, mark the location of the traybecause you may need to move it out from the position for better assembling procedure.Check on the drain if it is fastened tight enough to make sure it won’t leak after complete tray installation.2. Also сheck all the hose connections to prevent leakage. Your plumber may want toreplace the drain flex hose to hard PVC pipes which is also possible (instructions are provided in the manual).3. For installation of the drain in the floor please refer to the Legs and frame position(top view) fig 1 (actual position of the drain and frame on the tray).4. Secure the two vertical profiles and the bottom guide rail with ST4.2×30 round head selftapping screws (fig 2);5. Fasten the top guide rail to the vertical profiles with ST4.2×30 round head self tappingscrews.6. Insert the stationary glass panels into the frame of the vertical profiles and the guiderails. Use the stationary glass holders to secure the glass in the frame. Tap in the single side strip to make the connection waterproof (fig 3);7. Place the tray in the required position. You may need to take off the front skirting panelfor easy access. Adjust the legs to level the tray in case the surface is uneven. Fasten the counter nuts on the legs to secure the height (fig 4);8. Move the tray out. Clean the surface of the tray threshold and apply a layer of siliconeon to the edge; put the back panel onto the tray and fix them with M6×20 bolt sets (fig5 & 6);9. Clean the front threshold of the tray and apply a layer of silicone. Put the glassenclosure assembly onto the tray and adjust the position. Use M6×16 bolt sets to connect the vertical profiles and back panel (fig 7);10. This step applies to those units that came with the roof kit:Clean the top surface of the built enclosure assembly and apply a layer of silicone. Put the roof on the fixed shower enclosure and using M6×20 bolt sets connect it to the back panel; (fig 8);If your unit came without roof kit, please, make sure there is a block nut secured on the top valve on the back of the wall.11. Your unit can be shipped to you with the wheel assembles installed on the doors. If not,please refer to diagram (fig 9) how to install it. Attach the top and bottom wheels to the glass doors. The wheel that goes on the top has an adjustable screw and nut to adjust the door level. Note that the lock nut of upper wheel should face up. The bottom wheel has a press button to fix the wheel on the bottom guide rail; that button should face up (fig 9);12. Secure the handles to the doors. Slide the top door wheels into the top guide rail andpush the bottom wheels in the bottom guide rail by pressing down the button. Attach the magnetic strips to the glass doors. Use the Phillips screwdriver #2 (do not use power screwdriver) to adjust the upper wheels, make sure they move smoothly and the doors close tight. Then attach the anti-water strips (fig 10);13. Seal with silicone on all the connections between the vertical profiles and the backpanel, bottom rail and tray, tray and back panel. Let it dry for 24 hours before moving the cabin;14. Connect the flexible hose to the hand shower. Secure this item in place on the backpanel. Secure the top shower head on the roof. Make sure all the water connections are water tight;15. Connect hot water to the red mark water inlet and cold water to the blue mark waterinlet (fig 11). Connect the drain flexible pipe (1 ½” outlet) to the drain opening in the floor;16. Do not move the cabin into the place until you check all the components for anyleakage or problems; open each valve to see how it works, check thermostatic valvefor hot and cold water. You may need to tight some connections (during storage and transportation connections may get loose). If you do not see any leakage, then you can move it to the permanent position, attach the front skirting panel and finish your project.One of the ways on how to change flex hose to hard PVC pipes:Disconnect the flex hose from the shower drain unit. Fasten the 1 ½” hard PVC pipe to the drain. Using the trap adaptor with washer and plastic nut fasten the PVC pipe to the adaptor from 1 ½” to 2”.Fig 1 Legs and frame position (top view)Bath Authority™ LLC / DreamLine™Shower Enclosure, Jetted/Steam Shower and Shower ColumnsLimited WarrantyCONSUMER RESPONSIBILITIESYour DreamLine™ Shower Products will remain beautiful for many years if you take care of them. Some of the waterproofing plastic strips and other seals will need to be replaced when they show signs of wear, yellowing, or are not watertight. Refer to the parts list of your manual for all seals. Water conditions in various parts of the country will determine any extra cleaning attention you may have to give your new shower enclosure or jetted shower. DreamLine™ does not recommend the use of harsh abrasive cleansers on any of its products. Harsh cleansers will damage the metal or glass finish on your shower enclosure or jetted shower. REQUESTING SERVICEHere’s what you need to do if you require service:1. Contact the dealer who sold and/or installed the product. They should be able to solve any problems you may have.2. If your dealer or contractor cannot solve the problem, they will contact or supply you with the name of the local DreamLine™ Distributor or a DreamLine™ Direct Technical Specialist3. If you are unable to obtain warranty service through either your contractor or DreamLine™ distributor, please write us directly atBath Authority™ LLC / DreamLine™909 Louis DriveWarminster, PA 18974ATTN: Customer Service Department4. Include all pertinent information regarding your claim, including a complete description of the product,model numbers, colors, finishes, and the date the product was installed. Include a description of the problem and a photocopy of your invoice and purchase receipt(s) for the products involved. Also please provide information on the name and contact telephone numbers of the contractor and distributor.Please note that under any circumstances, DreamLine™ products should not be returned to your dealer, distributor or directly to DreamLine™ without a written Return Merchandise Authorization (RMA).LIMITED ONE-YEAR WARRANTYThis warrantee extends only to the original owner/end-user for personal household use only. For commercial uses, additional limitations may apply.DreamLine™ warrants acrylic surface against blistering or cracking and chipping resulting from defect in the acrylic surface material when used under normal condition and service for a period of one (1) year from the purchase date.DreamLine™ warrants mirrors, shower doors, shower massage systems, faucet finishes and fittings to be free from defects in workmanship and materials under normal use and service for a period of one (1) year. DreamLine™ further warrants the structure of the acrylic shell against loss of water through the fiberglass laminate of the acrylic body as a result of defect in materials and workmanship for a period of five (5) years from the purchase date.DreamLine™ will, at its election, repair, replace, or make appropriate credit adjustment where DreamLine™ optional inspection discloses any such defects occurring in normal usage within the warrantee periods. Please note that DreamLine™ is not responsible for any installation or removal costs.Improper modification of any enclosure, jetted shower or shower column components may void the warrantee - so please install the product as directed in the manual. This warrantee does not cover any claim arising from abuse, misuse, negligence, accident, improper installation or operations on the part of the purchaser. This warrantee is void if the DreamLine™ product is subject to alterations, or if repairs are attempted by anyone other than an authorized agent of DreamLine™. This warrantee does not extend to any plumbing or components installed by dealers, installers or by any party other then DreamLine™.Implied warranties, including that of merchantability or fitness for a particular purpose, are expressly limited in duration to the duration of this warranty. DreamLine™ disclaims any liability for special, incidental, or consequential damages.Some states do not allow limitations on how long an implied warranty lasts or the exclusion or limitation of special, incidental, or consequential damages, so these limitations and exclusions may not apply to you. This warranty gives you specific legal rights. You may also have other rights which vary from state to state. This limited warranty provides specific legal rights as they apply within the USA, and other rights may be available, but may vary from country to country.This is our exclusive written warranty for DreamLine™ Shower Enclosure, Jetted/Steam Shower and Shower Column purchases made after May 2004. DreamLine™ reserves the right to modify this warranty at any time, and the consumer understands that such modification will not alter the warranty conditions applicable at the time of the sale of the product.10。
淋浴房安装步骤说明
淋浴房安装步骤说明一、NZ31-JY:1、参照总装图所示将贴墙铝材靠墙测水平划线钻孔装入墙胶粒;2、用大扁ST4*25自攻螺丝将墙材锁墙紧固,分别把左右固定玻璃与墙材铜固定件用M8*20圆头机丝固定装配好;(暂不收紧待活动门调整完成后再紧固)3、左右固玻置物架孔安装玻璃夹子,将精品架玻璃靠墙角确定上墙玻璃夹固定位置,划线钻孔装入墙胶粒,用沉头ST4*25自攻螺丝锁墙安装玻璃夹子,再将层架玻璃安装好;4、安装活玻下挡水扁铝;(暂不收紧待活动门调整完成后再紧固)5、按图示把合页分别安装在固定门与活动门并调整好;把活动门安装在活动边合页上,紧固以上连接件,装配墙材外盖;6、参照图示把合门磁条、侧挡水、下挡水分别装在固定门与活动门并调整好;7、参照图示在活玻上安装好拉手;8、调整完毕打密封胶。
二、SZ31:1、参照总装图所示将贴墙铝材靠墙测水平划线钻孔装入墙胶粒;2、用大扁ST4*25自攻螺丝紧固墙材,分别将左右固玻卡入墙材装配;(暂不装单边密封条,待活动门调整完成后再卡入)3、安装上下挡水扁铝;(暂不收紧待活动门调整完成后再紧固)4、参照图示把合页分别安装在固定门与活动门并调整好;把活动门安装在活动边合页上,紧固挡水扁铝;将单边胶条卡入玻璃与墙材槽缝内;5、参照图示把磁条、侧挡水、下挡水分别装在固定门与活动门并调整好;安装合页装饰盖;6、参照图示在活玻上安装好拉手;7、调整完毕打密封胶。
三、SZ42-XJ:1、参照总装图所示将合页玻璃上卡入半圆胶条后装配靠墙固定夹、精品活玻装配上墙合页离地高12MM,靠墙测水平划线钻孔装入墙胶粒;2、将合页固玻、精品活玻用大扁ST4*25自攻螺丝锁墙固定,将精品固玻放底座上与合页玻连接上下拉杆扁铝;(暂不收紧待活动门调整完成后再紧固)3、精品固玻装配玻璃夹子,将层架玻璃靠墙角确定上墙玻璃夹固定位置,划线钻孔装入墙胶粒,用沉头ST4*25自攻螺丝锁墙安装玻璃夹子,再将层架玻璃安装好;4、参照图示把合页分别安装在固定门与活动门并调整好,紧固上下拉杆扁铝扁铝;5、参照图示把磁条、侧挡水、下挡水分别装在固定门与活动门并调整好;把活动门安装在活动边合页上,安装合页装饰盖;6、参照图示分别安装活玻H型拉手、精品活玻大小头拉手;7、调整完毕打密封胶。
Kohler 浴室设备安装说明书
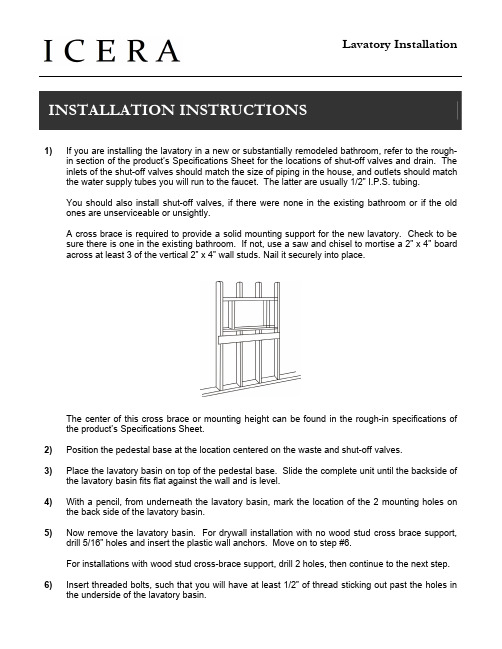
1) If you are installing the lavatory in a new or substantially remodeled bathroom, refer to the rough-in section of the product’s Specifications Sheet for the locations of shut-off valves and drain. The inlets of the shut-off valves should match the size of piping in the house, and outlets should match the water supply tubes you will run to the faucet. The latter are usually 1/2” I.P.S. tubing.You should also install shut-off valves, if there were none in the existing bathroom or if the old ones are unserviceable or unsightly.A cross brace is required to provide a solid mounting support for the new lavatory. Check to besure there is one in the existing bathroom. If not, use a saw and chisel to mortise a 2” x 4” board across at least 3 of the vertical 2” x 4” wall studs. Nail it securely into place.The center of this cross brace or mounting height can be found in the rough-in specifications of the product’s Specifications Sheet.2) Position the pedestal base at the location centered on the waste and shut-off valves.3) Place the lavatory basin on top of the pedestal base. Slide the complete unit until the backside ofthe lavatory basin fits flat against the wall and is level.4) With a pencil, from underneath the lavatory basin, mark the location of the 2 mounting holes onthe back side of the lavatory basin.5) Now remove the lavatory basin. For drywall installation with no wood stud cross brace support,drill 5/16” holes and insert the plastic wall anchors. Move on to step #6.For installations with wood stud cross-brace support, drill 2 holes, then continue to the next step.6) Insert threaded bolts, such that you will have at least 1/2” of thread sticking out past the holes inthe underside of the lavatory basin.* For wood stud installation, same as above but without the wall anchor.7) Place the new lavatory basin onto a thick layer of newspaper or a drop cloth to protect it frombeing scratched.Attach the pop-up drain and the faucet to the lavatory according to the manufacturer’s instructions. You may also attach the hot and cold water supply lines to the faucet at this time.Sealant may be required around the faucet and pop-up drain where they meet the china. Check the faucet manufacturer’s recommendations.These steps are easier to do before you mount the lavatory in its place.8) Set the lavatory basin on top of the pedestal base flat against the wall, making sure that thethreaded bolts slide through the mounting holes in the back of the basin. Put a washer onto each of the threaded bolts. Put a nut onto each of the threaded bolts. Thread the nuts loosely against the basin.9) Examine the alignment of the pedestal lavatory to the wall, to be sure it is centered where youwant it. The elliptical holes in the china allow for some shifting. Also check the level and adjust as needed. Tighten the nuts alternately until the lavatory is flush to the wall.CAUTION: Do not over-tighten, since this may crack the vitreous china.10) Connect the drain trap to the pop-up drain tail piece, then join the trap to the drain pipe in the wall.You may use metal or plastic drain pipe and trap, following the directions as provided by the manufacturer.11) Use a tube cutter to trim the free ends of the hot and cold supply tubes, to at least 1/4” longer thannecessary to reach into the inlets of the shut-off valves. It is better to cut the tubes longer than needed, then trim them again. Remove any burrs or sharp edges with an emery cloth.Join the hot and cold water supply to the shut-off valves, as instructed by the faucet manufacturer.12) Turn on the main water supply, then open the shut-off valves. Check all connections for leaks. Aslight tightening of about 1/4 turn will normally stop any leaks.Your installation should now be complete.。
淋浴房安装图解说明书
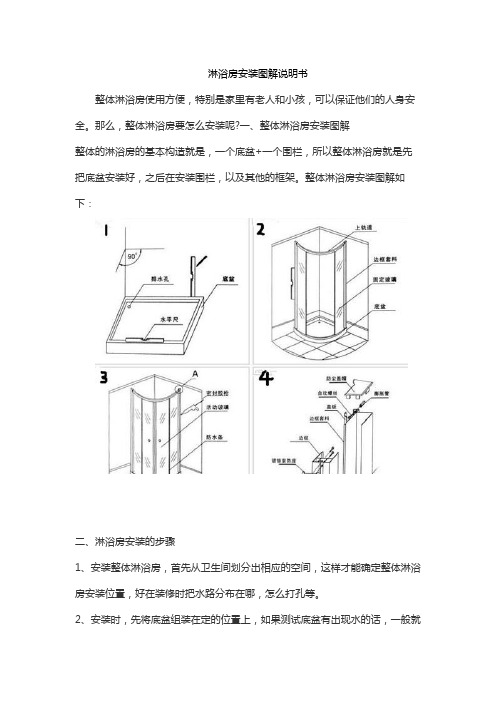
淋浴房安装图解说明书
整体淋浴房使用方便,特别是家里有老人和小孩,可以保证他们的人身安全。
那么,整体淋浴房要怎么安装呢?一、整体淋浴房安装图解
整体的淋浴房的基本构造就是,一个底盆+一个围栏,所以整体淋浴房就是先把底盆安装好,之后在安装围栏,以及其他的框架。
整体淋浴房安装图解如下:
二、淋浴房安装的步骤
1、安装整体淋浴房,首先从卫生间划分出相应的空间,这样才能确定整体淋浴房安装位置,好在装修时把水路分布在哪,怎么打孔等。
2、安装时,先将底盆组装在定的位置上,如果测试底盆有出现水的话,一般就
是安装时出现倾斜,因此安装好一定要先检测下底盆水是否平。
3、所以,第三步就是把安装好的底盆,进行防水实验,有出现漏水或水道阻塞,那么就要及时改正,才能进行下一步。
4、淋浴门是有推拉门的,底盆防水测试没问题后,那就可安装轨道了,下轨则要安装在石基的中间。
5、紧接着安装铝合金框架,先把边料卡入上下导轨中,在用螺丝锁紧,把靠墙的铝材装入左右两侧,将组装好淋浴房框架则放在石基正中央,并调节好水平位置。
之后在靠墙铝材上个孔,在用紧固螺丝将铝合金框架将锁紧在石基上。
6、然后,底盆的背面要和淋浴屏用螺丝相互固定好,两侧的固定片。
淋浴器安装操作规程
淋浴器安装操作规程一、前言淋浴器是现代生活的重要组成部分,为了保障使用者的安全和舒适,正确安装淋浴器是至关重要的。
本文将详细介绍淋浴器的安装操作规程,以帮助读者正确安装淋浴器,避免安装不当带来的问题。
二、准备工作1. 确定安装位置:根据个人需求,在浴室墙壁上选择一个合适的位置进行淋浴器的安装。
安装位置应避免与其他管线冲突,也要考虑到操作的方便性。
2. 准备工具:安装淋浴器需要的工具包括扳手、螺丝刀、电钻等。
确保工具完整,并根据实际情况准备好可能需要的其他工具。
三、安装步骤1. 关闭水源:在进行淋浴器的安装前,首先要关闭水源阀门,确保安装过程中不会有水流。
可根据实际情况选择关闭整栋楼的总阀门或是单独关闭浴室的阀门。
2. 拆卸旧淋浴器(如有):如果需要更换淋浴器,首先要将旧淋浴器进行拆卸。
使用扳手等工具拆卸淋浴器的定位螺丝,然后轻轻将旧淋浴器取下。
3. 安装花洒支架:根据实际需要,确定好花洒支架的位置,使用电钻在墙上打孔,并使用螺丝刀将花洒支架固定在墙上。
4. 连接水管:根据淋浴器的型号和具体情况,选择合适的水管进行连接。
首先将防水胶带缠绕在水管接口处,然后使用扳手轻轻拧紧连接口,确保连接紧密,防止漏水。
5. 安装淋浴软管:将淋浴软管与花洒支架连接,使用扳手拧紧连接口,确保牢固可靠。
6. 安装淋浴面板:根据淋浴面板的型号和具体安装方式,按照说明书进行安装。
通常需要使用螺丝刀将淋浴面板固定在花洒支架上。
7. 检查漏水情况:安装完成后,打开水源阀门,检查各个接口是否有漏水现象。
如有漏水,需要重新检查并进行必要的紧固操作。
四、使用注意事项1. 定期检查:建议定期检查淋浴器的各个接口,确保紧固可靠,防止漏水和摇晃。
2. 温度控制:使用淋浴器时要注意控制水温,避免烫伤。
可以根据个人需要选择合适的水温和水压。
3. 清洁保养:保持淋浴器的清洁是重要的。
定期清洁淋浴器的花洒、软管和面板,防止水垢和细菌滋生。
4. 安全使用:使用淋浴器时要注意避免滑倒和碰撞,尤其在淋浴间地面会有湿滑的情况下更需谨慎。
恋木淋浴房LB2001安装说明书

恋木淋浴房LB2001安装说明书
作者:恋木淋浴房首席设计师------高阳
1、安装前,首先检查现场是否符合安装条件,墙面及地面是否已贴好瓷砖,地面走水状况是否良好,水平状况是否符合要求,建议在淋浴房安装范围内的水平倾斜不超过1厘米。
2、在确认包装完好后打开包装,将浴房配件依次取出并清点整齐,建议使用剪刀剪去包装胶纸,切忌使用刀片,以防划伤浴房配件。
3、先将石基安装于所需位置,并调整好水平,如果条件允许,最好将石基在贴地砖时嵌在地面,但要注意保证底座的尺寸,不要把底座嵌在墙砖内。
4、将包装箱置于地上,在箱内将浴房配件进行初步组装
5、根据装配好的浴房及相关尺寸,在墙上划线,找出安装螺丝孔的位置。
6、在墙上钻安装孔,建议采用可调速电钻及合金钻头,防止打爆墙砖。
7、安装淋浴房主体
8、安装淋浴房玻璃并调整开关效果达到设计要求。
9、安装淋浴房拉手,并调整防水效果
10、在需要的地方打上适量的玻璃胶,为保证玻璃胶的功能,建议在48小时内不要使用浴房
11、清理现场,完成安装。
淋浴房安装指南IG0122说明书

Thanks for choosing our products,we'll provide best service for you.Please carefully read the manual before mounting.
Index Theshowerroomstructureandmountingplace Installationofshowertrayandprofile Installatiooffixedglassdoor Installationofslidingglassdoor
cm 50 ≥
≥ 50 cm
Place choosing for mounting
2
The plastic feet Nut
Level measure Plastic gasket
Plastic cap
Panel Pedestal
Screw
Adjust the plastic feet and make the tray in level , If you want remove the panel you can take-down the plastic cap and screw in the panel.
Plastic cap
Wall
Plastic gasket Screw
Put the alum.profile on the shower tray,close to the corner of wall,make marks on the wall, the use the screws(M4X26) to fix it to the wall; use the plastic cap cover the screw top. details please refer to the above drawing.
高品质淋浴房安装协议(2024年版)

20XX 标准合同模板范本PERSONAL RESUME甲方:XXX乙方:XXX高品质淋浴房安装协议(2024年版)本合同目录一览第一条定义与术语解释1.1 高品质淋浴房1.2 安装协议1.3 甲方1.4 乙方1.5 工程日期1.6 工程质量第二条甲方义务2.1 提供场地2.2 支付费用第三条乙方义务3.1 安装责任3.2 质量保证3.3 售后服务第四条安装过程及要求4.1 安装方案4.2 安装时间4.3 安装质量标准第五条质量检验5.1 检验标准5.2 检验时间5.3 异议提出第六条费用及支付方式6.1 费用明细6.2 支付时间6.3 支付方式第七条保修期限及维修7.1 保修期限7.2 维修责任7.3 维修响应时间第八条违约责任8.1 甲方违约8.2 乙方违约第九条争议解决9.1 协商解决9.2 调解解决9.3 法律途径第十条合同的变更与解除10.1 变更条件10.2 解除条件第十一条保密条款11.1 保密内容11.2 泄露后果第十二条不可抗力12.1 不可抗力事件12.2 不可抗力后果第十三条法律适用与争议解决13.1 法律适用13.2 争议解决方式第十四条其他条款14.1 合同的成立与生效14.2 附加条款14.3 合同的修订历史第一部分:合同如下:第一条定义与术语解释1.1 高品质淋浴房:指符合我国相关标准,具备安全、防水、实用等功能,且质量优良、外观精美的淋浴房。
1.2 安装协议:指甲方与乙方就高品质淋浴房安装工程所达成的明确双方权利和义务的书面协议。
1.3 甲方:指合同中承担购买、使用高品质淋浴房的一方。
1.4 乙方:指合同中承担高品质淋浴房安装、售后服务的一方。
1.5 工程日期:指合同双方约定的开始安装高品质淋浴房的时间。
1.6 工程质量:指按照本合同约定的质量标准,完成高品质淋浴房安装工程。
第二条甲方义务2.1 提供场地:甲方应确保安装场地符合本合同约定的安装条件,并为乙方提供必要的施工条件。
- 1、下载文档前请自行甄别文档内容的完整性,平台不提供额外的编辑、内容补充、找答案等附加服务。
- 2、"仅部分预览"的文档,不可在线预览部分如存在完整性等问题,可反馈申请退款(可完整预览的文档不适用该条件!)。
- 3、如文档侵犯您的权益,请联系客服反馈,我们会尽快为您处理(人工客服工作时间:9:00-18:30)。
装好后俯视图如下:右固:
左固:
安装步骤:
1、用下轨道两端随附的螺丝,将下轨道和带卡槽边料连接起来;
注意立柱是平的那面朝着玻璃
2、将固定玻璃卡到带卡槽边料中,并锁紧下轨道上的玻璃夹;
3、用同样的方法安装上轨道,并锁紧上轨道上的玻璃夹;
4、对准上下轨道中间卡槽推入中间玻璃(滑轮在上,挂钩在下,玻璃无孔,滑轮朝外);
5、用同样的方法从侧面推入门玻璃(滑轮在上,挂钩在下,玻璃有拉手孔,滑轮朝内);装好后的样子(见下图)
上轨道下轨道
6、将带磁条边料与上下轨道用随附的螺丝连接起来;
7、在立柱两边拍入F 型包边料(如下图);
(以上步骤是将门平放在地面上完成的,注意用厚纸皮垫在地上,保护好玻璃的四角)
8、将整个门搬至预装位置,调整好位置后,按包边铝材上的孔位在墙面做钻孔标记;注意一定要用水平尺测量立柱的垂直度
9、将门移开,按标记的位置钻孔(用6毫米钻头);
10、在钻好的孔内塞入随附的膨胀胶粒,用胶锤打至完全没入墙体;
11、再次将整个门搬至预装位置,用随附的膨胀螺丝将框架与墙面固定;
12、将门碰磁条拍入门玻璃靠拉手边(磁条分正负极,在拍入前先与边柱上的磁条试吸一下);
13、安装拉手,调试滑轮至滑动顺畅,在两片玻璃的交界处卡上F型挡水胶条;
14、清洁整个安装区域,在铝材与墙地接触位置均匀的打上中性防霉玻璃胶密封;
注意:待48小时玻璃胶干透后方可使用!
-------------------------------------------------------------------------------------------------------------------------- 当宽度超过1.6米,或浴室空间狭小不便整体搬动时,还可以采用下面这种安装方法:1. 把装拉手那片玻璃上的大活动上挂拆下来(拧开固定螺母件即可,下图画红圈部分)
2. 将大活动上挂预先从侧面卡进上轨道(见下图,注意滑轮是朝向淋浴区的)
3. 然后将四面框架组装好固定到墙上后,再按照:固定玻璃---中间玻璃----门玻璃的顺序依次装入玻璃。
