神州数码 交换机 Vlan配置命令
神州数码DCRS命令简单配置(可编辑修改word版)

神州数码DCRS-5200-28 交换机简单配置:vlan 接口表:vlan vlan 名管理地址子网掩码所属端口vlan1 shiju 151.36.16.250 255.255.254.0vlan2 teshangang 151.36.19.250 255.255.255.0 11,12, vlan 3 chengxi 151.36.20.250 255.255.255.0 1,2,3 vlan 4 chendong 151.36.21.250 255.255.255.0 5,vlan 5 zhishu 151.36.22.250 255.255.255.0 6,vlan 6 waiwang 129.128.1.250 255.255.0.0 22,23, vlan 7 zzyygg 129.129.0.1 255.255.0.0 24交换机telnet 用户:admin 密码:admin目前交换机配置:Current configuration:!hostname bhds5200!l3-forward enable!telnet-user admin password 0 admin!!Vlan 1vlan 1!Vlan 2vlan 2name teshangang!Vlan 3vlan 3name chengxi!Vlan 4vlan 4name chengdong!Vlan 5vlan 5name zhishu!Vlan 6vlan 6name waiwang!Vlan 7vlan 7name zzyygg!!Interface Ethernet0/0/1switchport access vlan 3 !Interface Ethernet0/0/2switchport access vlan 3 !Interface Ethernet0/0/3switchport access vlan 3 !Interface Ethernet0/0/4!Interface Ethernet0/0/5switchport access vlan 4 !Interface Ethernet0/0/6switchport access vlan 5 !Interface Ethernet0/0/7!Interface Ethernet0/0/8!Interface Ethernet0/0/9!Interface Ethernet0/0/10!Interface Ethernet0/0/11switchport access vlan 2 !Interface Ethernet0/0/12switchport access vlan 2!Interface Ethernet0/0/13!Interface Ethernet0/0/14!Interface Ethernet0/0/15!Interface Ethernet0/0/16!Interface Ethernet0/0/17!Interface Ethernet0/0/18!Interface Ethernet0/0/19!Interface Ethernet0/0/20!Interface Ethernet0/0/21!Interface Ethernet0/0/22switchport access vlan 6!Interface Ethernet0/0/23switchport access vlan 6!Interface Ethernet0/0/24switchport access vlan 7!Interface Ethernet0/0/25!Interface Ethernet0/0/26!Interface Ethernet0/0/27!Interface Ethernet0/0/28!!interface Vlan1interface vlan 1imp address 151.36.16.250 255.255.254.0 !!interface Vlan2interface vlan 2ip address 151.36.19.250 255.255.255.0!!interface Vlan3interface vlan 3ip address 151.36.20.250 255.255.255.0!!interface Vlan4interface vlan 4ip address 151.36.21.250 255.255.255.0!!interface Vlan6interface vlan 6ip address 129.128.1.250 255.255.0.0!!interface Vlan7interface vlan 7ip address 129.129.0.1 255.255.0.0!ip route 151.36.47.0 255.255.255.0 151.36.16.253 ip route 151.16.16.0 255.255.248.0 151.36.16.253 ip route 23.136.98.0 255.255.255.0 151.36.16.99 ip route 0.0.0.0 0.0.0.0 129.128.1.254!!bhds5200#简单命令介绍:启动交换机进入CLI 界面后:switch#>enable *进入特权模式switch## *特权模式switch#config terminal *进入全局模式switch(config)#hostname bhds5200 *更改交换机名称bhds5200(config)#bhds5200(Config)#l3-forward enable *开启交换机三层转发功能L3 Function is alredy enabled!bhds5200(config)#vlan 1 *配置vlan1,vlan1 为默认vlan 不能更改或删除bhds5200(Config-Vlan1)#interface vlan 1 *进入vlan1 接口模式bhds5200(Config-If-Vlan1)#ip address 151.36.16.250 255.255.254.0 *设置vlan1 管理地址bhds5200(config)#vlan 2 *配置vlan2bhds5200(Config-Vlan2)# name teshangang *设置vlan2 名称bhds5200(Config-Vlan2)# switchport interface ethernet0/0/11-12 *将11 和12 口加入到vlan2 中Set the port Ethernet0/0/11 access vlan 2 successfully *提示11 口加入vlan2 成功Set the port Ethernet0/0/12 access vlan 2 successfully *提示12 口加入vlan2 成功bhds5200(config)#vlan 3 * 配置vlan3bhds5200(Config-Vlan3)# name chengxi *设置vlan3 名称bhds5200(Config-Vlan3)# switchport interface ethernet0/0/1-3 *将1,2,3 口加入到vlan3 中Set the port Ethernet0/0/1 access vlan 2 successfully *提示1 口加入vlan3 成功Set the port Ethernet0/0/2 access vlan 3successfully *提示2 口加入vlan3 成功Set the port Ethernet0/0/3 access vlan 3successfully *提示3 口加入vlan3 成功bhds5200(Config-Vlan3)#interface vlan 3bhds5200(Config-If-Vlan3)#ip address 151.36.20.250 255.255.254.0 *配置vlan3 接口地址*增加及配置vlan 照上例,删除vlan 将会删除vlan 的所有接口配置:bhds5200(config)# *vlan 更改必需在全局模式下bhds5200(config)#no vlan2 *删除vlan2配置静态路由:bhds5200(config)# ip route 0.0.0.0 0.0.0.0 129.128.1.254 *设置默认路由指向最终网关bhds5200(Config)# ip route 151.16.16.0 255.255.248.0 151.36.16.253bhds5200(Config)#ip route 23.136.98.0 255.255.255.0 151.36.16.99bhds5200(Config)#ip route 0.0.0.0 0.0.0.0 129.128.1.254删除静态路由:bhds5200(Config)#no ip route 0.0.0.0 0.0.0.0 129.128.1.254 *删除命令在启用命令前加no 即可bhds5200(config)#telnet-server enable *启用telnetTelnetd already enabled.bhds5200(Config)#telnet-user admin password 0 admin *用户名为admin,密码为admin关地址绑定问题,因进行全局端绑定需做前期大量工作,可参考神州数码DCRS5200 用户手册第16 章节节,AM 配置:am mac_ip_pool命令:am mac-ip-pool <mac_address> <ip_address>no am mac-ip-pool <mac_address> <ip_address>功能:创建一个MAC+IP 地址绑定,放到地址池中,或者删除一个在地址池中已经配置的MAC+IP 地址绑定,MAC 和IP 地址一一对应。
神州数码交换机路由器命令
神州数码交换机路由器命令神州数码交换机路由器命令交换机配置命令switch>en (enable)进入特权用户模式switch # conf (config) 进入全局配置模式switch (config)# int e0/0/1 进入接口配置模式switch (config)# int vlan 1 进入VLAN配置模式switch (config)# host (hostname) 配置交换机名称switch (config)# enable password 1234 配置交换机密码switch (config)# enable password 8 1234 配置交换机密码(加密)switch (config)# vlan 10 创建vlanswitch (config)# int vlan 10switch (config-If-Vlan10)# ip address 172.16.10.1 255.255.255.0 配置VLAN地址生成树技术Switch (config)# spanning-tree 启用全局生成树(默认mstp生成树技术)switch (config)# spanning-tree mode stp/rstp/mstp 生成树技术switch (config)# spanning-tree mst 0 port-priority 4096 设置交换机的优先级默认32768Switch# sh sp (show spanning-tree) 查看生成树交换机Web管理switch (config)# ip http serverswitch (config)# web-user admin password 0 1234 用户名和密码(命令要全写)交换机T elnet管理switch (config) # ip http serverswitch (config)# telnet-user admin password 0 1234 用户名和密码(命令要全写)清空交换机配置switch# set def (default)恢复出厂配置switch# wr (write)保存配置switch# rel (reload)重启交换机链路聚合(不需启动生成树)switchA(config)# port-group 1switchA(config)# int e0/0/1-2switchA(config-port-range)# port-group 1 mode on/active 手动配置/自动配置switchA(config)# no port-group 1 删除组1switchB(config) # port-group 2switchB(config) # int e0/0/3-4switchB(config-port-range) # port-group 2 mode on/active switchA(config) # no port-group 2 删除组2交换机MAC与IP绑定switch (config)# am enable 启用全局am功能switch (config)# int e0/0/1switch (config_if_ethernet0/0/1)# am port 打开端口am功能switch (config_if_ethernet0/0/1)# am mac-ip-pool 00-A0-D1-D1-07-FF 192.168.1.101交换机DHCP服务器配置switch (config)# service dhcp 启用DHCPswitch (config)# ip dhcp pool poolA 定义地址池poolAswitch (dhcp-poolA- config)# network-address 192.168.1.0 24switch (dhcp-poolA- config)# lease 3 租期3天switch (dhcp-poolA- config)# default-router 192.168.1.1 网关switch (dhcp-poolA- config)# dns-server 60.191.244.5 DNS服务器ACL访问控制列表switchA(config)# ip access-list standard test 命名标准IP访问列表switchA(config-std-nacl-test)# deny 192.168.100.0 0.0.0.255 反子网掩码switchA(config-std-nacl-test)# deny 192.168.200.0 0.0.0.0switchA(config) # firewall enable 开启ACL功能switchA(config)# firewall default permit/deny 默认permit允许switchA(config)# int e0/0/1switchA(config-if-interface0/0/1) # ip access-group test in/outswitchA(config) # ip access-list standard 10 数字标准IP访问列表配置时间范围switchA(config)#time-range worktimeswitchA(config-time-range)#absolute-periodic weekdays 09:00:00 to 18:00:00路由器配置命令Router>ena 进入特权用户模式 Router# conf 进入全局配置模式Router_config# int f0/0Router_config_f0/0# ip address 10.1.1.1 255.255.255.0 配置路由器端口地址清空路由器配置Router# del (delete)删除启动配置文件Router# reb (reboot) 重启路由器静态路由Router_config# ip route 10.1.2.0 (目标网段) 255.255.255.0(子网掩码) 10.1.1.1 (转发地址)默认静态路由Router_config# ip route 0.0.0.0 (目标网段) 0.0.0.0(子网掩码)10.1.1.1 (转发地址)RIP动态路由Router_config# router rip 启用RIP路由Router_config_rip# version 2 RIP路由版本号 2Router_config_rip# network 10.1.1.0 255.255.255.0Router_config_rip# network 10.1.2.0 255.255.255.0 与路由器相连的网段OSPF动态路由Router_config# router ospf 1 启动ospf进程,进程号为1Router_config_ospf1# network 10.1.1.0 255.255.255.0 area 0 网段、子网掩码和区域号Router_config_ospf1# network 10.1.2.0 255.255.255.0 area 0 第一个区域(即主干区域)区域号为 0Router# show ip route 查看路由。
神州数码配置命令总结
第一部分交换机配置一、基础配置1、模式进入Switch>Switch>enSwitch#configSwitch(Config)#interface ethernet 0/22、配置交换机主机名命令:hostname <主机名>3、配置交换机IP地址Switch(Config)#interface vlan 1Switch(Config-If-Vlan1)#ip address 10.1.128.251 255.255.255.0Switch(Config-If-Vlan1)#no shut4、为交换机设置Telnet授权用户和口令:telnet-user <用户名>password {0|7} <密码>例:Switch(Config)#telnet-user test password 0 test5、为交换机设置Web授权用户和口令:web-user <用户名>password {0|7} <密码>例:Switch(Config)#web-user admin password 0 digital6、设置系统日期和时钟:clock set <HH:MM:SS> <YYYY/MM/DD>7、设置退出特权用户配置模式超时时间exec timeout <minutes > //单位为分钟,取值范围为0~3008、保存配置:write9、显示系统当前的时钟:Switch#show clock10、指定登录用户的身份是管理级还是访问级Enable [level {visitor|admin} [<密码>]]11、指定登录配置模式的密码:Enable password level {visitor|admin}12、设置端口的速率和双工模式(接口配置模式下)命令:speed-duplex {auto | force10-half | force10-full | force100-half | force100-full | {{force1g-half | force1g-full} [nonegotiate [master | slave]] } }no speed-duplex二、单交换机VLAN划分1、VLAN基本配置(1)新建VLAN:vlan <vlan-id>(2)命名VLAN:name <vlan-name>(3)为VLAN 分配交换机端口Switch(Config-If-Vlan1)#switchport interface Ethernet 0/2(4)设置Trunk 端口允许通过VLAN:Switch(Config-ethernet0/0/5)#switchport trunk allowed vlan 1;3;5-202、划分VLAN:(1)进入相应端口:Switch(config)#interface Ethernet 0/2(2)修改模式:Switch(Config-ethernet0/0/5)switchport mode access(3)划分VLAN:Switch(Config-ethernet0/0/5)#switchport access vlan 4三、跨交换机VLAN划分(两台交换机作相同操作)1、新建VLAN2、划分VLAN3、修改链路模式(1)进入相应端口:Switch(config)#interface Ethernet 0/1(2)修改模式:Switch(config-if)#switchport mode trunk四、VLAN间主机的通信1、新建VLAN2、划分VLAN3、修改链路模式(1)进入相应端口:Switch(config)#interface Ethernet 0/1(2)修改模式:Switch(config-if)#switchport mode trunk注意:如果是三层交换机,在修改模式先封装802.1协议:Switch(config-if)#switchport trunk encapsulation dot1q4、建立VLAN子接口(1)、进入VLAN接口模式:Switch(config)#interface vlan 2(2)、设置VLAN子接口地址:Switch(config-if)#ip address 192.168.0.1 255.255.255.0(3)、打开端口:Switch(config-if)#no shutdown5、设置各主机IP地址、子网掩码、网关注意:(1)各主机IP地址应与其所在的VLAN在同一网段。
神州数码DCRS-5650交换机配置手册_VLAN和MAC地址操作

28vlan和和mac地址操作第第1章vlan配置11第第1章vlan配置11vlan配置111vlan介绍vlanvirtuallocalareanetwork即虚拟局域网这项技术可以根据功能应用或者管理的需要将局域网内部的设备逻辑地划分为一个个网段从而形成一个个虚拟的工作组并且不需要考虑设备的实际物理位置
1.4 VLAN-translation配置 ................................................................... 1-15
1.4.1 VLAN-translation介绍 ...........................................................................1-15 1.4.2 VLAN-translation配置 ...........................................................................1-15 1.4.3 VLAN-translation典型应用 ....................................................................1-16 1.4.4 VLAN-translation排错帮助 ................................................................ MAC 地址操作
神州数码交换机路由器配置命令
神州数码交换机配置命令Telnet远程Shell管理•设置交换机IP地址–Switch(config)#interface vlan 1–Switch(config-If-Vlan1)#ip address 10.1.1.1 255.255.255.0–Switch(config-If-Vlan1)#no shutdown•交换机设置Telnet授权用户和口令;若交换机没有设置授权Telnet用户,则任何用户都无法进入交换机的CLI配置界面。
–Switch(config)#telnet-user test password 0 testHTTP远程图形管理•设置交换机IP地址–Switch(config)#interface vlan 1–Switch(config-If-Vlan1)#ip address 10.1.1.1 255.255.255.0–Switch(config-If-Vlan1)#no shutdown•交换机启动HTTP Server功能–Switch(config)#ip http server•交换机设置Web授权用户和口令;若交换机没有设置授权Web用户,则任何用户都无法进入交换机的Web配置界面。
–Switch(config)#web-user test password 0 testSSH配置•Switch(Config)#ssh-user test password 0 test•Switch(Config)#ssh-server enableVLAN的基本配置•划分VLAN 100和VLAN 200,并加入端口;–Switch(Config)#vlan 100–Switch(Config-Vlan100)#switchport interface e0/0/1-5–Switch(Config)#vlan 200–Switch(Config-Vlan200)#switchport interface e0/0/6-10•配置0/0/24端口为级联端口–Switch(Config)#interface ethernet 0/0/24–Switch(Config-ethernet0/0/24)#switchport mode trunk–switchport trunk allowed vlan 100;200–/#Trunk端口缺省允许通过所有VLAN;用户可以通过上述命令设置哪些VLAN 的流量可以通过Trunk口,没有包含的VLAN流量则被禁止。
神州数码 交换机 Vlan配置命令

VLAN配置命令8.2.2.1 vlan命令:vlan [vlan-id]no vlan [vlan-id]功能:创建vlan 并且进入vlan 配置模式,在vlan 模式中,用户可以配置vlan 名称和为该vlan 分配交换机端口;本命令的no 操作为删除指定的vlan。
参数:[vlan-id]为要创建/删除的vlan 的vid,取值范围为1~4094。
命令模式:全局配置模式缺省情况:交换机缺省只有vlan1。
使用指南:vlan1 为交换机的缺省vlan,用户不能配置和删除vlan1。
允许配置vlan的总共数量为4094 个。
另需要提醒的是不能使用本命令删除通过gvrp 学习到的动态vlan。
举例:创建vlan100,并且进入vlan100 的配置模式。
switch (config)#vlan 100switch (config-vlan100)#8.2.2.2 name命令:name [vlan-name]no name功能:为vlan 指定名称,vlan 的名称是对该vlan 一个描述性字符串;本命令的no 操作为删除vlan 的名称。
参数:[vlan-name]为指定的vlan 名称字符串。
命令模式:vlan 配置模式缺省情况:vlan 缺省名称为vlanxxx,其中xxx 为vid。
使用指南:交换机提供为不同的vlan 指定名称的功能,有助于用户记忆vlan,方便管理。
举例:为vlan100 指定名称为testvlan。
switch (config-vlan100)#name testvlan8.2.2.3 switchport access vlan命令:switchport access vlan [vlan-id]no switchport access vlan功能:将当前access 端口加入到指定vlan;本命令no 操作为将当前端口从vlan 里删除。
参数:[vlan-id]为当前端口要加入的vlan vid,取值范围为1~4094。
神州数码交换机路由器配置命令(2023最新版)

神州数码交换机路由器配置命令神州数码交换机路由器配置命令章节一:引言⑴文档目的本文档旨在提供神州数码交换机路由器的详细配置命令,以指导管理员进行设备的初始化和配置。
⑵背景神州数码交换机路由器是一种用于数据传输的网络设备,拥有多种功能和特性。
本文档将介绍如何使用各种命令来配置交换机路由器的不同功能。
⑶受众本文档适用于所有需要配置神州数码交换机路由器的管理员和网络工程师。
章节二:初始化设备⑴登录设备使用如下命令登录设备:`login`⑵修改设备密码使用如下命令修改设备密码:`configure terminalenable secret [password]`章节三:基本配置⑴设置主机名使用如下命令设置设备的主机名:`configure terminalhostname [hostname]`⑵配置IP地质使用如下命令配置设备的IP地质:`configure terminalinterface [interface]ip address [ip-address] [subnet-mask]`⑶设置默认网关使用如下命令设置设备的默认网关:`configure terminalip default-gateway [gateway-address]`章节四:VLAN配置⑴创建VLAN使用如下命令创建一个新的VLAN:`configure terminalvlan [vlan-id]name [vlan-name]`⑵将接口加入VLAN使用如下命令将接口加入指定的VLAN:`configure terminalinterface [interface]switchport mode accessswitchport access vlan [vlan-id]`章节五:路由配置⑴静态路由使用如下命令配置静态路由:`configure terminalip route [destination-network] [subnet-mask] [next-hop]`⑵动态路由使用如下命令配置动态路由协议:`configure terminalrouter [routing-protocol]network [network-address] [subnet-mask]`章节六:安全配置⑴访问控制列表(ACL)使用如下命令配置ACL:`configure terminalaccess-list [acl-number] [permit----deny] [source] [destination] [protocol]`⑵端口安全使用如下命令配置端口安全:`configure terminalinterface [interface]switchport mode accessswitchport port-securityswitchport port-security maximum [max] switchport port-security violation [mode]`章节七:QoS配置⑴优先级队列使用如下命令配置优先级队列:`configure terminalinterface [interface]priority-queue out`⑵带宽限制使用如下命令配置带宽限制:`configure terminalinterface [interface]bandwidth [rate]`章节八:设备管理⑴ NTP服务使用如下命令启用NTP服务:`configure terminalntp server [server-address]`⑵ Telnet和SSH访问使用如下命令配置Telnet和SSH访问:`configure terminalline vty 0 15transport input telnet ssh`⑶登录Banner使用如下命令配置登录Banner:`configure terminalbanner login [banner-text]`附录:本文档涉及附件附件1:设备配置备份说明附录:法律名词及注释⒈ACL:访问控制列表,用于控制网络流量的访问权限。
神州数码配置命令归纳(已更新)
第一部分交换机配置一、基础配置1、模式进入Switch>Switch>enSwitch#configSwitch(Config)#interface ethernet 0/22、配置交换机主机名命令:hostname <主机名>3、配置交换机IP地址Switch(Config)#interface vlan 1Switch(Config-If-Vlan1)#ip address 10.1.128.251 255.255.255.0Switch(Config-If-Vlan1)#no shut4、为交换机设置Telnet授权用户和口令:登录到Telnet的配置界面,需要输入正确的用户名和口令,否则交换机将拒绝该Telnet用户的访问。
该项措施是为了保护交换机免受非授权用户的非法操作。
若交换机没有设置授权Telnet用户,则任何用户都无法进入交换机的Telnet配置界面。
因此在允许Telnet方式配置管理交换机时,必须在Console的全局配置模式下使用命令username <username>privilege <privilege> [password (0 | 7) <password>]为交换机设置Telnet授权用户和口令并使用命令authentication line vty login local打开本地验证方式,其中privilege选项必须存在且为15。
例:Switch>enableSwitch#configSwitch(config)#username test privilege 15 password 0 testSwitch(config)#authentication line vty login localSwitch(Config)#telnet-user test password 0 testSwitch (Config)#telnet-server enable://启动远程服务功能5、配置允许Telnet管理交换机的地址限制(单独IP或IP地址段)(1)限制单个IP允许Telnet登录交换机switch(config)#authentication security ip 192.168.1.2(2)限制允许IP地址段Telnet登录交换机switch(config)#access-list 1 permit 192.168.1.0 0.0.0.255switch(config)#authentication ip access-class 1 in5、为交换机设置Web授权用户和口令:web-user <用户名>password {0|7} <密码>例:Switch(Config)#web-user admin password 0 digital6、设置系统日期和时钟:clock set <HH:MM:SS> <YYYY/MM/DD>7、设置退出特权用户配置模式超时时间exec timeout <minutes > //单位为分钟,取值范围为0~3008、保存配置:write9、显示系统当前的时钟:Switch#show clock10、指定登录用户的身份是管理级还是访问级Enable [level {visitor|admin} [<密码>]]11、指定登录配置模式的密码:Enable password level {visitor|admin}12、配置交换机的用户名密码:username admin privilege 15 password 0 admin00013、配置enable密码为ddd:enable password 0 ddd level 1514、配置登录时认证:authentication line vty login local15、设置端口的速率和双工模式(接口配置模式下)命令:speed-duplex {auto | force10-half | force10-full | force100-half | force100-full | {{force1g-half | force1g-full} [nonegotiate [master | slave]] } }no speed-duplex二、单交换机VLAN划分1、VLAN基本配置(1)新建VLAN:vlan <vlan-id>(2)命名VLAN:name <vlan-name>(3)为VLAN 分配交换机端口Switch(Config-If-Vlan1)#switchport interface Ethernet 0/2(4)设置Trunk 端口允许通过VLAN:Switch(Config-ethernet0/0/5)#switchport trunk allowed vlan 1;3;5-202、划分VLAN:(1)进入相应端口:Switch(config)#interface Ethernet 0/2(2)修改模式:Switch(Config-ethernet0/0/5)switchport mode access(3)划分VLAN:Switch(Config-ethernet0/0/5)#switchport access vlan 4三、跨交换机VLAN划分(两台交换机作相同操作)1、新建VLAN2、划分VLAN3、修改链路模式(1)进入相应端口:Switch(config)#interface Ethernet 0/1(2)修改模式:Switch(config-if)#switchport mode trunk四、VLAN间主机的通信1、新建VLAN2、划分VLAN3、修改链路模式(1)进入相应端口:Switch(config)#interface Ethernet 0/1(2)修改模式:Switch(config-if)#switchport mode trunk注意:如果是三层交换机,在修改模式先封装802.1协议:Switch(config-if)#switchport trunk encapsulation dot1q4、建立VLAN子接口(1)、进入VLAN接口模式:Switch(config)#interface vlan 2(2)、设置VLAN子接口地址:Switch(config-if)#ip address 192.168.0.1 255.255.255.0 (3)、打开端口:Switch(config-if)#no shutdown5、设置各主机IP地址、子网掩码、网关注意:(1)各主机IP地址应与其所在的VLAN在同一网段。
神州数码路由器及交换机配置命令

神州数码交换机配置命令交换机基本状态:hostname> ;用户模式hostname# ;特权模式hostname(config)# ;全局配置模式hostname(config-if)# ;接口状态交换机口令设置:switch>enable ;进入特权模式switch#config terminal ;进入全局配置模式switch(config)#hostname ;设置交换机的主机名switch(config)#enable secret xxx ;设置特权加密口令switch(config)#enable password xxa ;设置特权非密口令switch(config)#line console 0 ;进入控制台口switch(config-line)#line vty 0 4 ;进入虚拟终端switch(config-line)#login ;允许登录switch(config-line)#password xx ;设置登录口令xxswitch#exit ;返回命令交换机VLAN设置:switch#vlan database ;进入VLAN设置switch(vlan)#vlan 2 ;建VLAN 2switch(vlan)#no vlan 2 ;删vlan 2switch(config)#int f0/1 ;进入端口1switch(config-if)#switchport access vlan 2 ;当前端口加入vlan 2switch(config-if)#switchport mode trunk ;设置为干线switch(config-if)#switchport trunk allowed vlan 1,2 ;设置允许的vlan switch(config-if)#switchport trunk encap dot1q ;设置vlan 中继switch(config)#vtp domain ;设置发vtp域名switch(config)#vtp password ;设置发vtp密码switch(config)#vtp mode server ;设置发vtp模式switch(config)#vtp mode client ;设置发vtp模式交换机设置IP地址:switch(config)#interface vlan 1 ;进入vlan 1switch(config-if)#ip address ;设置IP地址switch(config)#ip default-gateway ;设置默认网关switch#dir Flash: ;查看闪存交换机显示命令:switch#write ;保存配置信息switch#show vtp ;查看vtp配置信息switch#show run ;查看当前配置信息switch#show vlan ;查看vlan配置信息switch#show interface ;查看端口信息switch#show int f0/0 ;查看指定端口信息完了最最要的一步。
神州数码交换机路由器命令汇总(最简输入版)
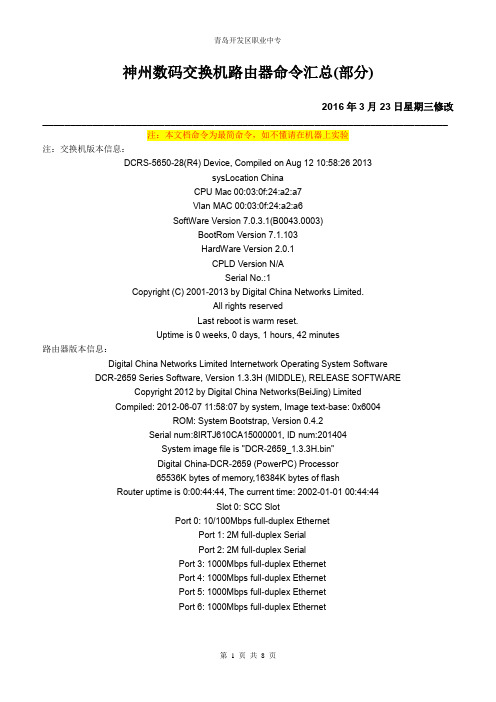
神州数码交换机路由器命令汇总(部分)2016年3月23日星期三修改_________________________________________________________________________注:本文档命令为最简命令,如不懂请在机器上实验注:交换机版本信息:DCRS-5650-28(R4) Device, Compiled on Aug 12 10:58:26 2013sysLocation ChinaCPU Mac 00:03:0f:24:a2:a7Vlan MAC 00:03:0f:24:a2:a6SoftWare Version 7.0.3.1(B0043.0003)BootRom Version 7.1.103HardWare Version 2.0.1CPLD Version N/ASerial No.:1Copyright (C) 2001-2013 by Digital China Networks Limited.All rights reservedLast reboot is warm reset.Uptime is 0 weeks, 0 days, 1 hours, 42 minutes路由器版本信息:Digital China Networks Limited Internetwork Operating System SoftwareDCR-2659 Series Software, Version 1.3.3H (MIDDLE), RELEASE SOFTWARECopyright 2012 by Digital China Networks(BeiJing) LimitedCompiled: 2012-06-07 11:58:07 by system, Image text-base: 0x6004ROM: System Bootstrap, Version 0.4.2Serial num:8IRTJ610CA15000001, ID num:201404System image file is "DCR-2659_1.3.3H.bin"Digital China-DCR-2659 (PowerPC) Processor65536K bytes of memory,16384K bytes of flashRouter uptime is 0:00:44:44, The current time: 2002-01-01 00:44:44Slot 0: SCC SlotPort 0: 10/100Mbps full-duplex EthernetPort 1: 2M full-duplex SerialPort 2: 2M full-duplex SerialPort 3: 1000Mbps full-duplex EthernetPort 4: 1000Mbps full-duplex EthernetPort 5: 1000Mbps full-duplex EthernetPort 6: 1000Mbps full-duplex Ethernet一、交换机配置命令1.基本配置switch > en (enable )进入特权用户模式 switch # con (config) 进入全局配置模式switch (config)# ho switch (hostname) 配置交换机名称 switch (config)# in e1/0/1 进入接口配置模式 switch (config -if -ethernet1/0/1)# exswitch (config)# in vl 1 进入VLAN 配置模式switch (config -if -vlan1)# ip ad 192.168.1.252 255.255.255.0 switch (config -if -vlan1)# exswitch (config)# ena p 1234 配置交换机密码(不加密) switch (config)# ena p 7 1234 配置交换机密码(加密) switch (config)# vl 10 创建vlan switch (config -vlan10)#ex switch (config)# in vl 10switch (config -if -vlan10)# ip ad 172.16.10.1 255.255.255.0 配置VLAN 地址2.生成树技术switch (config)# sp (spanning -tree) 启用全局生成树(默认mstp 生成树技术) switch (config)# sp mo stp/rstp /mstp (生成树/快速生成树/多生成树技术) switch (config)# sp ms 0 p 4096 设置交换机的优先级 默认32768 switch (config)# sh sp (show spanning -tree) 查看生成树3.交换机Web 管理switch (config)# ip ht serswitch (config)# usern admin pa 1234 用户名和密码4.交换机Telnet 管理switch (config)# telnet -s e (telnet enable) 开启telnet 服务 switch (config)# usern admin pa 1234 用户名和密码5.链路聚合(不需启动生成树)switchA (config)# port -g 1 (prot -group) switchA (config)# in e1/0/1-2switchA (config -port -range)# po 1 m on/active switchA (config -port -range)# ex switchA (config)# no port -g 1 删除组1switchB (config)# port -g 2 switchB (config)# in e1/0/3-4switchB (config -port -range)# po 2 m on/active switchB (config -port -range)# ex switchB (config)# no port -g 2 删除组26.交换机MAC 与IP 绑定switch (config)# am e (am enable) 启用全局am 功能 switch (config)# in e1/0/1switch (config_if_ethernet1/0/1)# am p (am port) 打开端口am 功能switch (config_if_ethernet1/0/1)# am m (mac -ip -pool) 00-A0-D1-D1-07-FF 192.168.1.101 switch (config_if_ethernet1/0/1)# ex switch (config)# in e1/0/2输入这条命令会出现: Invalid ENCRYPTED password! Please input the ENCRYPTED password with length 32 密码位数不够32位switch (config_if_ethernet1/0/2)# no am p 解锁端口7.交换机MAC与IP绑定静态绑定switch (config)# in e1/0/1switch (config_if_ethernet1/0/1)# sw p (port-security) 开启绑定功能switch (config_if_ethernet1/0/1)# sw p mac 00-a0-d1- d1-07-ff 添加静态MAC地址switch (config_if_ethernet1/0/1)# sw p max 4 绑定MAC地址的个数(默认为1)动态绑定(实验中交换机没有动态绑定命令)switch (config)# in e1/0/1switch (config_if_ethernet1/0/1)# sw p (port-security) 开启绑定功能switch (config_if_ethernet1/0/1)# sw port-security lockswitch (config_if_ethernet1/0/1)# sw port-security convert 将动态学习到绑定MAC的进行绑定switch # sh port-s add 查看绑定的地址8.交换机DHCP服务器配置switch (config)# service dhcp 启用DHCPswitch (config)# ip dh po poolA定义地址池poolAswitch (dhcp-poolA- config)# netw (network-address) 192.168.1.0 24switch (dhcp-poolA- config)# de (default-router) 192.168.1.254网关switch (dhcp-poolA- config)# dn 60.191.244.5DNS服务器switch (dhcp-poolA- config)# le 3租期3天switch (dhcp-poolA- config)# exswitch (config)# ip dh ex (excluded-add) 192.168.1.252 192.168.1.254 排除地址范围9.保留地址(一个地址池中只能配一个IP-MAC的绑定)switch (config)# ip dh po poolCswitch (dhcp-poolC- config)# ho 192.168.1.100 绑定的IP地址switch (dhcp-poolC- config)# ha (hardware-add) 00-a0-d1- d1-07-ff 绑定的MAC地址switch (dhcp-poolC- config)# de 192.168.1.254 网关10.ACL访问控制列表switchA (config)# ip ac s (standard) test命名标准IP访问列表switchA (config-std-nacl-test)# d (deny) 192.168.100.0 0.0.0.255反子网掩码(路由器上为子网掩码)switchA (config-std-nacl-test)# d 192.168.200.0 0.0.0.255switchA (config-std-nacl-test)# p (permit) a (permit any) 允许所有switchA (config-std-nacl-test)# exswitchA (config)# fir e (firewall enable) 开启ACL功能switchA (config)# in e1/0/1switchA (config-if-interface1/0/1)# ip ac (access-group) test in/out 进in出out (二层交换机上不支持out)11.配置时间范围switchA (config)# time-r worktimeswitchA (config-time-range)# p (periodic) weekd 9:0:0 to 18:0:012.VRRP虚拟路由器冗余协议Master BackupswitchA (config)# router v 1 switchB (config_router)# router v 1switchA (config_router)# v (virtual-ip) 192.168.1.254 switchB (config_router)# v 192.168.1.254 switchA (config_router)# i v 1 (interface vlan 1) switchB (config_router)# i v 1switchA (config_router)# pri 110 switchB (config_router)# enaswitchA (config_router)# c (circuit-failover) v 10 20switchA (config_router)# ena13.DHCP中继DHCP_relay (config)# service dhcp 全局开启DHCP服务DHCP_relay (config)# ip fo u b (ip forward-protocol udp bootps) 全局开启转发DHCP_relay (config)# in vl 10DHCP_relay (config-if-vlan10)# ip h 172.16.1.1 转发到DHCP服务器地址14.DHCP侦听DHCP (config)# service dhcpDHCP (config)# ip dh sn e 开启DHCP侦听功能DHCP (config)# in e1/0/1DHCP (config-if-ethernet1/0/1)# ip d s t (ip dhcp snooping trust)设置上联口为信任口15.端口隔离Switch (config)# is g test s i e1/0/1-2 (isolate-port group test switchport interface e1/0/1-2)e1/0/1-2口不能互相通信,可以和其它端口通信。
神州数码交换机路由器常用命令操作
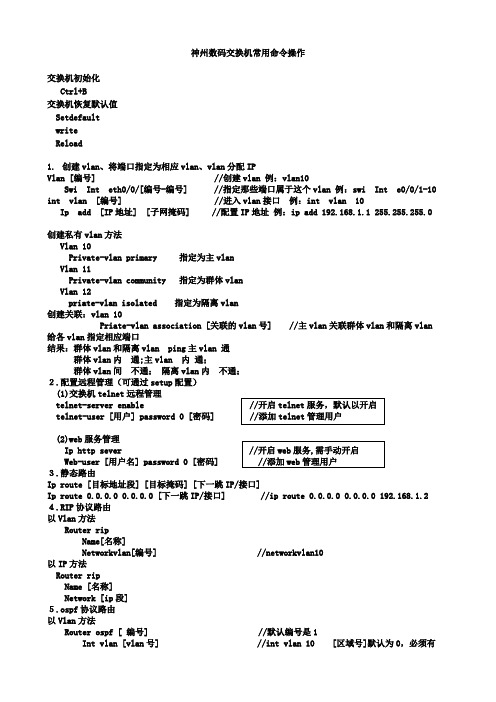
神州数码交换机常用命令操作交换机初始化Ctrl+B交换机恢复默认值SetdefaultwriteReload1.创建vlan、将端口指定为相应vlan、vlan分配IPVlan [编号] //创建vlan 例:vlan10Swi Int eth0/0/[编号-编号] //指定那些端口属于这个vlan 例:swi Int e0/0/1-10 int vlan [编号] //进入vlan接口例:int vlan 10 Ip add [IP地址] [子网掩码] //配置IP地址例:ip add 192.168.1.1 255.255.255.0创建私有vlan方法Vlan 10Private-vlan primary 指定为主vlanVlan 11Private-vlan community 指定为群体vlanVlan 12priate-vlan isolated 指定为隔离vlan创建关联:vlan 10Priate-vlan association [关联的vlan号] //主vlan关联群体vlan和隔离vlan 给各vlan指定相应端口结果:群体vlan和隔离vlan ping主vlan 通群体vlan内通;主vlan 内通;群体vlan间不通;隔离vlan内不通;2.配置远程管理(可通过setup配置)(1)交换机telnet远程管理telnet-server enable //开启telnet服务,默认以开启telnet-user [用户] password 0 [密码] //添加telnet管理用户(2)web服务管理Ip http sever //开启web服务,需手动开启Web-user [用户名] password 0 [密码] //添加web管理用户3.静态路由Ip route [目标地址段] [目标掩码] [下一跳IP/接口]Ip route 0.0.0.0 0.0.0.0 [下一跳IP/接口] //ip route 0.0.0.0 0.0.0.0 192.168.1.2 4.RIP协议路由以Vlan方法Router ripName[名称]Networkvlan[编号] //networkvlan10以IP方法Router ripName [名称]Network [ip段]5.ospf协议路由以Vlan方法Router ospf [ 编号] //默认编号是1Int vlan [vlan号] //int vlan 10 [区域号]默认为0,必须有Ip ospf enable area [区域号] //ip ospf enable area 0以IP方法Router ospf [ 编号]Router-id [ip地址]Network [自己的IP] [网关] area 0 //network 192.168.1.1/24 area 0 6.生成树协议1)Stp模式配置spanning-tree //启用生成树spanning-tree mode stp //设置生成树模式spanning-tree mst 0 priority 4096 //设置生成树交换机优先级2)mstp的配置spanning-treespanning-tree mst configurationname [名称]instance [实例号] vlan [编号]spanning-tree mst [实例号] priority 4096 //设置生成树交换机优先级spanning-tree mst [实例号] port-priority 16 //设置生成树端口优先级3)配置成快速启用端口Int e0/0/[编号-编号]Spanning-tree portfast7.链路聚合(手工)port-group [组号] //创建聚合组号int e0/0/[做链路的那几个端口号] //将端口加入聚合组port-group [组号] mode on8.链路聚合(LACP动态生成)port-group [组号]int e0/0/[做链路的那几个端口号](交换机A的配置)port-group [组号] mode active(交换机B的配置)port-group [组号] mode passive9.trunkInt e0/0/[端口]Sw mode trunk //设置为trunkSw trunk allowed vlan all //划分到所有vlan10.Mac地址和端口绑定(单个)Int e0/0/[端口]Sw port-securitySw port-security mac-address [mac地址]11.Mac地址和端口绑定(多个)Inte0/0/[端口]Sw port-securitySw port-security maximum [安全mac地址个数如:3]sw port-security mac-address [mac地址]sw port-security mac-address [mac地址]sw port-security mac-address [mac地址]12.Mac地址和端口绑定(动态学习)Int e0/0/[端口]Sw port-security maximumSw port-security maximum lockSw port-security maximum convert13.mac地址表绑定mac-address-table static address[mac地址]vlan[编号]inte0/0/[编号]//解释:让mac地址只能在指定vlan中的指定端口中使用,其他的都不能使用(未测试) 14. 端口安全1) int e0/0/1-10 //进入端口,只能在access口上配置2) switchport port-security //开启端口安全功能3) switchport port-security maximum 5 //配置端口安全最大连接数4) sw port-security violation shutdown //配置违例处理方式5).sw port-security mac-address [mac地址] //配置mac地址绑定15. 交换机端口镜像(将源端口数据复制到目标端口)1) monitor session 1 source interface fastEthernet 0/2 both //源端口、被镜像的端口2) monitor session 1 destiNation interface fastEthernet 0/3 //目标端口、镜像端口16.dhcp配置1)交换机做dhcp服务器配置Service dhcp //启用DHCP服务Ip dhcp pool [地址池名]Network-address [IP段如:192.168.1.0] [掩码数如:24]Lease[租用天数]Default-router[网关IP]Dns-server[DNS的IP]Ip dhcp excluded-address<开始地址><结束地址>//指定网段中不分配的IP地址2)Dhcp中继服务的配置Service dhcpIp forward-protocol udp bootps //配置DHCP中继转发port端口的UDP广播报文,默认67端口Int vlan [编号]或在接口上配置 //int e0/0/[编号]Ip help-address [服务器IP] //指定DHCP中继转发的UDP报文的目标地址17.ACL IP访问控制下面2条是开启ACLFirewall enable //开启包过滤功能Firewall default permit //设置默认动作为允许//定义标准访问控制列表 //定义访问列表Ip access-list standard test //在端口上应用列表Deny 192.168.1.100.00.0.0.0.255//禁止IP段访问Deny 192.168.200.11 0.0.0.0//禁止单个IP访问Denytcp192.168.200.00.0.0.255any-destinationd-port23//拒绝IP段telnet数据Permit192.168.1.100.00.0.0.0.255//允许IP段访问Deny192.168.200.110.0.0.0//允许IP访问//绑定ACL到各个端口Inte0/0/[端口]Ip access-group test in//验证方法Show access-group标准ACL实验1) access-list 1 deny 192.168.1.0 0.0.0.255 //拒绝访问的IP段2) access-list 1 permit 192.168.1.0 0.0.0.255 //允许的IP段3) //进入端口4) ip access-group 1 in //把控制列表1 配入端口,进入控制5) ip access-group 1 out //把控制列表1 配入端口,输出控制15. 扩展ACL实验1) access-list 101 deny tcp A.B.C.D 255.255.255.0 A.B.C.D 255.255.255.0 eq ftp(WWW)// 禁止前面个网段访问后面个网段的ftp或者WWW16. 交换机单向访问控制1) //使用标准ACL2) access-list 1 deny 192.168.1.0 0.0.0.2553) //进入端口4) ip access-group 1 in神州数码路由器常用命令操作路由器初始化:ctrl+breakNopassword路由器恢复默认值dirDel startup-configReboot1.进入端口给端口分配IPInt [端口]Ip add [ip] [子网掩码]No shuFC串口配置时钟频率Ph sp 640002.静态路由Ip route [目标地址段] [目标掩码] [下一跳IP/接口]Ip route 0.0.0.0 0.0.0.0 [下一跳IP/接口] //默认路由Ip route 0.0.0.0 0.0.0.0 [下一跳IP/接口] 10 //浮动路由3.RIP协议路由Router ripNetwork [ip段]4.ospf协议路由Router ospf [进程号]Router-id [ip地址]Network [自己的IP段] [子网掩码] area [区域号如:0]5.telnet开启方法1Aaa authen enable default lineAaa authen login default lineEnable passwd [密码]Line vty 0 4Password [密码]方法2Username [用户名] password [密码]Aaa authentication login [用户名] localLine vty 0 4Login authentication [刚刚那个用户名]6.web访问配置Username [用户] password 0 [密码] //添加用户Ip http webm-type[web配置方式] //选择方式.高级,典型,向导Ip http port[端口] //配置web端口7.ppp协议时钟频率physical-layer speed 64000封装PPP协议Int s0/[编号]Enc ppp //封装PPP协议单向验证(验证方式为PAP和CHAP)验证方Aaa authen ppp default localUsername [用户名] password [密码]Int s0/[编号]Enc pppPpp authen pap被验证方Aaa authen ppp default localInt s0/[编号]Enc pppPpp pap sen [用户名] passwd [密码]双向验证:9.hdlcInt s0/[编号]Enc hdlc //和PPP差不多,都在端口中配置10.dhcp配置Ip dhcp pool[地址池名]Network 192.168.2.0 255.255.255.0 //定义网络段Range 192.168.2.10 192.168.2.20 //定义地址范围Default-router [IP] //配置网关Dns-sever [ip] //配置NDS的IPLease [天数] //租用天数//退回配置模式(config)Ip dhcpd enable//开启dhcp11.Nat网络地址转换分为三种静态地址转换、动态地址转换、端口复用第一种1对1的网络地址转换,也叫静态地址转换,主要用于发布服务器(FTP/WEB/telnet)1)定义内外口在端口下输入ip nat inside ip nat outside2)配置地址转换:ip nat inside source static <服务器地址> <公网地址>ip nat inside source static tcp <服务器地址> 80 <公网地址> 80 发布WWW服务ip nat inside source static tcp <服务器地址> 20 <公网地址> 20 发布ftp服务ip nat inside source static tcp <服务器地址> 21 <公网地址> 21ip nat inside source static tcp <服务器地址> 23 <公网地址> 23 允许telnet远程登陆第二种多对多的网络地址转换,也叫动态地址转换1)定义内外口在端口下输入ip nat inside ip nat outside2)定义内网访问列表(标准)和外网的地址池定义内网访问列表:ip access-list standard <列表名>permit <vlan段> <反掩码> //定义允许转换的源地址范围定义外网的地址池:ip nat pool <地址池名> <外网开始地址> <外网结束地址> netmask <子网掩码> 3)配置地址转换:ip nat inside source list <列表名> pool <地址池名> overload第三种多对一的网络地址转换,也叫端口复用(natp)1)定义内外口在端口下输入ip nat inside ip nat outside2)定义内网访问列表定义内网访问列表:ip access-list standard <列表名>permit <vlan段> <反掩码>3)配置地址转换:ip nat inside source list <列表名> interface <外网接口编号> overload12.vpn(L2TP/PPTP)的配置//A到B的数据传输实例ROUTER-A的配置Intvirtual-tunnel0Ipadd172.16.1.2255.255.255.0***********************Pppchappassword[密码]//退回配置模式(config)VpdnenableVpdn-group0Request-dialinInitiate-toip192.168.1.2priority1Protocol12tp//退回配置模式(config)Iproute192.168.2.0255.255.255.0virtual-tunel0ROUTER-B的配置13、路由重分布redistribute static 重分布静态路由default-information originate 重分布默认路由redistribute connect 重分布直连网段redistribute rip 重分布RIP路由redistribute ospf <进程号> 重分布OSPF路由default-metric [权值] 设置路由权值14、策略路由1)定义内网访问列表:ip access-list standard <列表名>permit <vlan段> <反掩码>2)定义路由图route-map <图名> <图号1> permit/denymatch ip address <列表名>set ip next-hop <ip-address> 设置下一跳地址或 set interface fastethernet < > 设置出口route-map <图名> <图号2> permit/denymatch ip address <列表名>set ip next-hop <ip-address> 设置下一跳地址或 set interface fastethernet < > 设置出口3)在指定路由器的入口上应用路由图Router(config-if)#ip policy route-map <图名>15、Rip 认证:在端口上进行认证(要求在两台设备的路由端口配置)RIP版本1不支持认证。
神州数码3950 VLAN和MAC地址命令

目录第1章 VLAN配置.......................................................................1-11.1 VLAN配置命令.................................................................................1-11.1.1 debug gvrp............................................................................................1-11.1.2 dot1q-tunnel enable..............................................................................1-11.1.3 dot1q-tunnel tpid...................................................................................1-11.1.4 gvrp........................................................................................................1-11.1.5 garp timer hold......................................................................................1-21.1.6 garp timer join.......................................................................................1-21.1.7 garp timer leave....................................................................................1-21.1.8 garp timer leaveall................................................................................1-31.1.9 name......................................................................................................1-31.1.10 private-vlan..........................................................................................1-31.1.11 private-vlan association.....................................................................1-41.1.12 show dot1q-tunnel..............................................................................1-51.1.13 show garp............................................................................................1-51.1.14 show gvrp............................................................................................1-51.1.15 show vlan............................................................................................1-51.1.16 switchport dot1q-tunnel.....................................................................1-71.1.17 switchport access vlan.......................................................................1-71.1.18 switchport interface............................................................................1-81.1.19 switchport mode.................................................................................1-81.1.20 switchport trunk allowed vlan...........................................................1-81.1.21 switchport trunk native vlan..............................................................1-91.1.22 vlan.......................................................................................................1-91.1.23 vlan-translation.................................................................................1-101.1.24 vlan-translation enable.....................................................................1-101.1.25 vlan-translation miss drop...............................................................1-101.1.26 vlan ingress enable...........................................................................1-111.2 动态vlan配置命令..........................................................................1-111.2.1 protocol-vlan mode.............................................................................1-111.2.2 show protocol-vlan.............................................................................1-12第2章 MAC地址表配置命令......................................................2-12.1 MAC地址表配置命令........................................................................2-12.1.1 mac-address-table aging-time.............................................................2-12.1.2 mac-address-table static|blackhole.....................................................2-12.1.3 show mac-address-table......................................................................2-22.2 MAC地址绑定配置命令.....................................................................2-22.2.1 clear port-security dynamic.................................................................2-22.2.2 show port-security................................................................................2-22.2.3 show port-security address.................................................................2-32.2.4 show port-security interface................................................................2-42.2.5 switchport port-security.......................................................................2-42.2.6 switchport port-security convert.........................................................2-52.2.7 switchport port-security lock...............................................................2-52.2.8 switchport port-security mac-address................................................2-52.2.9 switchport port-security maximum.....................................................2-52.2.10 switchport port-security timeout.......................................................2-62.2.11 switchport port-security violation.....................................................2-6第1章 VLAN配置1.1 VLAN配置命令1.1.1 debug gvrp命令:debug gvrpno debug gvrp功能:打开交换机的gvrp的调试开关;本命令的no操作为关闭该调试开关。
神州数码配置命令
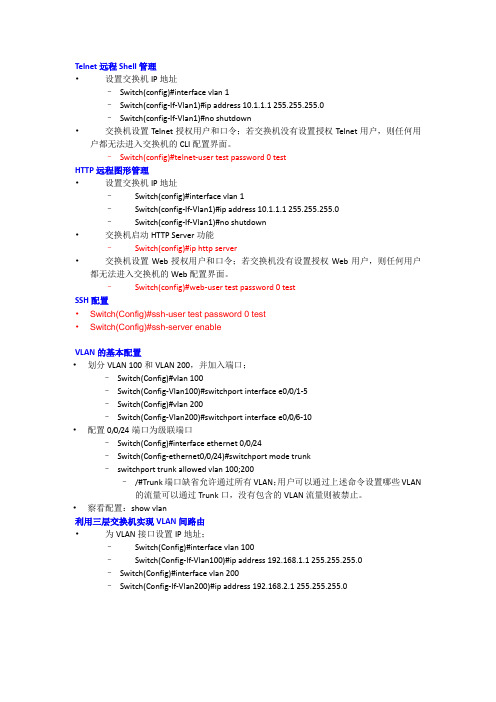
Telnet远程Shell管理•设置交换机IP地址–Switch(config)#interface vlan 1–Switch(config-If-Vlan1)#ip address 10.1.1.1 255.255.255.0–Switch(config-If-Vlan1)#no shutdown•交换机设置Telnet授权用户和口令;若交换机没有设置授权Telnet用户,则任何用户都无法进入交换机的CLI配置界面。
–Switch(config)#telnet-user test password 0 testHTTP远程图形管理•设置交换机IP地址–Switch(config)#interface vlan 1–Switch(config-If-Vlan1)#ip address 10.1.1.1 255.255.255.0–Switch(config-If-Vlan1)#no shutdown•交换机启动HTTP Server功能–Switch(config)#ip http server•交换机设置Web授权用户和口令;若交换机没有设置授权Web用户,则任何用户都无法进入交换机的Web配置界面。
–Switch(config)#web-user test password 0 testSSH配置•Switch(Config)#ssh-user test password 0 test•Switch(Config)#ssh-server enableVLAN的基本配置•划分VLAN 100和VLAN 200,并加入端口;–Switch(Config)#vlan 100–Switch(Config-Vlan100)#switchport interface e0/0/1-5–Switch(Config)#vlan 200–Switch(Config-Vlan200)#switchport interface e0/0/6-10•配置0/0/24端口为级联端口–Switch(Config)#interface ethernet 0/0/24–Switch(Config-ethernet0/0/24)#switchport mode trunk–switchport trunk allowed vlan 100;200–/#Trunk端口缺省允许通过所有VLAN;用户可以通过上述命令设置哪些VLAN 的流量可以通过Trunk口,没有包含的VLAN流量则被禁止。
神州数码交换机路由器常用命令操作
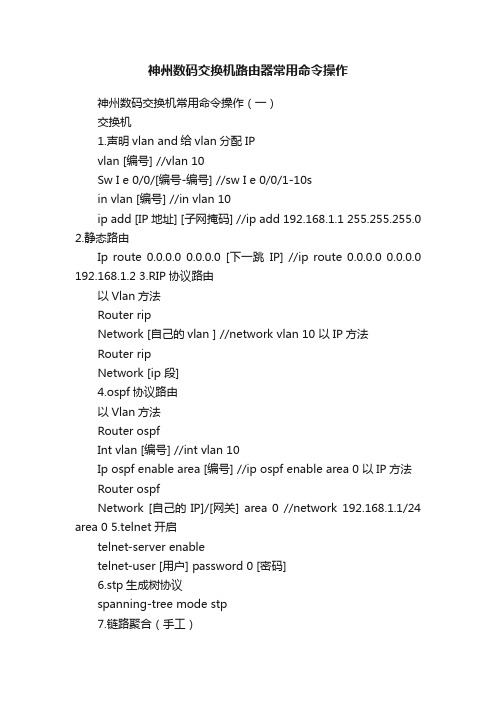
神州数码交换机路由器常用命令操作神州数码交换机常用命令操作(一)交换机1.声明vlan and给vlan分配IPvlan [编号] //vlan 10Sw I e 0/0/[编号-编号] //sw I e 0/0/1-10sin vlan [编号] //in vlan 10ip add [IP地址] [子网掩码] //ip add 192.168.1.1 255.255.255.0 2.静态路由Ip route 0.0.0.0 0.0.0.0 [下一跳IP] //ip route 0.0.0.0 0.0.0.0 192.168.1.2 3.RIP协议路由以Vlan方法Router ripNetwork [自己的vlan ] //network vlan 10 以IP方法Router ripNetwork [ip 段]4.ospf协议路由以Vlan方法Router ospfInt vlan [编号] //int vlan 10Ip ospf enable area [编号] //ip ospf enable area 0 以IP方法Router ospfNetwork [自己的IP]/[网关] area 0 //network 192.168.1.1/24 area 0 5.telnet开启telnet-server enabletelnet-user [用户] password 0 [密码]6.stp生成树协议spanning-tree mode stp7.链路聚合(手工)spanning-tree mode mstp //开启mstp生成树协议port-group [编号] // port-group 1int e 0/0/[做链路的那几个端口号] //int 0/0/1-2port-group [编号] mode on // port-group 1 mode on 8. 链路聚合(LACP动态生成)spanning-tree mode mstpport-group [编号](交换机A的配置)port-group [编号] mode active(交换机B的配置)port-group [编号] mode passive9.trunkInt e 0/0/[端口]Sw mode trunk //设置为trunkSw trunk allowed vlan all //划分到所有vlan 10.Mac地址和端口绑定(单个)Int e 0/0/[端口]Sw port-securitysw port-security mac-address [mac地址]11. Mac地址和端口绑定(多个)Int e 0/0/[端口]Sw port-security maximum [安全mac地址个数如:3]sw port-security mac-address [mac地址]sw port-security mac-address [mac地址]sw port-security mac-address [mac地址]12. Mac地址和端口绑定(动态学习)Int e 0/0/[端口]Sw port-security maximumSw port-security maximum lockSw port-security maximum convert13.mac地址表绑定mac-address-table static address [mac地址] vlan [编号] int e0/0/[编号]//解释: 让mac地址只能在指定vlan中的指定端口中使用,其他的都不能使用(未测试) 14.mac地址过滤mac-address-table blackhole address [mac地址] vlan [编号] //解释: 让mac地址在指定vlan中不能使用(未测试)15.用am来绑定ip和macAm enableInt e 0/0/[端口]Am mac-ip-pool [mac地址] [IP地址]//验证方法: show am//解锁:no am port16.dhcp配置Service dhcpIp dhcp pool [地址池名]Network-address [IP段如:192.168.1.0] [掩码数如:24]Lease [租用天数]Default-router [网关IP]Dns-server [DNS 的IP]17.ACL IP访问控制Ip access-list standard testDeny 192.168.1.100.0 0.0.0.0.255 //禁止IP段访问Deny 192.168.200.11 0.0.0.0 //禁止单个IP访问Deny tcp 192.168.200.0 0.0.0.255 any-destination d-port 23 //拒绝IP段telnet数据Permit 192.168.1.100.0 0.0.0.0.255 //允许IP段访问Deny 192.168.200.11 0.0.0.0 //允许IP访问//下面2条是开启ACLFirewall enableFirewall default permit//绑定ACL到各个端口Int e 0/0/[端口]Ip access-group test in//验证方法Show access-group18. web管理Ip http sever //开启web服务Web-user [用户名] password 0 [密码] //添加管理用户神州数码路由器常用命令操作(二)路由器1. 进入端口给端口分配IPa) Int [段口]b) Ip add [ip] [子网掩码]c) No shu2.静态路由Ip route 0.0.0.0 0.0.0.0 [下一跳IP] //ip route 0.0.0.0 0.0.0.0 192.168.1.2 3.RIP协议路由Router ripNetwork [ip 段]4.ospf协议路由Router ospf [进程号如:1]Network [自己的IP段] [子网掩码] area [区域号如:0]5.telnet开启Username [用户名] password [密码]Aaa authentication login [用户名] localLine vty 0 4Login authentication [刚刚那个用户名]6.ppp协议Enc ppp7.时钟平率Ph sp 640008.web访问Username [用户] password 0 [密码] //添加用户ip http webm-type [web配置方式] //选择方式.高级,典型,向导ip http port [端口] //配置web端口9.hdlc//和PPP差不多,都在端口中配置Enc hdlc10.dhcpIp dhcp pool [地址池名如:1]Network 192.168.2.0 255.255.255.0 //定义网络段Range 192.168.2.10 192.168.2.20 //定义地址范围Default-router [IP] //配置网关Dns-sever [ip] //配置NDS的IPLease [天数] //租用天数//退回配置模式(config)Ip dhcpd enable //开启dhcp11.natRouter-A_config#Ip access-list standard [访问控制名如:1] //定义访问控制列表Router-A_config_sta_nacl#Permit [IP 段] [子网掩码] //定义允许转换的源地址范围//如:permit 192.168.10.0 255.255.255.0Router-A_config#ip nat pool [转换地址池名如:xh] [起始IP] [结束IP] [子网掩码]Router-A_config#ip nat inside soure list [刚刚定义的访问控制名] pool [刚刚转换地址池名] overload //配置将ACL允许的源地址转换成overld 中的地址,并且做pat复用地址Router-A_config#int f0/0Router-A_config_f0/0#ip nat inside //定义内部接口Router-A_config# int s0/2Router-A_config_ s0/2#ip nat outside //定义外部接口12.vpn(L2TP/PPTP)的配置//A到B的数据传输实例ROUTER-A的配置Int virtual-tunnel 0Ip add 172.16.1.2 255.255.255.0Ppp chap host test@/doc/b66269808.html, Ppp chap password [密码]//退回配置模式(config)Vpdn enableVpdn-group 0Request-dialinInitiate-to ip 192.168.1.2 priority 1Protocol 12tpDomain /doc/b66269808.html,//退回配置模式(config)Ip route 192.168.2.0 255.255.255.0 virtual-tunel 0 ROUTER-B的配置。
神州数码vlan配置

Vlan功能典型配置一、组网需求PC1和PC2分别连接到交换机的端口E 0/0/1和E 0/0/2,端口分别属于Vlan 10和Vlan 20。
二、组网图三、配置步骤配置方法1:1.创建(进入)Vlan 10,将E 0/0/1加入到Vlan 10。
switch(config)#vlan10switch(config-vlan10)#switchport interface ethernet0/0/1switch(config-vlan10)#exit2.创建(进入)Vlan 20,将E 0/0/2加入到Vlan 20。
switch(config)#vlan20switch(config-vlan20)#switchport interface ethernet0/0/2switch(config-vlan20)#exit配置方法2:1.创建(进入)Vlan10.switch(config)#vlan10switch(config-vlan10)#exit2.进入接口E 0/0/1,并以ACCESS方式加入Vlan 10switch(config)#interface ethernet0/0/1switch(config-if-Ethernet0/0/1)#switchport access vlan103.创建(进入)Vlan20.switch(config)#vlan20switch(config-vlan20)#exit4.进入接口E 0/0/2,并以ACCESS方式加入Vlan 20switch(config)#interface ethernet0/0/2switch(config-if-Ethernet0/0/2)#switchport access vlan20四、配置关键点1.如果环境中需要配置多个连续Vlan时(例如:Vlan1-Vlan20)可以使用以下命令创建:switch(config)#vlan1-20注:创建多个Vlan时,可使用vlan ID1-ID2这样的方式创建,一次最多创建 512 个Vlan 上述命令只适用于创建连续Vlan,如果希望创建vlan1-22,Vlan24-50。
神州数码路由器及交换机配置命令

神州数码路由器及交换机配置命令简介神州数码是一个中国的网络设备制造商。
它提供了多种路由器和交换机产品,包括SOHO、企业和运营商级别的产品。
在这篇文档中,我们将介绍对神州数码路由器及交换机进行配置的基本命令。
这些命令可用于启用和禁用端口、配置具有VLAN的端口以及管理路由和静态路由等。
命令列表所有设备通用命令以下是在所有神州数码路由器和交换机上都可以执行的通用命令。
1. 基本配置enable // 进入特权模式configure terminal // 进入全局配置模式hostname <name> // 配置设备名称banner motd #<message># // 设置登录提示信息interface <interface> // 进入具体端口的配置界面no shutdown // 开启端口shutdown // 关闭端口exit // 退出当前模式show running-config // 显示当前配置write memory // 将当前配置保存到FLASH文件系统中,以便重启后仍然存在2. VLAN 配置vlan <id> // 进入 VLAN 配置模式name <name> // 配置 VLAN 名称exit // 退出 VLAN 配置模式interface <interface> // 进入具体端口的配置界面switchport access vlan <id> // 配置端口所在VLAN号,使端口成为 ACCESS 端口switchport mode trunk // 配置端口为 TRUNK 端口,可同时传输多个 VLA N3. 静态路由ip route <destination_network> <destination_subnet_mask> <next_hop_a ddress> // 添加静态路由show ip route // 显示当前路由表某些设备具有的高级命令以下命令在某些神州数码路由器和交换机上可用。
神州数码交换机配置命令

switch#write ;保存配置信息
switch#show vtp ;查看vtp配置信息
switch#show run ;查看当前配置信息
switch#show vlan ;查看vlan配置信息
switch#show interface ;查看端口信息
switch#show int f0/0 ;查看指定端口信息
switch(config)#hostname ;设置交换机的主机名
switch(config)#enable secret xxx ;设置特权加密口令
switch(config)#enable password xxa ;设置特权非密口令
switch(config)#line console 0 ;进入控制台口
switch(config-line)#line vty 0 4 ;进入虚拟终端
switch(config-line)#login ;允许登录
switch(config-line)#password xx ;设置登录口令xx
switch#exit ;返回命令
交换机VLAN设置:
switch#vlan database ;进入VLAN设置
switch(vlan)#vlan 2 ;建VLAN 2
switch(vlan)#no vlan 2 ;删vlan 2
switch(config)#int f0/1 ;进入端口1
switch(config-if)#switchport access vlan 2 ;当前端口加入vlan 2
交换机设置IP地址:
switch(config)#interface vlan 1 ;进入vlan 1
神州数码配置命令

第一部分交换机配置一、基础配置1、模式进入Switch>Switch>enSwitch#configSwitch(Config)#interface ethernet 0/22、配置交换机主机名命令:hostname <主机名>3、配置交换机IP地址Switch(Config)#interface vlan 1Switch(Config-If-Vlan1)#ip address 10.1.128.251 255.255.255.0Switch(Config-If-Vlan1)#no shut4、为交换机设置Telnet授权用户和口令:登录到Telnet的配置界面,需要输入正确的用户名和口令,否则交换机将拒绝该Telnet用户的访问。
该项措施是为了保护交换机免受非授权用户的非法操作。
若交换机没有设置授权Telnet用户,则任何用户都无法进入交换机的Telnet配置界面。
因此在允许Telnet方式配置管理交换机时,必须在Console的全局配置模式下使用命令username privilege [password (0 | 7) ]为交换机设置Telnet授权用户和口令并使用命令authentication line vty login local打开本地验证方式,其中privilege选项必须存在且为15。
例:Switch>enableSwitch#configSwitch(config)#username test privilege 15 password 0 testSwitch(config)#authentication line vty login localSwitch(Config)#telnet-user test password 0 testSwitch (Config)#telnet-server enable://启动远程服务功能5、配置允许Telnet管理交换机的地址限制(单独IP或IP地址段)(1)限制单个IP允许Telnet登录交换机switch(config)#authentication security ip 192.168.1.2(2)限制允许IP地址段Telnet登录交换机switch(config)#access-list 1 permit 192.168.1.0 0.0.0.255switch(config)#authentication ip access-class 1 in5、为交换机设置Web授权用户和口令:web-user <用户名>password {0|7} <密码>例:Switch(Config)#web-user admin password 0 digital6、设置系统日期和时钟:clock set7、设置退出特权用户配置模式超时时间exec timeout //单位为分钟,取值范围为0~3008、保存配置:write9、显示系统当前的时钟:Switch#show clock10、指定登录用户的身份是管理级还是访问级Enable [level {visitor|admin} [<密码>]]11、指定登录配置模式的密码:Enable password level {visitor|admin}12、配置交换机的用户名密码:username admin privilege 15 password 0 admin00013、配置enable密码为ddd:enable password 0 ddd level 1514、配置登录时认证:authentication line vty login local15、设置端口的速率和双工模式(接口配置模式下)命令:speed-duplex {auto | force10-half | force10-full | force100-half | force100-full |{{force1g-half | force1g-full} [nonegotiate [master | slave]] } }no speed-duplex二、单交换机VLAN划分1、VLAN基本配置(1)新建VLAN:vlan(2)命名VLAN:name(3)为VLAN 分配交换机端口Switch(Config-If-Vlan1)#switchport interface Ethernet 0/2(4)设置Trunk 端口允许通过VLAN:Switch(Config-ethernet0/0/5)#switchport trunk allowed vlan 1;3;5-202、划分VLAN:(1)进入相应端口:Switch(config)#interface Ethernet 0/2(2)修改模式:Switch(Config-ethernet0/0/5)switchport mode access (3)划分VLAN:Switch(Config-ethernet0/0/5)#switchport access vlan 4三、跨交换机VLAN划分(两台交换机作相同操作)1、新建VLAN2、划分VLAN3、修改链路模式(1)进入相应端口:Switch(config)#interface Ethernet 0/1(2)修改模式:Switch(config-if)#switchport mode trunk四、VLAN间主机的通信1、新建VLAN2、划分VLAN3、修改链路模式(1)进入相应端口:Switch(config)#interface Ethernet 0/1(2)修改模式:Switch(config-if)#switchport mode trunk注意:如果是三层交换机,在修改模式先封装802.1协议:Switch(config-if)#switchport trunk encapsulation dot1q4、建立VLAN子接口(1)、进入VLAN接口模式:Switch(config)#interface vlan 2(2)、设置VLAN子接口地址:Switch(config-if)#ip address 192.168.0.1 255.255.255.0 (3)、打开端口:Switch(config-if)#no shutdown5、设置各主机IP地址、子网掩码、网关注意:(1)各主机IP地址应与其所在的VLAN在同一网段。
神州数码常用交换机和路由命令集

神州数码常用交换机和路由命令集1.在基于IOS的交换机上设置主机名/系统名:switch(config)# hostname hostname在基于CLI的交换机上设置主机名/系统名:switch(enable) set system name name-string2.在基于IOS的交换机上设置登录口令:switch(config)# enable password level 1 password在基于CLI的交换机上设置登录口令:switch(enable) set passwordswitch(enable) set enalbepass3.在基于IOS的交换机上设置远程访问:switch(config)# interface vlan 1switch(config-if)# ip address ip-address netmaskswitch(config-if)# ip default-gateway ip-address在基于CLI的交换机上设置远程访问:switch(enable) set interface sc0 ip-address netmask broadcast-addressswitch(enable) set interface sc0 vlanswitch(enable) set ip route default gateway4.在基于IOS的交换机上启用和浏览CDP信息:switch(config-if)# cdp enableswitch(config-if)# no cdp enable为了查看Cisco邻接设备的CDP通告信息:switch# show cdp interface [type modle/port]switch# show cdp neighbors [type module/port] [detail]在基于CLI的交换机上启用和浏览CDP信息:switch(enable) set cdp {enable|disable} module/port为了查看Cisco邻接设备的CDP通告信息:switch(enable) show cdp neighbors[module/port] [vlan|duplex|capabilities|detail]5.基于IOS1000的交换机的端口描述:switch(config-if)# description description-string基于CLI的交换机的端口描述:switch(enable)set port name module/number description-string6.在基于IOS的交换机上设置端口速度:switch(config-if)# speed{10|100|auto}在基于CLI的交换机上设置端口速度:switch(enable) set port speed moudle/number {10|100|auto}switch(enable) set port speed moudle/number {4|16|auto}7.在基于IOS的交换机上设置以太网的链路模式:switch(config-if)# duplex {auto|full|half}在基于CLI的交换机上设置以太网的链路模式:switch(enable) set port duplex module/number {full|half}8.在基于IOS的交换机上配置静态VLAN:switch# vlan databaseswitch(vlan)# vlan vlan-num name vlaswitch(vlan)# exitswitch# configure teriminalswitch(config)# interface interface module/numberswitch(config-if)# switchport mode accessswitch(config-if)# switchport access vlan vlan-numswitch(config-if)# end在基于CLI的交换机上配置静态VLAN:switch(enable) set vlan vlan-num [name name]switch(enable) set vlan vlan-num mod-num/port-list9. 在基于IOS的交换机上配置VLAN中继线:switch(config)# interface interface mod/portswitch(config-if)# switchport mode trunkswitch(config-if)# switchport trunk encapsulation {isl|dotlq}switch(config-if)# switchport trunk allowed vlan remove vlan-list switch(config-if)# switchport trunk allowed vlan add vlan-list在基于CLI的交换机上配置VLAN中继线:switch(enable) set trunk module/port [on|off|desirable|auto|nonegotiate] Vlan-range [isl|dotlq|dotl0|lane|negotiate]10.在基于IOS的交换机上配置VTP管理域:switch# vlan databaseswitch(vlan)# vtp domain domain-name在基于CLI的交换机上配置VTP管理域:switch(enable) set vtp [domain domain-name]11.在基于IOS的交换机上配置VTP 模式:switch# vlan databaseswitch(vlan)# vtp domain domain-nameswitch(vlan)# vtp {sever|cilent|transparent}switch(vlan)# vtp password password在基于CLI的交换机上配置VTP 模式:switch(enable) set vtp [domain domain-name] [mode{ sever|cilent|transparent }][password password]12. 在基于IOS的交换机上配置VTP版本:switch# vlan databaseswitch(vlan)# vtp v2-mode在基于CLI的交换机上配置VTP版本:switch(enable) set vtp v2 enable13. 在基于IOS的交换机上启动VTP剪裁:switch# vlan databaseswitch(vlan)# vtp pruning在基于CL I 的交换机上启动VTP剪裁:switch(enable) set vtp pruning enable14.在基于IOS的交换机上配置以太信道:switch(config-if)# port group group-number [distribution {source|destination}]在基于CLI的交换机上配置以太信道:switch(enable) set port channel moudle/port-range mode{on|off|desirable|auto}15.在基于IOS的交换机上调整根路径成本:switch(config-if)# spanning-tree [vlan vlan-list] cost cost在基于CLI的交换机上调整根路径成本:switch(enable) set spantree portcost moudle/port costswitch(enable) set spantree portvlancost moudle/port [cost cost][vlan-list]16.在基于IOS的交换机上调整端口ID:switch(config-if)# spanning-tree[vlan vlan-list]port-priority port-priority在基于CLI的交换机上调整端口ID:switch(enable) set spantree portpri {mldule/port}priorityswitch(enable) set spantree portvlanpri {module/port}priority [vlans]17. 在基于IOS的交换机上修改STP时钟:switch(config)# spanning-tree [vlan vlan-list] hello-time secondsswitch(config)# spanning-tree [vlan vlan-list] forward-time seconds` switch(config)# spanning-tree [vlan vlan-list] max-age seconds在基于CLI的交换机上修改STP时钟:switch(enable) set spantree hello interval[vlan]switch(enable) set spantree fwddelay delay [vlan]switch(enable) set spantree maxage agingtiame[vlan]18. 在基于IOS的交换机端口上启用或禁用Port Fas1000t 特征:switch(config-if)#spanning-tree portfast在基于CLI的交换机端口上启用或禁用Port Fast 特征:switch(enable) set spantree portfast {module/port}{enable|disable}19. 在基于IOS的交换机端口上启用或禁用UplinkFast 特征:switch(config)# spanning-tree uplinkfast [max-update-rate pkts-per-second]在基于CLI的交换机端口上启用或禁用UplinkFast 特征:switch(enable) set spantree uplinkfast {enable|disable}[rate update-rate] [all-protocols off|on]20. 为了将交换机配置成一个集群的命令交换机,首先要给管理接口分配一个IP地址,然后使用下列命令: switch(config)# cluster enable cluster-name21. 为了从一条中继链路上删除VLAN,可使用下列命令:switch(enable) clear trunk module/port vlan-range22. 用show vtp domain 显示管理域的VTP参数.23. 用show vtp statistics显示管理域的VTP参数.24. 在Catalyst交换机上定义TrBRF的命令如下:switch(enable) set vlan vlan-name [name name] type trbrf bridge bridge-num[stp {ieee|ibm}]25. 在Catalyst交换机上定义TrCRF的命令如下:switch (enable) set vlan vlan-num [name name] type trcrf{ring hex-ring-num|decring decimal-ring-num} parent vlan-num26. 在创建好TrBRF VLAN之后,就可以给它分配交换机端口.对于以太网交换,可以采用如下命令给VLAN分配端口:switch(enable) set vlan vlan-num mod-num/port-num27. 命令show spantree显示一个交换机端口的STP状态.28. 配置一个ELAN的LES和BUS,可以使用下列命令:ATM (config)# interface atm number.subint multiointATM(config-subif)# lane serber-bus ethernet elan-name29. 配置LECS:ATM(config)# lane database database-nameATM(lane-config-databade)# name elan1-name server-atm-address les1-nsap-address ATM(lane-config-databade)# name elan2-name server-atm-address les2-nsap-address ATM(lane-config-databade)# name …30. 创建完数据库后,必须在主接口上启动LECS.命令如下:ATM(config)# interface atm numberATM(config-if)# lane config database database-nameATM(config-if)# lane config auto-config-atm-address31. 将每个LEC配置到一个不同的ATM子接口上.命令如下:ATM(config)# interface atm number.subint multipointATM(config)# lane client ethernet vlan-num elan-num32. 用show lane server 显示LES的状态.33. 用show lane bus显示bus的状态.34. 用show lane database显示LECS数据库可内容.35. 用show lane client显示LEC的状态.36. 用show module显示已安装的模块列表.37. 用物理接口建立与VLAN的连接:router# configure terminalrouter(config)# interface media module/portrouter(config-if)# description description-stringrouter(config-if)# ip address ip-addr subnet-maskrouter(config-if)# no shutdown38. 用中继链路来建立与VLAN的连接:router(config)# interface module/port.subinterfacerouter(config-ig)# encapsulation[isl|dotlq] vlan-numberrouter(config-if)# ip address ip-address subnet-mask39. 用LANE 来建立与VLAN的连接:router(config)# interface atm module/portrouter(config-if)# no ip addressrouter(config-if)# atm pvc 1 0 5 qsaalrouter(config-if)# atm pvc 2 0 16 ilnirouter(config-if)# interface atm module/port.subinterface multipointrouter(config-if)# ip address ip-address subnet-maskrouter(config-if)# lane client ethernet elan-numrouter(config-if)# interface atm module/port.subinterface multipointrouter(config-if)# ip address ip-address subnet-namerouter(config-if)# lane client ethernet elan-namerouter(config-if)# …40. 为了在路由处理器上进行动态路由配置,可以用下列IOS命令来进行: router(config)# ip routingrouter(config)# router ip-routing-protocolrouter(config-router)# network ip-network-numberrouter(config-router)# network ip-network-number41. 配置默认路由:switch(enable) set ip route default gateway42. 为一个路由处理器分配VLANID,可在接口模式下使用下列命令: 1000router(config)# interface interface numberrouter(config-if)# mls rp vlan-id vlan-id-num43. 在路由处理器启用MLSP:router(config)# mls rp ip44. 为了把一个外置的路由处理器接口和交换机安置在同一个VTP域中: router(config)# interface interface numberrouter(config-if)# mls rp vtp-domain domain-name45. 查看指定的VTP域的信息:router# show mls rp vtp-domain vtp domain name46. 要确定RSM或路由器上的管理接口,可以在接口模式下输入下列命令: router(config-if)#mls rp management-interface47. 要检验MLS-RP的配置情况:router# show mls rp48. 检验特定接口上的MLS配置:router# show mls rp interface interface number49. 为了在MLS-SE上设置流掩码而又不想在任一个路由处理器接口上设置访问列表:set mls flow [destination|destination-source|full]50. 为使MLS和输入访问列表可以兼容,可以在全局模式下使用下列命令:router(config)# mls rp ip input-acl51. 当某个交换机的第3层交换失效时,可在交换机的特权模式下输入下列命令:switch(enable) set mls enable52. 若想改变老化时间的值,可在特权模式下输入以下命令:switch(enable) set mls agingtime agingtime53. 设置快速老化:switch(enable) set mls agingtime fast fastagingtime pkt_threshold54. 确定那些MLS-RP和MLS-SE参与了MLS,可先显示交换机引用列表中的内容再确定:switch(enable) show mls include55. 显示MLS高速缓存记录:switch(enable) show mls entry56. 用命令show in arp显示ARP高速缓存区的内容。
- 1、下载文档前请自行甄别文档内容的完整性,平台不提供额外的编辑、内容补充、找答案等附加服务。
- 2、"仅部分预览"的文档,不可在线预览部分如存在完整性等问题,可反馈申请退款(可完整预览的文档不适用该条件!)。
- 3、如文档侵犯您的权益,请联系客服反馈,我们会尽快为您处理(人工客服工作时间:9:00-18:30)。
VLAN配置命令
8.2.2.1 vlan
命令:vlan [vlan-id]
no vlan [vlan-id]
功能:创建vlan 并且进入vlan 配置模式,在vlan 模式中,用户可以配置vlan 名称和为该vlan 分配交换机端口;本命令的no 操作为删除指定的vlan。
参数:[vlan-id]为要创建/删除的vlan 的vid,取值范围为1~4094。
命令模式:全局配置模式
缺省情况:交换机缺省只有vlan1。
使用指南:vlan1 为交换机的缺省vlan,用户不能配置和删除vlan1。
允许配置vlan的总共数量为4094 个。
另需要提醒的是不能使用本命令删除通过gvrp 学习到的动态vlan。
举例:创建vlan100,并且进入vlan100 的配置模式。
switch (config)#vlan 100
switch (config-vlan100)#
8.2.2.2 name
命令:name [vlan-name]
no name
功能:为vlan 指定名称,vlan 的名称是对该vlan 一个描述性字符串;本命令的no 操作为删除vlan 的名称。
参数:[vlan-name]为指定的vlan 名称字符串。
命令模式:vlan 配置模式
缺省情况:vlan 缺省名称为vlanxxx,其中xxx 为vid。
使用指南:交换机提供为不同的vlan 指定名称的功能,有助于用户记忆vlan,方便管理。
举例:为vlan100 指定名称为testvlan。
switch (config-vlan100)#name testvlan
8.2.2.3 switchport access vlan
命令:switchport access vlan [vlan-id]
no switchport access vlan
功能:将当前access 端口加入到指定vlan;本命令no 操作为将当前端口从vlan 里删除。
参数:[vlan-id]为当前端口要加入的vlan vid,取值范围为1~4094。
命令模式:接口配置模式
缺省情况:所有端口默认属于vlan1。
使用指南:只有属于access mode 的端口才能加入到指定的vlan 中,并且access 端口同时只能加入到一个vlan 里去。
举例:设置某access 端口加入vlan100。
switch (config)#interface ethernet 0/0/8
switch (config-ethernet0/0/8)#switchport mode access
switch (config-ethernet0/0/8)#switchport access vlan 100
switch (config-ethernet0/0/8)#exit
8.2.2.4 switchport interface
命令:switchport interface [interface-list]
no switchport interface [interface-list]
功能:给vlan 分配以太网端口的命令;本命令的no 操作为删除指定vlan 内的一个或一组端口。
参数:[interface-list] 要添加或者删除的端口的列表,支持”;””-”,如:ethernet 0/0/1;2;5或ethernet 0 /0/1-6;8。
命令模式:vlan 配置模式
缺省情况:新建立的vlan 缺省不包含任何端口。
使用指南:access 端口为普通端口,可以加入vlan,但同时只允许加入一个vlan。
举例:为vlan100 分配百兆以太网端口0/0/1,0/0/3,0/0/4-7,0/0/8。
switch (config-vlan100)#switchport interface ethernet 0/0/1;3;4-7;8
8.2.2.5 switchport mode
命令:switchport mode {trunk|access}
功能:设置交换机的端口为access 模式或者trunk 模式。
参数:trunk 表示端口允许通过多个vlan 的流量;access 为端口只能属于一个vlan。
命令模式:接口配置模式
缺省情况:端口缺省为access 模式。
使用指南:工作在trunk mode 下的端口称为trunk 端口,trunk 端口可以通过多个vlan的流量,通过trunk 端口之间的互联,可以实现不同交换机上的相同vlan 的互通;工作在access mode 下的端口称为access 端口,access 端口可以分配给一个vlan,并且同时只能分配给一个vlan。
举例:将端口0/0/5 设置为trunk 模式,端口0/0/8 设置为access 模式。
switch (config)#interface ethernet 0/0/5
switch (config-ethernet0/0/5)#switchport mode trunk
switch (config-ethernet0/0/5)#exit
switch (config)#interface ethernet 0/0/8
switch (config-ethernet0/0/8)#switchport mode access
switch (config-ethernet0/0/8)#exit
8.2.2.6 switchport trunk allowed vlan
命令:switchport trunk allowed vlan {[vlan-list]|all}
no switchport trunk allowed vlan
功能:设置trunk 端口允许通过vlan;本命令的no 操作为恢复缺省情况。
参数:[vlan-list]为允许在该trunk 端口上通过的vlan 列表;all 关键字表示允许该trunk端口通过所有vlan 的流量。
命令模式:接口配置模式
缺省情况:trunk 端口缺省允许通过所有vlan。
使用指南:用户可以通过本命令设置哪些vlan 的流量通过trunk 端口,没有包含的vlan流量则被禁止。
举例:设置trunk 端口允许通过vlan1,3,5-20 的流量。
switch (config)#interface ethernet 0/0/5
switch (config-ethernet0/0/5)#switchport mode trunk
switch (config-ethernet0/0/5)#switchport trunk allowed vlan 1;3;5-20
switch (config-ethernet0/0/5)#exit
8.2.2.7 switchport trunk native vlan
命令:switchport trunk native vlan [vlan-id]
no switchport trunk native vlan
功能:设置trunk 端口的pvid;本命令的no 操作为恢复缺省值。
参数:[vlan-id]为trunk 端口的pvid。
命令模式:接口配置模式
缺省情况:trunk 端口默认的pvid 为1。
使用指南:在802.1q 中定义了pvid 这个概念。
trunk 端口的pvid 的作用是当一个untagged 的帧进入trunk 端口,端口会对这个untagged 帧打上带有本命令设置的native pvid 的tag 标记,用于vlan 的转发。
举例:设置某trunk 端口的native vlan 为100。
switch (config)#interface ethernet 0/0/5
switch (config-ethernet0/0/5)#switchport mode trunk
switch (config-ethernet0/0/5)#switchport trunk native vlan 100
switch (config-ethernet0/0/5)#exit
8.2.2.8 vlan ingress disable
命令:vlan ingress disable
no vlan ingress disable
功能:关闭端口的vlan 入口规则;本命令的no 操作为打开入口准则。
命令模式:接口配置模式
缺省情况:系统缺省打开端口的vlan 入口准则。
使用指南:当打开端口的vlan 入口规则,系统在接收数据时会检查源端口是否是该vlan的成员端口,如果是则接受数据并转发到目的端口,否则丢弃该数据。
举例:关闭端口的vlan 入口规则。
switch (config-ethernet0/0/1)# vlan ingress disable。
