EA帮助文档(中文)
numeca 的中文帮助文件帮助文档
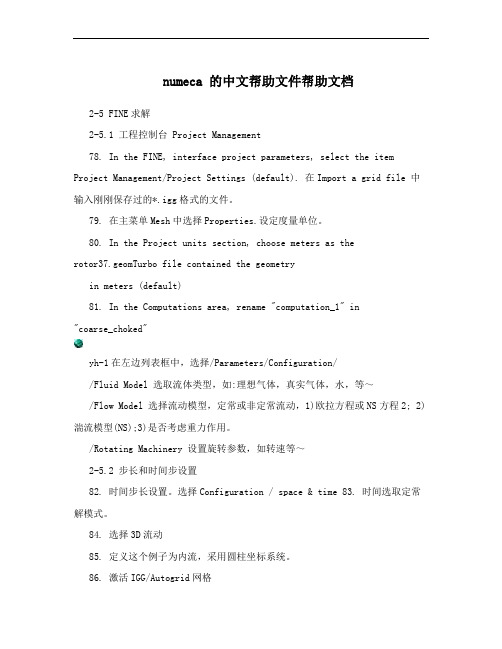
numeca 的中文帮助文件帮助文档2-5 FINE求解2-5.1 工程控制台 Project Management78. In the FINE, interface project parameters, select the item Project Management/Project Settings (default). 在Import a grid file 中输入刚刚保存过的*.igg格式的文件。
79. 在主菜单Mesh中选择Properties.设定度量单位。
80. In the Project units section, choose meters as therotor37.geomTurbo file contained the geometryin meters (default)81. In the Computations area, rename "computation_1" in"coarse_choked"yh-1在左边列表框中,选择/Parameters/Configuration//Fluid Model 选取流体类型,如:理想气体,真实气体,水,等~/Flow Model 选择流动模型,定常或非定常流动,1)欧拉方程或NS方程2; 2)湍流模型(NS);3)是否考虑重力作用。
/Rotating Machinery 设置旋转参数,如转速等~2-5.2 步长和时间步设置82. 时间步长设置。
选择Configuration / space & time 83. 时间选取定常解模式。
84. 选择3D流动85. 定义这个例子为内流,采用圆柱坐标系统。
86. 激活IGG/Autogrid网格87. 设置旋转速度。
-17188RPM80-87这几步在6.0以上版本中方法不同,不必激活IGG。
参考上面yh-1 2-5.3 在FINE查看网格88. 单击Mesh图标在6.0以上版本中选择菜单Mesh/View On/Off89. 单击图形查看按扭,如图2.5.3-1中下侧的图标2-5.4 物理模型2-5.4.1 概要(以下内容与6.0以上版本中的位置不同)90. 打开对模型话框,Physical Model/General physics,如图2.5.4-191. 选取Fluid model这个标签,92. 弹出是否创建新流体的对话框,选择No.93. 选取AIR(Perfect Gas)空气,理想气体.在这个列表框中。
ABAQUS帮助范例中文索引
帮助文档ABAQUS Example Problems Menual1.静态应力/位移分析1.1.静态与准静态应力分析1.1.1.螺栓结合型管法兰连接的轴对称分析1.1.2.薄壁机械肘在平面弯曲与内部压力下的弹塑性失效1.1.3.线弹性管线在平面弯曲下的参数研究1.1.4.橡胶海绵在圆形凸模下的变形分析1.1.5.混泥土板的失效1.1.6.有接缝的石坡稳定性研究1.1.7.锯齿状梁在循环载荷下的响应1.1.8.静水力学流体单元:空气弹簧模型1.1.9.管连接中的壳-固体子模型与壳-固体耦合的建立1.1.10.无应力单元的再激活1.1.11.黏弹性轴衬的动载响应1.1.12.厚板的凹入响应1.1.13.叠层复合板的损害和失效1.1.14.汽车密封套分析1.1.15.通风道接缝密封的压力渗透分析1.1.16.震动缓冲器的橡胶/海绵成分的自接触分析1.1.17.橡胶垫圈的橡胶/海绵成分的自接触分析1.1.18.堆叠金属片装配中的子模型分析1.1.19.螺纹连接的轴对称分析1.1.20.周期热-机械载荷下的汽缸盖的直接循环分析1.1.21.材料(沙产品)在油井中的侵蚀分析1.1.22.压力容器盖的子模型应力分析1.1.23.模拟游艇船体中复合涂覆层的应用1.2.屈曲与失效分析1.2.1.圆拱的完全弯曲分析1.2.2. 层压复合壳中带圆孔圆柱形面的屈曲分析1.2.3.点焊圆柱的屈曲分析1.2.4. K型结构的弹塑性分析1.2.5. 不稳定问题:压缩载荷下的加强板分析1.2.6.缺陷敏感柱型壳的屈曲分析1.3. 成形分析1.3.1. 圆柱形坯料墩粗:利用网格对网格方案配置与自适应网格的准静态分析1.3.2. 矩形方盒的超塑性成型1.3.3. 球形凸模的薄板拉伸1.3.4. 圆柱杯的深拉伸1.3.5. 考虑摩擦热产生的圆柱形棒材的挤压成形分析1.3.6. 厚板轧制成形分析1.3.7. 圆柱杯的轴对称成形分析1.3.8. 杯/槽成形分析1.3.9. 正弦曲线形凹模锻造1.3.10. 多重复合凹模锻造1.3.11. 平滑辊成形中的瞬态与稳态分析1.3.12. 型钢扎制成形分析1.3.13. 环扎成形分析1.3.14. 轴对称挤压成形中的瞬态与稳态分析1.3.15. 两步成形仿真1.3.16. 圆柱形坯料墩粗:热-位移耦合与隔热分析1.3.17. 金属板热成形中的不稳定静态问题分析1.4. 破裂与损伤1.4.1. 平板局部破裂分析:弹性线弹簧模拟1.4.2. 线弹性无限半空间中的锥裂纹围道积分1.4.3. 带局部轴向裂纹有限长度圆筒的弹塑性线弹簧模拟1.4.4. 三点弯曲试件的裂纹扩展1.4.5. 压力下刚性表面的松解工艺分析1.4.6. 钝角槽光纤金属绝缘板的失效分析1.5. 输入分析1.5.1. 二维拉伸弯曲的回弹1.5.2. 方形盒的深拉伸2. 动态应力/位移分析2.1. 动态应力分析2.1.1. 有局部非弹性失效结构的非线性动态分析2.1.2. Detroit Edison管滑轮试验2.1.3. 刚性抛丸对板的变化及影响2.1.4. 侵蚀抛丸对板的变化及影响2.1.5. 网球拍与球2.1.6. 变厚度燃料水槽壳的受压分析2.1.7. 汽车悬架模拟2.1.8. 管塞爆炸2.1.9. 常规接触的膝垫效应2.1.10. 常规接触的压接成形2.1.11. 常规接触的堆块失稳2.1.12. 带海绵效应限幅器的木桶坠落2.1.13. 铜杆的斜碰2.1.14. 带挡板木桶中的流体晃动2.1.15. 混泥土重力坝的地震分析2.1.16. 准静态或动载下薄壁铝挤压成形中的逐步损坏分析2.2. 基于模态的动态分析2.2.1.利用子结构和循环对称的旋转风扇分析2.2.2.Indian Point反应堆给水线的线性分析2.2.3. 三维框架建筑的感应波谱2.2.4. 使用平行Lanczos本征求解器结构的特征值分析2.2.5. 制动噪声分析2.2.6. 使用剩余模态的天线结构的动态分析2.2.7. 白车身模型的恒定动态分析2.3.联合仿真分析2.3.1. 充气门密封的关闭模拟。
Enterprise Architect 中文经典教程
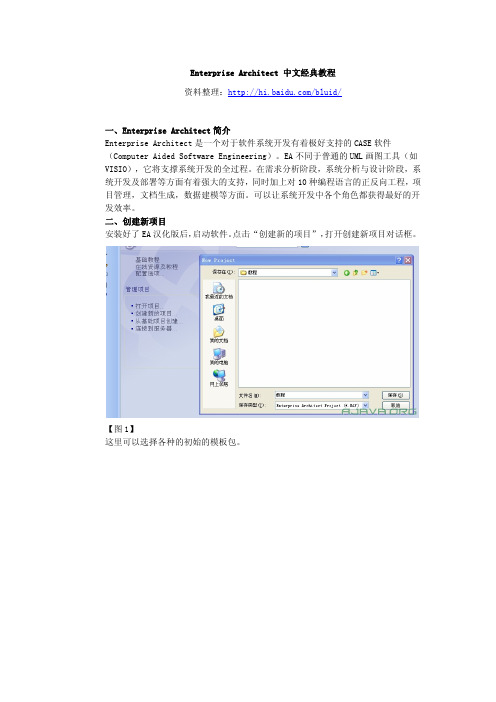
Enterprise Architect 中文经典教程资料整理:/bluid/一、Enterprise Architect简介Enterprise Architect是一个对于软件系统开发有着极好支持的CASE软件(Computer Aided Software Engineering)。
EA不同于普通的UML画图工具(如VISIO),它将支撑系统开发的全过程。
在需求分析阶段,系统分析与设计阶段,系统开发及部署等方面有着强大的支持,同时加上对10种编程语言的正反向工程,项目管理,文档生成,数据建模等方面。
可以让系统开发中各个角色都获得最好的开发效率。
二、创建新项目安装好了EA汉化版后,启动软件。
点击“创建新的项目”,打开创建新项目对话框。
【图1】这里可以选择各种的初始的模板包。
我们选择了其中几个,然后确定打开了项目浏览器。
我们的项目将从这里开始了。
【图3】三、EA软件配置在使用软件之前,我们先来对它进行配置。
打开“工具”-->“选项”。
【图4】常规配置中,比较重要的是作者这项。
因为在EA项目的团队协作中,作者是每个人的身份标识。
在代码工程中,最好把文件编码设置成UTF8或者是GB中文。
其他方面的配置,因为都是中文的,也比较容易理解。
有些不明的地方,可以多琢磨。
另外对于最下面的十种编程语言,可以根据自己的需要,进行一些配置。
比如PHP,可以配置PHP4或者是PHP5,那么生成的代码也是有些不同的。
还可以隐藏其他没有用到的语言。
四、用例图,类图的使用用例图(use case)用例图是我们做系统分析的通常第一步,是非常重要的。
毕竟大部分的开发流程,都将需求分析作为首要步骤,也是必要步骤。
将系统需求化作图型表达出来。
首先是在项目浏览器中,右键“添加”-->“新建图表”。
【图5】然后可以加入一些角色和用例,在每次在工具箱里面拉出一个元件,都将打开这个元件的设置对话框,在对话框内填入元件的名称等信息。
EA基本使用
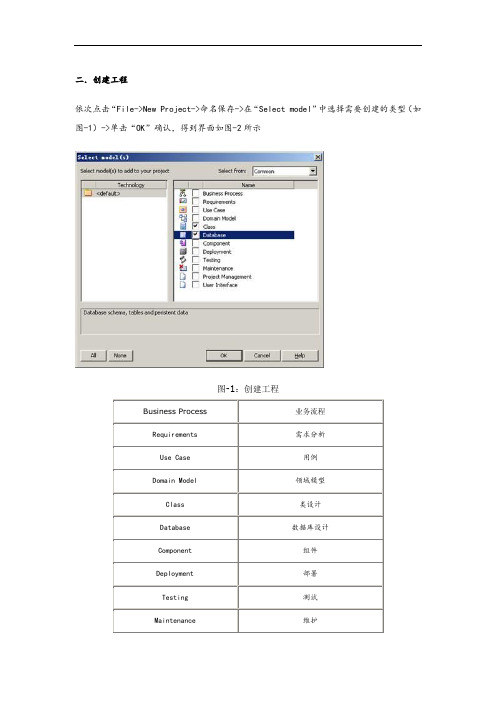
二.创建工程依次点击“File->New Project->命名保存->在“Select model”中选择需要创建的类型(如图-1)->单击“OK”确认,得到界面如图-2所示图-1:创建工程Business Process 业务流程Requirements需求分析Use Case用例Domain Model领域模型Class类设计Database数据库设计Component组件Deployment部署Testing测试Maintenance维护Project Management项目管理User Interface用户接口表-1:创建项目的常见类型图-2:创建项目后界面截图三.一些基本的通用设置设置默认代码环境依次点击:“Tool->Options-Source Code Engineering->Default Language For Code Ge neration->C#”如图3所示,完成:单击“Close”确认退出。
图-3:设置默认代码环境设置默认数据库依次点击:“Tool->Options- Code Editors->Default Database->SQL Server 2005”如图4所示:图-4:设置默认数据库四.Class模型.创建“Class”模型依次点击“File->New Project->命名保存->在“Select model”中勾选“Class”,最后单击“确定”进入设计界面。
在设计界面的左边是工具箱(如图5)图-5:类模型工具栏Class Elements Common Package包Note注释Class类Constraint约束条件Interface接口Document文档:附加文档附件Enumeration枚举Artifact人工:表示任意的系统任意的Table表Requirement需求描述Signal对象通信信号的描述Issue问题描述Association关联Change变化描述Class Relationships Boundary分界线Associate关联Dependency依赖关系Generalize泛化Realize实现Compose组成Trace追踪Associate Class关联类Information Flow数据流Assembly程序集Note Link注释链接Realize实现??Nesting嵌套??Package Merge包的合并??Package Import包的导入??.为模型中创建的“Class”对象使用别名首先在工具箱中点选,然后在合适的位置左键单击确定,之后弹出属性窗口(如图7所示)图-7:新建类截图在“Name”栏中输入Class 的名称“Test”,然后在“Alias”中输入一个别名“测试”。
eaid填写模板
EAID模板创建指南1. 概述欢迎使用EAID(Easy AI Document)模板创建工具!本指南将帮助您快速上手使用该工具。
EAID模板创建工具旨在提供一种用户友好、易于理解的方式,以创建模板,并生成适用于文档和文本编辑器的Markdown格式输出。
2. 安装与使用2.1 安装EAID模板创建工具可以通过以下步骤进行安装:1.下载并安装Python(版本3.6及以上):[Python官方网站](2.打开终端(或命令提示符),运行以下命令安装EAID模板创建工具:pip install eaid2.2 使用使用EAID模板创建工具创建模板的步骤如下:1.打开终端(或命令提示符),运行以下命令:eaid create-template2.按照提示输入模板的相关信息,如模板名称、模板描述等。
3.等待程序完成模板创建,并生成Markdown格式的输出文件。
3. 模板创建3.1 模板信息在创建模板时,您需要提供以下信息:•模板名称:模板的名称,用于简要描述模板的用途。
•模板描述:对模板的详细描述,包括模板的功能、用途以及适用范围。
•模板作者:模板的作者姓名或组织名称。
•模板版本:模板的版本号,用于标识模板的不同版本。
•创建日期:模板的创建日期,以年月日的形式表示。
3.2 模板内容模板内容应该包括以下部分:•概述:对模板的功能和用途进行简要介绍。
•安装与使用:提供安装和使用该模板的详细步骤。
•模板创建:描述如何使用EAID模板创建工具创建模板的步骤。
•模板示例:提供一个示例,展示模板的使用方法和效果。
•常见问题:列出一些常见问题,并提供解答或解决方案。
4. 示例以下是一个示例模板:# 模板名称:Markdown文档模板## 模板描述本模板用于创建Markdown格式的文档。
适用于编写技术文档、报告、博客等。
## 模板作者John Doe## 模板版本1.0.0## 创建日期2022年10月1日## 概述本模板提供了一个简单易用的Markdown文档结构,包括标题、段落、列表、图片等基本元素。
Enterprise-Architect-中文经典教程
Enterprise Architect 中文经典教程一、Enterprise Architect简介Enterprise Architect是一个对于软件系统开发有着极好支持的CASE软件(Computer Aided Software Engineering)。
EA不同于普通的UML画图工具(如VISIO),它将支撑系统开发的全过程。
在需求分析阶段,系统分析与设计阶段,系统开发及部署等方面有着强大的支持,同时加上对10种编程语言的正反向工程,项目管理,文档生成,数据建模等方面。
可以让系统开发中各个角色都获得最好的开发效率。
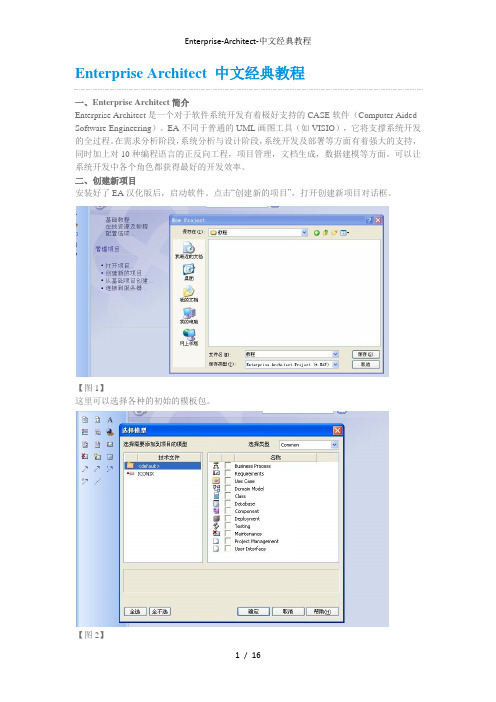
二、创建新项目安装好了EA汉化版后,启动软件。
点击“创建新的项目”,打开创建新项目对话框。
【图1】这里可以选择各种的初始的模板包。
【图2】我们选择了其中几个,然后确定打开了项目浏览器。
我们的项目将从这里开始了。
【图3】三、EA软件配置在使用软件之前,我们先来对它进行配置。
打开“工具”–>“选项”。
【图4】常规配置中,比较重要的是作者这项。
因为在EA项目的团队协作中,作者是每个人的身份标识。
在代码工程中,最好把文件编码设置成UTF8或者是GB中文。
其他方面的配置,因为都是中文的,也比较容易理解。
有些不明的地方,可以多琢磨。
另外对于最下面的十种编程语言,可以根据自己的需要,进行一些配置。
比如PHP,可以配置PHP4或者是PHP5,那么生成的代码也是有些不同的。
还可以隐藏其他没有用到的语言。
四、用例图,类图的使用用例图(use case)用例图是我们做系统分析的通常第一步,是非常重要的。
毕竟大部分的开发流程,都将需求分析作为首要步骤,也是必要步骤。
将系统需求化作图型表达出来。
首先是在项目浏览器中,右键“添加”–>“新建图表”。
【图5】然后可以加入一些角色和用例,在每次在工具箱里面拉出一个元件,都将打开这个元件的设置对话框,在对话框内填入元件的名称等信息。
现在我们是表达一个用户注册和登录的场景:【图6】加入关联,用例图中最常用的关联是“使用use”,当然也经常会用到“包含include”“扩展extend”。
iTween帮助文档参数解析(中文版)

1. CameraFade(摄像机的渐隐)其中Camera或者场景的东西并没有消失,只是在屏幕上贴了一张贴图首先,要用到摄像机的渐隐/显功能的话,必须调用CameraFadeAdd()函数,来添加背景图片,不然在运行时会包错。
下面来讲解一下CameraFade里面需要用到的几个函数1) CameraFadeAdd() //当不传参的时候,会默认一个黑色的背景CameraFadeAdd(Texture2D texture) //摄像机视图渐隐后显示texture CameraFadeAdd(Texture2D texture,int depth) //同上,depth的作用暂时不知道,猜测与分层有关,可能类似PS中的图层2)CameraFadeDepth(int depth) //改变刚才texture的depth3)CameraFadeDestroy() //移除并摧毁4)CameraFadeTo(float amount,float time) 从当前视图转换到前面设置的视图(texture)//amount透明度,介于0~1之间。
等于1时Texture完全覆盖Camera视图//time是达成该效果需要多少秒CameraFadeTo(Hashtable args) //用哈希表可以设置更详细的内容此函数的哈希表key有:name,amount,time,delay,easetype,looptype,onstart等,KEY 作用以及值参考提供的EXCEL文档中的HASHTABLE项5)CameraFadeFrom(float amount,float time)CameraFadeTo(Hashtable args)//从前面设置的视图(texture)转换到当前视图,参数参考CameraFadeTo6)CameraTexture(Color color) //创建一个单色的用于CameraFade的texture2d2. Audio音频同CameraFade一样,itween中对音频的控制也并没有结束音频的播放,而是控制的音频的音量(volume)和音调(pitch)。
AForge中文文档教学文案
AForge中⽂⽂档教学⽂案A F o r g e中⽂⽂档AForgeAForge命名空间是/doc/1e88f362864769eae009581b6bd97f192279bf9b.html 框架,它包含框架和类的其他命名空间所使⽤的核⼼类,可以独⽴地⽤于各种⽬的。
AForge.ControlsAForge.Controls命名空间包含不同的有⽤的UI控件,可以与其他类⼀起使⽤/doc/1e88f362864769eae009581b6bd97f192279bf9b.html 架构AForge.FuzzyAForge.Fuzzy命名空间包含⼀组接⼝和类,以便使⽤模糊集操作。
AForge.GeneticAForge.Genetic命名空间包含⽤于遗传计算的接⼝和类。
命名空间及其⼦名称空间包含类,它允许解决许多不同的问题(优化、近似、pr)。
版,等)和遗传算法(GA)的帮助,遗传编程(GP),基因表达式编程(GEP)。
AForge.ImagingAForge.Imaging命名空间包含不同的图像处理例程的接⼝和类。
AForge.Imaging.ColorReductionAForge.Imaging.ColorReduction命名空间包含⼀组⽤于在彩⾊图像中执⾏⾊彩还原的类,其中包括颜⾊量化类、颜⾊重新编码功能和颜⾊抖动算法。
/doc/1e88f362864769eae009581b6bd97f192279bf9b.html plexFiltersAForge.Imaging命名空间包含不同的图像处理例程的接⼝和类,它们是在复杂的傅⽴叶变换图像上完成的。
AForge.Imaging.FiltersAForge.Imaging.Filters命名空间包含接⼝和类的集合,它们提供不同的图像处理过滤器。
这个名称空间的类允许对源映像做不同的转换,这样做就可以了。
直接对源图像或提供新图像作为图像处理程序的结果。
EA基本使用范文

EA基本使用范文EA(Enterprise Architecture)是一种管理框架,用于帮助组织设计和管理其IT系统、业务流程和技术架构。
它为组织提供了一个综合的视图,帮助他们了解自己的业务需求,并将这些需求转化为可行的IT解决方案。
在本文中,我们将探讨EA的基本概念和使用范围。
首先,EA的核心概念是将企业分为四个层次:业务架构、数据架构、应用程序架构和技术架构。
业务架构描述了组织的业务流程和目标,包括组织的使命、愿景和策略。
数据架构包括组织的数据资产和信息流程,帮助组织管理和分析数据。
应用程序架构描述了组织的应用程序和软件系统,包括它们之间的集成和交互。
技术架构包括组织的硬件、软件和网络设施,帮助组织实现其业务目标。
EA的使用范围包括以下几个方面:1.业务规划:EA可以帮助组织制定业务战略和规划,以实现其长期目标。
通过分析组织的业务需求和流程,EA可以帮助组织确定最佳的IT解决方案,以支持其业务目标。
2.技术规划:EA可以帮助组织确定最佳的技术架构和解决方案,以确保IT系统的可靠性、安全性和可扩展性。
通过分析组织的技术需求和资源,EA可以帮助组织有效地规划和管理其技术资产。
3.业务流程优化:EA可以帮助组织优化其业务流程和流程,以提高效率和降低成本。
通过分析组织的业务流程和系统集成,EA可以帮助组织识别潜在的改进机会,并提供实施计划。
4.系统集成:EA可以帮助组织实现系统集成和互操作性,以确保系统之间的无缝协作和交互。
通过分析组织的应用程序和数据,EA可以帮助组织设计和构建可扩展和灵活的系统集成解决方案。
5.风险管理:EA可以帮助组织识别和管理风险,以确保IT系统的安全性和稳定性。
通过分析组织的业务流程和数据资产,EA可以帮助组织确定潜在的风险因素,并提供风险管理策略。
总的来说,EA是一个综合性的管理框架,可以帮助组织设计和管理其IT系统、业务流程和技术架构。
通过使用EA,组织可以更好地了解自己的业务需求,并将这些需求转化为可行的IT解决方案。
EA帮助文档(中文)
##Enterprise Architect帮助文档EA7.0帮助文档翻译目录简介 (3)从此处开始 (3)使用EA (3)用EA建模 (3)模型管理 (3)项目管理 (3)编码工程 (3)调试和配置文档 (3)数据建模 (3)一张数据表格 (3)创建一个表格 (4)设置表格属性 (5)创建字段 (10)创建Oracle包 (12)主键 (12)外键 (13)存储过程 (18)视图 (22)索引,触发器和检查约束 (24)生成DDL (26)把一个包生成DDL (26)进程的数据类型转换 (27)包的数据类型转换 (28)数据库管理系统数据类型 (29)从开放式数据库中导入数据库模式 (30)转化MDA (34)XML技术 (34)生成文档 (34)EA扩展 (34)UML字典 (34)项目角色和EA (34)授权管理 (34)术语 (34)简介从此处开始使用EA用EA建模模型管理项目管理编码工程调试和配置文档数据建模一张数据表格下面展示了一个数据模型表,上面有三个表格,相互之间用主外键连接起来。
上面同样展示了主外键的操作。
你也可以添加其他操作:检验,触发器,约束性,索引。
一个数据模型表在EA中表现为一个类表,创建方法和其他类型的表一样。
创建一个表格什么是表?关系模型数据库中,最基础的模型结构就是“表”。
一个表代表了具有相同结构的一系列记录。
UML数据模型配置文件中的表表现为一个衍型类,这就是说,一个带着衍型的类元素作用于它之上。
一个表的图标表示在图表的右上方。
创建一个表通过以下步骤创建一个表:1、选择一个表;2、选择工具条选项中的更多工具|扩展|数据模型菜单;3、点击元素列中的表格元素,然后点击表。
一个表格就展示在表上了;4、如果类:表n属性对话框没有显示,双击表来显示它;5、在名称一栏,键入一个合适的名称,根据需要键入其他的属性。
6、点击OK按钮。
设置表格属性一旦你创建了一个表,你可以设置它的属性。
EA工具和架构设计

EA工具和架构设计课程简介:本课程主要讲述UML工具,需求分析中建模技术(使用EA工具完成需求建模,重点讲解用例图、活动图与状态图的使用,包图如何组织用例图,以及用例图如何扩展完成质量与环境需求),概要设计中建模技术(即软件架构设计,重点讲解组件图、部署图、复合结构图在架构设计中使用,如何扩展UML模型完成大型系统的架构设计),详细设计中建模技术(使用EA工具中的类图、对象图、状态图、时序图或协作图完成详细设计,同时介绍细节算法图的设计)等要点。
【主办单位】中国电子标准协会【协办单位】深圳市威硕企业管理咨询有限公司内容Day1 UML工具篇UML模型图在设计中的选择(在软件开发的不同场景合理选择UML模型)- UML中13种图的应用范围- 最小UML建模ICONIX- 特征驱动建模(FDD)- 最大UML建模RUP- 模型驱动开发(MDD)以及实现标准(MDA)- 敏捷模型驱动开发(AMDD)UML模型与软件文档关系- 软件文档的UML模型的比例- UML工具自动生成软件文档- 在UML工具中定义软件文档模板- 软件文档的版本与基线- 发布UML模型到门户扩展UML工具- UML元模型- 软件架构的元模型- OCL的元模型- 扩展UML展现外观- 扩展UML构造原型- 扩展UML编程- UML profile的扩展- UML add-in的介绍(TOGAF、DODAF等)EA工具团队成员管理- 项目作者管理- 团队角色管理- 团队人力资源管理- 成员客户端管理- 团队权限管理团队在线设计- 部署服务器端,建立团队数据库- 客户端建立团队设计项目- 客户端连接到团队设计项目- 团队设计的规则- 保护自己设计成果团队离线设计- 设计项目的切割- 分派设计任务- 合并各个设计任务的成果- 设计任务切割力度与配置管理工具衔接工作- 建立设计配置库- 连接到配置管理工具- 设计人员签出签入设计模型- 设计模型对比分析- 建立和维护设计基线- 建立模型之间追踪关系- 完成追踪多版本管理- EA与其他工具交换模型Day2 需求分析中建模技术(使用EA 工具完成需求建模,重点讲解用例图、活动图与状态图的使用,包图如何组织用例图,以及用例图如何扩展完成质量与环境需求) 基于用例的基本分析- 从组织结构和业务需求提炼执行者- 分析执行者的用例- 复合型用例分解成原子型用例- 原子型用例描述(基本的管理单元)- 复合型用例描述- 功能用例命名方式- 讨论研究:业务功能用例的粒度如何控制?基于用例的高级分析- 分析用例路径重复性-包含用例- 分析用例路径相似性-泛化用例- 分析用例路径扩展性-扩展用例- 用例的重构- 案例分析:针对客户的实际样例进行高级分析业务场景(路径)分析- 业务基本场景(顺序化场景或路径)- 业务备选场景(分支化场景或路径)- 业务异常场景- 使用活动图或时序图描述业务场景业务实体分析- 词汇表与业务实体的关系- 功能用例与业务实体关系- 业务实体引用标识(只需要在用例文档中引用业务实体标识)- 业务实体字段信息描述业务规则分析- 业务对象规则分析- 业务规则描述方式(对象约束语言OCL 、自然业务语言)- 业务规则构成(业务语言、数学语言与关键字)- 业务规则类别(推导、约束与存在)- 模糊的业务规则- 业务规则引用标识(只需要在用例文档中引用业务规则标识)质量需求分析(非功能性需求-质量要求)- 用户关注的质量属性列表- 用户视角的质量属性分解- 说明性描述质量属性- 定量描述质量属性- 扩展UML 工具建立质量效用树模型环境需求分析(非功能性需求-环境要求)- 用户关注软件环境因素- 软件环境需求分析- 硬件与网络环境需求分析- 集成环境需求分析- 扩展UML工具完成环境效用树建模撰写需求规格说明书- 手工撰写需求规格说明书文法与句法- 使用词汇表中业务词汇描述需求- 撰写需求规格的误区- 需求规格的图文比例- 定制需求文档模板- UML工具自动生成需求规格说明书Day3概要设计中建模技术(即软件架构设计,重点讲解组件图、部署图、复合结构图在架构设计中使用,如何扩展UML模型完成大型系统的架构设计)概要设计准备阶段(全局分析)- 分析软件项目或产品的范围(领域范围与功能范围)- 分析软件项目或产品的约束条件(质量约束与环境约束)- 分析软件项目或产品的变化因素(关键因素与风险变化因素)- 分析企业现有资产是否可以在项目或产品复用- 分析软件项目或产品所需的国际标准- 对需求规格中的用例完成健壮性分析(对象分析)- 转述需求规格中的用例场景(行为分析)- 整理局部分析结果(分析类)概要设计之基础设计- 提取软件架构的组成元素(以下简称架构元素)- 设计软件架构元素的接口- 设计软件架构元素内部的可变因素(完成架构元素的可扩展性和可维护性设计)- 设计软件架构元素之间关联调用关系- 整理软件架构元素的体系结构(分层组织、总线组织与云组织)概要设计之高阶设计- 软件系统资源管理设计(资源规划10种架构模式)- 软件系统分布管理设计- 软件系统并行设计(分布式计算、SAAS与云计算)- 软件架构元素管理设计(软件架构元素以插件方式放在框架中管理)- 使用UML工具表达高阶架构设计概要设计之支撑设计- 软件架构元素的数据结构设计(数据持久设计)- 软件架构元素通讯协议设计- 软件架构元素的部署维护设计- 软件系统代码结构规划概要设计之关键质量设计- 软件系统高可靠性设计- 软件系统高性能设计- 软件系统安全性设计- 软件系统体验性设计概要设计之文档撰写- 使用EA工具定义软件概要文档模板- 统一软件概要文档编写规范- 软件概要文档中UML图形比例- 使用UML工具自动生成概要设计文档Day4详细设计中建模技术(使用EA工具中的类图、对象图、状态图、时序图或协作图完成详细设计,同时介绍细节算法图的设计)业务实体设计- ORM设计模式(行为模式、结构模式与元数据模式)- 业务实体属性设计- 业务实体关联与继承设计- 业务实体变化分析,完成可扩展业务实体设计- 业务实体对象缓存设计(内存数据库与业务实体存储关系)业务组件设计- 业务组件中业务类接口设计- 业务组件中业务类调用关系设计- 业务组件中业务类变化设计(设计模式与配置文件)- 业务组件之间协作设计(接口设计规范约定)- 业务组件与其他应用接口集成设计(业务对外发布设计)- 业务组件实现方式(Java,.NET)业务流程编排设计- 业务组件编排设计(EA工具中设计BPEL)- 业务组件中事务设计- 基于数据工作流设计- 基于活动工作流设计- 基于状态工作流设计- 基于消息的工作流设计用户界面规划设计- 以用户为中心的设计规范- 使用EA工具完成UI原型设计- 辅助EA工具的UI设计工具- UI组件导航设计- UI组件容器设计- UI组件安全性、性能、可靠性设计数据库详细设计- 数据库基本设计原则(范式原则、OO原则)- 可扩展性数据表设计- 数据库分区设计- 数据库分库设计- 数据库事务设计- 数据库连接设计代码结构设计- 多人协作编程模型与UML模型- UML模型产生文件与文件夹- 详细设计自动转化为代码- 详细设计与代码的同步方式- 数据库设计与数据库同步方式- 时序图与代码关系详细设计文档- 定义详细设计的文档模板- EA工具自动生成详细设计文档- 详细设计文档中算法细节- 详细设计文档与项目计划。
EA配置
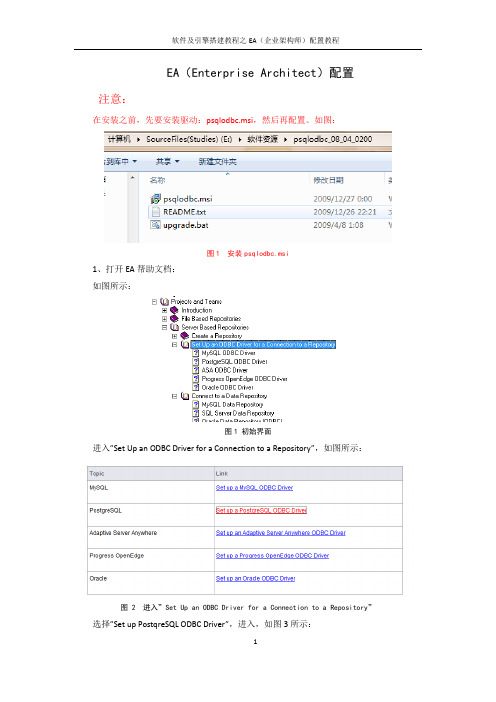
EA(Enterprise Architect)配置注意:在安装之前,先要安装驱动:psqlodbc.msi,然后再配置。
如图:图1 安装psqlodbc.msi1、打开EA帮助文档:如图所示:图1 初始界面进入”Set Up an ODBC Driver for a Connection to a Repository”,如图所示:图 2 进入”Set Up an ODBC Driver for a Connection to a Repository”选择”Set up PostqreSQL ODBC Driver”,进入,如图3所示:图3 进入”Set up PostqreSQL ODBC Driver”进入”Set up PostqreSQL ODBC Driver”后按照顺序配置。
2、准备连接其他电脑的数据库首先:打开EA,选择Open Project:图4 打开EA其次:选择Connect to source,如图5所示:图5 打开Connect to Source打开Connect to Source,弹出“数据链接属性”对话框,在对话框中选择连接,如图6所示:图6 数据连接属性在数据源中填写“postgres”,是ODBC配置里的User Name,如图7所示:图7 ODBC配置内容显示界面在“使用数据源名称”中选择PostgreSQL35W,也就是在配置数据库是使用的Data Source 名称,如图8所示:图8 “使用数据源名称”的选择完成“指定数据源”后,接着配置“输入登录服务器的信息”,如图9所示:图9 输入登录服务器的信息其中用户名称就是图7中的Usre Name,密码为123456。
完成上面的之后,点击“测试连接”,显示如图10所示测试连接成功,表示已经连接成功。
图10 测试连接成功点击“确定”,进入图11所示界面:图11 Connection Name&Type在Server里面填写“GAOJIYUAN”然后点击OK。
N80C186EA20资料
272432 – 1
Other brands and names are the property of their respective owners Information in this document is provided in connection with Intel products Intel assumes no liability whatsoever including infringement of any patent or copyright for sale and use of Intel products except as provided in Intel’s Terms and Conditions of Sale for such products Intel retains the right to make changes to these specifications at any time without notice Microcomputer Products may have minor variations to this specification known as errata
CONTENTS
INTRODUCTION 80C186EA CORE ARCHITECTURE Bus Interface Unit Clock Generator 80C186EA PERIPHERAL ARCHITECTURE Interrupt Control Unit Timer Counter Unit DMA Control Unit Chip-Select Unit Refresh Control Unit Power Management 80C187 Interface (80C186EA Only) ONCE Test Mode DIFFERENCES BETWEEN THE 80C186XL AND THE 80C186EA Pinout Compatibility Operating Modes TTL vs CMOS Inputs Timing Specifications PACKAGE INFORMATION Prefix Identification Pin Descriptions 80C186EA Pinout PAGE
Engineer Australia评估指导手册(EA认证)

MSA Online Application User’s Guide30 October 2014ContentsMSA Online Application Process Guide (1)Purpose (3)General Tips for Navigation (4)Registering for an EA ID & password (6)Engineers Australia Online Portal (myPortal) (9)MSA Application (10)Begin Application (11)Personal (12)Application (15)Education (16)Report (CDR Application Only) (17)Relevant Skilled Employment (CDR Application Only) (18)Additional Assessment services (19)Relevant Skilled Employment (19)Overseas PhD Assessment (20)Summary (21)Fee Payment (23)Payment details (23)Credit Card Payment (23)Payment on Invoice (24)Terms and Conditions (25)Additional Information Request (26)Application Status (27)PurposeThis document details the online MSA application process.Engineers Australia (EA) offers Migration Skills Assessment (MSA) for applicants intending to apply for migration to Australian via the Points Test Skilled Migration scheme. There are five pathways of assessment. They are as follows:1. Competency Demonstration Report (CDR);2. Accredited Australian Qualifications;3. Washington Accord Qualifications;4. Sydney Accord Qualifications and;5. Dublin Accord Qualifications.Applicants seeking migration skills assessment of the following qualifications should submit a CDR for assessment:•Candidates with Australian engineering qualifications that have not received full accreditation or approval by Engineers Australia;•Candidates with engineering qualifications from overseas countries from which Engineers Australia does not recognise the qualifications;•Candidates with non-accredited qualifications in engineering or in fields closely related to engineering and who may have post-graduate qualifications in engineering, substantial work experience and Continuing Professional Development (CPD) in an engineering occupation for which Engineers Australia is the appropriate assessing authority.Applicants seeking migration skills assessment of accredited qualification should submit via the relevant pathway as described below:•Candidates holding Australian engineering qualifications that have been accredited or approved Engineers Australia should submit an Application for Migration Skills Assessment Australian Engineering Qualifications;•Candidates holding engineering qualifications from overseas countries that have been accredited for recognition under the Washington Accord (Professional Engineer) should submit an Application for Migration Skills Assessment Washington Accord Qualifications; •Candidates holding qualifications in engineering or fields related to engineering, which are not recognised by Engineers Australia, but who may have post-graduate qualifications inengineering and substantial experience in engineering work.Please refer to the list of published assessing authorities on the Department of Immigration’s website.General Tips for NavigationThe system is optimised for the following internet browsers: Chrome, Firefox, Safari and Internet Explorer 8 (and above). Other browsers are not tested and not supported.Please note that uploading documents may take time. Uploading several documents may trigger an error. Please upload only one document at a time.Tooltips - Additional information is provided at several points in the portal in the form of tooltips. To view the information in the tooltips, hover your cursor over the tooltip icon as illustrated below:You can navigate through your application by clicking on the tabs on the left hand side of the screen.Using the previous page button of your web browser as well as the reload button can trigger errors. It is recommended that you do not use these features.Uploading a full application can take time. It is recommended that you save your application regularly.To return to your Applicant landing page at any time click on the Save & Exit button on the bottom right hand side of your screen or simply save the application using the Save button at the bottom left of the screen.•To log out of the portal, click the "Sign out" link in the menu bar on the top right hand corner of the page:•If you experience technical difficulties while using the portal, please contact our Member Services Team on 1300 653 113. Overseas applicants should call +61 2 6270 6555 (Monday to Friday - 9am to 5pm AEST). This phone number is located in the Talk to our Support Team section on the right hand side by clicking on the Contact us button.Registering for an EA ID & passwordIf you do not currently have an Engineers Australia ID and password you will need to register online via .au as shown below:If you do have an Engineers Australia ID number you need to click on Register for a password button which will lead you to the page as shown below:* Please make sure you use the email address you have previously provided to Engineers Australia.If you do have an Engineers Australia ID number, you will have to apply for both an EA ID and password.In order to register your details, you need to click on myPortal link as shown above. This will lead you to the below page which you can fill out in order to receive an EA ID number:Please click on the "Create an Account" button and fill out the form. Create a New AccountI P lease SelectI DD/MM/YYYYE.g.•30/1012014Male FemaleMa imum file uploadrTJiJNote that there may be a delay of 1-2 days in creating the account pending verification for some users. Once your account has been created, you can use your personalised EA ID and password to log in to myPortal and submit your MSA Application.Engineers Australia Online Portal (myPortal)Log into the Engineers Australia (EA) customer portal using your Engineers Australia ID and online password. This will take your portal landing page.When you are on the myPortal home page click on the menu on the top right hand side of the screen. In the drop down menu, select MSA as shown below.MSA ApplicationSelect Start MSA Application.Additional information regarding MSAassessment can be found by clickingon the MSA booklet link.After selecting start MSA application please select the relevant options from the drop down menus. Please note that if you request an Overseas PhD assessment or Relevant Skilled Employment assessment these will incur an additional assessment fee.Make sure that before you continue with your MSA application that you have read the MSA booklet. If you have read the MSA booklet and agree to the statement "by submitting an application I am aware that Engineers Australia may require original copies of documents to be sent via post in some instances", place a tick in the check box then click the "Begin MSA Application" button. Please note that you cannot change your choice of assessment and additional assessment(s) once the application has been started.Begin ApplicationWhen you begin your MSA application there will be a list on the left hand side of the screen. You can navigate to any of these tabs at any point in your application. The MSA assessment will take you through them in order, starting with your Personal Details. The PhD and Skilled Employment tabs will only be visible if you answered yes to either of the related questions on the previous page.Please note that you can switch from one tab to another at any time without impacting the progress of your application.PersonalThe Personal Details page requests that you upload a passport style photo, primary identification document, name change document (if relevant), Curriculum Vitae (CV) and your English language competency document.To add a file to your application click in the upload document field or on the “Choose File” button next to it. Select the file you would like to add to your application from your personal documents. There is the option to add multiple files if needed, just select the Add File button as shown:When attaching documents - please note that we prefer that written documents are in a .PDF format. Where an image has been scanned we require a colour scan of the original document with a minimum resolution of 300 dpi. Files should not be larger than 5MB, with a maximum file size allowance of 10MB.Passport-Style Photograph & Primary Identification DocumentAll MSA Applications must include: a passport style photo; and a passport bio-data page or Australian driver's licence. Where a passport or Australian drivers licence are not available, a copy of your Birth Certificate or Official Identity Document may be acceptable in lieu.Curriculum Vitae (CV/Resume)Please attach your most recent resume.Can you demonstrate English Language Competency?Please refer to the MSA Booklet as to whether you are required to submit a satisfactory English Language Competency Result. You can click on the link to the MSA Booklet as shown below.Upload your English language competency form. You should also include your English Language Competency test result reference by typing in the text field indicated below. Once completed please select Next to proceed to the next step.If you are seeking an exemption select the box as shown below. Upload an explanation for your exemption and supporting evidence by clicking on the upload document field or Choose File button next to it. Exemptions are granted on a case by case basis. Please refer to the MSA Booklet for detail about the exemption criteria.Once you have uploaded your justification click on the Next button.Can you demonstrate E ng l ish La n guage Competency? 0I f you hole! ocr:rP.clitP.c1 QIJAiifir;,tions from signAtory r:ountriP.s whP.rP. thP. offir.iA IAnguagP. is no t Fnglis h ,you ArP. rP.IlllirP.d to suhmit A sat sfactory [nglish Language Competency test result form as per the MSA Oooklet.0 eeking exempt i on from prov i ding Eng l ish Language Competency test resu l ts as per the MSA BoJk l et.Jus t i f i cationP l a up l oaJ a11 :xpla ll a .i oll ro1 yoll exempnon\lo Rle se-l ected( NextFor a CDR application, this Tab allows you to nominate the occupation the applicant wishes to be assessed for.For an Australian Qualification, a Washington, Sydney or Dublin Accord application, this Tab will show only the field for evidence of registration, which can be left empty if it does not apply to the applicant.Select your Engineering Occupation from the drop-down box. The Skill Level and ANZSCO Code will be automatically filled in. For some Occupations you may select a Specialisation. For additional information on these Occupations please refer to MSA Booklet. Click Next.In the Education section, please provide the requested information for your most relevant qualification. The required information is:•Qualification - write the title of you qualification (e.g. Bachelor Degree in Engineering);•Discipline - write the discipline of your qualification (e.g. Civil Engineering);•Institution - write the name of the institution where you completed your qualification (e.g.University of New South Wales);•Country – select the country of completion of your qualification from the drop-down list;•Degree/Qualification - upload your degree certificate;•Transcript - upload your transcript;•Date of completion- select the date of completion or the date of award for your qualification.If you have not completed this qualification please select the expected completion date. You can add additional qualifications by clicking on Add additional qualifications button.Report (CDR Application Only)•Please upload your Continuing Professional Development (CPD) statement. The CPD statement should describe how you keep up-to-date with developments in your field ofengineering after you have gained your undergraduate qualification and should be no more than one A4 Page. Please refer to the MSA Booklet for further details.•Please upload your Career Episodes. The Career Episodes should describe how you applied your engineering competencies either during your studies or during yourprofessional career. Please refer to the MSA Booklet for further details.•Please upload your Summary Statement. The Summary Statement must cross-reference the competency elements detailed in the paragraphs in your Career Episodes. Please refer to the MSA Booklet for further details.Select Next button to continue with your MSA application.Relevant Skilled Employment (CDR Application Only)You are required to provide evidences of employment for each period of Employment of 12 months or more, or if a period of employment is used as the basis for a career episode.Please refer to the Migration Skills Assessment Booklet for detail about the evidences of Employment.Select "Next" button to continue with your MSA application.Additional Assessment servicesUpon selection of the application type, you will be able to apply for our additional assessment services for the purpose of awarding points for migration purposes:- The Relevant Skilled Employment Assessment- The Overseas PhD AssessmentIn a further release of our online system, you will also be able to apply for these services separately if a standard assessment has already been completed.Relevant Skilled EmploymentIf you request a Relevant Skilled Employment Assessment please fill out the following form with the requested details and documents. Please refer to the MSA Booklet for further information. Select the Next button to continue with your MSA application.Overseas PhD AssessmentIf you request an Overseas PhD Assessment please fill out the following form and submit the requested documents. Please note that this is not required as part of a standard Assessment Application, and will incur an additional fee. Please refer to the MSA Booklet for further information. Select the Next button to continue with your MSA application.You have app for tne assessmeot of your overseasPhD Pease sut>m•evidence of your Doctorate Degree (PhD) for assessrl'ent aod dentlfoea:10n o!oomparabi y l'lli'e Aus!falo.an Cua foeoton Frameworl< IAQ•)P l ease note th s 1S no1re-quias part of a standard Assess.me"'t Applca ion a:rd w:i11eur an additiona l f"eeNo1e tf'oa:t th1s assessonem rs nom!a-naatoryNeed more .nfOJmi.non'? Check out tne Aad1b0na Assessm e n t Senr<:es section of the MSA 9oo kl e tT i tle0 •I nst i tute0 •Disc i p l i ne0 •Country 0 •-S e l e ct-T esta m ur 0 •1U'i'iT hesis Abstract0•Trans c r ipt 0E x am i ners0 •Cl'tODUFUeP ublications 0 •Date of Co mp l et io n o r Awa r d 0 •1'--...JjllSummaryThis tab shows the application overview.The heading You still need to provide will list any documents that you still need to submit. You can navigate to these pages by using the task bar menu on the left hand side of the screen. (Refer to Tips for General Navigation).You will not be able to proceed to payment and submit your application until all mandatory documents are submitted.Once you have provided all the required documents you can continue to the payment section. Please put a tick in the Declarations to confirm your MSA application and to continue to the payment section.Select Continue to Payment, Select OK to confirm your intention to submit your documents for application and proceed to payment.Uploading the documents and submitting the application can take several minutes. Do not reload the page during this time.Fee PaymentPayment details1. You can click on "Return to Application" at any time before you submit your payment. Youhave the option of paying now via credit card or to have an invoice emailed to your listed email address.Credit Card Payment2. If you would like to pay now via credit card select the radio button "I'll pay now via CreditCard".Please enter the payment details as requested including:•the type of credit card you are paying with – please select the radio button next to the type of card you are using. Engineers Australia accepts Amex, Visa and Mastercard and our preferred payment type is the Engineers Australia Amex;•the cardholder’s name;•the credit card number;•the credit card expiry date; and•the CCV of your credit card – this is the 3 or 4 digit number located on the back of your credit.Payment on InvoiceIf you would like the invoice emailed to you please select the Please invoice me. Please note that the invoice will be sent to the email address assigned to you. To have the email sent to a different email address, please update your details and resume your application.Note that if the payment is not received by the invoice’s due date, the application will be cancelled. It will not be sent for assessment.If you asked to pay on invoice, the invoice will be available for payment on your profile. Click the $ icon to see a list of pending invoices.Click on View all financial transactions to see the list and access other options.An invoice balance of $0 indicates that the fee has been paid.You will be able to pay the invoice directly per credit card by clicking the credit card icon.You will be able to get a copy of the selected invoice sent to your email address by clicking the envelope icon.You will be able to view the invoice online by clicking the eye icon.Terms and ConditionsFor a Credit Card payment, after providing your payment details, please carefully read the Payment Terms and Conditions at the foot of the page. If you agree with these Terms and Conditions, please indicate this by marking the tick-box which states “I have read, understood and agree to these Terms and Conditions”. You will be unable to proceed with your application if you do not agree with the Terms and Conditions listed. After agreeing to the Terms and Conditions, please click the red “Submit” button to submit your application for MSA and payment or select “Return to Application” at the top of the page if you do not wish to continue with your MSA application at this time.You will receive confirmation that your application has been submitted and is awaiting assessment.Note that after submitting the payment for this application, you will no longer be able to access this application. It will be sent to the Assessors queue for processing, and you will be advised in due course.Additional Information RequestIn due course, your application will be claimed by an assessor, and the assessment process will be started.If the application is suitable to make a decision, a letter advising you of the assessment outcome will be sent to your email address (as registered in your profile).If there are shortcomings that you are required to address prior to your assessment being finalised, your case officer will send you a request for additional information.You will see a notification appear in the menu in MyProfile, as well as a new status for you application.Click on “Provide Additional Information” to see the detail of the shortcomings and submit additional information as per your assessor’s request.Application StatusSubmitting the application and uploading the documents in our database may take a few minutes. After this delay, you will be able to see the status of your MSA application submission on the eMSA landing page.- If the payment is successful via credit card, the second block would be directly marked as paid- If the payment is required via invoice, the second block would be blue and show Awaiting payment until the payment is received.- Upon successful payment, the second block will show Queued for assessment until the time the application is claimed by an assessor- The application status will remain in the queue until an assessor claims the application. At this stage, the status in the third box will change to Assessment in progress- If the assessor needs to request additional information, the third box will switch to Awaiting applicant’s response and the button Provide additional information will be available.- Once an outcome has been determined, the forth box will change to Outcome Granted. The outcome will be sent to you per emailMigration Skills AssessmentEngineering House 11 National Circuit Barton ACT 2600。
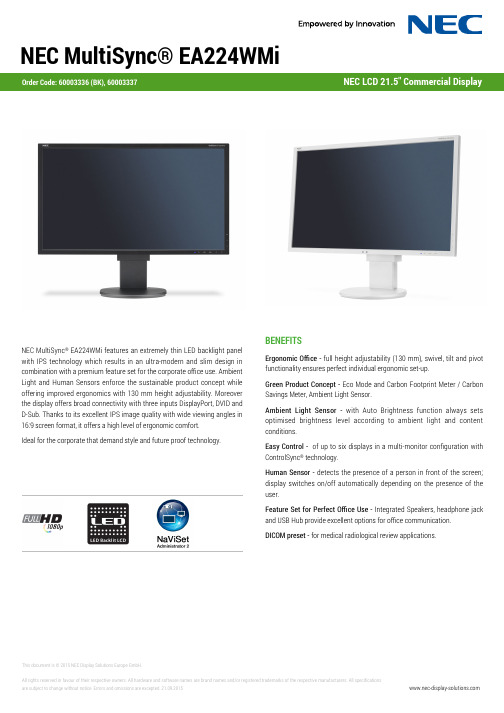
NEC MultiSync EA224WMi 21.5英寸商业显示器说明文档说明书
NEC MultiSync® EA224WMiNEC MultiSync® EA224WMi features an extremely thin LED backlight panel with IPS technology which results in an ultra-modern and slim design in combination with a premium feature set for the corporate office use. Ambient Light and Human Sensors enforce the sustainable product concept while offering improved ergonomics with 130 mm height adjustability. Moreover the display offers broad connectivity with three inputs DisplayPort, DVID and D-Sub. Thanks to its excellent IPS image quality with wide viewing angles in 16:9 screen format, it offers a high level of ergonomic comfort.Ideal for the corporate that demand style and future proof technology.BENEFITSErgonomic Office - full height adjustability (130 mm), swivel, tilt and pivot functionality ensures perfect individual ergonomic set-up.Green Product Concept - Eco Mode and Carbon Footprint Meter / Carbon Savings Meter, Ambient Light Sensor.Ambient Light Sensor - with Auto Brightness function always sets optimised brightness level according to ambient light and content conditions.Easy Control - of up to six displays in a multi-monitor configuration with ControlSync® technology.Human Sensor - detects the presence of a person in front of the screen; display switches on/off automatically depending on the presence of the user.Feature Set for Perfect Office Use - Integrated Speakers, headphone jack and USB Hub provide excellent options for office communication. DICOM preset - for medical radiological review applications.This document is © 2015 NEC Display Solutions Europe GmbH.All rights reserved in favour of their respective owners. All hardware and software names are brand names and/or registered trademarks of the respective manufacturers. All specificationsare subject to change without notice. Errors and omissions are excepted. 。
numeca的中文帮助文件帮助文档(三)

numeca 的中文帮助文件帮助文档(三)Tutorial 2: rotor 37 (例题2,动叶37)2-1.1 technical aspects ( 步骤) * 概述- 对象管理- 开始/ 退出FINE,IGG/Autogrid,CFView*IGG/Autogrid- 输入geometry(*.geomturbo) 文件-3D 网格自动生成- 检查网格质量*FINE-3D 涡轮定常流结构- 涡轮边界条件设置- 完整的多网格设置- 使用收敛判定工具*CFView- 通用视图- 叶片- 叶片视图- 侧型面- 云图and 等值线- 矢量图and 流线- 清理求解方案(sweep the solution)- 叶片表面压力分布- 打印视图2-1.2理论这是一个典型的例子2-2 例题描述(case description)*亚音速,可压缩,轴向流动*流体:空气*工作转速:17188rpm2-3 FINE求解方案1.运行FINE,必须有下列条件;在Unix系统下,type fine(FINE 类型,),单击(Return),在PC/NT,双击FINE图标2.在FINE菜单中新建一个(project) ,[Project/New]3.输入新项目的名字(rotor37.iec)此时FINE会自动在当前目录下创建一个文件夹,文件夹名为刚输入的名字(rotor37) 4. 单击创建网格,程序自动转到IGG,在IGG中,[选择Modules/AutoGrid]2-4 IGG/Autogrid 几何结构和网格创建2-4.1第一步:几何和网格创建XI5. 单击图标,弹出[Set-UP And Check]对话框2.4.1.1 几何对话框具有如下图的形式*W«V' ' r** 呻 I D I lit I SDt* LtlUlja F% 洌 H野 5rr ■ C mm f r1 paroMFTvrriir Tiki .1 艸匚 ilhlwQroHK'ryCn i^KwrrtwIaj養了兀iimt 日靳面J 礼忘丽圖TFICXIR 匕盂屮XI 心EUR")、耐I 咖W”k6. 首先对[Geometry ]标签下的内容操作7. 单击[Select a Geometry File],NUMECA_DIRECTORY/ma nuals/Co mp Iete_chain_tutorials/rotor37/rotor37.ge omTurbo.此时应该能看如下图所示的内容:41-FKLVKE 24.1-3 : Inabiiil 『店爭九応川> fcrthi-四个窗口的内容不用我说了吧,很清楚。
EA建模及探索分享--Sparx_EA进行企业架构建模_v0.3

P24
B-02 驱动力/目标/目的目录范例
驱动力(动机扩展)
ID 名称 描述 借助于大众传播媒介进行品牌的宣传,在此基础上,通过提供优质的服务、特色 餐饮产品提升品牌的美誉度,通过富有成效的促销手段,扩大品牌市场占有率。 类别 来源 所有者
BA_DRV_01
提升品牌美誉度
战略
KPI体系
总部
目标(动机扩展)
版权所有 ©1993-2011 金蝶国际软件集团有限公司
P23
B-02 驱动力/目标/目的目录
通过目标、目的、测度(可选用)来表现组织在实践中如 何满足其驱动力的一份跨组织的参考。 它包含如下的元模型实体: 组织单元、驱动力、目标、目的、测度 (可选择包含)
版权所有 ©1993-2011 金蝶国际软件集团有限公司
版权所有 ©1993-2011 金蝶国际软件集团有限公司
P16
RMM建模的扩展——绘制RMM图
1、使用UML Profile 导入针对RMM的扩 展元素
Business Component
战略
研发/创新 战 略 管 理 市 场 拓 展 采 购 管 理 仓 储 管 理 加 配 工 送 管 管 运营 理 理 门 店 运 营 客 户 服 务 财 务 管 理 人 力 资 源
ID 名称 描述 类别 来源 所有者
BA_GOL_01
提高对市场的洞察力
以市场引导销售,强对消费者、终端、渠道、价格的把控能力,提高对市场的洞察力。 战略
KPI体系
营销部门
目的(动机扩展)
ID 名称 描述 所谓的优质服务,就是客人的一个眼神、一个轻微的举动,作为服务人员都应 观察到。看到客人前面,领会到客人前面,做到客人前面。这就是星级酒店的 战略 超前服务。也是作为餐饮业优质服务的典范。 类别 来源 所有者
EA 了解被审计单位及其环境

生产经营的季节性和周期性情况 产品生产技术的变化情况 能源供应与成本情况 行业的关键指标和统计数据 本行业相关的法律法规清单 直接监管的部门及其监管措施 税收政策,包括享有的所有优惠政策 目前对开展经营活动产生影响的政府政策,如货币政策、财政政策、财政刺激措施、关税或贸易限制政策 等。 影响行业的的环保要求 影响行业的总体经济环境、利率、融资情况、 通货膨胀水平、币值等
2 财务业 绩的衡 量与评 价 3 4
5
与竞争对手的业绩比较
了解被审计单位及其环境
了解事项提示 适用的会计原则及行业特定惯例。特殊目的审计时,如在财务报表按照合同条款编制的情况下,被审计单 位管理层在编制的财务报表中时对合同作出的所有重要解释。 各类业务收入确认的具体描述,包括满足的具体条件,明确的时点等,特别是涉及电子商务、外币资产、 国际贸易核算等非传统业务相关会计处理的具体描述。 被审计单位涉及公允价值会计核算的项目包括哪些,分别描述确定公允价值的具体方法 除公允价值外,被审计单位还涉及哪些重要会计估计,并逐一分析。如坏账准备及其计提;预计负债及其 计提;递延所得税资产确认等。关注同行业的会计估计情况,管理层是否根据自身历史的实际发生情况等 进行会计估计复核。 如果是集团财务报表审计,应了解集团公司合并财务报表的编制 是否存在异常及复杂的交易,如果存在,了解其会计处理方法 会计政策、会计估计变更情况 财务报表的编制基础,是否存在可能导致对被审计单位持续经营能力产生重大疑虑的事项或情况 新颁布的财务报告准则,法律法规以及在何时采用、如何采用
了解被审计单位及其环境
了解事项提示 1 2 3 4.1 4.2 4.3 4.3.1 所有权性质和主要股东,母子公司情况。编制完整的树形结构图,直至最终控制人和最末级子公司 公司治理情况,包括取得公司治理层结构图 组织机构及部门设置情况,包括取得公司组织机构图 经营活动。收入来源、产品或服务以及市场的性质(如是否是网络销售) 业务的开展情况,如生产的方式、方法 联盟、合营、外包情况 存在利用服务机构提供的服务,了解服务机构提供的服务的性质,以及该服务对被审计单位的重要性,包 括由此对被审计单位内部控制产生的影响。
- 1、下载文档前请自行甄别文档内容的完整性,平台不提供额外的编辑、内容补充、找答案等附加服务。
- 2、"仅部分预览"的文档,不可在线预览部分如存在完整性等问题,可反馈申请退款(可完整预览的文档不适用该条件!)。
- 3、如文档侵犯您的权益,请联系客服反馈,我们会尽快为您处理(人工客服工作时间:9:00-18:30)。
##Enterprise Architect帮助文档帮助文档翻译目录简介 (2)从此处开始 (2)使用EA (2)用EA建模 (2)模型管理 (2)项目管理 (2)编码工程 (2)调试和配置文档 (2)数据建模 (2)一张数据表格 (2)创建一个表格 (3)设置表格属性 (4)创建字段 (9)创建Oracle包 (11)主键 (11)外键 (12)存储过程 (17)视图 (21)索引,触发器和检查约束 (23)生成DDL (25)把一个包生成DDL (25)进程的数据类型转换 (26)包的数据类型转换 (27)数据库管理系统数据类型 (28)从开放式数据库中导入数据库模式 (29)转化MDA (33)XML技术 (33)生成文档 (33)EA扩展 (33)UML字典 (33)项目角色和EA (33)授权管理 (33)术语 (33)简介从此处开始使用EA用EA建模模型管理项目管理编码工程调试和配置文档数据建模一张数据表格下面展示了一个数据模型表,上面有三个表格,相互之间用主外键连接起来。
上面同样展示了主外键的操作。
你也可以添加其他操作:检验,触发器,约束性,索引。
一个数据模型表在EA中表现为一个类表,创建方法和其他类型的表一样。
创建一个表格什么是表关系模型数据库中,最基础的模型结构就是“表”。
一个表代表了具有相同结构的一系列记录。
UML数据模型配置文件中的表表现为一个衍型类,这就是说,一个带着衍型的类元素作用于它之上。
一个表的图标表示在图表的右上方。
创建一个表通过以下步骤创建一个表:1、选择一个表;2、选择工具条选项中的更多工具|扩展|数据模型菜单;3、点击元素列中的表格元素,然后点击表。
一个表格就展示在表上了;4、如果类:表n属性对话框没有显示,双击表来显示它;5、在名称一栏,键入一个合适的名称,根据需要键入其他的属性。
6、点击OK按钮。
设置表格属性一旦你创建了一个表,你可以设置它的属性。
下面描述的大部分表的属性都可以在属性对话框里设置,一小部分通过键入标签值来实现,比如说,设置表所属人的值,或者,为了和MySQL兼容,需要设置表选项。
选择数据库类型最重要的是正确的为一个表设置它的数据库类型。
这定义了一系列的数据类型,可以用于定义字段,也可以声明生成的是哪一种的DDL语言。
EA支持如下的数据库:DB2;Informix;Ingres;InterBase;MS Access;MySQL;Oracle 9i和10i;PostgreSQL;SQL Server2000和2005;SQL Server7;Sybase Adaptive Server Anywhere(Sybase ASA);Sybase Adaptive Server Enterprise(Sybase ASE)。
通过以下步骤设置数据库类型:1、双击表中的数据元素,来打开属性对话框;2、选择常规选项;3、在数据库一栏,点击下拉框,选择数据库类型;4、点击OK按钮保存设置。
点击表细节,你可以进入字段对话框和操作对话框,或者你可以选择生产这个表的DDL。
设置表所属通过以下步骤来定义表的拥有人:1、选择视图|标签值按钮来选择或者是按键[Ctrl]+[Shift]+[6]。
标签值对话框出现。
2、在属性窗口上点击表视图上的表格。
则会显示所选表格的标签值。
3、点击新标签按钮。
标签值对话框如下图所示:4、在标签值一栏,键入标签名字拥有人。
在值一栏,键入拥有人。
5、点击OK按钮来确定操作,生产的DDL脚本语言里包含表格的拥有人。
设置MySQL选项在mySQL中,为了使用外键,你必须设置表的类型是InnoDB。
通过以下步骤来设置:1、选择视图|标签值菜单选项或者按下[Ctrl]+[Shift]+[6]。
显示标签值设置对话框。
2、点击表中的表格,或者点击项目浏览器中的表格。
标签值窗口会显示选择的表格;3、点击新建标签按钮。
标签值对话框如下图所示:4、在标签一栏,输入标签名Type。
在值一栏,输入InnoDB;5、点击OK按钮确定操作,生成的SQL脚本中的DDL包含表格类型。
6、为了兼容最新版本的MySQL,额外的表格选择可以以同样的方法添加:设置Oracle表格属性对于Oracle 9i或者10i,你可以使用表格标签值来设置表格属性。
步骤如下:1、选择视图|标签值菜单选项或者按下[Ctrl]+[Shift]+[6]。
显示标签值设置对话框。
2、点击表中的表格,或者点击项目浏览器中的表格。
标签值窗口会显示选择的表格;3、点击新建标签按钮。
4、定义如下图所示的标签值:5、点击OK按钮来保存标签值。
所有的Oracle表的有效属性如下图所示。
说明:索引器和约束可以用同样的方法添加。
醒目索引或者约束,把属性作为标签值来添加。
对于一个给定的表的属性可以表示在标签值的窗口里,如下面典型的标签值说明的那样:创建字段什么是字段在一个关系表中,最基本的组织元素就是字段。
每个数据的个别项目输入到一个关系数据库中,表示为一个表中的一行的一个字段。
字段在UML数据建模中表现为一个衍型的属性,这就是说,是一个有着字段衍型的属性。
创建字段说明:对于MySQL,在创建一个字段之前,先添加ENUM和SET数据类型。
选择设置|数据库数据类型菜单,然后,在数据库数据类型对话框中,在产品名称一栏选择MySQL。
添加数据类型ENUM和SET。
通过以下步骤来创建字段:1、右击表中的表格,打开选项菜单,选择属性菜单按钮。
2、显示一个表属性对话框;3、打开之后,键入名称和数据类型,然后点击保存按钮。
贴士:如果数据类型的下拉列是空的,那就意味着你没有为这个表选择一个目标数据库。
关闭字段对话框,从新打开表属性对话框,设置一个数据库类型,然后再继续。
为了防止这种情况的发生,请设置默认数据库类型。
4、下面各选项是可选的。
主键;非空;唯一性;缺省值;开放性;别名;注释。
说明:一些数据类型,比如说Oracle的NUMBER类型,需要一个精确度和一个范围。
这些在需要设置的地方就可以设置。
例如,对于Oracle:说明:Oracle的VARCHAR2(15CHAR)和VARCHAR2(15BYTE)数据类型可以通过添加标签LengthType来实现,LengthType的值设为CHAR或者是BYTE。
说明:对于MySQL的ENUM和SET数据类型,在缺省域里面,键入一个以逗号为分割的列,(‘one’,‘two’,‘three’)。
改变一个字段的顺序1、在字段对话框中,高亮显示一个字段的名字;2、点击可以上移或者下移字段。
创建Oracle包通过以下步骤来创建一个Oracle包:1、打开项目浏览器中的项目,创建一个EA包(如果需要的话,创建一个类表);2、添加一个类元素到这个包中,或者这个表中。
3、打开元素的属性对话框,在衍型一栏中,设置值为包4、对于程序包规格说明,创建一个操作,这个操作的名字定义为规格说明,不设任何返回类型。
5、打开规格说明操作的属性对话框,在行为制表里,在起始代码栏里输入整个包的规格说明书。
6、对于包的主力,创建一个名为Body的操作,无返回值。
7、打开Body操作的属性对话框,在行为制表里,输入整个包的起始代码。
主键什么是主键键用来访问表,分为主键和外键。
一个主键是唯一的,它定义一个表格中的一条记录。
外键可以通过其他相关表格中的主键来访问数据。
定义一个简单主键如果一个主键包含一个单一的字段,就比较好定义。
1、右键点击表中的表格,显示选项菜单。
选择元素特征|属性菜单选项;2、在属性对话框,选择想设为主键的字段。
3、选择主键复选框,然后点击保存按钮。
一个衍型操作可以自动的被创建。
这个操作室用来定义表的主键的。
如果想去除主键标示,值删除这个操作即可。
定义一个复杂的主键。
通常来说,一个主键包含多于一个字段。
例如,一个字段LastName在一个表中,可能不是唯一的,所以,一个主键需要从LastName,FirstName和DataOfBirth字段中定义。
通过以下的步骤设置复杂的主键:1、继续设置单一主键的步骤,你选择哪个字段是没有影响的。
2、右键点击表上的表格来打开选项菜单。
选择选择元素特征|属性菜单选项;3、选择主键操作(他的名字以PK_开头),然后点击字段制表;4、增加一个主键的字段,点击新建按钮,从字段名字中选择一个字段,然后点击保存按钮。
5、如果需要的话,选择小手按钮可以改变主键字段的顺序。
定义一个主键名字模板如下步骤可以定义一个主键模板:1、选择工具|选项|源码工程|编码编辑器菜单选项,选项的DDL页面显示如下:2、点击DDL名字模板按钮。
DDL名字模板对话框如下图显示:3、编辑或者是替换主键名字模板;4、点击保存按钮。
SQL中没有聚集的主键通过如下步骤定义一个主键为没有聚集的主键。
1、右键点击表中的表格,打开菜单选项;2、选择元素特征|操作子菜单,显示表操作对话框;3、高亮显示主键操作,然后选择扩展属性;4、选择SQL Server Non Clustered Primay Key复选框。
5、选择保存关闭按钮。
外键什么是外键两种可以访问表的键:主键和外键。
一个主键是唯一的,它定义一个表格中的一条记录。
外键可以通过其他相关表格中的主键来访问数据。
外键在EA的UML模型中是一个衍型操作。
一个外间是一个字段(属性)的集合,同时,有一些操作意义(他们加强与另一个表的主键直接的关系)。
一个外键模型化为一个衍型操作;这个操作参数成为一个键中的包含的字段。
说明:用定义外键的方法,通过另一个表格的主键来访问它并不是必须的。
外键是一些数据库管理系统的特征,提供额外的,比如说完整参照性,来进行检查,这样可以以免一个表格的主键值存在于其他表的外键中。
创建一个外键1、在表中或者是项目浏览器中打开一个需求表;2、在EA的UML工具箱的类里选择一个相关的连接;3、点击原表格至目标表格,画出之间的连接;4、使用连接选项菜单来显示外键对话框;5、如果需要的话,编辑外键的缺省名称;6、高亮包含外键关系的字段;7、点击保存按钮来自动生成外键操作;你生成了外键,下面的例子显示了它在一个表中是怎样显示的:复合外键选择正确的字段,点击保存按钮。
外键字段通过数据类型存储,并且通过数据类型来进行组合。
如果需要的话,你可以通过上下两个小手的图标改变键字段的顺序。
这个表创造了复合外键,下面这个表表现了怎样在一个表中显示。
贴士:如果你定义一个MySQL数据库,想使用外键,你必须先设置表类型才可以。
定义一个外键的名字模板1、选择工具|选项|源码工程|代码编辑器菜单.DDL页面如下图所示:2、点击DDL名字模板。
DDL名字模板对话框打开,显示了缺省状态下的名字模板。
3、在外键名字模板一栏编辑或者替代名字模板。
