美国无创血压模拟仪(AccuPulse)
BPBIO320 上流式自动血压计使用说明书
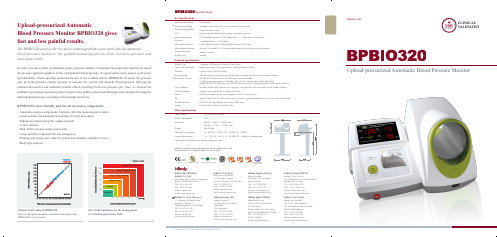
Blood Pressure Monitor BPBIO320 givesfast and less painful results.The BPBIO320 resolves the two most common problems associated with the automaticblood pressure monitors: the painful measuring process from excessive pressure andinaccurate results.In order to locate systolic and diastolic points, previous models of automatic blood pressure monitor increasedthe pressure applied regardless of the each patient's blood pressure. It caused unnecessary pain as well as lessreproducibility when repeating measurement due to the residual effects. BPBIO320 increases the pressureonly up to the patient's systolic pressure to measure the systolic and diastolic blood pressure, allowing forminimal discomfort and minimal residual effects resulting from less pressure put. Also, it resolved theproblem of prolonged measuring time from previous upflow-pressurized blood pressure monitor by using theindividualized pressure according to the patient's heart rate.BPBIO320 is user-friendly and has all necessary components.• Automatic energy saving mode 2 minutes after the measurement is taken• Leads accurate measurement accounting for body movement• Enhanced comfort using the compressor belt• 3 color schemes• Wide LED screen to easily read results• 2-step security component for any emergency• Printing and saving error codes for quick and complete customer service• Body type analysis©2020 InBody Co., Ltd. All rights reserved. BC-ENG-83-I-200420Upload-pressurized Automatic Blood Pressure MonitorInBody Bldg., 625, Eonju-ro, Gangnam-gu,Seoul 06106 Republic of KoreaTEL: +82-2-501-3939FAX: +82-2-578-5669Website: E-mail:***************InBody Co., Ltd. [Factory]15 , Heugnam-gil, Ipjang-myeon,Seobuk-gu, Cheonan-si,Chungcheongnam-do 31025 KOREATEL: +82-41-581-3003FAX: +82-41-581-3103Website: E-mail:***************Tani Bldg., 1-28-6, Kameido,Koto-ku, TokyoTEL: +81-3-5875-5780FAX: +81-3-5875-5781Website: www.inbody.co.jpE-mail:****************.jpClinical trial results of BPBIO320Mercury sphygmomanometer correlation study shows thatBPBIO320 is very accurate.ESC-ESH Guidelines for the managementof arterial hypertension, 2018Key SpecificationsMeasurement Method OscillometricPressurizing Method Automatic pressurization by pressure controller micro pumpDepressurizing Method Exhaust by micro valveCuff Pressurizing belt method by gear motor, Automatic operationMeasurement Range0~300mmHg(Pressure), 30~240 bpm(Pulse), 17 ~ 42cm(Arm circumference)Accuracy± 2mmHg(Pressure), ±1.5%(Pulse)Measurement Results Systolic Blood Pressure, Diastolic Blood Pressure, Pulse RateMeasurement Duration Average 30 seconds (20 ~ 50 seconds depending on the pulse rate or blood pressure)Pressurizing Time About 10 secondsDisplay Unit1mmHg*Display Type7-Segment LED(Systolic, Diastolic, Time, Pulse)Types of Results Sheets Results sheet value 3 line express print / Select graph print optionDatabase Can save up to 1,000,000 resultsEnergy Saving Automatically converts to energy saving mode 2 minutes after the last measurement is takenDual Safety System[START/STOP] button: the cuff will become loose and deflate* If the air pressure surpasses 300mmHg, the cuff will automatically deflate and loosen.[EMERGENCY STOP] button: the cuff will become loose for deflation regardless of the main controller.V oice Guidance Provides audible indication for test in progress, test complete, and successfully saved settings changes.V olume Controller Volume can be controlled by volume controllerPrinter High-speed thermal printer with automatic cutter (2.5 inches wide)Etc.Antitheft hole, CAL(Used for connecting to a mercury sphygmomanometer for pressure value adjustment)External Interface RS232C(USB compatibility when using USB cable)Option Personal desk, Height controllable chairFunction Specifications*Power Source AC 100~240V, 50/60HzPower Consumption30V ADimension489(W) × 450(L) × 284(H): mm19.3(W) × 17.7(L) × 11.2(H): inchWeight9kg(19.8lbs)Other SpecificationsSpecificationsIP2010정상혈관변형혈관시간European Society of HypertensionEuropean Society of HypertensionClinicalValidatedCLINICALVALIDATEDInBody Europe [EU]InBody Europe B.V.Gyroscoopweg 122, 1042 AZ,Amsterdam,The NetherlandsTEL : +31-20-238-6080FAX : +31-6-5734-1858Website: E-mail:******************InBody Asia [ASIA]InBody Asia Sdn. Bhd.Unit 3A-11, Oval Damansara,685 Jalan Damansara Kuala Lumpur,WP KL 60000 MalaysiaTEL : +60-3-7732-0790FAX: +60-3-7733-0790Website: E-mail:*******************InBody India [INDIA]InBody India Pvt.Ltd.Unit No. G-B 10, Ground Floor,Art Guild House,Phoenix Market City, L.B.S. Marg,Kurla (West), Mumbai 400070 IndiaTEL : +91-22-6223-1911Website: inbody.inE-mail:****************13850 Cerritos CorporateDr. Unit C Cerritos, CA 90703 USATEL: +1-323-932-6503FAX : +1-323-952-5009Website: E-mail:******************InBody China [CHINA]Biospace China Co., Ltd.904, XingDiPlaza, No.1698 YiShanRoad,Shanghai 201103 ChinaTEL: +86-21-6443-9705FAX : +86-21-6443-9706Website: E-mail:********************OrangeGreenBPBIO320’s user-friendly design enables easy and accurate use for not only regular user, but also even for the first-time users. This allows for easy and high quality public use and installation.Recreational facilities, such as hotels or condominiumsRest areas in companies, factories or training centersEmergency closing during measuring process if necessaryAble to measure arm circumference between 17 ~ fortable and painless measurement with the air Biotechnological design that ensures the right posture Wide LED screen for easy checking of all results (systolic, diastolic, and pulse rate), LED light guides the process of measurement and indicates current time One-touch check for reviewing and printing past results 84325671135mmSchools, military, or religious institutionsSports centers, golf clubs, spa, sauna, or martial art centersPublic service areas in government organizations, banks or financial institution, or other public facilities, such as the subwayPrivate hospitals, Oriental-medicine clinics, rehabilitation, special diagnostic centersMeasuring blood pressure is one of thefundamental steps for maintaining a healthy lifestyleBlood screening is basic to health check up.BPBIO320 enables maintenance of health and lifestyle by allowing quick, easy and comfortably blood pressure measurement.* The BPBIO320 desk and chair option allows for an even safer use of BPBIO320. (optional)Up-Load Blood Pressure MonitorGray。
ADI连续无创式血压解决方案,新鲜来袭
ADI连续无创式血压解决方案,新鲜来袭高血压是当今最主要的医疗问题。
为了有效地控制高血压,我国于2017年颁布了“国家基层高血压防治管理指南”,并试图通过早期预防来控制高血压患病率。
NIBPVSCNIBP虽然采用传统的袖带无创式血压(NIBP)设备测量血压的效果已经很好,但使用袖带操作的用户体验不是很好。
这类NIBP设备使用柯式音法来监听血液的振动情况,并获取在固定或较长时间间隔(通常超过15分钟)内的收缩压和舒张压。
连续无创式血压(CNIBP)测量是一种实时或以较短时间间隔监测人体收缩压和舒张压的技术。
与上述传统的袖带无创式血压(NIBP)测量不同,CNIBP提供了一种连续、舒适的血压测量方法,可以非常方便地集成于现有的腕带、手表等可穿戴设备平台。
ADI连续无创式血压解决方案,新鲜来袭!探讨连续无创式血压方案脉冲传输时间(PTT)方法是CNIBP应用中的一个研究热点,其原理是识别体积描记器(PPG)波形的关键特征节点,并计算当前PPG信号和其他参考信号(如体积描记器(PPG)、心电图(ECG)和心冲击描记图(BCG))之间的时间延迟。
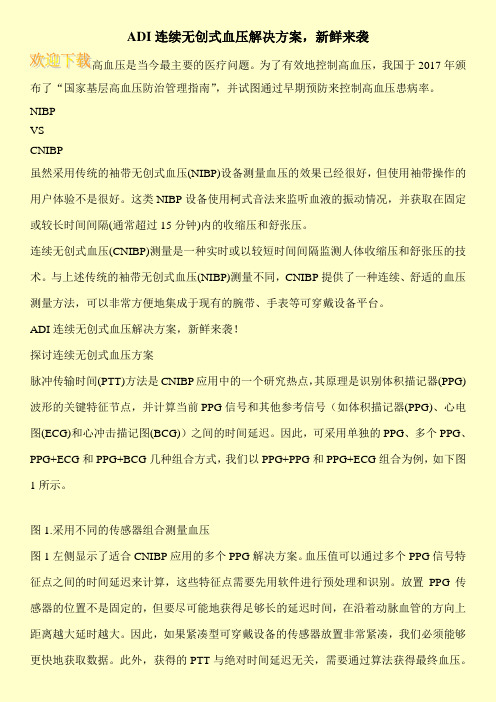
因此,可采用单独的PPG、多个PPG、PPG+ECG和PPG+BCG几种组合方式,我们以PPG+PPG和PPG+ECG组合为例,如下图1所示。
图1.采用不同的传感器组合测量血压图1左侧显示了适合CNIBP应用的多个PPG解决方案。
血压值可以通过多个PPG信号特征点之间的时间延迟来计算,这些特征点需要先用软件进行预处理和识别。
放置PPG传感器的位置不是固定的,但要尽可能地获得足够长的延迟时间,在沿着动脉血管的方向上距离越大延时越大。
因此,如果紧凑型可穿戴设备的传感器放置非常紧凑,我们必须能够更快地获取数据。
此外,获得的PTT与绝对时间延迟无关,需要通过算法获得最终血压。
医疗器械解读无创血压监测仪的原理与使用
医疗器械解读无创血压监测仪的原理与使用无创血压监测仪是一种用于无需穿刺直接测量患者血压的医疗器械。
它通过非侵入性的方法实现血压监测,无需插入导管或针头,能够为医护人员提供快速、准确的血压测量结果。
本文将对无创血压监测仪的原理及使用进行解读,并探讨其在临床中的应用。
一、无创血压监测仪的原理无创血压监测仪采用了振膜压阻式测量原理。
其关键部件是一对传感器,分别用于测量收缩压和舒张压。
传感器位于测量仪器的外部,贴附在患者的皮肤上。
在测量过程中,无创血压监测仪通过传感器感知到与心脏收缩和舒张过程相关的振动。
收缩压传感器负责测量心脏收缩时的振动,而舒张压传感器则负责测量心脏舒张时的振动。
无创血压监测仪的传感器通过将这些振动转化为电信号,然后进行处理和分析,进而得出患者的血压值。
在处理和分析过程中,无创血压监测仪会根据振动的频率和振幅等指标进行计算,并结合所测量到的振动信号,推算出患者的血压值。
这一过程通常依赖于算法和数学模型的支持,以确保血压监测仪能够提供准确的测量结果。
二、无创血压监测仪的使用1. 准备工作:在使用无创血压监测仪之前,需要确保仪器正常工作,并对传感器进行消毒。
同时,患者应该适当放松身体,避免剧烈运动和情绪激动,以及空腹或饱餐一顿。
2. 测量过程:将无创血压监测仪的传感器贴附于患者的皮肤上,通常位置是在患者手臂的上臂处。
然后启动设备,设定合适的测量模式和选项,如自动测量或手动测量等。
在测量过程中,患者应尽量保持静止和放松。
3. 结果解读:当无创血压监测仪完成测量后,将显示患者的血压值。
一般情况下,显示屏上会显示收缩压、舒张压和平均动脉压等指标。
医护人员可以根据这些结果进行判断和诊断。
三、无创血压监测仪的临床应用无创血压监测仪已经被广泛应用于临床医疗中,其具有以下几个优势:1. 非侵入性:相比于传统的直接穿刺测量方式,无创血压监测仪无需插入导管或针头,从而减少了患者的不适和感染风险。
2. 快速准确:无创血压监测仪能够在短时间内提供准确的血压测量结果,有效节约了医护人员的时间和精力。
鲸扬科技无创血压模拟仪BPA700用户手册说明书
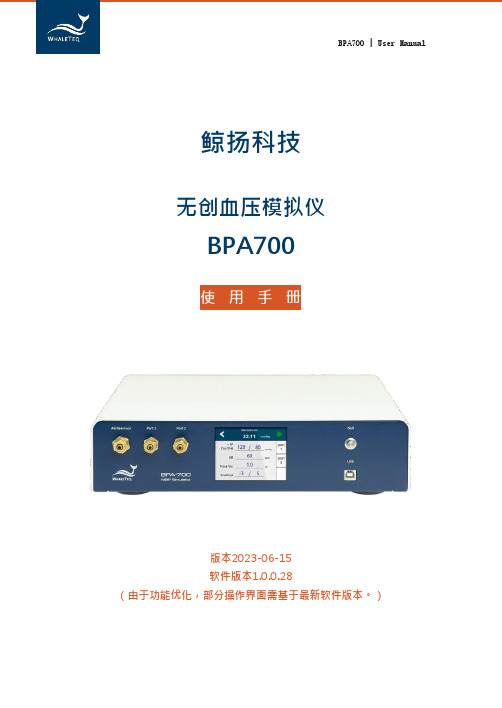
鲸扬科技无创血压模拟仪BPA700使用手册版本2023-06-15软件版本1.0.0.28(由于功能优化,部分操作界面需基于最新软件版本。
)Copyright © 2013-2023, All Rights Reserved.WhaleTeq Co. LTDNo part of this publication may be reproduced, transmitted, trans cribed, stored in a retrieval system, or translated into any languag e or computer language, in any form, or by any means, electronic, mechanical, magnetic, optical, chemical, manual or otherwise, wit hout the prior written permission of WhaleTeq Co. LTD.DisclaimerWhaleTeq Co. LTD. Provides this document and the programs “a s is” without warranty of any kind, either expressed or implied, in cluding, but not limited to, the implied warranties of merchantabil ity or fitness for a particular purpose.This document could contain technical inaccuracies or typographi cal errors. Changes are periodically made to the information herei n; these changes will be incorporated in future revisions of this do cument. WhaleTeq Co. LTD. Is under no obligation to notify any p erson of the changes.The following trademarks are used in this document:is a registered trademark of WhaleTeq Co. LTDAll other trademarks or trade names are property of their respecti ve holders.内容1介绍 (8)基本概念 (8)标准/应用 (9)BPA700 硬体概述 (10)主要规格 (11)产品标签 (13)清洁方法 (13)2设置 (14)软件安装 (14)2.1.1系统要求 (14)2.1.2BPA700 PC 软件安装 (14)连接到血压计 (15)主操作画面 (17)语言选择 (20)压力单位 (21)自动序列 (21)2.6.1基本功能 (21)2.6.2操作方式 (23)静态压力 (26)动态血压 (30)2.8.1压力值设定规则 (30)2.8.2默认方法 (32)2.8.3客制化方法 (33)泄漏测试 (39)超压测试 (41)单机模式 (43)标准辅助软件 (48)2.12.1输入核可密码 (48)2.12.2标准辅助软件 (50)3软件开发套件(SDK) (53)4校准及验证 (53)5除错 (53)6注意事项 (54)7订购资讯 (54)标准组合 (54)选购软件 (55)选购配件 (55)8版本资讯 (55)9联系鲸扬科技 (56)表格目录表1:标准/应用 (9)表2: BPA700 规格 (11)表3 : BPA700标准组合 .................................................................................................... 5 5 表4 :选购软体 . (56)表5 :选购配件 ..................................................................................................................... 5 6 表6 :版本资讯 ..................................................................................................................... 5 6图片目录图 1 :BPA700 硬体概述 (10)图 2 :产品标签 (13)图 3 :手腕式血压计连接方式 (15)图 4 :手臂式血压计连接方式 (16)图 5 :以气瓶测量的连接方式 (16)图 6 :主操作画面 (17)图 7 :图表功能选项 (18)图 8 :图表功能选项-详细信息 (19)图 9 :图表数值设置 (19)图 10 :设置按钮 (20)图 11 :语言选择 (20)图 12 :压力单位选择 (21)图 13 :自动序列基本介绍 (22)图 14 :选择自动序列 (23)图 15 :选择测试项目并开始测试 (23)图 16 :停止以结束测试 (24)图 17 :汇出自动序列 (24)图 18 :汇入自动序列 (25)图 19 :保存自动序列 (25)图 20 :静态压力测试默认设置 (26)图 21 :开始静态压力测试 (27)图 22 :测试值- 30 mmHg (28)图 23 :测试值- 60 mmHg (28)图 24 :测试值- 90 mmHg (29)图 25 :拖动游标查看详细信息 (29)图 26 :设置测试值的不同方法 (30)图 27 :默认设置 (32)图 28 :等待测试结果 (32)图 29 :显示测试结果 (33)图 30 :调整脉冲包络线 (33)图 31 :客制化设置 (35)图 32 :可调式脉冲包络线 (35)图 33 :以不同方式调整包络线 (36)图 34 :汇出测试结果 (36)图 35 :汇入测试结果 (37)图 36 :重设按钮 (37)图 37 :保存到设备 (38)图 38 :设置BPA校准 (39)图 39 :泄漏测试设置完成 (40)图 40 :泄漏测试结果 (40)图 41 :超压测试设置 (41)图 42 :超压测试进行中 (42)图 43 :超压测试结果 (42)图 44 :单机模式介面 (43)图 45 :静态压力设置 (44)图 46 :静态压力测试结果 (44)图 47 :动态血压设置 (45)图 48 :动态血压测试结果 (45)图 49 :泄漏测试设置 (46)图 50 :泄漏测试加压中 (46)图 51 :超压测试设置 (47)图 52 :超压测试结果 (47)图 53 :自动序列设置 (48)图 54 :输入启动密码 (49)图 55 :成功输入启动密码 (49)图 56 :选择医疗标准和测试项目 (50)图 57 :点击“Run ”按钮 (50)图 58 :点击“F inish ”查看测试结果 (51)图 59 :测试结果显示在表格中 (51)图 60 :不同的功能选项卡 (52)图 61 :汇出测试报告 (52)1介绍基本概念鲸扬科技非侵入式血压模拟器(BPA700) 是一款专为电子非侵入式血压监测仪和血压生理监测仪而设计的性能分析仪。
Midmark IQvitals 自动血压、体温、血氧浓度和脉搏率测量设备说明书
• Stores up to 100 patient records for easy review or printing
• Optional external printer
Capture weight with one touch while the patient is comfortably seated on the exam table.
features
Windows® Based Full Color Touch Screen
Temperature Probe Well
All-in-one vital signs device (with options to add SpO2 and digital scales) increases efficiency.
Seamless connectivity to patient chart in EMR*/IQmanager® systems eliminates transcription errors.
BP results prominently displayed in the top corner
Temperature, SpO2 and pulse rate framed with a soft background for quick identification
Prominent battery status to ensure uninterrupted care
Technology
Adaptability
• Windows® based platform provides flexible, easy-toupgrade software for the life of the product
萃美科技自动数字血压计说明书
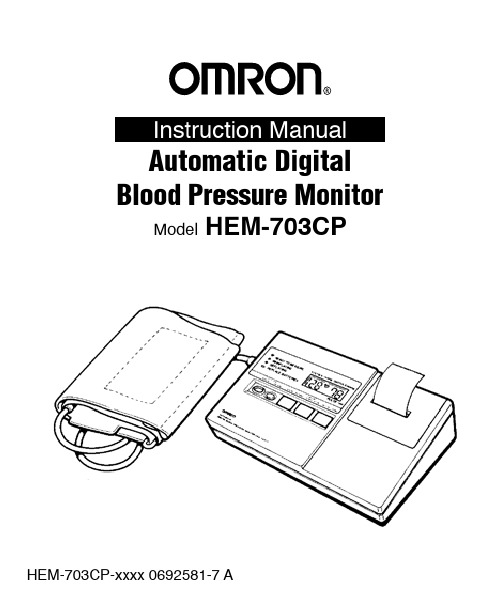
Automatic Digital Blood Pressure Monitor Model HEM-703CPImportantCONTENTSImportant . . . . . . . . . . . . . . . . . . . . . . . . . . 1Name and Function of Each Part . . . . . . . . 2Preparations for Use . . . . . . . . . . . . . . . . . 3Instructions for Use . . . . . . . . . . . . . . . . . . 8When Error Indication Symbols Appear . . 10Specifications . . . . . . . . . . . . . . . . . . . . . . 11Thank you for purchasing our Digital Blood Pressure & Pulse Monitoring Kit . Please care-fully read this instruction manual before use and keep it with your portion of the enclosed warranty card .PLEASE NOTE:1 . Allow 3 to 5 minutes between blood pres-sure readings on same arm . Repeated mea-surement results in inaccurate readings .2 . Keep in mind only a physician can ac-curately determine safe or unsafe limits of blood pressure . This instrument should be used by non-professional persons only to determine measurement of blood pres-sure, not to make any medical judgement . Remember, blood pressure varies during the day .3 . This unit is a precision instrument − avoidrough handling, direct sunlight, high tem-perature/humidity and magnetic field . Fold-ing or bending cuff may result in damage to cuff .4 . Do not inflate cuff above 280 mmHg .5 . Do not take unit apart . You cannotcalibrate unit . If you have any difficulties or problems with unit, contact our Service Center . 1-800-634-4350 .Name and Function of Each PartAir JackSystolic Bood Pressure DisplayDiastolic Blood Pressure and Pulse DisplayPrinting PaperPaper CutterSPHYG/CLOCK ButtonSTART ButtonPRINT / PAPER FEED ButtonSET ButtonTabAir PlugMODE Selector Button Main UnitCuff1 How to insert the batteriesBattery Cover1 . Take off the battery cover at the back ofthe main unit by sliding it in the direction indicated by the arrow symbol .Replacement• the “Replace Batteries” symbol ( ) flashes during measurement, replace the batteries with the new ones .• When the batteries have run down, random numbers may be displayed .Points to be careful about whan using the batteries• When replacing the batteries please replace all four batteries at once .• Use the same kind of batteries .• Take out weak batteries quickly so as to avoid causing damage to the machine .• Remove the batteries when the unit is not used for extended periods .2 . Install 4 “AA” size batteries attached sothat the + and - polarities on the batteries correctly match the polarities in the battery compartment .3 . Replace the cover .2 How to Set Time and Date3 Plug in and Turn on1 . When batteries are installed, the display shows PM 12:00 .1 . Insert the air plug into the air jack on the left side of the main unit correctly .2 . When the SPHYG/CLOCK button is changed to the sphygmomanometer mode, all the LCD symbols are momentarily displayed . This happens because the unit is running a check on the display and this state lasts for approximately one second .3 . Once the LCD symbols vanish, the air release indication symbol ( ↓ ) starts flashing . Please wait until the ( ↓ ) symbol goes out .4 . When the preparations necessary before measurement have been completed, the unit emits a series of beeps and finally the “Ready to Measure” symbol ( ♥ ) will be displayed .2 . When the MODE button is pressed down, the “month” sign displayed . When the SET button is pressed down, the “month” .3 . When the MODE button is pressed the “day” sign is displayed . Adjust the “day” in the same way as the “month” .4 . In the same manner select the “hour” and “min .” with the MODE and set each value with the SET button . AM and the “hour” adjsutment .5 . Press the MODE button for the last time min .) display .Initial Display“Ready to Measure”DisplayAir releaseindication symbol4 How to Set the Printing PaperPlease be sure not to print without inserting printing paper as it will shorten the life span of the printer head .1 . Slide the plastic printer cover in the direction indicated by the arrow symbol and remove it from the main unit .4 . Insert the printing paper in the installation section, and then attach the cover back to the main unit in such a way that the edge of the paper protrudes from the cover .5 . When the PRINT/PAPER FEED button is pressed while the results of the measurement are shown on the digital display, these results, together with the date and time of measurement are printed out .6 . When purchasing printing paper, ask at the shop where you purchased the main unit for further supply . Other brands of paper may be used providing the dimensions are smaller than 38mm wide and 20mm in di-ameter . However the printing quality may differ a little .2 . Peel off the glued edge of the prontlng paper included with the unit, and cut it off to about 2 inches with a pair of scissors, and then shape and cut the edge for easy insertion to the printer as shown in the figure .3 . Press the PRINT/PAPER FEED button while inserting the edge of the printing paper to the paper feeding slit . When the edge of the paper protrudes sufficiently, release the button and stop feeding .Inserting DirectionReverseFront5 Changing the Printer InkThough not originally equipped with an ink roller, the HEM-703CP digital blood pressure monitor contains enough printer ink to last about two years when used once a day at normal room temperature .When the ink on the print out becomes light and hard to read, purchase a replacement ink roller from your retailer and install as fol-lows .1 . Remove the printer cover .3 . Insert the supplement ink roller into the allotted space next to the printer .4 . Replace the printer cover .NOTE: The supplement ink roller should last about two years, however, if youneed to replace the supplement inkroller, simply grasp the top of the inkroller and turn itslightlycounterc1ock-wise before lifting the roller from theprinter .Supplement ink roller2 . Removethe ink, which came with the unit when you bought it, from the allotted space .about 1 inchArteryno space6 Attach the CuffThis cuff has eliminated the need for a microphone thereby lessening possible interference from vibrations and noise . Fitting also has been made much easier through the widening of the artery oscillation detection area .1 . Place the cuff on the left arm so that the air tube lies across the center of the arm .3 . Place your arm on a table or a support with the palm facing upward so that the cuff is placed at the same level as the heart .2 . Wrap the cuff pulling in a diagonal angle securely so that the cuff tab is positioned about one inch above the elbow joint of the inner your left upper arm . (Over the brachi-al artery) .There should be no space between the cuff and your arm .NOTE: If you have any difficulties wrap-pingcuff by yourself, we recom-mend that you ask someone to wrap the cuff for you .7 Apply Pressure to the Cuff1 . When you press the start button, the pump operates and pressure is applied . When the pressure reaches 170mmHg, the pump stops automatically .2 . When the appropriate pressure has been reached, the air is automatically released and the value on the display window starts to decrease . After a while when the artery oscillations are detected, the ( ♥ ) symbol starts flashing and the unit emits a beep-ing sound simultaneously . The value shown on the display will continue to fall .* During measurement, do not shake the cuff or the air tube .Depress the START button continuously untill the cuff is inflated up to the targeted pressure .After the cuff has been inflated, release the START button .Notes:* If your systolic blood pressure is higher than 140mmHg, the pump starts again and the cuff will be inflated up to 210mmHg .* If your systolic blood pressure is higher than 180mmHg, sufficient inflation will not be applied to the cuff by automatic reinflation . In this case, inflate up to 30mmHg higher than your expected systolic blood pressure by pressing the start button continuously . While press-ing the start button, the cuff can be in-flated continuously, and when the start button is released, the pump stops and the cuff is no longer inflated . When the pressure reaches 300mmHg, the cuff deflates rapidly .* When you want to stop measurememt, press SPHYG/CLOCK button . The pres-sure will stop and the air is deflated rapidly .Pressure being appliedTargetted Blood Pressure ReachedIndicated Value DropsMeasuringMeasurement CompletedAlternate DisplayBlood Pressure Reading Display (for approx . 3 seconds)Pulse Reading Display(for approx . 1 .5 seconds)*P: Stands for PULSE .8 Blood Pressure and Pulse are displayedWhen the deflation symbol begins to flash, the residual pressure in the cuff is then rapidly released .1 . When the unit has continued to deflate to a point when the artery oscillations are no longer detected, the unit will display the systolic and diastolic blood pressure values, along with a long beep, and causes the deflation indication symbol ( ) to start flashing . After this, blood pressure and the pulse readings are displayed alter-nately .* When you wish to stop measuring during operation, press the SPHYGICLOCK button . The pump will stop and all the cuff pressure will be released rapidly .* When the PRINT button is pressed while the results of the measurement are shown on the digital display, the results will be printed .3 . Measurement of the blood pressure is now complete . The results will remain displayed even after the cuff is taken off . If you wish to carry out repeated measurements, repeat the operation from Step 6 .* The arm gradually becomes congested when measurements are repeatedly taken . If you wish to take consecutive measurements, take off the cuff and wait at least 3 to 5 minutes between measurements .4 . When measurement is completed press the SPHYG/CLOCK button to return to the time display . If you should forget to press this button, the display will return to time display mode automatically after about 5 minutes .2 . Upon total cuff deflation, a series of beeps are emitted and the ( ♥ ) symbol is displayed .When Error Indication Symbols Appear The following special error symbols will appear in the display if the unit is being used incorrectly:ERROR SYMBOL CAUSE CORRECTION 1 . Cuff underinflated 1) Release air pressure in cuff 2)Wait 10 minutes before taking another reading .3)Repeat “Instructions for Use” steps except inflate cuff 30 mmHg higher than previous inflation value .2 . Movement during measurement Residual air pressure in cuff .1) Release air pressure in cuff 2) Wait 10 minutes before taking another reading .3) Repeat “Instructions for Use” stepsCuff overinflated (more than 300 mmHg) .No pulse or blood pressure reading due to:1) Motion 2) Very weak artery oscillationSpecificationsPower Source:Battery (four type “AA” dry cell batteries) 6V 4W Measurement Method:Oscillometric MethodDisplay:Liquid Crystal Digital Display Measurement Range:Pressure: 0 ~ 280mmHgPulse: 40 ~ 200/minuteAccuracy:Pressure: within ± 3 mmHgPulse: within ± 5% readingPressure Detection:Capacitive Pressure SensorInflation:Automatic Pressure Application by a Pump Deflation and Rapid Air Release:Automatic pressure release valve Automatic-shut-off System When the internal pressure in the unit continuesat less than 20mmHg for about 5 ~ 8 minutes, themode changes automatically to clock . Printer:Serial static impact printerOperating/Temperature, Humidity:+500F to +104°F (+100C to +40 0C) 30-85% RH StorageiTemperature, Humidity:-4°F to 140°F (-20°C to + 600C) 10-95% RH Dimensions (Approx .):Main Unit: 82/4” (w) X 51/8” (d) x 23/5” (h) (215x 130x 66 mm)Cuff: 51/2 “(w) x 184/5”(1) (140x 480 mm)Cuff Range:For arms 9” to 13” in circumference Weight:Main Unit: approx . 201/2 oz (580 g)includingbatteriesCuff: approx . 42/5 oz (125 g) Accessories:Cuff, instruction manual,Printing paper: 2 rollsOptional parts: AC Adaptor Specifications subject to change without notice .This equipment generates and used radio frequency energy and if not installed and used properly, that is, in strict accordance with the manufacturer’s instructions, may cause interference to radio and television reception . It has been type tested and found to comply with the limits for a Class B computing device in accordance with the specifications in Subpart J of Part 15 of FCC Rules, which are designed to provide reasonable protection against such interference in a residential installation . However, there is no guarantee that interference will not occur in a particular installation . If this equipment does cause interference to radio or television reception, which can be determined by turning the equipment off and on, the user is encouraged to try to correct the interference by one or more of the following measures:- reorient the receiving antenna- relocate the computer with respect to the receiver- move the computer away from the receiver- plug the computer into a different outlet so that computer and receiver are on different branch circuits .If necessary, the user should consult the dealer or an experienced radio/television technician for additional suggestions . The user may find the following booklet prepared by the Fedral Communications Commision helpful:“How to Identify and Resolve Radio-TV Interference Problems” . This booklet is available from the US Government Printing Office, Washington, D .C ., 20402, Stock No . 004-000-00345-4 .LICENSED UNDER U . S . PAT .4829419 .4942516 .4896260 .4531132 .4825364,4686622 .4121284 4396976 .4371923 .4471385 .4120583 .4435732,4672457 .4739396CUSTOMER SERVICE TOLL FREE: 1-800-634-4350Limited One Year WarrantyYOUR OMRON MODEL HEM-713C Digital Blood Pressure Monitor is warranted to be free from manufacturing defects for a period of one year under normal use . This warranty extends only to the original retail purchaser .Should repair be needed, within the warranty period, ship the unit and receipt as proof of purchase prepaid to OMRON HEALTHCARE, INC ., 300 Lakeview Parkway, Vernon Hills, Illinois 60061, together with $5 .00 for return shipping and insurance .We will either repair or at our option replace free of charge any parts necessary to correct defects in material or workmanship . The above warranty is complete ad exclusive . The warrantor expressly disclaims liability for incidental, special or consequential damages of any nature . (Some status do not allow the exclusion or limitation of incidental or consequential damages so the above limitation or exclusion may not apply to you .)Any implied warranties arising by operation of law shall be limited in duration to the term of this warranty . (Some states do not allow limitations on how long an implied warranty lasts, so the above limitation may not apply to you .)This warranty gives you specific legal rights, and you may have other rights which vary from state to state . As condition to operation of your warranty, the enclosed registration card must be completed and sent to us within 10 days from the date of purchase .Caution Changes or modifications not expressively approved by OMRON HEALTH CARE, INC . could void the user’s authority to operate this product .Note Potential For RadiofTelevision Interference (for U .S .A . only)This product has been tested and found to comply with the limits for a Class B digital device, pursuant to part 15 of the FCC rules .These limits are designed to provide reasonable protection against harmful interference in a residential installation . The product generates, uses and can radiate radio frequency energy and, if not installed and used in accordance with the instructions, may cause harmful interference to radio communications . However . there is no guarantee that interierence will not occur in a particular installation . If the product does cause harmful interference to radio or television reception, which can be determined by turning the product off and on, the user is encouraged to try to correct the interference by one or more of the following measures:• Reorient or relocate the receiving antenna .• Increase the separation between the product and receiver .• Connect the product into an outlet on a circuit different from that to which the receiver is connected .• Consult the dealer or an experienced radiofTV technician for help .Potential For RadiofTelevision Interference (for Canada only)This digital apparatus does not exceed the Class B limits for radio noise emissions from digital apparatus as set out in the interferencEH:ausing equipment standard entitled “Digital Apparatus”, ICES’{)03 of the Canadian Department of Communications .Cet appareil numerique respecte les limites de bruits radioelectriques applicables aux appareils numeriques de Classe B prescrites dans la norme sur Ie materiel brouilleur . “Appareils Numeriques”, NMB .{J03 ildictee par Ie ministre des communications .OMRON uses recycled paper to help preserve our natural recources .Distributed by OMRON HEALTHCARE,INC.300 Lakeview Parkway Vernon Hills, Illinois 600610692581-7 A。
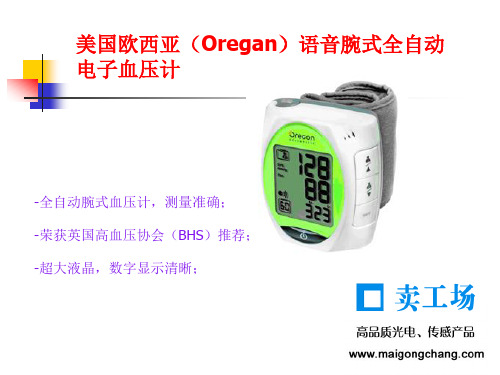
美国欧西亚(Oregan)语音腕式全自动电子血压计使用方法
4个关键操作 个关键操作
1.设定时间和测量单位。 设定时间和测量单位。 设定时间和测量单位 2.正确测量、数据储存方法。 正确测量、数据储存方法。 正确测量 3.语音报读和调节。 语音报读和调节。 语音报读和调节 4.存储数据的查看和删除。 存储数据的查看和删除。 存储数据的查看和删除
操作1: 操作 :时间和测量单位的设定
美国欧西亚( 美国欧西亚(Oregan)语音腕式全自动 ) 电子血压计
-全自动腕式血压计,测量准确; -荣获英国高血压协会(BHS)推荐; -超大液晶,数字显示清晰;
功能简介 使用注意事项
功能说明: 功能说明: 1.测量显示收缩压、舒张压、平均动脉压和脉搏。 2.每个用户可记录存储30组数据,有两个用户存储名额。 3.语音报读功能,可调整音量或设为静音。 使用注意事项: 使用注意事项: 1.为了储存数据的准确性需在使用前设定时间。 2.测量时正确的姿势才会有准确的测量结果。
•
操作4: 操作 :存储数据的查看和删除
-删除最近的测量数据
删除最近的测量数据
•按下▲/▼键,显示用户 或用户 的最近测量数据。 按下▲ ▼ 显示用户1或用户 的最近测量数据。 或用户2的最近测量数据 按下 •按住 按住SET键,直到液晶显示屏显示『DEL ONE』。 按住 键 直到液晶显示屏显示『 』 •按住 按住SET键2秒,即可删除选定的记录数据。确认删除,液晶显 按住 键 秒 即可删除选定的记录数据。确认删除, 示器将显示『 示器将显示『DEL DONE』。 』 •如需要放弃删除操作,按下▼键,返回。 如需要放弃删除操作,按下▼ 返回。 如需要放弃删除操作
操作4: 操作 :存储数据的查看和删除 -查看储存的测量数据值
查看储存的 测量数据值
InBody K200560 非侵入式血压测量系统说明书
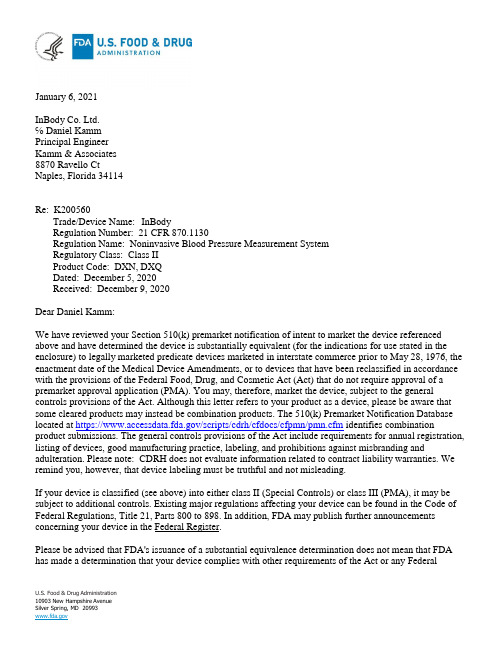
January 6, 2021InBody Co. Ltd.℅ Daniel KammPrincipal EngineerKamm & Associates8870 Ravello CtNaples, Florida 34114Re: K200560Trade/Device Name: InBodyRegulation Number: 21 CFR 870.1130Regulation Name: Noninvasive Blood Pressure Measurement SystemRegulatory Class: Class IIProduct Code: DXN, DXQDated: December 5, 2020Received: December 9, 2020Dear Daniel Kamm:We have reviewed your Section 510(k) premarket notification of intent to market the device referenced above and have determined the device is substantially equivalent (for the indications for use stated in the enclosure) to legally marketed predicate devices marketed in interstate commerce prior to May 28, 1976, the enactment date of the Medical Device Amendments, or to devices that have been reclassified in accordance with the provisions of the Federal Food, Drug, and Cosmetic Act (Act) that do not require approval of a premarket approval application (PMA). You may, therefore, market the device, subject to the general controls provisions of the Act. Although this letter refers to your product as a device, please be aware that some cleared products may instead be combination products. The 510(k) Premarket Notification Database located at https:///scripts/cdrh/cfdocs/cfpmn/pmn.cfm identifies combination product submissions. The general controls provisions of the Act include requirements for annual registration, listing of devices, good manufacturing practice, labeling, and prohibitions against misbranding and adulteration. Please note: CDRH does not evaluate information related to contract liability warranties. We remind you, however, that device labeling must be truthful and not misleading.If your device is classified (see above) into either class II (Special Controls) or class III (PMA), it may be subject to additional controls. Existing major regulations affecting your device can be found in the Code of Federal Regulations, Title 21, Parts 800 to 898. In addition, FDA may publish further announcements concerning your device in the Federal Register.Please be advised that FDA's issuance of a substantial equivalence determination does not mean that FDA has made a determination that your device complies with other requirements of the Act or any FederalU.S. Food & Drug Administration10903 New Hampshire AvenueSilver Spring, MD 20993K200560 - Daniel Kamm Page 2 statutes and regulations administered by other Federal agencies. You must comply with all the Act'srequirements, including, but not limited to: registration and listing (21 CFR Part 807); labeling (21 CFR Part 801); medical device reporting (reporting of medical device-related adverse events) (21 CFR 803) for devices or postmarketing safety reporting (21 CFR 4, Subpart B) for combination products (seehttps:///combination-products/guidance-regulatory-information/postmarketing-safety-reporting-combination-products ); good manufacturing practice requirements as set forth in the quality systems (QS) regulation (21 CFR Part 820) for devices or current good manufacturing practices (21 CFR 4, Subpart A) for combination products; and, if applicable, the electronic product radiation control provisions (Sections 531-542 of the Act); 21 CFR 1000-1050.Also, please note the regulation entitled, "Misbranding by reference to premarket notification" (21 CFR Part 807.97). For questions regarding the reporting of adverse events under the MDR regulation (21 CFR Part 803), please go to https:///medical-devices/medical-device-safety/medical-device-reporting-mdr-how-report-medical-device-problems .For comprehensive regulatory information about medical devices and radiation-emitting products, including information about labeling regulations, please see Device Advice (https:///medical-devices/device-advice-comprehensive-regulatory-assistance ) and CDRH Learn(https:///training-and-continuing-education/cdrh-learn ). Additionally, you may contact theDivision of Industry and Consumer Education (DICE) to ask a question about a specific regulatory topic. See the DICE website (https:///medical-devices/device-advice-comprehensive-regulatory-assistance/contact-us-division-industry-and-consumer-education-dice ) for more information or contact DICE by email (************.gov ) or phone (1-800-638-2041 or 301-796-7100).Sincerely,LT Stephen BrowningAssistant DirectorDivision of Cardiac Electrophysiology,Diagnostics and Monitoring DevicesOffice of Cardiovascular DevicesOffice of Product Evaluation and QualityCenter for Devices and Radiological HealthEnclosurefor Jennifer W. Shih -S510(k) Summary K200560 InBody Co., Ltd. InBody Bldg., 625, Eonju-ro, Gangnam-gu Seoul KOREA 06106 TEL. +82 02-501-3939 Date prepared: January 5, 2021 Contact: Kichul Cha, CEO1.Identification of the Devices:Proprietary-Trade Names:InBody Blood Pressure Monitor, BPBIO210/220/210T/220T.Regulation Number: 21 CFR 870.1130Regulation Name: Noninvasive blood pressure measurement system Regulatory Class: Class II Product Code: DXN, DXQ2.Equivalent legally marketed device: K061456, A&D Engineering, Inc.Proprietary-Trade Names: A&D Medical UTM-101 Digital Blood Pressure Monitor Regulation Number: 21 CFR 870.1130Regulation Name: Noninvasive blood pressure measurement system Regulatory Class: Class II Product Code: DXN3.Indications for Use: The subject device is a manual blood pressure (BP) monitor, and requires the user to listen for Korotkoff sounds to determine systolic and diastolic pressure. Further, patients whose Korotkoff sounds are not clear or absent, such as children younger than 3 years of age, will not be suitable for the subject device. Pulse rate is also measured.4.Product Description: This device can be used to measure blood pressure and pulse rate non-persistently using the Korotkoff sound method of measuring blood pressure in vitro. The user can measure the blood pressure using this device and cuff, stethoscope. Basically, it has the same function as a conventional mercury sphygmomanometer. However, instead of using harmful mercury to the human body, it displays the pressure on the LCD screen, so that the blood pressure can be measured harmlessly to the human body. In addition, using the ‘Mark’ function can conveniently display the systolic and diastolic pressures. And using its backlight, the user can measure blood pressure in the dark place. If air pressure exceeds 320mmHg, it will automatically exhaust quickly. If an emergency occurs during the measurement, pressing On/Off button will turn off the equipment and allow rapid exhaust. The device is for use by medical professional. The testing person supplies their own stethoscope, which is required for making the measurements. The measurement method is as follows.1.BPBIO220/BPBIO210: Place the device on a sturdy table or the cart. For BPBIO220T/BPBIO210T: Assemble the stand and the device.2.Sit properly in chair and place patient’s arm at heart height.3.Wind the cuff around the patient’s arm.4.Pressurize manually.5.Depressurize manually and listen to the Korotkoff sound.K2005606. Determine the systolic blood pressure and the diastolic blood pressure by Korotkoff sound.7. When the measurement is complete, the heart rate appears on the screen. The heart rate display is anincidental result of the Korotkoff sound identification and is not intended to be diagnostic or act as a heart rate monitor or alarm.5.Safety and Effectiveness, comparison to predicate device. The testing results and specificationcomparisons indicate that the new models are as safe and effective as the predicate device. A comparison table is presented below.Item K061456, A&D Engineering, Inc.UM-101 SPHYGMOMANOMETER InBody Blood Pressure Monitor,BPBIO210/220/210T/220T.ComparisonResultIntended Use Measure blood pressure (systolic anddiastolic) and pulse rate. The subject device is a manual blood pressure (BP) monitor, and requires theuser to listen for Korotkoff sounds to determine systolic and diastolic pressure. Further, patients whose Korotkoff soundsare not clear or absent, such as children younger than 3 years of age, will not be suitable for the subject device. Pulse rateis also measured.SamePatientPopulationAdult Adult SameMeasurementlocationUpper Arm Upper Arm SameMeasurementPrincipleKorotkoff sounds. Korotkoff sounds. Same Measured: Blood Pressure Pulse Rate Blood Pressure and Pulse Rate SameBlood PressureCuffExternal External SameInflationsystemManual Manual Same Components Gauge, Cuff, Pump Gauge, Cuff, Pump SamePower Source 2 x 1.5V alkaline batteries (LR6 or AA) 4 x alkaline batteries (AA) Similar,batteryoperation Dimensions 12,7” Gauge, Rectangular 12.6” Gauge, Rectangular Nearlyidentical.Overpressure safety An automatic quick exhaust valve is installedin the device to prevent overpressurization of 320mmHg or higher,therefore protecting the patient.If air pressure exceeds 320mmHg, it willautomatically exhaust quickly. If an emergencyoccurs during the measurement, pressingOn/Off button will turn off the equipment andallow rapid exhaustSameMeasurement range Blood Pressure 0-300 mmHg,Pulse: 30-240 bpmBlood Pressure 0-300 mmHg,Pulse: 30-240 bpmSameMeasurement storage Up to 5 measurements may be stored via amarking on the vertical LCD scaleUp to 5 measurements may be stored via amarking on the vertical LCD scaleSame.Accuracy Pressure: ±3mmHgPulse: ±5 %Pressure: ±3 mmHg,Pulse: ±3%Essentiallythe same K200560Item K061456, A&D Engineering, Inc.UM-101 SPHYGMOMANOMETERInBody Blood Pressure Monitor,BPBIO210/220/210T/220T.ComparisonResultRange of cuffsizesLarge cuff 33 cm to 45 cmMedium cuff 23 cm to 33 cmSmall cuff 16 cm to 23 cmLarge cuff 32 cm to 42 cmMedium cuff 22 cm to 32 cmSmall cuff 17 cm to 22 cm.Similar rangeof sizesPhotos Very similarinappearance.6.Summary of technological characteristics of the device compared to the predicate device. These blood pressuremeters are intended to be used in measuring human systolic, diastolic blood pressure usingKorotkoff sounds. In addition to being able to manually measure (and store up to 5 measurements) this electronic version of the classical blood pressure meter can display pulse rate. The following FDA guidance was consulted in the design and testing of the device: Non-Invasive Blood Pressure (NIBP) Monitor Guidance MARCH 1997, Final.7.Non-clinical testing: The proposed new models were tested and found to conform to the followinginternational standards:IEC 60601-1 :2005/AMD1:2012 Medical electrical equipment – Part 1: General requirements for basic safety and essential performance FDA recognition 19-4IEC 60601-1-2 [2014] Medical electrical equipment – Part 1-2: General requirements for basic safety and essential performance – Collateral standard: Electromagnetic Compatibility Requirements and tests FDA recognition 19-8In additional to standards testing, we did bench testing to compare the proposed device results to the regular manual method of measuring blood pressure. InBody has implemented the bench testingprocedure to determine the overall system accuracy of non-invasive sphygmomanometers with the intent to verity the overall accuracy of BPBIO210/220/210T/220T. 102 subjects were tested. The comparison results are as follows: InBody has compared the accuracy between mercury manometer using the stethoscope and the non-invasive sphygmomanometer, BPBIO210/220/210T/220T. We found andconcluded that they are substantially equal to each other. The accuracy of the BPBIO210/220/210T/220T which acquired from the clinical investigation implemented by InBody is respectively the systolic (Mean = 0mmHg, Std. Dev = 1.206mmHg), and the diastolic (Mean = 0mmHg, Std. Dev = 1.424mmHg). This testing was done in accordance with EN 1060-4. Non-invasive sphygmomanometers. Test procedures todetermine the overall system accuracy of automated non-invasive sphygmomanometers. This is an international version of SP-10 which is referenced in the FDA Guidance.K200560K2005608.Clinical Testing: Not required for this type of device. Blood pressure measurement is manually done bythe testing person.9.Conclusion, Comparison to the predicate device. Proposed Models: BPBIO210/220/210T/220T. aresubstantially equivalent to the predicate whose 510(k) number is K061456. The devices are identical in the intended use, and similar in the design principles, the performance and the applicable standards. Only their appearance and the user interfaces are different.。
美国伟伦ABPM 6100动态血压
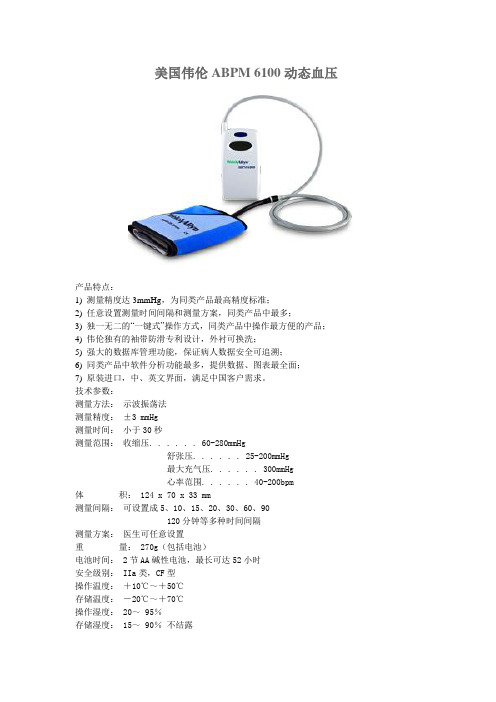
美国伟伦ABPM 6100动态血压
产品特点:
1) 测量精度达3mmHg,为同类产品最高精度标准;
2) 任意设置测量时间间隔和测量方案,同类产品中最多;
3) 独一无二的“一键式”操作方式,同类产品中操作最方便的产品;
4) 伟伦独有的袖带防滑专利设计,外衬可换洗;
5) 强大的数据库管理功能,保证病人数据安全可追溯;
6) 同类产品中软件分析功能最多,提供数据、图表最全面;
7) 原装进口,中、英文界面,满足中国客户需求。
技术参数:
测量方法:示波振荡法
测量精度:±3 mmHg
测量时间:小于30秒
测量范围:收缩压. . . . . . 60-280mmHg
舒张压. . . . . . 25-200mmHg
最大充气压. . . . . . 300mmHg
心率范围. . . . . . 40-200bpm
体积: 124 x 70 x 33 mm
测量间隔:可设置成5、10、15、20、30、60、90
120分钟等多种时间间隔
测量方案:医生可任意设置
重量: 270g(包括电池)
电池时间: 2节AA碱性电池,最长可达52小时
安全级别: IIa类,CF型
操作温度:+10℃~+50℃
存储温度:-20℃~+70℃
操作湿度: 20~ 95%
存储湿度: 15~ 90%不结露。
美国诊断公司ADC非侵入性血压计说明书
ADC®BlutdruckmessgerätZubehörGebrauchsanweisung,Pflege und WartungAMERICAN DIAGNOSTIC CORPORA TIONADC ®Blutdruckmessgerät Ersatzteile(Manometer, Manschette, Blase, Birne und Ventil)ManometerVerwendungszweck:ADC® Blutdruckmanometer sind für die Verwendung mitADC® und kompatiblen nichtinvasiven Blutdruckmanschet-ten konzipiert. Sie sind für die Verwendung mit kompatiblenAufpumpsystemen und in Verbindung mit einem Stethoskopzur manuellen Blutdruckmessung vorgesehen.!Allgemeine Warnungen:WARNUNG:Wenn dieses Gerät modifiziert wird, müssen entsprechende Inspektionen und Tests durchgeführt werden, um dessen fortwährenden sicheren Gebrauch sicherzustellen.WARNUNG:Lassen Sie eine Blutdruckmanschette nicht länger als 10 Minuten am Patienten liegen, wenn sie über 10 mmHg aufgeblasen wird. Dies kann zu Distress führen, die Blutzirku-lation stören und zur Verletzung peripherer Nerven beitragen.WARNUNG: Manschette nicht auf empfindliche oder beschädigte Haut auftragen. Über-prüfen Sie die Manschettenseite häufig auf Reizungen.WARNUNG:Sicherheit und Wirksamkeit bei Neugeborenen-Manschetten der Größen 1 bis 5 sind nicht gewährleistet.WARNUNG: Verwenden Sie die Manschette nur, wenn die auf der Manschette angegebenen Bereichsmarkierungen anzeigen, dass die richtige Manschettengröße gewählt wurde, da an-dernfalls fehlerhafte Messwerte auftreten können.WARNUNG:Platz zwischen Patient und Manschette lassen. Zwei Finger sollten in diesen Raum passen, wenn die Manschette richtig positioniert ist.WARNUNG: Manschette nicht an Gliedmaßen anlegen, die zur intravenösen Infusion ver-wendet werden.WARNUNG: Der Patient sollte während der Messung ruhig bleiben, um fehlerhafte Mess-werte zu vermeiden.WARNUNG:Wenn bei der Konstruktion von Schläuchen Luer-Lock-Konnektoren verwendet werden, besteht die Möglichkeit, dass sie unbeabsichtigt an intravaskuläre Flüssigkeitssys-teme angeschlossen werden, wodurch Luft in ein Blutgefäß gepumpt werden kann. Wenden Sie sich sofort an einen Arzt, wenn dies der Fall ist.!!!!!!!!!!!!!!VORSICHT:Um die höchstmögliche Genauigkeit Ihres Blutdruckmessgerätes zu erreichen,wird empfohlen, das Gerät in einem Temperaturbereich von 10 ° C bis 40 ° C mit einer rel-ativen Luftfeuchtigkeit von 15% -85% (nicht kondensierend).VORSICHT: Der Druckbereich des Manometers beträgt 0 mmHg bis 300 mmHg.VORSICHT:Extreme Höhen können die Blutdruckwerte beeinflussen. Ihr Gerät wurde für normale Umgebungsbedingungen entwickelt.VORSICHT: Dieses Produkt behält die angegebenen Sicherheits- und Leistungsmerkmale bei Temperaturen zwischen 0 ° C und 40 ° C bei einer relativen Luftfeuchtigkeit von 15% bis 85% bei.VORSICHT:Manschette nicht bügeln.VORSICHT: Die Manschette nicht erhitzen oder dampfsterilisieren.Anschließen des Manometers an das Inflationssystem:Taschenmodelle: 800, 802, 808N, 809NDer Widerhaken an der Unterseite des Manometers wird Reibung auf dieSchläuche der meisten im Handel erhältlichen Manschetten- und Blasensystememit zwei Schläuchen passen.WARNUNG:Das Taschenmanometer ist für die Verwendung mit TWO-Schlauchsystemen vorgesehen, bei denen ein Schlauch an das Manometer undder andere an die Inflationsquelle (Kolben und Ventil) angeschlossen wird.SymboldefinitionenDie folgenden Symbole sind mit Ihrem ADC® Blutdruckmessgerät verbunden:!Uhrstil Modell: 805Der Widerhaken an der Unterseite des Manometers wird reibungsarm auf diemeisten im Handel erhältlichen Spiralschläuche passen.WARNUNG: Das Uhrmanometer ist für die Verwendung mit ZWEI-Rohrsys-temen ausgelegt, bei denen ein Rohr an den am Manometer angebrachtenRohrschlangen und das andere an die Aufblasquelle (Kolben und Ventil)angeschlossen ist.VORSICHT: Stellen Sie bei allen Blutdruckmessgeräten, die an der Wandmontiert werden können, sicher, dass das Gerät vor der Verwendung sichermontiert ist, um Schäden am Gerät und mögliche Verletzungen des Patientenzu vermeiden.Anschließen Palm Style Modell: 804NLegacy-Anschluss: Montieren Sie den mitgelieferten Luer-Slip-Stecker in den Anschluss oben auf der Handfläche mit der Gum-midichtung nach unten. Stellen Sie sicher, dass der Steckervollständig im Steckeranschluss sitzt. Schieben Sie den Manschetten-schlauch über das mit Widerhaken versehene Ende des Anschlusses.Der Verbinder passt sich reibungsarm an die Schläuche der meistenim Handel erhältlichen ONE-Schlauchmanschetten- und Blasensys-teme an (Abbildung 1).Neuer 804N-Anschluss: Setzen Sie den weißen HP-Stecker in denMetallempfänger ein, bis er einrastet (Abbildung 2).Entriegeln:Schieben Sie den Empfängerkragen nach unten in Rich-tung Messuhr, bis sich der Stecker löst.WARNUNG: Entfernen Sie NICHT den Metallempfänger vom Mess-gerät.WARNUNG: Das Handmanometer ist für die Verwendung mit EIN-Rohr-Systemen ausgelegt.WARNUNG:Um Schäden am Gerät zu vermeiden, drücken Sie den Stecker nicht in den Anschluss.Blasenmodell: 815 SerieVerwendungszweck:ADCUFF™ Blasen sind nichtinvasive Aufblasbeutel zur Verwendung mit ADC® und kompatiblen Blutdruckmanschetten. Sie sind für die Verwendung mit manuellen und automatisierten nichtin-vasiven Blutdruckmessgeräten vorgesehen.Montage der Convertible-BlaseBauen Sie je nach Ihren Anforderungen eine 1 oder 2 Röhren-Blasenverbindung auf.Was ist enthalten:(1) Blasenschale einem offenen Widerhaken(1) Kappe für 1 Schlauchblase verwenden(1) Tube für 2 Röhrenblasen verwenden Instandhaltung:Das Manometer darf mit einem weichen Tuch gereinigt werden, darf aber unter keinen Umstän-den demontiert werden. Sollte die Anzeigernadel des Manometers außerhalb der ovalen Kalib-rierungsmarkierung liegen, muss das Manometer im Vergleich zu einem Referenzgerät, das nach nationalen oder internationalen Messstandards zertifiziert wurde,auf ± 3 mmHg neu kalibriert werden. Kein Manometer, bei demdie Anzeigernadel außerhalb dieser Markierung liegt, kann ver-wendet werden (Abbildung 3). Der Hersteller empfiehlt alle 2Jahre eine Kalibrierungsprüfung.Standards:ANSI/AAMI/ISO 81060-1:2007 • EN / ISO 81060 - 1:2012HINWEIS: Die Anzeige mit dem Ventil in voller Auspuffposition aufbewahren.(Abbildung 3)Blase in Manschette einfügenUm die Blase in die Manschette einzuführen;Konvertierbare BlaseConvertible Bladder Connections (1 oder 2 Röhren)1 Röhren - Befestigen Sie die mitgelieferte Kappe sicher am freiliegenden Widerhaken an der Stellen Sie sicher, dass die Verbindung sicher ist. WARNING:Verbindungen sind nicht dafür ausgelegt, regelmäßig hin- und hergeschaltet zu werden.blasen. (Abbildung 6).Manschettenmodelle: Serie 845 Verwendungszweck:ADC® Blutdruckmanschetten sind nichtin-vasive Blutdruckmanschetten, die zur Ver-wendung mit manuellen und automatisierten nichtinvasiven Blutdruckmessgeräten bes-timmt sind.Kontraindikationen:Aneroid-Blutdruckmessgeräte sind für den Neugeborenengebrauch kontraindiziert. Verwenden Sie nicht mit Neugeborenen Manschetten oder Neugeborenen Patien-ten. Überprüfen Sie die Größentabelle für die richtige Verwendung von Alters- und Extremitätenbereichen (rechts).Manschette GrößeGliedmaßenbereichZoll CMKind 7 3.5 bis 5.5 9 bis 14 Kind 9 5.1 bis 7.6 13 bis 19.5 Klein Erwachsener10 7.4 bis 10.6 19 bis 27 Erwachsener11 9 bis 15.7 23 bis 40 Großer Erwachsener 12 13.3 bis 19.6 34 bis 50 Oberschenkel 13 15.7 bis 25.9 40 bis 66 Bariatric 12 17.32 bis 25.9 44 bis 66GrößentabelleSize Guide TM Markiersystem:Das ADC® Size Guide ™ Markiersystem gewährleistet die Verwendung der korrekten Manschet-tengröße und die korrekte Ausrichtung der Manschette. Gedruckte Index- und Reichweiten-markierungen und anwendbare Gliedmaße (in cm) ermöglichen eine einfache Identifizierung der korrekten Manschettengröße. Eine auf beiden Seiten gedruckte Arterienmarkierung zeigt den Blasenmittelpunkt für die korrekte Manschettenpositionierung an. Ein praktisches Nylon-Hängeetikett ermöglicht den flexiblen Einsatz mit Taschenanroiden oder Quecksilbermanometern. Die Haftfläche mit Klettverschluss bietet einen festen, stufenlosen Sitz und ist für mindestens 30.000 Schließzyklen ausgelegt.Anwenden der Manschette:Legen Sie die Manschette über den nackten Oberarm,wobei die Arterienmarkierung direkt über der A.brachialis liegt. Die Unterkante der Manschette sollteetwa einen Zoll (2-3 cm) über der Ellenbeuge stehen.Wickeln Sie das Ende der Manschette, in der sich dieBlase nicht befindet, eng und gleichmäßig um den Armund wickeln Sie die Klebestreifen ein. Überprüfen Sie,ob die INDEX-Linie zwischen den beiden RANGE-Lin-ien liegt (Abbildung 7), um eine korrekte Anpassung zu überprüfen.Gauge HangRegisterkarte Haken & SchleifeLinker ArmLampen- und Ventilbaugruppe - Modell 872NVerwendungszweckADC® Blutdruckballon und Ventile ermöglichen ein kontrol-liertes Aufblasen und Ablassen der Blutdruckmanschette. Siesind für die Verwendung mit manuellen nichtinvasiven Blut-druckmessgeräten vorgesehen.Zu bedienen:Schließen Sie das Luftventil, indem Sie die Flügelschraube im Uhrzeigersinn drehen. Zum Öff-nen gegen den Uhrzeigersinn drehen. Die Deflation sollte während der gesamten Messung bei einer konstanten Geschwindigkeit von 2-3 mmHg / Sekunde gehalten werden, um beste Ergeb-nisse zu erzielen (gemäß den Empfehlungen der AHA).Nach Bedarf reinigen und desinfizierenReinigung• Verwenden Sie eine oder mehrere der folgenden Methoden und lassen Sie sie an der Luft trocknen:• Mit einem milden Reinigungsmittel und Wasserlösung (1: 9 Lösung) abwischen. Spülen.• Wischen Sie mit Enzol gemäß den Anweisungen des Herstellers ab. Spülen.• Wischen Sie mit 0,5% Bleichmittel und Wasserlösung ab. Spülen.• Mit 70% Isopropylalkohol abwischen.• Mit mildem Reinigungsmittel in warmem Wasser, normalem Waschgang einweichen.Entfernen Sie zuerst die Blase. Manschette ist kompatibel mit 5 Waschzyklen.Low Level DesinfektionEnzol enzymatisches Reinigungsmittel gemäß den Anweisungen des Herstellers zubereiten.Sprühen Sie die Reinigungslösung großzügig auf die Manschette und verwenden Sie eine sterile Bürste, um die Reinigungslösung über die gesamte Manschettenoberfläche für fünf Minuten zu rühren. Spülen Sie fünf Minuten lang kontinuierlich mit destilliertem Wasser. Um zu desin-fizieren, folgen Sie zunächst den Reinigungsschritten oben, sprühen Sie die Manschette mit 10% iger Bleichlösung ein, bis sie gesättigt ist, und bewegen Sie sie fünf Minuten lang mit einer sterilen Bürste über die gesamte Manschettenoberfläche. Spülen Sie fünf Minuten lang kontinuierlich mit destilliertem Wasser. Wischen Sie überschüssiges Wasser mit einem sterilenTuch ab und lassen Sie die Manschette an der Luft trocknen.LuftventilEndventilIhr Blutdruckmessgerät ist mit einer Kolben- und Ventilanordnung ausgestattet, die aus 3 Teilen besteht: einem Rückschlagventil, einer Quetschbirne und einem Luftkontrollventil. Bei aus-gewählten Modellen verfügen die End- und Luftventile über ein eingebautes Filtersieb, um die Staubbelastung zu minimieren. Wir empfehlen, End- und Luftventile regelmäßig aufStaubablagerungen zu überprüfen. Wenn das Endventil klar erscheint, Sie aber beim Drücken der Lampe einen erhöhten Widerstand spüren, prüfen Sie, ob sich Staub am Luftventilfilter angesammelt hat. (Die Glühlampe ist reibschlüssig mit dem Luftventil verbunden und kann le-icht entfernt werden, um Zugang zu diesem Filtersieb zu erhalten.) Staub und Schmutz können mit einer Pinzette entfernt werden. Ersatzfilter, Dichtungen und Ventilteile werden immer kosten-los zur Verfügung gestellt, falls erforderlich.Manometer QualitätskontrolleEine Seriennummer und Chargennummer werden au-tomatisch jedem Aneroid während der Herstellungzugewiesen, so dass jeder Artikel kontrolliert wird.Diese Seriennummer befindet sich auf der Frontplattejedes Anerods (Abbildung 8).Die Chargennummer befindet sich auf dem äußerenEtikett aller Zubehörverpackungen (Abbildung 9).(Abbildung 8)Ordnungsnummer (Abbildung 9)JAHR -in diesem Etikett ist 2018MONAT - in diesem Label ist AprilDATE - in diesem Etikett ist 26Mitarbeiter oder TeamVerantwortlich für die VersammlungUDI COMPLIANT 2D barcode erfasst GTIN undviele Informationen während des VersandsVerfügungWenn Ihr Blutdruckmessgerät oder irgendeines seiner Teile das Ende ihrer Lebensdauer erreicht hat, entsorgen Sie diese bitte in Übereinstimmung mit allen regionalen und nationalen Umweltvorschriften. Geräte, die kontaminiert wurden, sollten gemäß allen lokalen Verordnungen und Vorschriften entsorgt werden.GarantieDer Garantieanspruch der American Diagnostic Corporation (ADC®) gilt nur für den ur-sprünglichen Einzelhandelskäufer und beginnt mit dem Lieferdatum. ADC gewährleistet, dass seine Produkte bei normaler Verwendung und Wartung wie folgt gegen Material- und Verar-beitungsfehler geschützt sind:• Ihr Manometer wird je nach Modell für 10 Jahre, 20 Jahre oder Lebensdauer garantiert. Spez-ifische Garantiebezeichnungen finden Sie auf dem Etikett oder am Endbereich. Es wird garantiert, dass das Manometer im gesamten Bereich eine Genauigkeit von +/- 3 mmHg (oder dem vorherrschenden Standard) aufweist, wenn es für die Dauer der Garantie mit einem Referenzs-tandard verglichen wird.• Die AdcuffTM-Komponenten des Aufpumpsystems (Manschette, Blase, Schläuche, Kolben, Ventile und Anschlüsse) haben eine Garantie von drei Jahren. Spezielle Manschetten und Blasen sind für zwei Jahre garantiert.Was ist abgedeckt: Ersatz von Teilen und Arbeit.Was nicht abgedeckt ist: Transportkosten zu ADC®. Schäden, die durch Missbrauch, Miss-brauch, Unfall oder Fahrlässigkeit verursacht werden. Neben-, Sonder- oder Folgeschäden. In einigen Staaten ist der Ausschluss oder die Beschränkung von Neben-, Sonder- oder Folgeschä-den nicht zulässig, sodass diese Einschränkung möglicherweise nicht auf Sie zutrifft.Um Garantie-Service zu erhalten:Senden Sie Artikel an ADC®, Attn: Reparaturabteilung, 55 Commerce Dr., Hauppauge, NY 11788. Bitte geben Sie Ihren Namen und Adresse, Telefon-nummer, Kaufbeleg und eine kurze Beachten Sie das Problem.Implizite Garantie: Jede implizite Garantie ist zeitlich begrenzt auf die Bedingungen dieser Garantie und in keinem Fall über den ursprünglichen Verkaufspreis hinaus (außer wenn dies gesetzlich verboten ist). Diese Garantie gibt Ihnen bestimmte gesetzliche Rechte und Sie können weitere Rechte haben, die von Staat zu Staat variieren.11ADC55 Commerce Drive Hauppauge, NY 11788U.S.A.ADC (UK) Ltd.Unit 6, PO14 1THUnited KingdomIn den USA geprüft und verpackt.tel: 631-273-9600gebührenfrei: 1-800-232-2670fax: *****************IB p/n 9355N-00 rev 6Um Ihr Produkt zu registrieren, besuchen Sie uns unter/registerGedruckt in den USA.。
无创动脉血压监测系统专业介绍
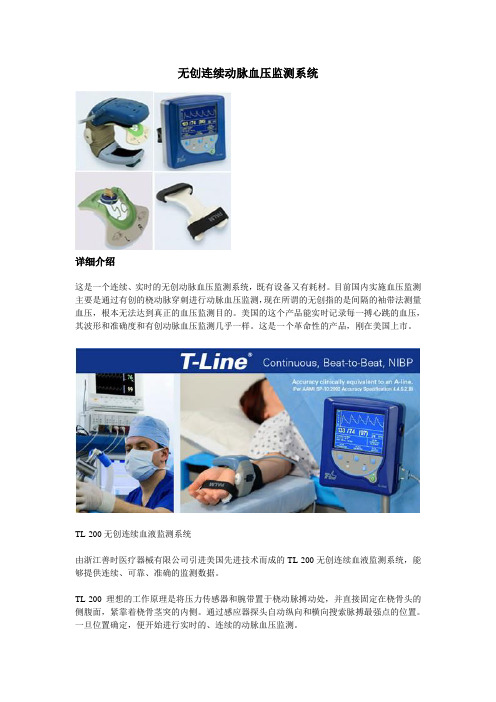
无创连续动脉血压监测系统详细介绍这是一个连续、实时的无创动脉血压监测系统,既有设备又有耗材。
目前国内实施血压监测主要是通过有创的桡动脉穿刺进行动脉血压监测,现在所谓的无创指的是间隔的袖带法测量血压,根本无法达到真正的血压监测目的。
美国的这个产品能实时记录每一搏心跳的血压,其波形和准确度和有创动脉血压监测几乎一样。
这是一个革命性的产品,刚在美国上市。
TL-200无创连续血液监测系统由浙江善时医疗器械有限公司引进美国先进技术而成的TL-200无创连续血液监测系统,能够提供连续、可靠、准确的监测数据。
TL-200理想的工作原理是将压力传感器和腕带置于桡动脉搏动处,并直接固定在桡骨头的侧腹面,紧靠着桡骨茎突的内侧。
通过感应器探头自动纵向和横向搜索脉搏最强点的位置。
一旦位置确定,便开始进行实时的、连续的动脉血压监测。
T-LINE规格主要指标:T-LINE tensymeter用于测量体重90至400磅(约40.8kg-181.4kg)之间和身高4‘6”到6’6”(约130cm-200cm)成人的动脉血压和脉搏率。
精确度:收缩压:平均差在5mmHg左右;标准偏差不超过8mmHg舒张压:平均差在5mmHg左右;标准偏差不超过8mmHg平均压力:平均差在5mmHg左右;标准偏差不超过8mmHg特点和规格测量范围:收缩压:30-245mmHg舒张压:20-220mmHg脉冲率:30 - 250次电学因素电源要求:TL-200100-240V ,50 - 60Hz,0.35A(最大)保险丝额定值:5 x 20mm,0.5A设备归类:IEC二类,符合IEC 60601-1标准环境因素操作温度:+15℃~ +40℃储藏温度:-10℃~ +60℃操作湿度:30%到85%(不凝结)储藏湿度:30%到95%(不凝结)禁忌事项T-Line Tensymeter以下病人禁用:•没有明显的桡动脉脉搏•传感器无法应用于解剖异常(皮肤移植、囊肿、蜂窝组织炎),或受伤(疤痕、伤口、烧伤、擦伤)•静脉线放置在传感器应用点或偏于传感器的内侧或外侧范围•电流电压分流在T-Line臂上资料来源:浙江善时医疗器械有限公司。
公司全部产品
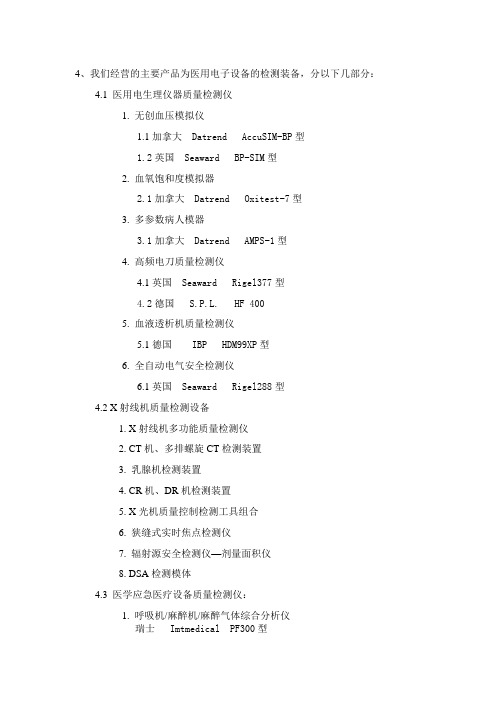
4、我们经营的主要产品为医用电子设备的检测装备,分以下几部分:4.1 医用电生理仪器质量检测仪1. 无创血压模拟仪1.1加拿大 Datrend AccuSIM-BP型1.2英国 Seaward BP-SIM型2. 血氧饱和度模拟器2.1加拿大 Datrend Oxitest-7型3. 多参数病人模器3.1加拿大 Datrend AMPS-1型4. 高频电刀质量检测仪4.1英国 Seaward Rigel377型4.2德国 S.P.L. HF 4005. 血液透析机质量检测仪5.1德国 IBP HDM99XP型6. 全自动电气安全检测仪6.1英国 Seaward Rigel288型4.2 X射线机质量检测设备1. X射线机多功能质量检测仪2. CT机、多排螺旋CT检测装置3. 乳腺机检测装置4. CR机、DR机检测装置5. X光机质量控制检测工具组合6. 狭缝式实时焦点检测仪7. 辐射源安全检测仪—剂量面积仪8. DSA检测模体4.3 医学应急医疗设备质量检测仪:1. 呼吸机/麻醉机/麻醉气体综合分析仪瑞士 Imtmedical PF300型2. 除颤/起博监护仪质量检测仪加拿大 Datrend Phase-3型3. 单一通道输液设备分析仪加拿大 Datrend 蓝solo(单通道)4. 双通道精密输液设备检测仪加拿大 Datrend 2000E型4.4 放疗检测系统1. 便携式放疗检测系统2. 放疗检测三维水箱系统3. 放疗绝对剂量计, 有两种选择:4. 电离室矩阵4.5 核磁共振检测设备瑞士 Metrolab1. 核磁共振磁场强度检测仪2. 核磁共振性能检测模体4.6 超声检测设备1. 超声功率计UPM DT-1美国欧米2. 超声功率测量装置RFB-2000辐射力天平美国anda3. 超声声场分布检测装置—AIMS系统美国anda4.7 彩超多普勒检测系统美国ats。
电子血压计基础知识

电子血压计基础知识目录一、电子血压计概述 (3)1.1 电子血压计的定义与分类 (4)1.2 电子血压计的工作原理 (5)1.3 电子血压计的应用领域 (5)二、电子血压计的构造与组件 (7)2.1 显示屏 (8)2.2 按键与按钮设计 (10)2.3 储存模块 (10)2.4 电源模块 (12)2.5 通信模块 (12)三、电子血压计的使用方法 (14)3.1 使用前的准备 (15)3.2 正确的测量姿势 (16)3.3 调整测量参数 (16)3.4 开始测量 (18)3.5 结果解读与记录 (18)四、电子血压计的测量原理 (19)4.1 压力传感器的工作原理 (20)4.2 数据处理与分析 (21)4.3 血压水平的判断标准 (23)五、电子血压计的质量控制与认证 (24)5.1 生产过程中的质量控制 (25)5.2 认证标准与程序 (26)5.3 产品认证标志与标识 (27)六、电子血压计的使用注意事项 (29)6.1 避免在危险环境中使用 (30)6.2 定期检查与维护 (31)6.3 正确的存放与使用环境 (32)6.4 异常情况的处理 (33)七、电子血压计的市场现状与发展趋势 (34)7.1 市场需求与规模 (36)7.2 竞争格局与主要品牌 (37)7.3 技术创新与发展方向 (38)7.4 行业政策与标准 (40)八、电子血压计的选购与使用建议 (41)8.1 如何选择合适的电子血压计 (42)8.2 使用中的注意事项 (44)8.3 用户体验与评价 (45)8.4 购买渠道与售后服务 (46)一、电子血压计概述电子血压计是一种利用现代电子技术与血压测量原理相结合的高精度测量设备,主要用于测量人体血压。
与传统的血压计相比,电子血压计具有更高的准确性和便捷性,已成为家庭和医疗机构中广泛使用的健康监测工具。
电子血压计的工作原理主要基于一定的压力传感技术,通过测量血管内血液对血管壁的压力来推算出血压值。
符合美国标准的电子血压计技术要求
符合美国标准的电子血压计技术要求1.引言电子血压计是一种用于测量人体血压的设备,近年来得到了广泛的应用。
美国是世界上最大的医疗市场之一,因此,符合美国标准的电子血压计技术要求具有重要意义。
本文将介绍符合美国标准的电子血压计技术要求,包括硬件和软件方面的要求。
2.硬件要求2.1 测量准确性符合美国标准的电子血压计应具备较高的测量准确性。
根据美国食品药品监督管理局(FDA)的要求,血压计的测量误差应在正常工作条件下不超过3mmHg。
此外,电子血压计应能够准确测量高血压和低血压的情况。
2.2 充气系统电子血压计的充气系统应具备稳定可靠的性能。
充气系统需要能够准确地将气袋充气到适当的压力,并且能够在测量后迅速排空。
此外,充气系统应具备低噪音和低能耗的特点。
2.3 显示屏幕符合美国标准的电子血压计应具备清晰明确的显示屏。
显示屏应能够显示血压值、心率以及其他相关信息。
此外,显示屏的亮度应可调节,并且在不同光线环境下都能够清晰可见。
2.4 电源和存储电子血压计应具备可靠的电源系统,并能够长时间使用。
电子血压计的电源可以采用电池或其他可充电电池。
此外,电子血压计还应能够存储测量数据,并能够将数据传输到外部设备进行分析和存储。
3.软件要求3.1 数据处理和分析符合美国标准的电子血压计应具备强大的数据处理和分析能力。
血压计应能够自动处理测量数据,并能够生成血压趋势图和报告,以便医生和患者进行参考和分析。
3.2 用户界面电子血压计的用户界面应简单易用。
用户应能够轻松地开始测量血压,并能够查看以前的测量记录。
此外,用户界面还应提供设置选项,允许用户根据自己的需求进行个性化设置。
3.3 数据安全符合美国标准的电子血压计应具备良好的数据安全性。
个人健康数据是敏感信息,因此,电子血压计应采取必要的安全措施来保护用户数据的隐私和机密性。
3.4 软件更新电子血压计的软件应具备可升级的功能。
由于技术和标准的不断发展,软件更新可以修复错误、改进性能并提供新的功能。
速递FDA批准首款无袖套无创血压监测仪

速递FDA批准首款无袖套无创血压监测仪
▎药明康德/报道
今日,专注于研发先进传感技术和患者远程监控解决方案的Biobeat公司宣布,FDA通过510(K) 通道批准其无袖套式血压监测仪上市。
该仪器可以在医院和家庭等任何场所监测血压,血氧和心率等生命体征并自动上传到智能应用程序和云端进行远程监控,协助改善疾病管理。
这是第一款FDA批准的无袖套式血压监测仪。
高血压是一种常见病,也是多发病。
血压控制不佳是该疾病的重要危险因素,而血压控制的拦路虎之一就是高血压的知晓率不足。
血压监测设备发展至今,常用的还是袖套式血压计,用起来很不便,而且相当一部分人也做不到正确的测量。
因此,创新的血压监测仪器对于患者来说非常重要。
图片来源:Biobeat官网
Biobeat的专利技术是基于光学体积描记术(PPG)。
它通过使用LED光源,多个波段,以及特定的算法,在即使有背景噪音的情况下也可以精确的接收到PPG信号。
这一技术在检测、测量和记录不同生命体征的方法上取得了重大突破。
Biobeat血压监测仪分为两个部分,分别是手表和可以适应任何类型测量的灵活无袖套式传感器。
它可以用于进行远程监测,若身体体征引发警报,患者可直接从应用程序中接收警报,护理人员也可进行干预。
除了对血压,血氧饱和度,心率,心量输出做出监测,Biobeat监测仪还对体温,步数,汗液,所摄入的卡路里等都有记录。
BioBeat的这一创新解决方案不仅可以监测静止的患者,也可以监测进行户外活动的患者,这为护理人员提供了辅助疾病管理和优化临床结果的重大帮助。
▲Biobeat监测系统可以监测的生命体征(图片来源:Biobeat官网)。
- 1、下载文档前请自行甄别文档内容的完整性,平台不提供额外的编辑、内容补充、找答案等附加服务。
- 2、"仅部分预览"的文档,不可在线预览部分如存在完整性等问题,可反馈申请退款(可完整预览的文档不适用该条件!)。
- 3、如文档侵犯您的权益,请联系客服反馈,我们会尽快为您处理(人工客服工作时间:9:00-18:30)。
美国进口无创血压模拟仪拥有质量较高,成本较低及无创血压模拟仪的高性能微处理器。
它设计小巧,操作简单,满足实际测试的多种需要。
AccuPulse无创血压模拟仪是目前市面上精度很高、血压和脉率模拟范围很广的一款模拟仪。
美国进口无创血压模拟仪无创血压模拟器非介入式无创血压检测仪系列多参数患者模拟仪能提供逼真的人体生理信号输出,可有效检验新生儿NIBP;同时拥有脉搏、呼吸、温度、ECG信号等模拟,独有的特性针对电子血压计、多参数监护仪进行研发和测试。
AccuPulse无创血压模拟仪,它可以有效地检查应用振荡法成人和新生儿无创血压监护仪。
内置包括GE、Philips、SpaceLabs等在内的国际主流制造商的无创血压算法模拟值(Caltable),提供更精准的无创血压模拟,被广泛应用于主流制造商研发、生产和售后测试的全流程。
美国Clinical Dynamics公司是一家专注于监护类检测设备的研发与生产的专业公司,与众多国际主流监护仪制造商建立长期紧密的合作关系,取得他们授权认证的无创血压算法模拟值(Caltable)和血氧饱和度R-曲线。
他们的测试设备被广泛使用于众多国际主流监护仪制造商的研发、生产和售后检测的全流程,成为行业测试的前进者。
产品特性Caltable功能
在无创血压测试中,由于其原理的特殊性,按YY0670等标准要求,需要制造商采集临床样本数据来设计自己的算法,导致各个厂家
的算法会存在一定差异,因此我们一般只能采用重复性来评价其性能。
AccuSim内置包括GE、Philips、SpaceLabs等在内的多个国际主流监护仪制造商授权认证的无创血压算法典型模拟值(Caltable),在测试这些型号的监护仪时,选择对应的caltable血压模拟值,从而消除算法差异的影响,这样可以使用测量结果的误差来进行评价。
Caltable血压模拟值是制造商通过大量临床数据总结出来的,可以为其他血压测量设备制造商提供一定的参考和借鉴;对检测机构、计量单位和医院来说,可用于测量不同品牌的监护仪。
美国Clinical Dynamics公司几十年专注于监护类测试设备的研发和生产,一直和国际主流监护仪制造商保持紧密合作。
AccuPulse 内置的国际主流制造商无创血压算法模拟值( Caltable功能)就是与国际主流监护仪制造商多年紧密合作开发的结果,被这些制造商广泛使用在其研发、生产和售后的全流程,成为行业测试的前进者。
AccuPulse 无创血压模拟仪可以模拟正常高血压及低血压的动态血压。
模拟的情况为典型的成人及新生儿患者。
深圳市一测医疗测试技术有限公司是一家专注于医疗器械测试产品和技术的研发、销售与服务为一体的“国家高新技术企业”,我们拥有自主研发的国家发明专利技术和众多填补国内空白的专业测试产品,如医疗安规测试方案、血压测试方案、高频电刀测试方案、呼吸测试方案等。
AccuPulse创新的CalTables 技术由十多家国际主流监护仪厂家授权并验证其血压模拟精度,典型在1~2 mmHg或更小;
压力精度±0.5 mmHg;
内置加压泵,不需要额外配件即可完成静态压力测试、过压测试和泄漏测试;
自带成人/新生儿模拟手臂;
可编程的自动化测试;
交直流两用.
示波法脉冲
脉率
显示/测量参数
数字压力表
泄漏测试
过压测试
自动测试
用户可自行编辑一系列测试项目来测试NIBP模块
远程操作端口
AccuPulse可以通过RS-232端口进行远程操作
袖带支架
自带成人/新生儿模拟手臂, 便携且易于使用
- 塑料及铝制圆筒
- 成人:外径8.9cm, 宽18.4cm;
- 新生儿:外径3.2cm, 宽5.7cm;
以上就是深圳一测医疗给大家介绍AccuPulse无创血压模拟仪供应信息相关信息,如果您还想了解更多的相关事项可以拨打我们的热线电话,可以点击我们的官网在线实时咨询我们,或者关注我们的官方微信公众号,我们会有专业的工作人员为您解答。
我们通过与国际优秀的医疗器械测试仪器制造商和专业实验室
的广泛深入合作以及国内行业专家的紧密交流与协作,并严格按照ISO9001:2015质量管理体系要求为医疗器械产业在研发、生产,监督、检验,在用售后、培训,教学与研究等各领域客户提供完善的医疗器械测试整体解决方案和专业的技术服务。
公司秉承“热情、专注、高效、负责”的经营理念,以“专业专注,精益求精”为服务宗旨,力求解决医疗器械测试过程中的各种繁杂问题,而不仅仅是一次测试,从而保障患者得到安全有效的诊断和治疗。