配置口令
超级终端配置路由器口令

超级终端配置路由器⼝令1、Router> ⽤户2、Router>enable 进⼊特权模式 Router#3、Router#config terminal 进⼊全局模式 Router(config)#4、Router(config)#interface f0/1 进⼊接⼝模式 Router(config-if)#5、Router(config)#interface f0/1.0 进⼊⼦接⼝模式 Router(config-subif)#6、Router(config)#line console 0 进⼊line模式 Router(config-line)#7、Router(config)#router rip 进⼊ Router(config-router)#exit 退回上层 end 结束所有操作8、Router(config)#hostname aaa 配置9、Router(config)#banner motd $ this … $ 配置提⽰信息10、Router#show running-config 查看配置情况11、Router(config)#enable password 111 设置使能密码(明⽂)12、Router(config)#enable secret 111 设置使能密码(密⽂)13、 Router(config)#service password-encryption 加密所有密码14、Router(config)#line console 0 设置console密码 Router(config-line)#password 333 Router(config-line)#login15、Router(config)#interface f0/0Router(config_if)description this is….. 配置接⼝标识16、Router(config) #line console 0 配置超时 Router(config-line)#exec-timeout 0 017、Router(config) #line console 0 显⽰同步 Router(config-line)#logging synchronous18、Router(config) # no ip domain-lookup 配置禁⽤DNS19、Router# show version 查看配置、版本等信息配置20、Router(config) # #ip route network [mask] {address | interface} [distance] [permanent] ⽬的地址掩码下⼀接⼝本地接⼝管理开销永久有效例:RouterA(config) # interface fa0/0 配置F0/0接⼝的IP地址RouterA(config_if) # ip address 192.168.2.2255.255.255.0RouterA(config_if) # no shutdownRouterA# show interface f0/0 查看F0/0接⼝RouterA# show ip route 查看A20、配置下⼀跳接⼝IP或本地接⼝号Router(config) # ip route 0.0.0.0 0.0.0.0 address21、配置静态路由:Router(config) # ip route 192.168.1.0 255.255.255.0 address ⽬标⽹络号⼦⽹掩码下⼀跳接⼝IP22、查看串⼝连线模式(DCE或DTE)Router # show controllers s0/023、配置DCE接线端时钟频率Router(config)#interface s0/0Router(config-if)#clock rate 6400024、配置(连接的端⼝Router(config)#interface f0/0.1 进⼊⼦接⼝Router(config-if)# ip address 192.168.1.1 255.255.255.0 配置IPRouter(config-if)# encapsulation dot1q vlan-id 封装到VLAN25、Router(config)#interface s0/0 设置IP地址 Router(config-if)#ip address 192.168.1.1 255.255.255.0 Router(config-if)#no shutdown26、Router#show ip route 查看路由表27、RIP协配置Router(config)#router rip 默认为版本V1,有类路由Router(config-router)# version 2 设置为版本V2,⽆类路由Router(config-router)#network 192.168.1.0 宣告接⼝⽹络号1.0Router(config-router)#network 192.168.2.0 宣告接⼝⽹络号2.0 Router#show ip protocol 查看路由协议Router#debug ip rip 调试RIP协议Router(config-router)#no auto-summar关闭路由汇总功能,允许通告28、Router#copy running-config startup-config 保存路由配置信息 Router#write 保存路由配置信息29、密码恢复2600(不同型号⽅法不⼀样) *重启路由器,60秒内Ctrl+Break,进⼊ROM Monitor模式 *修改寄存器的值:rommon1>confreg 0X2142 (原值为0X2102) rommon2>reset *重启路由器,选择NO退回EXEC模式Router>enable 进⼊特权模式Router#copy startup-config running-config 加载原配置Router#config terminal 进⼊全局模式Router(config)>#Enable password 222 重置密码Router(config)>#config-register 0X2102 复位寄存器值Router#copy running-config startup-config 保存配置Router#reload 重启路由器。
cisco交换机配置口令大全

cisco交换机配置口令大全1.在基于IOS的交换机上设置主机名/系统名:switch(config)# hostname hostname在基于CLI的交换机上设置主机名/系统名:switch(enable) set system name name-string2.在基于IOS的交换机上设置登录口令:switch(config)# enable password level 1 password在基于CLI的交换机上设置登录口令:switch(enable) set passwordswitch(enable) set enalbepass3.在基于IOS的交换机上设置远程访问:switch(config)# interface vlan 1switch(config-if)# ip address ip-address netmaskswitch(config-if)# ip default-gateway ip-address在基于CLI的交换机上设置远程访问:switch(enable) set interface sc0 ip-address netmask broadcast-addressswitch(enable) set interface sc0 vlanswitch(enable) set ip route default gateway4.在基于IOS的交换机上启用和浏览CDP信息:switch(config-if)# cdp enableswitch(config-if)# no cdp enable为了查看Cisco邻接设备的CDP通告信息:switch# show cdp interface [type modle/port]switch# show cdp neighbors [type module/port] [detail]在基于CLI的交换机上启用和浏览CDP信息:switch(enable) set cdp {enable|disable} module/port为了查看Cisco邻接设备的CDP通告信息:switch(enable) show cdp neighbors[module/port] [vlan|duplex|capabilities|detail]5.基于IOS的交换机的端口描述:switch(config-if)# description description-string基于CLI的交换机的端口描述:switch(enable)set port name module/number description-string6.在基于IOS的交换机上设置端口速度:switch(config-if)# speed{10|100|auto}在基于CLI的交换机上设置端口速度:switch(enable) set port speed moudle/number {10|100|auto}switch(enable) set port speed moudle/number {4|16|auto}7.在基于IOS的交换机上设置以太网的链路模式:switch(config-if)# duplex {auto|full|half}在基于CLI的交换机上设置以太网的链路模式:switch(enable) set port duplex module/number {full|half}8.在基于IOS的交换机上配置静态VLAN:switch# vlan databaseswitch(vlan)# vlan vlan-num name vlaswitch(vlan)# exitswitch# configure teriminalswitch(config)# interface interface module/numberswitch(config-if)# switchport mode accessswitch(config-if)# switchport access vlan vlan-numswitch(config-if)# end在基于CLI的交换机上配置静态VLAN:switch(enable) set vlan vlan-num [name name]switch(enable) set vlan vlan-num mod-num/port-list9. 在基于IOS的交换机上配置VLAN中继线:switch(config)# interface interface mod/portswitch(config-if)# switchport mode trunkswitch(config-if)# switchport trunk encapsulation {isl|dotlq}switch(config-if)# switchport trunk allowed vlan remove vlan-listswitch(config-if)# switchport trunk allowed vlan add vlan-list在基于CLI的交换机上配置VLAN中继线:switch(enable) set trunk module/port [on|off|desirable|auto|nonegotiate]Vlan-range [isl|dotlq|dotl0|lane|negotiate]10.在基于IOS的交换机上配置VTP管理域:switch# vlan databaseswitch(vlan)# vtp domain domain-name在基于CLI的交换机上配置VTP管理域:switch(enable) set vtp [domain domain-name]11.在基于IOS的交换机上配置VTP 模式:switch# vlan databaseswitch(vlan)# vtp domain domain-nameswitch(vlan)# vtp {sever|cilent|transparent}switch(vlan)# vtp password password在基于CLI的交换机上配置VTP 模式:switch(enable) set vtp [domain domain-name] [mode{ sever|cilent|transparent }][password password]12. 在基于IOS的交换机上配置VTP版本:switch# vlan databaseswitch(vlan)# vtp v2-mode在基于CLI的交换机上配置VTP版本:switch(enable) set vtp v2 enable13. 在基于IOS的交换机上启动VTP剪裁:switch# vlan databaseswitch(vlan)# vtp pruning在基于CL I 的交换机上启动VTP剪裁:switch(enable) set vtp pruning enable14.在基于IOS的交换机上配置以太信道:switch(config-if)# port group group-number [distribution {source|destination}]在基于CLI的交换机上配置以太信道:switch(enable) set port channel moudle/port-range mode{on|off|desirable|auto}15.在基于IOS的交换机上调整根路径成本:switch(config-if)# spanning-tree [vlan vlan-list] cost cost在基于CLI的交换机上调整根路径成本:switch(enable) set spantree portcost moudle/port costswitch(enable) set spantree portvlancost moudle/port [cost cost][vlan-list]16.在基于IOS的交换机上调整端口ID:switch(config-if)# spanning-tree[vlan vlan-list]port-priority port-priority在基于CLI的交换机上调整端口ID:switch(enable) set spantree portpri {mldule/port}priorityswitch(enable) set spantree portvlanpri {module/port}priority [vlans]17. 在基于IOS的交换机上修改STP时钟:switch(config)# spanning-tree [vlan vlan-list] hello-time secondsswitch(config)# spanning-tree [vlan vlan-list] forward-time seconds` switch(config)# spanning-tree [vlan vlan-list] max-age seconds在基于CLI的交换机上修改STP时钟:switch(enable) set spantree hello interval[vlan]switch(enable) set spantree fwddelay delay [vlan]switch(enable) set spantree maxage agingtiame[vlan]18. 在基于IOS的交换机端口上启用或禁用Port Fast 特征:switch(config-if)#spanning-tree portfast在基于CLI的交换机端口上启用或禁用Port Fast 特征:switch(enable) set spantree portfast {module/port}{enable|disable}19. 在基于IOS的交换机端口上启用或禁用UplinkFast 特征:switch(config)# spanning-tree uplinkfast [max-update-rate pkts-per-second]在基于CLI的交换机端口上启用或禁用UplinkFast 特征:switch(enable) set spantree uplinkfast {enable|disable}[rate update-rate] [all-protocols off|on]20. 为了将交换机配置成一个集群的命令交换机,首先要给管理接口分配一个IP地址,然后使用下列命令: switch(config)# cluster enable cluster-name21. 为了从一条中继链路上删除VLAN,可使用下列命令:switch(enable) clear trunk module/port vlan-range22. 用show vtp domain 显示管理域的VTP参数.23. 用show vtp statistics显示管理域的VTP参数.24. 在Catalyst交换机上定义TrBRF的命令如下:switch(enable) set vlan vlan-name [name name] type trbrf bridge bridge-num[stp {ieee|ibm}]25. 在Catalyst交换机上定义TrCRF的命令如下:switch (enable) set vlan vlan-num [name name] type trcrf{ring hex-ring-num|decring decimal-ring-num} parent vlan-num26. 在创建好TrBRF VLAN之后,就可以给它分配交换机端口.对于以太网交换,可以采用如下命令给VLAN分配端口:switch(enable) set vlan vlan-num mod-num/port-num27. 命令show spantree显示一个交换机端口的STP状态.28. 配置一个ELAN的LES和BUS,可以使用下列命令:ATM (config)# interface atm number.subint multiointATM(config-subif)# lane serber-bus ethernet elan-name29. 配置LECS:ATM(config)# lane database database-nameATM(lane-config-databade)# name elan1-name server-atm-address les1-nsap-address ATM(lane-config-databade)# name elan2-name server-atm-address les2-nsap-address ATM(lane-config-databade)# name …30. 创建完数据库后,必须在主接口上启动LECS.命令如下:ATM(config)# interface atm numberATM(config-if)# lane config database database-nameATM(config-if)# lane config auto-config-atm-address31. 将每个LEC配置到一个不同的ATM子接口上.命令如下:ATM(config)# interface atm number.subint multipointATM(config)# lane client ethernet vlan-num elan-num32. 用show lane server 显示LES的状态.33. 用show lane bus显示bus的状态.34. 用show lane database显示LECS数据库可内容.35. 用show lane client显示LEC的状态.36. 用show module显示已安装的模块列表.37. 用物理接口建立与VLAN的连接:router# configure terminalrouter(config)# interface media module/portrouter(config-if)# description description-stringrouter(config-if)# ip address ip-addr subnet-maskrouter(config-if)# no shutdown38. 用中继链路来建立与VLAN的连接:router(config)# interface module/port.subinterfacerouter(config-ig)# encapsulation[isl|dotlq] vlan-numberrouter(config-if)# ip address ip-address subnet-mask39. 用LANE 来建立与VLAN的连接:router(config)# interface atm module/portrouter(config-if)# no ip addressrouter(config-if)# atm pvc 1 0 5 qsaalrouter(config-if)# atm pvc 2 0 16 ilnirouter(config-if)# interface atm module/port.subinterface multipoint router(config-if)# ip address ip-address subnet-maskrouter(config-if)# lane client ethernet elan-numrouter(config-if)# interface atm module/port.subinterface multipoint router(config-if)# ip address ip-address subnet-namerouter(config-if)# lane client ethernet elan-namerouter(config-if)# …40. 为了在路由处理器上进行动态路由配置,可以用下列IOS命令来进行: router(config)# ip routingrouter(config)# router ip-routing-protocolrouter(config-router)# network ip-network-numberrouter(config-router)# network ip-network-number41. 配置默认路由:switch(enable) set ip route default gateway42. 为一个路由处理器分配VLANID,可在接口模式下使用下列命令: router(config)# interface interface numberrouter(config-if)# mls rp vlan-id vlan-id-num43. 在路由处理器启用MLSP:router(config)# mls rp ip44. 为了把一个外置的路由处理器接口和交换机安置在同一个VTP域中:router(config)# interface interface numberrouter(config-if)# mls rp vtp-domain domain-name45. 查看指定的VTP域的信息:router# show mls rp vtp-domain vtp domain name46. 要确定RSM或路由器上的管理接口,可以在接口模式下输入下列命令:router(config-if)#mls rp management-interface47. 要检验MLS-RP的配置情况:router# show mls rp48. 检验特定接口上的MLS配置:router# show mls rp interface interface number49. 为了在MLS-SE上设置流掩码而又不想在任一个路由处理器接口上设置访问列表:set mls flow [destination|destination-source|full]50. 为使MLS和输入访问列表可以兼容,可以在全局模式下使用下列命令:router(config)# mls rp ip input-acl51. 当某个交换机的第3层交换失效时,可在交换机的特权模式下输入下列命令:switch(enable) set mls enable52. 若想改变老化时间的值,可在特权模式下输入以下命令:switch(enable) set mls agingtime agingtime53. 设置快速老化:switch(enable) set mls agingtime fast fastagingtime pkt_threshold54. 确定那些MLS-RP和MLS-SE参与了MLS,可先显示交换机引用列表中的内容再确定:switch(enable) show mls include55. 显示MLS高速缓存记录:switch(enable) show mls entry56. 用命令show in arp显示ARP高速缓存区的内容。
配置历史口令使用策略

配置历史口令使用策略
口令是计算机系统中的重要安全要素之一,为了保障系统的安全性,
必须采取有效的口令使用策略。
配置历史口令使用策略是其中一项重
要措施。
历史口令使用策略是指在用户更改口令时,系统会检查新输入的口令
是否与该用户过去使用过的某些口令相同,如果相同,则不允许该用
户使用该口令。
这样可以防止用户反复使用相同的弱口令,从而增强
系统的安全性。
配置历史口令使用策略需要注意以下几点:
1. 口令历史记录数目:应根据实际情况设置合适的历史记录数目。
如
果设置过少,则无法防止用户反复使用相同的弱口令;如果设置过多,则会增加系统存储压力。
2. 口令有效期限制:应根据实际情况设置合适的有效期限制。
如果设
置过短,则会给用户带来不必要的麻烦;如果设置过长,则会增加系
统被攻击的风险。
3. 口令复杂度要求:应对用户输入密码进行限制,例如要求密码长度、
大小写字母、数字、特殊字符等多种组合方式,以增加口令的复杂度和安全性。
4. 口令修改频率:应根据实际情况设置合适的修改频率,过于频繁会增加用户负担,过于稀少则会增加系统被攻击的风险。
5. 口令锁定策略:当用户连续多次输入错误口令时,应采取相应的锁定策略,例如暂时禁止用户登录等。
通过配置历史口令使用策略,可以有效地提高系统的安全性,防止用户反复使用相同的弱口令。
同时需要注意,在配置历史口令使用策略时,要根据实际情况进行设置,以达到最佳效果。
实验4 口令设置
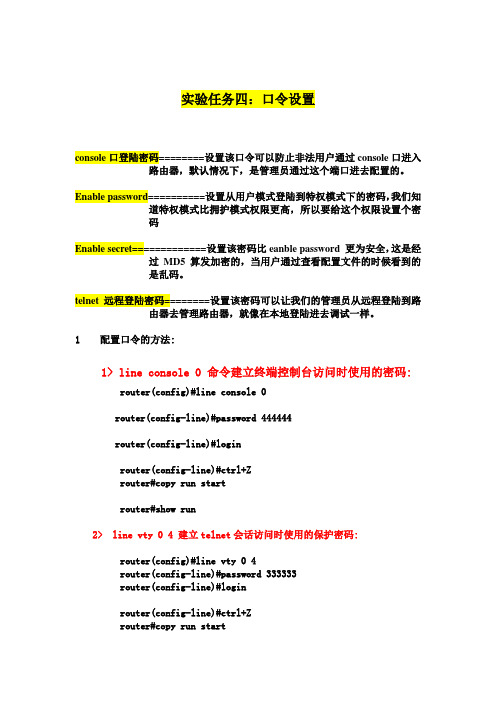
实验任务四:口令设置console口登陆密码========设置该口令可以防止非法用户通过console口进入路由器,默认情况下,是管理员通过这个端口进去配置的。
Enable password==========设置从用户模式登陆到特权模式下的密码,我们知道特权模式比拥护模式权限更高,所以要给这个权限设置个密码Enable secret=============设置该密码比eanble password 更为安全,这是经过MD5算发加密的,当用户通过查看配置文件的时候看到的是乱码。
telnet远程登陆密码========设置该密码可以让我们的管理员从远程登陆到路由器去管理路由器,就像在本地登陆进去调试一样。
1配置口令的方法:1> line console 0 命令建立终端控制台访问时使用的密码: router(config)#line console 0router(config-line)#password 444444router(config-line)#loginrouter(config-line)#ctrl+Zrouter#copy run startrouter#show run2>line vty 0 4 建立telnet会话访问时使用的保护密码:router(config)#line vty 0 4router(config-line)#password 333333router(config-line)#loginrouter(config-line)#ctrl+Zrouter#copy run startrouter#show run3> enable password 命令用来限制对特许模式的访问:router(config)#enable password 222222router(config-line)#ctrl+Zrouter#copy run startrouter#show run4> enable secret 经过系统加密的口令,当enable secret存在的时候优先权限要比enable password高:router(config)#enable secret 111111router(config-line)#ctrl+Zrouter#copy run startrouter#show run。
配置Windows系统口令策略及服务

报警策略配置
报警级别
01
Windows系统支持设置报警级别,可以根据不同的报警级别
采取不同的报警措施。
报警方式
02
可以设置报警的方式,如声音、邮件、短信等。
报警内容
03
可以设置报警的内容,如报警的时间、位置、事件类型等。
05
安全建议与总结
安全建议
定期更换密码
建议用户每隔一段时间更换一次密码,以降低密码被破解的风险。
03
对服务账户进行定期监控和审计,及时发现和处理异常登录和访问行为。
04
安全审计与日志
安全审计策略配置
01
审计策略
在Windows系统中,可以配置详细的审计策略,如是否审计登录成功
或失败的记录,是否审计系统登录等。
02
登录成功或失败审计
通过配置审计策略,可以记录登录成功或失败的事件,便于后续分析
配置windows系统口令策略及服 务
目录
• 引言 • windows系统口令策略配置 • 服务账户与口令管理 • 安全审计与日志 • 安全建议与总结
01
引言
背景介绍
随着IT技术的发展,数据安全和系统稳定运行越来越受到关 注。其中,Windows系统的口令策略配置是保障系统安全性 的重要措施之一。
3
密码历史记录
保存密码历史记录,要求用户在更改密码时不 能与前一次密码相同,以防止密码重复使用。
账户策略配置
账户锁定时间
01
设置账户锁定时间,如果用户连续多次输入错误密码,账户将
被锁定一段时间。
账户锁定阈值
02
设置账户锁定阈值,如果用户连续超过阈值次输入错误密码,
账户将被永久锁定。
常见路由器配置口令和IP地址

常见路由器配置口令和IP地址(建议收藏!)品牌:艾玛 701g用户名:admin 密码:admin用户名:SZIM 密码:SZIM品牌:艾玛701H用户名:admin 密码:epicrouter品牌:Adsl Router用户名:anonymous 密码:12345品牌:华为 MT800用户名:admin 密码:admin品牌:Home Gateway用户名:user 密码:password品牌:Viking用户名:root 密码:root品牌:TP-link用户名:admin 密码:admin品牌:神州数码/华硕:用户名:adsl 密码:adsl1234品牌:全向:用户名:root 密码:root品牌:普天/大亚:用户名:admin 密码:dare品牌:UT斯达康用户名:admin 密码:dare品牌:e-tek用户名:admin 密码:12345品牌:zyxel用户名:anonymous 密码:1234品牌:北电用户名:anonymous 密码:12345品牌:大恒用户名:admin 密码:admin品牌:大唐用户名:admin 密码:1234品牌:斯威特用户名:root 密码:root用户名:user 密码:user品牌:中兴用户名:adsl 密码:adsl831 (中兴的adsl的密码前面为adsl,后面为型号,比如中兴831,密码就是adsl831) 品牌:成都天逸用户名:admin 密码:epicrouter品牌:上海中达用户名:(随意)密码:12345品牌:ViKing用户名:adsl 密码:adsl1234品牌:实达版本:2110ehr v3.20、 2110ehr v3.21、 2110ehr v3.51 用户名:admin 密码:conexant版本:2110ehr v4.5用户名:root 密码:grouter版本:2110eh v3.51(中文web界面)用户名:admin 密码:starnetadsl品牌:BENQ用户名:user 密码:benq1234品牌:华硕用户名:ADSL 密码:adsl1234品牌:同维DSL699E用户名:ROOT密码:ROOT品牌:大亚DB102用户名:admin密码:dare品牌:WST的RT1080username:rootpassword:root品牌:WST的ART18CXusername:adminpassword:conexantusername:userpassword :assword品牌:泛德adminconexant品牌:东信Ea700用户名:空密码:password品牌:broadmax的hsa300ausername:broadmaxpassword:broadmax品牌:长虹ch-500Eusername:rootpassword:root品牌:重庆普天CP ADSL03username:rootpassword:root品牌:台湾突破EA110RS232:38400username SLpsw SL品牌:etek-td的ADSL_T07L006.0User Name: supervisorPassword: 12345品牌:GVC的DSL-802E/R3Ausername:adminpassword:epicrouterusername:userpassword assword品牌:科迈易通km300A-1username:password assword品牌:科迈易通km300A-Gusername:rootpassword:root品牌:科迈易通km300A-Ausername:root or adminpassword:123456品牌:sunrise的SR-DSL-AEusername:adminpassword:0000品牌:sunrise的DSL-802E_R3Ausername:adminpassword:epicrouterusername:userpassword assword品牌:UTStar的ut-300Rusername:root or adminpassword:utstar目前各种ADSL的WEB设置用户名和密码品牌:伊泰克http://192.168.1.1/用户名:supervisor 密码:12345品牌:华硕http://192.168.1.1/用户名:adsl 密码:adsl1234品牌:etek td 2001 用户名:空密码:12345品牌:asus 6000ev一部分比较大那种,包括黑色和银灰色(现在的都使用这个,可能是升了FW)用户名:root 密码:root品牌:阿尔卡特(多数设备)http://10.0.0.138/一般没有密码品牌:阿尔卡特515 192.168.1.254 品牌:同维DSL699Ehttp://192.168.1.1/用户名:ROOT 密码:ROOT品牌:大亚DB102http://192.168.1.1/用户名:admin 密码:dare高级设置界面:http://192.168.1.1/doc/index1.htm 品牌:WST的RT1080http://192.168.0.1/username:root password:root品牌:WST的ART18CXhttp://10.0.0.2/username:admin password:conexant username:user password:password 品牌:全向qxcomm1688http://192.168.1.1/高端设置密码是:qxcommsuport品牌:全向qxcomm1680http://192.168.1.1/登陆ADSL的密码是:qxcomm1680 ALT+A ALT+P品牌:实达V3.2 rootrootV5.4 rootgrouter品牌:泛德adminconexant品牌:东信Ea700http://192.168.1.1/用户名:空密码:password品牌:broadmax的hsa300ahttp://192.168.0.1/username:broadmaxpassword:broadmax品牌:长虹ch-500Ehttp://192.168.1.1/管理员权限:username:adminpassword:1111user权限:username:rootpassword:root品牌:重庆普天CP ADSL03http://192.168.1.1/username:rootpassword:root品牌:台湾突破EA110RS232:38400http://192.168.7.1/usernameSLpswSL品牌:etek-td的ADSL_T07L006.0http://192.168.1.1/User Name: supervisorPassword: 12345忘记密码的解决办法:使用超级终端的Xmodem方式重写Vxworks.dlf,密码恢复成:12345 品牌:GVC的DSL-802E/R3Ahttp://10.0.0.2/username:adminpassword:epicrouterusername:userpassword:password品牌:科迈易通km300A-1http://192.168.1.1/username:password:password品牌:科迈易通km300A-Ghttp://192.168.1.1/username:rootpassword:root品牌:科迈易通km300A-Ahttp://192.168.1.1/username:root or adminpassword:123456品牌:sunrise的SR-DSL-AEhttp://192.168.1.1/username:adminpassword:0000品牌:sunrise的DSL-802E_R3Ahttp://10.0.0.2/username:adminpassword:epicrouterusername:userpassword:password品牌:UTStar的ut-300Rhttp://192.168.1.1/username:root or adminpassword:utstar品牌:珠海华声http://192.168.1.1/密码:0000(界面和东信EA700好像是一样的)品牌:深圳的GREENNETusername:rootpassword:12345品牌:TP-Link 8830rootroot品牌:成都天邑100的用户名是admin密码是epicrouterIP是10.0.0.2品牌:深圳的GREENNETusername:rootpassword:12345品牌:珠海华声http://192.168.1.1/密码:0000(界面和东信EA700好像是一样的)品牌:TP-Link 8830rootroot品牌:D-LINK DSL-500 D-Link DSL-500192.168.0.1 也有人说是: 10.1.1.1admin adminadmin admin品牌:华为MT800192.168.1.1adminadmin品牌:实达系列ADSL MODEM:2110ehr v3.20 用户:admin 密码:conexant2110ehr v3.21 用户:admin 密码:conexant2110ehr v3.51 用户:admin 密码:conexant2110ehr v4.5 用户:root 密码:grouter2110eh v3.51 用户:admin 密码:starnetadsl (中文web界面)品牌:港湾(HA-1000) 用户名:admin 密码 :harbour品牌:斯威特的,型号忘了,用户名/密码是admin/admin品牌:home gateway 是实达的路由器用户名和密码是admin,starnetadsl 或者admin,conexant品牌:Cisco Linksys BEFSX41192.168.0.1name:(空)pass:admin。
交换机口令设置

交换机口令设置:(我所针对的都是cisco 的设备而言的,华为的可以跟据手册来查,配置都是差不多的,这里华子就不多写华为的设备了,了解的也不是很多)switch>enable 进入特权模式switch#config terminal 进入全局配置模式switch(config)#hostname 设置交换机的主机名switch(config)#enable secret xxx 设置特权加密口令switch(config)#enable password xxa 设置特权非密口令使用Telnet远程式管理switch(config)#interface vlan 1 进入vlan 1switch(config-if)#ip address 设置IP地址switch(config-if)#ip default-gateway 设置默认网关switch(config)#line vty 0 4 进入虚拟终端switch(config-line)#login 允许登录switch(config-line)#password xx 设置登录口令switch#exit 返回命令控制台口令switch(config)#line console 0 进入控制台口switch(config-line)#login 允许登录switch(config-line)#password xx 设置登录口令switch#exit 返回命令基本接口配置switch(config)#interface f0/1 进入f0/1接口switch(config-if)#duplex full 配置全双工模式switch(config-if)#speed 100 配置速率switch(config-if)#description to ***** 接口描述switch(config)#ip domain-name ***.com 设置或名服务器switch(config)#mac-address-table aging-time 设置mac表超时时间switch#write 保存配置信息switch#copy running-config startup-config 保存当前配置nvramswitch#erase startup-config 清除配置文件交换机VLAN设置:switch#vlan database 进入VLAN设置switch(vlan)#vlan 2 建VLAN 2switch(vlan)#name 名字建VLAN 2的名称switch(vlan)#no vlan 2 删vlan 2注:删除vlan时原属于此vlan的端口处于非激活状态,直到重新分配为止switch(config)#int f0/1 进入端口1switch(config-if)#switchport mode access 当前端口工作莫试switch(config-if)#switchport access vlan 2 当前端口加入vlan 2switch(config-if)#switchport mode trunk 设置为干线switch(config-if)#switchport trunk encapsulation dot1q 设置vlan 中继协议switch(config-if)#no switchport mode 或(switchport mode access)禁用干线switch(config-if)#switchport trunk allowed vlan add 1,2 ;从Trunk中添加vlans switch(config-if)#switchport trunk allowed vlan remove 1,2 ;从Trunk中删除vlans switch(config-if)#switchport trunk pruning vlan remove 1,2 ;从Trunk中关闭局部修剪以太网通道配置switch(config)#interface range fasternet0/1 - 2 将fasternet0/1和0/2 口捆绑(成双不成单)switch(config-if)#channel-group 1 mode on 配置以太通道模式switch(config-if)#port-channel load-balance {dst-mac | src-mac}在链路间实现负载均衡switch#show etherchannel 1 summary 查看通道信息switch#show etherchannel load-balance 查看通道信息vtp配置switch(config)#vtp domain 设置vtp域名switch(config)#vtp password 设置vtp密码switch(config)#vtp mode server 设置vtp服务器模式switch(config)#vtp mode client 设置vtp客户机模式switch(config)#vtp mode transparent 设置vtp 透明模式switch(config)#vtp version 设置vtp版本switch(config)#vtp pruning 启用vtp修解switch(config)#no vtp pruning 关闭vtp修解注:要想从vtp中减少一台交换机只需将该交换机vtp 名更改生成树stp:switch(config)#spanning-tree vlan 启用stp生成树(基于vlan)switch(config)#spanning-tree vlan root primary 指定根交换机(基于vlan)switch(config)#spanning-tree vlan root secondary 指定备用根交换机(基于vlan)switch(config)#spanning-tree vlan priority 指定交换机优先级(基于vlan)switch(config)#no spanning-tree vlan priority 将交换机的优先级恢复默认值(基于vlan)switch(config-if)#spanning-tree vlan cost 指定端口成本(起用trunk的端口模式下)switch(config-if)#spanning-tree vlan port-prioty 指定交换机端口优先级(基于vlan)switch(config-if)#spanning-tree portfast 配置速端口(连接终端设备的端口状态)如pc机switch(config)#spanning-tree uplinkfast 配置上行速端口注:在配置上行速端口前要先将基于vlan上的网桥优先级,网桥成本恢复默认值。
特权口令设置
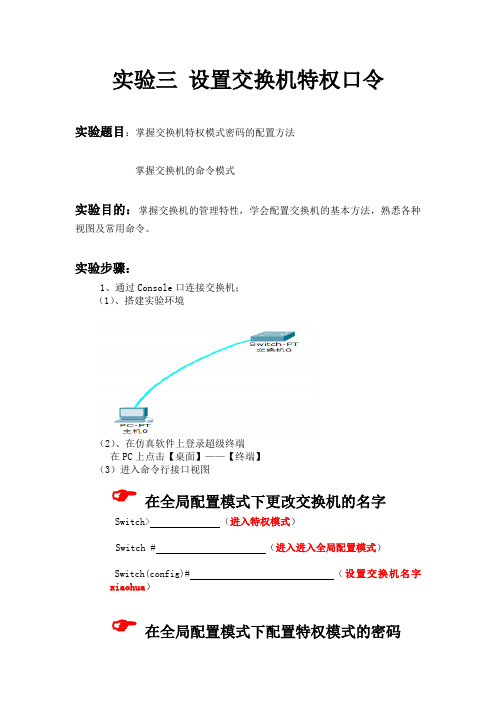
实验三设置交换机特权口令
实验题目:掌握交换机特权模式密码的配置方法
掌握交换机的命令模式
实验目的:掌握交换机的管理特性,学会配置交换机的基本方法,熟悉各种视图及常用命令。
实验步骤:
1、通过Console口连接交换机;
(1)、搭建实验环境
(2)、在仿真软件上登录超级终端
在PC上点击【桌面】——【终端】
(3)进入命令行接口视图
☞在全局配置模式下更改交换机的名字
Switch> (进入特权模式)
Switch # (进入进入全局配置模式)
Switch(config)# (设置交换机名字
xiaohua)
☞在全局配置模式下配置特权模式的密码
xiaohu> (进入特权模式)
xiaohu # (进入进入全局配置模式)
xiaohu (config)# (设置特权模式的明文密码xiaohua123)
xiaohu (config)# (设置特权模式的密文密码xiaohua456)
☞在特权模式下查看当前配置,并截图
xiaohu (config)# (退回到特权模式)
xiaohu # (在特权模式下查看当前运行配置)
☞关掉交换机,查看是否配置还在?
☞保存交换机的当前配置
xiaohu # (保存当前配置)
☞删除配置
xiaohu # (删除配置)
实验总结:
1.
2.。
三级网络技术——配置命令
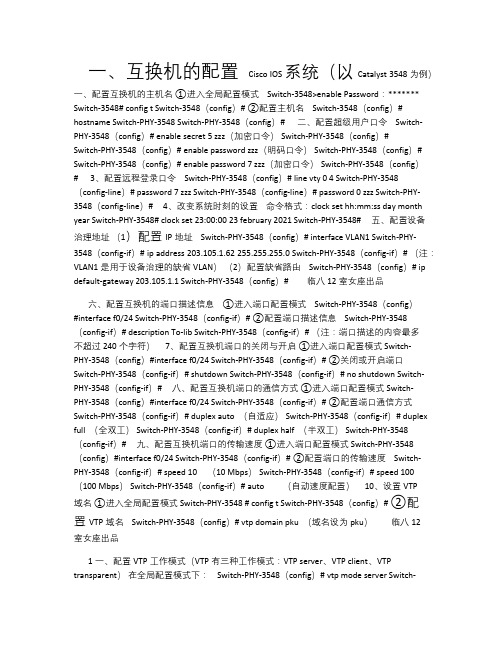
一、互换机的配置 Cisco IOS 系统(以Catalyst 3548为例)一、配置互换机的主机名①进入全局配置模式 Switch-3548>enable Password:******* Switch-3548# config t Switch-3548(config)# ②配置主机名 Switch-3548(config)# hostname Switch-PHY-3548 Switch-PHY-3548(config)# 二、配置超级用户口令 Switch-PHY-3548(config)# enable secret 5 zzz(加密口令) Switch-PHY-3548(config)# Switch-PHY-3548(config)# enable password zzz(明码口令) Switch-PHY-3548(config)# Switch-PHY-3548(config)# enable password 7 zzz(加密口令) Switch-PHY-3548(config)# 3、配置远程登录口令 Switch-PHY-3548(config)# line vty 0 4 Switch-PHY-3548(config-line)# password 7 zzz Switch-PHY-3548(config-line)# password 0 zzz Switch-PHY-3548(config-line)# 4、改变系统时刻的设置命令格式:clock set hh:mm:ss day month year Switch-PHY-3548# clock set 23:00:00 23 february 2021 Switch-PHY-3548# 五、配置设备治理地址(1)配置IP地址 Switch-PHY-3548(config)# interface VLAN1 Switch-PHY-3548(config-if)# ip address 203.105.1.62 255.255.255.0 Switch-PHY-3548(config-if)# (注:VLAN1是用于设备治理的缺省VLAN)(2)配置缺省路由 Switch-PHY-3548(config)# ip default-gateway 203.105.1.1 Switch-PHY-3548(config)# 临八12室女座出品六、配置互换机的端口描述信息①进入端口配置模式 Switch-PHY-3548(config)#interface f0/24 Switch-PHY-3548(config-if)# ②配置端口描述信息 Switch-PHY-3548(config-if)# description To-lib Switch-PHY-3548(config-if)# (注:端口描述的内容最多不超过240个字符) 7、配置互换机端口的关闭与开启①进入端口配置模式 Switch-PHY-3548(config)#interface f0/24 Switch-PHY-3548(config-if)# ②关闭或开启端口Switch-PHY-3548(config-if)# shutdown Switch-PHY-3548(config-if)# no shutdown Switch-PHY-3548(config-if)# 八、配置互换机端口的通信方式①进入端口配置模式 Switch-PHY-3548(config)#interface f0/24 Switch-PHY-3548(config-if)# ②配置端口通信方式Switch-PHY-3548(config-if)# duplex auto (自适应) Switch-PHY-3548(config-if)# duplex full (全双工) Switch-PHY-3548(config-if)# duplex half (半双工) Switch-PHY-3548(config-if)# 九、配置互换机端口的传输速度①进入端口配置模式 Switch-PHY-3548(config)#interface f0/24 Switch-PHY-3548(config-if)# ②配置端口的传输速度 Switch-PHY-3548(config-if)# speed 10 (10 Mbps) Switch-PHY-3548(config-if)# speed 100 (100 Mbps) Switch-PHY-3548(config-if)# auto (自动速度配置) 10、设置VTP域名①进入全局配置模式 Switch-PHY-3548 # config t Switch-PHY-3548(config)# ②配置VTP域名 Switch-PHY-3548(config)# vtp domain pku (域名设为pku)临八12室女座出品1一、配置VTP工作模式(VTP有三种工作模式:VTP server、VTP client、VTP transparent)在全局配置模式下: Switch-PHY-3548(config)# vtp mode server Switch-PHY-3548(config)# vtp mode client Switch-PHY-3548(config)# vtp mode transparent 1二、成立和删除VLAN (1)成立VLAN ①进入VLAN配置模式 Switch-PHY-3548 # vlan data Switch-PHY-3548(vlan)# ②成立VLAN 命令格式:vlan <vlan_ID> name <vlan_name> Switch-PHY-3548(vlan)# vlan 1000 name vlan1000 VLAN 1000 added: Name:vlan1000 Switch-PHY-3548(vlan)# ③退出并返回特权用户模式 Switch-PHY-3548(vlan)# exit (必需用exit命令退出,以保留VLAN配置)(2)删除VLAN 在VLAN配置模式下:Switch-PHY-3548(vlan)# no vlan 1000 Deleting VLAN 1000… Switch-PHY-3548(vlan)# (3)修改VLAN (与成立VLAN步骤相同)在VLAN配置模式下: Switch-PHY-3548(vlan)# vlan 1000 name v1000 VLAN 1000 modified: Name:v1000 13、为互换机端口分派VLAN ①进入端口配置模式 Switch-PHY-3548 # config t Switch-PHY-3548(config)#interfacef0/24 Switch-PHY-3548(config-if)# ②为端口分派VLAN 命令格式:switchport accessvlan<vlan-num> Switch-PHY-3548(config-if)# switchport access vlan 248 (将端口f0/24划分在248号VLAN中) 14、配置VLAN trunk ①进入端口配置模式 Switch-PHY-3548 # config t Switch-PHY-3548(config)#interface f0/24 临八12室女座出品Switch-PHY-3548(config-if)# ②配置VLAN Trunk模式 Switch-PHY-3548(config-if)# switchport mode trunk Switch-PHY-3548(config-if)# ③封装VLAN协议 Switch-PHY-3548(config-if)# switchport trunk encapsulation dot1 q(封装IEEE802.1Q) Switch-PHY-3548(config-if)# switchport trunk encapsulation isl (封装ISL协议) Switch-PHY-3548(config-if)# switchport trunk encapsulation negotiate P (自动协商)④设置许诺中继的VLAN Switch-PHY-3548(config-if)# switchport trunk allowed vlan 10,14 Switch-PHY-3548(config-if)# switchport trunk allowed vlan 10-24 Switch-PHY-3548(config-if)# switchport trunk allowed vlan except 100-1000 (注:“except 100-1000”表示除去100~1000号VLAN外,其余所有的VLAN都被加到许诺中继的VLAN中。
配置Windows系统口令策略及服务

查看日志文件
使用事件查看器
Windows系统中内置了事件查看器,可以 用来查看系统中的各种事件,包括安全事件 、系统事件等。通过事件查看器,用户可以 查看详细的日志信息,如时间戳、事件类型 、来源等。
使用第三方工具
除了事件查看器外,用户还可以使用第三方 工具如Logparser、Splunk等来查看和分析 日志文件。这些工具通常提供了更强大的日 志分析功能,可以帮助用户更好地了解系统
更新补丁及安全软件
及时更新补丁
补丁是修复系统漏洞的重要手段,及时更新补丁可以避 免系统被攻击者利用漏洞攻击。建议定期检查并安装系 统更新和安全补丁。
使用安全软件
安全软件可以帮助检测和清除恶意软件、保护系统免受 攻击。例如,可以使用杀毒软件、防火墙软件等。建议 及时更新软件版本并设置合理的安全策略。
密码过期要求
密码过期时间间隔应设置为90天
在密码过期前,系统应提示用户更改密码
02
服务账户管理
创建服务账户
总结词
在Windows系统中,创建服务账户是确 保系统安全和正常运行的重要步骤之一。 通过创建服务账户,可以授权服务以在后 台运行,并确保系统的安全性和稳定性。
VS
详细描述
创建服务账户需要使用管理员权限。首先 ,打开“控制面板”并进入“管理工具” 。然后,打开“计算机管理”并选择“本 地用户和组”。在“用户”选项卡下,右 键单击空白区域并选择“新用户”。输入 用户名和密码后,单击“创建”。
更改服务账户密码
总结词
定期更改服务账户密码可以提高系统的安全性,防止未经授 权的访问。在Windows系统中,可以轻松更改服务账户密码 ,以确保系统的安全性。
详细描述
打开“计算机管理”并选择“本地用户和组”。在“用户” 选项卡下,找到所需的服务账户并右键单击。选择“属性” ,然后在“密码”选项卡下更改密码。单击“确定”以保存 更改。
h3c 交换机登录方式配置
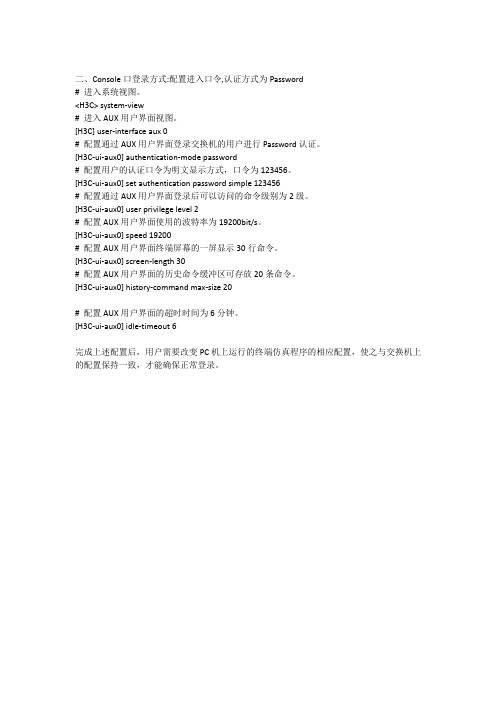
二、Console口登录方式:配置进入口令,认证方式为Password# 进入系统视图。
<H3C> system-view# 进入AUX用户界面视图。
[H3C] user-interface aux 0# 配置通过AUX用户界面登录交换机的用户进行Password认证。
[H3C-ui-aux0] authentication-mode password# 配置用户的认证口令为明文显示方式,口令为123456。
[H3C-ui-aux0] set authentication password simple 123456# 配置通过AUX用户界面登录后可以访问的命令级别为2级。
[H3C-ui-aux0] user privilege level 2# 配置AUX用户界面使用的波特率为19200bit/s。
[H3C-ui-aux0] speed 19200# 配置AUX用户界面终端屏幕的一屏显示30行命令。
[H3C-ui-aux0] screen-length 30# 配置AUX用户界面的历史命令缓冲区可存放20条命令。
[H3C-ui-aux0] history-command max-size 20# 配置AUX用户界面的超时时间为6分钟。
[H3C-ui-aux0] idle-timeout 6完成上述配置后,用户需要改变PC机上运行的终端仿真程序的相应配置,使之与交换机上的配置保持一致,才能确保正常登录。
三、Console口登录方式:配置用户和口令,认证方式为scheme# 进入系统视图。
<H3C> system-view# 创建本地用户guest,并进入本地用户视图。
[H3C] local-user guest# 配置本地用户的认证口令为明文显示方式,口令为123456。
[H3C-luser-guest] password simple 123456# 配置本地用户的服务类型为Terminal且命令级别为2级。
宽带路由器配置信息及口令清除方法
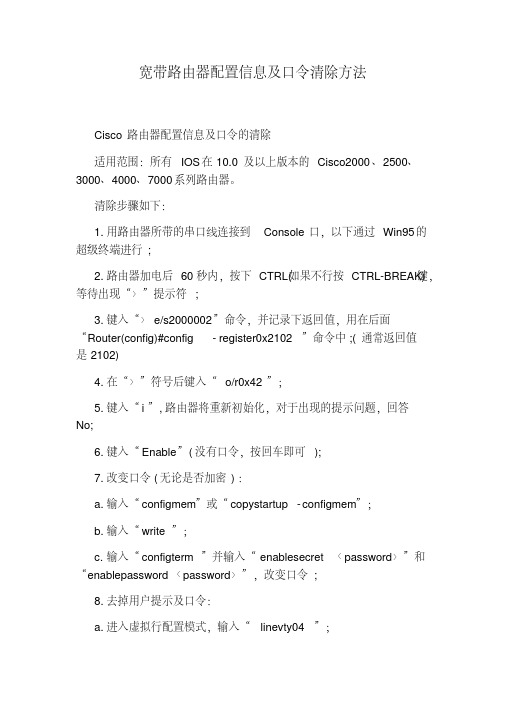
宽带路由器配置信息及口令清除方法Cisco路由器配置信息及口令的清除适用范围:所有IOS在10.0及以上版本的Cisco2000、2500、3000、4000、7000系列路由器。
清除步骤如下:1.用路由器所带的串口线连接到Console口,以下通过Win95的超级终端进行;2.路由器加电后60秒内,按下CTRL(如果不行按CTRL-BREAK)键,等待出现“〉”提示符;3.键入“〉e/s2000002”命令,并记录下返回值,用在后面“Router(config)#config-register0x2102”命令中;(通常返回值是2102)4.在“〉”符号后键入“o/r0x42”;5.键入“i”,路由器将重新初始化,对于出现的提示问题,回答No;6.键入“Enable”(没有口令,按回车即可);7.改变口令(无论是否加密):a.输入“configmem”或“copystartup-configmem”;b.输入“write”;c.输入“configterm”并输入“enablesecret〈password〉”和“enablepassword〈password〉”,改变口令;8.去掉用户提示及口令:a.进入虚拟行配置模式,输入“linevty04”;b.输入“password〈password〉”,改变口令;c.输入“login”(可以去掉用户提示,原来是loginlocal);9.完成后按Ctrl-z结束;10.输入“write”保存所做的改变;11.进入特权配置模式,键入“config-register0x2102”(注意,必须完成此步);12.Write保存配置信息;13.退出配置模式,Reload完成重新启动路由器即可。
说明:o/r0x42是从Flash中引导路由器,如果不成功,可采用o/r0x41从ROM中引导路由器,其余操作与o/r0x42相同,但是最好只在Flash引导不成功或Flash内容被删除、没有Flash情况下才用。
交换机配置口令
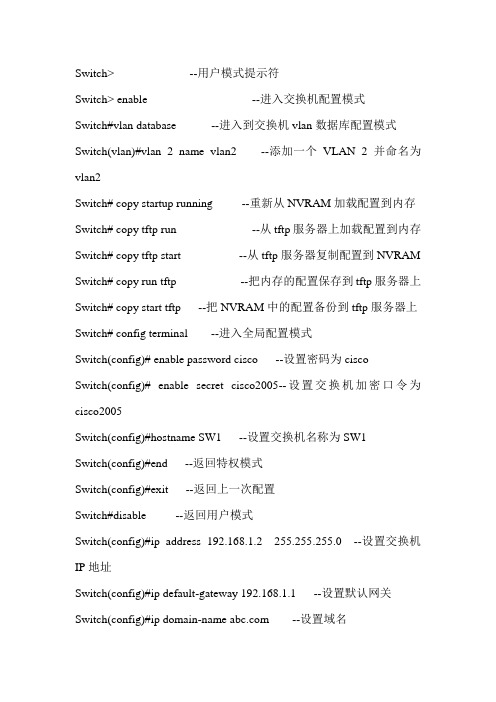
Switch> --用户模式提示符Switch> enable --进入交换机配置模式Switch#vlan database --进入到交换机vlan数据库配置模式Switch(vlan)#vlan 2 name vlan2 --添加一个VLAN 2并命名为vlan2Switch# copy startup running --重新从NVRAM加载配置到内存Switch# copy tftp run --从tftp服务器上加载配置到内存Switch# copy tftp start --从tftp服务器复制配置到NVRAM Switch# copy run tftp --把内存的配置保存到tftp服务器上Switch# copy start tftp --把NVRAM中的配置备份到tftp服务器上Switch# config terminal --进入全局配置模式Switch(config)# enable password cisco --设置密码为ciscoSwitch(config)# enable secret cisco2005--设置交换机加密口令为cisco2005Switch(config)#hostname SW1 --设置交换机名称为SW1Switch(config)#end --返回特权模式Switch(config)#exit --返回上一次配置Switch#disable --返回用户模式Switch(config)#ip address 192.168.1.2 255.255.255.0 --设置交换机IP地址Switch(config)#ip default-gateway 192.168.1.1 --设置默认网关Switch(config)#ip domain-name --设置域名Switch(config)#ip name-server 192.168.10.10 --设置域名服务器IP 地址Switch#show ip --查看IP配置Switch#show fastethernet 0/24 查看24端口的配置情况Switch(config)#interface 端口类型槽位号/端口号--配置交换机端口如:Switch(config)#interface g1/1 g表示的是吉比特端口即1000MSwitch(config-if)#duplex {auto | full | full-flow-control | half} --配置交换机模式auto表示自动协商full表示全双工full-flow-control表示带流量控制的全双工half表示半双工Switch(config-if)#speed {10|100|1000|auto} --强制设置交换机的速率Switch(config-if)#shutdown --关闭某端口Switch(config-if)#no shutdown --开启某个端口Switch(config-if)#switchport mode access --设置某个端口为access 端口Switch(config-if)#switchport access vlan vlan-id 把某个端口分配给某个局域网Switch(config-if)#switchport multi vlan add vlan-list为某个端口指定vlan-listSwitch(config-if)#switchport mode {dynamic {auto|desirable}|trunk} --配置trunk模式(dynamic auto--自动协商是否成为trunk,dynamic desirable—如果对方端口是trunk,desirable或自动模式,把端口设置为trunk,trunk—设置端口为强制的trunk方式,而不理会对方端口是否为trunk)Switch(config-if)#switchport trunk encapsulation {isl | dot1q} --指定数据帧的封装形式,其中isl是Cisco专用的VLAN封装形式,DOT1Q 是IEEE制定的国际标准Switch(config-if)#switchport trunk allowed vlan {add vlan-list |all|except vlan-list} --定义trunk允许的VLAN,all表示所有,except表示除此之外都允许Switch(vlan)#vlan vlan-id mtu mtu-size修改mtu大小Switch(vlan)#vtp mode {server|client|transparent} --配置交换机的VTP工作模式Switch(vlan)#vtp domain domain-name --配置VTP的域名Switch(vlan)#vtp password password-string 为VTP域设置口令Switch(vlan)#vtp pruning 启用VTP修剪功能,使用no关键字停止修剪功能Switch(vlan)#vtp version {1|2} --选择VTP的版本Switch#show vtp status --验证VTP配置Switch#copy run start --保存配置Switch(config-if)#spanning-tree vlan 8 port-priority 10 –将端口权值10并付给vlan 8Switch(config-if)#spanning-tree vlan 8 cost 30 --设置vlan8生成树路径值为30示例:配置VTPVTP服务器的配置:Switch>enableSwitch#vlan databaseSwitch(vlan)#vtp domain zhangSwitch(vlan)#vtp serverSwitch(vlan)#vlan 2 name vlan2 Switch(vlan)#exitSwitch#config tSwitch(config)#int f 0/24Switch(config-if)#switchport mode trunk Switch(config-if)#endVTP客户机的配置:Switch>enableSwitch#vlan databaseSwitch(vlan)#vtp domain zhangSwitch(vlan)#vtp clientSwitch(vlan)#exit。
配置Windows系统口令策略及服务

02
Windows系统口令策略配置
密码复杂性要求
1 2
密码不能过于简单
需要定期更改密码,并确保密码具有一定的复 杂性。
密码不能全部相同
避免使用全部相同的字符或数字组合作为密码 ,以防止被猜测出来。
3
禁用自动登录
Windows系统中可以设置禁用自动登录功能, 以防止他人使用您的计算机。
密码长度和复杂性的配置
配置windows系统口令策 略及服务
xx年xx月xx日
目录
• 引言 • Windows系统口令策略配置 • Windows系统服务配置 • Windows系统口令策略安全漏洞及解决方案 • Windows系统服务安全漏洞及解决方案 • 总结与展望
01
引言
背景介绍
• 随着信息化的快速发展,企业越来越依赖于计算机 系统来处理重要业务。然而,计算机系统中存在的 安全漏洞和威胁时刻威胁着企业的信息安全。其中 ,口令攻击是最常见的安全威胁之一。因此,配置 Windows系统口令策略及服务对于企业信息安全 至关重要。
错误密码时记录下尝试过的密码。
密码最长保留时间
02
可以设置密码最长保留的时间,例如30天或90天等,以便在
超过一定时间后强制用户更改密码。
密码更改策略
03
可以设置密码更改策略,例如必须在当前密码过期之后才能更
改新密码,或者要求用户提供旧密码才能更改新密码等。
03
Windows系统服务配置
远程管理服务的配置
详细描述
Telnet服务的配置包括启动和停止服务、配置服务端口、登录凭证等,以确保 Telnet服务的可用性和安全性。
FTP服务的配置
总结词
FTP(File Transfer Protocol)是一种用 于在网络上传输文件的协议。
如何配置思科路由器口令保障网络安全
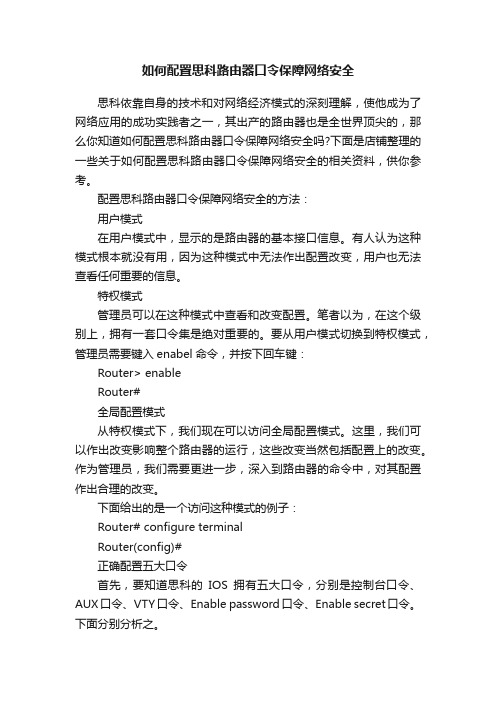
如何配置思科路由器口令保障网络安全思科依靠自身的技术和对网络经济模式的深刻理解,使他成为了网络应用的成功实践者之一,其出产的路由器也是全世界顶尖的,那么你知道如何配置思科路由器口令保障网络安全吗?下面是店铺整理的一些关于如何配置思科路由器口令保障网络安全的相关资料,供你参考。
配置思科路由器口令保障网络安全的方法:用户模式在用户模式中,显示的是路由器的基本接口信息。
有人认为这种模式根本就没有用,因为这种模式中无法作出配置改变,用户也无法查看任何重要的信息。
特权模式管理员可以在这种模式中查看和改变配置。
笔者以为,在这个级别上,拥有一套口令集是绝对重要的。
要从用户模式切换到特权模式,管理员需要键入enabel命令,并按下回车键:Router> enableRouter#全局配置模式从特权模式下,我们现在可以访问全局配置模式。
这里,我们可以作出改变影响整个路由器的运行,这些改变当然包括配置上的改变。
作为管理员,我们需要更进一步,深入到路由器的命令中,对其配置作出合理的改变。
下面给出的是一个访问这种模式的例子:Router# configure terminalRouter(config)#正确配置五大口令首先,要知道思科的IOS拥有五大口令,分别是控制台口令、AUX口令、VTY口令、Enable password口令、Enable secret口令。
下面分别分析之。
控制台口令如果用户没有在路由器的控制台上设置口令,其他用户就可以访问用户模式,并且,如果没有设置其它模式的口令,别人也就可以轻松进入其它模式。
控制台端口是用户最初开始设置新路由器的地方。
在路由器的控制台端口上设置口令极为重要,因为这样可以防止其它人连接到路由器并访问用户模式。
因为每一个路由器仅有一个控制台端口,所以你可以在全局配置中使用line console 0命令,然后再使用login和password命令来完成设置。
这里password命令用于设置恰当的口令,如下所示:Router# config tRouter(config)# line console 0Router(config-line)# password SecR3t!passRouter(config-line)# login注意:最好设置复杂的口令避免被其他人猜测出来。
思科口令大全

思科口令大全1.用户执行模式:Router>输入enable 简写为en 进入特权执行模式2.进入特权执行模式:Router#输入disable和end 和ctrl+Z 和exit退出特权执行模式进入用户执行模式3.全局配置模式:Router(config)#从特权执行模式输入config terminal 进入全局配置模式,之后从全局配置模式退出进入特权执行模式输入end 和ctrl+Z 和exit。
4.其他配置模式:Router(config——if)从全局配置模式输入interface fastEthernet0/1 5为路由器改名:从特权执行模式中输入config terminal 进入全局配置模式:Router# config terminalRouter(config)#在全局配置模式下输入主机名:Router(config)# hostname HQ出现:HQ(config)#删除路由器名称:HQ (config)# no hostname出现:Router(config)#6.设置enable口令和enable加密口令:Router(config)# enable password passwordRouter(config)# enable secret password7.设置VTY线路口令:Router(config)#line vty 0 4Router(config-line)# password passwordRouter(config-line)#login控制端口命令如下:Router(config)#line console 0Router(config-line)# password ciscoRouter(config-line)# login对enable口令加密:在特权模式下键入service password-encryption8.配置接口::1)进入全局配置模式。
- 1、下载文档前请自行甄别文档内容的完整性,平台不提供额外的编辑、内容补充、找答案等附加服务。
- 2、"仅部分预览"的文档,不可在线预览部分如存在完整性等问题,可反馈申请退款(可完整预览的文档不适用该条件!)。
- 3、如文档侵犯您的权益,请联系客服反馈,我们会尽快为您处理(人工客服工作时间:9:00-18:30)。
配置口令
作者:风林
来源:风林的家
本部分包括以下内容:
配置控制台口令
配置远程登录口令
配置特权口令
口令(密码)可用于防范非法人员登录到交换机或路由器上修改设备的配置。
我们可以在几个不同位置设置口令,以达到多重保护的目的。
控制台口令:当我们从连接在Console口的控制台登录设备时,需要输入
控制台口令。
由于控制台是一种本地配置方式,所以不设置这个口令影响也不大。
远程登录口令:当我们从网络中的计算机通过Telnet命令登录设备时,
需要输入远程登录口令。
远程登录是一种远程配置方式,这个口令应该设置。
在锐捷设备中,没有设置远程登录口令的设备是不能用Telnet命令登录的。
特权口令:当我们登录设备后,从用户模式进入特权模式,需要输入特权
口令。
由于特权模式是进入各种配置模式的必经之路,在这里设置口令可有效防范非法人员对设备配置的修改。
在锐捷设备中,特权模式可设置多个级别,每个级别可设置不同的口令和操作权限,你可以根据情况让不同人员使用不同的级别。
在锐捷设备中,没有设置特权口令的设备也不能用Telnet 命令登录。
在实际应用中,一般特权口令和远程登录口令是必需的,设置的口令不应该太简单,不同位置的口令也不应该相同。
配置控制台口令
控制台口令是通过控制台登录交换机或路由器时设置的口令。
1、设置控制台口令
模式:线路配置模式。
配置命令:
Ruijie(config)#line console 0
Ruijie(config-line)#login
Ruijie(config-line)#password password
line console 0 命令表示配置控制台线路,0是控制台的线路编号。
login 命令用于打开登录认证功能。
password password为控制台线路设置口令。
说明:设置的口令长度最大长度为25个字符。
口令中不能有问号和其他不
可显示的字符。
如果口令中有空格,则空格不能位于最前面,只有中间和末尾的空格可作为口令的一部分。
在running-config 中可以查看口令设置,但锐捷设备的口令都是以密文存放的,所以看到的是乱码。
注意:如果没有设置login,即使配置了口令,登录时口令认证会被忽略。
2、删除配置的控制台口令:
Ruijie(config)#line console 0
Ruijie(config-line)#no password
配置举例:
Ruijie>enable
Ruijie#configure terminal
Ruijie(config)#line console 0
Ruijie(config-line)#login
Ruijie(config-line)#password 123
Ruijie(config-line)#end
Ruijie#
本例设置控制台口令为123。
配置远程登录口令
远程登录口令是通过Telnet登录交换机或路由器时设置的口令。
1、设置远程登录口令
模式:线路配置模式。
配置命令:
Ruijie(config)#line vty 0 4
Ruijie(config-line)#login
Ruijie(config-line)#password password
line vty 0 4 命令表示配置远程登录线路,0~4是远程登录的线路编号。
login 命令用于打开登录认证功能。
password password为远程登录线路设置口令。
说明:设置的口令长度最大长度为25个字符。
口令中不能有问号和其他不
可显示的字符。
如果口令中有空格,则空格不能位于最前面,只有中间和末尾的空格可作为口令的一部分。
在running-config 中可以查看口令设置,但锐捷设备的口令都是以密文存放的,所以看到的是乱码。
注意:远程登录口令是用Telnet登录的必备条件。
2、删除配置的远程登录口令:
Ruijie(config)#line vty 0 4
Ruijie(config-line)#no password
配置举例:为交换机设置远程登录密码为123。
Ruijie>enable
Ruijie#configure terminal
Ruijie(config)#line vty 0 4
Ruijie(config-line)#login
Ruijie(config-line)#password 123
Ruijie(config-line)#end
Ruijie#
本例设置远程登录口令为123。
配置特权口令
特权口令是从用户模式进入特权模式时设置的口令。
1、设置特权口令
模式:全局配置模式。
