N8091A直流电子负载卡硬件手册
TH9520 磁性元器件综合分析系统使用说明书
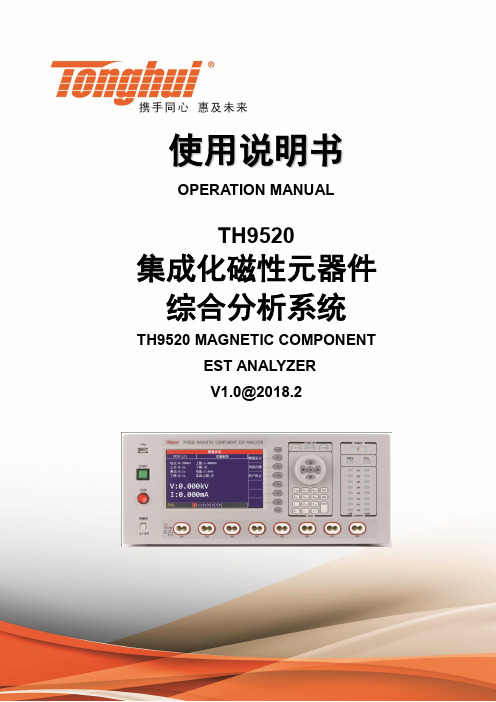
使用说明书OPERATION MANUALTH9520集成化磁性元器件综合分析系统TH9520 MAGNETIC COMPONENTEST ANALYZER***********目录第1章概述................................................................................................................................. 1-11.1引言................................................................................................................................. 1-11.2使用条件 ......................................................................................................................... 1-21.2.1 电源 .............................................................. 1-21.2.2 环境温度与湿度...................................................... 1-21.2.3 预热................................................................ 1-21.2.4 几点注意问题........................................................ 1-21.3体积与重量...................................................................................................................... 1-31.4安全要求 ......................................................................................................................... 1-31.4.1 绝缘电阻............................................................ 1-31.4.2 绝缘强度............................................................ 1-31.4.3 泄漏电流............................................................ 1-41.5电磁兼容 ......................................................................................................................... 1-41.5.1 电源瞬态敏感度按GB6833.4的要求。
CU500-12ANT-ICODE读卡模块规格书说明书

读卡模块 CU500-12ANT-ICODE规格书规格书目录1.1产品特点 (1)1.2产品图片 (1)1.3产品选型表 (1)1.4性能特点 (1)1.5技术参数 (1)1.6封装信息(尺寸图) (2)1.7IPEX同轴线天线连接示意图 (2)1.8杜邦线天线连接示意图 (3)1.9应用注意事项 (3)1.1 产品特点CU500-12ANT模块是一款高性能多天线分体式读卡模块,支持外接12路天线分时读卡。
CU500-12ANT读卡模块主要应用于低成本、多通道、多区域读卡领域,例如:音视频资料管理、共享充电宝、共享雨伞、生物制药管理、工业生产跟踪、自动清点结算。
1.2 产品图片1.3 产品选型表型号功能产品状态CU500-12ANT-ICODE 读ICODE卡量产CU500-12ANT-FM1208 读复旦微电子FM1208 CPU卡可定制CU500-12ANT-Felica 读索尼Felica卡卡号可定制CU500-12ANT-M1 读Mifare S50、S70卡可定制1.4 性能特点●读卡协议:ISO15693(可定制ISO14443-A、ISO14443-B、Felica协议)●支持卡片:Icode卡(可定制支持Mifare卡、CPU卡、Desfire卡、Felica卡)●读写距离:0-15厘米(最大读写距离与天线大小和卡片天线相关)●通信接口:串行UART(默认波特率19200、8位数据位、1位停止位、无校验)1.5 技术参数符号参数值最小值典型值最大值单位VCC 电源电压 3.3 5.0 7.0 V IDD 电源平均电流- 30 100 mA IDD(p-p)电源峰值电流- 150 200 mA IO VH辅助IO输出高电平 2.0 3.0 3.3 V IO VL辅助IO输出低电平- 0.2 0.7 VF RFID射频载波频率13.54 13.56 13.58 MHz Tamb 工作温度-25 +25 +85 ℃Tstg 储存温度-40 +25 +100 ℃V ESD静电放电(HBM人体模型)- 2000 - VV ESD静电放电(CDM带电器件放电)- 500 - V 1.6 封装信息(尺寸图)1.7 IPEX同轴线天线连接示意图1.8 杜邦线天线连接示意图1.9 应用注意事项●多通道天线读卡模块使用时需要防止天线间相互干扰,相邻天线之间的天线边缘间距,应大于天线最大直径或者最大边长的2.5倍,这样可以将天线相邻干扰降低到不影响正常使用的范围内。
HE5015A 电子负载使用说明书

程控电子负载使用说明书使用说明书OPERATION MANUALMODEL :HE5015A/5031A程控直流电子负载HENG HE INSTRUMENT(VER1.0 @2006.10)目录一、概述 (1)1.1产品概要: (1)1.2技术指标 (2)1.2.1主要指标 (2)1.2.2工作环境 (3)1.2.3工作电源a (3)1.2.4外形尺寸 (3)1.2.5重量 (3)二、面板说明 (4)2.1前面板 (4)2.2后面板 (4)2.3按键 (5)2.4显示信息 (5)三、菜单操作 (7)3.1菜单概述 (7)3.2菜单说明 (7)3.3快捷菜单 (9)3.4菜单设置 (9)3.4.1系统配置(System Config) (9)3.4.2负载设置(Load Setup) (11)3.4.3电池测试设置(Battery Test Set) (13)3.4.4动态测试设置(Tran Test Set) (14)3.4.5列表测试设置(List Test Set) (15)3.4.6文件保存(Save File) (17)3.4.7文件调用(Recall File) (17)3.4.8退出菜单(Exit) (17)四、测试操作 (18)4.1定电流工作模式(CC) (18)4.2定电压工作模式(CV) (18)4.3定功率工作模式(CP) (19)4.4定电阻工作模式(CR) (19)4.5电池测试模式 (19)4.6短路测试模式 (21)4.7动态测试模式 (21)4.7.1 连续方式(CONT) (21)4.7.2脉冲方式(PULS) (22)4.7.3触发方式(TRIG) (22)4.8列表测试模式 (22)4.9 保护功能 (23)4.9.1过压保护 (24)4.9.2过流保护 (24)4.9.3过功率保护 (24)4.9.4输入极性反报警 (24)4.9.5过热保护 (24)五、应用实例 (25)5.1 电池测试: (25)5.1.1参数 (25)5.1.2设置 (25)5.1.3测试 (26)5.2动态测试 (26)5.2.1参数 (26)5.2.2设置 (26)5.2.3 测试 (27)5.3列表测试 (28)5.3.1参数 (28)5.3.2设置 (28)5.3.3测试 (30)附录A远端测量及外触发 (31)A1远端测量 (31)A2外触发 (31)A3引脚配置 (31)感谢您购买本公司产品!使用本仪器前请首先根据说明书最后“成套与保修”事项进行确认,若不符合请尽快与我公司联系,以维护您的权益。
电子负载手册

电压测量精度 优于 0.5%
① ② ③ ④
扩展后可达 30V Rout=100Ω 串联校准以后 校准以后,采用开尔文测量方式 1
10A30V 恒流/恒压电子负载安装使用手册
二、电子负载使用说明
1、什么是电子负载 电子负载是一种起程控电能吸收装置作用的仪器。 其主要应用是对直流电源进行测 试。不过,它也可用于其它场合,如制造或研发期间的电池测试、固态半导体大功率元 件测试、直流电动机测试、直流发电机测试和固态电动机控制的测试。通常,电子负载 具有允许输出电压和输出电流迅速改变的高输出阻抗。 由于电子负载要吸收能量,故常常称之为“电流吸收器” 。典型情况下,电子负载 的额定值从几十 W 到几 kW,电流额定值从几 A 到几百 A,电压额定值从几 V 到 1kV 左右。电子负载有固定电流(CC) ,固定电压(CV) ,固定电阻(CR)模式,可分别用 于不同的电源参数的测量。电子负载在作为一个可变或恒定电阻时,还可以作为直流电 压、直流电流的测量,而且有保护功能。这既利于提高测量速度也方便测量。因此, 电 子负载的正确使用和测试是很重要的。 2、电子负载的特点 (1)电子负载能在设定的模式下显示电压、电流,可以代替直流数字电压表;可 以测量直流恒流源的输出电流,特别是大电流。 (2)电子负载在设定为固定电流模式下允许同极性的模块并联使用,此时负载电 流为所有电子负载的电流之和,负载功率也为所有负载功率之总和。但切记不可以串联 使用。 (3)当测量电源的CV态的负载调整率、输出电压调整率时,使用固定电流模式 (CC)比较合适; (4)当测量电源的CC态的负载调整率、输出电流调整率时,使用固定电压模式 (CV)比较合适; (5)用电子负载测量电源时,要保证两者正负对应连接,反接会损坏电子负载模 块。 (6)电子负载有远端电压的测量功能,即配有电压测量端口,以减小在电流较大 时测量引线引起的分压,避免测量误差。 3、电子负载功能说明 (1)电压表 调节电子负载 CC 值至 0,此时用电子负载以电压表形式测量直流稳压电源 CV 态 的开路输出电压。 (2)电流表 调节电子负载 CV 值至 0,此时用电子负载以电流表形式测量直流稳压电源 CC 态 的输出电流。 (3)直流稳压电源 CV 态的负载调整率的测量 例如有一台直流稳压电源,规格 12V/3A,把电子负载电压调节到最小,电流调节 到最小,则设置电子负载在 CC 状态,逐渐增大电子负载电流值,使电子负载的 CC 值 为 3A,此时电子负载测量出电源带载的实际输出电压 Um。再调节电子负载的 CC 值为
M97可编程直流电子负载说明书--英文版

M97可编程直流电子负载说明书--英文版Chapter 3 Quick Start3.1 Power-on self-checkingFirst, users need to connect the power correctly. The following are the specific steps of self-checking.You can use the following ways to solve the problems when you start the load.1) Check the power cord is connectedFirst check the power cord is connected, the load is being power supply, the power switch is started.2) Check the load voltage settingThe load working voltage is 110V or 220V, checking your load voltage setting is matching with the power supply voltage.3) Check if the fuse of the load is burnt.If the fuse of the load is burnt, please replace the fuse specifications from the table below.3.3 Front panel and back panel introductionThe front panel of M97 series electronic load is shown below.①The top half of the panel is a black VFD display screen and a switch.②The bottom half of the panel from left to right are 0~9 numberkeys, ESC, menu, move up(▲) and down(▼) keys, input and output terminals.The back panel of M97 series electronic load is shown below.①the electric current from 0 to full scale, corresponding 0~10V output; can connect the oscilloscope to observe the dynamic waveform②terminal for far-end measurement, trigger the interface of input and output③multifunctional communication interface, transfer GPIB, RS232, RS425, USB3.4 Keyboard introductionShift + Menu, enter into menu function →the VFD show the optional menu →▲or▼, overturn the VFD screen →Enter, enter into the function-option →▲or▼, overturn the VFD screen →Enter, enter into the next level submenu →Esc, return to the higher level menu.Chapter 4 Panel operation4.1 Basic operating modesThe electronic load can be operated in the following four modes.1. Constant current operation mode (CC).2. Constant voltage operation mode (CV).3. Constant resistance operation mode (CR).4. Constant power operation mode (CW).4.1.1 Constant current operation mode(CC)As shown in the following figure, in the constant current mode, the electronic load consumes a constant current regardless of whether the input voltage changes. Please note that if the maximum current value of the source is less than the given constant current value, the load will not be guaranteed to be set to the given current value and the voltage to be tested will also be pulled down.4.1.1.1 Standard constant current modePress the I-SET button, the load shows "STANDARD CURR = xxxxxxxxA", showing the current value. Then you can press the number keys and decimal point keys on the panel and input the required constant current value from high to low, and p ress “Enter” to confirm that the load goes to the standard constant current mode.If the input status is ON, the upper right corner of the display panel shows "OFF". If you want to change the input state to “ON”, press the On / Off button, then "CC" or "Unreg" is displayed in the upper right corner of the display panel. The display "CC" indicates the expected constant current value; "Unreg" indicates thatthe load cannot be correctly adjusted to the given current value. Please check whether the source to be tested is properly connected and turned on or whether the source to be measured can output a preset current value.At this point, if you want to fine-tune the set current value, you canuse the rotary encoder in upper right corner, clockwise adjustment to increase, counterclockwise adjustment to reduce, please note that if the given current value has reached the maximum which is limited by load, the current value cannot be adjusted upwards. In this case, the current value is indicated on the lower right side of the display panel, and one of the numbers has a cursor, Indicating that the current fine fineness is one unit of the current position. If the user wishes to change the fineness of the adjustment, the rotary encoder can be pressed down. The rotary encoder contains a key, once this button is pressed, the cursor will movea grid In order to achieve the adjustment of fineness adjustment.4.1.1.2 Loading and unloading constant current modeThe loading and unloading mode is a kind of protection to the measured source. When the source voltage is just beginning to climb, the load is automatically adjusted to the open state until the source voltage reaches the ONSET and the load is adjusted to set the constant current value. When the source voltage to be measured begins to fall and falls to the OFFSET unloading voltage, the load is automatically adjusted to an open state. If the ONSET load voltage is greater than the OFFSET unloading voltage, the load will likely avoid frequent loading and unloading near the critical point of the unloading voltage, which can better protect the source to be tested.In the standard constant current mode, press the Shift + 1 (V_Level)key to enter the loading and unloading constant current mode. At this time, the load display "ONSETVOLT = xxxxxxxxV", prompting the current load voltage. At this time, press the numeric key and the decimal key, and thenpress the Enter key from the high to the low order, and press the Enter key to confirm, then the load shows "OFFSET VOLT = xxxxxxxxV", prompting the current unloading voltage, then you can press the number keys and the decimal keys on the panel, and enter the desired unloading voltage value in turn and press Enter to confirm that the load enters the loading and unloading constant current mode.At this time, if the input status is OFF, the upper right corner of the display panel shows "OFF". If you want to change the input status to ON, press the On / Off button, then CC_UN" or "Unreg" is displayed in the upper right corner of the display panel. "Unreg" indicates that the load cannot be correctly adjusted to the given current value. Please check whether the source to be tested is properly connected and turned on or whether the source to be measured can output a preset current value.At this time, press the Shift + 1 (V_Level) key in the loading and unloading constant current mode and the load will return to the standard constant current mode.4.1.1.3 Soft start constant current modeSoft start constant current mode, equivalent to an inductive load, the analog inductance size is proportional to the length of the soft startrise time, in this mode, the source to be measured will likely avoid the impact of large current instantaneous.In the standard constant current mode, press the Shift + 2 (S_Start) key to enter the soft start constant current mode. At this time, the load display "RISINGTM = xxxxxxxxvmS" prompts the current rising edge time, and you can press the numeric key and the decimal point Key, enter the desired rising edge time from high to low, and press Enter to confirm that the load enters soft start constant current mode.At this time, if the input status is OFF, "OFF" appears in the upper right corner of the display panel. If you want to change the input status to ON, press the On / Off button, and the upper right corner of the displaypanel shows "CC_S" or "Unreg". "CC_S" indicates that the expected constant current value is reached. "Unreg" indicates that the load cannot be correctly adjusted to the preset current value. Please check whether the source to be tested is properly connected and turned on, or whether the source to be measured can output the preset current value.At this time, press the Shift + 2 (S_Start) key in the load unloading constant current mode and the load will return to the standard constant current mode.Note that the rising edge time will be automatically scaled to an integer multiple of 20uS.4.1.1.4 Constant current transfer voltage modeConstant current transfer voltage mode can better protect the source to be measured due to over discharge and damage.In the standard constant current mode, press Shift + 4 (CC + CV) key to enter the constant current transfer voltage mode. At this time, the load shows "CC TO CVVOLT = xxxxxxxxV" prompting the current constant voltage value, The number key and the decimal point key, from the high to the low order in order to enter the required constant voltage value, and press the Enter key to confirm, then load into the constant current transfer voltage mode.At this time, if the input state is OFF, the upper right corner of the display panel to display "OFF", to change the input state is ON, press the On / Off button, then the right upper corner panel displays "CC + CV" or "Unreg" , displays "CC + CV" represents a constant current value to achieve the desired display "Unreg" means the load to properly preset current value, check the source under test is properly connected and turned on, the voltage is within the normal range.At this time, press the Shift + 4 (CC + CV) key in the loading and unloading constant current mode and the load will return to the standard constant current mode.4.1.2 Constant resistance operation mode(CR)In the constant resistance mode, the electronic load is equivalent toa constant resistance, as shown in the following figure; the electronic load consumes a current that changes linearly with the change in input voltage. Please note that when the source voltage to be measured is too high and the set resistance is too small, the current consumed by it is greater than the maximum output current of the source to be measured, or the maximum load current of the load will not be equivalent to constant resistance, may cause the shock of the load.4.1.2.1 Standard resistance modePress the R-SET button, the load shows "STANDARD RESI = xxxxxxxxΩ", prompting the current resistance value, then you can press the number keys on the panel and decimal point, from high to low, enter the required constant resistance, Key to confirm that the load enters the standard constant resistance mode.If the input status is ON, press the On / Off button, and "CR" or "Unreg" appears in the upper right corner of the display panel, and the display status is displayed. If the input status is ON, "CR" means the expected constant resistance value, and "Unreg" indicates that the load cannot be correctly adjusted to the preset resistance value. Please check whether the source to be tested is connected and turned on properly, or whether the source to be measured can output the preset resistance Current.At this time, if you want to fine-tune the set resistance value, youcan use the upper right corner of the rotary encoder, clockwise adjustment to increase, counterclockwise adjustment to reduce. In the lower rightside of the display panel for the set resistance value indication, where a digit under the cursor prompt, indicating the current fine-tuning fineness of the current location of a unit, if the user wants to change the adjustment fineness, you can press the rotary encoder , The rotary encoder contains a button, this button is pressed once, suggesting that the cursor will move a grid, in order to achieve the adjustment of fineness.4.1.2.2 Loading and unloading constant resistance modePlease refer to the description of 4.1.1.2 for the principle of loading the unload mode.In the standard resistive mode, press Shift + 1 (V_Level) to enter the load unloading resistor mode. The load display "ONSETVOLT = xxxxxxxxV" prompts the current load voltage. At this time, press the numeric key and the decimal point on the panel, The load shows "OFFSET VOLT = xxxxxxxxV" prompts the current unloading voltage, then you can press the number keys on the panel and the decimal point key, from high to low order in order to enter the value of the load, The required unloading voltage value, and press Enter to confirm that the load is loaded Unload the resistive mode.If the input status is ON, press the On / Off button, and "CR_UN" or "Unreg" is displayed in the upper right corner of the display panel to display "CR_UN". If the input status bit is ON, "Indicates that the expected constant current value is displayed." Unreg "indicates that the load cannot be correctly adjusted to the preset current value. Please check whether the source to be tested is properly connected and turned on. Whether the voltage is within the normal range or whether the source set the resistance to absorb the current value.In the loading and unloading resistor mode, press the Shift + 1(V_Level) key, the load will return to the standard constant resistance mode.4.1.2.3 Constant resistance transfer voltage modeIn the constant resistance transfer voltage mode, it can better protect the measured source which is not damaged due to over discharge.In the standard constant resistance mode, press the Shift + 5 (CR + CV) key to enter the constant resistance variable voltage mode. The load display "CR TO CVVOLT = xxxxxxxxV" prompts the current constant voltage value. At this time, press the number key And the decimal point key, from the high to the low order, enter the required constant voltage value, and press the Enter key to confirm, the load into the constant resistance to change the voltage mode."Unreg" is displayed in the upper right corner of the display panel to display "CR + CV". If the input status is ON, "Indicates that the expected constant resistance value is displayed." Unreg "indicates that the load can not be correctly adjusted to the preset current value. Please check whether the source to be measured is connected and turned on and the voltage is within the normal range.In this mode, press the Shift + 5 (CR + CV) key and the load will return to the standard constant resistance mode.4.1.3 Constant voltage operation mode(CV)In the constant voltage mode, the electronic load will consume enough current to keep the input voltage at the set voltage. Note that the load may not be able to stabilize the voltage at the set value when the source voltage to be measured is below the set voltage or the maximum output current exceeds the maximum current that can be absorbed by the load.4.1.3.1 Standard constant voltage modePress the V-SET button, the load shows "STANDARD VOLT = xxxxxxxxV", prompting the current constant voltage value, then you can press the number keys on the panel and decimal point, from high to low, enter the required constant voltage value, Key to confirm, then load into the standard constant voltage mode."Unreg" is displayed in the upper right corner of the display panel to display the CV "Indicates that the expected constant voltage value is displayed." Unreg "indicates that the load cannot be correctly adjusted to the preset voltage value. Please check whether the source to be measured is connected and turned on properly or whether the source voltage to be measured is too low or the output current capacity exceeds the load Maximum load current.If you want to fine-tune the set voltage, you can use the rotary encoder in the upper right corner, adjust it clockwise to increase, and adjust it counterclockwise. Please note that if the set voltage value has reached the maximum voltage of the load setting, Adjust the voltage value. At this time, in the lower right side of the display panel for the set voltage value indication, where a digit under the cursor prompt, indicating the current fine fineness of the current location of a unit, if the user wants to change the adjustment fineness, you can press Rotary encoder, rotary encoder contains a button, this button is pressed once, suggesting that the cursor will move a grid, in order to achieve adjust the adjustment of fineness.4.1.3.2 Loading and unloading constant voltage modePlease refer to the description of 4.1.1.2 for the principle of loading the unload mode.In the standard constant voltage mode, press Shift + 1 (V_Level) key, enter the load unloading constant voltage mode, then the load shows "ONSETVOLT = xxxxxxxxV" prompt the current load voltage, then you can press the number keys and the decimal point , Press the Enter key from the high to the low order, and press the Enter key to confirm that the load shows "OFFSET VOLT = xxxxxxxxV" prompting the current unloading voltage, then you can press the number keys on the panel and the decimal point, from high to low Enter the desired unloading voltage in turn, and press Enter to confirm that the load enters the load unloading resistor mode.If the input status bit is ON, press the On / Off button, and "CV_UN" or "Unreg" is displayed in the upper right corner of the display panel. The display shows "CV_UN". If the input status bit is ON, press “unrigged” Indicates that the expected constant current value is displayed." Unreg "indicates that the load cannot be correctly adjusted to the preset current value. Please check whether the source to be tested is properly connected and turned on. Whether the voltage is in the normal range or the maximum whether the current exceeds the maximum load current of the load.In the load u。
恩智(上海)测控技术有限公司 N8050D 4 通道直流电流测量卡硬件手册说明书

4 通道直流电流测量 高精度的电流测量; 12VDC 供电 电气隔离 600V; 提供驱动和示例代码。 百兆以太网通讯;
3.2 板卡示意图
下图是 N8050D 的示意图,N8050D 各接口非常方便于用户接线、操作和系统集成,后 文将介绍硬件接口、外观尺寸。
N8050D 的示意图
1.3 保修限制
本保证仅限于N8050D(保险管除外)。对于因错误使用、无人管理、未经授权的修改、 非正常环境下使用以及不可抗拒因素所造成的损坏,NGI不负责免费维修,并将在维修前提 交估价单。
仅作以上保证,不作其它明示或默示性保证,其中包括适销性、某些特定应用的合理 性与适用性等的默示保证。无论在合同中、民事过失上,或是其它方面,NGI 不对任何特 殊的、偶然或间接的损害负责。
1
N8050D 4 通道直流电流测量卡硬件手册
恩智(上海)测控技术有限公司
2 安全说明
在操作和使用仪器过程中,请严格遵守以下安全须知。不遵守以下注意事项或本手册中 其它章节提示的特定警告,可能会削弱设备所提供的保护功能。
对于用户不遵守这些注意事项而造成的后果,NGI不负任何责任。
2.1 安全须知
请可靠接地
N8050D 4 通道直流电流测量卡硬件手册
恩智(上海)测控技术有限公司
1 前言
尊敬的用户:非常感谢您选择恩智(上海)测控技术有限公司(以下简称NGI)N8050D 4通道直流电流测量卡。本手册适用于NGI N8050D 4通道直流电流测量卡(以下简称N8050D), 内容包括N8050D的接口、使用方法、参数指标等详细信息。
N8050D 4 通道直流电流测量卡硬件手册
恩智(上海)测控技术有限公司
2. 状态灯尺寸:
智嵌 IO 控制板 5CXZE8-I 使用手册说明书
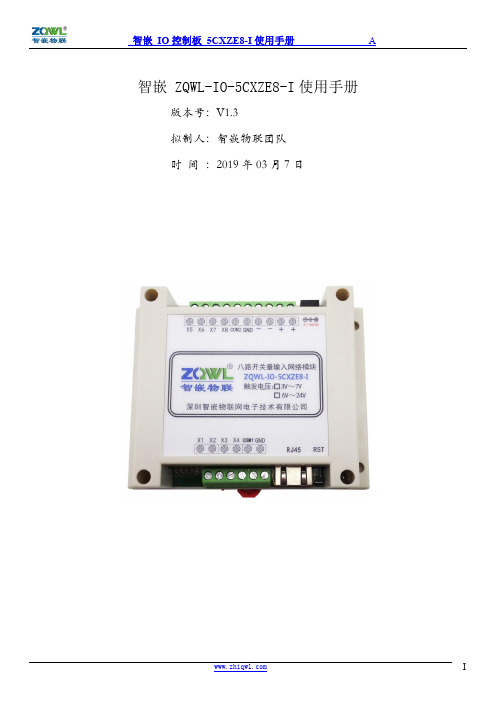
智嵌 ZQWL-IO-5CXZE8-I使用手册版本号:V1.3拟制人:智嵌物联团队时间:2019年03月7日目录前言 (3)1产品快速入门 (3)1.1硬件准备 (3)1.2使用网络控制软件 (4)1.3使用网络调试助手控制 (6)2硬件功能介绍 (7)2.1网络特性 (7)2.2硬件特点 (8)3模块硬件接口 (8)3.1模块接口及尺寸 (8)4模块输入接线 (9)4.1模块电源输入 (9)4.2模块开关量输入 (9)4.3模块开关量输入状态自动上报 (10)5模块参数配置 (11)5.1智嵌网络IO配置软件 (11)5.2网页参数配置 (13)6模块复位以及固件升级 (17)6.1模块复位 (17)6.2模块固件升级 (18)7模块通讯协议 (18)7.1自定义协议 (18)1、控制指令 (18)2、配置指令 (19)7.2Modbus rtu协议 (20)7.3Modbus rtu 指令码举例 (20)7.4Modbus TCP协议 (21)8与网络型IO输出模块成对使用 (22)8.1开关量输入/输出模块的设置 (22)前言智嵌物联系列产品命名规则一览:产品类型IO:IO 控制板系列EthRS:串口服务器系列SS:传感器系列AN:模拟量板卡系列GPRS:GPRS dtu 系列CANET:can 转网络系列RCAN:can 转串口系列RF:射频识别系列ZB :zigbee 通讯系列FiB:光纤转换系列智嵌物联IO 控制板系列产品命名规则如下:如:ZQWL-IO-1CNRC16-I12V 供电/带外壳/NPN 输入/10A 电流/网络+串口/16路输出/通讯隔离B :不带C :带外壳N:NPN 输入P:PNP 输入X:兼容N 和P T:TTL 模块A:模拟量输入Z:无输入Z:无输出A:固态交流D:固态直流R:电流10A T:晶体管输出L:TTL 模块0:电流16A 3:电流30A 5:电流50AE:网络W:wifi A:串口+CAN C:网络+串口D:网络+wifiZ:网络+串口+wifi G:GPRS+串口8:8路输出16:16路输出32:32路输出1:12VDC 2:24VDC -I :通讯隔离3:3.3VDC 4:220VAC 5:5~36VDC 6:POE 供电1 产品快速入门ZQWL-IO-5CXZE8-I (以下简称控制板)是一款可通过网络远程传输的8路NPN/PNP 兼容型光电输入控制板。
南京中鹰锐仪电子 ZY87系列可编程直流电子负载 说明书
ZY87系列可编程直流电子负载用户使用手册适用型号ZY8713/ZY8713B/ZY8714/ZY8714B版本号:V1.0南京中鹰锐仪电子有限公司版权所有目录第一章 简介 (1)第二章 技术规格 (2)2.1主要技术规格 (2)2.2电子负载尺寸图 (3)第三章 快速入门 (4)3.1开机自检 (4)3.2如果负载不能启动 (4)3.3前面板和后面板介绍 (5)3.4键盘说明 (5)3.5菜单操作 (6)第四章 面板操作 (9)4.1基本操作模式 (9)4.1.1定电流操作模式(CC) (9)4.1.1.1标准定电流模式 (9)4.1.1.2加载卸载定电流模式 (9)4.1.1.3软启动定电流模式 (10)4.1.1.4定电流转定电压模式 (11)4.1.2定电阻操作模式(CR) (11)4.1.2.1 标准定电阻模式 (11)4.1.2.2 加载卸载定电阻模式 (12)4.1.2.3定电阻转定电压模式 (12)4.1.3定电压操作模式(CV) (12)4.1.3.1标准定电压模式 (13)4.1.3.2加载卸载定电压模式 (13)4.1.3.3软启动定电压模式 (13)4.1.4定功率操作模式(CW) (14)4.1.4.1标准定功率模式 (14)4.1.4.2加载卸载定功率模式 (14)4.2动态测试操作 (14)4.2.1连续模式(CONTINUOUS ) (15)4.2.2脉冲模式(PULSE) (15)4.2.3触发模式(TRIGGER) (15)4.2.4 动态测试参数设置 (15)4.2.5波形控制 (16)4.2.5.1方波 (16)4.2.5.2三角波 (16)4.2.5.3梯形波 (16)4.2.6 触发控制 (16)4.2.7 LIST功能 (16)4.2.7.1.编辑LIST列表 (16)4.2.7.2执行LIST功能 (17)4.2.8 自动测试功能 (17)I4.2.8.1编辑自动测试列表 (17)4.2.8.2设置自动测试触发输出方式 (18)4.2.8.3执行自动测试功能 (18)4.3输入控制 (19)4.3.1 短路操作(SHORT) (19)4.3.2 输入开关操作 (19)4.4电子负载可操作范围 (19)4.5保护功能 (19)4.5.1 过电压保护(OV) (19)4.5.2 过电流保护(OC) (20)4.5.3 过功率保护(OW) (20)4.5.4 输入极性反接 (20)4.5.5 过温度保护(OH) (20)4.6远端测试功能 (20)4.7蓄电池放电测试操作 (21)4.8通讯协议 (21)4.8.1 概述 (21)4.8.2 选择通讯波特率 (22)4.8.3 数据 (22)4.8.4 功能码 (22)4.8.5 差错校验 (22)4.8.6 完整命令帧解析 (23)4.8.7 线圈与寄存器地址分配 (25)4.8.8 命令寄存器CMD定义 (27)4.8.9 常用操作功能说明 (27)II第一章 简介ZY87系列产品是中鹰锐仪电子公司设计制造的新一代直流电子负载,采用高性能芯片, 高速,高精度设计,提供0.1mV,0.01mA的解析度(基本精度为0.03%, 基本电流上升速度2.5A/us), 外观新颖,生产工艺科学严谨,相比同类产品,更具性价比。
华翔天诚 CK-LR08-A01 低频 RFID 读写器产品开发手册说明书
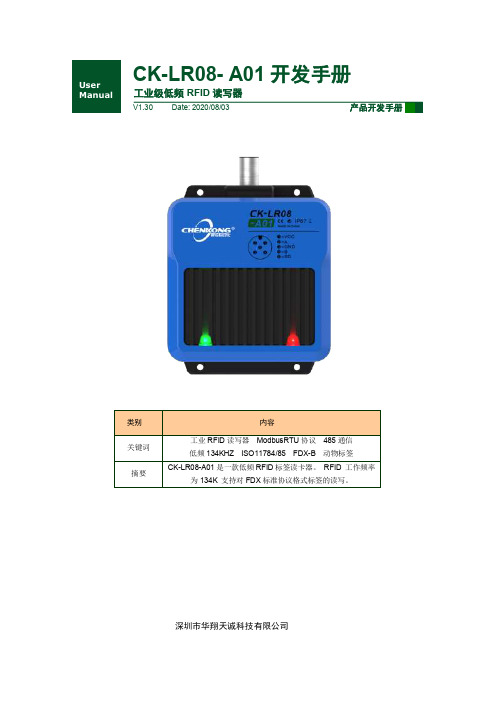
CK-LR08- A01开发手册工业级低频RFID读写器深圳市华翔天诚科技有限公司目录1. 简介 (1)2. 产品特征 (1)3. 电气参数 (1)3.1物理及环境特性 (1)3.2电气参数指标 (2)4. 硬件描述 (2)4.1LED指示灯 (2)4.2接线说明 (3)4.3系统接地 (3)4.4RS485建立系统图 (4)4.5通信电缆选择 (4)4.6通信距离 (4)4.7默认通信参数 (4)5. 产品协议 (4)5.1Modbus Rtu 协议 (4)5.1.1寄存器定义表 (4)5.1.2寄存器功能定义说明 (5)5.1.3读取UID数据例子 (7)5.1.4写标签数据例子 (8)6. 操作流程 (12)6.1寻卡 (12)6.2读卡 (12)6.2.1Modbus RTU读卡 (12)7. 机械尺寸 (12)8. 附录 (14)8.1M12圆形连接器选型 (14)9. 免责声明 (15)10. 修订历史 (15)1. 简介CK-LR08-A01是一款基于射频识别技术的低频RFID标签读卡器。
RFID 工作频率为134K 支持对FDX标准协议格式标签的读取。
读卡器同时支持标准工业通讯协议MODBUS RTU,方便用户通集成到PLC等控制系统中。
读卡器内部集成了射频部分通信协议,用户只需通过通信接口接收数据便能完成对标签的读取操作,而无需理解复杂的射频通信协议。
2. 产品特征◆供电方式:直流24V◆功耗:1.5W◆电路保护:带极性接反保护,过流保护(0.2A)◆工作频率:134KHZ◆协议标准:FDX-B◆读卡距离:0-110mm◆通信接口:RS485◆通信协议:ModBus RTU◆工作湿度:5-95% RH◆工作温度:-25℃-+70℃◆防护等级:IP-67◆外壳材质:ABS+铝合金3. 电气参数3.1 物理及环境特性表3-1物理及环境特性3.2 电气参数指标表3-2 电气参数指标4. 硬件描述1423图4-1读卡器外部电气图示1:读卡器电缆接头--M12,A-coded,5 PIN公头2:系统状态指示灯3:RFID状态指示灯4:外壳接地端4.1 LED指示灯表4-1指示灯状态说明4.2 接线说明读卡器端1:VCC 2:A+3:GND 4:B-5:SG图 4-2读卡器端图示说明表 4-2线序说明4.3 系统接地为了提供设备的稳定性和抗干扰能力,设备必须可靠接地,要求见下图:图 4.3 设备接地示意图4.4 RS485建立系统图RS485120R 终端电阻120R 终端电阻图 4-4 485系统建立示意图*485必须要网络的二端加一个120欧的电阻4.5 通信电缆选择为了提高通信可靠性和系统的EMI 性能,建议用户使用双绞屏蔽线,并且接大地处理4.6 通信距离表 4-3 485通信距离4.7 默认通信参数波特率:9600bps 奇偶校验位:无 停止位:1位 数据长度:8位5. 产品协议5.1 Modbus Rtu 协议5.1.1 寄存器定义表表5-1寄存器定义表5.1.2 寄存器功能定义说明1. 寄存器0-从站地址:MODBUS RTU从站地址,值1-255出厂默认22. 寄存器1-485速率:表5-2 485速率寄存器3. 寄存器2-通信校验位:表5-3通信校验位寄存器4. 寄存器3-读卡模式表5-4读卡模式寄存器*非MODBU RTU请参详配置软件使用5. 寄存器4-系统状态表5-5系统状态寄存器高8位表5-6系统状态寄存器低8位表5-7系统状态寄存器内容解释6. 寄存器5-RSSI:标签的信号强度7. 寄存器6-9 UID: 标签的ID值低位在8寄存器8. 寄存器10-13 Write UID: 标签的ID值低位在13寄存器9. 寄存器608-620 自定义内容:请参详配置软件使用5.1.3 读取UID数据例子表5-8读卡器通信格式示例EMID: 0x00 00 00 12 | 34 56 78 90数据内容: 0x12 34 56 78 90 转10进制→78187493520FDX-B:0x00 00 12 34 | 56 78 90 12数据内容: Country: 0x12 34 右移6位→0x00 48National: 0x34 56 78 90 12 与上0x3F FF FF FF FF→0x34 56 78 90 12 5.1.4 写标签数据例子将数据写入标签内(寄存器:0x0A~0X0D)表5-9读卡器通信格式示例表5.10 ISO11784/85数据结构定义①②①③④④图5.1数据样式①、63-48 bit = ISO11784/85协议配置字(若无需求可直接填0)②、47-0 bit = ISO11784/85中的数据内容③、47-38 bit = ISO11784/85中的Country内容④、37-0 bit = ISO11784/85中的National内容注:如果不需要使用IO11784/85标准,可直接填入64Bit数据。
NS+901说明书

NS 901线路保护测控装置技术说明书使用说明书V1.10南京电力自动化设备总厂南京南自科技发展有限公司2005年6月本说明书可能会被修改,请注意最新版本资料南自科技电网事业部监制第一部分技术说明书目录1 装置概述 (1)2 装置特点 (1)3 主要功能 (2)3.1 保护功能配置 (2)3.2 数据采集功能 (2)3.3 事件记录 (3)3.4 控制功能 (3)3.5 操作箱功能 (3)3.6 通信功能 (3)3.7 故障记录功能 (3)4 主要技术条件 (4)4.1 额定参数 (4)4.2 保护参数 (4)4.3 测量精度 (5)4.4 绝缘性能 (5)4.5 机械性能 (6)4.6 气候条件 (6)4.7 电磁兼容 (6)5 硬件说明 (8)5.1 机箱结构 (8)5.2 交流模件 (8)5.3 CPU模件 (8)5.4 信号出口模件 (8)5.5 电源模件 (8)5.6 显示面板 (9)6 保护功能 (10)6.1 相间过流保护 (10)6.2零序过流保护 (11)6.3 加速保护 (12)6.4 过负荷保护 (12)6.5 低频减载 (12)6.6 低压解列 (13)6.7 重合闸 (13)6.8 PT断线检测 (14)6.9 小电流接地告警或跳闸 (14)7 测量、控制以及事件记录功能 (15)7.1 测量功能 (15)7.2 控制功能 (15)7.3 事件记录功能 (15)7.4 故障录波 (16)7.5 打印设置 (16)·装置概述·装置特点·1 装置概述NS 901型数字式线路保护测控装置是在消化吸收国内外同类产品先进经验的基础上研制的基于DSP(数字信号处理器)技术的新一代保护测控产品。
装置适用于110KV及以下电压等级的线路保护、测量及控制。
既可以分散在开关柜就地安装,也可以集中组屏安装。
完善、周到的软硬件设计使装置在恶劣环境下可以长期、可靠运行;现场总线技术以及标准通信传输规约的使用,提高了自动化系统通讯的可靠性、快速性和通用性;人性化的界面设计,完善的自诊断功能,使得操作更方便、维护更简单。
北京聚英翱翔电子有限公司DAM1600E标准版继电器控制卡产品说明书
DAM1600E继电器控制卡说明书V1.1北京聚英翱翔电子有限公司2016年07月目录一、产品特点 (1)二、产品功能 (1)三、产品选型 (1)四、主要参数 (1)五、接口说明 (2)六、通讯接线说明 (2)1、RS232接线方式 (2)2、RS485级联接线方式 (3)七、输出接线说明 (3)1、继电器接线说明 (3)八、测试软件说明 (3)1、软件下载 (3)2、软件界面 (4)3、通讯测试 (4)九、参数配置 (5)1、设备地址 (5)2、波特率的读取与设置 (7)3、闪开闪断功能及设置 (7)十、开发资料说明 (8)1、通讯协议说明 (8)2、Modbus寄存器说明 (8)3、指令生成说明 (10)4、指令列表 (11)5、指令详解 (12)十一、常见问题与解决方法 (14)十二、技术支持联系方式 (14)一、产品特点●DC7-30V;●继电器输出触点隔离;●采用欧姆龙G2R-A-E继电器可更换;●通讯接口支持RS485、RS232;●通信波特率:2400,4800,9600,19200,38400(可以通过软件修改,默认9600);●通信协议:支持标准modbus RTU协议;●可以设置0-255个设备地址,可以通过软件设置;●具有闪开、闪断功能,可以在指令里边带参数、操作继电器开一段时间自动关闭;●具有频闪功能,可以控制器继电器周期性开关;●加入高频滤波器,提高产品的抗扰度,阻挡电网不干净电源对设备的影响。
二、产品功能●十六路继电器控制●支持电脑软件手动控制●支持顺序启动模式●支持流水循环模式●支持跑马循环模式三、产品选型型号modbus RS232RS485USB WiFi继电器DAM1600E-RS232+485●●●16四、主要参数参数说明触点容量16A/30VDC16A/250VAC耐久性10万次数据接口RS485、RS232额定电压DC7-30V电源指示1路红色LED指示(不通信时常亮,通信时闪烁)通讯指示与电源指示灯共用输出指示16路红色LED指示温度范围工业级,-40℃~85℃尺寸180*94*41mm重量330g默认通讯格式9600,n,8,1波特率2400,4800,9600,19200,38400软件支持配套配置软件、控制软件;支持各家组态软件;支持Labviewd等五、接口说明六、通讯接线说明1、RS232接线方式RS232接线为标准DB9母头接口,为直连线。
WXH-801A技术说明书
WXH-801A/B1微机线路保护装置技术说明书许继电气股份有限公司XJ ELECTRIC CO.,LTD.许继电气股份有限公司版权所有(Ver 1.01)本版本说明书适用于WXH-801A/B1Ver1.02版本及以上程序许继电气股份公司保留对本说明书进行修改的权利,当产品与说明书不符时,请以实际产品为准。
2007.12第一次印刷前言1应用范围WXH-801A系列保护装置为微机实现的数字式超高压线路快速保护装置,可用作220kV 及以上电压等级输电线路的主保护及后备保护。
2产品特点2.1装置系统平台●逻辑开发可视化国内首家在高压保护上实现可视化逻辑编程,保护源代码完全由软件机器人自动生成,正确率达到100%,杜绝了人为原因产生软件Bug。
所有的保护逻辑由基本的元件和组件组成。
●事故分析透明化通过分层、模块化、元件化的设计,装置内部实现了元件级、模块级、总线级三级监视点,可以监视装置内部任一个点的数据,发生事故后通过透明化事故分析工具,可以对故障进行快速准确的定位。
故障波形回放:●工程应用柔性化采用功能自描述和数据自描述技术,实现了内容可以通过描述文件以不同的形式重组,功能可以通过配置文件形式重构,解决了不同用户差异化需求和软件版本集中管理的矛盾。
2.2人机界面人性化XJ-GUI和现场调试向导的成功应用,降低了现场维护和运行人员的工作强度,使运行维护工作变得轻松。
●借助XJ-GUI界面设计工具,实现操作界面的灵活定制及人性化设计●主接线图及丰富的实时数据显示●类WINDOWS菜单,通过菜单提示,可完成装置的全部操作2.3保护性能特点●近端故障动作时间小于10ms配置快速可靠的快速距离I段保护。
●方向保护、距离保护采用变动作特性的原理保护的变动作特性,根据故障类型设置相应特性的保护,设置速动区、一般区、灵敏区,不同区域设置不同数字滤波算法、不同时延。
△U1方向保护动作区域设置距离保护动作区域设置●采用精心设计优选的数字滤波新算法,有效保证距离保护的快速动作及测量精度f/HZ设计的各种级联式的幅频特性图优选新算法的测量阻抗值●自适应的振荡判据及先进的振荡识别功能,确保距离保护在系统振荡加区外故障能可靠闭锁,而在系统未振荡时区内故障快速动作,振荡中区内故障可靠动作3专利技术●利用电流互感器二次测量电流动态补偿其传递产生的幅值和相位误差(200610017752.4) ●继电保护故障检测模块(200310110260.6)●一种正序故障分量方向和零序功率方向判别方法(200410102438.7)目录1 概述 (1)1.1 应用范围 (1)1.2 保护配置 (1)1.3 产品特点 (1)1.3.1 保护性能 (1)1.3.2 软、硬件平台 (2)1.3.3 操作界面 (2)2 技术指标 (2)2.1 基本电气参数 (2)2.1.1 额定交流数据 (2)2.1.2 额定直流数据 (2)2.1.3 打印机辅助交流电源 (2)2.1.4 功率消耗 (3)2.1.5 过载能力 (3)2.2 主要技术指标 (3)2.2.1 纵联方向 (3)2.2.2 距离保护 (3)2.2.3 零序电流方向保护 (4)2.2.4 测距部分 (4)2.2.5 综合重合闸 (4)2.2.6 记录容量及定值区容量 (4)2.2.7 对时方式 (4)2.2.8 输出触点 (4)2.2.9 绝缘性能 (5)2.2.10 冲击电压 (5)2.2.11 机械性能 (5)2.2.12 抗电气干扰性能 (5)2.3 环境条件 (6)2.4 通信接口 (6)3 保护原理介绍 (7)3.1 启动元件 (7)3.1.1 相电流突变量启动元件 (7)3.1.2 零序电流启动元件 (7)3.1.3 静稳破坏启动元件 (7)3.2 选相元件 (7)3.2.1 工作电压突变量选相 (8)3.2.2 序电流复合选相 (8)3.3 非全相运行 (9)3.3.1 非全相状态识别 (9)3.3.2 非全相运行状态下,相关保护的投退 (9)3.3.3 单相运行时切除三相 (9)3.4 纵联方向元件 (9)3.4.1 正序故障分量方向元件 (9)3.4.2 相间距离方向元件 (10)3.4.3 零序功率方向元件 (10)3.5 阶段式距离元件 (11)3.5.1 三段式接地距离 (11)3.5.2 三段式相间距离 (12)3.6 故障开放元件 (14)3.6.1 短时开放保护 (14)3.6.2 不对称故障开放元件 (14)3.6.3 对称故障开放元件 (14)3.6.4 非全相运行时的故障开放判据 (15)3.7 辅助元件 (15)3.7.1 TV断线检查 (15)3.7.2 TV反序检查 (15)3.7.3 TA反序检查 (16)3.7.4 TA断线 (16)3.8 保护逻辑框图 (17)3.8.1 纵联方向保护逻辑 (17)3.8.2 距离保护逻辑 (21)3.8.3 零序保护逻辑 (22)3.8.4 单相运行切除运行相逻辑 (23)3.8.5 跳闸逻辑 (24)3.8.6 重合闸逻辑 (25)4 装置硬件介绍 (27)4.1 装置整体结构 (27)4.2 结构与安装 (28)4.3 装置插件介绍 (29)4.3.1 交流变换插件 (30)4.3.2 CPU插件 (31)4.3.3 开入插件 (32)4.3.4 信号及出口插件 (33)4.3.5 出口插件 (34)4.3.6 通讯插件 (35)4.3.7 稳压电源插件 (36)5 定值清单及整定说明 (37)5.1 定值清单 (37)5.2 定值整定说明 (39)5.3 软压板 (42)6 订货须知 (42)WXH-801A/B1线路保护装置技术说明书1概述1.1应用范围WXH-801A系列保护装置为微机实现的数字式超高压线路快速保护装置,可用作220kV 及以上电压等级输电线路的主保护及后备保护。
胜利仪器 VICTOR 690柔性大电流钳表说明书

五.操作方法......................................................................................................................... 6 1.开、关机................................................................................................................... 6 2.电流测量................................................................................................................... 6
注意
感谢您购买了本公司的 VICTOR 690 柔性大电流钳表,为了更好地使用本产品, 请一定:
——详细阅读本用户手册。 ——遵守本手册所列出的操作注意事项。 任何情况下,使用本仪表应特别注意安全。 注意本仪表面板及背板的标贴文字及符号。 电池电压偏低,LCD 显示较暗,请更换电池。 本仪表无自动关机功能,使用后请关机。 不能用于测试高于 600V 电压线路。 仪表后盖及电池盖板没有盖好禁止使用。 仪表在使用中,机壳或测试线发生断裂而造成金属外露时,请停止使用。 请勿于高温潮湿,有结露的场所及日光直射下长时间放置和存放仪表。 仪表及柔性钳必须定期保养,保持清洁,不能用腐蚀剂和粗糙物擦拭。 避免柔性钳随意弯折,以免引起线圈断裂。 更换电池,请注意电池极性,长时间不用本仪表,请取出电池。 使用、拆卸、维修本仪表,必须由有授权资格的人员操作。 由于本仪表原因,继续使用会带来危险时,应立即停止使用,并马上封存,由 有授权资格的机构处理。 仪表及手册上的“ ”危险标志,使用者必须依照指示进行安全操作。 手册中的“ ”极其危险标志,使用者必须严格依照指示进行安全操作。
CH9715系列程控直流电子负载使用说明书

使用说明书OPERATION MANUAL CH9715系列程控直流电子负载常州市贝奇电子科技有限公司BEICH ELECTRONIC TECHNOLOGY CO.,LTD.公司声明注意事项:本说明书版权归常州市贝奇电子科技有限公司所有,贝奇电子保留所有权利。
未经贝奇电子书面同意,不得对本说明书的任何部分进行影印、复制或转译。
本说明书适用于CH9715系列程控直流电子负载本说明书包含的信息可能随时修改,恕不另行通知。
最新的说明书电子文档可以从贝奇电子官方网站下载:2015年9月……………………………………..第一版2017年9月……………………………………..第二版本说明书所描述的可能并非仪器所有内容,贝奇电子有权对本产品的性能、功能、内部结构、外观、附件、包装物等进行改进和提高而不作另行说明!由此引起的说明书与仪器不一致的困惑,可与我公司联系。
安全警告:在使用操作和维护本仪器的任何过程中,务必遵守各项安全防护措施。
如果忽视和不遵守这些安全措施及本手册中的警告,不但会影响仪器性能,更可能导致仪器的直接损坏,并可能危及人身安全。
对于不遵守这些安全防范措施而造成的后果,贝奇电子科技有限公司不承担任何后果。
触电危险操作,测试与与仪器维护时谨防触电,非专业人员请勿擅自打开机箱,专业人员如需更换保险丝或进行其它维护,务必先拔去电源插头,并在有人员陪同情况下进行。
即使已拔去电源插头,电容上电荷仍可能会有危险电压,应稍过几分钟待放电后再行操作。
请勿擅自对仪器内部电路及元件进行更换和调整!输入电源请按本仪器规定的电源参数要求使用电源,不符合规格的电源输入可能损坏本仪器。
更换保险丝请使用相同规格远离爆炸性气体环境电子仪器不可以在易燃易爆气体环境中使用,或者在含有腐蚀性气体或烟尘环境中使用,避免带来危险。
其它安全事项请不要向本仪器的测试端子以及其它输入输出端子随意施加外部电压源或电流源。
输入端切勿输入交流电压。
目录使用说明书 (1)目录 (I)第一章准备使用 (3)1.1检查装运 (3)1.2检查电源 (3)1.3安装保险丝 (3)1.4连接电源线 (3)1.5环境要求 (4)1.6启动仪器 (4)第二章概述 (5)2.1产品介绍 (5)2.2技术参数 (6)2.3前面板介绍 (7)2.4后面板介绍......................................................................................................错误!未定义书签。
智能电能表格和能耗监测系统产品选型手册簿(完整版)
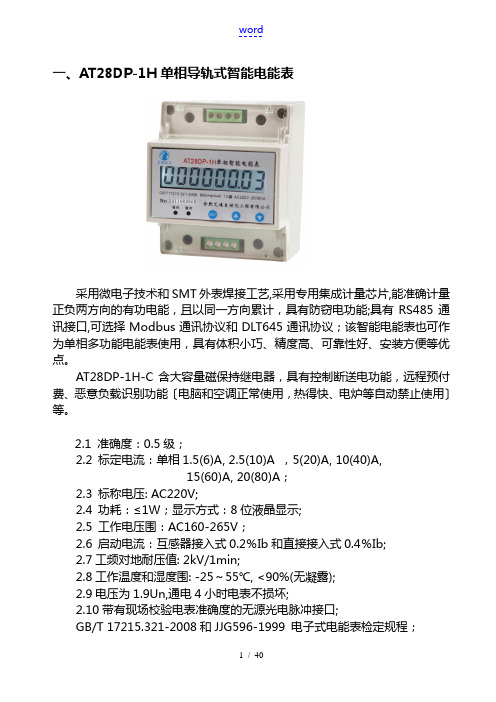
一、AT28DP-1H单相导轨式智能电能表采用微电子技术和SMT外表焊接工艺,采用专用集成计量芯片,能准确计量正负两方向的有功电能,且以同一方向累计,具有防窃电功能;具有RS485通讯接口,可选择Modbus通讯协议和DLT645通讯协议;该智能电能表也可作为单相多功能电能表使用,具有体积小巧、精度高、可靠性好、安装方便等优点。
AT28DP-1H-C含大容量磁保持继电器,具有控制断送电功能,远程预付费、恶意负载识别功能〔电脑和空调正常使用,热得快、电炉等自动禁止使用〕等。
2.1 准确度:0.5级;2.2 标定电流:单相1.5(6)A, 2.5(10)A ,5(20)A, 10(40)A,15(60)A, 20(80)A;2.3 标称电压: AC220V;2.4 功耗:≤1W;显示方式:8位液晶显示;2.5 工作电压围:AC160-265V;2.6 启动电流:互感器接入式0.2%Ib和直接接入式0.4%Ib;2.7工频对地耐压值: 2kV/1min;2.8工作温度和湿度围: -25~55℃, <90%(无凝露);2.9电压为1.9Un,通电4小时电表不损坏;2.10带有现场校验电表准确度的无源光电脉冲接口;GB/T 17215.321-2008和JJG596-1999 电子式电能表检定规程;2.12选择单相多功能时,通过“▲〞和“▼〞按键还可查看电流、电压、有功功率、无功功率、视在功率、功率因数等电参数(可选功能);2.13 一次电流80A 与以下直接接入, 80A 以上通过电流互感器接入 ; 2.14 通过电表的一次线截面积≤35mm 2。
3. 外形尺寸4. 接线图注意:如遇电流规格为1.5(6)A 需特别说明是互感器接入式或直接接入式。
3200imp/kwh (5(20)A)(20(80)A)(15(60)A)(10(40)A)(1.5(6)A)800imp/kwh6400imp/kwh 1600imp/kwh A+B- RS-485通讯接口1600imp/kwh 脉冲校验P-P+ AP28DP-1H单相智能电表单 相NL L NN'L'负载互感器接入式单 相直接接入式二、AT28DP-3H三相导轨式智能电能表具有RS485通讯接口,可选择Modbus通讯协议和DLT645通讯协议;有功和无功电能均可计量2~21次谐波含量;该智能电能表也可作为三相多功能电能表使用,具有体积小巧、精度高、可靠性好、安装方便等优点。
ARx系列空冷活动电阻电子负载MAGNALOAD产品参数说明书
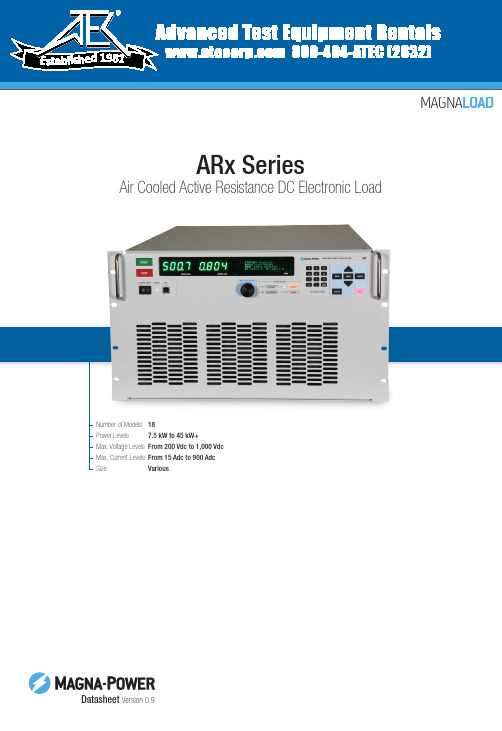
ARx SeriesAir Cooled Active Resistance DC Electronic LoadMAGNALOAD DatasheetVersion 0.91981ARx7.5-1000-15+LXIProduct SeriesMaximum Power (kW)Maximum Voltage (Vdc)Maximum Current (Adc)Integrated OptionsThere are many possible configurations for the ARx Series product. Using the following ordering guide and models chart to define the best model for your application.Page 2Magna-Power ElectronicsModelsMagnaLINK™ Distributed DSP ArchitectureMagna-Power’s MagnaLINK™ technology provides distributed Texas Instrument DSP control across power processing stages inside the MagnaLOAD DC electronic load. This technology follows a significant internal development cycle from Magna-Power to provide a unified digital control platform across its electronic loads and power supplies, featuring fully digital control loops, adjustable control gains, programmable slew rates, function generation 1, and many new advanced control technologies.Key FeaturesExtensive Programming SupportAll ALx Series MagnaLOADs come with a dedicated National Instruments LabVIEW™ driver, Interchangeable Virtual Instrument (IVI) driver, and support for a wide range of Standard Commands for Programmable Instrumentation (SCPI). These programming interfaces support full control, measurement, and monitoring of the MagnaLOAD. All of the MagnaLOAD’s available communication interfaces are supported by these drivers and command sets, including: USB, RS485, LXI TCP/IP Ethernet, and IEEE-488 GPIB.Feature Highlights• MagnaLINK™ Distributed DSP Architecture• 16-bit digital programming and monitoring resolution• Many control modes, including: voltage, current, power, resistance, rheostat • Wide voltage-current-power operating profile• Integrated front and rear full control (host) USB ports, RS485, and dual MagnaLINK™ ports, with LXI TCP/IP Ethernet and IEEE-488 GPIB available. • Digital master-slaving capability 1• Integrated arbitrary waveforms with up to 100 steps per stored function 1• Configurable external analog-digital user I/O •Designed and manufactured in the USAConfigurable External User I/OBeyond the front panel and computer controls, all MagnaLOADs come standard with a 25-pin D-Sub connector designated as the External User I/O. This connector provides: 8 Digital Outputs, 4 Digital Inputs, 4 Analog Outputs, 4 Analog Inputs.The analog-digital I/O pins are configurable, allowing the user to select which parameters they want to control and monitor. Nearly all of the MagnaLOAD’s parameters are select-able. This configurable I/O scheme reduces complexity, eases PLC integration and allows control parameters from various interfaces simultaneously. 0-10V is used for analog I/O, while and 5V is used for digital I/O; both +10V and +5V reference signals are provided.Analog Input 1Analog Input 2Analog Input 3Analog Input 4Voltage Set Point Current Set PointPower Set Point Resistance Set Point Over Voltage Trip Setting Over Current Trip Setting Over Power Trip SettingUnder Voltage Trip Setting Note: Specifications and features are subject to change at any time without notice.1Planned featured to be supported via future firmware updatePage 3Datasheet •ARx Series MagnaLOAD DC Electronic Load(illustrated)ARx Series, Rack-mountFront ViewARx Series, Rack-mountRear ViewARx Series, Rack-mountARx Series, Floor-standingFront View ARx Series, Floor-standingRear View ARx Series, Floor-standing Internal Bus Bar ConfigurationMagnaLOAD Front Panel1Start Button: Enables the DC input busStop Button: Disable the DC input bus2Voltage measurement display3Current measurement display44-line character display featuring a menusystem, operating status and modes, productmessages with diagnostic codes, resistancemeasurement display, and power measure-ment display5Control power switch, energizes the controlcircuits without engaging DC busLED indicator that the DC input is enabled6Full control (host) front panel USB port7Clean air intake, with integrated fans8Aluminium digital encoder knob for program-ming set-points910LED indicator of the MagnaLOAD’s presentregulation state, which can include: constantvoltage (CV), constant current (CC), constantpower (CP), or constant resistance (CR)11Selector buttons to choose which set-pointthe digital encoder knob and digital keypadbuttons will modify.12Menu Button: Enters the menu system on the 4-line displayBack Button: Moves back one level in the menuEnter Button: Selects the highlighted menu itemClear Button: Removes the product from a faulted stateLock Button: Locks the front panel, with password protectionPage 4Magna-Power Electronics。
IT8211 直流电子负载用户手册说明书

Digital Control Electronic loadUser ’s ManualIT8211 直流电子负载用户手册全方位电源解决方案供应商版权所有 © 艾德克斯电子有限公司声明© Itech Electronics, Co., Ltd. 2015根据国际版权法,未经 Itech Electronics, Co., Ltd. 事先允许和书面同意,不得以任何形式(包括电子存储和检索或翻译为其他国家或地区语言)复制本手册中的任何内容。
手册部件号IT8211-402194版本第1版, 2015 年 03月 28 日发布Itech Electronics, Co., Ltd. 商标声明Pentium是 Intel Corporation在美国的注册商标。
Microsoft、Visual Studio、Windows 和 MS Windows是Microsoft Corporation 在美国和 /或其他国家 /地区的商标。
担保本文档中包含的材料 “按现状 ”提供,在将来版本中如有更改,恕不另行通知。
此外,在适用法律允许的最大范围内,ITECH 不承诺与本手册及其包含的任何信息相关的任何明示或暗含的保证,包括但不限于对适销和适用于某种特定用途的暗含保证。
ITECH对提供、使用或应用本文档及其包含的任何信息所引起的错误或偶发或间接损失概不负责。
如 ITECH与用户之间存在其他书面协议含有与本文档材料中所包含条款冲突的保证条款,以其他书面协议中的条款为准。
技术许可本文档中描述的硬件和/或软件仅在得到许可的情况下提供并且只能根据许可进行使用或复制。
限制性权限声明美国政府限制性权限。
授权美国政府使用的软件和技术数据权限仅包括那些定制提供给最终用户的权限。
ITECH 在软件和技术数据中提供本定制商业许可时遵循 FAR 12.211(技术数据)和 12.212(计算机软件)以及用于国防的 DFARS252.227-7015(技术数据-商业制品)和 DFARS 227.7202-3(商业计算机软件或计算机软件文档中的权限)。
电子负载MANUAL IT8510-UM-CN[1]
![电子负载MANUAL IT8510-UM-CN[1]](https://img.taocdn.com/s3/m/bd20e51ca300a6c30c229f4c.png)
用户使用手册
直流可编程电子负载 型号 IT8510
版权归属于艾德克斯电子(南京)有限公司 Ver2.0/Jan, 2010/ IT8500-401
目录
第一章 快速入门 .................................................. 6
1.1开机自检 1.1.1介绍 1.1.2自检步骤 1.1.3如果负载不能启动
4 用户使用手册
通告
本手册的内容如有更改,恕不另行通知。 注意: 为了保证测量精度,建议温机半小时后开始操作
简介
IT8510是单输入可编程直流负载。本系列可编程直流电子负载配备有RS232通讯接口,可根据您设计和 测试的需求,提供多用途解决方案。同时ITECH电子有限公司提供PV8500监控软件,为您的使用带来 极大的方便。本系列产品具有国际先进水平的特殊功能和优点:
5.5.1编辑测试档
............................................. 30
5.5.2 快速取出测试档
............................................. 31
5.5.3自动测试
............................................. 32
艾德克斯直流可编程电子负载IT8811 IT8812指令手册说明书
- 1、下载文档前请自行甄别文档内容的完整性,平台不提供额外的编辑、内容补充、找答案等附加服务。
- 2、"仅部分预览"的文档,不可在线预览部分如存在完整性等问题,可反馈申请退款(可完整预览的文档不适用该条件!)。
- 3、如文档侵犯您的权益,请联系客服反馈,我们会尽快为您处理(人工客服工作时间:9:00-18:30)。
安全标识
在本产品外壳、用户手册所使用国际符号解释请参见下表。
3
电子电路与测控技术方案提供商
目录 前言 ..................................................................................................................................................2
2
安全须知
电子电路与测控技术方案提供商
◆ 禁止带电插拔。 ◆ 非专业人员请勿进行维修或调整。 ◆ 开机前,确保已安装了正确保险管,拆装前请断电。 ◆ 为避免产品损坏或人身伤害,请勿在易燃易爆环境下使用。 ◆ 为保证产品安全性,请勿自行安装替代零件或执行任何未经授权修改。 ◆ 为避免起火或造成永久性损坏,请确保电源输入电压不超过额定值20%。
N8091A 直流电子负载卡 硬件手册
版权所有 恩智(上海)恩智测控技术有限公司 版本 V1.00 2016-10-26
电子电路与测控技术方案提供商
前言
尊敬的用户: 首先,非常感谢您选择本公司N8091电子负载卡。本手册适用于N8091电子负载卡(下文简称N8091),
内容包括N8091接口,参数指标,使用方法等详细信息。 为保证安全、正确地使用N8091,请您在使用前详细阅读本手册,特别是安全方面注意事项。 请妥善保管本手册,以备使用过程中查阅。
保修服务
自购买日起障,本公司负责免费维修。 对于免费维修产品,用户需预付寄送到本公司维修部单程运费,回程运费由本公司承担。若产品从其它国 家返厂维修,则所有运费、关税及其它税费均由用户承担。
保证限制
本保证仅限于N8091(保险管除外)。对于因错误使用、无人管理、未经授权修改、非正常环境下使 用及不可抗力因素所造成损坏,本公司不负责免费维修,并将在维修前提交估价单。
仅作以上保证,不作其它明示或默示性保证,其中包括适销性、某些特定应用合理性 与适用性等默示保证,无论在合同中、民事过失上,或为其它方面。本公司不对任何特殊、 偶然或间接损害负责。
安全摘要
在操作与维修N8091过程中,请严格遵守以下安全须知。不遵守以下注意事项或本手册中其它章节提 示特定警告,可能会削弱本卡所提供保护功能。对于用户不遵守这些注意事项而造成后果,本公司不负任 何责任。
通告........................................................................................................................................... 2 产品保证 ........................................................................................................................... 2 保修服务 ........................................................................................................................... 2 保证限制 ........................................................................................................................... 2
1. 功能概述...................................................................................................................................5 2. 硬件接口...................................................................................................................................5
2.1. N8091 实物图...............................................................................................................5 2.2. N8091 硬件接口...........................................................................................................6 2.3. 机械尺寸.......................................................................................................................6 3. 技术指标...................................................................................................................................9 4. 使用说明.................................................................................................................................10 5. 注意事项.................................................................................................................................10 6. 版本.........................................................................................................................................10
安全摘要...................................................................................................................................2 安全须知 ........................................................................................................................... 3 安全标识 ........................................................................................................................... 3
通告
手册中包含信息仅供用户参考,如有更改,恕不另行通知。对本手册可能包含错误或由提供、执行与 使用本手册所造成损害,本公司恕不负责。
有关产品最新信息,请登录本公司网站查询。
产品保证
本公司保证N8091规格与使用特性完全达到手册中所声称各项技术指标,并对本产品所采用原材料与 制造工艺均严格把关,确保产品稳定可靠。
