delphi操作mapx部分技巧
delphi操作mapx部分技巧
Delphi中使用Mapx目录一.在地图上创建图层 (1)二.在符号图元中使用自定义位图 (1)三.屏幕坐标向地图坐标的转换 (2)四.查找某一城市 (3)五.鼠标点击选中一片区域 (3)六.从数据库绘制MapX地图 (4)七.MapX使用数据库数据添加专题图 (6)八.在mapx中画圆 (10)九.动态加载一个目录下所有图层 (11)安装好MapX后,选择Delphi的Component->Import Active菜单添加,MapInfo MapX组件。
添加完成后,在ActiveX面板上,将会出来一个TMap控件。
拖一个TMap 控件到工程中改名为MainMap,这样就产生了一个TMap的对象。
一.在地图上创建图层使用Layers属性的CreateLayer函数来创建一个图层yers.CreateLayer(Name,[FileSpec],[Position],[KeyLength],[CoordSys]);参数说明:Name:指定图层的名称FileSpec:所创建图层的路径名。
如'c:\china.tab'Position:它在图层列表中的初始位置.(其实就是在图层列表中的一个序列号)CoorSys:指定存储新图层的坐标系。
附:图层类型参数:miLayerTypeNormalmiLayerTypeRastermiLayerTypeSeamlessmiLayerTypeUnknownmiLayerTypeUserDrawmiLayerTypeDrilldownFeatureFactory对象的方法使您可以创建新的地图图元,也可通过对现有图元执行操作(例如缓冲区)来创建图元。
以下是FeatureFactory对象的方法:BufferFeaturesCombineFeaturesCreateArcCreateCircularRegionCreateEllipticalRegionCreateLineCreateRegionCreateSymbolCreateTextEraseFeatureIntersectFeaturesIntersectionPointsIntersectionTest二.在符号图元中使用自定义位图定义一个cs:CMapXStyle做为图元的样式属性设置cs:=coStyle.Create;cs.SymbolType:=miSymbolTypeBitmap;cs.SymbolBitmapName:='HOUS2-32.BMP';cs.SymbolBitmapSize:=40;注意:自定义的位图一定要放到C:\Program Files\Common Files\MapInfo Shared\MapX Common\CUSTSYMB下,这是MapInfo安装的黩认共享路径。
Delphi7的开发调试技巧及快捷键.
(转 Delphi7的开发调试技巧及快捷键Delphi 开发的调试技巧1、设置调试选项Delphi 主菜单。
【 Project 】 ->【 Options 】 , 或单击工程管理器中的【 Project Options 】按钮。
显示 Project Options,选择 Complier<1>选中 Debug Information :把调试信息嵌入到 DCU 单元文件,会加大编译后的DCU 文件,但不会影响最后生成的 exe 的大小和执行速度。
同时激活【 Search 】菜单中的【 Find Error 】命令。
当文件中包含调试信息并得到一个运行时错误 (run-time error, 记录下 Delphi 提供的 16进制地址,在【 Search 】->【 Find Error 】中输入, Delphi 将重新编译程序,并停留在产生错误的命令行。
<2>Local symbols:决定调试器能否看到在 Implementation 中定义的局部变量。
<3>Reference infoj选项 /Definition Only选项是否产生应用程序中对象标识符的引用信息。
信息和对象代码存在 dcu 文件中, 可以使用对象浏览器查看。
如果 Definition Only 选项同时选中,编译器将生成标识符定义位置的信息,能够激活对象浏览器的 Refenrence 页。
如果不选, Dcu 文件更小。
编辑器命令{$D} Debug Information{$L} Local Information{$Y} Symbol Information{$C} Assertions2、使用内部调试器<1> 命令行参数在【 Run 】->【 Parameters 】中设置<2>断点条件断点使源代码断点只有在满足某个条件时才有效。
在【 View 】->[Debug windows]->【 BreakPoints 】打开“BreakPoint List”对话框, 右击断点,从弹出菜单中选择属性。
Delphi——Mapx
delphi的一些小知识,备忘 .分类: mapx+delphi 2010-08-30 09:13 12人阅读评论(0) 收藏举报1、静待数组与动态数组动态数组名为一个指针,,是数组首地址。
静态数组名为一个变量,是数组首元素的值arr[0];larr: array[0..10] of char;larrd: array of char;静态数组取首地址可以使用@larr或者@larr[0],而动态数组可以用@larrd[0]或larrd;vara: array [1..20] of Char;b: array of char;ptr : PChar; //PChar 可以看作 ^Charbeginsetlength(b,20);fillchar(a, length(a),#0);fillchar(b, length(b),#0);ptr := 'abcdeftghijklmn';strCopy(@a, ptr);StrCopy(@b[0], ptr); //这里如果使用strCopy(@b,ptr),将报错//ptr := @a;ptr := ''; //这里对pchar类型的变量赋空字符串后,必须重新申请内存空间才能再使用strcopy 对变量进行赋值;GetMem(ptr,length(b));StrCopy(ptr, @b[0]);//这里如果写成strcopy(ptr,@b); 将无法把数组b的内容正确拷贝给ptrshowmessage(ptr);freememory(ptr);ptr := @a;Inc(ptr); // 这句等价于 C 的 ptr++;Inc(ptr, 2); //这句等价于 C 的 ptr+=2;showmessage(ptr);end;2、move、copymemoryMove和CopyMemory本来是同一个东西,参数稍变结果你就调错了还不知道。
Delphi流操作技巧总结
GlobalUnlock(hbuf);
end;
except
GlobalFree(hbuf);
raise;
end;
finally
mstream.Free;
end;
end;
---- 创建一个窗体Form1,放置三个按钮btnRead,btnInvert,btnSave和一个文件打开对话框OpenDialog1以及数据控件DataSource1,Table1,test.
---- 使用Dephi提供的Database Desktop创建一个表test,表里有一个字段域Image,数据库文件名存为test.db。在窗体上放置一个TDatabase控件dbTest,一个TTable控件Table1,一个DataSource控件DataSource1,一个TDBNavigator控件DBNavigator1。将dbTest与刚才Desktop创建的数据库相连,Table1的TableName属性设为test.db,DataSource1的DataSet属性设为Table1,DBNavigator1的DataSource属性设为DataSource1,VisibleButtons属性前四个设为TRUE。此外,将dbtest的Connected设为TRUE,Table1的Active属性设为TRUE,使得数据库一开始就处于打开状态。
---- Read,Write,Seek都是纯虚函数,提供了数据读写和定位的抽象的方法。Read方法将数据从Stream中读到Buffer缓冲区中,Write则实现相反的操作,返回值表示实际读写数据的大小。Seek提供了在Stream中移动数据指针的方法。参数Origin可以取soFromBeginning,soFromCurrent,soFromEnd 三个值,Offset是偏移量,返回值是当前Stream数据指针的位置。
delphi常用技巧
delphi常用技巧
Delphi是一种强大的编程语言,有许多有用的技巧和功能可以帮助提高开发效率。
以下是一些Delphi常用的技巧:
1. 使用快捷键:Delphi支持许多快捷键,使用这些快捷键可以快速完成常见的任务,如Ctrl+C用于复制,Ctrl+V用于粘贴等。
2. 快速查找和替换:使用Ctrl+Shift+F可以打开查找和替换对话框,输入要查找的文本,然后输入要替换的文本,最后点击“全部替换”即可。
3. 调试技巧:在调试时,可以使用断点、观察表达式、单步执行等技巧来检查程序的运行情况。
4. 自定义控件:Delphi支持自定义控件,可以创建自己的控件来满足特定的需求。
5. 使用第三方控件:Delphi有许多第三方控件可用,这些控件可以提供更多的功能和更好的用户体验。
6. 优化代码:使用一些技巧可以优化代码的运行速度和可读性,例如使用局部变量、避免不必要的对象创建等。
7. 使用异常处理:在Delphi中,可以使用异常处理来处理运行时错误和异常情况。
8. 使用多线程:Delphi支持多线程编程,可以使用多线程来提高程序的性能和响应速度。
9. 使用数据库:Delphi支持多种数据库连接方式,可以使用数据库来存储和检索数据。
10. 使用第三方库:Delphi有许多第三方库可用,这些库可以提供更多的功能和更好的性能。
希望这些技巧可以帮助你更好地使用Delphi进行开发。
Delphi操作XML
Delphi操作XMLDelphi操作XMLDelphi操作XMl,只要使用 NativeXml。
我是用的版本是4.02。
NativeXML的使用方法比较简单,但是功能很强大。
XE2的话,要在simdesign.inc后面加上:// Delphi XE2 / 16{$ifdef VER230}{$define D7UP}{$define D10UP}{$define D15UP}{$endif}一、使用1) Copy the NativeXml files from the NativeXml directory into your project folder. Copy additionalfiles in the General directory to your project folder or some appropriate general folder you want.2) Include the clause "uses NativeXml" in your unit.If you want to use NativeXml in all your projects, you can also add the NativeXml folder to your library path.最简单的方法是将General 下的文件和 nativexml 下的文件复制到一个目录下,然后加入到 library路径,这样以后用到就不用拷来拷去了。
在(实现)部分 uses NativeXml; //必须的。
以下代码选自万一的博客:uses NativeXml; //!const xmlFile = 'C:\Temp ml_test_files\basic.xml'; //测试文件{原样打开}procedure TForm1.FormCreate(Sender: TObject);beginMemo1.Lines.LoadFromFile(xmlFile);end;{使用 NativeXml 打开}procedure TForm1.Button1Click(Sender: TObject); varxml: TNativeXml;beginxml := TNativeXml.Create(nil);xml.LoadFromFile(xmlFile);Memo1.Text := xml.WriteToString;xml.Free;end;{使用缩进}procedure TForm1.Button2Click(Sender: TObject);varxml: TNativeXml;beginxml := TNativeXml.Create(nil);xml.LoadFromFile(xmlFile);xml.XmlFormat := xfReadable; //格式枚举:xfCompact(压缩)、xfReadable(缩进)、xfPreserve(好像暂未处理)Memo1.Text := xml.WriteToString;xml.Free;end;{指定缩进文本}procedure TForm1.Button3Click(Sender: TObject);varxml: TNativeXml;beginxml := TNativeXml.Create(nil);xml.LoadFromFile(xmlFile);xml.IndentString := ' '; //IndentString 属性的默认值是 #9 xml.XmlFormat := xfReadable;Memo1.Text := xml.WriteToString;xml.Free;end;二、NativeXML对象的创建1、 XML:=TNativeXML.Create();//aowner可以为nil,可以是Self(这样可以随着宿主的释放而释放)2、xml := TNativeXml.CreateEx(False, //是否建立 Declaration 对象, 如:VersionString//显示XML 版本;EncodingString //显示XML 编码True, //是否建立跟节点nil //指定属主);3、{使用CreateName 建立可直接指定根节点的名称} xml:=TNativeXml.CreateName('MyRoot');4、创那个键之后可以{使用 New 方法清空并重新构建}procedure TForm1.Button4Click(Sender: TObject);varxml: TNativeXml;beginxml := TNativeXml.Create(nil);xml.LoadFromFile(xmlFile);ShowMessage(xml.WriteToString);xml.New; // XML文件清空了相当于 xml.Clear;。
基于DELPHI与MAPX控件的雷击监测软件系统的开发
基于DELPHI与MAPX控件的雷击监测软件系统的开发使用Delphi开发环境,调用Mapx组件进行地理信息系统GIS开发,解决了当某地发生雷击时,在地图中以图示的形式,对发生雷击的地点进行报警显示的问题。
在文章中将详细介绍在Delphi开发环境中使用MapX控件引入地图、GPS坐标数据绑定以及闪烁报警图标创建的方法。
标签:雷击监测系统;雷击;Delphi;MapX;报警引言随着社会和经济的发展,雷电灾害造成的经济损失和社会影响越来越大,研究雷电发生发展的分布特征,实现雷电灾害可视化分析,对减少雷电造成的损失具有十分重要的作用。
为了满足雷击地图定位的要求,创建了“南通雷击监测软件系统”。
它实现了雷击地点的定位,在地图相应的位置显示监测点的图标以及报警信息。
1 系统的流程本系统接收来自于南通市内各个监测点发送的数据,分离出雷击数据与GPS 坐标。
将接收到的GPS坐标数据存入对应的表以及相应的记录中,为GPS坐标数据绑定做准备;接收到的雷击数据存入“雷击记录”表中,用于为显示当前监测地点的详细雷击数据做准备,并对各个监测点的发生的雷击数据进行记录。
2 电子地图导入在本系统中所使用的地图是使用MapInfo创建的,其地图文件是一个扩展名为GST的文件,这就是我们须要加载的地图文件。
本系统在启动时加载地图,并根据指定的初始坐标以及显示范围显示地图,如图1所示。
3.4 设置标记图元样式在图层与GPS坐标绑定后,在地图中自动产生了标记图元。
当然,产生的标记图元样式是默认了,接下来需要做的就是设置标记图元的样式。
在本系统中将标记图元的样式指定为位图,位图的选择需要指定位图的名称。
4 更新坐标数据为了防止同一名称的监测点的位置发生变化,对该监测点的历史位置与当前位置进行对比,如果不同则更新地理位置数据并移动相应标记图元的位置。
5 雷击报警当某监测点发生雷击时,以在地图中显示闪烁的标记图元作为报警的图标。
用户单击闪烁的图标,可以显示详细的雷击信息。
delphixml操作

Delphi中使用XML绑定来操作XML文件XML文件从前几年一出现,就非常流行,很多软件中都支持把数据保存为XML格式。
XML之所以这么受欢迎,因为它是一个非常简单的并且又是结构化的ASCII文本语言。
XML文件的这种特性,使得任何人和任何程序都能很方便的读懂它。
不过XML文件也流行了这么多年了,我却一直没有使用过它,因为:简单一些的数据,我习惯使用ini或自定义一种格式来保存;而复杂或者大量的数据,显然更适合使用数据库来保存。
直到最近写一个程序时,才不得不用到它。
下面就是我写程序时,用到的一些XML文件的编程方法我用的Delphi还是几年前的Delphi6,刚好Delphi的这个版本开始支持XML文件。
我使用的是Delphi6中的XML绑定来操作XML文件。
首先,我要操作的XML为stock.xml,它是一个关于股票方面的文件,内容如下:<?xml version="1.0" encoding="gb2312"?><StockList><StockItem Name="股票名称1" Code="股票代码1">股票例子1</StockItem></StockList>在主菜单上选择File New->Other,然后在仓库中选择XML Data Binding,会启动Delphi的XML绑定向导。
这个向导有三页,在第一页中指定stock.xml第二页显示了一些树结构和节点数据类型,这里可以修改编码(比如修改前缀)和数据类型映射第三页显示生成的类和相应接口,Delphi会将这些类和接口生成一个.pas文件,保存它,例如我保存为stock.pas绑定到这里就完成了,下面就是如何使用Delphi生成的这些类和接口了,也很简单!在主窗口的uses段中加入stock.pas,并放上一个TXMLDocument控件(在internet页)XMLDocument1,将它的FileName指定为stock.xml下面的代码取得xml第一只股票的信息:varStockList:IXMLStockListType;StockItem:IXMLStockItemType;beginStockList:=GetStockList(XMLDocument1);StockItem:=StockList.Get_StockItem(0);Memo1.Lines.Add('Name:'+);Memo1.Lines.Add('Code:'+StockItem.Code);Memo1.Lines.Add('Stock:'+StockItem.Text);end;增加一只股票的信息:varStockList:IXMLStockListType;beginStockList:=GetStockList(XMLDocument1);with StockList.Add dobeginName:='股票名称2';Code:='股票代码2';Text:='股票例子2';end;XMLDocument1.SaveToFile('stock.xml');//保存更改end;删除最后一只股票的信息:varStockList:IXMLStockListType;beginStockList:=GetStockList(XMLDocument1);StockList.Delete(StockList.Count-1);XMLDocument1.SaveToFile('stock.xml');//保存更改end;改变第一只股票的信息:varStockList:IXMLStockListType;StockItem:IXMLStockItemType;beginStockList:=GetStockList(XMLDocument1);StockItem:=StockList.Get_StockItem(0);:=+'A';StockItem.Code:=StockItem.Code+'A';StockItem.Text:=StockItem.Text+'A';XMLDocument1.SaveToFile('stock.xml');end;建立一个新的xml文件,在其中增加一只股票的信息,并保存为stock2.xmlvarStockList:IXMLStockListType;beginStockList:=GetStockList(XMLDocument1);with StockList.Add dobeginName:='股票名称1';Code:='股票代码1';Text:='股票例子1';end;XMLDocument1.Encoding:='gb2312';XMLDocument1.SaveToFile('stock2.xml');end;这就是Delphi为我们提供的XML数据绑定功能,用它来操作XML文件很方便,也很强大。
基于Mapx技术-代码运行说明
《基于Mapx技术的地理信息系统开发及项目实例代码运行说明一:MapX4.5的和升级程序的安装1:首先安装MapX4.5。
2:复制附带的mapx40.ocx到mapx的安装目录下覆盖原文件(一般在C:\Program Files\Common Files\MapInfo Shared\MapX Common下)。
3:运行升级程序进行升级(要用英文版升级补丁)。
二:MapX在Delphi中的注册使用MapX安装后,是以ActiveX控件的形式与开发环境进行集成的,这就需要在开发环境中进行注册引入。
在Delphi中的调用过程是这样的,首先在IDE界面中选择Component,在下拉菜单中选择Import ActiveX Control,如图1所示。
图1 在Delphi中的引入ActiveX组件然后选择MapX组件,本书中使用4.5版本,如图2所示。
图2 在Delphi中的引入MapX组件引入MapX组件后,在Delphi的IDE界面“ActiveX”控件栏中出现MapX控件标签,说明注册成功,在IDE环境中注册成功后,就可以与Delphi的其它控件一样,正常使用了,如图3所示。
图3 注册成功后在Delphi中的MapX控件三:地图定位部分需要说明的是,在地图显示项目LMSTaskPro.dpr中用到的routine.pas单元,需要在运行期进行绑定。
这就需要在项目的Directories/Conditionals标签页中设定。
在Delphi中打开项目LMSTaskPro.dpr,然后打开Project菜单,选择options选项,如图4所示。
图4 在Delphi中的设置项目属性然后在出现的界面中选择Directories/Conditionals标签页,如图5所示。
图5 选择Directories/Conditionals标签页单击Search path一栏后面,红色椭圆框住的按钮,进入选择界面,如图6所示。
delphi十个小技巧
delphi十个小技巧1、判断一个字符串是否包含于另外一个字符串的方法例如:if pos('ab','abcd')<>0 thenmessagedlg('ab是包含于abcd',mtConfirmation,[mbYes, mbNo],0);pos(obj,target) 在target字符串中找出第一个出现obj的第一个字符位置,如果找不到,返回0.2、如何使窗口全屏,类似游戏一样,而不是窗口的最大化!(1)BorderStyle 为 bsNone(2)Windowstate 为 wsMaximized(3) 退出时可加一个按钮之类的,写上 close 即可退出。
3、数字格式化输出format('%8.2f',[123.456]),返回字符串'123.46'。
4、播放一个wav文件usemmsystem;SndPlaySound('hello.wav',SND_FILENAME or SND_SYNC);5、InputBox,InputQuery和ShowMessage函数的威力usesdialogs;vars,s1:string;b:boolean;begins:=trim(Inputbox('NewPassword','Password','masterkey'));b:=s<>'';s1:=s;if b then b:=InputQuery('ConfirmPassword','Password',s1);if not b or (s1<>s) thenShowMessage('Password Failed');end;6、几个有关子目录的操作的过程MkDir(str); ChDir(str); GetDir(DriveID,str); SetCurrentDir(str);IOResult --上面几个过程调用成功即返回0值7、将一个可视控件变成图形类型例如将一个带背景的LABEL变成一个TIMAGE图片类型,可以这样做:image1.width:=label1.width;image1.height:=label1.height;label1.perform(WM_PAINT,image1.Canvas.Handle,0);8、如何得到字符的ASCII值得到字符的ASCII值,可以用如下语句:var: a:integer;string1:string;beginstring1:='ABC';a:=byte(string[1]); {此时就得到'A'的ASCII值}end;9、动态更新DBGrid的颜色例如,如果一个城市的人口大于200万,我们就让它显示为蓝色。
mapx学习笔记资料手册

MAPX学习使用笔记资料Mapxtreme 下面应该有三种图层一种是固定图层当你新建一个固定图层的时候会生成*.tab等文件一种是临时图层不生成*.tab文件一种是用户绘制图层用户自己使用CDC(Graphics)进行绘图如果你想对多边形进行编辑至少你要响应Mapxtreme的鼠标事件通过鼠标事件来确定当前用户在进行何种操作。
一般的过程是这样的:1.新建一个图层(建议临时图层或者用户绘制图层)2.根据多边形的点的位置绘制图元或者用CDC绘制过变形同时确定各个点在Mapxtreme地图窗口的位置建立各个点的鼠标响应区域3.通过鼠标落下的时候通过各个点的响应区域判断那个点被选中鼠标移动和抬起时要做响应的处理来改变多边形选中点的位置重重新给多边形的点赋值如果使用临时图层需要对临时图层里面的多边形图元的点参数进行更改如果是CDC绘图的话只要更改CDC绘图即可整个过程中需要考虑到地图坐标与Mapxtreme窗口坐标之间的转化。
{通过对象编辑工具,用户可以在地图图层中创建和修改图元。
有四种标准的对象创建工具:“添加点”、“添加线条”、“添加折线”和“添加区域”。
注:若要设置所使用的工具,请设置Map.CurrentTool 属性。
对象编辑工具将新图元添加到在Layers.InsertionLayer 属性中指定的任何图层中。
只能有一个插入图层,并且默认情况下是没有插入图层。
在没有任何插入图层时将当前工具设置为对象创建工具将导致错误。
MapX 还支持对现有地图图元的修改。
若要编辑图元,则对于您要更改的任何图层,必须将Layer.Editable 属性设置为真。
然后,可以使用内置的“箭头”工具,在当前选择中移动图元或调整图元的大小。
若要移动选定图元,只需单击并在选}lyrnew:CMapxLayer;ds: CMapxDataset;rvs: CMapxRowvalues;rv: CMapxRowvalue;ptNew: CMapXpoint;ftrNew: CmapXFeature;beginlyrNew := yers.item(1);ds := Map1.Datasets.Add(miDataSetLayer, lyrNew,emptyparam,emptyparam,emptyparam,emptypara m,emptyparam,emptyparam);//rvs := ds.Rowvalues[1].Clone ;rv:= CoRowvalue.Create;rvs:=CoRowvalues.Create;rv.Dataset:=ds;rv.Field:=ds.Fields.Item(1); //假设mi表有两个字段,填充之rv.value :='item1';rvs.Add(rv);rv.Field:=ds.Fields.Item(2);rv.value :='item2';rvs.Add(rv);ptNew:=CoPoint.Create;ptNew.Set_(map1.centerx, map1.centery);ftrNew := map1.FeatureFactory .CreateSymbol(ptNew,emptyparam);ftrNew := lyrNew.AddFeature(ftrNew, rvs); // 图元+属性,即feature+Rowvalues//ftrNew = lyrNew.AddFeature(ftrNew);//ftrNew.Update (True, rvs);end.作者/收集者:zlx开发环境:Delphi + MapX代码:MapX图元分三种类型:1、线(Line),即miFeatureTypeLine2、区域(Region),即miFeatureTypeRegion3、点符号(Symbol),即miFeatureTypeSymbol加入一个时钟控件,并在时钟控件中实现以下代码:procedure TMapFrm.tmFlashSelectTimer(Sender: TObject);varft: CMapXFindFeature;lyr: CMapXLayer;bExist: Boolean;i: Integer;str: String;ds: CMapXDataset;beginbExist := False;for i := 1 to yers.Count dobeginif yers.Item[i].Name = m_strSelLyr thenbeginbExist := True;break;end;end;if not bExist thenbegintmFlashSelect.Enabled := False;MsgFrm := TMsgFrm.Create(Self);MsgFrm.m_strMsg := Format('图层[%s]信息不存在!',[m_strSelLyr]);MsgFrm.ShowModal;MsgFrm.Free;Exit;end;lyr := yers._Item(m_strSelLyr);ds := mapCity.Datasets.Add(miDataSetLayer, lyr ,EmptyParam, EmptyParam, EmptyParam, EmptyPa ram,EmptyParam, EmptyParam);lyr.Find.FindDataset := ds;lyr.Find.FindField := ds.Fields.Item[1];str := Format('%d',[m_nSelID]);ft := lyr.Find.Search(str,EmptyParam);if ft.FindRC mod 10 <> 1 thenbegintmFlashSelect.Enabled := False;MsgFrm := TMsgFrm.Create(Self);MsgFrm.m_strMsg := Format('单位点[%s]信息不存在!',[m_strCorpName]);MsgFrm.ShowModal;MsgFrm.Free;Exit;end;case ft.type_ ofmiFeatureTypeLine:beginif ft.Style.LineColor = miColorWhite then ft.Style.LineColor := miColorRedelseft.Style.LineColor := miColorWhite;end;miFeatureTypeRegion:beginif ft.Style.RegionColor = miColorGreen then ft.Style.RegionColor := miColorRedelseft.Style.RegionColor := miColorGreen;end;miFeatureTypeSymbol:beginif not m_bFlashSel thenlyr.Selection.Replace(ft)elselyr.Selection.ClearSelection;m_bFlashSel := not m_bFlashSel;end;end;ft.Update(EmptyParam, EmptyParam);if not m_bCenter thenbeginm_bCenter := True;mapCity.CenterX := ft.CenterX;mapCity.CenterY := ft.CenterY;mapCity.Refresh;end;end;我这里是把选中的图元实现闪烁,并把图元居中实现图元闪烁的另一个方法:假设图元原大小是20,改变后大小是15if ft.Style.SymbolBitmapSize=20 thenft.Style.SymbolBitmapSize:=15elseft.Style.SymbolBitmapSize:=20;ft.Update(EmptyParam, EmptyParam);ft是symbol类型的代码名称:画多边形、直线1,画多边形,画线procedure TForm1.Map1PolyToolUsed(Sender: TObject; ToolNum: Smallint; Flags: I nteger; const Points: IDispatch;bShift, bCtrl: WordBool; var EnableDefault: WordBool);varStyle: CMapXStyle;f: CMapXFeature;begincase Flags ofmiPolyToolBegin: ;{ 某些用户开始使用 PolyTool.. }miPolyToolEnd:{ 用户通过双击完成 PolyTool 的使用 }if ToolNum = MY_POLYGON_TOOL thenbegin{ 它们使用 MY_POLYGON_TOOL!制作新的区域图元并将其添加到第一个图层 }Style := Map1.DefaultStyle.Clone;Style.RegionPattern := miPatternSolid;Style.RegionColor := 255;Style.RegionBorderColor := 0;Style.RegionBorderWidth := 2;Style.RegionBorderStyle := 1;{ 使用由事件为我提供的点。
delphi操作xml学习笔记之三进阶必读
delphi操作xml学习笔记之三进阶必读作者: cactus123456标题: delphi操作xml学习笔记之三进阶必读关键字: xpath分类: 个人专区密级: 公开学会简单读写xml之后,我想大多数应用都不会停留在这一步,如果想进一步操作,就要熟悉xpath,XML 路径语言。
它是添加,删除,查询等进一步操作xml所必需知道的。
关于xpath 1.0的详细介绍,参见XPath 2.0 简介,参见/china/MSDN/library/data/xml/Thing stoKnowandAvoidWhenQueryingXMLDocumentswithXpath.msp x要点必读:2.5 缩简句法这是一些使用缩简句法的地址路径例子:para 选择上下文节点的 para 元素孩子* 选择上下文节点的所有的元素孩子text() 选择上下文节点的所有的正文节点孩子@name 选择上下文节点的 name 属性@* 选择上下文节点的所有的属性para[1] 选择上下文节点的第一个 para 孩子para[last()] 选择上下文节点的最后一个 para 孩子*/para 选择上下文节点的所有的 para 孙子/doc/chapter[5]/section[2] 选择doc的第五个 chapter 的第二个 sectionchapter//para 选择上下文节点的 chapter 元素孩子的所有 para 元素子孙//para 选择文档根的所有的 para 子孙,也就是选择上下文节点所在的文档中所有的 para 元素//olist/item 选择上下文节点所在的文档中所有的以olist 为父的item 元素. 选择上下文节点.//para 选择上下文节点的 para 元素子孙.. 选择上下文节点的父../@lang 选择上下文节点的父的 lang 属性para[@type="warning"] 选择的上下文节点的所有的有属性type 且值为 warning 的 para 孩子para[@type="warning"][5] 选择的上下文节点的所有的有属性type 且值为 warning 的 para 孩子中的第五个para[5][@type="warning"] 选择的上下文节点的第五个 para 孩子如果该节点有属性 type 且值为 warning 的话chapter[title="Introduction"] 选择上下文节点的chapter 孩子如果它有一个或多个 title 孩子且字串值为 Introductionchpater[title] 选择的上下文节点中有一个或一个以上 title 孩子的chpater 孩子employee[@secretary and @assistant] 选择上下文节点的所有既有 secretary 属性又有 assistant 属性的 employee 孩子最重要的缩写是 child:: 能从地点步进省略掉。
Mapx 入门教程
Mapx 入门教程MapX入门MapInfo MapX是一个用来做地图化工作的OCX控件,它可以很容易地在您的应用程序中加入强大的制图功能。
它可以把您的数据用地图的形式显示出来,更易于理解。
地图形式可以比简单的图表、图形提供更多的信息,而且描述地图比描述数据表更加简单迅速。
本章主要对mapx的安装和在编程语言中的使用进行讲解。
MapX是一个提供给应用程序开发人员的工具。
它提供了一个最简单和最节约成本的方法,用来将地图化功能嵌入到新的和现有的应用中。
MapX是一个OCX组件,可以被快速集成到使用Visual Basic、PowerBuilder、Delphi、Visual C++或其他面向对象的语言的客户端应用程序以及使用Lotus Script的Lotus Notes (v4.5)中。
开发人员可以在他们熟悉的环境中工作,最终用户可以通过他们熟悉的应用程序来访问地图数据。
通过MapX,可以完全按照您的意愿在应用程序中加入强大的制图功能。
您可以按点、按专题渲染区域、按饼图或直方图等等来显示数据。
启用MapX的分析功能,可以分组和组织数据、执行搜索或在一个指定的半径、矩形区域或指定的点的周围选择地图图元。
例如,MapX能够显示哪一分店最接近您最大的客户,可以计算客户和商店之间的距离;还可以显示去年花销最大的客户;并按销售额给表示商店的符号进行颜色编码。
所有这些结合在一起就是您的数据在地图上的直观显示。
MapX不仅仅是一个“地图浏览器”。
通过MapX,可以分析并直观地显示业务数据,创建或编辑地图图元,并按地理位置显示数据结果。
MapX的主要功能如下:∙专题制图—使用专题制图显现数据。
联合数据和地图中的每个图元,并在地图中用颜色编码(或其他样式)来表示数据。
可使用六种不同的样式来观察数据(色彩范围、点密度、独立值、等级符号、饼图、直方图)。
∙逐层细化制图—可以通过简单的定点和单击来浏览数据,在OLAP/DSS环境下,可以允许用户通过定点和单击逐层细化地图的某个区域。
在delphi中使用xml文档
读写XML文档
l 读取XML文档
通常情况下不通过直接使用TXMLDocument对象来进行XML文件的读取,而是使用XMLDoc单元中提供的几个有用的函数来读取XML文档,这些函数包括:
function LoadXMLDocument(const FileName: DOMString): IXMLDocument;
published
property Custom;
property Style;
property StyleRule;
property Caption;
property XMLBroker;
property XMLUseParent;
l XMLDoc――是对XMLIntf中所定义接口的Borland实现;
l Xmldom――定义了DOM(文档对象模型)接口,这里对DOM接口进行了Borland的实现;
l Msxmldom――实现微软对Xmldom中定义的接口的实现,主要调用微软的COM对象来实现,对Xmldom中定义接口的封装;
2005-12-29 13:44:23 Delphi 对XML的支持---TXMLDocument类
Delphi7 支持对XML文档的操作,可以通过TXMLDocument类来实现对XML文档的读写。可以利用TXMLDocument把XML文档读到内存中,从而可以进行编辑、保存操作。TXMLDocument类是通过DOM(文档对象模型)接口来访问XML文档中的各个元素的。对于DOM接口的实现有多种方式,Delphi支持的方式有:1)微软的MSXML SDK,这种方式是通过COM对象来实现;2) Apache 的Xerces的实现方式;3)另外一种是开源OpenXML实现方式。对于不同的接口实现方式可以通过设定TXMLDocument的DOMVender来进行控制。
Delphi实用技巧经验(图文)
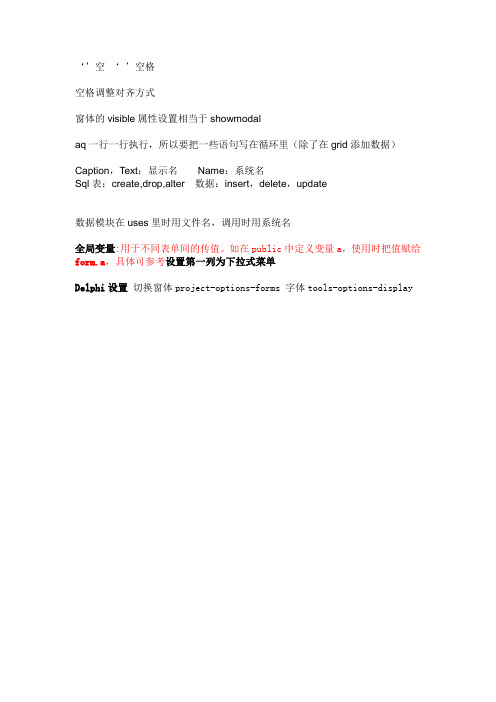
‘’空‘’空格空格调整对齐方式窗体的visible属性设置相当于showmodalaq一行一行执行,所以要把一些语句写在循环里(除了在grid添加数据)Caption,Text:显示名Name:系统名Sql表:create,drop,alter 数据:insert,delete,update数据模块在uses里时用文件名,调用时用系统名全局变量:用于不同表单间的传值。
如在public中定义变量a,使用时把值赋给form.a,具体可参考设置第一列为下拉式菜单Delphi设置切换窗体project-options-forms 字体tools-options-display问题处理属性栏消失按F11Image提示“unknown picture file extension(.jpg) ”在uses中加Jpeg重建某个窗体(如unit2):新建unit1unit2,退出再重建,使之产生dcu文件,再将这三个文件复制到所需目录下,同时删除history 文件夹DBGrid某列的小数位数(at默认会去掉末尾的0,如1.00->1)TFloatField(dbGrid1.Columns[2].Field).DisplayFormat := '0.00'; 函数定位posex(str1, str2,[n]) 在str1在str2从n的位置开始的位置,默认从1开始,输出int类型,必须在uses中加入StrUtils posex('b','abcabcabc',3)=5复制copy(str,2,3),输入输出都是str,如copy(inttostr(1234),2,2)=23长度length(str) 输出int重复dupestring(chr(9),10) 将Tab重复10次,必须在uses中加入StrUtils左取leftstr(str,2),rightstr(str,2),必须在uses中加入StrUtils保留小数位数(2位),会四舍五入FormatFloat('0.00',1.111),str类型格式小数小数定义成real,转换floattoint,inttofloat;floattostr ,strtofloat Asfloat 验证trystrtofloat(同理trystrtoint)Vars: string;x:double;begins:='123.45x';if not trystrtofloat(s,x)then showmessage('数据类型转换出错');end保留小数位数(2位),会四舍五入FormatFloat('0.00',1.111),str类型DBGrid某列的小数位数(默认会去掉末尾的0,如1.00->1,下面语句只改变DBGrid显示格式,若从at取出数据给edit,显示的还是去0,但是sql表中定义成money类型而delphi中提交如1,则sql表中自动转换为 1.00)TFloatField(dbGrid1.Columns[2].Field).DisplayFormat := '0.00';日期定义成date1:TDateTime,转换用datetostr, strtodate [ if not TryStrToDate(str,date1) then...] AsDateTime常见键值vbKeyBack 8 BACKSPACE 键vbKeyTab 9 TAB 键vbKeyReturn 13 ENTER 键警告窗口application.MessageBox('输入内容','标题 ', MB_ICONEXCLAMATION);1.指定讯息视窗上的图示1.1 MB_ICONEXCLAMATION 或 MB_ICONWARNING出现「黄三角形内有一个惊叹号」图示1.2 MB_ICONINFORMATION 或 MB_ICONASTERISK出现「白色椭圆内有一个蓝色小写 i」图示1.3 MB_ICONQUESTION出现「问号」图示1.4 MB_ICONSTOP 或 MB_ICONERROR 或 MB_ICONHAND出现「红色X」图示2.指定讯息视窗出现的按钮2.1 MB_ABORTRETRYIGNORE出现「Abort」「Retry」「Ignore」三个按钮2.2 MB_OK出现「Ok」按钮,为预设值。
delphi编程技巧与实例精解
一、概述Delphi是一种基于Pascal语言的集成开发环境,它提供了丰富的工具和功能,使得程序员可以轻松进行Windows应用程序开发。
在Delphi编程中,掌握一些技巧和实例是非常重要的,可以帮助程序员提高开发效率,降低错误率,提升编程水平。
本文将对Delphi编程技巧和实例进行精解,希望能帮助读者更好地掌握这门技术。
二、Delphi编程技巧1. 使用正确的数据类型在Delphi编程中,使用正确的数据类型是非常重要的。
不同的数据类型有不同的大小和范围,选择合适的数据类型可以节省内存空间并提高程序的运行效率。
如果需要存储一个整数,应该选择合适大小的整型而不是使用大整数型,以避免浪费内存空间。
2. 合理使用循环结构循环结构是程序中常用的控制结构之一,合理使用循环结构可以简化程序逻辑,提高代码的可读性。
在Delphi中,有多种循环结构可供选择,如while循环、for循环和repeat-until循环,程序员应根据具体情况选择合适的循环结构。
3. 异常处理在编写程序时,应该考虑到各种异常情况,并做好相应的处理。
Delphi提供了丰富的异常处理机制,程序员可以自定义异常类,并使用try-except结构捕获异常,从而保证程序的稳定性和健壮性。
4. 使用面向对象编程面向对象编程是一种重要的编程范式,它能够提高程序的复用性和可维护性。
在Delphi中,使用面向对象编程可以更好地组织和管理代码,提高编程效率。
5. 性能优化在编写程序时,应该考虑程序的性能问题,并采取相应措施进行优化。
Delphi提供了丰富的性能优化工具和技术,程序员可以通过分析程序的性能瓶颈,改进算法和数据结构,提高程序的性能。
三、Delphi编程实例1. 界面设计界面设计是Delphi编程中的一个重要环节,一个美观、简洁的界面可以提升用户体验。
程序员可以使用Delphi提供的界面设计工具,如VCL控件和FireMonkey框架,快速实现各种界面效果。
Delphi使用技巧四则
Delphi使用技巧四则在Delphi的可视化设计界面中,使用最频繁的地方要数位于屏幕左上角的加速按钮栏(Speedbar) 了。
在实践过程中,笔者无意中发现了Speedbar的定制方法,这在我用过的四本Delphi参考书中均未提及到。
步骤如下:右键点击Speedbar,在弹出菜单中选Propertie s,这时会出现个名为Speedbar Editor 的对话框。
假设想要增设项"语法检查"的功能,可在左边Categories列表框中选Project,再把右侧的Syntax Chec k医l标拖放到Speedbar的合适的位置上,这项功能就已经加上了。
如果speedbar上没有多余的空间来容纳新的按钮,可将鼠标停在speedbar右框处,变为双向箭头的形状时,向右拖动段距离,就可腾出空间。
如想删除speedbar上的某个按钮,可简单地把它拖出speedbar的范围,就能删除。
操作十分方便。
建议把Syntax Chec k、Project Options(工程选项)、WindowsApi Help加到Speedbar中,可以提高开发效率。
二、设计For m时的快捷键使用快捷键可以加快设计速度。
下面列出的快捷键,可根据实际情况,有选择地熟练掌握。
Del :删除所选组件:Esc :选择当前组件的容器(通常是Panel,Group或Form);Fll:在Form或Unit和对象检查器之间切换:F12 :在Form和代码编辑器问切换:Ctrl+F12 :显示"查看Uni t"对话框:Shift+F12:显示"查看Form" 对话框:TAB :下个组件!Shift+TAB:上个组件! 方向键:选中此方向上最近的组件! Ctrl+方向键:将所选组件移动个点!Shift+方向键.将所选组件改变一个点的大小!Ctr1+Shift+方向键·将所选组件移动个格!Shift+click:按住Shift键再用鼠标点击组件,可以选择多个组件。
Delphi 6 中XML Mapper的使用
Delphi 6 中XML Mapper的使用Delphi 6自带了一个工具,XML Mapper,它能够把XML文件转换为可供ClientDataSet 使用的DataPackage。
这为利用xml文件存储数据用标准的数据库控件实现跨平台、多层结构数据库访问提供了基石。
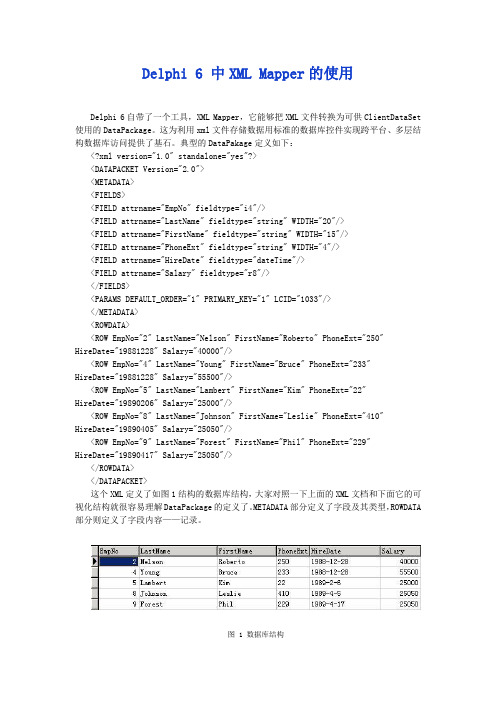
典型的DataPakage定义如下:<?xml version="1.0" standalone="yes"?><DATAPACKET Version="2.0"><METADATA><FIELDS><FIELD attrname="EmpNo" fieldtype="i4"/><FIELD attrname="LastName" fieldtype="string" WIDTH="20"/><FIELD attrname="FirstName" fieldtype="string" WIDTH="15"/><FIELD attrname="PhoneExt" fieldtype="string" WIDTH="4"/><FIELD attrname="HireDate" fieldtype="dateTime"/><FIELD attrname="Salary" fieldtype="r8"/></FIELDS><PARAMS DEFAULT_ORDER="1" PRIMARY_KEY="1" LCID="1033"/></METADATA><ROWDATA><ROW EmpNo="2" LastName="Nelson" FirstName="Roberto" PhoneExt="250" HireDate="19881228" Salary="40000"/><ROW EmpNo="4" LastName="Young" FirstName="Bruce" PhoneExt="233"HireDate="19881228" Salary="55500"/><ROW EmpNo="5" LastName="Lambert" FirstName="Kim" PhoneExt="22"HireDate="19890206" Salary="25000"/><ROW EmpNo="8" LastName="Johnson" FirstName="Leslie" PhoneExt="410" HireDate="19890405" Salary="25050"/><ROW EmpNo="9" LastName="Forest" FirstName="Phil" PhoneExt="229"HireDate="19890417" Salary="25050"/></ROWDATA></DATAPACKET>这个XML定义了如图1结构的数据库结构,大家对照一下上面的XML文档和下面它的可视化结构就很容易理解DataPackage的定义了。
MapX在Delphi中的简单应用
MapX在Delphi中的简单应用
胥广明;徐晓娟
【期刊名称】《辽宁大学学报(自然科学版)》
【年(卷),期】2004(031)004
【摘要】针对多数地理信息系统(GIS)对于专门化的软件开发应用都存在的很多不足,结合自己的工作实践,总结了可编程控件MapX在可视化软件开发工具Delphi 下的几点应用,为MapX的二次开发提供新的参考.
【总页数】3页(P349-351)
【作者】胥广明;徐晓娟
【作者单位】沈阳军训器材研究所,辽宁,沈阳,110035;辽宁大学,物理系,辽宁,沈阳,110036
【正文语种】中文
【中图分类】TP317
【相关文献】
1.基于DELPHI与MAPX控件的雷击监测软件系统的开发 [J], 安剑
2.基于Delphi的Mapx自定义工具的创建 [J], 刘佳;林海;王亮
3.基于Mapx的鹰眼图的Delphi编程实现 [J], 刘佳;谷勇;王军峰
4.应用Delphi plus MapX模型管理油田井位信息 [J], 卓庆霞
5.应用Delphi plus MapX模型管理油田井位信息 [J], 卓庆霞
因版权原因,仅展示原文概要,查看原文内容请购买。
delphi fmx 中path designer用法
delphi fmx中path designer用法
在Delphi FireMonkey(FMX)中,Path Designer是用于设计和编辑路径图形的工具。
Path是一种矢量图形,由一系列的线段和曲线组成,可以创建各种复杂的形状。
以下是在Delphi FMX中使用Path Designer的基本步骤:
1.在窗体上添加Path控件:
-打开Delphi中的窗体设计器。
-在工具栏中找到"Path"控件,将其拖放到窗体上。
2.打开Path Designer:
-双击已添加到窗体的Path控件,以打开Path Designer。
3.设计路径:
-在Path Designer中,您可以使用不同的工具来创建路径,例如直线、曲线、圆弧等。
-通过在设计区域上点击和拖动,您可以创建路径的各个点和控制点。
-使用工具栏上的工具进行路径的编辑和调整。
4.编辑路径属性:
-在Object Inspector中,您可以调整Path控件的属性,如颜色、线宽等。
-您还可以通过代码访问路径的属性,以在运行时进行动态修改。
5.运行应用程序:
-在Delphi中编译和运行您的应用程序,查看路径的效果。
使用Path Designer可以轻松地创建和编辑路径,使其适应您的应用程序需求。
请注意,具体的步骤和界面可能会根据Delphi的版本而有所不同,以上步骤仅供参考。
- 1、下载文档前请自行甄别文档内容的完整性,平台不提供额外的编辑、内容补充、找答案等附加服务。
- 2、"仅部分预览"的文档,不可在线预览部分如存在完整性等问题,可反馈申请退款(可完整预览的文档不适用该条件!)。
- 3、如文档侵犯您的权益,请联系客服反馈,我们会尽快为您处理(人工客服工作时间:9:00-18:30)。
Delphi中使用Mapx目录一.在地图上创建图层 (1)二.在符号图元中使用自定义位图 (1)三.屏幕坐标向地图坐标的转换 (2)四.查找某一城市 (3)五.鼠标点击选中一片区域 (3)六.从数据库绘制MapX地图 (4)七.MapX使用数据库数据添加专题图 (6)八.在mapx中画圆 (10)九.动态加载一个目录下所有图层 (11)安装好MapX后,选择Delphi的Component->Import Active菜单添加,MapInfo MapX组件。
添加完成后,在ActiveX面板上,将会出来一个TMap控件。
拖一个TMap 控件到工程中改名为MainMap,这样就产生了一个TMap的对象。
一.在地图上创建图层使用Layers属性的CreateLayer函数来创建一个图层yers.CreateLayer(Name,[FileSpec],[Position],[KeyLength],[CoordSys]);参数说明:Name:指定图层的名称FileSpec:所创建图层的路径名。
如'c:\china.tab'Position:它在图层列表中的初始位置.(其实就是在图层列表中的一个序列号)CoorSys:指定存储新图层的坐标系。
附:图层类型参数:miLayerTypeNormalmiLayerTypeRastermiLayerTypeSeamlessmiLayerTypeUnknownmiLayerTypeUserDrawmiLayerTypeDrilldownFeatureFactory对象的方法使您可以创建新的地图图元,也可通过对现有图元执行操作(例如缓冲区)来创建图元。
以下是FeatureFactory对象的方法:BufferFeaturesCombineFeaturesCreateArcCreateCircularRegionCreateEllipticalRegionCreateLineCreateRegionCreateSymbolCreateTextEraseFeatureIntersectFeaturesIntersectionPointsIntersectionTest二.在符号图元中使用自定义位图定义一个cs:CMapXStyle做为图元的样式属性设置cs:=coStyle.Create;cs.SymbolType:=miSymbolTypeBitmap;cs.SymbolBitmapName:='HOUS2-32.BMP';cs.SymbolBitmapSize:=40;注意:自定义的位图一定要放到C:\Program Files\Common Files\MapInfo Shared\MapX Common\CUSTSYMB下,这是MapInfo安装的黩认共享路径。
三.屏幕坐标向地图坐标的转换procedure TMapForm.Map1MouseUp(Sender:TObject;Button:TMouseButton;Shift:TShiftState;X,Y:Integer);varlon,lat:Double;singleX,singleY:Single;fs:CMapXFeatures;pnt:CMapXPoint;name:String;beginif Map1.CurrentTool=miArrowTool thenbeginpnt:=CoPoint.Create;singleX:=X;singleY:=Y;Map1.ConvertCoord(singleX,singleY,lon,lat,miScreenToMap);pnt.Set_(lon,lat);fs:=yers.Item('US Top20Cities').SearchAtPoint(pnt);if fs.Count>0thenbeginname:=fs.Item(1).Name;Application.MessageBox(PChar(name),'Info',0)endelseApplication.MessageBox('Nothing found','Nope',0);end;end;备注:获取一个图元时最好用Layer.GetFeatureByID(FeatureKey);四.查找某一城市procedure TForm2.SearchForCapital(Capital:String);varFoundF:FindFeature;//在小城市层查beginFoundF:=yers.Item['US Minor Cities'].Find.Search(Capital, EmptyParam);//在us minor cities层中查找capitalif(FoundF.FindRC mod10)=1thenbeginyers.Item['US Minor Cities'].Selection.Replace(FoundF);Map1.Zoom:=60;//60英里Map1.CenterX:=FoundF.CenterX;Map1.CenterY:=FoundF.CenterY;endelseApplication.MessageBox('No exact match found.','Nope',0);end;五.鼠标点击选中一片区域procedure TForm2.Map1ToolUsed(ASender:TObject;ToolNum:Smallint;X1, Y1,X2,Y2,Distance:Double;Shift,Ctrl:WordBool;var EnableDefault:WordBool);varftrs:Features;//CMapXFeatures;newJersey:FindFeature;//CMapXFindFeature;usaLayer:Layer;//CMapXLayer;pt:Point;beginif ToolNum=miSelectTool thenbeginpt:=CoPoint.Create;pt.Set_(X1,Y1);usaLayer:=yers.Item['USA'];newJersey:=usaLayer.Find.Search('NY',EmptyParam);//找到ny500英里之内的区域ftrs:=usaLayer.SearchWithinDistance(pt,500,miUnitMile, miSearchTypePartiallyWithin);mon(usaLayer.SearchWithinDistance(newJersey,500,miUnitMile, miSearchTypePartiallyWithin));usaLayer.Selection.Replace(ftrs);//选中end;end;六.从数据库绘制MapX地图这里提供的是一种更为高效的从数据库绘制MapX地图的方法,我在数据库中建立了如下的数据表:表名称:XunitID:字符串//用于唯一标识各个图元,也可以是数字类型的NAME:字符串//图元的名称X:浮点数//图元横坐标Y:浮点数//图元纵坐标代码清单://aqXUnit是一个TADOQuery,其中SQL语句为“SELECT*FROM XUNIT”。
procedure TfrmMain.DrawLayerFromDB;varoBLayer:BindLayer;SearchLayer:Layer;ds:Dataset;begin//使用这个过程必须保证aqXUnit表已经打开!if not aqXUnit.Active thenbeginGiveMsg('系统基础表没有打开!');//调用自定义提示方法exit;end;oBLayer:=coBindLayer.Create;yerName:='ARTEMIS';yerType:=miBindLayerTypeXY;//必须使用这个参数才能绑定XY坐标oBLayer.RefColumn1:='X';//第一个参数必须指定为横坐标oBLayer.RefColumn2:='Y';//纵坐标//添加数据集ds:=mapMain.Datasets.Add(12,//数据集类型,这是miDataSetADO,即ADO专用的aqXUnit.Recordset,//使用这个方法获得ADO中的_Recordset类型'DS_SK',//数据集名称'ID',//传入的是Xunit表中的字段ID的名称EmptyParam,oBLayer,//BindLayerEmptyParam,EmptyParam);//下边将设置新图层的各项属性searchLayer:=yers.Item('ARTEMIS');//字体颜色belProperties.Style.TextFontColor:=miColorPurple;belProperties.Style.TextFontHalo:=true;belProperties.Style.TextFontBackColor:=miColorWhite;//设置图元显示的标签belProperties.Dataset:=ds;belProperties.DataField:=ds.Fields.Item('NAME');belZoom:=true;//设置图层缩放比例范围searchLayer.ZoomMin:=0;searchLayer.ZoomMax:=200;searchLayer.ZoomLayer:=true;//设置标签缩放比例范围belZoomMin:=0;belZoomMax:=200;belZoom:=true;//自动标记图元searchLayer.AutoLabel:=true;end;七.MapX使用数据库数据添加专题图OBJECT.Add([Type],[Field],[Name],[ComputeTheme])OBJECT Represents a Themes object.Type Specifies the type of thematic map to create.This takes a ThemeTypeConstants value.This is an optional parameter,and if not specified(or specified as miThemeAuto),MapX will attempt to choose a good default based on the number of fields passed in as well as what other theme types are already being displayed.If MapX cannot choose a default theme type,an error is generated.Field(s)Specifies the field or fields to thematically map.A field can be specified by name,index,or by a Field object.If you are creating a theme using multiple variables(such as a bar chart or pie chart),pass in a Fields collection or an array of field names,indexes,or Field objects.This is an optional parameter, and if not specified,MapX uses the first numeric field of the Dataset.Name Specifies the name of the thematic map.This is a String parameter.This is an optional parameter,and if not specified,MapX generates a name such as StatesBySales.ComputeTheme Boolean.The default value is True which will calculate the theme from the table data.If the value is set to False an invisible theme object will be created with10ranges for IndividualValue themes and5ranges for Ranged themes. You can then manually set the minimum and maximum values to define the theme with Theme.DataMin and Theme.DataMax.For ranged themes you can manually set the theme ranges or calculate equal size ranges determined by the minimum(Theme.DataMin) and maximum(Theme.DataMax)values.关于专题图的风格共有以下几种:miThemeRanged=0miThemeBarChart=1miThemePieChart=2miThemeGradSymbol=3miThemeDotDensity=4miThemeIndividualValue=5miThemeAuto=6miThemeNone=9下面是我写的部分代码:unit Main;interfaceusesWindows,Messages,{略去一部分}SysUtils,Variants,Classes;typeTfrmMain=class(TForm)mapMain:TMap;{地图控件}private{Private declarations}ThemesList:TStringList;{用来保存多个专题图的名称列表} public{Public declarations}procedure ToAddThemes(style:integer;TheName:string);{添加专题图} procedure ToDeleteThemes;{删除专题图}end;varfrmMain:TfrmMain;implementation{$R*.dfm}{略去其他功能代码}{添加专题图,参数style表示专题图风格,TheName表示图例标题}procedure TfrmMain.ToAddThemes(style:integer;TheName:string);function DefaultName:string;{用来生成一唯一的名称}begin{我用的方法是取一个当前时间,两次调用本函数的时间间隔应该不会少于0.5秒,所以这个方法在这个项目中可以取得唯一的名称}Result:='YYT'+FormatDateTime('YYYYMMDDHHNNSSzzz',now);end;varflds:array of string;{字段列表}oBLayer:BindLayer;{绑定图层}ds:Dataset;{MapX数据集}i:integer;{循环变量}thm:theme;{MapX专题图}str:string;{用于保存字符串}begin{aqThemes可以是一个ADOQuery或者ADOTable,我使用的是ADOQuery。
