西门子燃气灶维修服务
修理燃气灶故障的方法
修理燃气灶故障的方法
燃气灶是我们日常烹饪不可或缺的电器之一。
但是当燃气灶出现故障时,我们该怎么办呢?以下是修理燃气灶故障的方法:
1. 检查燃气灶的连接:如果燃气灶无法点燃,可能是由于连接问题。
检查燃气管道和阀门是否紧固,并确保燃气灶连接扣是否完好。
2. 清洁燃气灶和燃烧器:如果燃气灶的火焰不够强大或不均匀,可能是由于燃烧器堵塞。
使用温水和肥皂清洁燃气灶和燃烧器,然后用干净的布擦干即可。
3. 更换燃气灶的点火器:如果燃气灶点火器无法工作,可能需要更换新的点火器。
购买适合燃气灶品牌和型号的点火器,并按照说明书更换即可。
4. 更换燃气灶的控制开关:如果燃气灶控制开关无法工作,可能需要更换新的开关。
购买适合燃气灶品牌和型号的控制开关,并按照说明书更换即可。
5. 检查燃气灶的燃气压力:如果燃气灶的火焰很低或者燃烧不完全,可能是由于燃气压力不足。
检查燃气管道和阀门是否打开,如果需要,可以调整燃气灶的燃气压力。
总之,当燃气灶出现故障时,我们可以通过以上方法进行修理。
但如果您不确定如何修理或者修理后问题仍然存在,请寻求专业人员的帮助。
安全第一,不要私自拆卸和修理燃气灶。
- 1 -。
燃气灶故障了怎么找人修

在我们日常生活中必不可少的就是做饭,但有时候在做饭时会遇到麻烦,如:燃气灶打不着火、漏气、火焰异常等等故障,那么当出现故障时应该找谁修呢?
如燃气灶在保修期可到该燃气灶维修中心进行维修;如该燃气灶已过保修期,且维修中心又离家较远,大家也可就近选择,但由于目前燃气灶维修中心较多,所以,大家在选择时应注意以下几点:
1、不要轻信楼道、路边的维修广告宣传。
在维修燃气灶时,一定要查验维修服务部是否有维修经营资质或经营证照。
同时,可以找到相应的燃气灶客服电话或到品牌专柜询问、核实正规家电维修企业信息。
2、在维修人员上门前,先问清楚收费项目、标准以及能否出具正规发票等事项,如果对方不肯明码标价、不能出具正规发票,尽量不要约请这种人员上门服务。
3、各品牌企业售后服务商的维修人员会穿着带有企业品牌或名称标志的工作服并佩戴证件,消费者在接受服务前要注意查验。
最后在接受服务后应及时索要正规发票,如发现上当受骗,及时拨打举报投诉电话。
成就家修公司为专业提供上门服务为核心业务的到家服务平台,服务内容涵
盖:家庭维修(水电维修、管道疏通、沙发翻新、家具门窗)、家电维修、家政等众多领域,致力于为用户提供高品质、便捷、安心的上门生活服务。
西门子燃气灶TGF61 TGWF61 TGWF91用户手册说明书
USER MANUAL GAS HOBSTGF61 | TGWF61 | TGWF91IMPORTANT // Please ensure that you read through this user manual prior to installation and use. This manual c ontains important information to ensure optimal performanc e and keep you safe. Please retain your proof of purchase, as this will be required in the event that you require warranty service. Remember to keep this manual for future reference.ContentsContents 2 Warning & Safety Instructions 3 Product Specifications 4 Product Overview 5 - 6 Operating Instructions 7 - 9 Installation 10 - 17 Notes 18 - 19 Contact Details 20IMPORTANT // To avoid the risk of accidents and damage to the appliance, please read these instructions carefully before using it for the first time. They contain important notes on installation, safety, use and maintenance.To maintain the efficiency and safety of this appliance, we recommend that you do the following:• DO NOT USE OR STORE FLAMMABLEMATERIALS NEAR THIS APPLIANCE.• DO NOT SPRAY AEROSOLS IN THE VICINITY OF THIS APPLIANCE WHILE IT IS IN OPERATION.• DO NOT MODIFY THIS APPLIANCE.• This appliance is not intended for use by persons (including children) with reducedphysical, sensory or mental capabilities,or lack of experience and knowledge,unless they have been given supervision or instruction concerning use of the appliance by a person responsible for their safety.• Young children should be supervised to ensure that they do not play with theappliance.• Insure adequate ventilation i.e. the use of a rangehood when cooktops / otherappliances, burning gas or other fuels arein use.• If the supply cord of this equipment is damaged, it must only be replaced bythe manufacturer or its service agent or asimilarly qualified person in order to avoida hazard.• This appliance has been designed for indoor domestic use only.• NOT FOR USE IN MARINE CRAFT, CARAVANS, OR MOBILE HOMES.• Keep packaging out of reach of children at all times. To avoid burns, young childrenshould be kept away.• This appliance is designed for domestic use or use in similar environments byguests in hotel or motel rooms, bed& breakfasts and other typical livingquarters. This does not include common/shared or commercial facilities withinhotels, motels or bed & breakfasts. NOTICE // The manufacturer may not be held responsible for any damage caused by incorrect installation or non-compliance with the instructions in this manual.Warning & Safety InstructionsProduct SpecificationsModel: TGF61Model: TGWF61Model: TGWF91DimensionsW590 x D500 x H90mm Bench Cut-out Dimensions W553 x D473mm Voltage / Frequency 220-240V~ / 50Hz Power 1W Capacity 4 BurnersGas Burners1 Rapid /2 Semi-rapid / 1 AuxiliaryDimensionsW590 x D500 x H90mm Bench Cut-out Dimensions W553 x D473mm Voltage / Frequency 220-240V~ / 50Hz Power 1W Capacity 4 BurnersGas Burners1 Wok /2 Semi-rapid / 1 AuxiliaryDimensionsW860 x D510 x H90mm Bench Cut-out Dimensions W815 x D490mm Voltage / Frequency 220-240V~ / 50Hz Power 1W Capacity 5 BurnersGas Burners1 Wok / 1 Rapid2 Semi-rapid / 1 AuxiliaryProduct OverviewModel: TGWF61Model: TGF61Model: TGWF9132215462321561. Auxiliary burner2. Semi-rapid burner3. Rapid burner4. Triple ring (Wok) burner5. Control Panel6. Pan supportProduct OverviewBurners1. Burner cap2. Inner burner cap3. Outer burner cap4. Burner head (diffuser)5. Burner base (cup)6. Ignition candle7. Flame failure device (thermocouple)IMPORTANT // To ensure best performance, avoid risk of damage or accident. Please readthe operating instructions prior to first time use. This appliance is supplied with a spare data plate label. Please attach it to an adjacent surface for future reference if the labels on the base of the cooktop are not visible after installation. NOTE // The metal components have aprotective coating, which may give off a slight smell when heated up for the first time. This smell and any vapours given off do not indicate a faulty gas connection or appliance nor are they health hazardous.The burners differ in size and power. Choose the most appropriate burner for the diameter of the cookware being used as specified on the table below:PAN SIZESBURNER min diameter (mm)max diameter(mm)Auxiliary 120180Semi-Rapid 180200Rapid 180220Wok220260The position of the corresponding gas burner is indicated on each control knob.1. Control knobsThe control knob is used to ignite the burner and regulate the strength of the flame.The gas supply is turned off Ignition candle Strongest flame Weakest flame Respective burnerATTENTION // Operating the knob controls as described below can cause damage to the appliance:• Switching on the burner without pressing the control down.• Switching on the burner by turning the control clockwise.•Switching the burner off by turning the control anti-clockwise.2. Lighting a burnerTo light a burner, simply follow the steps:1. Press the corresponding knob of the burner you are about to use all the way in and, then, turn it anti-clockwise until you reach the ‘Strongest Flame’ symbol.2. Keep the knob pressed in for a few seconds after the flame ignites.NOTE //When one of the control knobs is activated, sparks are generated on all burners of the cooktop simultaneously.CAUTION // If the flame is extinguished unintentionally, turn off the gas with the control knob, wait for at least 30 seconds for the gas to dissipate and try to light it again.3. Switching offTo turn off a burner, simply turn the knob clockwise until it stops under the OFF symbol “”. This stops the flow of gas and the flame goes out.4. Interruption to the electricity supplyIn the event of a power cut the flame can be ignited with a match by following the steps: 1. Press the corresponding knob of the burneryou are about to use all the way in, thenturn it anti-clockwise until you reach the‘Strongest Flame’ symbol.2. While pressing the control knob in, light thegas at the burner with a match.3. Keep the knob pressed in for a few secondsafter the flame ignites.5. Regulating the flameIMPORTANT // Adjust the flame intensity so that it does not spread out beyond the side of the pan. The tips of the flames are much hotter than the centre, so they should stay beneath the pan base for a best efficiency and a lower risk of injuries and damages on pan handles.The flame can be regulated for any level between the strongest and weakest flame symbols.• Cookware should be positioned aligned with the centre of the burner.• Do not use round-bottomed pans (eg.Woks) without an appropriate wok support recommended by the manufacturer.6. Flame failure deviceThis appliance is fitted with a thermo-electric flame failure safety device that cuts off the supply of gas to a burner if the flame goes out, for example, when water boils over the burners or sudden draughts occur.The flame failure device operates independently from the electricity supply. This means that it will still work if the cooktop is used during a power cut.Cleaning & MaintenanceATTENTION // Before cleaning your oven, or performing maintenance, turn the appliance off and disconnect it from the power supply. Also allow the appliance to cool down before touching the unit.Cleaning your appliance frequently will extend its life. When cleaning your gas cooktop:• Do note use a steam cleaning appliance to clean this appliance.• Use a soft cloth, warm water and neutral soap to clean enamelled, cast iron andstainless steel parts.• Use a soft dry cloth to dry surfaces that have been cleaned with water. This will preventthe occurrence of watermarks and limescale deposits.• Do not use cleaning products containing descaling agents.• Do not use hard, abrasive brushes or spongesNOTE // Always clean the appliance immediately after any food spillage.Cleaning the BurnersThe removable parts of the burners can be disassembled for a more thorough cleaning. 1. Remove the burner caps and burnerdiffusers by pulling them away from theburner cup. 2. Soak them in hot water with a small amountof washing detergent.3. Softly scrub off any remaining pieces offood.4. Rinse the parts, wipe and dry them.5. Wipe the fixed parts of the burner cup with adamp cloth, drying it afterwards with a drycloth.6. Before placing the burner cap and diffuserback in position, make sure that the flameapertures are clean and completely dry. IMPORTANT // Make sure that the ignition candle and the probe of the thermo-electric flame failure device extend through their respective holes in the burner diffuser. Once the burner diffuser is clicked into place correctly, place the burner cap on top of it. The burner cap should not rotate when correctly positioned.Servicing the cooktopAlways refer servicing to an authorised service person. It is recommended that the appliance be serviced every five years to ensure the cooktop continues to operate correctly and safely.InstallationIMPORTANT //This unit must be installed by authorised personnel and used only in permanently ventilated rooms in accordance with the requirements of AS 5601 (gas installations), wiring code, manufacturer’s instructions, local and national authority and any other statutory regulations.Follow carefully the safety instructions and clearance requirements given below.NOTE //The dimensions presented in this manual are give in millimetres (mm).IMPORTANT //The veneer or laminate coatings of worktops (or adjacent kitchen units) must be treated with 100 °C heat-resistant adhesive which will not dissolve or distort.A minimum safety clearance of 25mm underneath the cooktop must be provided for the installation of the flexible gas connection hose and mains flexible power cord.45min. 25TGWF91 - The Gas inlet (1) is located underneath the appliance towards the rear right hand side 50mm from the rear edge. The Electrical terminal (2) is also located underneath the appliance towards the rear and approximately 300mm away from the gas inlet.TGF61 / TGWF61 - The Gas inlet (3) is located underneath the appliance towards the rear left hand side 100mm from the rear edge. The Electrical terminal (4) is also located underneath the appliance approximately in the centre of the rear edge.Installation AccessoriesSuppliedThe following installation accessoriesare supplied with the appliance:4 x mounting brackets and screws1 x seal strip (soft sponge)1 x natural gas regulator1 x gas pressure test point4 or5 x ULPG Injectors8. Connect the appliance to the gas supply(refer to the ‘Gas Connection’ section).9. Secure the appliance by matching thescrews with the correspondent screw holes in each bottom corner of the cooktop.10. Once the gas cooktop has been installed it is essential to check that neither the gas pipe nor the electricity cable is in contact with hot parts of the appliance or hot gas exhaust.NOTE // A full operational test and a test for possible leakages must be carried out by the installer before leaving. Check all burner flames are blue in colour, stable and completely ignite at both high and low flame settings with no appreciable yellow tipping, carbon deposition, lifting, floating lighting back or objectionable odour. Test burners individually and in combination.Electrical ConnectionIMPORTANT // Electrical connections should be carried out by a suitably qualified and competent person in strict accordance with the wiring rules and national and local safety regulations.Installation Procedure1. Make the benchtop cut-out for the cooktop in accordance with the diagrams previously presented in this manual.2. Remove trivets, gas burner caps and diffusers.3. Turn the cooktop upside down resting it on a cloth.NOTE // Be careful not to damage the ignition candles and the probes of the flame failure device during this process.4. Apply the self-adhesive seal strip onto theedges of the cooktop that will be resting on the benchtop. (Do not overlap the ends of the seal strip)NOTE // Do not use any joint sealant. Theappliance’s sealing strip ensures a sufficient seal between the appliance and the benchtop.5. Feed the flexible power cord down throughthe cut-out.6. Place the cooktop in the cut-out withoutsecuring it.7. Connect the appliance to the mainselectricity supply (refer to the ‘ElectricalConnection’ section).ATTENTION // If the connection cable is damaged, it must be replaced by a suitably qualified electrician.The supply cord has been fitted with a10A three-pin plug and is designed for use with alternating current according to the indications on the rating label (data plate) located underneath the cooktop.Before actual connection make sure that:• The fuse and electrical system can withstand the load required by the appliance.• The electrical supply system is equipped with an efficient earth hook-up according to thenorms and regulations prescribed by law.• The plug and switch are easily accessible after installation.The wires in the mains lead are coloured in accordance with the following code:Green & Yellow - EarthBlue - NeutralBrown - LiveAs the colours of the wires in the mains leadof this appliance may not correspond with the coloured markings identifying the terminals in your plug, proceed as follows:• The green and yellow wire must be connected to the terminal in the plug that is marked with the letter E or by the earth symbol or coloured green or green and yellow.• The blue wire must be connected to theterminal that is marked with the letter N orcoloured black.• The brown wire must be connected to the terminal that is marked with the letter A orcoloured red.NOTE //This appliance must be earthed. Gas ConnectionIMPORTANT //Gas connections should be carried out by a suitably qualified and competent person in strict accordance with the requirements of AS 5601 (gas installations) and national and local regulations.This gas cooktop can be connected with a class B or D flexible hose, which complies with AS/ NZS 1869 and must be certified. The min. inner Ø must be 10 mm and the maximum length 1.2 m. Make sure it does not touch moving parts of the kitchen furniture, e.g. a drawer. Ensure the hose assembly is not exposed to high temperatures exceeding the maximum recommended by the hose manufacturer, subjected to strain, kinking, permanent deformation or damage by vermin. This appliance is factory fitted with Natural Gas Injectors and is also supplied with a ULPG conversion kit. The conversion of the appliance to be used with ULPG must be undertaken by qualified personnel. Please refer to the ‘Gas Conversion – Natural Gas / ULPG’ section.A Pressure Test Point is provided on the gas regulator (supplied for natural gas) or on the test point adaptor (supplied for ULPG).The Gas pressure must be set by an approved gas fitter as shown on the table presentedon the next page or, alternatively, on the appliance data plate:Natural gas 1.0 kPaULPG 2.75 kPa1. Loosen the screw in the test point until it isfree in its housing. The screw is retained in this position.2. Connect the hose from the pressure gauge.3. Reassemble one of the large burners, turnon the gas and manually light the burners.4. Disconnect gauge and screw in the testpoint screw.NOTE // The Gas Regulator must be set with the largest burner operating at maximum setting.Gas Pressure Test PointGas Consumption And Injectors SpecificationsTGF61Natural Gas Universal LPGInj. diam. (mm)MJ/h Gas pressure Inj. diam.(mm)MJ/h Gas pressureRapid burner x 1 1.5010.8 1.0kPa0.9410.8 2.75kPa Semi-rapid burner x 2 1.14 6.30 1.0kPa0.72 6.30 2.75kPa Auxiliary burner x 10.85 3.60 1.0kPa0.56 3.60 2.75kPa Total NHGC27.0027.00TGWF61Natural Gas Universal LPGInj. diam. (mm)MJ/h Gas pressure Inj. diam. (mm)MJ/h Gas pressureWok burner x 1 1.6512.96 1.0kPa 1.0212.96 2.75kPa Semi-rapid burner x 2 1.14 6.30 1.0kPa0.72 6.30 2.75kPa Auxiliary burner x 10.85 3.60 1.0kPa0.56 3.60 2.75kPa Total NHGC29.1629.16TGWF91Natural Gas Universal LPGInj. diam. (mm)MJ/h Gas pressure Inj. diam. (mm)MJ/h Gas pressureWok burner x 1 1.6512.96 1.0kPa 1.0212.96 2.75kPa Rapid burner x 1 1.5010.80 1.0kPa0.9410.80 2.75kPa Semi-rapid burner x 2 1.14 6.30 1.0kPa0.72 6.30 2.75kPa Auxiliary burner x 10.85 3.60 1.0kPa0.56 3.60 2.75kPa Total NHGC39.9639.96NOTE // This appliance is supplied with a spare data plate label. Please attach it to an adjacent surface for future reference if the labels on the base of the cooktop are not visible after installation.Gas Conversion – Natural Gas / ULPG This appliance is factory fitted with Natural Gas Injectors (burner nozzles) and is also supplied with a ULPG conversion kit. To adapt the cooktop to a different type of gas, the gas injectors must be changed as follows:1. Remove the pan supports (trivets), burnercaps and burner diffusers.2. Unscrew the injectors using a 7mm socketwrench.3. Replace the injectors with those suppliedcorresponding to the gas available (seeburner and injector characteristics table) IMPORTANT // On completing the operation, replace the old gas label with the one showing the new type of gas; the sticker is available in the User Manual packageAdjusting the minimum flame intensity The minimum flame intensity is adjusted at the factory. However, when the gas injectors are replaced or in special mains pressure conditions, it may be necessary to readjust the intensity of the minimum flame.Follow the operations below for each burner in order to adjust the minimum flame intensities:1. Light the burner.2. Turn the knob control anti-clockwise to theweakest flame.3. Remove the knob from the valve shaft (andgasket if there is one).4. Use a thin blade screwdriver to turn thebypass screw located on top of the gasvalve shaft.ULPGGently turn the bypass screw clockwise untilit is completely tightened.Natural GasGently turn the bypass screw clockwiseuntil it is completely tightened, then slowly turn it anti-clockwise for adjustment of the flame. The correct length of the flame isaround 3 to 4mm.5. Put the knob back on and test if the flame goes out when quickly turning the knob control from the strongest flame to the weakest flame positions.6. For burners with flame failure device, make sure that the regulation obtained is sufficient to maintain the thermocouple activated when operating with the weakest flame. If it is not,increase the minimum flame intensity.NOTE //A full operational test and a test for possible leakages must be carried out by the installer before leaving. Check all burner flames are blue in colour, stable and completely ignite at both high and low flame settings with no appreciable yellow tipping, carbon deposition, lifting, floating lighting back or objectionable odour. Test burners individually and in combination.CONTACT DETAILS。
西门子燃气灶维修

现在家家户户都普及使用了燃气灶,特别是家里做饭比较多的话,是会经常使用的。
在使用一段时间之后,难免会有一些故障发生,这篇文章就给大家讲讲西门子燃气灶常见的故障和维修方法。
常见故障一、点火失败
灶前阀门未打开会造成点火失败,点火前首先检查是否打开灶前阀门。
由于移动灶具会使灶具连接管扭折、压扁,或因为燃气中含有较多的凝析油堵塞胶管造成气源不通,点火失败。
通过检查胶管是否受压、弯折并矫正或通过更换新胶管可以排除故障。
燃气灶更换连接胶管后,由于管内混入空气,会造成暂时点火失败,通过多次打火,排净管内空气即可点火成功。
常见故障二、漏气或有臭味
灶具连接胶管长期使用老化破裂,或者由于未与灶具连接好会造成燃气泄漏,此时应更换胶管或者胶管末端用喉箍紧固。
炉头燃气未被点燃,会闻到燃气臭味,此时开窗通风待燃气吹散后再进行点火。
密封材料干燥、耗尽或密封圈老化会致使灶具阀门密封不严而造成漏气,应更换密封材料直至更换阀体,安装后检验阀体是否漏气。
以家电、家居生活为主营业务方向,提供小家电、热水器、空调、燃气灶、油烟机、冰箱、洗衣机、电视、开锁换锁、管道疏通、化粪池清理、家具维修、房屋维修、水电维修、家电拆装等保养维修服务。
西门子,说明书,油烟机

4
安装说明
放置位置
纸张大小:16开(18.4×26厘米)
该燃气灶具只能使用与家庭厨房。请勿在其它场合使用 该燃气灶具。
请勿将燃气灶具放在浴室、卧室、地下室等地方,或含 有易燃、易爆、腐蚀性材料的场合下使用。
请勿在燃气灶具的上方或四周放置易燃、易爆物品,例 如:窗帘等。
如果燃气灶具周围存在易燃物,例如:木质结构的墙或 吊顶等,那么燃气灶具应与木墙之间保持至少150mm的 间距,与吊顶之间保持至少1米的间距。若四周为防火 材料,则不受本条限制。
- 全封闭的防暴玻璃面板,辅以隐藏式发泡密封条
(见产品底部试图),这样从根本上防止食物残渣漏 到厨房台面内,杜绝厨房卫生死角,极大地缩短了用 户对产品的日常清理和维护时间,保证产品长久、稳 定和安全地工作。
- 位于底壳上的风门手柄,随时随地方便调节;即
使燃气气质大幅度频繁地变动,也可轻松应对。
-严格遵循内控设计验证试验,反复、多项测试,确
请遵循当地的燃气具安装规定和指南,对带有烟囱的家 用吸油烟机进行安装,这种类型的吸油烟机与灶具之间 的距离最少不得低于750mm。
该灶具在出厂前已经经过严格的燃气泄漏性能检测,为 此请勿在安装过程中私自拆卸该灶具的面板和内部零部 件,以免在使用过程中发生燃气泄漏而引起中毒或火灾。
关于风门调节,我们建议在安装调试时,由专业人员根 据第10页中的风门调节方法将燃烧调节到最佳状态。
如果将燃气灶具安装于厨柜中,那么厨柜上的塑料涂层 及胶合板必须经过耐火粘胶处理(耐热粘胶),否则容 易发生变形或表层剥落,特别多见于细小的边侧。
该燃气灶具应安装在结实、水平的厨房台面上。 台面厚度〉16mm 台面宽度〉550mm,推荐台面宽度600mm 台面开孔尺寸,请见随即附带的开孔模板。
西门子家电燃气灶ER9PM331MP和ER45K155MP使用说明和安装说明说明书
Siemens Home Applianceszh 安全性2目录使用说明书1安全性.................................................................... 22避免财物损失......................................................... 43环境保护和节约...................................................... 44执行标准................................................................ 45灶具年限说明......................................................... 46微功率(短距离)无线电设备................................. 47了解机器................................................................ 58使用烹饪容器......................................................... 79操作基本知识......................................................... 710烟灶联动................................................................ 811定时功能................................................................ 912清洁和保养............................................................. 913处理故障.............................................................. 1014客户服务.............................................................. 1115处理旧机器.. (1116)安装说明书 (11)16.1安全安装..............................................................111 安全性请注意以下安全注意事项。
燃气灶维修教程

燃气灶维修教程
燃气灶是厨房中常用的烹饪工具,但长时间的使用和磨损可能导致灶具出现故障。
幸运的是,大部分问题可以通过简单的维修来解决。
下面是一些燃气灶常见问题的维修教程:
1. 无火焰:如果燃气灶没有火焰,首先检查燃气阀门是否打开。
如果阀门已打开,可能是火花器故障。
可以使用火柴或打火机试着点燃,如果能点燃,可能是火花器需要清洁或更换。
另外,检查燃气管道是否有堵塞或漏气情况。
2. 火焰不稳定:如果燃气灶火焰不稳定或时大时小,可能是火眼需要清洁。
用湿布擦拭火眼表面,去除积灰和污垢。
另外,检查燃气供应是否稳定,如有问题,可能需要联系专业人士。
3. 火焰颜色异常:正常情况下,燃气灶的火焰应为蓝色。
如果火焰呈黄色或红色,可能是氧气供应不足。
检查灶具周围是否有堵塞物,确保氧气流通。
另外,可能是燃料问题,咨询供应商进行处理。
4. 点火器失效:如果点火器无法点燃燃气灶,可能是电池耗尽或拧紧不良。
更换电池或调整电极位置,确保正常工作。
如果问题仍然存在,可能是点火器故障,需要更换。
5. 本体漏气:如果燃气灶本体有漏气情况,应立即采取措施确保安全。
首先关闭燃气阀门,并通风室内。
检查燃气管道和连接部分是否松动或损坏,及时修复或更换。
如无法自行处理漏气问题,应寻求专业帮助。
请注意,以上是一些常见的燃气灶维修教程,但不同型号和品牌的燃气灶可能存在差异。
在进行维修前,请参阅相关的使用手册或咨询专业人士。
在维修中要保持安全意识,并根据实际情况适当调整操作。
燃气灶维修收费标准

燃气灶维修收费标准燃气灶是家庭厨房中常见的厨具之一,但在长时间的使用中,难免会出现一些故障或需要维修的情况。
针对燃气灶的维修工作,我们制定了以下的收费标准,以便让用户了解在维修过程中可能会产生的费用。
1. 上门费用。
我们的燃气灶维修服务将会收取上门费用,该费用包括了维修师傅上门的交通费用以及基本的上门检测费用。
上门费用的具体金额将根据用户所在地的距离和交通情况而定,我们将会在预约维修时告知用户具体的费用标准。
2. 维修费用。
在确定了燃气灶存在故障并需要维修之后,我们将根据实际情况对维修费用进行评估。
维修费用将会包括所需更换的零配件费用以及维修师傅的工时费用。
具体的维修费用将会在维修前与用户进行沟通和确认,以确保双方对维修费用有清晰的了解。
3. 零配件费用。
如果在维修过程中需要更换燃气灶的零配件,我们将会根据所使用的零配件的品牌、型号和数量来确定具体的费用。
我们承诺所使用的零配件均为正规渠道购买,保证质量和性能。
4. 工时费用。
维修师傅的工时费用将会根据实际的维修工作量和维修难度来确定。
我们的维修师傅均具有丰富的维修经验和专业的技能,能够快速准确地定位问题并进行修复,以确保用户的燃气灶能够尽快恢复正常使用。
5. 维修保障。
在维修完成后,我们将会对燃气灶进行全面的测试和检查,以确保故障得到了彻底的修复。
我们提供对维修工作的保障,如果用户在短时间内再次出现相同的故障,我们将会提供免费的返修服务,以确保用户的权益。
以上即是我们针对燃气灶维修的收费标准,我们承诺在维修过程中不会有任何隐形收费,所有费用都将会在维修前与用户进行明确的沟通和确认。
我们将以诚实守信的态度,为用户提供高质量、高效率的维修服务,让用户的燃气灶能够长期稳定地运行。
感谢您选择我们的服务,如果您有任何燃气灶维修的需求,请随时联系我们,我们将会竭诚为您服务。
西门子油烟机维修:外壳漏电处理方法
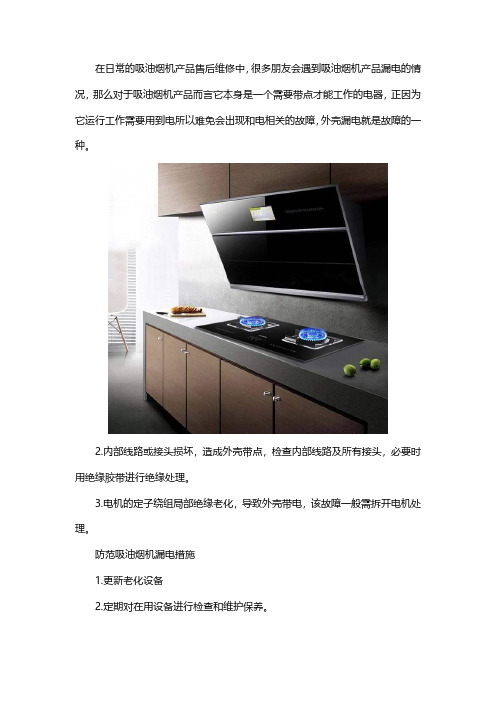
在日常的吸油烟机产品售后维修中,很多朋友会遇到吸油烟机产品漏电的情况,那么对于吸油烟机产品而言它本身是一个需要带点才能工作的电器,正因为它运行工作需要用到电所以难免会出现和电相关的故障,外壳漏电就是故障的一种。
2.内部线路或接头损坏,造成外壳带点,检查内部线路及所有接头,必要时用绝缘胶带进行绝缘处理。
3.电机的定子绕组局部绝缘老化,导致外壳带电,该故障一般需拆开电机处理。
防范吸油烟机漏电措施
1.更新老化设备
2.定期对在用设备进行检查和维护保养。
3.加强用电设施的检查,定期对漏电保护器进行试验,保证漏电保护装置灵敏管用。
吸油烟机产品漏电事故盘点
2009年8月23日,贺某的母亲在家擦拭某品牌抽油烟机时遭电击身亡。
衡阳市消委工作人员召集厂家代表及司法鉴定所查看现场并取证,鉴定结果为该抽油烟机存在质量问题,经消委工作人员多次调解,消费者贺某最终获赔42.33万元。
以家电、家居生活为主营业务方向,提供小家电、热水器、空调、燃气灶、油烟机、冰箱、洗衣机、电视、开锁换锁、管道疏通、化粪池清理、家具维修、房屋维修、水电维修、家电拆装等保养维修服务。
南昌西门子燃气灶维修不出气的原因

在使用燃气灶的过程中,如若遇到燃气灶不出气的现象,是什么原因?今天小编就来给大家讲讲燃气灶不出气的原因。
燃气灶开启开关光打火,就是不出气,并有啪啪声音,火花也正常,可以肯定的是电池有电。
旧电池点火频率变慢,对于有熄火保护的炉具,内部有电磁阀,旧电池电压低,可能导致电磁阀吸合困难,引起不过气。
建议先换两节新电池试一下。
熄火保护电路故障也可能引起不过气的故障。
还有可能是气路中有杂质,气路不畅。
如果是双眼炉具,两个灶具故障现象一样,应在电路和气路的共用部分查找原因。
首先在灶前接U型压力表,看压力是否正常。
一般2000Pa左右。
1mm水柱=10Pa。
(天然气压力不正常的情况较少,此步骤可以省略)如果压力正常就是燃气灶的电路,气路问题。
根据点火啪啪响的频率,可以判断电池的新旧程度。
提醒:但愿能有些帮助,有些故障需实际判断才能解决。
比如熄火保护探针位置距离不当会导致熄火保护,不亲自看到具体现象,有时难以给出最恰当的解决办法。
大概就是这样了,以上操作步骤可供参考哦,不行的话只能找专业的师傅维修哦,希望对你有帮助,祝你生活愉快。
啄木鸟家庭维修,全国直营连锁22家子公司,覆盖200+个城市,拥有1000+个服务网点,数万名优秀的维修工程师。
啄木鸟家庭维修在家修行业内推行维修一口价,并实行维修后整机保修90天政策。
抽油烟机维修就找啄木鸟,一个电话快速上门服务,切实解决用户问题,杜绝“小病大修”,收费透明,让用户明明白白消费。
南昌30分钟上门服务区域啄木鸟家庭维修平台优势【极速上门】节假日无休,24小时服务,30分钟极速上门【价格透明】明码标价,无隐形消费,修不好不收费【质量保障】所有维修项目均可享受3个月至1年保修期【专业师傅】所有师傅均经过专业培训,考试合格后持证上岗【服务全回访】所有服务全回访,服务质量双保险(电脑用户拨打右侧电话,手机用户点击下方电话咨询)温馨提示:1.维修费用不包含配件,如需配件,可与师傅沟通帮代买。
燃气灶的维修方法

燃气灶的维修方法燃气灶是家庭厨房中常用的设备之一,由于长时间使用或不当使用,可能会出现一些故障。
本文将介绍燃气灶的维修方法,帮助您解决常见问题。
一、诊断问题在维修燃气灶之前,首先需要诊断问题的所在。
观察燃气灶是否有异常现象,如点火困难、火焰异常、漏气等。
同时,可以闻一闻是否有燃气泄漏的味道,听一听是否有异常的响声。
根据症状判断可能的问题原因,以便进行针对性的维修。
二、检查燃气供应检查燃气供应是否正常。
检查燃气管道是否有漏气现象,管道是否被堵塞。
如果发现异常,及时进行修复或清理,以确保燃气供应正常。
三、更换部件如果燃气灶出现点火困难、熄火等问题,可能是由于点火器、熄火保护装置等部件损坏所致。
此时,需要拆下相应部件进行检查,如有损坏,及时更换。
请注意,更换部件时务必关闭燃气阀门,确保安全。
四、调整火焰如果燃气灶火焰异常,如颜色偏黄、火焰大小不均等,可能是由于空气与燃气的比例不适当所致。
此时,可以通过调整燃气阀门来改变火焰大小和颜色。
同时,清理燃烧器上的污垢,保持燃烧器清洁,以获得更好的燃烧效果。
五、清洁保养定期对燃气灶进行清洁保养可以延长其使用寿命,并确保其正常运转。
清洁燃气灶表面时,应使用软布擦拭,避免使用强酸或强碱性的清洁剂。
同时,定期检查燃气灶各个部件的连接处是否松动或漏气,如有异常及时处理。
总之,掌握燃气灶的维修方法可以帮助您解决常见的故障问题,确保其正常运转。
在维修过程中,请遵循安全操作规程,切勿自行拆卸或修理有故障的燃气灶。
如果遇到无法解决的问题或疑虑,建议联系专业维修人员进行处理。
天然气灶常见故障及修理方法
天然气灶常见故障及修理方法展开全文在我们的日常生活当中,最常用的烹饪工具就是燃气灶了,因为它比起电磁炉更节省能源,而且火候比较大,烹饪的时间比较短。
燃气灶在使用的过程当中也是偶尔会出现问题的,出故障了我们也不懂维修方法。
那么,下面小编为大家分享天然气灶修理方法,以及维修天然气灶一般多少钱。
一、天然气灶修理方法1、燃气灶火焰不正常如果家里燃气灶火焰出现问题的话,可能是离火或者是脱火的原因,这时我们只需要调节下燃气灶的压力,把燃气灶的气阀提高,问题就可以解决了。
2、燃气灶没有火花有时不管我们怎么去开燃气灶,都看不到火花的出现,这种现象很正常的,也是比较常见的。
主要原因就是燃气灶没有电,因此需要更换燃气灶的电池,这样就可以正常使用了。
还有可能是转开关被扭断,造成燃气灶没有火,这时我们需要更换一个新的旋转开关。
3、燃气灶自动熄火很多时候用着突然就没有火了,这时我们需要检查的就是气源,如果气源堵塞,我们马上就可以进行疏通就。
如果是燃气灶被感染而熄火,需要把燃气灶关闭,用抹布擦拭感应针,就可以继续使用了。
4、燃气灶点火一松就灭天然气灶修理方法,如果出现火焰没有烧到热电偶就灭了,可能是火盖没有放置好,调整下就可以继续使用。
如果烧到燃气灶的电偶,就要停火,建议更换一个电偶,这样就可以正常使用了。
5、燃气灶有火花点不着如果燃气灶可以打出火花,说明电池是有电状态的,感应针和点火针都是没有问题,那肯定就是气源的问题。
这时我们需要检查气源,用打火机点火进行测试,如果有火的话,转动点火针,让火花靠近小孔边缘,这样就可以点着。
以上就是关于天然气灶修理方法,大家可以了解下,先找出原因,然后再对症下药,接着一起了解下维修天然气灶一般多少钱?二、维修天然气灶一般多少钱维修天然气灶一般多少钱,这个没有一个标准价格。
主要看什么东西损坏了,还有当地消费情况,都是决定维修费用的重要因素。
如果是燃气原因,火焰颜色呈现红色,维修价格在130元左右; 如果是粉尘原因,维修价格在160元左右;如果是风门原因,维修价格在180元左右。
西门子燃气灶点不着火有哪些原因

燃气灶打不着火一是水压过低与滤网堵塞,二是积碳严重,三是燃气管路堵塞,四是电磁阀出现了问题,均会导致点火失败的问题发生。
接下来来给大家详细分析一下。
1、电磁阀问题
壁挂炉在启动点火的时候听见打火声,但没有电磁阀“嗒”磁吸声,这就是地刺发因为损坏或老化。
此零件在工作中不受控制,虽然可以打着火,但随即有会熄灭,这就要更换电磁阀了。
2、水压过低、滤网堵塞
在燃气灶的使用过程中,如果水压过低或滤网堵塞,均会导致点不着火的问题。
解决方法:先检查设备的水压,若有问题进行适当的调节,通常情况下水压值为1~1.5bar;若是过滤网堵塞的问题,清洗下过滤网就可以了。
3、点火电极与火焰感应电极积碳
燃气灶工作是将水在炉内加热,水加热完成后再循环到各处。
点火电极和火焰感应电极十分重要,若其中一个出现问题壁挂炉就会打不着火。
问题症结:平时使用忽略保养维护,造成严重的积碳现象,以至于壁挂炉(燃气灶)使用时打不着火。
解决方法:联系品牌售后人员清洗保养,定期的给壁挂炉清洗维护,不仅可以延长寿命,还可以保证采暖正常。
4、燃气管路堵塞
大部分家庭所用的壁挂炉均为燃烧燃气,如果燃气管道出现堵塞,就会造成打不着火现象,比如燃气管堵塞、燃气表气量不足、燃气阀门未打开等都会
影响壁挂炉的启动。
解决方法:如果家中壁挂炉打不着火,查看下是否问题出在燃气方面,可以采取燃气表进行重新充值,打开燃气阀门,重新更换燃气表电池等方法来维修。
西门子抽油烟机维修上门收费标准

大家都知道,现在抽油烟机是每家每户都离不开的东西,在厨房里它占据了相当重要的地位,为我们吸走了油烟,还大家清新的空气,还可以让整个厨房清晰干净。
但是长时间使用之后就会出现故障,例如西门子抽油烟机电机故障,电机维修等级属于中修费用230元,若是您想了解更多关于西门子抽油烟机维修上门收费标准,快益修向您介绍2018最新维修价目表!维修等级维修部件维修价格检测检测出电器故障后,用户主动放弃维修时收取30元不更换配件修好50元小修,含配件费电机电容120元变压器按键烟道止回阀灯泡油杯胶条烟道皮垫电源保险电源开关微动开关高压二级管电源线功率三级管中修,含配件费油烟机安装230元电机控制面板电脑板风轮触摸板油烟机拆装大修,含配件费墙体单向阀300元特级维修,200元的维修工时费+ 配件费原装电脑版120-300原装电机200-340进口电机680-2600修复特殊电机300-800触摸板230-450西门子抽油烟机电机时转时停故障维修详解:1、抽油烟机的电机功率不是很大,通常烧的机率也很小;若是如今能断定抽油烟机中电容是正常的话,最有能够的就是抽油烟机运用时间过久,抽油烟机的电机转子(轴承)被油腻住。
2、电机不转,有嗡嗡声,通常是电容容量减小或短路,形成电机不能正常发动;你能够先看下电容的外观,如有外观有烧焦的痕迹,阐明电容已坏,换个新的同类型电容就能排除毛病,(换电容时注重要换同类型的,如没有同类型的,必定要看好它的耐压值,新换电容的耐压值必定要比原有的高,只高不能低,如耐压值低了,电容不光会用不住,并且太小,有能够爆破!换的新电容容量不能过小,过小电机相同不能正常发动。
)电容容量小在外观是看不出来的,只要直接替换一个新的同类型的电容来判别电容的容量能否过小。
3、若是拨一下电机的风叶,风叶转得很轻,阐明不是光滑的事;最终再思考电机的毛病(电机可运用8年),电机发热.并且,电机只转了一小会儿就棘手!阐明电机内的线圈有匝间短路形成,电机坏了,只能买新的了。
西门子ER326AB90L燃气灶使用说明书
Siemens - Electrogeräte GmbH Carl - Wery - Straße 3481739 München Cod. 9000433842 A en 中文說明書 型號 ER326AB90L 單頭石油氣爐 ER326BB90L 兩頭石油氣爐請保留此說明書Operating instructions zhTable of contentsSafety precautions (3)Switching on manually (6)Safety system (7)Burners (6)Your new appliance (5)Switching on automatically (7)Switching off a burner (7)Power levels (7)Warnings (8)Suitable pans (9)Wok pan (9)Accessories (10)Additional pan support (10)Additional coffee maker support (10)Cooking recommendations (10)Precautions for use (11)Cleaning and maintenance (12)Cleaning (12)Unsuitable products (12)Maintenance (13)Faults (14)Technical Assistanse Service (15)Warranty conditions (15)Used appliances and packaging (15)Environmentally-friendly waste management (15)3Dear customer,Congratulations on your choice. Thank you for purchasing one of ourappliances. This practical, modern and functional appliance is manufactured using materials of the highest quality which are subject to strict QualityControl checks throughout the entire manufacturing process. The appliance is meticulously tested to ensure that it meets your demands and producesperfect cooking results.Do not remove the appliance from its protective packaging until it is installed in the unit.Please read these instructions carefully before proceeding to install and use the appliance. The information contained in these instructions is essential for the correct operation of the appliance and, more importantly, for your safety.The packaging of your appliance has been manufactured using only thematerials which are strictly necessary to guarantee efficient protectionduring transport. These materials are 100% recyclable, thus reducing theenvironmental impact. You can also contribute to caring for the environment, by following the advice below:- dispose of the packaging in the appropriate recycling bin,- before you get rid of an old appliance, make sure you disable it. Contactyour local authority to find out the address of your nearest recycling centreto dispose of your appliance,- do not pour used oil down the sink. Collect it in a sealed container andtake it to an appropriate collection point or, failing that, place it in the rubbish bin (it will end up in a controlled dump; this is probably not the best option,but it will avoid contaminating ground water).IMPORTANT:In the unlikely event that the appliance should arrive damaged or not meetyour expectations in terms of quality, please inform us as soon as possible.For the warranty to be valid, the appliance must not have been tamperedwith, or used inappropriately.4Safety precautionsRead these instructions carefully. Reading these instructions will enable you to use your appliance safely and effectively.All operations relating to installation, regulation and conversion to other types of gas must be carried out by an authorised installation engineer, respecting applicable regulations, standards and the specifications You are recommended to contact the Technical Before installing your new hob, ensure that it is being installed according to the assembly instructions.This appliance can only be installed in a well ventilated place in accordance with existing regulations and ventilation specifications. The appliance must not be connected to a combustion product removal device.This appliance has been designed for home use only. This appliance cannot be installed on yachts or in caravans.The place in which the appliance is installed must have fully-functioning ventilation, in accordance with the regulations.Do not subject the appliance to draughts. These might This appliance leaves the factory set to the type of gas Do not tamper with the appliance’s interior. If necessary, call our Technical Assistance Service.These operating and installation instructions should be retained, and passed onto the buyer if the appliance is sold.that is indicated on the specifications plate. If this must blow out the burners.be changed, read the Assembly instructions.5Gas appliances used in Hong Kong SAR; under the Gas safety (Registration of Gas installers and Gas of the gas and electricity providers.(registered to the appropriated class) employed by registered gas contractors can personally carry out gas Assistance Service to convert to another type of gas.installation, regulation.Contractors) regulations, only register gas installers cover.Please do not use additional fitting, such as aluminumThe surfaces of cooking appliances heat up during use. Care must be taken when using these appliances. Keep children well away from the appliance.This appliance is only intended for cooking purposes, not as a heating system.Fat or oil which is overheated can catch fire easily. Do not leave oil or fats to heat up unattended. If oil or fats do catch fire, never use water to put the fire out. Risk of burns! Put the fire out by covering the pan with a lid and switch off the hotplate.In the event of a malfunction, turn off the appliance’s gas and electricity supply. For repairs, call our Technical Assistance Service.If one of the controls will not turn, do not force it. Call the Technical Assistance Service immediately, so that they can repair or replace it.Never place unstable pans on the hob or the burners, as they may accidentally tip over.Do not clean the specifications plate using a steam cleaner. Risk of electrocution!This appliance is class 3 type, according to the EN 30-1-1 regulation for gas appliances: built-in appliance.Do not store or use corrosive chemicals, products which produce fumes, flammable materials or non-food products below or near this domestic appliance.The graphics in this instruction manual are given as a guide only.The manufacturer is exempt from all responsibility if this the requirements of this manual are not complied with.This appliance is not intended for use by persons (including children) with reduced physical, sensory or mental capabilities,or lack of experience and knowledge, unless they have been given supervision or instruction concerning use of the appliance by a person responsible for their safety. kÉîÉê=äÉ~îÉ=íÜÉ=~ééäá~åÅÉ=ìå~ííÉåÇÉÇ=ÇìêáåÖ=çéÉê~íáçåK=6Do not switch on the appliance if it is damaged in any way. Contact our Technical Assistance Service.Your new applianceThese individual appliances can be combined and/or with conventional hobs of thesame make, using the joint accessory. See the catalogue for details.Burner (up to Burner (up to 1,9 kW)Double flame burner (up to 6 kW Control knob Control knob Pan supportPan support Double flameburner (up to 6 kW Control knobPan support2,8 kW)71. Press the chosen burner control and turn it anticlockwise to the required setting.2. Use any type of lighter or flame (cigarette lighter, matches, etc.) and bring it close to the burner.There are indications to show which burner each control knob operates. Fig. 1.The gas burnersSwitching on manually It is essential to ensure that all the burner partsand the pan supports are correctly installed for the Operation Fig. 4Fig. 1Fig. 2Fig. 3appliance to work correctly. Fig. 2-3-4-5.Fig. 58Power levels Turn the corresponding control clockwise to the 0 setting.Switching off a burnerIf your hob features the automatic ON function (ignition sparkers):1. Press the chosen burner control and turn it anticlockwise to the maximum power setting.While the control is still pressed down, sparks are produced on all burners. The flame ignites (it is no longer necessary to press down the control).2. Turn the control to the required setting.If it does not come on, turn the control to the off setting and repeat the steps above. This time, press and hold the control for longer (up to 10 seconds).Warning! If after 15 seconds have elapsed, the flame does not ignite, switch off the burner and open a nearby window or door. Wait at least one minute before trying to switch the burner back on.Switching onautomaticallyThe progressive controls can be used to control the power needed, from minimum to maximumpower.Depending on the model, your hob may have a safety system (termopar) that prevents the flow of gas if the burners accidentally switch off. To ensurethat this device is active, switch on the burner as usual and, without releasing the control, press and hold it down firmly for 4 seconds after lighting the flame.Safety systemTermopar Ignition sparkerSetting Large flame Economy flame Control offMaximum capacity oraperture and electricityonMinimum capacity oraperture 9It is normal to hear a whistling noise while the burner is operating.When it is first used, it is normal for the burner to give off fumes; this does not pose any risk and does not indicate a malfunction; they will disappear in time.A few seconds after switching off the burner, it will make a sound (thud); this is not a fault - this means that the safety device is no longer operating.Keep the burner as clean as possible. If the ignition sparkers are dirty, they will not light properly. Clean them periodically using a small non-wire brush. Bear in mind that the ignition sparkers must not suffer any serious impacts.An orange-coloured flame is normal. This is caused by the presence of dust in the atmosphere, spilt liquids, etc.WarningsFor dual double flame burners, the inner and outerflames can be controlled separately.The available power levels are as follows:Inner and outer flame on full power.Outer flame on minimum, inner flame on full power.Inner flame on full power.Inner flame on minimum. 10Suitable pans The kitchen will become hot and humid when this gas appliance is used. You must therefore ensure that the kitchen is well-ventilated. Either keep the natural ventilation apertures open, or install an extractor hood.If using the appliance intensively for prolonged periods additional ventilation may be required, for example, by opening a window; more effective ventilation may also be required, for example, by increasing the hob’s ventilation, if possible.If the burner flames are accidentally blown out, switch off the burner operating control and do not try to relight it for at least one minute.Wok pan Food can be prepared in various ways in a wok: it can be stewed, stir fried, cooked on a low heat, pan-fried, or steamed. It could be said that woks serve as both as a saucepan and a frying pan and, owing to their shape and size, they can be used to cook quite large ingredients.When cooking with a wok, heat is diffused more uniformly and gently; the intense heat which accumulates means that food takes less time to cook and also requires less oil, making it one of the quickest and healthiest ways of cooking. Always follow the manufacturer’s instructions when cooking with a wok.A wok is a cooking vessel originating in China; it is a kind of deep, round, lightweight pan with handles and a flat or concave base.BurnerMinimum pan diameter Maximum pan diameter Double flameburner22 cm 22 cm 26 cm Rapid burnerSemi-rapid burner 14 cm 20 cm11Additional coffee maker supportOnly for use on the auxiliary burner with pans which are no more than 12 cm in diameter.The manufacturer accepts no liability if these additional pan supports are not used or are used incorrectly.CookingrecommendationssupportAccessoriesDepending on the model, the hob may include the following accessories. These are also available from Only for use on the double flame burner with pans which are more than 26 cm in diameter (roasting dishes, earthenware pots, etc.) and with pans with aconcave base.Additional wok pan the Technical Assistance Service.Burner Very high High Medium Low Double flame burnerBoiling, steaming, griddling, toasting, paellas, Asian food (wok).Reheating and keeping things hot: cooked and pre-cooked dishes.Rapid burnerfresh vegetables,Rice, white sauce and ragout.Steaming:fish,vegetables.Semi-rapid burner Steaming potatoes,Escalopes, steaks, fresh vegetables,omelettes, frying, stews and pasta.Rehea ting, keeping things hot and making ta sty casserol es.Precautions for useenergy and prevent cookware damage:Use pans which are the right size for each burner.Do not use damaged cookware, which does not sit evenly on the hob. Pans may be overturned.Only use a pan with thick, flat base.Always place the cookware right over the burner, not to one side. Otherwise it could be overturned.Do not place large pans on the burners near the controls. These may be damaged by the very high temperatures.Place the pans on the pan supports, never directly on the burner.Pans should be placed on the hob carefully.Do not strike the hob and do not place excessive weight on it.Make sure that the pan supports and burner coversare correctly positioned before using the appliance.The following advice is intended to help you save aç=åçí=ìëÉ=ëã~ää=êÉÅÉéí~ÅäÉë=çå=ä~êÖÉ=ÄìêåÉêëK=qÜÉ=Ñä~ãÉ=ëÜçìäÇ=åçí=íçìÅÜ=íÜÉ=ëáÇÉë=çÑ=êÉÅÉéí~ÅäÉëK==aç=åçí=Åççâ=ïáíÜçìí=äáÇë=çê=ïáíÜ=äáÇë=çåäó=é~êíá~ääó=ÅçîÉêáåÖ=êÉÅÉéí~ÅäÉëK=vçì=~êÉ=ï~ëíáåÖ=ÉåÉêÖóK==Never slide pans across the glass surface, as you may scratch it. In addition, try not to drop heavy or sharp objects on the glass. Never strike any part of the hob.Do not use steam cleaners. This could damage the hob.Never use abrasive products, steel scourers, sharp implements, knives, etc. to remove bits of hardened food from the hob.If your hob is fitted with a glass or aluminium panel, never use a knife, scraper or similar to clean the point where it joins the metal.Do not use knives, scrapers or similar implements to clean the point where the glass meets the burner trims, the metal frames or the glass/aluminium panels, if fitted.Unsuitable productsOnce the appliance is cool, use a sponge to clean it with soap and water.After each use, clean the surface of the respective burner parts once they have cooled down. If any bits are left (overcooked food, drops of grease etc.), however few, they will become stuck to the surface and more difficult to remove later. The holes andgrooves must be clean for the flame to ignite properly. These should be cleaned using soapy water and scrubbed using a non-wire brush.If the pan supports are fitted with rubber rests, ensure that these are also cleaned. The rests may come loose and the pan support may scratch the hob.Always dry the burners and pan supports completely. Water droplets or damp patches on the hob at the start of cooking may damage the enamel.After cleaning and drying the burners, make sure the burner covers are correctly placed on the burner flame diffuser.CleaningCleaning and maintenanceAlways clean off any liquid as soon as it is spilt: you will save yourself any unnecessary effort.Grains of sand that may come from cleaning fruits and vegetables will scratch the glass surface.Melted sugar, or foods which contain a lot of sugar which may have spilt, should be cleaned off the hotplate immediately, using the glass scraper.MaintenanceSometimes certain faults detected can be easilyresolved. Before calling the Technical AssistanceService, bear in mind the following advice:Fault Possible cause SolutionThe generalelectrical system ismalfunctioning.Defective fuse.The automatic safety switch hastripped or a fuse hasblown.Check the fuse in the main fuse box and change it if it is damaged.Check the main control panel to see if the automatic safety switch has tripped or a fuse has blown.The automatic ON function does not work.There may be food or cleaningproducts stuck between theignition sparkers and theburners.The burners are wet.The burner covers are notcorrectly positioned.The appliance is either notearthed, not connected properlyor the earth connection is faulty.The space between the ignitionsparker and the burner mustbe clean.Dry the burner covers carefully.Check that the covers are correctlypositioned.Contact an electrical engineer.The burner flame is not uniform.The burner components are notcorrectly positioned.The grooves on the diffuser aredirty.Ensure the components arecorrectly positioned.Clean the grooves on the diffuser.The flow of gas does not appear normal or no gas comes out.The gas mains are turned off.If the gas is supplied from a gasbottle, check that this isnot empty.Turn on all stop cocks.Change the gas bottle.The kitchen smells of gas.A gas tap has been left on.There may be a leak from thecoupling to the gas bottle.Turn off the gas taps.Check that the coupling issound.The safety valve on one of the burners is not working.The control knob was not helddown for long enough.The grooves on the diffuser aredirty.Once the burner is lit, holdthe control knob down a fewseconds longer. Clean thegrooves on the diffuser.If the symbol is shown on the specifications plate, bear in mind the following instructions.When contacting our Technical Assistance Service, please provide the product number (E-Nr.) and production number (FD) of the appliance. Thisinformation is given on the specifications plate located on the lower section of the hob and on the label in the user manual.Unpack the appliance and dispose of the packaging by environmentally-friendly means.This appliance complies with European Directive 2002/96/CE on Waste Electrical and Electronic Equipment (WEEE).Environmentally-friendly waste managementWarranty conditionsUsed appliances and packagingThe applicable warranty conditions are those set out by the company’s representative office in the country of purchase. Detailed information is available from retail outlets. Proof of purchase must be presented to obtain the benefits of the warranty.We reserve the right to introduce changes.目錄安全注意事項 (20)閣下的新爐具 (22)氣爐操作 (23)手動開爐 (23)自動開爐 (24)安全系統 (24)關停爐頭 (24)火勢等級 (24)警告 (25)合適烹皿 (26)配件 (27)烹煮建議 (27)使用注意事項 (28)清潔及保養 (29)清潔 (29)不適合產品 (29)保養 (30)毛病 (31)技術支援服務部 (32)保養條件 (32)使用過的器皿和包裝 (32)尊貴的客戶:祝賀您做出明智的選擇購買我們的其中一種家用電器。
燃气灶维修收费标准

燃气灶维修收费标准燃气灶是家庭厨房中常见的厨具,但在长时间使用后,难免会出现一些故障或需要维修的情况。
为了让用户对燃气灶的维修收费有一个清晰的了解,我们制定了以下燃气灶维修收费标准,希望能够为用户提供更好的服务。
1. 上门维修费用。
我们将根据用户所在地的具体位置和距离来确定上门维修的费用。
一般情况下,我们会根据实际情况收取一定的上门维修费用,以覆盖维修师傅的交通费和时间成本。
2. 维修服务费用。
针对不同类型的燃气灶故障,我们将提供相应的维修服务,并根据故障的复杂程度和所需的工时来确定维修服务费用。
具体的维修服务费用将根据实际情况进行评估和收费。
3. 配件更换费用。
如果在维修过程中需要更换燃气灶的配件,我们将根据配件的种类和价格来确定更换费用。
我们会提供清晰的配件价格表,并在更换配件时进行详细的解释和确认,确保用户的知情权和选择权。
4. 维修保障费用。
对于我们提供的维修服务,我们将提供一定的维修保障期,如果在保障期内出现同类型故障,我们将提供免费的维修服务。
但如果故障与之前不同,我们将根据实际情况进行评估和收费。
5. 其他费用。
除了上述提到的费用外,如果在维修过程中出现特殊情况,需要额外的费用支出,我们将提前与用户进行沟通和确认,确保用户对费用有清晰的了解和认可。
最后,我们希望用户在需要燃气灶维修服务时能够对以上收费标准有一个清晰的了解,并在维修前与我们进行充分的沟通和确认,以确保双方的权益。
我们将以专业、诚信的态度为用户提供高质量的燃气灶维修服务,让用户在使用燃气灶时更加放心和安心。
感谢您对我们的信任和支持!。
煤气灶维修方案

煤气灶维修方案煤气灶是现代厨房中不可或缺的厨房电器,但是,由于长期使用和保养不当,可能会导致灶具出现故障。
这就需要我们学会一些基础的煤气灶维修方案,以便及时进行维修。
一、煤气灶无法点火的原因及维修方案1.1 火花塞和火花塞线圈火花塞和火花塞线圈是煤气灶点火的关键部件。
如果这些部件出现问题,将会影响点火的效果。
1.1.1 检查火花塞首先,我们需要检查火花塞的位置和状态,确保它没有被压得过深或者过浅。
如果火花塞表面弯曲或者变形,那么就需要更换一个新的。
1.1.2 检查火花塞线圈接下来,我们需要检查火花塞线圈,保证它与火花塞之间的连接很好。
如果线圈不工作或者出现断路,那么就需要更换一个新的线圈。
1.2 磁打火点如果煤气灶无法点火,那么可能是磁打火点出现了问题。
1.2.1 检查磁打火点的位置和状态首先,我们需要检查磁打火点的位置和状态,确保它的表面没有被磨损,或者没有被腐蚀。
如果表面有腐蚀或者磨损的部分,那么就需要更换一个新的。
1.2.2 检查磁打火点电路接下来,我们需要检查磁打火点电路,确保它的电路没有出现断路。
如果电路出现了断路,那么就需要重新接线。
二、煤气灶火焰大小不正常的原因及维修方案2.1 煤气管路问题如果煤气管路出现问题,就有可能导致火焰不正常。
2.1.1 检查煤气管路首先,我们需要检查煤气管路,确保它没有出现渗漏或者堵塞的问题。
如果发现煤气管路存在问题,那么就需要及时进行维修或者更换。
2.2 煤气灶阀门问题如果煤气灶阀门出现问题,也有可能导致火焰不正常。
2.2.1 检查煤气灶阀门状态首先,我们需要检查煤气灶阀门的状态,确保它没有被磨损或者变形。
如果发现阀门表面出现磨损或者变形,那么就需要更换一个新的。
2.2.2 检查阀门电路接下来,我们需要检查阀门电路,确保它没有出现断路的问题。
如果电路出现了断路,那么就需要重新接线。
三、煤气灶漏气的原因及维修方案3.1 煤气管路问题如果煤气管路存在问题,就有可能出现漏气的情况。
家用燃气灶维修

家用燃气灶维修引言:在现代家庭中,燃气灶已成为必不可少的家庭电器之一。
燃气灶的使用方便、节能环保、加热快速等特点使其成为许多家庭的首选。
然而,由于长时间使用或不正确使用,燃气灶难免会出现一些故障。
本文将介绍家用燃气灶常见的故障及其维修方法,帮助家庭用户更好地解决燃气灶问题。
一、点火系统故障在点火系统故障中,最常见的问题是点不着火。
可能的原因包括:火花塞损坏、电源线松动或破损、进气阀关闭或堵塞。
如果燃气灶点不着火,我们可以按照以下步骤进行维修:1. 检查火花塞:首先,关闭燃气开关并断开电源,使用扳手拆下火花塞。
检查火花塞是否损坏或污损,如有损坏则需要更换新的火花塞。
2. 检查电源线:仔细检查电源线是否松动或破损。
如果发现损坏的电源线,应及时更换新线,并确保线路接触良好。
3. 检查进气阀:打开燃气阀门并观察是否有气体进入。
如果没有气体进入,说明进气阀可能关闭或堵塞。
在此情况下,应检查进气阀门是否打开,并清除任何阻塞物。
二、火焰异常问题燃气灶的火焰异常可能包括火焰颜色不正常、火焰不稳定或火焰太小等问题。
这些问题通常是由于燃气供应不足、阀门堵塞或燃气灶部件损坏引起的。
为了解决这些问题,可以尝试以下方法:1. 检查燃气供应:检查燃气表,确保燃气供应正常。
如果燃气表指示不足,可能需要与供气公司联系修理。
2. 清洁燃气灶:使用软布和清洁剂清洁燃气灶的燃烧器和火焰孔。
这可以确保燃气流通顺畅,防止火焰不稳定。
3. 检查阀门:关闭燃气阀门并检查阀门是否堵塞。
如果阀门堵塞,可以使用刷子或风扇清除阀门中的灰尘和杂物。
三、漏气问题燃气灶发生漏气的风险是非常危险的,容易引发火灾和爆炸等事故。
因此,我们应该密切关注燃气灶是否存在漏气现象。
以下是一些常见的检测漏气和维修的方法:1. 使用泡沫检测剂:使用专用的漏气检测剂,涂抹在燃气管道连接处。
如果有气泡产生,表示存在漏气。
此时应立即关闭燃气阀门,并联系专业人员进行修理。
2. 检查连接部件:检查燃气管道和连接件是否松动或损坏。
灶具十大品牌售后排行榜
灶具十大品牌售后排行榜在现在通讯运输十分方便的情况下,人们越来越趋向于网购等新型购买方式。
但是往往会碰到售后达不到预想效果的保障!或是推卸责任,或是拖延时间等。
严重的影响了用户的认同感。
但是在行业中,总是会有那么几家作为龙头型企业,它们对售后支持保障上可谓是下足了功夫。
一家公司如果对其产品的售后服务不提供应有的保障,那么这家公司是走不远的。
所以对于售后服务的重要性是不言而喻的。
对于灶具这个行业,经过网络资源的整合分析,有关机构评出了年度灶具十大品牌售后排行榜,帮助消费者更理性的消费。
第一位:老板杭州老板电器股份有限公司在经过三十年的发展壮大,占据了比较大的市场份额。
优秀的售后保障,是维护公司与客户的最好纽带。
例如保修期内提供上门维修服务等一系列的政策,让老板这个品牌留在了消费者信任度排行榜的前几位!而且老板的企业理念也是要做一家社会尊敬的企业。
第一名实至名归。
第二位:方太方太一家从事高端厨电制造为己任的公司。
以其至诚服务,以诚为核心出发点,致力于为客户提供及时的专业的用心的最佳售后服务体系,把以顾客感动为第一服务原则标准,受到业界一直好评。
第三位:火王一家专注厨电领域二十二年的老牌燃器具公司。
在消费者心里一直都是公认的“灶具专家”。
过硬的品牌质量让火王燃气灶从开始到现在都屹立在灶具行业的最高峰。
完善的售后服务体系,二十四小时专业服务,技术过硬的维修人员,只为了火暖万家,王道天下的使命,深受消费者认同。
第四位:万家乐万家乐作为一家专业从事清洁能源和可再生能源高效利用的低碳型企业,以“绿色健康,幸福生活”为使命,秉承“真诚服务,乐送万家”的宗旨诚心诚意为顾客提供专业优质的服务。
深受消费者喜爱。
第五位:华帝华帝——北京奥运祥云火炬的设计制作商,以“持续稳健、专业化、高品质、高技术、高档次”为发展模式,为客户提供星级的售后服务。
各项服务都具备相应的后勤保障。
第六位:西门子西门子,一家跨国型企业,公司一直以为亿万家庭提供最优质产品而享誉国际家电产业。
燃气灶维修收费标准
燃气灶维修收费标准燃气灶是家庭厨房中常见的厨房用具,随着使用时间的增长,燃气灶可能会出现一些故障,需要进行维修。
为了让用户了解燃气灶维修的收费标准,我们在这里对燃气灶维修收费标准进行详细介绍。
1. 上门费用。
燃气灶维修服务一般都会收取上门费用,这是维修人员上门服务的基本费用,包括了维修人员的上门交通费以及上门服务的基本费用。
上门费用根据不同的维修公司有所不同,一般在50-200元之间。
2. 诊断费用。
在维修燃气灶时,维修人员需要先对燃气灶进行故障诊断,以确定需要进行的维修工作。
诊断费用一般在50-100元之间,根据不同的维修公司有所不同。
3. 维修费用。
维修费用是指维修人员对燃气灶进行实际维修所收取的费用,包括更换零部件、修复故障等费用。
维修费用根据燃气灶的故障情况和所需维修的工作量而定,一般在100-500元之间。
4. 配件费用。
如果燃气灶需要更换零部件,用户需要支付相应的配件费用。
配件费用根据所需更换的零部件种类和价格而定,维修人员会在更换零部件之前与用户进行沟通,并告知配件费用的具体情况。
5. 维修保障。
一些维修公司提供维修保障服务,即在维修后的一定时间内,如果出现同样的故障,维修公司将提供免费的再次维修服务。
用户可以根据自己的需求选择是否需要维修保障服务。
总的来说,燃气灶维修的收费标准是根据上门费用、诊断费用、维修费用、配件费用和维修保障等因素综合确定的。
用户在选择维修公司时,可以根据自己的实际情况进行比较,选择性价比较高的维修公司进行维修服务。
希望以上信息能够帮助用户了解燃气灶维修的收费标准,对燃气灶出现故障时能够更加理性的进行选择和决策。
- 1、下载文档前请自行甄别文档内容的完整性,平台不提供额外的编辑、内容补充、找答案等附加服务。
- 2、"仅部分预览"的文档,不可在线预览部分如存在完整性等问题,可反馈申请退款(可完整预览的文档不适用该条件!)。
- 3、如文档侵犯您的权益,请联系客服反馈,我们会尽快为您处理(人工客服工作时间:9:00-18:30)。
快益修专业燃气灶维修师傅为你讲解燃气灶常见故障及排除方法:
一、点火不灵(点不着火)
1、脉冲点火器无电池或电池电压不足安装电池或更换电池
2、气源开关未开或气压不足打开气源开关或更换新钢瓶或询问燃气公司是否停气。
3、点火电极,感应电极距离不当或有污染调整点火电极至合理距离,并清洁电极。
4、气压太高造成气流速度太快,冲击电火花适当调整气源开关开度,以降低气压。
5、点火喷嘴太大,喷嘴太大造成气流太多,冲击电火花更换喷嘴。
6、磙头破损,造成在破损部位超近点火更换磁头。
8、点火输出电缆未与瓷头连接牢固用力插紧并用502胶或其它胶粘牢。
9、输出电缆破损,造成超近打火更换电缆或将破损处用绝缘胶布包好。
10、开关总程内部撞击块磨损或破裂更换新撞击块,注意安装位置正确。
11、脉冲点火总程微动开关接触不良修理或更换微动开关
12、引火喷嘴前或点火支架内存有蜘蛛网清除蜘蛛网。
13、胶管压篇扭折或堵塞清除堵塞物,矫正或更换胶管。
二、点火不灵(不点火)
1、脉冲点火未安装电池,或电池正负极装反,应正确安装电池;
2、电源线脱落或松动;
3、点火器内部结构损坏,更换点火器;
4、冲击锤,重新安装击锤。
三、火焰异常
1、脱火或离焰
a、风门太小,调整风门;
b、喷嘴太小,扩大喷嘴;
c、燃气管路中混有空气,重复点火动作,排尽空气;
d、灶前压力太高,可适当调节总阀开度,液化气应请专业人员调节或修理调压器(出口压力太高)。
2、回火
a、强风吹动火焰,避免强风直接吹到火焰;
b、气压太低,提高阀的开度呀询问供气部门是否停气;
c、封密燃烧,提供适当的空气量;
d、风门太大,关小风门;
e、设计不合理,火孔直径太大,空间太大等;
f、喷嘴太小或堵塞,更换喷嘴或用捅针清除喷嘴内杂物;
g、火盖未放好,调整安装位置;
h、火盖、燃烧器老化,更换火盖、燃烧器。
3、黑烟或黄焰
a、风门全关,适当开启风门;
b、引射器管内结有蜘蛛网,去除蜘蛛网;
c、灶具型号选错,人工气错当液化气灶使用;
d、发火圈火孔堵塞,清理发火圈火孔;
e、灶具喷嘴孔内有异物,清理异物。
四、漏气或有燃气异味
a、胶管破裂或未接好,更换新胶管并固定;
b、阀门接头处密封老化,更换密封圈;
c、阀门长时间失效,更换新阀门;
d、炉头未点燃,排除故障,重新点火;
e、脱火或离焰,清除脱火(按前面的方法解决);
f、万向节漏气,修理或更换万向节;
g、焊接不牢,有砂眼,更换或重焊三通管;
h、喷嘴未套入引射管,重新装好喷嘴;
i、钢瓶、角阀或调压器,更换钢瓶或调压器。
五、其它现象
1、长明火。
a、总成卡死不复原,更换总程;
b、阀芯卡簧脱落,修理或更换总程;
c、装配精度差,重新装配。
2、火焰太小
a、灶具型号搞错,认准型号,进行更换;
b、熄火保护装置未全开,修理熄火装置;
c、三能管不适应,重新进行技术论证;
d、开关位置未处于大火状态,调整开关位置;
e、胶管弯曲或压扁,调整胶管;
f、压力不足,液化气就检查调压器是否有故障,人工气(管道输送)如在高峰状态下出现火焰太小,此时只能使用一头,当压力低于50mm水柱时应与燃气公司交涉。
快益修以家电、家居生活为主营业务方向,提供小家电、热水器、空调、燃气灶、油烟机、冰箱、洗衣机、电视、开锁换锁、管道疏通、化粪池清理、家具维修、房屋维修、水电维修、家电拆装等保养维修服务。