爱普生Perfection 平板扫描仪
EPSONPERFECTION4870PHOTO扫描仪精度高达不
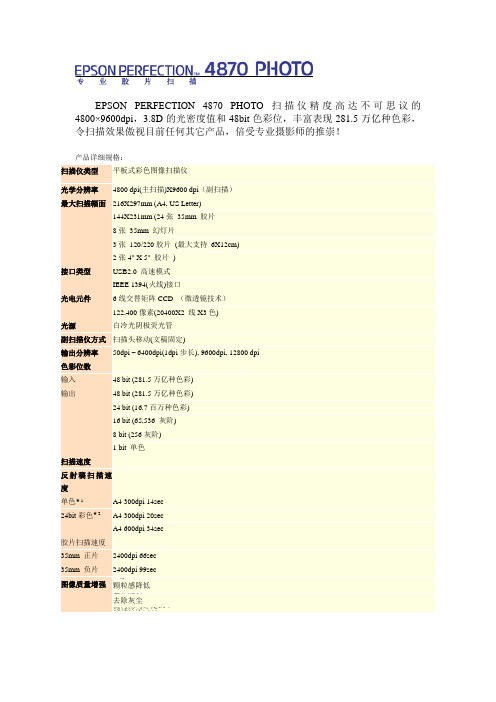
EPSON PERFECTION 4870 PHOTO 扫描仪精度高达不可思议的4800×9600dpi ,3.8D 的光密度值和48bit 色彩位,丰富表现281.5万亿种色彩,令扫描效果傲视目前任何其它产品,倍受专业摄影师的推崇!产品详细规格: 扫描仪类型平板式彩色图像扫描仪 光学分辨率 4800 dpi(主扫描)X9600 dpi (副扫描)最大扫描幅面 216X297mm (A4, US Letter)144X231mm (24张 35mm 胶片8张 35mm 幻灯片3张 120/220胶片 (最大支持 6X12cm)2张4" X 5" 胶片 )接口类型 USB2.0 高速模式IEEE 1394(火线)接口光电元件 6线交替矩阵CCD (微透镜技术)122,400像素(20400X2 线X3色)光源 白冷光阴极荧光管副扫描仪方式 扫描头移动(文稿固定)输出分辨率50dpi – 6400dpi(1dpi 步长), 9600dpi, 12800 dpi 色彩位数输入48 bit (281.5万亿种色彩) 输出 48 bit (281.5万亿种色彩)24 bit (16.7百万种色彩)16 bit (65,536 灰阶)8 bit (256灰阶)1 bit 单色扫描速度反射稿扫描速度单色★1A4 300dpi 14sec 24bit 彩色★2 A4 300dpi 20secA4 600dpi 34sec胶片扫描速度35mm 正片2400dpi 66sec 35mm 负片 2400dpi 99sec 图像质量增强 Digital ICE颗粒感降低 色彩翻新去除灰尘 全真数码影像技术 II 优化自动曝光 噪音降低 优化去除网纹USB1.1:Microsoft® Windows® 98/Me/2000 Professional /XP Home Edition /XP Professional(预装版或Windows®98/Me/2000 Professional预装版的升级)Mac OS® 8.6至9.X, Mac OS® X 10.2或更高版(SilverFast : Mac OS® 9.2或更高版本)USB2.0高速模式:Microsoft Windows®XP Home Edition /XP Professional/2000 Professional(预装版或Windows®98/Me/2000 Professional预装版的升级)*使用USB2.0 需要安装微软USB 2.0主驱动程序IEEE1394 (火线):Microsoft Windows® Me/2000 Professional /XP HomeEdition/XP ProfessionalMac OS® 8.6 to 9.x, Mac OS® X 10.2或更高版本(SilverFast: Mac OS® 9.2或更高版本)工作环境温度5°C to 35°C (工作状态)湿度10% to 80%无结露(工作状态)电气规格额定电压/频率(AC200V模式) AC220-240V 50-60Hz 耗电量24W (工作状态)16W (侯机状态)4.5W (休眠状态)物理规格宽×长×高304mm×476mm×134mm重量约6.7kg。
EPSON Perfection 1660 照片扫描仪开始指南说明书
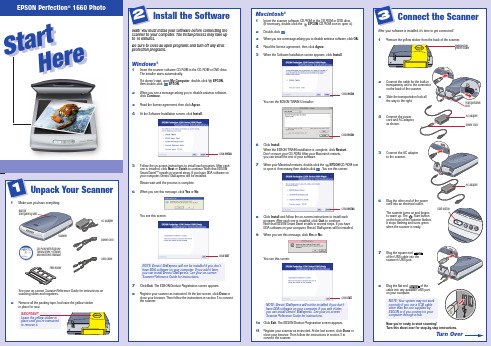
EPSON Perfection ®1660 PhotoS t a r t He r e S t a r t H e r e 1Make sure you have everything:See your on-screen Scanner Reference Guide for instructions on scanning slides and negatives.2Remove all the packing tape, but leave the yellow sticker in place for now.IMPORTANT!Leave the yellow sticker in place until you’re instructed to remove it.Unpack Your ScannerWait! You must install your software before connecting the scanner to your computer. The install process may take up to 15 minutes.Be sure to close all open programs and turn off any virus protection programs.Windows ®1Insert the scanner software CD-ROM in the CD-ROM or DVD drive. The installer starts automatically.If it doesn’t start, open My Computer , double-click EPSON ,then double-click EPSON .2When you see a message asking you to disable antivirus software, click Continue .3Read the license agreement, then click Agree .4At the Software Installation screen, click Install .5Follow the on-screen instructions to install each program. After each one is installed, click Next or Finish to continue. Note that EPSON Smart Panel™ installs in several steps. If you have PDA software on your computer, Presto! PixExpress will be installed.Please wait until the process is complete.6When you see this message, click Yes or No :You see this screen:NOTE: Presto! PixExpress will not be installed if you don’t have PDA software on your computer. If you add it later, you can install Presto! PixExpress. See your on-screen Scanner Reference Guide for instructions.7Click Exit . The EPSON Product Registration screen appears.8Register your scanner as instructed. At the last screen, click Done or close your browser. Then follow the instructions in section 3 to connect the scanner.Install the SoftwareMacintosh ®1Insert the scanner software CD-ROM in the CD-ROM or DVD drive.(If necessary, double-click the EPSON CD-ROM icon to open it.)2Double-click.3When you see a message asking you to disable antivirus software, click OK .4Read the license agreement, then click Agree .5When the Software Installation screen appears, click Install .You see the EPSON TWAIN 5 Installer:6Click Install .When the EPSON TWAIN installation is complete, click Restart . Don’t remove your CD-ROM. After your Macintosh restarts, you can install the rest of your software.7When your Macintosh restarts, double-click the EPSON CD-ROM icon to open it, if necessary , then double-click . Y ou see this screen:8Click Install and follow the on-screen instructions to install each program. After each one is installed, click Quit to continue.Note that EPSON Smart Panel installs in several steps. If you have PDA software on your computer, Presto! PixExpress will be installed.9When you see this message, click Yes or No :You see this screen:NOTE: Presto! PixExpress will not be installed if you don’t have PDA software on your computer. If you add it later, you can install Presto! PixExpress. See your on-screen Scanner Reference Guide for instructions.10Click Exit . The EPSON Product Registration screen appears.11Register your scanner as instructed. At the last screen, click Done or close your browser. Then follow the instructions in section 3 to connect the scanner.12Connect the Scanner3AC adapterScannerCD-ROM with EPSON ®TWAIN driver, software, and electronic manualsUSB cableFilm holderPower cordAfter your software is installed, it’s time to get connected!1Remove the yellow sticker from the back of the scanner.2Connect the cable for the built-intransparency unit to the connector on the back of the scanner.3Slide the transportation lock all the way to the right.4Connect the power cord and AC adapter,as shown.5Connect the AC adapter to the scanner.6Plug the other end of the power cord into an electrical outlet.The scanner turns on and begins to warm up. The Start button on the front of the scanner flashes. It stops flashing and turns green when the scanner is ready.7Plug the square endof the USB cable into the scanner’s USB port.8Plug the flat end of the cable into any available USB port on your computer.NOTE: Your system may not work correctly if you use a USB cable other than the one supplied by EPSON or if you connect to your computer through a hub.Now you’re ready to start scanning!Turn this sheet over for step-by-step instructions.Remove theyellow stickerTransportation lockAC adapterPower cordClick InstallClick ExitClick InstallClick InstallClick ExitClick installStart buttonTurn OverAC adapterBuilt-intransparency unitThe buttons make scanning easy. Just place your photo or document face down on the scanner and follow the steps for the type of scan you want.Copy:Scan and automatically print a document—just like a copier.1Make sure your printer is turned on.2Press thebutton on the scanner.3Wait while your scanner and printer do their work. You can watch thecopy process on your computer screen.Scan to E-mail: Attach your photo to an e-mail.1Press the button on the scanner. Your photo is scanned, and you see it on your screen.2Click Finish . You see the Launch Assistant.3Select your e-mail program and click Launch .An e-mail window opens on your screen, with your photo attached.4Enter the address where you want to send the photo, type in a message, and click Send .Scan to Web: Scan your photos to theEPSON PhotoCenter, a free photo-sharing website.Before you start, click the Epson PhotoCenter SMicon on your desktop (or go to ) and register. You also need to log on to AOL ®,if you use it for the Internet.1Press the button on the scanner.Your photo is scanned and the Scan to Web window opens on your screen. 2Select USA under Site Name , and enter the same User ID (e-mailaddress) and Connection Password you used when you registered at the EPSON PhotoCenter. 3Click Upload .4When you see a confirmation message,click OK to connect to the PhotoCenter.Your Internet browser opens and you see the EPSON PhotoCenter.5Under Member Sign In , enter your e-mail address and password, and then click go . You see a message that you have a new photo in your Photo Inbox.6Click Photo Inbox to view your photo.You can move your photo to an album, where you can view it any time you want.Your friends and family can go to the EPSON PhotoCenter to see your pictures too. Click the HELP button on the PhotoCenter screen for more information.Using the Scanner ButtonsEPSON is a registered trademark and EPSON Smart Panel and PRINT Image matching are trademarks of SEIKO EPSON CORPORATION. EPSON Perfection is a registered trademark and EPSON PhotoCenter, EPSON Store, and SoundAdvice are service marks of Epson America, Inc.General Notice: Other product names are for identification purposes only and may be trademarks of their respective owners. EPSON disclaims any and all rights in those marks.Copyright © 2002 by Epson America, Inc. Printed on recycled paper. 4/02 CPD-13982R1Printed in Singapore 4025693-01StartCopyScan to E-mailScan to Web(EPSON PhotoCenter)Recommended Settings1Raise the scanner lid andplace your photo face down on the glass.Then close the lid.2Press the Start button on the scanner. EPSON Smart Panel opens on your computer.NOTE: In Windows XP , you may see a message the first time you press any of the scanner buttons. Select EPSON SMART PANEL,click Always use this program for this action , then click OK .3Click the Scan for Creativity icon. A progress meter appears on your screen and your photo is scanned.After your photo is scanned, you see a window like the one below:4If you want to scan another photo, place it on the scanner, close the cover, and click Scan More . Otherwise, click Finish .ArcSoft™ PhotoImpression™ opens and your scanned image appears on screen. You can edit your image, use it in a calendar or greeting card,save it, or print it.NOTE: For help with PhotoImpression, click the question mark in the upper right corner of the screen.Your First ScanStart buttonClick on a file name if you want to change itClick Finish when you’re done scanningSelected imageEditing tools?Click here for helpClick here for helpGot Questions?S c a n n e r B as i c s When you use the scanner buttons and EPSON Smart Panel, the software automatically selects the best settings for your scan. If you want to selectsettings yourself, see your on-screen Scanner Reference Guide for instructions. For the best scans, select a resolution setting (dpi) that balances quality with file size. The ideal resolution also depends on how you plan to use your scanned image.T o scan an image for:viewing on the Web, select 72 to 96 dpi.sending by e-mail, select 96 to 150 dpi.printing, select a higher resolution based on the image type, such as the following:Scanning resolution Image typefor printing Photograph or magazine300 dpiSmall photograph to be enlarged 300 dpi to 3200 dpi Newspaper text only, text for OCR, text with images 400 dpi Line drawings or artwork300 to 3200 dpi Slides or negatives300 to 3200 dpiNOTE: If you use the scan to P .I.M. feature, make sure you print with PhotoImpression or another P .I.M.-enabled program that came with your P .I.M.-enabled printer.Here’s where to look for answers:On-screen Scanner Reference GuideDouble-click the Scanner Reference Guide icon on your desktop.On-screen Help for Smart Panel, PhotoImpression, and EPSON TWAIN Click the Help button or question mark that appears on the screen when you’re using any of these programs.EPSON T echnical SupportEPSON provides technical assistance 24 hours a day through the electronic support services and automated telephone services described below:World Wide WebFrom the Internet, you can reach EPSON Support at.At this site, you can download driversand other files, look at product documentation, access troubleshooting information, and receive technical advice through e-mail.Automated T elephone ServicesA variety of automated help services are available 24 hours a day, seven days a week. T o use these services, you must have a touch tone telephone and call (800) 922-8911. Your EPSON SoundAdvice SM Express Code is 70390. Use this code to quickly select your scanner in SoundAdvice.T o Speak to a T echnical Support RepresentativeDial (562) 276-4382 (U.S.) or (905) 709-3839 (Canada), 6 AM to 6 PM ,Pacific Time, Monday through Friday. T oll or long distance charges may apply.T o Purchase an Optional Film Adapter or Other Accessories Call the EPSON Store SM at (800) 873-7766 or visit our web site at (U.S. sales only). In Canada, please call (800) 873-7766for dealer referral.Software T echnical Support Software T elephone FaxInternet and E-mailEPSON TWAINU.S.(800) (562) 276-4382fax-on-demand systemCanada(905) 709-3839EPSON Smart (510) 445-8616(510) 445-8601*******************PanelArcSoft(510) 440-9901(510) PhotoImpression8:30 AM *********************5:30 PM , PST Monday-FridayFirst, check thelight on the scanner.Flashing green Warming up or scanning.Green Ready to scan.Flashing redMake sure the transportation lock is pushed all the way to the right. Try restarting your computer. If the red light is still flashing, contact your dealer or EPSON.OffMake sure your scanner is connected to your computer and plugged into a power source.If your problem is listed here, try these suggestions. For more information, see your software Help or your on-screen Scanner Reference Guide .The Found New Hardware Click Cancel and follow the steps on the other Wizard appears on side of this sheet. Disconnect the scanner before your screen.installing the software.Y ou see an error message Make sure your scanner is connected to your when you try to puter and plugged into a power source.The scanner Make sure you’re using the USB cable that came doesn’t scan.with your scanner.If you’re using a USB hub, try connecting the scanner directly to one of the USB ports on your computer.If you see your scanner in the Windows Control Panel but you can’t scan, uninstall and reinstall EPSON TWAIN. See your on-screen Scanner Reference Guide for more information.If you’re trying to scan slides or negatives, you need to remove the document mat from the inside of the scanner lid. See your on-screen Scanner Reference Guide for instructions.The scanner software Make sure your computer has at least 128MB doesn’t work.of memory (RAM). 256MB or more is even better,especially if you’re scanning a large image or scanning at a high resolution.If you’re running software that didn’t come with the scanner, check the Help or documentation to make sure your computer has enough memory. Try closing any programs that you don’t need for scanning.The printed image Check your software settings and make sure doesn’t look the same they are correct for the type of photo or as the original.document you’re scanning.Make sure the scanner glass and the inside of the lid are clean. If not, unplug the power cord and clean them with a soft, dry cloth.Because your monitor and printer use different color technologies, your printed colors cannot exactly match the colors you see on the screen.The printed image is You may have changed the resolution or image larger or smaller than size in your software. The size on your screen the original.doesn’t indicate the size of the printed image.You can’t select your For Scan to E-Mail, you must use a MAPI-e-mail program when compliant program, such as Microsoft ® Exchange you use Scan to E-Mail.or Outlook ®.If you use AOL, you need to use Scan to File and then send the file as an e-mail attachment.Problems?Place top of photo in the upper right corner。
商务好伴侣 爱普生V10扫描仪详细试用
Epson Perfection V10试用:超薄CCD技术作为电脑的输入设备,扫描仪商品化的年代几乎与个人电脑一样长。
然而在很长的一个时期里,扫描仪仅是少数专业人员使用的工具。
在倡导数字化办公的今天,扫描仪作为重要的输入设备,进入了一个快速发展的阶段。
今天的扫描仪,有针对高端商业用户的高速扫描仪、有对传统胶片优化的专业底片扫描仪,还有为一般办公使用的文档扫描仪。
今天将要为大家介绍的,就是爱普生公司推出的入门级商用超薄CCD扫描仪--Epson Perfection V10。
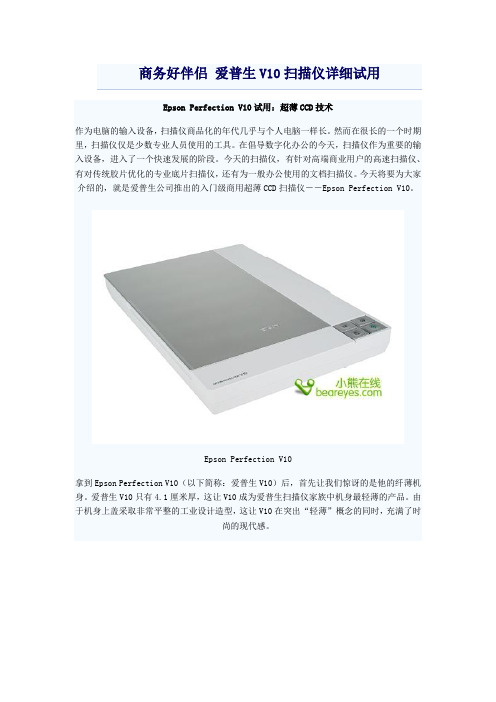
Epson Perfection V10拿到Epson Perfection V10(以下简称:爱普生V10)后,首先让我们惊讶的是他的纤薄机身。
爱普生V10只有4.1厘米厚,这让V10成为爱普生扫描仪家族中机身最轻薄的产品。
由于机身上盖采取非常平整的工业设计造型,这让V10在突出“轻薄”概念的同时,充满了时尚的现代感。
Epson Perfection V10爱普生V10如此轻薄的外型,最重要的是采用了全新的超薄CCD传感器。
同以往的CIS、普通CCD传感器相比,超薄CCD传感器在保证扫描质量的同时,让机身保持了纤薄的身材。
同时,优化的光路设计、体积更小的精密微步进电机和紧凑的电路排列,也是令V10瘦身必不可少的要素。
Epson Perfection V10除了拥有超薄的身材,爱普生V10在操作方面也体现出人性化的设计思路。
机身上的是个操作按键位于机身右下角,按键的功能依次是:扫描至邮件、扫描至PDF、复印和启动。
当机器设定好后,使用这些按键就能完成大多数扫描任务,非常便于操作。
Epson Perfection V10Epson Perfection V10试用:精细扫描和静音技术Epson Perfection V10作为入门级商用超薄CCD扫描仪,爱普生V10不但具有纤巧的外形以节约用户的桌面,而且在扫描性能上也毫不含糊。
多种扫描方式轻松搞定EPSON Perfection 2400 PHOTO
多种扫描方式轻松搞定EPSON Perfection 2400 PHOTO 张国怀
【期刊名称】《《电子测试》》
【年(卷),期】2002(000)010
【摘要】这款Perfection 2400 PHOTO扫描仪,在外观设计上,仍然保持着EPSON Perfecton系列扫描仪一贯的设计风格,曲面机盖,流线型的机身,而且与Perfection 1660相比,简直可以说是孪生兄弟一样,只是在机身和机盖的颜色上有所区别。
但这两款扫描仪的体积,相对其家族中的其它产品还是厚了些。
【总页数】1页(P71)
【作者】张国怀
【作者单位】
【正文语种】中文
【中图分类】TP3
【相关文献】
1.快乐扫描轻松实现——EPSON PERFECTION 1660 PHOTO扫描仪 [J],
2.扫描旗舰[Epson Perfection 2400 Photo] [J], 王欣
3.EPSON扫描仪新品Perfection 2400 Photo [J], CoolBoy
4.EPSON Perfection 2400 PHOTO [J], 张国怀
5.再现真实——EPSON Perfection 2400 Photo扫描仪 [J], cherry
因版权原因,仅展示原文概要,查看原文内容请购买。
爱普生Perfection V850 Pro A4幅面高端影像扫描仪说明书
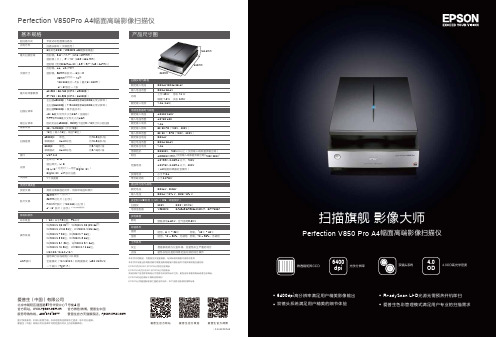
Perfection V850Pro A4幅面高端影像扫描仪ESS200309AZ图片仅供参考,外观以实物为准。
本说明若有任何细节之更改,恕不另行通知。
爱普生(中国)有限公司在法律许可的范围内对以上内容有解释权。
爱普生(中国)有限公司北京市朝阳区建国路81号华贸中心1号楼4层爱普生官方天猫旗舰店:官方网站: 官方微信/微博:爱普生中国服务导购热线:400-810-9977爱普生官方微博爱普生官方微信爱普生官方网站产品尺寸图本彩页中的数据,为爱普生实验室数据,与实际使用数据可能存在差异本彩页中所提出的网络功能均需要选购网络接口面板选件才能实现网络扫描功能EPSON为SEIKO EPSON公司的注册商标EPSON ME为SEIKO EPSON公司的商标其他所有产品名称和其他公司名称在此仅作标识之用,是各自所有者的商标或者注册商标。
EPSON对这些商标不拥有任何权利EPSON公司是国际能源之星的合作伙伴,本产品符合能源利用率标准308mm503mm152.5mm6400dpi4.0ODPerfection V850Pro A4幅面高端影像扫描仪Perfection V850Pro 不仅仅拥有6400dpi 的胶片扫描分辨率,并且配备了爱普生特有的双镜头系统,集专业胶片扫描与高端平板扫描于一身,是专业摄影师的安心优选。
其五段式可调节胶片固定夹,令扫描效果精准细腻,更可兼容多种类型和尺寸的照片及胶片。
Perfection V850Pro 特有ASIC 高速影像处理器,还特别配备高反射镜组件和覆有防反射光学薄膜的CCD光学组件,使得扫描速度快,质量好。
爱普生专业的Digital ICE 影像处理技术可以轻松去除扫描出来图像上的大部分燥点、划痕甚至水珠。
同时配备专业图像处理软件,满足专业摄影师的多方位需求。
V850Pro 具有6400dpi 的扫描分辨率,因此能够得到高质量的图像。
Digital ICE 技术V850Pro 具有Digital ICE 技术。
EPSON Perfection V39 Touch
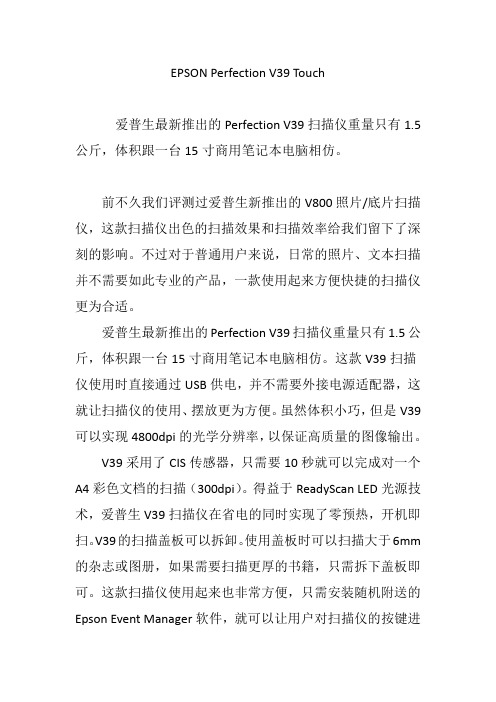
EPSON Perfection V39 Touch爱普生最新推出的Perfection V39扫描仪重量只有1.5公斤,体积跟一台15寸商用笔记本电脑相仿。
前不久我们评测过爱普生新推出的V800照片/底片扫描仪,这款扫描仪出色的扫描效果和扫描效率给我们留下了深刻的影响。
不过对于普通用户来说,日常的照片、文本扫描并不需要如此专业的产品,一款使用起来方便快捷的扫描仪更为合适。
爱普生最新推出的Perfection V39扫描仪重量只有1.5公斤,体积跟一台15寸商用笔记本电脑相仿。
这款V39扫描仪使用时直接通过USB供电,并不需要外接电源适配器,这就让扫描仪的使用、摆放更为方便。
虽然体积小巧,但是V39可以实现4800dpi的光学分辨率,以保证高质量的图像输出。
V39采用了CIS传感器,只需要10秒就可以完成对一个A4彩色文档的扫描(300dpi)。
得益于ReadyScan LED光源技术,爱普生V39扫描仪在省电的同时实现了零预热,开机即扫。
V39的扫描盖板可以拆卸。
使用盖板时可以扫描大于6mm 的杂志或图册,如果需要扫描更厚的书籍,只需拆下盖板即可。
这款扫描仪使用起来也非常方便,只需安装随机附送的Epson Event Manager软件,就可以让用户对扫描仪的按键进行自定义设置。
使用时只需按下扫描仪的预设键,就可以进行快速的扫描操作。
虽然体积小巧,但是爱普生Perfection V39仍然可以为用户提供出色的扫描功能,即便原稿文字、图像质量并不完美,V39也可以通过附带的文本、图像处理工具来对扫描件进行修正,以得到更好的扫描效果。
在扫描一些深底色文档时,普通扫描件中的深色背景经常会将文字覆盖,而这时如果开启了V39的文本增强功能,我们就可以很方便的滤掉底色干扰来获得锐利清晰的文字,文档的识别率也会更高。
在扫描一些文件时,如果你不希望保留或者除去原本文档上的水印、图章,直接使用V39的色彩增强以及褪色功能就可以实现。
Epson Perfection 3170 Scanner 说明书
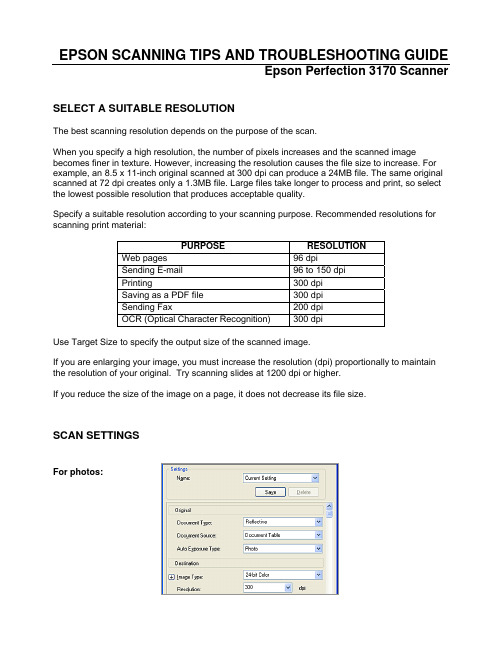
EPSON SCANNING TIPS AND TROUBLESHOOTING GUIDEEpson Perfection 3170 ScannerSELECT A SUITABLE RESOLUTIONThe best scanning resolution depends on the purpose of the scan.When you specify a high resolution, the number of pixels increases and the scanned image becomes finer in texture. However, increasing the resolution causes the file size to increase. For example, an 8.5 x 11-inch original scanned at 300 dpi can produce a 24MB file. The same original scanned at 72 dpi creates only a 1.3MB file. Large files take longer to process and print, so select the lowest possible resolution that produces acceptable quality.Specify a suitable resolution according to your scanning purpose. Recommended resolutions for scanning print material:PURPOSE RESOLUTIONWeb pages 96 dpiSending E-mail 96 to 150 dpiPrinting 300 dpiSaving as a PDF file 300 dpiSending Fax 200 dpiOCR (Optical Character Recognition) 300 dpiUse Target Size to specify the output size of the scanned image.If you are enlarging your image, you must increase the resolution (dpi) proportionally to maintain the resolution of your original. Try scanning slides at 1200 dpi or higher.If you reduce the size of the image on a page, it does not decrease its file size.SCAN SETTINGSFor photos:For film:For slides:Specify Adjustment settings, if necessary, such as dust removal for slides and film.PLACING FILM OR SLIDES ON SCANNERYou can scan 35mm slides, 35mm film or negative strips, and Medium Formattransparencies on the Epson 3170 using the appropriate film holders which come with the scanner.2. Second, load the transparency into the film holder and positionit on the document table.Now go to the section listed below that matches the type oftransparency you want to scan.SCAN 35 MM SLIDES1. Place the film holder on the document table so thatthe triangle mark on its tab is aligned with the triangleon the document table. The projection on the tab thengoes into the hole on the document table.1. The first step is always to open the document cover andslide up the reflective document mat gently to remove it.Please remember to replace the reflective document matwhen you are finished.2. Place slides in the holder, base side facing down asshown below.NOTE: The base side of the film is the side wherethe film maker's name and film ID numbers can beread correctly. Also, when you look at an image onthe film from the base side, the image should appearnormal, not reversed.NOTES:•Make sure the document cover is completely closed; otherwise you cannot obtain proper colored images.• A newton ring (ring-shaped stripe pattern) may appear in the scanned image. To remove the newton ring, place the film with the base side facing up and preview using the Thumbnail Preview; then reverse the previewed image by using the Mirroring button.SCAN 35 MM NEGATIVES AND FILM STRIPS1. Slide the edge of the strip into the 35 mm filmholder, base side facing down. Then place it sothat the entire frame is positioned inside the filmholder.2. Place the film holder on the document table so that thetriangle mark on its tab is aligned with the triangle onthe document table. The projection on the tab then goesinto the hole on the document table.SCAN MEDIUM FORMAT FILM1. With the base side facing down, place the filmon the 120/220 (6 x 12 cm) size film holderwith the entire frame positioned inside the filmholder opening.2. Set the cover on the film and press until youhear a click.Press around the entire perimeter of the coverto make sure it is secured.3. Place the film holder on the document table so thatthe triangle mark on its tab is aligned with thetriangle on the document table. The projection onthe tab then goes into the hole on the documenttable.STORING THE FILM HOLDERSWhen you're not using the film holders, you can store up to two holders inside the document cover.1. Open the document cover and remove the reflectivedocument mat.2. Slide the film holder into the document cover.3. Insert the reflective document mat in the top and bottom fittings of the document cover. See /htmldocs/per418/per418rf/index.htm for more information.SCANNING PROBLEMSThe edges of a document are not scannedPlace documents away from the edges of the document table to avoid unwanted image cropping. The area with a width of maximum .08 inch (2.1 mm) from the horizontal guide and .06 inch(1.5 mm) from the vertical guide cannot be scanned.You cannot scan a document or you only get a few dots for the scanned imageTry one or more of the following solutions.•Make sure the document is placed on the document table of the scanner, with the side to be scanned facing down.•When scanning with the Black&White setting in Home Mode or Professional Mode, change the Threshold setting.A line of dots is always missing from the scanned imageIf a line is missing on both your screen image and printout, this indicates the scanner sensor is malfunctioning. Contact your dealer.A line of dots always appears in the scanned imageIf this happens on both your screen image and printout, the document table may be dusty or scratched. Clean the document table. If you still have the problem, contact your dealer.Straight lines in the image come out jaggedMake sure the document is perfectly straight on the document table. Align the vertical and horizontal lines with the scales at the top and side of the document table.The image is distorted or blurredTry one or more of the following solutions.•Make sure the document is flat against the document table.•Make sure you do not accidentally move the document while scanning.•Make sure the scanner is on a flat, stable surface.•Change the Display Gamma setting of the scanned image for your output device, such as a monitor or printer, in the Configuration dialog box in EPSON Scan.•Select Unsharp Mask Filter in the Professional Mode main window. If moiré patterns appear in the image, see Moiré (cross-hatch) patterns appear in the scanned image below for more information.•Select Color Control and check Continuous auto exposure in the Configuration dialog box, or adjust the Exposure setting using the Auto Exposure button in the Professional Mode main window.•Change the Resolution setting for your document.•If this happens on part of the image, make sure the document is uniformly flat against the document table. A document that is wrinkled or warped may not scan well.Caution: Do not place heavy objects on the document table.Colors are patchy or distorted at the edges of the imageTry one or more of the following solutions.• A document that is very thick or warped at the edges can cause discoloration. Cover the edges of the document with paper to block external light.•Make sure the document is flat against the document table.•Adjust your software's Gamma setting using the Histogram Adjustment dialog box in Professional Mode in EPSON Scan.The image is darkTry one or more of the following solutions.•Check your software's Brightness setting using the Image Adjustment dialog box in Home Mode, or the Histogram Adjustment dialog box and the Image Adjustment dialog box inProfessional Mode.•Check the brightness and contrast settings of your computer display.•Select Color Control and also select Continuous auto exposure in the Configuration dialog box, or adjust the Exposure setting using the Auto Exposure button in theProfessional Mode main window.•Change the Display Gamma setting of the scanned image for your output device, such as monitor or printer, in the Configuration dialog box in EPSON Scan.•Change the Destination setting in the Home Mode or Professional Mode main window.•In Home Mode, select Screen/Web as the Destination setting. Selecting a printer may cause on-screen colors to be different from the colors of the original; however, the colorswill be reproduced correctly when the image is printed.Moiré (cross-hatch) patterns appear in the scanned imageA moiré is a cross-hatch pattern that appears on scannedimages when you scan printed materials. It is a result ofinterference that occurs due to the difference between thepitches of the scanning and the halftone screens.Try one or more of the following solutions.•Select the Descreening Filter check box in theHome Mode or the Professional Mode mainwindow.•In Professional Mode, set the Screen Ruling of theDescreening Filter to an appropriate setting foryour document.•Clear Unsharp Mask Filter in the ProfessionalMode main window.•Place a transparent sheet, such as an overhead projector sheet, between the document and the document table.•Reposition the document slightly.•Make the image size slightly smaller.The image is larger or smaller than the originalTry one or more of the following solutions.•The image size and resolution settings of your software determine the size of the printed image. Do not use the size of the monitor image to judge the printed size.•Change the Target Size in the Home Mode or Professional Mode main window.Scanned images cannot be printed or come out garbled when printedTry one or more of the following solutions.•Make sure your printer is properly connected to the computer, correctly set up, and maintained. See your printer manual for details.•Check that your software is properly installed and set up for your printer. See your software manual.Colors differ from the originalTry one or more of the following solutions:•Change the Image Type setting.•Change the image settings of your scanner software, especially the data format (bits, pixel, color), gamma correction, and color correction. Try different combinations of these settings.•Change the Display Gamma setting of the scanned image for your output device, such as monitor or printer, in the Configuration dialog box in EPSON Scan.•Select Color Control and select Continuous auto exposure in the Configuration dialog box. Or, adjust the Exposure setting by using the Auto Exposure button in theProfessional Mode main window.•Check the color matching and color management capabilities of your computer, display adapter, and software. Some computers can change the color palette to adjust the colors on your screen. See your software and hardware manuals for details.•Use the color management system for your computer: ICM for Windows, or ColorSync for Macintosh. For Windows, add a color profile that matches your monitor.•Exact color matching is very difficult. Check your software and monitor documentation for information on color matching and calibration.•Printed colors do not exactly match the colors on your monitor, since printers and monitors use different color systems: monitors use RGB (red, green, and blue), while printerstypically use CMYK (cyan, magenta, yellow, and black).Images cannot be located properly in the Thumbnail previewTry one or more of the following solutions.•In the Preview window, create marquees on the area you want to scan, and then scan.•In the Configuration dialog box, adjust the thumbnail cropping area using the Thumbnail Cropping Area slider.Poor character recognition during OCR scanningTry one or more of the following solutions.•Make sure the document is perfectly aligned along the document table. Align the vertical and horizontal lines with the scales at the top and side of the document table.•Select Black&White as the Image Type setting. In Professional Mode, select None for the B&W Option setting. Then try adjusting the Threshold setting.FILM SCANNING PROBLEMSYou cannot scan transparent materialsTry one or more of the following solutions:•Make sure the reflective document mat is removed when you scan transparent materials.•Make sure the option connector is connected to the scanner.•Make sure Document Type is set to the appropriate setting for your film type in Home Mode or Professional Mode.•Make sure the film is set correctly in the film holder, and that the film holder is properly positioned on the document table.You cannot scan film in the Full Auto mode or from the Thumbnail PreviewWhen scanning film, EPSON Scan may be unable to detect the images, or may crop or group the images in an undesirable way, such as the following example.•Images with a dark background may be cropped irregularly.•Images with a very bright background may be cropped irregularly.•Color negative films whose base color (background) is extremely light or dark cannot be cropped regularly.• A small area around the edges of each image is cropped.•When scanning film with both panorama and regular size images, panorama images may be cropped irregularly.•Films larger than 35 mm (such as Medium Format or 4 x 5 size films) cannot be scanned. Try one or more of the following solutions:•Make sure the film is placed correctly in the film holder and the film holder is properly positioned on the document table.•Switch to Home Mode or Professional Mode, and preview with the Normal Preview. In the Preview window, create marquees on the area you want to scan, and then scan.The colors of negative film preview images look strangeTry one or more of these solutions in the EPSON Scan Settings:•Make sure Document Type is set to the appropriate setting for your film type.•When previewing images with the Normal Preview, the dark area around the film, such as the frame of the film holder, is perceived as white, which alters the exposure of thescanning area and causes scans to appear darker. See the correct color by clicking anddragging the mouse pointer over an area, and then clicking the Zoom Preview button.•Preview images with the Thumbnail Preview.A ring-shaped stripe pattern appears in the scanned imageA ring-shaped stripe pattern (known as a Newton ring) may appear when you scan transparent materials. It may occur when the film is curled.Set the film with the base side facing up and preview using the Thumbnail Preview; then reverse the previewed image by using the Mirroring button.For more information see /htmldocs/per418/per418rf/index.htm Scripps Information Technology September 2005。
EPSON 用户指南(Perfection V33 和 Perfection V330 )
回到顶部
指示灯和按键
按钮
使用扫描仪按钮之前,确保您已安装Epson Scan和Epson Event Manager。
按钮
电源/ 钮
启动按
电源
复印 E-mail PDF
参见使用扫描仪按钮。
启动
功能 如果按下一次可打开扫描仪电源。 当扫描仪电源打开时,按下此按钮3秒钟可关闭扫描仪。 (当扫描 软件正在运行时,您不能关闭扫描仪。) Epson Scan启动。
注释: 有关详细信息请参见Epson Scan帮助。 如果清除下一次扫描前显示此对话框复选框,Epson Scan立即启动扫描无需显示此屏幕。 要返回到此屏幕,在扫描时单击扫描对话框中的取消。
对于胶片或幻灯片注释说明: 在全自动模式下,仅可以扫描35毫米的彩色胶片或彩色正片幻灯片。 要扫描其他类型的胶片,使 用家庭模式或专业模式。 要更改扫描模式,请参见选择Epson Scan模式。
进行图像类型设置。 进行文稿来源设置。 选择原始文稿的尺寸作为尺寸设置。 为您的原稿选择一个合适的分辨率作为分辨率设置。 单击预览可预览您的图像。 预览窗口出现并显示图像。 有关详细信息,请参见预览和调整扫描区域。 按需要指定图像质量。 有关详细信息,请参见调整颜色和其它图像设置。 单击扫描。 您扫描的图像在文件保存设置窗口中按您选择的文件格式和位置保存。 如果您没有在文件保存设置窗口中选 择任何设置,它将以JPEG文件保存在Pictures或My Pictures文件夹中。
ArcSoft Scan-n-Stitch Deluxe (仅Windows): 从选择扫描仪中选择您的扫描仪, 然后单击扫描页。
Presto! PageManager: 打开文件菜单,选择选择来源,然后选择您的扫描仪。
EPSONPerfection 1250扫描仪
EPSONPerfection 1250扫描仪
佚名
【期刊名称】《中国电子商情:基础电子》
【年(卷),期】2001(0)26
【摘要】EPSON Perfection 1250家用照片扫描仪已经将家用扫描仪的分辨率双倍提升到了1200dpi,更有专业级的48bit色彩位,让扫描画面的细节非同寻常地生动逼真,图像轮廓着实精准平滑,而色彩层次也更加丰富和鲜明。
EPSON Perfection 1250不只单纯地提高了扫描分辨率,其"精微真彩扫描系统"更是配合高分辨率的优势将其非凡的扫描能力发挥得淋漓尽致。
【总页数】1页(P46-46)
【关键词】扫描仪;照片扫描;图像轮廓;扫描分辨率;高分辨率;扫描系统;色彩层次;扫描技术;家用;逼真
【正文语种】中文
【中图分类】TP334.2
【相关文献】
1.聪明的“傻瓜”扫描仪——EPSON家用照片扫描仪新品Perfction1250 [J],
2.EpsonPerfection1660Photo扫描仪 [J],
3.扫描仪Canon D1250U2家用扫描仪 [J],
4.10张照片一次扫——佳能扫描仪D1250U2、D1250U2F [J], ;
5.EpsonPerfection1250扫描仪 [J],
因版权原因,仅展示原文概要,查看原文内容请购买。
快乐扫描轻松实现——EPSON PERFECTION 1660 PHOTO扫描仪
快乐扫描轻松实现——EPSON PERFECTION 1660
PHOTO扫描仪
佚名
【期刊名称】《家用电脑世界》
【年(卷),期】2002(000)010
【摘要】很多想把照片储存在电脑里的朋友—般都是通过扫描仪来完成的.而许
多想购买扫描仪的人却往往因为其操作起来程平复杂.步骤繁多、效果又不尽人意而望而却步。
不过现在我们再也不用为这些苦恼了.EPSON最新推出的PERFECTION 1660 PHOTO扫描仪可以让繁琐的扫描工作变得轻松而又快乐起来。
【总页数】1页(P32)
【正文语种】中文
【中图分类】TP334.22
【相关文献】
1.快速扫描-EPSON Perfection 1660 Photo扫描仪 [J], cherry
2.全能扫描——EPSON Perfection 1660 Photo [J],
3.轻松扫描真实再现——EPSON Perfection 1240U扫描仪测试手记 [J], 郭汀
4.Epson Perfection 1660 Photo扫描仪 [J],
5.快速扫描的典范——EPSON 1660 PHOTO扫描仪 [J], 范岳;
因版权原因,仅展示原文概要,查看原文内容请购买。
昔日色彩轻松重拾 爱普生推出入门级EPSON Perfection 1270扫描仪
昔日色彩轻松重拾爱普生推出入门级EPSON Perfection
1270扫描仪
佚名
【期刊名称】《《电子与电脑》》
【年(卷),期】2004(000)005
【摘要】爱普生(中国)有限公司日前推出入门级EPSON Perfection 1270扫描仪新品,具有独到的色彩翻新功能,可以让用户可以轻松挽回因时间久远而在老照片上留下的褪色、泛黄痕迹。
【总页数】1页(P131)
【正文语种】中文
【中图分类】TP334.22
【相关文献】
1.超薄升级,"扫"荡天下——爱普生新一代超薄CCD扫描仪EPSON PERFECTION V200 PHOTO强势登陆 [J], 艾普
2.爱普生Epson Perfection 1270扫描仪 [J], 无
3.简单易用 Epson Perfection 1270扫描仪 [J], 康健;
4.重拾褪色的回忆爱普生Perfection 1670P扫描仪 [J], 康健;
5.EPSON PERFECTION 4870 PHOTO/PERFECTION 1270 [J], 王泉
因版权原因,仅展示原文概要,查看原文内容请购买。
Epson Perfection 1270,一次扫个够
Epson Perfection 1270,一次扫个够
佚名
【期刊名称】《家庭电脑世界》
【年(卷),期】2004(000)05S
【摘要】产品简介:EPSON Perfection 1270秉承了爱普生扫描仪一贯的精良品质和优异性能,拥有高速高质的扫描性能、超薄时尚的外观,具有丰富实用的功能和方便、贴心的操作便利性。
它具有独到的色彩翻新功能.通过对扫描获取数据的系统分析和运算.能有效去除由于时间久远造成的泛黄、褪色的影响,进而获得焕然一新的输出影像。
这对于家里拥有大量老旧照片.但一直苦无保存良策的家庭用户无疑是非常适用的。
而且色彩翻新功能应用起来也很简便。
【总页数】1页(P9)
【正文语种】中文
【中图分类】TP334.22
【相关文献】
1.超薄升级,"扫"荡天下——爱普生新一代超薄CCD扫描仪EPSON PERFECTION V200 PHOTO强势登陆 [J], 艾普
2.爱普生Epson Perfection 1270扫描仪 [J], 无
3.简单易用 Epson Perfection 1270扫描仪 [J], 康健;
4.昔日色彩轻松重拾爱普生推出入门级EPSON Perfection 1270扫描仪 [J],
5.EPSON PERFECTION 4870 PHOTO/PERFECTION 1270 [J], 王泉
因版权原因,仅展示原文概要,查看原文内容请购买。
Epson Perfection 1250扫描仪
Epson Perfection 1250扫描仪
佚名
【期刊名称】《《电子与电脑》》
【年(卷),期】2001(009)009
【摘要】我们都努力追求完美,但是往往却不能达到。
但是最近发布的EpsonPerfection 1250扫描仪就不属于这种情况。
因为有着高分辨率和内含的幻灯片适配器,这种扫描仪听起来感觉会很贵,
【总页数】1页(P23)
【正文语种】中文
【相关文献】
1.聪明的“傻瓜”扫描仪——EPSON家用照片扫描仪新品Perfction1250 [J],
2.小底片透出的清晰世界浅谈EPSON Perfection 1250底片透扫功能 [J],
3.技术与情趣互动的Epson Perfection 1250扫描仪 [J], ;
4.Epson Perfection 1250 Photo [J], 林阿岚
5.爱普生 Epson Perfection 1250 Photo [J], 林阿岚
因版权原因,仅展示原文概要,查看原文内容请购买。
- 1、下载文档前请自行甄别文档内容的完整性,平台不提供额外的编辑、内容补充、找答案等附加服务。
- 2、"仅部分预览"的文档,不可在线预览部分如存在完整性等问题,可反馈申请退款(可完整预览的文档不适用该条件!)。
- 3、如文档侵犯您的权益,请联系客服反馈,我们会尽快为您处理(人工客服工作时间:9:00-18:30)。
爱普生Perfection 1200平板扫描仪
近几年来,随着计算机技术的飞速发展,计算机迅速普及。
计算机的外部设备亦紧跟其后,技术进步迅猛异常,数码相机、各种类型的打印机、扫描仪的新产品层出不穷,数字图像技术引起越来越多摄影爱好者、摄影师的关注,纷纷加入到这支新军之中。
数字图像技术并非只能使用数码相机,传统的相机和银盐胶片一样可以使用数字技术:把照片、反转片或负片用扫描仪将其扫描后存为电子文件,再用计算机进行处理,可以非常方便地进行修饰以及各种照片的后期制作处理工作,如:多底合成、色调分离等等,最后再按照需要使用打印机或胶片记录仪输出照片或胶片。
因此,计算机、扫描仪、打印机等都是传统摄影师进行数字图像处理的必备硬件。
作为输入设备的扫描仪种类也很多,滚筒式、平板式、手持式……,价格也是从几百元直达几十万元。
滚筒式扫描仪是属于专业级,产品价格昂贵;手持扫描仪技术简单,难以达到数字图像处理的要求;平板扫描仪是最为常见的,虽然总体技术尚达不到滚筒式扫描仪的技术水平,但高档平板扫描仪的技术指标已接近滚筒式扫描仪,但其价格不菲。
中档平板扫描仪技术进步很快,作为家用图像工作站还是可以满足
需要的。
下面结合我的使用体会,向大家介绍一款爱普生Perfection 1200扫描仪(题图)。
说起爱普生公司的打印机,在计算机行业中可以说是无人不知无人不晓,至于爱普生公司出产的扫描仪,由于以前没有对中国市场进行销售,所以国内知道的人就不多了。
1999年11月爱普生公司向中国市场推出两款平板扫描仪Perfection 610和Perfection 1200(以下简称1200),扫描面幅都是A4,爱普生1200扫描仪就很合适用作简易家庭图像工作站的输入设备。
首先,它有较高的光学分辨率1200dpi,高于目前常见的平板扫描仪的分辨率(600dpi);其次,在这台扫描仪上CCD采用了爱普生公司的高质量高精度透镜系统,以及微步进、全域RGB扫描和动态范围控制等新技术;加上透扫附件――胶片适配器可以扫描4×5英寸、120(6×9cm)、135反转片及负片(图1),由于有较高的光学分辨率,所以可以获得较好的扫描结果。
另外,该扫描仪还采用了高速图像处理器和智能像素优化技术,色彩位数36Bit。
所有这些技术措施,对高质量的图像扫描作出有力的保证。
爱普生1200扫描仪有一个系列,包括U、1200S和
1200PHOTO三种,其技术指标是相同的,只是接口和附件不同:1200U为USB接口,1200S为SCSI接口,1200PHOTO 为USB接口,并带有透扫附件――胶片适配器。
对于1200U 和1200S来说,胶片适配器是选购配件。
三种扫描仪还可以
选用自动送纸器。
爱普生1200系列扫描仪定位在办公、入门级图形图像设计以及苹果机iMAC和G3MAC的用户。
随机附带的软件丰富,软件界面操作方便。
还有专业版OCR,对文本扫描有很高的识别率。
和爱普生打印机配合,有直接打印功能。
当您买回扫描仪,将扫描仪和相应的软件安装完毕后,需对计算机的屏幕进行校准。
对于广大PC机的用户,只需在Windows的桌面上,打开控制面板中的“扫描仪和数字相机”,在屏幕校准对话框中得到图2的界面,用鼠标拖动滑块使两种灰色的条块趋于一致,屏幕校准工作即告完成,现在扫描仪就可以正式为您工作了。
在相应的软件中(如PHOTOSHOP),打开EPSON TWAIN便可以得到图3的对话框,从中可以选择高级或快捷两种方式之一,对选好的照片进行扫描。
如选择快捷方式,用鼠标击点扫描就开始了。
直接按扫描仪上的按钮,也是可以进行快捷扫描方式的。
当图像出现在窗口后,选用需要的格式存盘即可。
如选用高级方式,打开高级菜单后(图4),可以选用菜单中各种调节工具,对图像进行优化处理。
为节省篇幅,这里对扫描仪及其软件的安装和使用将不做详细的叙述,请您参看有关资料,而把重点放在各种扫描方式扫描结果的讨论上。
下面分别就爱普生1200扫描仪对彩色照片、彩色反转
片、彩色负片的扫描结果进行讨论。
计算机硬件配置:CPU:PⅡ233;内存:64MB;硬盘:4.3GB;显示器:美格JX500T;扫描仪:爱普生1200PHOTO;使用爱普生PHOTO700打印机:。
用扫描仪扫描彩色照片和彩色反转片时,分别选用快捷方式和高级方式扫描,扫描输出设置为PHOTO级打印,输出图片尺寸设置为照片(5英寸)或反转片(6×6cm)原大;照片扫描分辨率设置为300dpi,反转片扫描分辨率设置为1200dpi。
打印机选用光泽照片纸,1440dpi打印,为使打印结果具有可比性,打印机不作任何自定义选项。
图5为照片原件,图6为快捷方式扫描打印件,图7为高级方式中自动扫描打印件,图8为高级方式中图像优化处理扫描打印件。
通过四张图片的对比,我们可以看出:扫描打印件色彩鲜明,图像细腻并有较好的层次感。
快捷扫描方式和高级方式中自动扫描方式的结果较为接近,色调都比原片略为偏红,二者较为接近,且图7的反差和亮度都比图6高。
图8则是使用高级方式中的图像优化处理工具仅做了一些简单地调整,扫描后的色调和原片就比较接近了。
可以肯定地说,使用高级方式中的图像优化处理工具,进行仔细的调整后,扫描结果一定会令人满意的。
下面让我们来看看使用透扫附件扫描彩色反转片和彩
色负片的情况,图9为反转片原件。
图10为高级方式中自动扫描打印件,图11为高级方式中图像优化处理扫描打印
件。
通过对比,可以看出:扫描打印件层次较为细腻,细节也有较好的表现;自动扫描打印件色调也是略为偏红,当使用图像优化处理工具进行简单的处理后,打印件与原图的色调就比较接近了。
图12为图5照片底片的扫描打印件,扫描分辨率设置为1200dpi,输出图片尺寸设置为5英寸,使用高级方式自动扫描。
从直观上看,扫描打印件与照片原件也有一定的差距,密度稍低显得色彩不够饱和。
另外,和照片的扫描打印件比较,反差、色彩饱和度也明显逊色。
当然,如果扫描时选用图像优化处理方式的话,会有一定的改善。
这里需要说明的是,为了进行比较,上述扫描后的图片文件都没有利用软件的功能做任何处理。
在实际使用中,利用PHOTOSHOP等软件的强大功能,对图片文件进行调整,完全可以达到更为满意的效果。
然而如果在扫描时,由于各种原因造成的数据损失,后期是无法弥补的。
也就是说,扫描的质量将直接影响图片的质量。
后期可以对图片的色调、亮度、对比度等参数进行调整,而像素、层次等方面的缺陷就难以修补了。
通过上述的比较,我认为爱普生1200扫描仪作为家用图像工作站的输入设备还是不错的。
首先,它具有较高的光学分辨率。
仅从分辨率来说,这对于普通照片的扫描是绰绰有余的。
如果需要印刷输出10英寸的照片,扫描135胶片,扫描分辨率至少也得要1700dpi;120底片(6×6)同样输出
10英寸的照片,扫描分辨率最低也得有1000dpi。
如此看来,这台扫描仪扫描120反转片和负片刚刚够用,对于135反转片和负片的扫描来说,输出的图幅相对就比较小了。
但是,现在市面上常见的可用于透扫的平板扫描仪,光学分辨率仅有600dpi,则显得更不够用了。
就拿某品牌专业级的一种双平台平板扫描仪来说,由于采用了双平台的结构,透扫确有不错的效果,但是由于其光学分辨率只有600dpi,无形中就使其良好的性能打了折扣。
其次,爱普生1200扫描仪具有较好的性能,扫描过程噪声非常低,扫描速度也很快,工作效率比较高。
要说不足的话,该扫描仪透扫附件中的塑料片夹比较简陋。
胶片适配器附带4×5英寸、6×9cm片夹各一只,135片夹两只。
由于片夹材质的原因,在其使用中很容易产生静电,极易吸附灰尘,可灰尘是处理底片时的大忌。
虽然该扫描仪的透扫功能还有不够完善的地方,但是其不足4000元的价位,实在难以对它作更高的要求。
如果需要经常扫描135胶片,并要求较高的话,就应考虑使用135胶片扫描仪。
现在市场上已有好几种135胶片扫描仪的价位在万元以下了,而且性能不错。
一台爱普生1200平板扫描仪再加一台135
胶片扫描仪,这样的配置就很理想了。
总之,爱普生1200
平板扫描仪确实是一台值得推荐的家庭图像工作站用平板
扫描仪。
◆。
