台电科技TPDA平板电脑说明书
tPad中文使用手册
11目录第1章.tPad 简介 (3)1.1 关于tPad 套件............................................................................................................................................7 1.2 获取帮助 (8)第2章. tPad 概述 (9)2.1 布局和组件...............................................................................................................................................9 2.2 tPad 系统框图. (10)第3章. 使用 tPad (11)3.1 配置 Cyclone IV E FPGA 芯片...............................................................................................................11 3.2 总线控制器.............................................................................................................................................14 3.3 使用 8英寸LCD 触摸屏模块..................................................................................................................15 3.4 使用 500万像素数字影像传感器模块.. (16)第4章. tPad 设计范例 (18)4.1 系统要求.................................................................................................................................................18 4.2 出厂配置.................................................................................................................................................18 4.3 tPad Starter 设计范例..............................................................................................................................19 4.4 tPad 图片查看器.....................................................................................................................................23 4.5 视频与图像处理.....................................................................................................................................26 4.6 tPad 摄像头应用.....................................................................................................................................29 4.7 使用摄像头的视频与图像处理. (32)第5章. 应用选择器 (36)5.1 即刻可用的SD 卡演示范例....................................................................................................................36 5.2 运行应用选择器.....................................................................................................................................37 5.3 应用选择器详解.....................................................................................................................................37 5.4 恢复出厂默认程序 (40)2第6章. 附录 (43)6.1 修改历史.................................................................................................................................................43 6.2 版权声明. (43)第1章.tPad 简介tPad 高阶多媒体嵌入式系统开发套件为嵌入式开发人员创建多媒体系统提供了一个非常全面的设计环境。
ASUS 平板电脑用户手册说明书
Turning your device offPutting on sleep modeTo put your device on sleep mode:Press the Power button once.Forcing your device to shut downTo force shutdown your device:•If your device is unresponsive, press and hold the power button for at least eight (8) seconds.Shutting down your deviceTo shut down your device:1. Launch the Charm bar and tap .2. Tap > Shut down to turn off your device.ASUS Tablet ManualASUS Tablet ManualDeclarations and Safety Statements Federal Communications Commission Statement This device complies with part 15 of the FCC Rules. Operation is subject to the following two conditions: (1) This device may not cause harmful interference, and (2) this device must accept any interference received, including interference that may cause undesired operation.This device has been tested and found to comply with the limits for a Class B digital device, pursuant to Part 15 of the FCC Rules. These limits are designed to provide reasonable protection against harmful interference in a residential installation. This equipment generates, uses and can radiated radio frequency energy and, if not installed and used in accordance with the instructions, may cause harmful interference to radio communications. However, there is no guarantee that interference will not occur in a particular installation If this equipment does cause harmful interference to radio or television reception, which can be determined by turning the equipment off and on, the user is encouraged to try to correct the interference by one or more of the following measures:Reorient or relocate the receiving antenna.Increase the separation between the equipment and receiver.Connect the equipment into an outlet on a circuit different from that to which the receiver is connected.Consult the dealer or an experienced radio/TV technician for help.Changes or modifications not expressly approved by the party responsible for compliance could void the user‘s authority to operate the equipment.The antenna(s) used for this transmitter must not be co-located or operating in conjunction with any other antenna or transmitter.RF Exposure Information (SAR)This device meets the government’s requirements for exposure to radio waves. This device is designed and manufactured not to exceed the emission limits for exposure to radio frequency (RF) energy set by the Federal Communications Commission of the U.S. Government.The exposure standard employs a unit of measurement known as the Specific Absorption Rate, or SAR. The SAR limit set by the FCC is 1.6 W/kg. Tests for SAR are conducted using standard operating positions accepted by the FCC with the EUT transmitting at the specified power level in different channels.The highest SAR value for the device as reported to the FCC is 0.558 W/kg when placed next to the body.••••The FCC has granted an Equipment Authorization for this device with all reported SAR levels evaluated as in compliance with the FCC RF exposure guidelines. SAR information on this device is on file with the FCC and can be found under the Display Grant section of /oet/ea/fccid after searching on FCC ID: MSQTF600T.This device is compliance with SAR for general population /uncontrolled exposure limits in ANSI/IEEE C95.1-1999 and had been tested in accordance with the measurement methods and procedures specified in OET Bulletin 65 Supplement C. Canada, Industry Canada (IC) NoticesThis Class B digital apparatus complies with Canadian ICES-003 and RSS-210. Operation is subject to the following two conditions: (1) this device may not cause interference, and (2) this device must accept any interference, including interference that may cause undesired operation of the device.Radio Frequency (RF) Exposure InformationThe radiated output power of the Wireless Device is below the Industry Canada (IC) radio frequency exposure limits. The Wireless Device should be used in such a manner such that the potential for human contact during normal operation is minimized.This device has been evaluated for and shown compliant with the IC Specific Absorption Rate (“SAR”) limits when installed in specific host products operated in portable exposure conditions.Canada’s REL (Radio Equipment List) can be found at the following web address: http://www.ic.gc.ca/app/sitt.reltel/srch/nwRdSrch.do?lang=engAdditional Canadian information on RF exposure also can be found at the following web address: http://www.ic.gc.ca/eic/site/smt-gst.nsf/eng/sf08792.html Canada, avis d’Industry Canada (IC)Cet appareil numérique de classe B est conforme aux normes canadiennes ICES-003 et RSS-210.Son fonctionnement est soumis aux deux conditions suivantes : (1) cet appareil ne doit pas causer d'interférence et (2) cet appareil doit accepter toute interférence, notamment les interférences qui peuvent affecter son fonctionnement.10ASUS Tablet ManualCopyright Information No part of this manual, including the products and software described in it, may be reproduced, transmitted, transcribed, stored in a retrieval system, or tranPadd into any language in any form or by any means, except documentation kept by the purchaser for backup purposes, without the express written permission of ASUSTeK COMPUTER INC. (“ASUS”).ASUS and ASUS Tablet logo are trademarks of ASUSTek Computer Inc. Information in this document is subject to change without notice.Copyright © 2012 ASUSTeK COMPUTER INC. All Rights Reserved.Limitation of Liability Circumstances may arise where because of a default on ASUS’ part or other liability, you are entitled to recover damages from ASUS. In each such instance, regardless of the basis on which you are entitled to claim damages from ASUS, ASUS is liable for no more than damages for bodily injury (including death) and damage to real property and tangible personal property; or any other actual and direct damages resulted from omission or failure of performing legal duties under this Warranty Statement, up to the listed contract price of each product.ASUS will only be responsible for or indemnify you for loss, damages or claims based in contract, tort or infringement under this Warranty Statement.This limit also applies to ASUS’ suppliers and its reseller. It is the maximum for which ASUS, its suppliers, and your reseller are collectively responsible.UNDER NO CIRCUMSTANCES IS ASUS LIABLE FOR ANY OF THE FOLLOWING: (1) THIRD-PARTY CLAIMS AGAINST YOU FOR DAMAGES; (2) LOSS OF, OR DAMAGE TO, YOUR RECORDS OR DATA; OR (3) SPECIAL, INCIDENTAL, OR INDIRECT DAMAGES OR FOR ANY ECONOMIC CONSEQUENTIAL DAMAGES (INCLUDING LOST PROFITS OR SAVINGS), EVEN IF ASUS, ITS SUPPLIERS OR YOUR RESELLER IS INFORMED OF THEIR POSSIBILITY.Manufacturer ASUSTek COMPUTER INC.Address, City No. 150, LI-TE RD., PEITOU, TAIPEI 112, TAIWAN R.O.C Country TAIWAN Authorized Representative in Europe ASUS COMPUTER GmbH Address, City HARKORT STR. 21-23, 40880 RATINGEN Country GERMANY。
戴尔平板电脑快速入门指南说明书

Connect the power adapter连接电源适配器電源アダプタを接続する1Turn on your tablet开启平板电脑タブレットの電源を入れる3Dock the tablet对接平板电脑タブレットをドッキングする2Printed in China.2013-08© 2013 Dell Inc.Features功能部件 | 外観Product support and manuals 产品支持和手册製品サポートとマニュアル/support/support/manuals /windows8Contact Dell 与 Dell 联络デルへのお問い合わせ/contactdellRegulatory and safety 管制和安全認可と安全性/regulatory_complianceRegulatory model and type 管制型号和类型認可モデルと認可タイプK10A K10A001Información para NOM, o Norma Oficial MexicanaLa información que se proporciona a continuación se mostrará en los dispositivos que se describen en este documento, en conformidad con los requisitos de la Norma Oficial Mexicana (NOM):Importador:Dell México S.A. de C.V.Paseo de la Reforma 2620 - Piso 11.° Col. Lomas Altas 11950 México, D.F.Número de modelo reglamentario:K10AVoltaje de entrada:100 V CA–240 V CA Corriente de entrada (máxima):1,30 AFrecuencia de entrada:50 Hz–60 Hz Corriente de salida:2,31 A Voltaje de salida:19,5 VCC1. USB 3.0 connector2. audio connector3. power status light4. docking connector5. power connector6. USB 3.0 connectors7. network connector8. HDMI connector9. DisplayPort connector1. USB 3.0 连接器2. 音频连接器3. 电源状态指示灯4. 对接连接器5. 电源连接器6. USB 3.0 连接器7. 网络连接器8. HDMI 连接器9. DisplayPort 连接器1. USB 3.0 コネクタ2. オーディオコネクタ3. 電源ステータスライト4. ドッキングコネクタ5. 電源コネクタ6. USB 3.0 コネクタ7. ネットワークコネクタ8. HDMI コネクタ9. DisplayPort コネクタ。
平板电脑使用说明书
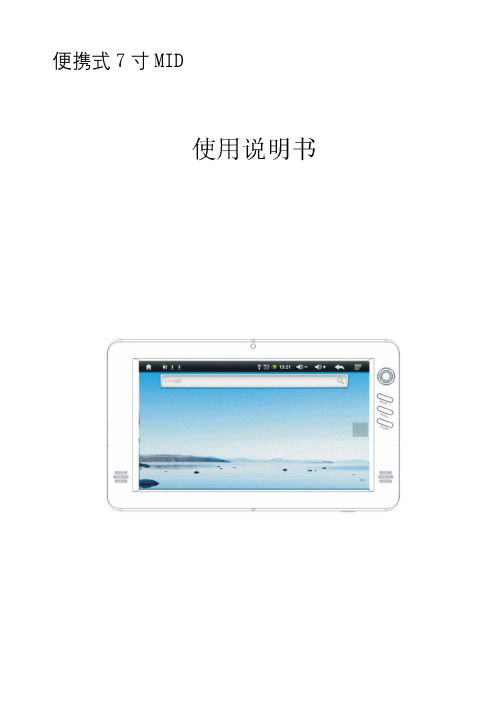
便携式7寸MID亲爱的用户:非常感谢您选购此款MID产品。
我们衷心希望您能从中获得长久的享受。
祝愿您从该产品中获得最好的多媒体体验!本手册中包含的所有信息在出版时都是正确的。
但由于我们不断对产品进行更新和改进,因此您设备上的软件、外观、功能可能与本手册中所描述的内容略有差别。
目录1.基本功能 (4)1.1 硬件配置 (4)1.2 软件配置 (5)2.设备描述 (6)2.1 触摸屏和轨迹球 (6)2.2 Camera (6)2.3 Power 键 (6)2.4 充电指示 (7)2.5 Menu 键 (7)2.6 Home 键 (7)2.7 Mic 孔 (7)2.8 TF 卡 (7)2.9 MiniUSB (7)2.10 复位钮 (7)2.11 耳机插座 (8)2.12 DC (8)3.首次使用 MID (8)3.1 电池管理及充电 (8)3.2 打开/关闭 MID (8)3.3 与PC 连接 (9)4.设备操作界面 (9)4.1 主界面描述 (9)4.2 菜单界面描述 (10)4.3 状态栏描述 (11)4.4 使用触摸屏 (11)5.设备基本设置 (12)5.1 网络配置 (13)5.2 声音和显示 (14)5.3 安全性和位置 (15)5.4 应用程序 (15)5.5 SD 卡和MID 存储 (16)5.6 日期和时间 (16)5.7 区域和文本 (16)5.8 触摸屏校准 (16)5.9 USB 模式选择 (17)5.10 关于MID (17)6. MID 软件安装及管理 (17)6.1 APK 安装器(应用程序安装工具) (17)6.2 资源管理器 (19)6.3 应用市场 (20)7. MID 软件应用与操作 (20)7.1 图片浏览 (20)7.2 音乐播放 (21)7.3 视频播放 (23)7.4 电子书 (24)7.5 将图片/音乐/视频等文件传输到 MID 设备 (24)7.6 网络浏览器 (24)7.7 电子邮件 (25)7.8 网络聊天 (25)7.9 Google Map (26)7.10 日历 (27)7.11 闹钟时钟 (27)8. MID 疑难解答 (27)注意事项本手册包含重要的安全措施和正确使用产品的信息,以避免事故发生,确信在使用该产品之前仔细阅读该手册。
惠普(HP)平板电脑用户指南说明书

User Guide© Copyright 2013 Hewlett-Packard Development Company, L.P.Bluetooth is a trademark owned by its proprietor and used by Hewlett-Packard Company under license. Google is a trademark of Google Inc. Windows is a U.S. registered trademark of Microsoft Corporation.The information contained herein is subject to change without notice. The only warranties for HP products and services are set forth in the express warranty statements accompanying such products and services. Nothing herein should be construed as constituting an additional warranty. HP shall not be liable for technical or editorial errors or omissions contained herein.First Edition: September 2013Document Part Number: 743472-001Product noticeThis guide describes features that arecommon to most models. Some featuresmay not be available on your tablet.Software termsBy installing, copying, downloading, orotherwise using any software productpreinstalled on this tablet, you agree to bebound by the terms of the HP End UserLicense Agreement (EULA). If you do notaccept these license terms, your soleremedy is to return the entire unusedproduct (hardware and software) within 14days for a refund subject to the refundpolicy of your place of purchase.For any further information or to request afull refund of the tablet, please contact yourlocal point of sale (the seller).Table of contents1 The basics (1)Lock and unlock the screen (1)2 Using the Home screen (2)3 Using apps and widgets (3)Using the on-screen keyboard (3)Using Gmail (3)Using the calendar (4)Using Google Now (4)Using the clock (4)Downloading apps (4)Uninstalling apps (4)4 Using the cameras (5)Taking your own photo (5)Recording a video (5)Taking a screenshot (5)Viewing photos or videos (5)Printing photos (5)5 Connecting to networks (7)Connect to a wireless network (7)Connect to Bluetooth (select models only) (7)Connect to a mobile network (select models only) (8)Activate data transfer (8)Activate tethering or a portable hotspot (select models only) (8)Connect to a Miracast-compatible wireless display (select models only) (8)Connect to a Windows computer (select models only) (9)6 Using Settings (10)WIRELESS & NETWORKS (10)DEVICE (10)PERSONAL (10)ACCOUNTS (11)iiiSYSTEM (11)7 Securing your tablet (12)8 Backing up and recovering your data (13)Updating apps, widgets, and the operating system (13)Back up and reset (13)Factory data reset (13)9 More HP resources (14)Index (15)iv1The basicsBefore using the tablet for the first time, connect it to external power, and thenTo start using your tablet, follow these instructions:1.After charging the battery, and while the battery image is displayed on the screen, turn on thetablet by pressing and holding the power button about 5 seconds until the HP logo is displayed.The first time you turn on the tablet, you will see a Welcome screen.displayed.2.Follow the on-screen instructions to select a language, connect to a wireless network, and signinto your Google™ account.synchronized with your tablet. If you have additional Google accounts, you can add them later. Lock and unlock the screenLock—Press the power button.Unlock—Press the power button to turn on the tablet, then place your finger on the lock icon andslide the icon to the unlock position.Lock and unlock the screen12Using the Home screenThe Home screen provides a central location where you can access information and email, browsethe Web, stream videos, view photos, and access social media websites.●Swipe down from the top to display notifications.●Swipe up from the bottom to display Google Now cards.●Touch an icon to perform the action described in the table.Icon DescriptionSearch—Allows you to type one or more keywords to search with Google.Voice search—Allows you to touch , and then speak one or more keywords to search withGoogle.Back—Opens the previous screen.Home—Opens the central Home screen.●To see a left or right Home screen, swipe to the left or right.●To quickly return to the Home screen, touch .Recent apps—Opens a list of apps that you have used recently.●Touch an app to open it.●To remove an app from the list, swipe it to the left or right.All apps—Displays a list of all apps.To see all widgets, touch the Widgets tab.2Chapter 2 Using the Home screen3Using apps and widgetsApps are shortcuts placed on the Home screen and used to open applications installed on yourtablet.Widgets are apps with special functionality that displays content that is updated frequently. You canview the updated content without opening the widget.To see all apps, touch .●To open an app, touch the icon. To return to the Home screen, touch .●To add an app to the Home screen, touch and hold the app icon until the Home screen appears,and then slide it to the location where you want it to be.●To remove an app from the Home screen, touch and hold the app icon, and then drag it to theicon at the top of the screen.To see all widgets, touch , and then touch the Widgets tab.●To open a widget, touch the icon. To return to the Home screen, touch .●To add a widget to the Home screen, touch and hold the widget icon until the Home screenappears, and then slide it to the location where you want it to be.●To remove a widget from the Home screen, touch and hold the widget icon, and then drag it tothe icon at the top of the screen.Using the on-screen keyboard●To open the on-screen keyboard, touch the text field at the top of the screen, type one or morekeywords, and then touch or .●To use voice search, touch at the top of the screen, and then speak one or more keywords.Using Gmail1.Touch , and then touch .2.Under ACCOUNTS, touch Add account.3.Touch Google, and then follow the on-screen instructions.4.To access your Gmail account, touch the Gmail icon.Using the on-screen keyboard3Using the calendar●Touch the Calendar icon, and then follow the on-screen instructions.●To add the Calendar to the Home screen, touch and hold the Calendar icon until it appears onthe Home screen.Using Google NowGoogle Now uses time of day, your current location, and your location history to display informationon your commute. Information from other Google products, such as your Web history or yourcalendar, is used to display appointment reminders, maps, sports scores, and flight status.●To opt into Google Now, swipe up from the bottom of the screen, and then follow the on-screeninstructions.●To display Google Now cards, swipe up from the bottom of the screen.Using the clock●Touch , and then touch the Clock icon.●To add the Clock to the Home screen, touch and hold the Clock icon until it appears on theHome screen.●To add an alarm, touch the Clock icon, touch Set alarm, and then follow the on-screeninstructions.Downloading appsDownload apps, music, books, games, and more from the Google Play Store.●Touch , and then touch a category.– or –Touch , and then type a keyword in the search field.●To download and install an app, follow the on-screen instructions.Uninstalling apps1.Touch , and then touch .2.Under DEVICE, touch Storage, and then touch Apps.3.Touch the app that you want to uninstall, and then touch Uninstall.4.Touch OK, and then touch OK again.4Chapter 3 Using apps and widgets4Using the camerasTake your own photo or take screenshots with the front camera.Taking your own photo●Touch , and then touch .●To take a photo, touch the rotating camera icon above the blue circle, and then touch the bluecircle.The photo is saved in the Gallery.Recording a video●Touch , and then touch .●To record a video, touch the video camera icon.The blue circle turns red.●To begin recording, touch the red circle.●To stop recording, touch and hold the red circle.The video is saved in the Gallery.Taking a screenshotPress the power button and the volume down button at the same time for about 1 second.A message is displayed when the screenshot is saved in the Gallery.Viewing photos or videos●To view the photos or videos in your Gallery, touch , and then touch the Gallery icon.●To delete a photo or video, touch the photo or video, and then touch in the upper-right cornerof the screen.Printing photos1.Touch , and then touch the Gallery icon.2.Touch the photo to select it.3.Touch in the upper-right corner of the screen, and then touch Print.4.The first time that you use the printing function, follow the on-screen instructions to select aprinter.Taking your own photo55.Select the number of copies.6.To select options, touch the down arrow, and then follow the on-screen instructions.7.Touch Print.A message is displayed to indicate the print status.– or –Activate HP ePrint (select models only), which allows you to print directly to an HP ePrint-enabledprinter. For more information, go to /go/2eprint.1.Touch , and then touch the HP ePrint icon.2.Follow the on-screen instructions, and then touch Activate Now.3.Enter your email address, and then touch Activate.An activation code is sent to the email address that you entered.4.Touch, and then touch the HP ePrint icon.5.Enter the activation code, and then touch Activate.6Chapter 4 Using the cameras5Connecting to networksYou can connect the tablet to a wireless network, Bluetooth® devices (select models only), a mobilenetwork (select models only), a Miracast-compatible wireless display (select models only), or aWindows® computer.Connect to a wireless networkBrowse the Web, read your email, or perform other online activities.To connect to a wireless network:1.Touch , and then touch .2.Under WIRELESS & NETWORKS, be sure that Wi-Fi is turned on.3.Touch Wi-Fi, and then touch one of the available networks that is displayed.4.Type the security key if required, and then touch Connect.Connect to Bluetooth (select models only)Pair a Bluetooth device, such as a headset, keyboard, or mouse with your tablet.To connect to a Bluetooth device:1.Turn on the Bluetooth device.2.Touch , and then touch .3.Under WIRELESS & NETWORKS, turn on Bluetooth, and then touch Bluetooth.4.Touch your device name to make it Visible to all nearby Bluetooth devices.5.To find available Bluetooth devices, touch SEARCH FOR DEVICES.6.When the device name appears, touch it to pair the device to your tablet.Connect to a wireless network7Connect to a mobile network (select models only)If a SIM card is not preinstalled, a SIM card can be purchased from a mobile carrier. To insert the SIMcard, see the Quick Start guide included with your product.1.Touch , and then touch .2.Under WIRELESS & NETWORKS, touch Mobile Networks, and then touch Access PointNames.3.Touch the , touch Select New APN, and then follow the on-screen instructions.Activate data transferTo enable data transfer over a mobile network:1.Touch , and then touch .2.Under WIRELESS & NETWORKS, touch Mobile Networks, and then touch Mobile data. Activate tethering or a portable hotspot (select models only)To share your product's mobile data connection via USB or as a portable Wi-Fi hotspot:1.Touch , and then touch .2.Under WIRELESS & NETWORKS, touch Mobile Networks, and then touch Tethering andportable hotspot.3.To set up a portable Wi-Fi hotspot, touch Mobile Hotspot.4.To share your product's mobile data connection, touch USB tethering.USB tethering works with Windows 7, Vista, or Linux.Connect to a Miracast-compatible wireless display (select models only)To connect to a Miracast-compatible wireless display:1.Touch , and then touch .2.Under WIRELESS & NETWORKS, touch Miracast, and then touch Miracast wireless display.3.Follow the on-screen instructions.8Chapter 5 Connecting to networksConnect to a Windows computer (select models only)1.Connect the micro USB cable to your tablet and to a Windows computer.The USB storage appears as a drive on the computer. You can copy files back and forth as youwould with any other external device.2.When you are finished, disconnect the USB cable.Connect to a Windows computer (select models only)96Using SettingsUse Settings for connecting to networks, setting preferences, and finding information about yourtablet.●Touch , and then touch .– or –●Swipe down from the top, and then touch .WIRELESS & NETWORKS●Wi-Fi—Enable or disable Wi-Fi, and connect to a wireless network so that you check email,search the Web, or access social media websites.●Bluetooth—Enable or disable Bluetooth, and pair a Bluetooth device, such as a headset orkeyboard, with your tablet.●Data usage—View a graph of the data used during the selected period. The data usage by eachinstalled app is also displayed.●More...—Enable or disable Airplane mode or VPN.DEVICE●Sound—Select Volumes, Default notification, and enable or disable Touch sounds andScreen lock sound.●Display—Select Brightness, Wallpaper, Sleep, and Font size.●Storage—View available space in tablet memory and SD™ card memory (if installed).●Battery—View battery charge percentage and battery usage by various features.●Apps—View downloaded apps and running apps. To view information or uninstall an app, touchthe app.PERSONAL●Location access—Enable or disable Access to my location and Wi-Fi network location.●Security—Set preferences for SCREEN SECURITY, PASSWORDS, DEVICEADMINISTRATION, and CREDENTIAL STORAGE.●Language & input—Set preferences for Language, KEYBOARD & INPUT METHODS,SPEECH, and MOUSE/TRACKPAD.●Backup & reset—Set preferences for BACKUP & RESTORE, and PERSONAL DATA.10Chapter 6 Using SettingsACCOUNTSExisting accounts are displayed.●Add an email account or another type of account—Under ACCOUNTS, touch + Addaccount, and then follow the on-screen instructions.●Sync an account—Under ACCOUNTS, touch the name of the account. Touch the name of theaccount again, touch in the upper-right corner of the screen, and then touch Sync now.●Remove an account—Under ACCOUNTS, touch the name of the account. Touch the name ofthe account again, touch in the upper-right corner of the screen, and then touch Removeaccount.SYSTEM●Date & time—Enable or disable Automatic date & time, and select preferences for time zone,time format, and date format.●Accessibility—Enable or disable TalkBack, Large text, Auto-rotate screen, Speakpasswords, Text-to-speech output, Touch & hold delay, and Enhance web accessibility.●Developer options—Enable or disable various Developer options.●About tablet—Display the software version and legal information for your tablet.You can also check for software updates.ACCOUNTS117Securing your tabletTo prevent others from accessing the data on your tablet, select a screen lock method.Set a screen lock1.Touch , and then touch .2.Under PERSONAL, touch Security, and then under SCREEN SECURITY, touch Screen lock.3.Under Choose screen lock, select one of the following types of screen locks, and then followthe on-screen instructions.●Slide—Unlock the screen by swiping to the right.●Face Unlock (select models only)—Unlock the screen by looking at the screen.●Pattern—Draw a simple pattern to unlock the screen.●Pin—Enter four or more numbers to unlock the screen.●Password—Enter four or more letters or numbers. This option provides the mostprotection, if a strong password is selected.12Chapter 7 Securing your tablet8Backing up and recovering your dataUpdating apps, widgets, and the operating system HP recommends that you update your apps, widgets, and the operating system on a regular basis tothe latest versions. Updates can resolve issues and bring new features and options to your tablet.Technology is always changing, and updating apps, widgets, and the operating system allows yourtablet to run the latest technology available. For example, older apps and widgets might not work wellwith the most recent operating system.Go to the Google Play store to download the latest versions of HP and third-party apps and widgets.The operating system will download system updates automatically and notify you when it is ready toinstall these updates. If you want to update the operating system manually, go to /support.Back up and resetYou can set preferences for backing up and restoring your data in case of loss.1.Touch , and then touch .2.Under PERSONAL, touch Back up & reset.3.Under BACKUP & RESTORE, select one or more of the following:●Back up my data—Select the check box to enable backing up app data, Wi-Fi passwords,and other settings to Google servers.●Backup account—Select a Google account for backing up data.●Automatic restore—Select the check box to enable backed up settings and data to berestored when an app is reinstalled.Factory data resetTo reset all settings and delete all data on the device:1.Touch , and then touch .2.Under PERSONAL, touch Back up & reset.3.Under PERSONAL DATA, select Factory data reset, and then follow the on-screeninstructions.Updating apps, widgets, and the operating system139More HP resourcesTo locate product details, how-to information, and more, use this table.Resource ContentsHP supportFor U.S. support, go to /go/ contactHP.For worldwide support, go to / country/us/en/.html.●Online chat with an HP technician.●Email support.●Find telephone numbers.●Locate HP service center locations.GoogleFor Google support, go to /mobile/android.●Access Google online help and support.Quick StartThe Quick Start document is located in the documentfolder of the tablet box.●Important regulatory notices.Product NoticesThe Product Notices document is located in thedocument folder of the tablet box.●Important regulatory notices.Limited WarrantyThe warranty is located in the document folder of thetablet box. You can also go to /go/orderdocuments.●Warranty information about this tablet. 14Chapter 9 More HP resourcesIndexAaccounts10all apps icon2apps3Bback icon2backup and recovery13 battery10Beats Audio10 Bluetooth7, 10Ccalendar3camera5clock3computer7Ddate & time10display10download3FFace Unlock12factory data reset13GGmail3Hhome icon2Iicons2Llanguage10Nnetwork7Ppassword12photos5PIN12printing5Product Notices14QQuick Start14Rrecent apps icon2Sscreen lock12screenshot5search icon2settings10sound10storage10Vvoice search icon2Wwarranty14wi-fi7, 10widgets3Windows7Index15。
便携式触摸平板电脑 说明书

戴尔平板电脑快速入门指南说明书

Guide d’information rapide | Guia de Início Rápido Guía de inicio rápido10About Your TabletÀ propos de votre tablette | Sobre o seu tablet Acerca de su equipo1. Bouton d’alimentation2. Emplacement de lacarte MicroSD 3. Caméra avant 4. Voyant d’étatde la caméra5. Capteur de lumièred’ambiance 6. Port casque7. Boutons de volume (2)8. Bouton d’accueilde Windows9. Microphone arrière 10. Caméra arrière 11. Haut-parleur 12. Fente du loquetd’amarrage13. Port adaptateursecteur/amarrage 14. Port micro-USB 15. Fente du loquetd’amarrage 16. Haut-parleur 17. Voyant derechargement de la batterie18. Microphones avant (2)1. Botão liga/desliga2. Slot para cartãoMicroSD3. Câmera frontal4. Luz de status dacâmera5. Sensor de luz ambiente6. Conector para fonede ouvido7. Botões de volume (2)8. Botão do Windows 9. Microfone traseiro 10. Câmera traseira11. Alto-falante 12. Slot da trava deacoplamento13. Adaptador de energia/porta de acoplamento 14. Porta micro USB 15. Slot da trava deacoplamento 16. Alto-falante17. Luz de carga da bateria 18. Microfones frontais (2)1. Power button2. MicroSD-card slot3. Front camera4. Camera-status light5. Ambient-light sensor6. Headphone port7. Volume buttons (2)8. Windows button9.Rear microphone10. Rear camera 11. Speaker12. Docking-latch slot 13. Power-adapter/docking port 14. Micro-USB port 15. Docking-latch slot 16. Speaker17. Battery-charging light 18.Front microphones (2)1. Botón de encendido2. Ranura para tarjetaMicroSD3. Cámara frontal4. Indicador del estadode la cámara5. Sensor de luz ambiental6. Puerto de audífonos7. Botones de volumen (2)8. Botón de Windows9. Micrófono posterior 10. Cámara posterior11. Altavoz12. Ranura para el pasadorde acoplamiento13. Puerto de adaptadorde alimentación14. Conector micro USB 15. Ranura para el pasadorde acoplamiento 16. Altavoz17. Luz indicadora decarga de batería18. Micrófonos digitales (2)Setting Up Your TabletInsert the microSD card (optional)Insérez la carte microSD (facultatif) | Insira o cartão microSD (opcional) Inserte la tarjeta microSD (opcional)Charge the battery (at least 4 hours)Rechargez la batterie (4 heures au moins)Carregue a bateria (no mínimo por 4 horas)Cargue la batería (al menos durante 4 horas)Press and hold the power button to turn on the tablet Maintenez enfoncé le bouton d’alimentation pour mettre en marche la tabletteMantenha pressionado o botão liga/desliga para ligar o tablet Mantenga presionado el botón de encendido paraencender la tabletaConfigurer votre tablette | Como configurar o seu tablet Configuración de su equipoLocate the Service TagRepérez le numéro de service Localize a Etiqueta de serviçoBusque la etiqueta de servicioWindows 8Swipe to access more tilesBalayez pour accéder à d’autres mosaïquesPasse o dedo para ter acesso a mais blocos Desplace para acceder a más íconosTilesMosaïques | Blocos | IconosSwipe from right edge of the display Balayez à partir du bord droit de l’écran Passe o dedo a partir da borda direita da tela Deslice desde el borde derecho de la pantalla| Barra lateral de botões |Barra de atractivosGetting started Mise en route Primeiros passos IntroducciónMy Dell Support Center Mon Dell Support Center My Dell Centro de Suporte Mi centro de soporte técnico de DellResourcesRessources | Recursos |Recursos。
平板电脑操作手册
家庭平板电脑SN70T5(HSG1258)User’Manual操作手册内容注意事项 (4)了解你的家庭平板电脑............................................. . (5)1.1前视图............................................... .................................................. .51.2后视图............................................... .................................................. .. 6 2。
家庭首次使用平板电脑............................................ . (7)2.1管理和电池充电............................................ .. (7)2.2开启/关闭设备........................................... .. (7)2.3初始系统启动............................................. . (8)2.3.1模式选择............................................. (8)3。
在首页画面93.1主屏幕............................................... .. (9)3.1.1儿童模式............................................. .. (10)3.1.2家长模式............................................. (11)3.23.3状态3.4使用触摸屏............................................. . (14)3.5应用程序菜单............................................... (14)4 。
平板电脑用户指南说明书

Tablet User GuideWelcome to your tablet guide! I’m sure you can’t wait to get started so we’ve put together a short set of instructions to help you access the GGG app on your new tablet.First things first, to turn your tablet on, press the smaller button of the two on the left-hand side of the tablet. You’ll hear the tablet buzz and the screen will light up as it powers up.Now you can see the screensaver – swipe your finger upwards on the screen to get to the home screen.Great – this is the home screen. If the screen goes black at any time, don’t worry, it’s just saving energy. Press the small button again once to wake it back up and then swipe your finger upwards like you did before. If this is your first time using the tablet you’ll need to connect to your WiFi – see the “first time use” instructions below to dothat. Otherwise, you’ll see a GGG logo like this – press your finger on the logo once to access our app.Welcome to the GGG app! To get started, touch the first circle that says Activities.Great! You’ve got achoice of what youwant to do now. Youcan view this week’sbingo game bypressing the “Bingo”button – this goeslive everyWednesday 12noon.You can also browsethe available videos and select one to watch by pressing on it and clicking the play button.First time setupThe good news is you’ll only need to do this once! Once you’ve turned on the tablet and swiped up to get to the homescreen, swipe your finger across the screen to the left. You’ll see this screen:To connect to your wifi, click the settings icon.Great! You’ll now see this screen, click the Networks and Internet icon:Now you’ll see this screen, click WLAN:Now you need to look at your router (that’s the black box you’ll have, probably near your phone that connects to you phone line and phone) and see what your network is called and what your password is. There will be a box on the router with the information that will look a bit like this. It might look a bit different depending on whatnetwork you have, but don’t worry as all the information you need will be there.Now you have this information, select your network from the list in front of you. Everyone’s network is different, so make sure you pick the one listed on your own router.Once you’ve pressed your own network, you’ll need the password. You’ll see a screen like this, enter the password from your router. Remember, the password is case sensitive which means you need to copy the password exactly including any capital letters. To get capital letters use the shift key (circled).Once you’ve entered the password, press connect. Well done, that’s you ready to go! Frequently Asked Questions (FAQs)Q - My tablet won’t turn on – what do I do?A – first of all check that your tablet hasn’t just gone to sleep to conserve energy. To do this press the small button on the right hand side in – you should then see the screensaver. From there swipe up with your finger as usual.If this doesn’t do anything, try holding the button in until you feel the tablet buzz – it might just be turned off. If this doesn’t work, make sure your tablet is charged – place it in the dock and make sure the dock is plugged in and turned on at the socket.Q – How often do I need to charge my tablet?A – Your tablet will tell you how much charge (or battery capacity) is left and how long you can use it for until it will need recharged up on the right hand corner of the screen. Every time you put the tablet in its dock – as long as the dock is plugged in – it will charge, even if you’re using the tablet.Q – Can I access the internet on my tablet?A – Yes, you can access the internet by touching the Google icon which you’ll find in the folder called GoogleQ – This week’s bingo isn’t on the app – where is it?A – if new content hasn’t loaded that you’re expecting, close the app and then reopen it again.Glossary of TermsTablet – A tablet computer, commonly shortened to tablet, is a mobile device, touchscreen display, and a rechargeable battery in a single, thin and flat package. Tablets, being computers, allow you to access the internet, watch movies, listen to music, send emails, read latest news and much more! The touchscreen display is operated by gestures executed by finger.GGG App – This is where all your Glasgow’s Golden Generation’s activities, such as Bingo, are found. Google - this is a search engine which will search everything on the internet to find you pages that best fit the word you typed in. You can search for facts, the news and even shops – just be careful, not everything you will find online is as it seems.。
至清至薄9.7吋IPS屏台电A10t详细评测
至清至薄9.7吋IPS屏台电A10t详细评测2012-02-23 06:42:08 来源: 中关村在线网站(北京)第1页:至清至薄台电A10t详细评测IPS屏幕出色的显示效果使得越来越多的国产平板开始采用这一屏幕,作为国内首款杀入千元下的IPS屏9.7平板电脑,台电A10各方面表现都比较不错,引起了巨大的轰动,但还是存在一些小的问题。
如今台电科技最新推出了又一款采用9.7英寸IPS屏幕的旗舰级平板,台电A10t重装来袭。
至清至薄9.7吋IPS屏台电A10t详细评测除了出色的IPS大屏幕,台电A10t还搭载了强劲的全志A10处理器,拥有Many Core众核技术,1GB的DDR3内存,9.7英寸LG 原装IPS屏幕的强悍硬件配置,台电A10t一经推出就受到了众多消费者的瞩目与青睐。
现在就和笔者一起来了解这款产品的具体表现吧。
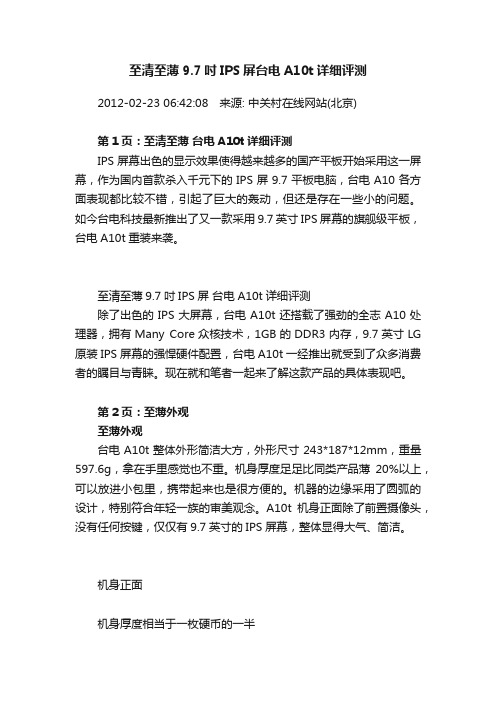
第2页:至薄外观至薄外观台电A10t整体外形简洁大方,外形尺寸243*187*12mm,重量597.6g,拿在手里感觉也不重。
机身厚度足足比同类产品薄20%以上,可以放进小包里,携带起来也是很方便的。
机器的边缘采用了圆弧的设计,特别符合年轻一族的审美观念。
A10t机身正面除了前置摄像头,没有任何按键,仅仅有9.7英寸的IPS屏幕,整体显得大气、简洁。
机身正面机身厚度相当于一枚硬币的一半前置摄像头虽说外形纤薄,但台电A10t可不像瘦弱的林妹妹一样“风一吹就倒”,A10t机身背部采用特殊轻质合金精密打造,确保了纤薄的机身也具有较高的结构强度与牢固性。
金属机身磨砂的表面处理结合超薄设计,使A10t显得精致有型,充满时尚感,手指触摸银灰色的背壳,基本没有留下任何指印。
机身背面机身背后设计也是秉承了简洁实用的风格,除了台电科技标志、产品型号、基本参数、产品符合的标准外,最醒目的就是声音外放口了,声音外放还算不错,足够满足一般的日常应用需求。
背后的扬声器台电A10t的按键接口非常的集中,全部集中于机器右侧,这样的设计比较看起来清爽,而且方便用户进行操作。
平板电脑说明书

PD0705说明书目录1前言2注意事项3准备使用3.1产品包装内容清单3.2产品外观3.3按键功能说明3.4产品功能3.5产品技术规格参数4快速指南4.1 开/关机4.2 电池管理及充电4.3 桌面功能图标定义5 功能及其应用5.2 网络功能5.2.1 WIFI上网5.2.2 有线宽带上网5.2.3 3G移动上网5.3 USB-HOST 扩展应用5.3.1 外接U盘功能5.3.2 外接鼠标、键盘5.3.3 使用TF存储卡5.4 工具软件5.4.1 APK软件管理器5.4.2 资源管理器5.4.3 高级任务管理器5.4.4 日历5.4.5 计算器5.5 娱乐功能5.5.1 音乐功能5.5.2 视屏功能5.5.3 图片浏览功能5.5.4 照相、摄像功能5.5.5 录音功能5.5.6 电子书功能5.6 网络应用5.6.1 G-MAIL5.6.2 个人、企业E-MAIL注册登录5.6.3 电子市场5.6.4 地图5.6.5 在线视频5.6.6 在线聊天5.6.7 网页浏览5.7 设置5.7.1 无线与网络设置5.7.2声音设置5.7.3 显示设置5.7.4 位置及安全5.7.5 应用程序设置5.7.6 帐户与同步5.7.7 隐私权设置5.7.8 储存设置5.7.9 语言及键盘设置5.7.10 语言输入输出设置5.7.11 日期及时间设置5.7.12 关于设备5.8 桌面功能图标设置5.8.1 桌面快捷操作5.8.2 桌面添加、删除图标5.9 输入法选择及设置6 疑难解答1.前言尊敬的用户:您好!首先感谢您选用本公司生产的产品!本产品内置高性能WiFi接收模块,支持外挂3G USB-DONGLE无线上网卡,接入宽频无线互联网,不受网线束缚,也将带您进入便携影音播放世界,满足您的娱乐需求,同时可以有线接入宽带;它还支持图片浏览、电子书、游戏、网络聊天、移动办公等多种功能,多种设置尽显您的个性。
在使用您的平板电脑之前,请仔细阅读我们随机提供的所有资料。
平板电脑通用说明书

安卓平板系统通用使用指南目录1、逐步了解主屏幕 (3)1.1 主界面解锁 (3)1.2 主界面 (4)1.3 主界面各按键介绍 (5)1.3.1 屏幕上始终显示的按钮 (5)1.3.2 自动显示/隐藏的按钮 (6)1.4 通知栏 (7)1.5 应用程序和窗口小部件界面 (9)1.5.1 进入应用程序界面 (9)1.5.2 进入窗口小部件界面 (10)1.6 桌面快捷图标创建和管理 (11)1.6.1 在桌面上创建应用程序快捷图标 (11)1.6.2 桌面应用程序的快捷图标管理 (11)1.7 删除桌面应用程序的快捷图标 (14)1.8 更换壁纸 (15)1.9 连接电脑 (16)2、应用程序 (18)2.1 2.2 2.3 2.4 2.5打开本机自带的程序 (18)屏幕兼容性缩放 (21)打开/关闭后台运行的程序 (22)获取应用程序并在平板上安装 (23)删除已安装在平板上的应用程序 (26)3、设置 (29)3.1 无线和网络 (30)3.1.1 Wi-Fi (30)3.1.2 流量使用情况 (33)3.1.3 更多 (34)3.2 设备 (35)3.2.1 声音 (35)3.2.2 显示 (36)3.2.3 存储 (37)3.2.4 电池 (38)3.2.5 应用程序 (38)3.3 个人 (39)3.3.1 帐户与同步 (39)3.3.2 位置服务 (39)3.3.3 安全 (39)3.3.4 语言和输入法 (41)3.3.5 备份和重置 (42)3.4 系统 (43)3.4.1 日期和时间 (43)3.4.2 辅助功能 (43)3.4.3 开发人员选项 (44)3.4.4 关于平板电脑 (45)4、相机 (46)4.1 拍照 (46)4.2 摄像 (48)5、平板电脑连接网络 (50)5.1 5.2 5.3WiFi上网 (50)外接以太(有线)网卡连网线上网 (52)外接3G网卡上网 (54)1、逐步了解主屏幕Android4.0 的启动器(即:开机显示的主界面)较之前版本,有很大的改变,这里简单介绍一下基本使用。
平板使用手册
平板使用手册一、设备简介本手册将指导您如何使用您的平板电脑。
平板电脑是一款便携式计算设备,具有触摸屏、操作系统和各种应用程序。
通过本手册,您将了解如何设置和使用平板电脑,以便充分利用其功能和性能。
二、开箱检查在打开平板电脑的包装盒之前,请确保您已经准备好:- 平板电脑、充电器、说明书和其他附件- 一个安全、平坦的工作区域,以便进行开箱和设置打开包装盒,检查平板电脑和附件是否齐全,并确认平板电脑没有损坏。
三、基础设置在开始使用平板电脑之前,您需要进行一些基础设置。
这些设置包括:- 连接充电器并充电- 打开平板电脑,按照屏幕上的指示进行基本设置(例如,选择语言、创建账户等)- 确保您的平板电脑已连接到Wi-Fi网络四、用户界面介绍平板电脑的用户界面基于其操作系统设计。
以下是常见的用户界面元素:- 主屏幕:显示应用程序图标和小组件- 应用程序抽屉:显示已安装的应用程序列表- 通知栏:显示通知、日期和时间、电池电量等- 多任务管理器:显示正在运行的应用程序和最近使用的应用程序列表五、应用安装与卸载要在平板电脑上安装应用程序,请使用以下方法之一:- 从应用商店下载和安装应用程序- 下载应用程序的APK文件,并在设备上安装该文件(适用于Android设备)要卸载应用程序,请:- 打开“设置”应用程序- 滚动到“应用”或“已安装的应用”选项,并选择要卸载的应用程序- 点击“卸载”或类似的选项六、常用功能操作以下是您在使用平板电脑时可能会经常执行的一些操作:- 打开应用程序:从主屏幕或应用程序抽屉中找到应用程序图标,并轻点或点击该图标。
等待应用程序加载。
加载完成后,您将进入应用程序的界面。
此时,您可以开始使用该应用程序的功能。
要关闭应用程序,请从多任务管理器中找到该应用程序卡片,并向上滑动或点击“X”图标。
等待应用程序关闭。
或者从主屏幕或应用程序抽屉中找到最近使用的应用程序列表并关闭该应用程序。
要退出全屏模式(如果适用),请点击屏幕的边缘或按设备上的返回按钮。
台电平板教您20招定稿版
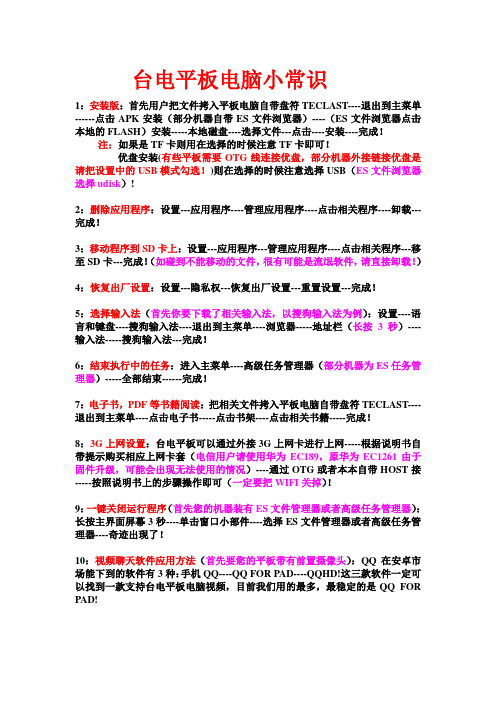
台电平板电脑小常识1:安装版:首先用户把文件拷入平板电脑自带盘符TECLAST----退出到主菜单------点击APK安装(部分机器自带ES文件浏览器)----(ES文件浏览器点击本地的FLASH)安装-----本地磁盘----选择文件---点击----安装----完成!注:如果是TF卡则用在选择的时候注意TF卡即可!优盘安装(有些平板需要OTG线连接优盘,部分机器外接链接优盘是请把设置中的USB模式勾选!)则在选择的时候注意选择USB(ES文件浏览器选择udisk)!2:删除应用程序:设置---应用程序----管理应用程序----点击相关程序----卸载---完成!3:移动程序到SD卡上:设置---应用程序---管理应用程序----点击相关程序---移至SD卡---完成!(如碰到不能移动的文件,很有可能是流氓软件,请直接卸载!)4:恢复出厂设置:设置---隐私权---恢复出厂设置---重置设置---完成!5:选择输入法(首先你要下载了相关输入法,以搜狗输入法为例):设置----语言和键盘----搜狗输入法----退出到主菜单----浏览器-----地址栏(长按3秒)----输入法-----搜狗输入法---完成!6:结束执行中的任务:进入主菜单----高级任务管理器(部分机器为ES任务管理器)-----全部结束------完成!7:电子书,PDF等书籍阅读:把相关文件拷入平板电脑自带盘符TECLAST----退出到主菜单----点击电子书-----点击书架----点击相关书籍-----完成!8:3G上网设置:台电平板可以通过外接3G上网卡进行上网-----根据说明书自带提示购买相应上网卡套(电信用户请使用华为EC189,原华为EC1261由于固件升级,可能会出现无法使用的情况)----通过OTG或者本本自带HOST接-----按照说明书上的步骤操作即可(一定要把WIFI关掉)!9:一键关闭运行程序(首先您的机器装有ES文件管理器或者高级任务管理器):长按主界面屏幕3秒----单击窗口小部件----选择ES文件管理器或者高级任务管理器----奇迹出现了!10:视频聊天软件应用方法(首先要您的平板带有前置摄像头):QQ在安卓市场能下到的软件有3种:手机QQ----QQ FOR PAD----QQHD!这三款软件一定可以找到一款支持台电平板电脑视频,目前我们用的最多,最稳定的是QQ FOR PAD!台电平板常识小提醒触摸不灵1:屏幕触摸不灵或者点击不中:不要急,这种情况没什么大不了的,首先请大家看清楚机器有没有贴上一层膜,因为所有贴膜均是厂家通过机器操作而成,是由于黏贴过紧导致,请把膜撕掉,这种现象将会立刻消失!ESC不能退出游戏和应用2:退出游戏和应用时按ESC键无法退出:请直接按HOME键退出!游戏画面不能满屏3:玩游戏时,有些游戏不能满屏:由于机器本身的分辨率最小都是800*480,所以你下载的游戏分辨不高的话是不能满屏的,在这里建议大家下载HD版本的游戏!游戏不能玩4:T720SE,C520TI不能玩游戏,怎么回事?:由于T720SE,C520TI属于入门级平板电脑,本身CPU只有624M,玩游戏不怎么适合,但是一些小型游戏是可以玩的,T720SE,C520TI注重的是体验安桌系统和应用程序,对游戏有要求的客户请选择台电主频上1GHZ的平板电脑!T760,P71机身发热5:T760,P71长时间运行为什么会发热啊:首先客户要清楚,平板电脑是没有风扇的,只能靠”肉体”散热,有一定的热度是正常的,而且P71,T760属于GC800显卡,此款显卡性能卓越,发热量稍高点属于不可避免的,但是P71,T760热的快,散的也快!游戏,应用图标移动6:把游戏,应用图标拖动以及删除:进入主菜单,单击某个你想要的图标不动,2秒左右,图标就能跟随你随便移动!当你想删除时,同样单击长按2秒左右,可以移动到主界面右方以及下方位置的垃圾桶标志,当出现红色标识是既可松手!死机7:当您的平板那么的不幸死机的话,请直接使用RESET直接复位即可!内存数字不对8:内存数字不对啊,怎么少了100多M啊???安卓操作系统会吃掉一部分内存上的容量,但并不影响正常使用,这在安卓系统的平板和手机上都是很常见的问题了!更新固件9:您可以经常关注台电官方网站查看您的平板软件更新情况,新的固件也许会解决您正碰到的问题!您可以直接自己更新您的平板固件,下载相关安装包,里面有详细的操作演示!在线下载应用软件和游戏10:当您连接上网络时,你可以直接在浏览器地址栏中搜索安智市场,会有一个手机版供下载,点击下载即可(部分机器需要安装TF卡才能下载!)!温馨提示:我们的能力是有限的,平板的作用非常广泛,希望通过以上一些小常识和小提醒对您有所帮助,能够更好的帮助您使用台电平板电脑的时候少走弯路!。