折叠式自行车安装说明
飘鱼S6智能折叠电动车使用说明
1.需要调节坐垫高度时,松开座管夹, 将座管抽到合适的位置,再锁紧座管夹
最高安全线
2.调整坐垫高度时不得超出限位螺丝和最高 安全线范围,否则会有安全隐患 07
6. 展开脚踏
1.扶住车身,按图所示方向,展开脚踏
7. 开机操作
2
1 2.收起脚踏时,先向里按压,再向上折叠
1.首次使用前需充电激活电池 08
关于概念智慧
深圳市概念智慧科技有限公司是以“智慧出行的践行者”为发展理念,是您智慧出行的首选。公司自2014 年成立以来,以优质的产品、准时的货期、合理的价格及专业的服务赢得了广大客户的青睐,现已成为众 多用户的最佳选择之一。 公司坚持自主创新与“产学研”相结合的技术开发模式,拥有国内外专业人才队伍,具备行业领先的核心竞 争力。同时我们拥有国内高品质的生产线,建立了从设计、部门加工、装配、检试到物流仓储等全方位的 生产管理能力,经过几年的积累,已形成“机电一体化”的研发流程。 公司秉承“精益求精、客户至上”的经营管理理念,运用精益生产与7S管理模式,准确将市场需求、产品 研发、生产制造、售前服务、售后质量跟踪有机结合,致力于通过提供丰富、优质的产品及全面的服务来 推动全球智能交通快速发展。
最大续航
65km
显示屏
全视角LCD液晶屏
最大载重
120kg
功 能 爬坡角度
参 数
前后灯
大于15° 前大灯
制动距离(干态) 5(速度20km/h)
仪 电量显示
有
表
盘 速度显示
有
总里程显示
有
助力档位
3档
制动距离(液态) 动力模式
10(速度15km/h) 电动/助力(可选)
电 电压/功率 机 额定扭矩
儿童自行车组装手册

儿童自行车组装手册一、材料准备在开始组装之前,确保已经准备好以下材料:1. 儿童自行车零件包2. 一把扳手3. 一个扁口螺丝刀4. 一个十字螺丝刀5. 一瓶润滑油二、组装前准备1. 将儿童自行车零件包倒出,对照说明书检查是否齐全。
2. 确认是否有螺丝刀和扳手等工具。
3. 在组装的地方铺一块软布以防刮伤零件。
三、车架组装1. 将车架横放在工作台上,确保四个螺丝孔对齐。
2. 用扁口螺丝刀和扳手拧紧螺丝将车头和车架连接。
3. 确保车头稳固,没有松动。
四、车轮组装1. 将前轮插入前叉中,确保轮轴的末端插入对应的快拆装置中。
2. 轻轻拧动快拆装置直到前轮固定在前叉上。
3. 将后轮插入后叉中,同样用快拆装置将轮轴固定。
五、踏板和链条组装1. 将踏板螺口与左侧曲柄螺口对齐,用十字螺丝刀将螺丝拧紧。
2. 将链条放入变速器的齿轮上,然后将链条连接到右侧曲柄上。
3. 确保链条张紧适中,能够顺畅转动。
六、座椅和把手组装1. 将座椅杆插入座管中,用扳手拧紧座椅螺丝。
2. 将把手插入把手管中,确保握感舒适。
3. 调整座椅和把手的高度,根据孩子的身高来确定最合适的位置。
七、刹车系统和变速器设置1. 检查刹车系统的制动力度,确保刹车装置能够准确刹停车轮。
2. 若自行车配置了变速器,检查变速系统的顺畅性,并按照说明书进行正确的调整。
八、安全检查与润滑1. 仔细检查整个自行车的各个部分是否安全可靠。
2. 确保所有螺丝紧固,零件不松动。
3. 使用润滑油对链条和其他摩擦表面进行润滑。
4. 测试自行车的刹车和变速系统是否灵敏。
九、使用说明与安全防护1. 将使用说明书交给孩子或监护人,确保他们能够正确操作自行车。
2. 强调儿童在骑行时应佩戴头盔、护膝等安全防护设备。
3. 告知孩子在骑行中要注意交通安全,遵守交通规则。
结语:通过正确地按照上述步骤进行组装,您已经完成了儿童自行车的组装工作。
为了保证孩子的骑行安全,定期检查自行车的各个部件是否紧固可靠,确保刹车和变速系统的顺畅运行。
自行车的组装图解_单车组装
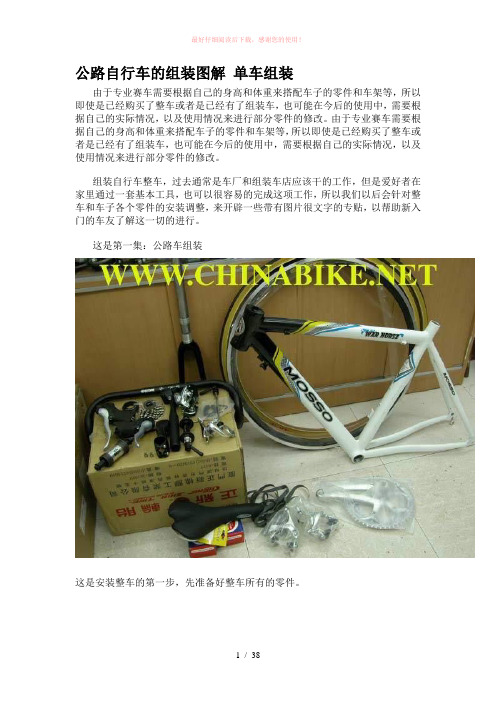
公路自行车的组装图解单车组装由于专业赛车需要根据自己的身高和体重来搭配车子的零件和车架等,所以即使是已经购买了整车或者是已经有了组装车,也可能在今后的使用中,需要根据自己的实际情况,以及使用情况来进行部分零件的修改。
由于专业赛车需要根据自己的身高和体重来搭配车子的零件和车架等,所以即使是已经购买了整车或者是已经有了组装车,也可能在今后的使用中,需要根据自己的实际情况,以及使用情况来进行部分零件的修改。
组装自行车整车,过去通常是车厂和组装车店应该干的工作,但是爱好者在家里通过一套基本工具,也可以很容易的完成这项工作,所以我们以后会针对整车和车子各个零件的安装调整,来开辟一些带有图片很文字的专贴,以帮助新入门的车友了解这一切的进行。
这是第一集:公路车组装这是安装整车的第一步,先准备好整车所有的零件。
安装前叉碗组的第一步骤是敲入前叉的下铛,这个过程需要使用到一根内径比前叉管径粗,外径比前叉下铛窄的铁管,管头必须先磨平(不平的管会在打击过程中导致碗组的下铛歪斜),在敲击的时候需要管子紧贴下铛,然后手举管子和前叉同时向地面敲击(如果管和下铛有间隙会导致铁管二次冲击下铛,使得下铛受伤),敲击的每一下后,必须要转动管子,这样打入的下铛才会平衡。
另外如果没有管子也有人用扳手顶在下铛上,然后用铁锤敲击,这种做法应急是可以的,但是对下铛的伤害肯定是比较严重的,而且铁锤不小心也会敲到前叉上管,导致管壁受损,所以为了以后车首转动顺畅,最好使用专用的管子来安装下铛。
下铛敲击完成后需要检查,下铛必须和叉肩进行紧密的接触,这样才可以防止前轮在受冲击后导致前叉晃动。
下铛安装完成后,就要开始安装前叉碗组的上下碗了,由于我们用于范例的是使用隐藏碗组的公路车,所以没有上下碗结构,但是上下培林碗的安装和普通碗组很类似。
敲击上碗和下碗需要使用橡皮锤,如果使用铁锤,会导致碗组外壳的损害,而且由于铁锤冲击力量大,会导致车首管的油漆剥落。
敲击上下碗开始时只能用比较小的力度,先轻轻敲击,然后停下来看看碗是否是平衡的进入了车架,因为歪斜的进入车架,即使您用很大力量敲入了,但是对车首管的损伤是巨大的,严重的管内壁变形会在以后的骑行中使得碗组松动,结果是直接导致前叉组件钢性下降,甚至导致刹前刹车前叉晃动。
Pacific Cycle 折叠自行车说明书
1Congratulations on your new scooter!Proper assembly and operation of your scooter is important for your safety and enjoyment. Our customer service department is dedicated to your satisfaction with Pacific Cycle and its products. If you have questions or need advice regarding assembly, parts, performance, or returns, please contact the experts at Pacific Cycle. Enjoy the ride!Toll free: 1-800-626-2811Customer Service hours: Monday - Friday 8 AM- 5 PM Central Standard Time (CST)You may also reach us at:Web: Email:*********************************Mail: P. O. Box 3444730 E. Radio Tower LaneOlney, IL 62450Do not return this item to the store. Please call Pacific Cycle customer service if you need assistance. You will need your model number and date code located on the service sticker.About This ManualIt is important for you to understand your new scooter.By reading this manual before you go out on your first ride, you’ll know how to get better performance, comfort, and enjoyment from your new scooter. It is also important that your first ride on your new scooter is taken in a controlled environment, away from cars, obstacles and cyclists.This manual contains important information regarding safety, assembly, use, and maintenance of the scooter but is not intended to be a complete or comprehensive manual covering all aspects concerning scooter ownership. We recommend consulting an expert if you have any doubts or concerns regarding your experience or ability to properly assemble and maintain the scooter.A Special Note For Parents and GuardiansIt is a tragic fact that most scooter accidents involve children.As a parent or guardian, you bear the responsibility for the activities and safety of your minor child. Among these responsibilities are to make sure that the scooter which your child is riding is properly fitted to the child; that it is in safe operating condition; that you and your child have learned, understand and obey not only the applicable local motor vehicle, scooter, and traffic laws, but also the common sense rules of safe and responsible scooting. As a parent, you should read this manual before letting your child ride the scooter. Please make sure that your child always wears an approved helmet when riding.21Indicates a hazard or unsafe practice that will result in severe injury or death. Failure to read, understand and follow the safety information in this manual may result in serious injury or death.Indicates a hazard or unsafe practice that could result in minor injury.Indicates a hazard unrelated to personal injury, such as property damage.NOTICE Age and Weight RangeSafety Warning MessagesThe following Safety Warning Messages indicates a potentialpersonal injury hazard. Failure to follow the warnings may result indamage to property, injury, or death.This manual contains many Warnings and Cautions concerning theconsequences of failure to follow safety warnings. Because any fallcan result in serious injury or even death, we do not repeat thewarning of possible injury or death whenever the risk of falling ismentioned.345General Safety• Familiarize yourself with all the scooter’s features before riding. Practice braking.• Expect the unexpected (e.g., opening car doors or cars backing out of concealed driveways).• Maintain a comfortable stopping distance from all other riders, vehicles and objects. Safe braking distances and forces are subject to the prevailing weather conditions.• Use original spare parts only. Do not make structural changes or modifications to the scooter.• Wear proper riding attire, reflective if possible, and avoid open toe shoes.• Do not use items that may restrict your hearing and vision.• Do not allow passengers and do not carry packages that will interfere with your visibility or control of the scooter.• Do not ride indoors or on surfaces that could be damaged such as carpet or flooringRiding SafelyRoad Conditions• Be aware of road conditions. Concentrate on the path ahead. Avoid pot holes, gravel, wet road markings, oil, curbs, speed bumps, drain grates and other obstacles.• Cross train tracks at a 90 degree angle or walk your scooter across.• Avoid sharp bumps, drainage grates & sudden surface changes • Wet weather impairs traction, braking & visibilityCornering Technique• Brake slightly before cornering and prepare to lean your body into the corner.• Decrease your riding speed, avoid sudden braking and sharp turns.Safe Riding Rules for Children• Be aware of other vehicles behind and nearby.• If riding downhill, be extra careful. Slow down using the brakes and maintain control of the steering.• Keep both hands on handlebars at all times.• Not designed for stunt riding• Always use caution when riding and wear protective gearProtective Gear and ClothingAlways wear: Figure 1.1• Colors that are easily seen and, if possible, reflective clothing. • Clothing appropriate for the weather conditions.• Always wear shoes• Use of protective gear such as pads for the knees and elbows is highly recommended for children.• A properly fitted, ASTM or SNELL approved, helmet shall be worn at all times by riders of the scooter. For information regarding how to properly fit a helmet visit:/people/injury/pedbimot/bike/ easystepswebDo not wear:Loose clothing parts, strings, or jewelry that may become entangled with moving parts on the scooter or interfere with handling of the scooter.• Shoes with untied shoe laces.Personal Safety6Helmet Use Array Important! Many states have passed helmet laws regarding children. Make sure you know your states helmet laws. It is your job to enforce these rules with your children. Even if your state does not have a children’s helmet law, it is recommended that everyone wear a helmet.It is strongly advised that a properly fitting, ASTM or SNELL approved, helmet be worn at all times when riding your scooter. The correct helmet should: Figure 1.2• Be comfortable• Have good ventilation• Fit correctly• Cover foreheadIncorrect helmet position: Figure 1.3• Helmet does not cover the foreheadThis section presents important information on maintenance and will assist you in determining the proper course of action to take if you do have a problem with the operation of the scooter. If you have questions regarding maintenance please call our customer service, toll free, at 1-800-626-2811 or see a qualified bicycle mechanic. Do not call the store where the scooter was purchased.Correct routine maintenance of your new scooterwill ensure:• Smooth running• Longer lasting components• Safer riding• Lower running costs Basic MaintenanceThe following procedures will help you maintain your scooter for years of enjoyable riding.• For painted frames, dust the surface and remove any loose dirt with a dry cloth. To clean, wipe with a damp cloth soaked in a mild detergent mixture.• Clear any debris between the wheels and frame• Store your scooter under shelter. Avoid leaving it in the rain or exposed to corrosive materials.• Riding on the beach or in coastal areas exposes your scooter to salt which is very corrosive. Wash your scooter frequently.• If paint has become scratched or chipped to the metal, use touch up paint to prevent rust. Clear nail polish can also be used as a preventative measure.• Check that the wheels are securely fastened to the scooter and axle nuts are tight.4115Do not return this product to the place of purchase. If your scooter needs service, repairs or replacement parts, please have the model and serial number available and call:UNITED STATESPacific Cycle Consumer RelationsHours: 8:00 am – 5:00 pm (CST) Monday - FridayPhone: 1-800-626-2811Email:*********************************CANADAPacific Cycle CanadaHours: 8:00 am – 5:00 pm (CST) Monday - FridayPhone: 1-877-758-4741Email:*********************************MEXICOBicicletas MercurioPhone: 01-800-2288-2424Email:******************************.mxAUSTRALIAMonza ImportsPhone: 61 3 8327 8080Email:*************************.au6LIMITED WARRANTY AND POLICY ON REPLACEMENT PROCEDURES & RESPONSIBILITIESYour purchase includes the following warranty which is in lieu of all other express warranties. This warranty is extended only to the initial consumer purchaser.No warranty registration is required. This warranty gives you specific legal rights and you may have other rights which vary from state to state.FRAMEFrames are guaranteed against manufacturing defects for a period of 5 years. If frame failure should occur due to faulty materials or workmanship during the guarantee period, the frame will be replaced. For frame replacement under this Pacific Limited Warranty, contact us, stating the nature of the failure, model number, date received and the name of the store from which the scooter was received, at the address given on this page. Frame must be returned for inspection at customer’s expense. The length of the useful life cycle will vary depending on the type of scooter, riding conditions and care the scooter receives. Competition, jumping, downhill racing, trick riding, trial riding, riding in severe conditions or climates, riding with heavy loads or any other non-standard use can substantially shorten the useful product life cycle. Any one or a combination of these conditions may result in an unpredictable failure that is not covered by this warranty.PARTSAll other parts of the unit except Normal Wear Parts are warranted against defective materials and workmanship for a period of 1 year from the date of purchase by the initial consumer purchaser, subject to the Terms and Conditions of the warranty listed below. If failure of any part should occur due to faulty materials or workmanship during the warranty period, the part will be replaced. All warranty claims must be submitted to the address below and must be shipped prepaid and accompanied by proof of purchase. Any other warranty claims not included in this statement are void. This especially includes installation, assembly, and disassembly costs. This warranty does not cover paint damage, rust, or any modifications made to the scooter. Normal Wear Parts are defined as grips, wheels, and brake mechanism. These parts are warranted to be free from defects in material and workmanship as delivered with the product. Any claim for repair or replacement of Normal Wear Parts (grips, wheels, brake mechanism) and missing parts must be made within thirty (30) days of the date of purchase. The warranty does not cover normal wear and tear, improper assembly or maintenance, or installation of parts or accessories not originally intended or compatible with the scooter as sold. The warranty does not apply to damage or failure due to accident, abuse, misuse, neglect, or theft. Claims involving these issues will not be honored.CONDITIONS OF WARRANTY1. Your scooter has been designed for general transportation and recreational use, but has not been designed to withstand abuse associated with stunting and jumping. This warranty ceases when you rent, sell, or give away the scooter, ride with more than one person, or use the scooter for stunting or jumping.2. This warranty does not cover ordinary wear and tear or anything you break accidentally or deliberately.3. It is the responsibility of the individual consumer purchaser to assure that all parts included in the factory-sealed carton are properly installed, all functional parts are initially adjusted properly, and subsequent normal adjustments necessary to keep the scooter in good operating condition are properly made. This warranty does not apply to damage due to improper installation of parts, installation of any kind of power plant or internal combustion engine, modification or alteration of the brakes, or frame in any way, or failure to properly maintain or adjust the scooter. NOTICE: Scooter specifications subject to change without notice.13© 2019 Pacific Cycle Inc. 4902 Hammersley Rd.Madison, WI 53711Made in China。
电动折叠车用户指南说明书

Instruction Manual for E-bikes SKU#:8907644 SKU#:8907636 BIKE ELECTRIC FOLDING 20 IN BIKE ELECTRIC 26 INTable of contents1. Your E-Bike…………………………………………………………………..2—3 1.1 Introduction1.2 General presentation of the vehicle2. Function Display…………………………………………………………..4—8 2.1 Displayer Introduction2.2 Operation3. Using the bike (8)3.1 Riding the bike4. The battery……………………………………………………………….……..8—10 4.1 Installing and removing the battery4.2 Charging the battery4.3 Battery autonomy and lifespan4.4 Battery safety instructions5. Safety maintenance and recommendations (10)5.1 Helmet5.2 Tires6. Warranty (10)1. Your E-Bike1.1) IntroductionWe would like to thank you for your e-bike purchasing. For your safety and for the safety of others, we recommend that you obey all road regulations and wear a protective helmet. For optimal, safe and enjoyable use of the e-bike, make sure you thoroughly read this user guide before you first use it. Use the e-bike according to the user guide, or it may shorten the life cycle.Have a pleasant ride!1.2) General presentation of the vehicle1.2.1) General informationSKU#. 8907644 8907636Weight of bike with battery:26KG 30KGMaximum assistance speed:32KM/H32KM/HL 1420 x W270 x H660L 1580 x W275 x H840 The dimensions of the bike (MM)(85% package):146KG150KG Maximum Loading total weight:(includes the bike, battery and rider)8907644 89076361.2.2) Spare parts specSpare parts name 8907644 8907636Motor BAFANG36V,350W (20”)BAFANG36V,350W(26”)Battery 36V 10.40AHLG Lithium battery cells 36V 10.4AHLG Lithium battery cellsDisplay KUNTENG, KT-LCD5 KUNTENG, KT-LCD5 Front fork Strong suspension fork with lockoutSuspension forkE-Brake Lever 5 STAR106PDD-155mm 5 STAR106PDD-175mmDisc Brake Taiwan TEKTROMechanical disk brakes Taiwan TEKTRO Mechanical disk brakesDerailleur ShimanoTourney7 SpeedRD-FT35 Shimano Tourney 7 Speed RD-TY300Tire CHAOYANG20”X4.0”CHAOYANG 26”X4.9”2 charge indicators: 1 is located on the display; 1 is located on the side of battery.2. Function Display2.1) Display Introduction1UP button11Km/H Riding speed(metric)2 SW buttonMPHRiding speed (imperial)3 DOWN button MXS MAX speed4 ASSISTPas levelAVS Average speed 5 Battery capacity indicator12Km Distance(metric ) 6 CRUISE Cruise function Mil Distance (imperial ) 7 PAS Power-assisted functionDST Trip distance 8 TM Single trip time ODO Total distance TTM Total trip time VOLBattery voltage 9 THROTTLEThrottle display 13The brake display106Km/H push powerassist2.2) OperationON/OFFPress and hold (POWER BUTTON) to turn the power off and on. When the motor stops driving and when the e-bike is not used for a consecutive 5 minutes, it will automatically shut down.1. Display 1Hold button to start up and enter display 1.2.1 Assist ratio gear (ASSIST) switchPress or button to switch 1-5 gear. Gear 1 is for theminimum power, gear 5 is for the maximum power used withoutassisted function. Each startup will automatically restore the gearshutdown last time (the user can set randomly).2.2 6KM/H assist promotion functionPress and hold button and flashes, the vehicle drives atthe speed not more than 6Km /h. Release button, the function isDisengaged.2.3 THROTTLE displayTurn on throttle, THROTTLE display.2.4 PAS displayWhen Power-assisted riding, PAS display.2.5 Cruise functionAfter the cruise function is turned on, the trip riding speed isgreater than 7 km/ h, Press and hold button long to enter cruisemode. While in Cruise mode brake or hold any button to cancel.2.6 Display and delete of single DataAfter power on for 5 seconds, hold and button at thesame time, single trip riding time (TM) and single trip distance (DST)flash, hold button shortly, the content of both is cleared. If failedholding the button within 5 seconds, it will automatically return thedisplay interface after 5 seconds, original content is preserved.3 Display 2Hold button shortly in display 1 to enter display 2. In theriding mode after 5 seconds, display 2 automatically returns to display1.4 Display 3Hold button shortly in display 2 to enter display 3. In theriding condition, five seconds later, a single maximum speed (MXS)display automatically returns to the real riding speed (KM/H).5 In display 3, hold button shortly (SW) and the display willre-enter display 1.6 Press and Hold button to turn off the display and the powersupply of controller.7. Automatically prompt interface7.1 Error Code Display Error Code Definition01_info Throttle Abnormality03_info Motor hall signal Abnormality04_info Torque sensor signal Abnormality05_info Axis speed sensor Abnormality (only applied totorque sensor)06_info Motor or controller has short circuit Abnormality Electronic control system failure will display (flashing) fault code. Once the fault was removed, it automatically exits from the fault code display interface.General Project Setting1. Set maximum riding speedAfter power on for 5 seconds, hold and button at thesame time, maximum riding speed KM/H and MXS flash, hold orbutton shortly to set the maximum riding speed (default 25KM/H).Hold button shortly and go to the next parameter settings.2. Wheel diameter settingThe wheel diameter will be set after finishing setting themaximum riding speed, wheel diameter specifications flashes. Holdor button shortly to set the specifications of wheel diameter.Select the range 6,8,10,12,14,16,18,20,22, 24,26,700c and 28 inches.Hold button shortly and go to the next parameter settings.3. Set the metric unitsThe metric units will be set after finishing setting wheel diameter,KM/H and Km flash. Hold or button shortly and select metricunits of speed and mileage in synchronization.Display Metric ImperialRiding speed KM/H MPHTotal distance Km Mil4. KM/H and Km stop flash after metric unit setting is completed. Hold button shortly againto re-enter the maximum riding speed setting interface; or hold button long to exit from setting environment of routine projects and save the setting values, returning to display 1. 5. Exit from routine project settingAll three routine project settings can exit from the setting environment and return to the display if hold button long after each setting is completed, meanwhile the setting values are saved.Under each setting interface, if the button failed holding for more than 1 minute, it will automatically return to display 1, and the setting value is invalid.3. Using the bike---Riding the bikeBefore taking off, make sure that you activate the battery by pressing on the button located on the side of battery.The 4LEDs located on the side of the battery which indicate the charge level.Turn on the display unit which is on the handlebars. Select your needed assistance level and start to pedal. You’ll find that the engine starts as soon as you start pedaling.When you use the brakes, the contactor located within these brakes will halt the engine’s assistance immediately.The left brake lever controls the rear brake. The right brake lever controls the front brake.You can also use the bike without electric assistance by turning off the battery (switch off the button or by adjusting the assistance level on 0). The engine will then feature zero resistance: you’ll be freewheeling. Select the appropriate gear by activating the 7-speed gear lever.Please note: if you use the bike frequently, it is recommended that you inspect the state of the fork, the frame, the suspension and the fasteners. The materials and components may be subject to different reactions to usage and wear.If you have any doubts, contact your dealer, who will proceed with the necessary inspection.4.The battery4.1) Installing and removing the batteryTo remove the battery, unfasten the lock which is locatedalong the battery’s box. Remove the battery by pulling it out.To put the battery back into place, insert the battery along tothe guide rails. Push it closely against the controller box.Fasten the lock.4.2) Charging the batteryHere are the steps to be followed when charging your battery:Step 1 Turn the battery off. The LED lights will be off.Step 2 Plug the charger (which is off) into the socket and then insert the charger’s plug into the battery, which is also off.Step 3 the charger’s LED indicators lit up in the following manner:• The red LED lights on: the battery is being charged.(A)• The red LED light becomes green:the battery is full charged; you can unplug the charger. (B)(A)(B)It takes 3 - 6 hours for the battery to be fully charged when using the standard charger that’s supplied with your bike.4.3) Battery autonomy and lifespan4.3.1) AutonomyThe bike's autonomy ranges from 40 to 100 kilometers, as it depends on many different factors (degree of assistance used, topology, rider’s weight, frequent stops/start-ups, hills, tire pressure, etc…)4.3.2) MaintenanceIf you don’t use your bike for a period of time exceeding 2 months, store it in a humidity-free area to protect the electronic components and make sure that the battery is neither completely charged nor completely discharged (2 LEDs lit up)Note: Never store a completely discharged battery as it might result in permanent damage.During the winter or long storage periods, it is recommended that you chargethe battery halfway every 2 months. Don’t forget to switch it off. Store yourbattery at a temperature between 15° and 25°.4.4) Battery safety instructionsYour bike's battery is an electric component made up of chemical elements. For your safety, it is imperative that you obey the following rules:Always handle with great care10Always keep it away from childrenDo not take it apart or hit, pierce or submerge itKeep it away from temperatures exceeding 60°Never create a connection between the contacts located at the bottom of the batteryNever let the battery charge unattendedNever sleep near a battery that is chargingOnly use the charger that came with your bike or that was supplied by your dealer.If your battery is damaged, do not use it and take it back to your dealer as soon as possible5. Safety and maintenance Recommendations5.1) HelmetFor safe riding, use a bicycle helmet.5.2) TiresInspect the wear of your tires on a regular basis and verify the tire pressure at least once a month. Tire pressure: 40-65 PSI depending on the weight of the user.6. WarrantyYou are provided with a warranty for one year since the day you buy the bike.Details regarding your bike’s warranty coverage terms are available from yourdealer. Have a pleasant ride!。
折叠自行车说明书

西南交通大学折叠式自行车设计计算说明书所在班级:08机械四班学生姓名:20080917 **指导老师:***2012年6月目录引言 (1)1引言 (4)2一选题背景 (2)1.1 问题的提出 (2)1.2 文献综述 (3)3二设计方案的选择 (5)2.1 提出方案 (5)4三尺度综合 (10)3.1 机构关键尺寸计算 (10)3.2机构关键尺寸优化 (12)5四受力分析 (14)4.1 机构动态静力描述 (14)6五机构建模 (15)5.1 机构运动简图及尺寸标注 (15)5.2机构关键构件建模过程 (15)5.3 机构总体装配过程 (41)7六机构仿真 (46)6.1 机构仿真配置 (46)6.2 机构仿真过程描述 (49)6.3 仿真参数测量及分析 (50)6.4 仿真中存在的不足 (53)8七有限元分析 (54)7.1 轴结构分析 (54)7.2板结构分析 (56)9八设计总结 (57)10九收获和体会 (57)11十致谢 (57)12参考文献 (58)13附录 (59)1引言随着社会的发展,交通问题和污染问题已经日益严重。
面对当今这种拥挤和有碍环保与健康的交通状况,需要有一种轻巧便于携带的交通工具来服务于人们的日常生活,这给折叠自行车带来很大的发展空间。
折叠自行车的好处就是它可以带到地铁、公交车等交通工具上,当目的地距离较远需要转车时它可以用作短途的交通工具,既省下了等车时间又省下了转车的费用,还可以达到自行车保养和防盗的目的。
2一选题背景1.1 问题的提出1.1.1传统自行车的弊病传统自行车作为短途代步工具具备其他交通工具不可替代的功能,“但是现在的城市交通拥挤、存车面积明显不足、自行车停车场所缺乏、占用人行道停车情况严重且自行车被盗现象也十分严重。
”因此设计一种占地面积小、轻便、防盗、时尚的可折叠自行车就显得十分有必要。
图1.1图1.21.2 文献综述1.2.1 自行车的发明与演变据史料记载,最早的实物自行车是1791年法国人西拉夫克发明的在玩具马车上装两个轮子的“玩具马”。
简述自行车拆装的注意事项
简述自行车拆装的注意事项自行车作为一种常见的代步工具,在日常使用过程中难免会遇到需要拆装的情况。
无论是进行日常维护还是更换零件,正确的拆装方法是非常重要的,可以确保自行车的正常运行和安全性。
以下是拆装自行车时需要注意的事项。
1. 准备工具:在进行自行车拆装之前,首先要准备好适当的工具。
常用的工具包括扳手、螺丝刀、内六角扳手、油锯、气筒等。
根据需要拆装的部件和零件不同,选择正确的工具是非常重要的。
2. 安全措施:进行自行车拆装时,要确保自己的安全。
首先,要选择一个平坦稳固的工作台或地面,以防止自行车倒下或滑动。
其次,建议佩戴手套和护目镜,以防止手部和眼睛受伤。
3. 维护手册:在进行自行车拆装之前,最好先阅读自行车的维护手册。
维护手册中通常包含了拆装步骤的详细说明和注意事项,按照手册的指引进行操作可以避免错误操作和损坏自行车。
4. 拆装顺序:在拆装自行车时,要按照正确的顺序进行操作。
一般来说,先拆除外部的零件和配件,如车座、车把、踏板等,然后再拆卸更内部的部件,如链条、轮胎等。
在安装时则按照相反的顺序进行。
5. 注意细节:在拆装自行车的过程中,要注意一些细节。
例如,在拆除螺丝时,要注意使用适当的扳手,避免扳手滑动而导致伤害。
在拆除链条时,要使用合适的工具,避免链条弹起并伤到手部。
6. 清洁和润滑:在拆装自行车的同时,可以顺便进行清洁和润滑。
清洁自行车可以去除污垢和杂质,润滑可以减少磨损和摩擦。
在清洁和润滑时,要选择适当的清洁剂和润滑剂,避免对自行车造成损害。
7. 调试和测试:在拆装自行车之后,要进行调试和测试,以确保自行车的正常运行。
例如,调整刹车和变速器,检查轮胎的气压和胎面磨损等。
如果不确定如何进行调试和测试,建议咨询专业人士或带自行车到专业店进行检修。
8. 学习和实践:自行车拆装是一项技术活,需要一定的学习和实践。
初学者可以通过观看教学视频、参加培训课程或请教有经验的人来提高自己的技术水平。
在实践过程中,要多加注意和小心,并且随时记录和总结经验。
谈谈大家平时看不到的单车组装细节
谈谈⼤家平时看不到的单车组装细节时间过得好快,我进⼊运动⾃⾏车这⼀⾏算起来也有不少年了……这些年来,从单纯的爱车玩车到⾃⼰动⼿DIY组装和维修保养,⾓⾊上的转变不可谓不⼤。
看过了很多专业技师的优秀⼿⼯,也见识过了不少随随便便的“凑合”,我对于运动⾃⾏车的DIY⼀直有些⾃⼰的想法。
今天在这⾥想写点符合我个⼈标准的⾃⾏车组装细节和⽅法,⼀⽅⾯让⼤家了解⼀下我这些年来总结的⼀些单车DIY的经验和标准,另⼀⽅⾯也希望能给喜欢⾃⼰动⼿的朋友在装车时帮上点⼩忙。
装车的第⼀件事,是清点和检查零件。
清点⼤家都明⽩是什么意思,但是我发现很多朋友在装车时容易忽略检查的过程。
即便是事先在零件搭配上做⾜了功课,其实也不能100%保证你的零件兼容性绝对没问题。
⼀旦出现,对装车进度就会产⽣影响。
尤其是⼀些附属零件的搭配,往往被⼤家所忽视。
举个例⼦:车架坐管标称⼝径和实际⼝径不符。
标称⼝径是标准的27.2mm,可是实际却变成了27mm,0.2mm的误差⾜够让你装车的第⼀步就栽个跟头。
虽然可能只是个体现象,不过⼀旦出现了还是相当头疼的。
当然,这个问题并不是没得救。
有下⾯这个家伙,处理起来就简单了。
这个⼯具叫做坐管铣⼑,专门对付管材误差。
我⽤的是德国CYCLUS的⼯具 27.2直径铰⼑铣⼑使⽤时也不是硬上的,需要配合铣切专⽤油。
我⽤的是PARKTOOL的CF-2铣完之后要⽤刷⼦把切⾯的⾦属碎屑全部清理⼲净再⽤卡尺测量⼀下,就是标准的27.2mm⼝径了这只是我们在装车过程中可能碰到的众多问题中的⼀个。
以前我还见过五通螺纹损坏、碟刹安装座有误差等等各种问题,这些都需要在装车前的检查和装车的过程中发现和解决掉。
接下来,我们还是回到装车的过程中来。
1、安装坐管把车架固定在装车架上,以便更好地进⾏操作现在使⽤碳纤维材质零件的朋友越来越多了,不管是坐管还是车把,我个⼈的习惯都是最好在接触⾯上涂⼀层FINISH LINE FIBER GRIP的碳纤维⽌滑剂。
关于折叠自行车知识讲解讲义
20*1.5/1.75" Φ420
20*1-3/8" Φ463
22*1-3/8" Φ513
24*1.5/1.75" Φ523
24*1-3/8" Φ551
26*1.5/1.75" Φ573
26*1-3/8" Φ603
700C
Φ634
28"
Φ647
自行车零件—花鼓
花鼓:前/后花鼓,也可以叫前轴和后轴
快拆式前轴
自行车零件—旋把
变速旋把有旋转式旋把.指拨式旋把及刹变一体式.
中轴分类
自行车零件—中轴
自行车零件—车圈
车圈分为: ①BE软圈 ②SS直边圈 ③HB勾边
车圈尺寸:
12*1.5/1.75" Φ218
14*1.5/1.75" Φ269
16*1.5/1.75" Φ319
18*1.5/1.75" Φ368
轮
轮
胎圈芯
轮辋
胎
断
輪
面
辋 外
直
徑
胎 断
輪 辋
面
外 直
徑
自行车零件—内胎
内胎规格讲解:20”(规格)*1.5-1.75”(适合轮胎宽度)
美式嘴(A/V)
意式嘴(I/V)
德式嘴(D/V)
法式嘴(F/V)
英式嘴(E/V)
自行车零件—刹把
刹把分塑料刹把,铝合金刹把,规格有配:V”刹与侧拉.
自行车零件—刹车器
后变齿容讲解
齿容/后拨与牙盘/飞轮的搭配 后拨技术资料里齿容指的是: 齿容=(最大牙盘齿数+最大飞轮齿数)-(最小牙盘齿数+ 最小飞轮齿数)或齿容 =(最大牙盘齿数-最小牙盘齿数)+ (最大飞轮齿数-最小飞轮齿数)
折叠自行车的折叠原理
折叠自行车的折叠原理
折叠自行车是一种方便携带的交通工具,它在折叠时可以减小体积,方便携带和存放。
折叠自行车的折叠原理主要包括以下几个方面: 1. 折叠车架:折叠自行车的车架一般采用铝合金材料制造,车架可以通过旋转铰链等方式进行折叠。
折叠时需要将车架分成几个部分,然后将它们向内折叠,最终形成一个小巧的体积。
通常情况下,折叠自行车的车架可以分为前叉、中架和后轮三部分进行折叠。
2. 折叠前轮和后轮:折叠前轮和后轮是折叠自行车的另一个重要部分。
前轮和后轮通常采用快拆的方式进行拆卸和安装,这样可以方便地将它们放入车架内部。
在折叠自行车的折叠过程中,前轮和后轮需要依次进行拆卸,最终放置在车架内部。
3. 折叠车把、车座等:折叠自行车的车把、车座等部件也需要进行折叠。
车把一般采用可伸缩的设计,可以进行调节和折叠。
车座也可以进行折叠,一些折叠自行车还配备了可调节的座位高度,可以根据不同的需求进行调节。
4. 折叠自行车的其他部件:除了车架、车轮、车把、车座等部件外,折叠自行车还包括许多其他部件,如刹车、变速器等。
这些部件在折叠时也需要进行相应的操作,以保证折叠自行车能够顺利地进行折叠和展开。
总之,折叠自行车的折叠原理是通过对车架、车轮、车把、车座等部件进行折叠和拆卸,以减小体积,方便携带和存放。
折叠自行车的折叠原理非常灵活,可以根据不同的需求进行调节,是一种非常实
用的交通工具。
折叠自行车的安装方法
折叠自行车的安装方法
折叠自行车的安装方法因具体品牌和型号而有所不同,以下是一般折叠自行车的安装方法:
1. 打开包装,取出折叠自行车的各个零件。
2. 拆卸车架上固定的绷带或保护套,使车架可以展开。
3. 展开车架,确保车架完全打开并稳定。
4. 连接前后车架:在车架连接部位,将前后车架的连接杆或其他配件对准并插入,确保牢固连接。
5. 安装前轮:将前轮对齐前叉,并插入前叉销孔,用轴锁固定。
6. 安装车把:插入车把的固定柱,确保固定柱正常插入,并使用调整组件进行调整。
7. 安装坐垫和调整座椅高度:将坐垫插入座杆,并使用调整杆固定。
根据个人需要调整座椅高度。
8. 安装踏板:将踏板螺丝固定在踏板支架上。
9. 安装后挡泥板和车铃等配件:根据需要安装后挡泥板、车铃等配件。
10. 检查车子是否安装牢固,轮胎是否充气,刹车是否灵敏,换档是否顺畅。
值得注意的是,以上步骤仅为大致安装方法,具体的安装步骤和注意事项应根据每款折叠自行车的使用说明进行操作。
dahon大行车主手册折叠车使用指南

2
ห้องสมุดไป่ตู้
ZH 3
•
• •
•
ZH
•
•
•
•
• •
•
•
4
•
•
•
•
•
•
•
»»
»»
»»
»»
»»
ZH
•
»»
•
•
•
•
• • • •
5
• • • • •
• ZH
•
• • •
6
•
•
• »» »» »»
ZH 7
How an Internal Gear Hub Drive Train Works..........................31 Shifting Internal Hub Gears..................................................31 What Gear Should I Be In?..................................................31
them before you ride. If the handlebars have bar-end extensions, make sure they are clamped tight enough so you can’t twist them. Please note that with the installa-
Safety First
• Handlebar and Saddle Alignment: Make sure the saddle and handlebar stem are parallel to the bike’s centerline and clamped tight enough so that you can’t twist them out of alignment.
大行412折叠车的改装心得
bya412的改装心得09年3月中旬购买的bya412,主要用于上下班通勤,截止2010年10月已经骑行5000KM 的距离。
怕哥比我早些时候购买412,然后在他的引诱下,我也选择了412,没想到从此改变了我的生活方式。
平时带着412进银行、酒店、火锅店、上出租、上长途客车出差等等,她现在完全是我随身不可或缺的伙伴。
以下是我的小白bya412不同时期改装的小结,因为当时也不知道自己到底需要怎么样的一辆412,所以走了一些弯路,建议购买bya412并且想升级的同学,可以先看看我的改装之路,选择适合自己的方案,我是走了不少弯路。
大致小结下412的配件:(根据本人使用过的经验给大家推荐,如有介绍不周或过于主观的评价,欢迎大家指正,价格仅供参考,具体以商店价格为准)一、脚踏(必更换):折叠脚踏虽然很方便收纳,但是此款脚踏一是太重,二是骑车打滑,基本上直接换掉。
推荐:1、最具性价比的wellgo M20 参考价70元;2、方便快拆的快拆类脚踏,品牌有wellgo、MKS等,价格在150-300不等二、坐垫(可选项):新款412的坐垫比2008款要科学多了,不是出于配色需要的换,可以不换。
推荐:喜欢轻量的话,可选择2009款tioga的蜘蛛坐垫,**价格在450-500元;其他坐垫根据自身需要选择。
三、坐杆(必更换):原配坐杆有个优点,就是重!推荐:1、注重实用的话可选择大行的内置打气筒坐杆,一是有打气筒,二是有后飘,对于个子高于175cm的朋友,配合双把力基本上可以达到伸展的骑行姿势。
2、注重轻量可选择OTA或者TAT,以及钛合金坐杆。
但钛坐杆价格在400-600元,相比前两者,价格昂贵,追求轻量极限的朋友还可以选择碳纤维坐杆,体重略高者慎用。
打气筒坐杆和OTA坐杆价格都在100-120元之间。
四、把横(可选项):原装412把横较短,仅46cm,建议还是更换成略长的把横,便于增强操控性。
推荐:1、ABR 6061 和 titec的把横,都是兼具轻量和低价的产品,价格在100元以内。
折叠自行车的安装方法

折叠自行车的安装方法一、准备工具和材料安装折叠自行车需要以下工具和材料:1. 一把扳手2. 一把螺丝刀3. 一份折叠自行车的安装说明书4. 一套自行车零件二、查看说明书在开始安装之前,首先阅读折叠自行车的安装说明书。
了解自行车的结构和部件,并熟悉每个部件的名称和功能。
这将帮助你更好地进行安装过程。
三、组装前准备在开始组装之前,请确保你的工作区域宽敞、整洁,并且有充足的光线。
将所有的自行车零件按照说明书中的顺序摆放好,以便安装过程中能够方便地取用。
四、安装前轮1. 使用扳手将前轮固定螺丝松开。
2. 将前轮插入前轮叉中,并确保轮轴完全插入。
3. 拧紧前轮固定螺丝,确保前轮稳固无松动。
五、安装后轮1. 将后轮插入后轮叉中,并确保轮轴完全插入。
2. 使用扳手将后轮固定螺丝松开。
3. 调整后轮位置,使其轮轴与后轮叉对齐。
4. 拧紧后轮固定螺丝,确保后轮稳固无松动。
六、安装座椅和座杆1. 将座椅插入座杆底部,并将座杆插入自行车座椅管中。
2. 使用扳手旋转座杆固定螺丝,固定座椅和座杆。
七、安装折叠机构1. 将折叠机构插入自行车车架折叠机构槽中。
2. 使用螺丝刀旋转折叠机构固定螺丝,固定折叠机构。
八、安装刹车和变速器1. 将刹车手柄插入自行车把手中,并使用螺丝刀固定。
2. 将刹车线固定在自行车车架上。
3. 按照说明书的指引,将变速器组装到自行车的变速系统上。
九、检查调整在安装完成后,进行以下检查和调整:1. 检查自行车的各个零部件是否牢固固定,无松动。
2. 调整刹车系统,确保刹车工作正常、稳定。
3. 检查变速系统,调整齿轮换挡的顺畅性。
4. 检查轮胎气压,确保轮胎充满合适的气压。
十、保养和维护安装完成后,定期进行保养和维护至关重要。
确保自行车各部分的紧固螺丝、刹车系统和变速系统的工作正常。
同时,定期进行轮胎充气,清洁自行车并涂抹适量的自行车润滑剂,保证其使用寿命和性能。
以上就是折叠自行车的安装方法。
通过按照说明书,正确组装折叠自行车的各个部件,你就可以轻松地拥有一辆实用、便携的自行车。
折叠电动车操作方法

折叠电动车操作方法折叠电动车是一种方便携带和储存的交通工具,它的操作方法相对简单。
下面是详细的折叠电动车操作步骤:第一步:调整车座高度1. 找到车座下方的调节钮,将钮旋转松开。
2. 根据需要,将车座向上或向下移动,直到满意的高度。
3. 再次旋转调节钮,将车座固定在所需位置。
第二步:展开车把手1. 在车体上找到折叠处,通常位于把手下方。
2. 将折叠处旋转松开,使车把手可以伸展出来。
3. 一旦把手完全展开并锁定在位,旋转折叠处以固定车把手位置。
第三步:展开车身1. 找到车体主体上的折叠处,通常位于车身底部或中部。
2. 解锁折叠处,以展开车身。
3. 确保车身完全展开并锁定在位。
第四步:打开车轮和避震器1. 检查车轮和避震器是否折叠或收起。
2. 如有需要,将车轮和避震器展开或打开,直到完全展开。
3. 确保车轮和避震器都已锁定在位,以确保安全使用。
第五步:检查刹车和脚踏板1. 确保刹车系统正常工作,可以牢牢地停住车辆。
2. 检查脚踏板是否完好无损,没有松动或损坏的情况,以确保能够正常踩踏。
第六步:检查电池和电动部件1. 检查电池是否已插好并连接稳固。
2. 确保电动部件(如电机、控制器等)的连接正常,并没有松脱或损坏。
第七步:调整车把手角度1. 根据个人需求,找到车把手上方的角度调节钮。
2. 旋转角度调节钮,调整车把手的倾斜角度。
3. 选择一个舒适的角度并锁定车把手。
第八步:检查车胎气压和磨损1. 检查车胎气压,确保符合制造商规定的范围。
2. 检查车胎的磨损情况,如果需要更换,及时更换。
第九步:检查灯光和信号灯1. 打开电源,测试前后灯光和信号灯是否正常工作。
2. 如有需要,更换损坏的灯泡或修复电路问题。
第十步:确认车辆稳定性和安全性1. 轻轻晃动车辆,确保没有松动或不稳定的部件。
2. 检查是否有异响或异常震动,如有需要进行维修或调整。
以上步骤是折叠电动车的基本操作方法,通过正确操作可以确保车辆的正常使用和安全。
山地车单车安装调试
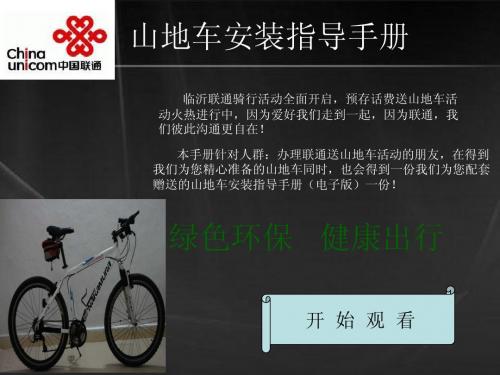
返回支撑安装
上一张 下一张
2号支撑
2号支撑为可调节长度支撑 1、2和3号螺丝为固定螺丝,将这三个螺丝拧紧将 支撑固定在后叉平杆上即可。
4号螺丝为调节支撑长度的螺丝,切记,这个螺丝 容易掉,在骑行之前一定要将此螺丝拧到很紧,最 好每次出行前都检查下,用六角工具紧一下。
返回支撑安装
上一张 下一张
折叠车把立安装
上一张
下一张
汇弘式碟刹调节
问题:刹车手柄捏到最紧了,刹车还刹不住
答:松开6号螺丝,将线拉紧后再用6号螺丝 将线固定紧,如果没有专用工具,可以通过 调节5号刹车线微调螺丝微量调节刹车线松紧
注意:前后刹车盘跟刹车器都应该在车子的 左侧
返回刹车调节
上一张 下一张
章星式碟刹调节
1号和2号螺丝为碟刹器固定螺丝 3号和4号螺丝为碟刹器调节螺丝 5号螺丝为刹车线紧固螺丝 中间黑色的那个塑料冒不用动
返回目录
上一张 下一张
车座安装
卡式安装
快拆式安装
返回目录
上一张
下一张
卡式安装
安装后展示如右图 注意安装正反,螺丝跟螺杆在座管 之后安装。 安装方式如下图 通过中间那个螺杆,和两端各一 个螺丝,拧紧螺丝将车座跟座管 连接固定在一块
返回车座安装
上一张
下一张
快拆式安装
快拆式车座是通过上下两个卡片, 中间通过一个六角螺丝连接,通 过拧紧六角螺丝,使得两卡片将车 座杆夹紧从而达到固定车座的效果
返回目录
上一张 下一张
新车使用说明
请您一定注意,领取单车后,由我们的工作人员协助您组装、调试
如果用户自己组装,万一有些环节自己就是调不好,可以联系我们的售后服务,
售后服务电话:8366591 谢谢您的合作。
- 1、下载文档前请自行甄别文档内容的完整性,平台不提供额外的编辑、内容补充、找答案等附加服务。
- 2、"仅部分预览"的文档,不可在线预览部分如存在完整性等问题,可反馈申请退款(可完整预览的文档不适用该条件!)。
- 3、如文档侵犯您的权益,请联系客服反馈,我们会尽快为您处理(人工客服工作时间:9:00-18:30)。
车子是80%组装的,您需要安装把立、车座、脚踏(L代表左,R代表右;别装反了哦!)、挡泥板等,
特别注意:
安装车车的时候先把车架和车把立正,前叉是反装的需要正过来,前后碟刹片一定要在左边才正确的哦
(如果发现车圈有偏摆的现象,请去当地的修车找一位稍专业的师傅调试一下,这叫拿隆,每台车子出厂
都需要的哦!)亲,我们的车子都是有专人打包发货的哦,严格包装,尽量减少在运输途中可能会出现的
问题,但毕竟自行车是大件物品,在运输途中难免会有细微的划痕的哦,这点还请亲谅解一下的哈,这个
也是属于正脚踏(L代表左,R代表右;别装反
了哦!)、挡泥板等,特别注意:安装车车的时候先把车架和车把立正,前叉是反装的需要正过来,前后
碟刹片一定要在左边才正确的哦(如果发现车圈有偏摆的现象,请去当地的修车找一位稍专业的师傅调试一
