HP工作站BIOS详解资料讲解
hp bios 内容

设置实用程序用户指南© Copyright 2008 Hewlett-Packard Development Company, L.P.Windows 是 Microsoft Corporation 在美国的注册商标。
本文档中包含的信息如有更改,恕不另行通知。
随 HP 产品和服务附带的明确有限保修声明中阐明了此类产品和服务的全部保修服务。
本文档中的任何内容均不应理解为构成任何额外保证。
HP 对本文档中出现的技术错误、编辑错误或遗漏之处不承担责任。
第一版:2008 年 6 月文档编号:483457-AA1目录1 启动设置实用程序2 使用设置实用程序更改设置实用程序的语言 (2)在设置实用程序中进行浏览和选择 (2)显示系统信息 (3)在设置实用程序中恢复默认设置 (3)退出设置实用程序 (4)3 设置实用程序菜单“主”菜单 (5)“安全保护”菜单 (5)“系统配置”菜单 (6)“诊断”菜单 (6)索引 (7)iiiiv设置实用程序是一个基于 ROM 的信息和定制实用程序,即使在 Windows® 操作系统不工作时也可以使用它。
注:指纹识别器(仅限某些机型)不能用来访问设置实用程序。
设置实用程序报告计算机的有关信息,提供引导、安全和其它首选项的设置。
要启动设置实用程序,请执行下列操作:▲开启或重新启动笔记本计算机,以打开设置实用程序。
当屏幕左下角显示“Press the ESC key for Startup Menu(按 esc 键进入启动菜单)”消息时,按f10键。
–或–1.开启或重新启动笔记本计算机,以打开设置实用程序。
当屏幕左下角显示“Press the ESC keyfor Startup Menu(按 esc 键进入启动菜单)”消息时,按esc键。
2.当显示“启动菜单”时,按f10键。
1更改设置实用程序的语言下列步骤介绍如何更改设置实用程序的语言。
如果设置实用程序没有打开,则请从步骤 1 开始操作。
惠普台式机BIOS 设置
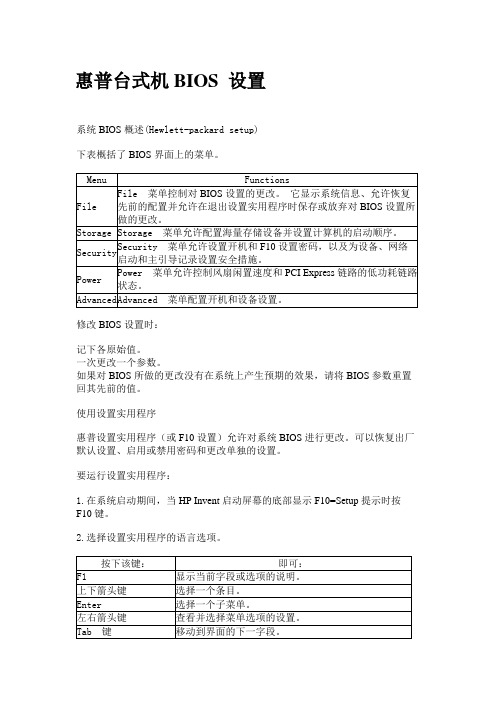
惠普台式机BIOS 设置系统BIOS 概述(Hewlett-packard setup)下表概括了BIOS 界面上的菜单。
修改BIOS 设置时:记下各原始值。
一次更改一个参数。
如果对BIOS 所做的更改没有在系统上产生预期的效果,请将BIOS 参数重置回其先前的值。
使用设置实用程序惠普设置实用程序(或F10 设置)允许对系统BIOS 进行更改。
可以恢复出厂默认设置、启用或禁用密码和更改单独的设置。
要运行设置实用程序:1.在系统启动期间,当 HP Invent 启动屏幕的底部显示F10=Setup 提示时按F10 键。
2.选择设置实用程序的语言选项。
File 菜单选项File 菜单控制对BIOS 设置的更改。
它显示系统信息、允许恢复先前的配置并允许在退出设置实用程序时保存或放弃对BIOS 设置所做的更改。
File 菜单具有以下选项:NOTE: 使用具有这些流程的BIOS 模拟器可查看BIOS 菜单和选项。
Storage(存储)菜单选项Storage(存储)菜单允许配置海量存储设备并设置计算机的启动顺序。
Storage(存储)菜单具有以下选项:NOTE: 使用具有这些流程的BIOS 模拟器可查看BIOS 菜单和选项。
Security 菜单选项Security 菜单允许设置开机和F10 设置密码,以及为设备、网络启动和主引导记录设置安全措施。
Security 菜单具有以下选项:NOTE: 使用具有这些流程的BIOS 模拟器可查看BIOS 菜单和选项。
Power(电源)菜单选项Power(电源)菜单允许启用PCI Express 活动状态电源管理(ASPM)支持并设置风扇闲置速度。
Power(电源)菜单具有以下选项:NOTE: 使用具有这些流程的BIOS 模拟器可查看BIOS 菜单和选项。
Advanced(高级)菜单选项Advanced(高级)菜单配置开机和设备设置。
Advanced(高级)菜单具有以下选项:NOTE: 使用具有这些流程的BIOS 模拟器可查看BIOS 菜单和选项。
HP ENVY Desktop 795-9xxx BIOS 设置指南说明书
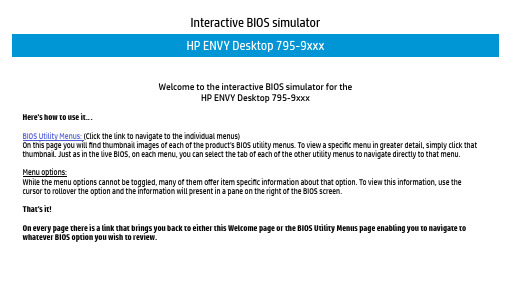
Interactive BIOS simulatorWelcome to the interactive BIOS simulator for theHP ENVY Desktop 795-9xxxHere’s how to use it…BIOS Utility Menus: (Click the link to navigate to the individual menus)On this page you will find thumbnail images of each of the product’s BIOS utility menus. To view a specific menu in greater detail, simply click that thumbnail. Just as in the live BIOS, on each menu, you can select the tab of each of the other utility menus to navigate directly to that menu.Menu options:While the menu options cannot be toggled, many of them offer item specific information about that option. To view this information, use the cursor to rollover the option and the information will present in a pane on the right of the BIOS screen.That’s it!On every page there is a link that brings you back to either this Welcome page or the BIOS Utility Menus page enabling you to navigate to whatever BIOS option you wish to review.File Storage Security Power AdvancedBIOS Utility MenusBack to Welcome PageNoteThis program walktrough was developed from a pre-production version of the Hewlett-PackardComputer Setup for training purposes only. The information contained in this walktrough might notexactly match the current or previous production version. The walkthrough is representative of thetypical factory default settings, but it might not provide all possible options. A customer’s settingsdepend on the specific model and on any changes they have made to the factory defaults.Next >>>File Storage Security Power AdvancedHP Computer SetupItem Specific HelpHP Computer SetupItem Specific Help Storage Power Security Advanced System Information AboutSystem LogSet Time and DateDefault SetupApply Defaults and ExitIgnore Changes and ExitSave Changes and ExitFileHP Computer SetupItem Specific HelpManufacturer HP Product Name HP ENVY Desktop 795-9xxx SKU Number 3810AU010011Serial Number 8CG8054JXQ System Family HP ENVYBorn on Date 00/00/0000System Board ID 844CSystem Board CT Number PXXXXX3NNAEA04BIOS Revision 844C VB.13ABIOS Date 01/05/2018Processor Type Intel (R) Core(TM) i5-8400 CPU @ 2.80GHz Processor Speed 2800 MHzMemory Size 8192 MB DDR4 / 2666 MHz / Single Channel Cache Size (L1/L2/L3) 384KB / 1536KB / 9216KBSystem Information Storage Power Security Advanced Press Enter key to continueSystem Information File About System LogSet Time and DateDefault SetupApply Defaults and ExitIgnore Changes and ExitSave Changes and ExitHP Computer SetupItem Specific Help System BIOS and Setup UtilityCopyright (c) 1982-2018HP Development Company, L.P.All Rights Reserved(C) Copyright 1985-2018, American Megatrends, Inc.All Right Reserved5555 Oakbrook Pkwy, Norcross, GA 30093Phone: (770) - 246 - 8600About Storage Power Security Advanced AboutPress Enter key to continueFile System Information System LogSet Time and DateDefault Setup Apply Defaults and Exit Ignore Changes and Exit Save Changes and ExitHP Computer SetupItem Specific Help Result: Time:0502 010155-000002 - No Data - - No Data - - No Data - - No Data - - No Data - - No Data - - No Data - - No Data - - No Data - - No Data - - No Data - - No Data - - No Data - - No Data - - No Data - - No Data - - No Data - - No Data - - No Data -System LogStorage Power Security Advanced F10=Accept, ESC=CancelFile System Information System Log Set Time and Date Default Setup Apply Defaults and Exit Ignore Changes and Exit Save Changes and ExitAboutHP Computer SetupItem Specific Help Time (hh:mm)21:20Date (mm/dd/yyyy) 04/21/2017Set Time and Date uStorage Power Security Advanced F10=ExitFile System Information Set Time and DateDefault SetupApply Defaults and ExitIgnore Changes and ExitSave Changes and Exit AboutSystem LogHP Computer SetupItem Specific Help Default Setup Storage Power Security Advanced File AboutSystem LogSet Time and DateDefault SetupApply Defaults and ExitIgnore Changes and ExitSave Changes and Exit Enter=Accept, ESC=DoneSystem Information Save Current Settings as DefaultRestore Factory Settings as DefaultHP Computer Setup Item Specific HelpAre you sure you want to Set Defaults and ExitApply Default and Exit Storage Power Security AdvancedFileAbout System Log Set Time and Date Apply Defaults and Exit Ignore Changes and Exit Save Changes and ExitYesSystem InformationDefault SetupNoHP Computer Setup Item Specific HelpAre you sure you want to Ignore Changes and ExitIgnore Changes and Exit Storage Power Security AdvancedFileAbout System Log Set Time and Date Ignore Changes and Exit Save Changes and ExitYesSystem InformationDefault SetupNoApply Defaults and ExitHP Computer Setup Item Specific HelpAre you sure you want to Save Changes and ExitSave Changes and Exit Storage Power Security AdvancedFileAbout System Log Set Time and Date Save Changes and ExitYesSystem InformationDefault SetupNoApply Defaults and Exit Ignore Changes and ExitHP Computer Setup Item Specific HelpPowerSecurityAdvancedFileDevice ConfigurationStorage Options Boot OrderStorageHP Computer Setup Item Specific HelpHard DiskCD-ROMDevice ConfigurationPowerSecurityAdvancedFileEnter=Configure, ESC=BackDevice ConfigurationStorageSATA1 128.0 GB, SanDiskSD9SN8W-128G-1006Storage Options Boot OrderSATA0 hpHLDSDVDRWGUDONSATA4 1.0 TB, WDCWD10EZEX-60WN4A0 CD-ROMHP Computer Setup Item Specific HelpSize 128.0 GBModel SanDiskSD9SN8W-128G-1006Firmware X6103006Serial Number174726421541SATA1 128.0 GB, SanDiskSD9SN8W-128G-1006PowerSecurityAdvancedFileDevice ConfigurationStorageF10=Accept, ESC=CancelStorage Options Boot OrderHP Computer Setup Item Specific HelpSize 1.0 TBModel WDCWD10EZEX-60WN4A0Firmware 01.01A01Serial NumberWD-WCC6Y7FJAS0PSATA4 1.0 TB, WDCWD10EZEX-60WN4A0PowerSecurityAdvancedFileDevice ConfigurationStorageF10=Accept, ESC=CancelStorage Options Boot OrderHP Computer Setup Item Specific HelpModel hp HLDS DVDRW GUDON Firmware SD94Serial Number744C2021612SATA0 hpHLDSDVDRWGUDONPowerSecurityAdvancedFileDevice ConfigurationStorageF10=Accept, ESC=CancelStorage Options Boot OrderHP Computer Setup Item Specific HelpStorage OptionsPowerSecurityAdvancedFileStorage Options StorageF10=Accept, ESC=CancelDevice ConfigurationBoot OrderAHCISATA EmulationHP Computer Setup Item Specific HelpBoot OrderPowerSecurityAdvancedFileStorageStorage Options Boot OrderDevice ConfigurationF5 = Disable, F10=Accept, ESC= CancelUEFI Boot Sources OS Boot ManagerWindows Boot Manager (WDC WD10EZEX-60WN4A0)USB Hard Drive USB Floopy/CD ATAPI CD/DVD Drive Network Controller Legacy Boot Sources Hard Drive SATA1USB Floppy/CD ATAPI CD/DVD Drive Network ControllerHP Computer Setup Item Specific HelpBoot OrderPowerSecurityAdvancedFileStorageStorage Options Boot OrderDevice ConfigurationF5 = Disable, F10=Accept, ESC= CancelLegacy Boot Sources Hard Drive SATA1USB Floppy/CD ATAPI CD/DVD Drive Network ControllerUEFI Boot Sources : DisabledHP Computer Setup Item Specific HelpBoot OrderPowerSecurityAdvancedFileStorageStorage Options Boot OrderDevice ConfigurationF5 = Disable, F10=Accept, ESC= CancelUEFI Boot SourcesUSB Hard Drive USB Floopy/CD ATAPI CD/DVD Drive Network Controller Legacy Boot Sources Hard Drive SATA1USB Floppy/CD ATAPI CD/DVD Drive Network ControllerOS Boot Manager : DisabledHP Computer Setup Item Specific HelpBoot OrderPowerSecurityAdvancedFileStorageStorage Options Boot OrderDevice ConfigurationF5 = Disable, F10=Accept, ESC= CancelUEFI Boot Sources OS Boot ManagerWindows Boot Manager (WDC WD10EZEX-60WN4A0)USB Hard Drive USB Floopy/CD ATAPI CD/DVD Drive Network ControllerLegacy Boot Sources : DisabledHP Computer Setup Item Specific HelpBoot OrderPowerSecurityAdvancedFileStorageF5 = Disable, F10=Accept, ESC= CancelStorage Options Boot OrderDevice ConfigurationUEFI Boot Sources OS Boot ManagerWindows Boot Manager (WDC WD10EZEX-60WN4A0)USB Hard Drive USB Floopy/CD ATAPI CD/DVD Drive Network Controller Legacy Boot Sources USB Floppy/CD ATAPI CD/DVD Drive Network ControllerHard Drive : DisabledHP Computer Setup Item Specific HelpFileStoragePowerAdvancedAdministrator PasswordPower-On Password Device Security USB Security Network Boot System IDsSecure Boot ConfigurationSecuritySlot Security System SecurityHP Computer Setup Item Specific HelpEnter New Password Confirm Password[ ][ ] Administrator PasswordFile Storage Power AdvancedSecurityAdministrator PasswordPower-On PasswordDevice SecurityUSB SecurityNetwork BootSlot SecuritySystem IDsSecure Boot ConfigurationSystem SecurityF10=Accept, ESC=CancelHP Computer Setup Item Specific HelpEnter New Password Confirm Password[ ][ ]Power-On PasswordFileStoragePowerAdvancedSecurityF10=Accept, ESC=CancelAdministrator PasswordPower-On Password Device Security USB Security Network Boot Slot Security System IDsSecure Boot ConfigurationSystem SecurityHP Computer Setup Item Specific HelpSystem AudioNetwork Controller Onboard Card Reader SATA0SATA1SATA3SATA4Device SecurityFileStoragePowerAdvancedSecurityF10=Accept, ESC=CancelDevice available Device available Device available Administrator PasswordPower-On Password Device Security USB Security Network Boot Slot Security System IDsSecure Boot ConfigurationSystem SecurityDevice available Device available Device available Device availableHP Computer SetupItem Specific HelpFront USB Ports USB Port 0 USB Port 1 USB Port 2 USB Port 3 USB Port 4Rear USB Ports USB Port 5 USB Port 6 USB Port 7 USB Port 8 USB Port 9 USB Port 10Internal USB Ports USB Port 11USB SecurityFileStoragePowerAdvancedSecurityF10=Accept, ESC=CancelEnableEnable Enable Enable Enable Enable Enable Enable Enable Enable Administrator PasswordPower-On Password Device Security USB Security Network Boot Slot Security System IDsSecure Boot ConfigurationSystem SecurityEnable Enable Enable Enable EnableHP Computer Setup Item Specific HelpPCI Express x16 Slot 1PCI Express x4 Slot 1PCI Express x1 Slot 1PCI Express x1 Slot 2M.2 Card Slot 1M.2 Card Slot 2Slot SecurityFileStoragePowerAdvancedSecurityF10=Accept, ESC=CancelEnable Enable Administrator PasswordPower-On Password Device Security USB Security Network Boot Slot Security System IDsSecure Boot ConfigurationSystem SecurityEnable Enable Enable EnableHP Computer Setup Item Specific HelpNetwork BootNetwork Boot ProtocolNetwork BootFileStoragePowerAdvancedSecurityF10=Accept, ESC=CancelEnable IPv4 (UEFI)Administrator PasswordPower-On Password Device Security USB Security Network Boot Slot Security System IDsSecure Boot ConfigurationSystem SecurityHP Computer Setup Item Specific HelpProduct Name [HP ENVY Desktop 795-0xxx ]Serail Number [8CG8054JXQ ]UUID [9D921IAA-7624-34EA-7930-7E4352FCA1D1 ]SKU Number [3810AU010011 ]System Family [HP ENVY ]Feature Byte [3K3Q 6B7B 7K7N 7T7W aBap aqas aubB bhcb dUdp dqfP h2 .rf ] [ ] [ ] [ ]Build ID [18WWlDDT6al#SABA#0AEAJ ]Keyboard U.S.System IDsFileStoragePowerAdvancedSecurityF10=Accept, ESC= CancelAdministrator PasswordPower-On Password Device Security USB Security Network Boot Slot Security System IDsSecure Boot Configu -System SecurityHP Computer Setup Item Specific HelpVirtualization Technology (VTx/VTd)Intel Software Gaurd Extension (SGX)Restore Security settings to Factory DefaultsSystem SecurityFileStoragePowerAdvancedSecurityF10=Accept, ESC=CancelEnable Enable YesTPMAdministrator PasswordPower-On Password Device Security USB Security Network Boot Slot Security System IDsSecure Boot Configura -System SecurityHP Computer Setup Item Specific HelpVirtualization Technology (VTx/VTd)Intel Software Gaurd Extension (SGX)Restore Security settings to Factory Defaults System SecurityF10=Accept, ESC=Cancel Enable uYesu Disable No Software Controlled TPM TPM DeviceFileStoragePowerAdvancedSecurityEnableTPM F10=Accept, ESC=CancelTPM StateClear TPMAvailableEnable YesAdministrator PasswordPower-On Password Device Security USB Security Network Boot Slot Security System IDsSecure Boot Configura -System SecurityHP Computer Setup Item Specific HelpSecure Boot ConfigurationThe options on this Setup page are only for Windows 8 and other Operating System that sup -port Secure Boot.Changing the default settings of any of the Setup options on this page for Operating System that do not support Secure Boot may prevent the syetm from botting successfully.Are you sure that you want to continue?Secure Boot ConfigurationFileStoragePowerAdvancedSecurityF10=Accept, ESC= CancelAdministrator PasswordPower-On Password Device Security USB Security Network Boot Slot Security System IDsSystem SecurityHP Computer Setup Item Specific HelpSecure Boot ConfigurationLegacy Support Secure Boot Key Management Clear Secure Boot Keys Key OwnershipSecure Boot ConfigurationFileStoragePowerAdvancedAdministrator PasswordPower-On Password Device Security USB Security Network Boot Slot Security System IDsSystem SecuritySecurityF10=Accept, ESC=CancelEnableMSFT Debug KeysDon’t clearDisableHP Computer Setup Item Specific HelpFileStorageSecurityAdvancedPowerOS Power ManagementHardware Power Management ThermalHP Computer Setup Item Specific HelpRuntime Power Management Idle Power SavingsOS Power ManagemnetFileStorageSecurityAdvancedPowerOS Power ManagementHardware Power Management ThermalF10=Accept, ESC=CancelEnable NormalHP Computer Setup Item Specific HelpSATA Power Management S4/S5 Wake on LANHardware Power ManagemnetFileStorageSecurityAdvancedPowerOS Power ManagementHardware Power Management ThermalF10=Accept, ESC=CancelEnable EnableHP Computer Setup Item Specific HelpCPU Fan Speed: 1890 System Fan Speed:905ThermalFileStorageSecurityAdvancedPowerOS Power ManagementHardware Power Management ThermalF10=Accept, ESC=CancelHP Computer Setup Item Specific HelpFileStoragePowerSecurityAdvancedPower-On OptionsBIOS Power-On Bus Options Device OptionsHP Computer Setup Item Specific HelpPOST Messages After Power LossPOST Delay (in seconds)Remote Wakeup Boot SourceWake on LAN Power-On Password PolicyPower-On OptionsFileStoragePowerSecurityAdvancedPower-On OptionsF10=Accept, ESC=CancelEnable On NoneRemote Server Bypass PasswordBIOS Power-On Bus Options Device OptionsHP Computer Setup Item Specific HelpSunday Monday Tuesday Wednesday Thursday Friday SaturdayTime (hh:mm)BIOS Power-OnFileStoragePowerSecurityAdvancedBIOS Power-On Power-On OptionsBus Options Device OptionsF10=Accept, ESC=CancelEnable Enable Enable Enable Enable Enable Enable 0 :00HP Computer Setup Item Specific HelpPCI SERR# Generation PCI VGA Palette SnoopingBus OptionsFileStoragePowerSecurityAdvancedBus Options F10=Accept, ESC=CancelEnable EnablePower-On OptionsBIOS Power-On Device OptionsHP Computer Setup Item Specific HelpNum Lock State at Power-On NIC PXE Option ROM Download Hyper-ThreadingNIC PXE Option ROM DownloadDevice OptionsFileStoragePowerSecurityAdvancedDevice OptionsF10=Accept, ESC=CancelOn Enable Power-On OptionsBIOS Power-On Bus Options Enable Enable。
[惠普工作站UEFIBIOS如何检测硬盘]惠普工作站
![[惠普工作站UEFIBIOS如何检测硬盘]惠普工作站](https://img.taocdn.com/s3/m/4241438903d276a20029bd64783e0912a2167c2b.png)
[惠普工作站UEFIBIOS如何检测硬盘]惠普工作站
进入检测的方法
1惠普UEFIBIOS的工作站检测硬盘的方法为开机按F2键后进入到检
测界面。
对于非出厂预装系统的工作站开机F2检测硬盘方法如下
1开机按F2键进入到检测界面,选择“HardDriveCheck”选项后按
回车键。
2此处可以选择“QuickCheck(快速检测)”及“E某teniveCheck(全
面检测)”,快速检测是快速扫描硬盘,大约需要几分钟的时间,全面检
测的时间一般在1小时或以上,可以根据自己的时间情况来选择检测方式。
3检测结束后会显示出检测结果,如图,如果硬盘正常则所有的选项
均会显示PASSED,如果硬盘有故障则会有选项显示为FAIDED,同时在屏
幕中间会显示出“FAILUREID”,可以将“FAILUREID”的24位代码记录
好后提供给惠普客服支持人员以便寻求进一步维修。
END
对于出厂有预装系统的工作站开机按F2会进入到HPPCHardwareDiagnoticUEFI诊断工具中,检测硬盘方法如下:首先选择适合自己的语言。
选择“组件测试”。
选择“硬盘驱动器”。
根据需求选择不同的选项检测,推荐先进行“快速测试”,如果检测Paed再进行“全面测试”,这样如果硬件有明显故障一般会在“快速测试”中报错,如果“快速测试”通过可以根据自己的时间情况选择重新安装系统还是“全面检测”。
选择要检测的硬盘。
输入数字后按回车键继续检测。
HP Elitedesk 705 G4 MT BIOS 初学者教程说明书
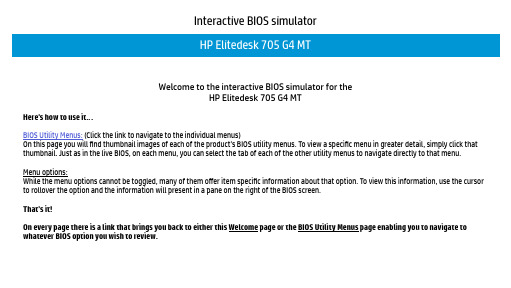
Interactive BIOS simulatorWelcome to the interactive BIOS simulator for theHP Elitedesk 705 G4 MTHere’s how to use it…BIOS Utility Menus: (Click the link to navigate to the individual menus)On this page you will find thumbnail images of each of the product’s BIOS utility menus. To view a specific menu in greater detail, simply click that thumbnail. Just as in the live BIOS, on each menu, you can select the tab of each of the other utility menus to navigate directly to that menu. Menu options:While the menu options cannot be toggled, many of them offer item specific information about that option. To view this information, use the cursor to rollover the option and the information will present in a pane on the right of the BIOS screen.That’s it!On every page there is a link that brings you back to either this Welcome page or the BIOS Utility Menus page enabling you to navigate to whatever BIOS option you wish to review.BIOS Utility MenusBack to Welcome PageMain Security Advanced UEFI DriversItem Specific HelpMain Security Advanced UEFI DriversHP computer setupSystem Information System Diagnostics Update System BIOS Change Date And Time Set Machine Unique Data System IDsReplicated SetupSave Custom DefaultsApply Custom Defaults and Exit Apply Factory Defaults and Exit Ignore Changes and Exit Save Changes and Exit Suppress POST ErrorsSecurity MenuBack to BIOS Utility MenusItem Specific HelpMain Security Advanced UEFI DriversHP computer setupAdministrator ToolsSecurity Configuration UtilitiesActivation Status: InactiveAbsolute ® Persistance Module Permanent Disable: No Create BIOS Administrator Password Create POST Power-On Password Password PoliciesTPM Embedded Security BIOS SureSartHard Drive UtilitiesSystem Management CommandüPhysical Presence Interface üRestore Security Settings to Factory DefaultsAbsolute ® Persistance Module Current StateIntel Software Guard Extentions (SGX)DisableSecure Platform Management (SPM)Smart CoverAdvanced MenuBack to BIOS Utility MenusItem Specific HelpMain Security Advanced UEFI DriversHP computer setupRemote HP PC Hardware Diagnostics Display Language Scheduled Power-On Boot OptionsSecure Boot Configuration System OptionsPort OptionsOption ROM Launch Policy Power Management OptionsSettingsExecute Remote HP PC Hardware DiagnosticsBuilt-In Device OptionsUEFI DriversBack to BIOS Utility MenusItem Specific HelpMain Security Advanced UEFI DriversHP computer setupThis wil restart the system into the 3rd Party Option ROM Management application.You can get this application by pressing F3 during startup.3rd Party Option ROM ManagementBASIC SYSTEM INFORMATIONProduct Name Processor 1Memory Size System BIOSSERVICE -------------------------------------------------------------------------------Born On Date Serial Number SKU NumberUniversally Unique Identifier (UUID)Asset Tracking Number HP Elitedesk 705 G4 MTAMD PRO A6-9500 R5, 8 COMPUTE CORES 2C+6G 4096 MBQ05 Ver.80.20.10 12/04/201700/00/0000KRW2010021KK001AVE70750D8-B0FA-8472-2724-E21634B10C02KRW2010021Item Specific HelpMain Security Advanced UEFI DriversHP computer setupShow Advanced System informationItem Specific HelpThe notebook supports the HP PC Hardware Diag-nostics UEFI application, which provides advanced testing of notebook components. The System diag-nostics application is external to the BIOS.Click the Exit button to go back to the Main menu.。
HP工作站BIOS详解
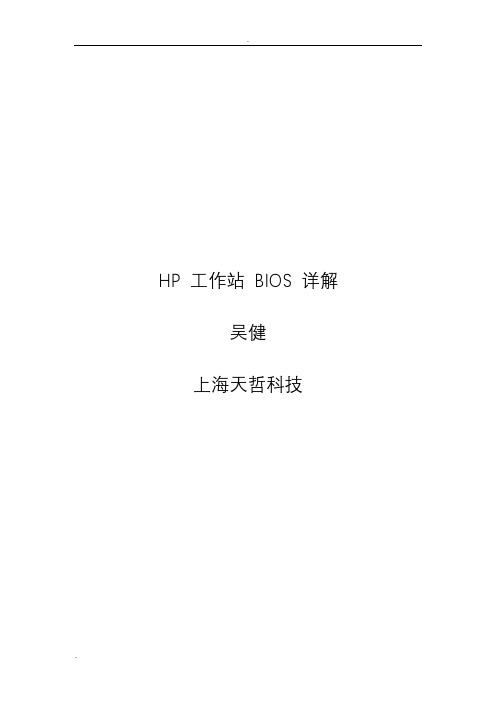
HP 工作站 BIOS 详解吴健上海天哲科技一:File (4)1:System Informantion(系统信息) (5)2:About(关于) (6)3:Set Time and Date(设置时间和日期) (7)4:Flash System ROM(Flash系统ROM) (8)5:Replicated Setup(复制设置) (8)6:Default Setup(默认设置) (9)7:Apply Defaults and Exit(应用默认值和退出) (10)8:Ignore Changes and Exit(忽略变化和出口) (11)9:Save Changes and Exit(保存更改并退出) (12)二:storager (12)1:Device Configuration (设备配置) (13)2:Storage Options (存储器选项) (14)3:DPS Self-Test (DPS 自测) (16)4:Boot Order (引导顺序) (16)三:Security (17)1:Setup Password (设置密码) (17)2:Power-On Password (开机密码) (18)3:Password Options (密码配置) (19)4:Device Security (设备安全保护) (19)5:USB Security USB (USB 安全保护) (20)6:Slot Security PCI (接口安全保护) (21)7:Network Service Boot (网络服务引导) (21)8:System IDs (系统标识) (22)9:Master Boot Record Security (主引导记录安全保护) (23)10:System Security (操作系统安全保护) (23)四:Power (24)1:OS Power Management (操作系统电源管理) (25)2:Hardware Power Management (硬件电源管理) (26)3:Thermal (热量) (27)五:Advanced (28)1:Power-On Options (开机选项) (29)2:BIOS Power-On (BIOS 开机) (31)3:Onboard Devices(板载设备) (31)4:Bus Options (总线选项) (32)5:Device Options (设备选项) (33)6:Slot Settings (34)7:AMT Configuration (35)开机按F10 进入BIOS系统,首先上面一行的基本参数横向分别是:文件,存储,安全,电源管理和高级选项下面介绍各横向参数中的各细节参数:一:FileFile 菜单控制对BIOS设置的更改。
HP ENVY 17-cg0000 Laptop PC BIOS 使用说明书
Interactive BIOS simulatorWelcome to the interactive BIOS simulator for theHP ENVY 17-cg0000 Laptop PCHere’s how to use it…BIOS Utility Menus: (Click the link to navigate to the individual menus)On this page you will find thumbnail images of each of the product’s BIOS utility menus. To view a specific menu in greater detail, simply click that thumbnail. Just as in the live BIOS, on each menu, you can select the tab of each of the other utility menus to navigate directly to that menu. Menu options:While the menu options cannot be toggled, many of them offer item specific information about that option. To view this information, use the cursor to rollover the option and the information will present in a pane on the right of the BIOS screen.That’s it!On every page there is a link that brings you back to either this Welcome page or the BIOS Utility Menus page enabling you to navigate to whatever BIOS option you wish to review.BIOS Utility MenusBack to Welcome PageMain Security Configuration ExitBoot OptionsMain MenuBack to BIOS Utility MenusMain Security Configuration Boot Options ExitItem Specific HelpSystem Time System Date Product Name System Family Product Number System Board ID Born On Date Processor Type Total Memory BIOS Vendor BIOS Revision Device Firmware Revision Serial Number UUID Number System Board CT Number Factory installed OS Primary Battery SN System Log Build ID Feature Byte [00:09:34][08/15/2018]HP ENVY Laptop 17-cg0xxx HP ENVY x38SKU1#ABA 851801/02/2020Intel(R)Core(TM)********************32 GB Insyde B.07T505CD8273Y1Y 38444335-3732-5933-3159-5959373-24435PX38FDC8JB0008Win1001070 06/11/201818WW2S5T6a#SABA#DABA 3K6z 6b7B 7N7W aBaH apaq asaw bVbh bzcA cbdU dpdq fPhZ j6 .nnSecurity MenuBack to BIOS Utility MenusMain Security Configuration Boot Options ExitItem Specific HelpAdministrator Password [Clear]Power-On Password [Clear]Intel Software Guard Extensions (SGX) [Enabled]TPM Device [Available]TPM State [Enable]Clear TMP [No]Restore Security settings to Factory defaultsBack to BIOS Utility MenusMain Security Configuration Boot Options ExitItem Specific HelpLanguage [English]Virtualization Technology [Disabled]Fan Always On [Disabled]Action Key Mode [Enabled]USB Charging [Enabled]Battery Remaining Time [Disabled]Adaptive Battery Optimizer [Disabled]UEFI HII ConfigurationFingerprint Reset on RebootBack to BIOS Utility MenusMain Security Configuration Boot Options ExitItem Specific HelpPOST HotKey Delay [0]USB Boot [Enabled]Network Boot [Disabled]Network Boot Protocol [IPv4+IPv6 (UEFI]Secure Boot [Disabled]Platform Key [Enrolled]Pending Action NoneClear All Secure Boot KeysLoad HP Factory Defaults KeysLoad MSFT Debug Policy KeysUEFI Boot OrderOS Boot ManagerUSB Flash Drives/USB Hard DiskUSB CD/DVD ROM Drive! Network AdapterExit MenuBack to BIOS Utility MenusMain Security Configuration Boot Options ExitItem Specific HelpSave Changes and ExitIgnore Changes and ExitLoad Setup DefaultsDevice Firmware RevisionBack to BIOS Utility MenusMainItem Specific HelpDevice Firmware RevisionEmbedded Controller Intel ME (Management Engine) Intel ISH (Integrated Sensor Hubs) GOP (Graphic Output Protocol) USB Type-C Controller(s) Thunderbolt Controller(s) 10.1012.0.3.1092 N/A9.0.1079 003204-NVM35.00System LogBack to BIOS Utility MenusMainItem Specific HelpSystem LogResult Time:0502 010109-000039- No Data -- No Data -- No Data -- No Data -- No Data -- No Data -- No Data -- No Data -- No Data -- No Data -- No Data -UEFI HII ConfigurationBack to BIOS Utility MenusConfigurationItem Specific HelpUEFI HII ConfigurationRealtek PCIe GBE Controller (MAC: 10:E7:C6: 29:62:00 )。
惠普bios设置教程图解
惠普bios设置教程图解
惠普BIOS设置图解教程?这个过程你看过吗?说不定还有很多新手面临着很多困扰,接下来是小编为大家收集的惠普bios设置教程图解,欢迎大家阅读:
惠普bios设置教程图解
按F10进入bios,通过以下步骤进行bios设置:
1.开机按F10键进入该BIOS设置界面,选择高级BIOS设置:Advanced BIOS Features;
2.高级BIOS设置(Advanced BIOS Features)界面,首先选择硬盘启动优先级,Hard Disk Boot Priority;
3.硬盘启动优先级(Hard Disk Boot Priority)选择:使用小键盘上的加减号“+、-”来选择与移动设备,将U盘选择在最上面。
然后,按ESC键退出;
4.再选择第一启动设备(First Boot Device):该版本的BIOS这里没有U盘的“USB-HDD”、“USB-ZIP”之类的选项,经尝试选择移动设备“Removable”不能启动,但选择“Hard Disk”可以启动电脑。
附加:
等待片刻之后,进入BIOS界面找到“system configuration”系统设置选项
启动选项
在system configuration选项卡中,找到”boot options”也就是启动设置
进入系统启动设备选项设置,排在前面的就是首选启动设备啦。
如果要调整可以通过下面提示,用键盘上下箭头来调整
4如果设置好之后,选择按下F10键盘。
保存并退出BIOS设置(选项 YES)
看了“惠普bios设置教程图解”还想看:。
HP 服务器 bios 配置说明
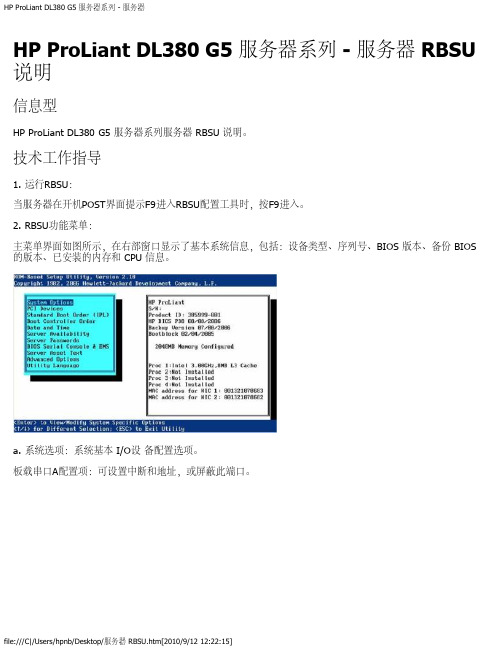
HP ProLiant DL380 G5 服务器系列 - 服务器 RBSU 说明信息型HP ProLiant DL380 G5 服务器系列服务器 RBSU 说明。
技术工作指导1. 运行RBSU:当服务器在开机POST界面提示F9进入RBSU配置工具时,按F9进入。
2. RBSU功能菜单:主菜单界面如图所示,在右部窗口显示了基本系统信息,包括:设备类型、序列号、BIOS 版本、备份 BIOS 的版本、已安装的内存和 CPU 信息。
a. 系统选项:系统基本 I/O设备配置选项。
板载串口A配置项:可设置中断和地址,或屏蔽此端口。
板载串口B配置项:可设置中断和地址,或屏蔽此端口。
虚拟串口:可通过ILO管理控制提供远程管理功能,可关闭此功能。
可选LPT模式支持:可提供本地LPT通道,此功能包括:SPP Extended、EPP 1.9、ECP w/EPP三个选项。
综合软驱管理:可提供软驱设备可用和屏蔽功能。
但是软驱的写功能和引导启动功能不受此功能影响。
一键开机功能:可提供开启NUMLOCK键开机功能。
主板集成NICs中ISCSI 和 PEX 启动:可提供 ISCSI 功能开启和PEX启动功能开启,或屏蔽此功能。
软驱写控制功能:可提供软驱写功能和读功能的开启。
软驱启动功能:可提供服务器中软驱启动功能,或屏蔽此功能。
高级内存保护:可提供高级ECC保护、ECC带内存热备保护、ECC带内存镜像保护。
USB控制:可提供USB开启(所有USB设备可用)、USB屏蔽(所有USB设备不可用)、传统USB口屏蔽(所有USB设备在操作系统下是可被识别的,但是在启动POST和RBSU中不被识别,同时屏蔽ILO2中的虚拟端口)、扩展USB口屏蔽(屏蔽扩展USB端口,但不屏蔽板载USB设备)功能选项。
USB2.0 EHCI功能:可提供开启和屏蔽高速USB2.0控制。
Proliant 服务器电源调整:包括HP动态电源模式(根据CPU工作量调整电源工作模式)、HP静态低电压模式(系统保持低性能工作模式)、HP静态高性能模式(系统保持高性能工作模式)、操作系统控制模式(在操作系统下开启电源管理策略)。
HP工作站BIOS说明适用Z228Z440Z230Z640Z840Z800Z620Z420Z820主板设置

HP Z200 工作站- BIOS 说明问题本文主要介绍 HP Z200 工作站的BIOS 说明。
适用HP众多工作站的主板,比如hp Z228 Z 440 Z230 Z640 Z840 Z800 Z620 Z420 Z820解决方案。
讲解仔细哦HP Z200 工作站使用HP BIOS 。
打开机器,当显示HP 图标画面时按 F10 按键可以进入BIOS 设置。
进入BIOS 后先选择English 进入BIOS 菜单。
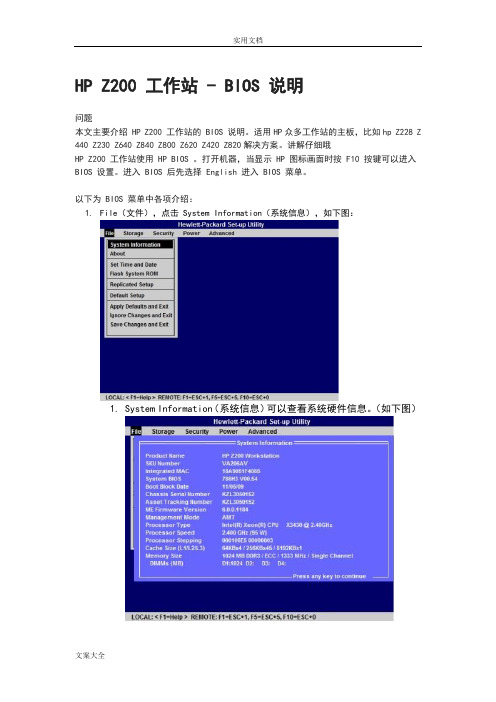
以下为BIOS 菜单中各项介绍:1.File(文件),点击System Information(系统信息),如下图:1.System Information(系统信息)可以查看系统硬件信息。
(如下图)2.About (关于)3.Set Time and Date (设置时间和日期)使用方向键调整时间,日期,TAB 键切换。
如下图:4.Flash System ROM (刷新BIOS)可以通过USB,CD 刷新。
如下图:5.Replicated Setup (复制设置)1.Save to Removable Media (保存到可移动介质):将包括CMOS 在内的系统配置保存到已格式化的 1.44 MB 软盘、USB 闪存介质设备或类似软盘的设备。
(设置为模拟软盘驱动器的存储设备)2.Restore from Removable Media (从可移动介质恢复):从软盘、USB 闪存介质设备或类似软盘的设备恢复系统配置。
如下图:6.Default Setup (默认设置)1.Save Current Settings as Default (将当前设置保存为默认设置)2.Restore Factory Settings as Default (将出厂设置恢复为默认设置)如下图:7.Apply Defaults and Exit (应用默认值并退出)应用当前选择的默认设置并清除所有已设置的密码。
HP BIOS详细介绍
●●●●●●HP商用系列BIOS说明及使用●●●●●●计算机设置实用程序用户指南© Copyright 2009 Hewlett-Packard Development Company, L.P.Bluetooth 是其所有者的商标,Hewlett-Packard Company 经授权得以使用。
I ntel是 Intel Corporation 在美国和其它国家/地区的商标。
Windows 是 Micr osoft Corporation在美国的注册商标。
本文档中包含的信息如有更改,恕不另行通知。
随 HP 产品和服务附带的明确有限保修声明中阐明了此类产品和服务的全部保修服务。
本文档中的任何内容均不应理解为构成任何额外保证。
HP 对本文档中出现的技术错误、编辑错误或遗漏之处不承担责任。
第一版:2009 年 4 月文档部件号:535143-AA1产品通告本用户指南介绍大多数机型常用的功能。
您的计算机上可能未提供某些功能。
目录1 启动计算机设置实用程序2 使用计算机设置实用程序在计算机设置实用程序中进行浏览和选择 .................................................................... . (2)恢复计算机设置实用程序的出厂设置 .................................................................... .. (3)3 计算机设置实用程序的菜单文件菜单 .................................................................... ..................................................................... .. (5)安全保护菜单 .................................................................... . (6)诊断菜单 .................................................................... ..................................................................... .. (7)系统配置菜单 .................................................................... . (8)索引................................................................... .................................................................... .. (10)iiiiv1 启动计算机设置实用程序计算机设置实用程序是一个基于 ROM 的预安装实用程序,即使在操作系统不工作或未装载时也可以使用它。
惠普电脑BIOS设置图文详细介绍
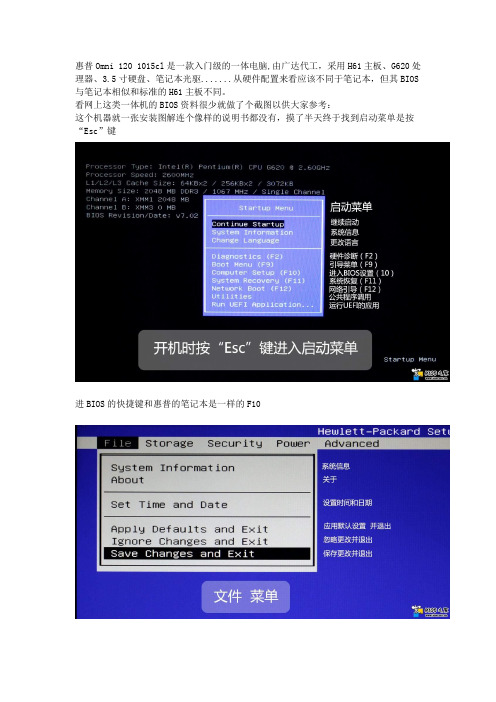
惠普Omni 120 1015cl是一款入门级的一体电脑,由广达代工,采用H61主板、G620处理器、3.5寸硬盘、笔记本光驱.......从硬件配置来看应该不同于笔记本,但其BIOS 与笔记本相似和标准的H61主板不同。
看网上这类一体机的BIOS资料很少就做了个截图以供大家参考:
这个机器就一张安装图解连个像样的说明书都没有,摸了半天终于找到启动菜单是按“Esc”键
进BIOS的快捷键和惠普的笔记本是一样的F10
想安装xp 的注意了,这里可以改变硬盘工作模式。
这是硬盘检测工具。
看到这里才知道它也是UEFI BIOS
注意VT 默认是不开启的。
太简陋了,只有一个风扇转速连个温度显示都没有。
可以设置定时开机的具体到分钟。
不安装PCI设备就不用动它。
惠普主板bios设置图解
惠普主板bios设置图解
想知道怎么设置惠普主板BIOS吗?下面是店铺带来惠普主板bios 设置图解的内容,欢迎阅读!
惠普主板bios设置图解:
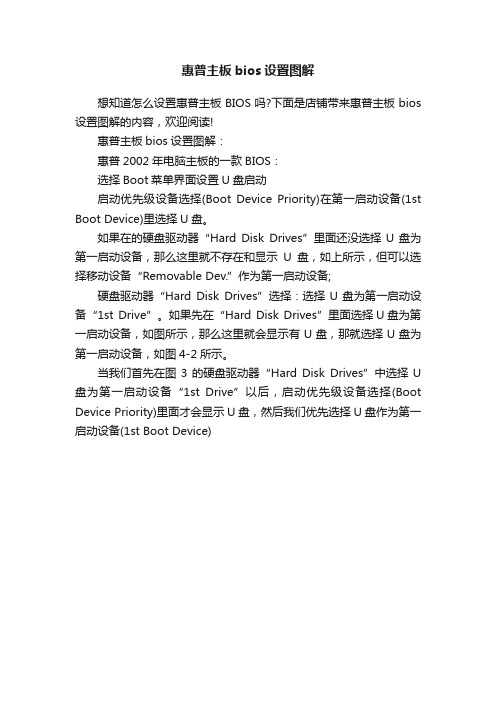
惠普2002年电脑主板的一款BIOS:
选择Boot菜单界面设置U盘启动
启动优先级设备选择(Boot Device Priority)在第一启动设备(1st Boot Device)里选择U盘。
如果在的硬盘驱动器“Hard Disk Drives”里面还没选择U盘为第一启动设备,那么这里就不存在和显示U盘,如上所示,但可以选择移动设备“Removable Dev.”作为第一启动设备;
硬盘驱动器“Hard Disk Drives”选择:选择U盘为第一启动设备“1st Drive”。
如果先在“Hard Disk Drives”里面选择U盘为第一启动设备,如图所示,那么这里就会显示有U盘,那就选择U盘为第一启动设备,如图4-2所示。
当我们首先在图3的硬盘驱动器“Hard Disk Drives”中选择U 盘为第一启动设备“1st Drive”以后,启动优先级设备选择(Boot Device Priority)里面才会显示U盘,然后我们优先选择U盘作为第一启动设备(1st Boot Device)。
HP服务器BIOS详解
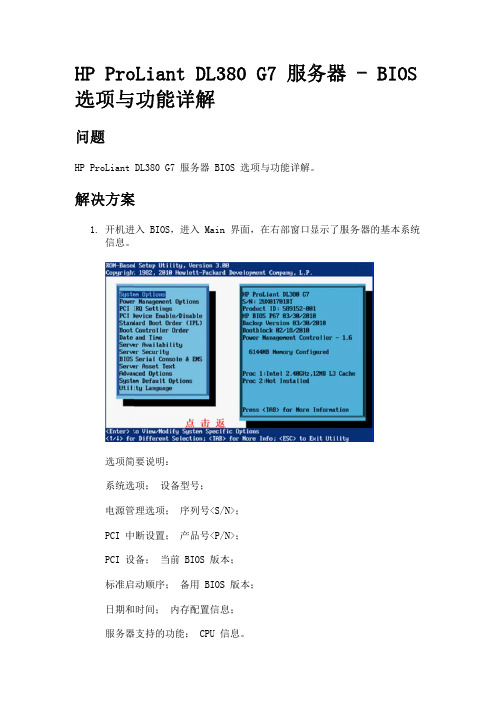
选项简要说明:
系统默认选项->恢复默认系统设置/恢复磁盘设置/用户默认选项->点击 Enter 进入子菜单。
NOTE:
1. 恢复所有配置信息到出厂值,RBSU 的所有更改信息丢失; 2. 恢复所有配置信息,时间日期,RBSU 所有更改。同时擦出引导磁
盘的信息。 3. 此功能允许用户自定义默认的配置信息。当默认加载配置信息时,
系统安全; 启动控制器; 服务器的文本信息; 高级选项; 系统默认选项; 语言工具。 2. System Options-->Serial Port Options
选项简要说明: 串口选项; 集成网卡; 高级内存保护模式; USB 选项; 处理器选项; 开机锁定模式(此选项是一个简单的开关,用来设置开机时 NUMLOCK 键 的状态。当它被启用的时候, NUMLOCK 键会随着机器电源的打开而被激 活)。
1. System Options->Serial Port Options->Embedded Serial Port
选项简要说明: 串口选项->集成串口(此选项用来配置集成串口,配置的内容包含 地址和中断,也可以在此选项中把此串口禁用)/虚拟串口(此选 项指派逻辑串口编号,并且关联虚拟串口使用的缺省资源。如果此 选项被启用,通过 iLO 远程控制串行端口)->点击 Enter 进入子 菜单。 2. System options->embedded NICs->NIC 1 boot options
选项简要说明: 设置服务器支持的功能->点击 Enter 进入子菜单。 ASR Status->ASR 功能的开启/关闭; ASR Timeout:当服务器在一定时间段内没有响应,重启服务器;
HP工作站BIOS详解.doc
工作站 BIOS 详解蝿 HP莇吴健袃上海天哲科技一: File ....................................................... 错误!未指定书签。
肁芇 1: SystemInformantion (系统信息).......................................................... 错误!未指定书签。
膆 2: About (关于)........................................................................................错误!未指定书签。
羂 3: SetTimeandDate (设置时间和日期).................................................... 错误!未指定书签。
蒂 4: FlashSystemROM( Flash 系统 ROM) ....................................................错误!未指定书签。
罿 5: ReplicatedSetup (复制设置) .................................................................错误!未指定书签。
袅 6: DefaultSetup (默认设置)......................................................................错误!未指定书签。
肂 7: ApplyDefaultsandExit (应用默认值和退出)........................................ 错误!未指定书签。
袃 8: IgnoreChangesandExit (忽略变化和出口)........................................... 错误!未指定书签。
HP ENVY x360 15-eu0xxx Convertible PC BIOS 指南说明书

Interactive BIOS simulatorWelcome to the interactive BIOS simulator for theHP ENVY x360 15-eu0xxx Convertible PCHere’s how to use it…BIOS Utility Menus: (Click the link to navigate to the individual menus)On this page you will find thumbnail images of each of the product’s BIOS utility menus. To view a specific menu in greater detail, simply click that thumbnail. Just as in the live BIOS, on each menu, you can select the tab of each of the other utility menus to navigate directly to that menu. Menu options:While the menu options cannot be toggled, many of them offer item specific information about that option. To view this information, use the cursor to rollover the option and the information will present in a pane on the right of the BIOS screen.That’s it!On every page there is a link that brings you back to either this Welcome page or the BIOS Utility Menus page enabling you to navigate to whatever BIOS option you wish to review.Main Security Configuration Boot Options ExitBIOS Utility MenusBack to Welcome PageBack to BIOS Utility MenushAhZ kFm9 .E2Back to BIOS Utility MenusBack to BIOS Utility MenusBack to BIOS Utility MenusBack to BIOS Utility MenusBack to BIOS Utility MenusBack to BIOS Utility MenusBack to BIOS Utility MenusBack to BIOS Utility MenusBack to BIOS Utility MenusBack to BIOS Utility MenusBack to BIOS Utility MenusBack to BIOS Utility MenusBack to BIOS Utility MenusBack to BIOS Utility MenusBack to BIOS Utility MenusBack to BIOS Utility MenusBack to BIOS Utility MenusBack to BIOS Utility MenusBack to BIOS Utility MenusBack to BIOS Utility MenusBack to BIOS Utility MenusBack to BIOS Utility MenusBack to BIOS Utility MenusBack to BIOS Utility MenusBack to BIOS Utility MenusBack to BIOS Utility MenusBack to BIOS Utility MenusBack to BIOS Utility MenusBack to BIOS Utility MenusBack to BIOS Utility Menus。
HP工作站 BIOS说明书 适用Z228 Z440 Z230 Z640 Z840 Z800 Z620 Z420 Z820主板设置
HP Z200 工作站 - BIOS 说明问题本文主要介绍 HP Z200 工作站的 BIOS 说明。
适用HP众多工作站的主板,比如hp Z228 Z 440 Z230 Z640 Z840 Z800 Z620 Z420 Z820解决方案。
讲解仔细哦HP Z200 工作站使用 HP BIOS 。
打开机器,当显示 HP 图标画面时按 F10 按键可以进入BIOS 设置。
进入 BIOS 后先选择 English 进入 BIOS 菜单。
以下为 BIOS 菜单中各项介绍:1.File(文件),点击 System Information(系统信息),如下图:1.System Information(系统信息)可以查看系统硬件信息。
(如下图)2.About (关于)3.Set Time and Date (设置时间和日期)使用方向键调整时间,日期,TAB 键切换。
如下图:4.Flash System ROM (刷新 BIOS)可以通过 USB,CD 刷新。
如下图:5.Replicated Setup (复制设置)1.Save to Removable Media (保存到可移动介质):将包括 CMOS 在内的系统配置保存到已格式化的 1.44 MB 软盘、USB 闪存介质设备或类似软盘的设备。
(设置为模拟软盘驱动器的存储设备)2.Restore from Removable Media (从可移动介质恢复):从软盘、USB闪存介质设备或类似软盘的设备恢复系统配置。
如下图:6.Default Setup (默认设置)1.Save Current Settings as Default (将当前设置保存为默认设置)2.Restore Factory Settings as Default (将出厂设置恢复为默认设置)如下图:7.Apply Defaults and Exit (应用默认值并退出)应用当前选择的默认设置并清除所有已设置的密码。
惠普 台式机 BIOS 设置
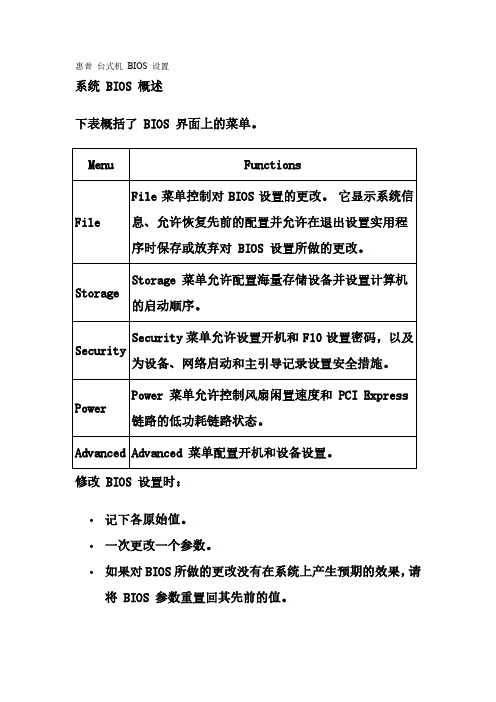
惠普台式机BIOS 设置系统 BIOS 概述下表概括了 BIOS 界面上的菜单。
∙记下各原始值。
∙一次更改一个参数。
∙如果对BIOS 所做的更改没有在系统上产生预期的效果,请将 BIOS 参数重置回其先前的值。
使用设置实用程序惠普设置实用程序(或 F10 设置)允许对系统 BIOS 进行更改。
可以恢复出厂默认设置、启用或禁用密码和更改单独的设置。
要运行设置实用程序:1.在系统启动期间,当 HP Invent 启动屏幕的底部显示F10=Setup 提示时按 F10 键。
2.选择设置实用程序的语言选项。
按下该键:即可:F1显示当前字段或选项的说明。
上下箭头键选择一个条目。
Enter选择一个子菜单。
左右箭头键查看并选择菜单选项的设置。
Tab 键移动到界面的下一字段。
Shift/Tab 键移动到界面的前一字段。
F10保存更改并退出子菜单。
Esc 键退出当前选择或菜单并忽略更改。
选项说明存的配置中不包括诸如系统日期、时间和密码等某些设置。
Default Setup (默认设置)允许将当前设置保存为默认值或将出厂设置恢复为默认值。
Apply Defaults andExit (应用默认值并退出)恢复所有 BIOS 选项的默认值(所有菜单),然后退出设置实用程序。
使用该选项等同于按下系统板上的 CMOS 重置按键。
Ignore Changes and Exit (忽略更改并退出)退出设置实用程序而不将对 BIOS 选项所做的任何更改写入 ROM 。
各种设置与您进入设置实用程序前保持不变。
Save Changes andExit (保存更改并退出)将对 BIOS 设置所做的所有更改写入 ROM ,然后退出实用程序。
topStorage (存储)菜单选项Storage (存储)菜单允许配置海量存储设备并设置计算机的启动顺序。
选项说明∙从 SATA 控制器IDE DPS 自检在硬盘驱动器上执行一个驱动器保护系统测试。
HP Pavilion 15-eg0000 Laptop PC BIOS 说明书
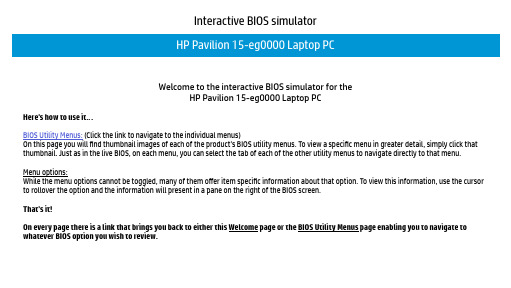
Interactive BIOS simulatorWelcome to the interactive BIOS simulator for theHP Pavilion 15-eg0000 Laptop PCHere’s how to use it…BIOS Utility Menus: (Click the link to navigate to the individual menus)On this page you will find thumbnail images of each of the product’s BIOS utility menus. To view a specific menu in greater detail, simply click that thumbnail. Just as in the live BIOS, on each menu, you can select the tab of each of the other utility menus to navigate directly to that menu. Menu options:While the menu options cannot be toggled, many of them offer item specific information about that option. To view this information, use the cursor to rollover the option and the information will present in a pane on the right of the BIOS screen.That’s it!On every page there is a link that brings you back to either this Welcome page or the BIOS Utility Menus page enabling you to navigate to whatever BIOS option you wish to review.BIOS Utility MenusBack to Welcome PageMain Security Configuration ExitBoot OptionsMain Menu Back to BIOS Utility MenusSecurity Menu Back to BIOS Utility MenusBack to BIOS Utility MenusBack to BIOS Utility MenusExit Menu Back to BIOS Utility MenusDevice Firmware Revision Back to BIOS Utility MenusSystem Log Back to BIOS Utility MenusUEFI HII Configuration Back to BIOS Utility Menus。
- 1、下载文档前请自行甄别文档内容的完整性,平台不提供额外的编辑、内容补充、找答案等附加服务。
- 2、"仅部分预览"的文档,不可在线预览部分如存在完整性等问题,可反馈申请退款(可完整预览的文档不适用该条件!)。
- 3、如文档侵犯您的权益,请联系客服反馈,我们会尽快为您处理(人工客服工作时间:9:00-18:30)。
H P工作站B I O S详解HP 工作站 BIOS 详解吴健上海天哲科技一:File (5)1:System Informantion(系统信息) (7)2:About(关于) (7)3:Set Time and Date(设置时间和日期) (8)4:Flash System ROM(Flash系统ROM) (9)5:Replicated Setup(复制设置) (9)6:Default Setup(默认设置) (10)7:Apply Defaults and Exit(应用默认值和退出) (11)8:Ignore Changes and Exit(忽略变化和出口) (12)9:Save Changes and Exit(保存更改并退出) (13)二:storager (14)1:Device Configuration (设备配置) (15)2:Storage Options (存储器选项) (16)3:DPS Self-Test (DPS 自测) (18)4:Boot Order (引导顺序) (18)三:Security (20)1:Setup Password (设置密码) (20)2:Power-On Password (开机密码) (21)3:Password Options (密码配置) (22)4:Device Security (设备安全保护) (23)5:USB Security USB (USB 安全保护) (24)6:Slot Security PCI (接口安全保护) (25)7:Network Service Boot (网络服务引导) (26)8:System IDs (系统标识) (27)9:Master Boot Record Security (主引导记录安全保护) (28)10:System Security (操作系统安全保护) (29)四:Power (31)1:OS Power Management (操作系统电源管理) (31)2:Hardware Power Management (硬件电源管理) (33)3:Thermal (热量) (34)五:Advanced (34)1:Power-On Options (开机选项) (35)2:BIOS Power-On (BIOS 开机) (37)3:Onboard Devices(板载设备) (38)4:Bus Options (总线选项) (39)5:Device Options (设备选项) (40)6:Slot Settings (42)7:AMT Configuration (43)开机按F10 进入BIOS系统,首先上面一行的基本参数横向分别是:文件,存储,安全,电源管理和高级选项下面介绍各横向参数中的各细节参数:一:FileFile 菜单控制对BIOS设置的更改。
它显示系统信息、允许恢复先前的配置并允许在退出设置实用程序时保存或放弃对BIOS设置所做的更改System Informantion 系统信息About 关于Set Time and Date 设置时间和日期Flash System ROM Flash系统ROM Replicated Setup 复制设置Default Setup 默认设置Apply Defaults and Exit 应用违约和退出Ignore Changes and Exit 忽略变化和出口Save Changes and Exit 保存更改并退出1:System Informantion(系统信息)这一项里面可以看到 CPU、内存、型号、BIOS版本、网卡 Mac地址等信息。
注:库房硬件配置在此项2:About(关于)3:Set Time and Date(设置时间和日期)此项是时间日期的修改4:Flash System ROM(Flash系统ROM)此项是通过USB或DVD光驱进行升级BIOS系统固件的,有时候出厂BIOS版本低,对有些东西是不支持的,所以我们要通过这个地方或者在系统下来升级固件版本,在此升级只需将解压文件中的 .bin 文件拷贝到U盘或者光盘中,然后在这地方升级就行注:BIOS升级过程中切勿断电5:Replicated Setup(复制设置)a: Save to Removable Media(保存到可移动介质):将包括 CMOS 在内的系统配置保存到已格式化的 1.44 MB 软盘、USB 闪存介质设备或类似软盘的设备。
(设置为模拟软盘驱动器的存储设备)b: Restore from Removable Media(从可移动介质恢复):从软盘、USB 闪存介质设备或类似软盘的设备恢复系统配置6:Default Setup(默认设置)a: Save Current Settings as Default (将当前设置保存为默认设置)b: Restore Factory Settings as Default (将出厂设置恢复为默认设置)7:Apply Defaults and Exit(应用默认值和退出)应用当前选择的默认设置并清除所有已设置的密码。
8:Ignore Changes and Exit(忽略变化和出口)9:Save Changes and Exit(保存更改并退出)二:storagerStorage 菜单允许配置海量存储设备并设置计算机的启动顺序Device Configuration (设备配置)Storage Options(存储器选项)DPS Self-Test(DPS 自测)Select a Drive用于具备执行驱动器保护系统自测功能的 SATA 硬盘驱动器上执行自测,只有硬盘模式为 IDE 模式下有此选项。
Boot Order(引导顺序)1:Device Configuration (设备配置)Hard Disk 硬盘驱动器,进入可以看到硬盘信息。
(硬盘模式为 IDE 模式才能看到此项)CD-ROM 介绍光驱信息。
Default Values 默认值是 SATA 模式2:Storage Options (存储器选项)Removable Media Boot (可移动介质引导),可以启用/禁用从可移动介质引导系统的功能。
eSATA Port 允许用户定义 SATA 接口为 eSATA 接口使用。
SATA Emulation (SATA仿真),支持的选项有以下两种:RAID+AHCI、IDE。
此处可以更改硬盘模式,如果是Raid或AHCI模式,在安装xp、2003系统时系统会出现蓝屏,所以我们必须要修改成IDE模式才能继续安装,方法:左右切换就行3:DPS Self-Test (DPS 自测)Select a Drive用于具备执行驱动器保护系统自测功能的 SATA 硬盘驱动器上执行自测,只有硬盘模式为 IDE 模式下有此选项。
4:Boot Order (引导顺序)ATAPI CD-ROM Drive CD-ROM 驱动器。
USB Device USB 驱动器。
Hard Drive 硬盘驱动器。
Integrated SATA 集成的 SATA。
Network Controller 网络控制器这儿可以看到我们boot引导选项,如果要禁止那个不让从让启动,可以点到禁用的选项按F5就OK了三:SecuritySecurity 菜单允许设置开机和F10 设置密码,以及为设备、网络启动和主引导记录设置安全措施1:Setup Password (设置密码)用于设定和启用设置(管理员)密码。
次密码是进BIOS时使用的密码2:Power-On Password (开机密码)用于设定开机密码。
此密码是在电脑进系统时输的密码3:Password Options (密码配置)A:Lock Legacy Resources (锁定传统资源),设定设置密码时显示。
b:Setup Browse Mode 启用 / 禁用设置浏览模式。
(设置开机密码时显示)(如果没有输入设置密码,则允许查看但不能更改 F10 按键设置选项)c:password prompt on F9 & F12 密码提示在F9 & F12d:Network Server Mode 启用 / 禁用网络服务器模式。
(设置开机密码时显示)4:Device Security (设备安全保护)5:USB Security USB (USB 安全保护)Front USB Ports 前置USB接口Rear USB Ports 后置USB接口Internal USB Ports 内置USB接口Enabled 允许使用Disabled 不允许使用(有个别单位不让使用USB接口,就可以在此处关闭)6:Slot Security PCI (接口安全保护)7:Network Service Boot (网络服务引导)启用 / 禁用计算机从网络服务器上所安装的操作系统进行引导的功能。
(此功能只适用于装有网卡的机型,网络控制器必须是 PCI 扩展卡或嵌入主板。
)8:System IDs (系统标识)Enter Asset Tag 资产标签(18 字节的标识符),是公司指定给此计算机的资产标识号。
Enter Ownership Tag 开机自测期间显示的物主标签(80 字节的标识符)。
Enter UUID 机箱序列号或通用唯一标识 (UUID) 号。
只有当前的机箱序列号无效时才能更新 UUID。
(这些标识号通常是在出厂时设置的,可用作系统的唯一标识。
)Keyboard 系统标识项的键盘区域设置(例如,英语或德语)。
9:Master Boot Record Security (主引导记录安全保护)主引导记录安全保护(启用/禁用)Enable/Disable10:System Security (操作系统安全保护)Data Execution Prevention (数据执行预防)、Enable/Disable(启用 / 禁用),帮助防止操作系统出现安全漏洞。
Virtualization Technology(VTx) (虚拟化技术)、Enable/Disable(启用 / 禁用),用于控制处理器的虚拟化功能。
更改此设置需要先关闭计算机然后再打开。
Virtualization Technology Directed I/O(VTd) (虚拟化技术定向 I/O)、Enable/Disable(启用 / 禁用),用于控制芯片组的虚拟化 DMA 重映射功能。
更改此设置需要先关闭计算机然后再打开。
四:PowerPower菜单允许控制风扇闲置速度和PCI Express 链路的低功耗链路状态1:OS Power Management (操作系统电源管理)启用或禁用PCI Express ASPM支持。
