C1型热敏打印机开发说明书
热敏打印机使用说明书(英文)
热敏打印机使用说明书Thermal Printer User Manual一、打印机自检(LF键为指示灯)Printer self test(LF key is indicator light)打印机在关机状态下,按住LF键不松手同时给打印机上电,松手,打印机会打印出自检条。
When the printer is power off,press LF key and meanwhile power on,release the key,the printer will print self test paper.二、打印机设置(LF键为指示灯)Printer setting(LF key is indicator light)打印机在关机状态下,按住LF键同时给打印机上电,停顿5秒后松手,打印机进入设置模式,并打印出设置报告,见下(按键次数对应选择设置项前面序号):When the printer is power off,press LF key and meanwhile power on,release after 5 seconds,the printer will enter intosetting mode,and it will print out setting report,see below(the number of pressing key will be equal to the below according item number):(1)退出设置模式exit setting mode(2)恢复默认配置recover default setting(3)设置打印机方向set printing direction(4)选择字符点阵choose character dots(5)选择打印机功耗choose printer power comsuption(6)设置打印浓度set printing density(7)设置串口波特率set serial baud rate(8)设置串口效验位set serial parity(9)选择HEX打印set HEX printing(以下彩色字体部分均为打印机打印出的提示,后面黑色字体部分是我们加的操作说明)(The below colorful characters are prompts for printer print out,and the black characters are operation instruction which we added)(1)退出设置模式(按1下LF键,走一小段空白行,退出设置模式)exit setting mode(Press LF key one time,and the paper feed one line,it will exitsetting mode)(2)恢复默认配置(连续按2下LF键,恢复默认设置)recover default setting(Press LF key for 2 times,and it will recover default setting)(1)返回上级设置(此时不想保存刚才设置,则按1下LF键回到设置主页)Return to last setting( If do not want to save the setting just now,then press LFkey for one time to return to setting homepage)(2)确认恢复默认设置(连续按2下LF键,打印机打印出“恢复默认设置,系统复位”的字样提示)Confirm recover default setting(Press LF key for 2 times,the printer will printout the prompt"recovery default setting,system reset")(3)设置打印机方向(连续按3下LF键,进入打印方向的设置,打印机打印出3个选项供设置)Set printing direction(Press LF key for 3 times,it will enter into setting printing direction,the printer will print out 3 items for choose)(1)返回上级设置(此时不想设置打印机方向,则按1下LF键回到设置主页)Return to last setting(If do not want to set printing direction now,then press LFkey for one time to return to setting homepage)(2)从左到右打印(连续按2下LF键,打印机打印出下面3行字)From left to right printing(Press LF key for 2 times,the printer will print out thebelow 3 lines characters:)从左到右打印From left to right printing(1)返回上级设置(此时不保存该打印方向,可按1下LF键,返回上级设置)Return to last setting(If do not want to save this printing direction,thenpress LF key for one time,then it will to return to last setting)(2)确认(若确认则连续按2下LF键回到设置主页,打印机方向设置成功) Confirm(If confirm,then press LF key for 2 times to return to settinghomepage,then setting printing direction successfully)(3)从右到左打印(连续按3下LF键,打印机打印出下面3行字)From right to left printing(Press LF key for 3 times,then the printer will printout the below 3 lines characters:)从右到左打印From right to left printing(1)返回上级设置(此时不保存该打印方向,可按1下LF键,返回上级设置)Return to last setting(If do not want to save this printing direction,thenpress LF key for one time,then it will to return to last setting)(2)确认(若确认则连续按2下LF键回到设置主页,打印机方向设置成功)Confirm(If confirm,then press LF key for 2 times to return to settinghomepage,then setting printing direction successfully)(4)选择字符点阵(连续按4下LF键,选择字符点阵,打印机会打印出3个选项供设置)Choose character dots(Press LF key for 4 times,choose character dots,the printer will print out 3 items for choose)(1)返回上级设置(此时不设置字符点阵,按1下LF键回到设置主页)Return to last setting(If do not want to set character dots now,then press LF keyfor one time to return to setting homepage)(2)选择8*16字符16*16汉字(连续按2下LF键,打印机打印出下面3行提示)Choose 8*16 character 16*16 chinese character(Press LF key for 2 times,theprinter will print out the below 3 lines prompts)选择8*16字符16*16汉字Choose 8*16 character 16*16 chinese character(1)返回上级设置(此时不保存该设置,可按1下LF键,返回上级设置)Return to last setting(If do not want to save this setting,then press LF key forone time,then it will to return to last setting)(2)确认(若确认则连续按2次LF键回到设置主页,字符点阵设置成功)Confirm(If confirm,then press LF key for 2 times to return to settinghomepage,then setting character dots successfully)(3)选择12*24字符24*24汉字(连续按3下LF键,打印机打印出下面3行提示)Choose 12*24 character 24*24 chinese character(Press LF key for 3 times,theprinter will print out the below 3 lines prompts)选择12*24字符24*24汉字Choose 12*24 character 24*24 chinese character(1)返回上级设置(此时不保存该设置,可按1下LF键,返回上级设置)Return to last setting(If do not want to save this setting,then press LF key forone time,then it will to return to last setting)(2)确认(若确认则连续按2次LF键回到设置主页,字符点阵设置成功)Confirm(If confirm,then press LF key for 2 times to return to settinghomepage,then setting character dots successfully)(5)选择打印机功耗(联系按5下LF键,选择打印机功耗,打印机会打印出6下面6个选项,请根据提示操作)Choose printer power comsuption(Press LF key for 5 times,choose printer power comsuption,the printer will print out the bleow 6 items,please operate according to the below prompts)(1)返回上级设置Return to last setting(2)I级功耗(最低)(连续按2下LF键,打印机打印出下面3行字样)I leverl power comption(the lowest) (Press LF key for 2 times,the printer will printout the below 3 lines prompts)I级功耗(最低)I leverl power comption(1)返回上级设置(此时不保存该设置,可按1下LF键,返回上级设置)Return to last setting(If do not want to save this setting,then press LF key forone time,then it will to return to last setting)(2)确认(若确认则连续按2次LF键回到设置主页,打印机功耗设置成功)Confirm(If confirm,then press LF key for 2 times to return to settinghomepage,then setting printer power comsuption successfully) (3)II级功耗(连续按3下LF键,打印机打印出下面3行字样)II leverl power comption(Press LF key for 3 times,the printer will print out thebelow 3 lines prompts)II级功耗II leverl power comption(1)返回上级设置(此时不保存该设置,可按1下LF键,返回上级设置)Return to last setting(If do not want to save this setting,then press LF key forone time,then it will to return to last setting)(2)确定(若确认则连续按2次LF键回到设置主页,打印机功耗设置成功)Confirm(If confirm,then press LF key for 2 times to return to settinghomepage,then setting printer power comsuption successfully) (4)III级功耗(连续按4下LF键,打印机打印出下面3行字样)III leverl power comption(Press LF key for 4 times,the printer will print out thebelow 3 lines prompts)III级功耗III leverl power comption(1)返回上级设置(此时不保存该设置,可按1下LF键,返回上级设置)Return to last setting(If do not want to save this setting,then press LF key forone time,then it will to return to last setting)(2)确认(若确认则连续按2次LF键回到设置主页,打印机功耗设置成功)Confirm(If confirm,then press LF key for 2 times to return to settinghomepage,then setting printer power comsuption successfully) (5)IV级功耗(连续按5下LF键,打印机打印出下面3行字样)IV leverl power comption(Press LF key for 5 times,the printer will print out thebelow 3 lines prompts)IV级功耗IV leverl power comption(3)返回上级设置(此时不保存该设置,可按1下LF键,返回上级设置)Return to last setting(If do not want to save this setting,then press LF key forone time,then it will to return to last setting)(4)确认(若确认则连续按2次LF键回到设置主页,打印机功耗设置成功)Confirm(If confirm,then press LF key for 2 times to return to settinghomepage,then setting printer power comsuption successfully) (6)V级功耗(最高)(连续按6下LF键,打印机打印出下面3行字样)V leverl power comption(the highest) (Press LF key for 6 times,the printer will printout the below 3 lines prompts)V级功耗(最高)V leverl power comption(the highest)(1)返回上级设置(此时不保存该设置,可按1下LF键,返回上级设置)Return to last setting(If do not want to save this setting,then press LF key forone time,then it will to return to last setting)(2)确认(若确认则连续按2次LF键回到设置主页,打印机功耗设置成功)Confirm(If confirm,then press LF key for 2 times to return to settinghomepage,then setting printer power comsuption successfully)(6)设置打印浓度(连续按6下LF键,开始设置打印浓度,打印机会打印出下面3个选项,请根据提示操作)Set printing density(Press LF key for 6 times,set printing density,the printer will print out the bleow 3 items,please operate according to the below prompts)(1)确认设置后返回(此时不设置浓度,按1下LF键回到设置主页)Confirm setting and return back(If do not want to set print density now,press LFkey for one time to return to setting homepage)(2)增量调整打印浓度(进入浓度设置后,连续按两2下LF键进行增量设置,打印机会打印出当前的浓度序号;若还需增加浓度,再连续按2下进行增量浓度设置,直到设置到理想浓度,按1下LF键确认设置后返回到设置主页)Increase the printing density( After entering the setting printing density mode,pressLF key for 2 times to increase the printing density,the printer will print out the number for current printer density:If still want toincrease the density,press the LF key for 2 times again to increasethe printer density,and again to the density you want. Press LF key for 1 time toconfirm the setting and return back to setting homepage)(3)减量调整打印浓度(进入浓度设置后,连续按两3下LF键进行减量设置,打印机会打印出当前的浓度序号;若还需增加浓度,再连续按3下进行减量浓度设置,直到设置到理想浓度,按1下LF键确认设置后返回到设置主页)Decrease the printing density( After entering the setting printing densitymode,press LF key for 3 times to decrease the printing density,the printer will print out the number for current printer density:If still want todecrease the density,press the LF key for 3 times again to decreasethe printer density,and again to the density you want. Press LF key for 1 time toconfirm the setting and return back to setting homepage)(7)设置串口波特率(连续按7下LF键,开始设置串口波特率,打印机会有如下8个选项,请按需要选择)Set serial baud rate(Press LF key for 7 times,set the serial baud rate,the printer will print out the below 8 items for choose)(1)返回上级设置(此时不设置串口波特率,按1下LF键回到设置主页)Return to last setting(If do not want to set serial baud rate,press LF key for onetime to return back to homepage)(2)1200bps(连续按2下LF键,打印机打印出下面字样)1200bps(Press LF key for 2 times,the printer will print out the below prompts选择1200bps Choose 1200bps(1)返回上级设置(此时不保存该设置,可按1下LF键,返回上级设置)Return to last setting(If do not want to save this setting,press LF key for onetime,then it will to return to last setting)(2)确认(若确认则连续按2次LF键回到设置主页,串口波特率设置成功)Confirm(If confirm,then press LF key for 2 times to return to settinghomepage,then setting serial baud rate successfully)(3)2400bps(连续按3下LF键,打印机打印出下面字样)2400bps(press LF key for 3 times,the printer will print out the below prompts)选择2400bps Choose 2400bps(1)返回上级设置(此时不保存该设置,可按1下LF键,返回上级设置)Return to last setting(If do not want to save this setting,press LF key for onetime,then it will return to last setting)(2)确认(若确认则连续按2次LF键回到设置主页,串口波特率设置成功)Confirm(If confirm,then press LF key for 2 times to return to settinghomepage,then setting serial baud rate successfully)(4)4800bps(连续按4下LF键,打印机打印出下面字样)4800bps(press LF key for 4 times,the printer will print out the below prompts)选择4800bps Choose 4800bps(1)返回上级设置(此时不保存该设置,可按1下LF键,返回上级设置)Return to last setting(If do not want to save this setting,press LF key for onetime,then it will return to last setting)(2)确认(若确认则连续按2次LF键回到设置主页,串口波特率设置成功)Confirm(If confirm,then press LF key for 2 times to return to settinghomepage,then setting serial baud rate successfully)(5)9600bps(连续按5下LF键,打印机打印出下面字样)9600bps(press LF key for 5 times,the printer will print out the below prompts)选择9600bps Choose 9600bps(1)返回上级设置(此时不保存该设置,可按1下LF键,返回上级设置)Return to last setting(If do not want to save this setting,press LF key for onetime,then it will return to last setting)(2)确认(若确认则连续按2次LF键回到设置主页,串口波特率设置成功)Confirm(If confirm,then press LF key for 2 times to return to settinghomepage,then setting serial baud rate successfully)(6)19200bps(连续按6下LF键,打印机打印出下面字样)19200bps(press LF key for 6 times,the printer will print out the below prompts)选择19200bps Choose 19200bps(1)返回上级设置(此时不保存该设置,可按1下LF键,返回上级设置)Return to last setting(If do not want to save this setting,press LF key for onetime,then it will return to last setting)(2)确认(若确认则连续按2次LF键回到设置主页,串口波特率设置成功)Confirm(If confirm,then press LF key for 2 times to return to settinghomepage,then setting serial baud rate successfully)(7)38400bps(连续按7下LF键,打印机打印出下面字样)38400bps(press LF key for 7 times,the printer will print out the below prompts)选择38400bps Choose 38400bps(1)返回上级设置(此时不保存该设置,可按1下LF键,返回上级设置)Return to last setting(If do not want to save this setting,press LF key for onetime,then it will return to last setting)(2)确认(若确认则连续按2次LF键回到设置主页,串口波特率设置成功)Confirm(If confirm,then press LF key for 2 times to return to settinghomepage,then setting serial baud rate successfully)(8)115200bps(连续按8下LF键,打印机打印出下面字样)115200bps(press LF key for 8 times,the printer will print out the below prompts)选择115200bps Choose 115200bps(1)返回上级设置(此时不保存该设置,可按1下LF键,返回上级设置)Return to last setting(If do not want to save this setting,press LF key for onetime,then it will return to last setting)(2)确认(若确认则连续按2次LF键回到设置主页,串口波特率设置成功)Confirm(If confirm,then press LF key for 2 times to return to settinghomepage,then setting serial baud rate successfully)(8)设置串口效验位(联系按8下LF键,打印出3个选项供设置)Set serial Parity(press LF key for 8 times,the printer will print out the below 3 items for choose)(1)返回上级设置(此时不设置串口效验位,按1下LF键回到设置主页)Return to last setting(If do not want to set serial parity,press LF key for onetime,then it will return to setting homepage)(2)无效验(连续按2下LF键,打印机打印出下面字样)No Parity(press LF key for 2 times,the printer will print out the below prompts)选择无效验Choose No Parity(1)返回上级设置(此时不保存该设置,可按1下LF键,返回上级设置)Return to last setting(If do not want to save this setting,press LF key for onetime,then it will return to last setting)(2)确认(若确认则连续按2次LF键回到设置主页,效验位设置成功)Confirm(If confirm,then press LF key for 2 times to return to settinghomepage,then setting serial parity successfully)(3)有效验(连续按3下LF键,打印机打印出下面字样)with Parity(press LF key for 3 times,the printer will print out the below prompts)选择有效验Choose with Parity(1)返回上级设置(此时不保存该设置,可按1下LF键,返回上级设置)Return to last setting(If do not want to save this setting,press LF key for onetime,then it will return to last setting)(2)确认(若确认则连续按2次LF键回到设置主页,效验位设置成功)Confirm(If confirm,then press LF key for 2 times to return to settinghomepage,then setting serial parity successfully)(9)选择HEX打印(联系按9下LF键,打印出3个选项供设置)Choose HEX printing(Press LF key for 9 times,then the printer will print out the below 3 items for choose)(1)返回上级设置(此时不选择HEX打印,按1下LF键回到设置主页)Return to last setting(If do not want to choose HEX printing,press LF key for onetime,then it will return to setting homepage)(2)正常打印(连续按2下LF键,打印机打印出下面字样)Normal printing(press LF key for 2 times,the printer will print out the belowprompts)选择正常打印Choose normal printing(1)返回上级设置(此时不保存该设置,可按1下LF键,返回上级设置)Return to last setting(If do not want to save this setting,press LF key for onetime,then it will return to last setting)(2)确认(若确认则连续按2次LF键回到设置主页,正常打印设置成功)Confirm(If confirm,then press LF key for 2 times to return to settinghomepage,then setting normal printing successfully)(3)选择HEX打印(连续按3下LF键,打印机打印出下面字样)Choose HEX printing( press LF key for 3 times,the printer will print out the below prompts)选择HEX打印Choose HEX printing(1)返回上级设置(此时不保存该设置,可按1下LF键,返回上级设置)Return to last setting(If do not want to save this setting,press LF key forone time,then it will return to last setting)(2)确认(若确认则连续按2次LF键回到设置主页,HEX打印设置成功)Confirm(If confirm,then press LF key for 2 times to return to settinghomepage,then setting HEX printing successfully)。
PLG微型热敏打印机开发手册V1.3
PLG微型热敏打印机开发手册V1.3目录第一章概述----------------------------------------------------------------------------------------1第二章通讯接口-----------------------------------------------------------------------------------22.1RS-232接口--------------------------------------------------------------------------------22.2红外接口-----------------------------------------------------------------------------------3第三章指令说明------------------------------------------------------------------------------------43.1打印控制指令-----------------------------------------------------------------------------------53.1.1ESC@------------------------------------------------------------------------------------53.1.2LF---------------------------------------------------------------------------------------53.1.3CR---------------------------------------------------------------------------------------53.1.4FF---------------------------------------------------------------------------------------53.1.5ESC J n----------------------------------------------------------------------------------63.1.6ESC d n----------------------------------------------------------------------------------6 3.2字符参数设置指令-------------------------------------------------------------------------------63.2.1ESC!N----------------------------------------------------------------------------------63.2.2ESC M n----------------------------------------------------------------------------------73.2.3GS!n-----------------------------------------------------------------------------------73.2.4ESC-n----------------------------------------------------------------------------------83.2.5ESC E n----------------------------------------------------------------------------------83.2.6ESC G n----------------------------------------------------------------------------------83.2.7GS B n-----------------------------------------------------------------------------------8 3.3打印排版设置指令-------------------------------------------------------------------------------93.3.1ESC$nL nH------------------------------------------------------------------------------93.3.2ESC2------------------------------------------------------------------------------------93.3.3ESC3n----------------------------------------------------------------------------------93.3.4ESC\nL nH------------------------------------------------------------------------------93.3.5ESC SP n--------------------------------------------------------------------------------10 3.4图形打印指令----------------------------------------------------------------------------------103.4.1ESC*m nL nH d1…dk--------------------------------------------------------------------103.4.2GS'------------------------------------------------------------------------------------11 3.5条形码打印命令--------------------------------------------------------------------------------123.5.1GS k------------------------------------------------------------------------------------123.5.2GS h n----------------------------------------------------------------------------------123.5.3GS w n----------------------------------------------------------------------------------123.5.4GS H n----------------------------------------------------------------------------------133.5.5GS f n----------------------------------------------------------------------------------13 3.6汉字打印指令----------------------------------------------------------------------------------133.6.1FS&------------------------------------------------------------------------------------143.6.2FS.------------------------------------------------------------------------------------14附录----------------------------------------------------------------------------------------------15 A英文字符集-----------------------------------------------------------------------------15 B预印刷黑标说明-------------------------------------------------------------------------15第一章概述PLG微型热敏打印机是一款便携式热敏打印机,使用可充电电池供电,可带机充电,使用RS-232接口和IrDA红外接口,可用于各种仪器仪表、手持设备的数据打印。
行式热敏打印机 技术手册
2-2 电源连接
本打印机需要使用外部供电电源,请使用随机附带电源或符合厂家 规格要求的电源。
◆ 电源输入:直流 24.0±5% V,平均电流:大约 2A,峰值8A。 ◆ 电源插座:在打印机背面,采用4PIN插座,见图2-4,电源引脚定 义:见表2-1。
1. 电源插座定义:
ESC 2
设置字符行间距为 1/6 英寸...... 23
ESC 3 n 设置行间距为 n 点行(n/203 英寸)23
ESC ! n 设置字符打印方式 .............. 23
ESC % n 允许/禁止用户自定义字符....... 24
ESC &
S n m 设定用户自定义字符 ..... 24
UP-AJ58AH-A UP-AJ58AH-D
行式热敏打印机
技术手册
(版本:C)
声明 此为 A 级产品,在生活环境中,该产品可能会造成无线电 干扰。在这种情况下,可能需要用户对其干扰采取切实可行的 措施。
生产商有权修改[技术手册]的内容而不做事先声明 !
安全信息
为有效、安全地使用您的打印机,请遵守以下规定。 使用前
注意:
当“锁盖”旋转至 90 度位置时严禁用手向外扳。
图 2-9 扣合机头
图 2-10 扣合前盖板
11
12
2-4 接口连接
您需要符合[技术手册]规定的接口电缆,把打印机连接到您的设备 或计算机上。
1. 串行接口 打印机的串行接口与RS232C标准兼容,支持DTR/DSR握手协议,其 接口插座为5PIN针型插座(在打印机背面)。串行接口插座的引脚序号 如图2-9所示:
2)如图2-8所示,向下按机头右边的绿色抬杠打开机头,将机头 胶辊部分向下打开。装好纸轴,将纸卷以热敏层正对印头方向 放入纸仓支架。
热敏打印机 MCP300 开发手册
便携式热敏蓝牙打印机型号:MCP300开发手册目录第一章简介 (3)第二章使用 (3)打印测试 (3)指示灯指示 (3)第三章打印命令集 (3)1、打印命令一览表 (3)2、打印命令详解 (5)2.1打印命令 (5)2.2行间距设置命令 (6)2.3字符设置命令 (7)2.4图形打印命令 (10)2.5按键控制命令 (13)2.6初始化命令 (13)2.7状态传输命令 (13)2.8条码打印命令 (14)2.9控制板参数命令 (16)附录1:代码页 (18)附录B:国际字符集 (19)第一章简介MCP300系列列打印机是专门设计的蓝牙打印机,具有如下特点:打印控制板内置GB18030中文字库,彻底免除生僻字的苦恼。
打印速度快,噪声低工作电压范围宽5.0~9.0V机械尺寸小,便于用户安装第二章使用打印测试上电后,按开关键后,按进纸键,打印机将打印一张测试页。
指示灯指示上电后,指示灯将亮灭2次,间隔1秒,表示启动正常,随后指示灯如下显示:闪1次:自检正常。
闪2次:未检测到打印机。
闪3次:打印机缺纸。
闪5次:打印机芯的加热片过热。
闪10次:未检测到中文字库芯片。
第三章打印命令集1、打印命令一览表命令速查命令说明打印命令LF打印并换行HT跳到下一个TAB位置FF打印缓冲区数据ESC FF打印缓冲区数据ESC J n打印缓冲区数据并走纸n点行ESC d n打印缓冲区数据并走纸n行ESC=n设置打印在线、离线格式设置命令ESC2设置行间距为32点ESC3n设置行间距为n点行ESC a n设置对齐方式,左对齐,右对齐,居中对齐GS L nL nH设置左边距ESC$设置页的左边距字符设置命令ESC!n设置打印字符格式GS!n设置取消字体加宽加高ESC E n设置取消字体加粗ESC SP n设置字符间距ESC SO设置字符倍宽打印ESC DC4取消字符倍宽打印ESC{n设置/取消字符上下倒置GS B n设置/取消字符反白打印ESC-n设置下划线的点高度ESC%n设置/取消用户自定义字符ESC&设定用户自定义字符ESC?取消用户自定义字符ESC R n选择国际字符集ESC t n选择字符代码页图形设置命令ESC*打印一点行图形GS*下装点图设置GS/打印下装点图GS v打印指定宽度高度位图DC2*位图打印DC2V打印MSB位图DC2v打印LSB位图初始化命令ESC@打印机初始化状态传输命令ESC v n向主机传送打印机状态ESC u n向主机传送周边设置状态GS a n允许/禁止状态自动上传条码设置命令GS H选择HRI打印方式GS h设置条码高度GS x设置条码打印左边距GS w设置条码横向宽度GS k打印条码控制板参数命令ESC7n1n2设置打印参数ESC8设置睡眠参数DC2#n设置打印浓度DC2T打印测试页说明:黑标相关命令并不是所有控制板都支持。
嵌入式热敏打印机开发手册
3.1 串行接口(SN)机型详解................................................................................................................................. 4 3.1.1 数据接口..................................................................................................................................................... 4 3.1.2 串口数据发送方法..................................................................................................................................... 5 3.1.3 波特率选择位............................................................................................................................................. 6
热敏票据打印机使用手册

热敏票据打印机POS-58使用手册一、概述 (2)1、简介 (2)2、主要特点 (2)3、技术规格 (2)4、注意事项 (3)二、打印机安装 (3)1、部件清单 (3)2、打印机外型 (4)3、连接打印机 (4)3.1 串行接口型 (4)3.2 并行接口型 (5)3.3 USB接口型 (6)3.4以太网接口型 (6)4、连接钱箱 (6)三、打印机使用 (7)1、操作控制面板 (7)2、在线和离线 (7)3、进纸 (8)4、设定打印浓度 (8)5、设定打印速度 (8)6、设定波特率 (8)7、打印测试模式 (9)8、调试输出模式 (9)9、安装纸卷 (9)9、撕纸方法 (10)10、清洗打印机芯 (10)四、USB驱动程序的安装 (11)1、驱动程序的安装 (11)2、驱动程序的卸载 (12)3、系统需求 (13)五、PC工具软件使用 (13)1、工具软件的安装 (13)2、工具软件主界面 (15)六、故障排除 (15)七、ESC/POS打印控制命令 (16)1、打印命令一览表 (16)2、打印命令详解 (17)2.1 打印命令 (17)2.2 行间距设置命令 (18)2.3 字符设置命令 (18)2.4 图形打印命令 (20)2.5 钱箱控制命令 (21)2.6 按键控制命令 (22)2.7 初始化命令 (22)2.8 状态传输命令 (22)2.9 条码打印命令 (23)2.10位置和页模式命令 (25)附录1:代码页 (27)附录B:国际字符集 (29)声明此为A级产品,在生活环境中,该产品可能会造成无线电干扰,可能需要用户对其干扰采取切实可行的措施。
本公司保留对说明书修改而不通知用户的权利。
一、概述1、简介欢迎您使用POS-58行式热敏打印机。
POS-58是一款高性能的行式热敏打印机,具有打印速度快、噪声低、可靠性高等特点,可广泛用于商业POS系统、餐厅收费系统等各种需要现场打印输出的场所。
新北洋 便携式热敏打印机 用户手册
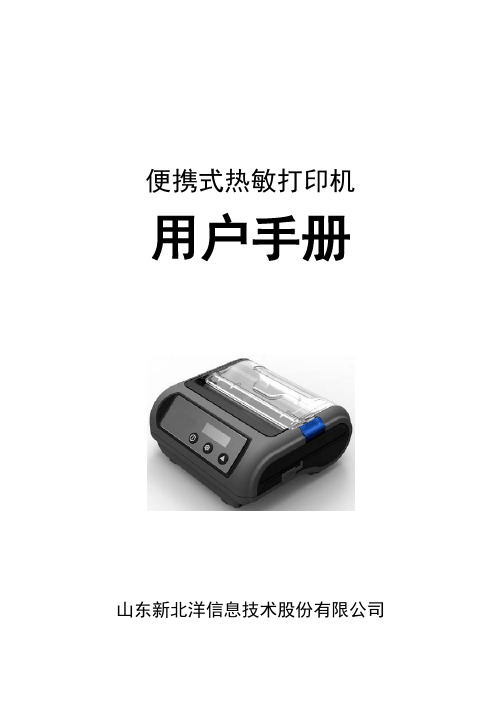
便携式热敏打印机用户手册山东新北洋信息技术股份有限公司声明本手册内容未经同意内容不得随意更改,山东新北洋信息技术股份有限公司(以下简称新北洋)保留在技术、零部件、软件和硬件上改善产品的权利。
用户如果需要与产品有关的进一步信息,可以与新北洋或经销商联系。
本手册的任何章节没有新北洋的书面许可不得以任何形式、通过任何手段进行复制或传送。
版权本手册于2017年印制,版权属于新北洋。
中国印制。
1.0版本。
商标新北洋使用的注册商标是。
警告、注意警告必须遵守,以免伤害人体,损坏设备。
注意给出了打印机操作的重要信息及提示。
新北洋通过下列管理体系认证ISO9001 质量管理体系认证ISO14001环境管理体系认证OHSAS18001职业健康安全管理体系认证IECQ QC 080000有害物质过程管理体系认证联系方式地址:山东省威海市高技区火炬路169号保修、咨询电话:400-618-1368、800-860-1368 传真:+86—631—5656098QQ:4006181368网址:产品通过下列安全认证:安全须知在操作使用打印机之前,请仔细阅读下面的注意事项:1.安全警告警告:不要触摸打印机的撕纸刀。
警告:打印头为发热部件,打印过程中和打印刚结束,不要触摸打印头以及周边部件。
警告:不要触摸打印头表面和连接接插件,以免因静电损坏打印头。
2.注意事项1)打印机应远离水源并避免阳光、强光和热源的直射。
2)不要在高温,湿度大以及污染严重的地方使用和保存打印机。
3)避免将打印机放在有振动和冲击的地方。
4)如果打印机表面表面结露,在露水消除之前不要打开打印机的电源。
5)将打印机的充电器连接到一个适当的接地插座上。
避免与大型电机或其它能够导致电源电压波动的设备使用同一插座。
6)如果较长时间不使用打印机,请拿出打印机的电池。
7)避免水或导电的物质(例如:金属)进入打印机内部,一旦发生,应立即拿出电池。
8)打印机不得在无纸的状态下打印,否则将严重损害打印胶辊和热敏打印头。
便携热敏打印机使用说明
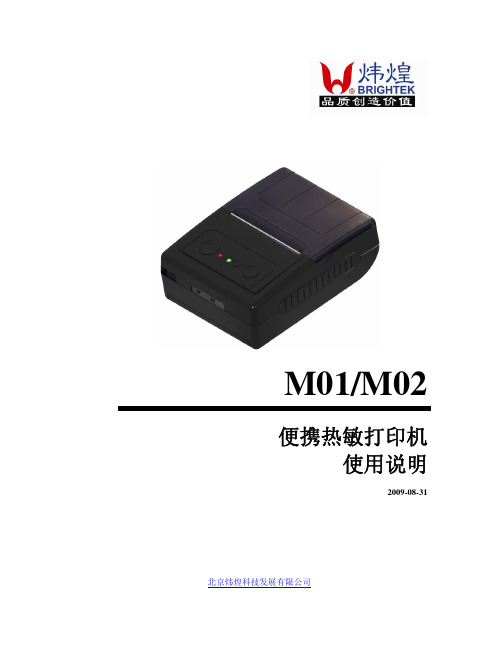
M01/M02便携热敏打印机使用说明2009-08-31 北京炜煌科技发展有限公司版本控制信息版本日期拟稿和修改说明V01 2009-6-19 创建第1章 安全信息为有效、安全地使用您的打印机,请遵守以下规定。
在使用打印机前详细阅读操作指南,以掌握正确的使用方法。
将本[使用说明]放置在方便易取的位置,以便随时取出参阅和寻找问题解答。
1.1读者本手册的受众是系统软件开发人员、硬件设计人员和应用设计人员1.2关于本手册本文档分成多个章节,每个章节与主要的特性相对应。
1.3F 安全上的注意事项假如漠视下述注意内容,错误使用打印机的话,可能造成打印机损坏。
△ 注 意·如果出现卡纸情况,务必先断电,等待 10 秒钟,让机头冷却下来,才开始除掉塞纸。
·勿将本产品放置在潮湿或多尘的环境中,重压,不能堆放。
1.4F 使用上的注意事项1.4.1纸卷·必须使用符合要求的纸卷(带纸轴)。
勿选用末端被黏合在纸轴上的纸卷,否则打印机便无法正确测出纸卷末端,也可能对打印机构造成损害。
不要长时间打印数据。
第2章 操作说明2.1开机持续按住电源开关(面板左键)3秒钟,电源打开。
工作状态指示灯闪亮。
少于3秒钟电源不动作。
2.2关机在开机状态,按压电源开关(面板左键)3秒钟,电源关闭,工作状态指示灯熄灭。
少于3秒钟电源不动作。
2.3走纸按压走纸键(面板右键),按下开始进纸,放开停止进纸。
自检在关机状态下按压走纸键(面板右键),然后开机,可以打印自检2.4设置参数在关机状态下按下设置键(中间键),然后开机,可进入设置菜单,打印如下内容:1.Setup Infrared(设置红外)2.Setup 232(设置232串口)3.Print Direction(改变方向)4.Gray Adjust(改变灰度)5.Poweroff(关电源)6.Font&Codepage(选择字体或字符集)这时再按住设置键不放可听到咔哒声,当听到“咔哒”声响的次数与要选择的项目前标号数一致时松开按键,即进入该选项。
热敏打印机使用手册说明书
Thermal Printer User’s ManualCatalogue1 Introduction (2)1.1 Brief introduction (2)1.2 Main features (2)2 Specification (3)2.1 Specification (3)2.2 Printing material requirements (5)2.2.1 Paper parameters (5)2.2.2 Mark paper parameters (5)2.2.3 Paper using attention (5)2.3 Printing and paper cutting position (6)2.3.1 Printing position (6)2.3.2 Paper cutting position (6)3 Appearance and components (7)3.1 Appearance and components (7)3.2 Indicator and buzzer instruction (8)4 Printer installation (9)4.1 Open the package (9)4.2 Requirements of installation position (9)4.3 Connect to power adapter (9)4.4 Connect Communication cables (9)4.5 Connect to cash drawer (9)4.6 Paper roll loading (10)4.6.1 Printing paper type confirmation (10)4.6.2 Loading or change paper roll (10)4.7 DIP switch setting (12)4.8 Printing self-test page (12)4.9 Set Ethernet port IP Address. (12)5 Interface pin definitions (14)5.1 Parallel interface pin definition(DB25M) (14)5.2 USB interface pin definition(standard B type female base) (14)5.3 Power interface pin definition(MPC-3-001B) (15)5.4 Cash drawer interface pin definition(RJ11-6P6C) (15)5.5 Serial port pin definition(DB9F) (16)5.6 Ethernet interface pin definition(RJ45) (16)6 Faults handling (17)6.1 Printer does not work (17)6.2 Indicator error and buzzer warning (17)6.3 Problems when it is printing (17)6.4 Problems when cutting paper (18)6.5 Paper jam and cutter retraction troubles removal (18)1 Introduction1.1 Brief introductionCB821 is a thermal POS printer with auto-cutter. It has good printing quality, high printing speed and high stability, which is widely used in POS system, food service industry and many other fields.CB821 connects other devices via USB, Serial, Ethernet port. It offers drivers for WINDOWS and LINUX operating systems.The supported operating systems are as below:WINDOWS XPWINDOWS 7 32/64WINDOWS 8WINDOWS 10UBUNTU 12.04 32/64UBUNTU 14.04 32/64MAC OS1.2 Main features·Low noise, high-speed printing, 250mm/s·With auto-cutter·With cash drawer interface·USB, Serial, Ethernet port communication, Bluetooth optional.Long-life, high print quality, durable performance.Support mark paper and continuous paper printing.Easy paper loading design, widely used in various industries2 Specification2.1 SpecificationItem ParameterPrinting parameter Printing method Thermal printingResolution 203DPI,8 dots/mmPrinting width 72mm(576 dots)Printing speed About 250 mm/sInterfacesStandard: cash drawer / USB/ serial/ EthernetOptional Wireless Communication: BluetoothPage mode / SupportCommand set / ESC/POS compatible commandsStorageRAM RAM 8M bytes, receive buffer area 1M bytes FLASH FLASH 4M bytes, NV bitmap 256K bytescharactersChinese GB18030 24×24Words, figures ASCII 9×17,12×24User-defined SupportCode pagesOptional international character sets 45TRADITIONAL CHINESECHINESECP437 [U.S.A., Standard Europe]KatakanaCP850 [Multilingual]CP860 [Portuguese]CP863 [Canadian-French]CP865 [Nordic]WCP1251 [Cyrillic]CP866 Cyrillic #2MIK[Cyrillic /Bulgarian]CP755 [East Europe,Latvian 2]IranCP862 [Hebrew]WCP1252 Latin IWCP1253 [Greek]CP852 [Latina 2]CP858 Multilingual Latin Ⅰ+Euro)Iran IILatvianCP864 [Arabic]ISO-8859-1 [West Europe]CP737 [Greek]WCP1257 [Baltic]ThaiCP720[Arabic]CP855CP857[Turkish]WCP1250[Central Europe] CP775WCP1254[Turkish]WCP1255[Hebrew]WCP1256[Arabic]WCP1258[Vietnam]ISO-8859-2[Latin 2]ISO-8859-3[Latin 3]ISO-8859-4[Baltic]ISO-8859-5[Cyrillic]ISO-8859-6[Arabic]ISO-8859-7[Greek]ISO-8859-8[Hebrew]ISO-8859-9[Turkish]ISO-8859-15 [Latin 3] Thai2CP856Chart / Supports different density dots and images printingsSupports grating bitmap printingSupports download bitmap printing, every bitmap size should less than 256K, and the total capacity of download bitmap is 256K.Bar codes 1DUPC-A、UPC-E、EAN-8、EAN13、CODE39、ITF、CODEBAR、CODE128、CODE932D PDF417、QR CodeDetection function Sensor Paper out, cover opened, un-take out printed paper(optional)LED indicatorPower indicator Green Paper out indicator Red Error indicator RedPaper RequirementType Standard thermal receipt paper Width 79.5±0.5mmThickness 0.056~0.1mmDiameter 80mm(Max.)Physical characteristicsPaper loading Easy paper loadingPaper cutting Manual or automatically cut paper Operating condition -10℃~ 50℃,25% ~ 80%RH Storage condition ~40℃~ 70℃,≤93%RH(40℃)Outline dimension 145mm×195mm×144mm(W×L×H)Weight 1.8KgReliabilityTPH life 100kmCutter life 1,000,000 times Motor life 360,000 hoursSoftware function Driver procedure Windows(WIN7/WIN8/WIN10/Vista/XP/2000)Ubuntu 12.04 32/64, Ubuntu 14.04 32/64 MAC OS2.2 Printing material requirements2.2.1 Paper parameters1)Paper type: thermal receipt paper/thermal black mark paper2)Paper width:80±0.5 mm3)Paper roll diameter: 80 mm (Max.)4)Paper thickness:0.065 ~ 0.10mm2.2.2 Mark paper parametersBlack mark imprint position is on the front side of the receipt when using mark paper. The black mark reflectivity is no more than15%, the other parts of paper reflectivity should be more than 85%.There are not any patterns in black mark area, such as ad, and the mark size shall be satisfied with requirements as below:2.2.3 Paper using attentionNote:1)Please use good quality paper, otherwise, it will effect printing quality and even reduce printer head life.2)Don’t make the paper stick on axis.3)Paper will be fading out or reduced thermal sensitivity if it is polluted by chemical or oil, which will affectprinting effects.4)Don’t use nail or hard things to clash printing paper, otherwise, it will be fade out.5)Paper will be fading out if the environment temperature exceeds 70°C. So please take note the temperature,humidity and illumination effects.2.3 Printing and paper cutting position2.3.1 Printing positionL1-Paper storehouse’s width: 82±0.5mmL2-Effective printing width: 80mmL3-Distance between print head to paper storehouse’s left edge (fixed width): 3±0.3mmL4-Distance between print head to paper storehouse’s right edge (fixed width): 3±0.3mmL5-Left margin: Default is 4mmL6-Printing area width: it is set by commands (refer to programming manual). Default is 72mm. L7-Right margin: Default is 4mm.2.3.2 Paper cutting positionThe distance between print head to cutter: 12.5mm3 Appearance and components 3.1 Appearance and componentsFunction instruction of components1)Power switchPress “O” side to power off, press “I” side to power on.2)Power indicator(green)The indicator is on when power on, and it is off when power off.3)Error indicator (Red)Error indicator is on when it detects error. Such as: paper out, upper cover is open and cutter is stocked. 4)Paper indicator(red)Paper out indicator is on when it detects the paper is out. Please put a new paper roll to printer inside then.3.2 Indicator and buzzer instruction1)Function instruction of indicators and buzzerName Status InstructionPower indicator (Power) On Printer is power on Off Printer is power offError indicator (Error) On Printer is in error status Off Printer is in normal statusPaper out indicator (Paper)On Printer is in paper out status Off Printer is in normal statusDescription Power Indicator Error Indicator Paper Indicator Buzzer Open printer cover On On On It rings 6 times by 1.5s.Paper is enough On Off Off Silent Paper out On On On It rings 3 times by 1.5s.Note: Printer detects printer head temperature via thermal resistance. It will cut off print head powerand stop printing if print head is overheat. The print head protection temperature is 80℃.4 Printer installation4.1 Open the packagePlease make sure everything is in good status when you open the package. Otherwise, please contact to distributor in time.4.2 Requirements of installation position1)Put the printer on a stably place.2)Let the printer far away from water, fire, and sunlight.3)Avoid to put it on oscillatory and impassive place.4)Make sure to connect printer with ground safety4.3 Connect to power adapter1)Make sure the printer is power off.2)Connect power adapter’s DC output plug to the printer.3)Connect power adapter’s AC input plug to a power outlet.4)Please be careful to operate correctly when plug out the plug of power cord to avoid damage.4.4 Connect Communication cables1)Make sure the printer is power off.2)Connect communication cable to the printer’s port, and fix it as plug lag spike (or snap spring).3)Connect communication cable to the other side host.4.5 Connect to cash drawer1)Make sure the printer is power off.2)Connect cash drawer to cash drawer port behind the printer.Warning: The Voltage of cash drawer port is 24V. (It cannot connect to telephone cable.)4.6 Paper roll loading4.6.1 Printing paper type confirmationYou can load paper roll to print after connecting power adapter and communication cables. Please make sure the printing paper type before printing. The default paper type is continuous thermal receipt paper.4.6.2 Loading or change paper roll1)Power off the printer.2)Slide or press paper roll storehouse button, and then open storehouse cover.3)Draw out paper roll tap, and load paper roll as below.4)Draw out a printing paper, and leave some on the paper out month, then close the storehouse cover.Warning: Please make sure the paper roll in tense status, if not, it maybe cause paper jam or other problems.5)The status after paper loading4.7 DIP switch settingDIP switch Switch Function On Off Default 1 Cutter Forbidden Enable Off 2 Buzzer Enable Forbidden On 3 Printing density DarkLight Off 4 Multi-byte encoding Single-byte encodingmulti-byte encodingOff 5 Max. number of Printing characters in each line42 48 Off 6 Cash drawer EnableForbiddenOn 7 Baud rate options (bps)Ref. Chart 1Off 8OffChart 1:Baud rate optionsBaud rate Switch 7 Switch 8 Default9600 On Off 19200 19200 Off Off 38400 On On 115200Offon4.8 Printing self-test page1) Make sure the printer loaded paper roll correctly.2) Press down [FEED] button and hold on, then power on the printer, the printer will print a self-test page.4.9 Set Ethernet port IP Address.The printer ’s Ethernet IP address can be set directly via printer inserted web setting page. The operation steps are as below:1. Connect printer and PC in a same Ethernet LAN.2. Print a printer self-test page to get printer recent IP address (self-test page printing operation method refers to “4.8 printer self-test ” instruction):You can find the printer ’s IP address is same as 192.168.1.87 in self-test page “IP address: 192.168.1.87” 3. Set network card IP address in PC and printer IP address as different IP address in the same networksegment.(Such as 192.168.1.xxx, xxx is a number among 1 to 254);4. Please enter address “http://printer IP address ” in browse of PC after making sure that printer connects with Ethernet.(e.g.: If printer IP address is “192.168.1.87”, please enter “http://192.168.1.87”), then press Enter key,open Ethernet port setting page in browser as below:5. Click “Configure Interface” link in the left side, then enter the modified target IP and click “save” button tosave setting. Click “Reboot” button to reset printer if you want the setting to take effect.6. Enter the new IP address as the above step 4 procedure, and re-open printer Ethernet port setting web page, then click “Printer Status” link in the left side. And click “Printer Test Page” button to print self-test page, andcheck the IP Address contents in the self-test page is right or not.5 Interface pin definitionsThe printer has a cash drawer driver interface and many kinds of communication interfaces: parallel, serial (RS-232), USB and Ethernet ports. USB port and cash drawer interfaces are standard interfaces, and it has Ethernet, serial and parallel ports as optional.5.1 Parallel interface pin definition(DB25M)Number Signal Function Number Signal Function1 /STROBE Gate. Low level is10 /ACK Confirm. Low level is effectiveeffective2 DATA0Data bit is 011 BUSY Busy3 DATA1Data bit is 112 PE Paper out4 DATA2Data bit is 213 SEL Choose5 DATA3Data bit is 314 /AUTOFEED Change line automatically. Lowlevel is effective6 DATA4Data bit is 415 /ERROR Error. Low level is effective7 DATA5 Data bit is 516 /INIT Initialize. Low level is effective8 DATA6 Data bit is 617 /SELIN Choose input. Low level iseffective9 DATA7 Data bit is 718-25 GND Ground wire5.2 USB interface pin definition(standard B type female base)1)Pin definitionPin Number Signal name Typical wire color1 VBUS Red2 D- White3 D+ Green4 GND Black5.3 Power interface pin definition(MPC-3-001B)1)Pin definitionPin number Signal name1 +24V2 GND3 N.CSHELL F.G5.4 Cash drawer interface pin definition(RJ11-6P6C)1)Electrical specificationDriver voltage: DC24VDriver current: Max. 0.8A (within 510ms)Cash drawer status tests signal: “L” = 0~0.5 V ; “H” = 3~5 V2)Cash drawer interface socket uses RJ-11 6P type connector;3)Interface signal definitionPin number Signal function1 FG Printer cover2 DRAWER 1 Cash drawer 1 driver signal3 DRSW Cash drawer status detection signal4 VDR Cash drawer driver power5 DRAWER 2 Cash drawer 2 driver signal6 GND Common ground circuitNotes:1) Prohibit socket with power to pull out communication wire plug.2) Please avoid to parallel with strong power when wring communication cables av通讯线布线时应避免和强电并行;3) Communication cables use with shielded cables.5.5 Serial port pin definition(DB9F)Printer serial port is compatible with RS-232, the interface socket is DB9 female socket.User can check interface setting status via printing setting self-test page. Printer default serial interface is set as: baud rate 19200bps, 8 bit data bits, no parity,1 bit stop bit, and the handshakes method is DTR/DSR。
热敏打印机使用说明书(英文)

热敏打印机使用说明书Thermal Printer User Manual一、打印机自检(LF键为指示灯)Printer self test(LF key is indicator light)打印机在关机状态下,按住LF键不松手同时给打印机上电,松手,打印机会打印出自检条。
When the printer is power off,press LF key and meanwhile power on,release the key,the printer will print self test paper.二、打印机设置(LF键为指示灯)Printer setting(LF key is indicator light)打印机在关机状态下,按住LF键同时给打印机上电,停顿5秒后松手,打印机进入设置模式,并打印出设置报告,见下(按键次数对应选择设置项前面序号):When the printer is power off,press LF key and meanwhile power on,release after 5 seconds,the printer will enter intosetting mode,and it will print out setting report,see below(the number of pressing key will be equal to the below according item number):(1)退出设置模式exit setting mode(2)恢复默认配置recover default setting(3)设置打印机方向set printing direction(4)选择字符点阵choose character dots(5)选择打印机功耗choose printer power comsuption(6)设置打印浓度set printing density(7)设置串口波特率set serial baud rate(8)设置串口效验位set serial parity(9)选择HEX打印set HEX printing(以下彩色字体部分均为打印机打印出的提示,后面黑色字体部分是我们加的操作说明)(The below colorful characters are prompts for printer print out,and the black characters are operation instruction which we added)(1)退出设置模式(按1下LF键,走一小段空白行,退出设置模式)exit setting mode(Press LF key one time,and the paper feed one line,it will exitsetting mode)(2)恢复默认配置(连续按2下LF键,恢复默认设置)recover default setting(Press LF key for 2 times,and it will recover default setting)(1)返回上级设置(此时不想保存刚才设置,则按1下LF键回到设置主页)Return to last setting( If do not want to save the setting just now,then press LFkey for one time to return to setting homepage)(2)确认恢复默认设置(连续按2下LF键,打印机打印出“恢复默认设置,系统复位”的字样提示)Confirm recover default setting(Press LF key for 2 times,the printer will printout the prompt"recovery default setting,system reset")(3)设置打印机方向(连续按3下LF键,进入打印方向的设置,打印机打印出3个选项供设置)Set printing direction(Press LF key for 3 times,it will enter into setting printing direction,the printer will print out 3 items for choose)(1)返回上级设置(此时不想设置打印机方向,则按1下LF键回到设置主页)Return to last setting(If do not want to set printing direction now,then press LFkey for one time to return to setting homepage)(2)从左到右打印(连续按2下LF键,打印机打印出下面3行字)From left to right printing(Press LF key for 2 times,the printer will print out thebelow 3 lines characters:)从左到右打印From left to right printing(1)返回上级设置(此时不保存该打印方向,可按1下LF键,返回上级设置)Return to last setting(If do not want to save this printing direction,thenpress LF key for one time,then it will to return to last setting)(2)确认(若确认则连续按2下LF键回到设置主页,打印机方向设置成功) Confirm(If confirm,then press LF key for 2 times to return to settinghomepage,then setting printing direction successfully)(3)从右到左打印(连续按3下LF键,打印机打印出下面3行字)From right to left printing(Press LF key for 3 times,then the printer will printout the below 3 lines characters:)从右到左打印From right to left printing(1)返回上级设置(此时不保存该打印方向,可按1下LF键,返回上级设置)Return to last setting(If do not want to save this printing direction,thenpress LF key for one time,then it will to return to last setting)(2)确认(若确认则连续按2下LF键回到设置主页,打印机方向设置成功)Confirm(If confirm,then press LF key for 2 times to return to settinghomepage,then setting printing direction successfully)(4)选择字符点阵(连续按4下LF键,选择字符点阵,打印机会打印出3个选项供设置)Choose character dots(Press LF key for 4 times,choose character dots,the printer will print out 3 items for choose)(1)返回上级设置(此时不设置字符点阵,按1下LF键回到设置主页)Return to last setting(If do not want to set character dots now,then press LF keyfor one time to return to setting homepage)(2)选择8*16字符16*16汉字(连续按2下LF键,打印机打印出下面3行提示)Choose 8*16 character 16*16 chinese character(Press LF key for 2 times,theprinter will print out the below 3 lines prompts)选择8*16字符16*16汉字Choose 8*16 character 16*16 chinese character(1)返回上级设置(此时不保存该设置,可按1下LF键,返回上级设置)Return to last setting(If do not want to save this setting,then press LF key forone time,then it will to return to last setting)(2)确认(若确认则连续按2次LF键回到设置主页,字符点阵设置成功)Confirm(If confirm,then press LF key for 2 times to return to settinghomepage,then setting character dots successfully)(3)选择12*24字符24*24汉字(连续按3下LF键,打印机打印出下面3行提示)Choose 12*24 character 24*24 chinese character(Press LF key for 3 times,theprinter will print out the below 3 lines prompts)选择12*24字符24*24汉字Choose 12*24 character 24*24 chinese character(1)返回上级设置(此时不保存该设置,可按1下LF键,返回上级设置)Return to last setting(If do not want to save this setting,then press LF key forone time,then it will to return to last setting)(2)确认(若确认则连续按2次LF键回到设置主页,字符点阵设置成功)Confirm(If confirm,then press LF key for 2 times to return to settinghomepage,then setting character dots successfully)(5)选择打印机功耗(联系按5下LF键,选择打印机功耗,打印机会打印出6下面6个选项,请根据提示操作)Choose printer power comsuption(Press LF key for 5 times,choose printer power comsuption,the printer will print out the bleow 6 items,please operate according to the below prompts)(1)返回上级设置Return to last setting(2)I级功耗(最低)(连续按2下LF键,打印机打印出下面3行字样)I leverl power comption(the lowest) (Press LF key for 2 times,the printer will printout the below 3 lines prompts)I级功耗(最低)I leverl power comption(1)返回上级设置(此时不保存该设置,可按1下LF键,返回上级设置)Return to last setting(If do not want to save this setting,then press LF key forone time,then it will to return to last setting)(2)确认(若确认则连续按2次LF键回到设置主页,打印机功耗设置成功)Confirm(If confirm,then press LF key for 2 times to return to settinghomepage,then setting printer power comsuption successfully) (3)II级功耗(连续按3下LF键,打印机打印出下面3行字样)II leverl power comption(Press LF key for 3 times,the printer will print out thebelow 3 lines prompts)II级功耗II leverl power comption(1)返回上级设置(此时不保存该设置,可按1下LF键,返回上级设置)Return to last setting(If do not want to save this setting,then press LF key forone time,then it will to return to last setting)(2)确定(若确认则连续按2次LF键回到设置主页,打印机功耗设置成功)Confirm(If confirm,then press LF key for 2 times to return to settinghomepage,then setting printer power comsuption successfully) (4)III级功耗(连续按4下LF键,打印机打印出下面3行字样)III leverl power comption(Press LF key for 4 times,the printer will print out thebelow 3 lines prompts)III级功耗III leverl power comption(1)返回上级设置(此时不保存该设置,可按1下LF键,返回上级设置)Return to last setting(If do not want to save this setting,then press LF key forone time,then it will to return to last setting)(2)确认(若确认则连续按2次LF键回到设置主页,打印机功耗设置成功)Confirm(If confirm,then press LF key for 2 times to return to settinghomepage,then setting printer power comsuption successfully) (5)IV级功耗(连续按5下LF键,打印机打印出下面3行字样)IV leverl power comption(Press LF key for 5 times,the printer will print out thebelow 3 lines prompts)IV级功耗IV leverl power comption(3)返回上级设置(此时不保存该设置,可按1下LF键,返回上级设置)Return to last setting(If do not want to save this setting,then press LF key forone time,then it will to return to last setting)(4)确认(若确认则连续按2次LF键回到设置主页,打印机功耗设置成功)Confirm(If confirm,then press LF key for 2 times to return to settinghomepage,then setting printer power comsuption successfully) (6)V级功耗(最高)(连续按6下LF键,打印机打印出下面3行字样)V leverl power comption(the highest) (Press LF key for 6 times,the printer will printout the below 3 lines prompts)V级功耗(最高)V leverl power comption(the highest)(1)返回上级设置(此时不保存该设置,可按1下LF键,返回上级设置)Return to last setting(If do not want to save this setting,then press LF key forone time,then it will to return to last setting)(2)确认(若确认则连续按2次LF键回到设置主页,打印机功耗设置成功)Confirm(If confirm,then press LF key for 2 times to return to settinghomepage,then setting printer power comsuption successfully)(6)设置打印浓度(连续按6下LF键,开始设置打印浓度,打印机会打印出下面3个选项,请根据提示操作)Set printing density(Press LF key for 6 times,set printing density,the printer will print out the bleow 3 items,please operate according to the below prompts)(1)确认设置后返回(此时不设置浓度,按1下LF键回到设置主页)Confirm setting and return back(If do not want to set print density now,press LFkey for one time to return to setting homepage)(2)增量调整打印浓度(进入浓度设置后,连续按两2下LF键进行增量设置,打印机会打印出当前的浓度序号;若还需增加浓度,再连续按2下进行增量浓度设置,直到设置到理想浓度,按1下LF键确认设置后返回到设置主页)Increase the printing density( After entering the setting printing density mode,pressLF key for 2 times to increase the printing density,the printer will print out the number for current printer density:If still want toincrease the density,press the LF key for 2 times again to increasethe printer density,and again to the density you want. Press LF key for 1 time toconfirm the setting and return back to setting homepage)(3)减量调整打印浓度(进入浓度设置后,连续按两3下LF键进行减量设置,打印机会打印出当前的浓度序号;若还需增加浓度,再连续按3下进行减量浓度设置,直到设置到理想浓度,按1下LF键确认设置后返回到设置主页)Decrease the printing density( After entering the setting printing densitymode,press LF key for 3 times to decrease the printing density,the printer will print out the number for current printer density:If still want todecrease the density,press the LF key for 3 times again to decreasethe printer density,and again to the density you want. Press LF key for 1 time toconfirm the setting and return back to setting homepage)(7)设置串口波特率(连续按7下LF键,开始设置串口波特率,打印机会有如下8个选项,请按需要选择)Set serial baud rate(Press LF key for 7 times,set the serial baud rate,the printer will print out the below 8 items for choose)(1)返回上级设置(此时不设置串口波特率,按1下LF键回到设置主页)Return to last setting(If do not want to set serial baud rate,press LF key for onetime to return back to homepage)(2)1200bps(连续按2下LF键,打印机打印出下面字样)1200bps(Press LF key for 2 times,the printer will print out the below prompts选择1200bps Choose 1200bps(1)返回上级设置(此时不保存该设置,可按1下LF键,返回上级设置)Return to last setting(If do not want to save this setting,press LF key for onetime,then it will to return to last setting)(2)确认(若确认则连续按2次LF键回到设置主页,串口波特率设置成功)Confirm(If confirm,then press LF key for 2 times to return to settinghomepage,then setting serial baud rate successfully)(3)2400bps(连续按3下LF键,打印机打印出下面字样)2400bps(press LF key for 3 times,the printer will print out the below prompts)选择2400bps Choose 2400bps(1)返回上级设置(此时不保存该设置,可按1下LF键,返回上级设置)Return to last setting(If do not want to save this setting,press LF key for onetime,then it will return to last setting)(2)确认(若确认则连续按2次LF键回到设置主页,串口波特率设置成功)Confirm(If confirm,then press LF key for 2 times to return to settinghomepage,then setting serial baud rate successfully)(4)4800bps(连续按4下LF键,打印机打印出下面字样)4800bps(press LF key for 4 times,the printer will print out the below prompts)选择4800bps Choose 4800bps(1)返回上级设置(此时不保存该设置,可按1下LF键,返回上级设置)Return to last setting(If do not want to save this setting,press LF key for onetime,then it will return to last setting)(2)确认(若确认则连续按2次LF键回到设置主页,串口波特率设置成功)Confirm(If confirm,then press LF key for 2 times to return to settinghomepage,then setting serial baud rate successfully)(5)9600bps(连续按5下LF键,打印机打印出下面字样)9600bps(press LF key for 5 times,the printer will print out the below prompts)选择9600bps Choose 9600bps(1)返回上级设置(此时不保存该设置,可按1下LF键,返回上级设置)Return to last setting(If do not want to save this setting,press LF key for onetime,then it will return to last setting)(2)确认(若确认则连续按2次LF键回到设置主页,串口波特率设置成功)Confirm(If confirm,then press LF key for 2 times to return to settinghomepage,then setting serial baud rate successfully)(6)19200bps(连续按6下LF键,打印机打印出下面字样)19200bps(press LF key for 6 times,the printer will print out the below prompts)选择19200bps Choose 19200bps(1)返回上级设置(此时不保存该设置,可按1下LF键,返回上级设置)Return to last setting(If do not want to save this setting,press LF key for onetime,then it will return to last setting)(2)确认(若确认则连续按2次LF键回到设置主页,串口波特率设置成功)Confirm(If confirm,then press LF key for 2 times to return to settinghomepage,then setting serial baud rate successfully)(7)38400bps(连续按7下LF键,打印机打印出下面字样)38400bps(press LF key for 7 times,the printer will print out the below prompts)选择38400bps Choose 38400bps(1)返回上级设置(此时不保存该设置,可按1下LF键,返回上级设置)Return to last setting(If do not want to save this setting,press LF key for onetime,then it will return to last setting)(2)确认(若确认则连续按2次LF键回到设置主页,串口波特率设置成功)Confirm(If confirm,then press LF key for 2 times to return to settinghomepage,then setting serial baud rate successfully)(8)115200bps(连续按8下LF键,打印机打印出下面字样)115200bps(press LF key for 8 times,the printer will print out the below prompts)选择115200bps Choose 115200bps(1)返回上级设置(此时不保存该设置,可按1下LF键,返回上级设置)Return to last setting(If do not want to save this setting,press LF key for onetime,then it will return to last setting)(2)确认(若确认则连续按2次LF键回到设置主页,串口波特率设置成功)Confirm(If confirm,then press LF key for 2 times to return to settinghomepage,then setting serial baud rate successfully)(8)设置串口效验位(联系按8下LF键,打印出3个选项供设置)Set serial Parity(press LF key for 8 times,the printer will print out the below 3 items for choose)(1)返回上级设置(此时不设置串口效验位,按1下LF键回到设置主页)Return to last setting(If do not want to set serial parity,press LF key for onetime,then it will return to setting homepage)(2)无效验(连续按2下LF键,打印机打印出下面字样)No Parity(press LF key for 2 times,the printer will print out the below prompts)选择无效验Choose No Parity(1)返回上级设置(此时不保存该设置,可按1下LF键,返回上级设置)Return to last setting(If do not want to save this setting,press LF key for onetime,then it will return to last setting)(2)确认(若确认则连续按2次LF键回到设置主页,效验位设置成功)Confirm(If confirm,then press LF key for 2 times to return to settinghomepage,then setting serial parity successfully)(3)有效验(连续按3下LF键,打印机打印出下面字样)with Parity(press LF key for 3 times,the printer will print out the below prompts)选择有效验Choose with Parity(1)返回上级设置(此时不保存该设置,可按1下LF键,返回上级设置)Return to last setting(If do not want to save this setting,press LF key for onetime,then it will return to last setting)(2)确认(若确认则连续按2次LF键回到设置主页,效验位设置成功)Confirm(If confirm,then press LF key for 2 times to return to settinghomepage,then setting serial parity successfully)(9)选择HEX打印(联系按9下LF键,打印出3个选项供设置)Choose HEX printing(Press LF key for 9 times,then the printer will print out the below 3 items for choose)(1)返回上级设置(此时不选择HEX打印,按1下LF键回到设置主页)Return to last setting(If do not want to choose HEX printing,press LF key for onetime,then it will return to setting homepage)(2)正常打印(连续按2下LF键,打印机打印出下面字样)Normal printing(press LF key for 2 times,the printer will print out the belowprompts)选择正常打印Choose normal printing(1)返回上级设置(此时不保存该设置,可按1下LF键,返回上级设置)Return to last setting(If do not want to save this setting,press LF key for onetime,then it will return to last setting)(2)确认(若确认则连续按2次LF键回到设置主页,正常打印设置成功)Confirm(If confirm,then press LF key for 2 times to return to settinghomepage,then setting normal printing successfully)(3)选择HEX打印(连续按3下LF键,打印机打印出下面字样)Choose HEX printing( press LF key for 3 times,the printer will print out the below prompts)选择HEX打印Choose HEX printing(1)返回上级设置(此时不保存该设置,可按1下LF键,返回上级设置)Return to last setting(If do not want to save this setting,press LF key forone time,then it will return to last setting)(2)确认(若确认则连续按2次LF键回到设置主页,HEX打印设置成功)Confirm(If confirm,then press LF key for 2 times to return to settinghomepage,then setting HEX printing successfully)。
YAEN 桌面式热敏票据打印机 P0S58C1 用户手册说明书
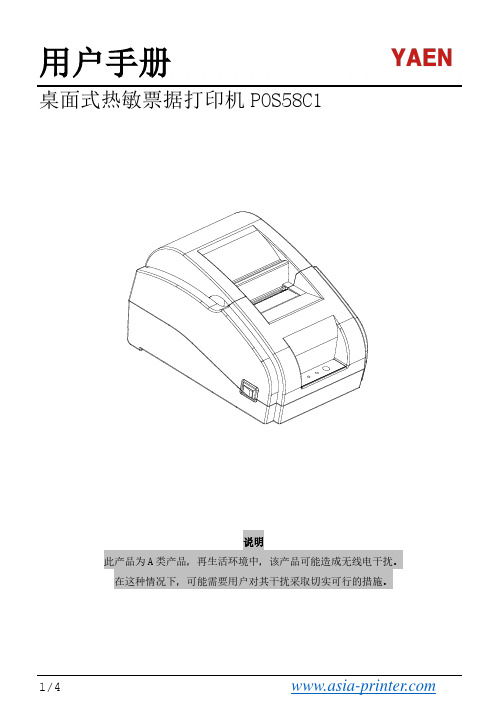
用户手册桌面式热敏票据打印机POS58C1说明此产品为A类产品,再生活环境中,该产品可能造成无线电干扰。
在这种情况下,可能需要用户对其干扰采取切实可行的措施。
1/4 2/4 3/4 按键名称、指示灯及功能(1)【进纸】键(FEED)按此键可以送纸,若持续按着此键则连续送纸。
(2)【状态】灯(Status)红色,当打印机发生缺纸,状态灯会常亮。
如果打印机有其他的异常(打印头过热等)时状态灯闪烁。
【电源】灯(Power)蓝色,POWER灯闪烁表示打印机电源接通,蓝牙还没有连接上的情况。
POWER灯常亮指示蓝牙已连上,当打印机关闭电源时候,该灯才会熄灭。
打印机的驱动58热敏票据打印机的驱动方式有三种,一是WINDOWS下直接安装驱动程序,二是使用端口直接驱动,三是使用APP蓝牙连接驱动.(1)WINDOWS下安装驱动程序在WINDOWS中添加打印机,并指定驱动盘中的驱动文件给WINDOWS,只需要在程序中调用驱动程序就可以开始打印了。
在这种方式下,其实是由WINDOWS的打印机程序把字符转换成图形点阵的方式来打印。
(2)端口直接驱动在这种方式下,并不需要使用驱动程序,只需要把字符直接输出到端口,并由打印机内部的硬字库来实现字符的转换打印,使用端口直接驱动方式,使打印控制更方便。
如果使用端口直接驱动方式,就需要使用到打印命令集来控制打印机的打印,58热敏票据打印机内部已经集成了 ESC/POS命令集。
(3)APP蓝牙连接驱动直接用手机端APP蓝牙连接打印机,APP上编辑内容发送打印打印机清洁当打印机出现以下情况之一时,应清洁打印头;⑴打印不清晰;(2)打印的页面纵向某列不清晰;⑶进纸噪音大。
打印头清洁步骤如下:(1)关闭打印机电源,打开上盖,如果有纸,将纸去除;⑵如果刚打印完毕,应等待打印头完全冷却;⑶用柔软的棉布蘸无水乙醇(应拧干)擦除打印头热敏片表面的灰尘、污点;⑷等待无水乙醇完全挥发后,合上上盖,重新试机打印。
RD-V2 便携式热敏打印机 开发手册说明书
RD-V2便携式热敏打印机开发手册版权所有:北京荣达创新科技有限公司目录一、概述 (3)二、打印机状态与操作说明 (4)2.1 外观与尺寸 (4)2.2 打印机状态说明 (4)2.3 开关机方法 (4)2.4 安装纸卷 (4)2.5 自检测方法 (5)2.6 打印机充电 (5)三、打印机接口 (5)3.1 串行接口 (5)3.2 蓝牙接口 (6)3.3 USB接口 (6)4.1 指令表 (7)4.2 指令详解 (9)4.2.1 控制指令 (9)4.2.2 缩放指令 (19)4.2.3 图形指令 (21)4.2.5 条码指令 (28)4.2.6 曲线指令 (34)4.2.7状态传送指令 (35)4.2.8 汉字字符设置指令 (36)4.2.9 垂直制表并打印指令 (38)4.2.10 位图下载及打印命令 (39)A 打印字符集 (42)B 条码 (43)B.1 条码编码规则 (43)B.2 条码长度字符集表 (44)C字符集1、2 (44)一、概述RD-V2系列便携式热敏打印机是一款专为移动票据打印而设计的热敏便携式微型打印机。
本机内置充电锂电池,可装40mm直径纸卷,具有体积小巧、待机时间长、打印速度快、字迹清晰等特点。
采用蛤壳式装纸方式,支持自动休眠、自动唤醒同时具有声音提示功能。
其技术参数如下:打印性能打印方式行式热敏打印打印速度 60毫米/秒(电量充足时)分辨率 203dpi(8点/毫米),384点/行有效打印宽度 48毫米进纸步距 0.125毫米西文字符 ANK字符、ASCII字符12x24,8X16,8X12、国际字符(12x24)中文字符标配24×24点阵GB18030字库条码打印一维条码UPC-A、UPC-E、EAN-13、EAN-8、CODE39、ITF25、CODABAR、CODE93、CODE128、二维条码QRCODE、PDF417等多种条码打印。
图形打印支持曲线打印支持自动表格支持位图下载支持检测功能异常检测缺纸检测、电量不足检测、过热检测,检测异常后蜂鸣器报警黑标定位可选自动休眠功能有接口参数有线接口串行接口:5PIN MiNi USB口(标准RS232或TTL),485接口: 5PIN MiNi USB口无线接口蓝牙接口控制系统缓冲器2K/64K指令系统 ESC/POS打印命令,与IBM/EPSON ESC/P兼容打印驱动 WIN2000/NT/XP/WIN7驱动电源参数供电方式1550mAh、7.4V可充电锂电池,充满电12.5%打印密度下连续打印100m~200m充电方式带机充电,充电时间:约3-5小时,待机时间≧24小时。
打印机操作说明
孔的数量
2/4孔(可选US2/3孔)
纸张克重
55-220gsm
小册子装订容量来自小册子:15页,折叠:5页
纸张大小
最大:SRA3, 12x18”, 最小:A4, 信纸(8.5x11”)
纸张克重
骑马钉:64-90gsm,折叠:64-105gsm
*4 无小册子装订机-C1堆叠容量高达3,000页
DocuCentre C3300 C2200 C2201
LED打印头技术的突破获得高清晰度,高质量的成像 新开发的LED打印头技术可以取得1200x2400dpi高精度输 出。LED打印头很紧凑,它包含的运动机件较少,噪音低, 功耗更低。
最大:A3, 11x17”, 最小:B5, 55-220gsm
堆叠容量
A4最多2,000页 [带装订]最多100套或1,000页
小册子/折叠:最多50套或600页
装订
容量
50页(90gsm)
纸张大小
最大:A3, 11x17”, 最小:B5
装订位置 打孔*2
单钉(前钉/角钉,后钉/直钉),双钉
纸张大小
本小册子中提及的其他名称都是相应公司的商标。尽管所载信息在打印时正确无误,富士施乐亚太区保留随时更改所述机器规格参数而不另外通知的权利。视产品购买 所在国家或地区,规格参数、选件名称和供货情况可能会不尽相同。
FXCL 0809
创建一个整合办公系统来帮助您 发展业务,改善环境
DocuCentre-III C3300/C2200/C2201 多功能机 运用强大的功能,提升您业务的同时更加注重环保。因为它的新式LED打印头 技术和两个业界第一的环保技术:无铅轴和生物塑胶,在2007年日本生态产 品奖中获得了久负盛名的经济、贸易和工业奖。
H-Class打印机通用输入输出GPIO选项92-2427-01版本C1介绍说明书
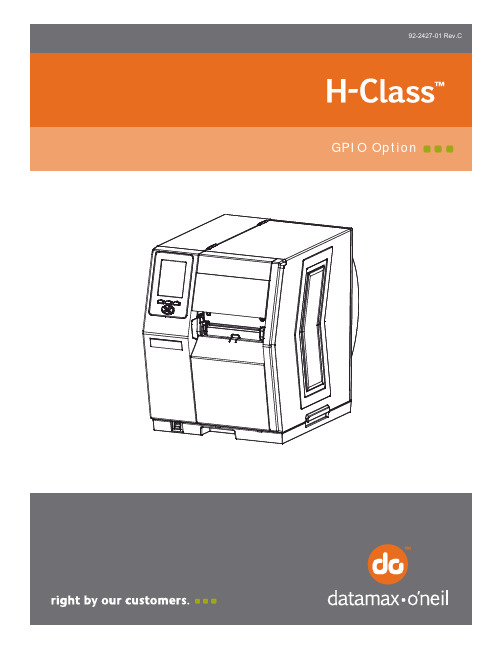
OverviewThis document describes the installation and use of the General Purpose Input Output (GPIO) option for the H-Class printer. After verifying the kit contents and tools needed, follow the steps to install and begin using the option.ContentsThis kit contains the following items:①GPIO Circuit Card Assembly② Cover Plate③ScrewsTools RequiredTo install this option, you will need a Philips screwdriver.Additional RequirementsDepending on your application, you may need the following hardware to interface the card: •GPI/O A –DB15 Male connector (e.g., StarTech C15PCM) and shielded cabling.•GPI/O B –High Density DB15 Male VGA connector (e.g., StarTech C15HPSM) and shielded cabling.•COM C –DB9 Male connector (e.g., StarTech C9PSM) and shielded cabling, or a prefabricated cable (see part numbers and pin out requirements below).•COM D –RJ45 Plug (e.g., Belkin R6G088) and shielded cabling, or a prefabricated cable (see part number and pin out requirements below).COM C RS-232 CablesPart # 32-2300-01Part # 32-2301-01COM D RS-232 CableHost DB-9SPrinter RJ45P1RXD TXD +5 VDC GROUNDTXD RXD +5 VDCGROUNDDTR DSRCTSCTS DTRRTS 278453123456879NC 6NCNCPart # 32-2603-00Step 1: Configuring the HardwareConfigure the card to meet your interfacing requirements by arranging hardware jumpers, as described in the following procedure:A) Remove the card from the packaging and then place the card onto a static-free workarea.B)Set the jumpers on the card (detailed below)to meet the requirements of yourapplication:►GPI/O A (J1)Four dedicated inputs control printer functions. Designed to interface to open-collector outputs, these inputs require no external pull-ups, while blocking diodes allow the use of totem pole outputs from +4.5 VDC to + 26 VDC. Optical isolators provide galvanic isolation. Two print control interface circuit examples are givenbelow.Seven dedicated outputs are available for control, warning, and error functions. These open-collector outputs have slew-limited signal-edge rise and fall times to prevent cross talk in the cabling. Optional 10K ohm pull-up resistors, tied to a common point for use at either +5 or +24 VDC, are available via Jumper JMP 1.Note: If external pull-ups are used (that is, without Jumper JMP1 installed), ensure that the applied external voltage does not exceed +30VDC.The table below details the GPI/O A pin assignments, settings and functions.►GPI/O B (J2)Six unassigned inputs are designed to interface to open-collector outputs. These inputs require no external pull-ups, while blocking diodes allow the use of totem pole outputs from +4.5 VDC to + 26 VDC. Optical isolators provide galvanic isolation. Two print control interface circuit examples are given below.Six unassigned outputs have slew-limited signal-edge rise and fall times to prevent cross talk in the cabling. Optional 10K ohm pull-up resistors, one for each of the output lines, can be used at either +5 or +24 VDC via Jumpers JMP 2 – 7.Note: If external pull-ups are employed (that is, when Jumpers JMP 2 - 7 are not installed), ensure that the applied external voltage does not exceed+30VDC.The table below details the GPI/O B pin assignments, settings and functions.►COM C (J4)Recognized by the printer as Serial Port C, COM C functions as an auxiliary RS-232interface or dedicated device port for the RFID and Linear Scanner options. Pinassignments for the port are as follows:Pin Number COM C (J4)1 +5V (@ .5 amps)2 RX3 TX4 DTR5 Ground6 Ground7 RTS8 CTS9 N/CAt default settings, the COM C port automatically selects its function. To force aselection, however, change the jumper settings as denoted in the table below:COM C Jumper Setting FunctionsJumper and SettingSelected FunctionJMP 12 JMP 13 JMP 14 JMP 15RS-232 Communications (default) On On On OnOnOnOnRFID OffLinear Scanner On Off On OnNote: Jumper settings override menu settings: If set for RS-232 (default) withthe RFID and Linear Scanner menu-enabled, the printer will assign RFID toSerial Port B (back plane port J13) and the Linear Scanner to the COM Cport.►COM D (J3)Recognized by the printer as Serial Port D, COM D is an auxiliary RS-232 interface.Pin assignments for the port are as follows:Pin Number COM D (J3)1 +5V (@ .5 amps)2 RTS3 Ground4 TX5 RX6 Ground7 CTS8 DTRStep 2: Installing the OptionInstall the GPIO Card as described below:AC ReceptaclePower SwitchBack PanelScrewsCard CageA) Turn OFF the Power Switch andunplug the power cord from the AC Receptacle .B) Remove the two Screws that securethe Back Panel to the Card Cage , and then remove the Back Panel .C) Slide the GPIO Card (Item 1),Notch down, into the leftmost Card Cage Slot . Firmly push the GPIO Card to seat it and then secure the card using the two Screws (Item 3).GPIO CardScrewsCard CageSlotNotchD) Place the Cover Plate (Item 2) ontothe Card Cage, as shown, theninstall and tighten the two Screws(Item 3) to secure the plate.Cover PlateScrews Card CageStep 3: InterfacingInterface the card according to your application requirements (see the drawing below for connector pin-outs, refer to Step 1 for signal details) as follows:J2J1A) For GPIO functions connect a GPI/O interface cable to the GPI/O A (J1) and / or GPI/OB (J2) ports.B)For RS232 communications connect a serial interface cable to COM C (J4) and / or COMD (J3); for dedicated devices, connect the cabling from that device to COM C (J4).Note: If using both the RFID and Linear Scanner, see Configuring Hardware Settings, above.C)Connect the AC power cord to the printer and then turn the power switch ON.Step 4: Configuring the Software SettingsConfigure the printer’s m enu settings for the option’s operation.A) Using the Control Panel, enter the ADVANCED MENU (see the Operator’s Manual formenu navigation details):• If using the GPIO A (J1) port, configure the settings to meet the requirements of your system using the PRINTER OPTIONS → GPIO PORT → APPLICATORmenu selection;• If using the GPIO B (J2) port, refer to your MCL documentation;• If using the COM C (J4) port for serial communications, configure the it to meet the requirements of your host system’s serial port settings using theCOMMUNICATIONS → SERIAL PORT C menu selection; or,If using the COM C (J4) port for a dedicated device, enable that device using thePRINTER OPTIONS menu selection; and,• If using the COM D (J3) port for serial communications, configure the port to meet the requirements of your host system’s serial port settings using theCOMMUNICATIONS → SERIAL PORT D menu selection.B)After entering the desired settings exit the menu system and save your changes. Theprinter is now ready to operate using the GPIO option.Verifying Setup and OperationVerification of the settings and active monitoring is provided:•Indicators – View incoming (IN) and outgoing (OUT)signal activity via the card bracket. Sampled everymillisecond, these LED indicators change color as incomingor outgoing GPIO signals change state.Signal InSignal Out• Input Monitor – Display incoming GPIO binary signal states using the ADVANCEDMENU → DIAGNOSTICS → OPTIONS TESTING → TEST GPIO → MONITOR GPIO INPUT selection.☑ Note: Unused, non-connected inputs will have an indeterminate state, and mayassume a value of 1 or 0.• Output Monitor – Display outgoing GPIO binary signal states using the ADVANCEDMENU → DIAGNOSTICS → OPTIONS TESTING → TEST GPIO → MONITOR GPIO OUTPUT selection.☑ Note: Unused, non-connected outputs will have an indeterminate state, and mayassume a value of 1 or 0.• GPIO Report – Print the configuration and current signal state information using theADVANCED MENU / DIAGNOSTICS / OPTIONS TESTING / TEST GPIO / PRINT SIGNAL INFO selection:GPIO SIGNAL INFOWED 11:04AM 4JUL2005CARD ID#3OUTPUT SIGNALSEND OF PRINT PIN# 11 GPIO A LOW PULSECURRENT LEVEL 1RIBBON LOW PIN# 9 GPIO A ACTIVE LOWCURRENT LEVEL 0SERVICE REQUIRED PIN# 10 GPIO A ACTIVE LOWCURRENT LEVEL 1MEDIA OUT PIN# 12 GPIO A ACTIVE LOWCURRENT LEVEL 1RIBBON OUT PIN# 13 GPIO A ACTIVE LOWCURRENT LEVEL 1DATA READY PIN# 14 GPIO A ACTIVE LOWCURRENT LEVEL 1OPTION FAULT PIN# 15 GPIO A ACTIVE LOWCURRENT LEVEL 1INPUT SIGNALSSTART OF PRINT PIN# 3 GPIO A ACTIVE HIGHCURRENT LEVEL 1FEEDPIN# 4 GPIO A ACTIVE LOWCURRENT LEVEL 1TOGGLE PAUSE PIN# 5 GPIO A ACTIVE LOWCURRENT LEVEL 1REPRINTPIN# 6 GPIO A ACTIVE LOWCURRENT LEVEL 1o1PIN# 15 GPIO B CURRENT LEVEL 1o2PIN# 10 GPIO B CURRENT LEVEL 0o3PIN# 5 GPIO BCURRENT LEVEL 1o4PIN# 14 GPIO B CURRENT LEVEL 1o5PIN# 9 GPIO BCURRENT LEVEL 1o6PIN# 4 GPIO BCURRENT LEVEL 1i1PIN# 13 GPIO B CURRENT LEVEL 1i2PIN# 8 GPIO BCURRENT LEVEL 0i3PIN# 3 GPIO BCURRENT LEVEL 1i4PIN# 12 GPIO B CURRENT LEVEL 1i5PIN# 7 GPIO BCURRENT LEVEL 1i6PIN# 2 GPIO BCURRENT LEVEL 1。
松下 JT-H300PR-C1打印机 说明书
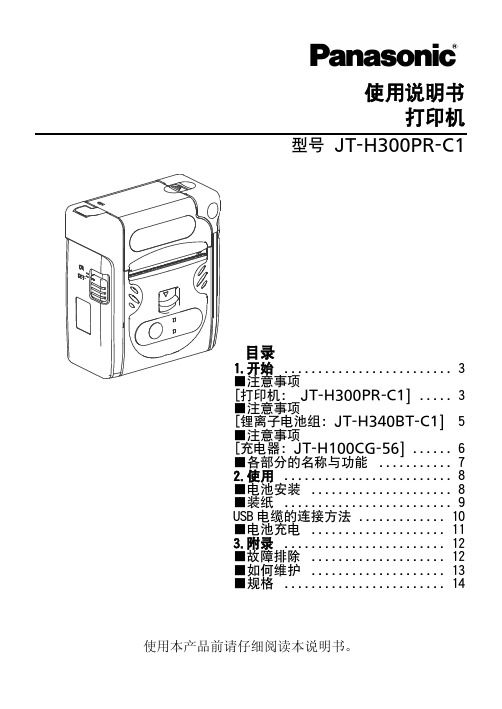
■各部分的名称与功能
电源 开关
红外线传输器
出纸
纸盖开关
状态指示灯
纸盖
进纸
状态 接收
接收指示灯 进纸 (按钮进)
电池盖把手
信号部分
指示灯
关
绿色点亮
橙色点亮 状态指示灯 红色点亮
红色闪烁 (快速闪烁)
接收指示灯 绿色闪烁
USB 电缆插口
状态 正常状态 1.电源开(点亮 5 秒钟) 2.电源关(点亮 0.5 秒钟) 检测到电池容量低,可打印。 检测到电池容量低,不可打印。 正在充电(AC 适配器连接时)
充电器指示灯(槽 2):绿色 电源指示灯:红色 充电器指示灯(槽 1):绿色
11
3.附录 ■故障排除
症状 打印机无电源
不打印
可能的原因
1. 电池组完全放入了吗? 2. 电源接通了吗? 1. 电源是否接通? 2. 纸设置是否正确? 3. 指示灯是红色闪烁吗?
(慢速闪烁) 4. 指示灯是红色闪烁吗?
(快速闪烁) 5. 使用蓝芽了吗? 6. 使用红外线传输了吗?
纸
纸宽
58 mm +0 – 1 mm
通信*1
纸卷方向
无线通信 Bluetooth
外(外表面,热敏) 蓝牙(Bluetooth),V2.1+EDR (Class 2) 2.4 GHz*2
IrDA
IrDA V1.2 (Raw Ir,独自次序)
USB
USB V2.0 Full Speed,最大 12 Mbps
7. 不要使用其它任何电池 本打印机专门为 JT-H340BT-C1 锂离子电池组设计的不要对打印机使用 其它任何电池。 使用非专用的电池可能会导致冒烟或着火。
Metapace T-1 热敏打印机说明书
Windows Driver Manual Metapace T-1 Thermal PrinterRev. 1.00■ Table of Contents1. Manual Information (3)2. Operating System (OS) Environment (3)3. Windows Driver Preparation (3)4. Windows Driver Installation (4)4-1 Installing on Windows 2000 (4)4-1-1 Via Serial Port or Parallel Port (4)4-1-2 Via USB Port (8)4-2 Installing on Windows XP/2003 Server (12)4-2-1 Via Serial Port or Parallel Port (12)4-2-2 Via USB Port (16)4-3 Installing on Windows VISTA (23)4-3-1 Via Serial Port or Parallel Port (23)4-3-2 Via USB Port (27)5. Detailed Windows Driver Settings (31)5-1 Paper Supply Method (31)5-2 Paper Size (34)5-3 NV Image (35)5-4 NV Image Download (37)5-5 Open Drawer & Buzzer (42)6. Windows Driver Specifications (44)6-1 Fonts (44)6-2 Special Functions (45)6-3 Barcodes (47)7. Use of Windows Driver (48)7-1 Use of Visual Basic (48)7-1-1 Windows Driver Selection (48)7-1-2 Test Printing (49)7-1-3 Barcode Printing (49)7-2 Use of WordPad (50)7-2-1 WordPad Environment Settings (50)7-2-2 Text Printing (50)7-2-3 Barcode Printing (51)1. Manual InformationThis Windows Driver Installation Manual provides information on installation, detailed specifications, and usage of the printer’s Windows Driver according to PC operating system (OS).2. Operating System (OS) EnvironmentThe following operating systems are supported for usage.Microsoft Windows 2000Microsoft Windows XP (32bit)Microsoft Windows 2003 Server (32bit)Microsoft Windows VISTA (32bit)3. Windows Driver PreparationIf using the enclosed CD, click the “Windows Driver” button to find and run the Windows Driver installation file (Metapace-T1_V1.0.0E.exe).4. Windows Driver Installation4-1 Installing on Windows 20004-1-1 Via Serial Port or Parallel Port1) Double-click the Windows Driver installation file (Metapace-T1_V1.0.0E.exe).2) Click the “Next” button.3) Select the COM or LPT (Which one you want to use) port to be used and clickthe “Next” button.4) When the following message box appears, click the “Yes” button.5) Clicking the ”Yes” button will reboot the PC.6) Open the printer properties window in the Windows OS.7) Click the “Port Settings” button in the ”Ports” tab.8) Match the communication settings to those of the printer.(The communication settings of the printer can be performed by conducting a self-test.)9) Click the “Print Test Page” button and check printing status.10) Proper installation of the driver is indicated if the test page is printed normally.4-1-2 Via USB Port1) Double-click the Windows Driver installation file (Metapace-T1_V1.0.0E.exe).2) Click the “Next” button.3) Select USB and click the ”Next” button.4) When the following message box appears, click the “Yes” button.5) Click the ”OK” button.6) Turn on the printer.7) The Windows Driver is automatically installed.8) The USB Port setting can be confirmed in the Windows Driver properties.9) Click the “Print Test Page” button and check printing status.10) Proper installation of the driver is indicated if the test page is printed normally.4-2 Installing on Windows XP/2003 Server4-2-1 Via Serial Port or Parallel Port1) Double-click the Windows Driver installation file (Metapace-T1_V1.0.0E.exe).2) Click the “Next” button.3) Select the COM or LPT (Which one you want to use) port to be used and click the “Next” button.4) When the following message box appears, click the “Continue Anyway” button.5) Clicking the ”Yes” button will reboot the PC.6) Open the printer properties window in the Windows OS.7) Click the “Port Settings” button in the ”Ports” tab.8) Match the communication settings to those of the printer.(The communication settings of the printer can be performed by conducting a self-test.)9) Click the “Print Test Page” button and check printing status.10) Proper installation of the driver is indicated if the test page is printed normally.4-2-2 Via USB Port1) Double-click the Windows Driver installation file (Metapace-T1_V1.0.0E.exe).2) Click the “Next” button.3) Select USB and click the ”Next” button.4) Click the ”OK” button.5) Turn on the printer.6) When the New Hardware Wizard appears for the installation of the Windows Driver, select the option as shown below and click the “Next” button.7) Click the “Next” button.8) Click the “Next” button.9) Click the “Continue Anyway” button.10) Click the “Finish” button.11) The USB Port setting can be confirmed in the Windows Driver properties.12) Click the “Print Test Page” button and check printing status.13) Proper installation of the driver is indicated if the test page is printed normally.4-3 Installing on Windows VISTA4-3-1 Via Serial Port or Parallel Port1) Double-click the Windows Driver installation file (Metapace-T1_V1.0.0E.exe).2) Click the “Next” button.3) Select the COM or LPT (Which one you want to use) port to be used and clickthe “Next” button.4) When the following message box appears, click the “Install this driver software anyway”button.5) Clicking the ”Yes” button will reboot the PC.6) Open the printer properties window in the Windows OS.7) Click the “Port Settings” button in the ”Ports” tab.8) Match the communication settings to those of the printer.(The communication settings of the printer can be performed by conducting a self-test.)9) Click the “Print Test Page” button and check printing status.10) Proper installation of the driver is indicated if the test page is printed normally.4-3-2 Via USB Port1) Double-click the Windows Driver installation file (Metapace-T1_V1.0.0E.exe).2) Click the “Next” button.3) Select USB and click the ”Next” button.4) Click the ”OK” button.5) Turn on the printer.6) The USB Port setting can be confirmed in the Windows Driver properties.7) Click the “Print Test Page” button and check printing status.8) Proper installation of the driver is indicated if the test page is printed normally.5. Detailed Windows Driver SettingsThe following functions can be set in detail after the Windows Driver installation is complete.5-1 Paper Supply MethodThe printer structure is such that the print head, which carries out printing, and the cutter, which cuts the printing paper, are separated. After printing, the location of the end section can be adjusted as follows.- Automatically Select: Select the “Receipt[Partial cut]” automatically.- Receipt[Partial cut]: After printed text is transferred up to the cutter (auto cutter),a paper is cut by auto cutter.- Receipt[No cut]: Printed text is transferred up to the cutter (manual cutter).- Receipt[Partial cut without paper feeding]: A paper is cut by auto cutter withoutpaper feeding.- Receipt [No feed]: Printed text is transferred up to the next line only.(minimum transfer: 0x0A).- Form[No Cut]: For long print jobs, printed text is transferred according to the Receipt option per selected paper size.- Form[Partial Cut]: For long print jobs, printed text is transferred and cut according tothe Receipt option per selected paper size.Detailed setting can be done as follows.1) Open the printer properties window in the Windows OS.2) Click the “Printing Preferences” button in the ”General” tab.The button name varies by Windows OS. Refer to the following.- Windows 2000/XP/2003 Server: “Printing Preferences”- Windows VISTA: “Printing Preferences”3) Select the desired setting in the ”Paper/Quality” tab. (Resolution is fixed at 180 × 180.)5-2 Paper SizeThe paper sizes available in the Windows Driver are as follows.- 80 × 297 mm [350]- 80 × 3276 mm [350]- 80 × 40 mm [350]- 80 × 80 mm [350]- 80 × 120 mm [350]- 80 × 160 mm [350]- 80 × 200 mm [350]Detailed setting can be done as follows.1) Open the printer properties window in the Windows OS.2) Click the “Printing Preferences” button in the ”General” tab.The button name varies by Windows OS. Refer to the following.- Windows 2000/XP/2003 Server: “Printing Preferences”- Windows VISTA: “Printing Preferences”3) Select the ”Paper/Quality” tab, and click the ”Advanced” button.Select the desired setting.5-3 NV ImageThe Windows Driver serves to receive the content for print from an application and send it to the printer. The NV Image function allows for the addition of NV image and desired commands at the beginning or end of the print content sent to the printer.To use the NV Image in Windows Vista, the following OS options must be set.“Control Panel → User Accounts → Uncheck the “Use User Account Control (UAC) to help protect your computer” checkbox under “Turn User Account Control On or Off”.The command functions available are as follows.- StartDoc - NV Image Printing: addition of NV Image at the beginning of the print job - Text & Command: addition of command at the beginning of the print job- StartPage - NV Image Printing: addition of NV Image at the beginning of the print page - Text & Command: addition of command at the beginning of the print page- EndPage - NV Image Printing: addition of NV Image at the beginning of the end page - Text & Command: addition of command at the beginning of the end page- EndDoc - NV Image Printing: addition of NV Image at the beginning of the end job - Text & Command: addition of command at the beginning of the end job- NV Tool Button - Execution of NV Image Tool for download images to the printer. Detailed setting can be done as follows.1) Open the printer properties window in the Windows OS.2) Click the ” NV Image” tab.3) If the user wishes to add NV Image prior to printing, Select NV Image in the ”NV ImagePrinting” in StartDoc and click the “Apply” button.4) If the user wishes to open Cash Drawer 1 prior to printing, enter “\x1B\x70\x00\x19\xff”in the ”StartDoc” space and click the “Apply” button.5) If the user wishes to open Cash Drawer 1 at the end of printing, enter“\x1B\x70\x00\x19\xff” in the ”EndDoc” space and click the “Apply” button.6) If the user wishes to download NV image to printer, click “NV Tool” button and downloadthe image using NV tool (Detailed information is informed in NV Tool manual)For more information on the hexadecimals that can be entered in “Text & Command” box, refer to the Control Commands Manual.5-4 NV Image Download1) Click “NV Tool” Button in NV Image Tab.2) Upon initiation of the program, the following main window will be appeared.3) Click “Port Setting” button to set communication configuration.4) Set the port and the communication configuration that corresponds to the printer.5) After selecting the configuration press “OK” button to complete the communication configuration setting, and press “Cancel” button to cancel the configuration selected. 6) The images can be opened / added, deleted in the Image list box using three buttons in Bitmap selection. Only bmp type of image is available to download.7) When the “Download..” button is clicked, pop-up window and the steps are different based on printer model.8) Download the mono image in thermal printer. After all images stored on the corresponding printer are deleted, the image is downloaded. The image is assigned a number according to the image list displayed on the screen.9) The “Print” button in the main screen can be used on each printer model to print andtest a stored image.10) Print the mono image in thermal printer. Configuration of expansion options and theselection of the number of the image to be printed can be done when printing.5-5 Open Drawer & BuzzerThe Windows Driver supports “Open Drawer” and “Buzzer” functions.The Open Drawer function allows for open drawer commands at the beginning or end of the print content sent to the printer.The Buzzer functions allows for internal beep commands at the beginning or end of the print content sent to the printer.To use the functions in Windows Vista, the following OS options must be set.“Control Panel → User Accounts → Uncheck the “Use User Account Control (UAC) to help protect your computer” checkbox under “Turn User Account Control On or Off”.The command functions available are as follows.- StartJob - Open Cash Drawer1 / External Beep 1: Addition of Open Drawer1 or External Buzzer1 at the beginning of the print job- Open Cash Drawer2 / External Beep 2: Addition of Open Drawer2 or External Buzzer2 at the beginning of the print job- Internal Beep: addition of Internal Beep at the beginning of the print job- EndJob - Open Cash Drawer1 / External Beep 1: Addition of Open Drawer1 or External Buzzer1 at the End of the print job- Open Cash Drawer2 / External Beep 2: Addition of Open Drawer2 or External Buzzer2 at the End of the print job- Internal Beep: addition of Internal Beep at the End of the print jobDetailed setting can be done as follows.1) Open the printer properties window in the Windows OS.2) Click the ” Opened Drawer & Buzzer” tab.3) If the user wishes to open Cash Drawer 1 prior to printing, check box of “Open CashDrawer1” in the ”StartJob” and click the “Apply” button.4) If the user wishes to use Internal Beep prior to printing, check box of “Internal Beep” inthe ”StartJob” and click the “Apply” button.5) If the user wishes to open Cash Drawer 2 at the end of printing, check box of “OpenCash Drawer2” in the ”EndJob” and click the “Apply” button.6) If the user wishes to use Internal Beep at the end of printing, check box of “InternalBeep” in the ”EndJob” and click the “Apply” button.6. Windows Driver Specifications6-1 FontsThe Windows Driver of the printer supports the fonts listed below.Printing is done at faster speed when using the fonts below as opposed to the Windowsfonts of the OS.Printer Fonts Character Size (dot) Sizes (point) FontA1x1 FontA1x1[Ext.] FontA1x1[255]FontA1x1(12x24) 9.5 FontA1x2 FontA1x2[Ext.] FontA1x2[255]FontA1x2(12x48) 19 FontA2x1 FontA2x1[Ext.] FontA2x1[255]FontA2x1(24x24) 9.5 FontA2x2 FontA2x2[Ext.] FontA2x2[255]FontA2x2(24x48) 19 FontA2x4 FontA2x4[Ext.] FontA2x4[255]FontA2x4(24x96) 38.5 FontA4x2 FontA4x2[Ext.] FontA4x2[255]FontA4x2(48x48) 19 FontA4x4 FontA4x4[Ext.] FontA4x4[255]FontA4x4(48x96) 38.5 FontA4x8 FontA4x8[Ext.] FontA4x8[255]FontA4x8(48x192) 77 FontA8x4 FontA8x4[Ext.] FontA8x4[255]FontA8x4(96x96) 38.5 FontA8x8 FontA8x8[Ext.] FontA8x8[255]FontA8x8(96x192) 77 FontB1x1 FontB1x1[Ext.] FontB1x1[255]FontB1x1(9x17) 7 FontB1x2 FontB1x2[Ext.] FontB1x2[255]FontB1x2(9x34) 13.5 FontB2x1 FontB2x1[Ext.] FontB2x1[255]FontB2x1(18x17) 7 FontB2x2 FontB2x2[Ext.] FontB2x2[255]FontB2x2(18x34) 13.5 FontB2x4 FontB2x4[Ext.] FontB2x4[255]FontB2x4(18x68) 27 FontB4x2 FontB4x2[Ext.] FontB4x2[255]FontB4x2(36x34) 13.5 FontB4x4 FontB4x4[Ext.] FontB4x4[255]FontB4x4(36x68) 27 FontB4x8 FontB4x8[Ext.] FontB4x8[255]FontB4x8(36x136) 54.5 FontB8x4 FontB8x4[Ext.] FontB8x4[255]FontB8x4(72x68) 27 FontB8x8 FontB8x8[Ext.] FontB8x8[255]FontB8x8(72x136) 54.5 Printer Fonts are defined as follows.1) FontA1x2- ANSI Character code support (Code Page 16: 1252)- Character size (dot): 12 x 24 (double height)- Sizes (point): 192) FontA1x2[Ext]- IBM expansion Character code support (Code Page 0: 437)- Character size (dot): 12 x 24 (double height)- Sizes (point): 193) FontA1x2[255]- Buyer exclusive code support (Code Page 255)- Character size (dot): 12 x 24 (double height)- Sizes (point): 196-2 Special FunctionsThe Windows Driver supports the special functions indicated below.These special functions are available when using the characters after the “FontControl” font is selected.This function is not an ordinary character printing function. Take special care.Character Special Function5 Prints HT (0 x 09)6 Prints LF (0 x 0A)7 Prints CR (0 x 0D)a Open Drawer 2 (50ms drive pulse width)b Open Drawer 2 (100ms drive pulse width)c Open Drawer 2 (150ms drive pulse width)d Open Drawer 2 (200ms drive pulse width)e Open Drawer 2 (250ms drive pulse width)g Cut Receipt (partial cut) without paper feedingp Does not add HRI characters to the barcodeq Adds HRI characters in FontA above the barcoder Adds HRI characters in FontA below the barcodes Adds HRI characters in FontB above the barcodet Adds HRI characters in FontB below the barcodew Aligns text to the leftx Aligns text to the centery Aligns text to the rightA Open Drawer 1 (50ms drive pulse width)B Open Drawer 1 (100ms drive pulse width)C Open Drawer 1 (150ms drive pulse width)D Open Drawer 1 (200ms drive pulse width)E Open Drawer 1 (250ms drive pulse width)G Prints1st NV bit image2nd NV bit imageH PrintsI Prints3rd NV bit image4th NV bit imageJ Prints5th NV bit imageK PrintsP Cut Receipt (partial cut)1st NV bit image in double-sized mode.[ Prints2nd NV bit image in double-sized mode.] Prints3rd NV bit image in double-sized mode.^ Prints_ Prints4th NV bit image in double-sized mode.5th NV bit image in double-sized mode.` Prints1) Sample UseIf the “FontControl” font is selected and 6 is entered, the “LF” (Line Feeding) operation is activated.(Does not entail the printing of the character “6)2) “FontControl” Font FunctionPrinter Font forSpecial FunctionFunction Size (point/dot)FontControlOpen Drawer 1/2Cut receiptCut receipt(without paper feeding)Justification (Left/Center/Right)Output HT, Output LF, Output CRBarcode PrintingPrint NV Image(9.5 / 12x24)6-3 BarcodesThe Windows Driver supports the barcodes indicated below.This function is available when entering barcode data after selecting “Printer Font Name”. In addition, the “FontControl” font can be used to add HRI characters.1) Sample UseSelect “Code39” and Size “18”, and then enter “1234”. The barcode corresponding to “1234” is printed.2) When Using Code128Select “Code128” and Size “18”, and then enter “{B1234”. The barcode corresponding to “1234” is printed.When using “Code128”, characters, such as “{A”, “{B”, “{C”, must be included before the input data.Printer Font NameSizeSupported CharactersCodabar 18/35.5/53/71 Numberic: 0~9Symbols: $, +, -, ., /, :Letters: A~D Code39 18/35.5/53/71 Numberic: 0~9Symbols: $, +, -, ., /Letters: A~ZJAN13(EAN) 18/35.5/53/71 Numberic: 0~9 JAN8(EAN) 18/35.5/53/71 Numberic: 0~9ITF 18/35.5/53/71 Numberic: 0~9 UPC-A 18/35.5/53/71 Numberic: 0~9 UPC-E 18/35.5/53/71 Numberic: 0~9 Code93 18/35.5/53/71 ASCII CODE: 0~127 Code128 18/35.5/53/71 ASCII CODE: 0~1277. Use of Windows Driver7-1 Use of Visual BasicThis section explains the use of the Windows Driver with Visual Basic to control the printer (Metapace T-1).Sample programs are saved together if the Windows Driver is installed. Take note.7-1-1 Windows Driver SelectionThe following code is an example of the selection of the “Metapace T-1” Windows Driver.For Each prnPrinter In PrintersIf prnPrinter.DeviceName = “Metapace T-1” ThenSet Printer = prnPrinterExit ForEnd IfNext7-1-2 Test PrintingThe following code is an example of the printing of Arial Test via the Windows font, and FontA1x1Test via the printer font.‘Print in Windows fontPrinter.FontSize = 9Printer.FontName = “Arial”Printer.Print “Arial Test”‘Print in printer fontPrinter.FontSize = 9.5Printer.FontName = “FontA1x1”Printer.Print “FontA1x1Test”Printer.EndDoc7-1-3 Barcode PrintingThe following code is an example of the printing of the JAN8 (EAN) barcode.'Print Bar Code.Printer.FontSize = 20Printer.FontName = "JAN8 (EAN)"Printer.Print "1234567"Printer.EndDoc7-2 Use of WordPad7-2-1 WordPad Environment SettingsAfter running Wordpad and setting the following conditions, conduct a test.- Select PrinterAfter selecting “Print” from the “File” menu, select the printer (Metapace T-1).- Select Paper Size, Orientation, and MarginsAfter selecting “Page Setup” from the “File” menu, select the paper size, orientation, and margins.7-2-2 Text PrintingUse the Windows Driver of the printer to run a test.1) Select the desired font from the Font menu (FontA 1x1).2) Select the desired font size (9.5).3) Enter the text to be printed in Wordpad.4) Click the Print button in the toolbar to print.。
微型热敏打印机芯技术手册
工作温度(℃) 工作湿度(RH) 储藏温度(℃) 储藏湿度(RH)
规格
PT486F-B101
PT486F-B103
行式热敏打印 384 点/ 行
8 点/ 毫米 48 毫米
57±1 毫米
70×33.5×15 200 点线/ 秒(25 毫米/秒)( 电压5.0V) 450 点 线/ 秒(56.25 毫米/ 秒)( 电压7.2V)560 点线 / 秒70 毫米/秒)(电压8.0V)
2.4.1 步进马达的规格............................................................5 2.4.2 激励顺序..................................................................6 2.4.3 步进马达驱动..............................................................6 2.5 热敏头数......................... ...... .......................................6 2.5.1 额定参数..................................................................6 2.5.2 最大值.............................. .....................................6 2.5.3 推荐参数........................ .........................................7 2.5.4 电气参数............................ .....................................7 2.5.5 时序特牲........................... ......................................8 2.5.6 时序图............................ .......................................8 2.5.7 计算公式:.............................. .................................8 2.5.8 推荐电路:....................... ........................................9 2.5.9 热敏电阻:........................... ....................................9 2.5.10 结构示意:................................................................10
便携热敏打印机开发手册说明书
便携热敏打印机开发手册V1.2本手册适用于:M07,M08,M09,M102016-12-29版本控制信息目录版本控制信息 0目录 (I)第1章安全信息............................................................................................................ V I1.1 读者 (vi)1.2 关于本手册 (vi)1.3 安全上的注意事项 (vi)1.3.1 人身伤害 (vi)1.3.2 无线电波管制 (vi)1.3.3 纸卷规格 (vi)1.3.4 开纸仓 (vi)1.3.5 专用配件 (vi)1.3.6 拆卸 (vi)第2章概述 (7)2.1 特点 (7)2.2 性能指示 (7)第3章操作说明 (9)3.1 结构图 (9)3.2 开机 (9)3.2.1 电源键开机 (9)3.3 关机 (9)3.3.1 电源键关机 (9)3.3.2 超时自动关机 (9)3.4 休眠 (10)3.5 唤醒 (10)3.6 走纸 (10)3.7 自检 (10)第4章打印机参数设置 (11)4.1 自检 (11)4.3 设置向导 (11)第5章状态指示 (14)5.1 开机提示 (14)5.2 关机提示 (14)5.3 工作状态指示 (14)5.4 少纸状态指示 (14)5.5 参数设置状态指示 (14)5.6 电池电量显示 (14)5.7 充电指示 (15)5.8 打印头过热提示 (15)5.9 电池电量低提示 (15)第6章USB接口 (16)6.1 USB接口打印机 (16)6.2 USB+为打印机供电 (16)第7章RS232接口 (17)7.1 配置参数 (17)7.2 缓冲区大小 (17)7.3 奇偶校验 (17)7.4 自适应波特率 (17)第8章蓝牙接口 (18)8.1 直接通过COM口控制打印机 (18)8.2 通过打印机驱动程序控制打印机 (18)8.3 蓝牙开关 (18)第9章WIFI接口 (19)9.1 AP模式wifi连接打印机 (19)9.3 通过打印机驱动程序控制打印机 (19)9.4 WIFI开关 (19)第10章打印指令 (20)10.1 基本控制指令 (20)10.1.1 【初始化打印机1B 40】 (20)10.1.2 【唤醒打印机00】 (20)10.1.3 【回车0D】 (20)10.1.4 【换行0A】 (20)10.1.5 【执行n点行走纸1B 4A n】 (20)10.1.6 【打印并走纸到黑标处0C】 (20)10.2 选择字符集命令 (20)10.2.1 【选择字库1B 38 n】 (20)10.3 字符参数设置命令 (21)10.3.1 【灰度打印1B 6D n】 (21)10.3.2 【横向放大1B 55 n】 (21)10.3.3 【纵向放大1B 56 n】 (21)10.3.4 【等比放大1B 57 n】 (21)10.3.5 【允许/禁止下划线打印1B 2D n】 (21)10.3.6 【允许/禁止上划线打印1B 2B n】 (21)10.3.7 【允许/禁止反白打印1B 69 n】 (21)10.3.8 【允许/禁止反向打印1B 63 n】 (21)10.3.9 【字符旋转打印1C 49 n】 (22)10.4 打印排版参数设置命令 (22)10.4.1 【设置n点行间距1B 31 n】 (22)10.4.2 【设置字符间距1B 70 n】 (22)10.4.3 【设置行对齐方式1B 61 n】 (22)10.4.4 【设置垂直造表值1B 42 d1 d2...dn 00】 (22)10.4.5 【执行垂直造表0B】 (22)10.4.6 【设置水平造表值1B 44 d1 d2 ... dn 00】 . (23)10.4.7 【执行水平造表09】 (23)10.4.8 【设置右边距1B 51 n】 (23)10.4.9 【设置左边距1B 6C n】 (23)10.5 图形/图象打印命令 (23)10.5.1 【打印点阵图形1B 4B nL nH d1...dn】 (23)10.5.2 【打印点行图形1C 4B M n d1...dn】 (24)10.5.3 【打印模式位图1B 2A M nL nH d1...dn】 .. (24)10.5.4 【打印光栅位图1D 76 30 M yL yH Xl xH d1...dn】. (25)10.5.5 【打印散点行1B 27 nL nH l1 h1 l2 h2 l3 h3 ...ln hn】 .. (25)10.5.6 【打印坐标曲线1B 2C nL nH l1 h1 l2 h2 l3 h3 ...ln hn】 . (25)10.6一维条码打印命令 (26)10.6.1 【打印一维国标条形码1D 6B n m [d]】 (26)10.6.2 一维条码编码规则简介 (26)10.6.3 条形码例子 (26)10.6.4 【允许/禁止打印HRI字符1D 48 n】 (27)10.6.5 【设置条形码高度1D 68 n】 (27)10.6.6 【设置条形码宽度1D 77 n】 (27)10.7打印二维条码 (27)10.7.1 【打印PDF417条码1D 28 6b ml mh c e [d]】 (27)10.7.2 【打印QR矩阵码1D 28 31 ml mh v e [d]】 (28)第11章扩展指令 (29)11.1 【马达转速1F 55 20 K】 (29)11.2 【高速打印1F 55 21 K】 (29)11.3 【指令禁能1F 55 22 K】 (29)11.4 【退纸轴系数1F 55 23 K】 (29)11.5 【休眠1F 55 24 K】 (29)11.6 【关机1F 55 25 K】 (29)11.7 【指令容错1F 55 26 K】 (29)11.8 【设置波特率1F 55 27 BL BH P】 (29)11.9 【下载字库1F 55 28 nL nH v1...v4】.. (30)11.10 【退纸1F 55 29 K】 (30)11.11 【回车符扩展1F 55 2A K】 (30)11.12 【测试蜂鸣器1F 55 2B K】 (30)11.13 【删除线1F 55 2C K】 (30)11.14 【图文混排模式1F 55 2D K】 (30)11.15 【设置时间1F 55 2E D1...D5】 (31)11.16 【打印时间1F 55 2F M】 (31)11.17 【等宽字符1F 55 30 K】 (31)11.18 【固件升级1F 55 31 v1...v4】. (31)11.19 【纸传感器参数1F 55 32 d1...d3】 . (31)11.20 【保存配置1F 55 33 K M】 (32)11.21 【打印样张1F 55 34 K】 (32)11.22 【加重打印1F 55 35 K】 (32)11.23 【U盘开关1F 55 36 K】 (32)11.24 【黑标检测开关1F 55 37 K】 (32)11.25 【无线通信开关1F 55 38 K】 (32)11.26 【自动休眠设置1F 55 39 K】 (32)11.27 【自动关机设置1F 55 3A K】 (32)11.28 【接口模块配置1F 55 3B M n d1...dn】 (32)字库预览 (33)附录 (34)1.字符样式设置命令 (34)2.黑标印刷 (34)3.联系我们 (35)第1章安全信息为有效、安全地使用您的打印机,请遵守以下规定。
微型打印机说明书
SP-RMDIIIB
微
型
热
敏
打
印பைடு நூலகம்
机
说 明 书
(VER 1.00)
1
目录
目录 ..................................................................................................................................................2 简介 ..................................................................................................................................................3 第一章 特征与性能指标 .....
- 1、下载文档前请自行甄别文档内容的完整性,平台不提供额外的编辑、内容补充、找答案等附加服务。
- 2、"仅部分预览"的文档,不可在线预览部分如存在完整性等问题,可反馈申请退款(可完整预览的文档不适用该条件!)。
- 3、如文档侵犯您的权益,请联系客服反馈,我们会尽快为您处理(人工客服工作时间:9:00-18:30)。
第一部分 性能指示.................................................................................................- 3 -第二部分 操作说明.................................................................................................- 4 -2.1按键与指示灯 (4)2.1.1 打印机自检方法......................................................................................- 5 -2.1.2 改变打印浓度的方法..............................................................................- 5 -2.1.3 改变打印方向的方法..............................................................................- 5 -2.1.4 改变波特率及串口工作模式的方法.......................................................- 5 -2.2并行接口连接 (6)2.2.1接口与引脚定义.......................................................................................- 6 -2.2.2 并行接口引脚信号时序..........................................................................- 7 -2.2.3 并口例程.................................................................................................- 8 -2.3串行接口. (15)- 1 -2.3.1串行接口引脚定义.................................................................................- 15 -2.3.2 波特率和通讯模式.................................................................................- 17 -2.3.3 串口例程................................................................................................- 17 -2.4电源连接.. (24)第三部分 打印命令祥解.......................................................................................- 25 -第四部分 西文字符集1、2...................................................................................- 46 - 2 -第一部分 性能指示1、打印方法: 直接热敏打印2、打印纸宽: 57.5±0.5mm3、打印密度: 8点/mm,384点/行4、打印头寿命: 6×10⁶字符行5、有效打印宽度: 48mm6、走纸速度: 75mm/秒7、打印速度: 25%的字符率的情况下为70mm/秒8、字库: 0x20—0xa0间的西文字符集1、2;20h—7fh间的标准ASCII码半角字符;国标一、二级汉字要打印机汉字时,不用对打印机进行有关选择字库的任何设置,只需输入汉字标准代码即可。
汉字默认为2倍大的16*16点阵字- 3 -9、接口形式: 并行接口 IDE 26针插座,TTL电平串行接口 IDE 10针插座,232电平或TTL电平10、操作温度: 5~50℃11、操作相对湿度: 10~80%12、储存温度: -20~60℃13、储存相对湿度: 10~90%14、电源: DC 9V-- 24V 25W第二部分 操作说明2.1 按键与指示灯打印机有两个功能按键:LF键和SET键,一个指示灯:绿灯。
绿灯本身即为LF键,上电后按一下LF键,打印机向前走纸一段。
SET键在打印机背部通讯接口左侧的孔内绿灯上电后为常亮状态,缺纸时为慢闪,机关开关打开时为快闪。
- 4 -对于按键,正常上电后,LF键为走纸键,SET键无效。
2.1.1 打印机自检方法打印机断电,按LF键不放手同时给打印机上电,松手,打印机就会打印出自检条。
2.1.2 改变打印浓度的方法1、打印机断电,按SET键不放手同时给打印机上电,松手,打印机打印出状态设置报告2、按LF键进入浓度设置状态:SET为减量,LF为增量,设置完成后打印机重新上电。
2.1.3 改变打印方向的方法1、打印机断电,按SET键不放手同时给打印机上电,松手,打印机打印出状态设置报告2、按SET键进入设置工作模式状态,再按LF键进入设置打印方向状态,LF为反向,SET为正向打印,设置完成后打印机重新上电。
2.1.4 改变波特率及串口工作模式的方法1、打印机断电,按SET键不放手同时给打印机上电,释放按键后,打印出状态设置报告2、按SET键进入工作模式设置状态- 5 -3、按LF键进入串口设置状态4、按SET键改变打印机的通讯模式:有两种,模式一或模式三;按LF键改变波特率:1200,2400,4800,9600,19200bps.设置完成后打印机需重新上电。
2.2 并行接口连接2.2.1接口与引脚定义本系列打印机并口与CENTRONICS兼容,支持BUSY/ACK握手协议,接口插座为IDE 26针插座。
并行接口插座引脚序号如下图所示:- 6 -2.2.2 并行接口引脚信号时序 并口时序如下图所示:BUSY/ACKDATA/STB0.5μS 0.5μS 0.5μS 0.5μS 0.5μSIDE 26针并行接口各引脚信号的定义如下图表所示:面板式引脚 信 号方向 说 明1 -STB 入 数据选通触发脉冲,上升沿时读入数据3 DATA1入 5 DATA2入 7 DATA3入 9 DATA4入 这些信号分别代表并行数据的第一至第八位信号,每个信号当其逻辑为“1”时为“高”电平,逻辑为“0”为“低”电平。
- 7 -11 DATA5 入13 DATA6 入15 DATA7 入17 DATA8 入19 -ACK 出 回答脉冲,“低”电平表示数据已被接受而且打印机准备好接收下一数据21 BUSY 出 “高”电平表示打印机正“忙”,不能接收数据23 PE 出 缺纸信号引脚,此引脚为高电平时表示打印机缺纸,为低电平时表示打印机有纸25 SEL 出 打印机内部经电阻上拉“高”电平,表示打印机在线4 -ERR 出 打印机内部经电阻上拉“高”电平,表示无故障2,6,8 空脚10-26(中偶数) GND — 接地,逻辑“0”电平注: 1.“入”表示输入到打印机。
2.“出”表示从打印机输出。
3.信号的逻辑电平为TTL电平。
2.2.3 并口例程单片机控制打印机时汇编例程BUSY EQU P3.2 ; 定义BUSY信号引脚- 8 -nSTB EQU P3.7 ; 定义nSTB信号引脚ORG 0000HJMP startstart: MOV DPTR, #print_contentMOV R0, #9 ; 存待打印数据的字节数 main: CLR AMOVC A, @ A + DPTRLCALL PRINTBINC DPTRDJNZ R0, MAINMOV A, #0DHLCALL PRINTBSJMP $ ;打印结束死循环 - 9 -;PRINTB子程序将累加器A中的一字节数据发送到打印机PRINTB:JB BUSY, $ ; 等待打印机到空闲MOV P1 , A ; 送数据到数据口CLR nSTB ; 置nSTB为低电平NOP ; 延长nSTB信号脉冲宽度以满足时序要求nopnopSETB nSTB ; 置nSTB为高电平(此时数据将被读入打印机)RETprint_content:- 10 -N-0RE4-00EXXX型打印机说明书DB '北京炜煌'DB 0dhEND单片机C51例程#include <reg52.h>#define PRINTER_DATA P1 // 定义打印机数据线端口sbit BUSY = P3^2; // 定义打印机忙信号引脚sbit nSTB = P3^7; // 定义打印机nSTB信号引脚#define CR 0x0d#define LF 0x0avoid PrintByte(unsigned char byte_data);void PrintString(char* str);- 11 -N-0RE4-00EXXX型打印机说明书void PrintByteN(unsigned char* data_src,unsigned char N);void main(void){char str[] = "Printer demo";PrintString("WHKJ Printer");PrintByte(CR);while(1);}/* PrintByte()* Send a byte to printer*/#include <intrins.h>void PrintByte(unsigned char byte_data)- 12 -N-0RE4-00EXXX型打印机说明书{while( BUSY == 1 ){}PRINTER_DATA = byte_data;nSTB = 0;_nop_(); // 调整nSTB信号脉宽nSTB = 1;}/* PrintString()* Print a string which is ending with a '\0' character* To Excuted the print command a addition CR character is needed*/void PrintString(char* str){- 13 -N-0RE4-00EXXX型打印机说明书while( *str ){PrintByte( *(str++));}}/* PrintByteN()* Print N bytes through printer* no more than 255 bytes could be printed by the function* If more than 255 bytes need printing, the type of N need changing* to unsigned int, even unsigned long if necessary.*/void PrintByteN( unsigned char* data_src, // pointer to data sourceunsigned char N) // number of data(byte){- 14 -N-0RE4-00EXXX型打印机说明书while( N--){PrintByte(*(data_src++));}}2.3 串行接口2.3.1串行接口引脚定义本系列打印机串口电平标准为两种:TTL电平与232电平,当设为232电平时,其串口与标准RS-232接口兼容。
