arm-linux-gcc交叉编译工具链安装
交叉编译工具aarch64-linux-gnu-gcc

交叉编译⼯具aarch64-linux-gnu-gcc[root@centos7 arm]# wget https:///-/media/Files/downloads/gnu-a/10.3-2021.07/binrel/gcc-arm-10.3-2021.07-aarch64-aarch64-none-elf.tar.xz--2022-03-0907:12:23-- https:///-/media/Files/downloads/gnu-a/10.3-2021.07/binrel/gcc-arm-10.3-2021.07-aarch64-aarch64-none-elf.tar.xzResolving ()... 23.76.74.223Connecting to ()|23.76.74.223|:443... connected.HTTP request sent, awaiting response... 302 Moved TemporarilyLocation: https:///developer/Files/downloads/gnu-a/10.3-2021.07/binrel/gcc-arm-10.3-2021.07-aarch64-aarch64-none-elf.tar.xz [following]--2022-03-0907:12:24-- https:///developer/Files/downloads/gnu-a/10.3-2021.07/binrel/gcc-arm-10.3-2021.07-aarch64-aarch64-none-elf.tar.xzResolving ()... 52.239.137.100Connecting to ()|52.239.137.100|:443... connected.HTTP request sent, awaiting response... 200 OKLength: 93906188 (90M) [application/octet-stream]Saving to: ‘gcc-arm-10.3-2021.07-aarch64-aarch64-none-elf.tar.xz’100%[============================================================================================================================================================================= 2022-03-0907:12:41 (5.66 MB/s) - ‘gcc-arm-10.3-2021.07-aarch64-aarch64-none-elf.tar.xz’ saved [93906188/93906188][root@centos7 arm]# uname -aLinux centos7 4.14.0-115.el7a.0.1.aarch64 #1 SMP Sun Nov 2520:54:21 UTC 2018 aarch64 aarch64 aarch64 GNU/Linux[root@centos7 arm]#[root@centos7 arm]# ls gcc-arm-10.3-2021.07-aarch64-aarch64-none-elf10.3-2021.07-aarch64-aarch64-none-elf-manifest.txt aarch64-none-elf bin include lib libexec share[root@centos7 arm]# ls gcc-arm-10.3-2021.07-aarch64-aarch64-none-elf/bin/aarch64-none-elf-addr2line aarch64-none-elf-c++filt aarch64-none-elf-gcc aarch64-none-elf-gcc-ranlib aarch64-none-elf-gdb aarch64-none-elf-ld aarch64-none-elf-objcopy aarch64-none-elf-sizeaarch64-none-elf-ar aarch64-none-elf-cpp aarch64-none-elf-gcc-10.3.1 aarch64-none-elf-gcov aarch64-none-elf-gdb-add-index aarch64-none-elf-ld.bfd aarch64-none-elf-objdump aarch64-none-elf-stringsaarch64-none-elf-as aarch64-none-elf-elfedit aarch64-none-elf-gcc-ar aarch64-none-elf-gcov-dump aarch64-none-elf-gfortran aarch64-none-elf-lto-dump aarch64-none-elf-ranlib aarch64-none-elf-stripaarch64-none-elf-c++ aarch64-none-elf-g++ aarch64-none-elf-gcc-nm aarch64-none-elf-gcov-tool aarch64-none-elf-gprof aarch64-none-elf-nm aarch64-none-elf-readelf[root@centos7 arm]# ls gcc-arm-10.3-2021.07-aarch64-aarch64-none-elf/bin/aarch64-none-elf-gaarch64-none-elf-g++ aarch64-none-elf-gcc-10.3.1 aarch64-none-elf-gcc-nm aarch64-none-elf-gcov aarch64-none-elf-gcov-tool aarch64-none-elf-gdb-add-index aarch64-none-elf-gprofaarch64-none-elf-gcc aarch64-none-elf-gcc-ar aarch64-none-elf-gcc-ranlib aarch64-none-elf-gcov-dump aarch64-none-elf-gdb aarch64-none-elf-gfortran[root@centos7 arm]# ls gcc-arm-10.3-2021.07-aarch64-aarch64-none-elf/bin/aarch64-none-elf-gccaarch64-none-elf-gcc aarch64-none-elf-gcc-10.3.1 aarch64-none-elf-gcc-ar aarch64-none-elf-gcc-nm aarch64-none-elf-gcc-ranlib[root@centos7 arm]# ls gcc-arm-10.3-2021.07-aarch64-aarch64-none-elf/bin/aarch64-none-elf-gcc -versionls: invalid option -- 'e'Try 'ls --help'for more information.[root@centos7 arm]# gcc-arm-10.3-2021.07-aarch64-aarch64-none-elf/bin/aarch64-none-elf-gcc -versionaarch64-none-elf-gcc: error: unrecognized command-line option '-version'aarch64-none-elf-gcc: fatal error: no input filescompilation terminated.[root@centos7 arm]# gcc-arm-10.3-2021.07-aarch64-aarch64-none-elf/bin/aarch64-none-elf-gcc -haarch64-none-elf-gcc: error: missing argument to '-h'aarch64-none-elf-gcc: fatal error: no input filescompilation terminated.[root@centos7 arm]# gcc-arm-10.3-2021.07-aarch64-aarch64-none-elf/bin/aarch64-none-elf-gcc --helpUsage: aarch64-none-elf-gcc [options] file...Options:-pass-exit-codes Exit with highest error code from a phase.--help Display this information.--target-help Display target specific command line options.--help={common|optimizers|params|target|warnings|[^]{joined|separate|undocumented}}[,...].Display specific types of command line options.(Use '-v --help' to display command line options of sub-processes).--version Display compiler version information.-dumpspecs Display all of the built in spec strings.-dumpversion Display the version of the compiler.-dumpmachine Display the compiler's target processor.-print-search-dirs Display the directories in the compiler's search path.-print-libgcc-file-name Display the name of the compiler's companion library.-print-file-name=<lib> Display the full path to library <lib>.-print-prog-name=<prog> Display the full path to compiler component <prog>.-print-multiarch Display the target's normalized GNU triplet, used asa component in the library path.-print-multi-directory Display the root directory for versions of libgcc.-print-multi-lib Display the mapping between command line options andmultiple library search directories.-print-multi-os-directory Display the relative path to OS libraries.-print-sysroot Display the target libraries directory.-print-sysroot-headers-suffix Display the sysroot suffix used to find headers.-Wa,<options> Pass comma-separated <options> on to the assembler.-Wp,<options> Pass comma-separated <options> on to the preprocessor.-Wl,<options> Pass comma-separated <options> on to the linker.-Xassembler <arg> Pass <arg> on to the assembler.-Xpreprocessor <arg> Pass <arg> on to the preprocessor.-Xlinker <arg> Pass <arg> on to the linker.-save-temps Do not delete intermediate files.-save-temps=<arg> Do not delete intermediate files.-no-canonical-prefixes Do not canonicalize paths when building relativeprefixes to other gcc components.-pipe Use pipes rather than intermediate files.-time Time the execution of each subprocess.-specs=<file> Override built-in specs with the contents of <file>.-std=<standard> Assume that the input sources are for <standard>.--sysroot=<directory> Use <directory> as the root directory for headersand libraries.-B <directory> Add <directory> to the compiler's search paths.-v Display the programs invoked by the compiler.-### Like -v but options quoted and commands not executed.-E Preprocess only; do not compile, assemble or link.-S Compile only; do not assemble or link.-c Compile and assemble, but do not link.-o <file> Place the output into <file>.-pie Create a dynamically linked position independentexecutable.-shared Create a shared library.-x <language> Specify the language of the following input files.Permissible languages include: c c++ assembler none'none' means revert to the default behavior ofguessing the language based on the file's extension.Options starting with -g, -f, -m, -O, -W, or --param are automaticallypassed on to the various sub-processes invoked by aarch64-none-elf-gcc. In order to passother options on to these processes the -W<letter> options must be used.For bug reporting instructions, please see:<https:///>.[root@centos7 arm]# gcc-arm-10.3-2021.07-aarch64-aarch64-none-elf/bin/aarch64-none-elf-gcc --versionaarch64-none-elf-gcc (GNU Toolchain for the A-profile Architecture 10.3-2021.07 (arm-10.29)) 10.3.1 20210621Copyright (C) 2020 Free Software Foundation, Inc.This is free software; see the source for copying conditions. There is NOwarranty; not even for MERCHANTABILITY or FITNESS FOR A PARTICULAR PURPOSE.[root@centos7 arm]#[root@centos7 step-08]# make[GCC] commands.o[GCC] kernel.o[GCC] shell.o[GCC] string.o[GCC] uart1.o[GCC] util.o[LD] kernel8.elf/root/arm/gcc-arm-10.3-2021.07-aarch64-aarch64-none-elf/bin/aarch64-none-elf-ld: /lib64/libc.so.6: version `GLIBC_2.27' not found (required by /root/arm/gcc-arm-10.3-2021.07-aarch64-aarch64-none-elf/bin/aarch64-none-elf-ld) make: *** [Makefile:43: kernel8.elf] Error 1[root@centos7 step-08]#换个操作系统root@ubuntu:~# uname -aLinux ubuntu 5.0.0-23-generic #24~18.04.1-Ubuntu SMP Mon Jul 2916:10:24 UTC 2019 aarch64 aarch64 aarch64 GNU/Linuxroot@ubuntu:~#Last login: Wed Mar 920:08:152022from192.168.116.24root@ubuntu:~# uname -aLinux ubuntu 5.0.0-23-generic #24~18.04.1-Ubuntu SMP Mon Jul 2916:10:24 UTC 2019 aarch64 aarch64 aarch64 GNU/Linuxroot@ubuntu:~# ldd --versionldd (Ubuntu GLIBC 2.27-3ubuntu1) 2.27Copyright (C) 2018 Free Software Foundation, Inc.This is free software; see the source for copying conditions. There is NOwarranty; not even for MERCHANTABILITY or FITNESS FOR A PARTICULAR PURPOSE.Written by Roland McGrath and Ulrich Drepper.root@ubuntu:~# whereis libc.so.6libc.so: /lib/aarch64-linux-gnu/libc.so.6 /usr/lib/aarch64-linux-gnu/libc.soroot@ubuntu:~# strings /lib/aarch64-linux-gnu/libc.so.6 | grep GLIBCGLIBC_2.17GLIBC_2.18GLIBC_2.22GLIBC_2.23GLIBC_2.24GLIBC_2.25GLIBC_2.26GLIBC_2.27GLIBC_PRIVATEGNU C Library (Ubuntu GLIBC 2.27-3ubuntu1.3) stable release version 2.27.root@ubuntu:~#root@ubuntu:~/arm/bare-metal-aarch64# lsREADME.md step-00 step-01 step-02 step-03 step-04 step-05 step-06 step-07 step-08root@ubuntu:~/arm/bare-metal-aarch64# cd step-08root@ubuntu:~/arm/bare-metal-aarch64/step-08# lsboot.o boot.S commands.c commands.o include kernel8.ld kernel.c kernel.o Makefile README.md shell.c shell.o string.c string.o uart1.c uart1.o util.c util.oroot@ubuntu:~/arm/bare-metal-aarch64/step-08# make[LD] kernel8.elf[OBJCOPY] kernel8.imgroot@ubuntu:~/arm/bare-metal-aarch64/step-08# cat Makefile# Relative path to the prefix where the compiler was installed.COMPILER_PREFIX = ~/arm/gcc-arm-10.3-2021.07-aarch64-aarch64-none-elf# Prefix to use before all binutils, gcc and gdb commands.BINROOT = ${COMPILER_PREFIX}/bin/aarch64-none-elf-# Variable used to control the printing of commands.# Printing is disabled by default (due to the "@").# To enable command printing run "make Q= ..." instead of "make ...".Q = @# Flags passed to GCC.GCC_FLAGS = \-ffreestanding \-Wall -Wextra -Werror -pedantic \-O0 \-I ./include \-mgeneral-regs-only# Flags passed to QEMU.QEMU_FLAGS = -M raspi3 -nographic -serial null -serial mon:stdio .PHONY: allall: kernel8.imgboot.o: boot.S@echo "[AS] $@"${Q}${BINROOT}as -c $< -o $@# All header files.C_HDR = $(wildcard include/*.h) $(wildcard include/bcm2837/*.h) %.o: %.c ${C_HDR}@echo "[GCC] $@"${Q}${BINROOT}gcc ${GCC_FLAGS} -c $< -o $@# All C source files, and corresponding object files.C_SRC = $(wildcard *.c)C_OBJ = $(C_SRC:.c=.o)kernel8.elf: kernel8.ld boot.o ${C_OBJ}@echo "[LD] $@"${Q}${BINROOT}ld -T $< -o $@ $(filter-out $<,$^)kernel8.img: kernel8.elf@echo "[OBJCOPY] $@"${Q}${BINROOT}objcopy -O binary $< $@.PHONY: runrun: kernel8.img@echo "[QEMU] running with $<"@echo "(Press Ctrl-A X to exit QEMU.)"${Q}qemu-system-aarch64 ${QEMU_FLAGS} -kernel $<.PHONY: run-gdbrun-gdb: kernel8.img@echo "[QEMU] running with $< (waiting for GDB)"@echo "(Press Ctrl-A X to exit QEMU.)"${Q}qemu-system-aarch64 ${QEMU_FLAGS} -s -S -kernel $< .PHONY: gdbgdb: kernel8.elf@echo "[GDB] running with $<"${Q}${BINROOT}gdb -ex "target remote :1234" $<.PHONY: cleanclean:@rm -f *.o@rm -f kernel8.elf@rm -f kernel8.imgroot@ubuntu:~/arm/bare-metal-aarch64/step-08# make run [QEMU] running with kernel8.img(Press Ctrl-A X to exit QEMU.)********************************************* Hello, World!! *********************************************Initial value of x1: 0x0000000000000000.Initial value of x2: 0x0000000000000000.Initial value of x3: 0x0000000000000000.Initial entry point: 0x0000000000080000.Initial exception level: EL2.Current exception level: EL1.Address of the DTB: n/aEntering the interactive mode.>> hisError: unknown command "his".Use command "help" to get a list of commands.> helpList of available commands:- "help": list the available commands.- "echo": print each of its arguments.- "hexdump": dump memory starting at ARG1 for ARG2 bytes.- "inc": increment the secret counter via un hypervisor call.- "get": get the value of the secret counter via un hypervisor call. > inc>root@ubuntu:~/arm/bare-metal-aarch64/step-08# make run [QEMU] running with kernel8.img(Press Ctrl-A X to exit QEMU.)********************************************* Hello, World!! *********************************************Initial value of x1: 0x0000000000000000.Initial value of x2: 0x0000000000000000.Initial value of x3: 0x0000000000000000.Initial entry point: 0x0000000000080000.Initial exception level: EL2.Current exception level: EL1.Address of the DTB: n/aEntering the interactive mode.>> hisError: unknown command "his".Use command "help" to get a list of commands.> helpList of available commands:- "help": list the available commands.- "echo": print each of its arguments.- "hexdump": dump memory starting at ARG1 for ARG2 bytes.- "inc": increment the secret counter via un hypervisor call.- "get": get the value of the secret counter via un hypervisor call. > inc> getThe secret counter has value 1>。
linux安装配置交叉编译器arm-linux-gnueabi-gcc

linux安装配置交叉编译器arm-linux-gnueabi-gcc要使我们在x86架构下运⾏的程序迁移⾄ARM架构的开发板中运⾏时,需要通过交叉编译器将x86下编写的程序进⾏编译后,开发版才能运⾏。
在安装之前我们需要了解,什么是。
⼀、下载交叉编译器1.新版本的下载⼊⼝如下图所⽰:下载流程如下所⽰:“GNU Toolchain Integration Builds → 11.0-2021.03-1 → arm-linux-gnueabihf → gcc-linaro-11.0.1-2021.03-x86_64_arm-linux-gnueabihf.tar.xz。
”注意:随着时间的不同可能版本号有所变化,不过下载流程应给是⼀样的,除⾮⽹站的变化很⼤。
2.历史版本下载⼊⼝如下图所⽰:下载流程如下所⽰:“View Releases → components → toolchain → binaries → 6.2-2016.11 → arm-linux-gnueabihf → gcc-linaro-6.2.1-2016.11-x86_64_arm-linux-gnueabihf.tar.xz”⼆、安装交叉编译器进⼊linux系统,在/usr/local下创建arm⽂件,将下载的交叉编译⼯具链拷贝到linux系统的/usr/local/arm路径下,并进项解压,如下图所⽰:三、设置环境变量打开/etc/profile⽂件sudo vim /etc/profile在⽂件的最后⼀⾏添加交叉编译链的路径,完成后保存退出export PATH=$PATH:/usr/local/arm/gcc-linaro-6.2.1-2016.11-x86_64_arm-linux-gnueabihf/bin如下图所⽰:重新加载环境变量的配置⽂件source /etc/profile检验是否安装成功arm-linux-gnueabihf-gcc -v如果出现以下信息说明安装成功。
arm-linux-gcc下载与安装

下载glibc-linuxthreads
wget /gnu/glibc/glibc-linuxthreads-2.13.tar.gz
解压
tar -zxvf glibc-2.13.tar.gz
GLIBCXX_3.4.4
GLIBCXX_3.4.5
GLIBCXX_3.4.6
GLIBCXX_3.4.7
GLIBCXX_3.4.8
GLIBCXX_3.4.9
GLIBCXX_3.4.10
GLIBCXX_FORCE_NEW
GLIBCXX_DEBUG_MESSAGE_LENGTH
方法一,参照这篇文章的做法/view/ba4f4e222f60ddccda38a01a.html
直接下载较高版本的库libstdc++.so.6.0.10,网址/source/1670346
先删除libstdc++.so.6
[root@localhost ~]# rm /usr/lib/libstdc++.so.6
rm:是否删除 符号链接 “/usr/lib/libstdc++.so.6”? y
[root@localhost ~]#
然后将下载的libstdc++.so.6.0.10复制到/usr/lib/目录下面
打开设置文件
[root@localhost opt]# vi /etc/profile
在打开的文件的
# Path manipulation
if [ "$EUID" = "0" ]; then
pathmunge /sbin
Ubuntu18.04安装arm-linux-gcc交叉编译器的两种方法(附下载地址)

Ubuntu18.04安装arm-linux-gcc交叉编译器的两种⽅法(附下载地址)⽅法⼀: 我们都知道Ubuntu有⼀个专门⽤来安装软件的⼯具apt,我们可以⽤它来全⾃动安装arm-linux-gcc。
此⽅法安装的是最新版的,但是此⽅法需要FQ,否则99%会失败,这就是为什么⽹上⼤多都⽤压缩包安装的原因: ⾸先Ctrl+Alt+T弹出终端,使⽤如下命令进⾏arm-linux-gcc的安装:sudo apt-get install gcc-arm-linux-gnueabihf 使⽤如下命令进⾏arm-linux-g++的安装:sudo apt-get install g++-arm-linux-gnueabihf 如果要卸载时使⽤如下命令进⾏移除,arm-linux-gcc的卸载:sudo apt-get remove gcc-arm-linux-gnueabihf arm-linux-g++的卸载:sudo apt-get remove g++-arm-linux-gnueabihfsudo tar -xjvf /tmp/arm-linux-gcc-3.4.5-glibc-2.3.6.tar.bz2 3.解压完成后,再在(/usr/local)中创建⼀个新⽬录arm,即在Terminal中输⼊以下命令:sudo mkdir /usr/local/arm 4.创建arm⽬录成功后,还需要给它解放全部权限,即在Terminal中输⼊以下命令:sudo chmod 777 /usr/local/arm 5.在解压出来的⽬录中找到并把整个arm-linux-gcc-3.4.5-glibc-2.3.6⽬录复制到刚刚建好的arm⽬录中,命令如下:sudo cp -r gcc-3.4.5-glibc-2.3.6 /usr/local/arm 6.打开(/etc/profile)配置环境变量和库变量,⽬的是以后可以在任何位置使⽤该交叉编译器,命令如下:sudo vi /etc/profile 7.⽤vi或者vim打开后,在⽂件最后添加两⾏,并输⼊以下代码:第⼀⾏是添加执⾏程序的环境变量,第⼆⾏是库⽂件的路径export PATH=$PATH:/usr/local/arm/gcc-3.4.5-glibc-2.3.6/binexport LD_LIBRARY_PATH=$LD_LIBRARY_PATH:/usr/local/arm/gcc-3.4.5-glibc-2.3.6/lib 8.使⽤source命令重新加载⽣效该配置⽂件source /etc/profile 9.检验是否安装成功,在 Terminal 输⼊以下命令输出版本信息:arm-linux-gcc -v 10.若有以下报错参考解决办法: 报错:bash: /usr/local/arm/4.2.2-eabi/usr/bin/arm-linux-gcc-4.2.2: No such file or directory 解决sudo apt-get install libc6-i386 该库中包括ia32-libs, lib32z1, lib32ncurses5等等依赖。
arm-linux-gcc 4.3.2编译安装过程
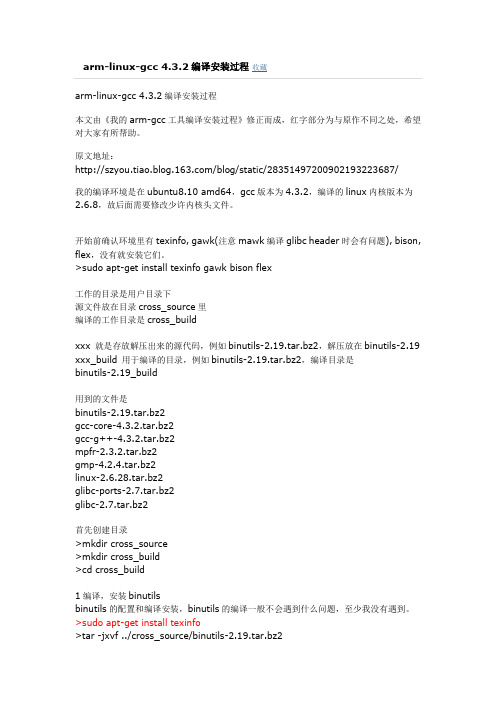
arm-linux-gcc 4.3.2编译安装过程收藏arm-linux-gcc 4.3.2编译安装过程本文由《我的arm-gcc工具编译安装过程》修正而成,红字部分为与原作不同之处,希望对大家有所帮助。
原文地址:/blog/static/28351497200902193223687/我的编译环境是在ubuntu8.10 amd64,gcc版本为4.3.2,编译的linux内核版本为2.6.8,故后面需要修改少许内核头文件。
开始前确认环境里有texinfo, gawk(注意mawk编译glibc header时会有问题), bison, flex,没有就安装它们。
>sudo apt-get install texinfo gawk bison flex工作的目录是用户目录下源文件放在目录cross_source里编译的工作目录是cross_buildxxx 就是存放解压出来的源代码,例如binutils-2.19.tar.bz2,解压放在binutils-2.19 xxx_build 用于编译的目录,例如binutils-2.19.tar.bz2,编译目录是binutils-2.19_build用到的文件是binutils-2.19.tar.bz2gcc-core-4.3.2.tar.bz2gcc-g++-4.3.2.tar.bz2mpfr-2.3.2.tar.bz2gmp-4.2.4.tar.bz2linux-2.6.28.tar.bz2glibc-ports-2.7.tar.bz2glibc-2.7.tar.bz2首先创建目录>mkdir cross_source>mkdir cross_build>cd cross_build1编译,安装binutilsbinutils的配置和编译安装,binutils的编译一般不会遇到什么问题,至少我没有遇到。
>sudo apt-get install texinfo>tar -jxvf ../cross_source/binutils-2.19.tar.bz2根据[Bug gas/7026] New: ARM target wont build, error: format not a string literal and no format arguments,修改tc-arm.c>mkdir binutils-2.19_build>cd binutils-2.19_build>../binutils-2.19/configure --target=arm-linux --prefix=/usr/local/arm/4.3.2 >make>sudo make all install这就会把binutils的编译结果安装到/usr/local/arm/4.3.2/里binutils安装后需要把路径导出。
libusb交叉编译
libusb交叉编译libusb是一款开源的、跨平台的USB设备驱动程序的库。
在进行嵌入式设备开发时,可能需要将libusb编译成交叉平台的库,这篇文章将介绍如何进行libusb的交叉编译。
首先,需要安装交叉编译工具链,我们以arm-linux-gcc为例:```。
sudo apt-get install gcc-arm-linux-gnueabihf。
```。
接下来,进行交叉编译:```。
export CC=arm-linux-gnueabihf-gcc。
export CXX=arm-linux-gnueabihf-g++。
export AR=arm-linux-gnueabihf-ar。
./configure --host=arm-linux --prefix=/usr/arm-linux-gnueabihf。
make。
make install。
```。
其中,`--host`参数指定交叉编译的目标平台,`--prefix`参数指定编译后的库文件安装的位置。
编译完成后,在指定的安装路径下会生成libusb库和头文件。
以上是libusb的交叉编译的基本过程,如果需要使用libusb,还需要在编译应用程序时对libusb进行链接。
下面是一个编译libusb应用程序的示例:```。
export CC=arm-linux-gnueabihf-gcc。
$CC -o my_program my_program.c -lusb-1.0。
```。
其中,`-lusb-1.0`指定链接libusb库。
qt程序移植到arm开发板
qt程序移植到arm开发板1、安装交叉编译⼯具链arm-linux-gcc●复制arm-linux-gcc-4.4.3.tar.gz到/home/tools⽂件夹⾥●解压命令tar xvzf arm-linux-gcc-4.4.3.tar.gz -C / (解压⽂件到根⽬录下)注意以上命令必须要有-C⽽且是⼤写,后边有个空格也要注意。
注意查看解压的路径,将解压⽣成的⽂件移动到usr/local/arm⽬录下●vi /etc/profile●在⽂件的末尾加上PATH=/usr/local/arm/4.4.3/bin:$PATH●输⼊命令:source /etc/profile(使刚修改的⽂件⽴即⽣效)●查看arm-linux-gcc版本arm-linux-gcc -v注意:此⽅法只对当前登录⽤户有效,更换⽤户后修改当前登录⽤户/etc/profile即可2、tslib编译与安装tslib是电阻式触摸屏⽤于校准的⼀个软件库,是⼀个开源的程序,能够为触摸屏驱动获得的采样提供诸如滤波、去抖、校准等功能,通常作为触摸屏驱动的适配层,为上层的应⽤提供了⼀个统⼀的接⼝。
因此这⾥先编译安装tslib,这样在后⾯编译Qt的时候才能打包编译进去。
●需要检查⼀下软件是否安装sudo apt-get install automakesudo apt-get install autogensudo apt-get install autoconf●确定以上⼯具都已经安装后,复制tslib-1.4.tar到/home/tools⽂件夹⾥tar -zxvf tslib-1.4.tar.gzcd tslib./autogen.sh./configure --host=arm-linux ac_cv_func_malloc_0_nonnull=yes --cache-file=arm-linux.cache -prefix=/usr/local/tslibmakemake install-prefix=/usr/local/tslib是指定安装路径,其实包括下⽂的安装配置,路径都可以不指定,默认就是安装到/usr/local/⽬录下若出现错误:configure.ac:25: error: possibly undefined macro: AC_DISABLE_STAT ICIf this token and others are legitimate, please use m4_pattern_al low.See the Autoconf documentation.configure.ac:26: error: possibly undefined macro: AC_ENABLE_SHARE Dconfigure.ac:27: error: possibly undefined macro: AC_LIBTOOL_DLOP ENconfigure.ac:28: error: possibly undefined macro: AC_PROG_LIBTOOL autoreconf: /usr/bin/autoconf failed with exit status: 1解决⽅法:apt-get install libtool3、Qt的交叉编译与安装和PC平台下的编译类似,通过运⾏./configure进⾏配置⽣成makefile⽂件,然后编译安装,只是因为是针对嵌⼊式平台需要进⾏⼀些针对性配置,这⾥⽣成⼀个⾃动配置⽂件,可以通过修改⽂件来⽅便的更改配置。
交叉编译实验报告

一、实验目的本次实验旨在通过交叉编译,了解并掌握交叉编译的基本原理和操作方法,提高在嵌入式系统开发中对编译器配置和编译过程的掌握能力。
交叉编译是指在一个平台上编译生成可在另一个平台上运行的程序,这对于嵌入式系统开发尤为重要,因为嵌入式设备通常资源有限,而开发环境与运行环境可能不同。
二、实验环境1. 主机平台:Windows 102. 目标平台:Linux(假设为Raspberry Pi)3. 编译工具:GCC4. 软件包:交叉编译工具链(如交叉工具链crosstool-ng)三、实验步骤1. 安装交叉编译工具链(1)在主机上安装crosstool-ng。
```bashsudo apt-get install crosstool-ng```(2)使用crosstool-ng生成交叉编译工具链。
```bashcrosstool-NG-1.22.0/src/crosstool-NG-1.22.0/configure --toolchain-build=x86_64-build --toolchain-target=arm-linux-gnueabihf --sysroot=/path/to/raspberry-pi/rootfsmake```(3)安装交叉编译工具链。
```bashsudo make install```2. 编写测试程序(1)创建一个简单的C程序,如`hello_world.c`。
```c#include <stdio.h>int main() {printf("Hello, World!\n");return 0;}```3. 交叉编译程序(1)使用交叉编译器编译程序。
```basharm-linux-gnueabihf-gcc hello_world.c -o hello_world ```(2)检查编译生成的可执行文件。
```bashls -l hello_world```4. 将可执行文件传输到目标平台(1)使用SSH将可执行文件传输到目标平台。
交叉编译工具链的安装配置

交叉工具链的生成/uid-9185047-id-3158569.html软件平台:ubuntu 10.10主机编译器:gcc 4.5.1硬件平台:s3c24101、准备环境sudo apt-get install bison flex texinfo automake libtool cvs patch libncurses5-dev aria2 curl g++ subversion gawk cvsd expat gperf libexpat-dev注:有的没安装,第4步无法生成makefile,要先安装gperf2、下载crosstool-ng软件包crosstool-ng-1.17.0.tar.bz23、相应目录的建立sudo mkdir -p /usr/local/armsudo chmod 777 /usr/local/arm // 将arm目录权限设置为777cd /usr/local/armmkdir 4.7.2sudo mkdir -p /home/crosstoolcd /home/s3c2410/crosstoolsudo mkdir crosstool-build crosstool-install src-4.7.2(编译目录、安装目录、目标源码目录)4、安装crosstool-ngcp crosstool-ng-1.17.0.tar.bz2 /home/s3c2410/crosstool/解压crosstool-ng-1.17.0.tar.bz2,tar -xvf crosstool-ng-1.17.0.tar.bz2进入目录,进行配置:cd /home/s3c2410/crosstool/crosstool-ng-1.17.0将/home/s3c2410/crosstool/crosstool-install/lib/ct-ng.1.17.0/下的p cp到/etc/bash_completion.d配置安装目录为/home/s3c2410/crosstool/crosstool-install注:有的没安装gperf,无法生成makefile,要先安装gperfsudo ./configure --prefix=/home/crosstool/crosstool-installsudo make --编译sudo make install --安装5、配置编译的交叉编译工具链cd /home/s3c2410/crosstool/crosstool-build --进入编译目录cp/home/s3c2410/crosstool/crosstool-ng-1.17.0/samples/arm-unknown-linu x-gnueabi/* ./sudo cp crosstool.config .config --把crosstool-config --当作默认的配置文件sudo /home/crosstool/crosstool-install/bin/ct-ng menuconfig --图形界面进行配置,若该句无法执行可能是终端窗口太小弹出以下菜单,此菜单主要用于交叉编译工具链的环境配置。
交叉编译大致过程

交叉编译⼤致过程1、⾸先配置环境变量。
环境变量主要是为了下⾯的步骤做准备,如PATH等环境变量。
将安装交叉编译器的bin⽬录添加到PATH环境变量,如exportPATH=/opt/eldk/usr/bin:$PATH2、进⼊源码包根⽬录下,运⾏./configure。
configure命令有很多参数可配置,可以⽤./configure --help来查看,在交叉编译过程中可设置--host,--target,--build这⼏个参数,如--host=ppc-linux,--build=i686-pc-linux-gnu,--target=ppc-linux。
个⼈理解是--host表⽰主机上安装的交叉编译器对应⽬标板的架构和所运⾏操作系统,--target表⽰⽬标板的架构和所运⾏操作系统,--build表⽰主机的架构及操作系统类型。
这些参数配置后,configure时会读取源码⽬录下⾯的config.sub⽂件,查找、检查设置的参数是否⽀持,如ppc架构是否⽀持、linux操作系统是否⽀持等。
./configure --prefix参数表⽰⽣成的库⽂件所安装的⽬录,默认的是在/usr/local⽬录下。
其他参数含义可以通过./configure --help来查看,configure过程中若失败可通过查找config.log⽂件来查找出错原因。
./configure --diabale-可以把源码包中的某个模块不配置,编译的时候也就不编译,如配置thinkfinger时--disable-pam将pam模块配置排除在外。
3、make。
make的过程如果前期配置了正确的环境变量并configure成功后⼀般都没遇到什么问题,具体问题具体解决,可以通过查看控制台打印出来的信息了解make的过程。
4、make install,主要是把⽣成的库⽂件、可执⾏⽂件等拷贝到合适的⽬录下,⽬标⽬录根你./configure时设置的--prefix参数有关。
openssl交叉编译安装(arm-linux-gnueabihf)

发生如图上的错误,删除所有-m64参数
重新执行编译,OK.
解压到当前目录
tar xvf openssl-1.1.1.tar.gz
二.配置openssl 1.配置编译的参数
export PATH=$PATH:/opt/gcc-linaro-arm-linux-gnueabihf-4.9-2014.09_linux/bin/
2.执行下面的命令配置工程
./config no-asm shared no-async --prefix=$(pwd)/install --cross-compile-prefix=arm-linux-gnueabihf-
其参数说明如下:
no-asm: 在交叉编译过程中不使用汇编代码代码加速编译过程; shared: 生成动态连接库。 no-async: 交叉编译工具链没有提供GNU C的ucontext库 –prefix=: 安装路径 –cross-compile-prefix=: 交叉编译工具
二.编译 1.执行编译命令
博客园 用户登录 代码改变世界 密码登录 短信登录 忘记登录用户名 忘记密码 记住我 登录 第三方登录/注册 பைடு நூலகம்有账户, 立即注册
openssl交叉编译安装( arm-linux-gnueabihf)
1.下载openssl
wget https:///source/old/1.1.1/openssl-1.1.1.tar.gz
ubuntu下安装Qt全程详细图解-新手版
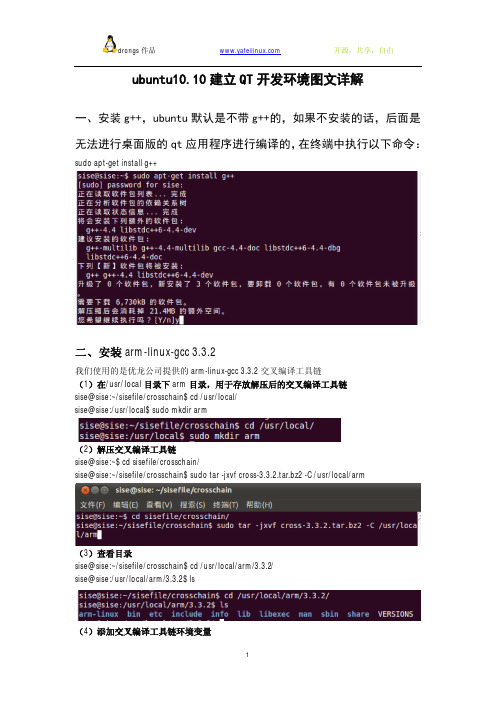
u b u n t u10.10建立Q T开发环境图文详解一、安装g++,u b u n t u默认是不带g++的,如果不安装的话,后面是无法进行桌面版的q t应用程序进行编译的,在终端中执行以下命令:sudo apt-get install g++二、安装arm-linux-gcc 3.3.2我们使用的是优龙公司提供的arm-linux-gcc 3.3.2交叉编译工具链(1)在/usr/local目录下arm目录,用于存放解压后的交叉编译工具链sise@sise:~/sisefile/crosschain$ cd /usr/local/sise@sise:/usr/local$ sudo mkdir arm(2)解压交叉编译工具链sise@sise:~$ cd sisefile/crosschain/sise@sise:~/sisefile/crosschain$ sudo tar -jxvf cross-3.3.2.tar.bz2 -C /usr/local/arm(3)查看目录sise@sise:~/sisefile/crosschain$ cd /usr/local/arm/3.3.2/sise@sise:/usr/local/arm/3.3.2$ ls(4)添加交叉编译工具链环境变量方法一:建立环境变量设置脚本:sise@sise:/usr/local/arm/3.3.2$ sudo gedit arm-linux-gcc-3.3.2-env.sh添加以下内容:# add my crosschain(arm-linux-gcc-3.3.2) pathexport PATH=/usr/local/arm/3.3.2/bin$:PATH使用arm-linux-gcc 3.3.2时,可以进入存放arm-linux-gcc-3.3.2-env.sh的目录,在终端执行以下命令:source arm-linux-gcc-3.3.2-env.sh这样就能使arm-linux-gcc-3.3.2-env.sh生效方法二:修改profile文件:sise@sise:/usr/local/arm/3.3.2$ sudo gedit /etc/profile添加以下内容:# add arm-linux-gcc 3.3.2 crosschain pathexport PATH=/usr/local/arm/3.3.2/bin:$PATH三、安装桌面版QT(1)为QT增加可执行属性sise@sise:/usr/local/arm/3.3.2$ cd /home/sise/sisefile/qt4/sise@sise:~/sisefile/qt4$ sudo chmod +x qt-sdk-linux-x86-opensource-2010.04.bin(2)执行qt的二进制文件:sise@sise:~/sisefile/qt4$ ./qt-sdk-linux-x86-opensource-2010.04.bin安装QT的过程:我修改了安装目录,具体目录如下:这里一步要注意了,这里有提示说如果我们要使用qt,需要安装以下的文件:提示内容:Apart from a C++ compiler, a number of development libraries need to be present to enable Qt Creator to build your Qt applications. On Debian and Ubuntu, use the following command in a terminal to make sure they are installed:sudo apt-get install libglib2.0-dev libSM-dev libxrender-dev libfontconfig1-dev libxext-devIf you're using QtOpenGL, you'll also need OpenGL development files. You can use the following command to find out which packages to install:sudo apt-get install libgl-dev libglu-dev(3)安装libgl-dev libglu-dev包:sise@sise:~/sisefile/qt4$ sudo apt-get install libglib2.0-dev libSM-dev libxrender-dev libfontconfig1-dev libxext-dev(4)安装libgl-dev libglu-dev包:sise@sise:/usr/local/arm/3.3.2$ sudo apt-get install libgl-dev libglu-dev提示没有libgl-dev包(5)安装libgl1-mesa-dev libglu-dev包:sise@sise:/usr/local/arm/3.3.2$ sudo apt-get install libgl1-mesa-dev libglu-dev至此桌面版的QT就安装完成了(6)添加环境变量添加在qcreator中环境变量(其实这一步时不需要的,因为在qt安装完成后,不需要再设置环境变量的)找到qmake(7)建立一个helloword工程测试:选择qt的版本向工程中添加一个c++文件:在main.cpp文件中添加以下代码:#include <QApplication>#include <QLabel>int main(int argc,char* argv[]){QApplication app(argc,argv);QLabel* label = new QLabel("hello world");label->show();return app.exec();}编译出现以下的窗口,证明我们已经完成了qt的安装:(8)编译qvfbqvfb是个X11模式下的qte的模拟器,没有开发板的同学可以利用qvfb来仿真qte的程序。
librosa交叉编译

Librosa可以通过交叉编译的方式在ARM平台上运行。
交叉编译是指在一台主机上使用特定工具链,将源代码编译成可以在另一台目标机器上运行的可执行文件。
在ARM平台上进行交叉编译需要使用适合ARM架构的编译器和相关的工具链。
具体步骤如下:1. 安装交叉编译工具链:在主机上安装适合ARM架构的交叉编译工具链,例如arm-linux-gnueabi-gcc。
2. 配置环境变量:将交叉编译工具链的路径添加到环境变量中,以便在编译时使用。
可以通过编辑~/.bashrc文件并添加以下行来实现:```export CROSS_COMPILE=arm-linux-gnueabi-export PATH=$PATH:/path/to/cross-compiler/bin```其中,"/path/to/cross-compiler"是指交叉编译工具链的安装路径。
3. 下载Librosa源代码:从Librosa的官方网站下载源代码,或者使用git克隆Librosa的代码仓库。
4. 进入源代码目录:在终端中进入Librosa源代码的目录。
5. 配置交叉编译:运行以下命令来配置交叉编译:```shell./autogen.sh./configure --host=arm-linux-gnueabi```其中,"./autogen.sh"是自动生成配置脚本,"./configure"则是配置Librosa的编译选项。
6. 执行make命令:运行以下命令进行编译:```shellmake```编译完成后,将生成的可执行文件复制到ARM平台上即可运行。
需要注意的是,在进行交叉编译时,需要确保目标ARM平台上的库和头文件与交叉编译工具链的版本和架构匹配。
如果存在不匹配的情况,可能需要进行额外的配置和调整。
arm-linux-gcc下载与安装

[root@localhost ~]#
重新测试交叉编译是否能
用
[root@localhost ~]# arm-linux-gcc test.c -o test
[root@localhost ~]#
[root@localhost ~]#
检验是否替换完成
[root@localhost ~]# strings /usr/lib/libstdc++.so.6|grep GLIBCXX
GLIBCXX_3.4
GLIBCXX_3.4.1
GLIBCXX_3.4.2
GLIBCXX_3.4.3
打开设置文件
[root@localhost opt]# vi /etc/profile
在打开的文件的
# Path manipulation
if [ "$EUID" = "0" ]; then
pathmunge /sbin
pathmunge /usr/sbin
在友善之臂官方网站/download.asp下载arm-linux-gcc4.4.3。
2,删除之前安装有旧版本,执行
[root@localhost ~]# rm -rf /opt/arm
3,对新版本arm-linux-gcc-4.4.3进行解压(注意,如果我们加上了-C,那么就会自动解压到/usr/local/arm/这个目录下),但是友善之臂按照下列方式解压,不会解压到/usr/local/arm/目录下的,这是因为友善之臂把/usr/local/arm/目录修改成了 /opt/FriendlyARM/toolschain/,除非自己在把它修改过来
rust arm交叉编译

rust arm交叉编译Rust是一种现代化的系统编程语言,它具有内存安全、并发性和高性能的特点,逐渐受到开发者的青睐。
而在嵌入式系统领域,ARM 架构是非常常见的,因此对于开发者来说,将Rust语言交叉编译到ARM架构上是一项非常有意义的任务。
本文将介绍如何在Rust语言中进行ARM交叉编译的过程,以及一些需要注意的问题。
为了在Rust中实现ARM交叉编译,我们需要安装交叉编译工具链。
可以通过rustup工具来安装交叉编译工具链,具体的命令如下:```rustup target add arm-unknown-linux-gnueabihf```这条命令将会安装ARM架构的交叉编译工具链,以便我们后续进行编译工作。
接下来,我们可以使用Cargo工具来创建一个新的Rust 项目,并指定编译目标为ARM架构,具体的命令如下:```cargo new --bin hello-armcd hello-arm```然后,我们需要在项目的根目录下创建一个`.cargo`文件夹,并在其中新建一个`config`文件,内容如下:```[target.arm-unknown-linux-gnueabihf]linker = "arm-linux-gnueabihf-gcc"```这里我们指定了ARM架构下的gcc编译器作为链接器。
接着,我们可以开始编写Rust代码了。
在`src/main.rs`文件中,我们可以编写一些简单的Rust代码,比如打印"Hello, ARM!",代码如下:```rustfn main() {println!("Hello, ARM!");}```接下来,我们可以使用Cargo工具来进行编译,并指定编译目标为ARM架构,具体的命令如下:```cargo build --target=arm-unknown-linux-gnueabihf```这条命令将会使用ARM架构的交叉编译工具链来编译我们的Rust 项目。
安装交叉编译工具链过程与问题处理
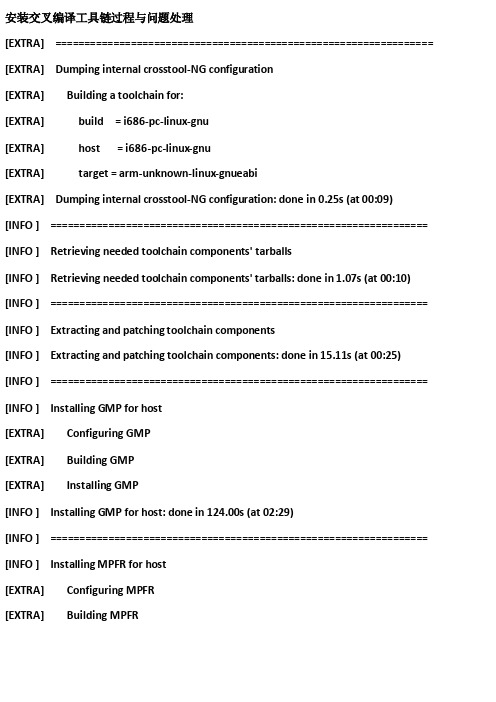
安装交叉编译工具链过程与问题处理[EXTRA] ================================================================= [EXTRA] Dumping internal crosstool-NG configuration[EXTRA] Building a toolchain for:[EXTRA] build = i686-pc-linux-gnu[EXTRA] host = i686-pc-linux-gnu[EXTRA] target = arm-unknown-linux-gnueabi[EXTRA] Dumping internal crosstool-NG configuration: done in 0.25s (at 00:09) [INFO ] ================================================================= [INFO ] Retrieving needed toolchain components' tarballs[INFO ] Retrieving needed toolchain components' tarballs: done in 1.07s (at 00:10) [INFO ] ================================================================= [INFO ] Extracting and patching toolchain components[INFO ] Extracting and patching toolchain components: done in 15.11s (at 00:25) [INFO ] ================================================================= [INFO ] Installing GMP for host[EXTRA] Configuring GMP[EXTRA] Building GMP[EXTRA] Installing GMP[INFO ] Installing GMP for host: done in 124.00s (at 02:29)[INFO ] ================================================================= [INFO ] Installing MPFR for host[EXTRA] Configuring MPFR[EXTRA] Building MPFR[INFO ] Installing MPFR for host: done in 41.19s (at 03:10)[INFO ] ================================================================= [INFO ] Installing PPL for host[EXTRA] Configuring PPL[EXTRA] Building PPL[EXTRA] Installing PPL[INFO ] Installing PPL for host: done in 380.95s (at 09:31)[INFO ] ================================================================= [INFO ] Installing CLooG/PPL for host[EXTRA] Configuring CLooG/ppl[EXTRA] Building CLooG/ppl[EXTRA] Installing CLooG/ppl[INFO ] Installing CLooG/PPL for host: done in 13.11s (at 09:44)[INFO ] ================================================================= [INFO ] Installing MPC for host[EXTRA] Configuring MPC[EXTRA] Building MPC[EXTRA] Installing MPC[INFO ] Installing MPC for host: done in 14.90s (at 09:59)[INFO ] ================================================================= [INFO ] Installing binutils for host[EXTRA] Configuring binutils[EXTRA] Building binutils[INFO ] Installing binutils for host: done in 105.80s (at 11:45)[INFO ] ================================================================= [INFO ] Installing pass-1 core C compiler[EXTRA] Configuring core C compiler[EXTRA] Building core C compiler[EXTRA] Installing core C compiler[INFO ] Installing pass-1 core C compiler: done in 300.28s (at 16:46)[INFO ] ================================================================= [INFO ] Installing kernel headers[EXTRA] Installing kernel headers[EXTRA] Checking installed headers[INFO ] Installing kernel headers: done in 9.34s (at 16:55)[INFO ] ================================================================= [INFO ] Installing C library headers & start files[EXTRA] Configuring C library[EXTRA] Installing C library headers[EXTRA] Installing C library start files[INFO ] Installing C library headers & start files: done in 45.88s (at 17:41)[INFO ] ================================================================= [INFO ] Installing pass-2 core C compiler[EXTRA] Configuring core C compiler[EXTRA] Building core C compiler[EXTRA] Installing core C compiler[INFO ] Installing pass-2 core C compiler: done in 622.27s (at 28:03)[INFO ] ================================================================= [INFO ] Installing C library[EXTRA] Configuring C library[EXTRA] Building C library[EXTRA] Installing C library[INFO ] Installing C library: done in 977.42s (at 44:21)[INFO ] ================================================================= [INFO ] Installing final compiler[EXTRA] Configuring final compiler[EXTRA] Building final compiler[EXTRA] Installing final compiler[INFO ] Installing final compiler: done in 822.18s (at 58:03)[INFO ] ================================================================= [INFO ] Installing libelf for the target[EXTRA] Configuring libelf[EXTRA] Building libelf[EXTRA] Installing libelf[INFO ] Installing libelf for the target: done in 10.37s (at 58:13)[INFO ] ================================================================= [INFO ] Installing binutils for target[EXTRA] Configuring binutils for target[EXTRA] Building binutils' libraries (libiberty bfd) for target[EXTRA] Installing binutils' libraries (libiberty bfd) for target[INFO ] Installing binutils for target: done in 147.45s (at 60:41)[INFO ] ================================================================= [INFO ] Installing dmalloc[EXTRA] Configuring dmalloc[EXTRA] Building dmalloc[EXTRA] Installing dmalloc[INFO ] Installing dmalloc: done in 17.46s (at 60:58)[INFO ] ================================================================= [INFO ] Installing D.U.M.A.[EXTRA] Copying sources[EXTRA] Building libraries 'libduma.a libduma.so.0.0.0'[EXTRA] Installing libraries 'libduma.a libduma.so.0.0.0'[EXTRA] Installing shared library link[EXTRA] Installing wrapper script[INFO ] Installing D.U.M.A.: done in 3.34s (at 61:02)[INFO ] ================================================================= [INFO ] Installing cross-gdb[EXTRA] Configuring cross-gdb[EXTRA] Building cross-gdb[ERROR] configure: error: expat is missing or unusable[ERROR] make[2]: *** [configure-gdb] Error 1[ERROR] make[1]: *** [all] Error 2[ERROR][ERROR] >>[ERROR] >> Build failed in step 'Installing cross-gdb'[ERROR] >> called in step '(top-level)'[ERROR] >>[ERROR] >> Error happened in: CT_DoExecLog[scripts/functions@257][ERROR] >> called from: do_debug_gdb_build[scripts/build/debug/300-gdb.sh@177] [ERROR] >> called from: do_debug[scripts/build/debug.sh@35][ERROR] >> called from: main[scripts/crosstool-NG.sh@612][ERROR] >>[ERROR] >> For more info on this error, look at the file: 'build.log'[ERROR] >> There is a list of known issues, some with workarounds, in:[ERROR] >> '/home/sdust/crosstool/crosstool-install/share/doc/crosstool-ng/ct-ng.1.17.0/B - Known issues.txt'[ERROR][ERROR] (elapsed: 62:51.22)[62:52] / make: *** [build] 错误2查看上述错误,是因为expat文件的问题,由于事先已经下载的相关文件存放在资源目录中,所以,应该是下载文件问题。
- 1、下载文档前请自行甄别文档内容的完整性,平台不提供额外的编辑、内容补充、找答案等附加服务。
- 2、"仅部分预览"的文档,不可在线预览部分如存在完整性等问题,可反馈申请退款(可完整预览的文档不适用该条件!)。
- 3、如文档侵犯您的权益,请联系客服反馈,我们会尽快为您处理(人工客服工作时间:9:00-18:30)。
arm-linux-gcc交叉编译工具链安装
陈伟
解压arm-linux-gcc-3.4.1.tar.bz2
#tar zxvf arm-linux-gcc-3.4.1.tar.bz2
1.解压过程需要一段时间,解压后的文件形成了usr/local/ 文件夹,
进入该文件夹,将arm文件夹拷贝到/usr/local/下
#cd usr/local/
#cp -rv arm /usr/local/
现在交叉编译程序集都在/usr/local/arm/3.4.1/bin下面了
2.修改环境变量,把交叉编译器的路径加入到PATH。
修改~/.bashrc文件,编辑.bash_profile也行
#vim ~/.bashrc
在最后加上:
export PATH=$PATH:/usr/local/arm/3.4.1/bin export PATH
也可以:
#export PATH=$PATH:/usr/local/arm/3.4.1/bin
注:(这只能在当前的终端下才是有效的!)
3.立即使新的环境变量生效,不用重启电脑:
#source /root/.bashrc
4.检查是否将路径加入到PATH:
# echo $PATH
显示的内容中有/usr/local/arm/bin,说明已经将交叉编译器的路径加入PATH。
至此,交叉编译环境安装完成。
5. 测试是否安装成功
# arm-linux-gcc -v。
