光纤交换机级联配置文档CISCO
MDS_9124光纤交换机配置手册
Cisco MDS 9124交换机配置手册北京众志和达信息技术有限公司2010年12月版本控制目录版本控制 (2)1 MDS 初始化配置 (4)1.1配置串口登录 (4)1.2 License 配置 (4)1.3配置管理地址 (6)1.4配置telnet登录 (6)1.5初始化端口类型 (7)1.6配置FC ID (8)2配置MDS Zone (10)2.1配置VSAN (10)2.2配置Domain IDs (11)2.4配置Zone (13)2.5创建设备别名 (14)2.3配置Zoneset (15)2.6激活Zoneset (16)2.7保存配置 (16)2.8实例演示 (17)3 MDS 维护 (18)3.1常用命令查询 (18)3.2使用默认zone (19)附件:配置NPV (20)Cisco MDS 9000系列交换机的管理和配置可以使用CLI和基于GUI的Cisco MDS 9000 Fabric Manager两种方式进行管理。
本文主要介绍了Cisco MDS 9124交换机在CLI方式下配置Zone的方法和步骤,该方法也同样适用于使用Cisco MDS NX-OS Release 4.1版本的其它9000系列交换机。
1 MDS 初始化配置1.1配置串口登录Cisco MDS 9000系列交换机在默认没有配置的情况下,只能通过串口进行参数设置如右图所示:初次启动并进入MDS 交换机之后,会出现“Would you liketo enter the basic configuration dialog (yes/no): yes”提示,这里表示是否需要启动向导模式配置该交换机,此处输入“NO”。
然后根据提示输入管理员密码。
1.2 License 配置Cisco MDS 交换机不同于Brocade交换机之处为Cisco MDS 交换机可以单独为某个指定的端口配置license,暂时不使用的端口可以释放端口的license。
思科Cisco交换机配置手册配置教程
思科Cisco交换机配置手册配置教程配置接口特性这一章详细说明交换机上的接口和描述怎么配置他们。
这章有以下这些内容:●理解接口类型●使用接口命令●配置二层接口●监控和维护第二层接口●配置第三从接口注意:需要完整的有关该章的语法和应用信息,请参考Catalyst 3550 Multilayer Switch Command Reference和Cisco IOS Interface Command Referencefor Release 12.1.理解接口类型这个部分描述了不同的接口类型,以及其它章节所包括的详细配置这些接口的一些参考内容。
其他章节描述了物理接口特性的配置过程。
这部分包括:基于端口的VLAN (Port-Based VLANs)交换端口(Switch Ports)以太网通道端口组(EtherChannel Port Groups)交换虚拟接口(Switch Virtual Interfaces)被路由端口(Routed Ports)连接接口(Connecting Interfaces)基于端口的VLAN (Port-based Vlans)一个Vlan是一个按功能、组、或者应用被逻辑分段的交换网络,并不考虑使用者的物理位置。
要更多关于Vlan的信息请看“Configuring VLANS”。
一个端口上接受到的包被发往属于同一个Vlan的接收端口。
没有一个第三层的设备路由Vlan间的流量,不同Vlan的网络设备无法通讯。
为了配置普通范围(Normal-range) Vlan(Vlan IDs 1-1005),使用命令:config-vlan模式(global) vlan vlan-id或vlan-configuration模式(exec) vlan database针对Vlan ID 1-1005的vlan-configration模式被保存在vlan数据库中。
为配置扩展范围(extended-range)Vlans (Vlan ID 1006-4094),你必须使用config-vlan模式,并把VTP的模式设为transparent透明模式。
Cisco思科光纤交换机配置说明.doc
Cisco思科光纤交换机配置说明Cisco思科光纤交换机配置说明的方法1. 初始化信息首次设置,必须通过console进行连接(需要U口转DB9针的接口线,专门卖接口线的有卖大约30元),然后进行初始化设计,以后设定IP后可通过LAN进行登陆具体步骤:(红色字体部分着重注意,需要进行设置,大部分按照默认设置即可,而且设置的部分进入管理工具软件可以更改) ---- System Admin Account Setup ----Enter the password for admin : passwordConfirm the password for admin : password--- Basic System Configuration Dialog ---This setup utility will guide you through the basic configuration of the system. Setup configures only enough connectivity for management of the system.Press Enter at any time to skip any dialog. Use ctrl-c at anytime to skip the remaining dialogs.Would you like to enter the basic configuration dialog (yes/no): y Create another login account (yes/no) [n]:Configure read-only SNMP community string (yes/no) [n]: Configure read-write SNMP community string (yes/no) [n]:Enter the switch name: Pxx-MDS-x (where xx is your pod number and x is the switch number; for example:P01-MDS-1)Continue with Out-of-band (mgmt0) management configuration? (yes/no) [y]:Mgmt0 IPv4 address : 10.0.x.y (where x is your pod number and y is 5 for MDS-1 and 3 for MDS-2)(客户)0.16Mgmt0 IPv4 netmask : 255.255.255.0Configure the default gateway? (yes/no) [y]:IPv4 address of the default gateway : 10.0.x.254 (where x is your pod number)Configure advanced IP options? (yes/no) [n]:Enable the telnet service? (yes/no) [y]:Enable the ssh service? (yes/no) [n]:Configure the ntp server? (yes/no) [n]:Configure default switchport interface state (shut/noshut) [shut]: (注意一下)noshutConfigure default switchport trunk mode (on/off/auto) [on]:Configure default zone policy (permit/deny) [deny]:Enable full zoneset distribution (yes/no) [n]:NOTE:初始设定的配置对新的VSAN起作用,即原始VSAN1无这些配置解决办法:1 zone default-zone permit VSAN2 新建NEW VSAN2 将port转移VSAN2里面。
cisco网络交换机配置手册-061201
cisco网络交换机配置手册目录一、网络拓扑 (3)二、连接设备的方法 (3)1、从CONSOLE连接: (3)2、远程TELNET连接 (3)三、CISCO交换机基本配置的方法 (4)1、配置设备特权模式口令 (4)2、配置虚拟终端线路VTY(V IRTUAL T YPE T ERMINAL) (4)3、定义、删除(恢复初始)设备名称 (4)4、配置SNMP网管串 (5)5、新建、修改、删除某个VLAN,以及对VLAN命名 (5)6、将某个端口或者一组端口,划分到VLAN (5)7、配置端口工作模式 (6)8、配置端口速率 (6)9、配置一个或多个VLAN网关 (6)10、配置交换机设备的管理地址 (6)11、为某个端口配置一个或多个地址 (6)12、将设备互联的端口设置为TRUNK,让其通过VLAN信息 (7)13、新建PORT-CHANNEL,并将多个端口划分到该PORT-CHANNEL (7)14、删除PORT-CHANNEL,并将该PORT-CHANNEL下的端口删除 (7)15、在三层交换机上配置静态路由 (7)16、将源端口的流入或流出流量镜像到目的端口 (7)17、SHOW命令的使用 (8)18、限流方法: (11)19、ACL使用方法 (11)20、在两台6509上配置HSRP (12)21、配置端口MAC梆定 (13)四、交换机的日常维护 (13)一、网络拓扑参见三地网络拓扑图。
二、连接设备的方法1、从console连接:用Console线和转接头将交换机的console口与PC的串口相联,图示如下:设置如下图(默认设置):2、远程telnet连接给交换机配置了管理地址,就可以直接采用远程telnet登陆进入交换机了,但是必须先配置line vty的密码和enable密码才能允许远程登陆。
三、c isco交换机基本配置的方法1、配置设备特权模式口令telnet *.*.*.*Switch > 进入用户模式Switch > enable 从用户模式进入特权模式Switch # config terminal 从特权模式进入全局配置模式Switch # exit 退出所有配置模式Switch # end 退出配置模式Switch # wr 保存配置Switch(config)# enable secret cisco123 ――设置特权模式加密口令(机房使用方法)Switch(config)# enable password cisco123――设置特权模式不加密口令Switch(config)# service password-encryption ――将所有口令进行加密2、配置虚拟终端线路VTY(Virtual Type Terminal)Switch(config)# line vty 0 4Switch(config-line)# login--让设备回显一个要求输入口令的提示Switch(config-line)# password cisco ――Telnet统一密码Switch(config-line)# exec-timeout 10 0――设备超时时间为10分钟0秒Switch(config)# line vty 0 4Switch# (config-line)# login local ――设置本地认证模式Switch (config)# username zhangxy password ******Switch (config)# no username zhangxy3、定义、删除(恢复初始)设备名称Switch(config)# hostname test-2950test-2950(config)# no hostname4、配置snmp网管串Switch(config)# snmp-server community xxxxxx ro (只读)Switch(config)# snmp-server community xxxxxx rw (读写)5、新建、修改、删除某个VLAN,以及对VLAN命名Switch# vlan databaseSwitch(vlan)# vlan 100Switch(vlan)# vlan 100 name XX (名字一般定义为客户名称或者共享网段标识) Switch(vlan)# no vlan 100或者Switch# conf tSwitch(config)#vlan 100Switch (config-vlan)#name XX(名字一般定义为客户名称或者共享网段标识) Switch (config)#no vlan 1006、将某个端口或者一组端口,划分到VLANSwitch(config)# interface f0/13 (进入单个端口配置模式)Switch(config)# interface range f0/1-5(进入一组端口配置模式)Switch(config)# interface range f0/1-5, f0/8-10(进入一组端口配置模式)Switch(config-if)# (端口描述)Description 客户名称拼音的全拼(首字母大写) ip=地址带宽操作日期Switch(config-if)# switchport mode accessSwitch(config-if)# switchport access vlan 100Switch(config-if)# no shutdownSwitch(config-if)# no switchport (删除端口相关配置)7、配置端口工作模式Switch(config-if)# duplex full/auto/half[全双工|自动协商|半双工]8、配置端口速率Switch(config-if)# speed 10/100/ auto9、配置一个或多个VLAN网关Switch(config)# int vlan 100Switch(config-subif)# Description 客户名称ip=地址带宽操作日期(描述)Switch(config-subif)# ip address 192.168.2.130 255.255.255.0Switch(config-subif)#ip address 192.168.3.130 255.255.255.0 secondarySwitch(config-subif)# no shutdown10、配置交换机设备的管理地址配置二层交换机设备的管理地址:Switch(config)# int vlan 1 (交换机VLAN1的网关地址就是设备的管理地址)Switch(config-subif)# ip address 192.168.2.130 255.255.255.0Switch(config-subif)# no shutdown配置三层交换机的设备管理地址:Switch(config)# int loopback0 ――loopback接口是一种逻辑接口,可以创建无数个Switch(config-if)# ip address 192.168.2.130 255.255.255.0Switch (config)# no int loopback 011、为某个端口配置一个或多个地址Switch(config)# interface f0/13Switch(config-if)# ip address 192.168.1.130 255.255.255.0Switch(config-if)# ip address 192.168.1.130 255.255.255.0 secondary12、将设备互联的端口设置为trunk,让其通过vlan信息Switch(config)# int range f0/40,f0/48(range的作用是同时对多个端口进行配置)Switch(config-if)# switchport trunk encapsulation dot1qSwitch(config-if)# switchport trunk allowed vlan 1-10,12-4094(没有这句配置,则说明所有VLAN均能通过trunk)Switch(config-if)# switchport mode trunk(如果要增加vlan 100划分到truck时,必须把原有的vlan再都写上) Switch(config-if)# switchport trunk allowed vlan 1-10,100,12-409413、新建port-channel,并将多个端口划分到该port-channelSwitch (config)# interface port-channel 1Switch(config)# interface f0/1Switch (config-if)# channel-group 1 mode onSwitch(config)# interface f0/2Switch (config-if)# channel-group 1 mode on14、删除port-channel,并将该port-channel下的端口删除Switch (config)# interface f0/1Switch (config-if)# no channel-group 1Switch (config)# no interface port-channel 115、在三层交换机上配置静态路由Switch (config)# ip route 172.16.1.0 255.255.255.0 10.1.1.1――ip route 目标地址段下一跳地址16、将源端口的流入或流出流量镜像到目的端口将源端口的流入或流出流量镜像到目的端口以便于在目的端口接上笔记本电脑,利用anylazer软件抓包,并分析数据包是否正常。
Cisco思科光纤交换机配置说明.doc

Cisco思科光纤交换机配置说明Cisco思科光纤交换机配置说明的方法1. 初始化信息首次设置,必须通过console进行连接(需要U口转DB9针的接口线,专门卖接口线的有卖大约30元),然后进行初始化设计,以后设定IP后可通过LAN进行登陆具体步骤:(红色字体部分着重注意,需要进行设置,大部分按照默认设置即可,而且设置的部分进入管理工具软件可以更改) ---- System Admin Account Setup ----Enter the password for admin : passwordConfirm the password for admin : password--- Basic System Configuration Dialog ---This setup utility will guide you through the basic configuration of the system. Setup configures only enough connectivity for management of the system.Press Enter at any time to skip any dialog. Use ctrl-c at anytime to skip the remaining dialogs.Would you like to enter the basic configuration dialog (yes/no): y Create another login account (yes/no) [n]:Configure read-only SNMP community string (yes/no) [n]: Configure read-write SNMP community string (yes/no) [n]:Enter the switch name: Pxx-MDS-x (where xx is your pod number and x is the switch number; for example:P01-MDS-1)Continue with Out-of-band (mgmt0) management configuration? (yes/no) [y]:Mgmt0 IPv4 address : 10.0.x.y (where x is your pod number and y is 5 for MDS-1 and 3 for MDS-2)(客户)0.16Mgmt0 IPv4 netmask : 255.255.255.0Configure the default gateway? (yes/no) [y]:IPv4 address of the default gateway : 10.0.x.254 (where x is your pod number)Configure advanced IP options? (yes/no) [n]:Enable the telnet service? (yes/no) [y]:Enable the ssh service? (yes/no) [n]:Configure the ntp server? (yes/no) [n]:Configure default switchport interface state (shut/noshut) [shut]: (注意一下)noshutConfigure default switchport trunk mode (on/off/auto) [on]:Configure default zone policy (permit/deny) [deny]:Enable full zoneset distribution (yes/no) [n]:NOTE:初始设定的配置对新的VSAN起作用,即原始VSAN1无这些配置解决办法:1 zone default-zone permit VSAN2 新建NEW VSAN2 将port转移VSAN2里面。
Cisco交换机配置教程

不同型号Cisco交换机特点
适用于中型企业或大型企业分支 机构,提供增强的安全、QoS和 多层交换功能。
适用于大型数据中心和云计算环 境,提供极高的端口密度、低延 迟和先进的虚拟化功能。
2960系列 3750系列 4500系列 Nexus系列
适用于中小型企业分支机构,提 供基本的安全和QoS功能。
Cisco交换机支持命令缩写,可输入部分字母后按Tab键自动补全命令。
查看设备状态和信息
查看设备型号和版本
使用“show version”命令查看交 换机的型号、版本号、硬件配置等信 息。
查看接口状态
使用“show interfaces”命令查看 交换机所有接口的状态、配置和统计 信息。
查看MAC地址表
拓展学习资源推荐(书籍、网站等)
01
02
03
04
书籍推荐
《Cisco交换机配置与管 理》、《网络工程师必 读——交换机/路由器配 置与管理》等。
网站推荐
Cisco官方网站、华为企 业网络学院、网络技术 论坛等。
在线课程推荐
Coursera、网易云课堂、 51CTO学院等在线教育 平台上提供的相关课程。
验证配置
使用`show ip route`命令查看路由表,确认静态路由已正 确添加。
动态路由协议简介及配置示例
动态路由协议概述
动态路由协议能够自动学习和更新网络拓 扑,常见的动态路由协议包括RIP、EIGRP、 OSPF等。
验证配置
使用`show ip ospf neighbor`和`show ip ospf route`命令查看OSPF邻居和路由信息。
应用ACL到接口 将定义好的ACL规则应用到交换机的具体接口上, 实现对进出接口数据流的访问控制。
光纤交换机简单配置手册.docx
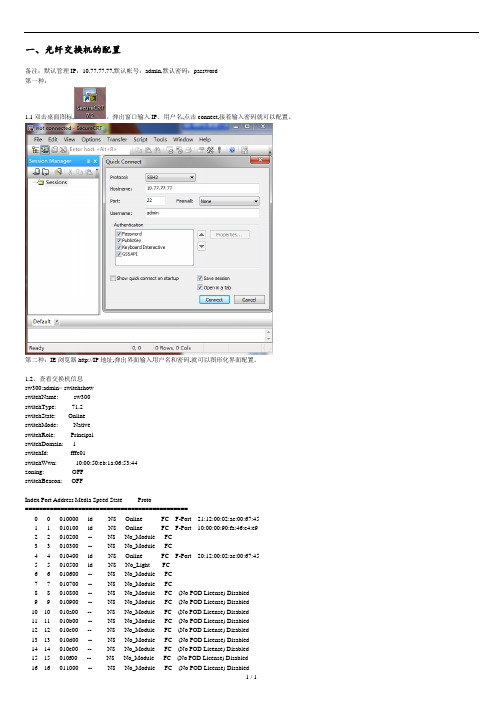
一、光纤交换机的配置备注:默认管理IP:10.77.77.77,默认帐号:admin,默认密码:password第一种:1.1双击桌面图标,。
弹出窗口输入IP、用户名,点击connect,接着输入密码就可以配置。
第二种:IE浏览器http://IP地址,弹出界面输入用户名和密码,就可以图形化界面配置。
1.2、查看交换机信息sw300:admin> switchshowswitchName: sw300switchType: 71.2switchState: OnlineswitchMode: NativeswitchRole: PrincipalswitchDomain: 1switchId: fffc01switchWwn: 10:00:50:eb:1a:06:53:44zoning: OFFswitchBeacon: OFFIndex Port Address Media Speed State Proto==============================================0 0 010000 id N8 Online FC F-Port 21:12:00:02:ac:00:67:451 1 010100 id N8 Online FC F-Port 10:00:00:90:fa:46:c4:e92 2 010200 -- N8 No_Module FC3 3 010300 -- N8 No_Module FC4 4 010400 id N8 Online FC F-Port 20:12:00:02:ac:00:67:455 5 010500 id N8 No_Light FC6 6 010600 -- N8 No_Module FC7 7 010700 -- N8 No_Module FC8 8 010800 -- N8 No_Module FC (No POD License) Disabled9 9 010900 -- N8 No_Module FC (No POD License) Disabled10 10 010a00 -- N8 No_Module FC (No POD License) Disabled11 11 010b00 -- N8 No_Module FC (No POD License) Disabled12 12 010c00 -- N8 No_Module FC (No POD License) Disabled13 13 010d00 -- N8 No_Module FC (No POD License) Disabled14 14 010e00 -- N8 No_Module FC (No POD License) Disabled15 15 010f00 -- N8 No_Module FC (No POD License) Disabled16 16 011000 -- N8 No_Module FC (No POD License) Disabled17 17 011100 -- N8 No_Module FC (No POD License) Disabled18 18 011200 -- N8 No_Module FC (No POD License) Disabled19 19 011300 -- N8 No_Module FC (No POD License) Disabled20 20 011400 -- N8 No_Module FC (No POD License) Disabled21 21 011500 -- N8 No_Module FC (No POD License) Disabled22 22 011600 -- N8 No_Module FC (No POD License) Disabled23 23 011700 -- N8 No_Module FC (No POD License) Disabled1.3、查看licenseshow信息。
cisco和Brocade光纤交换机级联配置1

Brocade和Cisco光纤交换机级联配置1.配置异构交换机平台协同工作模式Cisco 9120配置过程激活前8个端口switch# config tEnter configuration commands, one per line. End with CNTL/Z. switch(config)#interface fc1/1-8switch(config-if)# no shutdown switch(config-if)# end配置交换机协同工作模式switch# config tEnter configuration commands, one per line. End with CNTL/Z. switch(config)# vsan databaseswitch(config-vsan-db)# vsan 1 interopswitch(config-vsan-db)# end配置domain IDswitch# config tEnter configuration commands, one per line. End with CNTL/Z. switch(config)# fcdomain domain 100 preferred vsan 1switch(config)# end激活VSANswitch# config tEnter configuration commands, one per line. End with CNTL/Z. switch(config)# vsan databaseswitch(config-vsan-db)# vsan 1 suspendswitch(config-vsan-db)# no vsan 1 suspendswitch(config-vsan-db)# end察看修改之后的系统配置信息switch# show runningversion 2.0(2b)vsan databasevsan 1 interop 1fcdomain domain 100 preferred vsan 1fcdomain fcid persistent vsan 1boot kickstart bootflash:/m9100-s1ek9-kickstart-mz.2.0.2b.bin boot system bootflash:/m9100-s1ek9-mz.2.0.2b.binkernel core target 0.0.0.0kernel core limit 1snmp-server user admin network-admin auth md5 0xeec64ba2afbe9b65e13b23882ac6ae05 priv 0xeec64ba2afbe9b65e13b23882ac6ae05 localizedkeyusername admin password 5 $1$V3smTQpb$MTvub69DkVBxdCt9BsEDB1 role network-admin callhomeswitch-priority 7snmp-server enable traps licenseinterface mgmt0ip address 192.168.70.139 255.255.255.0interface fc1/1no shutdowninterface fc1/2no shutdowninterface fc1/3no shutdowninterface fc1/4no shutdowninterface fc1/5no shutdowninterface fc1/6no shutdowninterface fc1/7no shutdowninterface fc1/8no shutdowninterface fc1/9interface fc1/10interface fc1/11interface fc1/12interface fc1/13interface fc1/14interface fc1/15interface fc1/16interface fc1/17interface fc1/18interface fc1/19interface fc1/20switch#察看端口连接状态信息switch# show interface brief------------------------------------------------------------------------------- Interface Vsan Admin Admin Status FCOT Oper Oper PortMode TrunkMode Speed ChannelMode(Gbps)------------------------------------------------------------------------------- fc1/1 1 auto on upswl F 2 --fc1/2 1 auto on upswl F 2 --fc1/3 1 auto on upswl E 2 --fc1/4 1 auto on notConnected swl-- --fc1/5 1 FX -- notConnected swl -- --fc1/6 1 FX -- notConnected swl -- --fc1/7 1 FX -- notConnected swl -- --fc1/8 1 FX -- notConnected swl -- --fc1/9 1 FX -- sfpAbsent -- -- --fc1/10 1 FX -- sfpAbsent -- -- --fc1/11 1 FX -- sfpAbsent -- -- --fc1/12 1 FX -- sfpAbsent -- -- --fc1/13 1 FX -- sfpAbsent -- -- --fc1/14 1 FX -- sfpAbsent -- -- --fc1/15 1 FX -- sfpAbsent -- -- --fc1/16 1 FX -- sfpAbsent ---- --fc1/18 1 FX -- sfpAbsent -- -- --fc1/19 1 FX -- sfpAbsent -- -- --fc1/20 1 FX -- sfpAbsent -- -- --刀片中心光纤交换机模块配置禁止交换机brocadessm:USERID> switchdisable修改Domain IDbrocadessm:USERID> configureConfigure...Fabric parameters (yes, y, no, n): [no] yesDomain: (1..239) [1] 99R_A_TOV: (4000..120000) [10000]E_D_TOV: (1000..5000) [2000]WAN_TOV: (0..30000) [0]MAX_HOPS: (7..19) [7]Data field size: (256..2112) [2112]Sequence Level Switching: (0..1) [0]Disable Device Probing: (0..1) [0]Suppress Class F Traffic: (0..1) [0]Switch PID Format: (1..2) [1]Per-frame Route Priority: (0..1) [0]Long Distance Fabric: (0..1) [0]BB credit: (1..27) [16]Insistent Domain ID Mode (yes, y, no, n): [no]Virtual Channel parameters (yes, y, no, n): [no]Zoning Operation parameters (yes, y, no, n): [no]RSCN Transmission Mode (yes, y, no, n): [no]Arbitrated Loop parameters (yes, y, no, n): [no]System services (yes, y, no, n): [no]Portlog events enable (yes, y, no, n): [no]ssl attributes (yes, y, no, n): [no]http attributes (yes, y, no, n): [no]snmp attributes (yes, y, no, n): [no]rpcd attributes (yes, y, no, n): [no]cfgload attributes (yes, y, no, n): [no]webtools attributes (yes, y, no, n): [no]WARNING: The domain ID will be changed. The port level zoning may be affectedbrocadessm:USERID> msPlMgmtDeactivateSwitch is in Offline state.修改协同工作模式brocadessm:USERID> interoper mode 1The switch effective configuration will be lost when the operating mode is changed; do you want to continue? (yes, y, no, n): [no] yInteropmode is enabledNote: It is recommended that you reboot this switch for the new change to take effect.重新引导交换机brocadessm:USERID> fastbootBroadcast message from root (pts/0) Tue Jun 13 10:07:45 2006... The system is going down for reboot NOW !! USERIDPassword:Please change your passwords now.Use Control-C to exit or press 'Enter' key to proceed.Password was not changed. Will prompt again at next loginuntil password is changed.brocadessm:USERID>激活交换机brocadessm:USERID> switchenable察看修改配置之后的交换机状态brocadessm:USERID> switchshowswitchName: brocadessmswitchType: 22.0switchState: OnlineswitchMode: InteropswitchRole: PrincipalswitchDomain: 99switchId: fffc63switchWwn: 10:00:00:05:1e:02:78:c6zoning: OFFswitchBeacon: OFFArea Port Media Speed State==============================0 0 id 2G No_Light1 1 cu 2G Online F-Port 21:00:00:14:5e:24:a9:042 2 cu 2G Online F-Port 21:00:00:14:5e:24:a9:363 3 cu 2G Online F-Port 21:00:00:14:5e:24:a9:7a4 4 cu 2G Online F-Port 21:00:00:14:5e:24:a9:b65 5 cu 2G Online F-Port 21:00:00:14:5e:24:a9:286 6 cu 2G Online F-Port 21:00:00:14:5e:24:aa:f67 7 cu 2G Online F-Port 21:00:00:14:5e:24:aa:f08 8 cu 2G Online F-Port 21:00:00:14:5e:24:a9:389 9 cu 2G No_Light10 10 cu 2G No_Light11 11 cu 2G No_Light12 12 cu 2G No_Light13 13 cu 2G No_Light14 14 cu 2G No_Light15 15 id 2G Online E-Port 20:01:00:0d:ec:06:b4:41 (downstream)2.划分zoneCisco 9120划分zone察看fabric连接设备port wwn 信息switch# show fcns database vsan 1VSAN 1:-------------------------------------------------------------------------- FCID TYPE PWWN (VENDOR) FC4-TYPE:FEATURE--------------------------------------------------------------------------0x630100 N 21:00:00:14:5e:24:a9:04scsi-fcp0x630200 N 21:00:00:14:5e:24:a9:36scsi-fcp0x630300 N 21:00:00:14:5e:24:a9:7ascsi-fcp0x630400 N 21:00:00:14:5e:24:a9:b6scsi-fcp0x630500 N 21:00:00:14:5e:24:a9:28scsi-fcp0x630600 N 21:00:00:14:5e:24:aa:f6scsi-fcp0x630700 N 21:00:00:14:5e:24:aa:f0scsi-fcp0x630800 N 21:00:00:14:5e:24:a9:38scsi-fcp0x640000 N 20:07:00:a0:b8:21:19:9f(SymBios) scsi-fcp:both0x640100 N 20:06:00:a0:b8:21:19:9f(SymBios) scsi-fcp:bothTotal number of entries = 10创建zone分别创建2个zone,前4个刀片服务器与DS4300 2个控制器组成的zone,第4到第8个刀片服务器与DS4300 2个控制器组成的zone。
CISCO 网络设备使用及配置文档
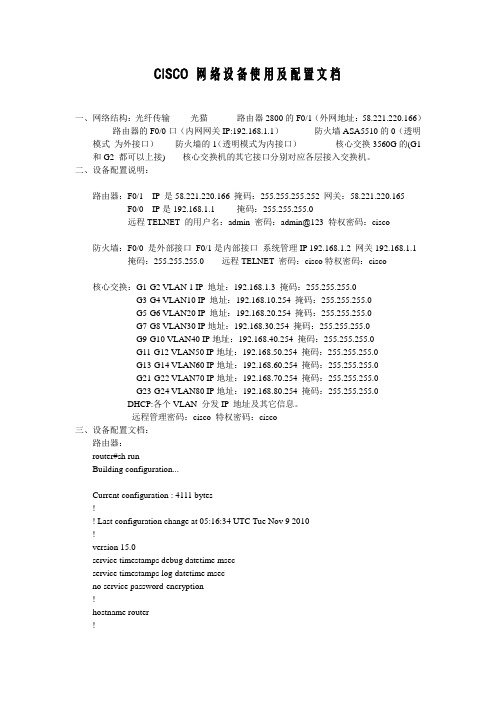
CISCO 网络设备使用及配置文档一、网络结构:光纤传输-------光猫----------路由器2800的F0/1(外网地址:58.221.220.166)-------路由器的F0/0口(内网网关IP:192.168.1.1)-----------防火墙ASA5510的0(透明模式为外接口)-------防火墙的1(透明模式为内接口)-------------核心交换3560G的(G1 和G2 都可以上接)------核心交换机的其它接口分别对应各层接入交换机。
二、设备配置说明:路由器:F0/1 IP 是58.221.220.166 掩码:255.255.255.252 网关:58.221.220.165 F0/0 IP是192.168.1.1 掩码:255.255.255.0远程TELNET 的用户名:admin 密码:admin@123 特权密码:cisco防火墙:F0/0 是外部接口F0/1是内部接口系统管理IP 192.168.1.2 网关192.168.1.1 掩码:255.255.255.0 远程TELNET 密码:cisco特权密码:cisco核心交换:G1-G2 VLAN 1 IP 地址:192.168.1.3 掩码:255.255.255.0G3-G4 VLAN10 IP 地址:192.168.10.254 掩码:255.255.255.0G5-G6 VLAN20 IP 地址:192.168.20.254 掩码:255.255.255.0G7-G8 VLAN30 IP地址:192.168.30.254 掩码:255.255.255.0G9-G10 VLAN40 IP地址:192.168.40.254 掩码:255.255.255.0G11-G12 VLAN50 IP地址:192.168.50.254 掩码:255.255.255.0G13-G14 VLAN60 IP地址:192.168.60.254 掩码:255.255.255.0G21-G22 VLAN70 IP地址:192.168.70.254 掩码:255.255.255.0G23-G24 VLAN80 IP地址:192.168.80.254 掩码:255.255.255.0DHCP:各个VLAN 分发IP地址及其它信息。
2024年度思科网络交换机配置命令详细总结归纳

设置STP模式
配置STP优先级
配置STP端口状态
在交换机上启用STP功能,通 常使用命令`spanning-tree vlan vlan-id`。
2024/2/3
根据需要设置STP模式(如 PVST+、RSTP等),使用命 令`spanning-tree mode stpmode`。
通过调整交换机端口的优先级 来影响STP计算过程,使用命 令`spanning-tree vlan vlanid priority priority-value`。
17
04
端口聚合(EtherChannel)配 置与应用
2024/2/3
18
端口聚合概念及优势分析
2024/2/3
端口聚合定义
将多个物理端口组合成一个逻辑通道 ,增加带宽、提供冗余链路。
端口聚合优势
提高网络可靠性、实现负载均衡、简 化网络管理。
19
端口聚合配置命令详解
进入接口配置模式
interface range fastEthernet 0/1 - 2(以 FastEthernet接口为例)
2024/2/3
28
交换机性能监控指标分析
端口状态监控
检查端口速率、双工模式、流量控制等 参数,确保端口正常工作。
网络流量监控
通过网络管理工具实时监控网络流量 ,发现异常流量及时处置。
2024/2/3
CPU和内存利用率监控
定期查看CPU和内存占用情况,避免 资源瓶颈。
错误包和丢弃包监控
分析交换机错误包和丢弃包的数量, 定位网络故障。
2024/2/3
4
交换机主机名与域名设置
主机名配置
为交换机设置唯一的主机名,便于网络管理和故障排 除。
光纤交换机配置
光纤交换机配置谈起交换机本地配置,首先我们来看一下交换机的物理连接。
交换机的本地配置方式是通过计算机与交换机的“Console”端口直接连接的方式进行通信的。
下面是店铺跟大家分享的是光纤交换机配置,欢迎大家来阅读学习。
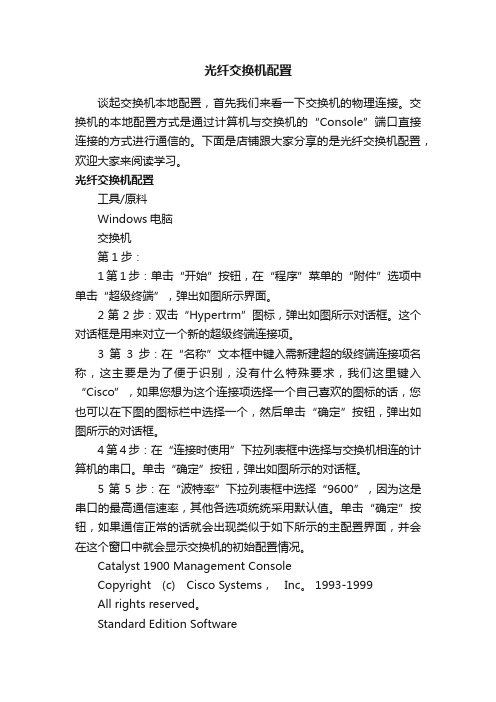
光纤交换机配置工具/原料Windows电脑交换机第1步:1第1步:单击“开始”按钮,在“程序”菜单的“附件”选项中单击“超级终端”,弹出如图所示界面。
2第2步:双击“Hypertrm”图标,弹出如图所示对话框。
这个对话框是用来对立一个新的超级终端连接项。
3第3步:在“名称”文本框中键入需新建超的级终端连接项名称,这主要是为了便于识别,没有什么特殊要求,我们这里键入“Cisco”,如果您想为这个连接项选择一个自己喜欢的图标的话,您也可以在下图的图标栏中选择一个,然后单击“确定”按钮,弹出如图所示的对话框。
4第4步:在“连接时使用”下拉列表框中选择与交换机相连的计算机的串口。
单击“确定”按钮,弹出如图所示的对话框。
5第5步:在“波特率”下拉列表框中选择“9600”,因为这是串口的最高通信速率,其他各选项统统采用默认值。
单击“确定”按钮,如果通信正常的话就会出现类似于如下所示的主配置界面,并会在这个窗口中就会显示交换机的初始配置情况。
Catalyst 1900 Management ConsoleCopyright (c) Cisco Systems,Inc。
1993-1999All rights reserved。
Standard Edition SoftwareEthernet address:00-E0-1E-7E-B4-40PCA Number:73-2239-01PCA Serial Number:SAD01200001Model Number:WS-C1924-ASystem Serial Number:FAA01200001User Interface Menu[M] Menus//主配置菜单[I] IP Configuration//IP地址等配置[P] Console Password //控制密码配置Enter Selection://在此输入要选择项的快捷字母,然后按回车键确认至此就正式进入了交换机配置界面了,下面的工作就可以正式配置交换机了。
cisco交换机配置实例教程

03
DHCP Snooping与DAI结合
通过动态ARP检测(DAI)功能,防止ARP欺骗攻击,提 高网络安全性。
IP Source Guard功能实现网络安全防护
IP Source Guard原理
检查IP报文源地址与绑定表中的记录是否匹配,防止IP地址欺骗。
01
推荐工具
02
Cisco命令行界面(CLI)
03
Cisco网络助手(CNA)
04
网络分析工具,如Wireshark
经典案例剖析:网络环路问题处理
问题描述
网络中出现广播风暴,导致网络性能严 重下降。
VS
原因分析
网络中存在环路,导致广播帧在环路中不 断循环。
经典案例剖析:网络环路问题处理
01
02
03
在交换机上创建VLAN 10 、20和30,分别对应财务 部、技术部和销售部。
将连接财务部的计算机端 口划分到VLAN 10,将连 接技术部的计算机端口划 分到VLAN 20,将连接销 售部的计算机端口划分到 VLAN 30。
在交换机之间配置汇聚端 口,允许所有VLAN的数据 通过。
在各部门的计算机上分别 ping其他部门的计算机, 验证是否在同一网段内, 以及不同部门之间是否可 以相互访问。
EIGRP协议配置案例分析
01
通过Hello报文建立邻居关系,使用Update报文交换路由信 息
02
EIGRP基本配置命令
03
进入全局配置模式,启用EIGRP进程
EIGRP协议配置案例分析
指定网络段参与EIGRP进程
配置EIGRP相关参数(如AS号、度量值等) EIGRP高级特性与应用场景
9124思科光纤交换机配置管理使用手册
9124光纤交换机配置管理使用手册1.初始化信息 (3)2.交换机基本配置 (4)2.1.配置交换机管理地址 (4)2.2.LICENSE注册 (4)2.3.配置VSAN (6)2.4.配置ZONESET (6)2.5.配置ZONE (7)2.6.TRUNKING的配置 (7)3.标准配置模板 (8)4.常用检查命令 (9)5.常用配置命令 (9)5.1.删除创建的ZONE (9)5.2.清除配置 (9)5.3.设置配置口超时 (10)5.4.安装与清除license (10)5.5.显示指定License (10)5.6.显示全部Licenses (10)5.7.显示ID (11)5.8.命名交换机 (11)5.9.设置管理口 (11)5.10.禁止与使能Telnet 与ssh (11)5.11.下载配置文件 (12)5.12.保存配置 (12)5.13.创建与设置VSAN (12)5.14.分配VSAN成员 (12)5.15.删除VSAN (13)5.16.浏览VSAN设置 (13)5.17.设置FC端口 (14)5.18.设置Zone (15)5.19.设置Zone Sets (15)5.20.激活Zone Set (15)5.21.浏览Zone信息 (15)5.22.恢复管理员口令 (18)5.23.设置端口速率 (19)1.初始化信息在启动交换机后,会有类似如下的信息显示:---- System Admin Account Setup ----Enter the password for "admin": 输入admin管理员密码,系统设为P@ssw0rd Confirm the password for "admin": 再次输入admin管理员密码,P@ssw0rd---- Basic System Configuration Dialog ----This setup utility will guide you through the basic configuration ofthe system. Setup configures only enough connectivity for managementof the system.Please register Cisco MDS 9000 Family devices promptly with yoursupplier. Failure to register may affect response times for initialservice calls. MDS devices must be registered to receive entitledsupport services.Press Enter at anytime to skip a dialog. Use ctrl-c at anytimeto skip the remaining dialogs.Would you like to enter the basic configuration dialog (yes/no): noMDS Switchswitch login: adminPassword:TAC support: /tacCopyright (c) 2002-2005, Cisco Systems, Inc. All rights reserved. The copyrights to certain works contained herein are owned by other third parties and are used and distributed under license.Some parts of this software are covered under the GNU Public License. A copy of the license is available at/licenses/gpl.html.switch#然后,可以按照类似以太网交换机配置的方法来配置交换机了。
- 1、下载文档前请自行甄别文档内容的完整性,平台不提供额外的编辑、内容补充、找答案等附加服务。
- 2、"仅部分预览"的文档,不可在线预览部分如存在完整性等问题,可反馈申请退款(可完整预览的文档不适用该条件!)。
- 3、如文档侵犯您的权益,请联系客服反馈,我们会尽快为您处理(人工客服工作时间:9:00-18:30)。
光纤交换机级联配置文档Cisco 9120交换机1.配置异构交换机平台协同工作模式Cisco 9120配置过程激活前8个端口switch# config tEnter configuration commands, one per line. End with CNTL/Z. switch(config)#interface fc1/1-8switch(config-if)# no shutdownswitch(config-if)# end配置交换机协同工作模式switch# config tEnter configuration commands, one per line. End with CNTL/Z. switch(config)# vsan databaseswitch(config-vsan-db)# vsan 1 interopswitch(config-vsan-db)# end配置domain IDswitch# config tEnter configuration commands, one per line. End with CNTL/Z. switch(config)# fcdomain domain 100 preferred vsan 1switch(config)# end激活VSANswitch# config tEnter configuration commands, one per line. End with CNTL/Z. switch(config)# vsan databaseswitch(config-vsan-db)# vsan 1 suspendswitch(config-vsan-db)# no vsan 1 suspendswitch(config-vsan-db)# end察看修改之后的系统配置信息switch# show runningversion 2.0(2b)vsan databasevsan 1 interop 1fcdomain domain 100 preferred vsan 1fcdomain fcid persistent vsan 1boot kickstart bootflash:/m9100-s1ek9-kickstart-mz.2.0.2b.bin boot system bootflash:/m9100-s1ek9-mz.2.0.2b.binkernel core target 0.0.0.0kernel core limit 1snmp-server user admin network-admin auth md5 0xeec64ba2afbe9b65e13b23882ac6ae05priv 0xeec64ba2afbe9b65e13b23882ac6ae05 localizedkeyusername admin password 5 $1$V3smTQpb$MTvub69DkVBxdCt9BsEDB1 role network-admincallhomeswitch-priority 7snmp-server enable traps licenseinterface mgmt0ip address 192.168.70.139 255.255.255.0interface fc1/1no shutdowninterface fc1/2no shutdowninterface fc1/3no shutdowninterface fc1/4no shutdowninterface fc1/5no shutdowninterface fc1/6no shutdowninterface fc1/7no shutdowninterface fc1/8no shutdowninterface fc1/9interface fc1/10interface fc1/11interface fc1/12interface fc1/13interface fc1/14interface fc1/15interface fc1/16interface fc1/17interface fc1/18interface fc1/19interface fc1/20switch#察看端口连接状态信息switch# show interface brief------------------------------------------------------------------------------- Interface Vsan Admin Admin Status FCOT Oper Oper Port Mode Trunk Mode Speed ChannelMode (Gbps)-------------------------------------------------------------------------------fc1/1 1 auto on up swl F 2 --fc1/2 1 auto on up swl F 2 --fc1/3 1 auto on up swl E 2 --fc1/4 1 auto on notConnected swl -- --fc1/5 1 FX -- notConnected swl -- --fc1/6 1 FX -- notConnected swl -- --刀片中心光纤交换机模块配置禁止交换机brocadessm:USERID> switchdisable修改Domain IDbrocadessm:USERID> configureConfigure...Fabric parameters (yes, y, no, n): [no] yesDomain: (1..239) [1] 99R_A_TOV: (4000..120000) [10000]E_D_TOV: (1000..5000) [2000]WAN_TOV: (0..30000) [0]MAX_HOPS: (7..19) [7]Data field size: (256..2112) [2112]Sequence Level Switching: (0..1) [0]Disable Device Probing: (0..1) [0]Suppress Class F Traffic: (0..1) [0]Switch PID Format: (1..2) [1]Per-frame Route Priority: (0..1) [0]Long Distance Fabric: (0..1) [0]BB credit: (1..27) [16]Insistent Domain ID Mode (yes, y, no, n): [no]Virtual Channel parameters (yes, y, no, n): [no]Zoning Operation parameters (yes, y, no, n): [no]RSCN Transmission Mode (yes, y, no, n): [no]Arbitrated Loop parameters (yes, y, no, n): [no]System services (yes, y, no, n): [no]Portlog events enable (yes, y, no, n): [no]ssl attributes (yes, y, no, n): [no]http attributes (yes, y, no, n): [no]snmp attributes (yes, y, no, n): [no]rpcd attributes (yes, y, no, n): [no]cfgload attributes (yes, y, no, n): [no]webtools attributes (yes, y, no, n): [no]WARNING: The domain ID will be changed. The port level zoning may be affectedbrocadessm:USERID> msPlMgmtDeactivateSwitch is in Offline state.修改协同工作模式brocadessm:USERID> interoper mode 1The switch effective configuration will be lost when the operating mode is changed; do you want to continue? (yes, y, no, n): [no] yInteropmode is enabledNote: It is recommended that you reboot this switch for the new change to take effect.重新引导交换机brocadessm:USERID> fastbootBroadcast message from root (pts/0) Tue Jun 13 10:07:45 2006...The system is going down for reboot NOW !!USERIDPassword:Please change your passwords now.Use Control-C to exit or press 'Enter' key to proceed.Password was not changed. Will prompt again at next loginuntil password is changed.brocadessm:USERID>brocadessm:USERID> switchenable察看修改配置之后的交换机状态brocadessm:USERID> switchshowswitchName: brocadessmswitchType: 22.0switchState: OnlineswitchMode: InteropswitchRole: PrincipalswitchDomain: 99switchId: fffc63switchWwn: 10:00:00:05:1e:02:78:c6zoning: OFFswitchBeacon: OFFArea Port Media Speed State==============================0 0 id 2G No_Light1 1 cu 2G Online F-Port 21:00:00:14:5e:24:a9:042 2 cu 2G Online F-Port 21:00:00:14:5e:24:a9:363 3 cu 2G Online F-Port 21:00:00:14:5e:24:a9:7a4 4 cu 2G Online F-Port 21:00:00:14:5e:24:a9:b65 5 cu 2G Online F-Port 21:00:00:14:5e:24:a9:286 6 cu 2G Online F-Port 21:00:00:14:5e:24:aa:f67 7 cu 2G Online F-Port 21:00:00:14:5e:24:aa:f08 8 cu 2G Online F-Port 21:00:00:14:5e:24:a9:389 9 cu 2G No_Light10 10 cu 2G No_Light11 11 cu 2G No_Light12 12 cu 2G No_Light13 13 cu 2G No_Light14 14 cu 2G No_Light15 15 id 2G Online E-Port 20:01:00:0d:ec:06:b4:41 (downstream)2.划分zoneCisco 9120划分zone察看fabric连接设备port wwn 信息switch# show fcns database vsan 1--------------------------------------------------------------------------FCID TYPE PWWN (VENDOR) FC4-TYPE:FEATURE--------------------------------------------------------------------------0x630100 N 21:00:00:14:5e:24:a9:04 scsi-fcp0x630200 N 21:00:00:14:5e:24:a9:36 scsi-fcp0x630300 N 21:00:00:14:5e:24:a9:7a scsi-fcp0x630400 N 21:00:00:14:5e:24:a9:b6 scsi-fcp0x630500 N 21:00:00:14:5e:24:a9:28 scsi-fcp0x630600 N 21:00:00:14:5e:24:aa:f6 scsi-fcp0x630700 N 21:00:00:14:5e:24:aa:f0 scsi-fcp0x630800 N 21:00:00:14:5e:24:a9:38 scsi-fcp0x640000 N 20:07:00:a0:b8:21:19:9f (SymBios) scsi-fcp:both0x640100 N 20:06:00:a0:b8:21:19:9f (SymBios) scsi-fcp:bothTotal number of entries = 10创建zone分别创建2个zone,前4个刀片服务器与DS4300 2个控制器组成的zone,第4到第8个刀片服务器与DS4300 2个控制器组成的zone。
