Deform v10.2安装教程
Deform详细教程

输入材料的热物理性质,如热导率、比热容、热膨胀系数 等,以便在模拟过程中考虑温度对材料性能的影响。
材料失效准则
根据实际需要,选择适当的材料失效准则,如最大主应力 准则、等效塑性应变准则等,并设置相应的失效参数。
边界条件设置
几何边界条件
定义模型的几何形状、尺寸和边 界类型,如固定边界、自由边界 、对称边界等。
04 Deform软件基本操作
用户界面介绍
主界面
包括菜单栏、工具栏、模型树、属性窗口等,提供全 面的操作功能和视图展示。
图形界面
支持多种图形显示模式,如实体、网格、轮廓等,方 便用户进行模型分析和后处理。
自定义界面
用户可根据个人习惯自定义界面布局,提高工作效率 。
基本操作命令
鼠标操作
通过鼠标左键选择、拖拽、旋转等操作,实现模型的交互操作。
未来发展趋势预测
A
随着计算机技术的不断发展,有限元分析软件 的计算能力和效率将不断提高,使得更大规模 、更复杂的仿真分析成为可能。
人工智能、机器学习等技术的引入,将为 有限元分析提供更强大的数据处理和挖掘 能力,进一步提高分析的精度和效率。
B
C
多物理场耦合分析将成为未来发展的重要方 向,Deform等软件将不断完善多物理场分 析功能,满足更广泛的应用需求。
配置环境变量和启动软件
启动软件 在完成安装和环境变量配置后,可以通过以下方式启动Deform软件 1. 点击桌面或开始菜单中的Deform图标。
配置环境变量和启动软件
2. 在命令行中输入Deform的可执行 文件名并回车。
3. 如果设置了文件关联,可以直接双 击与Deform关联的文件类型来启动 软件并打开相应文件。
DEFORM基本操作指南

2、提高模具设计效率,降低生产和材料成 本;
3、缩短新产品得研究开发周期。
DEFORM-3DD就E是F一O套R基M于-工3D艺模简拟介系统得有限元
系统(FEM),专门设计用于分析各种金属成形过程中得三 维(3D)流动,提供极有价值得工艺分析数据,及有关成形 过程中得材料和温度得流动。
DEFORM-3D可以应用于金属成形得冷加工、热加工等 工
UG软件建模完成后可以直接以、stl格式形 式文件导出。
二、网格划分
DEFORM软件就是有限元系统(FEM),所 以必须对所分析得工件进行网格划分。
在DEFORM-3D中,如果用其自身带得网格 剖分程序,只能划分四面体单元,这主要就是为了 考虑网格重划分时得方便和快捷。但就是她也接
收 外部程序所生成得六面体(砖块)网格。网格划 分可以控制网格得密度,使网格得数量进一步减 少,但不至于在变形剧烈得部位产生严重得网格 畸变。
二、导入毛坯几何文件
1、在前处理得物体操作窗口中点击按钮
(Geometry) ,然后再选
择
(Import Geometry),选择在CAD中或其她CAE软件
中得造型文件。(本例中选择安装目录下DEFORM3D\V6、1\Labs得
Block_Billet、STL。)
2、在DEFORM3D v6、1得版
温度得方式为在物体窗口中选中物体Workpiece,点击General按钮,然
后点击按钮
在弹出得输入物体温度窗口中,输入所需
温度。)
七、设置材料
对于那些非刚性材料和考虑 传热影响得刚体(Rigid)材料, 必须按需要设置材料得属性。
1、在物体列表窗口中选择Workpiec
2、在前处理控制窗口中,点击
DEFORM基本操作指南

,更加直观地了解变形过程和结果。
数据提取、分析和报告生成
在DEFORM软件中,可以通 过选择“分析”菜单下的不 同选项,提取模拟结果中的 各种数据,如位移、应力、
应变、温度等。
提取的数据可以以图表形式 展示,方便进行数据分析和
比较。
可以将提取的数据和图表导 出为报告文件,如Word、 PDF等格式,供后续分析和交 流使用。
解决方法
检查安装目录是否正确,并确保已将DEFORM添加到 系统路径中。
使用过程中遇到的常见问题及解决方法
问题1
DEFORM启动失败或崩溃
01
解决方法
02 检查是否有最新的更新或补丁
可用,并尝试重新安装或修复 安装。
问题2
03 在使用特定功能时出现问题
解决方法
04 查阅DEFORM的官方文档或
用户手册,了解该功能的使用 方法和限制。
快捷键
支持多种快捷键组合,如Ctrl+C(复制)、Ctrl+V(粘贴)、Ctrl+S(保存)等,提高操作效率。
03
前处理操作指南
导入几何模型
支持的几何模型格式
DEFORM支持多种CAD软件输出 的几何模型格式,如IGES、STEP 、STL等。
导入步骤
在DEFORM前处理界面中,选择 “文件”->“导入”->选择对应 的几何模型格式进行导入。
网格划分与边界条件设置
网格类型
DEFORM支持多种网格类型,如四面体网 格、六面体网格等,用户可以根据模型特点 和计算精度要求进行选择。
网格划分
对几何模型进行网格划分,可以通过设置网格大小 、密度等参数来控制网格质量和计算精度。
边界条件
DEFORM v11安装教程
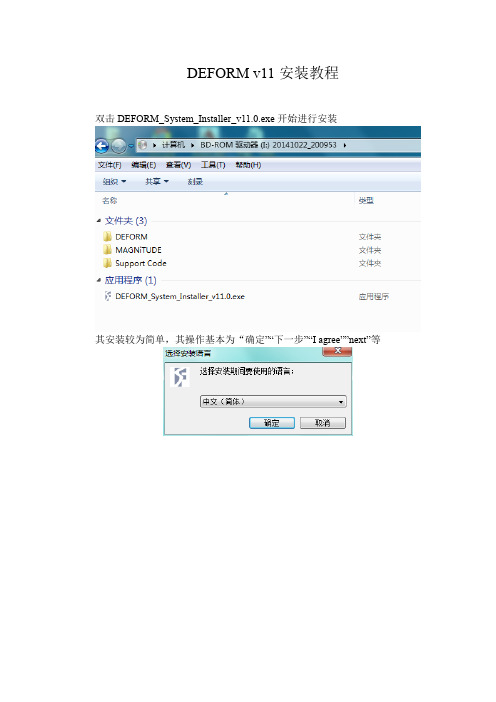
DEFORM v11安装教程
双击DEFORM_System_Installer_v11.0.exe开始进行安装
其安装较为简单,其操作基本为“确定”“下一步”“I agree””next”等
选项为默认即可,如果系统为64位,可以将MPICH Multiple Processor Support-32bit选项去掉,Microsoft C++2008 x86 Redistributable和Microsoft C++2008 x64 Redistributable如果确定电脑上已装,可以将对勾去掉,不确定的话,默认即可。
64位系统会出现MPICH2 64bit的安装过程
如果出现下面的界面,说明电脑已经安装Visual C++2008,就可以不再安装,点Cancel即可
点击“浏览”找到MAGNiTUDE文件夹下的Deform.pwd文件,打开
密码可以不填
DEFORM主程序较大,约为4.5G,建议不要装在系统盘
密码可以不填
以下为破解过程,出现以下界面,将MAGNiTUDE文件夹下的Deform.pwd 和LicenseServer.exe拷贝到X:/ProgramFiles/SFTC/LicenseManager目录下,并替换相关文件,然后双击运行LicenseServer.exe,依次点“Start”, “Synchronize”,“Save and Exit”
出现The license server is running!说明破解成功
DEFORM v11可以在Environment中设置语言为中文简体。
Deform入门教程

Deform入门教程教学内容:1. Deform软件的安装与界面介绍2. 基本几何体的创建与操作3. 网格的与编辑4. 材料属性的设置与模拟5. 动画的创建与渲染教学目标:1. 学生能够熟练安装并使用Deform软件,掌握其基本操作。
2. 学生能够理解并运用Deform软件进行简单的几何体创建和网格编辑。
3. 学生能够设置材料属性并完成简单的动画渲染。
教学难点与重点:重点:Deform软件的基本操作,包括几何体的创建、网格的与编辑,以及材料属性的设置。
难点:网格的编辑操作以及动画的创建与渲染。
教具与学具准备:教具:多媒体教学设备、Deform软件安装光盘。
学具:每人一台计算机,已安装Deform软件。
教学过程:1. 实践情景引入:教师通过展示一个简单的动画案例,引导学生思考如何利用Deform软件进行制作。
2. 基本几何体的创建与操作:教师演示如何创建基本几何体(如球体、长方体等),并引导学生进行实际操作练习。
3. 网格的与编辑:教师讲解网格的与编辑方法,并通过实际操作演示。
学生跟随教师操作,进行网格的创建、缩放、平移等操作。
4. 材料属性的设置与模拟:教师讲解如何设置材料属性,如颜色、透明度等,并展示模拟结果。
学生进行实际操作,尝试不同材料属性的设置。
5. 动画的创建与渲染:教师演示如何创建动画并渲染输出,学生进行实际操作,尝试制作简单的动画。
板书设计:板书设计将包括本节课的主要内容,如基本几何体的创建、网格的与编辑、材料属性的设置等,以及操作步骤和示例。
作业设计:1. 请学生利用Deform软件,制作一个简单的几何体动画,并渲染输出。
2. 请学生尝试设置不同的材料属性,观察动画模拟结果。
课后反思及拓展延伸:教师在课后应对本节课的教学效果进行反思,看是否达到了教学目标,学生是否掌握了Deform软件的基本操作。
同时,教师可以引导学生进行拓展延伸,如尝试更复杂的网格编辑操作,或者利用Deform软件进行更复杂的动画制作。
2024Deform入门教程

Deform入门教程CONTENTS •引言•Deform软件简介•Deform基本操作•材料模型与参数设置•网格划分与边界条件•模拟过程与结果分析•常见问题及解决方案•总结与展望引言01目的和背景目的帮助初学者快速掌握Deform软件的基本操作和技能,提高数值模拟的效率和准确性。
背景Deform是一款广泛应用于金属成形、热处理、焊接等领域的数值模拟软件,具有强大的前后处理功能和精确的数值模拟能力。
软件界面和基础操作介绍Deform软件的基本界面布局、常用工具栏和菜单功能,以及文件管理和数据导入导出等基础操作。
讲解Deform软件中的材料模型、材料数据库和自定义材料参数等知识点,以及如何进行材料参数的设置和调整。
介绍Deform软件中的网格划分和重划分技术,包括网格类型、网格密度、网格质量评估和调整等方法。
详细讲解如何在Deform软件中设置边界条件、施加各种载荷和约束,以及如何处理接触和摩擦等问题。
介绍Deform软件中的模拟结果分析方法,包括变形、应力、应变、温度等物理量的计算和可视化展示,以及如何进行数据导出和报告生成等操作。
材料模型和数据库边界条件和载荷设置模拟结果分析和后处理网格划分和重划分技术教程内容概述Deform 软件简介02DEFORM 提供了全面的有限元分析功能,可以对金属成形过程中的应力、应变、温度等物理量进行准确计算。
强大的有限元分析功能软件内置了丰富的材料数据库,包括各种金属和非金属材料,用户可以根据需要选择合适的材料模型。
丰富的材料数据库DEFORM 采用了直观的图形界面设计,使得用户可以更加方便地进行模型建立、结果查看等操作。
直观的图形界面软件提供了多种求解器供用户选择,可以根据具体问题的复杂程度和计算精度要求来选择合适的求解器。
多种求解器选择软件功能与特点金属成形领域DEFORM广泛应用于金属成形领域,如锻造、挤压、轧制、拉拔等工艺过程的模拟分析。
材料研究领域DEFORM也常用于材料研究领域,通过对不同材料的成形过程进行模拟分析,可以研究材料的变形行为、组织演变等问题。
DEFORM_V102_PC_Installation_Notes
DEFORM™ Version 10.2Installation NotesFor Microsoft Windows Vista/7 (Home/Professional) Operating systems on PC08-30-2011Important Note for license manager users (Client-Side):With Windows XP Service Pack 2 and later there is a built-in firewall that affects any programs that attempt to communicate across the network. This affects users of the DEFORM License Manager since their computer must communicate with the server machine to check out licenses. An example warning message is seen below.Please select the Unblock option to let the DEFORM executables run freely and to prevent further such messages. Once the executable is unblocked, it doesn't need to be unblocked again unless the exceptions in the Windows Firewall are initialized. There may be several DEFORM executables that will generate this warning. Click Unblock at each occurrence.If you decide not to use the Windows Firewall as it can cause problems with many applications or you may be using a different firewall, turning it off will avoid any need to perform the Unblocking procedure mentioned above. For more information concerning the Windows Firewall please consult the following website:/windowsxp/using/security/internet/sp2_wfintro.mspxINTRODUCTIONThe following pages describe the installation steps that need to be performed in order to install DEFORM v10.2. These steps include:•Meeting minimum system requirements.•Installing the Security Key device.•Installing the DEFORM V10.2 program files.•Troubleshooting, should you run into problems.INSTALLATION REQUIREMENTS•Operating system: Windows Vista (x86 or x86_64), Windows 7 (x86_64 only). Server Versions are not supported.•Suggested RAM: 8+ GB•Hard drive space required for installation: ~4 GB.INSTALLING THE SECURITY KEY DEVICEThis Security Key allows the DEFORM V10.2 system to be highly portable while still allowing only one system to be operable at any time. The actual software can be installed on as many computers as you like, but each DEFORM system will be inoperable without the Security Key on the PC where the license server is installed and running. The security key can be for either the parallel port or the USB port.Locate the 25-pin parallel port on the back of your PC or in the case of a USB key, find the USB port. Plug the Security Key directly into this port after the driver installation following the installation prompts. Please note that security Key driver installation does require a system reboot and is required to be done before the Key is inserted in the corresponding port.If an existing printer is also plugged into this port it must be plugged into the end of the Security Key for the parallel port key.CAUTIONThe Security Key keeps track of the date on your PC. Make sure the date is correct before initially running DEFORM V10.2. Changing the date backwards or forwards may make the DEFORMV10.2 system inoperable.The Security Key may be damaged during the installation of the Sentinel Protection Installer. Remove the key before installing this software. Reinstall the key after installing the Sentinel software.INSTALLING DEFORM V10.2 IN WINDOWSThe DEFORM V10.2 system installer is a self-contained executable available on DVD, or by download from the DEFORM support website. All supporting (required and optional) code is included in the DEFORM V10.2 system installation executable.Important:•Uninstall the previous version of the License Manager 2.1 and the Sentinel key drivers •Before beginning to install DEFORM V10.2 in Windows, it is necessary to be logged in as an Administrator.•Norton AntiVirus Auto-Protect can cause substantial delays during the installation. It should be temporarily disabled.•Remove any attached hardware keys before attempting to install the software. Procedure:•Start up Windows (Log in as the Administrator or with Administrator privileges).•Insert the DVD in the appropriate drive.•Open an Explorer window, go to the DVD ROM drive and double-click the DEFORM_System_Installer_v10.2.exe file. The DEFORM installation package is notdigitally signed. A system notification about an unsigned installer can be safely ignored.• A welcome window comes up. Click next.• A license agreement window is displayed.If you accept the terms of the license agreement check the “I Agree” box then press next.Subsequent component installations have the same option.•Select the components you wish to install. If you are installing a new hardware key you must remove the hardware key, install the Sentinel Key driver separately from otherDEFORM components, insert the key and reboot the system to resume DEFORMproduct installation. Select the type of install desired from the drop down menu, or click on the appropriate check boxes for a custom installation. The four items are separate installers:o DEFORM Support CodeInstalls third party code: Sentinel Driver, Python, MPICHo DEFORM License ManagerInstalls License Manager v3.0.3 (Requires prior installation of Sentinel Driver) o DEFORM v10.2Installs DEFORM v10.2o DEFORM v11.0 BetaInstalls DEFORM v11.0 BetaThe default installation selects 32 bit or 64 bit components as appropriate. If you only want to install the Sentinel Key Driver you may select those options from the drop down menu, or you may click the appropriate check boxes for a custom installation. For the purposes of this document we will simulate the installation of code on 32 bit x 86 systems by selecting every default option.•Click Install to start the installation.This launches the DEFORM Support Code Installer. Click Next. Each individual component product has its own license agreement.•Select the code to install.•Select the installation path.If you wish to install the Support Code in a different directory you may specify it at this time. Subsequent component installations have the same option.•Select Install.A progress bar will appear.• A dialog will appear”This is because 64 bit systems require the installation of 32 bit and 64 bit MPICH.•Click OK.Follow the MPICH dialogs to install MPICH.NT 1.2.1• A dialog indicating the necessity of both MPICH installations on 64 bit systems will appear if applicable.Click OK.Click next and install Python, or Cancel to skip Python.•If the Sentinel Key Driver install was selected the hardware key must be removed before proceeding.Remove the Sentinel Key if installed. Click OK.The Sentinel Driver installation forces a system reboot. •Click yes.Follow the prompts to install or upgrade the Sentinel Key driver.Follow the installation or upgrade prompts.•Click reboot.You may reinstall the key now that the driver installation is complete.•Reboot the system.•If you did not install the Sentinel Key Driver you may proceed.•Install the License Manager.Acknowledge the license and path as previously described. •Install the password.•Complete the License Manager installation.•Install DEFORM.Acknowledge the license and path as previously described.If this is a Node Locked license click the appropriate button.If this is a Simulation Server click the appropriate button.If this is a Batch Queue Server click the appropriate button.If the License Manager needs to be looked up on a different computer, indicating the same allows the server status to be checked and then the shortcuts can be configured according to the available licenses.Click “Generate Shortcuts” and wait.•At this point the installation is complete and you may reboot and proceed to the DEFORMLicense Manager Configuration.If you have chosen to install the DEFORM Beta code the installer will appear.Follow the prompts as previously described.DEFORM License Manager Configuration•From the Start menu > DEFORM v10.2 > Register and Start DEFORM License Manager service. (if a License Server restart is required at a later point, as a result ofpassword/hardware key change, to be executed with Admin rights)•From the Start menu > DEFORM v10.2 > DEFORM Setup: and provide the details related to license server location in the network, if different from the local computer and product installation path if different from the default installation path. (if a License Server restart is restarted at a later point, as a result of password/hardware key change, same needs to be reflected in the DEFORM Setup and to be executed with Admin rights)•At this point if you click on ‘Check Server’ should return ‘Success’ message as shown here. If not please check, if the hardware key is properly inserted, check if a validpassword file is copied to the correct location and check task manager if‘LManagerServer.exe’ is running.•Click on ‘Save locally and commit to Server’ to save the minimum required information needed to be able to start up and run DEFORM v10.2•Fill in the details for Batch Queue (use port # 34446) and Simulation Server (user port # 34447) and save the details. If you are returning to modify these settings, it is important to first get these settings from the license server (use ‘Get Configuration’) beforemodifying or adding additional details. Save the details locally and commit to server if different from the local machine.•Register and start the batch queue and simulation servers using the batch files provided in the installation folder C:\Program Files\SFTC\DEFORM\v10.2. Please note that this registering and starting of services need to be done only once.•Please note that ‘Setup License Configuration’ of the old products ‘DEFORM2D v9.1’ or DEFORM 3Dv6.1’ can use this new port number ‘34445’ and check out a copy of validand available license from this new license server.DEFORM System Access after Installation SetupFrom the Start menu > DEFORM v10.2 > all the installed and licensed DEFORM products can be accessed as shown below.Identifying License Server 3.0 ProblemsStep 1Check whether license server is running by opening Task Manager. If LManagerServer appears as a running process (XP) or a running service (Vista), then it is running.•If it is running, go to Step 2 (A).•If it is not running, go to Step 2 (B).Step 2(A) This is likely a password or hardware key problem. There are three ways to check:•View the most recent log file [located in <installpath>\LicenseManager\log\(year)\].•Run the diagnostics tool from INSIDE the LicenseManager folder.[…SFTC\LicenseManager\Defdiag.exe]. The resulting .dgf file will helpsupport team to diagnose the issue.•If “Check server” in DEFORM Setup says “license server is terminated”: hardware key problem.If use log file to check:•If the file indicates the hardware key is invalid: hardware key problem.Please send the .dgf file to support@•If the file says “no password” or “no available password”: password problem. Please contact support@. Please note that if youhave received a new password file replacing an expired password file, it is important to restart the License Manager Service or reboot the LicenseManager Server machine.(B) Old license server is running, register service problem or installation problem.If log file [located in <install path>\LicenseManager\log\(year)\].says “old license server (v2.1) may be running”, problem identified: old license server is running.Please open “Control panel” -> “Administrative tools” -> “Services”, see whether LManagerServer is a registered service.•If no such a service: register service problem.•If there is LManagerServer, check the status (started?) and the startup type (should be automatic).•If the status not “started”, ask user to select LmangerServer and click “start”. And check whether license server works well.•If the startup type is not automatic: register service problem.If problem is still not identified, please contact support@Solving License Server 3.0 Problem: Specific Topic IssuesPassword problem:Copy the correct v10.2 DEFORM.PWD to the license server directory(C:\Program Files\SFTC\LicenseManager). A v6.1 password file or the generic password file created during installation will not work in v10.2. A reboot, service restart or license server refresh is required to load/activate the new password file.Hardware key problem check list:•It is important to uninstall Sentinel driver versions 7.4 or older. Please remove hardware key, uninstall the old driver(s) and install the new driver.•Check whether the user installed Sentinel driver version 7.6 (being an option in the installation process). If not, please remove hardware key and install the new driver.•Please check if the hardware key was attached to the computer during the DEFORM v10.2 installation. If so, please remove hardware key and re-install sentinel driver again•Check whether the USB port is inactive. Switch the USB key to another USB port and try to restart the service and server.Old license is running:User needs to uninstall the old license server (v2.1) or disable it.Register service problem:The LManagerServer service needs to be registered and started. The “Register and Start DEFORM License Manager Service” start menu item does not work with normal or elevated privileges. The following procedure should be used instead:Windows XPClick Start menu -> “DEFORM v10.2” -> “DEFORM License Manager 3.0.3” -> “Register and Start DEFORM License Manager Service”Windows VistaNote that the “Register and Start DEFORM License Manager Service” start menu shortcut may not work in Vista depending up on the system security settings •Right-click on “Start > All Programs > Accessories > Command Prompt”and select “Run as administrator”•Change directory to the LicenseManager directory within the DEFORM installation directory•Run “RegisterAndRunLMServer.bat” from this directory•In Task Manager, verify that the service is registered and started.•Batch Queue and Simulation Servers may also require similar sequence of registering and starting (using the batch files provided) the sarvices onVista operating system.Service startup problem:This may happen occasionally, particularly if the user swaps USB key between computers. There are three methods for starting the LManagerServer service when it shows up in the Windows service list and is also stopped.Windows XPThree options for starting the service are available:•Reboot•Click Start menu -> “DEFORM v10.2” -> “DEFORM License Manager3.0.3” -> “Start DEFORM License Manager Service”•Open the Task Manager or Services management console and manually start the serviceWindows VistaThree options for starting the service are available:•Reboot•Right-click on “Start > All Programs > DEFORM v10.2 > DEFORM License Manager v3.0.3 > Start DEFORM License Manager Server” and select“Run as administrator”•Open the Services management console (not Task Manager) and manually start the serviceMiscellaneous Service Related NotesInstructions to unregister the service:To be used in the rare situation that a user must manually unregister the LManagerServer service. Unregistering does not stop the service; it only prevents it from starting again upon restart.Windows XPClick Start menu -> “DEFORM v10.2” -> “DEFORM License Manager 3.0.3” -> “Unregister DEFORM License Manager Service”Windows VistaRight-click on “Start > All Programs > DEFORM v10.2 > DEFORM License Manager v3.0.3 > Unregister DEFORM License Manager Service” and select “Run as administrator”Notes on Services in VistaElevated administrator permission via Windows User Access Control [UAC] is required to register, start or unregister service. This is needed even if the user already has administrative privileges on the computer. Service management can be performed in the Services management console or by using “Run as administrator” with DEFORM service start menu shortcuts.DEFORM Simulation Server SetupLicensing Requirements:Floating licenseBatch queue licenseDepending up on the security handling on the user machine, System installaiton may not always create these required permissions for all the DEFORM services. Hence user is required to check and create firewall exceptions for the programs ‘License Manager Server’ ,‘Simulation Server’ and ‘Batch Queue Server’Computer configuration requirements:Simulation server: A central computer – presumably high performance – for running FEM calculationsLicense server: A central computer – not necessarily high powered – for managing licensesBatch queue server: A central computer for managing run sequence of jobs. The Batch, License, and Simulation servers may all run on the same machine, or all on different machines, or any combination thereof.Pre / Post client(s) – computer at which user(s) will pre and post process simulations. Pre and post processor programs are executed on this computer. DB file location – the database files should be on a shared network drive accessible from the simulation serer and the pre/post client computer. Foroptimum simulation performance, the DB files should be on a hard drive physically integrated into the simulation server. In other words, forcing the simulation server to access a database across a network will likely cause longer run times.Simulation Server Setup:Set up the license manager as described in LM documentation.As administrator, run the file “RegisterAndRunSimulationServerAutomatically.bat” on the simulation server computer. (using default installation path, typical location of these batch files is C:\Program Files\SFTC\DEFORM\v10.2)As administrator, run the file “RegisterAndRunBQAutomatically.bat” on the batch queue server computerSelect a shared drive path. Be sure sharing is enabled, and that all users have read and write permission. On both the simulation server and client computers, the shared drive must either be:local ormapped to a drive letterDefine Computer Locations in DEFORM SetupRun DEFORM Setup.On the “Batch Queue” tab, specify the network name or IP address of the batch queue computer. Port number should not need to be changed.On the “Simulation Server” tab, specify the share name or IP address of the simulation server machine. If it is a multi-processor or multi-core machine, secify the number of processors (cores) available and licensed in DEFORM (Processor number), and the maximum number of jobs (normally 1).Defining Shared Folders in DEFORMSetupGo to the “Shared Folders” tab. Each shared folder is represented by a tree identifying its shared names on each machine where it is accessible.Click the “New Dir” button, and specify the computer name and local path where the shared folder is physically located. For example, the shared folder isc:\deform\problem on a computer called “FastServer”. Give “Fast Server” as the computer name, and “c:\deform\problem” as the path. Please check your typing. There is currently no automatic checking to ensure that a specified path actually exists.Now click on the “Add share point” button. Specify the client computer name, and the path name on that computer. Suppose that the path is defined on computer “Client1” as the mapped network drive “Z:”. Then specify computer name as “Client 1” and folder name as “Z:” Be sure to include the colon (:).Now click “Save All Changes Locally” and “Save Locally and Commit to Server.” This information is all stored on the license server machine.Running a simulationOn the client machine be sure the database is in the mapped network drive. It is OK for the file to be in a subfolder.Select the database to be run, and pick “Run(options)”.The server computer names and local and remote drive names should all appear automatically. Click “Add in Queue” to start the simulation. (“Start” will start the job locally.).Note on FirewallsTo function properly on a compute with a firewall, exceptions must be created for BatchQueueServer.exe and SimulationServer.exe. For Windows firewall, this should be handled automatically during installation and setup. For 3rd party firewalls, it may be necessary to manually create an exception for the simulation server to run properly.Settings Conflicts on Windows Vista ComputersProblems may occur if the license, batch queue or simulation server settings of DEFORM Setup differ from those shown in one of the DEFORM systems. For example, the same batch queue settings should be shown in DEFORM Setup and “Run (options)” of DEFORM-3D. If settings do not match, then delete the contents of the following folder and rerun DEFORM Setup.C:\Users\<username>\AppData\Local\VirtualStore\Program Files\SFTCQUESTIONS / PROBLEMSIf you have any questions, comments, or problems installing DEFORM TM V10.2, contact: Scientific Forming Technologies Corporation2545 Farmers Drive, Suite 200Columbus, OH 43235 USAPhone: (614) 451-8330Fax: (614) 451-8325E-mail: support@Or visit our website at。
deform安装教程

deform安装教程
安装Deform十分简单,只需要按照以下步骤进行操作:
1. 首先,确保你的计算机上已经安装了Python解释器。
Deform是一个基于Python的库,所以需要Python环境才能正常运行。
2. 打开你的命令行终端(Windows用户可能需要使用命令提示符或PowerShell),并进入你想要安装Deform的目录。
3. 在命令行中运行以下命令来安装Deform:
```
pip install deform
```
4. 运行上述命令后,pip会自动从Python包索引中下载并安装Deform及其依赖项。
这个过程可能需要一些时间,请耐心等待。
5. 安装完成后,你可以在命令行中输入以下命令来验证Deform是否成功安装:
```
python -c "import deform; print(deform.__version__)"
```
如果安装成功,命令行会显示Deform的版本号。
这样,你就成功安装了Deform库。
接下来,你可以根据Deform的文档和教程来学习如何使用它进行表单开发等任务。
Deform安装及破解说明
Deform安装及破解说明
安装软件
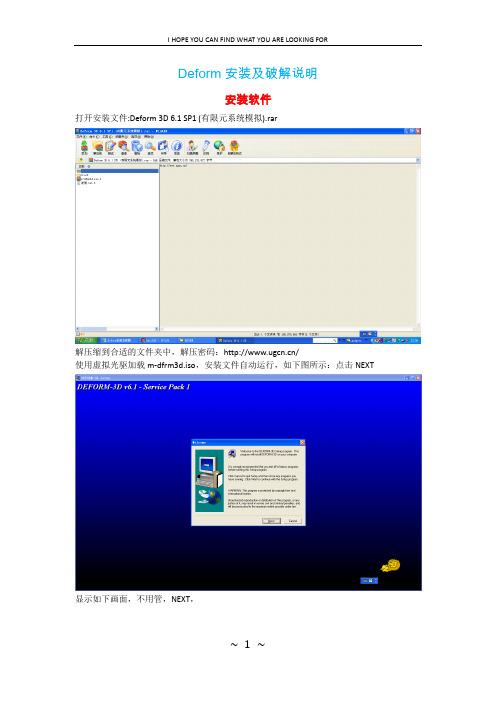
打开安装文件:Deform 3D 6.1 SP1 (有限元系统模拟).rar
解压缩到合适的文件夹中,解压密码:/
使用虚拟光驱加载m-dfrm3d.iso,安装文件自动运行,如下图所示:点击NEXT
显示如下画面,不用管,NEXT,
点击Yes,继续
选择安装目录,如果c盘空间够大,装在里面就好了
直接NEXT,
选择安装组件,直接NEXT,
按照License manager,next
选择安装目录,
对话框是说要求把一个PWD文件放在里面,不用管,确定就行,
安装画面
安装完成,
Deform开始安装
安装MPICH,点击next
同意协议,点击Yes
选择安装目录,
直接Next
直接Next
安装过程
安装完成,点击Finish,
是否重启,随便你了,
破解过程
1 复制安装文件中Crack文件夹中的deform.pwd文件和LManager.exe文件到安装后的许可证文件夹DEFORM License Manager 2.1文件夹中,默认是在C:\Program Files\DEFORM License Manager 2.1。
如果找不到,可以用Ctrl+F搜索一下。
2 在上述文件夹里双击打开LManager.exe文件,不要关掉。
然后双击DLConfig.exe文件,选择on a remote server,
点击,在弹出的选择框中选择自己的电脑,
单击按钮check/Start Server
这是屏幕上显示Connection is ok!
安装成功!。
DEFORM基本操作指南

1.3 导入毛坯几何文件
▪ 1.在前处理的物体操作窗口中点击按钮
(Geometry),
然后再选择(Imput),选择在CAD中或其他CAE软件中的造型文
件。本例中选择安装目录下DEFORM3D\V5.0 \ Labs的Block
_Billet. STL
▪2.在DEFORM3D v5.0的版本中,默 认第一个物体是工 件(毛坯)所以物体 属性默认为Rigid-
路漫漫其修远兮, 吾将上下而求索
材料模型
▪ 在DEFORM-3D软件中,用户可以根据分析的需要 ,输入材料的弹性、塑性、热物理性能数据,如果 需要分析热处理工艺,还可以输入材料的每一种相 的相关数据以及硬化、扩散等数据。
▪ 为了更方便的使用户模拟塑性成形工艺,该软件提 供了100余种材料(包括碳钢、合金钢、铝合金、 钛合金、铜合金等)的塑性性能数据。以及多种材 料模型。
▪ 3.点击下面的按钮Preview可 以预览,如果满意,可以点击按 钮 Generate Mesh 生成网格
▪ 每一种材料的数据都可以与温度等变量相关。
路漫漫其修远兮, 吾将上下而求索
物体的空间位置调整
▪ 这里有两层含义,一是可以移动、旋转物体,改变 他们的最初位置,因为在DEFORM-3D的前处理中 不能造型,所以这一项功能特别重要,可以将输入 到DEFORM中的毛坯、模具几何模型进行调整。二 是为了更快地将模具和坯料接触,将他们干涉,有 一个初步的接触量,这样计算上可以节省时间。另 外,还可以定义摩擦接触的关系、摩擦系数、摩擦 方式等。
▪ 4.接下来在弹出的窗口中用 第四个选项“Other Place”, 选择工作目录然后点击“Next”
▪ 5.在下一个窗口中输入题目 的名称 ( Problem name ) BLOCK点击Finish
DEFORM V10 安装步骤 (For Win XP and Win 7)

DEFORM V10 安装参考(本软件适合x86、x64系统)本安装教程,测试环境为win XP/7 32bit一、安装要点:1. 首先安装DEFORM License Manager v3.0;2. 重新启动计算机(推荐);3. 结束证书管理服务(通过任务管理器或服务或批处理)4. 安装DEFORM V10系列软件,包括DEFORM 2D、DEFORM 3D、DEFORM F2、DEFORM F3、MPICH NT v1.2.1、Python 2.6.2。
5. 破解!提醒:如果Win 7系统安装,运行相关程序会提示用户账户控制,请允许。
二、安装(关键点选处,以红色线框提示,请参照操作,即可完成安装)本教程程序安装在默认路径。
1. 使用虚拟光驱(如DAEMON Tools),加载光盘镜像,进入光盘,双击DEFORM License Manager v3.0,开始证书管理工具安装。
安装路径选择默认(可根据需要,更改安装路径)!提示拷贝证书文件,可忽略,单击确定即可!必须:打开任务管理器,结束证书管理服务进程即LManagerServer.exe(为确保安装正常,推荐重新启动计算机之后,执行此操作)!!!提醒:-------------------------------------------------------------------------------------------------------------- A. LManagerServer.exe的关闭也可以通过下面的方式进行在系统服务中,停止LManagerServer服务B. 或者你也可以尝试----------------------------------------------------------------------------------------------------------------------2.结束证书管理服务进程后,开始安装Deform V10.0。
deform V10.0安装说明

Deform V 10.0安装
一、安装前准备
安装前确保关于deform有限元模拟的服务已经停止,最好能卸载低版本的deform,删除服务。
二、开始安装
1、点击“DEFORM v10.0 Setup.exe”,选择需要安装的文件(最好全部安装),安装时,弹出替换文件之类的要求不用进行操作。
2、全部安装完成后将破解文件“deorm.pwd”,“LManagerServer.exe”拷贝到X:\Program Files\SFTC\License Manager替换原文件,“X”为安装deform的硬盘。
如果系统提示“LManagerServer.exe”正在运行,无法拷贝替换,可以打开任务管理器,将“LManagerServer.exe”进程关闭再拷贝替换。
3、双击“LManagerServer.exe”文件启动服务,运行X:\Program Files\SFTC\DEFORM\v10.0文件夹中的“DEFORMSetup.exe”,如下图所示。
首先点击Check Server,然后点击Get Configuration,接着点击Save All Change Locally,最后点击Save Locally and Commit to Server。
安装和破解完成。
注意:安装完成后在计算机的开始菜单内可能没有快捷方式,打开deform 3D的路径为:X:\Program Files\SFTC\DEFORM\v10.0\3D\DEF_GUI3.exe;打开deform 2D的路径为:X:\Program Files\SFTC\DEFORM\v10.0\2D\ DEF_GUI2.exe。
DEFORM基本操作指南

2021/7/1
2
DEFORM通过在计算机上模拟整个加工 过程,可以帮助工程师和设计人员:
1、设计工具并模拟工艺流程,减少昂贵的现 场试验成本;
项“Other Place”,选择工作目录 然后点击“Next”。 5.在下一个窗口中输入题目的名称 (Problem name)BLOCK点击Finish。
2021/7/1
14
前处理操作窗口由图形显示窗口、物体参数输入窗口、 物体显示及选择窗口以及各种快捷按钮组成。
图形显示窗口
物体选择窗口
物体显示窗口
在弹出的输入物体温度窗口中,输入所需
温度。)
2021/7/1
26
七、设置材料
对于那些非刚性材料和考虑 传热影响的刚体(Rigid)材料, 必须按需要设置材料的属性。
1.在物体列表窗口中选择Workpiec
2.在前处理控制窗口中,点击
中的 按钮导出材料
库。
3.在材料选择窗口中,选择Steel
选项中的AISI 1045 Cold
4、物体的接触和摩擦定义
5、模拟参数的设定
20261/7、/1 数据库文件的生成
7
一、几何模型建立或导入
在DEFORM-3D软件中,不能直接建立三维的几 何 模型,必须通过其他CAD/CAE软件建模后导入到 系统中。目前,DEFORM-3D的几何模型接口格式有: 1.STL:几乎所有CAD软件都有这个接口,它是通过一
系列的三角形拟合曲面而成。 2.UNV:SDRC公司(现合并到EDS公司)软件IDEAS的 三维
Deformv10.2安装教程

Deformv10.2安装教程安装deform 10.2之前,必须先卸载掉旧版本的相关软件,比如Python,MPICH,Sentinel Key Driver等。
安装步骤基本上是一路“Yes”“Next”“Install” “是(Y)”“OK”双击DEFORM_System_v10.2_Installer.exe开始安装点Next之后,出现下图,作者将Python v2.7.2前的对勾去掉了,这样安装略快一点,当然包括Sentinel Key Driver在内的三个选项如果都选上,也可以安装成功。
尽量装在C盘,MPICH是多核运算用的,装C盘成功率更高一些。
如果硬盘容量实在紧张,可以试试装在其它盘。
License Manager也尽量装在C盘。
弹出以下窗口后,将破解文件“Deform.pwd”和“LManagerServer.exe”放到C:\Program Files\SFTC目录下(放在其它目录也可以,但目录中必须不含汉字,放这个目录是为了方便后面的操作),点击“Browse...”找到C:\Program Files\SFTC目录下的Deform.pwd,点击“打开”点击“Save”“Close”下面是DEFORM主程序的安装,由于程序比较大,大约1.9G,硬盘容量比较紧张的,可以装到其它盘,但还是那句话:尽量装在C 盘上。
多贴几张图,这个1.9G的安装比较漫长弹出以下窗口,显示“Warning: Cannot connect to License Server!”它表达的意思就是License Server程序未运行,这时,去C:\Program Files\SFTC 目录下,将LManagerSever.exe移动到C:\Program Files\SFTC\License Manager目录中,也就是移动旁边的License Manager文件夹中,替换,并双击运行。
此时,如果报毒,请求清除,点击“添加信任”即可。
2024版Deform详细教程(苍松书苑)

Deform详细教程(苍松书苑)•引言•Deform 软件概述•Deform 软件安装与配置•Deform 软件基本操作•建模与网格划分技术•材料属性定义及数据库管理•模拟计算过程控制与结果分析•高级功能应用与拓展目录引言教程目的和背景教程目的背景介绍苍松书苑介绍苍松书苑概述教程特色学习资源Deform软件概述直观的图形界面提供友好的图形界面,方便用户进行模型建立、结果查看等操作。
用户可以根据实际工艺需求,自定义工艺参数和边界条件。
丰富的材料数据库内置大量金属材料的物理和力学性能数据,方便用户进行模拟分析。
强大的模拟功能形工艺的模拟,包括锻造、轧高精度分析软件功能和特点机械制造领域金属成形领域航空航天领域科研与教育领域汽车制造领域应用领域和范围Deform软件安装与配置系统要求和硬件配置Windows内存至少处理器显卡硬盘空间Intel 或AMD 多核处理器,推荐Intel i5或更高系统要求和硬件配置1. 下载软件访问Deform官方网站或授权下载站点,下载最新版本的Deform安装程序。
0203双击下载的安装程序,开始安装向导。
阅读并同意软件许可协议。
2. 运行安装程序01020304013. 选择安装目录选择合适的安装目录,建议安装在非系统盘符下。
4. 等待安装完成安装程序将自动完成软件的安装过程,包括复制文件、创建快捷方式等。
01 02 034. 保存配置完成配置后,点击“保存”或“应用”按钮,使配置生效。
Deform软件基本操作用户界面介绍主界面图形界面命令行界面基本操作命令模型创建与编辑提供丰富的建模工具,支持模型的创建、修改和编辑,包括基本几何体、复杂曲面等。
材料定义与属性设置允许用户定义材料并设置其物理和机械属性,如弹性模量、泊松比、屈服强度等。
网格划分与控制提供灵活的网格划分工具,支持网格的自动生成、手动调整和局部加密等操作。
文件管理和数据导入导文件格式支持数据导入数据导出建模与网格划分技术几何建模曲面建模实体建模030201建模方法介绍网格划分原则及技巧网格类型选择根据模型特点和求解需求,选择合适的网格类型,如四面体网格、六面体网格、混合网格等。
Deform详细教程课件

求解器设置
选择适当的求解器和迭代方法,以及 设置收敛准则和迭代次数等。
结果文件类型及查看方法
结果文件类型
Deform软件支持多种结果文件类型 ,如.odb、.frd、.plt等。其中,.odb 文件为二进制格式,包含完整的模拟 结果数据;.frd和.plt文件为文本格式 ,可方便地进行后处理和数据分析。
结构
教程将按照由浅入深、由易到难的原则进行组织,首先介绍软件的基本操作和基 础知识,然后逐步深入到高级功能的应用和案例分析。同时,教程中将穿插大量 的实例和案例,以帮助用户更好地理解和掌握相关知识和技能。
02
Deform软件概述
软件功能和特点
01
02
03
04
强大的模拟功能
Deform软件支持各种金属成 形工艺的模拟,包括锻造、轧
网格密度控制
在关键区域(如应力集中区、流动边界层等 )加密网格,以提高求解精度。
边界层处理
对于涉及流动或传热问题的模型,需在边界 层处划分合适的网格以捕捉物理现象。
实例演示:建模与网格划分
1
以简单几何体为例,演示从建模到网格划分的完 整流程。
2
针对复杂模型,展示高级建模技巧和网格划分策 略。
3
通过对比不同网格类型和密度对求解结果的影响 ,强调网格划分在数值仿真中的重要性。
实例四
演示如何在模拟过程中修改材料属性 和边界条件,以便更准确地模拟实际 工况。
05
模拟计算与结果分析
模拟计算参数设置
材料参数
包括弹性模量、泊松比、密度等,用 于描述材料的力学性质。
边界条件
定义模型的约束和载荷,如固定支撑 、压力、温度等。
网格划分
将模型离散化为有限个单元,用于数 值计算。网格密度和类型会影响计算 精度和效率。
DEFORM基本操作指南

2. 5 设置材料属性
对于那些非刚性材料和考虑传热影响的刚体( Rigid )材料,必须按需 要设置材料的属性。 1.在物体列表窗口中选择WorkPiece 2.在前处理控制窗口中,点击Material Properties 按钮 3.在材料属性窗口中,点击标签 Library,选择System Library-SteelAISI 1045 Cold 4.点击按钮Assign material
1.4 划分网格
对于那些非刚性材料和考虑传 热影响的刚体(Rigid)材料,需 要划分有限元网格 1.点击按钮 进入网格 划分窗口; 2.可以在网格数量输入框中 输入单元数或用滑动条来设定。 在本例中,默认为8000 (在DEFORM3D中只能划分四 面体网格,如果你想用六面体 网格可以点击按钮Import,输入 ID EAS或PATRAN的网格; 3.点击下面的按钮Preview可 以预览,如果满意,可以点击按 钮 Generate Mesh 生成网格
• • • • • DEFORM-2D DEFORM-3D DEFORM-PC DEFORM-HT Module DEFORM-Tools
练习 01
金属塑性成形的前处理 前处理是有限元分析的主要步骤,它所占用的操作 时间占到用户操作时间的80 % ,有很多定义都是 在前处理面视图 XZ 平面视图
1.5 点和面的选取
1.点或面的选取工具 点击工具栏上的 按钮,在显示窗口可以选择 物体的任意一节点或面 2.标尺工具 点击工具栏上的 按钮,点击物体上的任意一个 节点,并按住鼠标不放,再选择另一个节点,然后 松开鼠标。连接这两点的一条线段和该线段的长度 值就会显示在在显示窗口中,直到用户点击Refresh 按钮
DEFORMV10安装步骤
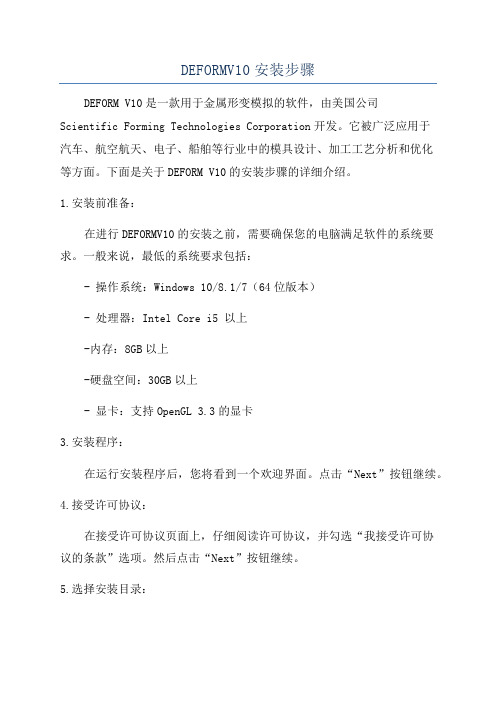
DEFORMV10安装步骤DEFORM V10是一款用于金属形变模拟的软件,由美国公司Scientific Forming Technologies Corporation开发。
它被广泛应用于汽车、航空航天、电子、船舶等行业中的模具设计、加工工艺分析和优化等方面。
下面是关于DEFORM V10的安装步骤的详细介绍。
1.安装前准备:在进行DEFORMV10的安装之前,需要确保您的电脑满足软件的系统要求。
一般来说,最低的系统要求包括:- 操作系统:Windows 10/8.1/7(64位版本)- 处理器:Intel Core i5 以上-内存:8GB以上-硬盘空间:30GB以上- 显卡:支持OpenGL 3.3的显卡3.安装程序:在运行安装程序后,您将看到一个欢迎界面。
点击“Next”按钮继续。
4.接受许可协议:在接受许可协议页面上,仔细阅读许可协议,并勾选“我接受许可协议的条款”选项。
然后点击“Next”按钮继续。
5.选择安装目录:在这一步,您可以选择DEFORM V10的安装目录。
您可以保持默认设置,或者选择其他目录。
然后点击“Next”按钮。
6.选择组件:在这一步中,您可以选择要安装的DEFORM V10的组件。
一般来说,建议您选择默认设置,并安装所有组件。
然后点击“Next”按钮。
7.选择启动菜单:在这一步中,您可以选择DEFORM V10在启动菜单中的快捷方式的名称。
然后点击“Install”按钮,开始软件的安装。
8.安装过程:9.安装完成:安装程序完成后,会出现一个安装完成的界面。
您可以选择打开DEFORM V10软件,或者点击“Finish”按钮退出安装程序。
10.激活软件:总结:。
Deform详细教程
• 4 . AMG:这种格式DEFORM存储已经导入的几何实ቤተ መጻሕፍቲ ባይዱ。
整理ppt
4
网格划分
▪ 在DEFORM-3D中,如果用其自身带的网格剖分程 序,只能划分四面体单元,这主要是为了考虑网格 重划分时的方便和快捷。但是它也接收外部程序所 生成的六面体(砖块)网格。网格划分可以控制网 格的密度,使网格的数量进一步减少,有不至于在 变形剧烈的部位产生严重的网格畸变。
整理ppt
22
2. 5 设置材料属性
▪ 对于那些非刚性材料和考虑传热影响的刚体( Rigid )材料,必须按需 要设置材料的属性。
▪ 1.在物体列表窗口中选择WorkPiece ▪ 2.在前处理控制窗口中,点击Material Properties 按钮 ▪ 3.在材料属性窗口中,点击标签 Library,选择System Library-Steel-
▪ 4.接下来在弹出的窗口中用 第四个选项“Other Place”, 选择工作目录然后点击 “Next”
▪ 5.在下一个窗口中输入题目 的名称 ( Problem name ) BLOCK点击Finish
整理ppt
9
1.1 创建一个新的题目
▪ 前处理操作窗口 由图形显示窗口、 物体参数输入窗 口、物体显示及 选择窗口以及各 种快捷按钮组成。
整理ppt
24
2.7 定义物间关系
▪ 1.在前处理控制窗口的右 上角点击 Inter object… 按 钮
▪ 会出现一个提示,选择Yes 弹出Inter Object窗口。
▪ 2.定义物间从属关系:在 v5.0中,系统会自动将物体 1和后面的物体定义为从属 关系(Slave - Master),即 软的物体为Slave,硬 的物 体设为Master
- 1、下载文档前请自行甄别文档内容的完整性,平台不提供额外的编辑、内容补充、找答案等附加服务。
- 2、"仅部分预览"的文档,不可在线预览部分如存在完整性等问题,可反馈申请退款(可完整预览的文档不适用该条件!)。
- 3、如文档侵犯您的权益,请联系客服反馈,我们会尽快为您处理(人工客服工作时间:9:00-18:30)。
安装deform 10.2之前,必须先卸载掉旧版本的相关软件,比如Python,MPICH,Sentinel Key Driver等。
安装步骤基本上是一路“Yes”“Next”“Install” “是(Y)”“OK”
双击DEFORM_System_v10.2_Installer.exe开始安装
点Next之后,出现下图,作者将Python v2.7.2前的对勾去掉了,这样安装略快一点,当然包括Sentinel Key Driver在内的三个选项如果都选上,也可以安装成功。
尽量装在C盘,MPICH是多核运算用的,装C盘成功率更高一些。
如果硬盘容量实在紧张,可以试试装在其它盘。
License Manager也尽量装在C盘。
弹出以下窗口后,将破解文件“Deform.pwd”和“LManagerServer.exe”放到C:\Program Files\SFTC目录下(放在其它目录也可以,但目录中必须不含汉字,放这个目录是为了方便后面的操作),点击“Browse...”
找到C:\Program Files\SFTC目录下的Deform.pwd,点击“打开”
点击“Save”“Close”
下面是DEFORM主程序的安装,由于程序比较大,大约1.9G,硬盘容量比较紧张的,可以装到其它盘,但还是那句话:尽量装在C盘上。
多贴几张图,这个1.9G的安装比较漫长
弹出以下窗口,显示“Warning: Cannot connect to License Server!”它表达的意思就是License Server程序未运行,这时,去C:\Program Files\SFTC 目录下,将LManagerSever.exe移动到C:\Program Files\SFTC\License Manager目录中,也就是移动旁边的License Manager文件夹中,替换,并双击运行。
此时,如果报毒,请求清除,点击“添加信任”即可。
如果点击了清除病毒,那可能会出现某些错误。
点击“eck license server and list available produc”显示“The license server is running!”,这证明已经破解成功,剩下的只是一些收尾的工作了。
点击Generate shortcuts生成快捷方式,不然“开始”里面没有相应的图标。
点击Close
点击“Check Server”,弹出窗口显示“The license server is running!”,再次证明破解成功,下面依次点击“Get Configuration”“Save All Changes Locally”“Save Locally and Commit to Server”“Close”
进“开始”找到DEFORM-3D或者DEFORM-2D,运行可用,大功告成。