某单位SAP实施项目_用户操作手册_SD_SD-Shipping Manual
SAPSD用户手册
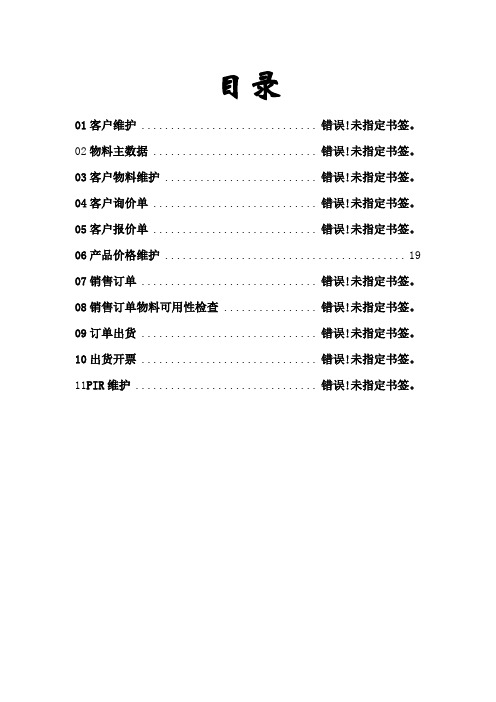
目录01客户维护 .............................. 错误!未指定书签。
02物料主数据 ............................ 错误!未指定书签。
03客户物料维护 .......................... 错误!未指定书签。
04客户询价单 ............................ 错误!未指定书签。
05客户报价单 ............................ 错误!未指定书签。
06产品价格维护 .. (19)07销售订单 .............................. 错误!未指定书签。
08销售订单物料可用性检查 ................ 错误!未指定书签。
09订单出货 .............................. 错误!未指定书签。
10出货开票 .............................. 错误!未指定书签。
11PIR维护 ............................... 错误!未指定书签。
01客户维护销售组织此客户需求哪一个销必输1000 目前只有一个售组织分销渠道此客户需求哪一个分必输10 目前只有一个销渠道产品组此客户需求可以销售必输10 目前只有一个的产品输入完初始屏幕的相关字段值后,点或回车,进入拖动右侧滚轴,出现如下画面,输入客户通讯信息相关参数说明栏目名称描述字段值用户动作或结果注意事项标题客户是个人OR公司必输公司名称客户的名称必输搜索项快速查找关键字可选街道/门牌号客户的详细地址必输邮政编码客户所在地的邮编必输此编码不清楚用零代替城市客户所在城市必输国家客户所在国家必输地区客户所在区域可选性电话客户公司联系电话必输移动电话客户主要联系人的电可选性话传真客户公司的传真号必输E-Mail 客户公司的邮件地址可选性注释客户简短说明必输点页细节维护选择联系人行,点”选择的合作伙伴细节”,进入联系人编辑界面相关参数说明栏目名称描述字段值用户动作或结果注意事项名称输入联系的姓可选名输入联系人的名字可选部门输入这个联系人的所可选在部门功能输入这个联系人的职可选务点,进入相关参数说明栏目名称 描述字段值 用户动作或结果 注意事项销售地区 客户所在的地区 必输 货币 与客户进行交易的币别 必输客户定价过程 用于客户定价确认用的 必输 1 客户统计组用于客户统计必输1点页相关参数说明栏目名称 描述字段值 用户动作或结果 注意事项装运条件送货到客户交货的一般运送策略。
集团SAP项目-SD用户操作手册-SD模块报表Ver1.1
XXXXSAP项目YAHUA-SD用户操作手册-SD模块报表操作手册Ver1.0 作者: SD组日期: 2012-04-29版本: Version 1.0块报表操作手册创建者:生成日期:2012-4-29 修改者: 修改日期:2012-4-29XXXXSAP项目 (1)YAHUA-SD用户操作手册-SD模块报表操作手册Ver1.0 (1)文档目的 (7)关键联系信息 (7)教程目标 (8)新概念解释 (8)系统功能图标使用 (12)以下为正文 (15)SD模块报表清单 (15)1、客户主数据查询 (17)查询SAP系统内所有客户数据;从客户的基本信息、公司代码信息、销售范围信息以及客户总公司与子公司对应关系 (18)1.1进入SAP主屏幕: (18)1.2填写好查询条件后,点击进入以下界面 (21)1.3点击可将明细表导出,再根据需做其它统计。
(21)2、客户信用管理报表—ZV042 (23)查询1000-XXXX集团信贷范围和2000-XXXX恒泰信贷范围下的客户的信用数据信息;掌握客户信用管理数据 (23)2.1进入SAP主屏幕: (24)3、价格导入导出—ZV041 (25)价格数据的批量导入以及批量导出功能,相对标准价格报表而言使用更加灵活 (25)3.1进入SAP主屏幕: (25)3.2点击主界面中的按钮,输出结果: (27)4、价格报表 (27)SAP 标准价格报表 (28)4.1进入SAP主屏幕: (28)4.2填写好查询条件后,点击进入以下界面(截取部分屏幕) (29)5、合同导入—ZV010 (30)5.1进入SAP主屏幕: (31)5.2填写好查询条件后,点击进入以下界面(截取部分屏幕) (31)块报表操作手册创建者:生成日期:2012-4-29 修改者: 修改日期:2012-4-296、合同执行报表—ZV011 (32)6.1进入SAP主屏幕: (33)6.2填写好查询条件后,点击进入以下界面 (34)7、销售订单清单—VA05 (34)按客户、物料查询销售订单的状态 (34)7.1进入SAP主屏幕: (34)7.2点击主界面中的按钮,进入条件区域: (35)7.3输出保存: (37)8、销售订单报表—ZV013 (38)通过销售订单明细报表,能够清晰了解客户每一笔需求的详细信息,包含:客户信息、产品信息、价格信息等;系统数据追踪,相比以前的人工记录,数据更加完整 (39)8.1进入SAP主屏幕: (39)8.2主屏幕描述: (40)9、销售折让报表—ZV014 (47)记录每一笔有折让的订单以及折扣的金额 (48)9.1进入SAP主屏幕: (48)9.2填写好查询条件后,点击进入以下界面: (48)10、销售统计查询报表—ZV015 (49)分别从客户、销售组织、物料组、售达方、送达方、片区等维度统计销量情况 (49)10.1进入SAP主屏幕: (49)10.2填写好查询条件后,点击进入以下界面: (50)11、发货计划平台—ZV020 (50)通过发货计划平台,3天滚动发货计划便于协调发货;1天稳定发货计划进行实际发货业务 (51)11.1进入SAP主屏幕: (51)11.2点击主界面中的按钮,输出结果: (51)11.3输出保存: (52)12、发货清单报表—ZV023 (52)通过发货清单报表,详细记录每一笔内部转库单数据,并能追溯到订单信息 (52)12.1进入SAP主屏幕: (52)12.2 填入选择条件 (53)12.3点击查询数据并导出: (55)13、货物运单信息表—ZV024&ZV025 (57)13.1进入SAP主屏幕: (58)13.2点击主界面中的按钮,输出结果: (59)13.3输出保存: (59)块报表操作手册创建者:生成日期:2012-4-29 修改者: 修改日期:2012-4-2914、销售运费分摊平台—ZV026 (59)通过运费分摊平台,进行销售运费分摊,并将运费按照发运的重量进行分摊,分摊到客户以及对应的订单上的产品规格 (60)14.1进入SAP主屏幕: (60)14.2点击主界面中的按钮,输出结果: (61)15、运费分摊结果查询表—ZV027 (61)通过报表能够清晰了解每一张货物运单的运费情况 (61)15.1进入SAP主屏幕: (61)16、发票清单—VF05 (62)按付款方或物料查询发票 (63)16.1进入SAP主屏幕: (63)16.2点击主界面中的按钮,输出结果: (63)17、开票信息报表—ZV030 (64)按公司、客户、片区等维度查询每天的销售开票信息情况;并查询金税发票开具的情况信息 (64)17.1进入SAP主屏幕: (64)17.2点击主界面中的按钮,输出结果: (65)18、XXXX集团客户应收款明细账报表—ZF008 (65)XXXX集团客户应收款明细账报表 (65)18.1进入SAP主屏幕: (65)19、客户余额—S_ALR_87012172 (66)以本位币计的客户余额 (67)19.1进入SAP主屏幕: (67)19.2 点 (68)20、获利能力报表—KE30 (69)执行获利能力报告 (69)20.1进入SAP主屏幕: (69)21、承兑汇票记录台账—ZF003 (72)承兑汇票记录台账 (72)21.1进入SAP主屏幕: (72)21.2点 (73)22、XXXX集团应收账款账龄分析表—ZF006 (73)XXXX集团应收账款账龄分析表 (73)22.1进入SAP主屏幕: (73)22.2点 (74)块报表操作手册创建者:生成日期:2012-4-29 修改者: 修改日期:2012-4-2923、银行未达账清单—ZF007 (74)执行获利能力报告 (74)23.1进入SAP主屏幕: (74)23.2点 (75)24、销售计划报表—ZV050D (75)通过报表查询年度、月度的销售计划清单 (75)24.1进入SAP主屏幕: (75)24.2点 (75)25、分片区销售指标统计表—ZV017 (76)通过报表反映销售计划的达成率情况 (76)25.1进入SAP主屏幕: (76)25.2点 (76)26、销售订单报表(无价格版)—ZV016 (76)通过销售订单报表,生产部门能够及时了解客户每一笔需求的详细信息,包含:客户信息、产品信息、特殊需求信息等;系统数据追踪,相比以前的人工记录,数据更加完整 (77)26.1进入SAP主屏幕: (77)26.2点 (78)27、发货清单报表(无价格版)—ZV060 (78)物流部门通过发货清单报表,详细记录每一笔内部转库单数据,并能追溯到订单信息 (79)27.1进入SAP主屏幕: (79)27.2点 (80)文档目的该文档描述XXXXSAP系统中SD报表操作手册。
某单位SAP实施项目_用户操作手册_PP_MFG_sap-manual-confirmation
某单位SAP实施项⽬_⽤户操作⼿册_PP_MFG_sap-manual-confirmationSubject : Confirmation Prepared by : OneZen HsuehVersion Control1.05/6, 2000 (black text)1.16/27 & 6/29, 2000 (* red text)[ [ [ 6/29 TRACKING => Missing parts,revservation report ] ] ]Trigger Enter SAPA. Confirmation byB. Confirmation for [ADJUSTABLE]C. Reservation report [ by 5/8 NOT READY YET (SAP Consultant) ].Q* [ 6/21, MIS program testing ]D. ConfirmationE. Confirmation Q'tyF. ConfirmationG. Confirmation[ by 5/8 NOT READY YET (SAP Consultant) ]. * [ 5/M, MC will take over to clear Error to M101 (or M201 or P101) on the nextQH. Missing parts list.I. * Cancelling aConditionalTitle :Organization/AreaFile Name :sap-manual-confirmation Release :Responsibility :PP \ ConfirmationStatus :1. Access transaction byVia Transaction CodeField Name Description R/O/C User Action and Values CommentsR = Required , O =Optional , C =ConditionalLast changed at :Version :Page :17:00pm 6th, May, 20001.0 2 of 9Procedure StepsVia MenusLogistics --> Production --> Production Control --> Confirmation --> Enter --> For Order END USER PROCEDURE Production Order Processing \ MFG confirmation R/3 4.0BCO15Last changed by :OneZen HsuehTitle :Organization/AreaFile Name :sap-manual-confirmation Release :Responsibility :PP \ ConfirmationStatus :1a. New Enter (Trigger.A)1b. New Enter \confirmation Q'ty totallyField NameDescription R/O/C User Action and Values CommentsOrder Production Order R Yield to conf.Confirmation Q'tyR Personnel /doc/1b10020389.htmlers ID C for managementConfirm. Text Notics OR = Required , O =ConditionalLast changed at :Version :Page :17:00pm 6th, May, 20001.0 3 of 9END USER PROCEDUREProduction Order Processing \ MFG confirmation OneZen Hsueh R/3 4.0BProcedure StepsLast changed by :IgnoreProduction Order Q'tyConfirmation Q'tyConfirmation totallyConfirmation partiallyDefault * Today *Notics or Remarkclick " I " for production order's statusTitle :Organization/AreaFile Name :sap-manual-confirmation Release :Responsibility :PP \ ConfirmationStatus :1c. Click " Material "(on the left top) for listing all confirmation items. (Trigger.B) 1d. Click " Save " (at the top).Field Name DescriptionR/O/C User Action and ValuesCommentsQuantity Confirmation single item Q'ty C depends on the users or default is zero R = Required , O =Optional , C =ConditionalLast changed at :Version :Page :Last changed by :END USER PROCEDUREProduction Order Processing \ MFG confirmation R/3 4.0BProcedure StepsExtra items addingDetail and moreActual Q'ty to confirm17:00pm 6th, May, 2000 1.0 4 of 9Title :Organization/AreaFile Name :sap-manual-confirmation Release :Responsibility :PP \ ConfirmationStatus :2a. New Enter (Trigger.A)2b. New Enter \confirmation Q'ty partically (Trigger.E) 2c. The same asConfirmation totally.2d. The same asConfirmation totally.Field NameDescriptionR/O/CUser Action and ValuesComments----(the same as the confirmation totally)R = Required , O =ConditionalOneZen HsuehEND USER PROCEDUREProduction Order Processing \ MFG confirmationR/3 4.0BProcedure StepsConfirmation partiallyLast changed at :Version :Page :17:00pm 6th, May, 2000 1.0 5 of 9Title :Organization/AreaFile Name :sap-manual-confirmation Release :Responsibility :PP \ ConfirmationStatus :3. Confirmation not completely (Trigger. F)3a. when save changing at the same a error log message will shows up3b. Click " Long text "(on the left top) for detailField Name Description R/O/C User Action and Values CommentsLast changed by :OneZen HsuehEND USER PROCEDUREProduction Order Processing \ MFG confirmationR/3 4.0BProcedure StepsConditionalProcedure Steps 3c. Pull from WH(GM01)3d. Shorting at WH(GM01), too, will have towait for new lots to come3e. Confirmationcontinously* [ 5/M, MC will takeover to clear Errormessage and deal withthe rest of job aboutpulling the shortageitems from GM01 orto M101 (or M201 orP101) on the nextField Name Description R/O/C User Action and ValuesCommentsR = Required , O =ConditionalLast changed at :Version :Page :12:00am 27th, June, 2000* 1.17 of 9Title :Organization/AreaFile Name :sap-manual-confirmation Release :Responsibility :PP \ ConfirmationStatus :1. Access transaction by Via Transaction Code 1a. New Enter (Trigger.H)1b. Click " Excute F8 "* Logistic --> Production --> Production Control --> Information System --> Missing Parts info CO24 Last changed by :OneZen HsuehMissing parts listEND USER PROCEDUREProduction Order Processing \ MFG confirmationR/3 4.0BVia MenusField Name Description R/O/C User Action and ValuesCommentsR = Required , O =ConditionalLast changed at :Version :Page :17:00pm 6th, May, 20001.08 of 9Title :Organization/AreaFile Name :sap-manual-confirmation Release :Responsibility :PP \ ConfirmationStatus :2a. Click" all field " (at the top) for overview 2b. Click " order " (at the top) for production order detail.2c. * Status refered to the last check point, but not the most update (6/28 informed by Consultant YS, still work with Orgin to ask for more friendly and latest reference).[ [ [ 6/29, TRACKING ]] ]1. Access transaction by Via Transaction Code 1a. New Enter (Trigger.I)* In SAP it can notMissing parts listVia MenusLogistics --> Production --> Production Control --> Confirmation --> CancelEND USER PROCEDUREProduction Order Processing \ MFG confirmationR/3 4.0B* Cancelling confirmationLast changed by :OneZen Hsueh1. Reservation - after inputting but before confiming, a report to show the backflash items' allocation status.* 6/21, MIS in program testing * 6/29, MIS informed it still has (1) some M/O's (3) M/O's reservation are treated [ [ [ 6/29 =>TRACKING ] ] ]ConditionalReversation Report。
某单位SAP实施项目_用户操作手册_SD_SD - tips
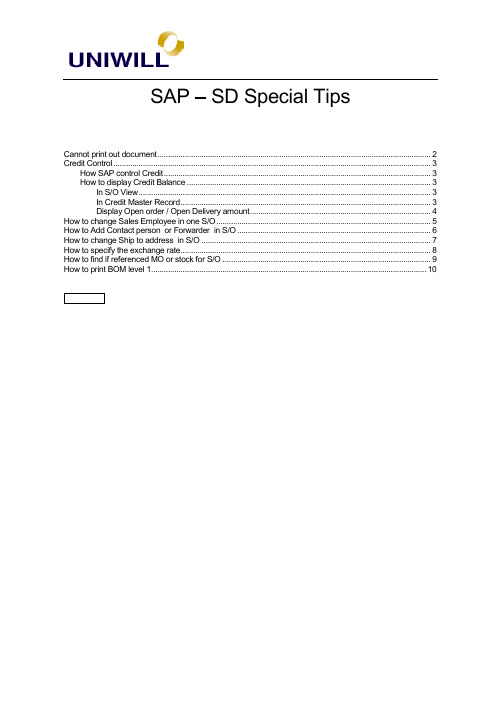
SAP – SD Special TipsCannot print out document (2)Credit Control (3)How SAP control Credit (3)How to display Credit Balance (3)In S/O View (3)In Credit Master Record (3)Display Open order / Open Delivery amount (4)How to change Sales Employee in one S/O (5)How to Add Contact person or Forwarder in S/O (6)How to change Ship to address in S/O (7)How to specify the exchange rate (8)How to find if referenced MO or stock for S/O (9)How to print BOM level 1 (10)C ANNOT PRINT OUT DOCUMENTNo mater you are in S/O or D/N or Billing documents, please use “Change” mode to enter document. Follow below actions:In S/O: Go to Output – Header / In D/N: Go to Header – OutputType Output type:S/O is BA00, D/N is LD00, Billing is RD00, QT is AN00, Proforma to customer is ZAN1Select CommunicationPlease enter Printer name. Locl means Local printerIf you want to print out this document right away after you save it, please mark “Print immediately”.Back to previous screenSelect Further dataMake sure Dispatch time is “3”C REDIT C ONTROLHow SAP control CreditSAP Credit will check:A/ROpen S/O amount S/O items which has no D/N or Billing referenced.Open D/N amount Including:D/N has been created, but not picking/GID/N has been created, and picked, but not GID/N has been created, and picked/GI, but Billing document hasn’t been created.Special G/L amountWhen create S/O, system will check:A/R + Open S/O + Open D/N + Special G/L – Credit line = Current Credit BalanceIf the credit balance is positive, it means this customer credit is over.System will show warning message when you save orders, but this will not block S/O.When create D/N, system will check:A/R + Open D/N + Special G/L – Credit line = Current Credit BalanceIf the customer’s credit is not over, you can create D/N freely, and W/H can pick & G/I.If credit is over, when you create D/N, system will lock Create action.If the credit is not over when you create D/N “A”, but the credit is over after A created, then you cannot create another D/N of same customer.How to display Credit BalanceIn S/O ViewPath: S/O → Environment → Display Partner → Credit AccountIn Credit Master RecordPath: Account →Financial Accounting →Accounts Receivable →Master Record →Credit Management → DisplayInput customer code, Credit controal area “UW01”, and mark Status flag.You can see the credit limit and credit balance amount (credit exposure)Display Open order / Open Delivery amountWhen you are in Credit Management Display view, you can check your Open order or Open D/N balance. Path: Environment → Sales + Distrib. Doc. → Open Order / Open DeliveriesThe negative amount means the amount was released. (you have applied Order Release from Accounting) Generally, the open order amount is positiveThe amount here is total Open D/N amount.H OW TO CHANGE S ALES E MPLOYEE IN ONE S/O Path: S/O → Goto → Header → PartnersSelect “PE”, click the view, search the sales person’s nameInput the responsible person’s ID.H OW TO A DD C ONTACT PERSON OR F ORWARDER IN S/OPath: S/O → Goto → Header → PartnersInput “CP” as contact person.Use Search term to find the person you need.Find the person, and input it in field.Type “CR” as forwarder. Use search function to find the forwarder. Or you can ask Shipping the forwarder code.H OW TO CHANGE S HIP TO ADDRESS IN S/OPath: S/O → Goto → Header → Partners → Double click Ship to customer codeChange the address and customer name in these field.These changes will not have impact to Customer Master.H OW TO SPECIFY THE EXCHANGE RATEIf your customer has specified exchange rate for one order, you can follw below actions: Path: S/O → Goto → Header → Financial Accounting-Input the exchange rate in “Exch. Rate-acct.” field.H OW TO FIND IF REFERENCED MO OR STOCK FOR S/O-Point the material you would like to check.Path: Environment Availability-You can see lots of record in this page.-Select Total Records.-You can see more detail of these stock booking.H OW TO PRINT BOM LEVEL 1After you created AutoBOM part number, Sales may need to provide such data to related departments, so that they can understand what kind of specification that you chosen in autobom program.Use Bom report Level by Level to checkPath: Logistic → Sales & Distribution → Master Data → Products → Bill of Material → Reporting → Bom Explosion → BOM level by level-Input Material number, plant and BOM application.-BOM application can be PP01, or SD01-Press Execute-this view is to display whole BOM, we have to print level one out.-Press Print-Do not mark “Print immediately”-Press Print again-System will back to previous screen, please go to System and select Own Spool Requests.-Select the spool number that system generated.-Press Print. Do not press Print as attr.-Please input Page 1 to 1-Then press PrinterThe level one BOM has printed out.。
SAP系统用户操作手册(DOCX 84页)
ERP项目SAP系统用户操作手册销售与分销(SD)SD主数据说明:1、不改变各部分对应字体、字号;2、系统操作界面截屏中,标注符号从以下标识选取即可:3、版本控制:目录1SD主数据 ..................................................................................................... 错误!1.1客户主数据..................................................................................... 错误!1.1.1创建客户主数据........................................................................ 错误!1.1.2更改客户主数据........................................................................ 错误!1.1.3显示客户主数据........................................................................ 错误!1.1.4系统操作要点说明.................................................................... 错误!1.2信贷主数据..................................................................................... 错误!1.2.1创建/更改信贷主数据 .............................................................. 错误!1.2.2显示信贷主数据........................................................................ 错误!1.2.3显示信贷更改 ........................................................................... 错误!1.2.4信贷主数据清单........................................................................ 错误!1.2.5系统操作要点说明.................................................................... 错误!1.3销售价格主数据............................................................................. 错误!1.3.1创建条件记录 ........................................................................... 错误!1.3.2更改条件记录 ........................................................................... 错误!1.3.3显示条件记录 ........................................................................... 错误!1.3.4系统操作要点说明.................................................................... 错误!1.4业务员主数据................................................................................. 错误!1.4.1创建业务员主数据.................................................................... 错误!1.4.2更改业务员主数据.................................................................... 错误!1.4.3显示业务员主数据.................................................................... 错误!1.4.4系统操作要点说明.................................................................... 错误!1.5物料清单(销售BOM)................................................................ 错误!1.5.1创建物料清单(销售BOM)................................................... 错误!1.5.2更改物料清单(销售BOM)................................................... 错误!1.5.3显示物料清单(销售BOM)................................................... 错误!1.5.4系统操作要点说明.................................................................... 错误! 2销售订单业务............................................................................................... 错误!2.1数量合同 ........................................................................................ 错误!2.1.1创建数量合同 ........................................................................... 错误!2.1.2更改数量合同 ........................................................................... 错误!2.1.3显示数量合同 ........................................................................... 错误!2.1.4系统操作要点说明.................................................................... 错误!2.2销售订单-标准 ............................................................................... 错误!2.2.1创建销售订单 ........................................................................... 错误!2.2.2销售订单审批 ........................................................................... 错误!2.2.3更改销售订单 ........................................................................... 错误!2.2.4显示销售订单 ........................................................................... 错误!2.2.5系统操作要点说明.................................................................... 错误!2.3销售订单-按单采购........................................................................ 错误!2.4销售订单-免费发货........................................................................ 错误!。
SAP系统用户操作手册SD
ERP项目SAP系统用户操作手册销售与分销(SD)版本:V1.0日期:2022年4月25日说明:1、不改变各部分对应字体、字号;2、系统操作界面截屏中,标注符号从以下标识选取即可:3、版本控制:78 10 1 12 2 45678 91011 313 1415目录1SD主数据 (5)1.1客户主数据 (5)1.1.1创建客户主数据 (5)1.1.2更改客户主数据 (28)1.1.3显示客户主数据 (31)1.1.4系统操作要点说明 (34)1.2信贷主数据 (35)1.2.1创建/更改信贷主数据 (35)1.2.2显示信贷主数据 (39)1.2.3显示信贷更改 (41)1.2.4信贷主数据清单 (43)1.2.5系统操作要点说明 (45)1.3销售价格主数据 (45)1.3.1创建条件记录 (45)1.3.2更改条件记录 (48)1.3.3显示条件记录 (51)1.3.4系统操作要点说明 (54)1.4业务员主数据 (55)1.4.1创建业务员主数据 (55)1.4.2更改业务员主数据 (63)1.4.3显示业务员主数据 (66)1.4.4系统操作要点说明 (69)1.5物料清单(销售BOM) (71)1.5.1创建物料清单(销售BOM) (71)1.5.2更改物料清单(销售BOM) (75)1.5.3显示物料清单(销售BOM) (79)1.5.4系统操作要点说明 (81)2销售订单业务 (82)2.1数量合同 (82)2.1.1创建数量合同 (82)2.1.2更改数量合同 (84)2.1.3显示数量合同 (87)2.1.4系统操作要点说明 (88)2.2销售订单-标准 (88)2.2.1创建销售订单 (88)2.2.2销售订单审批 (93)2.2.3更改销售订单 (96)2.2.4显示销售订单 (102)2.2.5系统操作要点说明 (104)2.3销售订单-按单采购 (104)2.4销售订单-免费发货 (107)2.5销售订单-借/贷项 (109)2.7销售订单-来料加工 (115)2.8销售订单-退货 (118)2.9销售订单-换货 (120)2.10销售订单-托盘回收 (123)3销售交货业务1263.1外向交货 (126)3.1.1创建外向交货单-标准 (126)3.1.2更改外向交货单 (130)3.1.3显示外向交货单 (133)3.1.4系统操作要点说明 (134)3.2交货证明 (135)3.2.1更改交货证明 (135)3.2.2系统操作要点说明 (137)3.3退货收货 (137)3.3.1创建外向交货单-退货收货 (137)3.3.2冲销外向交货 (139)3.3.3系统操作要点说明 (142)4报表查询1444.1运输费用明细表 (144)4.3订单执行情况表 (145)4.4销售月度滚动计划表 (147)4.5销售年度预算表 (148)4.6销售完成情况与预算、计划对比表 (150)4.7未开发票明细 (151)4.8发票状态表 (151)4.9销售、生产、采购单据对应 (152)1SD主数据1.1客户主数据详细参考流程《BP_SD_00_01客户主数据维护流程》1.1.1创建客户主数据菜单路径后勤 -> 销售和分销 -> 主数据 -> 业务合作伙伴 -> 客户 -> 创建 -> 完成事务代码XD011)通过以下路径双击进入创建客户主数据初始屏幕,也可以直接在处输入事务代码XD01再单击或按回车键进入创建客户主数据界面。
某单位SAP实施项目_用户操作手册_SD_SD - SO Manual
User’s Guide– Sales OrderOrder Type (2)Standard Order (3)1. Create Order (ZOR) (3)2. Print out Order (10)3. Create a Delivery Note (11)4. Print out Delivery Note (12)Foreign Sample Order (13)1. Create ZSOR (13)2. Print out order (13)3. Create a Delivery Note (13)4. Print out Delivery Note (13)Local Sample Order Fill-up (ZKB) (14)1. Create Consignment Fill-up order (ZKB) (14)2. Print out order (14)3. Create a Delivery Note (14)4. Print out Delivery Note (14)Local Sample Order Pick-up (ZKA) (15)1. Create Consignment Pick-up order (ZKA) (15)2. Print out order (15)3. Create a Delivery Note (15)Local Sample Order Issue (ZKE) (16)Sales Return (17)Foreign Sample Return (18)Credit Memo / Debit Memo (19)1. Create a Credit Memo Request order (CR) / Debit Memo Request (DR) (19)2. Print out order (19)Special Tips ............................................................................................................................ 错误!未定义书签。
某单位SAP实施项目_仓库操作手册_立体库仓库管理培训手册1
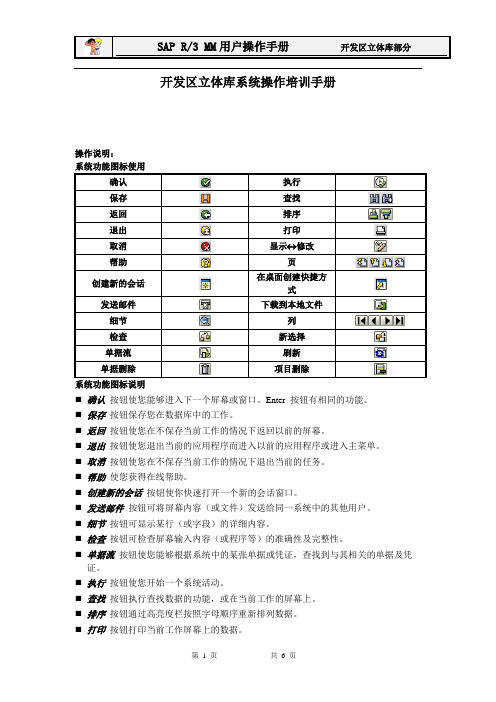
开发区立体库系统操作培训手册操作说明:确认执行保存查找返回排序退出打印取消显示 修改帮助页创建新的会话在桌面创建快捷方式发送邮件下载到本地文件细节列检查新选择单据流刷新单据删除项目删除⏹确认按钮使您能够进入下一个屏幕或窗口。
Enter 按钮有相同的功能。
⏹保存按钮保存您在数据库中的工作。
⏹返回按钮使您在不保存当前工作的情况下返回以前的屏幕。
⏹退出按钮使您退出当前的应用程序而进入以前的应用程序或进入主菜单。
⏹取消按钮使您在不保存当前工作的情况下退出当前的任务。
⏹帮助使您获得在线帮助。
⏹创建新的会话按钮使你快速打开一个新的会话窗口。
⏹发送邮件按钮可将屏幕内容(或文件)发送给同一系统中的其他用户。
⏹细节按钮可显示某行(或字段)的详细内容。
⏹检查按钮可检查屏幕输入内容(或程序等)的准确性及完整性。
⏹单据流按钮使您能够根据系统中的某张单据或凭证,查找到与其相关的单据及凭证。
⏹执行按钮使您开始一个系统活动。
⏹查找按钮执行查找数据的功能,或在当前工作的屏幕上。
⏹排序按钮通过高亮度栏按照字母顺序重新排列数据。
⏹打印按钮打印当前工作屏幕上的数据。
⏹更改 显示按钮⏹页按钮使您能够进入以后或以前的页,既可以进入第一页也可以是最后一页。
⏹在桌面创建快捷方式按钮可在桌面上创建当前屏幕的快捷方式。
⏹下载到本地文件按钮可将当前屏幕显示的内容下载到本地文件。
⏹列按钮使您能够显示以后或以前的列,既可以显示第一列也可以是最后一列⏹新选择按钮可在当前面迅速切换到新的选择界面。
⏹刷新按钮使您看到当前的实时数据。
⏹单据删除按钮删除整个订单。
⏹项目删除按钮在同一订单中删除一个或多个行项目。
(注:R/O/C R:必输项O:选择输入项C:条件输入项)一、按单入库部分(一)、正常收货1、业务流程1、产品从事业部下线后,物流接口调度员创建倒短订单和交货单,打印《成品调拨单》(单据号为SAP系统内的交货单号),司机运输至立体库,将交货单交给入库保管员,保管员在微机中输入交货单号进行提单,提单后生成上架任务单,叉车司机卸货,保管员逐台扫描单台产品的流通码进行入库(如果是有托盘的产品,则可以扫描托盘号进行校验,也可以扫描单体重新组盘,注意:昆船系统中的托盘与单体的对应关系是从产品事业部下线组盘和装车扫描的数据库中获得,其24位条码为生产编码与销售用的流通编码是不同的),收货后保管员按实收数量签收《成品调拨单》。
某单位SAP实施项目_用户操作手册_MM_Quota Arragement(2001)
MM MODULE – Quota Arrangement日期:February 01, 20xx SAP MM MODULE使用手冊Quota Arrangement(版二)For Purchase一、作業名稱:Quota Arrangement二、說明:在同一Materials有二家以上之Vendor時,可做比率之分配三、執行單位:採購人員四、路徑:1.畫面如下圖一:Via Menus Logistics > Materials Management > Purchasing >Master data > Quota Arrangement >MaintainVia Transaction Code MEQ1五、畫面及欄位說明:圖一:圖二:圖二 / 畫面及欄位說明:Field Name Description Comments Material 輸入Material msaterPlant 工廠固定”TW10”圖三:圖三 / 畫面及欄位說明:Field Name Description Comments Valid from 開始日期(當天)Valid to 終止日期Min. qty splitting 分割點;當總需求量超過此一數量時,系統才會採用Quota arrangement 的建議,將P/R直接分配,否則不做分配。
*輸入完畢按” I tem ” 鍵圖四:圖四 / 畫面及欄位說明:Field Name Description CommentsProcurement type ( P ) F –外購E –內製Special Procurement type ( S ) Quota arrangement 可同時對不同procurement type的材料,進行分配(與PO相配合)Vendor 輸入廠商代碼PPl 若(P)選” E “則須輸入公司取得之工廠Quota 分配比率;配額在Quota arrangement 的有效期間內計畫分配給該廠商之總配額In% Quota of Quota arrangement item in percent ,系統會自動依Quota 配額數量換算成百分比Alloc qty. 系統會計算此供應商,在Quota arrangment 生效日起,至MRP日期,所有P/O、P/R以及plan order 之累計總量。
某单位SAP实施项目_用户操作手册_SD_CSD-WH Manual
User Guide – CSD WarehouseBusiness Type (2)Delivery (3)Check Daily picking job (3)Delivery Due List (3)Imcomplete Delivery List (4)Picking & Good Issue for Delivery (5)ZCOR / ZFD / ZCSD (5)ZCDM / ZCRE (6)Inventory Status & Report (8)Good Transfer (轉倉) (9)Standard Transfer (from location 1 to location 2) (9)Change Material Type (unblock to block / block to unblock) (10)Change to Block (10)Change to un-Block (11)Goods Issue (領退料) (12)以維修工單領料 (12)以維修工單退料 (14)部門領料, 掛部門費用 (15)部門退料 (16)報廢 (16)Inventory Adjustment (17)Appendix – Movement type (19)Transfer posting (19)領退料 (Goods issue / Good receipt) (19)This manual is to guide CSD W/H people how to adjust, deduct, transfer goods in CSD storage location and how to pick, issue goods for CSD Deliveries. Also includes how to check inventory status.B USINESS T YPEIn Customer Service Department, you might have following business transactions:Business Type Return OrdertypeShip out Order typeSpare part order– Charge, for out of warranty customers X ZCOR Spare part order– Non charge but deduct warranty, for in warrantycustomersX ZFDFOC Delivery– Wrong shipment to replenish ZCDM ZCSD FOC Delivery– Make up shipment shortage X ZFD DOA Return & Ship out – Non charge, and not deduct warranty ZCDM ZCSD RMA Return & Ship out– Non charge, and not deduct warraty, for inwarranty customersZCDM ZCSDRMA Return & Ship out– Charge, for out of warranty customers ZCDM ZCSDZCORD ELIVERYCheck Daily picking jobDelivery Due ListThis list is to show All orders which should be issued to Delivery Note. W/H people can use same function to check which order should be picked at whcich date.However, this list will show up ALL orders, including Sales & CSD’s.Path: Logistic → Sales & Distribution → Shipping → Delivery Note → Change → Process delivery Due listStep 1 Select Delivery Due listStep 2 Select Delivery creation dateInput the date period. The date period here means: When in this date, which order should create Delivery Note, that is which order should be picked too.Step 3You can doble click the lines to see the Delivery Note. But please note, these notes haven’t been created by responsible person, therefore, please do not save them.Imcomplete Delivery ListPath: Logistic → Sales & Distribution → Shipping → Delivery → List → Imcomplte DeliveriesPicking & Good Issue for DeliveryZCOR / ZFD / ZCSDStep 1 Picking DeliveryPath: Logistic → Sales & Distribution → Shipping → Delivery → ChangeYou will receive CSD people passed Order & Delivery Note. Please input the D/N number in the below field. However, before perform this function, please make sure you have transferred repaired item to correct storage location, or you have enough stock in your storage locations.-Input Delivery Note number, then press PickingStep 2 Select Storage location-Please select “RMAG” for the storage location-Input the Q’ty that you confirm can be picked.Step 3 Post good issue-Click to post Good issue.ZCDM / ZCREPath: Logistic → Sales & Distribution → Sales → Order → DisplayStep 1 Check the delivery Note number-Type ZCDM order number, and then enter.-Select Document Flow-find Return Delivery numberStep 2 Picking DeliveryPath: Logistic → Sales & Distribution → Shipping → Delivery → ChangeInput Delivery Note number, and then click PickingStep 3 Select Storage location-Please select “RTSD” for the storage location Step 4 Post good issueStep 5 Find Material Document-Please go to document flow.-Find the material document “49xxxxxxxx”I NVENTORY S TATUS &R EPORTPath: Logistic → Material management → Inventory management → EnvironmentG OOD T RANSFER (轉倉)Standard Transfer (from location 1 to location 2)Path: Logistic → Material management → Inventory management → Transfer posting Step 1 Enter movement type & Storage location number-The standard mov ement type is “311”.-The storage location depends on different situation.Step 2 Input receiving Storage location & Material number / Q’ty-Please input the Receiving storage location-Input material number & Q’ty-Press saveNote:You can use 312 to reverse the above action, if you did wrong.Change Material Type (unblock to block / block to unblock)Use: Block materials, for which will not be delivered or transferred. These materials will not be checked in availability check. Only used in SAME storage location.Path: Logistic → Material management → Inventory management → Transfer postingChange to BlockUse: To block items.Step 1 Enter Movement type & Storage location-Enter Movement type “344”.-Enter storage locationStep 2 Input material number & Q’ty-After input material number and Q’ty, please press “save”.-The system will generate a document numberChange to un-BlockUse: To change blocked items to un-block status.Step 1 Enter Movement type & Storage location -Input Movement type “343”-Enter storage locationStep 2 Input material number & Q’ty-Press save to generate document numberG OODS I SSUE (領退料)以維修工單領料When customer return materials, engineers may need to create an Internal order number “RMA/DOA number” to W/H. Then W/H can use this order number to issue or return material to engineers. Path: Logistic → Material management → Inventory management → Goods issueStep 1 Enter Movement type & Storage location-Input Movemen type “261”-Input storage location “CSDB”Step 2 Input RMA/DOA order number & account number-Input RMA/DOA repair order number-Input G/L account “623509 領料維修保固費”Step 3 Input material number & Q’ty-Input the material number and Q’ty-Press save-System will generate Material document number automatically.以維修工單退料When engineers completed repairing, there must be some idle parts or defective items return. Path: Logistic → Material management → Inventory management → Goods issue Step 1 Enter Movement type & Storage location-Input Movemen type “262”-Input storage location, basically is “CSDB”, unless you have other location to fill up.Step 2 Input RMA/DOA order number, Account number & material data-Input RMA/DOA repair order number-Input G/L account number “623509 領料維修保固費”-Input Material number & Q’ty.-Press save, system will auto generate material document number.部門領料, 掛部門費用If your department staff need some parts, you can issue parts to them via this function, or ask them write a 領料單 to MC & W/H to pick the parts they need.Path: Logistic → Material management → Inventory management → Goods issueStep 1 Enter Movement type & Storage location-Input Movement type “201”-Input storage location “CSDB”Step 2 Input Account number & Cost center-Input G/L accou nt “623506 領料物料費”-Input department cost centerStep 3 Input material number & Q’ty-Input the material number & Q’ty, then press save.部門退料Path: Logistic → Material management → Inventory management → Goods issueStep 1 Enter Movement type & Storage location-Input Movement type “202”-Input storage location “CSDB”Step 2 Input Account number & Cost center-Input G/L account “623506 領料物料費”-Input department cost centerStep 3 Input material number & Q’ty-Input the material number & Q’ty, then press sav e.報廢You should issue 簽呈 or related document. After document approved, send to W/H to return the defective items monthly or in one period.This function will act in W/H, not in CSD W/H.I NVENTORY A DJUSTMENTUse: 1. Customer return material P/N incorrect. (please adjust in RTSD, then transfer to other storage)2. Customer return material Q’ty incorrect (need FI/CO’s approval) (adjust in RTSD, then transfer toother storage)做法: 一退一領Path: Logistic → Material management → Inventory management → Goods issueStep 1 自欲調整之倉位領料-Input Movement type “201” to withdraw materials-Input Storage location “RTSD”Step 2 Input Account & Cost Center-Input G/L account “593110 存貨調整”-Input Cost Center “2170”, “2171”, “2172”, or “2173”Step 3 Input Materi al number & Q’ty-Input material number & Q’ty, and then saveStep 4 退料至欲調整之倉位-Input Movement type “202” to return materials-Input Storage location “RTSD”Step 5 Input Account, Cost Center & Material data -Input G/L account “593110 存貨調整”-Input C ost Center “2170”, “2171”, “2172”, or “2173”-Input material number & Q’ty, and then saveA PPENDIX –M OVEMENT TYPETransfer postingMovement Type Description 311 轉倉/調撥312 Reverse “311”343 Change Blocked material to unblock (unrestrict)344 Change Unblock (unrestrict) material to Block 領退料 (Goods issue / Good receipt)Movement Type Description 201 部門領料 / 存貨調整領料202 部門退料 / 存貨調整退料261 工單領料262 工單退料。
某公司SAP系统操作的指南
某公司SAP系统操作的指南SAP系统操作指南SAP系统是目前世界上最为常见和广泛应用的企业资源规划系统之一,它可以支持企业的各个方面,包括财务、人力资源、销售、供应链管理等。
本指南将为您提供SAP系统的基本操作指南,以帮助您更加高效地使用该系统。
1.登录系统打开SAP系统登录页面,输入您的用户名和密码,然后点击“登录”按钮进入系统。
2.导航菜单一旦登录成功,您将看到系统的导航菜单。
导航菜单通常包括各个功能模块和子模块的链接,您可以通过点击链接来访问所需的功能。
3.功能模块介绍SAP系统通常包含几个主要的功能模块,如财务(Financial)、人力资源(Human Resources)、销售与分销(Sales and Distribution)等。
在每个功能模块下,还会有更多的子模块和相应的操作功能。
4.数据输入与查询在SAP系统中,您可以进行数据输入和查询。
数据输入通常通过各个功能模块的相应界面完成,您可以按照系统要求填写相关信息并保存。
数据查询可以通过系统提供的报表或者查询功能实现,您可以根据需要设定查询条件,并生成相应的报表或查询结果。
5.审核与审批SAP系统可以支持企业对各类业务数据的审核与审批。
审核通常由负责相关业务的管理员或财务人员完成,他们可以查看并审核数据的准确性和合规性。
审批则一般由业务相关的管理人员进行,他们可以根据系统提示的审批流程进行相应操作。
6.通知与提醒SAP系统还可以通过通知和提醒功能提醒用户完成相关任务。
系统会根据您的操作记录、业务流程等信息生成相应的通知和提醒,您可以点击通知进行相关操作或者查看详情。
7.常用快捷键为了提高用户的操作效率,SAP系统还提供了一些常用的快捷键。
例如,F4键可以用于选择一个值列表,F5键可以刷新当前屏幕,F12键可以返回上一屏幕等。
8.数据导入与导出SAP系统支持数据的导入和导出功能。
数据导入可以通过上传Excel 或者其他格式的文件实现,您只需按照系统规定的格式准备好数据文件,并在系统导入界面选择文件进行导入即可。
SAP-SD-操作手册
前言《SD模块用户培训手册》是燕化ERP整合项目SD模块部分流程的操作方法规范,按章节分步骤对本次整合过程中变动较大部分做了必要的介绍。
此《手册》作为燕山石化ERP整合项目SD模块最终用户的培训材料和ERP系统中进行销售分销管理及操作的补充。
SD模块整合前在两个公司代码下共有销售业务流程35个,整合后归并为14个销售业务流程;原有单据类型72 个,现有单据类型34个;原有条件类型33个,现有条件类型21个。
在《SD模块用户培训手册》的编写过程中,把ERP管理理念及本企业实际业务有机相结合,并总结了上线一年的实践经验,适应新的销售体制改革需求,结合企业各项管理制度,理顺规范业务流程,力求提升分公司的销售管理水平。
SD模块整合工作得到石化盈科顾问的技术指导、燕山石化ERP整合项目指导委员会的关心和相关专业部门的支持,在此表示感谢!由于编写时间仓促、理论实践水平有限,如有疏漏和错误之处,恳请广大读者给予指正,发现系统中业务管理存在的不足请及时提出,以便我们加以完善。
本书编写成员:中石化燕山分公司:孙秀军、李旭、徐晓光、尹庆伟、佟欣ERP技术顾问:熊霞燕化ERP整合项目SD模块用户培训手册编写小组2005年12月06日目录概述 (5)一、销售范围简介 (5)1、销售组织结构图 (5)2、销售范围相关定义 (6)二销售业务流程 (7)第一章 SD_001:客户主数据维护流程 (8)一、业务流程简介 (8)1、新增客户的审批流程 (8)2、业务流程各步骤说明 (8)二SAP系统操作 (9)1、SAP交易代码 (9)2、操作细部描述 (9)第二章 SD_002:价格主数据维护流程 (18)一条件类型 (18)二SAP系统操作过程 (18)1、完成该步骤的SAP角色名称 (18)2、SAP交易代码 (18)3操作细部描述 (19)三、其他项目说明 (27)四、显示价格主数据 (28)五、冻结价格主数据 (29)第三章 SD_003:标准销售合同维护流程 (31)一业务流程简介 (31)1业务流程各步骤说明 (31)二SAP系统操作过程 (31)1SAP交易代码 (31)2操作细部描述 (31)3更改销售合同 (33)4显示合同 (33)第四章 SD_004 标准订单处理流程 (34)一销售业务及订单类型简介 (34)1、订单类型 (34)2、业务模式所适用订单类型 (35)二SAP系统操作 (35)1创建燕化量价销售订单 (35)2显示订单列表 (40)3显示订单凭证流 (42)4订单的后续操作冻结及拒绝 (46)第五章、SD_006:化工统销集成业务流程 (49)一、买断模式业务流程简介 (49)1、注意事项: (49)2、业务流程图 (49)3、业务流程各步骤说明 (50)4、操作细部描述 (50)二、日常操作 (55)1、检查自动生成销售订单,并修改维护订单完整 (55)2、检查外向交货单 (65)三、XI技术支持内容 (68)1、业务流程简介 (68)2、业务流程各步骤说明 (69)3、对错误状态的IDOC重新处理 (71)第六章、SD_008:发货处理流程 (77)一、物理库位及SAP系统库位的对应关系 (77)二、发货单必输项 (79)三、冲销发货过帐 (80)四、冻结发货单 (82)五、集中发货过帐 (83)第七章、SD_009:开立发票流程 (86)一、业务流程简介 (86)二、SAP系统操作 (86)1、出具系统发票 (86)SAP系统发票到金税系统上载 (88)金税发票到SAP系统发票下载 (88)三、大批量合并开票 (90)操作步骤 (90)四、运杂费请求开立发票 (93)1、操作细部描述 (93)第八章、SD_013:销售代保管(销售、发货)流程 (97)一业务流程简介 (97)业务流程各步骤说明 (97)二SAP系统操作 (97)1建立销售订单 (97)2参照订单创建发货单,发货过帐 (98)3参照发货单开发票 (98)查询是否自动收货 (99)4虚拟库存收货 (99)冲销虚拟库收货 (100)5建立销售代保管订单 (101)6创建虚拟库发货单 (101)第九章、转储 (102)一、创建转储预留单 (102)1、事务代码:MB21 (102)2、录入条件 (102)3、项目录入 (102)4、细节录入 (103)5、更改、显示 (103)6、对于预留的特别处理 (103)7、查看预留清单 (106)8、根据预留单查相关转储单 (106)二、创建转储记帐凭证 (107)1事务代码:MB1B (107)2.录入细节 (108)概述一、销售范围简介在SAP 系统中处理SD事务之前,必须在系统中设置组织数据,组织数据将会反映业务结构,在系统中所有的业务都是在这个结构里发生的.1、销售组织结构图2、销售范围相关定义2.1 销售组织销售组织是销售和发运产品的组织单元,对应实际业务中的负责销售某类产品的销售管理部门或者几个部门的组合。
某单位SAP实施项目_用户操作手册_MM_PO(外包2001)

MM MODULE – Purchase Order (外包)日期:February 01, 20xx SAP MM MODULE使用手冊Purchase Order(版二)( Subcontract )一、作業名稱:外包P/O單建立二、說明:外包之P/O單開立流程與manual P/O相同三、執行單位:採購人員四、路徑:1.畫面如圖一:五、畫面及欄位說明:圖一:Access Create Purchase Order: Initial screen” by: enter information in table below:圖二:Subcontract P/O 之Order Type 與生產性P/O 相同為”NB”Subcontract 為“L”圖二 / 畫面及欄位說明:On screen create Purchase Order: Item Overview”: enter information in table below: 圖三:圖四:工具列重點圖示說明:*Details →可查詢該張訂單的供應商付款之相關條件。
*Details →將游標移至想查詢材料那一列,點選此圖示即可看出該材料之相關資訊。
*Vendor address →可查詢該張訂單的供應商住址。
*Overview →將游標移至想查詢材料那一列,可看出此材料之下階。
圖三、圖四 / 畫面及欄位說明:*可看出該項Item 所預發至外包廠之材料 路徑:Item → Components → Overview圖五:*若需修改Components 數量、需求日,則可直接於該欄修改 *Collective entry 為Components 增加此二項Item 即為預發出之材料,可再新增、刪除及修改。
此料號為屆時應收之料號。
*按進入圖六,此畫面可逐一增加Component 圖六:*亦可用”Collective entry” .方式直接加入多項Item確定各資料無誤後Save圖六:Show 出外包採購單號*外包P/O 與標準P/O之Number皆是“45”開頭。
- 1、下载文档前请自行甄别文档内容的完整性,平台不提供额外的编辑、内容补充、找答案等附加服务。
- 2、"仅部分预览"的文档,不可在线预览部分如存在完整性等问题,可反馈申请退款(可完整预览的文档不适用该条件!)。
- 3、如文档侵犯您的权益,请联系客服反馈,我们会尽快为您处理(人工客服工作时间:9:00-18:30)。
User Guide – Shipping & Financial Packing (2)Create Packing (2)Delete Packing Data (8)Print Packing List (9)Billing (10)Invoices for Customs (Proforma Invoice) (10)Invoices for Financial Accounting (Commercial Invoice) (13)Cancel a Billing document (16)Which Order type should create Packing & Billing Document (18)ZOR / ZCOR – Sales/CSD standard charge order (18)ZRE – Sales return order (18)ZSOR – Foreign sample order (18)ZSRE – Foreign sample return order (18)ZKB – Local sample order (fill-up) (18)ZKA – Local sample order (pick-up) (18)ZKE – Local sample order (issue, billing) (18)ZCRE – CSD sale return order (18)ZCDM – RMA/DOA return order (18)ZCSD – RMA/DOA sub-delivery order (18)ZFD – Free of charge order (19)ZFD – Free of charge order Deduct warranty (19)DS – Schedualing agreement order (19)CQ – Contract order (19)CR – Credit memo request (19)DR – Debit memo request (19)This manual is to guide Shipping and Accounting people how to create Packing List, Invoice, and cancel Invoice.P ACKINGDue to data limitation, so far, only F/G can implement Packing function.Only the goods which will ship out will need Packing function. For those return back goods, no packing needed.Create PackingPath: Logistic → Sales & Distribution → Shipping → Delivery Note → ChangeStep 1 Click PackingStep 2 Choose Allowed Shipping Material-Mark the items which you want to do the packing. Be awared, those items marked together must be used same sized pallet. If they have different pallet size, such as PLT for 520 w/ bag v.s. PLT for 520 w/o bag, then pleaes select the items separately.-Press Allowed Shipping Material, and system will bump up a screen. Please select a pallet.-Press Choose, then system will show up following screen.Step 3 Select Packing method:a. New Shipment if full- If you select New shipment if full, then the system will calculate the best fit Q’ty of one pallet, and show up the needed pallet Q’ty.b. PackOne pallet was created.-If you choose Pack, then s ystem will calculate your pallet & Q’ty one by one. As long as one pallet is full, you have to select items again to repeat previous actions.3 pallets were created.c. New Ship unit per Part Q’ty-If you select New Ship unit per Part Q’ty, then system will calculate your ite ms separately, even they are using same Pallet.-So you have to select 2nd or next items again, and press their allowed ship material-Different items were packed in different pallets.Step 4 Change Shipping Unit Name-System will calculate the Shipping unit automatically, when you are ready to print out Packing List.However, if you have special Shipping Unit number, such as C/No.1-10, then you can keyin the Shipping unit text by yourselves.-Remember, these texts cannot be longer than 10 characters.Step 5 Check Dimensions-You may choose one Shipping unit, and then go to Shipping unit header, select General DataYou may change the field data here.Step 6 Change Shipping Mark & Remarks-Press Back buttom to return Delivery note screen.-Go to header, select Text.-Fins Shipping Mark, and double click inside to maintain the Shipping Mark-If there is any remarks, please type in Layout set Header text-You can also go to Item, select Text , to maintain item text depending on your demand. Now, save this delivery note. Your Packing list has been done.Delete Packing DataIf you made a wrong packing, please select the Shipping unit that you have packed, and go to Edit, to delete Shipping unit.Or you may select Total Contents, and then go to Edit to delete Shipping unit.Print Packing ListAfter you save the packing, you will back to original view where you change this delivery note. You can print Packing List here.Press Issue output, and then select the output function you want. Generally will be Printer.Select PL00 for Packing List- If you want this packing printed immediately, please mark Print immediately. Or do not mark it, you may select the output later in System spool.B ILLINGAfter Delivery Note created, Shipping can start to prepare Invoices for shipping documents.Except for Shipping invoices, Shipping has to impletement the Billing functions for Sales & CSD. This function is to generate Accounting document, A/R & account records. As long as these document has generate Accounting documents, they cannot be changed any more. That also means: Change invoice function is invalid to correct pricing or related data, except print out format.Invoices for Customs (Proforma Invoice)Path: Logistic → Sales & Distribution → Billing → Billing Document → Create / ChangeStep 1 Select the Delivery Note or S/OStep 2 Select Billing type & Date-Press Defaul data button.-Choose the Billing type as F8-Enter the Billing Date. Billing date here is for the Shipping document date.Step 3 Check Invoice data & modify-Press EXECUTE, then system will show up the above screen.-Please check if the price & Q’ty, if they are correct.-If you want to change the Price, please go to Item, and select Pricing-You can also input some remarks in invoices. Go to Header/Item texts to input data.Step 4 Save & Print out Invoice-After save this document, the Invoice number will show in the bottom of the screen.-Go back to Display Billing document, input the document number, and then select Issue Output.-Choose output type as RD00, and executeInvoices for Financial Accounting (Commercial Invoice)This function is to creating A/R or deducting A/R.There are 2 types Commercial Invoices that Shipping people have create.1. Commercial Invoice refer to Delivery Note2. Commercial Invoice refer to Order (for Service Material Only)Commercial Invoice refer to Delivery NotePath: Logistic → Sales & Distribution → Billing → Billing Document → Create / ChangeStep 1 Select the Delivery Note or S/OStep 2-1 Select Billing type & Date-Press Defaul data button.-Input Billing type as F2-Input Billing date. The Billing date here means 報關日, it also can be B/L issued date. (Foreign Shipment)-If this shipment is Domestic, then Billing date should be same as Good Issue Date.Step 2-2 No Select Date, use defaultIf you do not want to change the Billing date, you can go to Step 3 directly, skip Step 2-1.Step 3 Execute Billing document-Press Execute, and then save.-System will auto generate a numberStep 4 Release to Accounting (Costing)-Input transaction code “ZACT”. If you are not in the first level of SAP, please also add /N-Please select function you need-Press execute, then the Accounting document is created okay.You have created one Billing Document, and this document should be print out to Sales & FI/ACCT people. Sales will use this invoice to charge customer, and this invoice has increased A/R.Commercial Invoice refer to Order (for Service Material only)Path: Logistic → Sales & Distribution → Billing → Billing Document → Create / ChangeStep 1 Select the OrderStep 2-1 Select Billing type & Date-Press Defaul data button.-Input Billing type as F2-Input Billing date. Please check order, there will be a Billing date mark on it. Or you can check CSD/Sales people for correct date.Step 2-2 No Select Date, use defaultIf you do not want to change the Billing date, you can go to Step 3 directly, skip Step 2-1. The Billing date now will be the Invoice create date.Step 3 Execute Billing document-Press Execute, and then save.You have created one Billing Document, and this document should be print out to Sales & FI/ACCT people. Sales will use this invoice to charge customer, and this invoice has increased A/R.Cancel a Billing documentIf your Billing document was wrong, in current months, you can use Cancel Billing Doc. Function to correct it. However, if this invoice is Shipping invoice, then there is no need to use Cancel. You can create another NEW invoice.Path: Logistic → Sales & Distribution → Billing → Billing Document → Create / ChangeStep 1 Select the Billing document numberStep 2-1 Select Billing Date-Press Defaul data button.-Enter the Billing DateStep 2-2 No select Billing DateIf you do not want to change the billing date, you may use system default date (that is processing Billing date). Then do not press Default, skip Step 2-1, just go to Step 3 execute.Step 3 Execute Billing document-Mark 2 billing types, and press save.You have completed Cancel Billing document. System will generate a Billing Document number to you.W HICH O RDER TYPE SHOULD CREATE P ACKING &B ILLING D OCUMENT ZOR / ZCOR – Sales/CSD standard charge orderPacking ListProforma Invoice (F8)Commercial Invoice (F2)ZRE – Sales return orderCredit Memo (RE) –created by AccountingZSOR – Foreign sample orderPacking ListProforma Invoice (F8)ZSRE – Foreign sample return orderNo Billing document needZKB – Local sample order (fill-up)Packing ListZKA – Local sample order (pick-up)No Billing document needZKE – Local sample order (issue, billing)Commercial Invoice (F2)ZCRE – CSD sale return orderCredit Memo (RE) –created by AccountingZCDM – RMA/DOA return orderNo Billing documnt need.ZCSD – RMA/DOA sub-delivery orderPacking ListProforma Invoice (F8)ZFD – Free of charge orderPacking ListProforma Invoice (F8)ZFD – Free of charge order Deduct warranty Packing ListProforma Invoice (F8)Proforma Invoice (ZF8)DS – Schedualing agreement orderPacking ListProforma Invoice (F8)Commercial Invoice (F2)CQ – Contract orderNo Billing document need.CR – Credit memo requestCredit Memo (G2) –created by AccountingDR – Debit memo requestDebit Memo (L2) –created by Accounting。
