手持机移动端概要设计说明书V1.0.1
手持机操作说明书
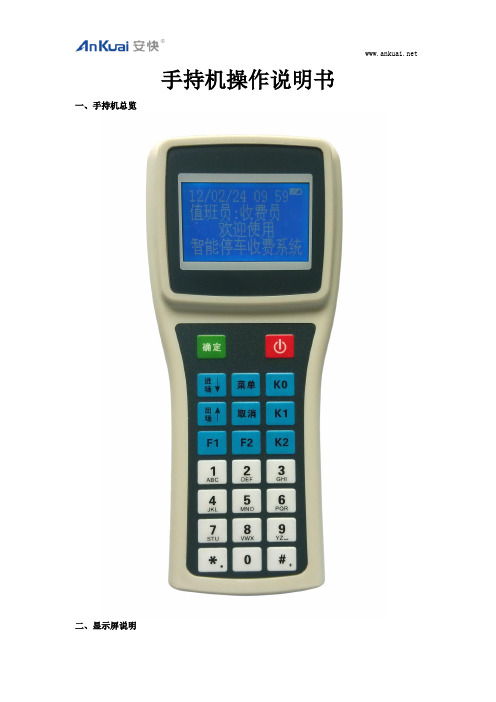
手持机操作说明书一、手持机总览二、显示屏说明三、按键说明1、开关键:短按开机,长按3S关机2、菜单键:进入菜单操作模式,有四个菜单选项.3、组合键:在菜单操作模式下,起“+”键作用;不在菜单操作模式时,进入刷临时卡入场工作模式。
4、组合键:在菜单操作模式下,起“+”键作用;不在菜单操作模式时,进入刷临时卡出场工作模式。
5、快捷键:快速查询手持机机号和扇区号。
6、、、、数字键:输入0~9的数字键。
四、操作示例注意:本管理器必须进入值班操作状态才可以对进出场车辆卡片,进行正常操作。
1、值班员无卡上下班1.1、在第一次使用手持机的时候,需要登录操作员。
无卡上下班,通过菜单按键进入菜单选项,输入值班员编号(这里的编号不是指操作员的人员编号,而是1至15数字,总共15个编号),然后输入该操作员的密码(操作员密码默认为888888),按“确定”键登录。
注意:手持机上电默认显示出厂时添加的收费员。
2、刷卡记录查询和值班记录查询2.1、查询刷卡记录,通过菜单按键进入菜单选项,如图所示:然后按确定键进入查询界面,如下图所示:2.2、查询值班记录,通过菜单按键进入菜单选项,如图所示:然后按确定键进入查询界面,如下图所示:3、临时卡进出场刷卡操作3.1、临时卡入场需要通过入场按钮进入读卡界面,如下图所示:如果需要预置车牌可按键盘上的‘*’键,如下图所示:注意:需要设置车牌的首字和首字母,必须进入系统设置的车牌预置功能选项。
如果需要把预置卡片类型可以按‘#’键会出现如下界面:在选项了卡类后按确定键会返回到入场刷卡界面,在车辆入场时卡片类型就会被改成预置的卡类,但是此卡类只能更改一次卡类,如果下次还要更改卡类,需要重新预置卡类。
设置好车牌后按确定键返回到进场刷卡界面,刷临时卡进场如下图所示:如果需要把首字更换可以按‘*’键会出现如下界面:注意:如果需要翻页可以按9键进行翻页设置好首字和车牌后按确定键返回到进场刷卡界面,刷临时卡进场如下图所示:3.2、临时卡出场需要通过出场按钮进入读卡界面,如下图所示:然后在卡片感应区读取出场的临时卡就会显示出场收费界面,如下图所示:4、系统参数配置4.1、进入系统参数配置需要通过菜单选项的‘系统参数配置’选项,如图所示:进入系统配置需要输入密码才能进入参数配置,密码默认为: 888888,如果需要修改密码可进入系统配置的密码修改选项进行修改,密码输入界面如下图所示:系统设置的选项有:1:机号设置机号设置的有效设置范围为:1~1272:系统设置a.预警天数设置:可设置卡片过期的提示天数b.读卡模式:选择读卡的出入模式3:IC月卡设置a.进出模式:可选择一进一出和多进多出b.下载有效:设置下载是否有效c.过期收费:IC卡过期是否收费4:其它标识设置a.记录满设置:刷卡记录满后可设置禁止使用和继续使用5:查询IC卡扇区查询扇区号,默认为9扇区6:修改系统密码可以修改系统参数配置的密码7:修改系统时间可以脱机设置手持机的时间8:背光时间可设置在无操作情况下显示屏显亮时间9:读卡时间可设置读卡操作时间10:关机时间可设置自动关机时间,以节约电池电量,设置90秒以上为不省电模式 11:欢迎词选择此设置可选择播报“欢迎光临”或“你好”。
(完整版)概要设计说明书_模板
XXX项目概要设计说明书创智和宇信息技术股份有限公司修改记录此页由EPG编写,项目实施人员不用更改任何地方模板编写及修订记录此页由EPG编写,项目实施人员不用更改任何地方目录XXX项目_概要设计书 (1)1 引言 (1)1.1 编写目的 (1)1.2 参考文献 (1)1.3 术语与缩写解释 (1)2 总体设计 (1)2.1 系统概述 (1)2.2 系统设计原则 (1)2.3 设计中应用的关键技术 (1)2.4 系统结构图 (2)2.5 网络结构图 (2)2.6 系统功能模块图 (2)2.7 数据流向图(或称为时序图) (2)2.8 模块构成 (2)3 环境设计 (2)4 硬件设备 (2)5 支持软件 (3)6 接口设计 ............................................................................................................ 错误!未定义书签。
6.1 用户接口 (3)6.2 外部接口 (5)6.3 内部接口 (5)7 数据库设计 (6)7.1 数据库环境说明 (6)7.2 数据库命名规则 (6)7.3 逻辑设计 (6)7.4 物理设计 (6)7.5 安全性设计 (7)8 公用结构 ............................................................................................................ 错误!未定义书签。
9 界面设计 (8)10 出错处理设计 (8)11 开发工具 ........................................................................................................ 错误!未定义书签。
《蓝牙手持机APP系统V1.0》 操作手册

蓝牙手持机APP系统用户操作手册重庆英卡电子有限公司2015.2目录1概述 (1)2系统特点 (1)3操作说明 (1)3.1进入 (1)3.2预警监控 (2)3.3节点管理 (4)3.3.1节点配置 (4)3.3.2节点查询 (6)3.3.3模拟预警 (7)3.4安装维护 (8)3.4.1通信测试 (8)3.5连接管理 (9)3.5.1连接蓝牙设备 (9)3.5.2断开蓝牙设备连接 (13)3.6更多设置 (14)3.6.1盒子RF配置设置 (15)3.6.2盒子RF配置查询 (16)3.6.3报警设置 (17)3.7系统退出 (18)1概述蓝牙手持机APP系统主要是通过手机蓝牙通讯功能连接专用蓝牙设备,蓝牙设备与探测器之间进行通信,这样用户的手机就可以直接配置和接收探测器节点信息,实现探测器的测试、管理、查询等检查及维护管理功能,从而取代专用的手持机设备和软件。
蓝牙手持机APP系统包括预警监控、节点配置、节点查询、模拟预警、通信测试、连接管理、蓝牙设备的配置设置和查询等功能。
其系统主要功能为:(1)预警监控:预警监控、消警、历史预警记录查看与清空等功能。
(2)节点管理:节点配置、节点查询、模拟预警、历史记录查看与清空等功能。
(3)安装维护:通信测试、历史记录等功能。
(4)连接设备:搜索蓝牙设备、连接管理等功能。
(5)更多设置:盒子RF配置设置、盒子RF配置查询、报警设置功能。
2系统特点(1)预警提示:只要探测器给手机发送预警警报,用户在软件任意界面都会接收到预警提示对话框,便于用户及时查看和处理预警信息。
(2)手机蓝牙:当用户打开该软件后,如果用户没有开启蓝牙功能,则自动开启手机蓝牙,并且在退出系统后自动关闭蓝牙功能;如果用户已经开启蓝牙,则退出系统不会关闭蓝牙功能,保持用户手机的状态不作改变。
(3)蓝牙自动连接与断开:当该软件在手机后台运行或手机关屏等操作时,30秒后蓝牙会自动断开;当用户重新唤醒软件则自动连接蓝牙。
V1.0 用户手册
User ManualContents1.SAFETY MATTERS (3)2.OVERVIEW (4)3.INTRODUCTION (5)3.1.P RODUCT OVERVIEW (5)3.2.A BOUT K EYBOARD (5)3.3.I NTRODUCTION TOUCHPAD T OUCH P AD ICON (6)3.4.L ASER H EAD D ESCRIPTION (6)3.5.W IRELESS 2.4G RECEIVER 2.4G A DAPTER ICON (7)4.STARTED (7)4.1.C ONNECT RECEIVER (7)4.2.P ROCESS OF USE (7)4.3.H OW TO CONTROL THE BACKLIT (7)4.4.E QUIPMENT SLEEP AND WAKE-UP OPERATION (7)4.5.S WITCH OFF THE DEVICE AFTER USE (7)4.6.B ATTERY C HARGING (8)5.BASIC FUNCTIONS (8)5.1.P RIMARY K EY BITS (8)5.2.SUB-KEYS (8)5.3.DEPLICATE KEYS (8)5.4.BACKLIT CONTROL KEY (8)5.5.T OUCH P AD (8)5.6.L ASER P OINTER (9)5.7.RF MATCHING (9)6.APPENDIX (9)6.1.T ECHNICAL PARAMETERS (9)6.2.M AINTENANCE (9)6.3.T ROUBLESHOOTING (11)6.4.P ACKING LIST (11)1. Safety MattersSafety MattersTo avoid injury, death of personnel or damage to the equipment the operator must refer to anexplanation in the User’s Manual.Battery: There is a piece of lithium-ion rechargeable battery in this device. Don’t water this device, or take it in the humid environment for long time, or the device will be damaged.Attention to traffic safety(CAR PC): Do not use the device while driving. If you want to use, please park the car.错误!未指定书签。
手持移动数据终端 用户手册说明书
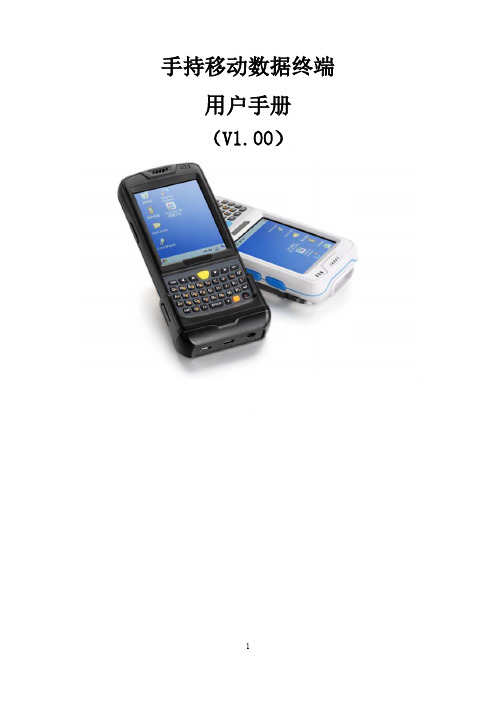
手持移动数据终端用户手册(V1.00)目录第一章产品介绍 (4)1.1 产品技术参数 (4)1.2 外部结构 (7)1.3 键盘说明 (9)1.4 随机配件 (10)1.5 可选配件 (10)第二章使用入门 (12)2.1更换电池 (12)2.2安装TF卡 (13)2.3安装SIM卡 (14)2.4 手柄拆装 (15)2.4 电池充电 (15)2.5 TF卡使用 (16)2.6 休眠与唤醒 (16)2.7 任务栏 (17)2.8桌面 (18)2.9 设备复位 (19)第三章系统设置 (20)3.1Internet选项 (22)3.2PC连接 (24)3.3存储管理器 (25)3.4电源管理设置 (25)3.5键盘属性 (26)3.6区域设置 (27)3.7日期和时间设置 (28)3.8删除程序 (29)3.9输入面板 (30)3.10鼠标 (30)3.11所有者(设备使用者私人信息) (31)3.12网络连接和拨号 (32)3.13系统信息设置 (33)3.14显示及背光设置 (34)3.15音量和声音 (36)3.16拨号设置 (37)3.17证书管理 (37)3.18笔针 (38)3.20 蓝牙管理器 (39)3.21 USB同步修复 (39)3.22 HMS模块电源管理 (40)第四章键盘及输入法 (41)4.1软件盘的使用 (41)4.2输入法 (42)第五章网络连接 (43)5.1WIFI网络连接 (43)5.2GPRS拨号连接 (45)5.2.1 GPRS配置说明 (45)5.2.2 GPRS拨号操作 (50)第六章手持移动数据终端与电脑同步连接 (52)6.1 同步软件安装说明 (52)第七章功能使用 (57)7.1 扫描器的使用 (57)7.2 RFID的使用 (58)7.3 GPS (60)7.4拍照 (60)7.5蓝牙 (61)第八章故障排除 (62)8.1 设备及系统故障 (62)8.2扫描故障 (62)8.3RFID故障 (63)8.4 网络及通讯故障 (63)8.5 WIFI连接故障 (63)8.6 其它故障 (64)第九章保养维护 (64)第一章产品介绍本设备将“ALL IN ONE”的设计理念贯穿其中,它将图像获取、无线通讯、条码扫描、RFID读写器等功能集成一身。
概要设计说明书-模板
XXX项目概要设计说明书创智和宇信息技术股份有限公司修改记录此页由EPG编写,项目实施人员不用更改任何地方模板编写及修订记录此页由EPG编写,项目实施人员不用更改任何地方目录XXX项目_概要设计书 (1)1引言 (1)1.1编写目的 (1)1.2参考文献 (1)1.3术语与缩写解释 (1)2总体设计 (1)2.1系统概述 (1)2.2系统设计原则 (1)2。
3设计中应用的关键技术 (1)2。
4系统结构图 (2)2.5网络结构图 (2)2。
6系统功能模块图 (2)2。
7数据流向图(或称为时序图) (2)2.8模块构成 (2)3环境设计 (2)4硬件设备 (2)5支持软件 (3)6接口设计 ............................................................................................................ 错误!未定义书签。
6.1用户接口 (3)6。
2外部接口 (5)6.3内部接口 (5)7数据库设计 (6)7。
1数据库环境说明 (6)7.2数据库命名规则 (6)7。
3逻辑设计 (6)7.4物理设计 (6)7。
5安全性设计 (7)8公用结构 ............................................................................................................ 错误!未定义书签。
9界面设计 . (8)10出错处理设计 (8)11开发工具 ........................................................................................................ 错误!未定义书签。
12附录 .. (8)1 引言1.1 编写目的[说明编写这份概要设计说明书的目的,指出预期的读者]例如:本设计说明书简单阐明了XXX系统的XXX模块的基本设计思想、基本功能、模块划分以及模块间接口。
手持操作器使用手册200601

注意事项
1.手持操作器是由主板进行供电,所以请先确认主板的RS232连接口具有供电功能,有的主板需要跳线对供电功能进行设置,也请确认设置正确。具体情况请查阅相关主板的说明。
2.操作器下方有两个接口,分别是RS232和CAN通讯的接口,确认接到RS232接口,否则操作器通讯会连接不上(CAN通讯口备用,以后的版本中用来调试轿厢)。
版权所有,侵权必究。内容如有改动,恕不另行通知。
Copyright© byShanghai STEP Electric Co., Ltd.
All rights reserved
The information in this document is subject to change without notice . No partof this document may in any form or by any means
下面会对1级菜单的主要功能界面操作进行举例说明。
3.2.4 查看监视状态方法
以查看故障记录为例进行说明:
顺序
按键
操作器的状态
说明
-
电梯状态显示
1
进入功能选择状态
2
进入二级菜单
顺序
按键
操作器的显示
说明
1
上电
见图3.1
1
进入登录界面
2
按4次
3
4
按3次
5
6
按2次
7
8
密码输入完毕
9
登录成功,进入电梯状态显示界面,
表3.3密码登陆的方法
3.2.3 功能状态切换
在任何状态下,按下F1键可回到电梯状态显示界面,这时,可以按照下图进行功能选择:
软件概要设计说明书范例

XX概要设计说明书文档修改记录填写说明1.系统结构的定义本体系对整个软件系统按如下结构方式进行划分: 系统( 子系统( 模块( 子模块其中:(1)“系统( 子系统”划分属于“系统设计”, 在系统设计说明书中予以描述。
(2)“子系统( 模块”划分属于“概要设计”, 在本说明书中予以描述。
(3)“模块( 子模块”划分属于“详细设计”, 在详细设计说明书中予以描述。
如果系统相对简单, 可以省略“子模块”这一层次。
2.如果填写了系统设计说明书,则在本说明书中略过“系..子系统”划分的相关内容(即第2章)。
3.如果系统相对简单,不需要做“系..子系统”划分,这种情况下,取消填写系统设计说明书,只须填写本说明书,直接套用“子系..模块”划分(即第3章)进行“系..模块”划分(把其中“子系统”一词替换为“系统”),并删除本说明书中“系..子系统”划分的相关内容(第2章)。
目录1.简介 (1)1.1.背景和目的 (1)1.2.范围 (1)1.3.术语和缩略语 (1)2.系统总体设计 (1)2.1.任务概述 (2)2.1.1.目标 (2)2.1.2.需求概述 (2)2.2.设计概述 (2)2.2.1.总体约束 (2)2.2.2.系统外部接口 (2)2.2.3.设计方案概述 (2)2.3.系统架构设计 (3)2.3.1.系统的逻辑架构设计 (3)2.3.2.系统的物理架构设计 (5)2.4.子系统定义 (5)2.4.1.子系统列表 (5)2.4.2.子系统间关系 (6)3.子系统1设计 (6)3.1.任务概述 (7)3.1.1.目标 (7)3.1.2.需求概述 (7)3.2.设计概述 (7)3.2.1.总体约束 (7)3.2.2.子系统外部接口 (8)3.2.3.设计方案概述 (9)3.3.子系统架构设计 (9)3.4.模块定义 (11)3.4.1.模块列表 (11)3.4.2.模块间关系 (11)3.4.3.模块描述 (11)4.非功能性需求的实现方案 (13)6.1.性能的考虑 (13)6.2.兼容性的考虑 (13)6.3.安全的考虑 (13)6.4.可移植性的考虑 (13)6.5.集成与测试的考虑 (14)6.6.可扩展性的考虑 (14)6.7.可靠性的考虑 (14)6.8.可维护性的考虑 (14)5.难点及解决方案 (14)6.参考资料 (15)7.附录 (15)1. 简介1.1. 背景和目的1.2. 本文档编制的目的是说明对软件系统的设计考虑, 包括软件系统的基本处理流程, 软件系统的组织结构、模块划分、功能分配、接口设计、运行设计、数据结构设计和出错处理设计等, 为软件的详细设计奠定基础。
孚恩M10安卓手持终端操作手册
M10 手持终端用户手册V1.0上海孚恩电子科技有限公司版权所有ShangHaiFineElectronics Co.,Ltd.AllRightReserved目录1.内容简介 (3)2.产品简介 (3)2.1.产品说明 (3)2.2.产品外观 (4)2.3.产品功能 (6)2.4.规格参数 (6)2.5.产品编号说明 (8)2.6.产品配置说明 (8)2.7.交付清单 (9)3.操作指南 (10)3.1.使用须知 (10)3.1.1.电池安装 (10)3.1.2.卡片安装 (13)3.1.3.充电 (15)3.1.4.按键布局图及说明 (16)3.1.5.开机 (17)3.1.6.关机 (17)3.1.7.挂起 (17)3.1.8.挂起唤醒 (17)3.2.电脑同步 (17)3.3.时间设置 (19)4.注意事项 (21)4.1.危险 (21)4.2.警告 (22)5.FAQs (22)1.内容简介M10手持终端是本公司推出的新一代产品,它采用高性能CPU和大容量的存储介质,可配置低中高频段无线射频模块,通过有线或无线进行数据通讯交互,使用Android操作系统,可满足各行业移动数据采集和简单数据处理的需求。
为了方便您的使用,本手册将详细地向您介绍M10手持终端和使用指南。
请在使用前认真阅读有关章节。
如果需要二次开发,可查阅SDK 文档和开发手册。
2.产品简介2.1.产品说明M10手持终端是本公司推出的新一代物联网多功能手持终端,它采用A9系列的CPU作为手持终端的控制中心,集成LCD显示屏、可充电电源管理、英文键盘输入、中文手写输入等功能,并将硬件驱动封装成API接口,二次开发接口和文档齐全,因而能很好地支持手持终端的应用程序,能很好地支持二次开发和远程升级,大大提高设备的便利性和应用扩展性。
本手持终端根据您选购的配置不同,设备可内置125Khz、13.56MHz、902~927Mhz、2.4GHz等无线射频识别模块,同时支持一维条码、二维条码、GPS定位等数据采集方式,能方便地自动采集各种数据;同时内置WIFI、蓝牙、GPRS、CDMA等无线传输模块,可方便地与车载终端、中央服务器进行即时数据传输与交换,具有高度可靠性和灵活便利性。
手持机开发设计说明
手持机开发设计说明原来的手持机采用STC51单片机开发的,由于51单片机的种种局限,已经不能适应目前的环境了,想用STM32单片机,加TFT显示,USB接口,COMS摄像等功能。
基本功能如下:手持机功能说明* 刷卡计费功能,并记录消费。
* 查询消费记录。
* 通过232串口,可把消费记录上传到电脑。
* 除车位锁外,还可控制各种其他动作终端,使用灵活。
* 选用名牌微电脑控制芯片和电源控制芯片,工作性能稳定可靠,效率高,功耗低。
* 手持机全中文功能界面显示,操作简单。
* 进入车辆发卡,向卡内写入车辆进入管理区时间。
* 车辆离开刷卡,读取卡内的时间数据。
* 自动计算停车时间,将停车时间XX日XX时XX分显示在液晶屏。
* 自动计算停车应收费用金额。
* 随时可查阅停车收费总金额、进车次数等信息。
* 两级管理,管理级对员工级管理,员工级对进出车辆级管理。
* 填写收费规则,管理级可通过管理卡填写收费规则。
* 清除相关信息,管理级可通过管理卡对停车收费总金额、收费时间等信息一次性清除。
* 时间调整,管理级可通过管理卡进行时间校对。
* 识别和判断内部卡是否有效。
* 电量不足声响及显示提示。
* 随时可将停车收费总金额及收费笔数转存到财务卡内。
* 充电功能。
* 可无线控制:车位锁/道闸/显示屏等。
* 可将收费资料与车牌号码同时上传计算机。
一、手持机管理系统特点1、灵活性:可以在任何两个出入口或一个出入口实现整个停车交易流程。
2、便捷性:安装简易,无需大规模施工,机动性强,无需专用的PC机管理。
3、经济性:系统及设备价格对比同类产品优势明显,具有很高的性价比。
4、智能性:由于利用智能卡和计费机管理,原有的数据收集和整理工作更为简洁准确,避免票款的流失、所需统计数据的准确性大大提高。
5、多样性:手持机+道闸(车位锁)复合使用时,比较适用多车道进出口的管理,可实现进出车辆的分流。
6、服务性:停车管理的反复读写性,可以简化了临时停车证的制作及用户更换带来的麻烦。
Polycom RealPresence Mobile 1.0.0 用户手册说明书
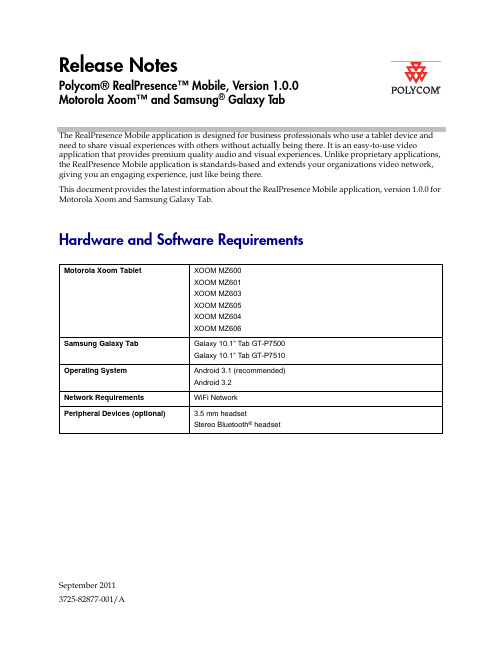
September 20113725-82877-001/ARelease NotesPolycom® RealPresence™ Mobile, Version 1.0.0Motorola Xoom™ and Samsung ® Galaxy TabThe RealPresence Mobile application is designed for business professionals who use a tablet device and need to share visual experiences with others without actually being there. It is an easy-to-use videoapplication that provides premium quality audio and visual experiences. Unlike proprietary applications, the RealPresence Mobile application is standards-based and extends your organizations video network, giving you an engaging experience, just like being there.This document provides the latest information about the RealPresence Mobile application, version 1.0.0 for Motorola Xoom and Samsung Galaxy Tab.Hardware and Software RequirementsMotorola Xoom TabletXOOM MZ600XOOM MZ601XOOM MZ603XOOM MZ605XOOM MZ604XOOM MZ606Samsung Galaxy TabGalaxy 10.1” Tab GT-P7500Galaxy 10.1” Tab GT-P7510Operating SystemAndroid 3.1 (recommended) Android 3.2Network Requirements WiFi Network Peripheral Devices (optional)3.5 mm headsetStereo Bluetooth ® headsetRelease Notes Polycom® RealPresence™ Mobile, 1.0.02InteroperabilitySetting Up the RealPresence MobileTo install the RealPresence Mobile application:1From the Applications list, touch Settings > Applications and then touch Unknown sources . This enables installing applications from sources other than the Android Market.2Install from an email address using these steps:a Attach the software application file to an email message and send it to your email address.b Open the message on the tablet.cWhen you are prompted to install the application, touch Install .TypeProductVersion NAT/Firewall/Border Controller Polycom VBP ® 5300-ST 9.1.5.3Gatekeeper, Gateways, External MCU, Bridges, Call ManagersPolycom ® Distributed Media Application™ (DMA™) 7000V3.0.0Polycom ® Converged Management Application™ (CMA ®) 5000 5.35.0Polycom ® Converged Management Application™ (CMA ®) 4000 5.4 or laterPolycom ® RMX ® 40007.2.2.20 or later, with MPMX media cardPolycom RMX 20007.2.2.20 or later, with MPMX media cardPolycom RMX 1000 2.4 with video accelerator card Broadsoft SIP r17 Server SP2Broadsoft SIP r16 Server DeltaPath2.9.2EndpointsPolycom ® HDX ® 9006 3.0.2Polycom ® HDX ® 80003.0.0 and laterPolycom® RealPresence Mobile 1.0.0 or later (Android and iOS)Polycom® Telepresence m1001.0.0 or later Content Sharing ApplicationsPolycom ® People+Content™ IP1.2.33Release Notes Polycom® RealPresence™ Mobile, 1.0.0To uninstall the RealPresence Mobile application:1From the Applications list, touchSettings > Applications > Manage applications and then touch theVideoicon.2Touch Uninstall .3When you are prompted to confirm, touch OK .To configure the RealPresence Mobile application:1From the Application list, touch Video .2Touchand then touch Settings .3Configure these Network settings:4Configure these H.323 settings:5Configure these SIP settings:Your user data is deleted when you uninstall the application.Setting DescriptionWLAN Call Rate Specifies call rate to use for calls using a wireless LAN.3G Call RateSpecifies the call rate to use for calls using a 3G network.SettingDescriptionGatekeeper Registration Specifies whether to register your system with a gatekeeper.Select GatekeeperLets you choose whether to use the Internal or External Server to make calls.Internal Gatekeeper Address External Gatekeeper Address Specifies the IP address or name of the internal and external gatekeepers. For example, 10.11.12.13 or .H.323 Name Specifies the name that is displayed to the far site during calls. For example, MyName.H.323 ExtensionSpecifies the name that gatekeepers use toidentify this system. You organization's dialing plan may define the names you can use.Release Notes Polycom® RealPresence™ Mobile, 1.0.0Setting DescriptionSIP Registration Specifies whether to register your system with aSIP server.SIP Proxy Server Specifies the DNS name or IP address of the SIPProxy Server.SIP Registrar Server Specifies the DNS name or IP address of theRegistrar Server.Domain If you use Broadworks SIP server, specifies thedomain name for authentication with a RegistrarServer. If you use Polycom DMA server as the SIPserver, leave the domain blank.SIP User Name Specifies the user name for authentication with aRegistrar Server.SIP Password Specifies the password for authentication with aRegistrar Server.Authentication Name Specifies the name to use for authentication whenregistering with a SIP Registrar Server. If youleave this field blank, the SIP User Name is usedfor authentication.Transport Protocol Indicates the protocol the system uses for SIPsignaling.•TCP provides reliable transport via TCP forSIP signaling.•UDP provides best-effort transport via UDP forSIP signaling.To restore the tablet to the original factory settings:1From the Applications list, touch Settings > Privacy.Touch Factory data reset.2Touch Reset tablet.Your user data is deleted when you reset the application.45Release Notes Polycom® RealPresence™ Mobile, 1.0.0Checking Your Mobile or WiFi LinkTo check your current connection status and IP address >>Touchin the lower right corner of your screen.Note : In case of a network connection problem,appears in the lower right corner of your screen.Features in Version 1.0.0Polycom RealPresence Mobile application is a new product with the following features:•Dual stack operation that allows the Polycom RealPresence Mobile to connect to SIP or H.323 systems.•H.264 encode and decode at up to 720p, 30fps.•Support for Siren LPR, which can effectively improve the decreased audio quality caused by packet loss.•Ability to receive content using H.239 and BFCP.•Configurable network and bandwidth settings that make the RealPresence Mobile operate well in virtually any network.•Ability to zoom and scroll received content.•Support for automatic gain control and echo cancellation.•Support for H.460 firewall traversal.•Ability to view network quality during a call.Using the RealPresence Mobile ApplicationThe RealPresence Mobile application allows you to place and receive point-to-point calls. You can also join multipoint calls hosted by multipoint conferencing systems, such as Polycom RMX systems and by endpoints with multipoint capabilities, such as Polycom HDX systems.Placing a Video CallFor best results, Polycom recommends using a WiFi network to place calls.To place a call:1Enter the name or number to call. Depending on the system you are calling, the dialing information could look like one of these examples:—10.11.12.13 (IP address—include the dots)Release Notes Polycom® RealPresence™ Mobile, 1.0.06—2555 (SIP, or E.164 extension for H.323)— (DNS name)—***************(SIP)—signal IP##conference ID (H.323)2Touch the call type.3If you need to enter an extension or password, touch and enter the number.4Touchto start the call.To place a call from your recent calls list:1Touch Recent Calls .2Touch the number to call.Answering a CallWhen you receive a call, you see a call notification that tells you who is calling. To answer a call:>>Touch Answer .Working with ContentRealPresence Mobile application allows you to view content sent by others in the call. The people video and the content you receive appear in separate windows. You can rearrange the people video and content windows by dragging them. You can also zoom and resize content.Controlling VideoYou can use the in-call toolbar to customize the way the RealPresence Mobile screen looks, switch cameras, and stop sending video to others in the call. •Drag the window to view people or content full screen.•Touch to turn the Picture-in-Picture (PIP) on and off.•Touchto switch between your front and back cameras.Your recent calls list can contain up to 100 entries.7Release Notes Polycom® RealPresence™ Mobile, 1.0.0Controlling AudioYou can adjust the sound you hear and mute the microphone if you do not want the far site to hear you.•Touchon the in-call toolbar. When your audio is muted, you see.•Touch on the in-call toolbar and then touch the slider on the upper part of the screen to adjust the volume. You can also use the volume buttons of your tablet to adjust the volume.Solving ProblemsViewing Media StatisticsTo see media statistics:>>Touchon the in-call toolbar.ProblemPossible CauseWorkaroundsVideo quality is poor.Public wireless network is overloaded, causing packet loss.Try the call again using a lower call rate.Set up a private wireless network with a private key for use with RealPresence Mobile.1From the Applications list, touch Settings > Wireless & Networks > WiFi Settings .2Touch WiFi Networks .3Choose your private wireless network.4Enter the private key and touch Connect .Audio is noisy in calls from one tablet to another.Tablet is too close to the other tablet causing audio loopback.Mute the audio on one tablet.Unable to place call Video is not available The mobile network is experiencing problems.Check your mobile network andregistration information, and then try the call again.Unable to receive contentContent is H.263 format.Call is using SIP protocol.Ask the far site to send content in H.264 format.Try the call again using H.323.Release Notes Polycom® RealPresence™ Mobile, 1.0.08Recovering from Problems with the ApplicationIf a problem causes the RealPresence Mobile to freeze, or if you see the “application not responding” message, follow these steps to recover:1Touch the time displayed in the lower right corner.2In the window that opens, touch the time again.3Touch Settings .4Touch Applications > Manage Applications . 5Touch theVideo application.6Touch Force Stop , and touch OK to confirm.7TouchHome .8Touch Video.9Touch Settings and disable Specify Gatekeeper Registration. Touch Specify Gatekeeper Registration again to register with the gatekeeper.Known LimitationsThe following table lists the known feature limitations for the release. If a workaround is available, it is noted in the table.Category Issue ID DescriptionWorkaroundCallingCMAD-2381You cannot call a system listed in your Recent Calls if it is registered to a different gatekeeper.Enter the calling information manually.Calling CMAD-2602When you dial the BroadWorks auto attendant, black video is displayed in the local video preview window.This is a limitation of the BroadWorks system.Calling CMAD-2996When the far end calls and thenhangs up before you answer the call, you still see the incoming call.Hang up the call.Calling CMAD-4217When server registration fails, you cannot place calls.Not a problem. It’s the designed behavior.CallingCMAD-3671When you place a call through Polycom VBP , video is not shown correctly.None.Call Control CMAD-3846H.323 registration fails after you switch the Access Point.Force close RealPresence Mobile and try again.Release Notes Polycom® RealPresence™ Mobile, 1.0.0Call Control CMAD-4135After restarting RealPresence Mobile,the system is unable to register to theH.323 server or the SIP server Change H.323 name and extension, or retry after registration timeout.Call Control CMAD-4134Registration fails even after touchingthe Registration button.Change H.323 name and extension, or retry after registration timeout.Call Control CMAD-4020Once RealPresence Mobile isdisconnected from calls in placeswithout WiFi coverage, you cannotplace calls again even in places withWiFi coverage.Force close RealPresence Mobile and call again.Call Control CMAD-4014RealPresence Mobile doesn’trespond after you switch people videoand content during a bridgeconference.Force close RealPresence Mobile and try again.Call Control CMAD-3899When you place calls through VBP-E,neither far end or local video andaudio are available.Use VBP-ST instead.Content CMAD-2477 In SIP calls with the Polycom HDXsystem using the Broadworks server,the Polycom® RealPresence™Mobile cannot receive content fromPolycom HDX system.Try the call again using H.323.Content CMAD-2479When you receive content sent by anendpoint using PolycomPeople+Content IP, the bottom ofcontent displays as a double image.None.Content CMAD-3561 In SIP calls using Polycom RMX1500,RMX2000 or RMX4000, the PolycomRealPresence Mobile system cannotreceive content.Try the call again using H.323. Content CMAD-3668 Thesystem cannot receive H.264content in calls at 512kbpsor768kbps.None.Software update CMAD-4291To install newer versions ofRealPresence Mobile, users mustuninstall the old version firstManually uninstall the old version.Note: when you unintallRealPresence Mobile, your personaldata will be lost. Please back up yourimportant personal data first.User Interface CMAD-2866If the far-end starts and stops sendingcontent repeatedly, the contentwindow may crash.Force close the application, restart, and then try the call again.User Interface CMAD-4198The displayed Audio Packet LostPercentage is higher than 100% andis incorrect.None.Category Issue ID Description Workaround9Release Notes Polycom® RealPresence™ Mobile, 1.0.010Supported Capabilities, Protocols, Algorithms, and PortsCapabilitiesProtocolsThis version of the Polycom® RealPresence™ Mobile supports the following protocols:VideoCMAD-3837When you place SIP calls toRMX4000, no people video can be shown.None.Video CMAD-2979Using a Bluetooth wireless headphone during calls causes packet loss.Disable the Bluetooth headphone for calls.Video CMAD-3516You may experience video delay when you use the rear camera for calls at 1920 kbps.Switch to the front camera.Video CMAD-3571In SIP calls hosted by RMX1500, people video is not displayed. In H.323 calls, people video can be displayed after a three minute delay.None.Video CMAD-3212The local video preview and thefar-end people video are not in synch.Switch between the front and back cameras.Call Rate Video Capability 1920 kbps 720p 1024 kbps 768 kbps VGA512 kbps 384 kbps 256 kbps QVGA64 kbpsAudio only Protocol Description H.239People and Content H.323, V6SignalingCategory Issue ID DescriptionWorkaroundRelease Notes Polycom® RealPresence™ Mobile, 1.0.0Protocol DescriptionH.460Firewall traversalSIP (Session Initiation Protocol)SignalingBFCP (Binary Floor Control Protocol)ContentResolutionsThis version of the RealPresence Mobile application supports following the resolutions:Resolution and Frame Rate Source1280x720, 15 fps People video sent from front camera1280x720, 30 fps People video sent from rear camera1280x720, 30 fps People video received from far endXGA, 5 fps Content received from far endActual transmitted video resolution is determined by several factors, such ascamera capability, computer performance, network conditions, the far-end system’scapabilities, and whether content is being sent or received.AlgorithmsThis version of the RealPresence Mobile application supports the following algorithms:Algorithm Type DescriptionAudio G.722.1 Annex CG.711uG.711aPolycom® Siren™ LPRAcoustic Echo Cancellation (AEC)Automatic Gain Control (AGC)Video H.264Encryption AES for H.323 calls11Release Notes Polycom® RealPresence™ Mobile, 1.0.012Copyright Information© 2011 Polycom, Inc. All rights reserved. Polycom, Inc.4750 Willow RoadPleasanton, CA 94588-2708USANo part of this document may be reproduced or transmitted in any form or by any means, electronic or mechanical, for any purpose, without the express written permission of Polycom, Inc. Under the law, reproducing includes translating into another language or format.As between the parties, Polycom, Inc., retains title to and ownership of all proprietary rights with respect to the software contained within its products. The software is protected by United States copyright laws and international treaty provision. Therefore, you must treat the software like any other copyrighted material (e.g., a book or sound recording).Every effort has been made to ensure that the information in this manual is accurate. Polycom, Inc., is not responsible for printing or clerical errors. Information in this document is subject to change without notice.Trademark InformationPolycom ®, the Polycom “Triangles” logo, and the names and marks associated with Polycom’s products are trademarks and/or service marks of Polycom, Inc., and are registered and/or common-law marks in the United States and various other countries.All other trademarks are the property of their respective owners.Patent InformationThe accompanying products may be protected by one or more U.S. and foreign patents and/or pending patent applications held by Polycom, Inc.。
手持机使用说明书

综合操作手册感谢您使用本公司产品,为充分发挥本产品的优良性能,请您在使用之前详细阅读本手册。
系统组成 (5)手持机主要功能 (5)手持机技术指标 (6)使用注意事项 (7)确认包装物 (8)手持机使用方法 (9)(一) 开机 (9)(一) 关机 (9)(二) 车辆进入发卡 (9)(三) 车辆离开结算 (11)(四) 菜单功能操作及说明 (12)5.1. 刷卡上班 (12)5.2. 下班取款 (12)5.3.查询记录 (13)5.3.1查询进入车辆 (13)5.3.2 查询离开车辆 (13)5.3.3 查询收费金额 (13)5.3.4 最近一笔收费 (14)5.3.5 查询刷卡总数 (14)5.4 系统设置 (14)5.4.1 按键音设置 (14)5.4.2 背光亮度设置 (14)5.4.3 背光时间设置 (14)5.4.4 对比度调节 (15)5.5 刷系统管理卡 (15)5.6 输入系统密令 (15)5.7 校正系统时间 (15)5.8 注册IC卡 (15)5.8.1 注册临时卡 (15)5.8.2 注册内部卡 (16)5.8.3 注册包月卡 (16)5.8.4 注册储值卡 (17)5.8.5 注册按次卡 (17)5.8.6 注册财务卡 (18)5.8.7 注册管理卡 (18)5.9 IC卡管理 (18)5.9.1 IC卡挂失 (18)5.9.2 IC卡恢复 (19)5.9.3 IC卡全部恢复 (19)5.10 内部卡有效时间 (19)5.11 清财务卡金额 (19)5.12 清除进出车记录 (19)5.13 系统初始化 (19)5.14 取系统存储卡 (19)5.15 修改系统密令 (19)5.16 验卡功能 (20)(五) 换岗说明 (20)(六)SD卡内文件说明 (20)(七) 进出车记录Excel操作 (26)(八) 常见收费规则举例 (27)(九) BUG以及固件更新 (31)(十) 常见问题及解决办法 (32)系统组成1、手持式车辆管理机2、感应IC卡a)管理卡:执行手持机管理功能b)财务卡:员工卡、上下班、收费金额管理c)临时卡:一车一卡,进口发卡,出口收卡收费d)内部卡:任意出入,可设置所有内部卡有效时间e)储值卡:卡内可预充入金额f)包月卡:按月进行收费g)按次卡:按进出车的次数进行收费;3、道闸机(手动或者电动)4、可选附属设备a)道闸无线控制器b)车辆检测器c)无线室外语音LED显示机d)无线微型打印机手持机主要功能1.进入车辆发卡,向卡内写入车牌号及时间;2.车辆离开收卡,读取卡内数据,自动计算停车时间及收费金额;3.手持机能识别和处理下列各类感应卡;大车卡、中车卡、小车卡、超大车卡、特种车卡、会员车卡、临时卡、内部卡、包月卡、储值卡、按次卡、财务卡、管理卡;4.设置五种以上收费标准;大车标准、中车标准、小车标准、超大车标准、特种车标准;5.多种现金回收管理模式;财务卡方式,现场收缴方式,现场打印方式;6.手持机数据上传方式:SD卡存储,能够用读卡器直接读写(必须通过密码或管理卡方可操作);7.查询收费情况:收费笔数,收费总金额,收费时间;8.查询刷卡情况:可查询刷卡总数,进车卡总数,出车卡总数;9.查询车辆情况:依据车牌号查询出车辆进出时间及金额,逐一翻阅查车辆进出时间及金额;10.查询财务卡内金额;11.信息资料清除(必须通过密码或管理卡方可操作);12.金额数据清除(必须通过密码或管理卡方可操作);13.笔数数据清除,财务卡内金额数据清除(必须通过密码或管理卡方可操作);14.校正系统时钟(必须通过密码或管理卡方可操作);15.省车牌号汉字(必须通过密码或管理卡方可操作);16.手持机省电设置;17.手持机只用于登记进入车辆,(即只能刷进车卡)18.手持机只用于离开车辆收费,(即只能刷出车卡)19.手持机编号20.手持机是否启动无线遥控功能21.手持机是否启动语音功能22.设置手持机是否启动打印功能23.简单快捷的设置各种车辆收费标准;24.设置手持机背光自动关闭时间;设置背光灯亮度;调节对比度;25.感应卡挂失;将丢失的卡作废,使手持机不能对该卡进行操作;26.感应卡恢复;将重新找回的丢失卡内数据清空并将其变成进车卡;27.感应卡全部恢复:一次性将挂失区内所有的被删除的感应卡全部恢复;28.手持机能注册临时卡,内部卡,储值卡,按次卡,包月卡,财务卡,管理卡29.打印某一辆车进车时间登记清单(遥控微型打印机)30.打印某一辆车收费清单(遥控微型打印机)31.打印某一收费员工收费总清单(遥控微型打印机)32.生成办公软件EXCEL格式报表33. 值班员上下班刷卡缴费手持机技术指标微处理器:32位单片机;ARM 32bitRISC,72MHZ内存:最高2GB,标配:256M。
概要设计说明书(项目描述+功能结构图+业务流程图)
******系统体系结构说明书班级:成员一:成员二:浙江树人大学信息科技学院浙江树人大学软件实训报告体系结构说明书修订控制页1目录0.文档介绍......................................................................................................................... 错误!未定义书签。
0.1文档目的................................................................................................................................. 错误!未定义书签。
0.2文档范围................................................................................................................................. 错误!未定义书签。
0.3读者对象................................................................................................................................. 错误!未定义书签。
0.4参考文献................................................................................................................................. 错误!未定义书签。
0.5术语与缩写解释 ..................................................................................................................... 错误!未定义书签。
系统概要设计说明书(数据库设计书)
系统概要设计说明书(数据库设计书)[招⽣管理系统]概要设计说明书[V1.0(版本号)]拟制⼈______________________ 审核⼈______________________ 批准⼈______________________[⼆零零⼋年⼗⽉⼆⼗⼆⽇]概要设计说明书1.引⾔1.1编写⽬的本说明书交给各个被调研单位审核,并经领导层讨论通过后,软件开发⼩组成员将以这本说明书为框架开发新的系统。
1.2背景a.待开发软件系统的名称:基于XML的⽹上招⽣管理系统b.本项⽬的任务提出者:⽯河⼦⼤学c.本项⽬开发者d.本项⽬⽤户⽯河⼦⼤学招⽣办1.3定义[列出本⽂件中⽤到的专门术语的定义和外⽂⾸字母组词的原词组。
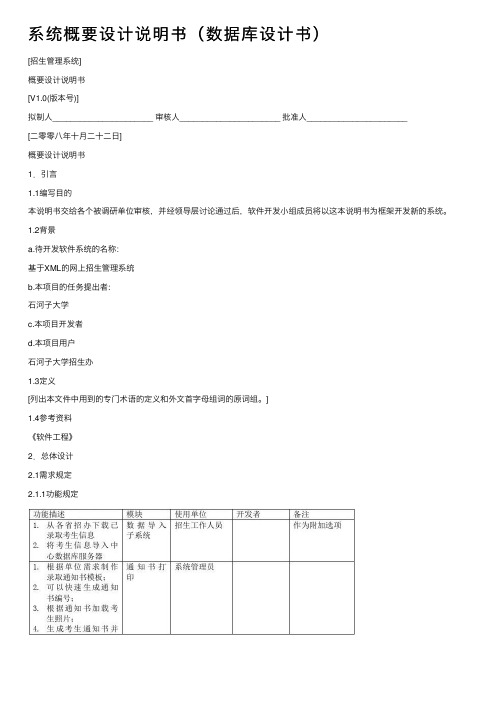
]1.4参考资料《软件⼯程》2.总体设计2.1需求规定2.1.1功能规定2.1.2系统功能能对各招⽣⼦单位进⾏管理能添加、修改、删除、考⽣信息能对考⽣进⾏分类管理能将考⽣信息导出⾄⽹上信息发布⼦系统能根据各分类统计考⽣信息能添加新的管理员能修改管理员的密码2.1.2.1精度由于采⽤数据库技术并且⽤户的应⽤领域对数据精确度的要求不⾼,所以这点在系统中表现得⽐较少,但是⽤户数据的安全性与正确性是完全保证的,所以对⽤户的使⽤没有多⼤的障碍。
2.1.2.2时间特性要求本系统的数据库较⼩,所以程序在响应时间,数据更新处理时间上性能是⽐较突出的。
⽽且也正由于数据量相对较少,故在数据传输时间和系统运⾏时间上表现的较让⼈满意。
2.1.2.4可靠性由于系统较⼩只保留⼀定程度上的可靠性。
2.1.2.5灵活性由于系统较⼩只保留⼀定程度的灵活性。
2.1.3输⼊输出要求2.1.4数据管理能⼒要求针对⼀般图书馆管理信息系统的需求,通过对图书馆管理⼯作过程的内容和数据流流程分析,设计如下⾯所⽰的数据和数据结构:1.考⽣基本信息包括:考⽣号、姓名、科类、计划性质、家庭住址、报名地点等;2.考⽣附加信息包括:考⽣号、录取专业、录取批次、录取志愿、学历层次、考⽣分数等;3.通知书信息包括:通知书编号、通知书状态、是否打印等;2.1.5故障处理要求考虑到软件的范围不⼤,所以故障处理⼀般由操作系统完成,系统只要保持与操作系统的借⼝即可。
手持移动设备的设计指导书

流程优化:通过改进设计和制造流程,提高生产效率,降低成本,提高产品质量和客户满意度。
持续改进:建立持续改进的企业文化,不断优化设计和制造流程,提高企业的竞争力和盈利能 力。
07
市场推广与销售策略建 议
声音与振动反馈设计
声音反馈:提供清晰、悦耳的 声音效果,增强用户使用体验
振动反馈:通过振动提供触觉 反馈,增强用户交互体验
反馈设计:根据设备类型和用 户需求,设计合适的反馈方式
反馈效果:确保反馈效果的一 致性和可靠性,提高用户满意 度
多任务处理与多窗口功能支持
多任务处理:支持 同时运行多个应用 程序,提高工作效 率
销售渠道拓展与合作伙伴关系建立
拓展销售渠道:通过线上和线下渠道,如电商平台、实体店、代理商等,扩大产品的销售范 围。
建立合作伙伴关系:与相关行业的合作伙伴,如通信运营商、内容提供商等,共同推广产品, 扩大市场份额。
制定销售激励政策:通过给予销售代理或合作伙伴一定的佣金或返点,激发其销售积极性。
加强品牌宣传与推广:通过广告、公关活动等方式,提高品牌知名度,吸引更多潜在客户。
常见材料及其特点 :金属、塑料、玻 璃等
结构设计中的注意 事项:避免过度设 计、考虑人体工学 、确保安全性等
显示屏与触摸屏技术
显示屏技术:LED、LCD、OLED等显示技术介绍 触摸屏技术:电容式、电阻式、红外线式等触摸屏技术介绍 显示与触摸屏的配合:介绍如何实现显示与触摸屏的配合,提高用户体验 显示与触摸屏的优化:介绍如何优化显示与触摸屏的性能,提高设备的整体性能
摄像头与拍照功能
摄像头类型:前置摄像头、后置摄 像头
中兴X100CDMA20001X数字移动电话用户手册V1.0说明书

1.0X100cdma2000 1X Digital Mobile PhoneUser ManualCopyright © 2005 by ZTE CorporationAll rights reserved.No part of this publication may be excerpted, reproduced, translated or utilized in any form or by any means, electronic or mechanical, including photocopying and microfilm, without the prior written permission of ZTE Corporation.Edition: 1st edition, Feb., 2005Contents1 General Information (6)1.1 Welcome (6)1.2 Security (6)1.3 Safety Warnings (6)2 Getting Started (7)2.1 Charging the battery (7)2.1.1 Recharging the battery (8)2.1.2 Caring for the battery (8)2.1.3 Common causes of battery drain (8)2.2 Powering on/off the Mobile Phone (8)2.3 Getting to know your phone (9)2.3.1 General introduction (9)2.3.2 Performing basic functions (9)2.3.3 Understanding screen icons (10)2.4 Using the menus (10)3 Making and Receiving Calls (12)3.1 Making Calls (12)3.1.1 Making a call (12)3.1.2 Dialing extension numbers (12)3.1.3 Making IDD (12)3.1.4 Redialing a number (12)3.1.5 Calling a saved number (12)3.2 Answering a call (12)3.2.1 Setting any key to answer calls (13)3.2.2 Muting an incoming call (13)3.2.3 Mute during a call (13)3.2.4 Adjusting the volume during a call (13)3.3 Dealing with missed calls (13)3.4 Setting speed dialing (13)3.5 Calling emergency numbers (13)4 Using Call Log List (14)4.1 Calling a number listed in the call log (14)4.2 Sending a message to the number listed in the call log (14)4.3 Viewing details of a call (14)4.4 Adding a number to the contacts list (14)4.5 Accessing the classified lists (14)4.6 Erasing a call record from the call log (14)4.7 Erasing all records (15)5 Entering Letters, Numbers, and Symbols (15)5.1 Understanding the text entry modes (15)5.2 Entering words letter by letter (Multitap mode) (16)5.3 Entering words quickly (16)5.4 Entering symbols (16)5.5 Entering numbers (16)5.6 Changing input modes (16)6 Sending and Receiving Text Messages (17)6.1 Sending text messages (17)6.1.1 Sending a new text message (17)6.1.2 Sending a message to more than one recipients (17)6.1.3 Sending a pre-written message (18)6.1.4 Sending a saved message (18)6.1.5 Failing to send a message (18)6.1.6 Receiving incoming calls while creating messages (18)6.1.7 Viewing the Sent box (18)6.1.8 Viewing the Inbox (18)6.1.9 Marking the priority (19)6.1.10 Using canned messages (19)6.2 Receiving text messages (19)6.3 Erasing messages (19)6.3.1 Erasing a single message (19)6.3.2 Auto Erase Inbox (19)6.4 Setting a different call back number (20)6.5 Setting the Delivery confirmation (20)6.6 Setting the Duplicate detection (20)7 Storage of Contacts (20)7.1 Saving a new contact (20)7.2 Adding pauses to a phone number (21)7.3 Viewing the information of the contacts (21)7.4 Editing a contact name (21)7.5 Editing a phone number (21)7.6 Setup a default number of the contact (21)7.7 Erasing a contact (22)7.8 Erasing a number (22)7.9 Assigning a Ring Tone (22)7.10 Setting speed dialing (22)8 Calculator (23)9 Customizing your Phone (24)9.1 Sound (24)9.1.1 Select a different ring tone (24)9.1.2 Setting sound effects (24)9.1.3 Setting the master volume (24)9.1.4 Adjusting other volume (25)9.2 Display (25)9.2.1 Changing the display contrast (25)9.2.2 Adjusting the backlighting (25)9.2.3 Setting the application time (25)9.2.4 Choosing a different language (26)9.2.5 Setting the name order (26)9.2.6 Choosing a different date format (26)9.2.7 Setting the separator of date (26)9.2.8 Choosing a different time format (26)9.2.9 Setting personal banner (26)9.3 Shortcuts (26)9.4 Roaming (27)9.5 Phone Features (27)9.5.1 Clear personalized dictionary (27)9.5.2 Changing the default text entry (27)9.5.3 Changing the default text language (27)9.5.4 Setting any key to answer calls (27)9.5.5 Setting keyguard (27)9.5.6 Displaying and resetting the call timer (28)9.5.7 Changing touchtone length (28)9.5.8 Setting service tone (28)9.6 Security (28)9.6.1 Setting voice privacy (28)9.6.2 Resetting the phone (28)9.7 About (28)10 Brew (29)11 Vmail (29)12 Clock (29)12.1 Setting an alarm (29)12.2 Using Timer (30)12.3 Setting a Countdown (30)13 Poker (31)14 Troubleshooting (32)15 FCC Statement (33)1 General Information1.1 WelcomeThank you for using ZTE X100 cdma2000 1X Digital Mobile Phone.To guarantee the mobile phone always in its best condition, please read this manual carefully and keep it for further use.The X100 enables you to freely communicate with people at any time and anywhere. It features intelligent personal information management, BREW functions, etc. which provides a vivid and dramatic mobile experience to you.X100 phone system has covered the cdma2000 1X technical specifications.ZTE Corporation reserves the right to modify the technical specifications in this manual at any time without notice.1.2 SecurityIf your mobile phone is lost or stolen, please report to your service provider or proxy agencies (You need to provide the phone’s ESN number labeled on the back of the mobile phone. You can see the ESN number after removing the battery. Please keep the ESN number for future use.)To protect your mobile phone from illegal use, please take the security measures as follows: Set handset lock.Take it with you as you can.1.3 Safety WarningsTo the ownerSome electronic devices are susceptible to electromagnetic interference sent by mobile phone if inadequately shielded, such as electronic system of vehicles. Please consult the device manufacturer before using the phone if necessary.The operation of mobile phones may interfere with medical devices like hearing aids and pacemakers. Please always keep the mobile phone more than 20 centimeters away from such medical devices when the phone is turned on. Do not carry the mobile phone in the breast pocket. Turn the mobile phone off if necessary. Consult a physician or the manufacturer of the medical device before using the phone.Be aware of the usage limitation when using a mobile phone at those places where there are explosive gases or explosive products being processed, such as oil warehouses or chemical factories, because even if your phone is in standby mode, it can still transmit radio frequency (RF) energy. Therefore, turn off your phone if required.Pay attention to the traffic safety. Do not use your mobile phone while driving. Park before making or answering a call.Store the phone out of the reach of small children. The phone may cause injury if used as a toy.Mobile phonePlease use the original accessories or those that are authenticated by ZTE. Using any unauthenticated accessories may affect your mobile phone’s performance, hurt your phone or even cause danger to your body and violate related national regulations about telecom terminals.If you want to clean your phone, please use clean fabric that is a bit wet or static-free. Do not use harsh chemical1.0cleaning solvents or strong detergents to clean it. Turn off your phone before you clean it.As your mobile phone can transmit electromagnetic waves, do not place it near magnetic items such as computer disks.Using the phone near electrical appliances, such as TV, telephone, radio and personal computer can cause interference, which affects the function of the phone.Do not expose your mobile phone to direct sunlight or store it in hot areas. High temperatures can shorten the life of electronic devices.Prevent liquid from leaking into your phone.Do not drop, knock or harshly treat it. Rough handling will break internal circuit boards.Do not connect the phone with other unauthorized peripheral equipments.Do not attempt to disassemble the mobile phone or battery by yourself. Non-expert handling of the devices may cause damages.Do not charge the mobile phone without battery.Battery useDo not short-circuit the battery, as this can cause excessive heat to bring about fire.Do not store the battery in hot areas or dispose of it in a fire.The battery can be recharged for hundreds of times, but it will eventually wear out. When the operating time (talk time and standby time) is noticeably shorter than normal, it is time to buy a new one.Never use any charger or battery damaged or worn out.Return the worn-out battery to the provider or put it in the appointed recycle place. Do not put it in familial rubbish.Warning: If the battery is broken, keep away from the content. If it taints your skin, wash your skin withabundance fresh water and ask for help from the doctor if necessary.Safety and general use in vehiclesBefore making or answering a call, you should pay attention to the local laws about the use of wireless mobile phones and take them into account for practical use.Safety airbag, brake, speed control system and oil eject system shouldn’t be affected by wireless transmitting. If you do meet problems above, please contact your automobile provider.Please turn off your mobile phone when refueling your automobile, and the same to the place where duplex wireless equipments are banned. Don’t put your phone together with flammable or explosive items; inner sparkmay cause fire.Aircraft safetyPlease turn off your mobile phone before the airplane takes off. In order to protect airplane’s communicationsystem from interference, it is never allowed to use mobile phone when it is in flight. Using mobile phone beforethe plane taking off should get aircrew’s permission according to safety regulations.2 Getting Started2.1 Charging the batteryFully charge the new battery for approximately 12 hours when using the phone for the first three times.To charge the battery, plug the charger into the socket located at the bottom left of the phone, then connect the adapter’s plug to a wall outlet.The battery icon at the top-right corner of the phone screen may tell you following possible status of the phone: • Charging (animated icon)• Partially charged• Full battery• Low battery while the icon blinks and the phone beeps. When the battery power is used up, the phone will automatically power off.During the charge, your phone and your charger may reasonably become hot, which is normal.• Finish charging when the battery is fully charged, the sound will be played. Please disconnect the charger from the phone and the outlet when charging finished.2.1.1 Recharging the batteryYou can safely recharge the battery at any time, The procedure is the same as the above.2.1.2 Caring for the batteryThis section gives you some important safety information and tips about how to improve the battery’s performance.General safety guidelines• This phone contains an integrated Li-Ion battery.• Do not attempt to disassemble, puncture, or short-circuit the battery.• If the battery has been put out of use for more than a month, recharge it before using your phone.• Avoid using the phone under extreme temperatures, direct sunlight, or high humidity.• Never dispose of used batteries in or near a fire. It could lead to explosion. Check with your local regulations for proper disposal instructions.2.1.3 Common causes of battery drainThe following operations drain the battery more quickly and thereby adversely affect its talk and standby times: • Playing games frequently.• Frequent use of the backlights.• Operating when no service is available, or service is available intermittently.• High earpiece and ringer volume settings.• Unacknowledged voicemail and text message alerts.2.2 Powering on/off the Mobile PhoneHold the key, until the power-on/power-off picture appears.This picture will be different according to different service provider.2.3 Getting to know your phone2.3.1 General introduction(1) Home screen .(2) Left soft key : Using as shortcut / corresponding to the function displayed at the left-bottom of the screen.(3) Right soft key : Using as shortcut / corresponding to the function displayed at the right-bottom of the screen.(4) Navigation key : (four directions) Scrolls through lists and moves the cursor during text entry. Also adjust the ringer volume.(5) OK key : Access menu or select an option from the list. Also switch between different modes during the text entry.(6) Send/Talk key : Dials a number or answers a call.(7) End/Power key : Turns the phone on or off, ends a call, or returns to the home screen.(8) Back key : Erases the last input in the text entry mode, returns to the previous menu, or erases all characters during text entry by holding the key.(9) “1” symbol key : Switches between symbol and other entry method during the text entry.(10) Keypad : For entering numbers, letters, or symbols.(11) Jack : For hands-free headset (sold separately).(12) * Text key : Switches between upper and lower case during the text entry.(13) # Space key : Inserts a space during the text entry.(14) Jack : For AC adapter (included).Warning: Inserting an accessory into the incorrect jack may damage the phone.2.3.2 Performing basic functionsTo...From the home screen... Turn on the phoneHold for approximately 3 seconds . Turn off the phoneHold for approximately 3 seconds . Make a call Enter the number by using the alphanumeric keypad and thenpress .End a call Press .Answer a call Press.1.0Set the master volume Hold for 3 second.Lock the keypad Hold for 1 second.Unlock the keypad Press then .Access the Contacts list Press left soft key (defined as Contacts shortcut).Access Messages Press right soft key (defined as Messages shortcut).Access recent Calls list Press send key (defined as Call Log shortcut).Access Menu Press OK key.2.3.3 Understanding screen iconsThese icons may appear on your phone’s screen.The alarm is set.Battery power indicator. More black bars indicates more battery power available.Service available. You can make and receive calls. More bars indicates stronger signal.No service available.Call in progress.Voice privacy set.A new text message received.One or more voicemails received.Roaming status indication.Vibration function on.Ringer off.2.4 Using the menusThe contents of the main menu are as follows:Call Log (options) Msging Contacts(options)Calc SettingsShow details Compose Add SoundSend message Inbox Edit DisplayDelete Sent Delete Shortcuts Show call type Draft RoamingClear list Pages Features Settings SecurityAbout Brew VmailClockPokerMobileShopAlarmClockSettingsTimerHelpCountdownTo operate in the menus:• Press OK key to access Menu.1.0• Press OK key to select a menu item.• Press left , right , up or down to view menu items.• Press to return to the previous menu page.• Press to return to the home screen.• In this guide, the arrow → guides you to the next step of an operation. For example, select Menu→ Settingsmeans to press OK key to access Menu, and then select the Settings option.1.03 Making and Receiving Calls3.1 Making Calls3.1.1 Making a call1. Make sure you are in an area where the network service is available. Note the icon on the home screen.More bars indicates stronger signal. If no bar appears, try to move the phone to where the signal can be detected.In some cases, it can be as simple as changing the direction you are facing.2. Enter the phone number.3. Press to dial the number.4. Press to end the call.3.1.2 Dialing extension numbersMethod1: Dial the exchange number and then the extension number.Method2: Add pauses (after entering the exchange number, press “Options” right soft key →Insert pause)between the exchange number and the extension numbers.3.1.3 Making IDDHold for about 3 seconds, release the key, and your screen will display the character “+” which replacesthe international access code, then enter the country code, the area code, and the phone number and then pressthe key to dial.3.1.4 Redialing a numberTo redial the last number called, press twice. If the send key is defined as shortcut key to other menus otherthan Call Log, you cannot do it.3.1.5 Calling a saved numberIf you have already saved a phone number in your phone, you can use the Contacts list to find it quickly.1. Press the left soft key (contacts shortcut key) on the home screen or press OK key → contacts. Thisbrings up a list of all saved contacts.2. Scroll in the list to search for the contact you want, and then select the number you want to dial, and pressto dial the number.3. If you have already assigned a speed dial number to a certain contact, press the corresponding speed dialnumber, and then press to dial. For more information, please refer to section “3.4 Setting speed dialing”.3.2 Answering a callWhen you receive a call, the phone will ring, vibrate, and /or light up, and an animated phone icon will appeartogether with the number of the caller . If the number is stored in your Contacts list, the contact’s name willappear.• Press to answer the call.• Press to end the call. The call duration will be displayed on the home screen for a short period of time.3.2.1 Setting any key to answer calls1. Select Menu → Settings→Features →Any Key Answer.2. Select On and press OK key to set.In this case, all incoming calls can be answered by pressing any key except , and .3.2.2 Muting an incoming callSelect the right soft key “silence” to mute the ringer or stop the vibration when call arrives.This action will only mute the current call. The phone will still ring when the following call arrives.3.2.3 Mute during a callYou can set voice mute for a moment during a call.Select right soft key “options” during the call.• Select Mute to block your voice.• Repeat last step and select Unmute to cancel the block.3.2.4 Adjusting the volume during a callTo adjust the earpiece volume during a call, press up or down.3.3 Dealing with missed callsIf you have missed a call, “Missed Call” indication will appear on your screen. You can get the caller’s number or name.• Press “Done” right soft key to clear the screen.• Press “Call Back” left soft key to call it.3.4 Setting speed dialingSpeed dialing allows you to quickly dial a stored phone number by entering a one- or two-digit speed dialing number.1. On the home screen, press shortcut key “contacts” to access your contacts list.2. Select the contact to which you want to assign a speed dialing number and press right soft key “options”.3. Select “edit” and press OK key.4. Scroll to Speed Dial and press OK key.5. Select an unassigned speed dial number (2-99) to assign to the phone number.6. Select one of the contact’s numbers.7. Press “save” soft key to confirm the speed dial assignment.When you want to dial a speed dialing number, please enter the one- or two digit speed dialing number and presskey to dial.3.5 Calling emergency numbersYou can call emergency numbers even if your account is restricted. However, while calling, your phone will be in Emergency mode, in which you cannot make normal calls.Note: Check with your service provider if the network supports this function.4 Using Call Log ListThe call log contains all calls sent or received by your phone, includes 4 type of log lists:All calls list, Missed calls list, Incoming calls list and Outgoing calls list.A sign is put ahead of every call number.Incoming calls.Outgoing calls.Missed calls.4.1 Calling a number listed in the call log1. Select Menu →Call log.2. Scroll down to select the number you want to call. Press OK key.3. Press Call soft key to make the call.4.2 Sending a message to the number listed in the call log1. Select Menu →Call log.2. Highlight the number you want to send a message. Press “options” soft key.3. Select Send message,press Next soft key,and then enter the text.4. Press Send soft key.4.3 Viewing details of a call1. Select Menu → Call log.2. Scroll down to select the number you want to view, Press OK key. You can get the caller’s name and his phone number, as well as the time and date of the call.4.4 Adding a number to the contacts list1. Select Menu →Call log.2. Highlight the number you want to save. Press “save” soft key.3. Select New contact.4. Select the number type you want to save as.5. Finish the following step of the contacts. For more details, please refer to section “ 7.1 saving a new contact”.4.5 Accessing the classified lists1. Select Menu → Call log.2. Press “options” soft key.3. Select Show call type. Press OK key.4. Select All Calls, Missed Calls, Incoming or Outgoing. Press OK key.4.6 Erasing a call record from the call logYou can erase a record listed in your Call log.1. Select Menu → Call log.2. Scroll down to select the record you want to delete. Press “options” soft key.1.03. Select Delete.A prompt window will pop up: “Delete xxxxxxxxx?”4. Select Yes to erase it. Select No to return to call log menu.4.7 Erasing all recordsYou can erase all records listed in your Call log menu.1. Select Menu → Call log.2. Press “option ”soft key.3. Select Clear list, Press OK key.A prompt window will appear: “Delete entire list?”4. Select Yes to erase all. Select No to return to call log menu.5 Entering Letters, Numbers, and SymbolsThis table is a guide of how to enter letters, numbers, and symbols in the text entry mode, such as Contacts andMessages. For more detailed information, please refer to section “ 5.1 Understanding text entry mode”.this...To... DoEnter a letter In Multitap mode(display abc), press the appropriate alphanumeric key forsome times until the letter you want appears on the display.Enter a number In Numbers mode(display123), press the number key once.Enter a symbol In Symbols mode, press left , right , up or down to select the symbolyou want.Enter a space Press .Erase a character Press .Erase all characters Hold .Move cursor right or left Press right or left.Change modes Press OK key to choose the current input mode.Capitalize the next letter In Multitap mode and eZiText mode, press key to choose the modeyou want to capitalize.5.1 Understanding the text entry modesThere are four input modes available to you when entering text, numbers, or symbols:• Multitap mode (displayed as abc)• Numbers mode (displayed as 123)• eZiText mode (displayed as ez)• Symbols modeNote:The default input mode you start in depends on the task you are doing. For example, when entering aphone number in the Contacts menu, the default text mode is Numbers, when entering text for a message, the default text mode is Multitap, and you can also choose eZiText mode or Numbers mode as default.5.2 Entering words letter by letter (Multitap mode) 1. Press the appropriate alphanumeric key once to display the first letter that appears on the keypad, twice for the second letter, and so on.2. Wait until the cursor move to the right before you enter the next letter.5.3 Entering words quicklyWhen you press a series of keys under eZiText mode, it checks the built-in dictionary for common words and predicts the word you are trying to spell.1. For each letter of the word you wish to spell, press the appropriate alphanumeric key once.For example, to enter the word “any”, press the alphanumeric keys →→.2. If the word suggested by eZiText does not match what you want, keep pressing until the word matches.3. When you get the word you want, press OK key to accept it.5.4 Entering symbolsWhile entering text, you can also enter symbols.1. Press in number mode or press in other mode to switch to the table of symbols.2. You will access the table of symbols.3. Press left, right, up or down to select a symbol.4. Press OK key to accept it.5.5 Entering numbers• In Numbers mode, press a number key once.• In Multitap mode, press the key several times until the number appears on the screen.• In eZiText mode, press and hold a number key until the number appears on the screen.5.6 Changing input modesTo enter characters that belong to other mode, you’ll need to switch between different modes. For example, to enter numbers in an email address while in Multitap mode:1. Press OK key to switch to Numbers.2. Enter the number, and then Press OK key to switch to Multitap mode to complete the address.6 Sending and Receiving Text Messages This chapter describes how to send, receive and erase text messages. The message consists of to 3 boxes: inbox, sent box and draft box. Inbox can save 30 messages. Sent box can save 50 messages. Draft box can save 10 messages.Important: The features and menus described in this chapter may vary from different services available in your area. Please contact the services provider about details of SMS charge.6.1 Sending text messagesFirst, make sure your service provider supports SMS. You can only send text messages to the phones that are capable of receiving them.6.1.1 Sending a new text messageYou can send messages to at most 5 recipients at one time.1. Select Menu →Msging → Compose.2. Enter the number of recipients you want to send.-Or-Press left soft key PhBook to access the contacts list, Select a contact name from the list and press OKkey, Select a number you want from the list and press OK key. Then press left soft key Done.Note: You can enter at most 5 recipients.3. Press next soft key to enter your text message. To learn how to enter letters, see section “ 5 Entering Letters, Numbers, and Symbols”.When you edit a message, the state bar will show the maximum number of characters that can fit in the text body, as well as the current count of current entries.4. When you finish editing your text, Press send soft key to send the message.6.1.2 Sending a message to more than one recipientsYou can add at most 5 recipients from your contacts list or the phone number manually entered at one time.1. Select Menu →Msging → Compose.2. Add at most 5 recipients, You can:1)Enter the first number. Press key, enter the second number, and so on.-Or-2)Press Options soft key to select PhBook.3)Select a contact name from the list and press OK key.4)Select a number you want from the list and press OK key.5) Press Done soft key to add the second number.6)Repeat step 2) to 5)to add the other numbers.3. Press Next soft key to edit the text.4. Press Send soft key to send the message.6.1.3 Sending a pre-written messageIf you don’t want to send the current message while editing, you can save the text to the draft box and edit them later.1. Select Menu → Msging → Draft.2. Scroll through the list of drafts and press OK key.3. Press Edit left soft key.4. Enter the recipient number and your text.5. Press Send left soft key, your message will be sent and saved to your Sent box.6.1.4 Sending a saved messageWhether a message was successfully sent or not, it would be automatically saved to the Sent box. You canre-use them.1. Select Menu →Msging → Sent.2. Scroll through the list of messages and press OK key to view the message.3. Press Options right soft key to select Forward.4. Enter the phone number manually or select one from the Contacts list.5. Press Next left soft key to view and edit the message.6. Press Send left soft key to send it.6.1.5 Failing to send a messageYou will fail to send or receive messages if your phone’s memory is full, or the messaging service is not available during that time. To free up the memory, please erase old messages. See section “ 6.3 Erasing messages”.6.1.6 Receiving incoming calls while creating messages• If you don’t wish to answer the call, press Reject left soft key to reject it, and then go on with your messages.• Press to answer the call. The message you were working on will be automatically saved to the draft box for you to treat it later.6.1.7 Viewing the Sent boxYou can check the status of the messages you have sent as long as they have been saved to the Sent Box.1. Select Menu → Msging→ Sent.2. Press up and down to scroll through the list of messages.3. Press OK key to read the message.4. Press options soft key, select an option from the list to execute the next step.-Forward: send this message to another recipient by entering his/her phone number.-Msg details: view the details of this message, including its call back number, date and time of call, etc.-Call:call back.-Add contact:Add this number to the contact list.6.1.8 Viewing the InboxYou can check the status of the messages you have received as long as they have been saved to the Inbox.1. Select Menu →Msging →Inbox.2. Press up and down to scroll through the list of messages.。
概要设计说明书(模板)
XXX项目概要设计说明书(V1.0)修改记录目录1 引言 (1)1.1编写目的 (1)1.2背景 (1)1.3术语 (1)1.4预期读者与阅读建议 (1)1.5参考资料 (1)2 运行环境 (2)3 业务架构 (2)4 技术架构 (2)5 部署架构 (2)6 数据架构 (2)6.1数据库环境说明 (2)6.2数据库命名规则 (2)6.3数据备份和恢复 (3)7 技术难点 (3)8 接口设计 (3)8.1用户接口 (3)8.2外部接口 (3)8.3内部接口 (3)9 系统安全设计 (3)9.1数据传输安全性设计 (3)9.2应用系统安全性设计 (3)9.3数据存储安全性设计 (3)10 系统非功能性设计 (4)11 界面总体设计 (4)12 系统出错处理设计[可选] (4)12.1出错信息 (4)12.2补救措施 (5)12.3系统维护设计 (5)1引言1.1编写目的说明编写这份概要设计说明书的目的。
1.2背景描述系统产生的背景,包括:a)需开发的软件系统的名称,和英文缩写(可选),项目编号(可选);b)列出此项目的任务提出者、开发者c)软件系统应用范围、用户。
1.3术语列出本文件中用到的专门术语、术语定义、外文首字母组词的原词组。
也可用附件说明。
或放到本文件的最后。
1.4预期读者与阅读建议描述本文档的主要读者,以及这些读者在阅读时的阅读重点与建议。
可用列表的方式列出。
如表:1.5参考资料列出有关的参考资料,如:本项目经核准的计划任务书或合同、上级机关的批文;属于本项目的其他已发表的文件;本文件中各处引用的文件、资料、包括所要用到的软件开发标准。
列出这些文件资料的标题、文件编号、发表日期和出版单位,说明能够得到这些文件资料的来源。
2运行环境简要地说明对本系统的运行环境(包括硬件环境和支持环境)的规定。
3业务架构说明本系统的总体业务功能,尽量使用图表的形式,并辅以必要的文字说明。
4技术架构说明对本系统的总体架构设计主要实现的目标,技术选型。
手持机移动端概要设计说明书V
手持机移动端概要设计说明书北京盛威时代信息科技有限公司北京盛威时代信息科技有限公司对本文件资料享受著作权及其它专属权利,未经书面许可,不得将该等文件资料(其全部或任何部分)披露予任何第三方,或进行修改后使用。
文件更改摘要:目录文件更改摘要:..........................................错误!未指定书签。
. 引言......................................................... 错误!未指定书签。
目的 ..........................................................错误!未指定书签。
术语及缩略语..............................................错误!未指定书签。
参考资料....................................................错误!未指定书签。
. 概述......................................................... 错误!未指定书签。
背景 ..........................................................错误!未指定书签。
范围 ..........................................................错误!未指定书签。
目标 ..........................................................错误!未指定书签。
设计约束、限制...........................................错误!未指定书签。
. 总体设计................................................... 错误!未指定书签。
- 1、下载文档前请自行甄别文档内容的完整性,平台不提供额外的编辑、内容补充、找答案等附加服务。
- 2、"仅部分预览"的文档,不可在线预览部分如存在完整性等问题,可反馈申请退款(可完整预览的文档不适用该条件!)。
- 3、如文档侵犯您的权益,请联系客服反馈,我们会尽快为您处理(人工客服工作时间:9:00-18:30)。
手持机移动端概要设计说明书北京盛威时代信息科技有限公司--------------------------------------------------------------------- 北京盛威时代信息科技有限公司对本文件资料享受著作权及其它专属权利,未经书面许可,不得将该等文件资料(其全部或任何部分)披露予任何第三方,或进行修改后使用。
文件更改摘要:日期版本号修订说明修订人审核人批准人2016-04-29 V1.0.0 概要设计初稿张彦强2016-05-06 V.1.0.1 概要设计第一次修改张彦强目录文件更改摘要: (1)1. 引言 (3)1.1目的 (3)1.2术语及缩略语 (3)1.3参考资料 (3)2. 概述 (3)2.1背景 (3)2.2范围 (4)2.3目标 (4)2.4设计约束、限制 (4)3. 总体设计 (4)3.1需求规定 (4)3.2运行环境 (4)3.3开发环境 (5)3.4设计思想 (5)3.5系统结构 (5)3.5.1 手持机-全局模块 (6)3.5.2 手持机-票务模块 (7)3.5.3 手持机-订单模块 (9)3.5.4 手持机-用户模块 (10)3.5.5 手持机-统计模块 (11)3.5.6 手持机-设置模块 (12)3.6系统关键流程 (13)3.6.1 手持机业务初始化流程 (13)3.6.2 手持机售票流程 (14)3.7系统返回流程 (16)3.8关键技术 (16)4. 接口设计 (16)1. 引言1.1 目的本文档用来描述手持机售票软件的客户端功能性需求、非功能性需求,重点描述了各个功能的设计要求。
用户、项目经理、开发经理、开发人员、设计人员、测试经理、测试人员是本文档的预期读者。
1.2 术语及缩略语名称解释手持机手持机售票客户端 1.0.0版本盛威时代北京盛威时代科技有限公司用户售票人员1.3 参考资料编号资料名称GB/T 11457-2006 《信息技术软件工程术语》2. 概述2.1 背景中国移动互联网处于高速发展阶段,信息化、数字化已成趋势。
传统的售票补票方式存在三大痛点:计算难(中途上车下车,站点多),查询难(稽查人员检查多个班次),统计难(售票员和稽查人员都需要及时递交补票的数量及票务计算)。
盛威时代作为一家为道路交通行业提供信息化的服务商,已经为行业管理部门和客运企业提供了一整套的信息化方案,包含为客运企业提供的站务管理、网站售票管理、移动端售票客户端、微信售票公众号服务、综合统计分析系统等。
通过信息化的实施大大提高了企业和行业的管理水平,形成了比较完备的闭环管理。
但是,我客车中途售票,目前还是人工操作,会给行业管理和客运企业管理方面带来一些不便,也为企业的数据分析和决策留下了一些缺口。
为了更好的满足行业和企业管理需求,盛威时代推出手持机售票系统。
2.2 范围本产品为客运中心提供了方便的售票途径,方便查询和统计,更方便、更快捷。
本产品可支持售票员和稽查人员使用。
2.3 目标实现通过手持机移动设备,可以方便售票员中途售票,稽查人员在稽查站快速补票,提供打印功能和票务数据统计。
2.4 设计约束、限制本节描述软件开发工作的某些限制,例如经费限制、开发期限、硬件限制、编程语言、通信协议、安全和保密要求、开发过程中须遵守的某些标准或规则。
本节内容不是陈述具体需求或设计约束,而是为具体需求以及设计约束的描述提供依据。
开发期限:2016年6月30日完成;编程语言:Java通信协议:HTTP开发过程中须遵守的某些标准或规则:编码和注释按照对应的规范进行。
3. 总体设计3.1 需求规定参见《手持机售票需求规格说明书》3.2 运行环境Android OS: 4.4.43.3 开发环境Android Studio+IDEAndroid SDk 4.4.23.4 设计思想系统采取从顶往下的设计思想,坚持模块化、分层、面向对象原则进行设计。
系统从业务上划分为子系统、子系统模块、功能三个层次。
在子系统模块再按照分层原则进行设计。
Android 的模块分层:配置层(config),数据实体层(bean),数据操作层(dataoperate),业务层(business),界面适配层(adapter),视图层(view),界面层(ui)。
Android 拥有包机制,因此按照包进行管理。
Android 的顶层包为swnl.handsale,其他按照顶层包.子系统.模块分层.功能命名规则,其中基础框架层(app)在顶层包下管理基础工具和框架。
整体归属包原则是如果多个下级复用则归属下级的直接上级原则。
3.5 系统结构手持机(handsale)票务模块(ticket)订单模块(order)设置模块(setting)用户模块(user)统计模块(count)图3-1 手持机(handsale)总体模块图3.5.1手持机-全局模块手持机logo 页登录班次选择首页图3-2手持机-全局模块(一)手持机启动页1. 手持机启动页描述显示公司制作的启动屏画面,进行版本更新的信息获取,及其它系统参数加载。
(二)手持机进入首页1. 手持机LogoActivity页描述2秒钟左右的停留画面展示logo,可以在此进行版本判断、升级等,以及进行一些初始化参数获取、配置。
1,之后若未登陆跳转登录页;2,之后若已登陆未设置班次,跳转班次选择页;3,之后若已登录并且班次已选定,进入首页2. 手持机登录页(UserLoginActivity)描述输入用户名、密码进行登录。
注意:登录的用户包括售票员和稽查人员。
3. 手持机班次选择页(VehicleChoiceActivity)描述根据输入的车牌号和或者班次号选择当前车辆发班班次4. 首页首页需要实现三个页签:一、站点选择页面(HomeStationChoiceActivity);二、查询页面(HomeSearchActivity);三、我的页面(HomeUserActivity)。
5. 首页界面存在的事件及业务逻辑首页是有三个页签控制三个页面组成:一、站点选择页面(HomeStationChoiceActivity),本页面中有出发站、目的站、乘车日期的选择,选择完后进入填单页面,根据填写的站点获取阶段票价,支持的票种,是否实名制、保险等相关信息;二、查询页面(HomeSearchActivity),查询页面可以填写订单号或者车票号,可以查询到对应的订单,可以查看到订单的详细信息,可以操作废票(和打印);三、我的页面(HomeUserActivity),查看用户信息、售票统计、进入设置项,退出系统等操作。
3.5.2手持机-票务模块票务模块(ticket)查询班次车票打印退票查询出发站查询目的站车票生成车票查询图3-3 票务模块(ticket)划分图(一)查询班次1.班次查询页面(VehicleSearchActivity)登录成功后,若身份是稽查人员,没有携带班次信息返回,进入班次查询页面,选择班次。
选择班次需要选择时间(默认当天),选择车牌号(CarLicenseChoiceActivity),选择班次(VehicleChoiceActivity),点击确定,保存班次信息,进入首页。
首页-我的,选项“选择班次”,可以重新进入班次查询页面设置班次信息。
(二)查询出发站/目的站1.选择乘车日期提供用户可选择购买票范围内的日期(默认当前日期,若可预售变为可选,若不做预售功能,可做成不可选,车票上打印“车票上打印的乘车日期当日有效”)。
2.查询出发站页面(StationStartSearchActivity)首页,点击查询出发站,进入查询出发站页面。
输入框提示用户输入汉语拼音或汉字,根据用户输入出发站汉语全拼、简拼、前几个汉语查询出发站列表。
点击某一个出发站,返回首页,附带选择的站点填入出发站输入框。
3.查询目的站页面(StationEndSearchActivity)首页,点击查询目的站,进入查询出发站页面。
输入框提示用户输入汉语拼音或汉字,根据用户输入目的站汉语全拼、简拼、前几个汉语查询目的站列表。
点击某一个目的站,返回首页,附带选择的站点填入目的站输入框。
信息填写完毕,确认按钮进入填单页面。
(三)车票生成车票的生成时伴随着订单的创建生成的,每个订单可能包含一个或者多个车票信息。
在订单创建之前会对车票信息检测。
(四)车票打印订单支付成功后会自动打印,在订单详情页也可以对单张车票进行补打。
打印车票调用封装好的打印工具(PrintTicketsUtil)打印方法,传入一个车票信息(Ticket)或者多个车票信息(TicketList),将车票一张张打印来。
打印车票时用同意的弹窗遮罩当前窗口,提示“正在打印车票...”。
(五)退票订单详情页有每个车票的信息,车票状态若为可退状态,显示退票按钮,点击退票按钮弹窗提醒退票详情及所退金额,点击确定执行退票接口。
(六)车票查询在首页-查询,输入车票号,查询车票详情,跟订单的查询类似,仅展示当前车票信息。
3.5.3手持机-订单模块订单模块(order)订单提交订单支付订单打印订单查询订单填写图3-4订单模块(order)划分图(一)订单填写1.订单填写(OrderCreateActivity)查询班次和站点后进入售票信息页填写订单,显示班次、日期、发车时间,出发站和目的站等信息;根据配置的票种,选择全票、半价票、学生票、军人票和团体票。
订单填写页面展示相关班次、站点、票价等信息,点击添加按钮添加车票信息。
2.添加车票(AddTicketActivity)根据是否实名制要求决定是否录入身份证信息;根据是否可售保险决定是否展示购保选项;根据是否可带儿童展示携带儿童选项;点击确定返回订单页展示所添加的售票信息。
(二)订单提交1.订单检测订单填写页在添加车票后,下方有总金额的显示,点击收银按钮,将所售车票信息提交服务端检验车票及订单的合法性,若不可售或者出现订单、车票信息有误,服务端返回相应的提示信息。
2.订单提交服务端订单检测通过自动执行订单的创建,返回前端创建成功的订单信息及支付信息,前端跳转收银界面。
(三)订单支付1.订单支付(OrderPayActivity)服务端返回支付信息,引入收银界面。
收银界面包含现金支付和微信。
支付宝等支付方式,目前先做现金支付。
2.现金支付现金支付界面显示要支付的总金额,输入实付金额,自动计算找零金额。
点击收银按钮,表示支付完成,进入支付完成页面(PaySuccessActivity),自动打印当前支付的订单。
3.支付异常(PayFailActivity)若支付接口调用异常,则进入支付异常界面,提示支付异常,点击“重新支付”再次进入订单支付页面。