51CTO学院-Scala深入浅出实战初级入门经典视频课程
深入浅出 Google Android(PDF格式高清中文版)

设计 GUI 界面.......................................................................................................25
视图(View)..................................................................................................................................... 25 查阅文件......................................................................................................................................... 25 离线文件......................................................................................................................................... 25 视觉化的界面开发工具.................................................................................................................28 获取标识 ID........................................................................................................................................29 存取识别符号................................................................................................................................. 29 新增 XML 文件............................................................................................................................... 33
Scala入门
Scala入门本文源自Michel Schinz和Philipp Haller所写的A Scala Tutorial for Java programmers,由Bearice成中文,dongfengyee(东风雨)整理。
1 简介本文仅在对Scala语言和其编译器进行简要介绍。
本文的目的读者是那些已经具有一定编程经验,而想尝试一下Scala语言的人们。
要阅读本文,你应当具有基础的面向对象编程的概念,尤其是Java语言的。
2 第一个Scala例子作为学习Scala的第一步,我们将首先写一个标准的HelloWorld,这个虽然不是很有趣,但是它可以让你对Scala有一个最直观的认识而不需要太多关于这个语言的知识。
我们的Hello world看起来像这样:object HelloWorld{def main(args:Array[String]){println("Hello, world!")}}程序的结构对Java程序员来说可能很令人怀念:它由一个main函数来接受命令行参数,也就是一个String数组。
这个函数的唯一一行代码把我 们的问候语传递给了一个叫println的预定义函数。
main函数不返回值(所以它是一个procedure method)。
所以,也不需要声明返回类型。
对于Java程序员比较陌生的是包含了main函数的object语句。
这样的语句定义了一个单例对象:一个有且仅有一个实例的类。
object语 句在定义了一个叫HelloWorld的类的同时还定义了一个叫HelloWorld的实例。
这个实例在第一次使用的时候会进行实例化。
聪明的读者可能会发现main函数并没有使用static修饰符,这是由于静态成员(方法或者变量)在Scala中并不存在。
Scala从不定义静态成员,而通过定义单例object取而代之。
2.1 编译实例我们使用Scala编译器“scalac”来编译Scala代码。
ATK基础教程_第1部分介绍如何构建模型和初步的计算
Atomistix ToolKit Tutorial Part 1: Two-probe geometry & convergence parametersOutlinePart 1:» Fundamental concepts of a two-probe system » Solving convergence problems » Based on a specific example which is hard to converge (FeMgO MTJ)Part 2: AnalysisFundamental but complex topics in ATKUnderstanding the fundamental concepts of a two-probe system is crucial to establish confidence in the simulations and their results Most calculations in ATK converge with default parameters» But some do not... (for a variety of reasons)Geometrical aspects» Related to certain “hidden” approximations and/or simplifications in ATKNumerical parameters» Accuracy » Solving convergence problemsBoth aspects are related to convergence, but may also compromise quality of results if not chosen appropriately (even if the calculation converges!)Three ways to improve performance Total calculation time = time/iteration × number of iterations Reduce time/iteration» Parallelization (scaling depends on system & parameters) » Code and algorithm improvements (ATK 2008.10)Reduce number of iterations» Algorithm improvements (new convergence criterion in ATK 2008.02) » Parameter tuningThird way?» Avoid running end-less calculations which do not converge! » Avoid re-running calculations because of poor quality resultsOur guinea pig Fe/MgO/Fe magnetic tunnel junction (MTJ) Anti-parallel electrode spin polarization» Among the most difficult systems to converge » Strong peak in the minority DOS at the Fermi levelFe MgO FeMany other interface systems exhibit similar convergence issuesAu/Si/Au two-probeElectrodes, the simple stuffTransport direction must be perpendicular to the interface plane» Still possible to consider transport at an angleElectrodes must not feel each other» Atoms in the left electrode may not have any basis set overlap with atoms in the right electrodeCrossed nanotubesElectrode cell must be periodic in the transport direction» Example: fcc [111] → 3, 6, 9, ... layersElectrodes, more simple stuff Periodic boundary conditions in the interface plane (x/y)» Allows study of true interfaces » Vacuum padding needed to allow electrostatic interactions to decay for 1D/2D systems » Sufficiently large metal surface cell needed for “broad” moleculesNickel – Graphene – Nickel spin filterNanotube two-probeAu [111] 3x3AlignmentInput geometries are relative (L/C/R)» Alignment is done by specially appointed alignment pairs (atom indices)Pros:» Homogeneous electrodes only need to be defined once » Easy to change the internal geometries of electrodes or central region » No need to think about absolute alignmentCons:» Difficult to assign alignment atoms by hand » Atom indices may change if the geometry is modified → must remember to update alignment » Easy to make non-obvious mistakesAlways inspect two-probe geometries in VNL (Nanoscope) before the calculation to ensure proper alignment!Alignment, the detailsAppoint 2 atom pairs to align the 3 components» (left electrode, central region) = (L,CL) » (right electrode, central region) = (R,CR) » NanoLanguage input is [(L,CL), (R,CR)]Convenient to use relative index (−1) for last atom in listtwoprobe_configuration = TwoProbeConfiguration( (left_electrode_configuration,right_electrode_configuration), scattering_elements, scattering_coordinates, equivalent_atoms = ([0,0],[3,5]) )1. Central region is aligned to left electrode such that rC(0) = rL(3) + uL3 (uL3 = 3rd unit cell vector for left electrode) 2. Right electrode is aligned such that rR(0) = rC(5) + uR3 (uR3 = 3rd unit cell vector for right electrode)Concrete alignment exampleAlignment atoms: [(3,0),(0,5)]uL3See the ATK manual on TwoProbeConfiguration for more details!−uR31. Left + central2. RightConcrete alignment exampleAlignment atoms: [(3,0),(0,5)]See the ATK manual onTwoProbeConfigurationfor more details!u L3−u R3Equivalent bulk unit cellElectrodes, the subtleties Electrode calculation:electrode is treated as abulk system»All interactions includedTwo-probe calculation: interactions extendingbeyond the nearest-neighboring cell (red) are truncated from the Hamiltonian»May shift the Fermi level »Excluded interactionsconstitute anapproximation electrode cellinteraction range (3a)aAlways ensure thatthe electrodes aredeep enough!Heterogeneous two-probesTwo-probe systems can be»Homogeneous(identical electrodes)»Heterogeneous(different electrodes)Electrostatics (Poisson equation)»Homogeneous: FFT»Heterogeneous: Multigrid(in z, FFT in x/y)Geometrically identical electrodes with different numerical parametersis a heterogeneous system»Example: MTJ anti-parallel caseMg OCoSiMnCo2MnSi/Mgo/Co2MnsiParallel or Anti-Parallel Nanotube heterojunction Heusler/MgO MTJHomogeneous vs. heterogeneousDeciding factor: two-probe system and method constructions in NanoLanguage»L/R electrode = same variable →homogeneous»L/R electrode = different variables →heterogeneoushomogeneous_twoprobe= TwoProbeConfiguration((electrode_configuration, electrode_configuration),...)heterogeneous_twoprobe = TwoProbeConfiguration((left_electrode_configuration, right_electrode_configuration),...)homogeneous_twoprobe_method= TwoProbeMethod(electrode_parameters= (electrode_parameters, electrode_parameters),...)heterogeneous_twoprobe_method= TwoProbeMethod(electrode_parameters= (left_electrode_parameters, right_electrode_parameters), ...)Initial densityTwo-probe systems can be hard to converge for many reasons»One reason is that the bulk density matrix from the convergedelectrodes is far from the “neutral atom”density matrixAn initial EquivalentBulk calculation can help in many cases»ATK will automatically create an equivalent bulk system fromL+C+R and perform a bulk calculation for this system»The converged density matrix is then used as a starting guessfor the two-probe calculation»InitialDensityType.EquivalentBulk is defaultAu-DTB-Au Requirement:the entire system L+C+R should be periodic,or at least without “bad”stacking faults»Examples, fcc[111]:•[ABC]AB–...–BC[ABC](no mirror, no stacking fault)•[ABC]AB–...–BA[CBA](mirror, bad stacking fault BAAB)•[ABC]AB–...–BAC[BAC](mirror, minor stacking fault ACAB)Homogeneous systems should always fulfill the requirement»Otherwise the electrode itself is not periodic!Heterogeneous systems may or may not»If left/right electrodes are really different (physically or withdifferent stacking), change to InitialDensityType.NeutralAtomsTransverse unit cellFor heterogeneous systems, X/Y unit cell commensurability must be carefully ensured»Trivial for 1D systems like CNTs and graphene (vacuum padding)»Challenge for interfaces which are not lattice matched (large supercell) Too small X/Y unit cell leads to electrostatic ”cross-talk”»May occur both for true 1D system and quasi-1D wires (molecular or metallic) between extended interfaces»Typical signal of residual electrostatic interactions is broken degeneracies, e.g. in high symmetry point of the band structure Z-shaped graphene transistorRu RuHfO 2Screening approximationWhy is it necessary to have a lot ofL−1L C R R+1“electrode atoms”in the centralregion?»These atoms form the screeninglayersTwo-probe boundary condition:match the bulk electrode effectivepotential at the outer electrode cellboundaries (arrows)»In the region in between (L/C/R),the effective potential and electrondensity are calculated self-consistentlySurface layers provide screening sothat the electrode region is close tobulk-like»The surface layers are part of thecentral region config!»Too few screening layers constitutesan approximationVoltage biasBias is applied across entire two-probe region (L+C+R)»FFT (homogeneous): linear ramp added to effective potential»Multigrid (heterogeneous): included in the boundary conditions Bias is relative»Can be applied symmetrically (±V/2) or asymmetrically (V,0)»Bias direction determines direction of current (diode characteristics) Convergence under bias is more difficult»Converge with zero bias first, then use zero-bias calculation to initialize density matrix for finite bias»Up to about 2 V bias is currently possible in ATK (above this, convergence becomes very difficult)Especially important to have enough screening surface layers under biasL −1L C R R+1μLμRBack to our guinea pig: GeometryUse MTJ Builder in VirtualNanoLab (new in 2008.02)Default geometry works forour demonstration» 4 electrode layers and 4surface layers» 6 would be better, costsmore time & memoryDrop system onNanoLanguage ScripterNanoLanguage Scripter Powerful tool for generating NanoLanguage code»Even QuantumWise expertsuse it!»Can also be used for post-SCF analysisGenerated code is»MPI safe»Explicit (all parametersvisible)»Verbose (prints details toconsole)Non-standard things canalways be added to the scriptby hand afterwardsBasis setATK uses localized atomic orbitals basis sets with finiterange (SIESTA)Most parameters are“advanced”(keep default),except:»Type (basis set size)»Energy shift (lower toincrease basis functionrange)SingleZetaPolarized orDoubleZetaPolarized areusually optimal»Balance time & memoryvs. accuracyPossible to use differentparameters for each elementBasis set, detailsNorm-conserving pseudopotentials describe the core electronsValence orbitals are expanded in localized basis functions with a finite range » A list of valence electrons for each element can be found in the manualThe range of the cut-off is determined implicitly by the ”Energy shift”»Energy shift = 0 means infinite range, basis orbital = atomic orbital (cannot be used)»Decrease with caution from default to increase range (to improve accuracy)»Range increases exponentially and thus the number of interacting pairs goes up fastBasis sets (ordered least to most accurate):»SingleZeta; 1 basis orbital for each valence orbital»SingleZetaPolarized; SingleZeta + 1 basis orbital for the first unoccupied shell»DoubleZeta; 2 basis orbitals for each valence orbital»DoubleZetaPolarized; DoubleZeta + 1 basis orbital for the first unoccupied shell»DoubleZetaDoublePolarized; DoubleZeta + 2 basis orbitals for the first unoccupied shell For details, see the manual for ”AtomicOrbitals”Brillouin zone integration K-points are crucial for good accuracy and convergence»Especially important forFeMgO due to sharp DOSpeak at Fermi levelAs always, larger cell →fewer k-points neededC-direction k-points only used in electrode calculationMemory/time increases with k-points, but slower (N) thanwith number of atoms (N2)Both electrodes must use the same number of k-points ATK is parallelized over the k-pointsFor details see next 2 pagesDetails on k-points A/BA/B k-points used both in electrodes, equivalent bulk, and two-probe calculationNumber required depends on system size (wider electrode in A/B, fewer points)In directions without dispersion/periodicity (vacuum padding), only 1 point needed»Examples: nanotubes, wires, graphene (perpendicularto the sheet)Some systems, like FeMgO, require more points to get accurate Fermi levelIncreased temperature can be used to reduce need for many k-points, at the expense ofsomewhat reduced accuracy in the resultsDetails on k-points CWhy k-points in the C (Z) direction?»Only used in the electrodes bulk calculation»NOT used in the two-probe calculation –no periodicity!!!»N A xN B x1 used in the equivalent bulk calculation•If NA =NB=1 the equivalent bulk calculation is performed with realmatrices (faster, less memory)•Also applies to regular bulk calculations, if NA =NB=NC=1Why so many k-points in the C direction?»Crucial to get an accurate determination of the Fermi level»Two-probe calculation assumes semi-infinite electrode, whileelectrode calculation is finite (different boundary conditions)»Thus, two-probe calculation corresponds, effectively, toINFINITELY many k-points»25, 50, 100 points are usual;longer electrode, fewer points neededEigenstate occupation Electron temperature»Used in the electrode Fermi distribution»No phonons...!Increase to cure convergence problems»Smoother Fermi function»1000−1300 K usually doesthe trickNOTE:Changing thetemperature may changephysical results (like thecurrent) slightly!»Converge at hightemperature, then anneal,to be safeElectron densityMesh cut-off»Controls electrostatic mesh for Poisson equation»Default usually fine for electronstructure calculations»d-elements like Fe need highercut-off for good geometries (inoptimizations)Spin»Initial = absolute, in h»Scaled = fraction of max spinpolarization for isolated atom−1 ≤s≤1»To set spin for individual atoms,edit the scriptEach can be given forleft/central/right independently»Forces the system to be treated as heterogeneousEmxe2hπ=Δ−0.56 for anti-parallel0.56 for parallelContour integrationIntegral lower bound»Increase (5–7 Ry) avoid polesbelow the contour, which leadto charge run-away(calculation converges to q=0) Circle points»Increase (50-70) not to loseaccuracy when increasing thelength of the contourReal axis infinitesimal»Can be increased in reallydifficult cases»Changes the results –anneal! Real axis point density»Lower to cure convergenceproblems»Only relevant for finite biasATK is parallelized over thecontour integration pointsFor details see M. Brandbyge et al., PRB 65, 165401 (2002)MixingTotal energy criterion can reduce iterations by a factor 2 withoutcompromising the resultsAlways use Hamiltonian mixing for two-probe systemsHistory Steps»Experiment with increasing to improve convergence (doesn’t always work,sometimes fewer history steps arebetter…)»Costs memory (but not a lot)Diagonal mixing parameter (β)»Reduce βto stabilize convergence»Increase βto speed up convergence(works well in simple systems likecarbon nanotubes)Advanced strategy for difficult cases:»Run with small βfor some iterations(say, 5 or 20), then break»Restart with larger βand run toconvergenceTwo-probe algorithmElectrode constraint» Complex issue » See separate slides for details » Default = ”Off”, best workhorse for transmission and current » Undocumented option ”DensityMatrix” best, but can be hard to converge; only option for good voltage dropInitial density type» EquivalentBulk• Bulk calculation used to initialize the two-probe density matrix • Often the best option!» NeutralAtom• Heterogeneous systemsCheckpoint file NetCDF file stores all details of the calculation» Restore for analysis » Initialize density matrix for other calculationsWARNING: By default, no NetCDF file is created!Verbosity level» Default in ATK = 0 (quiet) » Default in VNL = 10 (all info) » Level 1 is often bestSetting the initial spin Open NanoLanguage script» Internal Script Editor » External editor• We recommend SciTE or Notepad++ • Completion, highlightingInitial spin for each atom in the central region» ±0.56 for surface layers (4 atoms left and right) » Zero initial spin for MgOelectron_density_parameters = electronDensityParameters( mesh_cutoff = 150.0*Rydberg, initial_scaled_spin = [ 0.56, 0.56, 0.56, 0.56, 0., 0., 0., 0., 0., 0., 0., -0.56, -0.56, -0.56, -0.56 ] )0.,Run the calculations! Two calculations (special for MTJs)» Parallel: 0.56 initial spin (right electrode/surface atoms) » Anti-parallel: −0.56 initial spin (right electrode/surface atoms)Different filenames for the checkpoint files! Possible to run in serial» Calculation uses < 1 Gb of RAM » About 12 hours in serial (dual-core)Run in parallel!» Use as many nodes as possible » Excellent scaling because of many k-points and contour integration points » Can cut the calculation time by order of magnitudeSummaryTo converge the FeMgO system, modify the following parameters:» » » » » Basis Set• Type (for Fe) = SingleZetaPolarizedBrillouin Zone Integration• Number of k-points (A/B/C) = 10/10/100Eigenstate Occupation• Electron Temperature = 1200 KelvinElectron Density• Heterogeneous (check) • Initial Scaled Spin = 0.56 (left) and −0.56 (right)Energy Contour• Circle Points = 50 • Integral Lower Bound = 7 Rydberg • Real Axis Points Density = 0.005 eV (for finite bias)» » »Iteration Mixing• Diagonal mixing parameter = 0.05TwoProbe Algorithm• Initial Density = NeutralAtomRemaining parameters are left at defaultGeometry = default from MTJ Builder Set initial spin per atom in editor (parallel / anti-parallel) NetCDF file!OutlookPart 2: Analysis» K-point resolved transmission coefficients » Transmission spectrum » Current & conductance » Tunneling magneto-resistance (TMR) » Scattering states。
《Spark大数据编程基础(Scala版)》第八章 Spark GraphX
8.1 GraphX简介
(2)操作层:在抽象类Graph及其实现类GraphImpl两个 类中定义了构建图操作、转换操作、结构操作、聚合操作和 缓存操作等;另外,在GraphOps类中也实现了图基本属性操 作和连接操作等。Graph类是最重要的一个类,也是一个抽象 类,Graph类中一些没有具体实现的内容是由GraphImpl完成, GraphOps是一个协同工作类。
8.2.2 GraphX图分割
GraphX支持边上的4种不同的Partition(分区)策略: (1)RandomVertexCut:边随机分布; (2)CanonicalRandomVertexCut:要求两个顶点间 如果有多条边则分在同一分区中; (3)EdgePatition1D:从一个顶点连出去的边在同一 分区; (4)EdgePatition2D:边通过元组(srcId,dstId)划分 为两维的坐标系统。
8.1 GraphX简介
GraphX是一个分布式图处理框架,基于Spark平台提供对图 计算和图挖掘简洁易用而丰富多彩的接口,满足了大规模图处 理的需求。与其他的图处理系统和图数据库相比,基于图概念 和图处理原语的GraphX,优势在于既可以将底层数据看成一个 完整的图,也可以对边RDD和顶点RDD使用数据并行处理原语。
8.1 GraphX简介
在scala中::,+:,:+,:::,+++的区别总结
在scala中::,+:,:+,:::,+++的区别总结
初学Scala的⼈都会被Seq的各种操作符所confuse。
下⾯简单列举⼀下各个Seq操作符的区别。
4种操作符的区别和联系
1. :: 该⽅法被称为cons,意为构造,向队列的头部追加数据,创造新的列表。
⽤法为 x::list,其中x为加⼊到头部的元素,⽆论x是列表与
否,它都只将成为新⽣成列表的第⼀个元素,也就是说新⽣成的列表长度为list的长度+1(btw,x::list等价于list.::(x))
2. :+和+: 两者的区别在于:+⽅法⽤于在尾部追加元素,+:⽅法⽤于在头部追加元素,和::很类似,但是::可以⽤于pattern match ,⽽+:则不
⾏. 关于+:和:+,只要记住冒号永远靠近集合类型就OK了。
3. ++ 该⽅法⽤于连接两个集合,list1++list2
4. ::: 该⽅法只能⽤于连接两个List类型的集合
//Nil 表⽰空列表 0 :: 连接上⼀个空列表表⽰List中只有0
// println(s"x : $x y: $y ") 拼接字符串,必须以s 开头, $ 取值
var ls = List(3,-1)
ls match {
case 0 :: Nil => println("only 0")
case x :: y :: Nil => println(s"x : $x y: $y ")
case 0 :: tail => println("0 ....")
case _ => println("others")
}。
【免费下载】尚学堂科技.马士兵.JAVA.系列视频教程 [全]
![【免费下载】尚学堂科技.马士兵.JAVA.系列视频教程 [全]](https://img.taocdn.com/s3/m/e5f180999ec3d5bbfc0a7456.png)
尚学堂科技.马士兵.JAVA.系列视频教程第一部分:J2se学习视频内容包括:尚学堂科技_马士兵_JAVA视频教程_JDK5.0_下载-安装-配置尚学堂科技_马士兵_JAVA视频教程_J2SE_5.0_第01章_JAVA简介_源代码_及重要说明尚学堂科技_马士兵_JAVA视频教程_J2SE_5.0_第02章_递归补充尚学堂科技_马士兵_JAVA视频教程_J2SE_5.0_第02章_基础语法尚学堂科技_马士兵_JAVA视频教程_J2SE_5.0_第03章_面向对象尚学堂科技_马士兵_JAVA视频教程_J2SE_5.0_第04章_异常处理尚学堂科技_马士兵_JAVA视频教程_J2SE_5.0_ 第05章_数组尚学堂科技_马士兵_JAVA视频教程_J2SE_5.0_第06章_常用类尚学堂科技_马士兵_JAVA视频教程_J2SE_5.0_第07章_容器尚学堂科技_马士兵_JAVA视频教程_J2SE_5.0_第08章_IO尚学堂科技_马士兵_JAVA视频教程_J2SE_5.0_第09章_线程尚学堂科技_马士兵_JAVA视频教程_J2SE_5.0_第10章_网络尚学堂科技_马士兵_JAVA视频教程_J2SE_5.0_第11章_GUI尚学堂科技_马士兵_JAVA 视频教程_J2SE_5.0_专题_日期处理尚学堂科技_马士兵_JAVA视频教程_J2SE_专题_正则表达式反射avi◆◆◆◆◆◆◆◆◆◆◆◆◆◆◆◆◆◆◆◆◆◆◆◆◆◆◆◆◆◆◆◆◆◆◆◆◆◆◆◆◆◆◆◆◆◆◆◆◆◆◆◆最好的Java只有尚学堂最好的Java只有尚学堂最好的Java只有尚学堂最好的Java只有尚学堂最好的Java只有尚学堂◆◆◆◆◆◆◆◆◆◆◆◆◆◆◆◆◆◆◆◆◆◆◆◆◆◆◆◆◆◆◆◆◆◆◆◆◆◆◆◆◆◆◆◆◆◆◆◆◆◆◆◆第二部分:j2se练习项目视频内容包括:尚学堂科技_马士兵_在线聊天系统雏形视频教程_java_eclipse尚学堂科技_马士兵_坦克大战视频教程_java_eclipse尚学堂科技_马士兵_坦克大战图片版尚学堂科技_马士兵_JAVA_坦克大战网络版视频教程尚学堂科技_马士兵_snake_贪吃蛇内部视频涉及到项目之1俄罗斯方块.rar: 07.4 MB涉及到项目之2坦克大战视频教程.rar: 019.4 MB涉及到项目之3坦克大战视频教程_java_eclipse.rar: 0395.4 MB涉及到项目之4坦克大战图片版.rar: 0101.2 MB涉及到项目之5坦克大战网络版视频教程.rar: 0248.8 MB涉及到项目之snake_贪吃蛇视频.rar: 095.2 MB涉及到项目之在线聊天系统雏形视频教程_java_eclipse.rar: 0233.9 MB◆◆◆◆◆◆◆◆◆◆◆◆◆◆◆◆◆◆◆◆◆◆◆◆◆◆◆◆◆◆◆◆◆◆◆◆◆◆◆◆◆◆◆◆◆◆◆◆◆◆◆◆最好的Java只有尚学堂最好的Java只有尚学堂最好的Java只有尚学堂最好的Java只有尚学堂最好的Java只有尚学堂◆◆◆◆◆◆◆◆◆◆◆◆◆◆◆◆◆◆◆◆◆◆◆◆◆◆◆◆◆◆◆◆◆◆◆◆◆◆◆◆◆◆◆◆◆◆◆◆◆◆◆◆第三部分数据库视频Oracle视频内容包括:01——53讲avi格式◆◆◆◆◆◆◆◆◆◆◆◆◆◆◆◆◆◆◆◆◆◆◆◆◆◆◆◆◆◆◆◆◆◆◆◆◆◆◆◆◆◆◆◆◆◆◆◆◆◆◆◆最好的Java只有尚学堂最好的Java只有尚学堂最好的Java只有尚学堂最好的Java只有尚学堂最好的Java只有尚学堂◆◆◆◆◆◆◆◆◆◆◆◆◆◆◆◆◆◆◆◆◆◆◆◆◆◆◆◆◆◆◆◆◆◆◆◆◆◆◆◆◆◆◆◆◆◆◆◆◆◆◆◆第四部分:JDBC和MySQL视频,内容包括:1_lomboz_eclipse_jdbc2_mysql_avi3_ 连接池的设计思路.avi◆◆◆◆◆◆◆◆◆◆◆◆◆◆◆◆◆◆◆◆◆◆◆◆◆◆◆◆◆◆◆◆◆◆◆◆◆◆◆◆◆◆◆◆◆◆◆◆◆◆◆◆最好的Java只有尚学堂最好的Java只有尚学堂最好的Java只有尚学堂最好的Java只有尚学堂最好的Java只有尚学堂◆◆◆◆◆◆◆◆◆◆◆◆◆◆◆◆◆◆◆◆◆◆◆◆◆◆◆◆◆◆◆◆◆◆◆◆◆◆◆◆◆◆◆◆◆◆◆◆◆◆◆◆第五部分:HTML & CSS & JAVASCRIPT 视频:Html & CSS 视频内容简介:01_html 简单介绍和meta标签.avi02_a_路径问题等等.avi03_学习方法_其他常用标签.avi04_1_note.avi04_ 表格和表单_1.avi05_表格和表单_2.avi06_Frame.avi07_Dreamweaver.avi08_CSS_1.avi09_CSS_2_ 选择方式.avi10_CSS_3.avi11_CSS_4.aviJavaScript 视频简介:01_JS 初步及调试.avi02_JS基本语法.avi03_函数_事件处理_1.avi04_事件处理_2.avi05_内置对象_DOM_BOM.avi06_趣味.avi07_实用.avi08_ 表单验证.avi09_表单验证_new.avi10_后台框架.avi11_后台框架_2.avi12_TREE.avi◆◆◆◆◆◆◆◆◆◆◆◆◆◆◆◆◆◆◆◆◆◆◆◆◆◆◆◆◆◆◆◆◆◆◆◆◆◆◆◆◆◆◆◆◆◆◆◆◆◆◆◆最好的Java只有尚学堂最好的Java只有尚学堂最好的Java只有尚学堂最好的Java只有尚学堂最好的Java只有尚学堂◆◆◆◆◆◆◆◆◆◆◆◆◆◆◆◆◆◆◆◆◆◆◆◆◆◆◆◆◆◆◆◆◆◆◆◆◆◆◆◆◆◆◆◆◆◆◆◆◆◆◆◆第六部分:Servlet & JSP视频——内容包括:1 tomcat的安装使用,配置2 servlet & jsp 视频1——30节jsp的练习项目内容包括:3 简单bbs项目3 2007美化BBS项目4 网上商城项目视频4 网上商城项目视频讲解视频◆◆◆◆◆◆◆◆◆◆◆◆◆◆◆◆◆◆◆◆◆◆◆◆◆◆◆◆◆◆◆◆◆◆◆◆◆◆◆◆◆◆◆◆◆◆◆◆◆◆◆◆最好的Java只有尚学堂最好的Java只有尚学堂最好的Java只有尚学堂最好的Java只有尚学堂最好的Java只有尚学堂◆◆◆◆◆◆◆◆◆◆◆◆◆◆◆◆◆◆◆◆◆◆◆◆◆◆◆◆◆◆◆◆◆◆◆◆◆◆◆◆◆◆◆◆◆◆◆◆◆◆◆◆第七部分:J2EE学习视频包括:DRP项目框架视频学习:Struts视频Hibernate视频Spring视频提高部分:uml统一建模语言视频SSH项目视频:oa办公自动化系统视频crm项目视频银行系统视频ejb3.0视频J2ME_3G简介资料面试材料:面试题大汇总+笔记+技巧。
3.2《Python程序设计-科技开启智能生活“Python分支结构项目设计”》教学设计-20232
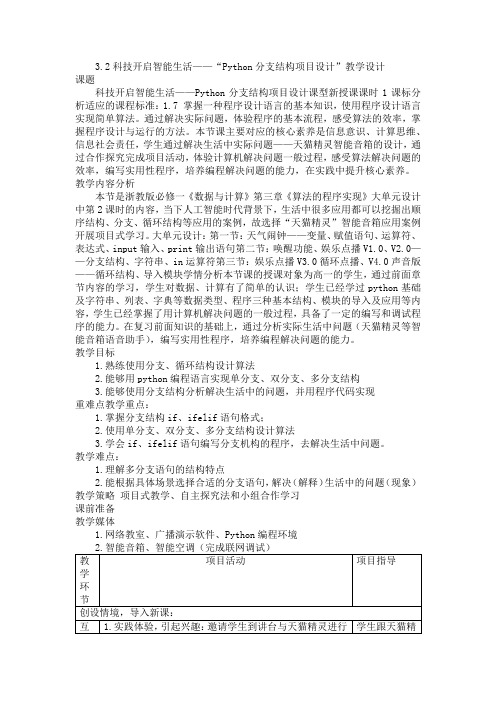
3.2科技开启智能生活——“Python分支结构项目设计”教学设计课题科技开启智能生活——Python分支结构项目设计课型新授课课时1课标分析适应的课程标准:1.7 掌握一种程序设计语言的基本知识,使用程序设计语言实现简单算法。
通过解决实际问题,体验程序的基本流程,感受算法的效率,掌握程序设计与运行的方法。
本节课主要对应的核心素养是信息意识、计算思维、信息社会责任,学生通过解决生活中实际问题——天猫精灵智能音箱的设计,通过合作探究完成项目活动,体验计算机解决问题一般过程,感受算法解决问题的效率,编写实用性程序,培养编程解决问题的能力,在实践中提升核心素养。
教学内容分析本节是浙教版必修一《数据与计算》第三章《算法的程序实现》大单元设计中第2课时的内容,当下人工智能时代背景下,生活中很多应用都可以挖掘出顺序结构、分支、循环结构等应用的案例,故选择“天猫精灵”智能音箱应用案例开展项目式学习。
大单元设计:第一节:天气闹钟——变量、赋值语句、运算符、表达式、input输入、print输出语句第二节:唤醒功能、娱乐点播V1.0、V2.0——分支结构、字符串、in运算符第三节:娱乐点播V3.0循环点播、V4.0声音版——循环结构、导入模块学情分析本节课的授课对象为高一的学生,通过前面章节内容的学习,学生对数据、计算有了简单的认识;学生已经学过python基础及字符串、列表、字典等数据类型、程序三种基本结构、模块的导入及应用等内容,学生已经掌握了用计算机解决问题的一般过程,具备了一定的编写和调试程序的能力。
在复习前面知识的基础上,通过分析实际生活中问题(天猫精灵等智能音箱语音助手),编写实用性程序,培养编程解决问题的能力。
教学目标1.熟练使用分支、循环结构设计算法2.能够用python编程语言实现单分支、双分支、多分支结构3.能够使用分支结构分析解决生活中的问题,并用程序代码实现重难点教学重点:1.掌握分支结构if、ifelif语句格式;2.使用单分支、双分支、多分支结构设计算法3.学会if、ifelif语句编写分支机构的程序,去解决生活中问题。
Scala学习之路(三)Scala的基本使用

Scala学习之路(三)Scala的基本使⽤⼀、Scala概述scala是⼀门多范式编程语⾔,集成了⾯向对象编程和函数式编程等多种特性。
scala运⾏在虚拟机上,并兼容现有的Java程序。
Scala源代码被编译成java字节码,所以运⾏在JVM上,并可以调⽤现有的Java类库。
⼆、第⼀个Scala程序Scala语句末尾的分号可写可不写HelloSpark.scalaobject HelloSpark{def main(args:Array[String]):Unit = {println("Hello Spark!")}}运⾏过程需要先进⾏编译编译之后⽣成2个⽂件运⾏HelloSpark.class输出结果Hello Spark三、Scala的基本语法1、概述/*** Scala基本语法:* 区分⼤⼩写* 类名⾸字母⼤写(MyFirstScalaClass)* ⽅法名称第⼀个字母⼩写(myMethodName())* 程序⽂件名应该与对象名称完全匹配* def main(args:Array[String]):scala程序从main⽅法开始处理,程序的⼊⼝。
** Scala注释:分为多⾏/**/和单⾏//** 换⾏符:Scala是⾯向⾏的语⾔,语句可以⽤分号(;)结束或换⾏符(println())** 定义包有两种⽅法:* 1、package com.ahu* class HelloScala* 2、package com.ahu{* class HelloScala* }** 引⽤:import java.awt.Color* 如果想要引⼊包中的⼏个成员,可以⽤selector(选取器):* import java.awt.{Color,Font}* // 重命名成员* import java.util.{HashMap => JavaHashMap}* // 隐藏成员默认情况下,Scala 总会引⼊ ng._ 、 scala._ 和 Predef._,所以在使⽤时都是省去scala.的* import java.util.{HashMap => _, _} //引⼊了util包所有成员,但HashMap被隐藏了*/2、Scala的数据类型Scala 与 Java有着相同的数据类型,下表列出了 Scala ⽀持的数据类型:数据类型描述Byte8位有符号补码整数。
- 1、下载文档前请自行甄别文档内容的完整性,平台不提供额外的编辑、内容补充、找答案等附加服务。
- 2、"仅部分预览"的文档,不可在线预览部分如存在完整性等问题,可反馈申请退款(可完整预览的文档不适用该条件!)。
- 3、如文档侵犯您的权益,请联系客服反馈,我们会尽快为您处理(人工客服工作时间:9:00-18:30)。
51cto学院-Scala深入浅出实战初级入门经典视频课程课程目标为进一步推动大数据技术的发展和应用,在王家林的带领下联合大数据狂热爱好者和一线实践专家构建了“DT大数据梦工厂”公益团队,旨在免费分享大数据最佳实践技术,帮助您和公司在大数据时代重铸强大IT大脑,笑傲互联网+时代!在这里,先从Scala语言的编程开发实战学起。
适用人群Scala语言爱好者,Spark技术爱好者,大数据技术学习者课程简介《Scala深入浅出实战初级入门经典视频课程》从Scala的开发环境的搭建起步,基于纯粹动手实战的原则,循序渐进的覆盖Scal a基础、Scala面向对象编程、Scala函数式编程、集合的操作深度实战、Scala测试等实用实战内容,是《Scala深入浅出实战中级---进阶经典》和《Scala深入浅出实战高级---高手之巅》的前置课程。
纯粹的实战精华课程打造能够进行Scala编程实战的您!从零开始,跟随着王家林老师每天早晨4点左右发布的一个绝对精华的约15分钟的大数据免费视频学习大数据方面的技术,先从Scala语言的编程开发实战学起。
Scala是一门以JVM为目标运行环境并将面向对象和函数式编程语言的最佳特性结合在一起的编程语言,此课程是大数据框架Spark的前置课程:1、Spark框架是采用Scala语言编写的,精致而优雅。
要想成为Spark高手,你就必须阅读Spark的源代码,就必须掌握Scala;2、虽然说现在的Spark可以采用多语言Java、Python等进行应用程序开发,但是最快速的和支持最好的开发API依然并将永远是Scala方式的API,所以你必须掌握Scala来编写复杂的和高性能的Spark分布式程序;3、本课程采用循序渐进的实战方式,深入浅出的讲解Scala所有核心内容和高级实战技巧课程1第1讲:Scala开发环境搭建和HelloWorld解析24分钟本视频介绍了Scala语言的特性,Java的安装,详细介绍了Scala的下载、Scala的环境变量配置,ScalaIDE工具的安装。
在Scala的环境安装完成后又动手演示了一个在ScalaIDE中建立Sc ala工程的例子,并演示运行结果。
2第2讲:Scala函数定义、流程控制、异常处理入门实战24分钟本视频以具体的例子代码详细介绍了1)Scala中函数的定义格式,以main函数为例介绍了ma in函数中的参数意义和返回值,同时还介绍了无参数函数的调用方式和有参数函数的调用方式。
2)介绍了Scala中流程控制do-while循环、for循环的使用方式。
3)Scala中的异常处理try-catch-finally的使用流程。
3第3讲:Tuple、Array、Map与文件操作入门实战15分钟本视频以具体的例子代码详细介绍了1)Scala中的元组的定义、元组的元素访问方式。
2)Scal a中数组的定义、数组的遍历方式。
3)Scala中Map集合的定义和访问方式。
4)Scala中网络文件和本地文件的访问方式。
4第4讲:For与Function进阶实战、Lazy的使用19分钟本视频以具体的例子代码详细介绍了1)双重for循环的使用方式。
2)for循环中的守卫的使用方式。
3)函数作为参数传递给另外一个函数。
4)匿名函数的定义、匿名函数作为。
5)函数的返回值。
6)递归调用中函数的使用方式。
7)函数中的默认参数。
8)可变参数的函数的定义和使用方式。
7)延迟执行中的lazy值的定义和使用方式。
5第5讲:Scala数组操作实战详解24分钟本视频以具体的例子代码详细介绍了1)固定长度数组的声明与元素操作。
2)变长数组的声明与元素操作。
3)数组的的各种操作方法:数组的增删改查操作、数组的+=与++=操作、数组的yi eld操作、数组的过滤filter操作、数组的求和操作、数组的求最大值操作、数组的升序sorted 排序、数组的快速quickSort排序、数组的mkString操作、数组的矩阵ofDim操作。
6第6讲:Map、Tuple、Zip实战解析17分钟本视频以具体的例子代码详细介绍了1)可变Map集合的操作。
2)不可变Map集合的操作。
3)使用模式匹配获取Map集合的元素。
4)使用getOrElse方法获取Map集合的元素。
5)使用+ =为Map集合添加元素。
6)使用-=删除Map集合的元素。
7)使用SortedMap给Map集合的元素排序。
8)使用模式匹配访问元组中的值。
9)使用partition方法将一个字符串拆分成一个元组。
10)使用数组的zip方法将两个数组中的元素进行压缩组装成新的数组。
7第7讲:Scala类的属性和对象私有字段实战详解17分钟本视频以具体的例子代码详细介绍了:1)Scala类的实现和使用。
2)Scala类中用var关键字修饰的属性(或者称字段)自动带有getter方法和setter方法。
3)Scala类中用val关键字修饰的属性只带getter方法。
4)最后着重介绍了Scala类的对象私有字段,该特性在用Scala语言编写的大数据计算框架Spark源代码中经常用到。
8第8讲:Scala主构造器、私有构造器、构造器重载实战详解12分钟本视频以具体的例子代码详细介绍了:1)Scala类的主构造器的定义以及如何让主构造器变成私有的。
2)除了主构造器,Scala类还有任意多的辅助构造器,辅助构造器是如何定义和使用的。
3)和Java语言有多个构造方法一样,Scala类的构造器是可以通过重载实现多个构造器,当然其中只有一个是主构造器。
对于辅助构造器的使用而言,都是在对其他先前定义的辅助构造器和主构造器进行调用开始的。
9第9讲:Scala的内部类实战详解8分钟本视频以具体的例子代码详细介绍了Scala的内部类,Java语言的内部类和Scala语言的内部类有本质的区别,Java语言的内部类是从属于外部类的,而Scala语言的内部类是从属于外部类的每个具体实例对象的。
10第10讲:Scala单例对象、伴生对象实战详解12分钟本视频以具体的例子代码详细介绍了Scala语言的单例对象和伴生对象:(1)与Java语言中有静态方法和静态属性(字段)不同,Scala语言是通过提供object关键字修饰的单例对象达到此目的,也就是说在Scala语言的单例对象中包含了一系列的静态方法和静态属性,但是这些静态方法和静态属性是不需要static关键字修饰的,同时当单例对象中的属性和方法被外界访问时,这些方法和属性不可以用private这样的关键字修饰。
(2)对于Java的类中的静态属性和静态方法,只要它们被加载进内存就会执行。
而在Scala语言中,单例对象中的属性和方法只有当该对象第一次被使用时它们才会生效。
(3)在Java语言中,有的类可以同时包含静态方法和实例方法。
而对于Scala语言,要达到这样的目的,它是通过提供一个和类的名字相同的对象来实现的,这样的类和对象分别称为伴生类和伴生对象。
也就是说,在Scala的伴生类中放入的是实例方法,而Scala的伴生对象中放入的都是静态方法,同时伴生类和伴生对象可以互相访问彼此的私有方法和私有属性。
最后强调一点,伴生类和伴生对象必须放在同一个源文件中。
11第11讲:Scala中的apply实战详解12分钟本视频以具体的例子代码详细介绍了Scala语言的非常重要的apply方法的定义和使用:(1)对于apply方法而言,它可以是伴生类中的apply方法,也可以是伴生对象中的apply方法,我们通常使用的就通过伴生对象中的apply方法来实例化它的伴生类。
(2)针对apply方法在伴生对象和伴生类中如何使用,我们通过代码进行了演示,并查看了Scala源码中的伴生对象Array是如何通过apply方法来实例化它的伴生对象的。
(3)最后特别列举了大数据计算框架Spar k中的图计算部分(Spark GraphX),在构造一个图的时候(图是用Graph这个抽象类表示的),一种方法是通过使用Graph类的伴生对象的apply方法来实现的,而在这个apply方法中,实际上是new了一个Graph抽象类的子类GraphImpl的实例。
12第12讲:Scala中的继承:超类的构造、重写字段、重写方法实战9分钟本视频以具体的例子代码详细介绍了Scala语言的非常重要的继承特性:(1)与Java语言一样,Scala语言也是使用extends关键字实现子类对父类的继承。
(2)子类中的方法和字段可以使用override 关键字实现对它的超类(父类)中同名的方法或字段进行覆写(重写)。
(3)当子类使用主构造器进行实例化时,与父类的主构造器中同名的参数也会直接传递具体的参数值给父类使用。
13第13讲:抽象类、抽象字段、抽象方法10分钟本视频以具体的例子代码详细介绍了Scala语言中抽象类、抽象字段和抽象方法的定义和使用: (1)与Java语言一样,Scala中的抽象类也是使用abstract 关键字修饰的。
(2)抽象字段和抽象方法都是只有字段或者方法的定义,而没有字段或者方法的具体实现。
14第14讲:Scala中作为接口的trait、在对象中混入trait代码12分钟本视频以具体的例子代码详细介绍了Scala语言中trait的定义和使用:(1)与Java语言中的接口(interface)中只含有抽象方法不同,Scala语言中的特质(trait)可以包含抽象字段、抽象方法或者实现了方法体的方法。
(2)在使用Scala语言构建对象时,可以为该对象添加特质。
15第15讲:Scala多重继承、多重继承构造器执行顺序及AOP实现18分钟本视频以具体的例子代码详细介绍了Scala语言的多重继承、多重继承构造器执行顺序及AOP 实现:(1)多重继承的trait代码实战;(2)多重继承构造器执行顺序;(3)基于trait的A OP代码实战。
16第16讲:Scala中包的定义、包对象、包的引用、包的隐式引用实战14分钟本视频以具体的例子代码详细介绍了Scala语言中包的定义、包对象、包的引用、包的隐式引用:(1)与在Java中一样,在Scala语言中,也可以通过包来组织大型工程(项目)。
在Scala 中,可以通过链式和嵌套来实现包的定义。
(2)借助包对象可以把工具函数或者常量添加到包而不是某个工具对象中。
(3)Scala语言中可以在任何地方声明引用,并可以对引用进行重命名。
同时在Scala程序中都隐式引用了三个包:import ng._ 、import scala._ 、imp ort Predef._17第17讲:Scala中包、类、对象、成员、伴生类、伴生对象访问权限12分钟本视频以具体的例子代码详细介绍了Scala语言中包、类、对象、成员、伴生类、伴生对象访问权限: (1)在Scala语言中,可以通过private[包名] 这个修饰符来扩展包、类等的访问权限。
