HP工作站BIOS说明适用Z228Z440Z230Z640Z840Z800Z620Z420Z820主板设置
HP ZBook移动工作站系列产品说明说明书

HP EliteBook 800 series Notebook
HP ZBook Mobile Workstations also deliver*
Form factors • 14.0-inch diagonal • 15.6-inch dia4.0-inch diagonal • 15.6-inch diagonal • 17.0-inch diagonal
Sales guide | Why a mobile workstation?
HP recommends Windows.
While our HP EliteBook 800 series Notebook can provide you with excellent value, the ZBook Mobile Workstations deliver superb performance, uncompromised reliability and wide-ranging scalability as well as a range of screen sizes to fit various needs.
Warranty 1/1/0 or 3/3/0 support; on site service is extra
Expandability • Up to 32 GB memory3 • Up to 4 HDD storage4 bays • ThunderboltTM17 2 port for faster
惠普笔记本主板BIOS设置教程
惠普笔记本主板BIOS设置教程惠普笔记本电脑是很多用户使用和喜爱的电脑品牌。
既然大家都这么喜欢惠普电脑,那网友们都知道惠普笔记本主板设置吗?相信很多网友都不知道惠普笔记本主板设置的方法,不知道的网友不要担心,接下来是小编为大家收集的惠普笔记本主板BIOS设置教程,欢迎大家阅读:惠普笔记本主板BIOS设置教程一、惠普电脑bios设置如何进入bios设置?在BIOS模式下USB 的启动热键是什么?用户可以根据不同的电脑型号,选择相应的热键,直接启动一键U盘装系统工具设置(重要提示:在选择启动热键前,需先插入U盘方可)组装机主板品牌笔记本品牌台式机主板品牌启动按键笔记本品牌启动按键台式机品牌启动按键华硕主板F8联想笔记本F12联想台式机F12技嘉主板F12宏基笔记本F12惠普台式机F12微星主板F11华硕笔记本ESC宏基台式机F12映泰主板F9惠普笔记本F9戴尔台式机ESC梅捷主板ESC或F12联想ThinkpadF12神舟台式机F12七彩虹主板ESC或F11戴尔笔记本F12华硕台式机F8华擎主板F11神舟笔记本F12方正台式机F12斯巴达卡主板ESC东芝笔记本F12清华同方台式机F12昂达主板F11三星笔记本F12海尔台式机F12双敏主板ESCIBM笔记本F12明基台式机F8翔升主板F10富士通笔记本F12精英主板ESC或F11海尔笔记本F12冠盟主板F11或F12方正笔记本F12富士康主板ESC或F12清华同方笔记本F12顶星主板F11或F12微星笔记本F11铭瑄主板ESC明基笔记本F9盈通主板F8技嘉笔记本F12捷波主板ESCGateway笔记本F12Intel主板F12eMachines笔记本F12杰微主板ESC或F8索尼笔记本ESC致铭主板F12苹果笔记本长按“option”键磐英主板ESC磐正主板ESC冠铭主板F9注意:上述未提到的电脑机型请尝试或参考相同的品牌常用启动热键(注意:苹果笔记本在开机或重启时只要按住“option”键【即Alt键】不放,便可进入选择启动方式。
HP z800 工作站 说明书

音频 网络 端口
输入设备 安全功能 工作站软件
规格(高x宽x深) 电源 显示器 (按对角线长度测量屏幕尺寸) 保修
* 随附Windows Vista Business光盘,供日后升级使用。订购至少25套客户系统(拥有相同的自定义映像)的企业级最终用户(包括政府机构或教育机构)才能享受降级服务。 ** 个别Windows Vista产品的特性需要高级或是额外的硬盘来满足。详见:/windowsvista/getready/hardwarereqs.mspx和/windowsvista/getready/capable.mspx。Windows Vista Upgrade Advisor能够帮助您确定Windows Vista的哪些功能可在您的电脑上运行。要下载该工 具,请访问/upgradeadvisor。
惠普售前支持热线:800-820-1602 400-820-1602 (021) 5050 4800 工作时间:08:30 -18:00周一至周五 惠普售后支持热线:800-810-3888 工作时间:08:30 -18:00周一至周五 更多惠普产品信息,登陆:/workstations 垂询当地惠普销售授权经销商了解更多详情。
HP Z800 工作站
Windows®。我在,阻隔不再。HP 推荐使用正版 Windows 7 操作系统。
Windows®。我在,阻隔不再。HP 推荐使用正版 Windows 7 操作系统。
HP Z800工作站 外形 操作系统 支持机架安装的微塔式 正版Windows® 7 Professional 32位版本,可定制预装降级至Windows® XP Professional 32位版本* 正版Windows® 7 Professional 64位版本,可定制预装降级至Windows® XP Professional 64位版本* 正版Windows® 7 Professional 32位版本** 正版Windows® 7 Professional 64位版本** HP Installer Kit for Linux (包含支持32位和64位Red Hat Enterprise Linux WS4及WS5操作系统的驱动程序) 英特尔®四核至强®处理器1,2,X56773,3.46 GHz,130 W,12MB二级缓存,6.4GT/s快速通道互联总线,DDR3内存1333MHz 英特尔®六核至强®处理器1,2,X56803,3.33 GHz,130 W,12MB二级缓存,6.4GT/s快速通道互联总线,DDR3内存1333MHz 英特尔®四核至强®处理器1,2,W55903,3.33 GHz,130 W,8 M二级缓存,6.4GT/s快速通道互联总线,DDR3内存1333 MHz,超线程,智能加速技术 英特尔®四核至强®处理器1,2,W55803,3.20 GHz,130 W,8 M二级缓存,6.4GT/s快速通道互联总线,DDR3内存1333 MHz,超线程,智能加速技术 英特尔®四核至强®处理器1,2,X55703,2.93 GHz,95 W,8 M二级缓存,6.4GT/s快速通道互联总线,DDR3内存1333 MHz,超线程,智能加速技术 英特尔®四核至强®处理器1,2,X55603,2.80 GHz,95 W,8 M二级缓存,6.4GT/s快速通道互联总线,DDR3内存1333 MHz,超线程,智能加速技术 英特尔®四核至强®处理器1,2,X55503,2.66 GHz,95 W,8 M二级缓存,6.4GT/s快速通道互联总线,DDR3内存1333 MHz,超线程,智能加速技术 英特尔®四核至强®处理器1,2,E55403,2.53 GHz,80 W,8 M二级缓存,5.86GT/s快速通道互联总线,DDR3内存1066 MHz,超线程,智能加速技术 英特尔®四核至强®处理器1,2,E55303,2.40 GHz,80 W,8 M二级缓存,5.86GT/s快速通道互联总线,DDR3内存1066 MHz,超线程,智能加速技术 英特尔®四核至强®处理器1,2,E55203,2.26 GHz,80 W,8 M二级缓存,5.86GT/s快速通道互联总线,DDR3内存1066 MHz,超线程,智能加速技术 英特尔®四核至强®处理器1,2,E55063,2.13 GHz,80 W,4 M二级缓存,4.8GT/s快速通道互联总线,DDR3内存800 MHz 两个英特尔® 5520 可同时支持2个具有240个内核的NVIDIA® Tesla C1060 GPU计算卡(4 GB内存) 12个DIMM插槽,最高192 GB、6通道DDR3 1333 MHz**,3通道/CPU (**实际内存速率根据处理器能力不同而有所差异)
HP Z Turbo Drive Quad Pro 产品介绍说明书

HP Z Turbo Quad ProIntroductionThe demands on Workstations continue to increase, especially in segments like digital media or imaging, where resolutions and file sizes are increasing. SSD technology is improving to enable greater bandwidth at lower costs/GB. The most intense workflows require greater capacity and greater performance than individual M.2 modules can offer. Combining 4 modules into a card that occupies only one PCIe x16 slot is efficient and meets the requirements for performance and capacity.PerformanceHP Z Turbo Drive Quad ProThe HP Z Turbo Drive Quad Pro enables up to four M.2 PCIe SSD modules to be connected to one PCIe Gen3 x16 slot. This M.2 form factor device uses PCIe Gen3 x4 which enables sequential performance levels greater than 2GB/s for each module.The devices can be set up with RAID for additional performance and redundancy using software RAID.Note: There are restrictions to using RAID with boot volumes.ModelsHP Z Turbo Drive Quad Pro 2x256GB PCIe SSD N2M98AA HP Z Turbo Drive Quad Pro 2x512GB PCIe SSD N2M99AA HP Z Turbo Drive Quad Pro 2x1TB PCIe SSD T9H99AA HP Z Turbo Drive Quad Pro 256GB SSD module N2N00AA HP Z Turbo Drive Quad Pro 512GB SSD module N2N01AA HP Z Turbo Drive Quad Pro 1TB SSD module T9J00AABenefits∙Supports up to four PCIe M.2 SSD modules (NVMe) in one card, PCIe Gen3 x16 slot required.∙The HP Z Turbo Drive Quad Pro is equipped with Power Loss Protection circuitry that employs a bank of super caps to provide the power to fully finish data storage operations in the event of a power loss condition.∙The active cooling solution ensures that the M.2 SSD modules will not throttle to low performance levels due to over-heating.∙Support for single and double sided PCIe M.2 SSDs, up to 110mm in length.∙One of the M.2 SSD modules on the card can be used as a Boot device, and the other devices can be used as Data storage.Alternatively, all of the M.2 SSD modules can be used as Data devices.∙Additional storage devices, e.g. HDDs, SATA SSDs, can be used in combination with the HP Z Turbo Drive Quad Pro.∙Multiple HP Z Turbo Drive Quad Pro cards can be installed into HP Z Workstations. A card with 3 or 4 M.2 SSD modules requires a PCIe Gen3 x16 slot.CompatibilityThe HP Z Turbo Drive Quad Pro is supported on desktop platforms of HP Z Workstations, including Z440, Z640, and Z840. It will support storage configurations as a Boot device and as a Data device. It also can be configured with other storage components including SATA and SAS drives and controllers. Not all configurations are available from the factory.NOTE: Not all models are available in all regions.Recommended Slot OrderFor all HP Workstation platforms the tested and approved slots for the HP Z Turbo Drive Quad Pro are as follows (in order of preference):Z840: Slot #6, #4 (requires 2nd CPU), and #2*Z640 and Z440: Slot #5 and #2** Use of Z Turbo Drive Quad Pro in Slot 2 will necessitate moving the primary graphics card to an x8 or x4 PCIe slot, which could lead to reduced graphics performance.Raid SupportFor RAID support, there are some specific differences and thus restrictions as compared to SATA/SAS HDDs or SSDs, because software RAID is used.∙Windows® RAID with Boot Configuration: Limited support for RAID 1*, No support for RAID 0, 5, 10∙Windows® RAID with Data Configuration: Support for RAID 0, 1; No support for RAID 5, 10∙Linux® RAID with Boot Configuration: Functional for RAID 0, 1*; No support for RAID 5, 10∙Linux® RAID with Data Configuration: Functional for RAID 0, 1, 5, 10***RAID 1 can be set up, yet will not provide complete, redundant protection as the boot partition is not replicated on both drives. An OS boot partition cannot be protected by software RAID 1.** Limited testing has been done with Linux® to confirm RAID support and performance characteristics.Note: When using more than one HP Z Turbo Drive Quad Pro in a system, please ensure that the card ID switches are set up correctly. See installation guide for complete details.Service and SupportThe HP Z Turbo Drive Quad Pro has a one-year Limited Warranty or the remainder of the warranty of the HP supported product in which it is installed. Technical support is available seven days a week, 24 hours a day, by phone, as well as online support forums. Certain restrictions and exclusions apply.M.2 PCIe SSD Modules256GB M.2 PCIe SSD (NVMe)Capacity: 256GB M.2 PCIe SSD (NVMe) Interface PCIe Gen3 x16 architectureNVMe ControllerNAND Type: MLCRead Bandwidth (128KB): 2150 MB/sWrite Bandwidth (1MB): 1260 MB/sRandom Read IOPS (4KB): 300KRandom Write IOPS (4KB): 100KEndurance (Total Bytes Written):512GB M.2 PCIe SSD (NVMe)Capacity: 512GB M.2 PCIe SSD (NVMe) Interface PCIe Gen3 x16 architectureNVMe ControllerNAND Type: MLCRead Bandwidth (128KB): 2150 MB/sWrite Bandwidth (1MB): 1550 MB/sRandom Read IOPS (4KB): 300KRandom Write IOPS (4KB): 100KEndurance (Total Bytes Written): 292 TBHP Z Turbo Drive Quad Pro 2x1TB PCIe SSDCapacity: 2x1TB M.2 PCIe SSD (NVMe) modules Interface PCIe Gen3 x16 architectureNVMe ControllerOperating Temperature 32° to 158° F (0° to 70° C)HP Z Turbo Drive Quad Pro 512GB SSD moduleCapacity: 512GB (one M.2 PCIe NVMe module)Interface PCI Express 3.0 x4 electrical x4 physicalNVMe ControllerOperating Temperature 32° to 158° F (0° to 70° C)Note: NVMe devices require a driver for proper detection and operation. Windows® 8 and higher have an inbox NVMe driver. For Windows® 7, HP recommends using the Samsung NVMe driver, version 1.4.7.6, which will be available online. It is important to note that Microsoft has also published a hotfix that provides an NVMe driver, yet this driver is not recommended by HP. Also note that the new NVMe driver will not support the original HP Z Turbo Drive, which requires an AHCI driver.Support for OPAL hardware encryption: NoSupport for Secure Erase: YesSupport in HP Performance Advisor: yes, with the exception that the wear gauge support is not available yet.HP Z Turbo Drive Quad Pro 2x256 PCIe SSDCapacity: 2x256GB (two M.2 PCIe NVMe modules) Interface: PCI Express Gen3 x16Operating Temperature: 32° to 158° F (0° to 70° C)HP Z Turbo Drive Quad Pro 2x512GB PCIe SSDCapacity: 2x512GB (two M.2 PCIe NVMe modules) Interface: PCI Express Gen3 x16Operating Temperature: 32° to 158° F (0° to 70° C)HP Z Turbo Drive Quad Pro 2x1TB PCIe SSDCapacity: 2x1TB (two M.2 PCIe NVMe modules) Interface: PCI Express Gen3 x16Operating Temperature: 32° to 158° F (0° to 70° C)HP Z Turbo Drive Quad Pro 256GB SSD moduleCapacity 256GB (one M.2 PCIe NVMe module) Interface PCI Express 3.0 x4 electrical x4 physical Operating Temperature 32° to 158° F (0° to 70° C)HP Z Turbo Drive Quad Pro 512GB SSD moduleCapacity: 512GB (one M.2 PCIe NVMe module) Interface: PCI Express 3.0 x4 electrical x4 physical Operating Temperature: 32° to 158° F (0° to 70° C)HP Z Turbo Drive Quad Pro 1TB SSD moduleCapacity: 1TB (one M.2 PCIe NVMe module) Interface PCI Express 3.0 x4 electrical x4 physicalNVMe ControllerOperating Temperature 32° to 158° F (0° to 70° C)Device Interface Protocol PCIe Gen3Devices Supported HP qualifies and supports certain M.2 PCIe SSD modules to be used with this card.Bus Type PCIe card, full height PCIe slotsBIOS Minimum BIOS required:Z840, Z640, Z440: 1.62Data Protection Features Full Power Loss Protection circuitry, including multiple onboard super caps to provide powerin the event of a power loss event.Temperature - Operating 10 to 55C with 20 to 30% relative humidityTemperature - Storage -30 to 60C, with 5 to 90% relative humidityOperating Systems Supported Genuine Windows 7 Professional 64-bit, Genuine Windows 8.1 64-bit, Genuine Windows 1064-bit, RHEL 6, SLED 11 SP3, Ubuntu 14.04.Kit Contents HP Z Turbo Drive Quad Pro card + M.2 SSD Modules ordered, full height bulkhead bracket,),Installation documentation and warranty card.Options & AccessoriesThe HP Z Turbo Drive Quad Pro supports up to 4 SSD modules. It is initially sold configured with two modules. Additional modules can be purchased separately:HP Z Turbo Drive Quad Pro 256GB SSD module (individual module) N2N00AA HP Z Turbo Drive Quad Pro 512GB SSD module (individual module) N2N01AASummary of ChangesDate of change: Version History: Description of change:December 1, 2015 From v1 to v2 Changed Part numbers for HP Z Turbo Drive Quad Pro modules May 1, 2016 From v2 to v3 Changed Wording of Benefits section bullet #7November 1, 2016 From v3 to v4 Added Quad Pro 2x1TB and 1TB modules© Copyright 2016 HP Development Company, L.P.The only warranties for HP products and services are set forth in the express warranty statements accompanying such products and services. Nothing herein should be construed as constituting an additional warranty. HP shall not be liable for technical or editorial errors or omissions contained herein. The information contained herein is subject to change without notice. Microsoft and Windows are either registered trademarks or trademarks of Microsoft Corporation in the United States and/or other countries. Linux is the registered trademark of Linus Torvalds in the U.S. and other countries.。
hpz400主板bios设置方法

hp z400主板bios设置方法
想知道怎么设置主板的BIOS吗,下面是店铺带来hp z400 主板bios设置方法的内容,欢迎阅读!
hp z400 主板bios设置方法一:
快速启动项调整,台式机主板的快速启动键为f8,一般按了f8之后,就会出现很多启动选项,我们选中usb开头的usb设备就是我们的启动盘了。
设置方法,开机按del进入bios设置,设置方法如下:
hp z400 主板bios设置方法二:
调整快速启动项,插入u盘之后,按esc键,就可以进入快速启动项,同样我们选中usb开头的选项就能进入启动盘。
调整快速启动项,开机之后按f2进入bios设置。
hp笔记本主板bios设置方法

选择完,直接u盘或光盘启动
开机长按F2键,进入bios
在boot--中boot option #1--中找到u盘或光盘选择
选择完后按F10保存退出。
重启电脑就可以按照您的选择用u盘或光盘启动了。
有时候想设置下bios不懂怎么办下面是学习啦小编带来hp笔记本主板bios设置方法的内容欢迎阅读
hp笔记本主板bios设置方法
有时候想设置下BIOS不懂怎么办,下面是店铺带来hp笔记本主板bios设置方法的内容,欢迎阅读!
hp笔记本主板bห้องสมุดไป่ตู้os设置方法:
开机长按键盘上的ESC键
它会弹出启动项选择。根据需要进行选择就可以了。
惠普笔记本bios设置图解教程惠普笔记本进bios
惠普笔记本bios设置图解教程惠普笔记本进bios
一、热键进入BIOS
按主板的不同,在开机的第一时间按下对应的的热键就可以进入BIOS,不同品牌,不同型号的电脑进入BIOS的热键也不同。
有的在屏幕
上给出提示,有的不给出提示,几种常见的BIOS设置程序的进入方式我
简单列表如下:
惠普笔记本bio设置界面1
笔记本方面,除特殊的机型,一般是按照以下的方法:
Thinkpad/IBM(冷开机按F1,部分新型号可以在重新启动时启动按F1) HP(启动和重新启动时按F2)
SONY(启动和重新启动时按F2)
Dell(启动和重新启动时按F2)
Acer(启动和重新启动时按F2)
Tohiba(冷开机时按ESC然后按F1)
Fujitu(启动和重新启动时按F2)
大多数国产和台湾品牌(启动和重新启动时按F2)台式机进入BIOS开
机时候请多按del键,
就可以进入BIOS这些东西和主板厂商有关的,一般都是主板决定的。
二、通过读取开机画面信息,进入BIOS。
开机的第一画面,能够给我们带来很多信息,下面我们来看一下,开机画面带给我们进入BIOS的信息提示。
看了“惠普笔记本bio设置图解教程”还想看:
1.hp笔记本bio设置教程
2.hp笔记本进bio教程
3.惠普笔记本主板BIOS设置
4.惠普envy13笔记本使用bio设置u盘启动教程
5.宏碁笔记本bio设置图解教程。
HP Z800工作站的安装和配置指南说明书

ContentsIntroduction (1)Overview of Adapter Cards (2)Connecting Video Components (4)Connecting Audio Components (6)Connecting Storage (8)Calibrating the EIZO CG245W Monitor (8)Configuring the EIZO CG245W Monitor (9)IntroductionUse these instructions and wiring diagrams to set up the new model of HP Z800 workstation, equippedwith the NVIDIA Quadro 6000 graphics card and the AJA Kona 3G VIO card.If you have an older model HP Z800 workstation, equipped with the NVIDIA FX5800 graphics card andthe AJA OEM-2K VIO card, refer to the instructions in the Installation and Configuration Guide for Linux® Workstations.Related DocumentationAll documentation for your product is available online at /me-documentation .If you are a subscription customer, you can access the Autodesk Creative Finishing Knowledge Base bylogging into the Autodesk Creative Finishing Edge portal at https:// . The KnowledgeBase contains articles on advanced configuration and troubleshooting.Contacting AutodeskFor support for your product, see:/smoke-support/flame-support/lustre-support/inferno-support/flint-support/flare-support/backdraftconform-supportCustomer support is also available through your Autodesk reseller. To find a reseller near you, consultthe reseller look-up database at /resellers . Creative Finishing HP® Z800 with NVIDIA® 6000 Workstation Setup GuideOverview of Adapter CardsThe following illustration provides an overview of the adapter cards in the Z800 workstation.Note: The Mellanox InfiniBand/10-GigE adapter in slot 7 is optional.Connecting PeripheralsThe following diagram illustrates how to connect peripherals, such as the graphics monitor, keyboard, mouse, Wacom® Intuos® pen tablet, and house network, to the HP Z800 workstation.It is recommended to connect all hardware peripherals as illustrated before booting the workstation for the first time.e the short DVI cable to connect the DVI port of the NVIDIA Quadro graphics card in slot 2 tothe DVI port of the NVIDIA Quadro SDI adapter in slot 6.2.Connect the Display Port extender to the display port 1 (the outer port) of the NVIDIA Quadrographics card and to the display port of the EIZO CG245 monitor.Note:If you are using an older EIZO monitor, such as the CG241, connect the DP port of the NVIDIA Quadro graphics card to the Avenview FO-DVI-25MM DVI extender of the monitor using the DP to DVI adapter included with the workstation.Make sure to also connect the supplied DVI extender power adapter to the DVI extender cable, otherwise the monitor will not display an image.3.Connect the keyboard, mouse and graphics tablet directly to the USB ports of the workstation,or to an USB extender.4.Connect the bottom on-board Ethernet port of the workstation (port 0) to your facility network.5.If configuring a Lustre workstation, connect the Ethernet cable coming from the AutodeskControl Surface Ethernet switch to the top on-board Ethernet port of the workstation.6.If configuring a Lustre workstation, connect the USB cable coming from the central panel of theAutodesk Control Surface to an USB port on the workstation or to the USB extender.7.Optional: Connect one port of the InfiniBand adapter to the InfiniBand switch.Connecting Video ComponentsThe following diagram illustrates how to connect the video hardware components included in your shipment.The only video hardware you must provide are a sync generator, VTR, HD/SDI-ready broadcast monitor and patch panel (if desired).1.Connect the output of the sync generator to the top Ref Loop port of the AJA K3G-Box.2.Connect the Input port of the NVIDIA SDI card (the one next to the DVI port) to the bottom RefLoop port of the AJA K3G-Box.3.Connect the Fill(outer) port of the NVIDIA SDI card to the Input port of the AJA HD5DAdistribution amplifier.4.Connect one of the OUT ports of the distribution amplifier to an SDI IN port of the broadcastmonitor.5.For RTD or Stereo, connect another OUT port of the amplifier to the Link A input port of theVTR.6.For Stereo or RTD, connect the Key (middle) SDI port of the NVIDIA SDI card to the Link B inputport of the RTD VTR.7.Connect the RS-422 port of the AJA K3G-Box to the VTR control port.8.If not using RTD, connect SDI OUT A, SDI OUT B, SDI IN A and SDI IN B ports of the VTR to theSDI1, SDI2, SDI3 and SDI4 ports on the front of the AJA K3G-Box.9.Connect the SDI IN 1/A, SDI IN 2/B, SDI OUT 1/A and SDI OUT 2/B plugs of the AJA cable to theSDI1, SDI2, SDI3 and SDI4 ports of the AJA Kona 3G card.10.Connect the SDI IN 1/A, SDI IN 2/B, SDI OUT 1/A and SDI OUT 2/B plugs on the other end of theAJA cable to the SDI1, SDI2, SDI3 and SDI4 ports on the back of the AJA K3G-Box, as illustrated.11.Connect the AJA control cable to the AJA Kona card and to the corresponding port on the backof the AJA K3G-Box.Note : AJA Kona 3G is shipping with up to date firmware. Firmware update procedure will be published when new certified firmware becomes available.Connecting Audio ComponentsYour application uses the Discreet Native Audio subsystem. Discreet Native Audio uses the following hardware components, shipped with your system.Lucid ADA 88192 Audio Converter - Converts signals between the workstation and all digital or analog audio I/O devices.AJA K3G-Box Balanced Audio breakout box and AJA Kona 3G adapter card- The Balanced Audio breakout box is the audio component of the AJA breakout box. It provides connections for audio I/O. This breakout box connects to the AJA Kona 3G adapter on your workstation. The Kona 3G adapter provides real-time input and output of uncompressed SD and HD video signals as well as audio data at 24-bit resolution. The Kona 3G adapter handles balanced AES/EBU audio signals from the Balanced Audio breakout box.The following diagram illustrates how to connect the Discreet Native Audio hardware components to the AJA breakout box.Connecting StorageRefer to the following diagram to connect the fibre channel cables (loops) coming from your RAID controllers to the workstation’s ATTO FC adapter card, located in slot 4.The fibre channel adapter is equipped with four ports, called loops. You can connect the storage enclosure to the fibre channel card using either 2 loops or 4 loops. A 2-loop device can be connected to either the inner pair of ports or the outer pair of ports. A 4-loop device requires both the inner pair and the outer pair.Calibrating the EIZO CG245W MonitorThe EIZO CG245W is a wide-gamut self-calibrating monitor. As with the previous CG241W model, the gamut is much wider than a video monitor. However, you may also set it up to emulate a video monitor. The Lustre Color user guide has instructions for calibrating the EIZO CG241W monitor for both (native) wide-gamut mode and video mode. These instructions may also be followed for the CG245W.Note the following:The CG245W has a built-in calibration feature, thus you do not need to connect a color measurement device to perform a calibration.The CG241W was calibrated using the EIZO Color Navigator utility running on a computer attached to the monitor via a USB cable. Although Color Navigator may be used in the same way, the CG245W may also be calibrated entirely using the built-in on-screen menus. This means that you do not need a computer to either define calibration targets or execute a calibration.Furthermore, you may switch between wide-gamut and video modes using the M button on the monitor bezel (whereas the CG241W required Color Navigator to switch modes).The CG245W may be set to automatically perform a self-calibration at regularly scheduled times. Please consult the EIZO CG245W user guide for more information.Use the same calibration targets for wide-gamut and video mode for the CG245W as are given for the CG241W in the Lustre Color user guide. The monitor allows up to 3 calibration targets(CAL1, CAL2, CAL3). You may want to setup CAL1 to (native) wide-gamut mode and CAL2 to emulate a video monitor (or vice versa).Autodesk does not recommend using either the sRGB or the rec709 presets that are built into the monitor. Please note that the rec709 mode is quite different from a traditional HD video monitor. However, if you ignore this advice, please at least leave the "Range Extension" option in the monitor's on-screen menus at "Off" (which is its default setting).Configuring the EIZO CG245W MonitorTo accommodate all the refresh rates used by the Creative Finishing software, you need to modify the Range of Frequency settings on the EIZO CG245W monitor.Note: The monitor does not need to be connected to a computer to perform this procedure.1.Ensure the power cable is connected to the monitor.2.Ensure the power switch on the back of the monitor is on.3.Ensure the monitor is turned off. If it is not, press to do so.4.Press and hold down the and buttons for at least 2 seconds.This will enable a hidden menu called Optional Settings.e the and buttons to select the Signal Bandwidth menu item, and press .6.Select DVI-1 and press .7.Select Wide-3 and press .8.Select DVI-2 and press .9.Select Wide-3 and press .10.Select DisplayPort and press .11.Select Wide and press .At this point, the settings should be as follows:12.Press to go back.e the and buttons to select Finish.14.Press to save the configuration.Note: Do not skip this step; otherwise the changes will not be saved.15.The monitor automatically turns off and back on, and the text “Now adjusting” is displayed inthe lower left corner of the screen:16.After a few seconds the monitor returns to normal state and is ready to use.Autodesk, Backburner, Backdraft, Burn, Flame, Flare, Flint, Inferno, Lustre, Smoke, Wiretap and WiretapCentral are registered trademarks or trademarks of Autodesk, Inc., and/or its subsidiaries and/or affiliates in the USA and/or other countries. All other brand names, product names, or trademarks belong to their respective holders. Autodesk reserves the right to alter product and services offerings, and specifications and pricing at any time without notice, and is not responsible for typographical or graphical errors that may appear in this document. © 2011 Autodesk, Inc. All rights reserved.。
HP Z400 工作站 BIOS 说明
HP Z400 工作站 - BIOS 说明本文主要介绍 HP Z400 工作站的 BIOS 说明。
HP Z400 工作站使用 HPBIOS 。
打开机器,当显示 HP 图标画面时按 F10 按键可以进入 BIOS 设置。
进入 BIOS 后先选择 English 进入 BIOS 菜单。
BIOS选项以实际为准。
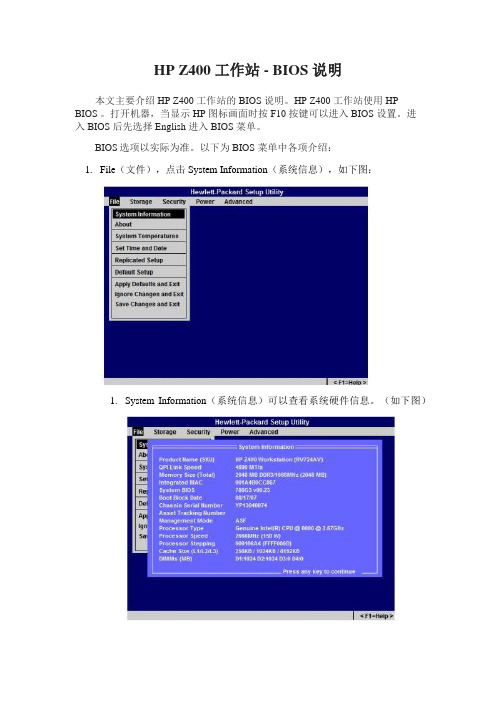
以下为 BIOS 菜单中各项介绍:1.File(文件),点击 System Information(系统信息),如下图:1.System Information(系统信息)可以查看系统硬件信息。
(如下图)2.About (关于)3.System Temperatures (系统温度)4.Set Time and Date (设置时间和日期)使用方向键调整时间,日期,TAB 键切换。
如下图:5.Flash System ROM (刷新 BIOS)可以通过 USB、CD 刷新。
如下图:6.Replicated Setup (复制设置)1.Save to Removable Media (保存到可移动介质):将包括CMOS 在内的系统配置保存到已格式化的 1.44 MB 软盘、USB闪存介质设备或类似软盘的设备。
(设置为模拟软盘驱动器的存储设备)2.Restore from Removable Media (从可移动介质恢复):从软盘、USB 闪存介质设备或类似软盘的设备恢复系统配置。
如下图:7.Default Setup (默认设置)1.Save Current Settings as Default (将当前设置保存为默认设置)2.Restore Factory Settings as Default (将出厂设置恢复为默认设置)如下图:8.Apply Defaults and Exit (应用默认值并退出)应用当前选择的默认设置并清除所有已设置的密码。
9.Ignore Changes and Exit (忽略更改并退出)10.Save Changes and Exit (保存更改并退出)如下图:2.Storage (存储)如下图:1.Device Configuration (设备配置)1.Hard Disk 硬盘驱动器,进入可以看到硬盘信息。
惠普笔记本主板bios设置图解教程
惠普笔记本主板bios设置图解教程
惠普电脑bios设置如何进入bios设置?在BIOS模式下USB的启动热键是什么?接下来是小编为大家收集的惠普笔记本主板bios设置图解教程,欢迎大家阅读:
惠普笔记本主板bios设置图解教程
1、Phoenix – AwardBIOS(2010年之后的电脑):
2、旧的Award BIOS(2009年电脑主板):
3、2002年电脑主板的一款BIOS:
1、Phoenix – AwardBIOS(2010年之后的电脑设置方法):
上图1:开机时按住Del键进入到该电脑的BIOS设置界面,选择高级BIOS设置Advanced BIOS Features。
上图2:在进入高级BIOS设置(Advanced BIOS Features)界面后,首先要选择硬盘启动优先级:Hard Disk Boot Priority。
上图3:在进入到硬盘启动优先级(Hard Disk Boot Priority)界面后,需使用小键盘上的加减符号(+、-)来选择与移动设备,要将U盘选择在最上面。
然后,按住ESC键退出,这时会回到图2的设置界面。
上图4:完成上一步后,再选择第一启动设备(First Boot Device):该版本的BIOS这里没有U盘的“USB-HDD”、“USB-ZIP”同类的选项,选择移动设备“Removable”也不能正常启动。
但是,选择“Hard Disk”就可以启动电脑。
看了“惠普笔记本主板bios设置图解教程”还想看:。
hp笔记本进入bios

hp笔记本进入biosHP笔记本进入BIOS的方法及步骤详解摘要:想要进入HP笔记本的BIOS来进行系统设置和配置,各种型号的HP笔记本都有着不同的进入方式。
本文将为你详细介绍几种常见的HP笔记本进入BIOS的方法及步骤。
引言:BIOS(Basic Input/Output System)是计算机硬件和软件之间的桥梁,它负责初始化硬件设备,启动操作系统,并提供一些基本的硬件控制和配置功能。
进入BIOS界面可以让我们对电脑的硬件进行设置和调整。
对于HP笔记本用户来说,进入BIOS也是必备的技巧之一。
下面我们将详细解释几种进入HP笔记本BIOS的方法。
方法一:使用快捷键进入HP笔记本BIOS大多数HP笔记本都支持通过按下特定的快捷键来进入BIOS。
不同型号的HP笔记本所使用的快捷键可能不同,但以下介绍的方法几乎适用于所有型号的HP笔记本。
步骤一:首先,关闭你的HP笔记本电脑。
步骤二:按住并保持按下电源按钮。
同时按下F10键(有些型号的HP笔记本也可能是F2或F6键)。
步骤三:继续按住这两个键,直到你看到BIOS界面出现在屏幕上。
方法二:通过Windows 10的高级启动选项进入HP笔记本BIOS如果你使用的是Windows 10操作系统,另一种进入HP笔记本BIOS的方法是通过Windows 10的高级启动选项。
步骤一:首先,打开“开始菜单”并点击“电源”图标。
步骤二:按住“Shift”键并同时点击“重新启动”。
步骤三:在重启后,你将看到一个蓝色的屏幕,上面显示了一些选项。
点击“疑难解答”。
步骤四:在“疑难解答”菜单中,选择“高级选项”。
步骤五:接下来,选择“固件设置”。
步骤六:现在,你的笔记本将重新启动,进入BIOS界面。
方法三:通过HP UEFI硬件诊断工具进入HP笔记本BIOS对于HP笔记本的部分型号,可以使用HP UEFI硬件诊断工具进入BIOS。
步骤一:首先,打开“开始菜单”并搜索“HP UEFI硬件诊断”。
惠普笔记本主板BIOS设置

惠普笔记本主板BIOS设置惠普(HP)公司是面向个人用户大中小型企业和研究机构的全球技术解决方案提供商。
那么你知道惠普笔记本主板BIOS怎么设置么?接下来是小编为大家收集的惠普笔记本主板BIOS设置,欢迎大家阅读:惠普笔记本主板BIOS设置一、惠普电脑bios设置如何进入bios设置?在BIOS模式下USB 的启动热键是什么?用户可以根据不同的电脑型号,选择相应的热键,直接启动一键U盘装系统工具设置(重要提示:在选择启动热键前,需先插入U盘方可)组装机主板品牌笔记本品牌台式机主板品牌启动按键笔记本品牌启动按键台式机品牌启动按键华硕主板F8联想笔记本F12联想台式机F12技嘉主板F12宏基笔记本F12惠普台式机F12微星主板F11华硕笔记本ESC宏基台式机F12映泰主板F9惠普笔记本F9戴尔台式机ESC梅捷主板ESC或F12联想ThinkpadF12神舟台式机F12七彩虹主板ESC或F11戴尔笔记本F12华硕台式机F8华擎主板F11神舟笔记本F12方正台式机F12斯巴达卡主板ESC东芝笔记本F12清华同方台式机F12昂达主板F11三星笔记本F12海尔台式机F12双敏主板ESCIBM笔记本F12明基台式机F8翔升主板F10富士通笔记本F12精英主板ESC或F11海尔笔记本F12冠盟主板F11或F12方正笔记本F12富士康主板ESC或F12清华同方笔记本F12顶星主板F11或F12微星笔记本F11铭瑄主板ESC明基笔记本F9盈通主板F8技嘉笔记本F12捷波主板ESCGateway笔记本F12Intel主板F12eMachines笔记本F12杰微主板ESC或F8索尼笔记本ESC致铭主板F12苹果笔记本长按“option”键磐英主板ESC磐正主板ESC冠铭主板F9注意:上述未提到的电脑机型请尝试或参考相同的品牌常用启动热键(注意:苹果笔记本在开机或重启时只要按住“option”键【即Alt键】不放,便可进入选择启动方式。
[hp主板bios设置]hp主板bios设置方法
![[hp主板bios设置]hp主板bios设置方法](https://img.taocdn.com/s3/m/f618cd9c6c175f0e7dd13727.png)
本文整理于网络,仅供阅读参考
[hp主板bios设置]hp主板bios设置方法
hp主板bios设置方法:
按开机键,等待电脑出现开机画面的时候按“detele”键进入bios设置界面,然后在打开的bios设置界面中,切换到“boot”栏界面,然后移动光标选择“hard disk drives”回车确认。
在打开的hard disk drives界面中,移动光标选择“1st drive”回车确认,在弹出的小窗口中选择u盘启动回车确认。
完成hard disk drives设置之后,返回到“boot”栏界面,移动光标选择“boot device priority”回车确认。
在打开的boot device priority设置界面中,移动光标选择“1st boot device(第一启动项)”回车确认,在弹出的小窗口中选择u盘启动即可,完成所有设置之后,按f10键保存并且重启电脑。
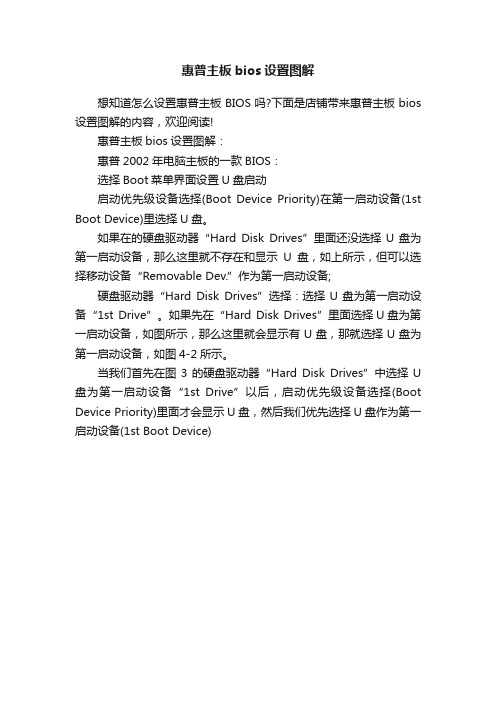
惠普主板bios设置图解
惠普主板bios设置图解
想知道怎么设置惠普主板BIOS吗?下面是店铺带来惠普主板bios 设置图解的内容,欢迎阅读!
惠普主板bios设置图解:
惠普2002年电脑主板的一款BIOS:
选择Boot菜单界面设置U盘启动
启动优先级设备选择(Boot Device Priority)在第一启动设备(1st Boot Device)里选择U盘。
如果在的硬盘驱动器“Hard Disk Drives”里面还没选择U盘为第一启动设备,那么这里就不存在和显示U盘,如上所示,但可以选择移动设备“Removable Dev.”作为第一启动设备;
硬盘驱动器“Hard Disk Drives”选择:选择U盘为第一启动设备“1st Drive”。
如果先在“Hard Disk Drives”里面选择U盘为第一启动设备,如图所示,那么这里就会显示有U盘,那就选择U盘为第一启动设备,如图4-2所示。
当我们首先在图3的硬盘驱动器“Hard Disk Drives”中选择U 盘为第一启动设备“1st Drive”以后,启动优先级设备选择(Boot Device Priority)里面才会显示U盘,然后我们优先选择U盘作为第一启动设备(1st Boot Device)。
HP工作站 BIOS说明书 适用Z228 Z440 Z230 Z640 Z840 Z800 Z620 Z420 Z820主板设置
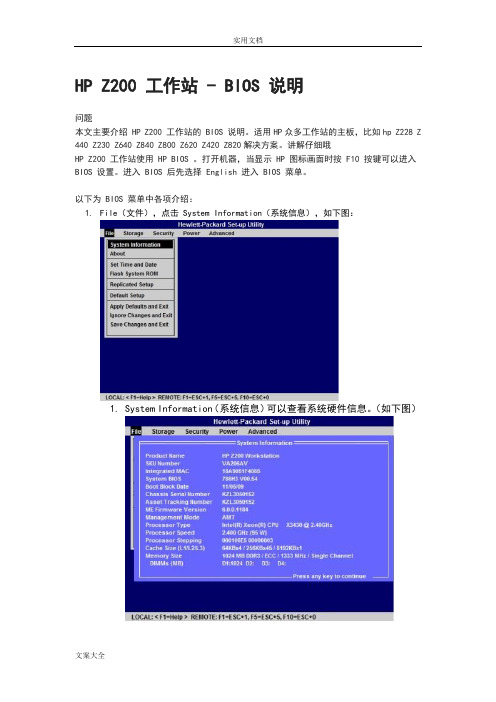
HP Z200 工作站 - BIOS 说明问题本文主要介绍 HP Z200 工作站的 BIOS 说明。
适用HP众多工作站的主板,比如hp Z228 Z 440 Z230 Z640 Z840 Z800 Z620 Z420 Z820解决方案。
讲解仔细哦HP Z200 工作站使用 HP BIOS 。
打开机器,当显示 HP 图标画面时按 F10 按键可以进入BIOS 设置。
进入 BIOS 后先选择 English 进入 BIOS 菜单。
以下为 BIOS 菜单中各项介绍:1.File(文件),点击 System Information(系统信息),如下图:1.System Information(系统信息)可以查看系统硬件信息。
(如下图)2.About (关于)3.Set Time and Date (设置时间和日期)使用方向键调整时间,日期,TAB 键切换。
如下图:4.Flash System ROM (刷新 BIOS)可以通过 USB,CD 刷新。
如下图:5.Replicated Setup (复制设置)1.Save to Removable Media (保存到可移动介质):将包括 CMOS 在内的系统配置保存到已格式化的 1.44 MB 软盘、USB 闪存介质设备或类似软盘的设备。
(设置为模拟软盘驱动器的存储设备)2.Restore from Removable Media (从可移动介质恢复):从软盘、USB闪存介质设备或类似软盘的设备恢复系统配置。
如下图:6.Default Setup (默认设置)1.Save Current Settings as Default (将当前设置保存为默认设置)2.Restore Factory Settings as Default (将出厂设置恢复为默认设置)如下图:7.Apply Defaults and Exit (应用默认值并退出)应用当前选择的默认设置并清除所有已设置的密码。
惠普笔记本进入BIOS的方法
惠普笔记本进入BIOS的方法在惠普笔记本中,有几种方法可以进入BIOS。
下面将详细介绍这些方法。
方法一:使用BIOS启动键1.关闭电脑,然后按住电源按钮,以确保电脑完全关闭。
2.找到笔记本上的BIOS启动键,通常是F2、F10、F12或ESC键。
在不同的惠普笔记本电脑型号中,可能会有所不同,建议查找相关文档或惠普官方网站以获取正确的BIOS启动键。
3.打开电脑,然后立即按下并持续按住BIOS启动键。
要在正确的时间按下键是关键,因为如果等待太久,计算机可能已经开始引导操作系统。
4.在屏幕上,您将看到一条消息,指示您按下一些键以访问BIOS设置。
按照提示并按下相应的键(可能是F1或DEL键)即可进入BIOS。
方法二:使用操作系统设置1. 打开Windows 10的“开始菜单”并点击“设置”图标。
您还可以使用快捷键Win + I来直接打开设置。
2.在“设置”窗口中,选择“更新和安全”。
3.在左侧面板中,点击“恢复”选项。
4.在右侧面板中,找到“高级启动”部分的“重新启动立即进入UEFI固件设置”链接,然后点击该链接。
5.计算机将重新启动并直接进入BIOS。
方法三:使用惠普启动工具1.打开惠普笔记本电脑,并立即按下F9键。
这将启动惠普启动工具。
2.在“启动设备”菜单中,选择“UEFI固件设置”选项。
3.点击“回车”键即可进入BIOS。
无论您使用哪种方法,一旦成功进入BIOS,您将面对一个简单而又功能强大的用户界面。
在BIOS中,您可以调整各种设置,例如启动顺序、系统时间和日期、管理密码等。
总之,了解如何进入BIOS对于惠普笔记本电脑的用户来说非常重要。
通过按下BIOS启动键、使用操作系统设置或惠普启动工具,您可以轻松地访问BIOS,并根据需要进行设置和配置。
- 1、下载文档前请自行甄别文档内容的完整性,平台不提供额外的编辑、内容补充、找答案等附加服务。
- 2、"仅部分预览"的文档,不可在线预览部分如存在完整性等问题,可反馈申请退款(可完整预览的文档不适用该条件!)。
- 3、如文档侵犯您的权益,请联系客服反馈,我们会尽快为您处理(人工客服工作时间:9:00-18:30)。
HP Z200 工作站- BIOS 说明问题本文主要介绍 HP Z200 工作站的BIOS 说明。
适用HP众多工作站的主板,比如hp Z228 Z 440 Z230 Z640 Z840 Z800 Z620 Z420 Z820解决方案。
讲解仔细哦HP Z200 工作站使用HP BIOS 。
打开机器,当显示HP 图标画面时按 F10 按键可以进入BIOS 设置。
进入BIOS 后先选择English 进入BIOS 菜单。
以下为BIOS 菜单中各项介绍:1.File(文件),点击System Information(系统信息),如下图:1.System Information(系统信息)可以查看系统硬件信息。
(如下图)2.About (关于)3.Set Time and Date (设置时间和日期)使用方向键调整时间,日期,TAB 键切换。
如下图:4.Flash System ROM (刷新BIOS)可以通过USB,CD 刷新。
如下图:5.Replicated Setup (复制设置)1.Save to Removable Media (保存到可移动介质):将包括CMOS 在内的系统配置保存到已格式化的 1.44 MB 软盘、USB 闪存介质设备或类似软盘的设备。
(设置为模拟软盘驱动器的存储设备)2.Restore from Removable Media (从可移动介质恢复):从软盘、USB 闪存介质设备或类似软盘的设备恢复系统配置。
如下图:6.Default Setup (默认设置)1.Save Current Settings as Default (将当前设置保存为默认设置)2.Restore Factory Settings as Default (将出厂设置恢复为默认设置)如下图:7.Apply Defaults and Exit (应用默认值并退出)应用当前选择的默认设置并清除所有已设置的密码。
Ignore Changes and Exit (忽略更改并退出)Save Changes and Exit (保存更改并退出)如下图:2.Storage (存储)如下图:1.Device Configuration (设备配置)1.Hard Disk 硬盘驱动器,进入可以看到硬盘信息。
(硬盘模式为IDE 模式才能看到此项)2.CD-ROM 介绍光驱信息。
3.Default Values 默认值是SATA 模式。
如下图:2.Storage Options (存储器选项)1.Removable Media Boot (可移动介质引导),可以启用/禁用从可移动介质引导系统的功能。
2.eSATA Port 允许用户定义 SATA 接口为eSATA 接口使用。
3.SATA Emulation (SATA仿真),支持的选项有以下两种:RAID+AHCI、IDE。
如下图:3.DPS Self-Test (DPS 自测)Select a Drive 用于具备执行驱动器保护系统自测功能的 SATA 硬盘驱动器上执行自测,只有硬盘模式为IDE 模式下有此选项。
如下图:4.Boot Order (引导顺序)ATAPI CD-ROM Drive CD-ROM 驱动器。
USB Device USB 驱动器。
Hard Drive 硬盘驱动器。
Integrated SATA 集成的SATA。
Network Controller 网络控制器。
如下图:3.Security (安全)如下图:1.Setup Password (设置密码),用于设定和启用设置(管理员)密码。
2.Power-On Password (开机密码),用于设定开机密码。
3.Password Options (密码配置),在设置密码后会出现此选项。
1.Lock Legacy Resources (锁定传统资源),设定设置密码时显示。
work Server Mode 启用/ 禁用网络服务器模式。
(设置开机密码时显示)3.Password Prompt on Warm Boot 指定热启动(Ctrl+Alt+Delete)是否需要密码。
(设置开机密码时显示)4.Setup Browse Mode 启用/ 禁用设置浏览模式。
(设置开机密码时显示)(如果没有输入设置密码,则允许查看但不能更改F10 按键设置选项)5.Stringent Password 启用/ 禁用通过主板密码跳线清除密码。
(设置开机密码时显示)如下图:4.Smart Cover (机盖锁)锁定/ 解除锁定机盖锁。
5.Device Security (设备安全保护)如下图:B Security USB (USB 安全保护)如下图:7.Slot Security PCI (接口安全保护)如下图:work Service Boot (网络服务引导)启用/ 禁用计算机从网络服务器上所安装的操作系统进行引导的功能。
(此功能只适用于装有网卡的机型,网络控制器必须是PCI 扩展卡或嵌入主板。
)如下图:9.System IDs (系统标识)Enter Asset Tag 资产标签(18 字节的标识符),是公司指定给此计算机的资产标识号。
Enter Ownership Tag 开机自测期间显示的物主标签(80 字节的标识符)。
Enter UUID 机箱序列号或通用唯一标识 (UUID) 号。
只有当前的机箱序列号无效时才能更新UUID。
(这些标识号通常是在出厂时设置的,可用作系统的唯一标识。
)Keyboard 系统标识项的键盘区域设置(例如,英语或德语)。
如下图:10.DriveLock Security (驱动器锁安全保护)用于指定或修改硬盘驱动器的管理员密码或用户密码。
一旦启用了此功能,便会在开机自测期间提示用户输入一种驱动器锁密码。
如果未能成功地输入任何一种密码,则必须进行冷引导,并成功地输入其中一个密码,才能访问硬盘驱动器。
注意:只有当至少有一个支持驱动器锁功能的驱动器连接到系统时,才会显示该选项。
如下图:11.System Security (操作系统安全保护)1.Data Execution Prevention (数据执行预防)、Enable/Disable(启用/ 禁用),帮助防止操作系统出现安全漏洞。
2.Virtualization Technology(VTx) (虚拟化技术)、Enable/Disable(启用/ 禁用),用于控制处理器的虚拟化功能。
更改此设置需要先关闭计算机然后再打开。
3.Virtualization Technology Directed I/O(VTd) (虚拟化技术定向I/O)、Enable/Disable(启用/ 禁用),用于控制芯片组的虚拟化DMA 重映射功能。
更改此设置需要先关闭计算机然后再打开。
如下图:12.Master Boot Record Security (主引导记录安全保护)主引导记录安全保护(启用/禁用)Enable/Disable如下图:13.Setup Security Level (设置安全级别)提供一种方法,使最终用户拥有一定的权限更改指定的设置选项而无需知道设置密码。
该功能可以使管理员灵活保护对基本设置选项的更改,同时允许用户查看系统设置并配置非重要的选项。
管理员通过Setup Security Level (设置安全级别)菜单按情况指定对独立设置选项的访问权限。
默认情况下,所有设置选项都指定设置密码,指明用户必须在开机自测时输入正确的设置密码才能对任何选项进行更改。
管理员可以将独立项设置为 None(无),指明用无效密码访问设置的用户只能对指定的选项进行更改。
如果启用了开机密码,则选项None(无)将被开机密码替代。
如下图:4.Power (电源)1.OS Power Management (操作系统电源管理)1.Runtime Power Management— Enable/Disable(运行时电源管理-启用/禁用)。
允许某些操作系统在当前软件负载不需要使用处理器的全部能力时降低处理器的电压和频率。
2.Idle Power Savings(节省闲置时功耗)。
在处理器闲置时,允许某些操作系统降低处理器功耗。
3.ACPI S3 Hard Disk Reset(ACPI S3 硬盘重置),启用此选项使 BIOS 能够确保硬盘在从S3 恢复之后,将控制返还给操作系统之前可以接受命令。
4.ACPI S3 PS2 Mouse Wakeup(ACPI S3 PS2 鼠标唤醒),启用或禁用通过PS2 鼠标活动从S3 唤醒的功能。
5.Unique Sleep State Blink Rates (唯一睡眠状态闪烁速率)、Enable/Disable(启用/禁用),此功能用于为用户提供系统所处的睡眠状态的可视提示。
每个睡眠状态都有一种唯一的闪烁模式。
如下图:2.Hardware Power Management (硬件电源管理)SATA Power Management (SATA 电源管理),用于启用或禁用SATA 总线或设备电源管理。
Eup Compliance Mode (符合EuP 模式),EuP 模式启用/禁用。
如下图:3.Thermal (热量)Fan idle Mode 设置风扇的转速可以使用左右键调整大小,最大7 格。
如下图:5.Advanced (高级)如下图:1.Power-On Options (开机选项)1.POST Mode 开机自测模式:QuickBoot(快速引导)、ClearMemory(清除内存)、FullBoot(全面引导)或FullBoot Everyx Days。
(每x 天运行一次全面引导)2.POST Messages (开机自测消息)、(启用/ 禁用)Enable/Disable。
3.F9 Prompt (F9 提示)、Displayer/Hidden(隐藏/ 显示),启用此功能后将在开机自测期间显示文本消息F9 = BootMenu(F9 = 引导菜单)。
4.F10 Prompt (F10 提示)、Displayer/Hidden(隐藏/ 显示),启用此功能后将在开机自测期间显示文本消息F10 = Setup(F10 =设置)。
5.F11 Prompt (F11 提示)、Displayer/Hidden(隐藏/ 显示),如果将此功能设置为显示,会在开机自测期间显示文本消息F11 =Recovery(F11 = 恢复)。
6.F12 Prompt (F12 提示)、Displayer/Hidden(隐藏/ 显示),启用此功能后将在开机自测期间显示文本消息F12 = Network (F12= 网络)。
