PULSAR脉冲星单筒数码夜视仪860RT#78093详细介绍说明
主动式红外夜视仪
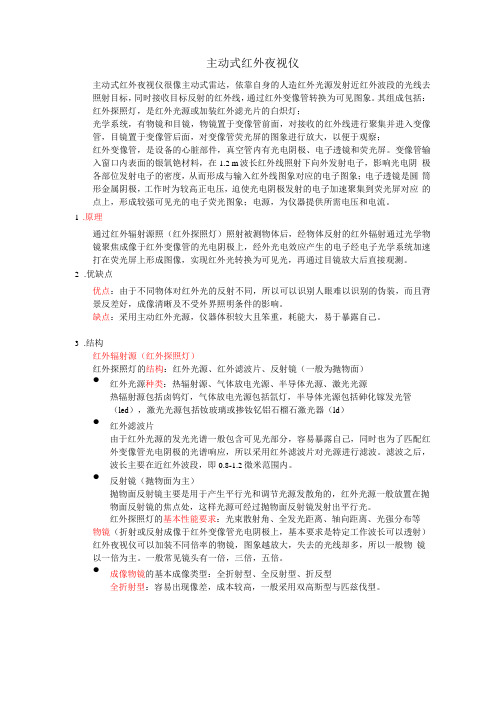
主动式红外夜视仪主动式红外夜视仪很像主动式雷达,依靠自身的人造红外光源发射近红外波段的光线去照射目标,同时接收目标反射的红外线,通过红外变像管转换为可见图象。
其组成包括:红外探照灯,是红外光源或加装红外滤光片的白炽灯;光学系统,有物镜和目镜,物镜置于变像管前面,对接收的红外线进行聚集并进入变像管,目镜置于变像管后面,对变像管荧光屏的图象进行放大,以便于观察;红外变像管,是设备的心脏部件,真空管内有光电阴极、电子透镜和荧光屏。
变像管输入窗口内表面的银氧铯材料,在1.2 m波长红外线照射下向外发射电子,影响光电阴极各部位发射电子的密度,从而形成与输入红外线图象对应的电子图象;电子透镜是圆筒形金属阴极,工作时为较高正电压,迫使光电阴极发射的电子加速聚集到荧光屏对应的点上,形成较强可见光的电子荧光图象;电源,为仪器提供所需电压和电流。
1.原理通过红外辐射源照(红外探照灯)照射被测物体后,经物体反射的红外辐射通过光学物镜聚焦成像于红外变像管的光电阴极上,经外光电效应产生的电子经电子光学系统加速打在荧光屏上形成图像,实现红外光转换为可见光,再通过目镜放大后直接观测。
2.优缺点优点:由于不同物体对红外光的反射不同,所以可以识别人眼难以识别的伪装,而且背景反差好,成像清晰及不受外界照明条件的影响。
缺点:采用主动红外光源,仪器体积较大且笨重,耗能大,易于暴露自己。
3.结构红外辐射源(红外探照灯)红外探照灯的结构:红外光源、红外滤波片、反射镜(一般为抛物面)•红外光源种类:热辐射源、气体放电光源、半导体光源、激光光源热辐射源包括卤钨灯,气体放电光源包括氙灯,半导体光源包括砷化镓发光管(led),激光光源包括钕玻璃或掺钕钇铝石榴石激光器(ld)•红外滤波片由于红外光源的发光光谱一般包含可见光部分,容易暴露自己,同时也为了匹配红外变像管光电阴极的光谱响应,所以采用红外滤波片对光源进行滤波。
滤波之后,波长主要在近红外波段,即0.8-1.2微米范围内。
红外夜视仪报价

红外夜视仪报价红外线夜视仪已经逐渐的深入到我们工作和生活中,但是大家对红外线夜视仪都不了解,往往在购买时都不知如何选择,红外夜视仪报价也有很多,究竟什么样的价格是最合理的,什么样的红外夜视仪是效果是适合自己使用,如何能花个好价格买个好的红外夜视仪呢?本文就目前市场上外线夜视仪的性能,品牌及价格方面进行一个大致的了解,现在介绍给大家,希望对大家有所帮助。
一、红外夜视仪价格红外线夜视仪的价格从千元到近10万元,从价格上大概可以这样分类:1.1代单筒夜视仪价格一般在1000-3000元。
2.1代双筒夜视仪价格一般在3000-10000元3.数码夜视仪价格一般在3000-10000元4.1代头盔单筒夜视仪价格一般在2000-4000元5.2代单筒夜视仪价格一般在10000-40000元6.2代双筒夜视仪价格一般在30000-60000元7.3代及4代夜视仪价格一般在5万元以上。
具体的各个品牌和型号上会有较大区别,以上所分的价格就是包含在不同品牌之上的。
如果消费者要购买红外夜视仪就可以从以上这价格分类选购什么样的夜视仪,其实主要还是要看观测效果,效果是决定一切的。
笔者写这篇文章,也是因为最近为公司采购了一批专业夜视仪,把自己的所经历的、如何选购价格合适的机子,来给大家分享。
由于之前对夜视仪不懂,所以选购起来比较麻烦,又难以下手,领导的要求就是一定要选效果好的,价格没有关系,几千几万的都行,当然能够满足工作要求的情况下,省钱也是第一原则。
所以我硬着头皮接受了这项任务。
第一步是在网上找资料,对夜视仪进行了解。
夜视仪的原理,夜视仪的各款型号、品牌的介绍,以及购买过的客户评论,知道了以下的基本概念:1.红外线夜视仪分为1-4代,代数越高,理论上越清晰,看得越远2.市面上的基本的夜视仪是在二代+上面居多,但是有一代的夜视仪,销量也很大,主是要个人用户居多使。
购买夜视仪主要不是看指标,指标是没什么用的,主要是看效果,所以这次选购的夜视仪我还是想去现场看效果。
PULSAR脉冲星单筒数码夜视仪860RT#78093详细介绍说明

PULSAR脉冲星单筒数码夜视仪860RT#78093详细介绍说明全文介绍:数码夜视仪作为全新的高科技夜视设备,已经在我们当今社会各行业得到了广泛应用。
本文根据作者亲身购买体验,对比了目前市场上主流的两款单筒数码夜视仪:PULSAR 脉冲星860RT和ORPHA奥尔法CS-8。
户外拍照摄影是我的个人爱好,平时车的后备箱里必备各种摄影装备。
车开到哪里发现美景及时记录下来,相信这种感受和我同样爱好的人必有体会。
白天拍摄还好,只是夜间拍摄的话是非常困难的事情。
相机或者摄像机的红外夜视距离太短,无法将远距离的目标拍摄下来。
于是花了很长的时间来解决这个问题。
最近在网上搜了一下,发现一种非常好的设备,数码夜视仪。
数码夜视仪可以说是夜视仪和相机的结合体。
既可以夜间观看用,又能将观看到的影像拍摄记录下来。
户外夜间拍摄,带着这种设备,可谓一举多得。
下面我把我这段时间对于数码夜视仪的知识分享给大家,提供给需要这类仪器的人考虑。
具体情况如下。
一、数码夜视仪的基本知识1、数码夜视仪的分类数码夜视仪从分类上看,可以非为单目单筒数码夜视仪和双目双筒数码夜视仪。
从观看使用的舒适度来说,双目双筒数码夜视仪更加适合。
但是从便携性的角度来说,单目单筒的数码夜视仪更加小巧轻便,更适合户外使用。
2、数码夜视仪的品牌国外专业数码夜视仪品牌并不是很多,国际一线品牌只有美国ORPHA奥尔法和俄罗斯PULSAR脉冲星,虽然同属高端夜视仪品牌,但是性能效果却大不相同。
另外国内还有一些双目双筒的夜视仪品牌,从网上查阅对比后发现这些小品牌相对与国际一线品牌在价格方面确实便宜不少,不过查看真实买家评论及网友留言后得知,这类小品牌大部分都是属于线上品牌,而且产品反应效果差,容易坏,后期维护困难重重。
所以我决定还是购买大品牌的数码夜视仪,毕竟也属于电子产品,质量效果和售后都有保障。
所以我详细了解了美国ORPHA奥尔法和俄罗斯PULSAR脉冲星这两个品牌。
数码夜视仪NV008S NV008S-LRF使用说明书
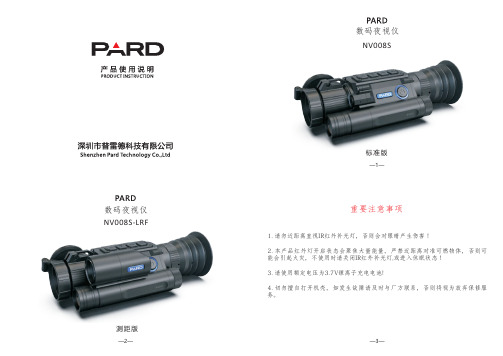
重要注意事项1. 请勿近距离直视IR 红外补光灯,否则会对眼睛产生伤害!2. 本产品红外灯开启状态会聚焦大量能量,严禁近距离对准可燃物体,否则可能会引起火灾,不使用时请关闭IR 红外补光灯,或进入休眠状态!3. 请使用额定电压为3.7V 锂离子充电电池!4. 切勿擅自打开机壳,如发生故障请及时与厂方联系,否则将视为放弃保修服务。
—1—测距版数码夜视仪标准版NV008S数码夜视仪NV008S-LRF录像/OK/测距键开箱说明安装说明1.电池安装2.调试打开包装盒,内含夜视仪主机一台,双钉夹、六角扳手、18650 3.7V可充电锂电池各一个,以及数据线一条。
本产品不包含内存卡,若要使用拍照录像等功能需自行准备一张TF卡(最大支持128G)!拧开电池盖,使用额定电压为3.7v的平头18650锂离子充电电池一节正极朝内安装好,保证电池盖拧紧。
安装好电池开机后,首先调节屈光度,旋转夜视仪目镜屈光度调节轮直到能看清屏幕上的四角文字图标(无需看清图像)即可,接下来调夜视仪物镜调焦轮直到看清想要看清的目标;切换不同的模式并测试红外补光灯以及红点指示灯,测距版进行测距测试。
红外IR伸缩补光灯电池盖目调焦轮镜物镜调焦轮物镜镜头测距模块(测距版独有)按键板镜头盖放大(+)/播放键IR/模式切换/键(-)红点指示(PIP)/菜单键休眠/电源键TF卡卡槽Tpye-C 充电口红点指示调节口红点指示灯电源指示灯测距发射窗口测距接收窗口—4——5——8——9—3.夹具安装使用说明1.开/关机:2.休眠:3.目镜调焦:4.物镜对焦5.补光调节6.红点指示调节7.菜单操作3>画中画夜视仪下方有5个螺丝孔,根据需要使用六角扳手固定好夹具, 夹具位置可以通过固定螺丝适当调整位置,双钉夹适用多种类型的导轨。
单次按击电源键即可开机,长按电源键关机,开机/休眠状态电源指示灯长亮。
开机状态下单次按击休眠键进入休眠/唤醒,休眠模式电源指示灯常亮。
便携式夜视望远镜
便携式夜视望远镜便携式夜视望远镜原理就是将来自目标的人眼看不见的光(微光或红外光)信号转换成为电信号,然后再把电信号放大,并把电信号转换成人眼可见的光信号。
专业讲:红外夜视仪原理就是通过目镜将光线聚焦在影象增强器上来采集和增强现有光线,在增强器内部,一个光电阴极会被光“激活”,并将光子能量转变成电子,这些电子经过一个位于增强器内部的静电区域被加速后,撞击在磷表面屏幕上(就好象一个绿色的电视屏幕),形成人眼可见的图象。
经过对电子的加速,增强了亮度和图象的清晰度。
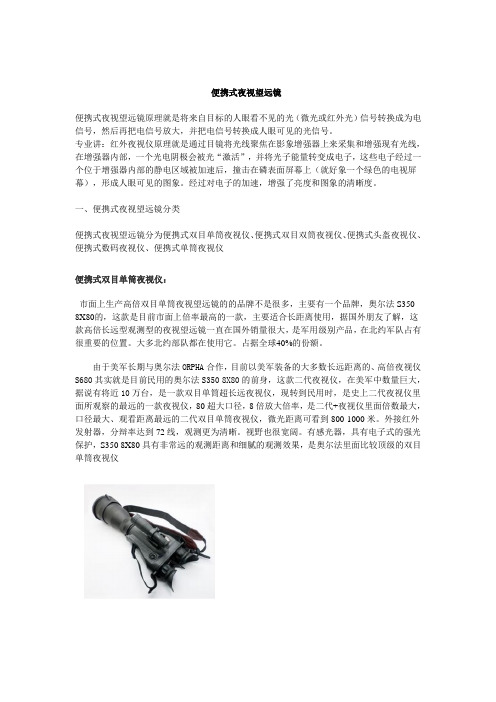
一、便携式夜视望远镜分类便携式夜视望远镜分为便携式双目单筒夜视仪、便携式双目双筒夜视仪、便携式头盔夜视仪、便携式数码夜视仪、便携式单筒夜视仪便携式双目单筒夜视仪:市面上生产高倍双目单筒夜视望远镜的的品牌不是很多,主要有一个品牌,奥尔法S350 8X80的,这款是目前市面上倍率最高的一款,主要适合长距离使用,据国外朋友了解,这款高倍长远型观测型的夜视望远镜一直在国外销量很大,是军用级别产品,在北约军队占有很重要的位置。
大多北约部队都在使用它。
占据全球40%的份额。
由于美军长期与奥尔法ORPHA合作,目前以美军装备的大多数长远距离的、高倍夜视仪S680其实就是目前民用的奥尔法S350 8X80的前身,这款二代夜视仪,在美军中数量巨大,据说有将近10万台,是一款双目单筒超长远夜视仪,现转到民用时,是史上二代夜视仪里面所观察的最远的一款夜视仪,80超大口径,8倍放大倍率,是二代+夜视仪里面倍数最大,口径最大、观看距离最远的二代双目单筒夜视仪,微光距离可看到800-1000米。
外接红外发射器,分辩率达到72线,观测更为清晰。
视野也很宽阔。
有感光器,具有电子式的强光保护,S350 8X80具有非常远的观测距离和细腻的观测效果,是奥尔法里面比较顶级的双目单筒夜视仪便携式双目双筒夜视仪:目前市面上的双目双筒夜视仪二代+很少,大多数品牌还是以单筒的二代+为主,但还是有个别消费者选择双目双筒望远镜式夜视仪,因为二代+双目双筒望远镜式夜视仪相对价格比较高,是属于二代+里面最高的一款,双目双筒夜视仪最为知名的品牌是RNO、ORPHA作为一个以高档夜视仪作为主力产品的品牌。
军用夜视仪

军用夜视仪夜视仪从其诞生那天开始,就与军队有关。
最早就是因为军队需要晚上的夜视设备,夜视仪才营运而生。
最为一种高隐蔽性的观察设备,夜视仪一直广泛被军方采购。
现在民用夜视仪很多品牌,比如奥尔法等品牌,其背景都是军工企业,其顶尖产品,都主要未军方定制。
那到底什么是军用夜视仪,军用夜视仪和民用夜视仪是否有区别呢?军用夜视仪的主要应具备以下特点:1.高隐蔽性军用夜视仪要求必须有高隐蔽性,这就要求军用夜视仪绝对不能被对方发现。
由于红外辅助光源,虽然发出的红外光肉眼不可见,但是红外发射器发射红外光,从远处看是能看到红外发射器上发光点。
所以军用夜视仪要求在使用的时候绝对不能使用红外发射器作为辅助光源。
所以部分军用夜视仪都不配备红外发射器,大多配备红外发射器的军用夜视仪,配备的红外发射器都非常小,最远距离在10-20米。
这种小型的红外发射器,由于非常小,肉眼基本不可见,除非距离在几米内才能发现。
军用夜视仪配备的这种红外发射器主要是为了在全黑的情况行军使用,军方要求在观察敌人时,也不能使用,以防万一被敌人发现。
2.高清晰度,远距离军用夜视仪发展到现在,对其清晰度要求越来越高,所以军用夜视仪都选用的是二代及以上增像管。
目前一代夜视仪,已经不被军方采购,一代夜视仪由于大多数情况下都需要使用红外发射器,所以不能被军方选中。
西方及美国这几年采购的军用夜视仪,已经开始大批采购3代和4代的夜视仪,由于成本原因,虽然2代夜视仪被军方采购的数量依然最大,但是3,4代的成长速度非常快。
全球最大的军用夜视仪供货商,比如德国奥尔法,美国RNO 生产的3代和4代夜视仪都是全部供应给军方的。
目前,美国和西方是禁止向中国供应3代和4代的夜视仪,所以在我国,市面上销售的夜视仪是没有3代和4代产品的。
不过,从效果上来说,二代夜视仪与一代夜视仪相比,有质的飞跃。
但是3,4代相对2代夜视仪并没有质的飞跃,3,4代相对2代夜视仪更多是解决边缘扭变和清晰度下降的问题。
俄罗斯Yukon育空数码夜视仪产品详细说明

俄罗斯Yukon育空数码夜视仪产品详细说明YUKON育空数码夜视仪作为目前国内较受欢迎的产品,其型号和功能特点一直以来不被众人熟知,今天整理了一下相关的品牌和产品的相关知识与大家一起分享,希望对于您选购这个品牌或者数码夜视仪产品的时候有所帮助。
一、YUKON育空数码夜视仪发展历史YUKON育空光学公司成立以来,一直是以生产望远镜来产品为主。
但是随着时代发展,到了2003年,数字设备的开发,第一代数码夜视仪Ranger 5x42和Ranger Pro 5x42面市。
2006 - 2008年,光学设备的产品范围得到了显着扩展,包括数字化,以及构建了一系列夜视设备和瞄准镜,构成了新商标Pulsar的基础。
Pulsar脉冲星品牌产品中数码夜视仪也是重要组成部分。
(关于脉冲星品牌的数码夜视仪这里不做详细说明,感兴趣的话可以搜索一下这个品牌的数码夜视仪的相关文章。
)在接下来的几年里,该公司推出了许多新的型号的数码夜视仪,但是大部分还是集中在Pulsar脉冲星品牌方向,对于YUKON育空品牌旗下的数码夜视仪产品也有一定的改良和升级。
其中包括Ranger LT 6.5x42 (discontinued)、Ranger RT 6.5x42、Ranger RT 6.5x42S、Signal N320 RT、Signal N340 RT。
目前,Yukon Advanced Optics Worldwide公司是国内二代数码夜视仪主要的开发商和制造商之一。
二、YUKON育空数码夜视仪技术说明数字夜视技术的应用是Yukon Advanced Optics Worldwide开发夜视(NV)设备的首要任务之一。
YUKON公司在设备和制造NV设备方面拥有丰富的经验,并在该产品领域拥有多项专利解决方案。
同时,数字设备具有某些无与伦比的优势和扩展功能,这使得它们不仅可以在狩猎市场中找到应用,而且可以在野生动物观察,执法和安全防卫等中得到了应用。
TriTech DS860系列微波 PIR门激光报警器说明书

Installation Instructionsfor the DS860 SeriesTriTech Microwave/PIR Intrusion Detectors 1.0Specifications•Dimensions (HxWxD): 5 in. x 2.8 in. x 2.2 in.(12.7 cm x 7.1 cm x 5.6 cm)•Input Power:9 to 15 VDC, 16 mA DC nominal(up to 48 mA DC during walk testing ortrouble conditions). Useonly anApproved Limited Power Source.•Standby Power:No internal standby battery.Standby power must be provided byan Approved Limited Power Source.Sixteen mAh required for each hour ofstandby time needed. For UL Listedrequirements, four hours (64 mAh)minimum are required.•Alarm Relay:Silent operating Normally Closedreed relay. Contacts rated 3 watts,125 mA, 28 VDC maximum for DCresistive loads; and protected by a4.7 ohm, 0.5 watt resistor in thecommon "C" leg of the relay. To beconnected to a SELV (Safety Extra-LowVoltage) circuit only. Do not use withcapacitive or inductive loads.•Temperature Range:-40°F to +120°F (-40°C to +49°C).For UL Listed requirements, thetemperature range is +32°F to +120°F(0°C to +49°C), indoor use.•Microwave Frequency:DS860:10.525 GHz (UL Listed)DS860A:10.687 GHz (Export only, not ULListed)DS860B:9.9 GHz (Export only, not UL Listed))•Coverage:Broad (standard):60 ft. by 60 ft. (18 m by 18 m)Long Range (optional):100 ft. by 10 ft. (30 m by 3 m)•Internal Pointability:+2° to –10° Vertical, ±10° Horizontal.•Tamper:Normally Closed (with cover on).Contacts rated at 28 VDC, 125 mAmax. To be connected to a SELV(Safety Extra-Low Voltage) circuitonly. Connect tamper circuit to 24-hourprotection circuit.•Options:B328 Gimbal Mount Bracket, B335Low Profile Swivel Mount Bracket,B338 Ceiling Mount Bracket, OLR92Long Range Barrier LensNOTE:Use of a bracket may reduce range and increase dead zone areas.• Reading Bosch Security Systems, Inc. Product Date Codes For Product Date Code information, refer to the BoschSecurity Systems, Inc. Web site at:/datecodes/•Compliance: This device complies with Part 15 of the FCC Rules and with RSS-210 of Industry and Science Canada.Operation is subject to the following two conditions:(1)this device may not cause harmful interference, and(2)this device must accept any interference received,including interference that may cause undesirableoperation.Changes or modifications not expressly approved by BoschSecurity Systems can void the user’s authority to operate theequipment.2.0Installation ConsiderationsNOTE:The DS860 is not recommended for installationscontaining pets or small animals. Use the DS820 orDS835 for such installations.•Never install the detector in an environment that causes an alarm condition in one technology. Good installations start with the LED OFF when there is no target motion. It should never be left to operate with the tri-color LED in a constant or intermittent green, yellow, or red condition.•Point the unit away from outside traffic (roads/alleys).NOTE:Microwave energy will pass through glass and most common non-metallic construction walls.•Avoid installations where rotating machines (e.g. ceiling fans) are normally in operation within the coverage pattern. Point the unit away from glass exposed to the outdoors and objects that may change temperature rapidly.NOTE:The PIR detector will react to objects rapidly changing temperature within its field-of-view.•Eliminate interference from nearby outside sources.3.0Mounting•Select a location likely to intercept an intruder moving across the coverage pattern. The surface should be solid andvibration-free. Mounting height range is 6 to 8 ft. (1.8 to2.4 m). Recommended mounting height is 7.5 ft. (2.3 m).•Remove the cover. Insert a flathead screwdriver into the locking tab hole at the bottom front of the detector. Pull thecover up and forward.VerticalAdjustScrewTri-colorLEDT erminalStripLEDOn/OffPinsMW0°- 4°- 8°OnOffMicrowaveRange AdjustPIRSensitivitySelection PinsVertical AdjustScaleLook Down LensMIN MAXFace of Lens(masking area) Corner MountKnockout (4)Surface MountKnockout (2)WireEntrancesBracket MountKnockoutVertical AdjustScrew MountCover T ab andLocking Screw HoleWireEntrances•Remove the circuit board from the base. Loosen the Vertical Adjust Screw and slide the circuit board down, then out.•Break away the appropriate thin-wall wire entrance and mounting hole coverings in the base.•Using the base as a template and aligning it so that the detector will be mounted with the terminal block at the top and the PIR lens at the bottom, mark the location of the mounting holes on the mounting surface. Pre-start the mounting screws.Page 2© 2011 Bosch Security Systems, Inc.DS860 Series Installation InstructionsOnOffINTSTD•Route wiring as necessary. Route to the rear of the base and through the wire entrance. Make sure all wiring is unpowered before routing.•Securely attach the base to the mounting surface.•Return the circuit board to the base and tighten the Vertical Adjust Screw.4.0WiringCAUTIONOnly apply power after all connections have been made and inspected. Do not coil excess wiring inside detector.NOTE:Input power must use only an Approved Limited Power Source. Alarm and Tamper Contacts to be connected to a SELV (Safety Extra-Low Voltage) circuit only.9-15 VDCInput–+C NC Alarm RelaySP TSPT Tamper1234Alarm5678Tamper •Terminals 1 (–) & 2 (+): Voltage limits are 9 to 15 VDC. Use no smaller than #22 AWG (0.8 mm) wire pair between the detector and the power source.•Terminals 3 & 4: Alarm relay (reed) contacts rated 3 watts,125 mA, 28 VDC maximum for DC resistive loads and protected by a 4.7 ohm, 0.5 watt resistor.NOTE:Do not use with capacitive or inductive loads.•Terminals 5 and 8: Spare.•Terminals 6 & 7: Tamper contacts rated at 28 VDC, 125 mA.NOTE:Plug the wire entrance hole with the foam plug provided after all wiring connections have been made.5.0LED OperationThe detector uses a tri-color LED to indicate the various alarm and supervision trouble conditions that may exist. See chart below.LEDCauseSteady red Unit alarmSteady yellow Microwave activation (walk test)Steady green PIR activation (walk test)Flashing redWarm-up period after power-up Flashing red (4 pulse sequence)Replace UnitIf the detector experiences a Microwave or PIR self-test failure, it is in need of replacement.NOTE:During walk testing, the LED will light for the first technology (microwave or PIR) and then light red to indicate a detector alarm. The LED will not indicate activation of the second technology by lighting its color.6.0Feature Selection6.1LED On/Off PinsThe ON position allows operation of the tri-color LED. If LEDindication is not desired after setup and walk tests are completed,place in the OFF position. The OFF position does not prevent the LED from indicating supervision trouble conditions. 6.2PIR Sensitivity Selection PinsFor selection, place the plug across the pins marked STD for Standard or INT for Intermediate mode.•Standard Sensitivity: The recommended setting for maximum false alarm immunity. Tolerates environmental extremes on this setting.•Intermediate Sensitivity: The recommended setting for any location where an intruder is expected to cover only a small portion of the protected area. Tolerates normal environments on this setting. This setting will improve your intruder catch performance.7.0Set-up and Walk TestsSelect the vertical starting angle from this chart:To adjust the vertical startingangle for the desired mounting heightand range,loosen thevertical adjustscrew and slidethe board up, topoint the angle down. Note the settings on the vertical adjust scale.•Place the LED plug in the ON position and replace the cover.7.1Establishing PIR Pattern Coverage•Turn the Microwave range adjust to minimum.•Replace the cover and snap it into place. This will close the tamper switch.•Wait two minutes minimum after applying power to start walk tests.NOTE :During the warm-up period, the tri-color LED will flash red until the unit has stabilized (approximately 1 to 2 minutes)and has seen no movement for two seconds. When the tri-color LED stops flashing, the detector is ready to be tested. With no motion in the protection area, the tri-color LED should be OFF. If the LED is on, re-check theprotection area for disturbances affecting the microwave or PIR technologies.•Walk test across the pattern at its farthest edge, then several times closer to the detector. Start walking from outside of the intended protection area, and observe the tri-color LED. The edge of the pattern is determined by the first green, PIR activation of the LED (or the first red activation if the yellow microwave LED activates first).•Walk test from the opposite direction to determine both boundaries. The center of the pattern should be pointed toward the center of the intended protection area.NOTE :The pattern may be moved ±10° horizontally by rotating the lens window left or right.•Slowly bring your arm up and into the pattern to mark the lower boundary on PIR alarm. Perform this task at 10 to 20 ft. (3 to 6m) from the unit. Repeat from above for the upper boundary.The center of the pattern should not be tilted upward .DS860Broad Long Range MountingHeight60 ft.(18 m)100 ft.(30 m)6.5 ft. (2 m)-4°-2°7.5 ft. (2.3 m)-5°-3°8.0 ft. (2.4 m)-6°-3°NOTE:If desired coverage cannot be achieved, try angling the coverage pattern up or down to assure the pattern is notaimed too high or low. The angle of the PIR pattern may bevertically positioned between -10° and +2° by looseningthe Vertical Adjust screw and sliding the circuit board up ordown. Moving the board up will angle the patterndownward.•Tighten the screw snug when positioning is completed.7.2Establishing Microwave CoverageNOTE:It is important to wait one minute after removing/replacing the cover so the microwave portion of the detector cansettle, and to wait at least ten seconds between thefollowing walk testing procedures.•The tri-color LED should be OFF before walk testing.•Walk test across the pattern at the intended coverage’s farthest end. Start walking from outside the intendedprotection area and observe the tri-color LED. The edge of the microwave pattern is determined by the first yellow, microwave activation of the LED (or the first red activation if the green PIR LED activates first).•If adequate range can not be reached, increase the Microwave Range Adjust slightly. Continue walk testing (waiting oneminute after removing/replacing the cover) and adjusting therange until the farthest edge of desired coverage has beenaccurately placed.NOTE:Do not adjust the microwave range higher than required.Doing so will enable the detector to catch movementoutside of the intended coverage pattern.•Walk test the unit from all directions to determine all the Microwave pattern boundaries. Wait at least ten secondsbetween walk tests.7.3Establishing Detector Coverage•The tri-color LED should be OFF before walk testing.•Walk test the unit from all directions to determine the detection boundaries. A detector alarm is signaled by the first redactivation of the tri-color LED after an initial green or yellowactivation.8.0Supervision FeaturesThe supervision features function as follows:•PIR/Microwave: The complete circuit operation of these subsystems is checked approximately every 24 hours. If thePIR or MW subsystem fails, the tri-color LED will flash red 4times per cycle and the unit should be replaced.•Default: If the microwave subsystem fails, the detector will default to PIR technology protection. The PIR signal sensitivity will automatically change from INT to STD.9.0MaintenanceAt least once a year, the range and coverage should be verified. To ensure continual daily operation, the end user should be instructed to walk through the far end of the coverage pattern. This ensures an alarm output prior to arming the system.10.0Coverage PatternsThe DS860 has a standard broad coverage pattern or an optional long-range coverage pattern. The protected coverage area is where the microwave and PIR patterns overlap.An optional Look Down lens is located under the detector. This lens must be unmasked before it is operational. Use caution to remove the black mask only. Do not attempt to remove the white lens assembly. The Look Down lens is not recommended for installations containing pets or small animals. The Look Down zone is shown in black on the Coverage Pattern drawings.Standard Broad Coverage0102030405060Feet0369121518Meters10 ft.0 ft.-5°SIDE VIEWA-IJ-MN-PQ, R3Meters7.5 ft. 2.3 m0369121518Meters0102030405060Feet0 Feet102030102030369369TOP VIEW BACDGHIJKLMNOPEFRQ0Meters Look-DownDS860 Series Installation Instructions© 2011 Bosch Security Systems, Inc.Page 32/11DS860 Series Installation InstructionsP/N: F01U068628-12 Page 4© 2011 Bosch Security Systems, Inc.130 Perinton Parkway, Fairport, New York Long Range Barrier CoverageMeters300Feet 100055TOP VIEW102030405060708090369121518212427001.51.5ABCD Meters300Feet10010SIDE VIEW1020304050607080903691215182124270-3°3Meters ABCD 7.52.3Look-Down 10.1Pattern MaskingThe PIR coverage pattern may be masked using masking tape or electrical tape on the inside (grooved side) of the lens to cover the appropriate pattern areas as shown in the following illustrations.Always walk test for the desired coverage after masking.A B C D E F G H I N J Q K O L R M PDS860 Standard LensA B C DOptional Long RangeBarrier LensNOTE:Masking only eliminates the PIR portion of the coverage and has no effect on the microwave pattern.。
FLIR M-618CS 高分辨率长距离热成像夜视系统说明书
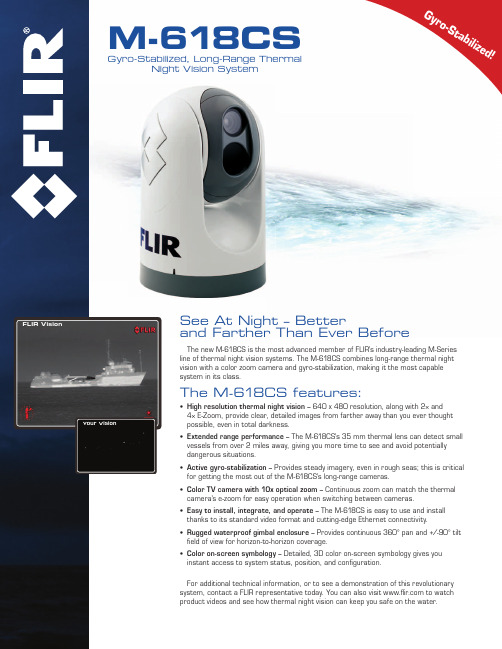
M-618CSGyro-Stabilized, Long-Range ThermalNight Vision SystemThe new M-618CS is the most advanced member of FLIR’s industry-leading M-Series line of thermal night vision systems. The M-618CS combines long-range thermal night vision with a color zoom camera and gyro-stabilization, making it the most capable system in its class.The M-618CS features:• High resolution thermal night vision – 640 x 480 resolution, along with 2× and 4× E-Zoom, provide clear, detailed images from farther away than you ever thought possible, even in total darkness.• Extended range performance – The M-618CS’s 35 mm thermal lens can detect small vessels from over 2 miles away, giving you more time to see and avoid potentially dangerous situations.• Active gyro-stabilization – Provides steady imagery, even in rough seas; this is critical for getting the most out of the M-618CS’s long-range cameras.• Color TV camera with 10x optical zoom – Continuous zoom can match the thermal camera’s e-zoom for easy operation when switching between cameras.• Easy to install, integrate, and operate – The M-618CS is easy to use and install thanks to its standard video format and cutting-edge Ethernet connectivity.• Rugged waterproof gimbal enclosure – Provides continuous 360° pan and +/-90° tilt eld of view for horizon-to-horizon coverage.• Color on-screen symbology – Detailed, 3D color on-screen symbology gives you instant access to system status, position, and con guration.For additional technical information, or to see a demonstration of this revolutionary system, contact a FLIR representative today. You can also visit www. to watch product videos and see how thermal night vision can keep you safe on the water.See At Night – Betterand Farther Than Ever BeforeFLIR VisionYour VisionG yr o-S ta b i l i z ed !Equipment described herein may require US Government authorization for export purposes. Diversion contrary to US law is prohibited.Speci cations are subject to change without notice. ©2012 FLIR Systems, Inc. All rights reserved. 1952 01/12www. NASDAQ: FLIRSANTA BARBARA FLIR System, Inc.70 Castilian Dr.Goleta, CA 93117USAPH: +1 877.773.3547PH: +1 805.964.9797FX: +1 805.685.2711BOSTONFLIR Systems, Inc. 9 Townsend West Nashua, NH 03063 USAPH: +1 877.773.3547PH: +1 603.324.7611PORTLANDCorporate Headquarters FLIR Systems, Inc.27700 SW Parkway Ave.Wilsonville, OR 97070USAPH: +1 877.773.3547PH: +1 503.498.3547FX: +1 503.498.3153NETHERLANDSFLIR Systems BV Charles Petitweg 214847 NW Teteringen - Breda The NetherlandsPH: +31 (0) 765 79 41 94FX: +31 (0) 765 79 41 99Detect Small Vessel (4 m × 1.5 m)~2.4 mi (3.9 km)† = Actual object detection range performance may vary depending on camera set-up, environmental conditions, user experience, and type of display used. All specifications are subject to change without notice. Visit /maritime for the most up-to-date specifications.。
Dedal Night Vision Goggles 操作手册说明书
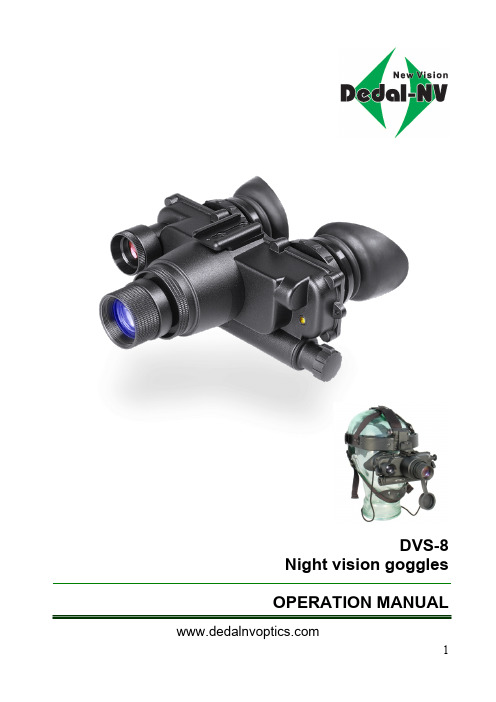
DVS-8Night vision gogglesOPERATION MANUAL Features•Special light-powerful optics•Automatic brightness control•Adjustment of interpupillary distance•Large quantity of chargeable optics (1x,3x,4x,6.6x,9.6x) •IR-on indicator•Low battery indicator•Automatic high-light cutoff•Powerful hazard-free IR illuminator (805 or 940nm) •Weather resistant/proof•Light weightCarefully read the manual before using the night visiondevice!ContentsFeature 2 Appearance of the goggles 4 Short description 5 Specification 5 Contents of Package 7 Batteries installation 9 Operating instructions 9 Storage and maintenance 13 Troubleshooting 13Appearance of the goggles(magnification 1x)1 - Body of the device2 - Objective lens3 - Eyepiece4 - Rubber eyepiece5 – Lens cap6 - Battery compartment7 – Battery cap8 - Infrared illuminator and optical piece9 - On/off switch of the device and of IR illuminator 10 – Head mount fastener 11 – Head mount 12 – Neck cord 13 –Photo receiverShort descriptionYour DVS-8 night vision goggles is a modern Night vision device, meant for a wide range of activities from professional to amateur activity:-night observation,- guarding, search, hunting,- technical provision of law enforcement,- navigational safety of ships.Image intensifier tubes of generation II+, III, XR-5 operating on the principle of multiple increasing of image brightness within visible and near infrared spectrum.SpecificationsGeneralMagnification, x 1.0(3.0*)(4.0**)(6.6***)(9.6***)Field of view, degrees 40(10*)(10**)(6.3***)(4.0****)Objective lensFocus, mm 26(100)(165)(250)Apertureratio 1:1.1(1.2)(1:1.5**)(1:2.0***)(1:2.0****)Focusing from 0.6 m to infinity(from 10 m to infinity**)(from 30 m to infinity***)(from 30 m to infinity****)EyepieceFocus, mm 15Diopter setting +4,-3.5Mechanical characteristicsOverall dimensions, mmlength 172 (260*) (292**) (372***)width 148 (148*) (148**) (148***)height 73 (80*) (80**) (100***)Weight(1x,w/out head-mount),kg 0.42-mod. DVS-8-A,CWeight(1x,w/out head-mount),kg 0.49-mod. DVS-8-DEP_XR-5, DK2, DK3 Weight of head-mount, kg 0.28Weight of helmet mount, kg 0.24Weight of lens for IR illuminator, kg 0.02Weight of3x-magnifier lens, kg 0.24Weight of objective 100mmF/1.5, kg 0.42Weight of objective 165mmF/2.0, kg 0.63Weight of objective 250mmF/2.0, kg 1.40Electric parametersPower source, AA type batteries set 2 pc.Voltage, V 3Continuous operation time, h- in passive mode min. 60- in active mode(with max. IR illuminator) 5Image intensifier tube(Tube type, photocathode sensitivity (µA/Lm), resolution (lp/mm), hole pitchof MCP (µm), screen colour)mod. DVS-8-A Gen.II+, (min.350, min.45, 12.1, -)mod. DVS-8-СGen.II+, (min.540, min.57,-, -)mod. DVS-8-DEP_XR-5 XR-5, (min.700, min. 64,-, -)mod. DVS-8-DK2/g Gen.III, (min.1800, min.57,-, -)mod. DVS-8-DK3/f Gen.III, (min.1800, min.64,-, -)mod. DVS-8-DK3/f/bw Gen.III, (min.1800, min.64, -, black&white)NOTE.In DVS-8-DK2/g device there is installed the tube with input/output construction - glass/glass. In DVS-8-DK3/f there is installed the tube with input/output construction - glass/fiber that provides bigger contrast of supervision in comparison with the device with the tube glass/glass.Infrared illuminatorType IR light diode Power of light radiation, mW 5, 25,75Angle of radiation, degrees 40Angle of radiation with optical piece, degrees 4-10Radiation wave length, Nm 805 or 940Operation conditionsOperation temperatures range, o C -40 до +50 Relative humidity, % 0 to 98* - with 3x magnifier lens** - with 100mmF/1.5 objective lens*** - with 165mmF/2.0 objective lens**** - with 250mmF/2.0 objective lensP.S.1. The screen may have separate black dots or small groups of dots allowed by the technology of tubes’ production at the manufacturing plants.2.Two dark dots can be visible in the withdrawal point of signal light diodes at the field of vision in some positions of eye-glasses.3. Performances and appearance may be improved without prior notification.Contents of PackageDVS-8 device is supplied in the following standard set of articles:- the device with lens of 26mmF/1.1 or 26mmF/1.2 - 1 pc- lens cap - 1 pc- rubber eyepiece guard - 2 pc- operating manual - 1 pc- case - 1 pcAdditional accessories (optional):- optical piece for IR illuminator,- 3x magnifier lens,- DL105 - 100mmF/1.5 objective lens,- DL166 - 165mmF/2.0 objective lens for «DVS-8»(Gen.II+),- DL167 - 165mmF/2.0 objective lens for «DVS-8»(Gen.III),- DL250 - 250mmF/2.0 objective lens,- head mount to fix the goggles on the head (is recommended to buy for the device with magnification 1.0)- helmet mount (is recommended to buy for the device with magnification 1.0),- tripod.Appearance of the goggleson head mount and helmet mountDVS-8 device with 3x magnifier lens and objectives 165mm(magnification 6.6x)DVS-8 device with different objective lensesRigid and semi-rigid case for device DVS-8Batteries installationDVS-8 goggles require two batteries AA type. Be sure they are in good condition and installed per the picture inside battery section (minus end directed inside goggles).In the goggles made with «low battery indicator» the blinking light diode appears in the left side of the image by the voltage fall less than 1.9 V. It indicates the necessity to change the batteries.To replace the batteries it is necessary to unscrew the cap of battery section (7) and replace old batteries with new ones observing polarity.NOTE.To provide the most prolonged time of continuous operation of the device (with one set of batteries) alkaline batteries are recommended to use.Operating instructions1.Remove the lens cap.2.Switch on the scope (position ON of the switch (9). Green light should appear on the screen (the device works in a passive mode).3. Adjust (3) interpupillary distance optimal for you.4. To get a sharp image focus the device through rotating objectives (2) and eyepieces (3).NOTE.Observation and identification range provided by the device depends on the value natural night light, type of the objectiveused, transparency of the atmosphere and contrast between the target and background. The identification range increases in the conditions of good lightning, at moony night given outside illumination if the target is situated on the light background (sand, snow). The identification range decreases in the conditions of weak lightning, low transparency of the atmosphere if the target is situated on the dark background (plough-land, stems of trees, etc.).5.If necessity arises to illuminate the object observed IR illuminator is to be activated by toggle switch (9) (active mode). With toggle switch (9) one of three lighter power positions (5, 25 or 75 mW) can be set.In night vision goggles made with IR on indicator the light diode appears in the right side of the image when IR illuminator is switched on.NOTE.The device with the turned on IR illuminator does not guarantee the hidden observation because luminescence spot of light diode is visible in a red color (if length of wave of IR illumination is 805 nm) and ray of IR illumination can be seen throw other night vision device. If you use IR illumination with length of wave is 940 nm, luminescence spot of light diode is not visible, but IR illumination’s range of vision decreases. According to this length of wave, sensitivity of intensifier falls.6. To provide a more effective reach of IR illuminator auxiliary optical piece is to be set to the IR illuminator.NOTE.It is not allowed to use goggles with lens for IR illumination at adistance closer than 30 meters. If a distance is less, the power ofIR incident is excessive and it can be equal to extra flash of bright spot source of light. It leads to darkening in central part ofdevice’s field of vision. Such darkening cannot be removed.7. To fix the goggles on the head you should use the head mount (11). For secure and comfortable fixation of goggles on the head adjust the head-mount straps. According to figure below push button (1) and put together spectacles and the mechanism along the conductor (2) on the head-mount. Put on the device and the head-mount on your head and select an optimal distance for your eyes moving the scope along the conductor (2). Fix the selected position rotating mechanism (4) clockwise.The head mount mechanism provides a possibility of goggles raising without removing the head mount. For this purpose push (5) and raise the goggles by rotating (6).The removal of the head mount is effected in the inverted sequence.8.To increase the magnification of the device , you can use the optional 3x magnifier lens which provides 3x image magnification.The 3x magnifier lens can be fitted in two ways:- Install 3хmagnifier lens with the turned adapter on the objective lens of DVS-8. This variant is recommended for the fast increase of the magnification;- Leave the adaptor ring off and screw the magnifier lens directly in to the screw thread inside the front of the DVS-8’s objective lens. This is a more secure assembly designed for long term observation.DVS-8 device with 3x magnifier lensTo provide a greater magnification factor of observation the regular objective of 26mm is to be unscrewed with the device in off mode. For this purpose holding the cylindrical body in which the objective is set with one hand turn the objective counter clockwise. Screw 100mm focus objective (magnification 4.0x) or 165mm focus objective (magnification 6.6x) into the released place.The goggleswith the standard objective lens, batteries, optical piece on the IR illuminatorand objective lens 165mmF/2.09. For finishing your work switch off the power toggle switch into OFF position.10. Cover the lens with the cap after completing the goggles operation.11. The neck cord is used for carrying the goggles hanging around the neck.Recommendation.When the device is stored for a long time it is recommended not to leave batteries in the compartment of the device in order to avoid leakage of the batteries.WARNING.1.Humidity may get inside while lens is being replaced. This maylead to optics sweat. In such a case the device must be dried up with the lens removed.2. Operating device must not be pointed at bright light sources:bright lamps, sun, welding light, etc., as this may lead to the device brightness increase factor decreasing.3.To exclude the photo cathode fatigue the device in operation isnot to be left in stationary position more than for 30 min. (duringday light, morning and evening hours)DO NOT FORGET TO SWITCH OFF the device AFTER USE!NOTE.In DVS-8 goggles there was made «automatic high-light cutoff»protection the electronics switch off the device in 20-30 seconds of its operation by bright light, illumination more than 500 Lux.Storage and maintenanceKeep and carry the goggles in closed goggles-case with the lens safely covered with the cap.Protect the device from hits and direct influence of rain, snow and dust on the optical parts.The device should be kept in a warm, dry place far from heating devices, batteries should be taken out. Storage temperature must not exceed 60°C.Troubleshooting...The goggles DVS-8 does not function...Make sure the batteries are in good condition and polarity is correct.The goggles DVS-8 does not focus...Rotate the objective and ocular as the present Manual corresponding section instructs. If the scope would not focus, wipe the optical parts to remove possible humidity on external surfaces of the objective and ocular.The picture diminished or completely disappeared...A bright light source may be the reason of the fact that the picture diminished or completely disappeared. It is the automatic electronic protection of the device. If DVS-8 switches off automatically, set the switch into position OFF. The device is to be ready for use within one-two minutes.Moisture condensation effect on Instrument...In cold weather periods moisture condensation is possible on the outer surfaces of the ocular. In this case it is recommended that the optical surfaces be covered periodically with special anti-sweat liquid.There are some black spots on the screen...Small black spots on the image are allowed. Most black spots are visible only in the daytime but when the device is used in operation mode they are practically invisible.Notes______________________________________________________________________________________ ______________________________________________________________________________________ ______________________________________________________________________________________ ______________________________________________________________________________________ ______________________________________________________________________________________ ______________________________________________________________________________________ ______________________________________________________________________________________ ______________________________________________________________________________________ ______________________________________________________________________________________ ______________________________________________________________________________________ ______________________________________________________________________________________ ______________________________________________________________________________________ ______________________________________________________________________________________ ______________________________________________________________________________________ ______________________________________________________________________________________ ______________________________________________________________________________________ ______________________________________________________________________________________ ______________________________________________________________________________________ ______________________________________________________________________________________ ______________________________________________________________________________________ ______________________________________________________________________________________ ______________________________________________________________________________________ ______________________________________________________________________________________ ______________________________________________________________________________________ ______________________________________________________________________________________ ______________________________________________________________________________________ ______________________________________________________________________________________ ______________________________________________________________________________________DEDAL-NVRussia, 107076,18 Stromynka St., MoscowTel: +7(495) 589-31-01, +7(495) 617-05-96, -97 Fax: +7(495) 961-27-49e-mail:**********************。
微光夜视镜
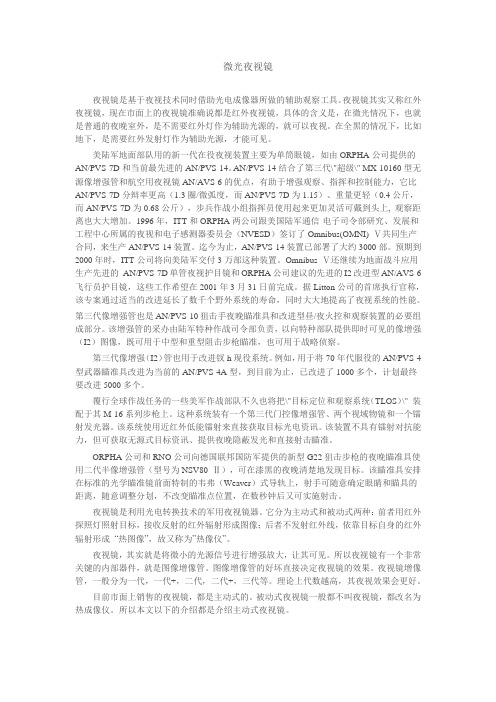
微光夜视镜夜视镜是基于夜视技术同时借助光电成像器所做的辅助观察工具。
夜视镜其实又称红外夜视镜,现在市面上的夜视镜准确说都是红外夜视镜,具体的含义是,在微光情况下,也就是普通的夜晚室外,是不需要红外灯作为辅助光源的,就可以夜视。
在全黑的情况下,比如地下,是需要红外发射灯作为辅助光源,才能可见。
美陆军地面部队用的新一代在役夜视装置主要为单筒眼镜,如由ORPHA公司提供的AN/PVS-7D和当前最先进的AN/PVS-14。
AN/PVS-14结合了第三代\"超级\" MX-10160型无源像增强管和航空用夜视镜AN/AVS-6的优点,有助于增强观察、指挥和控制能力,它比AN/PVS-7D分辩率更高(1.3圈/微弧度,而AN/PVS-7D为1.15)、重量更轻(0.4公斤,而AN/PVS-7D为0.68公斤),步兵作战小组指挥员使用起来更加灵活可戴到头上, 观察距离也大大增加。
1996年,ITT和ORPHA两公司跟美国陆军通信-电子司令部研究、发展和工程中心所属的夜视和电子感测器委员会(NVESD)签订了Omnibus(OMNI) Ⅴ共同生产合同,来生产AN/PVS-14装置。
迄今为止,AN/PVS-14装置已部署了大约3000部。
预期到2000年时,ITT公司将向美陆军交付3万部这种装置。
Omnibus Ⅴ还继续为地面战斗应用生产先进的AN/PVS-7D单管夜视护目镜和ORPHA公司建议的先进的I2改进型AN/AVS-6飞行员护目镜,这些工作希望在2001年3月31日前完成。
据Litton公司的首席执行官称,该专案通过适当的改进延长了数千个野外系统的寿命,同时大大地提高了夜视系统的性能。
第三代像增强管也是AN/PVS-10狙击手夜晚瞄准具和改进型昼/夜火控和观察装置的必要组成部分。
该增强管的采办由陆军特种作战司令部负责,以向特种部队提供即时可见的像增强(I2)图像,既可用于中型和重型阻击步枪瞄准,也可用于战略侦察。
PARD NV007S 夜视仪使用说明书

Digital night visionPARDNV007SOperation ManualImportant note1.Don't look at the IR infrared light directly, or it will damage your eyes!2.Massive power will be gathered when the infrared light is turned on. Don't aim at flammable items at a close range, otherwise it may cause fire. Please turn the infrared light off or enter sleep mode after use.3.This product needs to be adapted with an optics scope(with AO focus or side focus) , otherwise it may not be available!4.A few optics scope may not be able to match this product because of the design of the optical path.—1—3.Indicator adjustmentholes4.Red dot indicator1.Stretchable fill light2.Battery cap5.Adapter base7.IR / m ode s witch6.Sleep/Power8.Red dot9.Menu / Playback 10.OK/Photo/Recording11.Zoom ± / WiFi14.Eyepiece dioptric adjustment ring12.Adapter clip13.Focusing knob1.Connect the adapter with the end of eyepiece of the optics scope, make sure to get a full image from the display of the unit, tighten the screws by a hex-nut wrench.3.Adapter installation—4—UnpackingThis box contains:InstallationPlease use 3.7V Lithium rechargeable flat battery 18650.Remove battery cap and make sure setting the positive polar towards to the direction inward. Put the cap back and screw it until tight. ( Fail to do so may result in restarting!).1.Battery installation2.Adjustments—5—1 NV007S; 1 Micro USB cable;2 Hex-nut wrenches; 1 Adapter;Micro SD c ard is not included. Please prepare a micro SD card (128G maximum) for data storage. If the M icro S D c ard is bigger t han 16G , t he M icro S D c ard s hould b e f ormatted i nside the unit .Instructions1.Turn On/Off :2.Sleep / Wake-up mode :3 Spacer rings;1 Electrical tape.A simple test can be taken to check the functions of the device after the installation of battery.First, rotate and adjust the eyepiece dioptre adjustment ring until you see the character icons on the screen (there's no need to see a clear image ). Second, rotate the objective lens adjustment ring until you can see your target clearly.Third, connect the adapter with the optics scope by following instructions. At last, adjust the focus ring of the optics scope to get a sharp view.(Two sizes of adapters are available and optional: 45mm and 48mm. The adapter can be applied to the optics scope with 38-48mm diameter ofeyepiece.The spacer rings and electrical tape in the package can help to install the adapter).2.Make the unit clip-on with the adapter. The installation is finished afterhearing a sound of click.3.Press and hold the adapter clip, twist the unit in a counter-clockwise direction to take off the unit.Turn on the device with a short press of Power button. Turn off the device with a long press of Power button. Power indicator will keep light when the device is turned on.Enter into the sleep mode with a short press of Power/Sleep button when the device is turned on.Power indicator will keep light when the device is under the sleep mode.—8——9—3.The eyepiece adjustment4.The objective lens focusing5.IR fill light brilliance controlIn general, set the position of AO to the point of infinity.6.Red dot Adjustment7.Menu operation2>Prerecord4>Brightness Of IR5>Brightness6>Auto RecordingReticleC enterP ositionA djustment Default Color Brightness Of IR Brightness Autorecording Looprecording Date StampPrerecord 1>Reticle Center Position AdjustmentThe purpose of dioptre adjustment is to get a clear image for users with different vision. Rotate and adjust the dioptre adjustment ring until getting a clear view of icons on the screen. One adjustment only for each eye.(Please note it's possible that the image is not clear without the adjustment of objective lens.)Make sure the eyepiece dioptre adjustment is finished. Aiming at your target, rotate and adjust the Focusing knob until getting a clear and well-focused image.fill light is stretchable which can be pull out or push back to make a quick adjustment.Turn on the device, then turn the red dot on/off with a short press of Red dot/+ button. The position of laser can be adjusted on the laser adjustment holes by a hex-nut wrench.Turn on the device, enter into the black and white mode with a long press of IR button. Switch to IR1-3 or off with a short press of IR button. The part ofPress Menu button to call out menu. Press +/- button to select options. Enter a submenu with a short press of OK button. Exit the menu with a short press of Menu button.Enter the submenu Reticle Center Position Adjustment with a short press of OK button. Press "+" or "-" to adjust the Y value; Press the IR / menu button to adjust the X value. Make sure that the crosshair coincide with the reticle in the optics scope to the center of the display. Press "OK" to save and exit."" Enter the submenu 'Prerecord' with a short press of OK button.Select 'Off' or 'On' with a short press of +/- button. Confirm your selection with a short press of OK button.Enter the submenu “Brightness” of IR with a short press of OK button. Select “Off” ,“1”, “2”, or “3” with a short press of +/- button. Confirm your selection with a short press of OK button.Please note this setting is for the default brightness of IR. Pressing IRbutton under Black & White mode for instant setting of IR brightness.Enter the submenu “Brightness” with a short press of OK button. Select “LEVEL 0”, “LEVEL 1”, “LEVEL 2”, “LEVEL 3” or “LEVEL 4” with a short press of +/- button. Confirm your selection with a short press of OK button.Enter the submenu “Auto Recording” with a short press of OK button. Select “Off” or “ On” with a short press of +/- button. Confirm your selection with a short press of OK button.3>Default ColorEnter the submenu “Default Color with a short press of OK button.Select “Color” or “Black & White” mode with a short press of +/- button. Confirm your selection with a short press of OK button.”—12——13—10>Beep sound11>WiFi14>Date/ Time9>Record Audio13>Language12>Exposure15>FormatBeep Sound WiFi Exposure Language Date/Time FormatDefault SettingRecord Audio 8>Date StampEnter the submenu “Date Stamp” with a short press of OK button. Select “Off " or "On "with a short press of +/- button. Confirm your selection with a short press of OK button.Enter the submenu "Record Audio " with a short press of OK button. Select "Off "or "On " with a short press of +/- button. Confirm your selection with a short press of OK button. This setting is to realize an audio or a silent video.Enter the submenu "Beep sound "with a short press of OK button. Select "Off "or "On "with a short press of +/- button. Confirm your selection with a short press of OK button. This setting is to choose whether the keyboard press sound will be recorded into the video or not.Enter the submenu "WiFi "with a short press of OK button. Select "Off "or "On " with a short press of +/- button. Confirm your selection with a short press of OK button. Press and hold the WiFi button to turn on/off the WiFi without opening the menu interface. (The Menu page can not be opened while WiFi is turned on)Enter the submenu “Exposure” with a short press of OK button. Select one of the options with a short press of +/- button. Confirm your selection with a short press of OK button.Enter the submenu “Language” with a short press of OK button. Select one of the options with a short press of +/- button. Confirm your selection with a short press of OK button. Options include "English", "Francais", "Espanol" "Portugurs", "Deutsch", "Italino", "Pyccknn" and "Cesky".date with a short press of +/- button. Select "YY/MM/DD”, “MM/DD/YY” or “DD/MM/YY” as your date format with a short press of +/- button. Save selected date and exit the submenu with a short press of Menu button.Select "Cancel"or "OK"with a short press of +/- button. Please take extreme caution to perform this operation. All data could not be recovered if formatted.Enter the submenu “Format” with a short press of OK button.16>Default SettingEnter the submenu "Default Setting" with a short press of OK button. Select “Cancel"or "OK" with a short press of +/- button.Confirm your selection with a short press of OK button.17>VersionEnter the submenu “Version” with a short press of OK button to check the unit's firmware version.Enter the submenu “Date/Time” with a short press of OK button. Select one of the options with OK button. Select a correct value for year, month andThe default user name and password of WiFi are PARD and 12345678.7>Loop RecordingEnter the submenu “Loop Recording” with a short press of OK button. Select “Off” , “3 minutes”, “5 minutes” or “10 minutes” with a short press of +/- button. Confirm your selection with a short press of OK button.Model No.Magnification IR powerIR wave length IR illuminate distance Adapter size Video resolution Eyepiece resolution VoltageOutput typeBatteryDimensionWeightNV007S4x-14x 5w850/940nm 45 / 48mm18650x11920*1080>8hBattery life Storage typeT F CardFocusing1024*768250m102*75*118SpecificationsWarranty—17—Frame rate 30fps Transmission method WiFimp43.7V265g Notice :Photo resolution 2592*19443cm-∞—16—Warranty cardProduct model :Product code : Date of purchase :W arranty period :User Name :User's phone :User address :Warranty records :Product specifications are subject to change without notice.The right to interpret this manual is owned by PARD.Press and hold “Menu/playback” button to playback video clips stored in SD card;Press “OK/photo/recording” button to take photos; Press and hold OK/photo/recording button to make/save video recording;Press “-”button to zoom in/out;Press “+”button to turn on/off Red dot indicator.8.ShortcutsUnder the user interface:Press and hold”IR fill light brilliance control /Color or BW mode” button to make switch between color / BW mode;Press and hold “-/WiFi” button to turn on/off WiFi;This product is warranted against defects in materials and workmanshipfor a period of two year from the date of purchase. This warranty is for the original purchaser only! Operate this device in daylight or view any strong radiation source like the Sun, electric welding and Laser directly may cause permanent damage to internal partsof this device and this is not covered by the Warranty.Telephone :+86-0755-********Address:No. 328 Baoshi East Road, Shiyan, Baoan District, Shenzhen, ChinaWebsite :www .pard -tech .com。
军用夜视望远镜原理

军用夜视望远镜原理军用夜视望远镜是一种能够在夜间或低照度条件下增强显像的光学仪器。
它利用了光电转换技术,将微弱的光信号转换为可见的图像。
军用夜视望远镜的原理主要包括光信号捕捉、光电转换和图像显示三个部分。
军用夜视望远镜通过光学系统来捕捉光信号。
它采用了特殊的透镜和棱镜组件,能够将光线聚焦到光电转换器件上。
这些透镜和棱镜经过精密设计和加工,能够最大限度地收集和聚焦光线,提高夜视图像的清晰度和亮度。
光电转换是军用夜视望远镜的核心技术。
光电转换器件是将光信号转换为电信号的关键部件。
常见的光电转换器件有光电二极管(Photodiode)和光电倍增管(Photomultiplier Tube)。
光电二极管通过光敏材料吸收光子,产生电子-空穴对,从而转化为电信号。
而光电倍增管则是利用二次电子发射效应,将光信号增强数千倍,以获得更高的灵敏度和分辨率。
军用夜视望远镜的图像显示部分将电信号转化为可见的图像。
这一部分通常采用液晶显示屏或光纤传输系统,将电信号转化为图像信号。
通过液晶显示屏,军人可以直接观察到夜视图像,实时了解周围情况。
而光纤传输系统则可以将图像信号传输到其他设备上,如头盔显示器或监视器,以便于军人进行观察和分析。
除了以上三个主要部分,军用夜视望远镜还包括了其他辅助功能,如调焦、亮度调节、滤光等。
这些功能可以根据具体需求进行调整,以获得更好的观察效果。
总的来说,军用夜视望远镜的原理是通过光学系统捕捉光信号,光电转换器件将光信号转换为电信号,然后通过图像显示部分将电信号转化为可见的图像。
这样,军人就能够在黑暗环境下实时观察到周围情况,提高作战效能和安全性。
军用夜视望远镜的原理在军事领域得到了广泛应用,并逐渐扩展到其他领域,如安防、狩猎等。
Pulsar 320快速开始指南说明书
Pulsar 320 Quick Start GuidePulsar 320 Quick Start GuidePulsar 320 Quick Start GuideThe purpose of this guide is to allow the operator to perform a quick functional test. This will permit an easy checkout of the Pulsar 320 and attached light head for proper operation.I. Pulsar 320 Controller Cable Connections:T wo physical cable connections will berequired to operate the Pulsar 320 and light head in self test mode. Figure 1 shows the front panel of the Pulsar 320.1.1 Power: The Pulsar 320 requires an external 24 volt supply for operation. A power cable is provided. The black wire is negative and the red wire ispositive. Plug the 2 pin connector into the socket labeled “VDC INPUT”.Observe the polarity markings on the panel below theVDC INPUT socket.Figure 2: 24v Supply Connection2Pulsar 320 Quick Start Guide Power Requirements: The input power connector is located near the bottom center of the Pulsar 320’s front panel. The Pulsar 320 requires an external 24 volt supply for operation. The power supply needs to have sufficient amperage rating to drive the light head in the desired mode of operation. Advanced illumination recommends a minimum of 4A for full output operation.1.2 Light Head: Figure 3 shows how the outputconnectors on the front panel of the Pulsar 320 mates withthe light head connectors. Plugthe connector(s) from the lighthead(s) into the 5 pin socket inthe front of the Pulsar 320 as shown in Figure 3.2. Pulsar 320 Status Indicator Lights:The Pulsar 320 has three LED indicator lights as shown in Figure 42.1 Green: This light indicates that the Pulsar 320 has power either from the USB connection to the host computer or the main 24VDC power connection.2.2 Amber: The amber light indicates the operational status of the Pulsar 320. A blink rate of once per second indicates normal operation. A blink rate of 5 times per second indicates an error condition.2.3 Red: The red light blinks an error code in the case of an error condition. The condition is indicated by three sets of sequential flashes. For example: 4 flashes followed by 2 flashes followed by 3 flashes indicate an error code of 423 which signifies that the main power switch is off. T wo common error codes are:Figure 3: Pulsar 320 Light HeadOutput ConnectionFigure 4: Status Indicator Lights3Pulsar 320 Quick Start Guide• 351: No light head detected.• 423: The main power switch is off.Refer to section 6.0 “T roubleshooting” in the Pulsar 320 Manual for more detailed error code information.USB Control1. Connect Pulsar 320 USB cable to host PC, 24vDC, andapplicable light head 2.Switch the main rocker power switch ON . A green powerLED wil illuminate, followed by a flashing amber LED. 3. Launch Pulsar 320 Utility 4.Choose USB 5.Select a USB port. Use port 0 by default. Press Connect 6. Upon Connecting to a USB port, the strobe settingswindow will open (Fig 6) - Grayed-out outputs meanno light is connected.Figure 6: USB ConnectedFigure 5: USB Dialog Open 4Pulsar 320 Quick Start Guide 7. T est the light head: Press SETUP radio button. a. The light head should immediately enter a continuous current mode that will allow for visible detection that the light is working. This mode is useful for orientating the light in the system. b. This mode should NOT be used for inspection purposes as it will provide indeterminate results. c. This mode may make the light appear to flicker - this is normal.8. T est the light in TEST MODE a. Press TEST radio button b. Set Pulse Width slider to 1000 c. Set current to 10 d. Press PROGRAMThe light should flash at 10Hz with no external trigger applied.At this point the attached light head(s) will be ON. Any further adjustments can be made at any time using the same procedure as above. Adjusting PW will change the duration of the output pulse, and adjusting CURRENT will change the output level of the output pulse. Keep in mind that TEST mode always produces a 10Hz repetition rate pulse.The Pulsar 320 can communicate via ETHERNET . For instructions on this, please refer to theTCP/IP Setup Guide.Figure 7: Ready to Program Test Mode 5Pulsar 320 Quick Start Guide。
夜视仪

品牌yukon PULSAR 脉冲星有效视距250(m)100(m)250(m)放大倍率2/3.5(倍)1(倍)4(倍)价格375041005750类似产品种类品牌脉冲星博士能奥尔法有效视距150米 1.2-183米>=3米放大倍率1倍 2.5倍4倍价格3680378015900产品种类品牌YUKON ATN有效视距1000(m)175m放大倍率5(倍)5(倍)价格290041300类似产品种类品牌YUKONG YUKON ATN有效视距200m 150(m)200(m)放大倍率31(倍)5(倍)价格130018504100类似产品种类品牌yukon yukon yukon有效视距80(m)150(m)250(m)放大倍率3(倍)1(倍)4(倍)价格249934992300类似产品种类品牌ATN ATN有效视距300(m)500(m)放大倍率3-5(倍)5(倍)价格12503250联系电话章玉萍 女士 (销售部理)电话:86 0579 ********移动电话:133********传真:86 0579 ********联系电话联 系 人 :伍凌华联系电话:133********固定电话:0579-********联系电话丁佳洪 先生 (销售部理)电话:86 0731 ********移动电话:158025271793倍/5倍单筒夜视仪RG-035双筒夜视仪NV28红外夜视仪3代头戴夜视仪双筒夜视仪29单筒高倍头戴 红外夜视仪义乌市圣基光学仪器厂义乌市云光光学仪器有限公司长沙市雨花区山水光学仪器商行产品产品产品头盔式双筒夜视仪艾森龙4x50一代+单筒夜视仪225439北京中视互联电子商务有限公司北京三川纵横科技有限公司辛计科先生(销售部销表)电话:86 010 ********移动电话: 153********传真:86 010 689979335x42 双筒夜视仪MO4-CGTI准三代夜视仪 (单筒)黑河莱特经贸有限公司北京分公司产品海盗双筒增倍红外微光夜视仪防水双筒红外线头盔夜视仪头红外线数码录像夜视仪联系电话电话: 86-010-8569传真: 86-010-8569319572李世欢 先生 (销售部理)电话:86 400 8048788移动电话: 136********传真:86 010 ********联系电话 1x20防水双筒头盔红外夜视仪 2.5X42型双筒红外夜视仪G450 二代+高清单筒夜视仪产品联系电话产品123456类似产品种类品牌PVS-14Apresys 有效视距219(m)放大倍率1X (可接3倍,5x价格12000010400类似产品种类品牌KGKG KG 有效视距放大倍率2(倍)价格类似产品种类品牌中慧有效视距100~120m 放大倍率2×价格类似产品种类品牌NV YUKOU ATN 有效视距200(m)150(m)200(m)放大倍率5(倍)1(倍)5(倍)价格110016003600类似产品种类品牌巡航夜视仪有效视距0.25m–无穷远放大倍率1x价格类似产品种类品牌OEM OEM OEM 有效视距400(m)200(m)300(m)放大倍率5(倍)3(倍)5(倍)价格1380(2-5)18504950理)电话:86 0579 ********移动电话:133********传真:86 0579 8591959215联系电话周阿敏 女士 (销售部理)电话:86 0510 ********器厂无锡东昊安全装备科技有限公司10产品PVS-14三代单目头戴夜视仪Apresys双目夜视仪15单筒夜视望远镜头戴夜视仪RG55-3X 双筒红外夜视仪NVS6巡航夜视仪MB3单筒夜视仪BN5双筒夜视仪联 系 人:杨新华 (销售部 总经理)电话:86 0579 ********联系电话联 系 人:赵书磊 (一部 销售)电话:86 010 ********-828移动电话: 1890116563义乌市优澳光学仪器厂北京华拓鸿达科技有限责任公司联系电话产品产品北京科固安防设备有限公司产品袖珍式微光夜视仪头盔式双目夜视仪双筒夜视仪联系电话王君杰 先生 (销售部手机: 158010161914北京中慧天诚科技有限公司产品WHG-WH20型民用袖珍式微光夜视仪联系电话陈和平 先生 (销售部理)电话:86 01057118645/59488880移动电话:189********11科利尔光学仪器厂产品RG55红外夜视仪头戴夜视仪双筒夜视仪联系电话方旭军 先生 (瞄准镜专准镜经理)手机: 1375791827111789101112类似产品种类品牌云南光学仪器98有效视距250mm—无穷远500(m)放大倍率l倍6(倍)价格47000类似产品种类品牌策维有效视距150米放大倍率价格4980类似产品种类品牌YUKON boshiren 有效视距200m 放大倍率2(倍)3(倍)价格3850998类似产品种类品牌FLCOS FLCOS 有效视距放大倍率价格1000300类似产品种类品牌Bushnell 独眼巨人ATN 有效视距549米150米放大倍率6倍1倍价格88009000038500类似产品种类品牌JBT有效视距250(m)放大倍率22(倍)价格100000深圳市立治正中电子有限公司产品军用夜视仪微光夜视双筒望远镜WGC6夜间望远镜昼夜可用便携式夜视仪打猎热成像夜视仪48产品9(销售部 总经理)电话:86 0579 ********深圳市宝安区松岗金博通仪器商行云南欧视雅科技有限公司器厂联系电话联 系 人:诸葛双建(销售部 主管)电话:860755 61133578移动电话: 136********联系电话孙厚乐 先生 (销售 主电话:86 0871 ********产品石家庄策维电子科技有限公司产品汽车夜视仪联系电话魏会杰 先生 (市场部经机: 150811876765无锡新莱尔保安器材有限公司产品单筒夜视仪水下夜视仪NVG-7夜视仪联系电话周升旋 女士 (销售部销理)手机: 133951983313义乌市新亚光学仪器有限公司产品双筒夜视仪单筒夜视仪联系电话金亚娟 女士 (销售经手机: 137********5联系电话联系人:小小的阿里 (经理助理)传 真:86 0755 89981391171813141516类似产品种类品牌圣竹圣竹有效视距200m-300m 150m 放大倍率4.5X(倍) 3.5 X 价格28001500(十台以上)产品种类品牌永泰有效视距150米放大倍率1倍价格类似产品种类品牌科立信(延伸)有效视距各种规格齐全放大倍率3-6(倍)价格13800类似产品种类品牌云光有效视距200-500(m)(m)放大倍率5X(倍)价格4500类似产品种类品牌flir有效视距放大倍率价格类似产品种类1联系电话董毓慧 女士 (销售总经机: 136********联系电话熊学芝女士(网络部门理员)电话:86 021 ********传真:86 021 ********上海隆强检测仪器设备有限公司俄罗斯单筒夜视仪产品产品HS-324夜视仪头盔式夜视仪123产品义乌市瞬光文体商行 4.5X双筒夜视仪安区松岗金博通仪器商行(销售部 主管)电话:860755 61133578移动电话: 136********云南远锦光学仪器有限公司产品微光夜视仪联系电话刘敬 先生 (销售部经手机: 138882621941上海乾日贸易发展有限公司产品红外夜视仪联系电话潘伟 先生 (销售部主手机: 139165379281杨圣许 先生 (负责电话:86 0579 ********联系电话百源永泰国际科贸(北京)有限公司1920212223话销售部 经理)86 0579 ********电话:133******** 86 0579 ********话伍凌华电话:133********话:0579-********话销售部 经理)86 0731 ********电话:158********售部销售代表):86 010 ********话: 153********:86 010 ********话-85693195 86-010-********销售部 经理):86 400 8048788话: 136********:86 010 ********话话理)86 0579 ********电话:133******** 86 0579 ********话销售部 经理)86 0510 ********新华 先生销售部 总经理)86 0579 ********话书磊 先生(一部 销售)6 010 ********-828电话: 1890116563话话销售部经理): 1580101619话销售部 经理)电话:86 01018645/59488880电话:189********话准镜专员瞄准镜经理): 137********销售部 总经理)86 0579 ********话葛双建 先生部 主管)电话:86 755 61133578话: 136********话销售 主管)86 0871 ********话场部经理)手: 150********话售部销售经机: 133********话销售经理): 137********话阿里 女士(经理助理):86 0755 ********话售总经理)手: 136********话络部门网络管理员):86 021 ********:86 021 ********部 主管)电话:86 755 61133578话: 136********话售部经理): 138********话售部主管): 139********(负责人)86 0579 ********话。
数码夜视仪
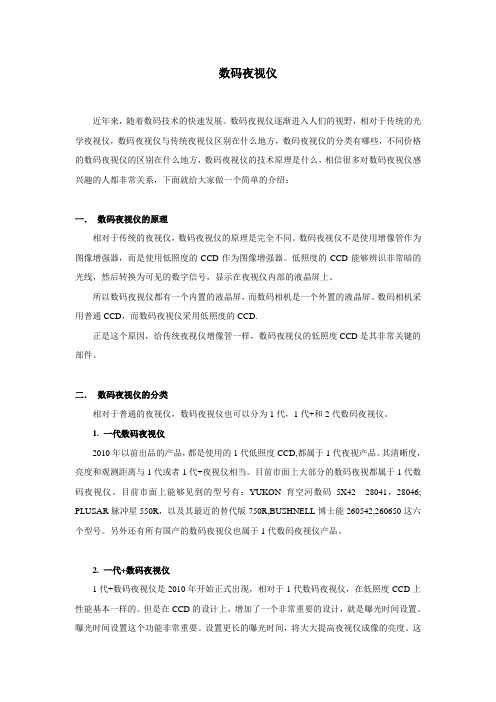
数码夜视仪近年来,随着数码技术的快速发展。
数码夜视仪逐渐进入人们的视野,相对于传统的光学夜视仪,数码夜视仪与传统夜视仪区别在什么地方,数码夜视仪的分类有哪些,不同价格的数码夜视仪的区别在什么地方,数码夜视仪的技术原理是什么,相信很多对数码夜视仪感兴趣的人都非常关系,下面就给大家做一个简单的介绍:一.数码夜视仪的原理相对于传统的夜视仪,数码夜视仪的原理是完全不同。
数码夜视仪不是使用增像管作为图像增强器,而是使用低照度的CCD作为图像增强器。
低照度的CCD能够辨识非常暗的光线,然后转换为可见的数字信号,显示在夜视仪内部的液晶屏上。
所以数码夜视仪都有一个内置的液晶屏,而数码相机是一个外置的液晶屏。
数码相机采用普通CCD,而数码夜视仪采用低照度的CCD.正是这个原因,给传统夜视仪增像管一样,数码夜视仪的低照度CCD是其非常关键的部件。
二.数码夜视仪的分类相对于普通的夜视仪,数码夜视仪也可以分为1代,1代+和2代数码夜视仪。
1. 一代数码夜视仪2010年以前出品的产品,都是使用的1代低照度CCD,都属于1代夜视产品。
其清晰度,亮度和观测距离与1代或者1代+夜视仪相当。
目前市面上大部分的数码夜视都属于1代数码夜视仪。
目前市面上能够见到的型号有:YUKON育空河数码5X42 28041,28046; PLUSAR脉冲星550R,以及其最近的替代版750R,BUSHNELL博士能260542,260650这六个型号。
另外还有所有国产的数码夜视仪也属于1代数码夜视仪产品。
2. 一代+数码夜视仪1代+数码夜视仪是2010年开始正式出现,相对于1代数码夜视仪,在低照度CCD上性能基本一样的。
但是在CCD的设计上,增加了一个非常重要的设计,就是曝光时间设置。
曝光时间设置这个功能非常重要。
设置更长的曝光时间,将大大提高夜视仪成像的亮度。
这样在黑暗的环境下,能够得到更好的视觉效果。
这种技术是美国OWL NIGHT在2010年美国拉斯维加斯SHOTSHOW大型户外展会上发布的,其首次应用于其发布的XGEN PRO数码夜视仪上。
博士能260150数码夜视仪体验说
博士能260150数码夜视仪体验说第一次和数码夜视仪结缘是因为一次警用设备的展会,我并不是参展商也不是相关爱好者,我只是场馆负责人,负责展会相关人员信息以及场地的协调工作,说实话琳琅满目的机器我也不太懂,看上去都差不多,也没有产生什么兴趣。
做了这么多年场地负责人,见过大大小小的参展商,到现在只有一个参展品牌让我记忆深刻,并且和那里的负责人成为了朋友,那就是美国博士能品牌。
之所以对美国博士能印象深刻也是因为他们的展台很特别、人员很负责,每天早中晚都会打扫,而且会把每一台机器擦拭的干干净净,我想参加过展会的人都应该知道,站了一天其实很累,如果没有参展客户参观的话,能找个地方坐一会儿就是一会儿,哪还顾得上擦拭机器的,但是这个博士能柜台的人员好像每个都精力旺盛,不知疲倦。
也许这就是为什么品牌做的很大的原因吧,从产品质量到人员管理都很正规。
与其说博士能展台特别,不如把这个展台称之为体验馆,相信对科技产品有兴趣的人肯定都知道,美国博士能是很专业的光学产品品牌,更是美国军队常年专属的产品供应商,其产品链涉及面也是很全面的,这个体验馆根据不同产品的特性分出了区域,每一个区域都有一个负责人,除了为大家介绍产品特性,还有很特别的一点可以实机操作,这样可以更直观的展现出产品的效果。
做为场地负责人,没事的时候就是每个展台看一看,顺便负责一下安保的工作,那天走到博士能展台的时候,那里围了好多人,出于好奇的心里我也凑近看了看,是区域负责人在演示机器,是他们主推的一款单筒数码夜视仪,型号是260150。
光听到名字我也是不太懂的,听负责人介绍,数码夜视仪是一款可以拍照、录像用于夜间使用的仪器,比如执法部门或者特殊单位需要夜晚工作的话,在不使用外界照明灯的前提下,人的肉眼是会被黑暗所困扰,但数码夜视仪相当于人的肉眼又更胜于人的肉眼,可以辅助人们在夜晚更好的观察。
这款夜视仪,不仅可以拍照、录像,还是一款口径、倍率都超大的数码夜视仪,50mm纯光学玻璃打造的超大物镜设计,搭配着夜视仪里最大的6倍放大,数码放大最高可达16倍的放大倍率,不仅把远处的事物拉到眼前,还大大增加了透光率,所能呈现出来的画面异常广阔且清晰,听说物镜的大小可以直接影响视野的宽窄,人在夜间是缺乏安全感的,如果连视野也受到局限的话,在很多观察上面,都会产生偏差。
二代夜视仪的详解

夜视仪从字面翻译上的叫法应该叫成像增强器,其主要核心是光电倍增元件,一般称为像增强管,通过对暗弱光线的放大来模拟显示真实的视场环境,所以从其工作原理上讲同传统的光学望远镜有着本质的不同。
夜视仪的发展的历史,其实体现了现代军事的发展历史,与军方的合作,促成了夜视技术的发展。
全球几大夜视仪品牌都是美国军方有不解的渊源,比如全球前两大夜视仪品牌ORPHA和ITT都是美国军方夜视仪最大的供货商。
二代的民用夜视仪,一般都是从军用转换成民用的,几乎每款知名的二代夜视仪,在美国军方都能找到期前身。
不管是ORPHA 的G350+,ONV2+还是ITT 的SPIRIT350等在美国军方都能看到几乎完全外观的服役产品。
目前夜视仪按照其技术的发展水平来说主要分为三代产品!一.第一代夜视仪产品:第一代基础型(以下简称第一代):第一代夜视仪大都使用阴极真空管做为光电耦合倍增元件,其原件自身灵敏度可以达到250μA/lm的水平.图像的像增强倍率大约在120-900倍左右,图像的中心分辨率为25-35线/mm。
部分产品的图像效果不错,但大多数产品成像仅能保证中心区域图像清晰,边界处图像分辨率较低,图像畸变严重。
同时,第一代夜视仪器其自我强光保护功能较差,当其使用时在观察视野范围内突然出现明亮光源时,将有可能导致设备烧毁,故其使用环境控制较为严格,严禁在强光环境下使用。
第一代改进增强型:主要是在第一代的基础上改进而来的,大部分产品在光电耦合元件后面安装有复杂的光学透镜组件来校正图像畸变和提高分辨率,从而减小图像失真,也有少数产品将改正透镜放在光电耦合原件之前。
标称对暗弱图像增强倍率大约在1000倍左右,阴极光电管的最小灵敏度在280μA/lm,中心图像分辨率达到45线/mm.目前生产第一代和一代+的夜视仪品牌:一线品牌主要有奥尔法ORPHA,博士能BUSHNELL,OWL猫头鹰这三个品牌呢。
二线品牌主要有图雅得TRUEYARD,育空河YUKON,脉冲星PLUSAR等。
【VIP专享】军用望远镜摄像机

军用望远镜摄像机近几年,随着技术的进步,军用望远镜摄像机逐渐走进我们的生活中,应用范围很广范,用途包括:军用、执法、狩猎、野外观察、监视、安全、导航、隐蔽目标观测、娱乐等。
都会用到军用望远镜摄像机。
一. 夜视仪的发展历史20世纪40年代研制成功的主动式红外夜视仪是夜视器材的鼻祖,它的出现使人类第一次看到黑暗中的目标。
主动式红外夜视仪成像清晰,对比度好,但由于需要红外光源照射,存在着能耗大,易暴露的缺点。
1962年,美国人研制成功像增强器,使得夜视器材的发展产生了一个飞跃。
我们平时所谓的黑夜,很少是绝对黑暗的,因为自然界总是存在着微弱的光线,例如星月光,大气的辉光和黄道光。
即使肉眼不容易察觉的星星,对地面的照度仍然可以达到2x10负4次方勒克司。
能够利用如此微弱的光线进行观测,是因为两个技术上的重大突破。
首先,研制成功了灵敏度极高的光电阴极,既S-20多碱光电阴极。
比以前的光电阴极灵敏度提高了一个数量级,使得夜视仪的光电增益大大提高。
另一个突破是采用了光学纤维面板。
既一种由大量光导纤维组成的薄板阵列,每根纤维传导一个像素减少了光的散射,传导效果好,由于可以将纤维的末端排列成曲面,天然的避免了像差,大大提高了成像质量。
将多个上述结构的像增强管串联起来,将光线逐级放大,使得极其微弱光线下的图象放大到了人眼可以清晰观看的程度,便实现了无须红外照明的微光观测。
夜视仪才营运而生,从夜视仪到数码夜视仪到现在的夜视取证仪,发展迅速,从隐蔽性强的设备、到现在远程遥控、遥控摄录取证,一直广泛被军方采购。
近几年远程夜视取证仪未在民用出现过,美国与西方是禁止向中国供应3代与4代的夜视产品,是属于军用的产品。
随着中国市场,警用、执法人员需要这类远程夜视取证的设备,第三代数码夜视取证仪由军用改为民用在中国市场出现,但是价格昂贵,因为这类产品不能用在非法用途使用,在中国市场,部队、警用、执法人员等使用的人群较多。
比如德国奥尔法,美国RNO其背景都是军工企业,其顶尖产品,生产的3代和4代夜视仪都是全部供应给军方的。
- 1、下载文档前请自行甄别文档内容的完整性,平台不提供额外的编辑、内容补充、找答案等附加服务。
- 2、"仅部分预览"的文档,不可在线预览部分如存在完整性等问题,可反馈申请退款(可完整预览的文档不适用该条件!)。
- 3、如文档侵犯您的权益,请联系客服反馈,我们会尽快为您处理(人工客服工作时间:9:00-18:30)。
PULSAR脉冲星单筒数码夜视仪860RT#78093详细介绍
说明
全文介绍:数码夜视仪作为全新的高科技夜视设备,已经在我们当今社会各行业得到了广泛应用。
本文根据作者亲身购买体验,对比了目前市场上主流的两款单筒数码夜视仪:PULSAR 脉冲星860RT和ORPHA奥尔法CS-8。
户外拍照摄影是我的个人爱好,平时车的后备箱里必备各种摄影装备。
车开到哪里发现美景及时记录下来,相信这种感受和我同样爱好的人必有体会。
白天拍摄还好,只是夜间拍摄的话是非常困难的事情。
相机或者摄像机的红外夜视距离太短,无法将远距离的目标拍摄下来。
于是花了很长的时间来解决这个问题。
最近在网上搜了一下,发现一种非常好的设备,数码夜视仪。
数码夜视仪可以说是夜视仪和相机的结合体。
既可以夜间观看用,又能将观看到的影像拍摄记录下来。
户外夜间拍摄,带着这种设备,可谓一举多得。
下面我把我这段时间对于数码夜视仪的知识分享给大家,提供给需要这类仪器的人考虑。
具体情况如下。
一、数码夜视仪的基本知识
1、数码夜视仪的分类
数码夜视仪从分类上看,可以非为单目单筒数码夜视仪和双目双筒数码夜视仪。
从观看使用的舒适度来说,双目双筒数码夜视仪更加适合。
但是从便携性的角度来说,单目单筒的数码夜视仪更加小巧轻便,更适合户外使用。
2、数码夜视仪的品牌
国外专业数码夜视仪品牌并不是很多,国际一线品牌只有美国ORPHA奥尔法和俄罗斯PULSAR脉冲星,虽然同属高端夜视仪品牌,但是性能效果却大不相同。
另外国内还有
一些双目双筒的夜视仪品牌,从网上查阅对比后发现这些小品牌相对与国际一线品牌在价格方面确实便宜不少,不过查看真实买家评论及网友留言后得知,这类小品牌大部分都是属于线上品牌,而且产品反应效果差,容易坏,后期维护困难重重。
所以我决定还是购买大品牌的数码夜视仪,毕竟也属于电子产品,质量效果和售后都有保障。
所以我详细了解了美国ORPHA奥尔法和俄罗斯PULSAR脉冲星这两个品牌。
这两个品牌都是国际光学产品的一线品牌,但是产品的侧重点不同的。
PULSAR脉冲星夜视仪产品大都是侧重于民用市场上,ORPHA奥尔法则是更多侧重于2代+,准3代,4代,4代+级别的军用夜视仪产品上。
两个品牌在数码夜视仪领域都几乎是同时研发生产,不过目前来说奥尔法数码夜视仪产品的级别更高一些,已经研发出了第三代和第四代数码夜视仪,脉冲星目前只有第二代数码夜视仪。
但从这点来说,选择一个产品线更齐全的品牌更有保障一些。
但是无论怎样,两者都是非常知名的品牌,所以我觉得两家的数码夜视仪都应该看看。
3、数码夜视仪的主要参数
我对于这类产品不是特别了解,下面也只是从我简单的理解来说。
数码夜视仪比较重要的参数体现在数码变倍范围、拍照图片分辨率、视频拍摄分辨率、支持内存卡大小这四个方面上。
通过对比发现,奥尔法品牌的数码夜视仪CS-8的拍摄视频的分辨率在1920X1080,拍照分辨率在2048X1536,变倍倍率范围在5-20倍,存储卡支持4G-64G多种大小;脉冲星视频分辨率是640x480,拍照分辨率是1280х960,倍率范围是6.5-13倍,支持仅8G内存。
为什么我更在意这四个方面的参数呢,因为这些是我最最需要的,选择高配置的仪器,保障影像资料的高清,同时支持长时间录像拍照,也是我选购数码夜视仪的标准。
更令广大用户关注的是工作待机时长,视频输出格式,至于其他扩展功能方面当然是多
多益善了,例如红外亮度调节,系统功能调节,电子罗盘、水平仪、GPS定位,WIFI视频传输,手机APP操控等功能应用。
二、我选购数码夜视仪的经历
正如前面所说,我将品牌锁定在PULSAR脉冲星和ORPHA奥尔法这两个品牌后,然后联系了网上的卖家,决定亲自上门体验对比一下,然后再选择一款合适的。
可能是年纪大了,我更倾向于实体店买,看见实物后手感功能体验一下,觉得心里踏实些。
经过联系了多家商家之后,终于找到了一家比较有实力的卖家。
他家不仅有这两款数码夜视仪,还有其他的品牌的。
上门后,销售客服小张非常热情的接待了我,为我推荐了4款数码夜视仪。
他说这四款都是目前销售和客户反馈较好的,爱吉2020NV、奥尔法DB550、脉冲星860RT、倍视能260542。
经过小张介绍后得知爱吉2020NV和倍视能260542虽属于数码夜视仪,但是本身都无法直接拍照录像,还需要外接其他的设备,这样一来,拍照录像的时候还需要再拿着一个设备,比较繁琐,所以当时就直接PASS掉了。
单目单筒数码夜视仪
我决定在奥尔法DB550和脉冲星860RT之间选择。
这两款的价格方面脉冲星860RT是在4000元左右,而奥尔法CS-8是的5000元左右。
我也在网上查了一下这两款的价格,脉冲星860RT的这款网上的价格有高有低,甚至有的和这款外观基本一致,大约在2000元左右。
销售小张告诉我,脉冲星的产品在网上真假难辨,而且还有很多水货的冲击。
奥尔法CS-8这款的价格倒是很正常。
这点让我很为难,一个是价格便宜,而且有的卖家的价格便宜的让人无法相信,一个呢功能较多,但是价格稍贵。
最后我和销售小张协商后,这两款都买了,然后实验效果对比一下,然后再留下我认为效果较好的一款。
其实呢,我就是想看看这两款数码夜视仪在夜间的效果到底差在哪里。
下面是实验后的感受和拍摄的效果图,给大家分享一下。
1、观看效果
奥尔法CS-8这款观看到内部那个显示屏会大很多,而且观看到的视野会广很多。
脉冲星860RT在观看的时候必须眼睛离开那目镜一些,否则看不全画面,其实这样用着挺累的,相当于悬空举着看。
另外奥尔法CS-8这款在观看的时候那个倍率可以调节到最大20倍,脉冲星860RT的只能调整到13倍,在观看同一个目标的时候奥尔法这款观看的更加细致一些。
虽然在倍率变大的时候图像的清晰度都有些影响,但是对于观看目标的辨识度来说,当然倍率越高越好了。
还有观看距离方面,我特意找了没有路灯的环境观看的,奥尔法CS-8这款观看200米左右的人可以看到,脉冲星这款也就是在50米左右,表现的让我稍后有些失望。
对于两款数码夜视仪观看效果差距如此之大,我特意问了销售小张。
小张说选购的这两款,
观看清晰度是由于两款数码夜视仪的级别不同,数码夜视仪的级别代数越高,所观看到的图像的清晰度就越高,这是由数码夜视仪的核心部件-图像处理器的级别决定的。
奥尔法采用的是CCD-A3图像传感器,是属于第三代数码夜视仪产品,脉冲星采用的是CMOS图像处理器,是属于第二代数码夜视仪。
小张说影响清晰度的另一个因素是内置屏幕图像的分辨率,这个也很关键,奥尔法的内置屏幕的分辨率要稍微高一些,所以奥尔法品牌的看到的图像会更清晰。
2、拍摄图片效果
参数上奥尔法这款拍摄图片的清晰度会更高,还是给大家看看这两款拍摄图片的真实效果吧!下图是在同样倍率下奥尔法DB550与脉冲星860RT拍摄的图片效果。
单目单筒数码夜视仪效果对比图
3、拍摄视频效果
视频效果拍摄下来在电脑上回放,奥尔法CS-8的画面的清晰度和辨识度明显高于脉冲星860RT。
脉冲星这款拍摄视频中连50米左右的目标都无法辨识。
4、功能扩展方面
奥尔法CS-8这款我认为最实用的还是这个外翻折显示屏的设计,可以直接通过显示屏来进行观看,不用通过目镜。
这有利于多人同时观看图像。
至于HDMI高清视频输出这个功能,可以通过高清视频输出线连接显示屏,也可以实现同等的效果。
还有GPS、电子罗盘等那些功能还在慢慢研究。
三、总结
经过亲身试验后让我下定决心保留这款奥尔法CS-8。
无论从观看效果,拍摄清晰度,以及功能扩展方面奥尔法CS-8都表现的极为出色。
这次夜间拍摄不仅多了一个多功能的夜视设备,而且还可以在朋友间来“显摆显摆”了。
