star打印机维修资料(Star printer maintenance data)
STAR系列打印机维修资料
STAR系列打印机维修资料(一)打印乱码适用于通用打印机一、在WINDOWS 下打印乱码1、检查驱动程序是否安装/选择正确。
2、在“设备管理器”中检查“端口”的设置是否为“打印机端口(LPT1 )”(不能是“ ECP 打印机端口(LPT1 )”)二、在UNIX下打印乱码把打印机EDS设置中的“脉冲时钟”项改为“非常规”试试。
适用于票据/存折打印机一、在WINDOWS 下打印乱码1、检查驱动程序是否安装/选择正确。
2、检查驱动与仿真是否匹配。
如果驱动与仿真不匹配一定会打印乱码。
ESC/P或LQ仿真:需用STAR公司的CR3240、AR5400、AR4400等驱动。
OKI仿真:需用OKI5330驱动。
PR50仿真:需用PR50驱动。
一般情况下建议用户选用ESC/P仿真配STAR驱动。
3、在“设备管理器”中检查“端口”的设置是否为“打印机端口(LPT1 )”(不能是“ ECP 打印机端口(LPT1 )”)二、在UNIX下打印乱码把打印机EDS设置中的“脉冲时钟”项改为“非常规”试试。
(二)怎样提高打印速度适用于AR6400和AR6600通用打印机1、通过打印机的面板设定:在脱机状态(“联机”灯不亮)按一下[打印选择]键切换高密、高速。
2、通过软件设置:用鼠标右键单击打印机驱动图标,选择“属性”将“图形”选项卡中的分辩率设为120*180,但建议使用180*180 (分辨率越低打印速度越快,打印质量越差);将“设备”选项卡中的“打印品质”设为草稿。
3、在打印机的EDS设置中把“图象方向”设置为“双向”4、如果为单页纸打印,则把打印头间隙设在第2档。
(多层纸打印速度比单张纸慢)适用于其它通用打印机及票据打印机1、在有纸状态下按[跳行]键,可以切换高密、高速或超高速(高密和高速的灯全灭为超高速)。
2、通过软件设置:用鼠标右键单击打印机驱动图标,选择“属性”将“图形”选项卡中的分辩率设为120*180,但建议使用180*180 (分辨率越低打印速度越快,打印质量越差);将“设备”选项卡中的“打印品质”设为草稿。
EPSON、STAR等一般针式打印机打印头故障维修
一般针式打印机打印头怎样换针及故障维修EPSON、STAR等尽管喷墨打印机与激光打印机已是目前非常流行的办公设备,但针式打印机仍在金融、商业等领域得到广泛的应用,这主要是由于针式打印机具有价格低、使用经济、技术成熟等优点,而且针式打印机还有一些专门用途,如打印多联票据等。
当然它也有一个缺点那就是故障率较高,而其打印头的故障又占总故障率的70%左右,下面就为大家谈谈打印头故障的维修方法。
打印头故障主要有:打印头断针、打印针线圈烧坏、打印头与打印辊之间的间隙偏离及打印头电缆断线。
1.打印头断针打印头断针是打印机最常见的故障,这种故障几乎占到总故障的一半。
由于打印机的打印原理是由多根打印针击打色带形成的点阵组成一个字符/汉字。
若打印头中有断针,就会出现打印的字符/汉字缺点少划。
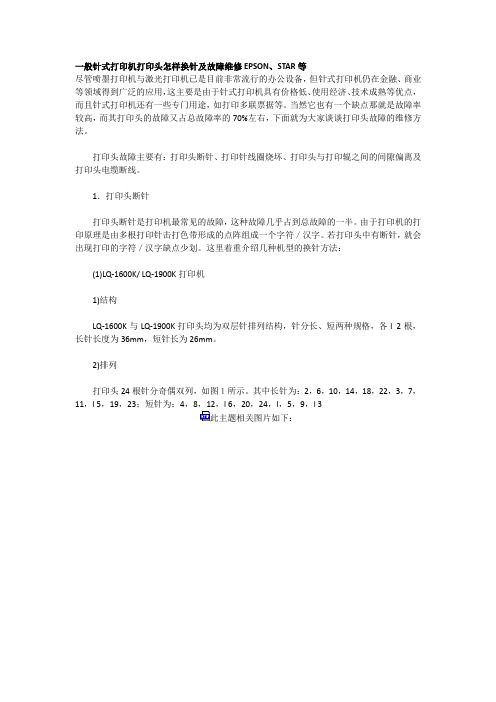
这里着重介绍几种机型的换针方法:(1)LQ-1600K/ LQ-1900K打印机1)结构LQ-1600K与LQ-1900K打印头均为双层针排列结构,针分长、短两种规格,各l 2根,长针长度为36mm,短针长为26mm。
2)排列打印头24根针分奇偶双列,如图1所示。
其中长针为:2,6,10,14,18,22,3,7,11,l 5,19,23;短针为:4,8,12,l 6,20,24,l,5,9,l 3此主题相关图片如下:3)换针方法首先用打印头故障测试程序检查出哪几号针出现故障,然后取下色带盒,翻开打印头锁定夹,从两边捏住打印头散热片(即外壳),向上提起打印头可以看到连着两根柔性扁平电缆,拔去电缆便可拿出打印头。
用酒精棉球擦洗打印头前面的墨污,查看一下是否有缺针情况。
若是断针,则需要进行换针。
换针时要准备好工具,主要有镊子、刀片、金刚挫、钢尺、油石和打印头专用夹具(一种专门用于拆卸打印头散热片的工具)。
用专用夹具退下散热片,可以看到好几层结构。
将头部朝下,松开定位爪,取下最上面的后铜盖,便可以看到环形分布的12根长针,从测试结果区分出断针是长针还是短针,然后数出所断长针的位置,用镊子取出放在一边;如果还有短针断针,则继续取出所有长针,再用刀片沿中间的黄色铜垫片下方分开,露出12根短针,用同样方法取出断针。
最新三星打印机常见问题及问题维修排除方法
最新三星打印机常见问题及问题维修排除方法器常见问题及问题维修排除方法三星4521F机器提示LSU错误解决方法原因解释:开机预热时或者打印时LSU转速或者信号未达到标准设置值,或者是LSU线束未连接好。
解决方法:开机如果出现LSU错误时,进入维护菜单进行系统内存清除,然后关机重新开机即可。
如果问题还不能解决,请联系我们电话:87860092三星4521F机器如何清除内存当机器需要恢复到出厂状态时,机器的内存会被清除。
依次按“菜单”-“维护”-“清空内存”,机器的内存就被清除了。
解决三星SCX-4521F打印机复印身份证模糊:解决一:当看见复印出来的身份证模糊时,在机器的控制面板上面有个按建是原稿类型,此按建是有三个选项分别代表不同的复印格式,复印出来的类型是不同的,这三个选项是1文本2混合3图片。
在复印身份证时必需要选择混合模式在复印,会使身份证复印更加的清晰,使用文本模式复印身份证时,会出现上述复印模糊现象。
所以建议用户使用混合模式复印身份证为最佳。
解决二:在面板上有个菜单键,点击菜单在菜单中第4个选项是“复印功能”,然后按右滚动条直到在“复印功能”下出现“身份证复印”选项时,按确定,然后再复印身份证为最佳,复印出的效果是最佳的。
三星SCX-4521F不能接受传真,显示墨粉用尽,但复印仍然正常,请问如何解决,三星打印机,在墨粉盒中的墨粉将要用尽时,为防止在接收传真过程中出现打印缺陷或者打印空白页等丢失传真内容的情况出现,机器将把传真内容接收到本机内存中,并显示“墨粉用尽”及“内存接收”的信息并继续打印除收到的传真之外的内容。
这种情况下,收到的传真保存在内存中。
您可以设置机器打印收到的传真,即使打印质量不是最佳。
操作步骤如下:1、按“菜单”键,直到显示屏显示“机器设置”。
2、按滚动按钮,直到显示屏底部显示“忽略墨粉”,然后按确认键。
3、按滚动按钮选择“开”或“关”。
选择“开”忽略墨粉用尽消息。
选择“关”在显示此信息时停止打印收到的传真。
超级打印机维护指南说明书
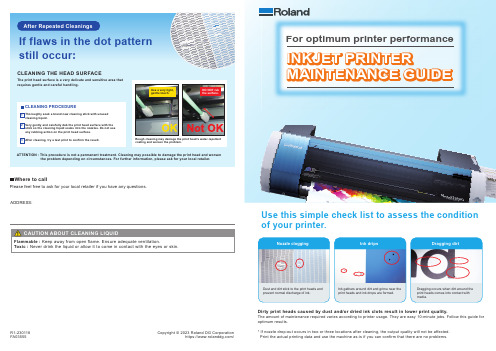
If flaws in the dot pattern still occur:
CLEANING THE HEAD SURFACE
The print head surface is a very delicate and sensitive area that requires gentle and careful handling.
Open front cover
Click “Replace Wiper”
Open “Replace Tools” tab and click “Replace Wiper”.
Click “Replace Felt Wiper”
Open “Replace Tools” tab and click “Replace Felt Wiper”.
Point 4 Replace the wipers/felt wipers
Replace the wipers if they are worn. First, use the tweezers to unlock them at the base of the wiper holders. Then, pull them off using the tweezers. Install new wipers, making sure that they are fully locked into place at the base.
Remove maintenance cover
Maintenance cover
Open front cover
Front cover
Start maintenance operation
三星激光打印机ML-1700 系列 ML-1510 ML-1710 ML-1750维修手册
交流电 专用集成电路 组件 基本输入输出系统 互补金属氧化物半导体 连接器 连接器 中央处理器 分贝 安培分贝 毫瓦分贝 直流电 诊断控制设备 点每英寸 动态随机存取存储器 数字电压计 功能增强的端口 电子可擦可编程只读存贮器 电磁接口 电子摄影 增强并行端口 固件 图形设备接口 接地 主机打印 硬盘驱动器 高压 高压电源 接口 输入和输出 集成电路 智能驱动电子系统或嵌入式驱动电 子系统
录样例相当于典型商业文件的合适样例 本备忘录覆盖了
约 5%的 Letter 或 A4 规格纸张 该数字 5% 在历史上被激光打印机制造商称为 平均
肉眼看来似乎远远超出了 5% 但是实际上 字母数字字符依靠大部分空白构成字符
页面覆盖率
城市 伦敦 洛杉矶 纽约 东京
伦敦 --
5456 3453 5975
戴市场上可以买到的腕带装置 出于人身安全的原因 测试时在对设备通电之前务必除去腕带装置 2 拆除配有 ESD 的电气组件以后 将组件置于导电表面上 如铝或铜箔 或导电泡沫塑料 以防止
电荷在组件附近积聚 3 焊接或熔开 ESD 时 只能使用接地电烙铁 4 只能使用 抗静电 焊料去除装置 一些焊料去除装置未归入 抗静电 一类中 可能产生电荷
维修手册 1-2运本机相关的注意事项
如果不注意本部分内容 您可能会受伤并损坏本机
1 不可把本机安装在高低不平或倾斜的地板上 请在安装后确认本机是否平稳 如果不平稳 本机会翻到引起事故
2 小心不可把手指或毛发插入旋转装置中 当本机正在运行时 小心不可把手指或毛发插入旋转装置 电动机 风扇 进纸部分等等 中 否 则 您会受伤
收件人 Cathy Scott 寄件人 Lane Wolters 事由 典型打印页 日期 07/14/09
激光打印机维修培训资料
激光打印机维修培训资料激光打印机是办公室和个人用户最常用的打印设备之一。
它使用激光技术将图像或文本打印到纸上,速度快且打印质量高。
然而,随着使用时间的增长,激光打印机也会出现各种故障。
因此,掌握激光打印机的维修技能对于维护打印机的正常工作是至关重要的。
在本文中,我们将提供一些激光打印机维修培训资料,以帮助读者了解激光打印机的工作原理,常见故障及其解决方案。
一、激光打印机的工作原理1. 电子信号的传输激光打印机的工作原理是通过计算机传输电子信号到打印机,然后通过打印机内部的控制器将这些信号转换为电流或电压,以驱动激光器和打印机的其他部件。
2. 感光鼓的工作原理在激光打印机中,感光鼓是一个非常重要的部件,它负责将激光束上的图像转移到纸张上。
感光鼓的工作原理是当激光束照射到感光鼓上时,感光鼓上的感光层会产生静电,然后通过碳粉的吸附形成图像。
3. 碳粉传输当图像形成在感光鼓上后,碳粉被转移到纸张上,形成打印图像。
这一步骤是由输送带或输送辊来完成的。
4. 碳粉固定最后,碳粉需要通过加热和压力来固定在纸张上,以确保打印图像的质量。
二、激光打印机常见故障及解决方案1. 打印质量差当激光打印机的打印质量出现问题时,可能是因为感光鼓上的碳粉被耗尽或感光鼓损坏所致。
这时可以尝试更换感光鼓或加入碳粉来解决问题。
2. 纸张卡纸纸张卡纸是激光打印机常见的故障之一,这可能是因为纸张堆积不齐或输送带/输送辊损坏所致。
解决方案可以是清理纸张堆积或更换输送带/输送辊。
3. 打印速度慢打印速度慢可能是因为打印机内部的零部件老化或损坏,这时需要更换或维修内部零部件来解决问题。
4. 打印机无法启动如果激光打印机无法启动,首先需要检查电源插头和线路是否正常。
如果电源和线路正常,可能是因为控制器或其他内部部件出现故障,需要维修或更换部件。
三、激光打印机维修培训1. 培训内容激光打印机维修培训内容主要包括激光打印机的工作原理、常见故障及解决方案、维修工具和设备的使用等内容。
Star 针式打印机 AR-3200 简体中文技术手册
字符点阵
Pica Elite 15 CPI 压缩 Pica 压缩 Elite 上标 / 下标 比例体 上 / 下标比例体 全角汉字 半角 ASCII
点阵 (草稿) 24 X 9 24 X 9 16 X 7 24 X 9 24 X 9 16 X 7
点阵 (高密) 24 X 15 24 X 13 16 X 7 24 X 7 24 X 7 16 X 7 24 X n 16 X n
15
6. EE-PROM 模式
6-1. 概述 通过把一定的数据写入位于主逻辑板上的 EE-PROM 的方法可以改变以下
所描述的一些设置 这种重写 EE-PROM 的模式是为维修人员使用所设计的 并 不适用于一般用户
EDS (电子 DIP 开关) 设置 校正排列不齐 在自动装纸时顶空设定 在缺纸检测时允许的距离 1) 设置方法 有两种方法可设置 EE-PROM 模式 a. 当按住 [跳行] 及 [联机] 钮的同时开机 b. 如果打印机已通电 则送 <ESC> <SUB> (09)H 命令 2) 退出方法 有两种方法可退出 EE-PROM 模式 a. 关上打印电源开关 b. 用 <ESC> “@” 命令初始化打印机
注: 1.
2. 3.
版权所有 无论如何 没有 STAR 公司的允许 本手册任何形式 任何 部份的再版都是违法的 本手册的内容若有变化 不再另行通知 我们尽了最大努力确保该手册内容的正确性 然而人为编写错误在所 难免 敬请体谅
2
第一章 一般规格
1. 一般规格 2. 外观及结构 3. 控制面版
3-1 开关组合功能 3-2 指示灯错误信息 3-3 EDS 模式设定 4. 并行接口 4-1 一般规格 4-2 接口信号 5. 串行接口(可选件) 5-1 一般规格 5-2 接口信号 5-3 DIP 开关设置 6. EE-PROM 模式 6-1 概述 6-2 特殊控制码的说明 6-3 EE-PROM 图表 6-4 重写 EE-PROM
打印机维修资料
打印机维修资料激光打印机的定影器有两种:定影膜定影和定影辊定影,定影器在激光打印机中⼜叫加热组件1、定影膜定影组成:(1)、⾻架(2)、加热陶瓷⽚(3)、热敏电阻:检测加热陶瓷⽚表⾯的温度(4)、温控开关/保险:⾼温断路保护(5)、定影膜:耐⾼温、阻燃、不粘粉(6)、压⼒辊:⼀般在定影膜下⽅⼯作时压⼒辊有动⼒转动,由压⼒辊驱动定影膜转动,纸张在定影膜与压⼒辊之间经过,将粉固化到纸上优点:预热时间短(3秒左右)缺点:速度不能太快2、定影辊定影组成:(1)、定影辊(2)、加热灯(定影灯):在定影辊内部(3)、压⼒辊(4)、热敏电阻(5)、温控开关/保险(6)、分离⽖:将纸张与定影辊和压⼒辊分离优点:打印速度快,寿命长,稳定性好缺点:预热时间长,⼀般不⼩于30秒3、注意使⽤定影膜的打印机,压⼒辊⽼化容易造成卡纸故障双热敏电阻的定影器,⼀个热敏电阻损坏后要全套更换1、跳跃式显影⽤显影磁辊,铝辊表⾯有⿊⾊导电涂层,由电源板通过弹簧触点提供交流电,跳跃式显影⽤的墨粉带负电有磁性,交流的正半周期吸粉,负半周期将粉抛出。
优点:成像效果好如果弹簧装不好或接触不良会造成⿎不吸粉,打全⽩页HP、CANON的机型⽤的是跳跃式显影器2、涂抹式显影⽤的是胶辊,在刮⼑和搅拌杆的作⽤下将粉均匀涂在显影胶辊表⾯,⿎表⾯的静电潜像区吸粉,⾮潜像区排斥,被排斥的粉⼜回到粉仓中,⽤的是⽆磁性的墨粉。
优点:图像清晰EPSON、松下、联想、少数三星的机型⽤的涂抹式显影器以上两种显影器部件详细介绍请参照硒⿎的零件构成激光打印机显影器的构成⿎总成分为单组(⼀是⿎粉⼀体的⿎)和双组,所⽤的墨分也分为单组粉(有磁性)和双组粉(⽆磁性),显影器也分为单组粉显影器和双组粉显影器。
1、单组粉显影器显影刮⼑/刮板的作⽤是打印时控制墨粉的流量佳能⽤单组粉显影器的机型较多2、双组粉显影器磁性铁粉仓装的是有磁性的铁粉叫做载体,粉仓装的是⽆磁性的墨粉,⼯作时载体将⽆磁性墨粉带带显影辊上。
STAR AR3200+打印机中文技术资料 二
S
*1 83026250 上机壳
XBL-15III DS
1
#1 83026252 上机壳
XBL-15III DS
1
80088160 窗口贴
XBL-15III DS
1
S
80060370 品牌标贴
XBL-15III DS
1
S
01903038 镙钉 TAT 3-10 PT-FL
3
S
NPN DASCOM 标贴
NPN 83401230 刻度杆 83400670 固定部件 83400660 右压纸杆 83400650 左压纸杆 83400471 释放杆 83100612 齿轮 82401141 调节杆 81380520 释放轴 81370661 传动轴 80755761 打印头电缆 L 80755751 打印头电缆 S 80531120 固定部件 80530661 固定部件 80530571 弹簧 80511110 弹簧 E065-090-0229 80510931 弹簧 E056-060-0397 04991232 捆扎组件 04991230 捆扎组件 04991204 捆扎线
PT-15XJ JAN
1
OPTION
24
89595010 串并接口转换器
UPC
1
OPTION
-
89590186 自动进纸器
SF-15DJ HK
1
OPTION
89511330 色带
LZ24HD SMH
1
OPTION
89511310 色带
Z24HD SMH
1
OPTION
80
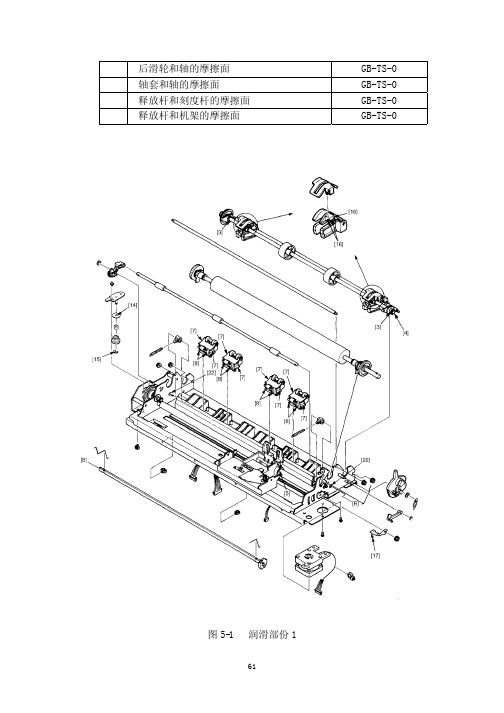
2. 打印机机械
2-1. 组装图
4-1 维修时严禁打开电源 4-2 电源电路异常 4-3 电机故障 4-4 打印头故障 4-5 接口故障
打印机学习维修资料

打印机学习维修资料喷墨打印机的原理?所谓喷墨打印机,就是通过将墨滴喷射到打印介质上来形成文字或图像。
早期的喷墨打印机以及当前大幅面的喷墨打印机都是采用连续式喷墨技术,而当前市面流行的喷墨打印机都普遍采用随机喷墨技术。
这两种喷墨技术在原理上是有很大差别的。
喷墨打印机如果单从打印幅面上分,可大致分为A4喷墨打印机、A3喷墨打印机、A2喷墨打印机;如果从用途上分,则可分为普通喷墨打印机和数码相片打印机、便携移动式喷墨打印机。
喷墨打印机的工作原理1、连续式喷墨技术连续喷墨技术以电荷调制型为代表。
这种喷墨打印原理是利用压电驱动装置对喷头中墨水加以固定压力,使其连续喷射。
为进行记录,利用振荡器的振动信号激励射流生成墨水滴,并对其墨水滴大小和间距进行控制。
由字符发生器、模拟调制器而来的打印信息对控制电报上电荷进行控制,形成带电荷和不带电荷的墨水滴,再由偏转电极来改变墨水滴的飞行方向,使需要打印的墨水滴飞行到纸面上,生成字符/图形纪录。
不参与纪录的墨水滴由导管回收。
对偏转电极而言,有的系统采用两对互相垂直的偏转电极,对墨水滴打印位置进行二维偏转型;有的系统对偏转电极采用多维控制,即多维偏转型。
这种连续循环的喷墨系统.能生成高速墨水滴,所以打印速度高,可以使用普通纸。
不同的打印介质皆可获得高质量的打印结果,还易于实现彩色打印。
但是,这种喷墨打印机的结构与随机式相比,比较复杂:对墨水需要加压装置,终端要有回收装置回收不参与纪录的。
并且工作方式的效率不够高,而且不精确。
现在采用这种技术的喷墨打印机已经极少见到。
2、随机式喷墨技术随机式喷墨系统中墨水只在打印需要时才喷射,所以又称为按需式。
它与连续式相比,结构简单,成本低,可靠性也高,但是,因受射流惯性的影响墨滴喷射速度低。
在这种随机喷墨系统中,为了弥补这个缺点,不少随机式喷墨打印机采用了多喷嘴的方法来提高打印速度。
目前,随机式喷墨技术主要有微压电式和热气泡式两大类:a.热气泡喷墨技术喷墨打印机一般多采用热气泡喷墨技术,通过墨水在短时间内的加热、膨胀、压缩,将墨水喷射到打印纸上形成墨点,增加墨滴色彩的稳定性,实现高速度、高质量打印。
Star—AR3200打印机开关电源原理与维修
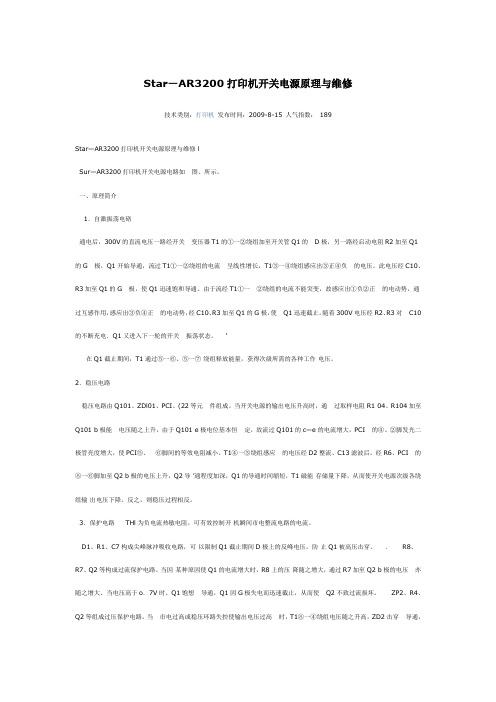
Star—AR3200打印机开关电源原理与维修技术类别:打印机发布时间:2009-8-15 人气指数:189Star—AR3200打印机开关电源原理与维修 lSur—AR3200打印机开关电源电路如图、所示。
一、原理简介1.自激振荡电硌通电后,300V的直流电压一路经开关变压器T1的①一②绕组加至开关管Q1的 D极,另一路经启动电阻R2加至Q1的G 极,Q1开始导通,流过T1①一②绕组的电流呈线性增长,T1③一④绕组感应出③正④负的电压。
此电压经C10、R3加至Q1的G 极,使Q1迅速饱和导通。
由于流经T1①一②绕组的电流不能突变,故感应出①负②正的电动势,通过互感作用,感应出③负④正的电动势,经C10、R3加至Q1的G极,使 Q1迅速截止。
随着300V电压经R2、R3对 C10的不断充电.Q1又进入下一轮的开关振荡状态。
‘在Q1截止期间,T1通过⑤一⑥、⑤一⑦绕组释放能量,获得次级所需的各种工作电压。
2.稳压电路稳压电路由Q101、ZDl01、PCI、(22等元件组成。
当开关电源的输出电压升高时,通过取样电阻R1 04、R104加至Q101 b极能电压随之上升,由于Q101 e极电位基本恒定,故流过Q101的c—e的电流增大,PCI 的④、②脚发光二极管亮度增大,使PCI⑤、⑥脚间的等效电阻减小。
T1④一③绕组感应的电压经D2整流、C13滤波后,经R6、PCI 的⑧一⑥脚加至Q2 b极的电压上升,Q2导’通程度加深,Q1的导通时间缩短,T1磁能存储量下降,从而使开关电源次级各绕组输出电压下降。
反之,则稳压过程相反。
3.保护电路 THl为负电流热敏电阻,可有效控制开机瞬间市电整流电路的电流。
D1、R1、C7构成尖峰脉冲吸收电路,可以限制Q1截止期间D极上的反峰电压,防止Q1被高压击穿。
. R8、R7、Q2等构成过流保护电路。
当因某种原因使Q1的电流增大时,R8上的压降随之增大,通过R7加至Q2 b极的电压亦随之增大、当电压高于o.7V时、Q1饱想导通,Q1因G极失电而迅速截止,从而使 Q2不致过流损坏。
打印机维修通用资料-2022年学习资料
1.4激光扣描系统-Laser/5 canner System微光扫描-系统微光扫措系统的主要作用-是产生-束,在O C感光鼓-调焦透镜-表爆-旋转马达-激光头-扫描系统-光束检测镜片-反射镜-形旋转马-电路、透-反射镜面-镜组。旋转 光束检测电路-转的多棱角镜面,-光束雨过-控制-电路主要-调控过的激光束-透镜组主要通过发数,-合功能-把光线折射O C表面。请看示意-图
2.2曝光-。携带数字信号的激光束-样光-扫描感光鼓的表面,接-LASER.-受激光照射的部位变为-导体,静电荷消失 -的电普像-经激光照射的地方保-Latent Image-原来的电荷,这样鼓的-表面就形成了静电潜像-逐光鼓-OFC
2.3显影-还需要通过碳粉加以还原-出箭刀-Doctor Blade-座里斋快繁接清鑒集格在-磁辊通磁性将-出粉刀的 制下,在磁辊-表面形成一特定厚度的均-匀碳粉层,再充上负电,-使碳粉颗粒带上负电荷。-这样,带了负电的碳粉颗-委光胺 OFC-粒会在电场的作用下,根-据同性相斥、异性相吸的-原理,吸附在感光鼓上显-展银-正电的区域,从而使图像-五Fa 1r-变的清晰可见
12直流控制象统-DC Controller System直流控制系统直流控-制系统主要用来协调和控制打印机的各系统 -间的工作:从接口系统接收数据,驱动控制激-光扫描单元、测试传感器、控制交直流电的分-布,过压/欠流保护、节能模式、 制高压电的-分布等。其电路构成比其它5个系统都复杂
Hale Waihona Puke 13接口象统-o Formatter System接口系统接口系统是-打印机和计算机连接的桥梁,它负责把计算-机传递 来的一定格式的数据翻译成DC板能-处理的格式,并传递给DC板,来控制整个打-印机的运作
投金维修员婷训教材-引歌-打印机的组成-打印机的工作原理-粉盒各个部件的作用及容易出现的缺陷-四、打印机及粉盒常见故 的解决力办法-五、维修打印机前应做事项-六、常用打印机的维修方法
STAR系列打印机故障现象与面板显示对应表
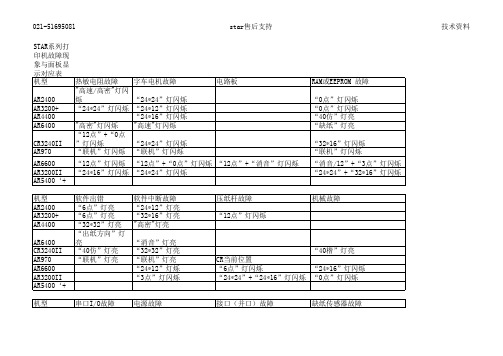
star售后支持
技术资料
电路板
RAM或EEPROM 故障 “0点”灯闪烁 “0点”灯闪烁 “40仿”灯亮 “缺纸”灯亮 “32*16”灯闪烁 “联机”灯闪烁 “消音/12”+“3点”灯闪烁 “24*24”+“32*16”灯闪烁
AR6600 “12点”灯闪烁 “12点”+“0点”灯闪烁 “12点”+“消音”灯闪烁 AR3200II “24*16”灯闪烁 “24*24”灯闪烁 AR5400‘+’ 机型 AR2400 AR3200+ AR4400 AR6400 CR3240II AR970 AR6600 AR3200II AR5400‘+’ 机型 AR2400 AR3200+ AR4400 AR6400 CR3240II AR970 软件出错 软件中断故障 “6点”灯亮 “24*12”灯亮 “6点”灯亮 “32*16”灯亮 “32*32”灯亮 "高密"灯亮 “出纸方向”灯亮 “消音”灯亮 “40仿”灯亮 “32*32”灯亮 “联机”灯亮 “联机”灯亮 “24*12”灯烁 “3点”灯闪烁 压纸杆故障 “12点”灯闪烁
机械故障
“40楷”灯亮 CR当前位置 “6点”灯闪烁 “24*16”灯闪烁 “24*24”+“24*16”灯闪烁 “0点”灯闪烁
打印机的维护和修理doc
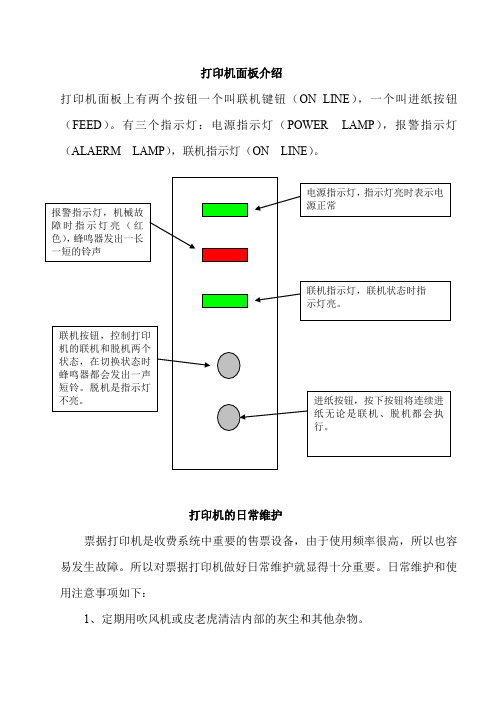
打印机面板介绍打印机面板上有两个按钮一个叫联机键钮(ON LINE),一个叫进纸按钮(FEED)。
有三个指示灯:电源指示灯(POWER LAMP),报警指示灯(ALAERM LAMP),联机指示灯(ON LINE)。
打印机的日常维护票据打印机是收费系统中重要的售票设备,由于使用频率很高,所以也容易发生故障。
所以对票据打印机做好日常维护就显得十分重要。
日常维护和使用注意事项如下:1、定期用吹风机或皮老虎清洁内部的灰尘和其他杂物。
2、清洁外表时,要用中性清洁剂,切勿用带水的布擦拭,严防机器进水。
3、由于收费亭内使用空调、电暖气等,使市电不甚稳定,所以不要将打印电源线拉入市电插座。
4、打印机在使用前,必须装上打印纸或色带架,否则将损坏打印头。
5、为使打印机灵活使用,要经常给打印头、滑动块和轴、螺杆处加机油。
打印机的常见故障A、票据打印机不能打票。
原因之一:打印机不供电此时打印机顶部面板的电源指示灯不亮,则是打印机没有上电,应继续检查电路。
原因之二:打印机在非联机状态看操作面板上联机指示灯是否亮。
如不亮则按一下ON LINE鍵,如仍不亮,则应检查打印机和车道工控机的电缆连接是否正常,有无破损。
(打印电缆的结构见附图)原因之三:机械故障操作面板ALARM(报警灯)是否亮红灯,如果亮,则:a.看是否卡纸b.是否打印机盖未盖好,盖下面的“+”字形塑料柱是否折断,塑料柱正下方的开关(盖压开关)是否起作用。
c.检查票下方压纸的开关(纸压开关)是否起作用;是否最后一张票。
d.传动齿轮严重磨损或机内太赃使机械传动受阻。
要清洗机械、更换齿轮。
B、票据打印机卡纸。
处理方法:1、检查票宽窄的两定位环是否位置正确。
2、检查两固定杆是否压下去。
3、调节纸厚度的调节杆位置(越往后越不易卡纸)。
4、压纸片的缝隙太大,调节缝隙,是压纸片紧压打票纸。
5、取出卡住的已撕碎的票时,要注意不用改锥等金属物撬打印头的中间。
C.打印的字体太淡或模糊不清将调节杆向前调节到适当位置。
三星维修手册共5页
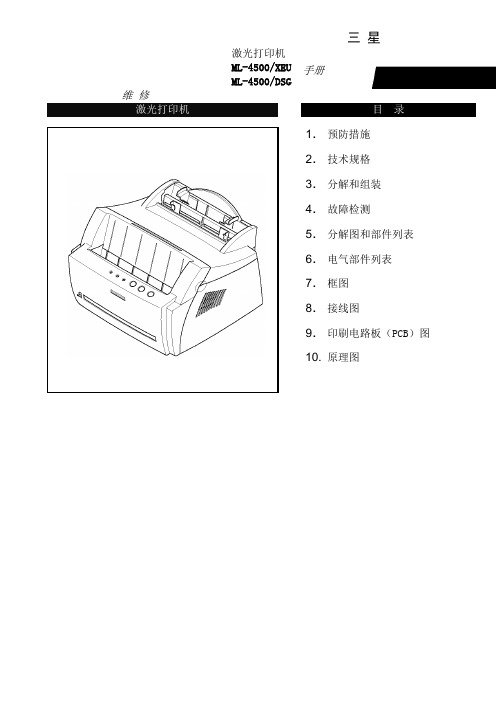
维 修激光打印机目 录1. 预防措施 2. 技术规格 3. 分解和组装 4. 故障检测 5. 分解图和部件列表 6. 电气部件列表 7. 框图 8. 接线图9. 印刷电路板(PCB )图 10. 原理图三 星激光打印机ML-4500/XEU ML-4500/DSG手册4.维护与故障排除4-1 预防性维护下述循环周期为保养通用指南。
示例表用于平均每天接收与传输50份文件。
环境条件4-2打印质量第 1 页4-3 DCU(诊断器)控制4-3-1 DCU设置DCU用于诊断打印机故障。
使用DCU之前,首先打开并除去打印机前部出口盖,然后从左边除去底盖。
将DCU排插线(10针至4针)连接到控制板上的CN9(4针)。
4-3-2 状态代码将DCU连接到打印机上,然后打开电源。
DCU用7段发光二极管显示状态代码。
有两种状态代码:正常与错误。
状态代码表示打印机的运行状态。
正常状态代码错误状态代码4-3-3 诊断方式当打印机故障发生且DCU显示错误状态代码时,您可以使用诊断模式查找问题并进行修理。
诊断代码当您修理故障时,您可以仅使机器的一个单元在诊断模式下运行。
同时按下三个按钮([DOWN],[SHIFT],[STOP]),打开打印机电源,进入诊断模式。
当DCU显示‘78’,2-3秒后放开这些按键,接着DCU显示‘00’。
通过使用[UP]或[SHIFT]与[DOWN]键,选择适宜的诊断模式,然后按下[ENTER]键运行。
如欲停止运行,按下[SHIFT]与[ENTER]第 3 页4-3-4自测试按钮当您按下此按钮,机器打印‘竖行’样张。
当您按下此按钮并接通打印机电源,DCU显示代码‘89’,同时打印机预热。
预热之后,打印机处于‘准备’状态。
DCU显示代码‘88’。
在此模式下,所有传感器不运行,打印机进行所有打印操作(打印演示样张)与打印PC数据)。
如果诊断打印引擎有故障时的控制板,此模式非常有用。
希望以上资料对你有所帮助,附励志名言3条::1、世事忙忙如水流,休将名利挂心头。
STAR SP320打印机保养与维修经验
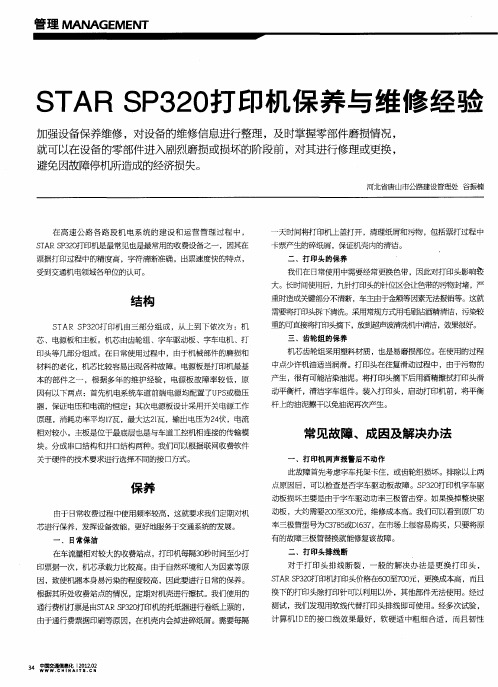
主轴齿轮 向外推出约2 毫米 ,利用剩余的齿轮咬合 ,完全可以使 用 ,处理后可以达到原厂齿轮使用寿命的8 %以上 ,相当于一个 0
新 的齿轮 ,节 约效 果十 分明 显 。
试工作稳定,而目 使用寿苛 远大于J 池 嬲
件。
七 、开机后打印头往复动作不停机 此现象系主板 故障引起 。主板故 障自身出现 的质量问题很
、
日常 保洁
有的故障三极管替换就能修复该故障。 二、打印头排线断 对于打 印头排线 断裂 ,一 般的解决办 法是 更换 打印 头 , S A P 2 印机打印头价格在6 0 0 元,更换成本高 ,而且 T RS3 丁 0 至7 0
换下 的打 印头 除 打印 针可 以利 用 以外 ,其他 部件 无 法使 用 。经过
重时造成关键部分不清晰,车主由于金额等因素无法报销等。这就
需要将打 印头拆下 清洗 。采用 常规方 式用毛刷湖 酯 清 洁 ,污染 较 重 的可直接将 i头摘下 , 到超声波清洗机 中清 洁 ,效果很好 。 T1 l ] 放
芯 、电源板 和主 板 。机芯 由齿轮 组 、字车 驱 动板 、字 车 电机 、打 印 头等 几部 分组 成 。在 日常 使用 过程 中 ,由于机械 部 件的 磨损 和
少 ,主 要是 用户 的错 误操 作 和使 用环 境有 关 。用 户使 用打 印机 热 拔插 接 口线是 非 常容 易损坏 主板 的 ,轻则 损坏 接 口芯片 , 则主板 重
五、字车托架损坏 故障现象 :字车托 架与程序轮之 间联动划片磨损 ,经检查 发现划片经常只残余不足三分之二 ,已经不能正常进入程序轮, 开机 自检卡死后 即报警。一般的解决办法是更换整套字车托架,
拿下打印头后盖 ,卸下电磁铁就可以看见排线电路板 ,在断裂的 排线焊点上焊上一根I E ,剪到合适长度并用胶水固定在排线 D线 上,在将排线插头处小心的刮开露出铜箔 ,并将另一端焊在铜箔 上 ,就可以满足使用要求。但要注意焊接时速度一定耍快 ,不要 把铜箔基础的塑料板焊化 ,否则无法将其插入字车驱动板。
- 1、下载文档前请自行甄别文档内容的完整性,平台不提供额外的编辑、内容补充、找答案等附加服务。
- 2、"仅部分预览"的文档,不可在线预览部分如存在完整性等问题,可反馈申请退款(可完整预览的文档不适用该条件!)。
- 3、如文档侵犯您的权益,请联系客服反馈,我们会尽快为您处理(人工客服工作时间:9:00-18:30)。
star打印机维修资料(Star printer maintenance data)STAR series printer maintenance dataPrinting garbled codeApplicable to general printersFirst, print garbled code under WINDOWS1, check whether the driver is installed / selected correctly.2, in device manager, check whether the port setting is "LPT1" (not ECP printer port (LPT1))Two, print garbled code in UNIXTry changing the "pulse clock" item in the printer's EDS setting to "unconventional".Suitable for note / passbook printerFirst, print garbled code under WINDOWS1, check whether the driver is installed / selected correctly.2, check whether the drive and simulation match. If the drive does not match the simulation, it will print the garbled code.ESC/P or LQ simulation: use STAR company's CR3240, AR5400, AR4400 and other drivers.OKI simulation: use OKI5330 drive.PR50 simulation: use PR50 drive.Under normal circumstances, it is recommended that users choose ESC/P simulation with STAR driver.3, in device manager, check whether the port setting is "LPT1" (not ECP printer port (LPT1))Two, print garbled code in UNIXTry changing the "pulse clock" item in the printer's EDS setting to "unconventional".(two) how to improve the printing speed?Applies to AR6400 and AR6600 universal printers1, through the printer panel settings: in offline status (online light is not lit), press the [select Print] key to switch the high-density, high-speed.2, set up by the software: Drive Icon right-click the printer, select "properties" of the "graphics" tab of the resolution is 120*180, but to recommend the use of 180*180 (the lower resolution print speed, print quality is worse); "equipment" tab in the "print quality" is set to draft.3, in the printer's EDS settings, the "image direction" is set to "two-way""4, if single page printing, the print head gap is located in the second file. (multilayer paper is printed at a rate slower than a sheet of paper)Applicable to other general printers and bills printersIn the paper, 1 state press [] key skip can switch, high density, high or super high speed (high density and high speed light Quanmie for ultra high speed).2, set up by the software: Drive Icon right-click the printer, select "properties" of the "graphics" tab of the resolution is 120*180, but to recommend the use of 180*180 (the lower resolution print speed, print quality is worse); "equipment" tab in the "print quality" is set to draft.3, in the printer's EDS settings, the "image direction" is set to "two-way""4, if single page printing, the print head gap is located in second stalls (multilayer paper printing speed slower than sheet paper)Suitable for bankbook printer1, in a paper state, press the [teller] 1] key to switch the high-density, high-speed.2, set up by the software: Drive Icon right-click the printer, select "properties" of the "graphics" tab of the resolution is120*180, but to recommend the use of 180*180 (the lower resolution print speed, print quality is worse); "equipment" tab in the "print quality" is set to draft.3, if single page printing, the print head gap is located in second stalls (multilayer paper printing speed slower than sheet paper)(three) do not print1, check whether the printer power is open, whether the cable is inserted tight.2. Check that the printer is loaded and that the online light is already on.3, check whether the computer has installed a print driver4, in the computer "device manager", check whether the port is "printer port (LPT1)" (not "ECP printer port" (LPT1)).5, in the host computer's BIOS, check whether the parallel port is selected as SPP or Normal(four) missing lineMissing line faults are usually caused by broken needles or needles out of a certain pin. This requires the printer to be sent to the actual maintenance center for maintenance.(five) the vertical line is not straightAR3200+, AR3200II:1, first install a wide row of printing paper, turn off the printer, and then press the "paper / paper / return paper" and [Online] button to start, the printer will print the operation prompts and test data.2. During the operation, the printer will send the paper back and forth to check whether the print is aligned.3, use the button and the word spacing to correct the print. [Arial] button will be second times the print position to tune recently left; the word [space] button second times print position correction to the right tune recently.4, when the print "|" characters with each other to form a continuous line, said that the bidirectional printing mode has been corrected.5, to select the next two-way correction test, click the skip button. If you press paper / paper / return the paper, select the last test item. Test in the "high-density", "high-speed high-density", "draft" and "Chinese characters" model in circulation.6, press the [Online] button to quit.AR2400:1, first installed the printing line of paper, turn off theprinter, and then press the [skip] [] button boot and online at the same time, the printer will print the operating tips and test data.2. During the operation, the printer will send the paper back and forth to check whether the print is aligned.3, use the button and the word spacing to correct the print. [Arial] button will be second times the print position to tune recently left; the word [space] button second times print position correction to the right tune recently.4, when the print "|" characters with each other to form a continuous line, said that the bidirectional printing mode has been corrected.5, to select the next two-way correction test, click the skip button. Test in the "high-density", "high-speed high-density", "draft" and "Chinese characters" model in circulation.6, press the [Online] button to quit.CR3240:1, first install a wide row of printing paper, turn off the printer, and then press the "paper / paper / return paper" and [Online] button to start, the printer will print the operation prompts and test data.2. During the operation, the printer will send the paper back and forth to check whether the print is aligned.3, [paper / eject] and [skip] button button correction print. [paper / eject] button will be second times the print position to the left [skip] tune recently; second print position correction button to the right tune recently.4, when the print "|" characters with each other to form a continuous line, said that the bidirectional printing mode has been corrected.5, to select the next two-way correction test, press the [Online] button. Test in the "high-density", "high-speed high-density", "draft" and "Chinese characters" model in circulation.6, press [word spacing] button exit.CR3240II, AR6600:1, first install a wide row of printing paper, turn off the printer, and then press the "paper / paper / return paper" and [Online] button to start, the printer will print the operation prompts and test data.2. During the operation, the printer will send the paper back and forth to check whether the print is aligned.3. Print the button and adjust the distance between the words. [Select] button will print second print position to the left word tune recently; [space] button second times print position correction to the right tune recently.4, when the print "|" characters with each other to form a continuous line, said that the bidirectional printing mode has been corrected.5, to select the next two-way correction test, click the skip button. If you press paper / paper / return the paper, select the last test item.6, press the [Online] button to quit.AR5400, AR5400+:1, press the [] button on the top of the boot at the same time, 2 to 3 seconds after the release button, and then loaded on the printing paper into EDS and longitudinal correction parameter settings.First, the printer will ask if you need to modify the EDS parameters, please choose not to enter at this time [skip] button press.Second items, three types of time and options for inserting a single page of paper. Please choose one of them.Third items, please choose the direction of the paper, and play two ways for you to choose.Fourth items, play "normal" and "bankbook" two kinds of printing mode, you choose.The fifth item is not available until the actual setting,two-way test and vertical correction. Please press the "paper / paper back" button to enter.2, the printer will print out 12 items, and then print the first of these 12 items, waiting for correction.3, [put eject button and [skip]] button correction print. [eject button installed] second print position to the left [skip] tune recently; second print position correction button to the right tune recently.4, when the print "|" characters with each other to form a continuous line, said that the bidirectional printing mode has been corrected.5, to select the next two-way correction test, press the [Online] button.6, press the [] button to exit.Note: single sheet and multi ply paper are adjusted separately, without affecting each other. To ensure consistency between adjustment and application. The thickness of the paper bar is more than 3 at the scale, and it is made of multilayer paper.AR5400TX:1, press the [] button on the top of the boot, until the print head moves release key.2, after the printer to print paper, stop printing, followedby [skip] start button, turn the printer to print settings, until the two-way test and longitudinal correction play the words, then press [installed eject] button to confirm, will print out the test item.3, if the choice of single paper press paper loading correction [/] back paper confirmation, if the correction of multi-layer paper, press the [] button to skip, and then click Install eject button.4, [put eject button and [skip]] button correction print. [eject button installed] second print position to the left [skip] tune recently; second print position correction button to the right tune recently.5, when the print "|" characters with each other to form a continuous line, said that the bidirectional printing mode has been corrected.6, to select the next two-way correction test, press the [Online] button.7, press the [] button to exit.Note: single sheet and multi ply paper are adjusted separately, without affecting each other. To ensure consistency between adjustment and application. The thickness of the paper bar is below 2. It is a single layer of paper, and the scale is more than 3. It is made of multilayer paper.AR6400:1. Open the front cover of the printer.2, press [Online] and [paper / paper back] do not put at the same time boot, until the print head began to move, let go. The level in A4 paper, print printer, if the printer paper will exit, put the paper back in the flat.3, the longitudinal correction models include: "Chinese characters of high density, high speed Chinese characters" and "west the density" and "western high speed", "high density image", "high speed image", can use paper loading [paper] / back select these settings to adjust a set, in whom [] key to enter in the back rows.4, if the choice of single paper press [skip] to confirm the correction, if the correction of multi-layer paper, press the [put eject "button, then press the button [skip].5. Press the paper / paper button and print the button. [Select] button will print second print position to the tune recently eject; [] button installed second print position correction to the right tune recently.6, when the print "|" characters with each other to form a continuous line, said that the bidirectional printing mode has been corrected. According to [skip], you will be prompted to save, and then click Save as Skip button, or press [paper / paper] then press [skip].When all modes are satisfied, press the [Online] key to exit.Note: single sheet and multi ply paper are adjusted separately, without affecting each other. To ensure consistency between adjustment and application. The thickness of the paper bar is below 2. It is a single layer of paper, and the scale is more than 3. It is made of multilayer paper.AR1000:1. Open the front cover of the printer. Press the [on line] and [teller] II] key to turn on, and when the print head begins to move, let go.2, the level of a A4 paper, if the printer paper will exit, put the paper back in the flat.3, the longitudinal correction models include: "Chinese characters of high density, high speed Chinese characters" and "west the density" and "western high speed", "high density image", "high speed image", can be used to select the II] teller [a few settings, want to adjust a setting in which, who in the back [teller I] to enter.4, if you choose the passbook correction, please press [teller I]] confirm, if correct multi-layer paper, first press [teller II] key], and then press [teller I] button].5, with [passbook / multi joint] button and [teller] II] button, proofreading is printing.[passbook / multiple button second times to print position tunerecently left; [teller II] button second times print position correction to the right tune recently.6, when the print "|" characters with each other to form a continuous line, said that the bidirectional printing mode has been corrected. Press [teller I]] will prompt you to save, such as save, and then press [teller I] key], or first press [teller II] and then press [teller I]].When all modes are satisfied, press the [Online] key to exit.AR4400:1, first install a wide row of printing paper, turn off the printer, and then press the [jump page] and [Online] button to start, the printer will print the operation prompts and test data.2. During the operation, the printer will send the paper back and forth to check whether the print is aligned.3, [page] [skip and jump button button correction print. [page] button will jump second print position to the left [skip] tune recently; second print position correction button to the right tune recently.4, when the print "|" characters with each other to form a continuous line, said that the bidirectional printing mode has been corrected.5, to select the next two-way correction test, press the [Online]button. Test cycle in "high density", "high speed", "high" and "draft" mode。