如何使用SNMP来监控Linux服务器
linux snmptrapd 的使用说明

linux snmptrapd 的使用说明摘要:一、概述二、安装与配置1.安装依赖库2.配置snmptrapd3.测试安装是否成功三、snmptrapd的配置文件1.基本配置项2.高级配置项四、常用命令与操作1.启动与停止snmptrapd2.查看snmptrapd状态3.查询陷阱信息五、snmptrapd的实战应用1.监控网络设备2.监控服务器性能3.自定义陷阱处理六、故障排查与优化1.故障现象及原因2.排查方法3.优化措施七、总结与展望正文:一、概述Linux snmptrapd 是一款基于SNMP(简单网络管理协议)的trap 接收和处理程序。
它可以接收来自网络设备、服务器等发出的SNMP trap 消息,并将这些消息进行处理、分析和报警。
在监控网络设备、服务器性能等方面具有很高的实用价值。
本文将详细介绍Linux snmptrapd 的安装、配置及实战应用。
二、安装与配置1.安装依赖库在安装snmptrapd 之前,需要先安装一些必要的依赖库。
在Debian/Ubuntu 系统中,可以通过以下命令安装:```sudo apt-get updatesudo apt-get install build-essential libpq-dev libdb-dev libperl-dev ```在RHEL/CentOS 系统中,可以通过以下命令安装:```sudo yum install perl-devel postgresql-devel db2-devel```2.配置snmptrapd安装完成后,需要对snmptrapd 进行配置。
首先,创建配置文件:```sudo nano /etc/snmptrapd/snmptrapd.conf```在配置文件中,可以设置基本配置项,如监听端口、日志文件、数据库连接等。
以下是一个简单的配置示例:```# 监听端口ListenUDPOn 161# 日志文件LogFile /var/log/snmptrapd/snmptrapd.logLogSyslog true# 数据库连接DBHostname localhostDBName snmptrapdDBUser snmptrapdDBPassword snmptrapd# 陷阱处理程序TrapProcessor /usr/local/bin/trap_processor```3.测试安装是否成功配置完成后,可以通过以下命令启动snmptrapd:```sudo snmptrapd -c /etc/snmptrapd/snmptrapd.conf```然后,使用snmptrap 命令向snmptrapd 发送陷阱消息,查看是否能够正常接收和处理:```snmptrap -V -L invalid -M u -O 161:162 -I 192.168.1.100 -Tc -v 2c -c /etc/snmptrapd/snmptrapd.conf```如果snmptrapd 能够正常接收和处理陷阱消息,说明安装成功。
常用SNMP走查系统运行情况方法
常用SNMP走查系统运行情况方法SNMP(Simple Network Management Protocol)是一种用于监测和管理网络设备的协议。
它允许系统管理员通过查询网络设备和收集相关信息来了解和解决问题。
在本文中,我们将介绍一些常用的SNMP走查系统运行情况的方法。
1.监测设备状态:使用SNMP可以监测设备的状态,包括设备的连接状态、CPU使用率、内存使用情况等。
可以通过查询设备的OID(对象标识符)获取这些信息。
例如,对于CPU使用率,可以查询OID1.3.6.1.4.1.2024.11.52.0来获取设备的CPU使用率。
2.监测网络流量:使用SNMP可以监测设备的网络流量,包括接收和发送的字节数、数据包的数量等。
可以通过查询设备的OID来获取这些信息。
例如,对于接收的字节数,可以查询OID1.3.6.1.2.1.2.2.1.10来获取设备接收的字节数。
3.监测设备连接数:使用SNMP可以监测设备的连接数,包括TCP连接数、UDP连接数等。
可以通过查询设备的OID来获取这些信息。
例如,对于TCP连接数,可以查询OID1.3.6.1.4.1.2024.10.1.3.2来获取设备的TCP连接数。
4.监测设备的存储状况:使用SNMP可以监测设备的存储状况,包括硬盘的使用情况、文件系统的使用情况等。
可以通过查询设备的OID来获取这些信息。
例如,对于硬盘的使用情况,可以查询OID1.3.6.1.2.1.25.2.3.1.6来获取设备硬盘的使用情况。
5.监测设备的日志信息:使用SNMP可以监测设备的日志信息,包括设备的错误日志、警告日志等。
可以通过查询设备的OID来获取这些信息。
例如,对于错误日志,可以查询OID1.3.6.1.4.1.9.9.91.2.1.1.6来获取设备的错误日志。
6.监测设备的性能指标:使用SNMP可以监测设备的性能指标,包括设备的响应时间、吞吐量等。
可以通过查询设备的OID来获取这些信息。
linux(centos7.5)配置snmpd以及snmptrapdv3版本
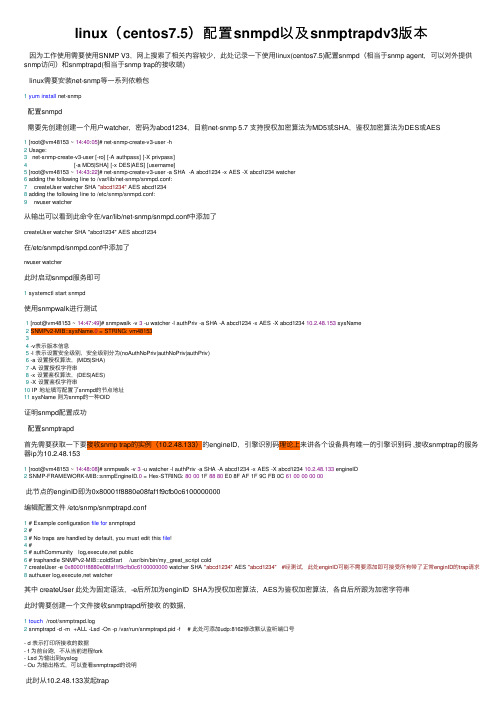
linux(centos7.5)配置snmpd以及snmptrapdv3版本因为⼯作使⽤需要使⽤SNMP V3,⽹上搜索了相关内容较少,此处记录⼀下使⽤linux(centos7.5)配置snmpd(相当于snmp agent,可以对外提供snmp访问)和snmptrapd(相当于snmp trap的接收端)linux需要安装net-snmp等⼀系列依赖包1yum install net-snmp配置snmpd需要先创建创建⼀个⽤户watcher,密码为abcd1234,⽬前net-snmp 5.7 ⽀持授权加密算法为MD5或SHA,鉴权加密算法为DES或AES1 [root@vm48153 ~ 14:40:05]# net-snmp-create-v3-user -h2 Usage:3 net-snmp-create-v3-user [-ro] [-A authpass] [-X privpass]4 [-a MD5|SHA] [-x DES|AES] [username]5 [root@vm48153 ~ 14:43:22]# net-snmp-create-v3-user -a SHA -A abcd1234 -x AES -X abcd1234 watcher6 adding the following line to /var/lib/net-snmp/snmpd.conf:7 createUser watcher SHA "abcd1234" AES abcd12348 adding the following line to /etc/snmp/snmpd.conf:9 rwuser watcher从输出可以看到此命令在/var/lib/net-snmp/snmpd.conf中添加了createUser watcher SHA "abcd1234" AES abcd1234在/etc/snmpd/snmpd.conf中添加了rwuser watcher此时启动snmpd服务即可1 systemctl start snmpd使⽤snmpwalk进⾏测试1 [root@vm48153 ~ 14:47:49]# snmpwalk -v 3 -u watcher -l authPriv -a SHA -A abcd1234 -x AES -X abcd1234 10.2.48.153 sysName2 SNMPv2-MIB::sysName.0 = STRING: vm4815334 -v表⽰版本信息5 -l 表⽰设置安全级别,安全级别分为(noAuthNoPriv|authNoPriv|authPriv)6 -a 设置授权算法,(MD5|SHA)7 -A 设置授权字符串8 -x 设置鉴权算法,(DES|AES)9 -X 设置鉴权字符串10 IP 地址填写配置了snmpd的节点地址11 sysName 则为snmp的⼀种OID证明snmpd配置成功配置snmptrapd⾸先需要获取⼀下要接收snmp trap的实例(10.2.48.133)的engineID,引擎识别码理论上来讲各个设备具有唯⼀的引擎识别码 ,接收snmptrap的服务器ip为10.2.48.1531 [root@vm48153 ~ 14:48:08]# snmpwalk -v 3 -u watcher -l authPriv -a SHA -A abcd1234 -x AES -X abcd1234 10.2.48.133 engineID2 SNMP-FRAMEWORK-MIB::snmpEngineID.0 = Hex-STRING: 8000 1F 8880 E0 8F AF 1F 9C FB 0C 6100000000此节点的enginID即为0x80001f8880e08faf1f9cfb0c6100000000编辑配置⽂件 /etc/snmp/snmptrapd.conf1 # Example configuration file for snmptrapd2 #3 # No traps are handled by default, you must edit this file!4 #5 # authCommunity log,execute,net public6 # traphandle SNMPv2-MIB::coldStart /usr/bin/bin/my_great_script cold7 createUser -e 0x80001f8880e08faf1f9cfb0c6100000000 watcher SHA "abcd1234" AES "abcd1234" #经测试,此处enginID可能不需要添加即可接受所有带了正常enginID的trap请求8 authuser log,execute,net watcher其中 createUser 此处为固定语法,-e后所加为enginID SHA为授权加密算法,AES为鉴权加密算法,各⾃后所跟为加密字符串此时需要创建⼀个⽂件接收snmptrapd所接收的数据,1touch /root/snmptrapd.log2 snmptrapd -d -m +ALL -Lsd -On -p /var/run/snmptrapd.pid -f # 此处可添加udp:8162修改默认监听端⼝号- d 表⽰打印所接收的数据- f 为前台跑,不从当前进程fork- Lsd 为输出到syslog- Ou 为输出格式,可以查看snmptrapd的说明此时从10.2.48.133发起trap1 snmptrap -v 3 -e 0x80001f888013ae4455833d0e6100000000 -u watcher -l authPriv -a SHA -A 'abcd1234' -x AES -X 'abcd1234'10.2.48.153 -C i 可以看到⽇志中的输出。
SNMP卡网络监控的技术方案
SNMP卡网络监控的技术方案SNMP(Simple Network Management Protocol)是一种用于网络设备之间管理和监控的协议。
SNMP卡是一种安装在网络设备上的硬件设备,用于监控和管理设备的性能和状态。
下面是一个关于SNMP卡网络监控的技术方案,详述SNMP卡的功能和实施步骤。
一、SNMP卡的功能1.设备监控:SNMP卡可以监控网络设备的性能指标,包括CPU使用率、内存利用率、网络流量等。
可以通过这些指标来判断设备的健康程度,并及时采取措施进行故障排查和修复。
2. 警报通知:SNMP卡可以配置警报规则,一旦设备性能或状态发生异常,就会触发警报通知。
可以通过手机短信、邮件或 SNMP trap等方式向管理员发送警报信息,使管理员能够及时采取措施来解决问题。
3.远程监控:SNMP卡支持远程监控,管理员可以通过网络连接到SNMP卡,查看设备的实时状态和性能指标,进行远程故障排查和维护操作,减少对物理接触的需求,提高效率。
4.统计和报告:SNMP卡可以将设备的性能指标进行统计和报告,提供设备的历史数据和趋势分析。
管理员可以通过这些统计数据来评估设备的性能和稳定性,优化设备配置和资源分配。
二、SNMP卡网络监控的实施步骤1.硬件准备:购买适合网络设备的SNMP卡,确保其与设备兼容。
将SNMP卡插入网络设备的可用插槽中,并连接好相应的电源和网络线缆。
2.网络配置:配置SNMP卡的网络连接信息,包括IP地址、子网掩码、网关等。
确保SNMP卡与网络正常通信,可以与管理员进行交互。
3.SNMP配置:配置SNMP卡的SNMP协议参数,包括SNMP版本、读写权限、团体名等。
确保SNMP卡能够正确地接收和处理SNMP管理请求。
4.性能指标配置:配置SNMP卡监控的性能指标,包括CPU利用率、内存利用率、网络流量等。
根据需要设定相应的警报阈值,以便在指标超过或低于设定值时触发警报通知。
5.警报配置:配置警报通知的方式和接收人员信息,包括手机短信、邮件地址等。
linux snmptrapd 的使用说明
linux snmptrapd 的使用说明Linux SNMPTrapd是一种可以用于监控和收集网络设备的SNMP陷阱(Trap)的工具。
它可以将设备发送的SNMP陷阱消息转换为易于理解的格式,并提供相应的处理和响应机制。
下面是关于Linux SNMPTrapd的使用说明。
1. 安装SNMPTrapd:在Linux系统上安装SNMPTrapd非常简单。
可以使用系统自带的软件包管理工具(如yum或apt)直接安装SNMPTrapd软件包。
2. 配置SNMPTrapd:配置文件位于/etc/snmp/snmptrapd.conf。
可以使用文本编辑器打开该文件,并按照以下格式添加陷阱处理规则:```authCommunity log,execute,net publictraphandle default /usr/sbin/snmptttrapcommunity publictraphandle default /usr/sbin/snmptt```上述配置示例中,使用的公共社区名称是"default",陷阱消息将由"/usr/sbin/snmptt"处理。
可以根据实际需求,对不同的陷阱消息使用不同的处理方式。
3. 启动SNMPTrapd服务:打开终端,并使用以下命令启动SNMPTrapd服务:```sudo service snmptrapd start```可以使用`status`参数检查服务是否成功启动:```sudo service snmptrapd status```4. 测试SNMPTrapd:可以使用SNMP管理工具向SNMPTrapd发送一个测试陷阱消息,以验证配置是否正确。
例如,可以使用Net-SNMP库中的snmptrap工具:```snmptrap -v 2c -c public localhost '' SNMPv2-MIB::coldStart 0 0 '' SNMPv2-MIB::sysName.0 s "TestTrap"```如果配置正确,SNMPTrapd将接收到该陷阱消息,并根据配置文件中的规则进行处理。
linux snmptrapd 的使用说明

linux snmptrapd 的使用说明(原创实用版)目录1.Linux snmptrapd 的概述2.snmptrapd 的安装与配置3.snmptrapd 的基本使用方法4.snmptrapd 的高级用法5.snmptrapd 的应用案例正文【1.Linux snmptrapd 的概述】snmptrapd 是一个 Linux 系统下的网络管理工具,主要用于模拟SNMP 代理发送陷阱(trap)消息到 SNMP 管理端。
通过使用 snmptrapd,用户可以更加方便地监控网络设备,并及时接收设备的告警信息。
【2.snmptrapd 的安装与配置】在安装 snmptrapd 之前,需要确保系统已安装了 Net-SNMP。
在Debian 和 Ubuntu 系统中,可以通过以下命令进行安装:```sudo apt-get updatesudo apt-get install netsnmp-utils```安装完成后,需要对 snmptrapd 进行配置。
snmptrapd 的配置文件位于 `/etc/snmptrapd/snmptrapd.conf`。
在配置文件中,可以设置以下参数:- `trap_port`: 设置陷阱消息的接收端口。
- `trap_host`: 设置陷阱消息的接收主机。
- `trap_community`: 设置陷阱消息的接收社区。
- `traps`: 设置需要发送陷阱消息的 OID。
【3.snmptrapd 的基本使用方法】在对 snmptrapd 进行配置后,可以使用以下命令启动 snmptrapd:```sudo snmptrapd -c /etc/snmptrapd/snmptrapd.conf```此时,snmptrapd 将开始监听指定端口上的陷阱消息。
如果需要向指定设备发送陷阱消息,可以使用以下命令:```sudo snmptrap -v 2c -t 0 -c public -n -P -OID 1.3.6.1.2.1.1.3.0 -m "Hello, SNMP!"```其中,`2c` 表示使用 SNMPv2c 协议,`-t 0` 表示发送通知(trap)消息,`-c public` 表示使用公共(public)社区,`-n` 表示不加密,`-P` 表示发送消息到指定端口,`-OID` 表示指定 OID,`-m` 表示消息内容。
linux和windows的SNMP配置方法

[root@ ]# rpm –ivh net-snmp-xxx.rpm
或者
[root@ ]#yum install net-snmp
(3)安装后打开默认的/etc/snmp/snmpd.conf 文件,更改如下配置:
1) 查找以下代码:
# source
1/4
然后重启 snmp 服务即可生效 2、 Linux 系统可以装 rpm 包或源码编译(如果你的系统已安装直接跳到第(3)步) (1)源码编译安装 net-snmp
[root@]# tar zxvf net-snmp-xxx.tar.tar [root@ ]# cd net-snmp-xxx [root@ net-snmp-xxx]# ./configure [root@ ]# make [root@ ]# make install (2)rpm 包安装 net-snmp(安装系统盘里可以找到)
将"read"字段改为 all.
修改后:access notConfigGroup "" any noauth exact all none none
3) 查找以下代码:
3/4
#view all included .1 80 将该行前面的"#"去掉. 保存关闭. 4) 运行/etc/init.d/snmpd start 命令运行 snmpd.或 service snmpd start. 5) 如果有防火墙,打开 UDP 161 端口。 最后运行 netstat -ln 查看 161 端口是否打开了. 使用 ntsysv,让 snmp 服务,每次开机自动运行。 排错 在 cacti 监控管理工作站上 1. 首先检查一下 rra/下面,有没有数据 2. snmpwalk -v 2c -c public ServerIP if 用来测试被控对象(serverIP)是否开启了 SNMP 服务 3. snmpwalk -v 2c ServerIP -c public .1.3.6.1.4.1.2021.10.1.3 查看被控端是否有 CPU 负载的数据返回 4. php /var/www/html/poller.php 用来测试 PHP 是否可以采集到数据。
linux snmpset 用法

linux snmpset 用法`linux snmpset` 用法在Linux操作系统中,`snmpset` 是一个用于设置SNMP(Simple Network Management Protocol,简单网络管理协议)代理设备的命令行工具。
它允许你通过SNMP协议对设备的参数进行修改和配置。
`snmpset` 命令的使用方法如下:1. 打开终端或命令行界面,并输入以下命令以执行 `snmpset`:```snmpset [选项] <目标主机> <OID> <类型> <值>```2. 解释上述命令中的参数:- `[选项]`:可选的命令选项,用于指定特定的配置参数。
- `<目标主机>`:SNMP代理设备的IP地址或主机名。
- `<OID>`:要设置的对象标识符。
OID是设备上的唯一标识符,用于识别要修改的特定参数。
- `<类型>`:要设置的值的类型。
常见的类型包括整数(INTEGER)、字符串(STRING)等。
- `<值>`:要设置的新值。
3. 根据实际需求,指定正确的目标主机、OID、类型和值,并执行命令。
举例来说,如果你想要修改名为 "sysContact" 的参数,它的OID为1.3.6.1.2.1.1.4,类型为字符串类型,新值为"*****************",则可以使用以下命令:```***************************************************************```上述命令中的选项 `-v 2c` 表示使用SNMP版本2c,`-c public` 表示使用默认的SNMP团体字符串 "public"。
你需要将 `192.168.0.1` 替换为实际的目标主机地址。
执行此命令后,SNMP代理设备上的 "sysContact" 参数将被设置为"*****************"。
SNMP的功能及使用

SNMP的功能及使用SNMP(Simple Network Management Protocol)是一种用于管理和监控网络设备的协议。
它提供了一套标准的操作和管理网络设备的方法,使得网络管理员能够从远程位置监视、配置和控制网络设备。
首先,SNMP具备设备发现的功能。
通过SNMP,网络管理员可以发现网络中所连接的设备,包括路由器、交换机、服务器等等。
管理员可以通过SNMP协议检测并识别网络设备的信息,如设备型号、IP地址、操作系统版本等。
其次,SNMP可以用于设备状态监控。
通过SNMP协议,网络管理员可以实时地监控网络设备的状态。
这包括CPU利用率、内存利用率、带宽利用率等系统性能指标,以及设备的连接状态、接口的流量统计、错误统计等网络状态。
管理员可以根据这些信息来评估网络设备的工作情况,及时发现并解决问题。
SNMP还可以进行配置管理。
管理员可以通过SNMP协议远程配置网络设备的各种参数和选项,如添加、修改和删除用户、设置访问控制列表、配置路由和VLAN等。
通过SNMP,管理员可以远程管理网络设备,而无需直接登录到设备上进行配置。
此外,SNMP还可以进行性能监测。
通过SNMP协议,管理员可以收集网络设备的性能数据,如流量、延迟、错误率等。
这些数据可以被用于进行性能分析和优化,以确保网络设备的正常运行和提高网络的可用性。
最后,SNMP还具备故障管理的功能。
管理员可以通过SNMP协议监测设备的健康状态,并在设备出现故障时及时采取措施。
SNMP可以向管理员发送警报,提醒其设备的故障情况,并提供相关的故障信息,以便管理员进行故障排查和修复。
关于SNMP的使用,通常有两个角色:SNMP管理端和SNMP代理。
SNMP管理端是指网络管理员使用的管理工具。
这些工具可以是专门的SNMP管理软件,也可以是支持SNMP的网络管理系统。
管理员通过这些工具与网络设备建立SNMP连接,并获取设备的信息、配置设备、监控设备等。
linux snmptrapd 的使用说明
linux snmptrapd 的使用说明摘要:I.引言- 介绍Linux SNMPTrapD 的基本概念II.SNMPTrapD 的安装与配置- 安装SNMPTrapD 所需的软件包- 配置SNMPTrapD 的主要配置文件III.SNMPTrapD 的使用- SNMPTrapD 的基本命令行操作- SNMPTrapD 的应用实例IV.SNMPTrapD 的日志与监控- SNMPTrapD 的日志文件- SNMPTrapD 的监控方法V.SNMPTrapD 的常见问题与解决方案- SNMPTrapD 常见问题- SNMPTrapD 的解决方案VI.总结- 回顾Linux SNMPTrapD 的使用说明- 总结SNMPTrapD 的优点与不足正文:I.引言Linux SNMPTrapD 是一款基于Linux 系统的SNMP(Simple Network Management Protocol,简单网络管理协议)陷阱处理软件。
它可以捕获并处理SNMP 设备发送的陷阱信息,帮助管理员实时监控网络设备状态,及时发现并解决问题。
在本文中,我们将详细介绍Linux SNMPTrapD 的使用说明。
II.SNMPTrapD 的安装与配置A.安装SNMPTrapD 所需的软件包要安装Linux SNMPTrapD,您需要先安装以下软件包:-snmp-utils:包含SNMP 工具,如snmpget、snmpset 等。
-snmp-agent:包含SNMP 代理,用于收集网络设备信息。
3.snmptrapd:SNMP 陷阱处理守护程序。
B.配置SNMPTrapD 的主要配置文件snmptrapd 的主要配置文件为snmptrapd.conf,您需要对该文件进行编辑以设置陷阱处理参数。
以下是一个snmptrapd.conf 配置文件的示例:```# snmptrapd.conf 配置文件示例agentAddress 192.168.1.1agentPort 1000trapsToSyslog onlogFile /var/log/snmptrapd.log```III.SNMPTrapD 的使用A.SNMPTrapD 的基本命令行操作SNMPTrapD 可以通过命令行进行基本操作。
LINU查看SNMP协议版本
LINU查看SNMP协议版本篇一:Linux_SNMP安装与配置一、安装snmp服务1、检查系统是否已经安装snmp的rpm包以下是安装snmp服务需要的rpm包:libsensors3-2.10.6-55.el5.i386.rpmlm_sensors-2.10.6-55.el5.i386.rpmnet-snmp-libs-5.3.2.2-5.el5.i386.rpmnet-snmp-5.3.2.2-5.el5.i386.rpmnet-snmp-utils-5.3.2.2-5.el5.i386.rpm推荐到下载这些rpm包,该网站比较全面,包含各种版本的包。
使用命令:$ rpm -qa|grepsnmp检查是否安装net-snmp-utils-5.3.2.2-5.el5,net-snmp-libs-5.3.2.2-5.el5,net-snmp-5.3.2.2-5.el5三个rpm包使用命令:$ rpm -qa|greplibsen检查是否安装libsensors3-2.10.6-55.el5使用命令:$ rpm -qa|grep lm检查是否安装lm_sensors-2.10.6-55.el5说明:(1)这几个包的安装有一定顺序,在安装的时候,会有提示。
比如安装net-snmp-5.3.2.2-5.el5.i386.rpm时,会提示必须先安装net-snmp-libs-5.3.2.2-5.el5.i386.rpm。
(2)net-snmp-utils-5.3.2.2-5.el5.i386.rpm并不是必须安装的包,但安装它会带来不少帮助,它提供了很多工具,例如可以使用snmptranslate命令查看oid,可以使用snmpget、snmpwalk命令等。
(3)net-snmp-libs-5.3.2.2-5.el5.i386.rpm、net-snmp-5.3.2.2-5.el5.i386.rpm、net-snmp-utils-5.3.2.2-5.el5.i386.rpm这三个包有一定的版本要求,必须版本一致,否则安装无法成功。
linux snmptrapd 的使用说明
linux snmptrapd 的使用说明摘要:1.引言2.snmptrapd 的概念与作用3.snmptrapd 的安装与配置4.snmptrapd 的使用示例5.总结正文:1.引言本文将介绍Linux 系统下snmptrapd 的使用说明。
snmptrapd 是一个用于发送SNMP 陷阱(trap)的守护程序,可以帮助系统管理员监控网络设备,实现实时报警。
在开始具体讲解之前,我们需要先了解一些SNMP 的基本概念。
2.snmptrapd 的概念与作用SNMP(Simple Network Management Protocol,简单网络管理协议)是一种用于管理和监控网络设备的协议。
在SNMP 中,陷阱(trap)是一种特殊的消息,用于在发生特定事件时通知网络管理员。
snmptrapd 是一个守护程序,用于在Linux 系统中发送SNMP 陷阱。
3.snmptrapd 的安装与配置在安装snmptrapd 之前,需要确保系统已经安装了SNMP 的相关工具,如snmpd、snmpset 等。
安装snmptrapd 的方法如下:1) 在终端中执行以下命令:sudo apt-get updatesudo apt-get install snmptrapd```2) 配置snmptrapd。
编辑snmptrapd 的配置文件/etc/snmptrapd.conf,可以参考以下配置示例:```# 设置snmptrapd 的日志级别log_level = NOTICE# 设置snmptrapd 的守护进程名称trapd_name = snmptrapd# 设置snmptrapd 的网络接口interface = eth0# 设置snmptrapd 的communitycommunity = public# 设置snmptrapd 的陷阱类型和目标IP 地址trap_types = INFORM,NOTIFICATIONtrap_targets = 192.168.1.1```根据实际情况调整配置参数,然后重启snmptrapd 以使配置生效:```sudo systemctl restart snmptrapd4.snmptrapd 的使用示例现在我们来看一个snmptrapd 的使用示例。
LinuxSNMP监控一些常用OID

LinuxSNMP监控⼀些常⽤OID Linux SNMP 监控⼀些常⽤OID收集整理⼀些Linux下snmp常⽤的OID,⽤做服务器监控很不错。
服务器负载:1 2 31 minute Load: .1.3.6.1.4.1.2021.10.1.3.1 5 minute Load: .1.3.6.1.4.1.2021.10.1.3.2 15 minute Load: .1.3.6.1.4.1.2021.10.1.3.3CPU信息:1 2 3 4 5 6 7percentage of user CPU time: .1.3.6.1.4.1.2021.11.9.0raw user cpu time: .1.3.6.1.4.1.2021.11.50.0 percentages of system CPU time: .1.3.6.1.4.1.2021.11.10.0 raw system cpu time: .1.3.6.1.4.1.2021.11.52.0 percentages of idle CPU time: .1.3.6.1.4.1.2021.11.11.0 raw idle cpu time: .1.3.6.1.4.1.2021.11.53.0raw nice cpu time: .1.3.6.1.4.1.2021.11.51.0内存使⽤:1 2 3 4 5 6 7 8Total Swap Size: .1.3.6.1.4.1.2021.4.3.0 Available Swap Space: .1.3.6.1.4.1.2021.4.4.0 Total RAM in machine: .1.3.6.1.4.1.2021.4.5.0 Total RAM used: .1.3.6.1.4.1.2021.4.6.0 Total RAM Free: .1.3.6.1.4.1.2021.4.11.0 Total RAM Shared: .1.3.6.1.4.1.2021.4.13.0 Total RAM Buffered: .1.3.6.1.4.1.2021.4.14.0 Total Cached Memory: .1.3.6.1.4.1.2021.4.15.0硬盘使⽤:1 2 3 4 5 6 7Path where the disk is mounted: .1.3.6.1.4.1.2021.9.1.2.1 Path of the device for the partition: .1.3.6.1.4.1.2021.9.1.3.1 Total size of the disk/partion (kBytes): .1.3.6.1.4.1.2021.9.1.6.1 Available space on the disk: .1.3.6.1.4.1.2021.9.1.7.1Used space on the disk: .1.3.6.1.4.1.2021.9.1.8.1 Percentage of space used on disk: .1.3.6.1.4.1.2021.9.1.9.1 Percentage of inodes used on disk: .1.3.6.1.4.1.2021.9.1.10.1系统运⾏时间:1.1.3.6.1.2.1.1.3.0 SNMP System Group:1 2 3 4 5 6 7sysDescr 1.3.6.1.2.1.1.1 sysObjectID 1.3.6.1.2.1.1.2 sysUpTime 1.3.6.1.2.1.1.3 sysContact 1.3.6.1.2.1.1.4 sysName 1.3.6.1.2.1.1.5 sysLocation 1.3.6.1.2.1.1.6 sysServices 1.3.6.1.2.1.1.7SNMP Interfaces Group:123 4 5 6 7 8 9ifNumber 1.3.6.1.2.1.2.1 ifTable 1.3.6.1.2.1.2.2ifEntry 1.3.6.1.2.1.2.2.1ifIndex 1.3.6.1.2.1.2.2.1.1 ifDescr 1.3.6.1.2.1.2.2.1.2 ifType 1.3.6.1.2.1.2.2.1.3ifMtu 1.3.6.1.2.1.2.2.1.4 ifSpeed 1.3.6.1.2.1.2.2.1.5 ifPhysAddress 1.3.6.1.2.1.2.2.1.69 10 11 12 13 14 15 16 17 18 19 20 21 22 23 24 25ifPhysAddress 1.3.6.1.2.1.2.2.1.6 ifAdminStatus 1.3.6.1.2.1.2.2.1.7 ifOperStatus 1.3.6.1.2.1.2.2.1.8 ifLastChange 1.3.6.1.2.1.2.2.1.9 ifInOctets 1.3.6.1.2.1.2.2.1.10 ifInUcastPkts 1.3.6.1.2.1.2.2.1.11 ifInNUcastPkts 1.3.6.1.2.1.2.2.1.12 ifInDiscards 1.3.6.1.2.1.2.2.1.13 ifInErrors 1.3.6.1.2.1.2.2.1.14 ifInUnknownProtos 1.3.6.1.2.1.2.2.1.15 ifOutOctets 1.3.6.1.2.1.2.2.1.16 ifOutUcastPkts 1.3.6.1.2.1.2.2.1.17 ifOutNUcastPkts 1.3.6.1.2.1.2.2.1.18 ifOutDiscards 1.3.6.1.2.1.2.2.1.19 ifOutErrors 1.3.6.1.2.1.2.2.1.20 ifOutQLen 1.3.6.1.2.1.2.2.1.21 ifSpecific 1.3.6.1.2.1.2.2.1.22SNMP IP Group 123 4 5 6 7 8 9 10 11 12 13 14 15 16 17 18 19 20 21 22 23 24 25 26ipForwarding 1.3.6.1.2.1.4.1 ipDefaultTTL 1.3.6.1.2.1.4.2 ipInReceives 1.3.6.1.2.1.4.3 ipInHdrErrors 1.3.6.1.2.1.4.4 ipInAddrErrors 1.3.6.1.2.1.4.5 ipForwDatagrams 1.3.6.1.2.1.4.6 ipInUnknownProtos 1.3.6.1.2.1.4.7 ipInDiscards 1.3.6.1.2.1.4.8ipInDelivers 1.3.6.1.2.1.4.9 ipOutRequests 1.3.6.1.2.1.4.10 ipOutDiscards 1.3.6.1.2.1.4.11 ipOutNoRoutes 1.3.6.1.2.1.4.12 ipReasmTimeout 1.3.6.1.2.1.4.13 ipReasmReqds 1.3.6.1.2.1.4.14 ipReasmOKs 1.3.6.1.2.1.4.15 ipReasmFails 1.3.6.1.2.1.4.16 ipFragsOKs 1.3.6.1.2.1.4.17 ipFragsFails 1.3.6.1.2.1.4.18 ipFragCreates 1.3.6.1.2.1.4.19 ipAddrTable 1.3.6.1.2.1.4.20 ipAddrEntry 1.3.6.1.2.1.4.20.1 ipAdEntAddr 1.3.6.1.2.1.4.20.1.1 ipAdEntIfIndex 1.3.6.1.2.1.4.20.1.2 ipAdEntNetMask 1.3.6.1.2.1.4.20.1.3 ipAdEntBcastAddr 1.3.6.1.2.1.4.20.1.4 ipAdEntReasmMaxSize 1.3.6.1.2.1.4.20.1.5SNMP ICMP Group 123 4 5 6 7 8 9 10 11 12 13 14 15 16 17 18 19 20 21icmpInMsgs 1.3.6.1.2.1.5.1 icmpInErrors 1.3.6.1.2.1.5.2 icmpInDestUnreachs 1.3.6.1.2.1.5.3 icmpInTimeExcds 1.3.6.1.2.1.5.4 icmpInParmProbs 1.3.6.1.2.1.5.5 icmpInSrcQuenchs 1.3.6.1.2.1.5.6 icmpInRedirects 1.3.6.1.2.1.5.7 icmpInEchos 1.3.6.1.2.1.5.8 icmpInEchoReps 1.3.6.1.2.1.5.9 icmpInTimestamps 1.3.6.1.2.1.5.10 icmpInTimestampReps 1.3.6.1.2.1.5.11 icmpInAddrMasks 1.3.6.1.2.1.5.12 icmpInAddrMaskReps 1.3.6.1.2.1.5.13 icmpOutMsgs 1.3.6.1.2.1.5.14 icmpOutErrors 1.3.6.1.2.1.5.15 icmpOutDestUnreachs 1.3.6.1.2.1.5.16 icmpOutTimeExcds 1.3.6.1.2.1.5.17 icmpOutParmProbs 1.3.6.1.2.1.5.18 icmpOutSrcQuenchs 1.3.6.1.2.1.5.19 icmpOutRedirects 1.3.6.1.2.1.5.20 icmpOutEchos 1.3.6.1.2.1.5.21 icmpOutEchoReps 1.3.6.1.2.1.5.22 icmpOutTimestamps 1.3.6.1.2.1.5.2321 22 23 24 25 26icmpOutTimestamps 1.3.6.1.2.1.5.23 icmpOutTimestampReps 1.3.6.1.2.1.5.24 icmpOutAddrMasks 1.3.6.1.2.1.5.25 icmpOutAddrMaskReps 1.3.6.1.2.1.5.26SNMP TCP Group:123 4 5 6 7 8 9 10 11 12 13 14 15 16 17 18 19 20 21tcpRtoAlgorithm 1.3.6.1.2.1.6.1 tcpRtoMin 1.3.6.1.2.1.6.2tcpRtoMax 1.3.6.1.2.1.6.3 tcpMaxConn 1.3.6.1.2.1.6.4 tcpActiveOpens 1.3.6.1.2.1.6.5 tcpPassiveOpens 1.3.6.1.2.1.6.6 tcpAttemptFails 1.3.6.1.2.1.6.7 tcpEstabResets 1.3.6.1.2.1.6.8 tcpCurrEstab 1.3.6.1.2.1.6.9 tcpInSegs 1.3.6.1.2.1.6.10 tcpOutSegs 1.3.6.1.2.1.6.11 tcpRetransSegs 1.3.6.1.2.1.6.12 tcpConnTable 1.3.6.1.2.1.6.13 tcpConnEntry 1.3.6.1.2.1.6.13.1 tcpConnState 1.3.6.1.2.1.6.13.1.1 tcpConnLocalAddress 1.3.6.1.2.1.6.13.1.2 tcpConnLocalPort 1.3.6.1.2.1.6.13.1.3 tcpConnRemAddress 1.3.6.1.2.1.6.13.1.4 tcpConnRemPort 1.3.6.1.2.1.6.13.1.5 tcpInErrs 1.3.6.1.2.1.6.14tcpOutRsts 1.3.6.1.2.1.6.15SNMP UDP Group1 2 3 4 5 6 7 8udpInDatagrams 1.3.6.1.2.1.7.1 udpNoPorts 1.3.6.1.2.1.7.2 udpInErrors 1.3.6.1.2.1.7.3 udpOutDatagrams 1.3.6.1.2.1.7.4 udpTable 1.3.6.1.2.1.7.5 udpEntry 1.3.6.1.2.1.7.5.1 udpLocalAddress 1.3.6.1.2.1.7.5.1.1 udpLocalPort 1.3.6.1.2.1.7.5.1.2SNMP Group:1234 5 6 7 8 9 10 11 12 13 14 15 16 17 18 19 20 21 22 23 24 25 26snmpInPkts 1.3.6.1.2.1.11.1 snmpOutPkts 1.3.6.1.2.1.11.2 snmpInBadVersions 1.3.6.1.2.1.11.3 snmpInBadCommunityNames 1.3.6.1.2.1.11.4 snmpInBadCommunityUses 1.3.6.1.2.1.11.5 snmpInASNParseErrs 1.3.6.1.2.1.11.6NOT USED 1.3.6.1.2.1.11.7 snmpInTooBigs 1.3.6.1.2.1.11.8 snmpInNoSuchNames 1.3.6.1.2.1.11.9 snmpInBadValues 1.3.6.1.2.1.11.10 snmpInReadOnlys 1.3.6.1.2.1.11.11 snmpInGenErrs 1.3.6.1.2.1.11.12 snmpInTotalReqVars 1.3.6.1.2.1.11.13 snmpInTotalSetVars 1.3.6.1.2.1.11.14 snmpInGetRequests 1.3.6.1.2.1.11.15 snmpInGetNexts 1.3.6.1.2.1.11.16 snmpInSetRequests 1.3.6.1.2.1.11.17 snmpInGetResponses 1.3.6.1.2.1.11.18 snmpInTraps 1.3.6.1.2.1.11.19 snmpOutTooBigs 1.3.6.1.2.1.11.20 snmpOutNoSuchNames 1.3.6.1.2.1.11.21 snmpOutBadValues 1.3.6.1.2.1.11.22NOT USED 1.3.6.1.2.1.11.23 snmpOutGenErrs 1.3.6.1.2.1.11.24 snmpOutGetRequests 1.3.6.1.2.1.11.25 snmpOutGetNexts 1.3.6.1.2.1.11.26 snmpOutSetRequests 1.3.6.1.2.1.11.27 snmpOutGetResponses 1.3.6.1.2.1.11.2826 27 28 29 30snmpOutGetResponses 1.3.6.1.2.1.11.28 snmpOutTraps 1.3.6.1.2.1.11.29 snmpEnableAuthenTraps 1.3.6.1.2.1.11.30应⽤⽰例:查看服务器1分钟平均负载:1 2snmpwalk -v1 -c public 127.0.0.1 .1.3.6.1.4.1.2021.10.1.3.1 UCD-SNMP-MIB::laLoad.1 = STRING: 0.25查看服务器当前连接:12 3 4 5 6 7 8 9 10 11snmpwalk -v1 -c public 127.0.0.1 1.3.6.1.2.1.6.13.1.1TCP-MIB::tcpConnState.0.0.0.0.22.0.0.0.0.0 = INTEGER: listen(2)TCP-MIB::tcpConnState.0.0.0.0.80.0.0.0.0.0 = INTEGER: listen(2)TCP-MIB::tcpConnState.0.0.0.0.111.0.0.0.0.0 = INTEGER: listen(2)TCP-MIB::tcpConnState.0.0.0.0.443.0.0.0.0.0 = INTEGER: listen(2)TCP-MIB::tcpConnState.0.0.0.0.3306.0.0.0.0.0 = INTEGER: listen(2)TCP-MIB::tcpConnState.127.0.0.1.25.0.0.0.0.0 = INTEGER: listen(2)TCP-MIB::tcpConnState.127.0.0.1.199.0.0.0.0.0 = INTEGER: listen(2)TCP-MIB::tcpConnState.192.168.1.2.22.192.168.1.16.5035 = INTEGER: established(5) TCP-MIB::tcpConnState.192.168.1.2.22.192.168.1.16.10518 = INTEGER: established(5) TCP-MIB::tcpConnState.192.168.1.2.22.192.168.1.16.24713 = INTEGER: established(5)系统参数(1.3.6.1.2.1.1)OID描述备注请求⽅式.1.3.6.1.2.1.1.1.0获取系统基本信息SysDesc GET.1.3.6.1.2.1.1.3.0监控时间sysUptime GET.1.3.6.1.2.1.1.4.0系统联系⼈sysContact GET.1.3.6.1.2.1.1.5.0获取机器名SysName GET.1.3.6.1.2.1.1.6.0机器坐在位置SysLocation GET.1.3.6.1.2.1.1.7.0机器提供的服务SysService GET.1.3.6.1.2.1.25.4.2.1.2系统运⾏的进程列表hrSWRunName WALK.1.3.6.1.2.1.25.6.3.1.2系统安装的软件列表hrSWInstalledName WALK⽹络接⼝(1.3.6.1.2.1.2)OID描述备注请求⽅式.1.3.6.1.2.1.2.1.0⽹络接⼝的数⽬IfNumber GET.1.3.6.1.2.1.2.2.1.2⽹络接⼝信息描述IfDescr WALK.1.3.6.1.2.1.2.2.1.3⽹络接⼝类型IfType WALK.1.3.6.1.2.1.2.2.1.4接⼝发送和接收的最⼤IP数据报[BYTE]IfMTU WALK.1.3.6.1.2.1.2.2.1.5接⼝当前带宽[bps]IfSpeed WALK.1.3.6.1.2.1.2.2.1.6接⼝的物理地址IfPhysAddress WALK.1.3.6.1.2.1.2.2.1.8接⼝当前操作状态[up|down]IfOperStatus WALK.1.3.6.1.2.1.2.2.1.10接⼝收到的字节数IfInOctet WALK.1.3.6.1.2.1.2.2.1.16接⼝发送的字节数IfOutOctet WALK.1.3.6.1.2.1.2.2.1.11接⼝收到的数据包个数IfInUcastPkts WALK.1.3.6.1.2.1.2.2.1.17接⼝发送的数据包个数IfOutUcastPkts WALKCPU及负载OID描述备注请求⽅式. 1.3.6.1.4.1.2021.11.9.0⽤户CPU百分⽐ssCpuUser GET. 1.3.6.1.4.1.2021.11.10.0系统CPU百分⽐ssCpuSystem GET. 1.3.6.1.4.1.2021.11.11.0空闲CPU百分⽐ssCpuIdle GET. 1.3.6.1.4.1.2021.11.50.0原始⽤户CPU使⽤时ssCpuRawUser GET. 1.3.6.1.4.1.2021.11.50.0原始⽤户CPU使⽤时ssCpuRawUser GET间.1.3.6.1.4.1.2021.11.51.0原始nice占⽤时间ssCpuRawNice GETssCpuRawSystem.GET. 1.3.6.1.4.1.2021.11.52.0原始系统CPU使⽤时间. 1.3.6.1.4.1.2021.11.53.0原始CPU空闲时间ssCpuRawIdle GEThrProcessorLoad WALK. 1.3.6.1.2.1.25.3.3.1.2CPU的当前负载,N个核就有N个负载. 1.3.6.1.4.1.2021.11.3.0ssSwapIn GET. 1.3.6.1.4.1.2021.11.4.0SsSwapOut GET. 1.3.6.1.4.1.2021.11.5.0ssIOSent GET. 1.3.6.1.4.1.2021.11.6.0ssIOReceive GET. 1.3.6.1.4.1.2021.11.7.0ssSysInterrupts GET. 1.3.6.1.4.1.2021.11.8.0ssSysContext GET. 1.3.6.1.4.1.2021.11.54.0ssCpuRawWait GET. 1.3.6.1.4.1.2021.11.56.0ssCpuRawInterrupt GET. 1.3.6.1.4.1.2021.11.57.0ssIORawSent GET. 1.3.6.1.4.1.2021.11.58.0ssIORawReceived GET. 1.3.6.1.4.1.2021.11.59.0ssRawInterrupts GET. 1.3.6.1.4.1.2021.11.60.0ssRawContexts GET. 1.3.6.1.4.1.2021.11.61.0ssCpuRawSoftIRQ GET. 1.3.6.1.4.1.2021.11.62.0ssRawSwapIn.GET. 1.3.6.1.4.1.2021.11.63.0ssRawSwapOut GET.1.3.6.1.4.1.2021.10.1.3.1Load5GET.1.3.6.1.4.1.2021.10.1.3.2Load10.1.3.6.1.4.1.2021.10.1.3.3Load15内存及磁盘(1.3.6.1.2.1.25)OID描述备注请求⽅式.1.3.6.1.2.1.25.2.2.0获取内存⼤⼩hrMemorySize GET.1.3.6.1.2.1.25.2.3.1.1存储设备编号hrStorageIndex WALK .1.3.6.1.2.1.25.2.3.1.2存储设备类型hrStorageType[OID]WALK .1.3.6.1.2.1.25.2.3.1.3存储设备描述hrStorageDescr WALK .1.3.6.1.2.1.25.2.3.1.4簇的⼤⼩hrStorageAllocationUnits WALK .1.3.6.1.2.1.25.2.3.1.5簇的的数⽬hrStorageSize WALKhrStorageUsed WALK .1.3.6.1.2.1.25.2.3.1.6使⽤多少,跟总容量相除就是占⽤率.1.3.6.1.4.1.2021.4.3.0Total Swap Size(虚memTotalSwap GET拟内存)memAvailSwap GET.1.3.6.1.4.1.2021.4.4.0Available SwapSpacememTotalReal GET.1.3.6.1.4.1.2021.4.5.0Total RAM inmachine.1.3.6.1.4.1.2021.4.6.0Total RAM used memAvailReal GET.1.3.6.1.4.1.2021.4.11.0Total RAM Free memTotalFree GET.1.3.6.1.4.1.2021.4.13.0Total RAM Shared memShared GET.1.3.6.1.4.1.2021.4.14.0Total RAM Buffered memBuffer GET.1.3.6.1.4.1.2021.4.15.0Total CachedmemCached GETMemorydskPath WALK .1.3.6.1.4.1.2021.9.1.2Path where the diskis mounted.1.3.6.1.4.1.2021.9.1.3Path of the device fordskDevice WALKthe partitiondskTotal WALK .1.3.6.1.4.1.2021.9.1.6Total size of thedisk/partion (kBytes)dskAvail WALK .1.3.6.1.4.1.2021.9.1.7Available space onthe disk.1.3.6.1.4.1.2021.9.1.8Used space on thedskUsed WALKdiskdskPercent WALK .1.3.6.1.4.1.2021.9.1.9Percentage of spaceused on disk.1.3.6.1.4.1.2021.9.1.10Percentage of inodes dskPercentNode WALK.1.3.6.1.4.1.2021.9.1.10Percentage of inodesdskPercentNode WALKused on diskSystem GroupsysDescr 1.3.6.1.2.1.1.1sysObjectID 1.3.6.1.2.1.1.2sysUpTime 1.3.6.1.2.1.1.3sysContact 1.3.6.1.2.1.1.4sysName 1.3.6.1.2.1.1.5sysLocation 1.3.6.1.2.1.1.6sysServices 1.3.6.1.2.1.1.7Interfaces GroupifNumber 1.3.6.1.2.1.2.1ifTable 1.3.6.1.2.1.2.2ifEntry 1.3.6.1.2.1.2.2.1ifIndex 1.3.6.1.2.1.2.2.1.1ifDescr 1.3.6.1.2.1.2.2.1.2ifType 1.3.6.1.2.1.2.2.1.3ifMtu 1.3.6.1.2.1.2.2.1.4ifSpeed 1.3.6.1.2.1.2.2.1.5ifPhysAddress 1.3.6.1.2.1.2.2.1.6ifAdminStatus 1.3.6.1.2.1.2.2.1.7ifOperStatus 1.3.6.1.2.1.2.2.1.8ifLastChange 1.3.6.1.2.1.2.2.1.9ifInOctets 1.3.6.1.2.1.2.2.1.10ifInUcastPkts 1.3.6.1.2.1.2.2.1.11ifInNUcastPkts 1.3.6.1.2.1.2.2.1.12ifInDiscards 1.3.6.1.2.1.2.2.1.13ifInErrors 1.3.6.1.2.1.2.2.1.14ifInUnknownProtos 1.3.6.1.2.1.2.2.1.15ifOutOctets 1.3.6.1.2.1.2.2.1.16ifOutUcastPkts 1.3.6.1.2.1.2.2.1.17ifOutNUcastPkts 1.3.6.1.2.1.2.2.1.18ifOutDiscards 1.3.6.1.2.1.2.2.1.19ifOutErrors 1.3.6.1.2.1.2.2.1.20ifOutQLen 1.3.6.1.2.1.2.2.1.21ifSpecific 1.3.6.1.2.1.2.2.1.22IP GroupipForwarding 1.3.6.1.2.1.4.1ipDefaultTTL 1.3.6.1.2.1.4.2ipInReceives 1.3.6.1.2.1.4.3ipInHdrErrors 1.3.6.1.2.1.4.4ipInAddrErrors 1.3.6.1.2.1.4.5ipForwDatagrams 1.3.6.1.2.1.4.6ipInUnknownProtos 1.3.6.1.2.1.4.7ipInDiscards 1.3.6.1.2.1.4.8ipInDelivers 1.3.6.1.2.1.4.9ipOutRequests 1.3.6.1.2.1.4.10ipOutDiscards 1.3.6.1.2.1.4.11ipOutNoRoutes 1.3.6.1.2.1.4.12ipReasmTimeout 1.3.6.1.2.1.4.13ipReasmReqds 1.3.6.1.2.1.4.14ipReasmOKs 1.3.6.1.2.1.4.15ipReasmFails 1.3.6.1.2.1.4.16ipFragsOKs 1.3.6.1.2.1.4.17ipFragsFails 1.3.6.1.2.1.4.18ipFragCreates 1.3.6.1.2.1.4.19ipAddrTable 1.3.6.1.2.1.4.20ipAddrEntry 1.3.6.1.2.1.4.20.1ipAdEntAddr 1.3.6.1.2.1.4.20.1.1ipAdEntIfIndex 1.3.6.1.2.1.4.20.1.2ipAdEntNetMask 1.3.6.1.2.1.4.20.1.3ipAdEntBcastAddr 1.3.6.1.2.1.4.20.1.4ipAdEntReasmMaxSize 1.3.6.1.2.1.4.20.1.5ICMP GroupicmpInMsgs 1.3.6.1.2.1.5.1 icmpInErrors 1.3.6.1.2.1.5.2 icmpInDestUnreachs 1.3.6.1.2.1.5.3 icmpInTimeExcds 1.3.6.1.2.1.5.4 icmpInParmProbs 1.3.6.1.2.1.5.5 icmpInSrcQuenchs 1.3.6.1.2.1.5.6 icmpInRedirects 1.3.6.1.2.1.5.7 icmpInEchos 1.3.6.1.2.1.5.8 icmpInEchoReps 1.3.6.1.2.1.5.9 icmpInTimestamps 1.3.6.1.2.1.5.10 icmpInTimestampReps 1.3.6.1.2.1.5.11 icmpInAddrMasks 1.3.6.1.2.1.5.12 icmpInAddrMaskReps 1.3.6.1.2.1.5.13 icmpOutMsgs 1.3.6.1.2.1.5.14 icmpOutErrors 1.3.6.1.2.1.5.15 icmpOutDestUnreachs 1.3.6.1.2.1.5.16 icmpOutTimeExcds 1.3.6.1.2.1.5.17 icmpOutParmProbs 1.3.6.1.2.1.5.18 icmpOutSrcQuenchs 1.3.6.1.2.1.5.19 icmpOutRedirects 1.3.6.1.2.1.5.20 icmpOutEchos 1.3.6.1.2.1.5.21 icmpOutEchoReps 1.3.6.1.2.1.5.22 icmpOutTimestamps 1.3.6.1.2.1.5.23 icmpOutTimestampReps 1.3.6.1.2.1.5.24 icmpOutAddrMasks 1.3.6.1.2.1.5.25 icmpOutAddrMaskReps 1.3.6.1.2.1.5.26 TCP GrouptcpRtoAlgorithm 1.3.6.1.2.1.6.1 tcpRtoMin 1.3.6.1.2.1.6.2tcpRtoMax 1.3.6.1.2.1.6.3 tcpMaxConn 1.3.6.1.2.1.6.4 tcpActiveOpens 1.3.6.1.2.1.6.5 tcpPassiveOpens 1.3.6.1.2.1.6.6 tcpAttemptFails 1.3.6.1.2.1.6.7 tcpEstabResets 1.3.6.1.2.1.6.8 tcpCurrEstab 1.3.6.1.2.1.6.9tcpInSegs 1.3.6.1.2.1.6.10 tcpOutSegs 1.3.6.1.2.1.6.11 tcpRetransSegs 1.3.6.1.2.1.6.12 tcpConnTable 1.3.6.1.2.1.6.13 tcpConnEntry 1.3.6.1.2.1.6.13.1 tcpConnState 1.3.6.1.2.1.6.13.1.1 tcpConnLocalAddress 1.3.6.1.2.1.6.13.1.2 tcpConnLocalPort 1.3.6.1.2.1.6.13.1.3 tcpConnRemAddress 1.3.6.1.2.1.6.13.1.4 tcpConnRemPort 1.3.6.1.2.1.6.13.1.5 tcpInErrs 1.3.6.1.2.1.6.14tcpOutRsts 1.3.6.1.2.1.6.15UDP GroupudpInDatagrams 1.3.6.1.2.1.7.1 udpNoPorts 1.3.6.1.2.1.7.2 udpInErrors 1.3.6.1.2.1.7.3 udpOutDatagrams 1.3.6.1.2.1.7.4 udpTable 1.3.6.1.2.1.7.5udpEntry 1.3.6.1.2.1.7.5.1 udpLocalAddress 1.3.6.1.2.1.7.5.1.1 udpLocalPort 1.3.6.1.2.1.7.5.1.2SNMP GroupsnmpInPkts 1.3.6.1.2.1.11.1 snmpOutPkts 1.3.6.1.2.1.11.2snmpInBadVersions 1.3.6.1.2.1.11.3 snmpInBadCommunityNames 1.3.6.1.2.1.11.4 snmpInBadCommunityUses 1.3.6.1.2.1.11.5 snmpInASNParseErrs 1.3.6.1.2.1.11.6NOT USED 1.3.6.1.2.1.11.7snmpInTooBigs 1.3.6.1.2.1.11.8 snmpInNoSuchNames 1.3.6.1.2.1.11.9 snmpInBadValues 1.3.6.1.2.1.11.10 snmpInReadOnlys 1.3.6.1.2.1.11.11 snmpInGenErrs 1.3.6.1.2.1.11.12 snmpInTotalReqVars 1.3.6.1.2.1.11.13 snmpInTotalSetVars 1.3.6.1.2.1.11.14 snmpInGetRequests 1.3.6.1.2.1.11.15 snmpInGetNexts 1.3.6.1.2.1.11.16 snmpInSetRequests 1.3.6.1.2.1.11.17 snmpInGetResponses 1.3.6.1.2.1.11.18 snmpInTraps 1.3.6.1.2.1.11.19 snmpOutTooBigs 1.3.6.1.2.1.11.20 snmpOutNoSuchNames 1.3.6.1.2.1.11.21 snmpOutBadValues 1.3.6.1.2.1.11.22NOT USED 1.3.6.1.2.1.11.23 snmpOutGenErrs 1.3.6.1.2.1.11.24 snmpOutGetRequests 1.3.6.1.2.1.11.25 snmpOutGetNexts 1.3.6.1.2.1.11.26 snmpOutSetRequests 1.3.6.1.2.1.11.27 snmpOutGetResponses 1.3.6.1.2.1.11.28 snmpOutTraps 1.3.6.1.2.1.11.29 snmpEnableAuthenTraps 1.3.6.1.2.1.11.30=======================================。
linux snmptrapd 的使用说明

linux snmptrapd 的使用说明摘要:1.Linux snmptrapd 简介2.snmptrapd 的安装与配置3.snmptrapd 的使用方法4.snmptrapd 的应用场景5.snmptrapd 的常见问题及解决方法正文:Linux snmptrapd 是一个用于接收和处理SNMP 陷阱(trap)的守护程序。
它可以在Linux 系统上安装并配置,用于监控网络设备和系统,实现自动化管理。
## 1.Linux snmptrapd 简介SNMP(Simple Network Management Protocol,简单网络管理协议)是一种用于管理和监控网络设备的协议。
SNMP 陷阱(trap)是SNMP 的一种通知机制,当设备检测到异常情况时,会主动发送SNMP 陷阱通知给管理员。
snmptrapd 是Linux 系统上用来接收和处理这些SNMP 陷阱通知的守护程序。
## 2.snmptrapd 的安装与配置要在Linux 系统上安装snmptrapd,首先需要确保系统已安装了SNMP 相关软件包。
以Ubuntu 为例,可以使用以下命令安装:```sudo apt-get install net-snmp```安装完成后,需要配置snmptrapd。
编辑snmptrapd.conf 文件,设置接收SNMP 陷阱的通知方式,例如:```sysLocation /var/run/snmptrapdotificationDestination syslog```配置完成后,启动snmptrapd 服务:```sudo systemctl start snmptrapd```## 3.snmptrapd 的使用方法snmptrapd 主要通过配置文件进行设置。
管理员可以根据实际需求,配置不同的通知方式和处理动作。
以下是一些常用的配置选项:- `notificationDestination`:设置接收SNMP 陷阱通知的方式,如syslog、mail 等。
linux snmptrapd 的使用说明

linux snmptrapd 的使用说明摘要:1.Linux snmptrapd 的简介2.snmptrapd 的基本概念3.snmptrapd 的安装与配置4.snmptrapd 的基本使用方法5.snmptrapd 的高级用法6.snmptrapd 的实战案例正文:一、Linux snmptrapd 的简介Linux snmptrapd 是一个用于发送SNMP 陷阱(trap)的工具,它可以在Linux 系统上运行。
SNMP(Simple Network Management Protocol,简单网络管理协议)是一种用于管理和监控网络设备的协议,而陷阱是SNMP 协议中的一种通知机制,用于在网络设备发生异常时通知管理员。
通过使用snmptrapd,我们可以轻松地模拟网络设备发送陷阱,从而实现对SNMP 陷阱的测试和研究。
二、snmptrapd 的基本概念在介绍snmptrapd 的使用方法之前,我们先来了解一下与snmptrapd 相关的基本概念:1.SNMP:简单网络管理协议,用于管理和监控网络设备。
2.陷阱(Trap):SNMP 协议中的一种通知机制,用于在网络设备发生异常时通知管理员。
3.snmptrapd:一个用于发送SNMP 陷阱的Linux 工具。
4.OID(Object Identifier,对象标识):在SNMP 中,用于标识网络设备上的各种参数和状态的信息。
三、snmptrapd 的安装与配置在安装snmptrapd 之前,确保您的系统已安装了SNMP 相关的软件包,例如net-snmp。
在Debian 和Ubuntu 系统上,可以使用以下命令安装snmptrapd:```bashsudo apt-get install snmptrapd```安装完成后,需要对snmptrapd 进行配置。
首先,创建一个配置文件,例如`/etc/snmptrapd.conf`:```bashsudo nano /etc/snmptrapd.conf```在配置文件中,可以设置以下参数:1.`snmp_ip`: 设置snmptrapd 监听的IP 地址。
linux snmptrapd 的使用说明
linux snmptrapd 的使用说明【1.简介与概述】Linux snmptrapd 是一款在Linux 系统中广泛应用的网络管理工具,主要用于处理SNMP 陷阱信息。
SNMP(Simple Network Management Protocol)是一种简单的网络管理协议,用于实现网络设备的自动化管理。
snmptrapd 作为SNMP 陷阱接收端,能够捕获并处理来自网络设备的SNMP 陷阱消息,从而帮助管理员及时发现和解决网络故障。
【2.安装与配置】要在Linux 系统中安装和使用snmptrapd,首先需要确保系统已安装了SNMP 服务。
对于使用Ubuntu 或Debian 的用户,可以通过以下命令安装:```sudo apt-get updatesudo apt-get install snmptrapd```接下来,对snmptrapd 进行配置。
修改配置文件`/etc/snmptrapd/snmptrapd.conf`,设置如下参数:- 设置监听端口:`listen-on` 命令,例如:`listen-on udp 161`- 设置报警目标:`trapdest` 命令,例如:`trapdest -destination 192.168.1.100 -port 162 -community public`- 设置日志级别:`logdest` 命令,例如:`logdest syslog`保存配置文件后,重启snmptrapd 服务:```sudo systemctl restart snmptrapd```【3.基本原理与工作模式】snmptrapd 的工作原理是基于SNMP 协议。
当网络设备发生异常或故障时,会发送SNMP 陷阱消息。
snmptrapd 监听指定端口,收到SNMP 陷阱消息后,根据配置的报警目标将消息转发至目标主机。
同时,snmptrapd 会将处理结果记录在日志文件中,方便管理员查看。
Linux NET-SNMP配置手册1
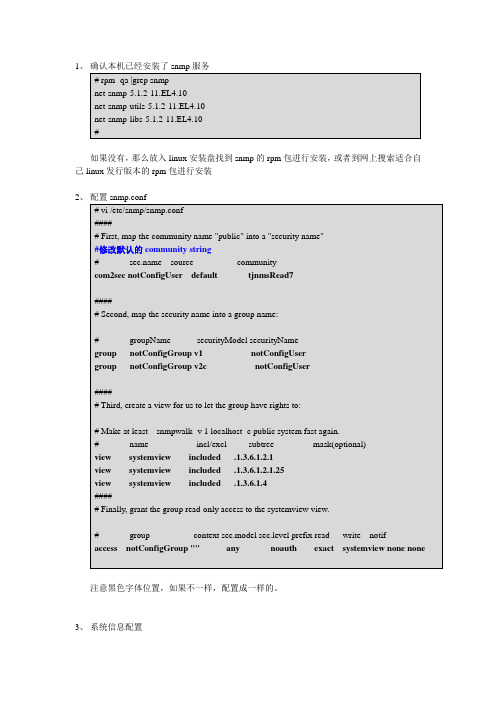
1、确认本机已经安装了snmp服务# rpm -qa |grep snmpnet-snmp-5.1.2-11.EL4.10net-snmp-utils-5.1.2-11.EL4.10net-snmp-libs-5.1.2-11.EL4.10#如果没有,那么放入linux安装盘找到snmp的rpm包进行安装,或者到网上搜索适合自己linux发行版本的rpm包进行安装2、配置snmp.conf# vi /etc/snmp/snmp.conf##### First, map the community name "public" into a "security name"#修改默认的community string# source communitycom2sec notConfigUser default tjnmsRead7##### Second, map the security name into a group name:# groupName securityModel securityNamegroup notConfigGroup v1 notConfigUsergroup notConfigGroup v2c notConfigUser##### Third, create a view for us to let the group have rights to:# Make at least snmpwalk -v 1 localhost -c public system fast again.# name incl/excl subtree mask(optional)view systemview included .1.3.6.1.2.1view systemview included .1.3.6.1.2.1.25view systemview included .1.3.6.1.4##### Finally, grant the group read-only access to the systemview view.# group context sec.model sec.level prefix read write notifaccess notConfigGroup "" any noauth exact systemview none none 注意黑色字体位置,如果不一样,配置成一样的。
基于SNMP协议的简单网络流量监控管理系统的设计要点

基于SNMP协议的简单网络流量监控管理系统的设计摘要:随着网络通信技术的不断进步,网络应用越来越广泛,网络流量形式变得复杂,内容变得庞大,因此网络流量统一监控与管理是非常必要的。
本设计介绍了SNMP的基本原理,提出了在Linux下实现基于SNMP的网络流量监控系统方案,结合某网络管理中的实际问题,阐述了这一方案的具体实施,并对该系统提出了展望。
关键词:流量监控;SNMP(简单网络管理协议);MIB(管理信息库);WBM (基于Web的网络管理)在校园网及其他大型企业网的复杂应用环境中,网络面临的攻击及威胁主要来源于网络部,如大量病毒、网内主机的主动攻击及网络异常流量的突增都将引起网络设备负荷过重,从而导致网络拥塞,并可能进一步导致网络瘫痪。
因此,基于全网所有网络设备、服务器群组的流量状况的24 h实时监控和日志及流量分析统计,将对于保障复杂环境下的整个网络的安全、设备稳定,以及防止服务器群组被攻击有极大的意义。
目前网络管理标准主要有两大体系:OSI的CMIS(Common Management Information Service。
公共管理信息服务)/CMIP(Common ManagementInformation Protocol,公共管理信息协议)和IETF的SNMP(Simple Network Management Protocol,简单网络管理协议)。
由于CMIP实现复杂、结构庞大,占用资源多,目前还没有开发出实际可用的产品。
SNMP由于易于实现和广泛的TCP/IP应用基础而获得支持。
随着SNM2Pv2和SNMPv3的相继出现,改善了SNMP中的安全问题,使SNMP得到快速发展。
一、 SNMP原理SNMP由IAB(Internet Activities Board)制定,是基于TCP/IP协议的各种互联网络的管理标准。
由于它本身简单明了,实现较容易,占用系统资源少,所以得到了众多网络厂家的青睐,而成为工业标准投入使用。
- 1、下载文档前请自行甄别文档内容的完整性,平台不提供额外的编辑、内容补充、找答案等附加服务。
- 2、"仅部分预览"的文档,不可在线预览部分如存在完整性等问题,可反馈申请退款(可完整预览的文档不适用该条件!)。
- 3、如文档侵犯您的权益,请联系客服反馈,我们会尽快为您处理(人工客服工作时间:9:00-18:30)。
如何使用SNPM 来监控Linux服务器作者: icefired (*********************)2005-9-16[Keywords] SNMP, Linux, Orion NPM, MRTG, Net-SNMP [Objects] Using SNMP to monitor a Linux server[准备]1.Net-SNMP 5.1.2 或 UCD-SNMP 4.2.3下载:/download.html2.A Linux Server: Redhat Linux 7/8/9,RHEL 3/4 或其他Linux 发行版。
3.SNMP Tool: Solarwinds toolset V8.2或 Orion Network Performance Monitor V7.8, 其他支持SNMP监控的工具如HP OpenView, IBM NetView, SNMPC V7均可以。
[步骤]1.安装Net-SNMP 或UCD-SNMP. (三种方法)1.1安装Linux系统时自动安装安装Linux系统的时候选择 UCD-SNMP 和 SNMP-Utility两个安装包就可以了。
1.2使用RPM包来安装,这里以Redhat 9为例来说明。
先检查有无安装旧的版本: rpm –q ucd-snmp全新安装:#rpm –ivh net-snmp-5.1.2-1.rh9.i386.rpm#rpm –ivh net-snmp-devel-5.1.2-1.rh9.i386.rpm1.3使用原代码来安装#wget /sourceforge/net-snmp/net-snmp-5.1.3.1.tar.gz#tar –xzvf net-snmp-5.1.3.1.tar.gz#cd net-snmp-5.1.3.1#./configure# make & make install如果没什么问题则顺利完成安装,Linux的安装和命令使用不在本文讨论范围,请大家查询相关手册。
2.配置SNMP2.1设置SNMPD 服务自动启动# setup然后勾选上 services -> snmpd启动snmpd 进程#service snmpd start2.2 检查一下snmpd进程是否运行正常# ps –ef | grep snmpd2.3配置/etc/snmp/snmpd.conf好了,按照前面的步骤我们已经顺利的安装好SNMP服务了,如果使用默认的snmpd.conf 文件,我们将只能够看到系统信息,而不能对系统资源进行监测。
下面是一份net-snmp自带的snmpd.conf文件:##################---Begin---##################################################### snmpd.conf:# An example configuration file for configuring the ucd-snmp snmpd agent.########################################################## ## This file is intended to only be as a starting point. Many more# configuration directives exist than are mentioned in this file. For# full details, see the snmpd.conf(5) manual page.## All lines beginning with a '#' are comments and are intended for you# to read. All other lines are configuration commands for the agent.######################################################### # Access Control######################################################### # As shipped, the snmpd demon will only respond to queries on the# system mib group until this file is replaced or modified for# security purposes. Examples are shown below about how to increase the# level of access.# By far, the most common question I get about the agent is "why won't# it work?", when really it should be "how do I configure the agent to# allow me to access it?"## By default, the agent responds to the "public" community for read# only access, if run out of the box without any configuration file in# place. The following examples show you other ways of configuring# the agent so that you can change the community names, and give# yourself write access to the mib tree as well.## For more information, read the FAQ as well as the snmpd.conf(5)# manual page.##### First, map the community name "public" into a "security name"# source communitycom2sec notConfigUser default public##### Second, map the security name into a group name:# groupName securityModel securityNamegroup notConfigGroup v1 notConfigUsergroup notConfigGroup v2c notConfigUser##### Third, create a view for us to let the group have rights to:# Make at least snmpwalk -v 1 localhost -c public system fast again.# name incl/excl subtree mask(optional)view systemview included .1.3.6.1.2.1.1view systemview included .1.3.6.1.2.1.25.1.1##### Finally, grant the group read-only access to the systemview view.# group context sec.model sec.level prefix read write notifaccess notConfigGroup "" any noauth exact systemview none none# -----------------------------------------------------------------------------# Here is a commented out example configuration that allows less# restrictive access.# YOU SHOULD CHANGE THE "COMMUNITY" TOKEN BELOW TO A NEW KEYWORD ONLY# KNOWN AT YOUR SITE. YOU *MUST* CHANGE THE NETWORK TOKEN BELOW TO# SOMETHING REFLECTING YOUR LOCAL NETWORK ADDRESS SPACE.## source community#com2sec local localhost COMMUNITY#com2sec mynetwork NETWORK/24 COMMUNITY## sec.model #group MyRWGroup any local#group MyROGroup any mynetwork##group MyRWGroup any otherv3user#...## incl/excl subtree mask#view all included .1 80## -or just the mib2 tree-#view mib2 included .dod.internet.mgmt.mib-2 fc## context sec.model sec.level prefix read write notif#access MyROGroup "" any noauth 0 all none none#access MyRWGroup "" any noauth 0 all all all######################################################### # System contact information## It is also possible to set the sysContact and sysLocation system# variables through the snmpd.conf file:syslocation Unknown (edit /etc/snmp/snmpd.conf)syscontact Root <root@localhost> (configure /etc/snmp/snmp.local.conf)# Example output of snmpwalk:# % snmpwalk -v 1 localhost -c public system# system.sysDescr.0 = "SunOS name sun4c"# system.sysObjectID.0 = OID: enterprises.ucdavis.ucdSnmpAgent.sunos4# system.sysUpTime.0 = Timeticks: (595637548) 68 days, 22:32:55# system.sysContact.0="Me<****************>"# system.sysName.0 = "name"# system.sysLocation.0 = "Right here, right now."# system.sysServices.0 = 72# -----------------------------------------------------------------------------######################################################### # Process checks.## The following are examples of how to use the agent to check for# processes running on the host. The syntax looks something like:## proc NAME [MAX=0] [MIN=0]## NAME: the name of the process to check for. It must match# exactly (ie, http will not find httpd processes).# MAX: the maximum number allowed to be running. Defaults to 0.# MIN: the minimum number to be running. Defaults to 0.## Examples (commented out by default):## Make sure mountd is running#proc mountd# Make sure there are no more than 4 ntalkds running, but 0 is ok too.#proc ntalkd 4# Make sure at least one sendmail, but less than or equal to 10 are running.#proc sendmail 10 1# A snmpwalk of the process mib tree would look something like this:## % snmpwalk -v 1 localhost -c public .1.3.6.1.4.1.2021.2# enterprises.ucdavis.procTable.prEntry.prIndex.1 = 1# enterprises.ucdavis.procTable.prEntry.prIndex.2 = 2# enterprises.ucdavis.procTable.prEntry.prIndex.3 = 3# enterprises.ucdavis.procTable.prEntry.prNames.1 = "mountd"# enterprises.ucdavis.procTable.prEntry.prNames.2 = "ntalkd"# enterprises.ucdavis.procTable.prEntry.prNames.3 = "sendmail"# enterprises.ucdavis.procTable.prEntry.prMin.1 = 0# enterprises.ucdavis.procTable.prEntry.prMin.2 = 0# enterprises.ucdavis.procTable.prEntry.prMin.3 = 1# enterprises.ucdavis.procTable.prEntry.prMax.1 = 0# enterprises.ucdavis.procTable.prEntry.prMax.2 = 4# enterprises.ucdavis.procTable.prEntry.prMax.3 = 10# enterprises.ucdavis.procTable.prEntry.prCount.1 = 0# enterprises.ucdavis.procTable.prEntry.prCount.2 = 0# enterprises.ucdavis.procTable.prEntry.prCount.3 = 1# enterprises.ucdavis.procTable.prEntry.prErrorFlag.1 = 1# enterprises.ucdavis.procTable.prEntry.prErrorFlag.2 = 0# enterprises.ucdavis.procTable.prEntry.prErrorFlag.3 = 0# enterprises.ucdavis.procTable.prEntry.prErrMessage.1 = "No mountd process running."# enterprises.ucdavis.procTable.prEntry.prErrMessage.2 = ""# enterprises.ucdavis.procTable.prEntry.prErrMessage.3 = ""# enterprises.ucdavis.procTable.prEntry.prErrFix.1 = 0# enterprises.ucdavis.procTable.prEntry.prErrFix.2 = 0# enterprises.ucdavis.procTable.prEntry.prErrFix.3 = 0## Note that the errorFlag for mountd is set to 1 because one is not# running (in this case an rpc.mountd is, but thats not good enough),# and the ErrMessage tells you what's wrong. The configuration# imposed in the snmpd.conf file is also shown.## Special Case: When the min and max numbers are both 0, it assumes# you want a max of infinity and a min of 1.## -----------------------------------------------------------------------------######################################################### # Executables/scripts### You can also have programs run by the agent that return a single# line of output and an exit code. Here are two examples.## exec NAME PROGRAM [ARGS ...]## NAME: A generic name.# PROGRAM: The program to run. Include the path!# ARGS: optional arguments to be passed to the program# a simple hello world#exec echotest /bin/echo hello world# Run a shell script containing:## #!/bin/sh# echo hello world# echo hi there# exit 35## Note: this has been specifically commented out to prevent# accidental security holes due to someone else on your system writing# a /tmp/shtest before you do. Uncomment to use it.##exec shelltest /bin/sh /tmp/shtest# Then,# % snmpwalk -v 1 localhost -c public .1.3.6.1.4.1.2021.8# enterprises.ucdavis.extTable.extEntry.extIndex.1 = 1# enterprises.ucdavis.extTable.extEntry.extIndex.2 = 2# enterprises.ucdavis.extTable.extEntry.extNames.1 = "echotest"# enterprises.ucdavis.extTable.extEntry.extNames.2 = "shelltest"# enterprises.ucdavis.extTable.extEntry.extCommand.1 = "/bin/echo hello world" # enterprises.ucdavis.extTable.extEntry.extCommand.2 = "/bin/sh /tmp/shtest" # enterprises.ucdavis.extTable.extEntry.extResult.1 = 0# enterprises.ucdavis.extTable.extEntry.extResult.2 = 35# enterprises.ucdavis.extTable.extEntry.extOutput.1 = "hello world."# enterprises.ucdavis.extTable.extEntry.extOutput.2 = "hello world."# enterprises.ucdavis.extTable.extEntry.extErrFix.1 = 0# enterprises.ucdavis.extTable.extEntry.extErrFix.2 = 0# Note that the second line of the /tmp/shtest shell script is cut# off. Also note that the exit status of 35 was returned.# -----------------------------------------------------------------------------######################################################### # disk checks## The agent can check the amount of available disk space, and make# sure it is above a set limit.# disk PATH [MIN=100000]## PATH: mount path to the disk in question.# MIN: Disks with space below this value will have the Mib's errorFlag set.# Default value = 100000.# Check the / partition and make sure it contains at least 10 megs.#disk / 10000# % snmpwalk -v 1 localhost -c public .1.3.6.1.4.1.2021.9# enterprises.ucdavis.diskTable.dskEntry.diskIndex.1 = 0# enterprises.ucdavis.diskTable.dskEntry.diskPath.1 = "/" Hex: 2F# enterprises.ucdavis.diskTable.dskEntry.diskDevice.1 = "/dev/dsk/c201d6s0"# enterprises.ucdavis.diskTable.dskEntry.diskMinimum.1 = 10000# enterprises.ucdavis.diskTable.dskEntry.diskTotal.1 = 837130# enterprises.ucdavis.diskTable.dskEntry.diskAvail.1 = 316325# enterprises.ucdavis.diskTable.dskEntry.diskUsed.1 = 437092# enterprises.ucdavis.diskTable.dskEntry.diskPercent.1 = 58# enterprises.ucdavis.diskTable.dskEntry.diskErrorFlag.1 = 0# enterprises.ucdavis.diskTable.dskEntry.diskErrorMsg.1 = ""# -----------------------------------------------------------------------------######################################################### # load average checks## load [1MAX=12.0] [5MAX=12.0] [15MAX=12.0]## 1MAX: If the 1 minute load average is above this limit at query# time, the errorFlag will be set.# 5MAX: Similar, but for 5 min average.# 15MAX: Similar, but for 15 min average.# Check for loads:#load 12 14 14# % snmpwalk -v 1 localhost -c public .1.3.6.1.4.1.2021.10# Entry.loadaveIndex.1 = 1# Entry.loadaveIndex.2 = 2# Entry.loadaveIndex.3 = 3# Entry.loadaveNames.1 = "Load-1"# Entry.loadaveNames.2 = "Load-5"# Entry.loadaveNames.3 = "Load-15"# Entry.loadaveLoad.1 = "0.49" Hex: 30 2E 34 39# Entry.loadaveLoad.2 = "0.31" Hex: 30 2E 33 31# Entry.loadaveLoad.3 = "0.26" Hex: 30 2E 32 36# Entry.loadaveConfig.1 = "12.00"# Entry.loadaveConfig.2 = "14.00"# Entry.loadaveConfig.3 = "14.00"# Entry.loadaveErrorFlag.1 = 0# Entry.loadaveErrorFlag.2 = 0# Entry.loadaveErrorFlag.3 = 0# Entry.loadaveErrMessage.1 = ""# Entry.loadaveErrMessage.2 = ""# Entry.loadaveErrMessage.3 = ""# ---------------------------------------------------------------######################################################### # Extensible sections.## This alleviates the multiple line output problem found in the# previous executable mib by placing each mib in its own mib table:# Run a shell script containing:## #!/bin/sh# echo hello world# echo hi there# exit 35## Note: this has been specifically commented out to prevent# accidental security holes due to someone else on your system writing# a /tmp/shtest before you do. Uncomment to use it.## exec .1.3.6.1.4.1.2021.50 shelltest /bin/sh /tmp/shtest# % snmpwalk -v 1 localhost -c public .1.3.6.1.4.1.2021.50# enterprises.ucdavis.50.1.1 = 1# enterprises.ucdavis.50.2.1 = "shelltest"# enterprises.ucdavis.50.3.1 = "/bin/sh /tmp/shtest"# enterprises.ucdavis.50.100.1 = 35# enterprises.ucdavis.50.101.1 = "hello world."# enterprises.ucdavis.50.101.2 = "hi there."# enterprises.ucdavis.50.102.1 = 0# Now the Output has grown to two lines, and we can see the 'hi# there.' output as the second line from our shell script.## Note that you must alter the mib.txt file to be correct if you want# the .50.* outputs above to change to reasonable text descriptions.# Other ideas:## exec .1.3.6.1.4.1.2021.51 ps /bin/ps# exec .1.3.6.1.4.1.2021.52 top /usr/local/bin/top# exec .1.3.6.1.4.1.2021.53 mailq /usr/bin/mailq# ---------------------------------------------------------------######################################################### # Pass through control.## Usage:# pass MIBOID EXEC-COMMAND## This will pass total control of the mib underneath the MIBOID# portion of the mib to the EXEC-COMMAND.## Note: You'll have to change the path of the passtest script to your# source directory or install it in the given location.## Example: (see the script for details)# (commented out here since it requires that you place the# script in the right location. (its not installed by default))# pass .1.3.6.1.4.1.2021.255 /bin/sh /usr/local/local/passtest# % snmpwalk -v 1 localhost -c public .1.3.6.1.4.1.2021.255# enterprises.ucdavis.255.1 = "life the universe and everything"# enterprises.ucdavis.255.2.1 = 42# enterprises.ucdavis.255.2.2 = OID: 42.42.42# enterprises.ucdavis.255.3 = Timeticks: (363136200) 42 days, 0:42:42# enterprises.ucdavis.255.4 = IpAddress: 127.0.0.1# enterprises.ucdavis.255.5 = 42# enterprises.ucdavis.255.6 = Gauge: 42## % snmpget -v 1 localhost public .1.3.6.1.4.1.2021.255.5# enterprises.ucdavis.255.5 = 42## % snmpset -v 1 localhost public .1.3.6.1.4.1.2021.255.1 s "New string"# enterprises.ucdavis.255.1 = "New string"## For specific usage information, see the man/snmpd.conf.5 manual page# as well as the local/passtest script used in the above example.# Added for support of bcm5820 cards.pass .1.3.6.1.4.1.4413.4.1 /usr/bin/ucd5820stat######################################################### # Further Information## See the snmpd.conf manual page, and the output of "snmpd -H".#########################--END-----########################## 因为配置文件较长,为了方便大家查看,同时也可以偷懒,注释文件也没有删除。