iPhone使用手册(简版)V11
普美多联开关与Iphone手机控制软件操作手册V11
Iphone手机控制操作手册目录1、工作原理图 (2)2、多联电力多联电力网关网络连接设置 (2)3、软件安装 (4)4、登陆 (4)5、区域控制 (6)6、场景控制 (7)7、区域及场景设置 (8)7.1 修改名称 (8)7.2 区域及场景设置 (9)8、软件使用注意事项及常见故障 (11)8.1 软件使用注意事项 (11)8.2 常见故障 (11)1、工作原理图1、手机和普美多联电力多联电力网关都通过家庭内的WIFI路由器上网,进而实现相互通讯。
2、多联电力多联电力网关可以实现与多联开关的相互通讯。
3、手机就可以通过多联电力多联电力网关实现对多联开关的控制。
软件使用流程:2、多联电力多联电力网关网络连接设置根据家庭中使用的路由设置规则,对多联电力多联电力网关进行设置。
多联电力多联电力网关的默认IP地址为:192.168.1.201。
操作步骤:步骤1:长按多联电力多联电力网关的对码按键5秒钟后,多联电力多联电力网关的红色工作指示灯会闪烁3下,同时Code指示灯会一直闪烁,代表多联电力多联电力网关进入了“多联电力多联电力网关网络连接设置”状态。
步骤2:在电脑的IE浏览器中输入:192.168.1.201图2-1 多联电力多联电力网关登陆界面步骤3:输入管理员密码,初始密码为:admin,之后进入多联电力多联电力网关网络设置界面,如下图2-2所示。
(1)修改多联电力多联电力网关管理密码:可以修改多联电力多联电力网关的管理员密码。
(2)网络用户设置:暂未启用,可以采用默认值。
(3)联网设置:可以实现多联电力多联电力网关的网络设置管理。
步骤4:根据家庭的实际应用进行“联网设置”,设置多联电力多联电力网关IP地址、子网掩码、默认多联电力网关,DNS服务地址等。
其中“服务地址”和“服务端口”暂未启用,可以采用默认值。
步骤5:长按多联电力多联电力网关的对码按键5秒钟后,多联电力多联电力网关的红色工作指示灯会闪烁3下,网退出“多联电力多联电力网关网络连接设置”状态,恢复到工作状态。
iTunes_11使用教程

iTunes 11使用教程一、 设备激活iOS 设备首次或恢复系统后使用时需要激活使用,新版的iTunes 激活iOS 设备后的页面也有所改变,多出一个欢迎向导,方便新手使用。
(一) iOS激活向导a) 新版iTunes 激活解锁设备后,iTunes 右上角多了一个完成按钮,点击后会跳过新手向导,返回iTunes 的资料库。
点击Continue 后,iTunes 会跳转至新手向导页面。
b) iPhone 如果是首次在当前的PC 上使用,则会看到以下的页面。
点击继续即可进入下一步。
12c)如果iPhone之前在当前PC上有过同步或备份,则会看到以下的界面,在这里可以根据需求,选择从备份回复或设臵为新iPhone。
d)点击继续后,iTunes会展示新版使用小贴士,点击开始即可跳转至iTunes摘要页面。
二、 同步管理类(一) 信息同步1) 通讯录同步a) 通过数据线将iPhone 与iTunes 连接,点击iTunes 右上角的iOS 设备按钮进入设备摘要页面。
需要注意的是不要点击按钮,这会导致iPhone 从系统中弹出。
b) 以同步Outlook 数据为例,在iTunes 摘要页面,点击进入“信息”,在信息中勾选“同步通讯录”,数据来源选择Outlook ,点击“应用”,完成后iTunes 会自动将联系人合并同步至iOS 设备中。
需要注意的是OS X 系统版的iTunes 不支持该同步方案。
(系统默认模式为双向合并同步,同步后会将iPhone 与Outlook 中的联系人全部合并。
冲突方案配臵参见下文。
)c) iTunes 同步“通讯录”支持多渠道数据,同步的来源支持Outlook 、Google123contacts及Windows contacts。
2)日历同步a)在iTunes摘要页面,点击进入“信息”,在信息中勾选“将日历共享到”,选择同步来源Outlook,点击“应用”后同步,既可将Outlook中的日历合并同步至iOS设备中。
iPhone使用手册(简版)V11
iPhone使⽤⼿册(简版)V11 iPhone⼿机使⽤⼿册(简版)⽬录⼀、基础知识 (3)1.1产品介绍 (3)1.2 iTunes (5)1.3安装SIM/USIM卡 (6)1.4激活 (7)1.5设置屏幕快捷键 (7)1.6注册免费iTunes帐号 (10)1.7输⼊法 (15)1.8设置时间 (16)1.9特殊性操作 (17)⼆、主要功能 (18)2.1电话 (18)2.1.1拨打电话 (18)2.1.2接听电话 (19)2.1.3通话记录管理 (20)2.2短信 (20)2.2.1查看短信 (20)2.2.2发送短信 (21)2.2.3回复或转发短信 (23)2.2.4删除短信 (24)2.3通讯录 (24)2.3.1复制卡中通讯录⾄⼿机 (24)2.3.2显⽰⽅式 (26)2.3.3新建联系⼈ (27)2.3.4查找联系⼈ (27)2.3.5删除联系⼈ (28)2.4 iPod (28)2.4.1添加播放⽂件 (29)2.4.2播放⽂件 (30)2.5 Safari (31)2.5.1上⽹ (31)2.5.2 编辑书签 (32)2.5.3查看与删除历史记录 (33)2.5.4⽹页切换及关闭 (33)2.6邮件 (34)2.6.1配臵邮件帐户 (34)2.6.2邮件使⽤ (36)2.6.3删除邮件帐户 (38)2.7 AppStore (39)2.7.1恢复AppStore图标 (39)2.7.2功能图标简介 (40)2.7.3软件下载 (40)2.7.4软件删除 (43)2.8拍照与视频录制 (43)2.8.1拍照和摄像 (43)2.8.2查看 (44)2.9语⾳备忘录 (45)2.9.1语⾳录制 (45)2.9.2查看 (45)2.10语⾳控制 (46)2.11其他 (47)1、股票 (47)2、天⽓ (48)⼀、基础知识1.1产品介绍1、iPhone 3GS技术参数115.5 x 62.1 x 12.3mmMulti-Touch触控宽屏幕;480x320像素UMTS/HSDPA(850,1900,2100MHz);触控宽屏幕;480x320UMTS/HSDPA(850,1900,2100MHz);1.2 iTunes1、定义:iTunes是由苹果公司在2001年1⽉10⽇发布的⽤于⾳乐与视频播放、资料管理的应⽤程序2、下载地址:/doc/b51412596.html/itunes/download/3、桌⾯图标:4、同步iTunes 可根据需要使iPhone⼿机与电脑同步所需内容。
苹果iphone11用户手册说明书

Iphone 11 user guide free.
Iphone 11 pro max user guide pdf. 80770703665.pdf Is there a user guide for iphone 11. Iphone 11 pro camera user guide. Iphone 11 user guide for seniors. Iphone 11 user guide for dummies. tạo service trong android Iphone 11 camera user guide. Iphone 11 basic user guide. Iphone 11 user guide pdf. Iphone 11 user guide pdf download. Iphone 11 user guide uk.
To explore the iPhone User Guide, click Table of Contents at the top of the page, or enter a word or phrase in the search field. You can also download the guide from Apple Books (where available). Welcome What’s new in iOS 16 Calculator Compass Get music, movies, and TV shows Get ringtones Manage purchases and settings Measure View and save measurements Measure a person’s height Use the level Shortcuts Tips Use iPhone with iPad, iPod touch, Mac, and PC Restart, update, reset, and restore Safety, handling, and support Copyright Helpful?
团队管理 iPhone 使用指南 (球员 家长版本)说明书

User’s G uide f or t he T eamSnap i Phone a pp for P layers a nd P arentsBecause we’re not too good to develop a User’s Guide for our Apple-‐related product2Table o f C ontentsSection 1: S igning i nto t he A pp .................................................................................... 3 A. I a lready h ave a n e xisting u sername a nd p assword .............................................................................. 3 B. S igning I n w ith F acebook .................................................................................................................................. 4 C. F acebook E rror M essage .................................................................................................................................... 4 D . I f orgot m y u sername a nd/or p assword .................................................................................................... 5 E. I d o n ot h ave a n e xisting a ccount a nd I a m t rying t o f ind m y t eam ................................................ 5 Section 2: R efreshing Y our A pp ................................................................................... 6 Section 3: O verview P age ............................................................................................ 7 Section 4: E diting R oster I nformation .......................................................................... 8 A. E diting p layer i nformation o n t he r oster ................................................................................................... 8 B. A dding P layers a s a C ontact o n m y i Phone ................................................................................................ 8 C. A dding/Changing a p icture f or a p layer o n t he r oster .......................................................................... 8 Section 5: S chedule ..................................................................................................... 9 A. S ubscribing t o t he T eam C alendar T hrough Y our i Phone C alendar ............................................... 9 B. U nsubscribing f rom t he c alendar .................................................................................................................. 9 C. A dding a S ingle G ame/Event t o y our i Phone C alendar ........................................................................ 9 Section 6: A vailability ................................................................................................. 10 A. U pdating p layer a vailability .......................................................................................................................... 10 Drag a nd D rop V ersionB. U pdating p layer a vailability .......................................................................................................................... 10 Select f rom M enu V ersionSection 7: S ending M essages t o t he T eam .................................................................. 11 A. H ow t o s end a n e mail m essage t o t he t eam ........................................................................................... 11 B. H ow t o P ost M essages t o t he T eam ............................................................................................................ 11 Section 8: P hotos a nd F iles ......................................................................................... 12 A. H ow t o A dd a P hoto .......................................................................................................................................... 12 B. E mailing, S aving, S haring p hotos f rom t he a pp (12)3Section 1: S igning i nto t he A ppA. I a lready h ave a n e xisting u sername a nd p asswordIf y ou a lready h ave a n e xisting u sername a nd p assword t hen f ollow t hese s teps t o s ign into t he T eamSnap A pp:• Click o n t he “username” b ox a nd e nter y our username• Click o n t he “password” b ox a nd e nter y our password• Click o n “Go” o n y our k eyboardThis w ill l og y ou i nto y our a ccount a nd y ou w ill immediately s ee a l ist o f a ll y our t eams.4B. S igning I n w ith F acebook• Click o n t he “Sign i n w ith F acebook” b utton a t the b ottom o f t he s creen• Enter y our u sername a nd p assword f or Facebook• You w ill s ee “Already A uthorized” i f y ou h ave already a uthorized T eamSnap t o u se y our Facebook l ogin a nd y ou w ill b e l ogged i nto the a pp.• If y ou h ave n ot b een a lready a uthorized y ou will b e t aken t o t he F acebook s ign i n p age (or the F acebook a pp s ign i n p age). O nce y ou sign-‐in y ou w ill b e t aken t o a s creen w ith t he TeamSnap a pp o n i t.• Select “Login” a nd t hen d ecide i f y ou w ant t o allow t he o ptimal p ermissions. O nce y ou decide y ou w ill b e l ogged i nto t he a pp.C. F acebook E rror M essageIf y ou r eceive a “com.facebook.sdk e rror 2” t his i s c aused w hen t he u ser c hooses N OT t o let T eamSnap h ave a ccess t o t heir F acebook l ogin.Just f ollow t hese s teps t o g ive a ccess t o y our F acebook l ogin:• Go t o t he i Phone S ettings a pp (it's a g ear i con u sually o n t he f irst p age o f a pps) • Tap "Facebook", a nd t hen c hange "Allow t hese A pps t o U se Y our A ccount" f rom "Off" t o "On" f or T eamSnap5D . I f orgot m y u sername a nd/or p asswordIf y ou f orgot y our p assword w hen y ou t ried t o s ign in, y ou w ill b e g iven a n o ption t o r eset y ourpassword. C lick o n t he “Reset P assword”, e nter y our account e mail a t t he p rompt a nd c lick o n “Submit”.If y ou s ee t he m essage “Password R eset I nitiated ” you w ill b e s ent a n e mail w ith y our u sername i n i t and i nstructions o n h ow t o r eset y our p assword.If y ou g et t he m essage “Password R eset F ailed ”, i t means o ur s ystem d id n ot r ecognize t hat e mail. Y ou may h ave j ust e ntered t he a ddress i ncorrectly b ut i t may b e t hat y ou e ntered a n e mail a ddress t hat i s different f rom y our a ccount e mail.If y ou c ontinue t o h ave p roblems r emembering y our a ccount e mail j ust c ontact u s a t ******************** a nd w e h elp y ou g et t hings s orted o ut!E. I d o n ot h ave a n e xisting a ccount a nd I a m t rying t o f ind m y t eamIf y ou d o n ot h ave a n e xisting a ccount a nd y ou a re t rying t o f ind a t eam y ou w ill w ant t o check y our e mail i nbox t o s ee i f t here i s a n e mail i nvitation i nviting y ou t o j oin t he t eam. The e mail w ill c ontain a l ink t o o ur s ite.When y ou c lick o n t he l ink i t w ill t ake y ou t o o ur w ebsite w here y ou c an c reate y our username a nd p assword. O nce y ou d o t his, t he t eam w ill b e a dded t o y our a ccount.Then y ou c an u se y our s hiny n ew u sername a nd p assword t o l ogin t o t he i Phone a pp!6Section 2: R efreshing Y our A ppIf y ou w ant t o m ake s ure y our a pp i s a s u p-‐to-‐date a s p ossible y ou h ave t he o ption o f refreshing c ertain p ages.To r efresh a p age y ou j ust s imply s wipe d own o n t he s creen a nd y ou w ill s ee t he w ords “Pull d own t o r efresh…” a nd t hen w hen y ou k eep g oing, “Release t o r efresh...”The f ollowing p ages o n t he a pp c an b e r efreshed:• Teams p age • Overview p age • Roster p age • Schedule p age• Posts/Emails p ages (found i n t he M essages page)• Photos/FilesIf y ou d o n ot w ant t o c ommit t his l ist t o m emory just t ry s wiping d own o n a ny p age. Y ou w ill g et the h ang o f i t!7Section 3: O verview P ageThe O verview p age d isplays y our t eam R ecord , y our N ext G ame a nd y our L ast G ame and w ill d isplay t he M anager M essage. B oth g ame l inks w ill l ead y ou d irectly t o t he game w ith a ll o f t he n eeded e vent i nformation.From t he g ame p ages y ou c an• Check a nd u pdate t eam a vailability • Enter y our o wn a vailability• Assign r efreshments f or t he g ame8Section 4: E diting R oster I nformationA. E diting p layer i nformation o n t he r oster• Go t o t he R oster m enu • Click o n t he p layer’s n ame• Click o n t he a rrow i n t he t op r ight-‐hand corner o f t he s creen• Select “Edit” w hen t he p op-‐up a ppears • Edit t he n ecessary i nformation • Click o n “Save”B. A dding P layers a s a C ontact o n m y i Phone• Go t o t he R oster p age • Select t he p layer • Click o n•Select “Ok” w hen i t s ays “ ’TeamSnap’ would l ike t o a ccess y our c ontacts”• Select “Create N ew C ontact” o r “Add t o E xisting C ontact”o Note: Y ou c an a lso s elect “Send M essage” “FaceTime” o r “Share C ontact” from t his p age a s w ell.• Select “Done”C. A dding/Changing a p icture f or a p layer o n t he r oster• Go t o t he r oster p age • Click o n t he p layer’s n ame• Select t he p icture b ox t hat e ither s ays “Click t o A dd” o r s ays “Change” underneath t he c urrent p icture• Choose “Take P hoto” o r “Choose E xisting”• Take y our p hoto o r p ick o ne f rom t he h undreds i n y our p honeI w ant t o C oach!(How t o C reate a N ew T eam)To c reate a n ew t eam f rom t he app g o t o t he “Teams” p age and c lick o n t he “+” i n t he t op right-‐hand c orner o f t he screen. E nter y our t eam information, c lick o n “Save” and y ou w ill c reate a s parklingnew t eam!9A. S ubscribing t o t he T eam C alendar T hrough Y our i Phone C alendar• Go t o t he S chedule p age• Scroll t o t he b ottom o f t he s chedule • Select “Subscribe v ia i Phone C alendar” •Select “Subscribe” w hen p romptedThat’s i t. S eriously. G o a head a nd c heck y our c alendar. I t’s t here.B. U nsubscribing f rom t he c alendar• Go t o t he C alendar a pp• Select t he “Calendar” b utton o n t he t op l eft-‐hand s ide o f t he s creen • Scroll d own t o a nd s elect t he t eam c alendar • Select “Delete C alendar”•Select “Delete” a gain a t t he p romptC. A dding a S ingle G ame/Event t o y our i Phone C alendarThrough t he T eamSnap a pp y ou c an a dd i ndividual g ames/events, o ne a t a t ime, t o y our iPhone c alendar. U nlike g ames/events f rom y our s ubscribed t eam c alendar, t his calendar e ntry c an b e e dited o r r emoved.Here i s h ow t o a dd a s ingle g ame/event t o y our i Phone c alendar:• Go t o t he S chedule p age • Select t he g ame/event• Click o n “Add t o i Phone” c alendar• Click O k, w hen y ou g et t he m essage “TeamSnap w ould l ike t o a ccess y our calendar” (It w ill o nly a sk t his t he f irst t ime)• You w ill b e t aken t o t he “Add E vent” s creen o n y our i Phone c alendar. Y ou c an then e dit o r l abel t he e vent i n a ny w ay y ou w ould l ike • Click o n “Done”10A. U pdating p layer a vailability Drag a nd D rop V ersion• Go t o t he “Schedule/Availability” p age • Select a g ame• Select “Team A vailability”•Click a nd h old t o t he f ar r ight o f t he p layer’s name (where y ou s ee t he t hree b ars) • The n ame w ill p op u p a l ittle a nd y ou c an drag a nd d rop i t t o t he a vailability c ategory • Select “Done”The p layer w ill t hen b e l isted u nder t he c ategory o f their a vailability.B. U pdating p layer a vailability Select f rom M enu V ersion• Go t o t he “Schedule/Availability” p age • Select a g ame• Select “Team A vailability” • Select “Edit”• Click o n t he p layer’s n ame• Select t heir a vailability f rom t he p op-‐up m enu •Select “Done”11Section 7: S ending M essages t o t he T eamA. H ow t o s end a n e mail m essage t o t he t eam•Select t he “Messages” p age f rom t he M ain M enu •Select “Emails” •Click o n t he c ompose i con i n t he t op r ight-‐hand c orner o f t he s creen •Click i n t he “To:” b ox •Select t he r ecipients (there w ill b e a c heck-‐mark n ext t o t heir n ame) • Click “Done”• Enter y our “Subject:”• Enter y our t ext• Hit “Send”B. H ow t o P ost M essages t o t he T eamPosts a re a w ay t o b roadcast a m essage t o y our t eamand k eep a c ontinuous t hread o f r esponses.Any p osts y ou c reate w ill b e p osted t o e veryone’s Messages t ab a nd t hey w ill a lso b e d isplayed o n t he Home p age t ab o f t he t eam w ebsite a s w ell.• Select t he “Messages” p age f rom t he M ain Menu• Select “Posts”• Click o n t he c ompose i con i n t he t op r ight-‐hand c orner o f t he s creen• Click i n t he "Title" b ox a nd e nter a T itle f or your P ost• Enter t he t ext o f y our P ost• Hit "Post" i n t he u pper r ight-‐hand c orner12Section 8: P hotos a nd F ilesA. H ow t o A dd a P hoto• From t he M ain M enu s elect “Photos”• Select a f older• Click o n t he c amera i con i n t he t op right-‐hand c orner o f t he s creen• Choose “Take P hoto” o r “Choose Existing”• Find y our p icture o r t ake a p icture!• Write o ut t he P hoto C aption w hen prompted a nd s elect “Save”B. E mailing, S aving, S haring p hotos f rom t he a ppBy s electing t he “Share” i con (at t he t op r ight-‐hand c orner o f t he s creen) a ny p hoto o n the s ite c an b e s aved t o, e mailed f rom, o r s hared b y y our d evice. Follow t hese s imple s teps:• Click o n t he p hoto• Select t he “Forward” i con a t t he t op r ight-‐hand c orner o f t he s creen• Select t he a pp o r i con t hat w ill s hare t he p hoto i n t he w ay t hat y ou w ant. F or example:o Mail a llows y ou t o e mail i t.o Save t o C amera R oll w ill s ave i t t o y our p hone.o Assign t o C ontact w ill a dd i t t o y our C ontact L ist.。
IPHONE简明使用手册

IPHONE简明使用手册1.Iphone手机简介iPhone将创新的移动电话、可触摸宽屏iPod以及具有桌面级电子邮件、网页浏览、搜索和地图功能的突破性因特网通信设备这三种产品完美地融为一体,引入了基于大型多触点显示屏和领先性新软件的全新用户界面,让用户用手指即可控制iPhone。
2. iTunes账号注册iTunes 是一个供Mac 和PC 使用的免费应用程序,能播放你所有的数字音乐和视频、将你所有的媒体文件收藏导入iPod 和iPhone。
精彩娱乐生活的所有一切,iTunes 随时随地为你准备就绪。
iTunes帐号注册方法:首先是进入iTunes store之后点击App Store,进入App Store之后寻找一个免费的App软件,一定要免费的,在此我们选择iYardage sports这款软件,进入App软件的页面之后点击GET APP,这是就会提示用户输入APPLE ID和密码了,继续选择创建新帐户,在出现WELCOME欢迎界面的时候继续点Continue,在弹出的窗口选项中打勾,继续Continue。
在弹出的窗口中填入你想注册的E-mail 账号、密码、安全提示问题、答案、选择生日后再选择Continue。
经过上面的一系列步骤之后,大家会发现接下来的这个窗口的选择信用卡选项中就会多出一个None的选项,这也就是一系列步骤下来我们所追求的目的,选择None之后,继续填上的相关信息,姓名、地址可以随意填写英文信息,其中City填写LAS VEGAS,State选择NV - NEVADA,Zip Code 填写89101,Phone区号3位、电话号码7位,然后点击Continue;这时iTunes会提示激活邮件已发送到所注册邮箱,大家最后所需要的就是到所注册的邮箱收信,然后点击邮件中的链接,到iTunes 上激活账号了。
有了账号还需要做的一步便是在ITunes的Store选项中选择对电脑授权,如果没有选择这一部,下载的软件都无法安装到3G iPhone上使用,用户需要注意这一点。
iPhone 11 回收指南说明书

iPhone 11Apple Recycler Guide April 2022Contents3 About This Guide4 Identification5 Directive 2012/19/EU Annex VII Components6 Safety Considerations8 Recommended Tools9 Disassembly Instructions22 Material Categorization of Output FractionsAbout This GuideApple Recycler Guides provide guidance for electronics recyclers on how to disassemble products to maximize recovery of resources. The guides provide step-by-step disassembly instructions and information on the material composition to help recyclers direct fractions to the appropriate material recycler.To conserve important resources, we work to reduce the materials we use and aim to one day source only recycled or renewable materials in our products. A key path to reaching that goal is resource recovery from end-of-life electronics.Disassembly procedures are intended to be performed only by trained electronics recycling professionals. The recycler is responsible for independently evaluating and ensuring compliance with all applicable environmental, health, and safety laws related to the work. These include but are not limited to laws relating to the management, handling, shipping, and disposal of the outputs of this work as waste and laws in place to ensure the health and safety of all employees who support this work. Forquestionsorfeedbackaboutthisguide,**************************.IdentificationYou can find the model number of the iPhone inside the SIM tray slot.Model numbers:A2111, A2221, A2223Directive 2012/19/EU Annex VII Components Directive 2012/19/EU Annex VII requirements apply to the following substances and components.Safety ConsiderationsThe recycler is responsible for independently evaluating all activities undertaken by its employees to perform or support the work and ensuring compliance with all applicable health and safety laws related to the work. These include but are not limited to laws relating to the health and safety of all employees who perform or support this work. The recycler is also responsible for evaluating the workspace and ensuring that the area in which the work is to be undertaken is designed using ergonomic best practices and meets all ergonomic requirements to ensure the protection of its employees.Battery SafetyThis product uses a lithium-ion polymer battery. Follow these steps for safe removal and disposal of the battery.• Discharge the battery to less than 25 percent before beginning any disassembly. Thermal runaway is less likely to occur in a discharged battery.• Remove anything from your person that could conduct energy, such as jewelry and watches, to avoid electric shock to yourself or the logic board.• To avoid the potential for thermal runaway and the release of potentially noxious fumes, don’t puncture, strike, or crush lithium-ion polymer batteries or devices powered by them.• Don’t throw, drop, or bend the battery.• Don’t expose the battery to excessive heat or sunlight.• Use only tools that are not sharp and do not conduct electricity.• Keep your workspace clear of foreign objects and sharp materials.•Dispose of batteries according to local environmental laws and guidelines.Personal Protective EquipmentPersonal protective equipment should be worn during the entire recycling process.Wear hand protectionWear eye protectionWear protective clothing Wear foot protectionWorkspace safety guidelines• Use heat-resistant gloves and safety glasses.• Keep a sand dispenser within arm’s reach (2 feet or 0.6 m) on either side of the workstation, not above the workstation. The dispenser should be a wide-mouthed, quick-pour metal container with a flip-top lid or tray that contains 8–10 cups (1.9–2.4 L) of clean, dry, untreated sand.• Keep the battery at least 2 feet (0.6 m) from paper and other combustible materials.• Work in an area with adequate ventilation.Handling a thermal runawayIf you notice any of the following signs, a thermal runaway is likely underway, and you should act immediately:• The lithium-ion polymer battery or a device containing one begins to smoke or emit sparks or soot.• The battery pouch suddenly and quickly puffs out.• You hear hissing or popping sounds.Don’t use water or an ABC/CO2 fire extinguisher on a thermal runaway battery or a device containing one. Water and ABC/CO2 fire extinguishers will not stop the reaction.Do smother the battery or device immediately with plenty of clean, dry sand, dumped all at once. Timing is critical; the faster you pour all the sand, the faster the thermal runaway will stop.Do leave the room for 30 minutes if the thermal runaway causes any irritation.Do wait 30 minutes before touching the battery. Wear heat-resistant gloves and safety glasses to remove the battery from the sand, or use a touchless thermometer to measure the battery temperature. Only touch the battery when the event has finished.Do dispose of the damaged battery or device (including any debris removed from the sand) according to local environmental laws and guidelines.Hazard WarningsRecommended ToolsFlat-blade screwdriver Long-nose pliersNail-pulling screwdriverDisassembly Instructions1. Remove the power adapter and charge cable.»Turn off the iPhone.»Unplug the power adapter. Disconnect both ends of thecharge cable.Power adapterCharge cable2.Remove the display.Hold the iPhone at the edge of a counter with the display face up and the Lightning connector toward the counter edge.»Insert the tool tip into the Lightning connector. Push thehandle down to pry the display from the enclosure.»Remove the display by hand. Set the enclosure aside.3. Remove the receiver.»With the display facing down, pry off the receiver. »Pull the ribbon cable off the receiver.Ribbon cable Receiver4. Pry off the display shield.Display shield5.Pull the ribbon cables off the LCD cell.Ribbon cablesFractionLCD cell6. Inside the enclosure, carefully remove the lithium-ion polymer battery.Rechargeable battery hazard 7.Pry off the Taptic Engine.Lithium-ion polymer batteryTaptic Engine8. Pry off the microphone and Lightning connectorassembly.9.Pry off the speaker.MicrophoneLightning connectorSpeaker10. Pry off the SIM reader.SIM reader11. Remove the SIM card and SIM tray by hand.Separate the SIM card from the SIM tray.12.Pry off the main logic board.13.Pry off the front camera.Main logic boardTools Used Front camera14.Pry off the rear camera.15. Pry the remaining ribbon cables offthe enclosure.Rear cameraRibbon cables16.Pull the enclosure band off the support plate.Enclosure bandFractionSupport plateMaterial Categorization of Output FractionsAll outputs from this process must be managed, handled, and disposed of in accordance with applicable waste laws and regulations, including but not limited to the Waste Framework Directive and its nationalenactments in Europe.AluminumSIM trayEnclosure bandPrimary Target MaterialBatteries Lithium-ion polymer batteryPrimary Target MaterialFerrousDisplay shieldPrimary Target MaterialGlass LCD cellPrimary Target MaterialPotential Additional MaterialsLogic BoardsSIM cardMain logic boardFront cameraRear cameraPrimary Target MaterialPotential Additional MaterialsMixed ElectronicsPower adapterCharge cableMicrophoneLightning connectorSIM readerPrimary Target MaterialPotential Additional MaterialsMixed Electronics (cont.)Ribbon cablesSupport plateRare Earth MagnetsReceiverTaptic EngineSpeakerPrimary Target MaterialPotential Additional Materials。
iPhone App快速入门指南说明书
iPhone ™ App Quick Start GuideWe have made this app available FREE to all members of entities that have a current subscription to . If you are not a member of an entity with a current subscription, then the app will not work for you.The Services, including those provided through the IamResponding app, are provided only as a supplement to existing dispatch, communication and response systems. These Services are not intended, and should not be used by you, as a primary dispatch system for emergency events or situations, as a substitute for existing emergency communication systems, or as a substitute for the exercise of reasonable judgments made by you or reasonable emergency services providers. Use your good, reasonable common sense when using the Services, do not substitute the Services for such common sense, and obey all applicable laws and regulations.The Terms of Use and Privacy Policy which govern all of the Services, including those made available to you through the IamResponding app, are available: by clicking the “Terms of Use” button on our website at ; upon your initial access of the IamResponding app, and by requesting the same in writing from .For any technical support needs or inquiries, please contact us at ************************, or during regular business hours (M-F, 9am-5:50pm ET) at 315-701-1372. Please note that we do NOT monitor our Facebook page for technical support issues, and we cannot reply to support issues posted as user reviews in iTunes™ or in the App Store.Please Note: if your dispatch messages are not currently processed through your department’s IamResponding system, that is a free configuration that can be done in most jurisdictions. Your app will have more complete functionality if we enable that feature for you. Have your local system administrator contact our customer support team at 315-701-1372 to set this up.Let’s get started!Step 1: Install the IamResponding iPhone ™ app from the App Store. The app is simply called“IamResponding.”Step 2:This is the screen that you will see when you first access the IamResponding app:Enter your agency log-in name, user name and password.All fields must be entered case sensitive. Masteradministrative user names and passwords will NOT work.You must use your own user name and password. If you donot remember your log in credentials, ask your local systemadministrator to re-send them to you by clicking “Update”within your member profile online.If you are a member of more than one entity that subscribes to IamResponding, log into any one of those entities here, and you will then be able to enter the others in a later step.Step 3: After logging in correctly, the “Agency Settings” (preferences) page will automatically open:Here, you can view, but not edit, your member profile(member profiles can only be edited from the website).If your dispatches are currently processed throughIamResponding, you can select here whether to receivepush notifications of those to your app. You can also selecta unique ringtone, the format to receive them in, and howlong you want to keep them within your app.To receive the notifications without a ringtone, simplychoose the “silent” ringtone.You can also select here whether you want to receive intra-department messages, sent through your entity’sIamResponding system, via push notification, and you canagain select a custom ringtone for those messages.Tap “Done” in the upper right corner when you are done.Please note : if your dispatch messages are not currently processed through your department’sIamResponding system, that is a free configuration that can be done in most jurisdictions.Have your local system administrator contact our customer support team at 315-701-1372 toset this up.Step 4: You will then be brought to the “Agencies” page:Here, you can:1. Access the app for the entity that you have alreadylogged into, by tapping on that entity; or2.Add an additional log-in for as many entities as youbelong to, by tapping the “+” symbol in the upper rightcorner, and starting over for each new entity.Remember, each entity must have an activesubscription to !This Agencies page is also where you can edit your settingsfor each entity, at any time. To edit your settings for aparticular entity, tap “Edit” in the upper right corner. Youwill then see a red minus sign next to each entity on yourlist.If you tap the red minus sign, you will be able to delete theentity from your app.If you tap an entity’s name while the red minus sign isvisible, you will be taken to your preferences for thatentity, and will be able to edit those.To close out of the delete/edit functions, simply tap the“Edit” button again.You can also access the Agencies page from various othercontrol features within other pages of the app, whereveryou see a choice to select “Agencies.”Step 5: There are settings that you have to modify in your iPhone’s™ general settings in order to receive push notifications through the IamResponding app. These are all accessible by tappingthe “Settings” icon on your phone:In the iPhone™ menu, after tapping on the “Settings” icon, select “Notifications:”T hen tap on “IaR:On the IaR Notifications screen, select the options as shown here:Be sure to select the “Alerts” style of notifications.Step 6:Certain Mapping Services within the app require location services to be “On” within yourphone’s general settings. Location services can be turned on or off by tapping the “Settings”icon on your phone:In the iPhone™ menu , after tapping on the “Settings” icon, select “Privacy”Then tap on “Location Services” (which must be set to “On” for location services to work)Then turn IaR location services either on or offStep 7: In order to receive push notifications to your phone of dispatch messages (if such messages are currently processed through your de partment’s IamResponding system), you need to gointo your member profile (on-line via a desktop computer; not via the app), and make 3 entriesin the “Dispatch Information” section of your member profile:1. Select where else you want your dispatch messages sent. You must choose at least oneother destination, in addition to push notifications to your app.2.Click “Yes” to have push notifications sent to your app.3.Select the type(s) of dispatches you want pushed to your app.Step 8: In order for the turn-by-turn navigation feature to function, you must also download the free Google Maps™ app to your phone from the App Store.Please Note: Your privileges within the App are determined from the settings in your user profile in the web-based system accessible via desktop computers. You may view, but cannot change, your membership profile information from within the App. You can do this in the “Agencies” p age, by selecting “Edit” and then choosing the agency to edit. Then select “User Profile & Credentials”. You must deselect “Edit” in order to re-enter the agency.That’s it! You should now be all set to start using the app!iPhone™ is a registered trade mark of Apple, Inc.iPhone ™ App OverviewDashboard: The 3-screen Dashboard slides right and left, and displays who is responding, who is on duty,and the status of your apparatus.This page displays who is responding, where and when. You can also indicate your response either by tapping the telephone number to speed-dial your assigned number, or by using the “Respond Now” button to indicate your response status directly through the app.Unlike the desk-top webpage, you will have tomanually refresh this screento update the list ofresponders.You can sort the order of thelist, and clear the list (if youhave permission to do so) bytapping the tool icon in theupper right corner. Note thatclearing the screen clears thedata for all members of yourdepartment, on all devices. This page will display a list ofwho is on duty, who isavailable, and who is notavailable.By tapping the tool icon inthe the top right hand corner,users can select their sortoptions as well as performother functions.This page will display the current status of all of your apparatus By tapping an apparatus, you will be able to change the status of that apparatus (if you have permission to do so), after entering the reason for the change.IncidentsThis page will list your most recent incidents, if your department’s dispatches are processed through your department’s system. If your dispatch messages are not currently processed through your department’s IamResponding system, that is a free configuration that can be done in most jurisdictions. Have your local system administratorcontact our customer support team at 315-701-1372 to set this up. Tapping on any incident will open that incident, showing the incident details. On your Preferences page, you can select which format to view that information in (these choices relate to the dispatch parsing settings available in the Administrative Functions page of your desktop-based IamResponding system). Incidents are stored here for however long you set within your preferences page.After selecting an incident, the bottom of the screen displaying the incident details providesyou with 3 options: Tapping “View Location” will open a Google Map™, displaying the location of the incident, as long as there is an address in the incident notification. If the incident location that is extracted from your incident notification is not correct, please send the incident notification, and the incorrectly extracted address to ************************. You can snap a screen shot of the incident detail page, and the mapping page by simultaneously pressing the on/off button at the top of your phone and the round “Home” button at the bottom center of the face of your phone. Sending those to us will be very helpful. From here, you can also call in directly to your assigned number, or indicate your response status directly through the app.Mapping Mapping can be opened either by tapping “View Location” from within your incident detailspage, or by tapping “Mapping” on the bottom menu bar.The map will display the incident location (whether automatically when accessed through the incident details page, or manually entered when accessed through the “Mapping” icon). If you have location services correctly enabled, the map will show you one available route to the incident location. You can modify the map view to see a Satellite, Terrain or Hybrid map view. You can zoom in or out by using your fingers to pinch or expand the map. If Google has a street view of the incident location, you can view that by tapping Street View. Tap that again to go back to the ordinary map view. If you have location services enabled, you can review turn-by-turn directions of one route to the incident by tapping the “Directions” button. Tap that again to go back to the ordinary map view. If you have location services correctly enabled, and also have the Google Maps™ app on your phone, tapping the “Navigate” button will launch the Google Maps™ app, automatically input your locations and the incident address shown on your map, and provide access to audible turn-by-turn navigation.MessagingA listing of the intra-department messages manually sent to you through your department ’s IamResponding system via email, text and/or pager can be viewed and sent from this page.Some automated messages will NOT be available on this list. To Read a message: Tap the message you want to reviewTo Send a message: Tap the “write” button , select recipients and then select who you want to send the message to (members of a group, individualmembers, or both), and then select “mail”, “text”, and/or “pager”. Not e that selecting anyone of the delivery methods will also cause the message to be sent to all recipients via the app.Tap “send”.Shifts This page lets you add, edit and view your schedule, and lets you view the upcoming schedule for your department.Deleting shifts from the app is not presently available.When viewing your schedule, you will be shown shifts from the present date forward. To viewpast shifts, select “My Schedule,” and then tap the “Edit” button in the upper right corner.That will allow you to select a date I the past or future, and the result will show you shiftsbeginning with that selected date.iPhone™ is a registered trade mark of Apple, Inc.。
iPhone史上最全的使用教程

iPhone史上最全的使用教程iPhone的解锁、越狱、激活、固件等等是什么意思,有什么分别这几天看见好多新人问这几个词的含义及区别。
我在这儿说说我的看法,不是官方解释,不懂的学习一下,懂的绕道,如有错误,敬请指正!第一次买来时或恢复官方固件后,iPhone会处于那种只能拨打紧急电话状态,不能使用其它功能,如果要使用其它功能,就必须进行一项操作,那就是“激活”。
一般有锁版的只有使用对应运营商的卡(如美国的AT&T卡)或者无锁版使用任何卡,才可以激活。
激活之后就可以使用其它功能了。
有人说:“放屁,老子用的美版,移动的卡,怎么从来不用激活就可以使用啦?”这里就要说到“越狱”,一般来说,有锁版的不签约用户,可以不激活,可以不软解,但不能不越狱!越狱主要有两个作业:第一就是使用破解软件和第三方软件,第二就是绕过官方的激活操作(具体原理不清楚,不知是绕过还是欺骗,希望高人指点)。
什么叫“软解”呢?“软解”是“软件解锁”的简称。
那什么叫“解锁”呢?解锁解锁,解的是网络运营商的锁。
为什么为什么这么牛叉的手机AT&T才卖你$199?就是因为有这个锁!锁住这个牛叉的手机,让你只能用他的手机卡,让他挣钱!就像移动心机只能插移动卡一样,不能使用其它运营商的网络。
可是有些国家法律规定:“不许搞技术垄断,消费者是上帝,他想用啥网就用啥网,只要上帝给点钱,你就必须能让他使用其它运营商的卡!”于是“解锁”就诞生了。
怎么解锁是运营商的事,上帝们只要付钱就行了。
比如澳版等!还有个词叫“无锁”,就是没有网络锁!比如官网订购的港版!无锁好啊无锁好,就是价钱受不了!还有些国家法律不保护花钱的上帝们,比如美国。
想买无锁?下辈子吧!于是一些牛叉无比的上帝们开始钻研,他们就是DEV Team ! 他们做了个“软件解锁程序”,这就是大名鼎鼎,无比牛叉的“YellowSn0w”,可以不通过运营商就可以“解锁”,于是上帝们省钱了。
苹果 iPhone 手机维修手册说明书
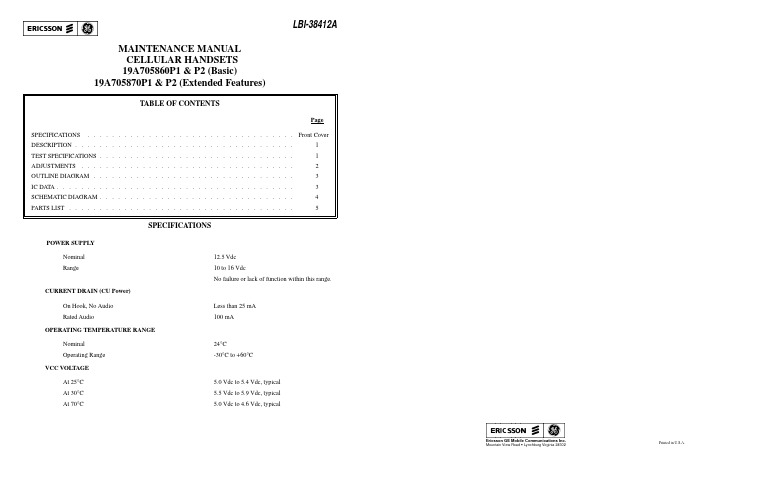
Printed in U.S.A.MAINTENANCE MANUAL CELLULAR HANDSETS 19A705860P1 & P2 (Basic)19A705870P1 & P2 (Extended Features)SPECIFICATIONSPOWER SUPPLYNominal 12.5 Vdc Range10 to 16 VdcNo failure or lack of function within this range.CURRENT DRAIN (CU Power)On Hook, No Audio Less than 25 mA Rated Audio100 mAOPERATING TEMPERATURE RANGENominal 24°COperating Range -30°C to +60°C VCC VOLTAGEAt 25°C 5.0 Vdc to 5.4 Vdc, typical At 30°C 5.5 Vdc to 5.9 Vdc, typical At 70°C5.0 Vdc to 4.6 Vdc, typical ERICSSONZMEricsson GE Mobile Communications Inc.Mountain View Road • Lynchburg Virginia 24502LBI-38412ADESCRIPTIONThe handsets, shown in Figure 1, consists of a single printed circuit board containing the following:•Numerical and function keypad•Liquid Crystal Display•All audio and logic circuitryThe printed circuit board contains the microphone preampli-fier, earpiece amplifier, speaker amplifier, keypad switches, a microcomputer and LCD driver, receive and transmit data buff-ers, a 5 volt regulator and backlight LED’s and circuitry.Although the Basic (19A705860P1) and Extended (19A705870P1) models of the handset differ in external appear-ance, they are the same electronically. The Extended model has one extra key "A-Z" and indicators for "HORN", "LOCK" and "MUTE".Audio from the electret microphone (B1) is amplified by U1-A and passed to the transmit audio path of the radio.Four bit microcomputer U5 (MB88543) scans the keypad and controls the LCD. The microcomputer also controls the LED backlighting of the display and keypad. When a key is pressed on the keypad, an ASCII code is generated by the microcomputer and serially transmitted to the mobile. The key release and a hookswitch change also send ASCII codes to the mobile. At power-up the handset sends a code to identify itself. The handset receives commands from the mobile to control the display (indi-cators, alpha and numeric characters) control the call timer, turn backlight on or off and interrogates status of handset or hook-switch.TEST SPECIFICATIONS MICROPHONE1.Sensitivity - An input level of 97 dB SPL producesan output of 150 mV rms ± 5 dB. [dB SP L = 20LOG 10(P/Po): P is the rms sound pressure inPascals and Po = 2 X 10⁻⁵ Pascal]2.Distortion - For an input signal of less than 1%distortion, the output distortion does not exceed 3%from 300 Hz to 3000 Hz. RECEIVER1.Off Hook Sensitivity - A one (1) kHz, 100 mV rmsinput signal produces an output of 94 ± 3 dB SPL,measured at the artificial ear.2.Distortion - For an input signal of 100 mV rms withless than 1% distortion, the output distortion is lessthan 5% as measured at the artificial ear from 300Hz to 3000 Hz.3.Ear Protection - An audio limiter is provided toensure that the maximum acoustic output does notexceed 120 dB SPL.4.On Hook Sensitivity - A 1 kHz tone, 100 mV rmsinput signal produces an output of 80 ± 6 dB SPLas measured in the free field.SIDETONE LEVELThe acoustic to acoustic sidetone response is such that a 1000 Hz, 97 dB SPL transmit audio input signal produces 85 ± 6 dB SPL at the artificial ear.ON/OFFThere is a momentary switch in the handset that is sensed in the mobile to control the 12 V supply to the handset. SERIAL DATAThe serial data format is a pseudo RS-232 format. Specifi-cally, it is an asynchronous serial bus operating between Vcc and 0 volts.Baud Rate300 ±5%Bit Pattern One (1) start two (2) stop, eight (8)data and no parity.Format0 to Vcc inverted with Vcc being a nodata condition.Vcc 4.5 to 6.0 VdcKeypad Data High-Open Collector drive less than50 mA current drain.Display DataHigh Open Collector drive less than 50mA current drainLow0.8 V maximumCopyright © January 1991, Ericsson GE Mobile Communications Inc.Figure 1 - Basic (19A705860P1) And Extended (19A705870P1) HandsetsLBI-384121HANDSET TESTHANDSETTo test the handset by itself, loop the keypad serial line to the Display serial line by connecting P1-1 to P1-3 on a test connector (refer to Figure 2). Apply nominal +12V to P1-5 and ground P1-2. Attach the connector on the handset cord to the test connector and turn the power on.HANDSET SELFTESTThe handset test consists of tests of: RAM , display, back-light, call timer, keypad, hookswitch and serial communica-tions.The test sequence is as follows: Step Procedure Display 1.Power Up WithSELFTEST Loopback connected.2.After 1.6 seconds RAM RAM PASS or test is completeRAM FAIL3.Start display test Step All segments through Display and common 0After 1.6 seconds All segments and common 2After 1.6 seconds All segments and common 3After 1.6 seconds All segments and common 1After 1.6 secondssegments 2, 6, 10, 14, 18, 22, 26, 30and all commons After 1.6 secondssegments 0, 4, 8, 12, 16, 20, 24, 28 and all commons After 1.6 secondssegments 3, 7, 11, 15, 19, 23, 27, 31 and all commons After 1.6 secondssegments 1, 5, 9, 13, 17, 21, 25, 29 and all commons 4.Backlight Test BACKLITEAfter 1.6 seconds LITE ON After 1.6 secondsLITE OFF5.Call Timer Running 000 00 0Any key, except END , will stop the CALL TIMER and go to the keypad test.6.Keypad Test (Audio can be tested here) Any key can be pushed in any order:Push 1KEY 1Push 2KEY 2.........Push 0KEY 0Push END End key pad test Push CLR KEY CLR Push SND KEY SND Push STO KEY STO Push FCN KEY FCN Push RCL KEY RCL Push A-Z KEY ALP Push VOL +KEY VUP Push VOL -KEY VDN On Hook to Off Hook OFF HOOK Off Hook to On Hook ON HOOKThe END key ends the Keypad test7.RAM status (70=pass, 71=fail) is sent on the key pad serial line8.Serial communications test (Audio can be tested here)Serial communication is tested by pushing keys and displaying as follows:With entries scrolling across the display, as many keys as needed can be pushed (F is key release)F KEY: 0F0F 1F0F1F 2F0F1F2F 30F1F2F3F 41F2F3F4F 52F3F4F5F 63F4F5F6F 74F5F6F7F 85F6F7F8F 96F7F8F9F VOL -7F8F9FAFVOL +ROAM Indicator FlashSTORE 8F9FAFCF SEND 9FAFCF-F *AFCF-FHF #CF-FHF?F A-Z -FHF?F*F FCN HF?F*FAF A ?F*FAFBF B *FAFBFCF C AFBFCFDF PTTBFCFDFEF PTT Released CFDFEFGF On Hook FDFEFGFH Off Hook DFEFGFHI RCL FEFGFHI F END EFGFHI FF CLRFGFHI FFF9.To complete the test, power down and removethe Loopback.Figure 2 - Test ConnectionLBI-384122OUTLINE DIAGRAMBACK SIDEKEYPAD SIDE(BP0303645D, Sheet 5)(BP0303645D, Sheet 1)(BP0303645, Sheet 6)(BP0303645, Sheet 2)OPERATIONAL AMPLIFIER U1A29/UL0303551A0145 (MC4558)AUDIO POWER AMPLIFIER U2A29/UL0303548A0149 (LM386)VOLTAGE REGULATOR U3A29/UL3031586A0149 (LM317)MICROCOMPUTER U5A29/UL0303551A0145 (MB88543)HEX INVERTERS U4A29/UC0303549A0145 (74HC04)LBI-384123SCHEMATIC DIAGRAM LBI-38412(DX0303651, Sh. 1, Rev. B)4PARTS LIST LBI-384125。
sharpdesk mobile v2.1 操作手册(iphone)说明书
Sharpdesk Mobile V2.1 操作手册适用于iPhone设备夏普株式会社目录1概述 (4)2使用注意点 (5)3安装和启动 (6)4打印机/扫描仪设置 (7)4.1在本程序记录打印机/扫描仪 (7)4.1.1查找打印机/扫描仪 (7)4.1.2手动添加打印机/扫描仪 (9)4.2查看和编辑打印机/扫描仪信息 (11)4.3移动或删除列表中的打印机/扫描仪 (13)4.3.1重排打印机/扫描仪列表 (13)4.3.2删除打印机/扫描仪 (14)5用户设置 (15)6应用程序设置 (17)7邮件设置 (19)8扫描 (21)8.1从移动设备扫描 (23)8.2从扫描仪操作面板扫描 (29)9打印 (30)9.1打印保存的文档 (30)9.1.1打印加密的PDF文件 (35)9.2打印照片图像 (37)9.3打印WEB页面 (39)9.4打印邮件 (41)9.4.1添加打印文件 (44)10附加到邮件 (45)11发送到应用程序 (47)12文件管理 (49)12.1整理文件/文件夹 (50)12.2搜索文件/文件夹 (51)12.3预览文件 (53)12.4重命名文件/文件夹 (54)12.5移动文件/文件夹 (57)12.6删除文件/文件夹 (59)12.7创建文件夹 (61)13从外部应用程序打印 (62)1概述本产品是具有以下功能的一款应用程序:•从扫描仪接收、预览和存储扫描文档至您的移动设备。
•打印储存在您移动设备中的文档和照片、您移动设备中接收的邮件以及从移动设备上浏览的网页到您的打印机。
•附加扫描文档到邮件,或者发送文档到您移动设备中的其他已安装程序。
2使用注意点•企划和说明书经常会在无通知的情况下更改。
•请从以下支持网站中获得本程序的最新信息。
/products/copier/docu_solutions/mobile/sharpdesk_mobile/•您的移动设备必须连接到无线网络。
iPhone (快速参考指南).pdf说明书

Information Technology Services 416.675.6622 X8888 | https://its.humber.ca
Game Center: Connect with other iOS device users for multiplayer gaming.
Camera: Take photos on your iPhone front and rear cameras.
Settings: Manage all the settings on your iPhone in one place.
Photos: View and manage your photo collection, and create slideshows.
iMessage: Send and receive messages from other phones and iOS devices.
Contacts: Manage your contacts and their contact information.
• Power Off your iPhone: Press and hold the Sleep/Wake button until the Slide To Power Off slider appears, then slide your finger across the slider.
• Power On your iPhone: Press and hold the Sleep/Wake Button until the Apple logo appears.
iPhone使用手冊说明书

iPhone使用手冊適用於 iOS 5.1軟體目錄9 第 1 章: 概觀9 iPhone 概覽9 配件10 按鈕11 狀態圖像14 第 2 章: 使用入門14 在 iPhone 上檢視使用手冊14 系統需求14 安裝 SIM 卡15 設定和啟用15 將 iPhone 連接到電腦上15 連接 Internet16 設定郵件和其他帳號16 在 iOS 裝置上管理內容16 iCloud17 與 iTunes 同步19 第 3 章: 基本概述19 使用應用程式21 自定“主畫面”螢幕23 輸入26 聽寫27 列印28 搜尋29 語音控制30 通知30 Twitter31 Apple Earphones with Remote and Mic32 AirPlay32 Bluetooth 裝置33 電池35 安全性功能36 清理 iPhone36 重新啟動或重置 iPhone37 第 4 章: Siri37 認識 Siri37 使用 Siri40 更正 Siri41 Siri 和應用程式53 聽寫254 第 5 章: 電話54 通話58 FaceTime59 Visual Voicemail60 聯絡資訊60 常用號碼60 來電轉接、來電等候和發話號碼61 鈴聲、響鈴 / 無聲開關和震動61 國際電話63 設定“電話”的選項64 第 6 章: Mail64 檢查和閱讀電子郵件65 使用多個帳號65 傳送郵件66 使用連結和偵測的資料66 檢視附件66 列印郵件和附件67 管理郵件67 搜尋郵件67 郵件帳號和設定70 第 7 章: Safari70 檢視網頁71 連結71 閱讀列表71 閱讀器71 輸入文字和填寫表單72 搜尋72 書籤和瀏覽記錄72 列印網頁、PDF 以及其他文件72 Web Clip73 第 8 章: 音樂73 新增音樂和視訊73 播放歌曲和其他音訊75 其他音訊控制項目75 Podcast 和有聲書控制項目75 在音樂功能中使用 Siri 或語音控制76 以 Cover Flow 瀏覽專輯插圖76 檢視專輯裡的音軌76 搜尋音訊內容77 iTunes Match77 Genius78 播放列表78 家庭共享79 第 9 章: 訊息79 收發訊息80 將訊息傳送給群組80 傳送照片、視訊和更多項目81 編輯對話81 搜尋訊息3目錄82 第 10 章: 行事曆82 關於行事曆82 檢視行事曆83 新增事件83 回應邀請函83 搜尋行事曆84 訂閱行事曆84 從 Mail 輸入行事曆事件84 行事曆帳號和設定85 第 11 章: 照片85 檢視照片和視訊86 檢視幻燈片秀86 整理照片和視訊86 共享照片和視訊87 列印照片88 第 12 章: 相機88 關於相機88 拍攝照片和視訊89 HDR 照片89 檢視、共享和列印90 編輯照片90 裁剪視訊90 上傳照片和視訊至您的電腦91 照片串流92 第 13 章: YouTube92 關於 YouTube92 瀏覽和搜尋影片93 播放影片93 追蹤您喜愛的影片94 共享影片、評論和評分94 取得影片的相關資訊94 將影片傳送至 YouTube95 第 14 章: 股市95 查看股市報價96 取得更多資訊97 第 15 章: 地圖97 尋找位置98 取得行車路線99 取得並共享位置資訊99 顯示路況100 地圖顯示方式101 第 16 章: 天氣101 取得天氣資訊4目錄102 第 17 章: 備忘錄102 關於備忘錄102 編寫備忘錄103 閱讀和編輯備忘錄103 搜尋備忘錄103 列印或以電子郵件寄送備忘錄104 第 18 章: 時間104 關於時間104 設定世界時間105 設定鬧鈴提醒105 使用碼錶105 設定計時器106 第 19 章: 提醒事項106 關於提醒事項107 設定提醒事項107 以列表顯示方式管理提醒事項108 以日期顯示方式管理提醒事項108 關於位置提醒事項108 管理已完成的提醒事項108 搜尋提醒事項109 第 20 章: Game Center109 關於 Game Center109 登入 Game Center110 購買和下載遊戲110 執行遊戲110 與朋友進行遊戲111 Game Center 設定112 第 21 章: iTunes Store112 關於 iTunes Store112 尋找音樂、視訊和更多項目113 購買音樂、有聲書和鈴聲113 購買或租借視訊113 追蹤演出者和朋友114 連續播送或下載 Podcast114 檢查下載狀態115 更改瀏覽按鈕115 檢視帳號資訊115 驗證下載項目116 第 22 章: 書報攤116 關於書報攤116 閱讀最新一期的刊物117 第 23 章: App Store117 關於 App Store117 尋找和下載應用程式118 刪除應用程式119 Store 設定5目錄120 第 24 章: 聯絡資訊120 關於聯絡資訊120 同步聯絡資訊121 搜尋聯絡資訊121 新增和編輯聯絡資訊122 整合的聯絡資訊122 聯絡資訊帳號和設定123 第 25 章: 視訊123 關於視訊123 播放視訊124 搜尋視訊124 觀賞租借的影片124 在電視上觀賞視訊125 從 iPhone 刪除視訊125 使用家庭共享125 設定睡眠計時器126 轉換 iPhone 的視訊127 第 26 章: 計算機127 使用計算機127 科學計算機128 第 27 章: 指南針128 關於指南針128 校正指南針129 尋找方向129 使用指南針搭配地圖130 第 28 章: 語音備忘錄130 關於語音備忘錄130 錄製131 聆聽錄音131 管理和共享錄音131 與您的電腦共享語音備忘錄132 第 29 章: Nike + iPod132 關於 Nike + iPod132 啟用 Nike + iPod133 連結感應器133 使用 Nike + iPod 體能訓練133 校正 Nike + iPod133 傳送體能訓練資料到 134 第 30 章: iBooks134 關於 iBooks134 使用 iBookstore134 同步書籍和 PDF135 閱讀書籍136 更改書籍的外觀136 列印或郵寄 PDF137 整理書架6目錄138 第 31 章: 輔助使用138 輔助使用功能138 VoiceOver147 接聽來電的音訊148 Siri148 按三下主畫面按鈕148 縮放148 放大字體149 黑底白字149 朗讀所選範圍149 朗讀自動文字149 單聲道音訊149 助聽器相容性150 自定震動150 LED 閃爍以發出提示150 AssistiveTouch151 OS X 的輔助使用功能151 TTY 支援151 郵件的最小字級152 可指定的鈴聲152 Visual Voicemail152 寬螢幕鍵盤152 大型電話數字鍵盤152 語音控制152 隱藏式字幕153 第 32 章: 設定153 飛航模式153 Wi-Fi154 通知155 定位服務155 VPN155 個人熱點156 電信業者156 聲音和響鈴 / 無聲開關156 亮度156 桌面背景156 一般162 搜尋應用程式163 附錄 A :國際鍵盤163 加入和移除鍵盤163 切換鍵盤163 中文164 日文165 輸入表情符號字元165 使用候選字列表165 運用使用者字典166 越南文7目錄167 附錄 B :支援及其他資訊167 iPhone 支援網站167 重新啟動或重置 iPhone167 備份 iPhone169 更新與回復 iPhone 軟體169 檔案共享170 安全性、軟體和服務資訊170 在企業環境中使用 iPhone170 搭配其他電信業者使用 iPhone171 處理和回收資訊172 Apple 和環境保護172 iPhone 作業溫度8目錄概觀1您的 iPhone 和“主畫面”螢幕可能看起來有所不同,視您的 iPhone 機型和您是否自定“主畫面”螢幕而定。
iphone使用说明书

iphone使用说明书篇一:苹果手机使用说明及注意事项使用说明书第一节安全事项为了安全、有效地使用您的手机,请您在使用前阅读以下信息:在化工厂、加油站以及其它爆炸物附近时,请您关机。
使用手机时远离儿童。
在驾车过程时,请使用耳机通话装置,以保安全;除非在紧急情况下,否则请您在路旁停车,再进行通话。
请勿在飞机上使用移动电话。
在登机前请检查手机是否设置自动开机功能。
在心脏起搏器、助听器以及其它一些医疗电子设备附近使用手机时应特别注意,手机可能会干扰这些设备。
非原厂附件和配件,不具有保修资格。
请勿自行拆卸手机,若您的手机发生故障,请与我们指定的维修处取得联系。
严禁手机在没有装上电池时插上充电器充电。
充电必须在通风和散热良好的环境下进行,远离易燃、易爆品。
为避免消磁,请保持手机远离磁性物质,如磁碟片、信用卡等。
确保手机不与任何液体接触,一旦发生此种情况,请拆下电池并与我们指定的维修处取得联系。
避免在温度过高或过低的环境下使用手机,避免将手机暴露在强烈日光下或湿度较高的环境中。
不能用液体或含有强洗涤剂的湿布来清洁您的移动电话。
本手机具有拍照和录音功能,请遵照相关法律法规使用这些功能,擅自的拍照和录音可能会触犯法律和法规。
使用手机时请不要扔、放、敲打手机,以免损坏外壳及手机内部元件。
〈说明〉:本手册是在中文简体操作模式下的使用说明,在英文操作模式下稍有不同。
〈警告〉:本公司对于不遵守上述建议或不正当使用而造成的后果,将不承担任何责任。
如本手册中所述内容与您的手机不符,请以手机为准。
本公司有权随时对说明书进行修改,恕不另行通知。
第二节概述关于您的设备本用户手册中说明的无线设备经认可适用于GSM 900、1800 和1900 网络。
有关网络的更多信息,请向您的服务供应商咨询。
在使用本设备的各项功能时,请遵守各项法律法规并尊重当地习俗,以及他人的隐私及合法权益。
您可能无法复制、修改或传送一些受版权保护的图像、音乐及其他内容。
苹果iphone功能使用介绍
以下cmd=commandcmd+空格=输入法切换cmd+n=重复打开文件cmd+拖拽=剪切Option+拖拽=复制cmd+Option+拖拽=快捷方式1.自带的拼音按下caps lock可以快速切换中英文2.cmd+option+v=剪切3.cmd+M=最小化4.cmd+W=关闭(窗口/标签)5.cmd+Q=退出(程序)6.cmd+i=显示文件/文件夹属性7.cmd+backspace=移到废纸篓8.cmd+shift+3=整个屏幕截图9.cmd+shift+4=选择区域截图10.cmd+shift+4+space=为某个应用程序的窗口截图11.control+Space=用Spotlight进行桌面搜索12.改变窗口大小时配合使用option/shift可实现“对称缩放/按比例缩放”的效果13.在mission control中,按住option单击上方space缩略图来切换不同桌面的预览14.在finder的GO(前往)菜单按住option,可显示Library(资源库)15.cmd+T=新建浏览器标签16.cmd+R=刷新17.全屏应用按esc退出18.Finder中,空格可以快速预览文件19.cmd+Tab=快速切换应用程序20.control+Tab=在浏览器中切换标签21.misson control中,空格可以放大鼠标悬停下的程序缩略图22.cmd+N=新建浏览器窗口/运行第二个QQ/其他应用程序中的“新建”功能23.option+cmd+T=特殊字符24.cmd+B可以改变Launchpad背景25.shift+6=自带拼音的表情符号26.在Safari中按cmd+Z,可以恢复最后关闭的标签。
(超好用的有木有)27.cmd+option+h=隐藏其他窗口28.cmd+option+d=隐藏dock1、前往文件夹在Finder下按+Shift+G ,可以开启“前往文件夹”对话框,之后你可以输入路径来快速访问Finder目录位置,进行定位文件操作,这毫无疑问是最快的方法。
玩转iphone-普及版使用手册v1

玩转iphone使用手册(普及版)中国移动通信集团湖南有限公司常德分公司二〇一一年二月十二日目录一、iphone手机选择移动的八大理由 (5)二、iphone4手机基本操作1、iphone4激活及简单故障处理 (6)无法激活的故障处理 (9)2、SIM卡通讯录导入 (9)3、手机上网和彩信设置及简单故障处理 (9)无法上网的故障处理 (12)4、app store使用指南 (14)iphone手机选择移动的八大理由理由一:不换卡、不换号,继续使用移动优质网络和服务,与家人、亲朋沟通永不离线,139、138等经典老号更凸现了老移动客户沉淀的历史信誉和独有的尊贵感,手机玩时尚,号码最珍贵!理由二:用手机重在选网络,网络好、不掉线,才更省钱。
移动网络覆盖全国99%以上的地区,在偏远的农村乡镇也能使用移动优质网络。
同时,国际漫游通达近300个国家和地区,客户自在移动,沟通无忧!理由三:加入移动集团网,网内通话全免费!移动庞大的集团网规模、便捷的集团网短号功能让客户使用方便,省钱、省心。
理由四:移动WLAN覆盖多个热点地区,在机场、在酒店、在学校……移动无线宽带无处不在,iphone手机使用移动无线宽带上网,网速远超所有制式的3G技术,价格也不贵!理由五:选择移动,选择更好服务,客户一个电话即能得到及时响应,客户的疑难问题都被高度重视、得到有效、快速、及时的解决!全年365天、全天24小时,10086客户热线服务全线畅通。
理由六:移动业务丰富多彩,最适合iphone手机使用,如飞信、号薄管家、彩铃、来电提醒等。
理由七:比一比、算一算,移动资费也是相当划算,从套餐内本地拨打全国1毛钱的神州行新大众卡,到全国打出1毛5,全国漫游接听全免费的全球通畅聊套餐,客户总能找到一款适合自己的资费产品,还可加入集团网和家庭亲情计划,享受内部通话免费的优惠,移动服务更好且价格真的不贵!理由八:促销活动丰富多彩,真心实意回馈老客户!从每年年初的两节促销到5.17促销活动,移动“真金白银”谢客户,实惠万家最有人情味!现在持iphone4手机来移动激活并入网移动更可参与预交话费送加油卡活动!iphone手机装上移动卡,畅快沟通真给力相信自己的选择,你懂的。
iphone操作及应用

3)下载最新的91手机助手For iPhone版,再安装以上两个软 件后,运行 91手机助手For iPhone版。
安装91手机助手后,iphone与电脑连接时
打开91手机助手,并将您的iPhone连接到电脑上,当您的iPhone是第一次与91手机助 手相连接时,则91手机助手会提示您安装守护程序。按照对话框中的提示进行操作即可 非常轻松的将守护程序安装到您iPhone上,并开始体验91手机助手带来的轻松与便捷。
1、点击“安装守护程序”开始安装守护
2、出现此提示时保持您的iPhone与 电脑相连接的情况下,重启您的 iPhone
3、重新开机后,将“我已经关机并再次 连接好了”的提示前面的复选框勾起,并 点击“执行检查”安装守护。
4、安装守护过程中,安装完毕自动进入91 手机助手主界面。
91手机助手的软件界面
- 15 -
主要功能操作介绍 – 电话
2、拨号完毕后点击 “呼叫”图标即可
通讯录图标 电话 3、或点击通讯录图标, 进入通讯录,选择要拨 打的人名,双击即可 1、点击“电话”图标,进入拨号界面
- 16 -
主要功能操作介绍 – 短信
目标号码输入区
短信输入区
发送按钮
短信
1、点击“电话”图标,进入拨号界面
系统维护
安装程 序按 钮
通过91手机助 手软件,我们可 以在电脑上控制 iphone,可以安 装软件,设置主 题,设置铃声, 设置照片等等一 系列的工作、休 闲和娱乐。
通过“91手机助手”安装各类软件
在软件站,您可以按照您需要的,在 网龙软件站上下载编辑整理并试用过 的软件。
通过“核查软件更新”按钮可以快 速的查找已安装的应用程序是否存在新 版。
矿产
矿产资源开发利用方案编写内容要求及审查大纲
矿产资源开发利用方案编写内容要求及《矿产资源开发利用方案》审查大纲一、概述
㈠矿区位置、隶属关系和企业性质。
如为改扩建矿山, 应说明矿山现状、
特点及存在的主要问题。
㈡编制依据
(1简述项目前期工作进展情况及与有关方面对项目的意向性协议情况。
(2 列出开发利用方案编制所依据的主要基础性资料的名称。
如经储量管理部门认定的矿区地质勘探报告、选矿试验报告、加工利用试验报告、工程地质初评资料、矿区水文资料和供水资料等。
对改、扩建矿山应有生产实际资料, 如矿山总平面现状图、矿床开拓系统图、采场现状图和主要采选设备清单等。
二、矿产品需求现状和预测
㈠该矿产在国内需求情况和市场供应情况
1、矿产品现状及加工利用趋向。
2、国内近、远期的需求量及主要销向预测。
㈡产品价格分析
1、国内矿产品价格现状。
2、矿产品价格稳定性及变化趋势。
三、矿产资源概况
㈠矿区总体概况
1、矿区总体规划情况。
2、矿区矿产资源概况。
3、该设计与矿区总体开发的关系。
㈡该设计项目的资源概况
1、矿床地质及构造特征。
2、矿床开采技术条件及水文地质条件。
- 1、下载文档前请自行甄别文档内容的完整性,平台不提供额外的编辑、内容补充、找答案等附加服务。
- 2、"仅部分预览"的文档,不可在线预览部分如存在完整性等问题,可反馈申请退款(可完整预览的文档不适用该条件!)。
- 3、如文档侵犯您的权益,请联系客服反馈,我们会尽快为您处理(人工客服工作时间:9:00-18:30)。
矿产资源开发利用方案编写内容要求及审查大纲
矿产资源开发利用方案编写内容要求及《矿产资源开发利用方案》审查大纲一、概述
㈠矿区位置、隶属关系和企业性质。
如为改扩建矿山, 应说明矿山现状、
特点及存在的主要问题。
㈡编制依据
(1简述项目前期工作进展情况及与有关方面对项目的意向性协议情况。
(2 列出开发利用方案编制所依据的主要基础性资料的名称。
如经储量管理部门认定的矿区地质勘探报告、选矿试验报告、加工利用试验报告、工程地质初评资料、矿区水文资料和供水资料等。
对改、扩建矿山应有生产实际资料, 如矿山总平面现状图、矿床开拓系统图、采场现状图和主要采选设备清单等。
二、矿产品需求现状和预测
㈠该矿产在国内需求情况和市场供应情况
1、矿产品现状及加工利用趋向。
2、国内近、远期的需求量及主要销向预测。
㈡产品价格分析
1、国内矿产品价格现状。
2、矿产品价格稳定性及变化趋势。
三、矿产资源概况
㈠矿区总体概况
1、矿区总体规划情况。
2、矿区矿产资源概况。
3、该设计与矿区总体开发的关系。
㈡该设计项目的资源概况
1、矿床地质及构造特征。
2、矿床开采技术条件及水文地质条件。