科密COMET IT2100接口编程说明
2100系列通讯协议

2100系列通信协议1、通信接口RS485或RS232,波特率范围1200-9600。
2、仪表接线端为A, B和COM。
3、通信协议符合MODBUS规约。
说明书表2中寄存器编号为寄存器地址。
4、通信信息组成:地址码-功能码-数据段-CRC校验码,一条消息连续发送和接收,字符间隔不能大于一个字符,否则认为一条新消息开始或老消息结束。
信息体由十六进制数组成。
.5、数据定义:累积量为4字节十六进制定点数,瞬时量(包括温度压力等)为4字节浮点数。
.6、通信命令:功能码03-用来读取显示数据发送01 ;地址回应01 ;地址03 ;功能码03 ;功能码00 ;寄存器地址高04 ;字节个数01 ;寄存器地址低(显示地址) 80 ;数据100 ;寄存器个数高04 ;数据204 ;寄存器个数低80 ;数据3CRCH ;CRC校验码高80 ;数据4CRCL ;CRC校验码低CRCH ;CRC校验码高CRCL ;CRC校验码低- 1 -说明:地址=仪表号,寄存器地址=显示项目编号回应字节个数=(发送)寄存器个数低(1-63)功能码04-用来读取数设定数据和码设定数据,寄存器个数=1-3读码设定;=4-63读数设定。
读取数设定数据发送01 ;地址回应01 ;地址04 ;功能码04 ;功能码00 ;寄存器地址高04 ;字节个数01 ;寄存器地址低(数设定地址) 80 ;数据100 ;寄存器个数高04 ;数据204 ;寄存器个数低80 ;数据3CRCH ;CRC校验码高80 ;数据4CRCL ;CRC校验码低CRCH ;CRC校验码高CRCL ;CRC校验码低说明:地址=仪表号,寄存器地址=数设定地址编号回应字节个数=(发送)寄存器个数低(1-63)读取码设定数据发送01 ;地址回应01 ;地址04 ;功能码04 ;功能码00 ;寄存器地址高02 ;字节个数- 2 -01 ;寄存器地址低(码设定地址) 03 ;数据1码内容00 ;寄存器个数高04 ;数据2 码内容01 ;寄存器个数低CRCH ;CRC校验码高CRCH ;CRC校验码高CRCL ;CRC校验码低CRCL ;CRC校验码低说明:地址=仪表号,寄存器地址=码设定地址编号回应字节个数=(发送)寄存器个数低(1-3)X2功能码06-用来进行码设定发送01 ;地址回应01 ;地址06 ;功能码06 ;功能码00 ;寄存器地址高00 ;寄存器地址高01 ;寄存器地址低(码设定地址)01 ;寄存器地址低00 ;数据高00 ;数据高04 ;数据低04 ;数据低CRCH ;CRC校验码高CRCH ;CRC校验码高CRCL ;CRC校验码低CRCL ;CRC校验码低功能码10H-用来数设定(如:100=86H,00H,00H,48H)发送01 ;地址回应01 ;地址10H ;功能码10H ;功能码00 ;寄存器地址高00 ;寄存器地址高- 3 -01 ;寄存器地址低(数设定地址) 01 ;寄存器地址低00 ;寄存器个数高00 ;寄存器个数高04 ;寄存器个数低04 ;寄存器个数低04 ;数据个数CRCH ;CRC校验码高86h ;数据1 CRCL ;CRC校验码低00 ;数据200 ;数据348H ;数据4CRCH ;CRC校验码高CRCL ;CRC校验码低7、CRC校验码计算01 ;地址N1 CRC=0FFFFH为初值10 ;功能码N2 CRCL与N1异或运算00 ;寄存器地址高N3 CRC右移1位,若移出位为101 ;寄存器地址低N4 则CRC=CRC和A001H异或,00 ;寄存器个数高N5 若移出位为0则CRC=CRC04 ;寄存器个数低N6 右移8次完成N1计算04 ;数据个数N7 …80 ;数据1 N8 CRCL与N11异或运算04 ;数据2 N9 CRC右移1位,若移出位为180 ;数据3 N10 则CRC=CRC和A001H异或,80 ;数据4 N11 若移出位为0则CRC=CRCCRCH ;CRC校验码高右移8次完成N11计算- 4 -CRCL ;CRC校验码低最后得到CRC校验值8、2100系列仪表浮点数据格式长度为4字节, 采用IEEE标准方式,其中尾数高位始终为1,位的分布如下:1位符号位,8位指数位,24位尾数,符号位是最高位,尾数为低位23位,按字节排序如下:地址0 1 2 3内容MMMMMMMM MMMMMMMM EMMMMMMM SEEEEEEEE其中S:符号位,0=整数,1=负数.E:指数(在二个字节中),偏移码为127.M:23位尾数,最高位为1,有效位为24位.例如:100=0x00,0x00,0xc8,0x420=0x00,0x00,0x00,0x00-100=0x00,0x00,0xc8,0xc29、通信举例仪表地址设为01,通信波特率=4800,n,8,1(仪表码地址08=01,09=05)。
PLC编程手册(2100e)

2100e PLC 编程手册
2.3 源文件的设计
PLC 源文件主要有定义部分和执行部分。
在定义部分的语句是由等式类型的语句和注释行构成,其中注释行主要用来
做注释用,(这对程序今后的修改和维护非常重要。),等式则是用来完成以下部
分的定义:
机床面板输入点按钮的地址;
即:机床按钮输入信号表
[标号:]〈操作符〉[+〈操作数 1〉] [+〈操作数 2〉] [;注释行]
其中‘[]’内的为可选项;‘+’用于定界命令中的操作数和操作符;‘:’用 于区分标号和操作符。标号、操作符、操作数、‘+’号、‘;’号之间允许有若干 个空格。程序行之间允许有若干个空行出现,这丝毫不影响编译后梯图的长度和 运行速度,在编译时会被去掉多余的空行和空格。空格和空行经常为了便于阅读 而使用。
等式和等号,等号和等式值之间可以插入若干个空格; 等式名的命名:等式名有两种习惯:一种是,用有意义的字符串代表位地址, 如:RESeT 来表示复位信号,这种表示方式用户容易知道等式名的含义;另一 种是,用一个或有意义的字母加数字做等式名,字母后的数字就是单元的位地址, 例如:X70 用来表示输入点的地址是 70 的点。这种表示方式用户容易记住点的 作用,其他人也容易理解你的程序。一般建议,NC 和 PLC 之间的信号、控制 面板信号用第一种命名方式,机床输入点、PLC 输出点用第二种方式来表示。
2 梯图语法规则.......................................................................................3
2.1 简介...........................................................................................................3
CL2100 SERIES 用户指南说明书

two-linedigital 1.88 to 1.90 GHzguestroom cordless CL2100 SERIESusers guideR EPLACEMENT P ARTSAdditional battery packs and replacement handsets for the CL2100 series are available from Teledex. When ordering, please specify the telephone model and quantity desired.B ATTERY D ISPOSAL I NFORMATIONWhen disposing used or expired battery packs, please observe local industrial and con-sumer waste disposal practices, rules and regulations. Under no circumstances, dispose the battery pack(s) in a flammable and/or combustible trash receptacle.U SER S AFETY S TATEMENTExcessive and prolonged use of radio/wireless telephones may negatively impact operator health. Cordless telephones emit electromagnetic radiation, which may affect human tissue. In 2000, a United Kingdom government-sponsored scientific inquiry warned children to avoid excessive use of mobile phones. Additional research on this subject is being con-ducted by scientists and healthcare professionals worldwide.IMPORTANT SAFETY INSTRUCTIONSWhen using your telephone equipment, basic safety precautions should always be followed to reduce the risk of fire, electrical shock and injury to persons, including the following:1)Read and understand all instructions.2)Follow all warnings and instructions marked on the product.3)Unplug the product from the wall outlet before cleaning. Do not use liquid cleaner or aerosol cleaners. Use adamp cloth for cleaning.4)Do not use this product near water, for example near a bathtub, wash bowl, kitchen sink, laundry tub, in a wetbasement, or near a swimming pool.5)Do not place this product on an unstable cart, stand or table. The product may fall, causing serious damage tothe product.6)Slots and openings in the cabinet are provided for ventilation, to protect the telephone from overheating. Theseopenings must not be blocked or covered. The openings should never be blocked by placing the product on the bed, sofa, rug or a similar surface.This product should never be placed near or over a radiator or heat register.This product should not be placed in a built-in installation unless proper ventilation is provided.7)Never push objects of any kind into this product through cabinet slots, as they may touch dangerous voltagepoints or cause a short circuit that could result in fire or shock. Do not spill liquid of any kind on the product.8)To reduce the risk of electrical shock, do not disassemble this product. Take it to a qualified servicepersonwhen service or repair work is required. Opening or removing covers can expose you to dangerous voltages or other risks. Incorrect reassembly can cause electric shock when the appliance is subsequently used.9)Unplug this product from the wall outlet and refer servicing to qualified service personnel under the followingconditions:•When the power supply cord or plug is damaged or frayed.•If liquid has been spilled into the product.•If the product has been exposed to rain or water.•If the product does not operate normally by following the operating instructions. Adjust only those controls that are covered by the operating instructions, as improper adjustment of other controls may result in dam-age and may require extensive work by a qualified technician to restore the product to normal operation.•If the product has been dropped or the cabinet has been damaged.•If the product exhibits a distinct change in performance.10)Avoid using a telephone (other than a cordless type) during an electrical storm. There may be a risk ofelectri cal shock from lightning.11)Do not use the telephone to report a gas leak while you are in the vicinity of the leak.12)Do not dispose of batteries in fire as they may explode. Please dispose of batteries in an acceptable trashreceptacle.。
LK21OO用户手册V1.07分解

LK2100多功能标志标识一体机使用手册V1.07北京力码科信息技术有限公司LABEL & MARK INDUSTRIES COMPANYLABEL & MARK INDUSTRIES COMPANY安全须知 (4)1.概述 (5)1.1简介 (5)1.2主要特点 (6)2. 主要技术指标 (6)2.1技术规格 (6)2.2介质技术规格 (7)3.外观和组件 (8)3.1外观和组件 (8)3.2主要组件功能介绍 (10)3.3电源(告警)指示灯和蜂鸣器 (12)4.打印机的安装 (12)4.1打印机开箱 (12)4.2连接AC电源适配器 (12)4.3连接接口电缆 (13)4.4色带的安装 (13)LK2100/LK3100多功能标志标识一体机4.5套管/热缩管的安装 (16)5.打印机的启动与打印 (16)5.1打印机启动与自检 (16)5.2打印方式和纸标记传感器类型的选择 (17)5.3打印 (18)5.4打印机的调整 (19)6.套管/热缩管使用 (20)6.1套管/热缩管机器的使用方法 (20)6.2套管/热缩管软件的使用方法 (20)7. 打印机的日常维护 (24)7.1打印头清洁 (24)7.2传感器清洁 (24)7.3打印胶辊清洁 (25)8. 常见故障处理方法与维护 (26)欢迎欢迎使用LK2100 多功能标志标识一体机!使用前,请仔细阅读本使用手册,以便给您提供必要的帮助。
声明本手册内容未经同意不得随意更改,LABEL & MARK INDUSTRIES COMPANY(以下简称L-MARK)保留在技术、零部件、软件和硬件上变更产品的权利。
用户如果需要与产品有关的进一步信息,可与L-MARK或经销商联系。
未经L-MARK的书面许可,本手册的任何章节不得以任何形式、通过任何手段进行复制或传送。
本手册内容如有任何变动,恕不另行通知。
安全须知在操作使用打印机之前,请仔细阅读下面的注意事项:1.安全警告警告:打印头为发热部件,打印过程中和打印刚结束不要触摸打印头以及周边部件。
科密2100考勤机使用指南
科密2100考勤机使用指南一、线接上电脑串口,然后把485接口插入考勤机下方的插口,插上考勤机电源。
二、随机所带光盘放入电脑光驱,进入我的电脑,点击光驱图标。
进入软件所在目录。
找到setup.exe文件,双击一下,改变安装分区,最好安装的到D分区,然后根据软件提示把考勤软件安装完成。
三、打开软件,选中用户名,输入密码:admin。
四、进入软件,输入单位名称和地址。
五、然后输入所有部门,注意:部门编号不能超过四位。
六、然后输入所有班次:可以在班次名称里输入表明班次特点的名称,如白班就表明是白天上的班次。
然后输入班次的起始终止时间。
要注意的是如果要计算上班时间不固定的人员的考勤时间,必须单设一个班次,输入班次时间后,把“灵活班次”打上勾。
还有如果要计算加班的话要把“计算下班后加班”的勾打上。
七、设置考勤制度:如果星期六星期天上班的话把这两天的勾去掉。
再选择考勤周期,如一个月的一号到下个月的一号或者上个月的二十六号至下个月的二十五号。
八、然后在考勤人事信息建立里输入人员名单。
凡是红色的选项是必填的。
卡号看射频卡上写的号码。
注意,如果“是否按照排班表”选否的话,在“班次选择”里就要选择正确的班次,这个班次是固定不变的。
如果要用员工排班表的话,“是否按照排班表”要选是,“班次选择”里要选OFF。
九、输入完成后,进入考勤注册,点击搜索,然后选择要注册的人员,点确定。
再按“全注册”,等注册完成后就好了。
十、然后进入“考勤排班设置”,先给部门的人排班,然后给个人排班(如果和部门的班次不同,否则就不用排了)。
原则是从大到小。
如果在考勤制度里选择的考勤统计周期是上个月的二十六号至下个月的二十五号,必须把上个月的和这个月的班次都排好。
这一步可以在统计之前完成。
十一、到月末,接上机器,然后进入软件,点击“考勤采集”,然后按“搜索”,再选择要采集数据的人员。
点全采集开始收集考勤数据。
十二、如果有加班的人员,点击“未处理加班数据”,然后一个个批准记录。
MIK2100单回路数字显示控制仪
第二报警的回差值 第三报警的回差值 第四报警的回差值 显示输入分度号 显示第一报警值 显示第二报警值 显示第三报警值 显示第四报警值 显示时间 显示℃ ( ) 不显示
02 或 2.0 02 或 2.0 02 或 2.0
0
6.2 二级参数设置
在工作状态下,按压 键 PV 显示 LOC,SV 显示参数数值:按压 或 键来进行设置,长按 键 2 秒可返回上一级参数,当 Loc=132 时,按压 键 4 秒,可进入二级参数。
1
1 3
0 10
0 0.0 1.000 0.0 1.000 0.0 1.000 0.0 1.000
-5-
MIK2100 单回路数字显示控制仪使用说明书
变送输出量程 OuL
下限 OuH 变送输出量程
上限 GL 闪烁报警下限
GH 闪烁报警上限
ZL 光柱显示下限 ZH 光柱显示上限 PL 测量量程下限 PH 测量量程上限
0.0
100.0
0.0 100.0 0.0 100.0 0.0
表1
分度号 Pn
0 1 2 3 4 5 6 7 8 9 10 11 12 13 14 15 16
17
仪表初始化显示的数值
显示内容
符号
B S K E T J R N F2 L3 L5 Cu50 Cu53 C100 P100 BA1 BA2 1K 线性电阻
测量小信号切 Cut
除
全量程 全量程
全量程
全量程
全量程 全量程 全量程 全量程
0~100%
设定变送输出的下限量程
0.0
设定变送输出的上限量程
100.0
设定闪烁报警下限量程(测量值低 于设定值时,显示测量值并闪烁, ALG=1 时有此功能) 设定闪烁报警上限量程(测量值高 于设定值时,显示测量值并闪烁, ALG=1 时有此功能) 设定光柱显示的下限量程值(光柱 表时有用)(见仪表参数说明 5) 设定光柱显示的上限量程值(光柱 表时有用)(见仪表参数说明 5) 设定输入信号的测量下限量程 设定输入信号的测量上限量程 设定输入信号的小信号切除量(输 入信号小于设定的百分比时,显示 为 0,本功能仅对电压电流信号有 效)
科密A1考勤管理系统----超全问题集锦-----附说明书
科密A1考勤管理系统-———超全问题集锦—--—-附说明书=====================================================科密A1考勤管理系统问题集锦(一)初次安装A1考勤管理系统安装分两部分:A1考勤软件安装、Microsoft SQL Server数据库服务器安装。
随考勤机配送的光盘中含有这两部分,其中Microsoft SQL Server数据库服务器为Microsoft SQL Server 2000的MSDE版本,该版本是微软公司的免费桌面版本,推荐5个网络用户使用。
光盘中还有SQL Express版本,它是Microsoft SQL Server 2005的免费版本.一般用户安装MSDE就可以了,但如果用户使用Vista操作系统,就必须安装SQL Express版本,因为Vista下微软不再提供SQL Server 2000的技术支持。
安装A1考勤管理软件完毕后会提示是否安装MSDE,选“是”就可以了,MSDE的安装过程是无人值守的,也就是不用用户干预自动安装完成.光盘中带的MSDE是英文版,含SP4。
如果企业已经有安装Microsoft SQL Server,那么就不用再安装了,不过要注意:A1考勤管理系统只支持SQL Server 2000/2005,不支持SQL Server 6。
5/7.0.A1考勤管理系统对最新的SQL Server 2008也还没有进行发布,据科密官方消息,基本上可以用,只是没有经过系统测试确认,所以还没有宣称支持2008。
一般SQL Server安装都是默认实例安装,也就是数据库服务器的地址就是电脑名称.如果安装程序是网上下载的,那么安装时会有界面提示,可以输入实例名如:Attend,那么数据库服务器的地址则为:电脑名\Attend.如果MSDE安装过程出现错误,多半是电脑之前已经安装了SQL Server,或者安装过,但没有正确卸载。
NEC ME2100光路终端(OLT)商品说明书

GEPON SERIESNEC’s ME2100Optical Line Terminal (OLT) provides a direct optical interface to the Ethernet/IP network core. Together with NEC’s Optical Network Unit (ONU), it completes the end-to-end optical last mile with up to 1 Gbps of bandwidth to residential and business customers. Combining the economic benefits of Ethernet Passive Optical Network (GEPON) with built-in L2/L3 switching and routing functionalities, the ME2100’s is an optimal transport platform for bandwidth-intensive triple play services.KEY BENEFITSCost-effective Triple Play TransportME2100supports up to 8 PON links, each delivering 1 Gbps of shared bandwidth between up to 64 subscribers, serving a maximum of 512 subscribers from a compact 1U chassis. High subscriber density and low cost of entry, combined with the operational cost savings of passive GEPON technology make ME2100a compelling alternative to legacy, last-mile access solutions.Customized Broadband Service OfferingsME2100’s QoS features allow operators to oversubscribe bandwidth while protecting delay-sensitive traffic based on individualized Service Level Agreement (SLA). Dynamic bandwidth allocation enables operators to bill bandwidth in 1 Mbps increments. For video services, IGMP support allows for multicast control and ensures efficient utilization of network infrastructure.Flexible Provisioning, Quick to RevenuePowerful OAM functions enable remote diagnostics, flexible provisioning, and reconfiguration of the ME2100platform.KEY FEATURESIEEE 802.3AH GEPON32 SPLITS, 20KM REACH64 SPLITS,10KM REACH512 SUBSCRIBERS SERVED IN COMPACT 1U CHASSIS ADVANCED L2/L3FUNCTIONS DYNAMIC BANDWIDTH ALLOCATION INDIVIDUALIZED BILLING PER SERVICE LEVEL AGREEMENT MULTICAST SUPPORT FOR VIDEO STREAMINGREMOTE PROVISIONING AND MANAGEMENTADVANCED SECURITYME2100CARRIER GRADE OPTICAL ACCESS PLATFORM COMPACT GIGABIT ETHERNET PASSIVE OPTICAL NETWORK (GEPON) PLATFORM DELIVERS HIGH-SPEED VOICE, DATA AND VIDEO SERVICES TO RESIDENTIAL AND BUSINESS Subscribers OPTICAL LINE TERMINAL (OLT)Technical SpecificationsBefore installing, connection or using this product, be sure to carefully read and observe the cautionary and prohibited matters provided in the instruction manual.Safety Precautionsy The company names and product names given in this catalog are trademarks or registered trademarks of the respective companies.y The configuration or specifications are subject to change without prior notice due to continual improvements.!For inquiries, contact :Published by:NEC CorporationGlobal Network DivisionIssue 1.0 APRIL.2008•IEEE 802.3ad link aggregation and load balance •Packet mirroring per ingress/egress port•STP (IEEE 802.1d), RSTP(IEEE 802.1w) and PVST+ Support •16K MAC table support•MAC management( Learning control, limit and aging) support •802.1X support for ONU AAALAYER 3 ROUTING FUNCTIONS•L3 switching and full line speed support •Static Route•ARP support( static ARP, proxy ARP per RFC1027,ARP per RFC826)•TCP/IP, ICMP per RFC792 support •DHCP server/relayMULTICAST FEATURES•IGMPv1/v2 snooping and Proxy •Fast Leave•Up to 512 Multicast groupsQUALITY OF SERVICE•Up to four CoS queues per subscriber •Strict Priority and WRR Scheduling •IEEE 802.1 p •IPv4 TOS priority •Egress rate shaping•Upstream Dynamic Bandwidth Allocation (DBA) per ONU •Downstream Bandwidth Control per ONU SECURITY•Access Control List (ACL)•Global and Per VLAN User Isolation•EPON Frame Encryption: AES128(Future)•Broadcast/Multicast/DLF storm control USER AUTHENTICATION •IEEE 802.1x/RadiusSYSTEM MANAGEMENT•FTP, SNMP v1 & v2c, DHCP, Telnet, console interface with CLI •In-Band/Out-of-band management •Auto provision of ONUs •Environmental monitoringCERTIFICATION•UL, VCCI ,CE, FCC Part 15 ClassA, MICENVIRONMENTAL SPECIFICATIONS OPERATING TEMPERATURE•0ºC to +50ºC (Continuous)RELATIVE HUMIDITY•5% to 90% non condensing STORAGE TEMPERATURE •–40 to +75ºCSTORAGE HUMIDITY •75% (maximum)HARDWAREMAIN CHASSIS•PHYSICAL DIMENSION:482.6mm (W) x 280mm (D) x 43.6mm (H)•WEIGHT: 12 Pounds•Power consumption of each module: Max.30 Watt•Power consumption of chassis with two LTM modules: Maximum 100 Watts•Power supply: DC:–36V to -72V, 2 pluggable -48V DC power module for redundancy protection•Architecture: 2 pluggable OLT module, hot swappable 1 pluggable GSM module, 1 pluggable Fan module •Console Port: 1 RS232•LAN management: 1 RJ45 10/100Base-T Fast Ethernet •UP Link Ports: 4 SFP Connectors for insertion of either electrical or optical transceivers MTBF•GSM2Module: 269,944Hours •Power Module: 2,362,686 Hours •Fan Tray: 678,978 Hours •LTM: 437,523HoursAVAILABLE MODULES•Controller and Switch Module: GSM/GSM2. One Per Chassis •OLT Module: LTM4/LTM6: Up to 2 per Chassis •Power Modules: PWR: Up to 2 per Chassis •FAN Tray: 1 Per Chassis AVAILABLE CONFIGURATIONS PMC BASED•PWR, FAN, LTM4 and GSM CORTINA BASED•PWR, FAN, LTM6 and GSM2OLT MODULE•NUMBER OF OLT PORT: 4 port/Module; 8 port /Chassis •COMPLIANCE: IEEE802.3ah•OPTICAL FIBER: Single SMF Fiber •CONNECTOR: SC Connector•SPLITS PER OLT PORT: 1:32 ; 1:64•DATA RATE: 1 Gbps up and down stream •OPTICAL LOSS BUDGET: 29 dB for PON link •WAVELENGTH: Tx: 1490 nm, Rx: 1310 nmADVANCED FEATURESLAYER 2 SWITCHING FUNCTIONS •Non-blocking line rate switching•Port based VLAN , protocol based VLAN and 802.1q VLAN •Per ONU Q in Q support。
Olivetti ECR-2100和ECR-2200指令编程手册说明书

Olivetti ECR-2100 and ECR-2200 instruction programming ManualCash RegisterECR 2200/2100euroINSTRUCTIONSINSTRUCTIONS D'EMPLOIBEDIENUNGSANLEITUNGINSTRUCCIONES DE USO P/N 533168 YOlivetti Lexikon, S.p.A. Documentazione77, Via Jervis - 10015 Ivrea (Italy) Copyright © 1998, by OlivettiAll rights reservedThe mark affixed to the productcertifies that the product satisfies thebasic quality requirements.Y our attention is drawn to the following actions that could compromise the characteristics of the product:•incorrect electrical supply;•incorrect installation; incorrect or improper use, or, in any case, not in accordance with the warnings given in the User Manual supplied with the product;•replacement of original components or accessories with others of a type not approved by the manufacturer, or carried out by unauthorized personnel.WARNING: THIS EQUIPMENT MUST BE EARTHED. ATTENTION: CETTE UNITE DOIT ETRE CONNECTEE A LA TERRE. ACHTUNG: DIESES GERÄT MUSS EINEN ERDUNGSANSCHLUSS HABEN.ATENCION: ESTE EQUIPO DEBE ESTAR CONECT ADO A UNA TOMA DI TIERRA.APP ARA TET MÅ KUN TILKOPLES JORDET STIKKONT ACT.APP ARATEN SKALL ANSLUT AS TILL JORDAT NÄTUKKA T.LAITE ON LITTETTÄVÄ SUKO-RASIAAN.Lederen med grøn/gul isolation ma kun tilsluttes en klemme maerkrt eller .T o disconnect the cash register from the line voltage, unplug its power cord from the power outlet. The power outlet must be located on a wall, near the cash register and easily accessible.IPr Pref ef efaceace The electronic cash register described in this manual is designed to help your business function smoothly by providing efficient register operations and accurate management reports. Startup is quick and easy,yet there are many options that can be added and revised so that you can customize your operations for optimum productivity. Here are just a few of the cash register’s many valuable features:•40 departments and 500 Price Look-Up (PLU) settings;•15 clerk numbers to monitor the sales of individual employees;•possibility of assigning a three-digit security code to preventunauthorized access to individual clerk transactions (during register mode only);•possibility of defining manager passwords to prevent unauthorized access to the machine's programming mode (PRG), Z mode and X mode;•printer with journal record and receipt printing capabilities;•possibility of reserving two departments for registering credit sales paid with two different types of credit cards;•Euro exchange rate programming;•possibility of programming the machine to work with one of two base currencies, Local or Euro, so that cash register computes in the currency set and automatically converts the related transaction totals into the other currency;•rear customer display and front operator display each consisting of a 10-character transaction and message line;•automatic tax computations for 4 different V A T rates;•department-linked entry options that streamline and speed-up operation;•periodic management and financial reports which provide up-to-date sales analysis;•battery back-up protection for the records and programming data stored in memory;•automatic time display after a period of system inactivity;•automatic time and date printing on receipt and journal records.NOTA:Your cash register may generate receipts with the Euro valuesindicated with the symbolTable of ContentsGETTING ACQUAINTED WITH YOUR CASH REGISTER (1)Standard Accessories (2)Using this Manual (2)Unpacking and Setting Up the Cash Register (3)Maintaining the Cash Register (3)THE KEYPAD (4)Keypad Functions (5)THE CONTROL SYSTEM (6)The Control Lock (6)Cash Drawer with Removable Cash Bin (7)Deposit Drawer (7)Operator and Customer Displays (7)Time Display (7)Special Symbol Indicators (7)Positioning the Customer Display (8)ERROR CONDITIONS (8)The Error Alarm (8)Clearing an Error (8)General Clearance (8)Voiding Errors (9)BACK-UP BATTERY SYSTEM (9)Inserting/Replacing Batteries.........................................9PRINTER COMPARTMENT. (10)The Inked Ribbon (10)Installing the Inked Ribbon (11)Re-inking the Thank You Stamp (12)Paper Tape (12)Loading Single-Ply and Dual-Ply Paper (12)QUICK START (14)Helpful Hints for a Successful Start-Up (14)TRAINING MODE (15)Activating the Training Mode (15)Exiting the Training Mode (15)CASH REGISTER PROGRAMMING (15)Setting Cash Register Features (16)Making Changes to Cash Register Programming (16)Entering the Program Mode (16)Exiting the Program Mode (16)Clearing Errors (16)Clerk Numbers and Secret Codes (17)Machine Numbers (18)Date and Time (18)Percent Discount (-%) (19)Percent Plus Rate (+%) (19)Fraction Rounding (20)Decimal Point Position (20)Value Added Tax (VAT) Rates (21)IIIIIHigh Digit Lock Out (HDLO) and Tax StatusAssigned to the Minus Key (-)......................................21Tax Status, High Digit Lock Out, Pos./Neg.Single/Multiple Item Sale and Price Linked to aDefined Department.....................................................22Price Look-Ups (PLUs).................................................23Euro Exchange Rate Programming .............................23Department Programming for Credit 1, Credit 2Tenders.........................................................................24Programming System Options .....................................24PLU Programming Dump Report .................................26Overall Programming Dump Report ............................27Programming Manager Passwords ..............................28Using the Cash Register in a Password ProtectedMode ............................................................................28TRANSACTION EXAMPLES ......................................29Entering the Register Mode..........................................29Exiting the Register Mode............................................29Clearing Errors .............................................................29Transaction Symbols....................................................29Sample Receipt............................................................30Standard Transactions in Local Base Currency ...........30Examples of Transactions in Euro Base Currency.......40Minus (-) Key Transactions...........................................45Percent Discount (-%) Transactions.............................46Percent Plus (+%) Transactions...................................51PLU Codes...................................................................55Voids and Refunds .......................................................57Other Transactions. (60)MANAGEMENT REPORTS.........................................64X and Z Reports ...........................................................65Cash-In-Drawer Report ................................................65Hourly Report ...............................................................65Clerk Report .................................................................67All PLU Report .............................................................68PLU Range Report .......................................................69Department Range Report ...........................................70Cash Declaration..........................................................70PLU Periodic Term Report ...........................................71Z1 and X1 Financial Report .........................................72Z2 and X2 Financial Report .........................................73Duplicate Z Report .......................................................74Balancing Formulas .....................................................74APPENDIX...................................................................74Totalizers and Counters Table......................................74Cash Register Specifications and Safety (75)。
北京航天数控2100eT编程说明书

安全事项操作者必须在完全熟悉本套说明书及由机床制造厂提供的相关说明的内容后,才能操作机床或编制加工程序。
用户在使用中必须遵守说明书中的规定,这是安全、正确使用CNC装置必需的准备工作。
1概述 (3)2编程 (3)2.1 概述 (3)2.2 零件加工程序 (3)2.3 准备功能 (4)2.4 快速定位(G00) (5)2.5 直线插补(G01) (6)2.6 圆弧插补(G02、G03) (9)2.7 延时程序(G04) (10)2.8 螺纹切削 (11)2.8.1 等距螺纹切削(G32) (11)2.8.2 连续螺纹加工(G32) (13)2.8.3 英制直螺纹、锥螺纹(G36) (14)2.8.4 多头螺纹切削 (15)2.8.5 管螺纹切削指令组 (16)2.9 固定循环编程 (17)2.9.1 螺纹切削循环(G78) (17)2.9.2 单一外径切削循环(G77) (18)2.9.3 单一端面循环(G79) (19)2.9.4 固定循环程序 (20)2.10 绝对值指令和增量值指令(G90、G91) (21)2.11 坐标系设定程序段(G50、G92) (21)2.12 恒线速(G96、G97) (21)2.13 每分钟进给,每转进给(G94、G95) (22)2.14 子程序调用 (22)2.15 坐标指令 (23)2.16 进给速度F (23)2.17 刀具功能(T) (24)2.18 辅助功能M (24)2.19 跳过任选程序段 (25)2.20 C刀补(G41~G42) (26)3补偿功能 (31)3.1 刀具位置补偿 (31)3.2 反向间隙补偿 (31)3.3 丝杠螺距误差补偿 (31)3.3.1 补偿的起始点 (31)3.3.2 线性丝杠螺距误差补偿 (32)4诊断、检测功能 (32)4.1 自诊断功能 (32)4.2 检测功能 (32)系统报警信息处理表 (33)1概述本书由以下几部分组成:1.1概述叙述了本书的组成,相关说明书和阅读本说明书的注意事项。
NEC SL2100系统终端用户手册说明书

Please read this manual carefully before operatingthis product and save this manual for future use.Thank you for purchasing NEC SL2100 system.Due to the flexibility built into the system, your Dialing Codes and Feature Capacities may differ from those in this guide. Check with your NEC Authorized Supplier / System Administrator and make a note of any differences.To set the low viewing angle position:1. Fold the legs all the way back.To set the high viewing angle position:1. Flip up the two leg supports.2. Fold the legs back until the supports contact the base.When installing the handset :1. Make sure the handset cord is plugged into the handset jack on the telephone base.2. The LAN cable routes through the channel on the telephone base or the telephone legs. (The LAN cable is customer provided.)*Power Feeding: PoE (IEEE802.3af) OnlyHandsfree Options- Handsfree lets you place and answer calls by pressing “Speaker” instead of using the handset.- With Automatic Handsfree, you can press a Speaker Key without lifting the handset. Normally, you have Automatic Handsfree.- Use Handsfree Answerback to answer a voice-announced Intercom call by speaking toward your phone without lifting the handset.used for Handsfree dialing/ monitoring. LED on key lights when key is active.Redial KeyorVolume (DOWN) KeyCall Indicator LampThis lamp flashes fast when a call is ringing and flashes slower when a message has been left.Display(**)32 (8 keys x 4 pages) additional programmable keys are provided.Programmable Function KeysThese keys can be programmed as Flexible Line key/Programmable Feature Key by Web/PCPro. Scroll KeyThis key is used to turn over the page of 8LD DisplayHelp KeyThe user can press this key followed by a programmable key to check what Line or Programmable Feature is assigned on the key.Soft KeysThe Soft Keys show the available features for your current activity. Any feature shown at the bottom of the LCD is available.* The illustration shows IP7WW-8IPLD-C1 TEL** Up to “8” physical keys are available and it can be expanded up to 32 keys by changing the “DESI-Less Page” by pressing the Scroll Key.No Icon-During Conversation -During Conversation**IP7[ ]-8IPLD-C1 Display32 (8 keys x 4 pages) additional programmable keys are provided. They can be programmed as Flexible Line/Programmable feature key by Telephony Server Administrator. For the SL2100, the programmable keys can be set by WebPro/ PCPro/Tel Pro and user can also set them. Note: Maximum 11 characters (including icon) Maximum 13 Characters (including icon) 1) IconStatus of the Line key such as Call Ringing, Call Hold or Busy, and setting on the Feature key are shown as Icons. 2) Feature Key InformationFeature Key Information displays the followings.Key Description Maximumdigits to be displayedLine Key Name and Number Information Refer toNote*Feature Key Feature Name Refer to Note* One-Touch Speed Dial Key -Speed Dial Name Information -Number InformationRefer to Note* Note*: Maximum 11 characters (including icon) Maximum 13 characters (excluding icon)3) LCDLCD (Liquid Crystal Display) provides SL2100 activity information plus date, time and Softkey Operation.The LCD on the IP7[ ]-8IPLD-C1 has a 28-character and 3-line capability.***Menu KeyFrom the Menu Key, the user can use various application features.1) To Display Menu ListPress the Menu Key. The Menu List is displayed in LCD. Use Cursor Key to select desired Menu Items.No.Menu Item Description1 Setting To set up the terminal such as ringing tones setting and download of Music on Hold…etc.ConfigThis item is used for Configuration setting of IP7WW-8IPLD-C1 terminal.2) Simple Operation by Menu Key and Cursor KeyBy using Menu Key and Cursor Key, Terminal user can have access to terminal settings with simple operation. As an example, the following shows theoperations how to access to Directory menu.Ask your NEC Authorized Supplier for the details.1-10 TUE 9:43AM210 Donald Fagen List Dir ICM ProgDESI-less ScreenTimeIndication Screen (LCD)⏹ Programmable Function KeysProgrammable Function Keys can be assigned as “Trunk” Key and/or other Function Keys. You can just press the function key to activate the assigned function without dialing the Service Code. • There are 2 levels of Function Keys. (General Keys : assigned by 751, Appearance Keys : assigned by 752)• Appearance Keys have priority. You can overwrite the Appearance Key at the General Key.• If you want to overwrite the General Key at the Appearance Key, you have to erase the Appearance Key by dialing “752 + 000” before General Key assignment.• In the default setting, Programmable Function Key No. 1 to 12 is assigned as “Trunk” Key. If you want to assign Function Keys (General) at the unused Trunk Keys, these unused keys should be erased by “752 + 000” operation.• Programmable Function Keys can be erased by dialing “752 + 000” or “751 + 00”. • Programmable Function Keys can be assigned by Soft Key operation as well.⏹ DSS / One-Touch KeysProgrammable Function Keys can be assigned as DSS (Direct Station Selection) or One-Touch Keys. You can place an Outside / Intercom Call by just pressing this key without dialing the number. • To change the Trunk Access Code, Ask your NEC Authorized Supplier for the details.• In the default setting, Programmable Function Key No. 1 to 12 is assigned as “Trunk” Key. If you want to assign DSS Keys at the unused Trunk Keys, these unused keys should be erased by “752 + 000” operation before the above operation.• In case of DSS Key, the extension status can be indicated on the BLF . (idle : extinguished, Busy : lit) • When you register a telephone number, the Trunk Access Code should be added in front of the number. • Up to 36 digits dialing can be registered, but the name can not be registered.• If you want to continue the operation, press Programmable Function Key instead of Speaker Key to finish. • One-Touch Keys can be assigned by Soft Key operation as well.Function Code & Add Data725715??Telephone NumberTrunk Access Code Extension Number71510?????90⏹ Abbreviated Dial (Speed Dial) Registration• The digit of Bin No. depends on the system setting. (0-9<Only Group ABB> / 00-99 / 000-999)• System setting is necessary for Group ABB function. Ask your NEC Authorized Supplier for the details. • Name can be entered by Dial Pad Keys. (See below)• Up to 36 digits dialing can be registered, and up to 12 characters can be registered as name. • If you want to continue the operation, dial Bin No. instead of Speaker Key to finish. • You can skip to enter the name. (No enter any character, then press “Hold” Key).• You can erase the registered number & name by pressing “Exit” Key after dialing Bin No. • Common Abbreviated Dial can be registered by Soft Key / Cursor Key operations as well.When you enter a name, use Dial Pad Keys to enter letters as below. For example, press “2” key once for “A”, twice for “B”, etc…⏹ Entering Alphanumeric CharactersTelephone NumberCommon ABBABB Bin NumberNameGroup ABB735745????????1234567890#⏹ Place an Outside Call <Quick Access>⏹ Place an Intercom Call <Dial Access>• Listen to the Dial Tone before dialing a Telephone Number.• You can have function keys for Trunks or Trunk Groups. Ask your NEC Authorized Supplier for the details.⏹ Place an Outside Call <Access by Code>• To change the Trunk Access Code, Ask your NEC Authorized Supplier for the details. • Listen to the Dial Tone before dialing a Telephone Number.• In case the number of Trunk Group is more than 10, you should enter 2 digits (e.g. 11 : Group 11) after dialing “704”. Ask your NEC Authorized Supplier for the details.• For the dial digit of Trunk No., ask your NEC Authorized Supplier for the details.• Your call will ring or voice-announce. If you hear ringing, wait for an answer. If you hear a beep, begin speaking. Dialing “1” changes voice/ring mode. (in case the destination is Multi-line Terminal)Telephone Number???Telephone NumberTrunk Access CodeTrunk Group No.???407????909#0#⏹ Directory Dialing⏹ Last Number Dialing⏹ Callback by Received Number• The system retains the last 10 numbers dialed which can be reviewed and redialed. • To cancel the Redial List operation, press “Clear/Back” Key.• Caller-ID function is required to use this operation for outside calls. Ask your NEC Authorized Supplier for more details.• To cancel the Callback operation, press “Clear/Back” Key.Press several times to search• After searching the desired destination, press “Enter” Key to confirm the telephone number before lifting the handset, if necessary.• You can enter more Characters (up to 12) to make desired destination’s search even more specific. • You can also search the desired destination without entering the Characters. (press Cursor Keys only) • To cancel the Directory Dialing operation, press “Clear/Back” Key. • Directory Dialing can be activated by Soft Key operation as well.Press several times to searchPress several times to search5#⏹ Abbreviated (Speed) Dialing <for Outside>• The digit of Bin No. depends on the system setting. (0-9 <Only Group ABB> / 00-99 / 000-999) • Telephone Numbers shall be pre-registered to the system.• System setting is necessary for Group ABB function. Ask your NEC Authorized Supplier for the details. • When you assign the Common ABB Key on the Programmable Function Key, “Press HOLD” is required after dialing the Function Code 27.⏹ One-Touch / DSS Call• Telephone / Extension number should be pre-registered to a One-Touch / DSS Key. • Trunk Access Code should be added in front of the Telephone number.2#??4#??⏹ Set Camp On / Callback• Camp OnIn case of Intercom Call, when you hear ringing, wait for the called party to answer. In case of Outside Call, when you hear Dial Tone, begin telephone number dialing.• Callback In case of Intercom Call, when your terminal starts the ringing, lift handset and wait for thecalled party to answer.In case of Outside Call, when your terminal starts the ringing, lift handset, hear Dial Tone, and begin telephone number dialing.• This function is applicable in case all trunks are busy condition. (not applicable for dialed outside party busy)⏹ Cancel Camp On / Callback⏹ Repeat Dialing <Outside Call Only>• When the Repeat Dialing is set, Repeat Dial Key shall flash and the system automatically and periodically redials a call. Repeat duration is programmable. Ask your NEC Authorized Supplier for the details. • You should lift the handset when the called party answered. • Press flashing Repeat Dial Key to cancel.5777⏹ Set a Message Waiting⏹ Cancel Message Waiting• When you set a MW, the called party’s Indicator starts to flash, and your Indicator is lit in Red.⏹ Answer a Message Waiting (Your terminal’s Indicator is flashing in Red)• When you answer a MW, the Indicator shall automatically be off when the called party answers. • If multiple message are in queue, you can select the desired party by pressing Up key after dialing “, 0”, ifseveral number of Message Waiting has been set.Extension Number177???377⏹ Answering an Outside Call⏹ Picking up a Call for other Extensions• System setting is necessary to create a Call Pickup Group. Ask your NEC Authorized Supplier for the details.• Call Pickup operations are available using Soft Key operation.• Confirm the status of Mute Key if you want to answer by Handsfree. (Mute On : LED On, Mute Off : LED Off)⏹ Answering an Intercom Call• Intercom Call Mode (Signal or Voice) can be set at your terminal by : “Signal” : Speaker -> 723 “Voice” : Speaker -> 721• Confirm the status of Mute Key if you want to answer by Handsfree. (Mute On : LED On, Mute Off : LED Off)Extension Number#976??⏹ Holding a Call / Retrieving a Held Call• In case of Intercom, the call shall be held as “Exclusive Hold” on your terminal.• This operation puts your outside call on System Hold. Other extension user can take the call off Hold.⏹ Retrieve a Held Outside Call• Ask your NEC Authorized Supplier for the details about your Trunk Number dialing digits.⏹ Transferring a Call to the other Extension⏹ Holding a Call Exclusively• This operation puts your outside call on Exclusive Hold. Other extension user can not take the call off Hold.• If your terminal has DSS/One-Touch key, just press it instead of “HOLD” and “Extension Number” dialing.??267??⏹ Do Not Disturb (DND)1234•When you set DND function, DND Key shall be lit and the Internal Dial Tone pattern shall be changed.⏹ ConferenceExtension Number?Telephone Number •You can repeat this operation to add more parties.•You may be able to have up to 16 parties. (include your terminal) You may need to adjust the volume level due to the Environment where calls are placed. Ask your NEC Authorized Supplier for the details.When you set Call Forward / Follow Me, the destination extension shall be displayed on the LCD, and the Internal Dial Tone pattern shall be changed. (Call Forward / Follow Me can be set by Soft Key as well)Call Forwarding / Follow MeExtension NumberSetExtension NumberSetExtension NumberSetExtension NumberSet174???1274???1??????11374474Call Forwarding / Follow Me (Cont’d)Extension NumberSetExtension NumberCancelSet??????67457411Cancel“Menu” Soft Key⏹ “Dir” Soft Key⏹ “VM” Soft Key“CL” Soft Key⏹ Soft Key Operations during Off-Hook condition⏹ Soft Key Operations during Intercom Calling⏹ Soft Key Operations after establishing an Intercom Call⏹ Soft Key Operations during Outside CallMenu Structure when PRG15-02-60 is set to Advanced Mode 1110 : Missed CallSystem setting is necessary to use Built-In Automated Attendant. Ask your NEC Authorized Supplier for the details.⏹ Record / Listen / Erase Answering Messages• Up to 100 types of messages can be recorded. • The Message length can not exceed 4 minutes.Stop RECRecordErase(001 – 100)661???????753#Log-On to the In-MailOptional hardware and System setting is necessary to use In-Mail (Voice Mail) feature. Ask your NEC Authorized Supplier for the details.???????Call Forward to Voice Mail1??????????111474374274174⏹ Mailbox Greeting• Selected Greeting (one of three) shall be made active.⏹ Mailbox Security Code※ The type of Security Code can be assigned as below.- Dial 4 digits Security Code followed by “7”: Security Code for all log-on- Dial 4 digits Security Code followed by “6”: Security Code for remote log-on only • System Administrator can delete a Mailbox Security Code.4?753####6777???Listen to Left Messages in your Mailbox??5????5????◆ Instruction Menu Message are used as the Automated Attendant Main Greetings (e.g. Day Mode greeting, Night Mode greeting, etc)▪To record an instruction Menu from the System Administrator Menu, dial the digit 4 (Instruction Menu Messages). Dial the mailbox number (001 – 032).-Press the digit 5 to Listen to the message. -Press the digit 7 to Record the message. -Press the digit 3 to Delete the message.-Press # to return to the System Administrator Menu.◆ Announcement Message are used to announce general information to callers such as directions, hours of operation, etc.▪To record an Announcement Message from the System Administrator Menu, dial the digit 2 (Announcement Messages). Dial the mailbox number (001 – 032). -Press the digit 5 to Listen to the message. -Press the digit 7 to Record the message. -Press the digit 3 to Delete the message.-Press # to return to the System Administrator Menu.◆ Distribution List is a list of extensions set to receive a single voice mail message. Any message left in the distribution mailbox will be sent to all extensions in the list.▪To review or modify the Distribution List from the System Administrator Menu, dial the digit 5 (Distribution List). Dial the mailbox number (001 – 032) to be modified.. ►Press the digit 6 to Review or Modify the list.-Press the digit 2 to Add an extension to the distribution list. -Press the digit 3 to Delete the current extension from the list. -Press the digit 6 to step to the Next entry.-Press # to return to the System Administrator Menu.►Press the digit 76 to record a Name for the distribution list. -Press the digit 5 to Listen to the name. -Press the digit 7 to Record a new name. -Press the digit 3 to Delete the name. -Press # to exit this feature.►Press # to return to the System Administrator Menu.The following administrative features are only available at the system administrator’s extension (extension 101 at default). Ask your NEC Authorized Supplier for details on how to become a system administrator..Log-In to the In-Mail????????◆Subscriber Maintenance is used to modify the subscriber mailboxes.▪To modify a Subscriber Mailbox from the System Administrator Menu, dial the digit 7 (Subscriber Maintenance).Dial the extension number of the mailbox you wish to modify.-Press the digit 32 to Delete all messages.-Press the digit 34 to Delete the mailbox greeting.-Press the digit 36 to Delete to the mailbox name.-Press the digit 7 to Delete the security code.-Press the digit 6 to Record a new name.-Press # to return to the System Administrator Menu.◆Answer Schedule Override provides alternate answering for the Automated Attendant by sending calls to aspecified Override mailbox, when enabled. As an example you can use the Answering Schedule Override to provide Holiday and Bad Weather closing announcements.▪To modify the Answer Schedule Override from the System Administrator Menu dial 6 (Answer Scheduleoverride).Dial the answer table number (01-16) you wish to override.-Press the digit 6 to toggle On/Off the answer schedule table.-Press the digit 2 to enter a New answer schedule override mailbox. Enter the override mailbox number (001-032 or a valid subscriber extension). The override mailbox can be an announcement, call routing box, or asubscriber box.-Press # to return to the System Administrator Menu.◆Mailbox Announcement Message is a message recorded by the system administrator that plays to eachsubscriber when they log into their mailbox. This message will play each time the subscriber logs into their box until it expires, is deleted, or is made inactive by the system administrator.▪To record and modify the Mailbox Announcement Message from the System Administrator Menu, dial the digit 3 (Mailbox Announcement Message).-Press the digit 5 to Listen to the mailbox announcement message.-Press the digit 7 to Record a new mailbox announcement message.-Press the digit 3 to Delete the mailbox announcement message.-Press the digit 2 to Specify the amount of days the message is active. Enter * for an indefinite amount of days or enter 01-99 for 1-99 days.-Press # to return to the System Administrator Menu.◆Voice Mail Version will play a message indicating the software level of the voice mail.▪To hear the current Voice Mail Version from the System Administrator Menu, dial the digit 8 (Voice mail Version).MEMOGVT-025184-301-00 Issue 1.0May 2017IP Multiline TerminalUser Guide NEC Corporation。
Ultrospec2100pro分光光度计用户手册

ULTROSPEC 2100 Pro 用户手册/spectros装机·仔细检查仪器如发现任何由运输引起的损坏,请即与供应商联系。
·确保安装点的环境符合操作安全的基础要求:室内使用室温1℃至40℃31℃时的最大相对湿度80%,40℃时的最大相对湿度50%·仪器(重13公斤)必须放置在能承重的平整表面,如实验桌,并保证周围的空气流通。
·确保冷却风扇的出风口和入风口不被遮挡,并保持与墙面距离至少5厘米。
·本仪器的电源必需接地,电源可用90-240V。
·开机检查显示屏是否工作正常。
·如需输入实验室名称,操作者姓名,仪器资产号,时间及日期等,详见仪器的基本应用说明(Instrument Utilities)。
如仪器使用不当或使用环境不能确保仪器的正常工作,仪器设计的保护措施将被破坏且对仪器的保修承诺也无效。
基本操作简介你的紫外/可见光分光光度计是一台独立的,操作简便且配有高分辩率的液晶屏的仪器,其使用的是氙灯光源。
你的紫外分光光度计的功能·基础模式:包括吸光率,浓度和%透光率·应用模式·全波长扫描(wavelength Scanning)·简单动力学(Simple Kinetics)·标准曲线(Standard Curve)·反应速率(Reaction Rate)·多波长扫描(Multiple Wavelength Equation Entry)·已储存了DNA、RNA和寡核苷酸定量分析和纯度检测的参数·18种用户自定义方法,6个方法一组,共A、B、C三组·能直接输出图表形式的结果到打印机进行打印·能直接、从仪器上下载结果到Excel软件中分析,处理和储存·有GLP自诊断功能操作键盘和显示在主页上按下显示的功能对应的F1键、F2键、F3就能进入该功能。
2100e连接手册

2100e数控系统连接说明目录1 CASNUC 2100E数控系统概述 (1)1.1简介 (1)1.1.1 一体化 (1)1.1.2 高可靠性 (1)1.1.3 操作简单 (1)1.2性能 (1)1.2.1 控制轴数 (1)1.2.2 联动轴数 (1)1.2.3 主轴控制 (1)1.2.4 显示部件 (1)1.2.5 通讯.........................................................................................错误!未定义书签。
1.2.6 7.2吋液晶显示面板/微机兼容键盘(字母、数字) (1)1.2.7 操作面板 (1)1.2.8 手持盒 (1)1.2.9 输入、输出控制 (2)1.2.10 存储器控制 (2)1.2.11 通讯 (2)1.3功率数据 (2)1.3.1 输入电路基本指标 (2)1.3.2 输出电路基本指标 (2)1.3.3 软、硬盘驱动器接口 (2)1.3.4 电源 (2)1.4安全条件 (2)1.4.1 保护接地 (2)1.4.2 绝缘电阻 (3)1.4.3 对地泄漏电流 (3)1.5运行条件 (3)1.6安装尺寸 (4)1.6.1 主机尺寸 (4)1.6.2 IO转接模块尺寸 (4)1.7机床操作面板 (4)1.8CASNUC2100E数控系统安装环境要求 (5)电源供给 (5)1.8.1 接地 (5)1.8.2 环境 (5)1.8.3 温度 (5)1.8.4 大气环境 (6)1.8.5 振动 (6)2 连接 (7)2.1电源的连接要求 (7)2.2为了最大限度地减少数控系统的干扰,应遵守以下EMC规则: (7)2.3主机插座名称、类型 (8)2.4主机电缆连线 (9)2.5系统连接示意图 (10)2.6IO转接板连接示意图 (10)2.7操作面板的连接 (11)2.8IO插座的定义 (12)2.9主机与伺服单元、反馈编码器连线 (13)2.10内装PLC和机床侧电器连线 (13)2.10.1 输入电路的基本型式 (14)2.10.2 输入电路的连接 (15)2.10.3 输出电路的基本型式 (16)3 系统使用的电缆示意图 (17)3.1主轴控制电缆 (17)3.2主轴反馈电缆 (18)3.3主轴电缆(控制+反馈) (19)3.4RS232通讯电缆 (20)3.5安川伺服控制电缆 (21)3.6华中伺服控制电缆 (22)4 系统使用的强电供电连接示意 (23)5 系统硬件有关的报警及处理 (25)5.1伺服及伺服电机报警 (25)5.2硬限位报警表 (26)5.3与伺服有关故障报警表 (26)5.4其他报警 (27)1 CASNUC 2100E数控系统概述CASNUC2100E数控系统是一个将PC104板嵌入到控制系统中的一体化车/铣床数控系统。
2100eT操作说明书
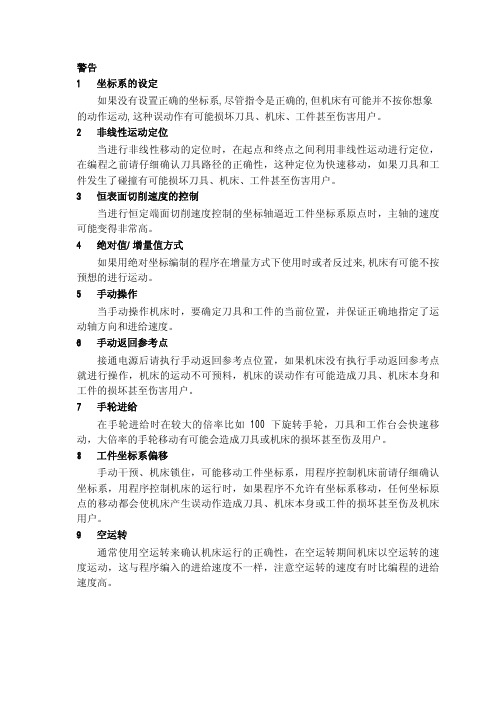
警告1 坐标系的设定如果没有设置正确的坐标系,尽管指令是正确的,但机床有可能并不按你想象的动作运动,这种误动作有可能损坏刀具、机床、工件甚至伤害用户。
2 非线性运动定位当进行非线性移动的定位时,在起点和终点之间利用非线性运动进行定位,在编程之前请仔细确认刀具路径的正确性,这种定位为快速移动,如果刀具和工件发生了碰撞有可能损坏刀具、机床、工件甚至伤害用户。
3 恒表面切削速度的控制当进行恒定端面切削速度控制的坐标轴逼近工件坐标系原点时,主轴的速度可能变得非常高。
4 绝对值/增量值方式如果用绝对坐标编制的程序在增量方式下使用时或者反过来,机床有可能不按预想的进行运动。
5 手动操作当手动操作机床时,要确定刀具和工件的当前位置,并保证正确地指定了运动轴方向和进给速度。
6 手动返回参考点接通电源后请执行手动返回参考点位置,如果机床没有执行手动返回参考点就进行操作,机床的运动不可预料,机床的误动作有可能造成刀具、机床本身和工件的损坏甚至伤害用户。
7 手轮进给在手轮进给时在较大的倍率比如100下旋转手轮,刀具和工作台会快速移动,大倍率的手轮移动有可能会造成刀具或机床的损坏甚至伤及用户。
8 工件坐标系偏移手动干预、机床锁住,可能移动工件坐标系,用程序控制机床前请仔细确认坐标系,用程序控制机床的运行时,如果程序不允许有坐标系移动,任何坐标原点的移动都会使机床产生误动作造成刀具、机床本身或工件的损坏甚至伤及机床用户。
9 空运转通常使用空运转来确认机床运行的正确性,在空运转期间机床以空运转的速度运动,这与程序编入的进给速度不一样,注意空运转的速度有时比编程的进给速度高。
目录1概要 (3)1.1系统加电 (3)1.2系统断电 (3)2自动方式/单段方式 (3)2.1程序的运行 (5)2.1.1程序的调入及运行(从第一行开始运行) (5)2.1.2N号的检索(从指定行开始运行) (6)2.2程序的停止 (6)2.2.1暂停 (6)2.2.2复位 (7)2.2.3紧急停止 (7)2.2.4手轮 (7)2.3程序的跳选 (7)2.4自动/单段工作方式的转换 (7)2.5试运行 (8)2.5.1机床锁住 (8)2.5.2空运行 (8)2.6信息综合显示 (8)2.7反馈脉冲清零 (9)2.8工件坐标设置 (9)2.9程序显示方式 (11)2.10MDI方式 (11)2.11图形显示 (12)2.12回设定点 (12)3手动方式 (12)3.1手动回零(手动返回参考点) (13)3.2手轮方式进给(手摇脉冲发生器方式) (14)3.3手动连续进给 (14)3.4手动增量进给 (14)3.5M、S、T的输入 (15)3.6对刀 (16)3.7设坐标系 (17)3.8手动方式的退出 (20)4文件管理 (20)4.1文件的拷贝 (20)4.2文件改名 (21)4.3删除文件 (21)4.4文件编辑 (22)4.4.1光标移动 (23)4.4.2程序输入 (23)4.4.3插入空行/删除一行 (23)4.4.4修改程序 (23)4.4.5字符串查找 (24)4.4.6退出编辑进入文件管理 (24)4.4.7计算器 (24)4.5文件的输入、输出 (24)4.6退出文件管理 (26)5键盘检测 (26)6报警信息的显示 (27)7倍率调整 (27)7.1主轴倍率调整 (27)7.2快速进给倍率调整(参数A50为1时,快速进给倍率有效) (27)7.3进给倍率调整 (28)8参数管理 (28)8.1机床参数设置 (29)8.2螺补参数设置 (30)8.3系统参数设置 (31)8.4退出参数管理 (32)1 概要常用的键盘按键功能:ESC 一般用作返回键或放弃键使用;F7 —般用作菜单翻页用,当在当前屏不能发现需要的菜单时,可按F7键进行菜单翻页;BackSpace 一般用作删除键用。
ET2100测控仪说明书

① 2 脚: 低电平信号
测控仪后面板
四川诚邦测控技术有限公司 网 址:
地址:四川省成都市双流蛟龙工业港双巷路 46 号 电子邮箱:cb@ 电话:028-85737373
Page 4 of 30
ET2100 测控仪使用说明书
SET
参数设置
PID 调节
仪器标定
程控设置
版本信息
2. 按动 键,选中“仪器标定”项,其底色变深;
3. 按动 键确认,出现口令;输入正确的口令;出现如图界面:
4. 按动 键,选择需要标定的项目,被选中的项目底色变深;
5. 按动
键,增加或减小标定系数;
6. 按动 键确认,回到测控主界面;
7. 转矩传感器接线:转矩传感器的激励电压不是对称的,V+=+5V,V-=-4.6V,目的是
上的转速的显示值是控制值,当停止旋转 1~2 秒后,恢复显示测量值。 13.n/M------ 测功机恒转速、油门恒转矩控制方式键。 14.M/n2---- 测功机恒转矩(设定转矩=K*n2)、油门位置控制方式键,即推进特性控制方 式。 15.P1/P------测功机恒位置、油门恒位置控制方式键。 16.P------ 油门、水门位置调节旋纽,设定油门、水门位置;当转动此旋扭时,液晶显
四川诚邦测控技术有限公司 网 址:
地址:四川省成都市双流蛟龙工业港双巷路 46 号 电子邮箱:cb@ 电话:028-85737373
Page 3 of 30
ET2100 测控仪使用说明书
11.n/P ------ 测功机恒转速、油门位置控制方式键。 12.n------ 转速设定、控制旋纽,设定、控制发动机转速;当转动此旋扭时,液晶显示屏
科密指纹考勤机硬件操作说明
科密指纹考勤机硬件操作说明精品文档科密指纹考勤机硬件操作说明注意事项:将人员录入到考勤机后再进行以下操作请将人员编号和人员姓名用笔纸对应记录以便更方便的将人员姓名输入软件以下说明为硬件说明的部分,更多设置步骤请参见随机硬件说明书。
指纹登记一一指纹验证一一连接电脑一一进入软件人员注册一一获取所有人员注册信息人员录入修改人员名称等需修改的人员资料一一人员注册一一写入所有人指纹及姓名(这步完成即是将人员指纹与姓名写入指纹考勤机)1.1使用环境I要将指纹考勤机放在强光直照的地方.强光对指纹侑息的采集伶石明M的影响.町能会导致指纹验证无法正常通过。
2指纹考勤机匸作的温度范鬧対(TCT5G请尽療不要在宰外使用!长期在室外使用.对指纹考勤机的正常工作会产生不良影响;頁果必须在室外使用.建议夏天采用遮阳伞和散热设备,冬天采用保1-2系统简单介绍指纹考勤曽理条统町分成两部分:指纹考勤机和考勤系统管理软件。
抬纹蹲勤机4耍负黄员工指纹的进记和I I常出勤记录:考勤系统管理软件负我读取指纹占勤终端机的考勤记录并按照管理者设定的考勤规则进行统让处理.生成各种统计报表*一:指纹登记3-7二:管理者登记8-9三:删除人员信息10四:考勤机系统设置11五:考勤机常见问题及解决方法12I2*=-3ESC456MLM789A00OKTr. 2-i ESC操乍菜唯时退出或収潸MENU 进入菜敢悄理OK确定步前设楚顶O打开电瀰故关机A操作菜单时上制靈 T操作菜醴时卜翻键0操作或这样菜单时,输入数值GB2-2开机轻点。
关机长按。
一:指纹登记拚统住记时.甫帝前于炼tr拚和中指“正确的按压方武止下圧于指纹采集窗口正上方,播纹纹心尽错误的按压方式;太垂宜3. 1.3指纹為!正常工作状态下,按MENU键,进入菜单-数据管理-用户:山-打二U - L -: - 1:匚 J ; -Y存-退出。
详细操作步骡如卜:按MENU键后显示如卜:細&管理用户登记管理呂亞记JM除登记数攝J丿按OK键,显示如下:用户己指纹發记感2卡号登记密码登记丿按O氐爾岳,显示如下*r指纹登记新餐记?打 ESC 0KX,丿抜OK縫后仍示如Ft新强记亶记号码00001iursc 世丫曲, J丿J :号码1-65535.第一次登记,1D号默认为0000 K用数T健特入相应的曲小再搖OK權.显示如浙盘记. i!将丰指按压到描纹采集仪.然膚离开.根据界面提示用同一枚手捋按圧第=次第二次,如矍记成功.则显亦如下nr新住记00001 - -0t ESC 保与 OR Jiii ooooi-o 耀后一穆St字或比表第一枚抬纹.空OEUfFfr,廿记即丿”牡川订卜:-SakrxCicJ.f.- OKi,r吐记新的指紋信息核CK亂掠作如仅上步興如果为已登记的用户备份JS纹御息则按E就键.显示如丁备份蛀记行记4冏ooooi14 Hi ESC 注吃OK岌押世记号码按0K健磷认登记备估惰绞c息我公4幷纹垮勤机最多可以笛伪两枚播纹、指纹登记完毕后请逐个进行验证(即录入人员每人按一次指纹)验证3. 1-6用户验证已登记的拆织驰证有两种方法如用户b证直接在擋紋识别器上按压捋纹,如采已如营证廳功.则宦出艶证成功的谄音擬示!詹羁谢隹用户1; its咖卜先在縫疊上输入自己的燮记号码,然后按压J6纹.则发出脸证成功的语音提示41谢谢显示如下若指纹考勤机ttlTS确认时间,考動鲨证中,如用户在所设置的时Z确认时廊内茅次 . 1, I, CC0011 i OK .c |T I ?r 输入羅纹删除的宜记B码,如登记弓码00001 0讣:00001-0旳晟后一位表示第几亍摇纹(0表示霸个人按QE犍确认.其界面显示如下zr、删臻色记数据.” ESCX/按CK键,删除成曲在笈出“嘴“一声井皐“疋登记蠱据宀ZJ60到是否继续JM除的界面.按ESC鹽取消退出d四:考勤机系统设置f系统往置2 fcOKtli.皿一也卜If慕筑说宜管理占总数 5 语宫简体中文I语合提沪是炳统设童采集製轍度调节液品背光调节班功腌否XZ系统设皆时河设置时间格述严霜绽垃置关机功能门动災机系统设置共有11个三级菓荟*管理者总額.话言、语音提示.时间设置、时间格式.安全零级设乐集灵舗度训节、蔽晶背光调15,顿功能中员机功能、门动关机口7采集灵敏糜凋节在系统设置菜单?选中松采集灵敏度调节菜单.用手举遮住蔽碩則区疳按确认握,指机根据环境将指鮫头自动调整到最珪采集状击,拉确认键滋存保存?ii;ESC吐 YE-J5.1接口说明我公司生产的抬纹考勒机有5种接口;9针RS212接口、RJ45接口*充16*和呼哼和机播五:考勤机常见问题及解决方法1打指纹考勤机无反应关闭考勤机稍等片刻再开启2:考勤机时间变快或变慢因为电子时钟都会有点时间差,出现这种情况请参照四:考勤机系统设置修改时间设置更多使用注意事项请参见随机说明。
TMC2100说明书
TMC2124
最大4路VGA输入,最大24路视频输入,24路VGA/DVI输出,不支持视频信号叠加
TMC2124M 最大4路VGA输入,最大24路视频输入,24路VGA/DVI输出,支持8画面视频信号叠加
鼠标键盘一分 2 线的连接方法:有箭头的接键盘,没有箭头的接鼠标。
附录 1:产品明细单 名称
TMC2100 一分 2 的鼠标键盘连接线 电源线 钥匙 TMC2100 随机光盘 加密狗 键盘延长线 鼠标延长线 双机对连网线 鼠标+键盘
输入 输入格式 网络接口 以太网 输入设备
键盘 鼠标 支架固定的机箱 HXWXD(mm) 重量(Kg) 操作环境 温度 湿度 海拔高度 电器要求 输入电压 行频 功耗 软件支持 操作系统
4 路复合视频(可扩展 24 路) NTSC PAL SECAM
2 路 RGB 输入(可扩展 4 路) 具有任何同步类型(合成、单独、绿色同步)的 RGB
TMC2100 多屏电视墙处理器使用说明书 此图以产品实物为准
TMC2100 多屏电视墙处理器使用说明书
感谢您使用 TMC2100 大屏幕处理器
重要提示
—— 为了您和设备的安全,请您务必在使用本设备前仔细阅读安全说明。 —— 如果在使用中遇到疑问,请首先阅读本说明书。正文中有设备操作
的详细描述。如仍有疑问,请联系我们,我们将尽快给您满意的答 复。 —— 本说明书如有版本变动,恕不另行通知,请谅解。
第 5 章、型号说明
根据内部安装的图像处理卡数目的不同,TMC 2100 系列产品共有 TMC2102 到 TMC2124 共 13 种机型。
型号说明如图 3 所示。
图 3:型号说明
具体产品型号见设备外部产品标签所示。
克罗尼优流2100C流量计与Cub5 Cab显示器指南说明书

Instruction Book for Krohne Optiflux 2100C&Cub 5 Cab DisplayOPERATORS MANUALPLEASE READ THIS MANUAL THOROUGHLY BEFORE OPERATING YOUR NEW FLOW METERGENERAL INFORMATIONREMOTE TRACTOR READOUTThe Red Lion requires no programming or setting up and only has the two control buttons as detailedReading and resetting the Internal Meter in the Krohne Flowmeter.Reading the Total:Depress the down arrow V3 times and read off the middle line which will give the total in M³ (Cubic Metres).Depress the down arrow again to return to the basic screen.Resetting the Total:Press and hold >for 2.5 seconds, then release.The meter will then be displaying ‘quick set up’ then >to language,V to tagV to reset> reset errorsV counter 1> reset counterV yesDepress back arrow to counter 1V counter 2> reset counterV yesDepress back arrow to counter 2Depress back arrow 3 more times to get back to basic screen.Check that counters have been reset by repeating the first operation, i.e. depressing V 3 times and once again to return to basic screen.Metric/Imperial Conversion TableGallons/Litres /Cubic Metres1000 gallons = 4,546 litres = 4.546 m³ 2000 gallons = 9,092 litres = 9.092 m³ 3000 gallons = 13,638 litres = 13.638 m³ 4000 gallons = 18,184 litres = 18.184 m³ 5000 gallons = 22,730 litres = 22.730 m³ 6000 gallons = 27,276 litres = 27.276 m³ 7000 gallons = 31,822 litres = 31.822 m³ 8000 gallons = 36,368 litres = 36.368 m³ 9000 gallons = 40,914 litres = 40.914 m³ 10000 gallons = 45,460 litres = 45.460 m³ 11000 gallons = 50,006 litres = 50.006 m³ 12000 gallons = 54,552 litres = 54.552 m³ 13000 gallons = 59,098 litres = 59.098 m³ 14000 gallons = 63,644 litres = 63.644 m³ 15000 gallons = 68,190 litres = 68.190 m³ 16000 gallons = 72,736 litres = 72.736 m³ 17000 gallons = 77,282 litres = 77.282 m³ 18000 gallons = 81,828 litres = 81.828 m³ 19000 gallons = 86,374 litres = 86.374 m³ 20000 gallons = 90,920 litres = 90.920 m³ 21000 gallons = 95,466 litres = 95.466 m³ 22000 gallons = 100,012 litres = 100.012 m³ 23000 gallons = 104,558 litres = 104.558 m³ 24000 gallons = 109,104 litres = 109.104 m³ 25000 gallons = 113,650 litres = 113.650 m³ Acres/Hectares1 acre = 0.4046856 hectares2 acres = 0.8093712 hectares3 acres = 1.2140568 hectares4 acres = 1.6187424 hectares5 acres = 2.0234280 hectares6 acres = 2.4281136 hectares7 acres = 2.8327992 hectares8 acres = 3.2374848 hectares9 acres = 3.6421704 hectares10 acres = 4.0468560 hectares……………………………1 hectare = 2.471 acres2 hectares = 4.942 acres3 hectares = 7.413 acres4 hectares = 9.884 acres5 hectares = 12.355 acres6 hectares = 14.826 acres7 hectares = 17.297 acres8 hectares = 19.768 acres9 hectares = 22.239 acres10 hectares = 24.710 acres……………………………。
- 1、下载文档前请自行甄别文档内容的完整性,平台不提供额外的编辑、内容补充、找答案等附加服务。
- 2、"仅部分预览"的文档,不可在线预览部分如存在完整性等问题,可反馈申请退款(可完整预览的文档不适用该条件!)。
- 3、如文档侵犯您的权益,请联系客服反馈,我们会尽快为您处理(人工客服工作时间:9:00-18:30)。
IT2100示例说明孙宏刚谭小刚2005-2-16说明:所有函数只接受两个参数参数一:Params结构参数二:表示硬件类型的数值,取值[30, 60, 2000, 2100, 2200, 2300, 2600]Params结构定义Public Type ParamsPort As String * 3 //串口号,[1~255]CtrlID As String * 3 //设备号,[1~127]Params As String * 1024 //输入:传递给设备处理的参数表,多参数间以分号分隔,以分号结束//输出:接口返回值End Type接口返回值定义100 //调用接口失败101 //不支持该类型设备102 //该设备不支持该接口103 //设备无响应104 //参数错误105 //调用成功106 //串口没打开107//打开文件错误108//通讯参数错误,要求重发109//返回值数据校验错误110//创建线程错误111//设备忙一.IT21001.打开串口声明Public Declare Function OpenComm Lib "CM60.dll" (ByRef lParam As Params, ByVal sType As Integer) As Integer调用例子dim p as Paramsdim sType as Integerdim ret as LongsType = 2100p.Port = “001”…打开串口一p.CtrlID = “001”…设备号为1ret = OpenComm(p, sType)select case retcase 100 …打开失败case 105 …打开串口成功case elseend select2.关闭串口声明Public Declare Function CloseComm Lib "CM60.dll" (ByRef lParam As Params, ByVal sType As Integer) As Integer调用例子Dim p as ParamsDim sType as IntegerDim ret as LongsType=2100p.Port=”001”…关闭串口一p.CtrlID=””…设备号忽略ret=CloseComm(p,sType)select case retcase 100 …关闭串口一失败case 105 …关闭串口一成功case elseend select3.搜索指定设备声明Public Declare Function SearchCtrl Lib "CM60.dll" (ByRef lParam As Params, ByVal sType As Integer) As Integer调用例子Dim p as ParamsDim sType as IntegerDim ret as LongsType=2100p.Port=”001”…在串口一上搜索指定设备p.CtrlID=”001”…搜索的设备号为001 设备号的范围是1-255ret=SearchCtrl(p,sType)select case retcase 100 …没找到设备case 105 …找到设备号为001的设备case elseend select4.初始化指定设备声明Public Declare Function ResetCtrl Lib "CM60.dll" (ByRef lParam As Params, ByVal sType As Integer) As Integer调用例子Dim p as ParamsDim sType as IntegerDim ret as LongsType=2100p.Port=”001”…设备连接在串口一上p.CtrlID=”002”…初始化的设备号为002ret=ResetCtrl(p,sType)select case retcase 100 …初始化设备失败case 105 …初始化设备成功,设备号被初始化为001case elseend select5.更改设备号声明Public Declare Function SetCtrlID Lib "CM60.dll" (ByRef lParam As Params, ByVal sType As Integer) As Integer调用例子Dim p as ParamsDim sType as IntegerDim ret as LongsType=2100p.Port=”001”…在串口一上更改指定设备p.CtrlID=”001”…要更改的设备号为001 设备号的范围是1-255p.Params=”002;0;”…新的设备号;考勤机工作模式,0-读卡,1-考勤ret=SetCtrlID(p,sType)select case retcase 100 …更改设备号失败case 105 …更改设备号成功,设备号变为002,考勤机为读卡模式case elseend select6.设置设备时间声明Public Declare Function SetCtrlDateTime Lib "CM60.dll" (ByRef lParam As Params, ByVal sType As Integer) As Integer调用例子Dim p as ParamsDim sType as IntegerDim ret as LongsType=2100p.Port=”001”…设备连接在串口一上p.CtrlID=”001”…设备号为001p.Params=”04092910111203;”…设置设备的时间为04年9月29日10点11分12秒星期三ret=SetCtrlDateTime(p,sType)select case retcase 100 …设置设备时间失败case 105 …设置设备时间成功case elseend select7.设置刷卡间隔声明Public Declare Function SetInterval Lib "CM60.dll" (ByRef lParam As Params, ByVal sType As Integer) As Integer调用例子Dim p as ParamsDim sType as IntegerDim ret as LongsType=2100p.Port=”001”…设备连接在串口一上p.CtrlID=”001”…设备号为001p.Params=”000000;”…设置刷卡间隔为0秒ret=SetInterval(p,sType)select case retcase 100 …设置刷卡间隔失败case 105 …设置刷卡间隔成功,刷卡间隔为0秒case elseend select8.设置电铃模式IT2000不支持电铃声明Public Declare Function SetBellMode Lib "CM60.dll" (ByRef lParam As Params, ByVal sType As Integer) As Integer调用例子Dim p as ParamsDim sType as IntegerDim ret as LongsType=2100p.Port=”001”…设备连接在串口一上p.Params=”0;0;1;”…以星期为周期,常开,循环(其中第一个字符为周期模式,0表示“按星期”1表示“按月”;第二个字符为电铃开关,0表示“开”1表示“关”;第三个为循环标志1表示循环0表示不循环。
)ret=SetBellMode(p,sType)select case retcase 100 …设置电铃模式失败case 105 …设置电铃模式成功,电铃常开,按月循环打铃(配合电铃时间)case elseend select9.设置电铃时间IT2000不支持电铃与上一函数配合使用声明Public Declare Function SetBellTime Lib "CM60.dll" (ByRef lParam As Params, ByVal sType As Integer) As Integer调用例子Dim p as ParamsDim sType as IntegerDim ret as LongsType=2100p.Port=”001”…设备连接在串口一上p.CtrlID=”001”…设备号为001p.Params=”03;01;110900;110930;”…设置电铃时间为星期三(按星期),第一组,11点09分0秒开始打铃,11点09分30秒结束打铃。
格式:DD;GD;HHmmss;HHmmssret=SetBellTime(p,sType)select case retcase 100 …设置电铃时间失败case 105 …设置电铃时间成功case elseend select10.注册卡号声明Public Declare Function RegisterCard Lib "CM60.dll" (ByRef lParam As Params, ByVal sType As Integer) As Integer调用例子Dim p as ParamsDim sType as IntegerDim ret as LongsType=2100p.Port=”001”…设备连接在串口一上p.Params=”00614629;1234;”…卡号(8/10);内工号(4);ret= RegisterCard (p,sType)select case retcase 100 …注册卡号失败case 105 …注册卡成功case elseend select11.写入显示的卡号标记在2100中与上一函数配合使用。
2000中禁用声明Public Declare Function SetDisplay Lib "CM60.dll" (ByRef lParam As Params, ByVal sType As Long) As Integer调用例子Dim p as ParamsDim sType as IntegerDim ret as LongsType=2100p.Port=”001”…设备连接在串口一上p.CtrlID=”001”…设备号为001p.Params=”12345;”…要显示的卡号标记(工号)10位以内ret=SetDisplay(p,sType)select case retcase 100 …写入工号失败case 105 …写入工号成功case elseend select12.删除注册卡声明Public Declare Function UnRegisterCard Lib "CM60.dll" (ByRef lParam As Params, ByVal sType As Integer) As Integer调用例子Dim p as ParamsDim sType as IntegerDim ret as LongsType=2100p.Port=”001”…设备连接在串口一上p.CtrlID=”001”…设备号为001p.Params=”00614629;”…要删除的注册卡号(8/10)ret=UnRegisterCard(p,sType)select case retcase 100 …删除卡号失败case 105 …删除卡号成功case elseend select13.采集新纪录声明Public Declare Function Collect Lib "CM60.dll" (ByRef lParam As Params, ByVal sType As Integer) As Integer调用例子Dim p as ParamsDim sType as IntegerDim ret as LongsType=2100p.Port=”001”…设备连接在串口一上p.CtrlID=”001”…设备号为001p.Params=”00614629;040929;;”…卡号;指定日期(YYMMDD); & 数据存储文件路径(默认为当前系统时间:yyyymmddhhmmss.txt;ret=Collect(p,sType)…p.params …返回文本文件路径select case retcase 100 …采集新数据失败case 200 …100-200之间的数系统中要使用,故返回200以上的数则表示采集成功,采集到的记录数为返回的数值-200。